
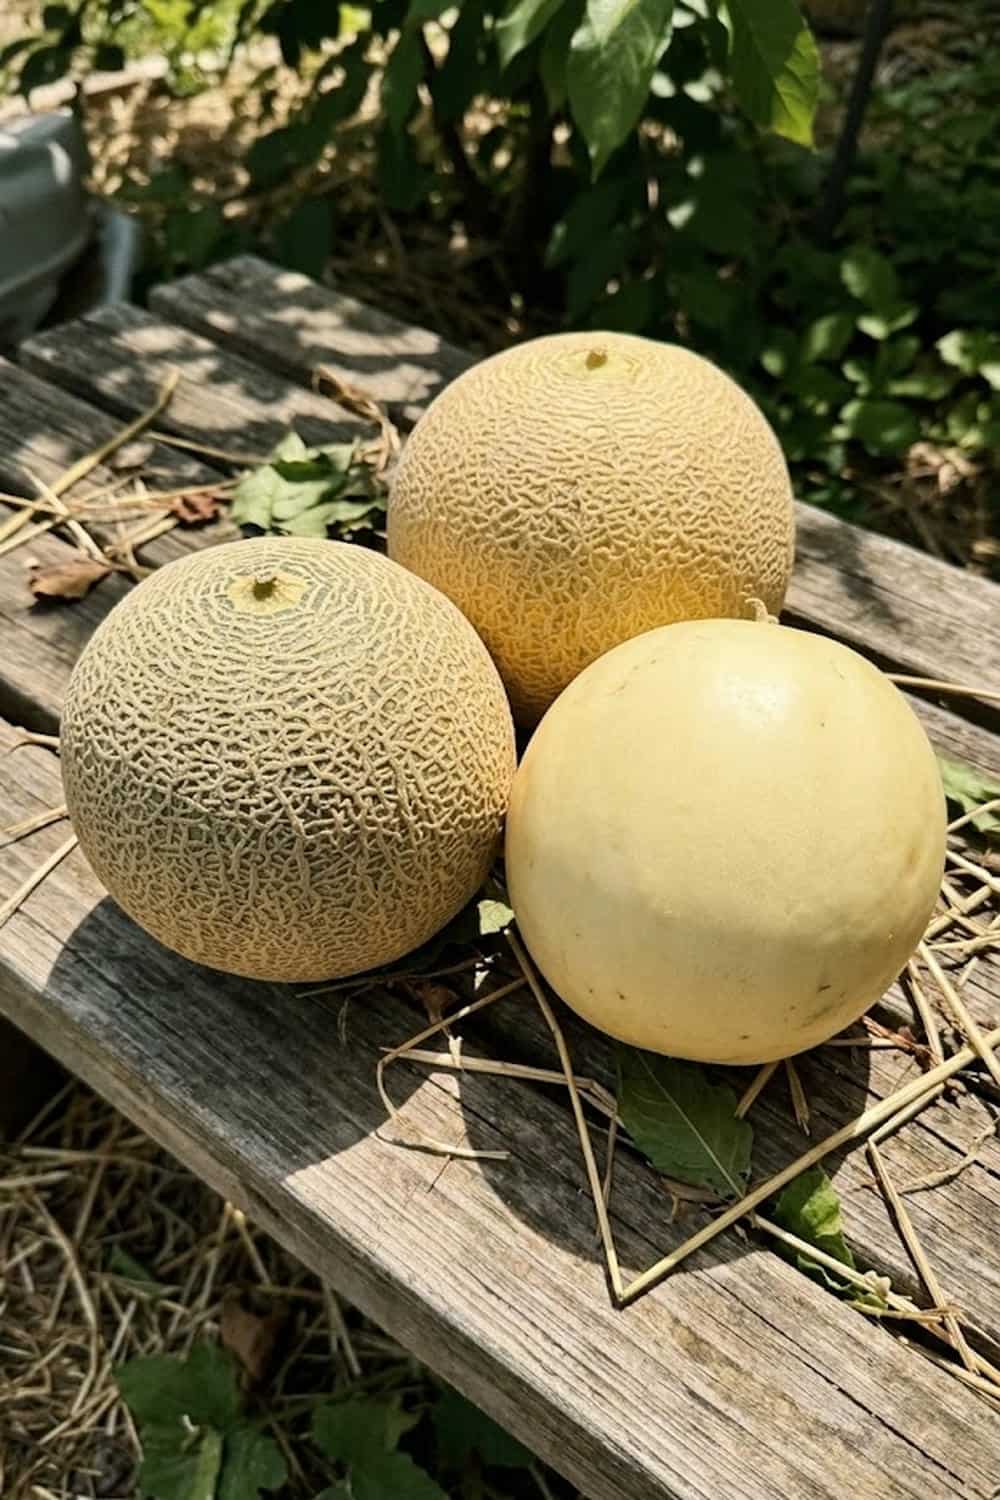

You stare at the pathetic, bland cantaloupe from the grocery store, wondering why you even bothered. It’s like eating crunchy, water-logged cardboard, and it frustrates you because you know how a real melon should taste. You crave that dense, sugary sweetness that drips down your chin, a flavor that speaks of pure summer sun. But growing them seems intimidating, like a master gardener’s secret, and you’re worried about ending up with nothing but a tangle of vines and heartbreak.
I’ve been there, staring at vines that produced baseball-sized, flavorless disappointments, and I understand that frustration deeply. I’ve put in the years of trial and error, research, and sweaty afternoons to unlock the actual secrets to success. In this guide, I will share the exact, curated steps I use to get consistently heavy, sugary harvests. You will learn the nuances of heat management, the truth about watering, and the precise signs of ripeness so you can stop settling and start growing the best melons of your life.
Choose the Right Cultivars for Your Climate Zone
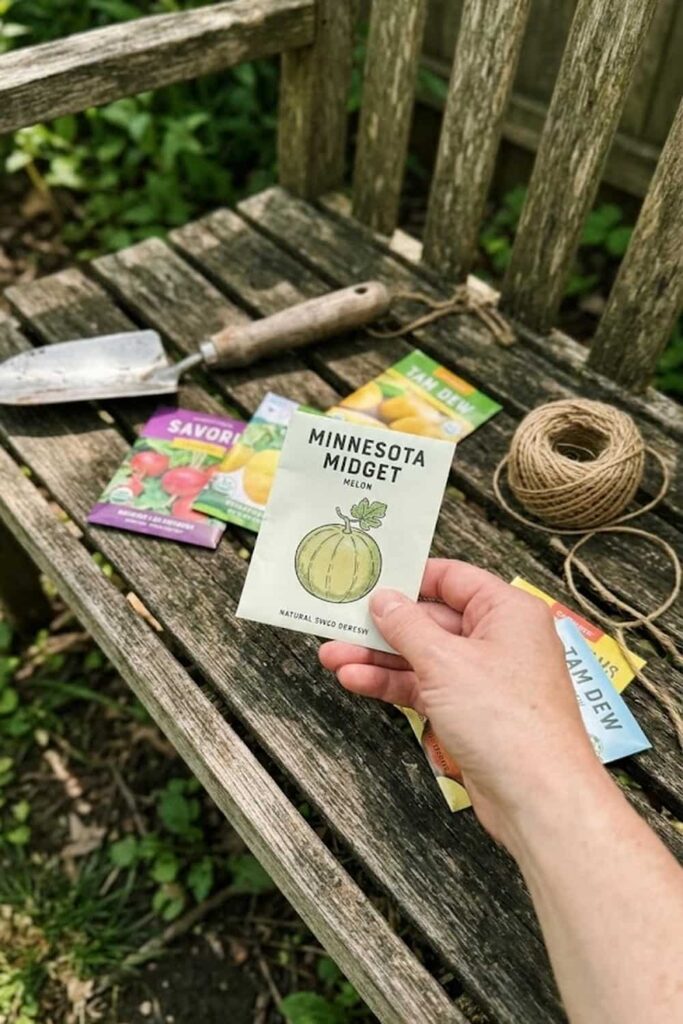
Choosing the wrong melon variety is the single biggest mistake you can make, especially if you live outside of a tropical climate. I remember my first year, I tried growing a 120-day heirloom variety in my zone 6 garden, and frost killed the vines before the fruit even began to network; it was a total loss of time and effort. Now, I always analyze the “days to maturity” listed on seed packets to ensure it fits within my region’s frost-free window. This one decision improves your chances of a successful harvest by perhaps 90%.
According to research from Cornell University, identifying your local growing degree days (GDD) is essential for selecting appropriate cultivars. If you reside in a cooler area, you must prioritize short-season melons like ‘Minnesota Midget’ (60-70 days) or ‘Savor’ (Charentais type, 75 days). If you enjoy a long, hot summer, you can explore larger, longer-maturing varieties.
I find it helpful to think about melons in three main groups based on their characteristics and growing requirements. While they are all technically Cucumis melo, their needs and harvest signals can vary. When you choose a specific type, you can tailor your care more effectively. For instance, knowing that net-free melons like Honeydew need a longer time to develop sugars helps me manage my expectations.
Common Melon Groups and Varieties
- Reticulatus (Muskmelons): This group includes common cantaloupes, which have textured, netted rinds and salmon-colored flesh. Varieties include ‘Hales Best’ and ‘Sarah’s Choice’.
- Inodorus (Winter Melons): These melons lack the distinct musky aroma when ripe and have smooth or wrinkled rinds. Honeydew (‘Tam Dew’) and Casaba (‘Golden Beauty’) are examples.
- Cantalupensis (True Cantaloupes): Often confused with Muskmelons in North America, these are mostly European types with warty or rinded skins and very sweet orange flesh, like ‘Charentais’.
Understanding these distinctions allows you to choose not just a melon, but the right melon that will flourish in your specific garden environment. I always encourage gardeners to pick at least two varieties to experiment with, as one may outperform the other in different weather patterns.
Monitor Soil Temperature Before Outdoor Planting
Melons are absolute heat-seekers; they originate from warm tropical regions and have zero tolerance for cold soil. If you plant your seedlings too early, when the earth is still chilled from spring, you will stunt their growth, or they may simply rot. I made this mistake one particularly enthusiastic April, and the plants I set out early were quickly overtaken and outperformed by the ones I started weeks later when the weather was truly settled. Consistent soil temperature develops robust, healthy root systems which are essential for vigorous vines.
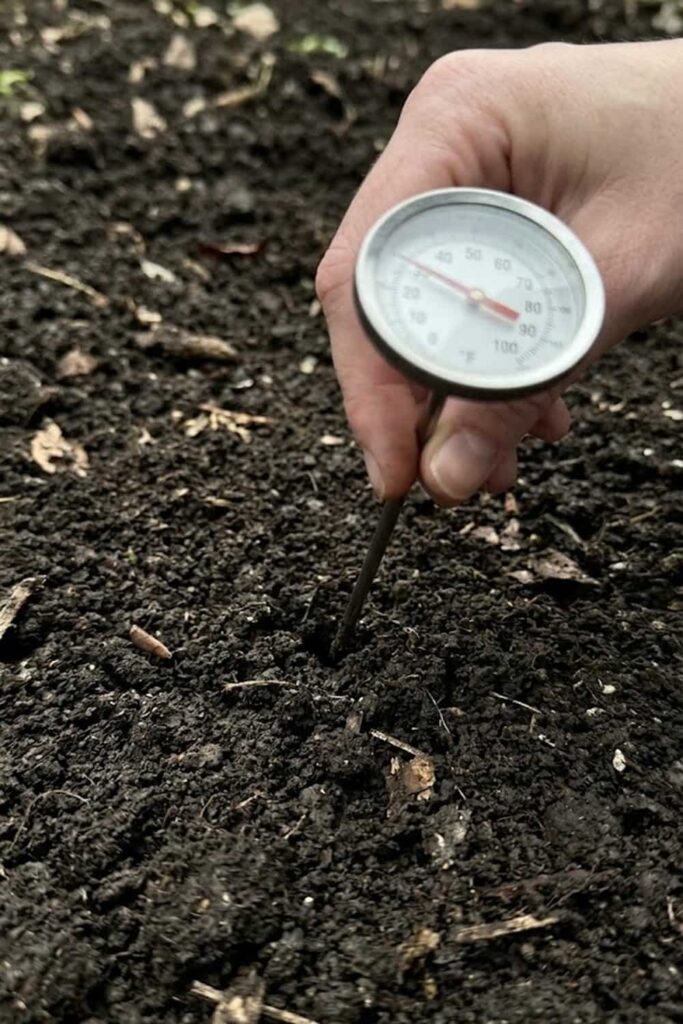
Your goal is to ensure the soil temperature consistently reaches 70°F (21°C) before you even think about putting Cucumis melo near the ground. I never rely on the air temperature as a guide; the soil takes much longer to warm up, especially in heavy clay. I strongly recommend using a dedicated soil thermometer to get an accurate reading. Push the probe down 4 inches into the soil in the spot you plan to plant. Check it at the same time every day for at least four days; if it stays at 70°F, you are ready to proceed.
Waiting for the correct temperature is vital because cold soil inhibits water uptake and nutrient absorption. Studies from Oregon State University indicate that planting in soil below 60°F increases the risk of soil-borne fungal diseases like Pythium. By monitoring and waiting, you are actively practicing prevention against disease and ensuring your plants have the metabolic energy needed for strong, initial growth. Patience is a fundamental requirement in this process.
Amend Your Soil Mix for High Fertility
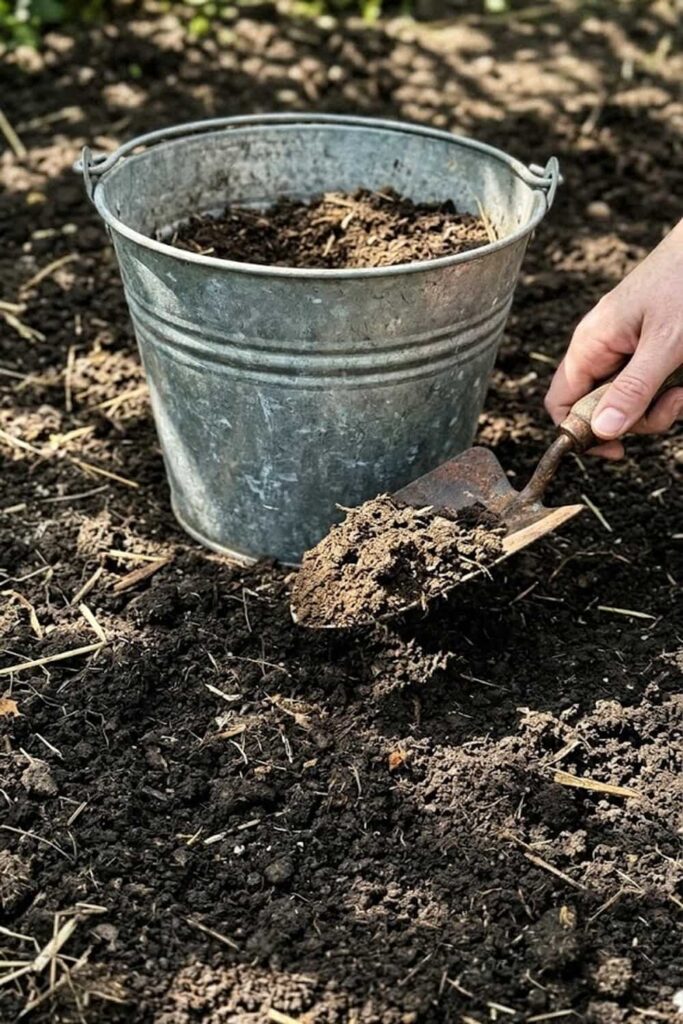
I cannot overstate how important fertility is for melons. These vines are voracious feeders that consume a massive amount of nutrients to Fuel their rapid growth and create heavy, sugary fruits. If you plant them in poor, compacted, or nutrient-deficient soil, you are effectively guaranteed bland, small results. I used to think a generic granular fertilizer was enough, but my harvests truly transformed only after I started aggressively amending my soil mix with rich organic matter. Proper soil preparation developments the robust plant structure required for a bounty.
To build the ideal growing environment, you must amend the soil heavily before planting. I strongly advocate for incorporating a minimum of 3 to 4 inches of aged compost or well-rotted manure into your garden beds. This creates a fertile loam with excellent drainage, which is critical. A high-quality compost not only provides a slow release of nutrients like nitrogen, phosphorus, and potassium but also significantly improves soil structure and water-holding capacity.
Your goal is to create a rich, loose, well-draining soil with a pH between 6.0 and 6.8. I always perform a quick soil pH test in the spring to confirm where I stand. If your pH is off, the plants cannot efficiently absorb the nutrients you are providing, no matter how much you fertilize. Proper drainage is also a non-negotiable form of protection; melons will quickly succumb to root rot if they are forced to sit in soggy earth. Investing time in your soil develops the foundation of your entire season’s success.
Key Factors for Fertile Melon Soil
- Organic Matter: Provides essential nutrients, improves soil texture, and supports beneficial microbial activity.
- Drainage: Prevents waterlogging, which is critical for protecting sensitive melon taproots from rot.
- pH Balance (6.0–6.8): Ensures that crucial macro and micronutrients are biologically available to the plants.
- Aeration: Loose soil allows roots to penetrate deeply and consume oxygen effectively.
Use Black Plastic Mulch to Trap Vital Heat
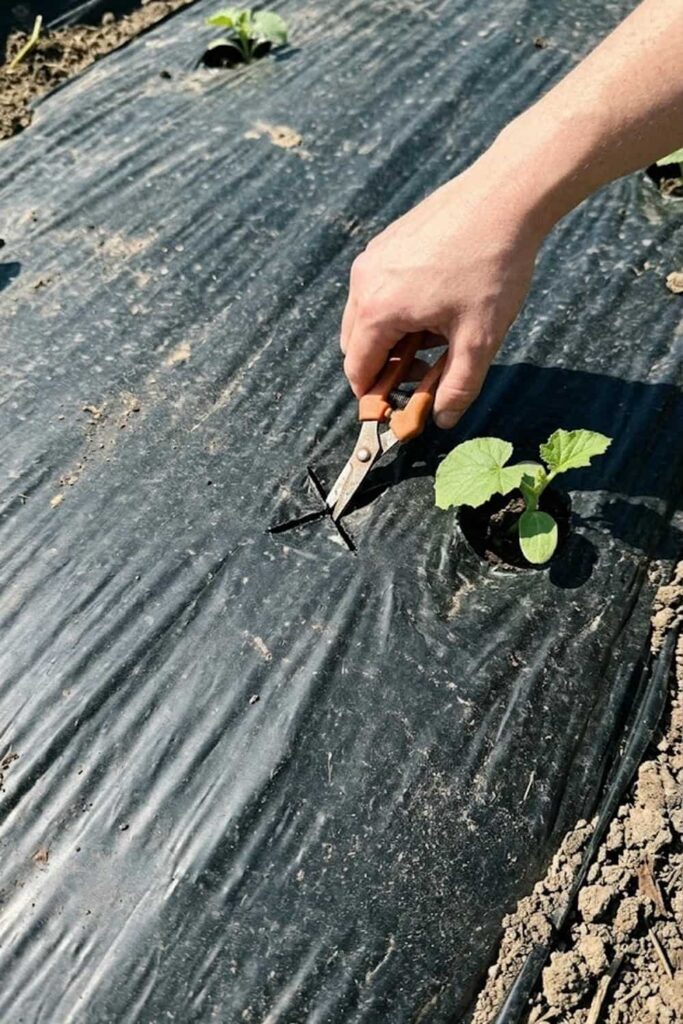
If I could only give you one pro tip to guarantee success with melons, especially in anything but the hottest climates, it would be this: use black plastic mulch. Melons thrive on heat, and their root systems need to stay warm to function optimally and absorb the vast amounts of water and nutrients they require. I consistently observe that vines grown with black mulch grow faster, are more vigorous, and produce earlier, sweeter fruit than those grown on bare ground. This simple care step develops a crucial microclimate that directly mimics the melon’s tropical origins.
The strategy is simple: you are using the black plastic to capture solar radiation and Transfer it into the soil as heat. This process increases the soil temperature by a significant 5 to 10 degrees compared to non-mulched areas. It prevents the ground from cooling off too much at night, ensuring that the Cucumis melo roots continue to grow actively 24 hours a day. According to data from the University of California, this extra soil warmth can advance your harvest by as much as two weeks, which can make all the difference in areas with short growing seasons.
Before you lay the plastic, ensure your soil is properly amended and watered. Then, stretch the plastic tightly over the row and bury the edges with soil to anchor it against the wind. This practice not only provides vital heat but also acts as a superb protection against moisture loss and weed competition. You are creating a sealed system that conserves water and directs all the soil’s resources to your melon plants. When you plant, simply cut small, X-shaped holes in the plastic and set your seedlings through them.
Primary Benefits of Black Plastic Mulch
- Soil Warming: Increases soil temperature by 5–10°F, stimulating rapid root and vine development.
- Moisture Conservation: Significantly reduces water evaporation, ensuring consistent soil moisture.
- Weed Control: Blocks sunlight, preventing weed seeds from germinating and competing for nutrients.
- Fruit Protection: Keeps developing melons off the bare dirt, reducing ground-spot rot and pest damage.
Grow Seeds Indoors in Biodegradable Peat Pots
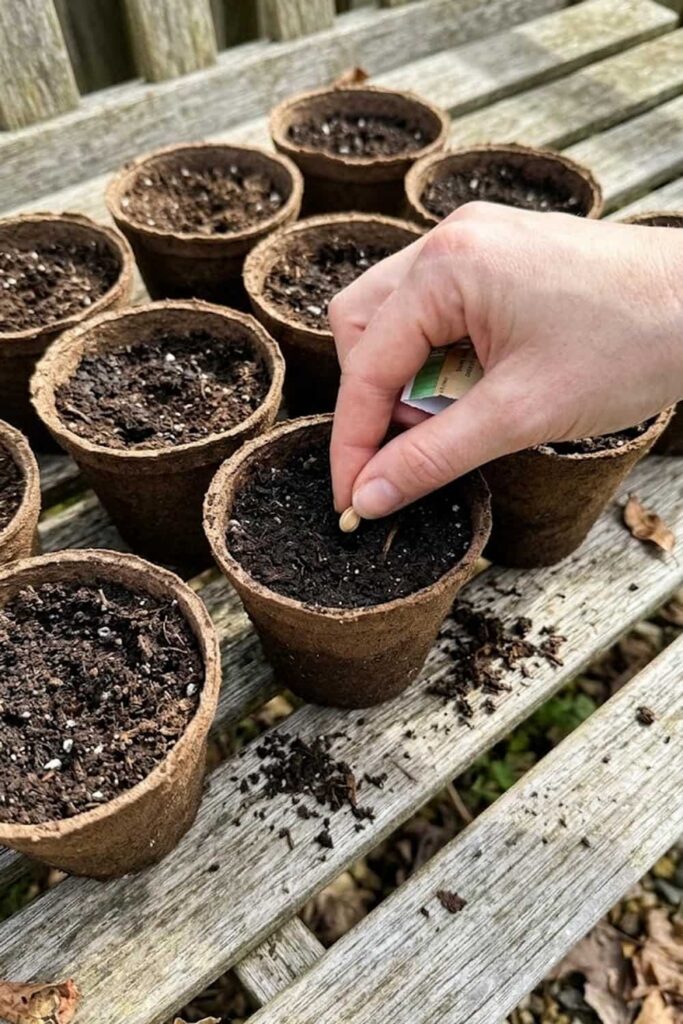
Starting your melons indoors is a critical strategy for extending your growing season and ensuring success, especially in regions with cool springs. I learned early on that you must protect the sensitive taproots of Cucumis melo; they absolutely resent being disturbed. I used to start them in standard plastic cell trays, and the shock of transplanting would set them back by weeks, or worse, cause the seedlings to completely fail. Using biodegradable peat pots or paper pots is a game-changer because you plant the entire pot, developing a seamless transition to the garden.
I recommend starting your melon seeds indoors exactly 3 to 4 weeks before your average last frost date. If you start them too early, the seedlings will become root-bound and stressed in their pots, leading to stunted growth. Plant two seeds per peat pot, about half an inch deep. I find that using a high-quality seed-starting mix is essential for providing the right environment for germination. Maintaining a soil temperature of 75°F to 80°F is perfect; I use a seedling heat mat to ensure consistent warmth.
Once the seeds germinate and develop their first set of true leaves, you must thin them to one strong seedling per pot. When it’s time to move them outdoors, you will plant the entire pot directly into the amended, warm soil. A critical step is to peel away the top rim of the peat pot before planting; if left exposed to the air, it can wick vital moisture away from the seedling’s roots. This method provides robust protection against transplant shock, ensuring your vines begin their outdoor life with maximum vigor.
Control Cucumber Beetles Early in the Season
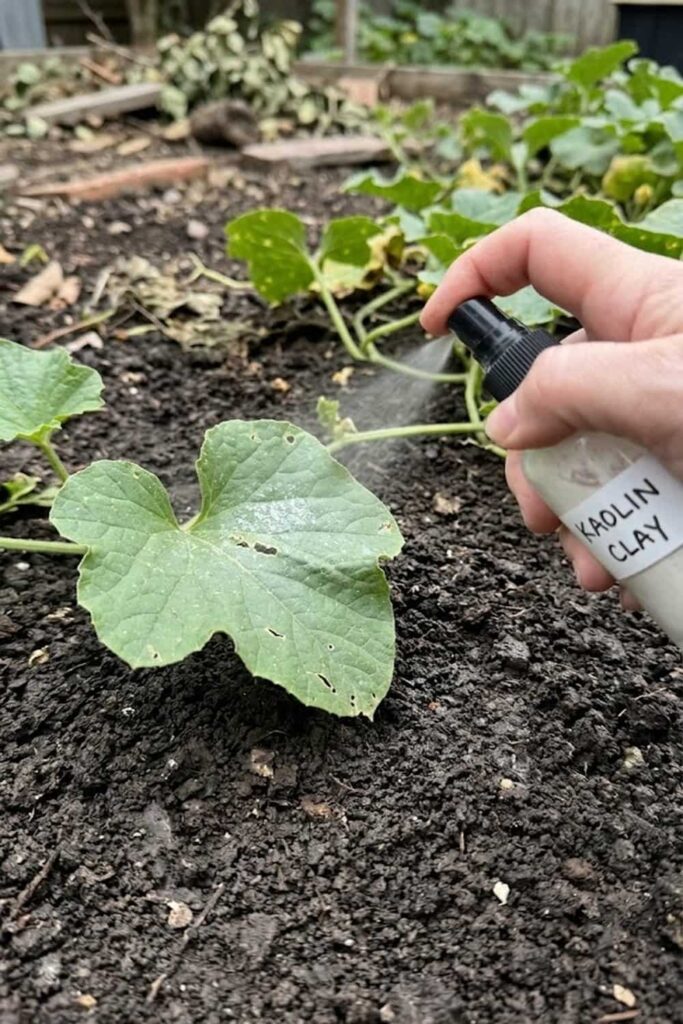
If you do not practice early prevention, cucumber beetles can completely devastate your melon crop before you even see a single fruit set. These persistent yellow-and-black striped (or spotted) pests do not just cause cosmetic damage by chewing holes in the leaves and blossoms; their feeding activity transmits a lethal bacterial wilt pathogen. I have seen entire healthy, vigorous vines collapse in a single day due to wilt infection. By the time you notice the typical sign—whole runners wilting while the rest of the plant looks fine—the bacterial disease is already inside the stem, and the plant cannot be saved.
Studies from Purdue University Extension support the critical need for a strong, pro-active defense, confirming that managing these beetles in the first weeks of growth is essential to prevent severe economic damage and wilt spread. Your most powerful defense tool, which I always use, is a physical barrier: a floating row cover. This lightweight, breathable fabric is draped over the seedlings immediately after you transplant them. It lets air, water, and sunlight through but provides complete protection against beetles by physically preventing them from accessing the plants to feed or lay eggs.
You must keep the floating row covers securely pinned down to the soil on all edges until your melon vines begin to produce separate male and female flowers. At that specific moment, you have a critical decision to make: you must temporarily remove the covers during the day to allow essential pollinators, like bumblebees, to access the blossoms for fruit set. Removing the barriers too early exposes the young plants to infection; removing them too late results in a lack of pollination. This careful timing develops a truly resilient vine structure.
Pro-Active Defense Measures
- Floating Row Covers: Creates an immediate physical barrier, which provides complete pest protection for sensitive young seedlings.
- Kaolin Clay Spray: Coats the foliage in a non-toxic white residue that repels and confuses feeding beetles.
- Nematodes: Applying beneficial entomopathogenic nematodes to the soil controls beetle larvae before they emerge.
Master the Watering Schedule for Maximum Sweetness
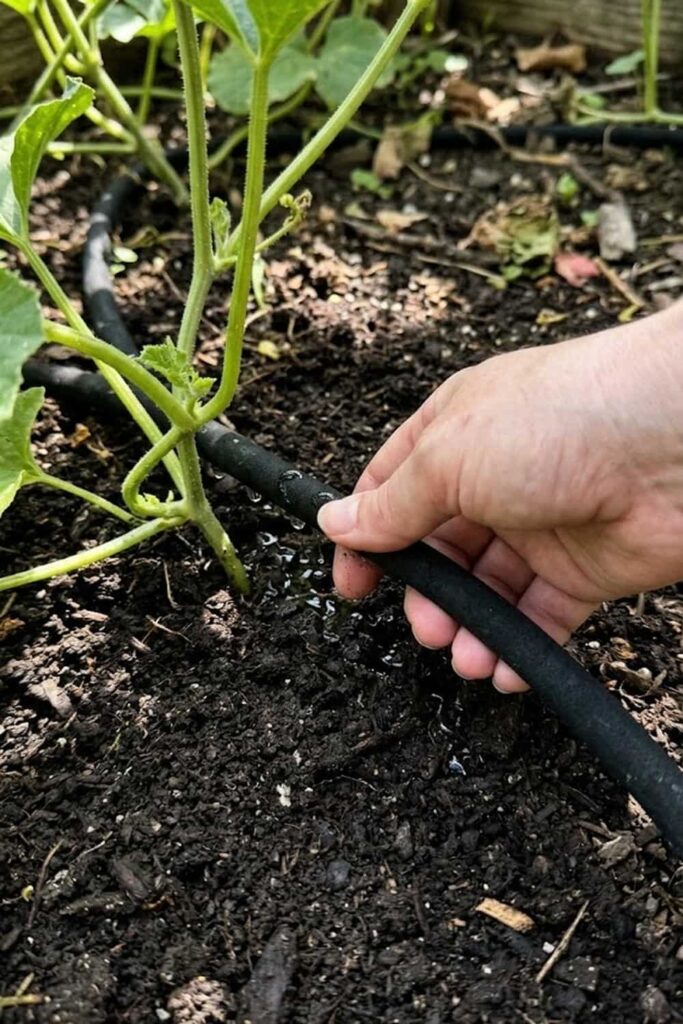
In my experience, no other factor, aside from temperature, impacts the ultimate flavor and texture of your melon harvest more than your irrigation strategy. Water is the predicate in the sentence of a melon’s lifecycle, delivering every single nutrient required for growth. If you provide inconsistent moisture—alternating between parched soil and saturated ground—you will likely end up with fruit that has a bland, diluted flavor or, even worse, fruit that splits open overnight due to sudden internal pressure. Mastering a careful watering schedule develops that dense, rich, sugary flesh that everyone craves.
Your core goal must be to maintain consistent, deep moisture during the critical vegetative growth and fruit-setting phases. While you may want to avoid daily shallow sprinkling, which only wets the surface, you must provide 1 to 2 inches of water per week, distributed in one or two heavy, soaking applications. I find that using drip irrigation or a soaker hose is the most effective and informative method; it delivers the water directly to the root zone while preventing the foliage from getting wet. Keeping the large leaves dry provides invaluable disease control against fungal issues like powdery mildew.
There is a vital nuance you must understand for that “perfect” taste: you must alter the strategy completely once your melons reach their full size and begin to show signs of ripening, such as the color changing or a strong aroma developing. At this specific point, approximately 10 to 14 days before harvest, you should drastically reduce or completely stop irrigation. This deliberate and reflective control over moisture forces the plant to concentrate its energy and existing sugars within the fruit, developing maximum sweetness rather than using its resources on new vegetative growth.
Critical Melon Watering Stages
- Establishment (Transplant–Vine Run): Consistent, moderate moisture ensures strong, uninterrupted root and vine growth.
- Fruiting (Flowering–Fruit Set): Deep, regular soaking, delivering 1-2 inches of water, is vital for fruit sizing and structure.
- Ripening (Full Size–Harvest): Cease or significantly reduce water to increase the fruit’s sugar concentration (Brix).
Fertilize Based on the Plant’s Growth Stage
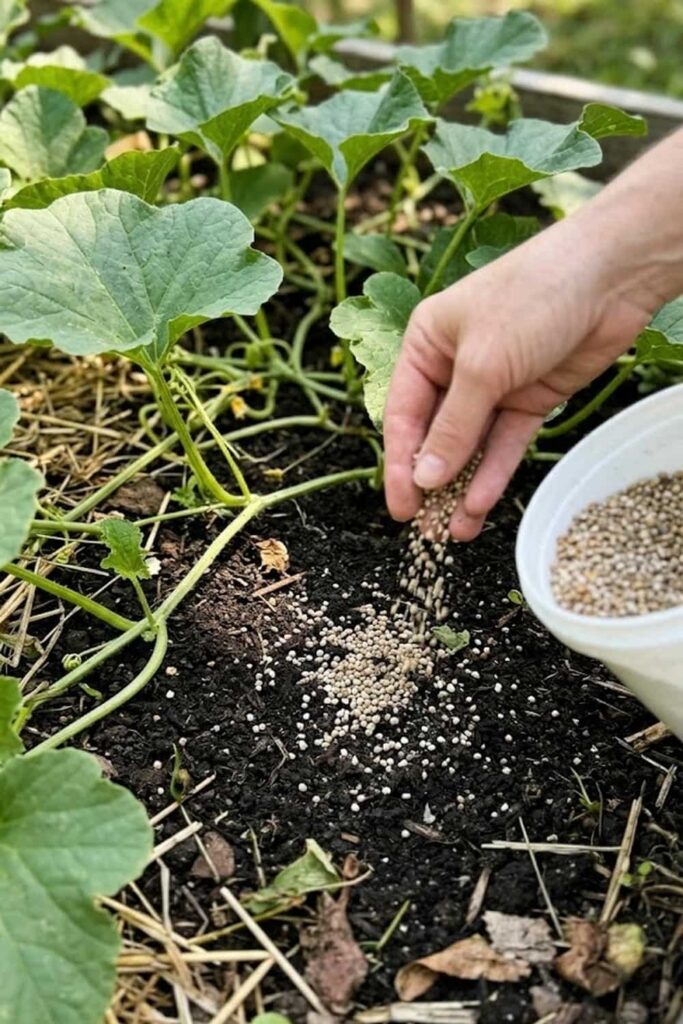
As I’ve mentioned, melons consume massive amounts of energy and nutrients; they are classic “heavy feeders.” You cannot rely on a single application of compost at planting if you want to push your vines to produce those complex, sugary flavors. Your fertilizing program must be dynamic, altering its primary nutrient ratio to match the plant’s specific metabolic goals at different growth stages. Balanced and purposeful fertilizing develops not just a large plant, but a productive one that has the resources to complete its sugary reproductive cycle.
During the initial growth phase, when the Cucumis melo seedlings are rapidly developing their expansive canopy of leaves and long vines, the primary nutrient requirement is nitrogen (N). I provide a slow-release, nitrogen-rich fertilizer—perhaps an 8-4-4 organic mix—about two weeks after transplanting. This focuses the plant’s energy on building that robust “solar array” of foliage, which will later photosynthesize the sugars. I also integrate liquid seaweed drench every 10 days for essential trace minerals and protection against general plant stress.
The dynamic changes as soon as you observe the first bright yellow flowers appear on the runners. At this critical moment, you must immediately shift your focus away from vegetative growth and toward reproductive success. I always side-dress the plants with a high-potassium (K) and high-phosphorus (P) formula—like a 4-8-8—which directly supports flower formation, fruit development, and, most importantly, sugar translocation. Potassium is scientifically proven to increase the Brix levels (sugar content) and enhance the complex aroma of the maturing melon.
Dynamic Melon Fertilizing Schedule
- Growth Stage 1 (Vegetative): Focus on Nitrogen (N) for strong vine and leaf development (e.g., 8-4-4).
- Growth Stage 2 (Reproductive): Transition to Potassium (K) and Phosphorus (P) for flower/fruit set (e.g., 4-8-8).
- Maintenance (Throughout): Use compost tea and liquid seaweed for trace minerals and general plant protection.
Encourage Pollination for a Better Fruit Set
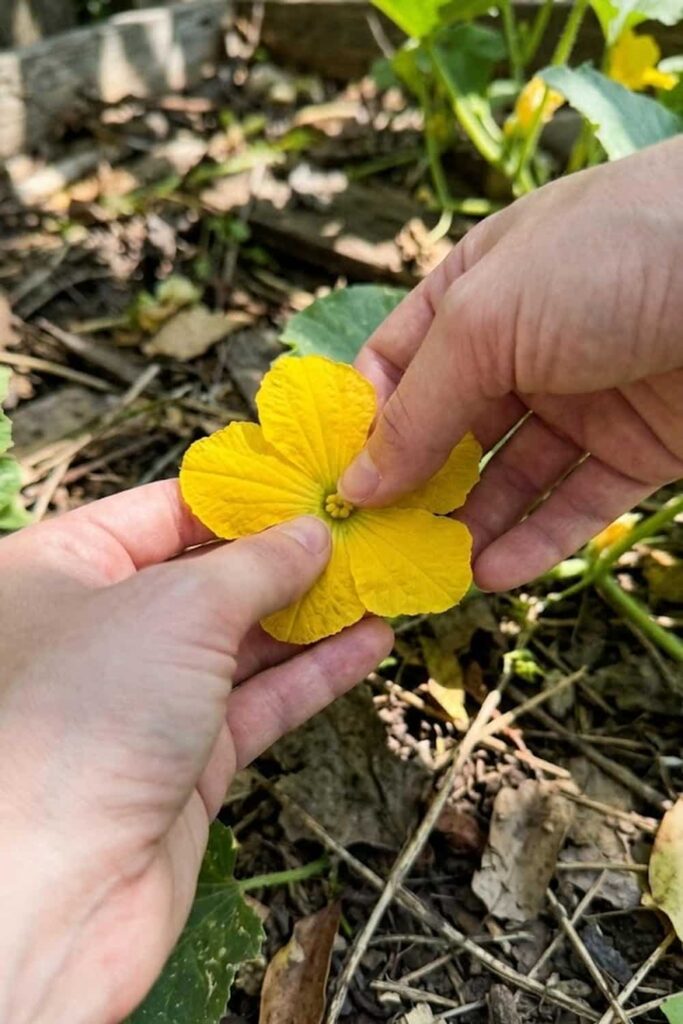
I’ve had seasons where my melon vines were massive, green, and covered in dozens of beautiful flowers, yet they yielded perhaps two or three small fruits. This is incredibly frustrating, and it almost always points to a critical failure in pollination. Melons are monoecious, meaning they produce separate male and female flowers on the same plant, and they rely entirely on external help, primarily honeybees and bumblebees, to move the heavy pollen from the male flower’s anthers to the female flower’s stigma. Consistent and active pollination develops the initial fruit set which is essential for any meaningful harvest.
You cannot just assume the pollinators will find your melons, especially if your garden is sparse or you use floating row covers. In my reflective control of the environment, I make it a priority to actively encourage these beneficial insects. I plant complex, aromatic flowering companions, like borage, lavender, and alyssum, nearby to develop a compelling scent trail. If you are using row covers for pest prevention against cucumber beetles, you must be disciplined; you must lift or remove the covers during the day as soon as both male and female flowers appear, allowing the bees vital access during their prime foraging hours.
If bee activity remains low in your garden, you must take matters into your own hands. Hand-pollinating your melons is a simple and rewarding care step that guarantees fruit set. Female flowers are easy to identify; they are the ones with a distinct tiny, miniature melon (the ovary) located directly behind the petals. To hand-pollinate, locate a fresh male flower, carefully remove its petals to expose the pollen-laden anther, and then gently and thoroughly brush that anther inside the female flower’s center. Performing this simple, informative task during the morning, when the pollen is most viable, provides reliable results for your season’s success.
- Monoecious Plants: Produces separate male and female flowers on the same vine.
- Female Flower: Identified by the small, miniature melon (ovary) behind the bloom.
- Male Flower: More numerous; possesses a pollen-producing central anther.
Prune Lateral Vines to Direct Plant Energy
I remember when I first started growing melons, I thought that more vine meant more fruit, so I let the plants scramble unchecked in all directions. I ended up with a gorgeous, massive green jungle, but dozens of tiny, bland melons that never ripened before the first frost. This was a critical failure in energy management. Successful Cucumis melo cultivation requires purposeful and strategic pruning to actively direct the plant’s resources. Pruning develops a higher quality, sweeter harvest because you are concentrating the energy into a manageable number of fruits.
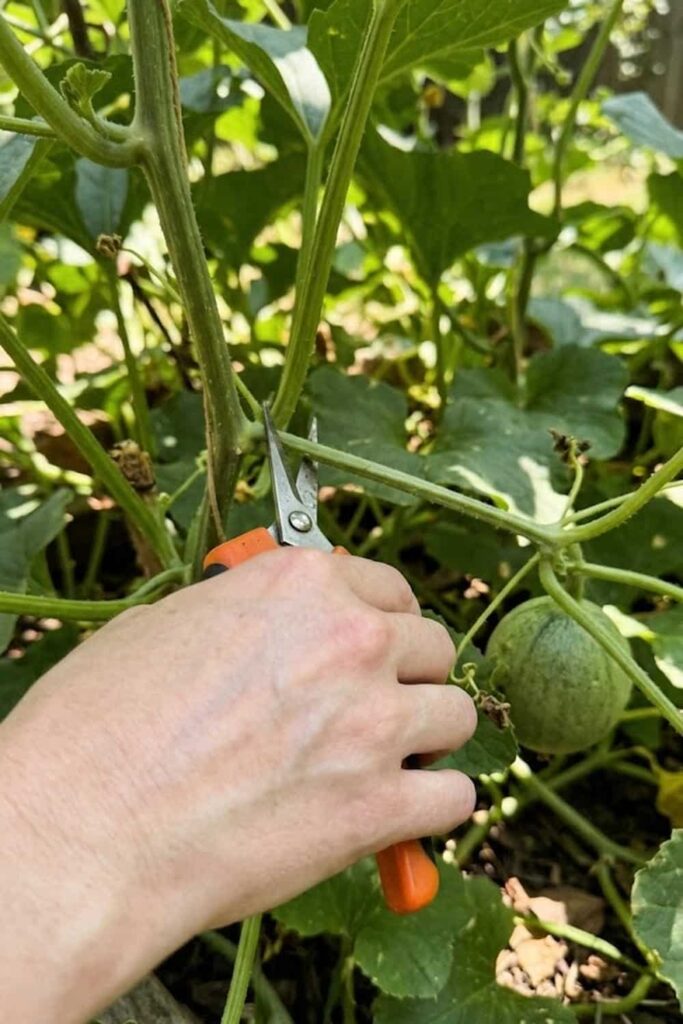
The structure of a melon vine is key to understanding this care step: the main vine typically only produces male flowers, while the shorter, side-branching “lateral” vines are the ones that produce the coveted female flowers that set fruit. Your goal is to encourage these lateral branches first, and then control their numbers. When the main vine reaches about 3 or 4 feet in length, I pinch off its growing tip. This action is informative to the plant, signaling it to immediately break dormancy on several lateral buds, resulting in multiple fruitful side vines.
Once these primary lateral branches begin setting fruit, you must apply reflective control over their production. I recommend allowing only two to three fruits to develop per vine. For every other secondary lateral vine or blossom, I ruthlessly pinch them off. Studies from Purdue University Extension support this method, indicating that controlling fruit numbers significantly increases the translocation of sugars to the remaining melons, developing maximum sweetness and complexity rather than diluting the plant’s limited resources.
Energy-Directing Pruning Strategy
- Tip Main Vine (3-4 feet): Encourages multiple fruitful lateral branches rather than one long, non-productive stem.
- Set Fruits (2-3 per plant): Concentrates all the vine’s sugar and nutrient production into a manageable harvest.
- Pinch Excess Secondary Shoots: Ruthlessly removes competing growth, directing maximum energy to the developing fruit.
- Develop Ventilation: Improves airflow through the canopy, providing protection against fungal diseases.
Provide Vertical Support for Small Varieties
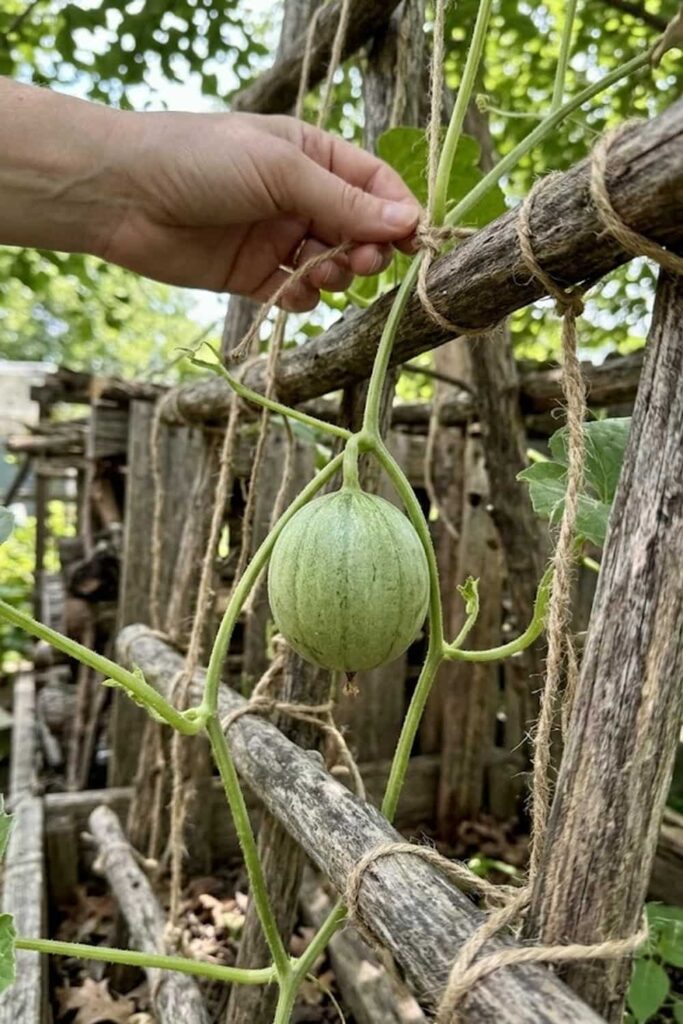
I remember when I first started, I used to think melons required acres of sprawling space, which was incredibly frustrating because my own garden plot was quite small. This limiting belief is a critical failure in imagination. If you, like me, find yourself struggling to fit complex vines into a compact area, you must practice reflective control over the plant’s architecture. Vertical gardening, which means training the vines upward on a sturdy structure, is a rewarding care step that develops a healthier and more productive environment.
This technique is most effective with small, personal-sized melon cultivars like ‘Minnesota Midget’ or ‘Charentais’. You are not just saving space; you are providing an invaluable form of protection for your season’s success. Elevating the Cucumis melo vines significantly improves air circulation around the large leaves, which is informative in the prevention of devastating fungal issues like powdery mildew. Furthermore, keeping the fruits off the soil provides complete defense against ground-based rot and common pests like wireworms.
Your vertical support structure must be robust, as a mature melon vine laden with multiple heavy fruits is surprisingly dense. I always construct a sturdy A-frame trellis using wood and heavy-gauge wire fencing. As the young runners begin to sprawl, I physically weave them through the trellis and secure them with soft jute twine. Note that as the individual fruits reach about baseball size, they will require internal support slings, made from flexible fabric like pantyhose or garden netting, to distribute their weight and prevent the developing harvest from simply tearing free of the vine.
Strategic Benefits of Trellising
- Maximizes Space: Converts horizontal garden area into high-yield vertical growing space, increasing per-square-foot production.
- Disease Prevention: Improves air circulation, providing invaluable protection against fungal pathogens like powdery mildew.
- Fruit Quality: Keeps developing melons off the dirt, preventing ground spots, rot, and soil-borne pest damage.
- Ease of Harvest: Positions the fruit at a convenient height, developing a much faster and more efficient harvesting experience.
Prevent Powdery Mildew with Proper Spacing
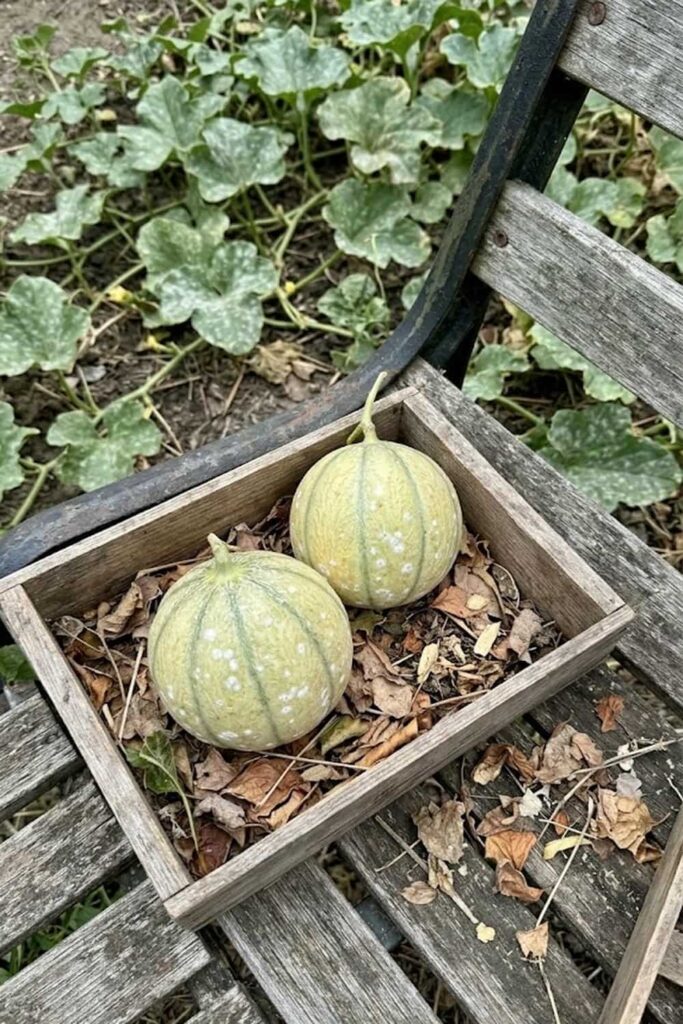
I’ve faced few garden heartbreaks more complete than watching a massive, healthy melon vine collapse just weeks before harvest, its entire green canopy smothered in what looks like a heavy dusting of white powder. This devastating issue is powdery mildew, a common fungal disease that develops in the humid, stagnant microclimate of an overcrowded melon patch. I understand the frustration deeply, and I know that ignoring preventative disease control is a critical failure. Proper plant spacing is your primary and most powerful tool in the prevention of this crop-killing pathogen.
Search data confirms that Erysiphe cichoracearum and Podosphaera xanthii (the pathogens responsible for powdery mildew) thrive when Cucumis melo is crowded and airflow is restricted. Your goal is to develop a dry, breezy environment that discourages fungal germination. At planting, you must be disciplined; I always space my melon mounds at least 3 to 4 feet apart, with 5 feet between rows. In a small space, you can achieve this essential separation while vertical gardening, which inherently develops better ventilation than sprawling.
Proper spacing provides multiple layers of invaluable protection for your season’s success. It ensures that sunlight penetrates the dense leaf canopy, rapidly drying any morning dew that can signal a fungal outbreak. It also develops the robust, individual plant health needed for complete disease defense. If you observe the earliest sign—the typical small, white, circular spots on the oldest lower leaves—you must react immediately. I recommend side-dressing with liquid seaweed, which is informative to the plant to build a resilient response, and applying an organic, sulfur-based fungicide.
Critical Cultural Practices for Fungal Control
- Optimal Spacing (3-4 feet): Improves airflow through the canopy, providing essential protection against humidity buildup and disease.
- Drip Irrigation: Concentrates water at the soil mix and root zone, developing a dry environment on the leaves where fungi cannot germinate.
- Morning Watering: If you must use overhead watering, doing so early in the day allows full sun to dry the foliage completely before sunset.
- Crop Rotation: Practice proper management by avoiding planting melons (or other cucurbits) in the same spot for at least 3 years to prevent soil-borne inoculum.
Identify the “Full Slip” Harvest Stage
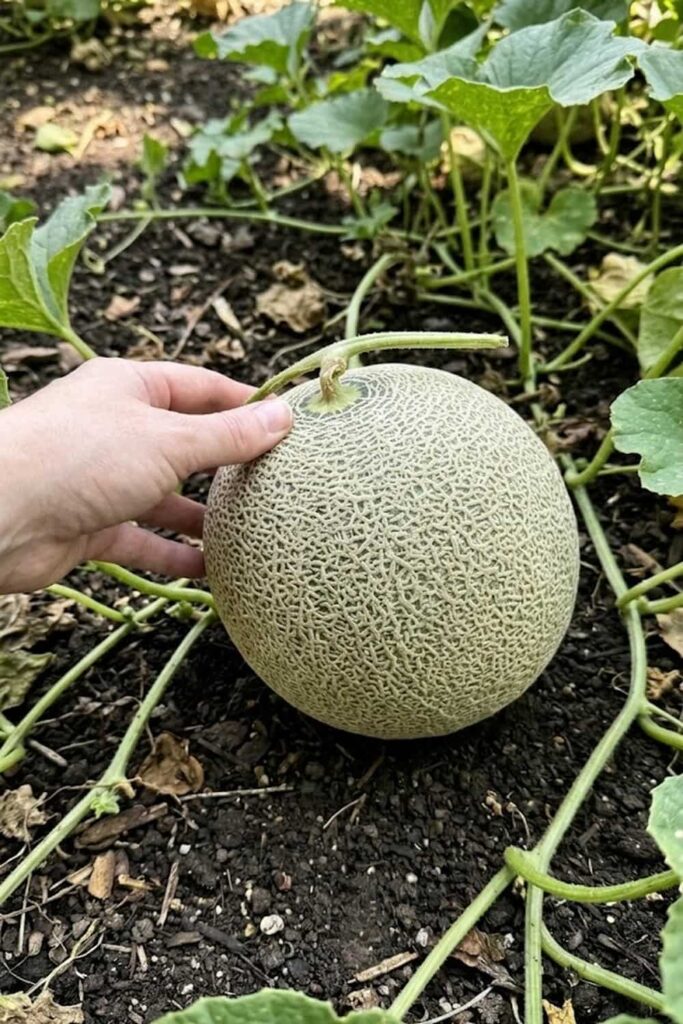
This is it—the moment you have worked for all season. The most critical failure in Cucumis melo cultivation is not a pest or a disease; it is the heartbreaking error of harvesting a beautiful, perfect-looking melon too early. It is a limiting belief that color alone is an indicator of readiness. Unlike tomatoes, melons will not significantly increase their sugar content after they are removed from the vine. Mastering the precise, informative signs of ripeness develops that dense, sugary, aromatic experience that store-bought options can simply never replicate. Your successful harvest is a rewarding experience that requires careful monitoring of physical cues.
For most reticulatus types (common cantaloupes), the ultimate indicator is a phenomenon called “full slip.” This develops when the stem begins to naturally separate from the fruit as a reaction to peak maturity. I find that when I put gentle, lateral pressure on the stem, it should cleanly and effortlessly “slip” away, leaving a smooth, indented cavity on the melon’s blossom end. If you have to pull, twist, or cut the stem, it is informative that the fruit is not yet at maximum sweetness. This physical release provides invaluable protection against bland, under-ripe results.
The cues are slightly different for non-netted varieties like Honeydew. While they do not “slip,” they develop other reflective signs of maturity. I prioritize monitoring the change in surface texture; the rind will shift from smooth and waxy to a distinctly sticky, matte finish. I also always observe the “ground spot”—the area where the fruit was resting on the soil—which will transition from pale white to a deep, creamy yellow. Learning these nuances provides reliable results for your season’s success.
Crucial Melon Ripeness Signals by Type
| Melon Group | Primary Signal | Visual Cues | Aroma |
| Cantaloupe (Netted) | Full Slip: Stem releases effortlessly from the fruit with light pressure. | Rind changes from green to tan; net texture is deep and corky. | Intense, musky, and undeniably sweet from the blossom end. |
| Honeydew (Smooth) | Rind Feel: Surface becomes dull, matte, and distinctly sticky. | Ground spot turns from white to creamy yellow; rind develops a velvety appearance. | Very faint sweetness; mostly identified by feel and color. |
| True Cantaloupe (Rinded) | Aroma: Powerful, complex perfume is informative of full maturity. | Color shifts to warm yellow; blossom end becomes slightly soft. | Extremely aromatic; the fragrance fills the immediate garden air. |
Manage Pests with Organic Neem Oil
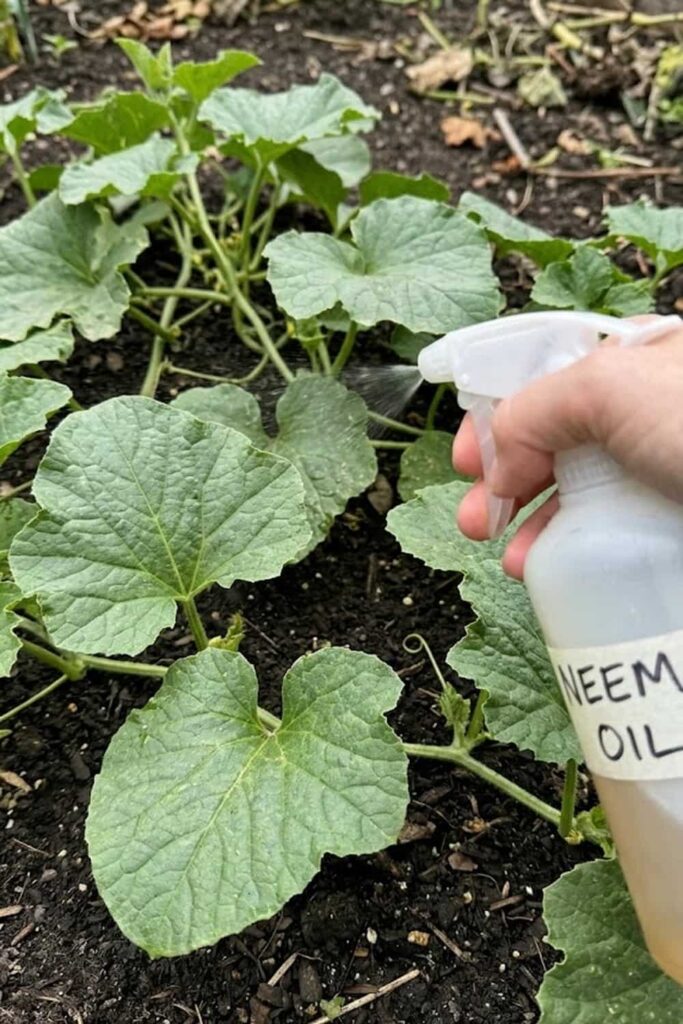
Even with robust prevention, you will likely face some late-season pest challenges. A common and frustrating issue is observing the large, protective melon leaves becoming smothered in a sticky residue (honeydew) and a subsequent black, sooty mold. This is informative of a severe aphid infestation, or perhaps the early arrival of squash bugs. Ignoring these persistent insects is a critical failure in management, as they drain the vital plant sap that the Cucumis melo requires to develop maximum sugar content. I understand the worry, and I find that proper, organic pest control develops a truly resilient vine structure and saves your crop.
Search data confirms that Neem oil is a versatile and powerful organic insecticide for managing a variety of common melon pests. It develops multiple forms of invaluable protection for your season’s success. Neem does not rely on harsh, reflective chemistry; rather, it possesses complex biological triples that actively inhibit feeding, disrupt insect hormones, and prevent larvicide development. I prioritize applying a 1% solution of Neem oil as a dynamic, preventative drench every 14 days, with a specific focus on coating the vulnerable undersides of the leaves, where most pests establish their complex colonies.
Proper application provides reliable results and prevents pest-driven failure. For effective control, always apply Neem oil during the morning, before direct sunlight can create unbalanced, harsh lighting that leads to leaf burn. It provides complete defense against general infestations when used consistently. I combine this informative, helpful care step with complex monitoring of my vines and side-dressing with liquid seaweed, developing a holistic defense program that ensures my melons have the health and resources needed to reach their sugary potential.
- Mode of Action: Disrupts insect feeding, hormones, and larval development; acts as an informative anti-feedant.
- Preventative Schedule (1% Solution): Apply every 14 days to coat vulnerable foliage and discourage pest establishment.
- Target Areas: Focus on the leaf undersides, where colonies of aphids, whiteflies, and squash bug nymphs are often located.
- Application Timing: Morning or late evening applications provide protection against harsh daylight and maximize efficacy.
FAQ: Your Best Melon Growing Questions Answered
This final informative section addresses specific beginner concerns and provides direct answers to your complex questions about how to grow melon fruit from seeds for beginners. I understand the worry, and I know that proper guidance develops a truly successful experience, providing incredible results for your season’s success.
Question: How to grow melon fruit from seeds for beginners?
Answer: You must provide consistent heat; start seeds indoors in peat pots 4 weeks before your last frost, maintaining a soil temperature of 75°F to 80°F, and only transplant them outdoors once the soil is a reliable 70°F.
Question: How often should I fertilize my melon vines?
Answer: Fertilizing provides essential nutrients; apply a balanced organic nitrogen fertilizer at planting and then a high-potassium side-dressing about 6 weeks later when the first flowers appear.
Question: Why are my melons not sweet?
Answer: Bland flavor is typically informative of water management failure; cease all irrigation 10 days before harvest to allow the Cucumis melo to concentrate its natural sugars rather than diluting them with excess moisture.
Question: Do melons need vertical support or sprawling space?
Answer: Spacing improves airflow; sprawling provides defense against disease when rows are separated by 5 feet, but trellising developments a healthier environment in small areas, providing protection from ground-based rot and pests.
Question: When and how do I harvest a cantaloupe?
Answer: Identify ripeness carefully; cantaloupes are mature at “full slip,” informative when the stem separates effortlessly and cleanly from the fruit, developing maximum sweetness and aroma.
Conclusion
Learning how to grow melon fruit successfully is a rewarding, multi-stage process that balances heat management, dynamic fertilizing, and purposeful disease prevention. I know that when you implement these exact 17 curated steps, from selecting the perfect variety to identifying “full slip” ripeness, you provide yourself with complete defense against failure. Mastering these informative care steps develops a truly successful season, allowing you to stop settled for bland alternatives and experience the unparalleled, sugary flavor of a vine-ripened, homegrown melon.








