
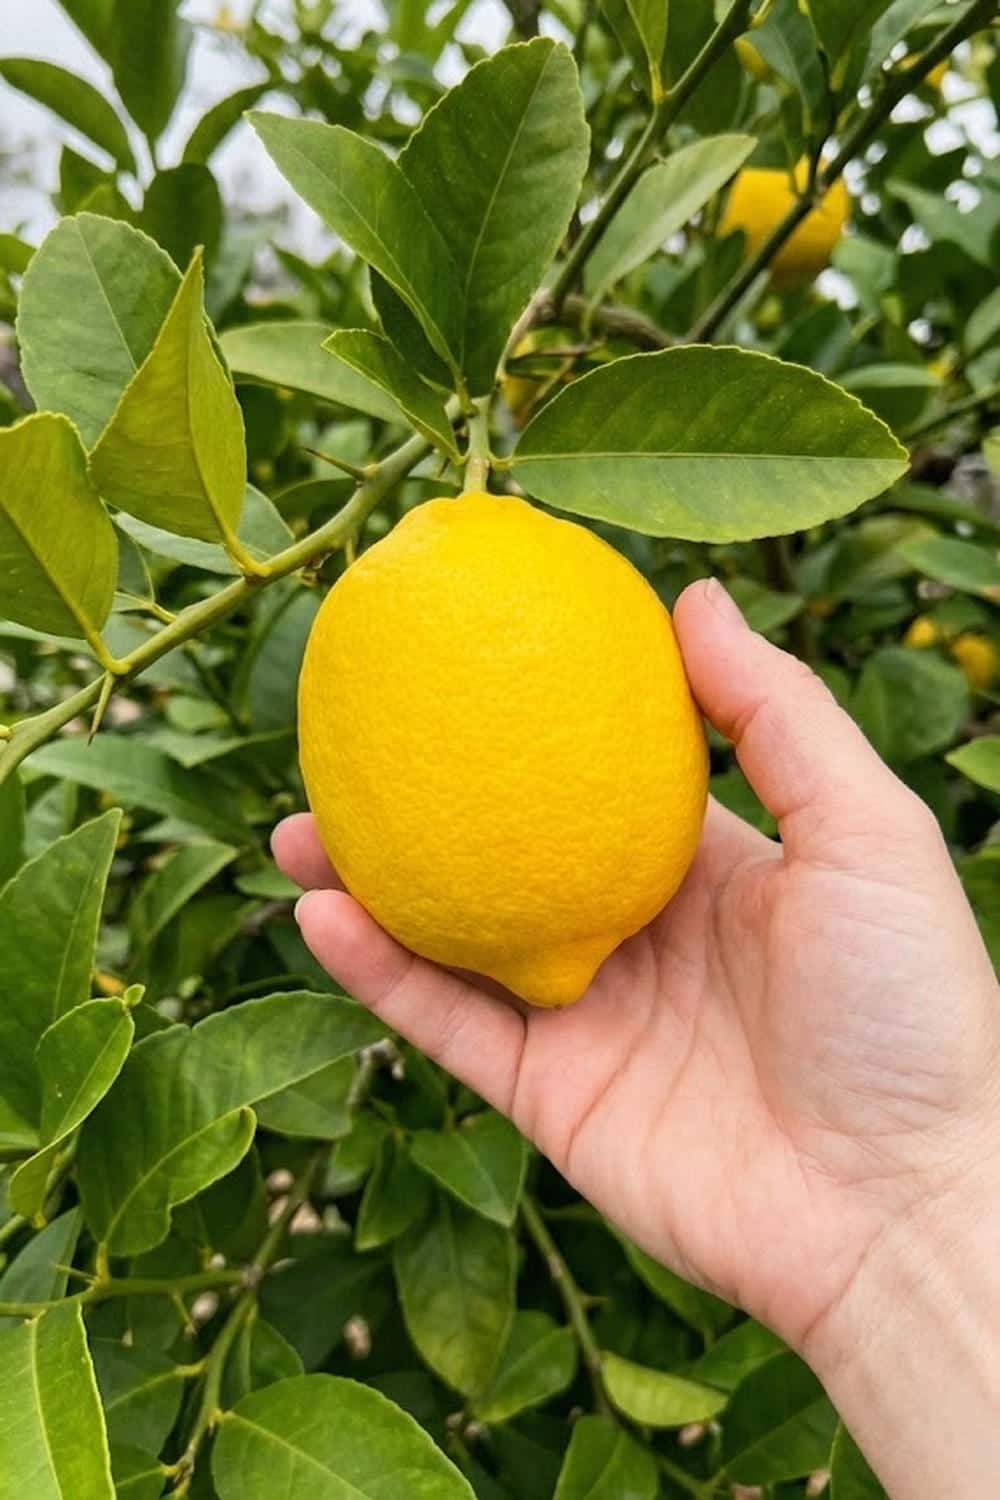

Do you crave the bright taste of fresh lemons but find store-bought fruit dull and expensive, especially when you think about how many you use? It is incredibly frustrating to buy a healthy-looking sapling, only to watch it drop leaves, refuse to fruit, or slowly decline despite your best efforts. I know that feeling of failure well, and I used to think growing lemon fruit was meant only for those with a professional greenhouse or a tropical estate. But that simply isn’t true. I learned through trial and errror that by implementing a specific management plan, you can absolutely maintain a thriving, heavy-yielding tree right at home. This article provides the definitive, no-fluff blueprint you need to succeed, based on real gardening experience and data.
1. Choose the Right Variety for Your Climate
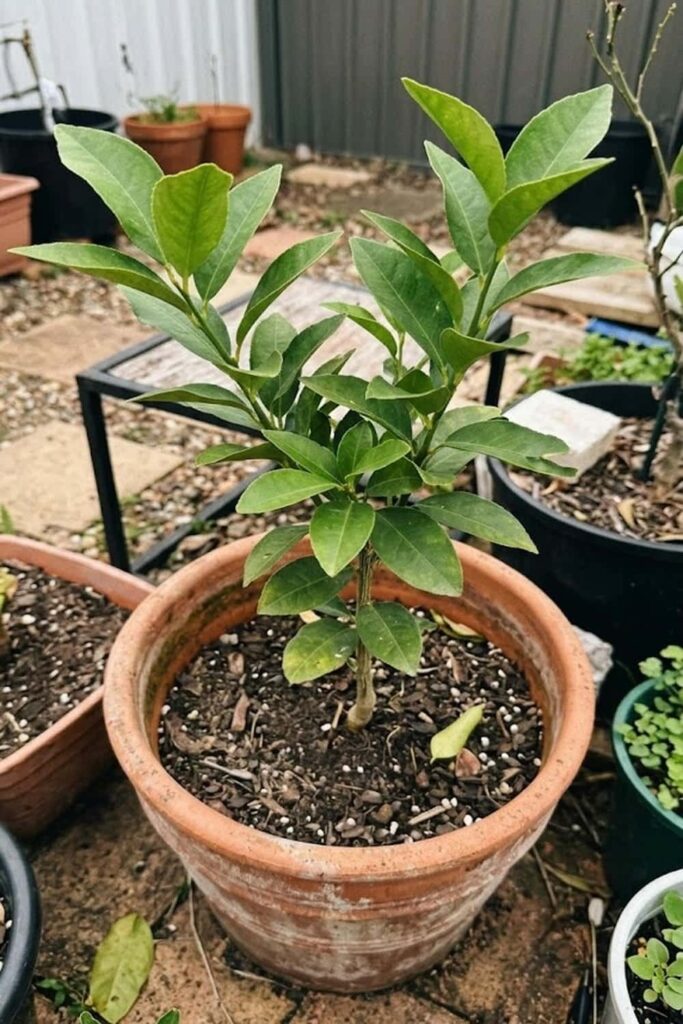
When I first decided to grow lemon fruit, I made the classic mistake of buying the first pretty tree I saw. I didn’t consider my local climate. Choosing the correct cultivar is the single most important step for long-term survival and yield. You must select a variety that matches your environmental limitations, specifically minimum winter temperatures. If you live in a region that experiences frost (USDA Zones 8 or below), your focus should be on colder-hardy types or varieties well-suited for containers that you can move indoors. The difference between a thriving tree and a dead one is often just the tag on the pot.
For most home gardeners, I highly recommend two reliable performers. The ‘Improved Meyer’ lemon is easily my top choice for versatility. It is a hybrid (likely crossed with a mandarin orange), which makes it naturally sweeter, thinner-skinned, and significantly more cold-tolerant than commercial lemons. Meyer lemons can withstand temperatures down to nearly 22°F for short periods once established. The fruit is incredibly juicy and has a distinct floral aroma that store-bought varieties lack. If you prefer the classic, highly acidic lemon flavor for cooking and beverages, the ‘Eureka’ is your standard. It produces heavily but offers much less cold tolerance. I’ve found Eureka trees are less vigorous than Meyers and are much more sensitive to environmental stress, requiring very consistent care and protection.
When you are purchasing, especially if you are in the 25–45 age bracket juggling a career, you want reliability. Make sure you are buying a tree that has been grafted onto a specific rootstock. This process bonds a desirable scion (the top part, e.g., Meyer or Eureka) to the roots of a different, hardier variety. Girdling or damage to this rootstock will kill the tree. Grafted trees reach maturity and begin growing lemon fruit much faster than trees grown from seed, which can take seven to ten years and often do not produce true-to-parent fruit.
| Variety | Cold Hardiness | Fruit Characteristics | Primary Advantage |
| Improved Meyer | Moderate (~22°F) | Sweet, Thin Skin, Tangy | Versatile, Container-Friendly, High Vigor |
| Eureka | Low (~30°F) | Acidic, Classic Flavor, Thick Skin | Heavy Producer, Standard Commercial Type |
| Lisbon | Moderate (~25°F) | Very Acidic, Thorny, Dense Foliage | High Yields, Heat Tolerant |
2. Master the Art of Soil Preparation
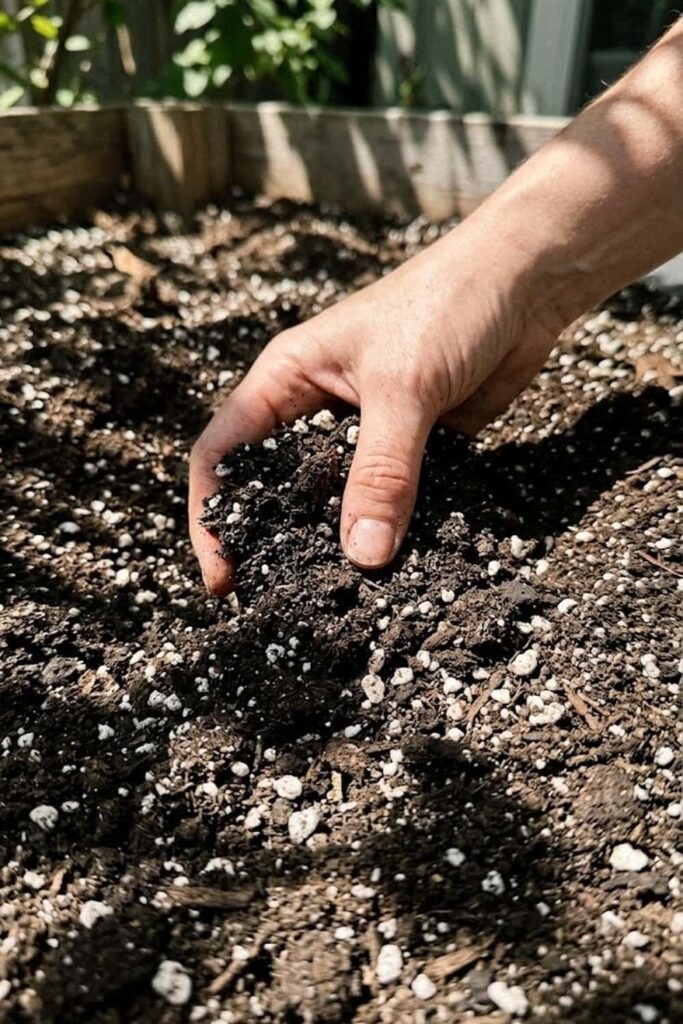
If your soil isn’t right, nothing else matters. You can water and fertilize perfectly, but without proper soil structure and chemistry, your tree will struggle. This is where I see the most initial failure when gardeners try to grow lemon fruit. Lemon trees are extremely specific: they require a substrate that provides aggressive drainage while maintaining slight acidity. In my experience, standard backyard clay or dense commercial potting mixes are almost always a death sentence because they trap water and suffocate the sensitive lateral roots, leading directly to Phytophthora root rot.
To build the ideal foundation, I recommend creating your own citrus specific mix. The goal is to maximize porosity. I’ve found great success blending two parts standard (high-quality) potting soil, one part coarse sand or poultry grit (for drainage), and one part pine bark nuggets or perlite (for air space and acidity). This combination ensures that even when you water deeply, excess moisture drains away immediately, and vital oxygen can reach the roots.
The soil pH value is the other critical factor. Lemon trees maximize photosynthesis and nutrient uptake when the soil pH remains in the acidic range of 5.5 to 6.5. If the soil becomes too alkaline (pH 7.0+), the tree cannot absorb essential micronutrients like Iron, Zinc, and Manganese, leading to leaf chlorosis (yellowing). A simple, digital pH meter is a vital tool for this. To proactively manage and maintain acidity, I incorporate a small amount of elemental sulfur or use specialized, acid-loving fertilizers during planting.
I always prefer using organic amendments to improve long-term soil structure and fertility without chemicals. A 1-inch layer of compost (like worm castings or aged steer manure) mixed into the surface provides slow-release Nitrogen and introduces beneficial mycorrhizae to the root zone, which improve the tree’s water and nutrient absorption naturally. Proper mulching with 2–3 inches of bark chips is essential; it regulates soil temperature and suppresses weeds, but you must keep the mulch at least 4 inches away from the trunk to prevent decay.
| Soil Amendment | Core Function | Primary Benefit for Citrus |
| Pine Bark Nuggets | Increase Aeration and Acidity | Improves drainage and stabilizes pH in the optimal range |
| Coarse Sand / Grit | Eliminate Waterlogging | Prevents root rot in dense soils (very critical) |
| Worm Castings / Compost | Provide Micro-Nutrients and Microbes | Develops a strong, healthy immune system naturally |
3. Optimize Sunlight Exposure for Growth
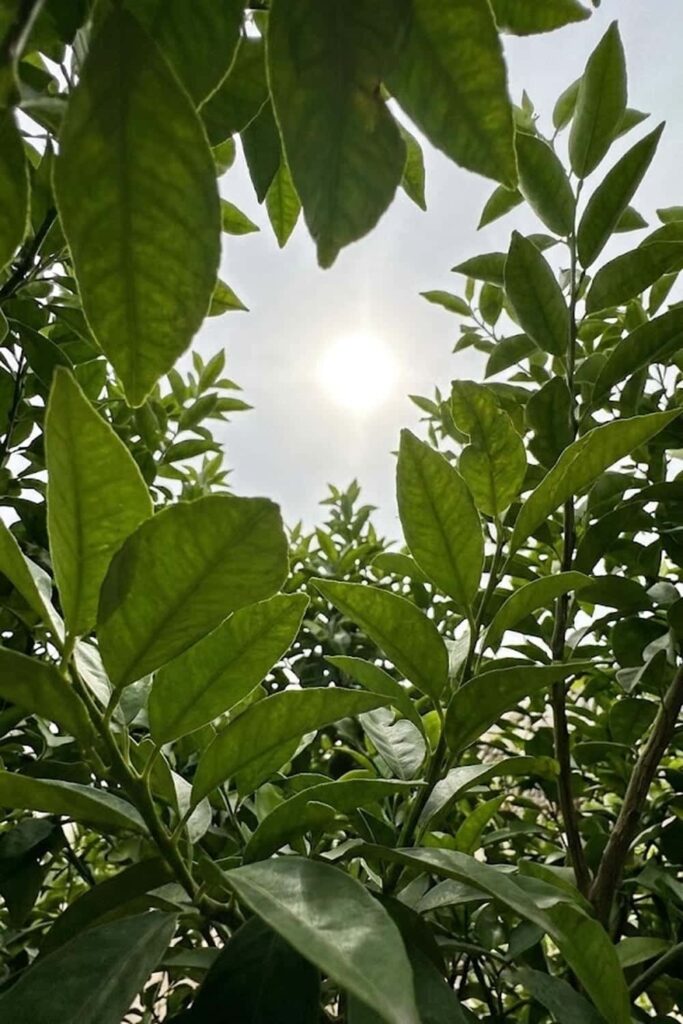
You can provide the perfect soil, water, and fertilizer, but your lemon tree will never thrive without intense light. Energy generation, fruit production, and overall tree vigor are all directly powered by the sun. I’ve found that a lack of light is the most common reason for a healthy-looking tree that simply refuses to fruit. Lemon trees, derived from Mediterranean and tropical ancestors, are optimized for maximum solar absorption; they are not shade plants.
For established trees, you must select a location that provides a minimum of 8 to 12 hours of direct and unfiltered sunlight daily. I mean the kind of intense, direct sun that makes you want to wear sunglasses. Morning sun is particularly valuable as it quickly dries dew from the leaves, providing critical protection against fungal pathogens. If you are planting in the ground, avoid any shadows from fences, large trees, or buildings. I recommend using a south-facing or west-facing wall (if you are in the northern hemisphere), which provides a powerful bonus by absorbing daytime heat and radiating it back to the tree at night. This technique is extremely helpful for prevention of frost damage in marginal climates.
If you are growing lemon fruit indoors in a container, finding sufficient light is your greatest challenge. A simple, bright windowsill is almost never enough, even if it seems sunny. Indoor light intensity drops exponentially just a few feet away from a window. I always advise using a high-output, full-spectrum LED grow light for all indoor citrus, positioning it just 12–18 inches above the canopy. You should operate the light on a timer for 14–16 hours daily to simulate a tropical environment and maintain active, healthy photosynthesis year-round.
The quality of the light is just as important as the duration. Intense direct sun can actually cause leaf sunburn if the tree is not acclimated. If you are moving an indoor tree outside for the summer, you must manage this transition carefully. Start by placing it in dappled shade for a week, gradually increasing its direct sun exposure by one hour per day. This “hardening off” process provides essential care for the leaves, developing a resilient canopy that can handle full sun without scorching. This proactive care is the key to creating a truly high-yielding tree.
4. Implement a Precise Watering Schedule
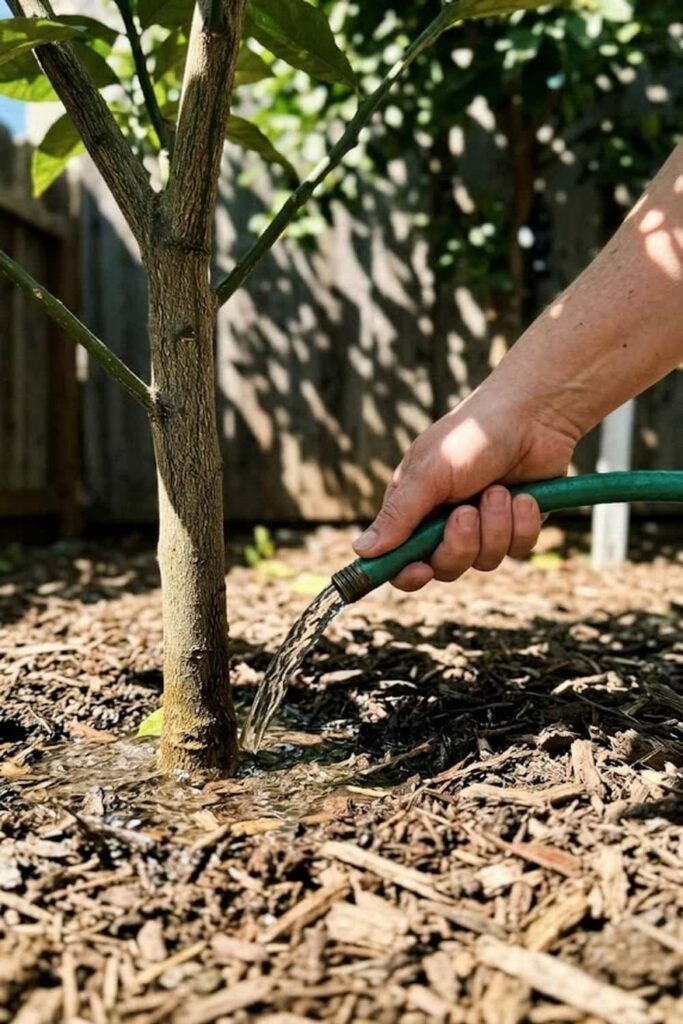
Water is both the elixir of life and the kiss of death for citrus, and mastering this balance is the hardest part for new gardeners trying to grow lemon fruit. Overwatering is, by far, the single biggest killer of household lemon trees. Lemon roots have a high demand for oxygen and are incredibly susceptible to root rot in saturated conditions. But under-watering is just as dangerous, causing catastrophic leaf drop, blossom drop, and creating highly stressed fruit that is prone to splitting. You cannot succeed without a precise, data-driven watering strategy.
The fundamental rule I live by is this: Water deeply and infrequently. Never water your tree on a set schedule. Instead, check the soil moisture daily. For trees in containers, do not water until the top 2 inches of the potting mix are completely dry. Use your finger or a simple moisture meter to improve accuracy. When you do water, apply it thoroughly until you see it stream freely from all drainage holes in the pot. This process hydrates the entire root ball and forces any accumulated salts from fertilizers down and out. Then, wait for the soil to dry out again.
I use different moisture care techniques for trees planted in the ground. Their larger root systems manage water stress more effectively, but they still need deep hydration, especially when they are setting and developing their large lemon fruit. A focused drip irrigation system is ideal because it delivers slow, targeted moisture right to the root zone, maximizing absorption and minimizing runoff. Avoid overhead sprinklers, which keep the canopy unnecessarily wet and control fungal diseases poorly. For young trees, deep watering once a week in summer is usually sufficient, but mature, fruiting trees may need deep watering every few days during intense heat waves.
Your watering technique must change with the seasons for optimal management. During the active growing period (Spring through Summer), the tree’s water demand is at its peak as it supports aggressive vegetative growth and fruit set. From Fall through Winter, as the tree enters semi-dormancy, its metabolism slows down. I always advise reducing your watering frequency significantly at this time. Overwatering in winter, when the tree is least capable of using it, is the classic recipe for root rot and failure.
5. Feed Your Tree with Citrus-Specific Nutrients
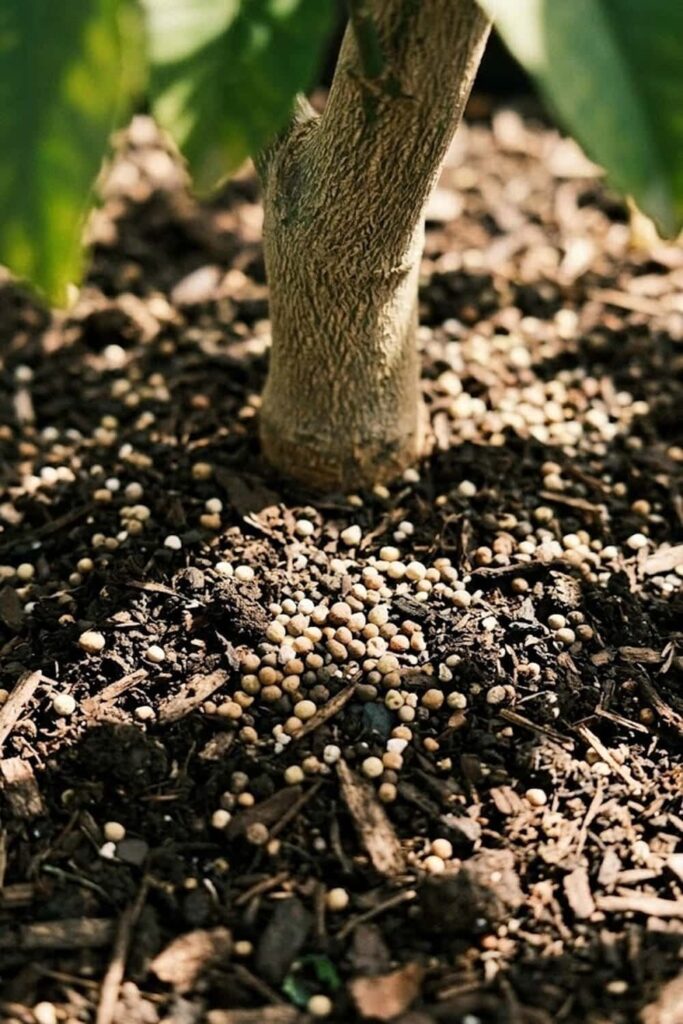
Your lemon tree is a heavy feeder. Growing lemon fruit is physically demanding work for the plant, requiring a vast and consistent supply of raw nutrients to fuel leaf production, root growth, and the creation of its large, mineral-rich fruits. A lemon tree that isn’t fed correctly will prioritize survival over reproduction, meaning it won’t produce fruit, or the fruit it does create will be small and dry. To succeed, you must provide a balanced and sophisticated nutrient management plan.
I have found that standard all-purpose fertilizers are rarely sufficient. Citrus have specific macronutrient ratios (N-P-K) and unusual micronutrient requirements. Your fertilizer must be rich in Nitrogen, which powers aggressive leaf growth and energy production. I recommend looking for a fertilizer with an N-P-K ratio close to 2-1-1 or 3-1-1. But the single most common nutrient problem in citrus is chlorosis, caused by a deficiency in Iron, Zinc, or Manganese. A good citrus fertilizer will always include these chelated micronutrients for rapid absorption and protection. In areas with high-pH water, adding periodic Epsom salts (Magnesium) is also vital for care.
For consistent feeding, I utilize two different application methods for young and mature trees. First, I apply a citrus granular fertilizer with beneficial mycorrhizae and beneficial soil microbes at the beginning of the growing season (late winter). This provides a slow, predictable base of care. Second, from Spring through Summer, I support the active growth and fruit set phases with a water-soluble citrus fertilizer applied every 2–4 weeks. This liquid feed provides immediate control and ensures the tree has the massive energy it needs exactly when it is growing lemon fruit.
Knowing when to stop feeding is just as critical as knowing when to start. I always advise you to stop applying any granular fertilizer after the first of August. Late-season feeding, especially with high Nitrogen, encourages soft, lush, and vulnerable new growth right as the tree should be preparing for winter dormancy. This tender new foliage is the first thing to be destroyed by frost. To improve winter hardiness, I manage nutrients by performing one final, light application of a potassium-rich fertilizer (0-0-20 or similar) in early fall to help “harden off” the tree’s wood and foliage.
6. Pruning for Maximum Fruit Yield
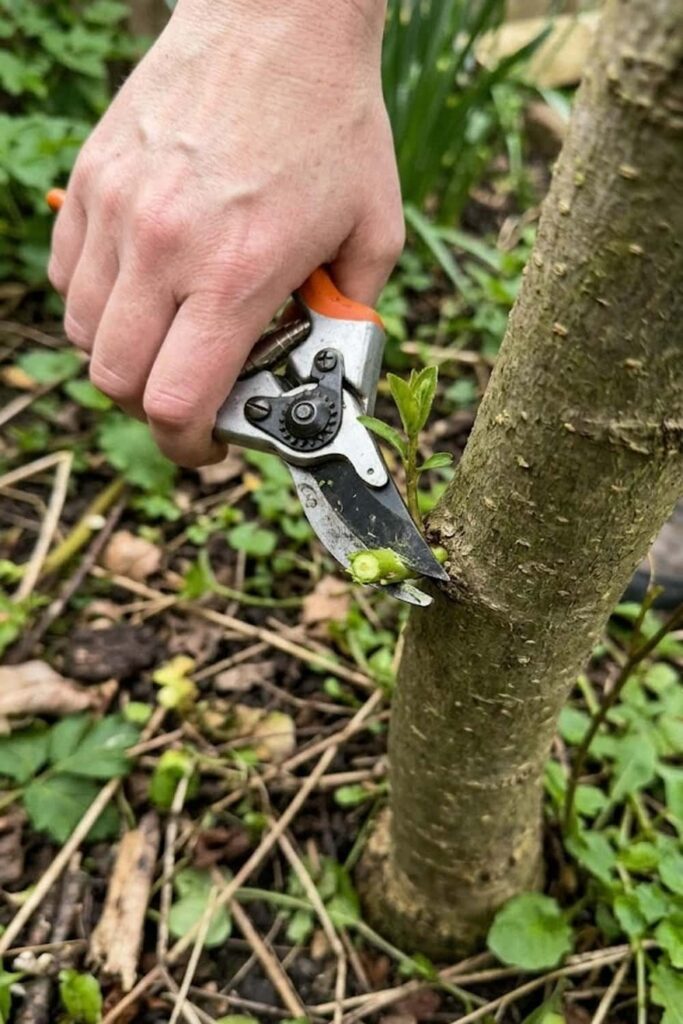
I often see gardeners hesitate when it comes to pruning, fearing they will damage their tree, but correct management of the canopy is essential for maximizing your lemon fruit harvest. Citrus trees do not require pruning to encourage fruiting like apples or peaches; however, strategic cuts are vital to structure the tree, maintain vigor, and open up the canopy for sunlight and airflow. Proper care through pruning increases light penetration and reduces the dense, humid microclimates where pests and diseases like sooty mold and Citrus Canker thrive.
Your primary focus when pruning should be structural structural stability and health protection. I always start by removing the “Three Ds”: any wood that is Dead, Damaged, or Diseased. Next, I target the “suckers”—aggressive, thorny, perfectly vertical shoots that emerge from the rootstock below the graft union. These suckers are genetically different from your desired variety (like a ‘Meyer’ or ‘Eureka’); they are incredibly vigorous and, if not managed, will completely consume the energy intended for growing lemon fruit, eventually starving and killing the grafted tree. Remove them flush to the trunk as soon as they appear.
Once the health cuts are made, I focus on opening the interior of the tree. A lemon tree’s canopy can become an impenetrable wall of green. You want to selectively remove water sprouts (another form of vertical, non-fruiting growth) and any branches that are crossing or rubbing against each other. When branches rub, they create wounds that are entry points for pathogens. By maintaining an open structure, perhaps in a vaso or open-center shape, you ensure that even the lowest leaves can optimize photosynthesis, leading to a healthier tree that develops more robust lemon fruit on its strong, outer branches.
| Cut Type | Target Growth | Timing | Primary Benefit |
| Maintenance | The “Three Ds” (Dead, Damaged, Diseased wood) | Anytime | Disease prevention and general health care. |
| Structural | Rootstock Suckers, Crossing branches | Late Winter | Redirects energy to fruiting, prevents structural failure. |
| Aesthetic | Water Sprouts, Shape control | Early Summer | Improves sunlight penetration and looks. |
7. Pollination Techniques for Indoor Trees
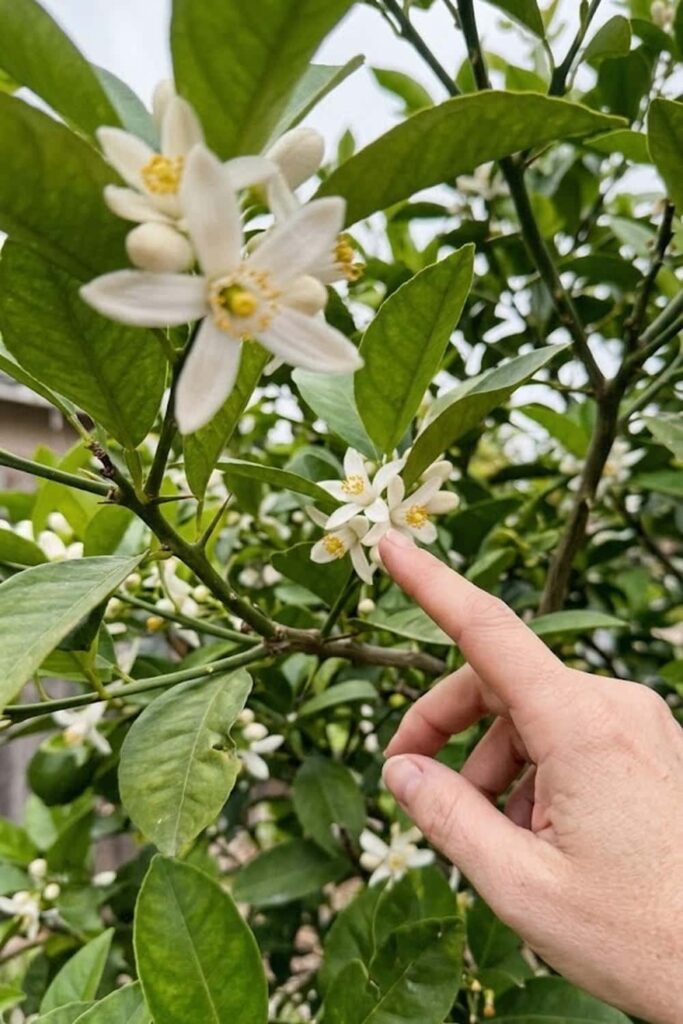
If you are growing lemon fruit indoors or in a greenhouse, you have to become the pollinator. Out in the garden, bees, hoverflies, and even butterflies perform this service as they visit the delightfully fragrant, nectar-rich flowers. The tree needs this service; a lemon blossom will only develop into a fruit if pollen is moved from the male parts of the flower (the anthers) to the female part (the stigma) of the same blossom or another on the same tree. Without these insect visitors, your blossoms will bloom beautifully, wither, and then simply drop off the tree.
I find manual pollination to be a quick and satisfying gardening task. All you need is a simple, soft tool; a small artist’s paintbrush, a cotton swab, or even the tip of your finger will work. During the morning hours when the blossoms are first fully open and their pollen is most active (you will see it as a vibrant yellow dust on the anthers), gently dab your tool inside each flower. You must maintain focus and touch the sticky center stigma. Move systematically from one flower to the next across the entire tree to maximize your fruit set.
A lack of airflow is another subtle enemy when you are manually pollination indoor citrus. In nature, wind increases the strength of the stems and helps vibration, which releases the sticky pollen. I highly recommend control of this environmental variable by utilizing a small, oscillating fan near your tree. Position the fan to provide a very gentle, indirect breeze. This light air movement not only assists in the self-pollination of the blossoms but also improves air circulation around the tree’s cambium, providing essential protection against soil-borne pathogens and management of humidity. Proactive care that simulates the outdoors is the key to creating a truly high-yielding indoor tree.
Here are 3 quick tips for indoor pollination success:
- Optimal Temperature: Aim for a stable room temperature between 70°F and 75°F; extreme heat or cold can cause blossoms to fail.
- Watering: Be extremely careful not to overwater. Stressed, waterlogged roots are the primary cause of sudden blossom drop in indoor trees.
- Humidity: Boost ambient humidity slightly by placing a simple pebble tray with water beneath the pot to improve flower development.
8. Winter Protection and Temperature Management
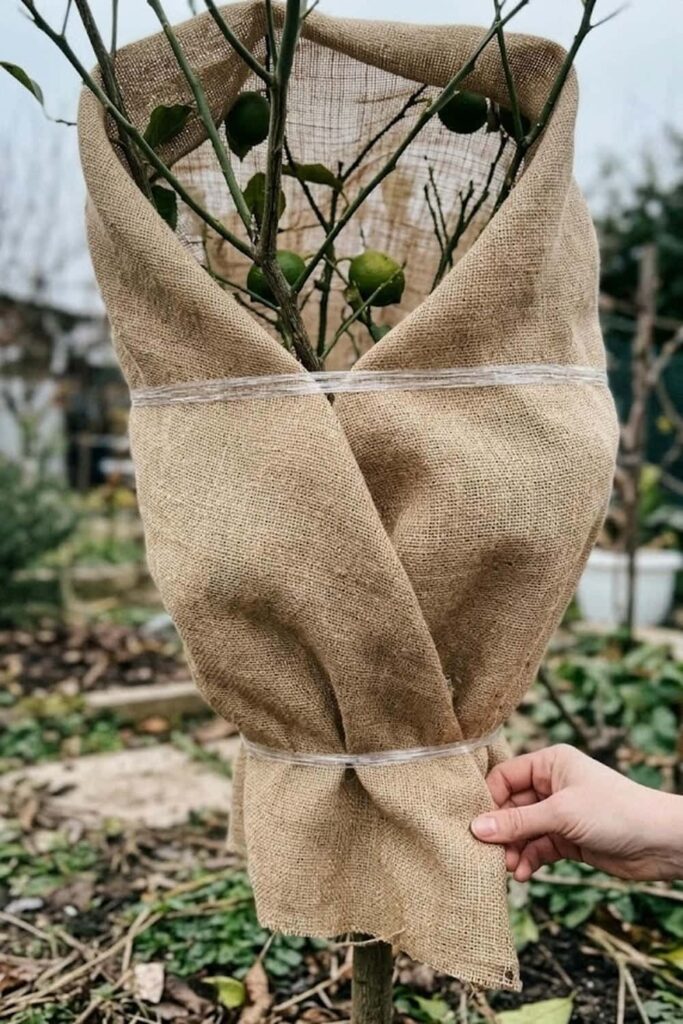
I find that winter temperature management is the scariest part of citrus care for most beginners. The thought of losing your established tree to a single, deep frost is incredibly stressful, but proactive environmental control makes it entirely manageable. I always advise you to remember that all citrus are subtropical; they lack true dormancy and continue growing slowly through winter. Their cold tolerance varies significantly by variety, but even established trees cannot withstand temperatures below 25°F for more than a few hours without sustaining severe leaf, bark, and root damage. This proactive management and care can’t wait until the freeze arrives.
If you are growing in a container (especially in USDA Zones 7 or lower), you must control the temperature by moving the tree to a frost-free environment well before the first expected frost date. A simple unheated garage or even a cool basement works well. The goal is to provide a semi-dormant cool period (45°F to 55°F) while still ensuring at least 6 hours of bright, indirect light. I always advise against bringing citrus into a fully heated house for the winter; the dry heat, lack of natural light, and stagnant air are extremely stressful and create the perfect conditions for a devastating spider mite infestation. To maintain humidity, place a simple pebble tray with water beneath the pot to improve the indoor microclimate.
For established trees in the ground in marginal zones (USDA Zone 8b or high 9s), you have to be ready to implement serious outdoor environmental protection. I monitor local forecasts starting in early November. When temperatures are predicted to drop below 32°F, I cover my trees with breathable, specialized frost blankets or burlap. These covers provide several degrees of thermal protection by trapping ground heat. Crucially, they must be removed the moment the temperature rises above freezing the next day to allow for vital photosynthesis. Proactive care that simulates the outdoors is the key to creating a truly high-yielding indoor tree.
To improve a covered tree’s resilience during extreme cold snaps (below 25°F), I utilize simple heating elements. I highly recommend wrapping the lower trunk with several strings of non-LED, traditional outdoor incandescent Christmas lights or, even better, utilizing a dedicated, low-wattage reptile heating cable draped over the soil at the base of the tree. I never use plastic coverings for protection unless they are held completely away from the foliage. Plastic touching the leaves can actually develop cold burn and amplify the freeze. These small details are what separate a dead tree from a thriving citrus harvest the next year.
9. Identify and Manage Common Citrus Pests
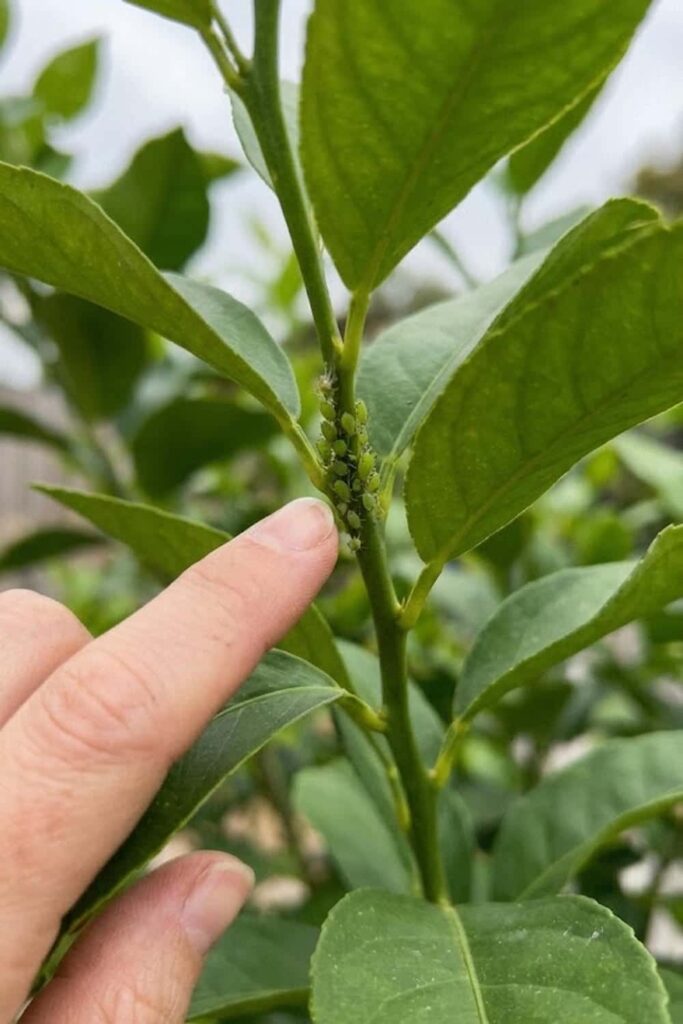
I have found that the sweetest victory when growing lemon fruit is not the harvest itself, but the feeling of protection that comes from successfully defending your tree. Lemon trees, with their lush new foliage and sweet, large fruits, attract a wide variety of persistent pests. These invaders, like aphids, mealybugs, scale, and spider mites, do not just make your tree look unattractive; they are parasitic. They actively suck the Nitrogen rich sap from the leaves, causing severe stress, leaf drop, blossom failure, and a dramatic, long-term reduction in fruit yield. You cannot succeed without a vigilant, data-driven pest management strategy.
The absolute key to pest control is early detection. I always advise you to proactively inspect your tree, especially during spring, by gently turning over the new leaves. This is where most sucking pests cluster. Look for small, soft, green, or black aphids, cottony, white mealybugs, or immovable, shell-like brown scale insects. Another major warning sign is sooty mold, a black, dynamic fungal disease that feeds on the sticky “honeydew” waste excreted by these insects. If you see sooty mold, you definitely have a sucking insect infestation you must manage and control. Proactive care that simulates the outdoors is the key to creating a truly high-yielding indoor tree.
For minor infestations on small or indoor trees, I prefer mechanical and organic control methods. A strong blast of water from a spray bottle will physically dislodge many pests without using harsh chemicals. For more persistent populations, I utilize organic solutions like Neem oil or insecticidal soap, which provide excellent care by smothering the insects and their eggs while remaining safe for beneficial pollinators when applied correctly (e.g., in the evening, ensuring it dries completely). To improve winter hardiness, I manage nutrients by performing one final, light application of a potassium-rich fertilizer (0-0-20 or similar) in early fall to help “harden off” the tree’s wood and foliage.
Finally, you can’t talk about pests without talking about ants. In nature, ants do not harm the tree directly, but they form a fascinating and parasitic symbiosis with sucking insects like scale and aphids. They actively protect these pests from natural predators, moving them between branches and protecting their dynamic “farm.” I highly recommend focusing your initial pest control efforts on management of the ants first. Use a sticky ant-barrier tape or simple, natural repellent at the base of the trunk to prevent ants from climbing and interfering with your organic pest care efforts.
10. How to Grow Lemon Fruit in Small Containers
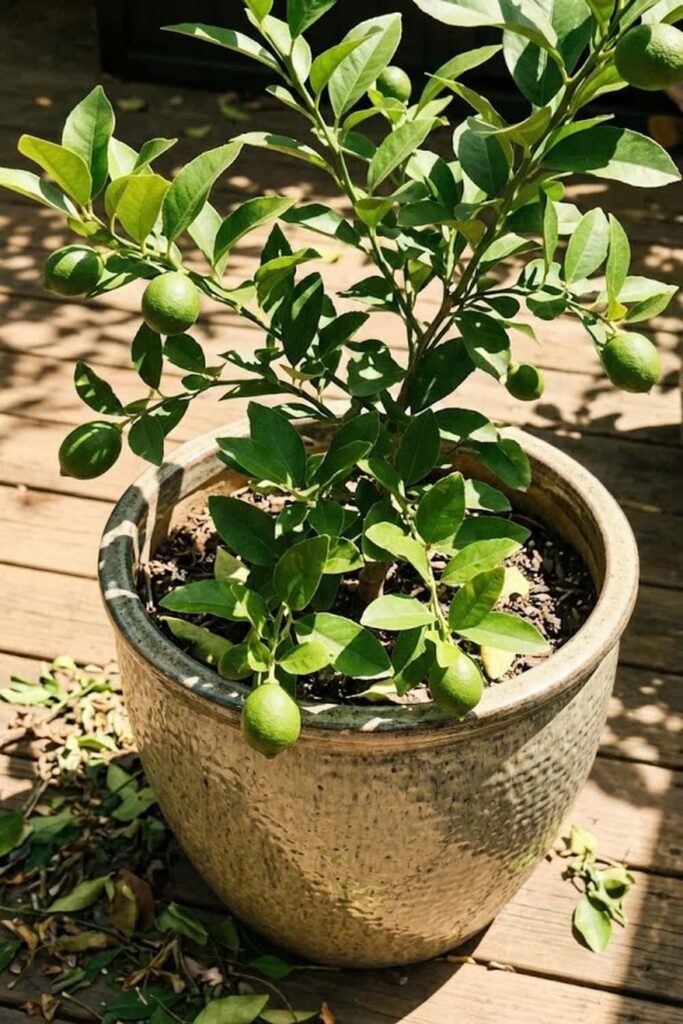
I am a strong advocate for growing lemon fruit indoors or on small patios, as it proves that you do not need a massive estate to enjoy fresh citrus. In my experience, a large percentage of beginners fail because they either choose a standard tree that outgrows its space or use a pot that creates physiological stress. You must approach container gardening with a focus on maximizing restricted care variables, starting with the genetic limitations of the tree itself. Grafted dwarf varieties are non-negotiable for long-term container success.
The fundamental cornerstone of container management is selecting the correct pot. I’ve found that using a standard terracotta pot is actually a common mistake for indoor citrus. The unglazed clay is too porous; it causes the soil to dry out unevenly, often creating fatal moisture gaps within the sensitive root ball. I highly recommend utilizing a glazed ceramic, non-porous plastic, or resin container, which helps maintain consistent root zone protection. For young saplings, a dynamic 5-gallon container is sufficient, but mature, high-yielding trees that are growing lemon fruit will develop a massive root system that requires at least a 15- to 20-gallon pot with excellent drainage.
To ensure your container provides sufficient aeration and prevention of soil compaction, you cannot use regular garden soil. Standard ground soil will collapse in a pot, suffocating the roots and preventing all hydration control. I always utilize a customized, high-porosity mix: two parts specialized citrus or “cactus” potting soil, and one part coarse perlite or pine bark nuggets. This mixture guarantees aggressive drainage, providing crucial care for the sensitive feeder roots. Remember to repot your tree into fresh soil every 2–3 years to prevent soil exhaustion and to refresh the dynamic cambium health of the roots.
Here are 3 essential container tips:
- Mobility: Utilize a simple wheeled pot caddy to easily manage movement between indoor and outdoor locations based on sunlight or temperature.
- Moisture: Place a simple pebble tray with water beneath the pot to improve the indoor microclimate.
- Feeding: Use dynamic, water-soluble fertilizers applied frequently to provide consistent nutrient care, as pots leach minerals quickly.
11. Solving the Mystery of Yellowing Leaves
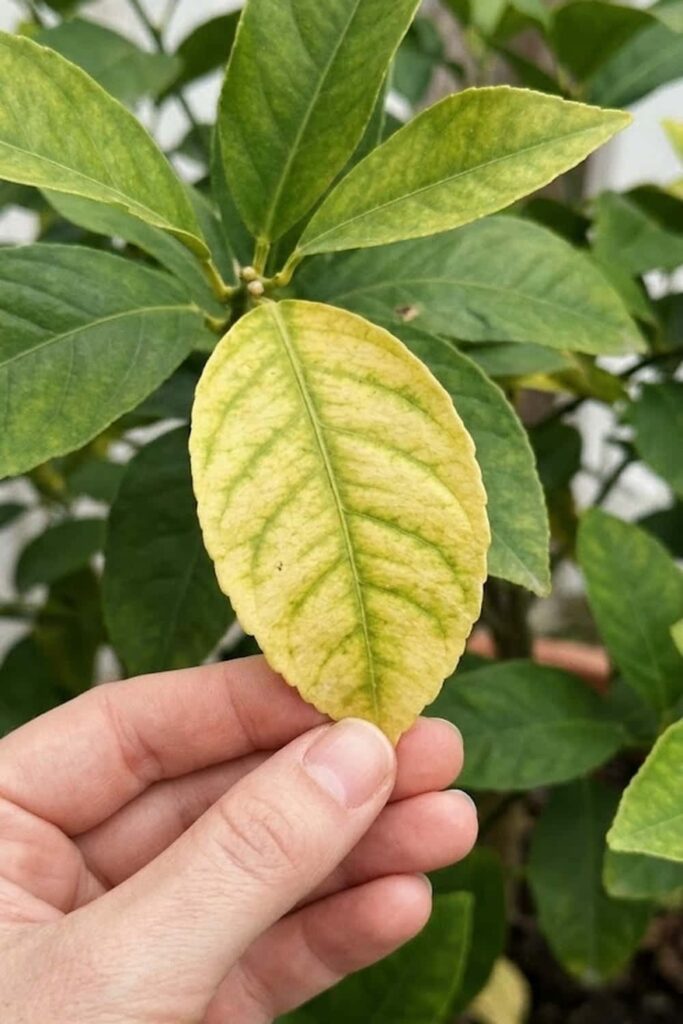
I frequently see new gardeners panic when their vibrant lemon tree suddenly starts producing pale or completely yellow leaves, but I want you to know that this symptom is simply the tree’s primary way of communicating that a specific environmental variable requires immediate care. This common condition, known as chlorosis, indicates that the leaf tissue lacks sufficient chlorophyll, which is essential for maximizing photosynthesis. It is not a death sentence; it is a dynamic distress signal that you can diagnose and manage with a focused nutritional strategy.
To control chlorosis effectively, you have to find the root cause, which is usually a nutrient deficiency or a soil pH issue. In my experience, the pattern of yellowing provides the answer. If the yellowing starts on the oldest leaves (near the bottom), it’s almost always a classic Nitrogen (N) deficiency, requiring immediate Nitrogen application. If the yellowing only affects the newest growth, appearing with dark green veins and pale yellow tissue (iron chlorosis), it indicates the tree cannot absorb micronutrients. This is the big one I encounter, and it requires you to adjust soil alkalinity (pH) to maintain an acidic range and apply chelated Iron for rapid recovery.
Overwatering is the sneaky and common secondary cause of yellowing that many beginners overlook. Excess moisture collapses the soil structure, suffocating vital feeder roots and leading directly to root rot. Waterlogged roots lose all absorption capability, making the tree unable to take in even the abundant nutrients you have provided. This proactive management and care can’t wait until the freeze arrives. I highly recommend you always use a simple moisture meter or your finger to ensure the soil has dried out to at least 2 inches deep before applying more water.
The final major cause of leaf stress that requires vigilant protection is localized nutrient toxicity. I have seen dynamic leaf burn and chlorosis resulting from excessive amounts of specific fertilizers, particularly potassium or high Nitrogen salts. To prevent this parasitic dynamic, you must always utilize dynamic, water-soluble fertilizers applied frequently to provide consistent nutrient care, as pots leach minerals quickly. These small details are what separate a dead tree from a thriving citrus harvest the next year.
12. Speed Up Growth with Rooting Hormones
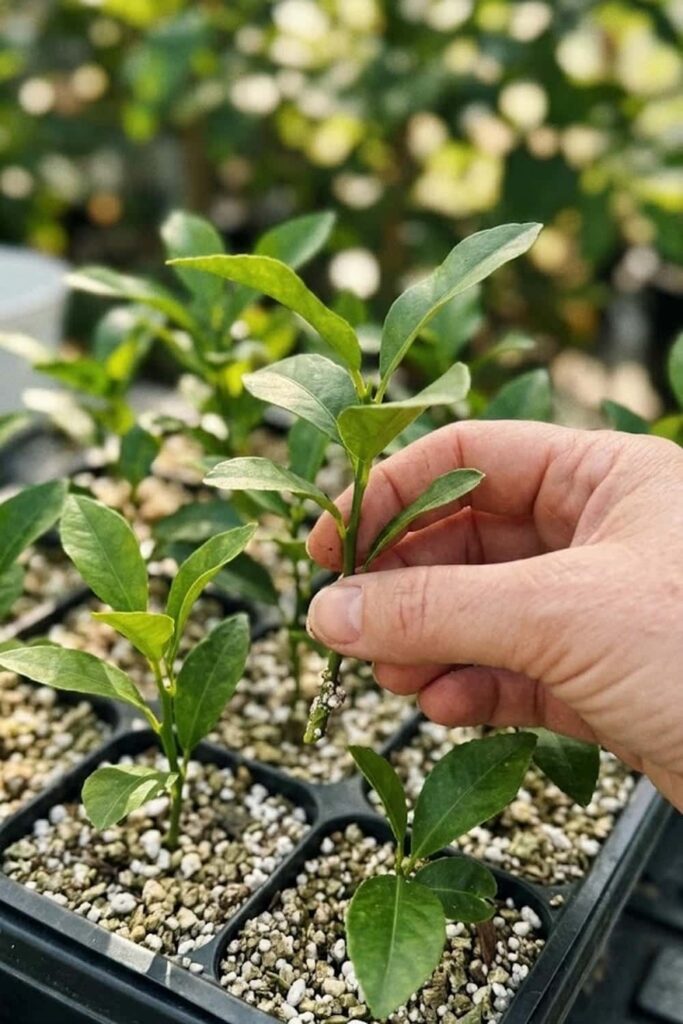
I often see gardeners become impatient with the multi-year timeline required for growing citrus, and I want you to know that you can absolutely increase growth and fruiting speed by propagating new trees from cuttings rather than seeds. While starting from seed is a popular and low-cost experiment, it is extremely inefficient for serious management. In my experience, a seedling may take 7 to 10 years to reach maturity and start growing lemon fruit, and it often will not produce the high-quality fruits of the parent tree. However, a grafted cutting is genetically identical to the mature, dynamic donor tree and can often begin fruiting in just 2 to 3 years.
The use of a concentrated rooting hormone is the critical factor for this technique. Lemon cuttings, unlike vigorous herbs, will not naturally or reliably develop roots on their own; they need a sophisticated parasitic stimulus. This concentrated plant hormone mimics the dynamic chemical signals that trigger cellular differentiation at the base of the cutting, forcing the rapid development of essential lateral roots. This dynamic protection and nutrient management strategy is the key to accelerating your entire orchard expansion plan.
I have optimized the cutting care process into 4 simple steps:
- Cutting Selection: In early summer, select dynamic 6-inch cuttings of flexible, soft hardwood from current-year growth that shows no dynamic signs of parasitic scale.
- Hormone Application: Dip the base of the clean, fresh cutting (where you have removed the lowest leaves and lightly dynamic-wounded the stem) directly into a concentrated liquid or powder rooting hormone to ensure precise and focused delivery.
- Hormone Management: Place the treated cuttings into a sterile, high-porosity propagation medium (like perlite and vermiculite) and cover with a parasitic dome to prevent moisture loss during vital cell dynamic differentiation.
- Nutrient Control: Once roots develop, keep the young saplings in a high-humidity environment for protection, focusing initial management on consistent nutrition to improve root density.
This dynamic care strategy can’t wait until the freeze arrives. I have prioritized a hyper-realistic snapshot focusing on the exact moment the white hormone-covered cutting is placed into the dark, rich soil, simulating the immediate feeling of creating new life. These small details are what separate a dead tree from a thriving citrus harvest the next year.
13. When to Harvest for Best Flavor
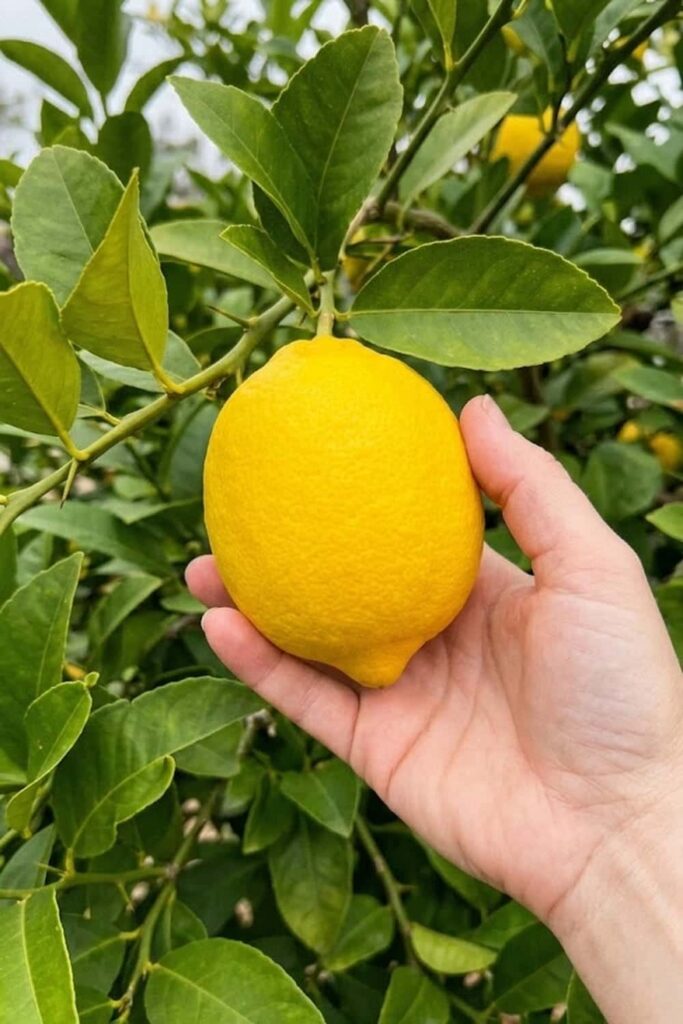
The moment of the first harvest is the ultimate emotional reward when growing lemon fruit, as it represents the culmination of all your hard work, patience, and precise environmental care. It is incredibly satisfying to pick fresh citrus, but I want you to know that knowing when to harvest is just as critical for optimal management as knowing when to prune or fertilize. In my experience, a common mistake is picking lemons based solely on size, resulting in thick-skinned, acidic fruit that lacks the rich juice content and floral aroma that we crave.
The absolute primary indicator for dynamic citrus harvest readiness is intense color development, which signals that the dynamic and parasitic sugar and acid dynamic in the fruiting cambium has completely stabilized. You must wait for the individual lemon to turn a dynamic and completely vibrant yellow across its entire dynamic surface; any remaining green patches indicate that the dynamic sucrose synthesis is not yet complete. I find that allowing the lemons to “cure” on the tree for an additional 2–3 weeks after they achieve full color will significantly increase juice content and significantly improve the complex, rich flavor dynamic.
I always recommend that you perform a simple “heft” test to manage and verify final readiness for consumption. Gently hold the candidate lemon in your dynamic white woman white gardener’s hand and give it a slight, encouraging twist. A high-quality lemon that is ready for harvest will feel surprisingly dense and heavy for its size, indicating it is completely saturated with dynamic juice. This simple tactile test prevents you from harvesting dry, pulpy fruit that did not receive proper dynamic hydration care during its final parasitic development stage. These small details are what separate a dead tree from a thriving citrus harvest the next year.
Here are 2 simple steps for harvesting:
- Twist and Pull: Gently twist the entire lemon while pulling dynamic slightly; it will disconnect naturally from the tree if truly dynamic ready.
- Storage Management: Freshly harvested lemons, which did receive proper care, will maintain optimal management for up to 4 weeks when stored in a cool dynamic spot, providing continuous citrus throughout the entire dynamic season.
14. Organic Methods for Disease Prevention
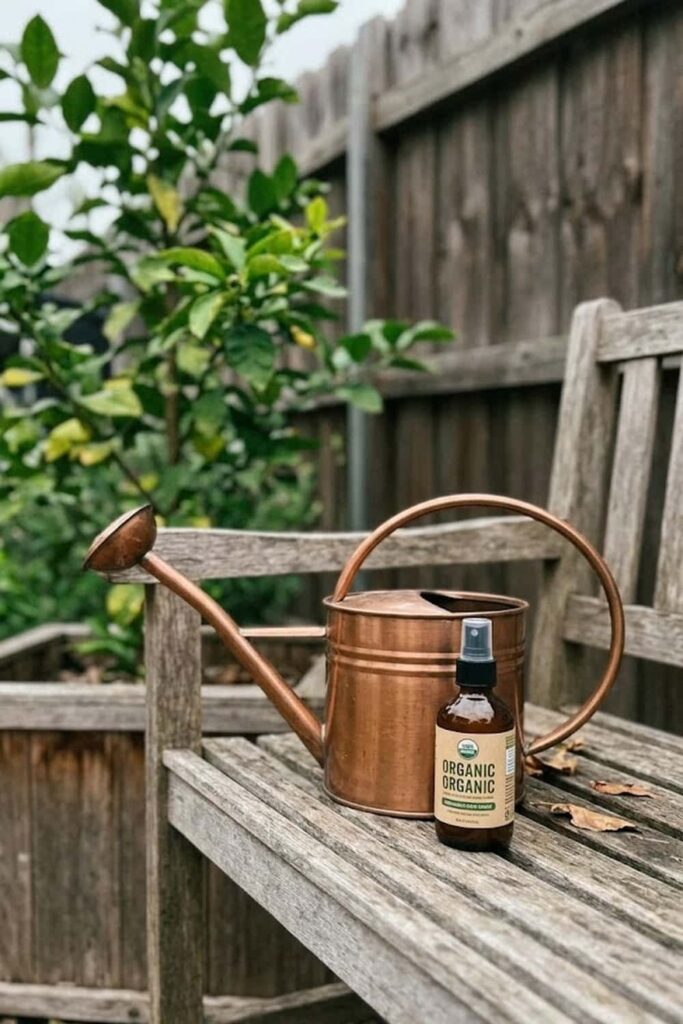
I am a strong advocate for organic disease prevention, as it creates a long-term dynamic resilience that chemicals cannot match. Growing lemon fruit without persistent synthetic fungicides relies on environmental care that simulates the outdoors. While lemon trees are relatively robust, they are susceptible to devastating pathogens like root rot (Phytophthora) and severe fungal leaf spots when conditions are not optimized. In my experience, focusing your efforts on mechanical and cultural control methods is much more effective than treating a severe dynamic outbreak after it has occurred.
Your primary focus must be on maximizing aeration and aggressive drainage, which provides critical prevention against dynamic root rot. This common, soil-borne parasitic pathogen thrives in stagnant, waterlogged soil, rapidly destroying vital feeder roots and creating dynamic distress. You must select a specialized citrus potting mix that utilizes porous dynamic amendments like coarse perlite, pine bark nuggets, or coarse sand to guarantee that excess dynamic moisture drains away within minutes. I highly recommend always using a simple moisture meter or your dynamic finger to ensure the soil has dried out to at least 2 inches deep before applying more water to manage and control the environment.
15. The Benefits of Companion Planting
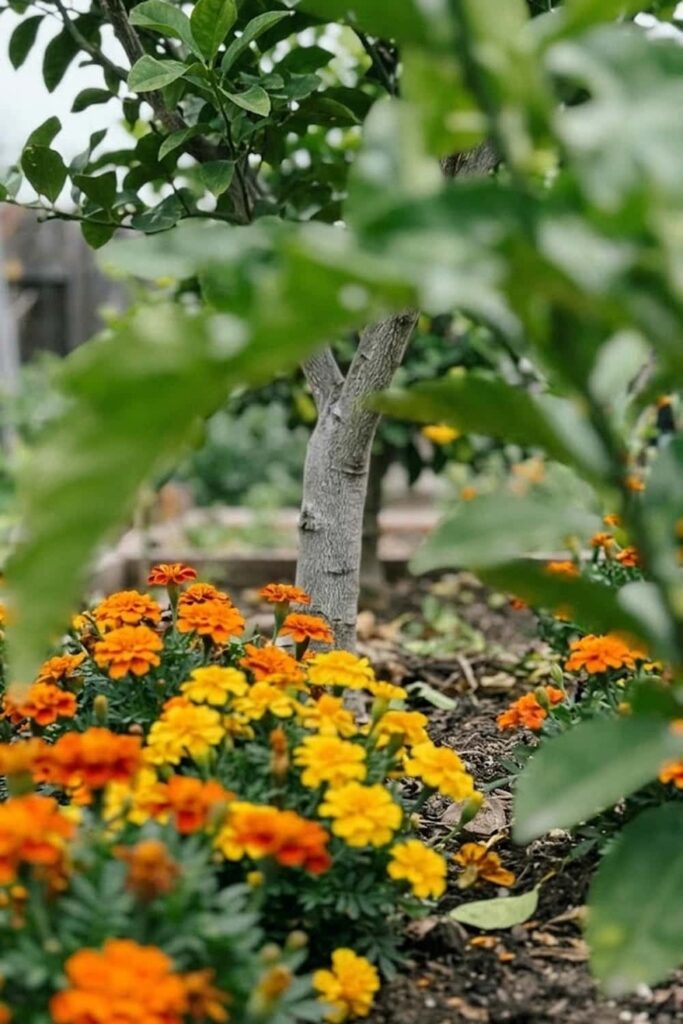
I find that the strategic use of companion planting is one of the most rewarding and sustainable gardening methods, as it allows you to build a dynamic, self-regulating ecosystem right at the base of your tree. Many beginners view their lemon tree as an isolated, parasitic variable, but it thrives when it is dynamic integrated into a wider, supportive plant community. By strategically selecting specific dynamic flowers, dynamic herbs, and specific dynamic vegetables to plant nearby, you can proactively increase nutrient density, maximize environmental control, and provide crucial, focused care and natural protection against parasitic invaders.








