You have spent your hard-earned weekend clearing a patch in your backyard, dreaming of vibrant, homegrown berries, only to watch your plants struggle with yellowing leaves or a complete lack of fruit. It is incredibly frustrating to invest your time and money into a garden project only to have common pests or poor soil quality steal your harvest before it even begins. You deserve a garden that rewards your effort with abundance, not a collection of thorny sticks that refuse to produce. I have been in those exact muddy boots, and I am here to show you that mastering how to grow gooseberry fruits is entirely possible when you follow a proven, high-yield blueprint.
Select Disease-Resistant Varieties for Longevity
When I first started my berry patch, I made the mistake of picking the first plant I saw at the local nursery. You shouldn’t have to deal with the heartbreak of American gooseberry mildew destroying your hard work. Selecting the right variety is the most critical step in your prevention strategy. In the world of Ribes uva-crispa, genetics are your best friend.
If you want a plant that stands up to environmental stress, I highly recommend the ‘Invicta’ cultivar. It is widely considered the gold standard for disease-resistant green gooseberries. For those of you looking for a sweeter, redder fruit that you can eat straight from the bush, ‘Captivator’ is an excellent choice that features fewer thorns. Many gardeners who enjoy high-antioxidant shrubs often look into how to grow elderberry as a companion crop, as they share similar hardiness zones and soil preferences.
Understanding European vs. American Types
You will generally encounter two main types: the European (Ribes uva-crispa) and the American (Ribes hirtellum). European varieties typically produce larger, more flavorful fruits but are more susceptible to mildew. American types are hardier and more resistant to disease but often have smaller berries. Many modern cultivars are hybrids of the two, giving you the “best of both worlds” in terms of flavor and resilience.
Top Rated Cultivars for Home Gardens
| Cultivar Name | Fruit Color | Primary Strength | Best Use |
| Invicta | Green | High Mildew Resistance | Culinary/Jams |
| Captivator | Red | Nearly Thornless | Fresh Eating |
| Hinnonmaki Red | Red | Very Hardy / Tart | Pies & Crumbles |
| Hinonmaki Yellow | Yellow | Unique Honey Flavor | Dessert Fruit |
I have found that planting a mix of these varieties not only extends your harvest season but also ensures that if one plant faces a specific local challenge, the others can still thrive. You should check your USDA Hardiness Zone; most gooseberries thrive in zones 3 through 8, as they require a period of winter chill to set fruit effectively.
Why Self-Fertile Bushes are a Game Changer
One thing you will love about gooseberries is that most are self-fertile. This means you only need one plant to get fruit. However, in my experience, if you plant two different varieties near each other, the cross-pollination often leads to a high yield harvest with even larger berries. It is a simple way to boost your results without extra labor. When you choose your plants, look for “two-year-old” bushes, as these have an established fibrous root system that will settle into your soil much faster than younger cuttings.
Site Selection for Maximum Sunlight
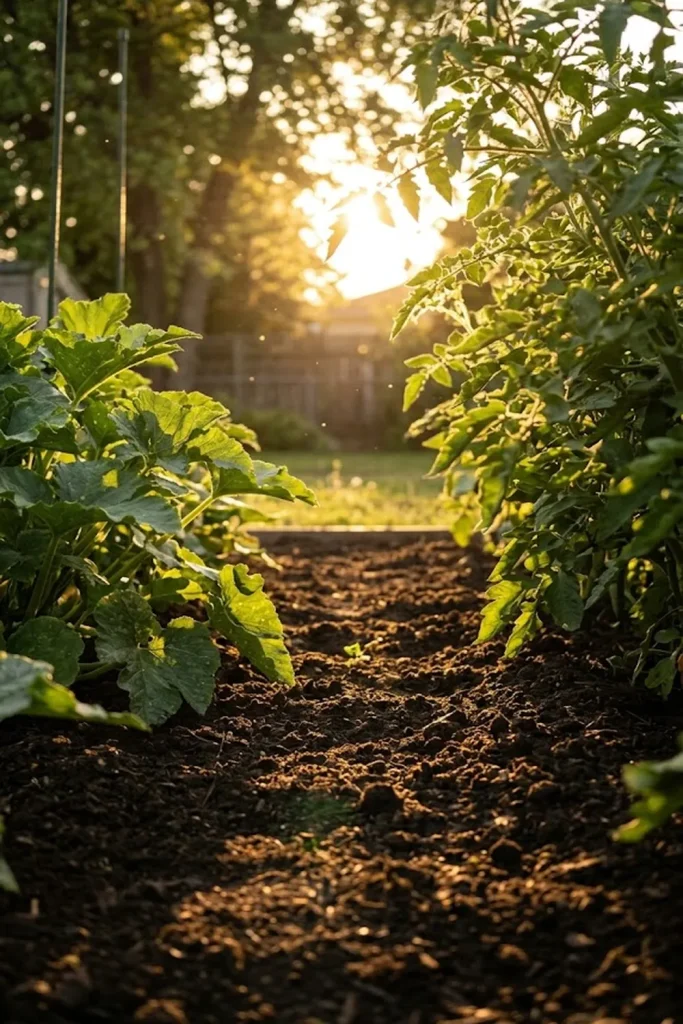
Once you have your disease-resistant plants, your next task in mastering how to grow gooseberry fruits is giving them the proper home. I have seen so many well-intentioned gardeners tuck their gooseberries into a dark, forgotten corner only to wonder why the fruit never sizes up. You must provide significant sunlight for photosynthesis. While some varieties tolerate partial shade, a truly heavy crop requires at least six to eight hours of direct sun daily. This light drives fruit development and ensures those delicious, natural sugars develop fully. Without it, you are basically growing sour green marbles.
Optimizing Light and Airflow
In hotter climates, I have found that a location with morning sun and some light afternoon shade is ideal. This specific care prevents “leaf scorch” or “sunscald,” where the fruit literally cooks on the bush during intense summer heat. But remember, the goal is always maximum light without the stress of excessive heat. Another crucial element is airflow. Good circulation around your gooseberry bushes is a primary defense against powdery mildew and other fungal issues. Avoid planting them tightly against a wall or hedge where air stagnates. You should also consider wind; while good airflow is necessary, strong, cold winds in early spring can damage the delicate flowers and dramatically reduce your potential yield.
Positioning for Accessibility
Think about your future self when placing these thorny bushes. You will appreciate planting them where you have easy access for pruning, weeding, and, most importantly, harvesting. You should avoid areas where you will be constantly brushing against the plant, as those sharp spines are not very forgiving. I like to leave at least 3 to 5 feet of space between plants. This gives them room to mature and facilitates your management efforts.
Considering Permanent Planting Sites
Gooseberries are a long-term investment; with the right care, a well-placed bush can produce abundant harvests for 15 to 20 years or more. Because they will be a permanent fixture in your backyard garden, taking the time to select the absolute best location now saves you from the risky and disruptive task of trying to transplant a large, mature, and thorny shrub later. Your best bet is to incorporate them thoughtfully into your overall garden design, perhaps along a sunny fence line or integrated into a productive edible landscape.
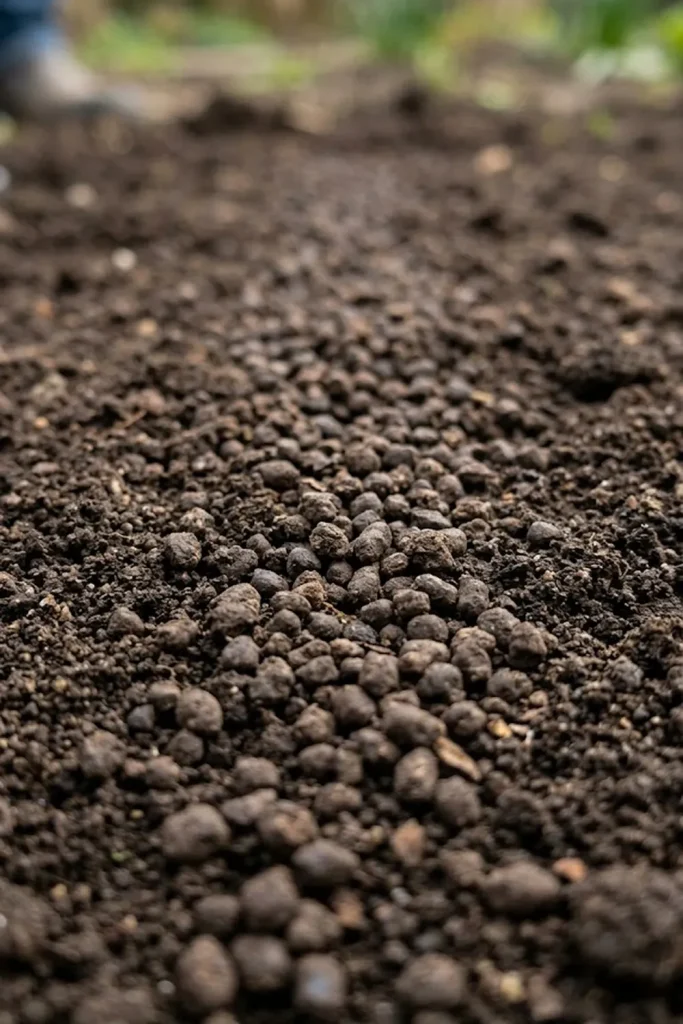
Soil pH and Nutrient Management
The foundation of any healthy garden is, without a doubt, the soil. While the sunlight dictates the fruit’s flavor and potential size, the soil provides the raw materials. If your soil is dense clay or overly sandy, you face a major hurdle in how to grow gooseberry fruits successfully. Gooseberries require fertile, well-draining soil that retains some moisture. I cannot emphasize “well-draining” enough; they have a relatively shallow, fibrous root system that is very susceptible to root rot in waterlogged conditions. They hate “wet feet.”
Mastering Soil pH for Nutrient Intake
Your target soil pH for gooseberries should fall between 6.0 and 6.8. This slightly acidic range is the sweet spot where most essential nutrients are most available to the plant’s roots. I always recommend getting a simple soil test done before you plant; this gives you an accurate reading of your current pH and nutrient levels. I once planted some currants in very alkaline soil and watched them turn yellow and sickly within months—a classic sign of iron chlorosis caused by high pH blocking iron intake. You don’t want that for your gooseberries. If your soil test comes back showing a pH above 7.0, you can amend it with elemental sulfur or acidic organic matter to bring it down into the ideal range.
Essential Nutrients: The “Big Three” for Berry Yields
Like all major food crops, gooseberries depend on Nitrogen, Phosphorus, and Potassium (NPK). However, I have found they have some specific nutrient management preferences that you need to know about. A high-quality organic fertilizer is always preferable to synthetic options, as it builds long-term soil health rather than just providing a quick chemical fix.
- Nitrogen (N): Essential for strong, leafy growth and overall bush vigor. However, you should avoid excessive nitrogen application. I’ve seen this lead to an explosion of soft, green foliage which is both highly susceptible to powdery mildew and attracts sap-sucking pests like aphids, often at the direct expense of fruit production.
- Phosphorus (P): Critical for robust root development, especially during the crucial first few years after planting. It also plays a key role in photosynthesis and energy transfer within the plant.
- Potassium (K): If you are aiming for that high-yield harvest, this is your most important nutrient. Potassium directly influences the size, quality, and sweetness of the berries. It also helps with the ripening process and improves the plant’s overall resistance to disease and drought stress. Gooseberries have a very high “potash requirement,” and in my experience, supplemental applications are often necessary, even in fertile soils.
Magnesium: The Overlooked Mineral
A common deficiency I see in home gooseberry patches is Magnesium. This vital mineral is the centerpiece of the chlorophyll molecule, which drives photosynthesis. A classic symptom of magnesium deficiency is interveinal chlorosis, where the leaves turn yellow while the veins remain bright green. This condition significantly impairs the plant’s ability to produce energy, ultimately leading to reduced yields and lower-quality fruit. You can easily address this by amending your soil with dolomite lime (if you also need to slightly raise the pH) or by applying Epsom salts (magnesium sulfate). I’ve found that a well-balanced diet of these essential and secondary nutrients is the surest way to guarantee a rewarding high yield harvest.
Planting Bare-Root vs. Container Bushes
Once you have secured the perfect sunny spot and amended your soil, it is time to get your plants in the ground. This is a pivotal moment in learning how to grow gooseberry fruits. You will generally have two choices when buying your stock: bare-root or container-grown bushes. I have planted dozens of both over the years, and each has its place. The “best” option really depends on your budget and when you decide to start your garden project. It is essential to handle both types with care to ensure they establish quickly and provide that high yield harvest you are dreaming of.
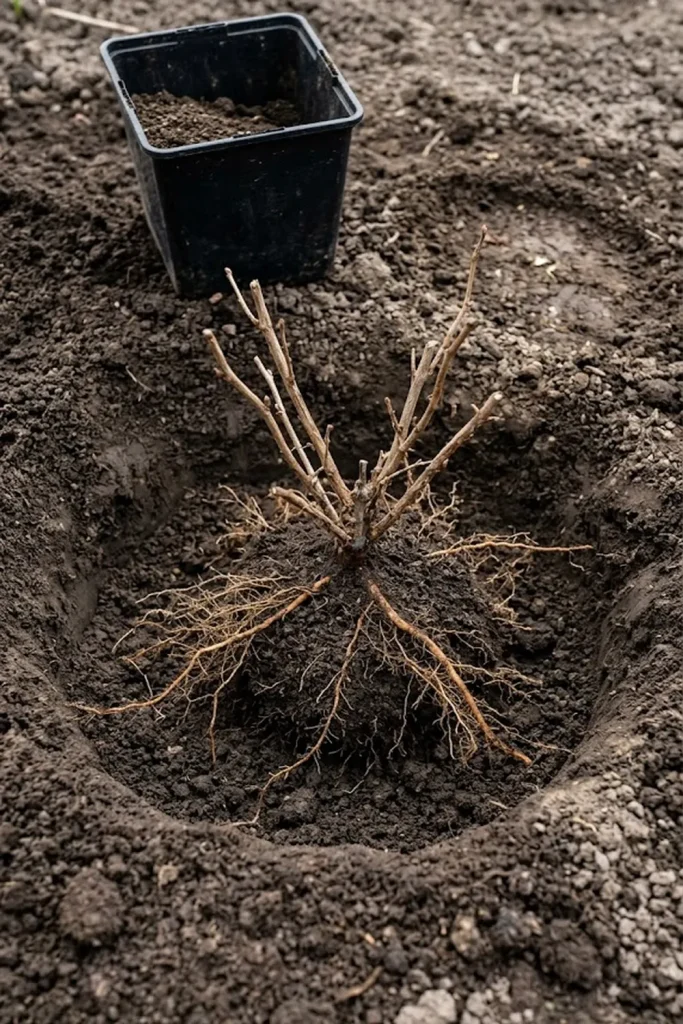
Bare-Root Bushes: Cost-Effective Authority
I prefer bare-root plants when I want to establish a large fruit patch without overspending. These plants are dormant, harvested without soil, and shipped usually in late autumn or early spring. This allows for a deeper and more expansive root development from the very beginning. You will want to get these in the ground as soon as they arrive and the soil is workable. Because they have no supporting soil or pot, they establish quickly in their new environment. Make sure you do not let the roots dry out during the planting process, as this is the primary cause of transplant shock in bare-root stock.
Container-Grown Bushes: The Instant Start
Container-grown bushes are my usual recommendation if you are a busy gardener who is getting a late start to the planting season. These plants are already established in a pot with a healthy soil root ball. The major advantage is flexibility; you can theoretically plant these at any point during the growing season, as long as you are committed to keeping them watered during the initial establishment period. I find that this method offers a higher success rate for beginners simply because it is harder for a potted plant to completely dehydrate during the critical care window.
The Planting Process: Step-by-Step for Maximum Success
Whatever type of bush you choose, the general planting principle remains the same. You are laying the foundation for many years of productivity, so take your time and do it right. Here is the process I have used successfully for years.
- Digging the Hole: Make your hole roughly twice the width of the root ball or bare-root spread. For depth, aim to have the bush sitting at the same level it was in its pot. I have often found it is better to plant it slightly deeper (perhaps one inch) than it was originally to encourage new stems from the base, which eventually facilitates easier pruning techniques.
- Root Preparation: If your plant is container-grown, you must check if it is “pot-bound,” with roots circling the soil. Gently tease those outer roots outward, as this encourages them to explore the new soil. For bare-root plants, soak the roots in a bucket of water for an hour before planting. This helps with initial hydration.
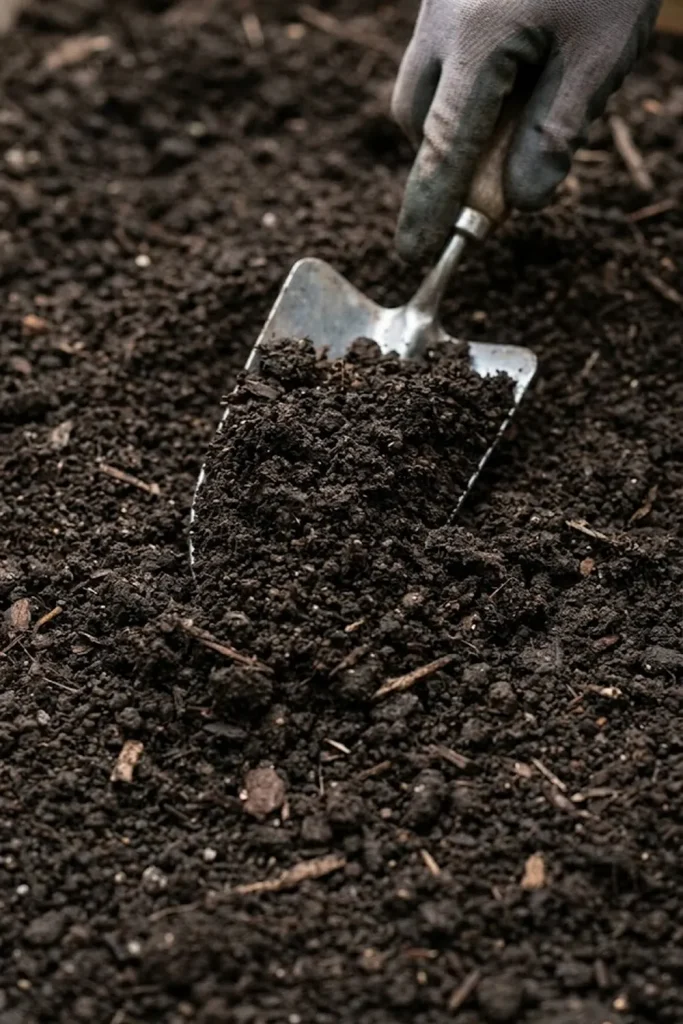
- Backfilling: Mix your excavated soil with some high-quality compost. Firm the soil around the plant gently with your foot to remove large air pockets, but do not compress it so much that you restrict root movement. A very common how to grow gooseberry fruits mistake is leaving large, dry air gaps around those delicate fibrous roots.
- Watering and Mulching: Give the plant a deep, slow watering immediately. Then, apply a layer of organic mulch around the base (but not touching the stem) to help with moisture retention and weed control. This creates a perfect microclimate for root care.
Hydration and Water Protection

Water is the lifeblood of your gooseberry yield. While the soil type and location give the plant potential, the consistent application of care is what translates that potential into large, juicy berries. I have seen countless gooseberry crops suffer simply because the gardener underestimated the plant’s hydration needs, especially during the critical fruit development phase in mid-summer. Learning how to grow gooseberry fruits for a high yield harvest means being responsive to your plant’s thirst.
Understanding Gooseberry Thirst
I find that new gardeners often misjudge the watering requirements of their gooseberry plants. Because they are established woody shrubs, many people assume they can handle drought once they are planted. However, you have to remember that how to grow gooseberry fruits successfully requires you to be proactive during those dry, hot weeks of summer. Gooseberries have a relatively shallow root system, which means they cannot reach deep-seated soil moisture as effectively as some other established bushes. This shallow root care is fundamental during the fruit-set and fruit-swelling periods. Without proper hydration, the plant will simply shed its fruit to save itself.
The Problem of Water stress
You will find that consistent moisture is far more critical than an occasional flood of water. This is why a regular watering schedule is paramount during fruit development. If you are not seeing a high yield harvest, it might not be a lack of nutrients, but a classic case of water protection failure. The primary goal is deep, infrequent watering rather than light, daily sprinkling. I always recommend watering at the base of the plant rather than from above, as this delivers the moisture where it is needed—to the roots—and reduces the chance of moisture-loving fungi like powdery mildew taking hold on the leaves.
Effective Techniques for Water Care
I have found that a simple irrigation system is your best ally in care and hydration management.
- Drip Irrigation: This is by far my preferred method. It applies water slowly and deeply directly to the soil over several hours, ensuring that the moisture penetrates the entire fibrous root zone. It also minimizes water loss to evaporation and runoff.
- Soaker Hoses: An economical alternative, soaker hoses are perfect for long rows of bushes. They ensure an even distribution of moisture along the entire row, providing consistent hydration without needing constant supervision.
- Watering Rings: If you only have one or two plants, creating a small earthen “ring” around the base of the plant can act as a reservoir during your hand-watering sessions, helping the water to pool and sink in rather than draining away.
Maintaining Consistent Soil Moisture
Consistent soil moisture prevents a range of problems, including fruit drop and fruit splitting. The latter occurs when a long dry spell is followed by a heavy deluge of rain; the fruits swell faster than the skin can stretch, leading to unsightly split berries that are highly susceptible to rot. By providing consistent water through a tailored management plan, you ensure your fruits reach their maximum potential size and quality.
Mulching for Root Care
Once your plants are in the ground and you have established a good watering schedule, your next step in mastering how to grow gooseberry fruits is mulching. I find that many gardeners view mulching as purely aesthetic, something that makes the garden “look finished.” However, from a horticultural perspective, a thick layer of organic mulch is one of the most powerful tools in your care arsenal, providing protection and nutrition for that vital but shallow fibrous root system.
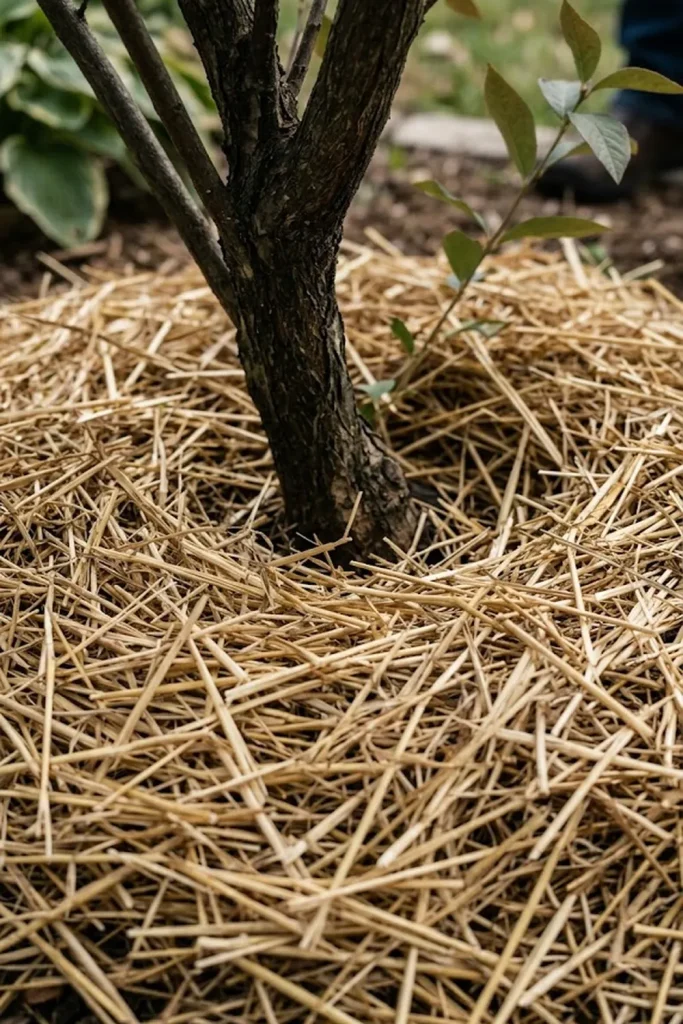
Mastering Mulch for Gooseberry Care
Gooseberries are a shallow-rooted plant, which means they are susceptible to rapid fluctuations in soil temperature and moisture. By creating a 2- to 3-inch barrier, you are essentially establishing an insulation layer for the root care zone. The primary function of mulch in the first few years is moisture retention. I find that this reduces your need for frequent watering. As the mulch breaks down, it also adds valuable organic matter and nutrients to the soil. For a high yield harvest, you need to ensure that the mulch doesn’t come into direct contact with the stem, as this can encourage rot.
Techniques for Effective Root Management
A thick layer of organic mulch is also a highly effective form of weed control. Weeds compete with your gooseberries for water and nutrients, and because the roots are so shallow, pulling those weeds manually can sometimes damage your gooseberry’s fibrous root system. Mulch also prevents soil splashing onto the lower leaves, reducing the risk of fungal disease. Over time, as the organic matter breaks down, it improves the overall soil structure, providing a perfect and consistent management layer that enhances care efforts.
The Problem of Excess Nitrogen
One critical thing to keep in mind is that you must avoid high-nitrogen mulch around gooseberries, especially in spring. For example, fresh grass clippings are a no-go, as their high-nitrogen content can lead to excessive green growth that is both soft and very prone to American gooseberry mildew. I prefer to use compost or well-rotted manure, both of which provide a more balanced and slow-release form of care.
Effective Mulching for Long-Term Value
| Mulch Type | Best For | Advantages | Disadvantages |
| Compost | Nutrient Management | Adds nutrients, improves soil, very natural | Needs frequent replenishing, can be expensive |
| Well-Rotted Manure | Soil Care | High in organic matter, good nutrients, water retentive | Requires thorough rotting, can be variable in quality |
| Bark Chips | Weed Control | Long-lasting, attractive, good insulation | Can temporarily lock up nitrogen, relatively acidic |
| Straw | Moisture Retention | Economical, great for larger areas, light reflecting | Breaks down quickly, can sometimes attract slugs |
In my experience, the best and most resilient mulch strategy is to use a layer of compost, covered by a light dressing of bark chips or straw. This provides a deep, slow release of nutrients while simultaneously improving root care and moisture management for your treasured high yield harvest.
The Open-Center Pruning Technique
Pruning is, without a doubt, the most intimidating aspect of how to grow gooseberry fruits for many beginners. Those sharp, intimidating thorns do not help. However, I have learned that avoiding your pruners is the single biggest mistake you can make. An unpruned gooseberry bush quickly becomes a dense, unproductive tangle of weak wood, making harvesting a painful chore and creating a perfect environment for mildew to thrive. To secure that high yield harvest, you must master annual management and care through proper pruning.
Pruning for Performance and Profit
Your primary objective with gooseberry pruning is creating an open-centered shrub, often compared to a “goblet” shape. This architectural choice serves two major purposes. First, it maximizes sunlight penetration, ensuring that the fruit on the inner branches can ripen. Second, it provides excellent airflow, which is the cornerstone of how to grow gooseberry fruits that remain free from powdery mildew. From a purely practical standpoint, this open structure also makes harvesting much easier, reducing the time you have to spend weaving your gloved hands around those painful thorns.
Understanding Fruiting Habit
I find that successful pruning relies on understanding how the plant produces fruit. Gooseberries primarily bear their best and heaviest fruit on “2-year-old wood” (branches that grew during the previous summer) and on short, spurs of older wood.
| Wood Age | Appearance | Pruning Goal |
| Current Season | Soft, green, flexible wood | Care: Tip and lateral management |
| 1-Year-Old | Control: Semi-ripe, light brown wood | Promotes strong future growth |
| 2-Year-Old | Care: Mature, greyish brown wood | Key for current season’s yield |
| 3-Year-Old | Management: Dark, thick, furrowed wood | Retain some healthy branches |
| 4-Year-Old+ | Prevention: Very dark, scaly, often unproductive | Protection: Remove completely to make space |
Your annual care focuses on removing the oldest, least-productive branches (4+ years old) and thinning the current and previous season’s wood. This keeps the plant youthful, vibrant, and incredibly productive.
Techniques for Effective Branch Management
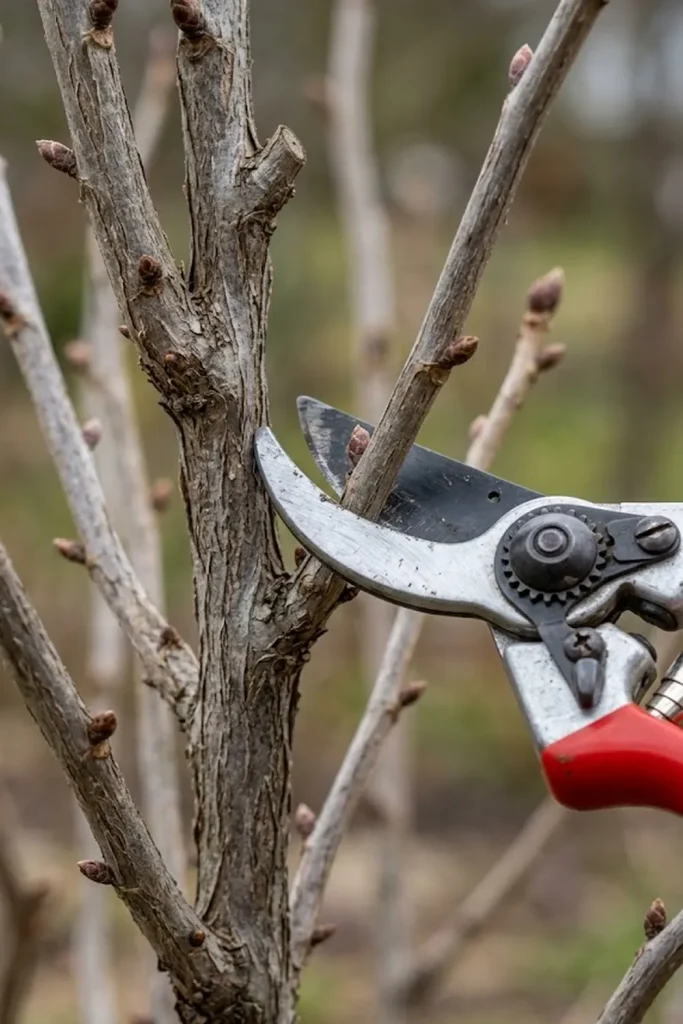
The best time for major pruning is late winter, when the plant is completely dormant.
- Start with the ‘3 Ds’: Always begin your pruning by removing any Dead, Damaged, or Diseased wood. This is a fundamental principle of care.
- Clear the Base: Remove any low-hanging branches that are touching or close to the soil. As these can facilitate soil splashed onto the leaves, it is a primary form of disease prevention.
- Thin the Center: For that “goblet” shape, look for crowded stems crossing in the center. Identify the weakest of these stems and cut them back to their base. You should also consider removing any branches growing toward the center of the bush rather than outward.
- Tip-Pruning for Spurs: For current season growth, I have found that tip-pruning about one-third of the vigorous new growth in winter encourages the development of those critical, fruit-producing lateral spurs for the following summer. I always make my cut just above an outward-facing bud.
Organic Pest Control and Prevention

I would much rather manage a few healthy caterpillars than deal with a complete garden ecosystem collapse. When learning how to grow gooseberry fruits, you will inevitably face pest pressure. In my experience, the biggest challenges for a high yield harvest are the gooseberry sawfly larvae and aphids. Both of these pests can decimate your bush’s ability to produce energy, and a significant sawfly infestation can completely defoliate a mature shrub in days. Your entire strategy should focus on early detection, organic care, and integrated management of these populations.
Early Detection: Your Best Defense
I have found that the secret to organic pest control is not “when to spray,” but “when to check.” By monitoring your plants every few days, you can spot and manage emerging pest issues before they become a serious threat. I start my inspections at the beginning of spring, as the sawfly adults are typically active and looking for places to lay eggs when the first leaves appear.
- Under the Leaves: Sawfly larvae are often found on the underside of the lower leaves. They are small, light green, and have tiny black dots. Look for clusters of these “pseudo-caterpillars” and a simple how to grow gooseberry fruits technique is to simply squish them manually.
- Aphids on New Growth: For aphids, look for them clustered on the soft, succulent current season’s growth, especially the tips. I use a strong blast of water from my garden hose to dislodge them.
Effective Techniques for Pest Management
I rely on a combination of cultural, biological, and physical care techniques.
- Neem Oil and Insecticidal Soaps: If you have a larger infestation that you cannot manage by hand, these organic solutions provide an effective form of control. They work primarily by smothering the pests rather than poisoning them.
- Cultural Prevention: Good nutrient management and pruning play a role, as robust, open bushes are less attractive to sap-sucking pests and better tolerate initial damage. Avoid excessive nitrogen, which can lead to that soft, lush growth that attracts pests and powdery mildew.
- Biotic Assistance: I am a big believer in promoting natural predators. Encourage ladybugs, hoverflies, and lacewings, as these beneficial insects make quick work of small pest colonies. You can plant simple nectar-rich flowers nearby, such as Tansy or Calendula, to attract them to your backyard garden.
Protection from Larger Competitors
You will find that your care extends to protecting your crop from larger garden residents. The biggest and most predictable competition for your high yield harvest will come from birds. I use lightweight netting to create a barrier, which I drape over the bushes as soon as the fruit begins to show its translucent, greenish-ripe color. Netting is a non-lethal and highly effective form of protection for securing your treasured harvest. Over time, you can even establish a complete berry cage, a more permanent form of bird management.
Nutrient Boosting with Potassium
If you have a strong, healthy bush but the fruit is consistently small, you need to revisit your nutrient management and care routine. Learning how to grow gooseberry fruits means understanding what nutrients the plant needs and when it needs them. As I mentioned in the soil section, gooseberries have a exceptionally high requirement for potassium (K). This essential nutrient is the key to creating large, sweet, well-developed berries. You can have the perfect soil structure and watering schedule, but a lack of available potash will always result in a suboptimal crop.
The Power of Potash
Potassium is involved in almost every aspect of a high yield harvest. It helps with photosynthesis, drives fruit size, improves the berries’ ability to resist disease, and plays a role in making them sweet and flavorful. Because the gooseberry’s shallow root care zone is quickly depleted of this vital element, you must replenish it annually. In my experience, the results are almost guaranteed: larger berries, better flavor, and a healthier overall plant.
Essential and Secondary Nutrients
I always apply my soil amendments and supplements at the beginning of spring, just as the buds are starting to swell.
- Potassium Source: My preferred organic source is a natural, mineral-based supplement like “Sulfate of Potash,” which is highly available and quickly absorbed.
- Secondary Nutrient Source: As I noted in the soil section, I also recommend a Magnesium supplement, such as Epsom salts. This secondary nutrient management step ensures that the plant has everything it needs to drive vigorous growth.
Techniques for Effective Nutrient Management
I always gently rake my organic fertilizer into the top inch of soil around the base of the plant, being careful not to disturb the shallow, fibrous root system. After the supplement is applied, a thorough watering is critical to activate the nutrients and wash them down into the root zone. A balanced diet, combining essential, secondary, and micronutrients, is the most powerful care step you can take to move your gooseberries from “average” to “abundant.”
Bird Protection Strategies
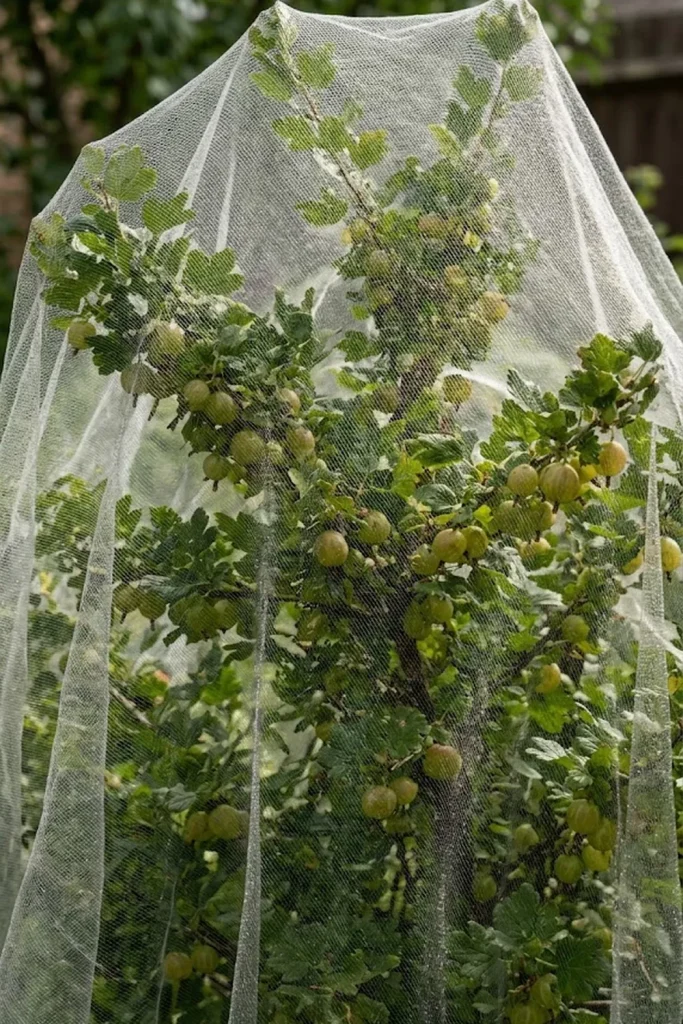
You are not the only one eyeing those swelling berries. As your fruit begins to ripen, you will quickly discover that local bird populations have been monitoring your progress with keen interest. Without an effective form of protection, a flock of starlings or blackbirds can harvest your entire crop in a single morning. This is one of the most common and frustrating hurdles in how to grow gooseberry fruits successfully. To secure that high yield harvest, you must implement a robust form of barrier management before the fruit turns fully translucent and sweet.
Securing the Shrub for Yield
Your best defense against avian crop-theft is garden netting. While simple reflective tape or other visual deterrents may provide some temporary protection, I have found that they are a secondary form of control that birds quickly become accustomed to. A lightweight mesh barrier is by far the most reliable way to guarantee a rewarding high-yield harvest. You should drape the netting gracefully over your entire shrub as soon as the first hints of color (or for green varieties, translucence) appear. I usually make sure the netting is pinned or anchored gently to the ground to prevent any entry from below. For long-term ease, many gardeners establish a permanent or semi-permanent “berry cage” structure.
Effective and Non-Lethal Management
I have found that a well-designed bird cage or netting system provides complete peace of mind.
- Complete Enclosure: Creating a “berry cage” structure is a more significant investment, but it is one that you will never regret. It eliminates the daily frustration of netting and provides year-round, non-lethal protection. A cage also allows you to comfortably work inside without having to remove large nets.
- Cultural Prevention: The very shape of your shrub can help with protection. An open-center pruning technique makes your bush more airy, which is less attractive to birds looking for a dark, secure place to perch and eat. A robust form of barrier management ensures your fruit stays where it belongs—on the bush.
Harvesting at the Peak of Flavor

The final stage of learning how to grow gooseberry fruits is the harvest. Your hard-earned weekend labor, careful planning, and consistent care all lead to this moment. But simply picking a berry when it looks green is not the way to secure that highly productive high yield harvest. You need to understand the ripening process of your specific variety, as well as the culinary intended use, because both factors will dictate management of your picking schedule.
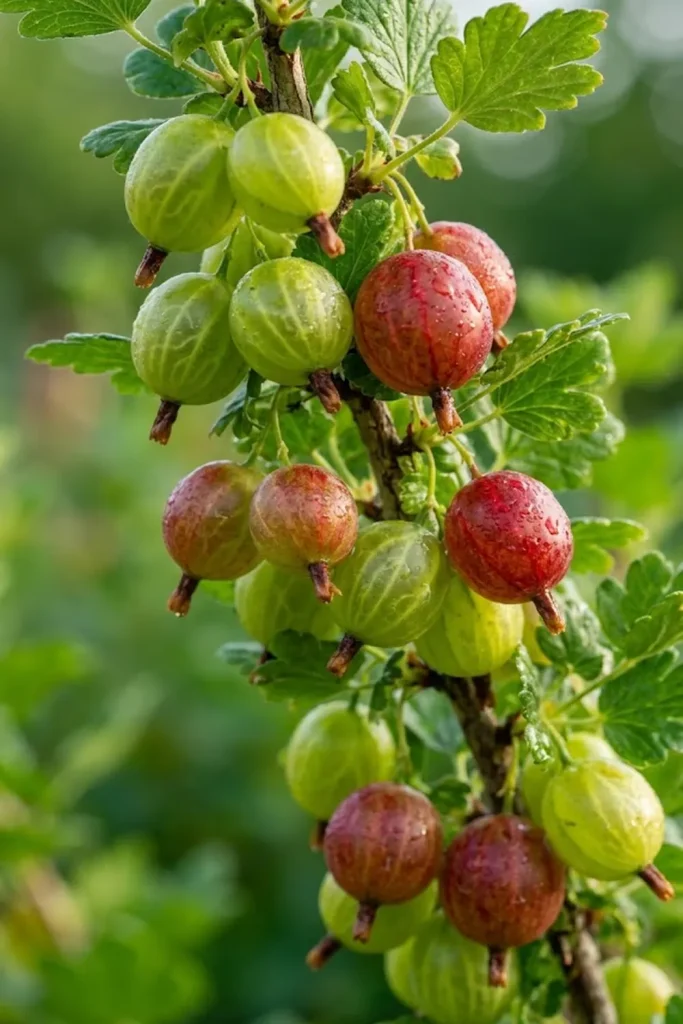
Understanding the Sweet-Tart Spectrum
I have learned that the “right” time to pick is highly personal. If you are aiming for culinary use—pies, crumbles, and especially jams—you should harvest the berries when they are still firm and primarily green, but showing their first hint of “swelling” color. At this stage, they are high in pectin, which ensures your jams set perfectly, and their tart flavor provides that classic, satisfying “kick.” For dessert use or for eating fresh off the bush, you must be more patient. Wait for the fruit to soften slightly and develop its full color (or deep, golden-translucent if green). At this stage, the sugars have fully developed, making for a sweet, complex treat.
Techniques for Effective Harvesting Management
For a high yield harvest, you should plan on picking your crop over several passes.
- Multiple Picking Passes: The berries on the outside of the bush will ripen faster than those deeper inside. For complete control of your harvest, I pick the ripest fruit first and return every few days to harvest the remaining ones as they reach their peak.
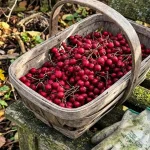
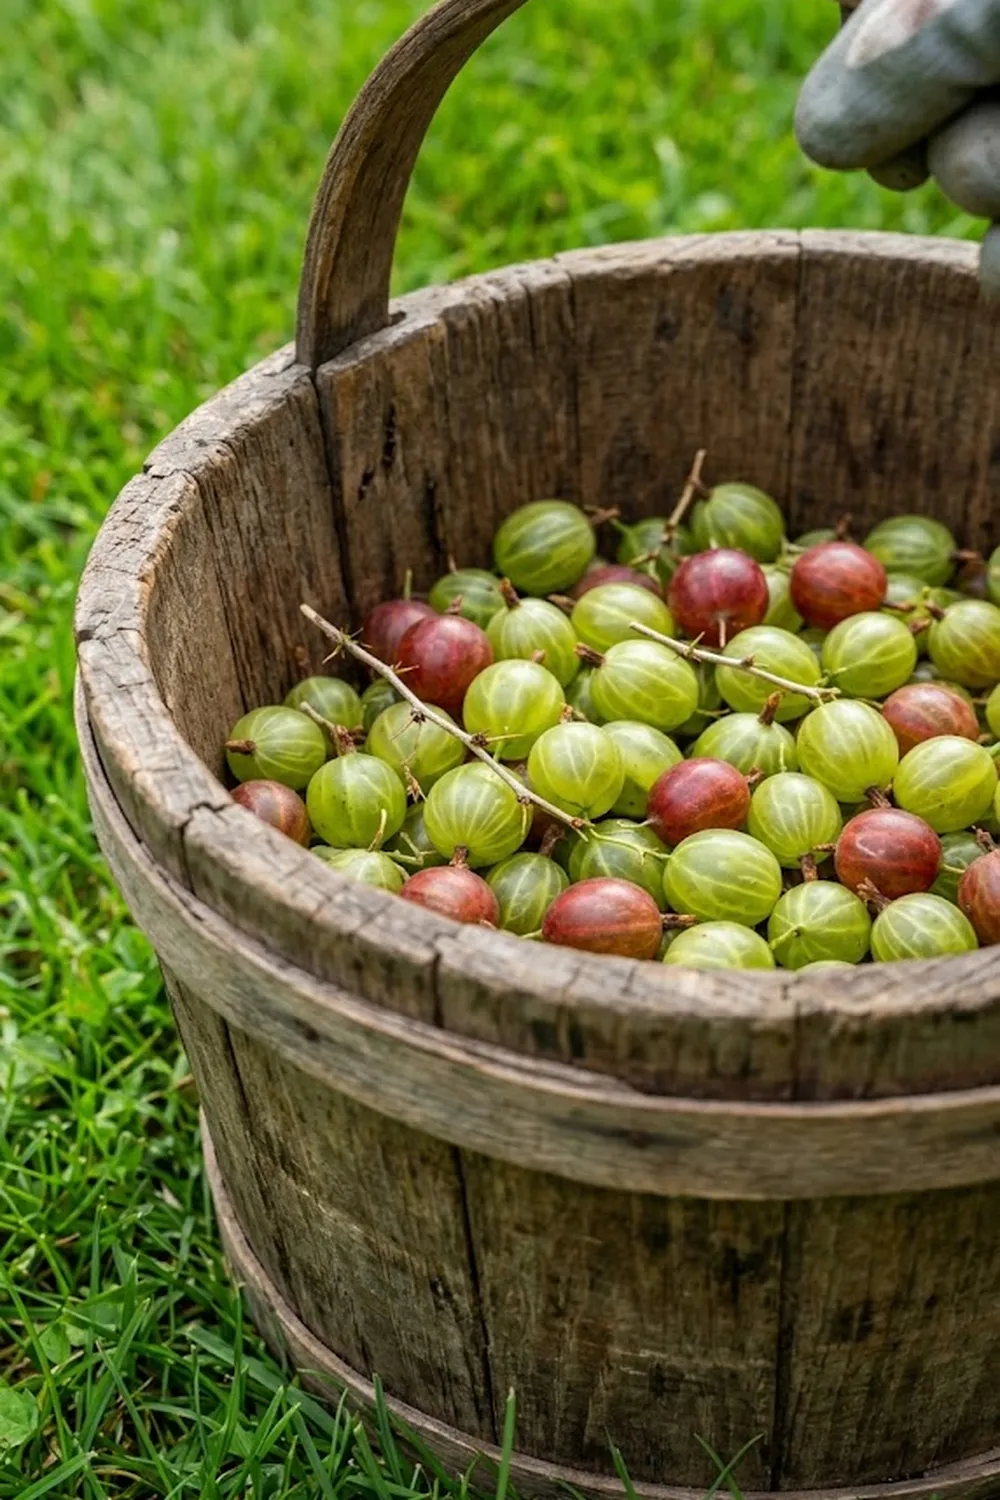
- Gentle Handling: Gooseberry skin can be surprisingly delicate. I always suggest using a gentle touch and thick, supportive gloves to protect your hands from those powerful thorns. Instead of pulling the berries off, which can sometimes tear the fruit or the stem, you should gently “lift and twist” them off. I use a shallow basket to minimize the weight on the lower layer of berries.
Effective and Long-Term Value
| Harvest Goal | Maturity | Color | Texture | pectin Content |
| Culinary / Jams | Immature | Firm Green | Very Hard | High |
| Pies / Crumbles | Semi-Mature | Greenish-Swelling | Firm | Medium |
| Fresh Dessert | Ripe | Full Red or Golden-Green | Soft | Low |
A targeted management of your picking schedule ensures you have the exact fruit you need for your favorite recipe.
FAQs: Your Gooseberry Questions Answered
How to grow gooseberry fruits for a high yield harvest every year?
The absolute keys to a massive harvest are consistent pruning and potassium-rich feeding. Annual removal of old wood encourages lateral spurs, and potassium ensures your berries swell to their maximum size. You must maintain this care routine.
Can I grow gooseberries in a small backyard?
Absolutely. Because they are compact, deciduous shrubs and can even be trained to grow vertically as cordons, they are ideal for gardeners with limited space or raised beds. This form of management maximizes your square footage.
How long does it take for a gooseberry bush to fruit?
If you plant a two-year-old bush, you can expect a small harvest in the first year, with full production kicking in by years three and four. They are a highly rewarding and relatively fast-fruiting option for a home orchard.
Are there thornless gooseberry varieties?
Yes, varieties like ‘Captivator’ and ‘Pax’ have significantly fewer thorns, which simplifies both maintenance and harvesting care tasks, making them a very rewarding choice for beginner gardeners.
What is the primary disease management priority?
Your biggest threat is powdery mildew. Using a preventative strategy focused on choosing a disease-resistant variety (like ‘Invicta’), providing maximum sunlight and airflow through open-center pruning, and avoiding excessive nitrogen will significantly reduce your risk.
How to grow gooseberry fruits to prevent pest damage?
early detection is paramount. I use organic management tools such as manually dislodging aphids with a blast of water and squishing sawfly larvae by hand. By keeping your bushes healthy, you are also making them more resilient to any initial pest damage. Consistent care is your best ally.