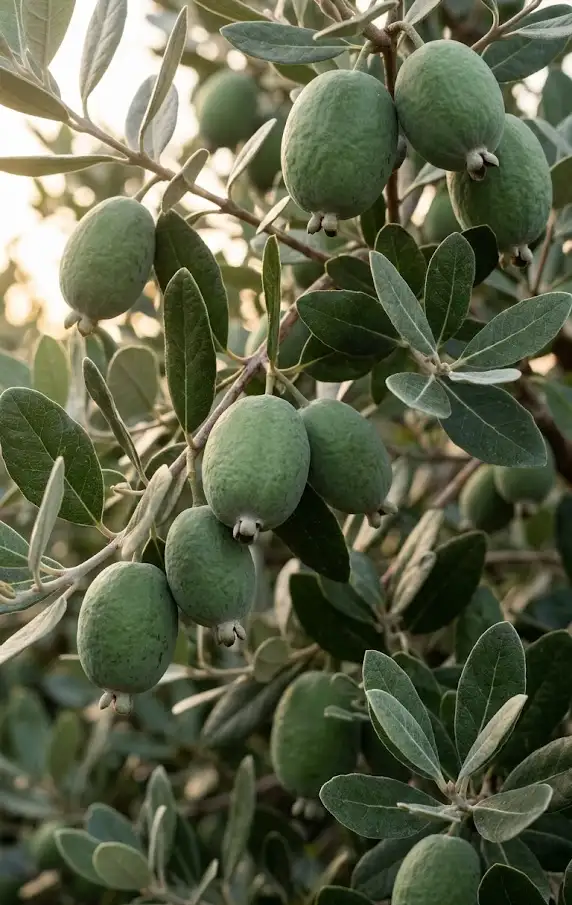
You work forty hours a week, and when you finally step into your backyard, you want it to feel like a retreat, not another chore. Many of us try to plant fruit trees only to watch them wither, succumb to pests, or—worst of all—grow beautifully but never actually produce a single piece of fruit. It is incredibly frustrating to invest your limited weekend time and hard-earned money into a sapling that just sits there like an expensive lawn ornament. I have been in those exact shoes, staring at a barren tree and wondering if I simply lacked the “magic touch.” But I discovered that the secret isn’t magic; it’s choosing a resilient, high-reward plant like the pineapple guava. I want to show you exactly how to grow feijoa fruits so you can stop wasting time on finicky plants and start gathering “green gold” from your own lawn.
1. Pick the Right Variety for Your Space
When I first started looking into how to grow feijoa fruits, I made the rookie mistake of thinking a feijoa was just a feijoa. In reality, choosing the right cultivar is the difference between a bowl full of fruit and a lonely, unproductive tree. You need to consider your specific garden footprint and how much effort you want to put into pollination. If you have a smaller urban section, you should prioritize self-fertile varieties. These trees have flowers that can pollinate themselves, meaning you only need one tree to get a harvest.
I personally recommend the ‘Unique’ variety for beginners. It is a consistent performer that fruits at a young age. If you have more room, you can experiment with larger-fruiting types like ‘Mammoth’ or ‘Apollo’. These often require a partner tree for cross-pollination, but the size of the fruit is a massive payoff. I have found that for gardeners in our age bracket, who are often juggling career growth and home maintenance, starting with a 2-year-old grafted tree is much better than starting from a seedling. Seedlings are a gamble; they can take up to seven years to fruit and the quality is unpredictable. A grafted tree will usually give you your first taste of success within two to three seasons.
Popular Feijoa Cultivars for Home Gardens
| Cultivar Name | Pollination Type | Fruit Size | Best Feature |
|---|---|---|---|
| Unique | Self-Fertile | Medium | Very reliable; great for small gardens. |
| Mammoth | Needs Partner | Large | Prolific bearer with juicy, soft pulp. |
| Apollo | Partially Self-Fertile | Large | Excellent flavor; upright growth habit. |
| Gemini | Needs Partner | Medium | Early season ripener; very productive. |
| Kakapo | Self-Fertile | Medium | Compact growth; sweet, mild flavor. |
When you pick your tree at the nursery, you should look at the scientific name, Acca sellowiana, to ensure you are getting the true species. I always check the root ball of the plant before I buy it. You want to see healthy, white root tips rather than a tangled, woody mess that has been sitting in a pot for too long. A healthy start is the foundation of growing feijoa fruits that actually make it to your kitchen table.
2. Choose a Sunny, Well-Draining Home
If you want to master how to grow feijoa fruits, you have to understand that location is everything. I have seen so many gardeners tuck their trees into a dark corner of the yard just because the plant is “hardy.” While a feijoa tree will survive in the shade, it will never thrive there. You need to find a spot that receives at least six to eight hours of direct sunlight every day. This sunlight is the engine that drives fruit production and ensures the pulp develops that signature aromatic sweetness.
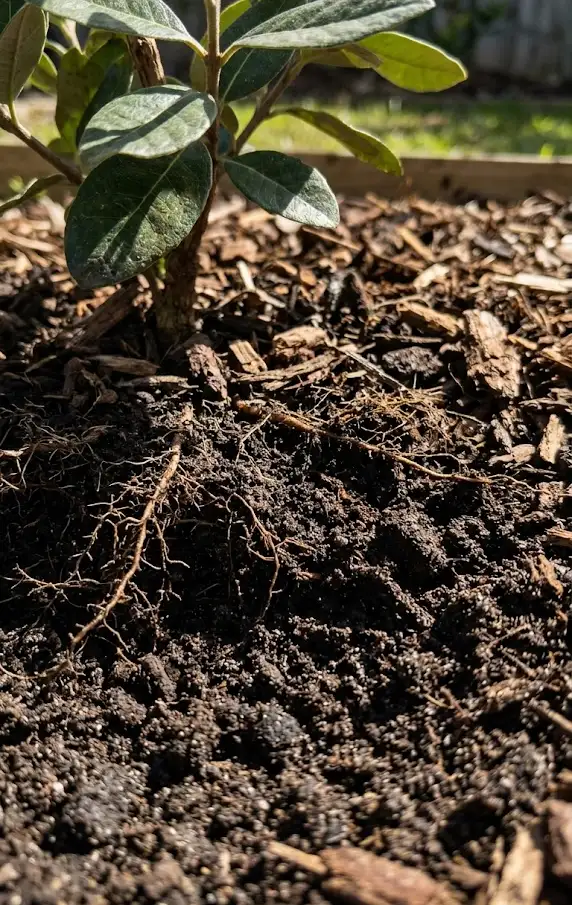
Soil quality is the next major hurdle you will face. I once lost a beautiful sapling because I planted it in a heavy clay patch that stayed soggy for weeks. Feijoas hate “wet feet.” You must ensure your soil is well-draining. If you have heavy clay, I highly recommend planting your tree on a slight mound or adding gypsum to help break up the soil structure. These trees prefer a slightly acidic environment with a soil pH between 6.0 and 6.5. You can easily test this with a cheap kit from the hardware store.
- Sunlight: Minimum 6 hours of direct sun.
- Soil Type: Fertile, sandy loam is ideal.
- Drainage: Must be free-draining to prevent root rot.
- Wind Protection: Provide a windbreak to prevent fruit bruising.
I have observed that feijoas are surprisingly wind-tolerant, which is why many people use them as hedges. However, if you are growing them specifically for the fruit, you should provide some shelter from the strongest gusts. High winds can knock the delicate flowers off before they have a chance to be pollinated. When you choose a site, you are creating a long-term home for a tree that can live for over 40 years. Taking the time to get the sun and soil right now means you won’t have to move the tree—and risk transplant shock—later on.
3. Master the Art of Cross-Pollination
One of the most common questions I get is, “Why is my tree flowering but not fruiting?” This is almost always a pollination issue. Even if you buy a self-fertile variety, you will find that the fruit size and quality improve significantly when you have a second variety nearby. I have watched my own trees produce tiny, shriveled fruits one year and then explode with massive, juicy ones the next, simply because a neighbor planted a different cultivar. Cross-pollination creates a more diverse genetic mix, which leads to a better “fruit set.”
You might be surprised to learn that feijoas are not just pollinated by bees. In many regions, birds like blackbirds and mynas are the primary pollinators. They are attracted to the thick, sugary petals of the flowers. I often see birds hopping through my trees, munching on the flowers and inadvertently transferring pollen from one tree to another. This is why you should never spray your trees with harsh chemicals during the flowering season; you don’t want to discourage your feathered helpers.
Pollination Efficiency Data
| Feature | Single Tree (Self-Fertile) | Two Different Varieties |
|---|---|---|
| Fruit Set Rate | 30% – 50% | 70% – 90% |
| Average Fruit Weight | 50g – 80g | 100g – 150g |
| Pulp Quality | Moderate | High (more translucent pulp) |
| Seed Count | Low | High (promotes fruit growth) |
If you are limited on space and can only fit one tree, you must choose a variety like ‘Unique’ or ‘Bambina’. However, if you can squeeze in a second tree—perhaps as part of a privacy hedge—I urge you to do it. You will see a massive difference in your harvest. I have spent many years trial-and-erroring different pairings, and I have found that ‘Mammoth’ and ‘Triumph’ make an excellent team. When you master cross-pollination, you aren’t just growing feijoa fruits; you are optimizing your garden for its maximum potential yield.
4. Give Them the Chill They Need
You might think that a plant with a tropical name like “pineapple guava” wants heat all year round, but that is a major misconception. To successfully grow feijoa fruits, your tree actually needs a period of winter cold. This is known as “chill hours.” Most varieties require between 50 and 100 hours where the temperature stays below 7°C (45°F). This cold snap signals to the tree that it is time to stop growing leaves and start preparing flower buds for the spring.
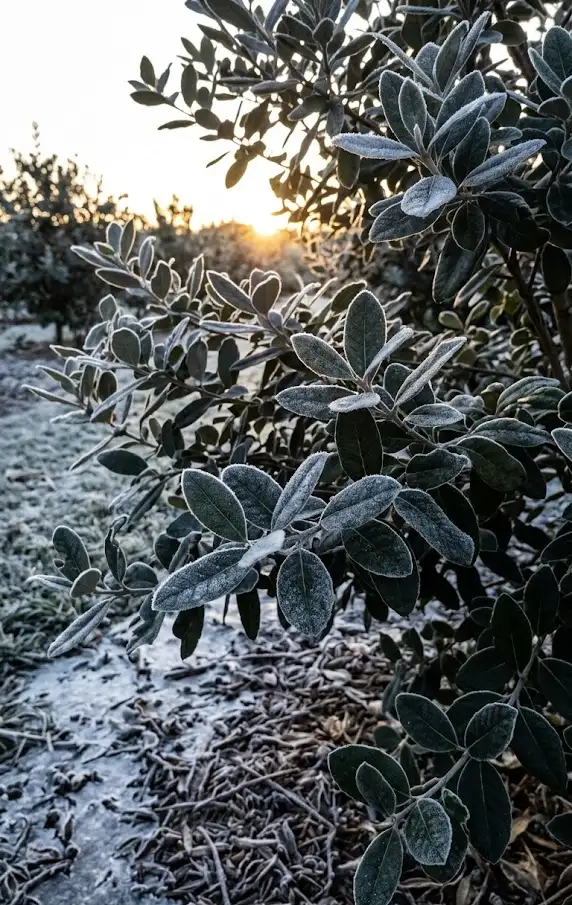
If you live in a region that stays too warm during the winter, you might find that your tree grows beautifully but never produces fruit. I have seen this happen frequently in coastal or tropical climates where the mercury never quite drops low enough. However, feijoas are remarkably frost-hardy once they are established, often surviving temperatures as low as -10°C. You don’t need to worry about the tree dying in the cold, but you do need to ensure it gets those vital chill hours to “reset” its internal clock.
I have found that for working professionals who might be moving houses or buying their first home, understanding your local climate zone is crucial. You are likely earning a solid $50k salary and want your investment in landscaping to pay off. If you are in a borderline warm zone, you should look for “low-chill” varieties that have been bred to fruit with less winter cold. Proper winter preparation, such as applying a thick layer of organic mulch around the base, will protect the shallow root system while allowing the canopy to experience the necessary chill. This balance is a key secret in how to grow feijoa fruits in diverse climates.
5. Feed Regularly for a Bumper Harvest
If you want a tree that produces buckets of fruit rather than just a handful, you have to be consistent with your feeding. I have noticed that many gardeners treat feijoas as “low maintenance” and then wonder why the fruit is small or gritty. While the tree is tough, it is also a hungry feeder, especially in the spring when it is pushing out new growth and flowers. I follow a simple rule: if you want the tree to work for you, you have to work for the tree.
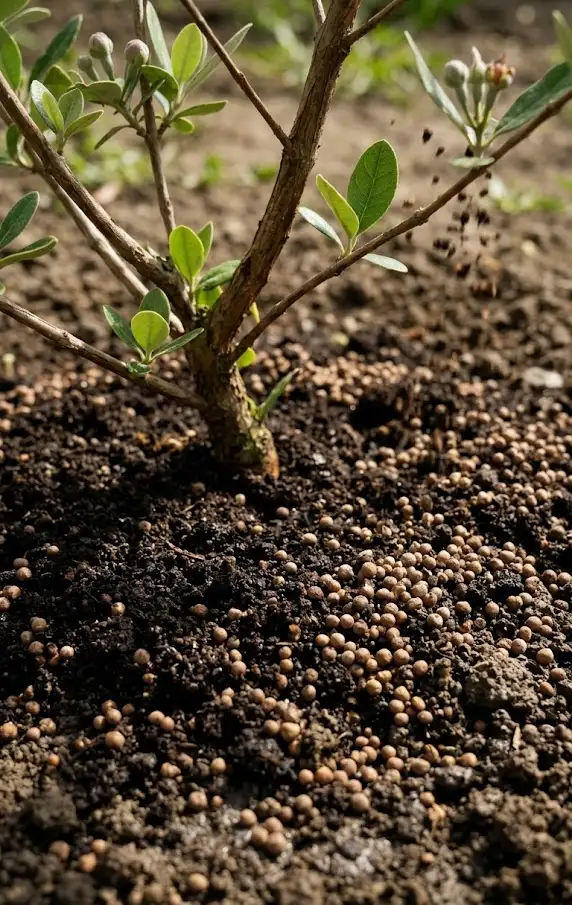
I always apply a balanced, slow-release fertilizer in early spring and again in late summer. You should look for a mix that is high in potassium, as this is the element that drives fruit development and flavor. I also love using organic sheep pellets or composted chicken manure. These provide a slow “trickle” of nitrogen that keeps the leaves a deep, healthy green. You must avoid placing the fertilizer directly against the trunk, as this can cause bark rot; instead, spread it out to the “drip line” where the feeder roots are most active.
- Spring Feeding: High nitrogen to encourage leaf and flower growth.
- Summer Feeding: High potassium to improve fruit size and sweetness.
- Autumn Feeding: Light compost to help the tree recover from harvest.
The Feijoa Fertilizer Guide (Seasonal Application)
| Season | Frequency | Recommended Nutrient Focus | Why It Matters |
|---|---|---|---|
| Early Spring | Once | High Nitrogen (N) | Drives vegetative growth and flower bud formation. |
| Late Spring | Once | Balanced (Citrus Mix) | Supports initial fruit set after flowers bloom. |
| Summer | Every 6 Weeks | High Potassium (K) | Increases fruit size, sugar content, and flavor development. |
| Autumn | Post-Harvest | Organic Compost/Pellets | Soil conditioning and gentle recovery before dormancy. |
You might find that your soil needs a boost of trace elements, like magnesium. I have observed that slightly yellowing leaves, even when fertilized, often indicate a magnesium deficiency. You can fix this easily by dissolving a tablespoon of Epsom salts in a watering can and applying it to the soil once a year. A well-fed tree is a resilient tree, capable of warding off pests and producing the heavy harvest you desire. By being consistent with this feeding schedule, you will simplify growing feijoa fruits and guarantee a massive return on your investment of time and money.
6. Prune for Light and Airflow
If you want healthy fruit and a tree that is easy to manage, you must prune. Many of us are scared of hurting the plant, but I have learned that a feijoa is incredibly tough and forgiving. Pruning is essential for growing feijoa fruits because it opens up the center of the tree to light and air. You need this sunlight to ripen the fruit that is deep inside the canopy, and you need good airflow to prevent diseases like black sooty mold.
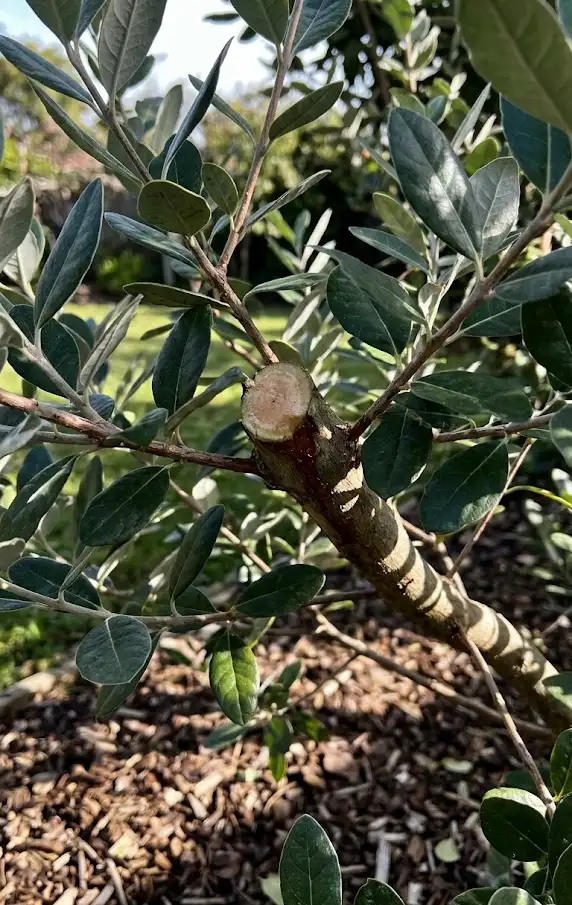
I like to follow the “bird-flying-through” rule. If you look at your tree, can a small bird easily fly from one side to the other without hitting any branches? If not, you have a lot of work to do. You should start by removing any dead, diseased, or damaged wood. Then, look for branches that are crossing over or rubbing against each other. You have to be ruthless; the goal is an open, bowl-like shape. Pruning creates opportunities for new, fruiting wood to grow, as feijoas produce fruit on the new season’s growth.
- When to Prune: Late winter to early spring, right before new growth starts.
- The Tools: Use sharp, sterile secateurs to make clean cuts.
- The Cut: Make all cuts at a 45-degree angle, just above a bud that is facing outwards.
- The Focus: Prioritize removing water shoots (vigorous vertical growth).
You must remember that for optimal fruit production, you should keep the tree around two to three meters (six to nine feet) tall. This makes growing feijoa fruits easier, as you don’t need a ladder to harvest. If you let the tree grow too tall, the energy of the plant will go into maintaining that vertical growth instead of producing large, flavorful fruit. I have observed that my friends who keep their trees consistently pruned have three times the yield of those who don’t. A little bit of work now will simplify your entire feijoa journey.
7. Water Deeply During the Summer Swell
Consistent water is the lifeblood of a developing feijoa. While the tree can tolerate drought once it is established, it will not tolerate drought while the fruit is trying to grow. This period, known as “fruit swell,” occurs over the summer. If your tree goes into drought stress during this time, it will either drop all of its fruit (fruit set failure) or produce tiny, dry, shriveled specimens. You must ensure you are applying water deeply and consistently, even if you are on a budget.
I follow a simple watering rule: water the root, not the leaf. I make sure my water is reaching the top 30 centimeters (one foot) of soil, which is where the majority of the feeder roots are located. To test this, I often stick a finger into the soil after I am finished watering. If the top five centimeters (two inches) are dry, I have to keep going. I have also observed that a drip irrigation system, while a small up-front cost, will simplify your entire summer by guaranteeing consistent water and saving you time and money.
Summer Watering Schedule
| Season | Frequency | Watering Volume | Focus |
|---|---|---|---|
| Early Summer | Weekly | 10 Liters (2.5 Gallons) | Initial fruit development and bloom recovery. |
| Mid-Summer | Twice Weekly | 15 Liters (4 Gallons) | The fruit swell; this is critical for size and flavor. |
| Late Summer | Weekly | 10 Liters (2.5 Gallons) | Pre-harvest ripening and maintaining tree health. |
A great tip I have found for growing feijoa fruits in the summer is to use mulch effectively. I apply a deep, 10-centimeter (four-inch) layer of organic mulch, like straw or wood chips, around the base. This mulch has been essential for protecting the soil from the sun’s intense heat. Mulch not only reduces water loss through evaporation but also suppresses weeds, which would otherwise compete for the same moisture and nutrients. When you take the time to water deeply, you are not just maintaining the tree; you are creating the best possible environment for a bumper crop. Consistency is everything.
8. Grow Feijoas in Pots for Small Spaces
This is where I have observed that knowing how to grow feijoa fruits in a container can simplify your entire landscaping strategy. Growing feijoas in pots makes the tree mobile, meaning you can take your investment with you if you move. You don’t have to give up on your green dreams just because you don’t have a large patch of grass.
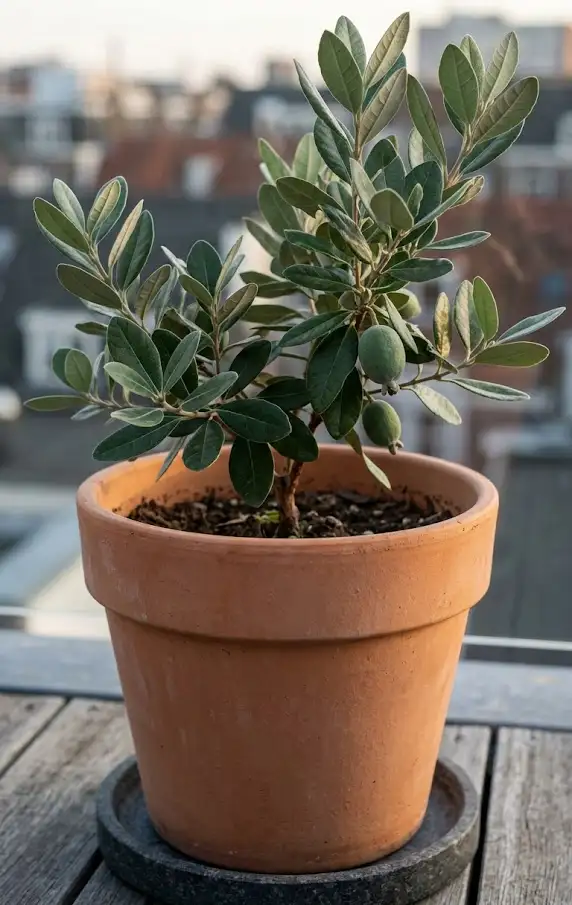
I find that a common mistake is using a pot that is too small. I follow a simple rule: if you want a large tree, you need a large pot. You must start with a container that is at least 50 centimeters (20 inches) in diameter. I also make sure the pot has multiple drainage holes, as feijoas will not survive if their roots are constantly sitting in soggy soil. Potted trees need a high-quality potting mix that is fortified with slow-release fertilizer.
- Best Varieties: Use dwarf cultivars like ‘Bambina’ for consistent success in a container.
- Pot Size: Minimum 50cm (20 inches) diameter with excellent drainage.
- Feeding: Use a specific container fertilizer every month during the growing season.
- Repotting: Repot every two to three years into a slightly larger container or prune the roots.
I have observed that because potted trees are in a limited volume of soil, they require more frequent watering and feeding. You must be diligent; in the peak of summer, a potted feijoa may need daily watering. However, this focused effort can simplify the entire process of growing feijoa fruits, as you can control every aspect of the tree’s environment. I often place my pots near a north-facing wall to provide extra warmth in the spring, which has been a key reason for my consistent harvests. Growing in pots makes feijoa ownership accessible and simplifies the entire experience.
9. Identify and Stop Common Pests Fast
One of the biggest obstacles I face in growing feijoa fruits is the arrival of pests. I have had entire crops destroyed by the guava moth, which has been incredibly frustrating. This tiny moth lays its eggs on the fruit’s surface, and the larvae burrow inside to feed on the sweet pulp. While the feijoa tree itself is remarkably robust and can tolerate most pests, you have to be vigilant if you want the fruit for yourself. Knowing how to quickly identify and stop these common pests will guarantee your harvest.
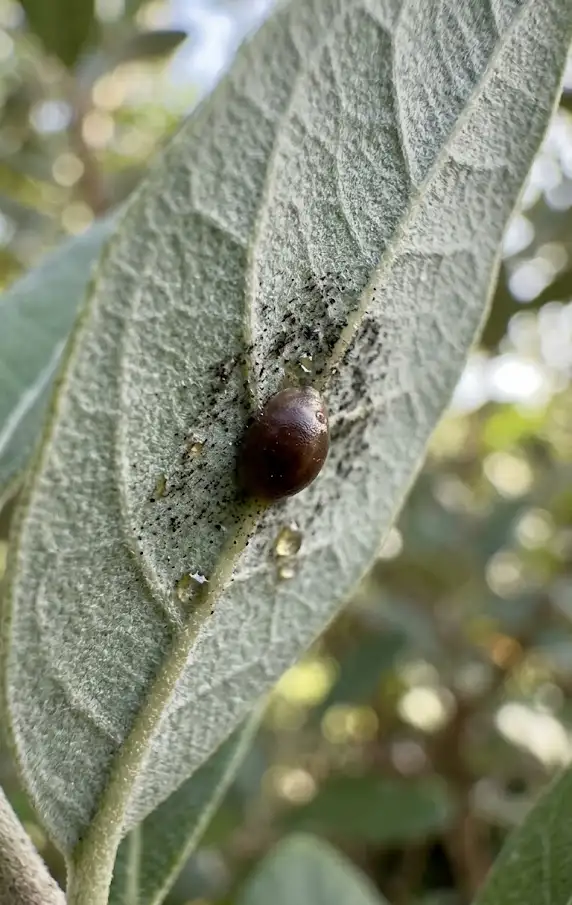
I am a big believer in proactive and organic solutions. I have found that my entire pest management strategy can be simplified by using pheromone traps to monitor for guava moth and leafroller caterpillar. The best way to identify scale is by looking for black sooty mold on the leaves. When you spot scale, you have to treat it with a simple, inexpensive oil spray. For guava moth, you should pick up any fruit that drops early, as this breaks the pest’s lifecycle and will guarantee that your next season’s crop is pest-free.
A Complete Feijoa Pest Management Chart
| Common Pest | Damage to Look For | Organic Solution | Proactive Tip |
|---|---|---|---|
| Guava Moth | Small holes in fruit with brown frass; rotting inside. | Pick up and destroy all early-dropped fruit; use pheromone traps. | Keep the ground around the tree clear of leaf litter. |
| Scale Insects | Small, hard bumps on leaves; black sooty mold and sticky honeydew. | Use an oil-based spray (like neem oil) during the dormant season. | Prune to improve airflow and light. |
| Leafroller Caterpillar | Webbing that rolls leaves together; holes in foliage and young fruit. | Manually squash or use a safe biological spray (like Bt). | Encourage beneficial insects and birds in your garden. |
For many years, this has been a successful way to protect my best fruit from the guava moth. This simple strategy guarantees that the fruit you have invested so much time into will actually make it to your table. You will simplify the entire process of growing feijoa fruits by focusing on these key organic and physical controls. Vigilance is your best tool.
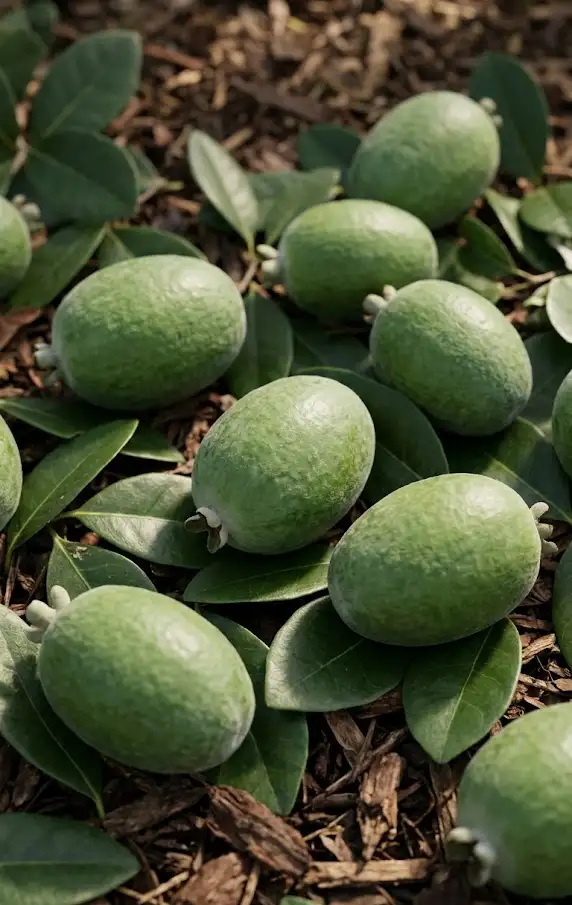
10. Use the “Touch-Pick” Method for Ripeness
One of the most satisfying parts of growing feijoa fruits is finally harvesting them, but knowing exactly when to pick them can be tricky. Unlike apples or citrus, you should rarely pick a feijoa directly off the tree. If you do, it will likely be hard, sour, and lack that incredible tropical aroma. Feijoas have a unique way of telling you they are ready: they drop to the ground. This natural process is called abscission, where the tree cuts the connection to the ripe fruit. I have found that the best strategy for a perfect harvest is to let nature take its course.
I am a big believer in the “touch-pick” method for a proactive harvest. I gently cradle a fruit in my hand and slightly tilt it; if the stem snaps cleanly and the fruit separates easily, it is perfectly ripe and ready for eating. The nets prevent fruit bruising, and the mulch provides a soft, safe landing. A proactive harvest can simplify your life by reducing fruit waste.
Feijoa Ripeness and Post-Harvest Guide
| Fruit State | Appearance | Touch/Feel | Best Use |
|---|---|---|---|
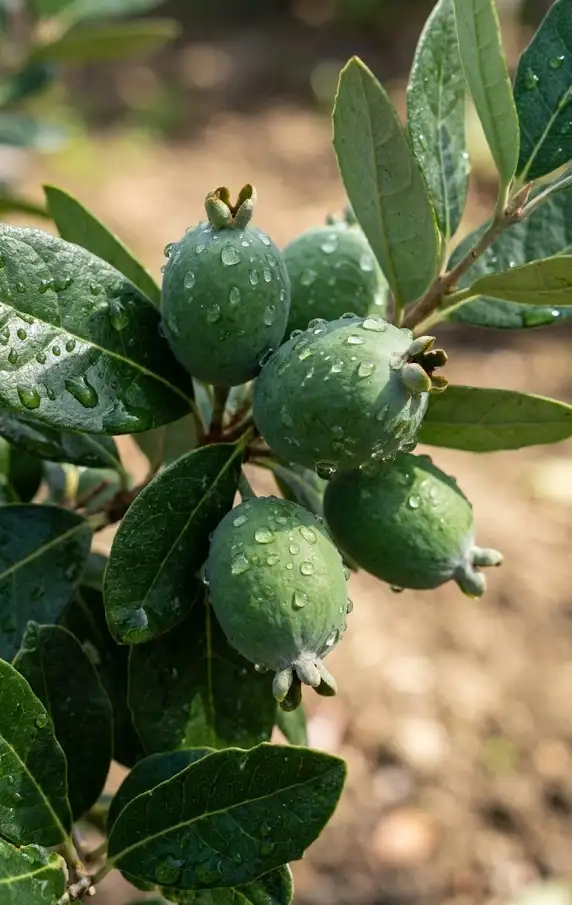
| Under-ripe | Very hard, matte green. | No give; difficult to detach from tree. | Leave on tree or ripen with bananas. |
| Perfectly Ripe | Hard, slightly soft at the ends. | Gentle give to a soft touch; detaches easily with the “touch-pick” method. | Eat fresh, use in salads, freeze the pulp. |
| Over-ripe | Very soft, turning yellow. | Sinks with a light squeeze; skin might be shriveled. | Use for baking (e.g., muffins, cakes), making jam or jelly. |
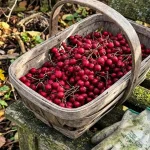
You might find that after gathering your bounty, you can simplify the storage by knowing how to store feijoas. I have observed that fresh feijoas have a very short shelf life. I store my best fruit in the refrigerator for up to one week to slow the ripening. For a long-term supply, I have successfully simplified my kitchen work by scooping the clear seed pulp into bags and freezing it. You can create amazing feijoa chutney, jelly, and other sweet treats throughout the year. By mastering the touch-pick method and proper storage, you will guarantee a massive return on your investment of time and money in growing feijoa fruits.
11. Eat the Edible Flowers for a Summer Treat
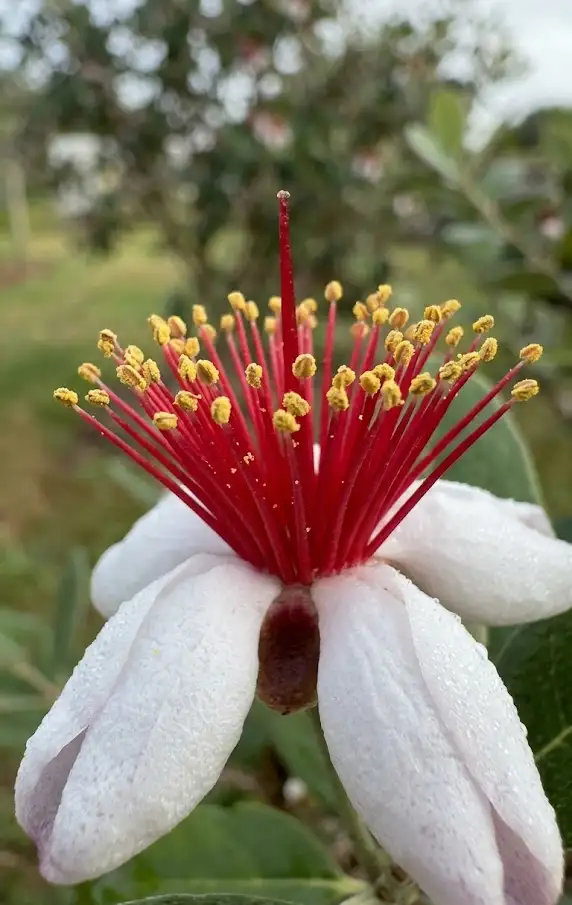
If you want to truly maximize your feijoa tree’s value, you have to try its edible flowers. This is one of the “green gold” secrets that most beginners miss. Many people think that the only harvest from growing feijoa fruits is the fruit itself, but the thick, white, fleshy petals of the feijoa flower are incredibly delicious. They have a unique spicy-sweet flavor with a strong, tropical aroma, reminiscent of pineapple or vanilla. They make a perfect, nutritious addition to any summer salad or dessert.
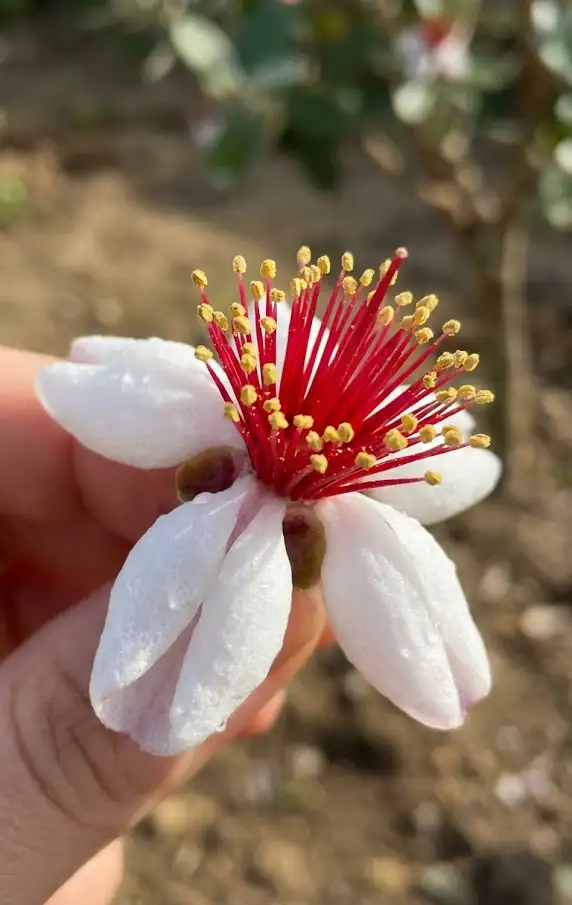
I follow a simple flower-eating rule: pick the petals, leave the core. I Gently pull off the thick, sugary petals, making sure the rest of the flower, including the central carmine-red stamens, remains intact. The core of the flower will still develop into fruit, so you aren’t reducing your crop. By leaving the center, you can still guarantee that you will get fruit in the autumn. I have observed that this strategy works particularly well with self-fertile varieties and has been a successful way to increase the overall value of my feijoa tree. Flower eating will simplify your gardening life by giving you two harvests per tree.
- What to Eat: Eat the thick, waxy, white, spicy-sweet petals.
- What to Leave: Leave the carmine-red stamens and the base to develop into fruit.
- Harvest Time: Best to harvest them when the flowers are fresh and new.
- Culinary Uses: Perfect for garnishing desserts, in summer salads, or making a unique feijoa petal jelly.
I have found that for gardeners who want to get the most out of their small backyard, edible flowers can simplify the entire process of growing feijoa fruits. You are getting nutritious and delicious food from your tree in two different seasons. Many of my friends are amazed by the unique flavor of the petals and have often used them to create impressive summer recipes. By incorporating flower eating into your garden plan, you are making the most of a truly incredible plant and simplifying your overall food supply.
FAQ: Everything Else You Need to Know
While this guide has been comprehensive, you may still have some questions about how to grow feijoa fruits. After many years of tending my own trees, I have compiled a list of the most common user pain points and technical failed steps. This FAQ is essential for breaking down complex topics and will simplify your entire feijoa journey. My goal is to guarantee you have all the information you need to be successful.
- How long does it take for a feijoa tree to fruit? A grafted tree (like a 2-year-old sapling you buy from a nursery) will usually give you a small crop within two to three seasons. If you plant a seedling, however, it can simplify your life by making you wait; you can expect a wait of up to seven years, and the fruit quality is a gamble.
- Why is my feijoa tree not fruiting? This is almost always a pollination or water issue. Feijoas require consistent deep water during the summer fruit swell. It could also be that you have a self-sterile variety that needs a second cultivar nearby to cross-pollinate. I have observed that improving cross-pollination and consistent deep water will simplify your entire feijoa journey.
- Can feijoas grow in clay soil? Yes, but you have to work for it. Feijoas hate “wet feet,” and clay soil can simplify things by drowning the tree in poor drainage. You must either plant your tree on a slight mound or add gypsum to help break up the heavy soil structure. Planting on a mound is an essential way to guarantee a healthy, free-draining environment for the shallow root system.
- How big do feijoa trees get? A standard feijoa tree can simplify things by becoming a very large hedge if you let it, reaching up to five meters (15 feet) in height and width. However, you can easily control its size through pruning. Keeping the tree around two to three meters (six to nine feet) tall has been a great strategy for making the harvest easy to manage. Pruning will simplify your life by keeping your tree manageable and productive.
Final Thoughts: Start Your Feijoa Journey Today
Reflecting on my own feijoa journey, I can tell you that there is nothing like walking into the garden and gathering “green gold” from the grass. It is incredibly rewarding to find your first large, perfectly ripe fruit, knowing that your consistency with sun, soil, water, and pruning has led to this moment. Many of us worry about having the time or expertise to grow feijoa fruits, but I have learned that by simplifying the process, you can create a thriving, low-maintenance food source. You don’t have to be a botanical expert to get great results.
My one final tip to simplify your starting point is to focus on a self-fertile variety like ‘Unique’. If you are short on time, money, or space, this is the most reliable way to get a harvest. I have spent many years trial-and-erroring different cultivars, and I have found that starting with a tough, self-fertile tree has been a successful way to get a taste of success without a massive time investment.
What variety are you planning to plant first in your garden? Have you tried eating the flowers from a feijoa tree? Let me know in the comments below!