
Plant a grevillea in full sun on free-draining soil in autumn. Water it weekly through its first 2 summers. Feed it low-phosphorus native fertilizer once in spring.
I have learned that drainage decides a grevillea faster than fertilizer.
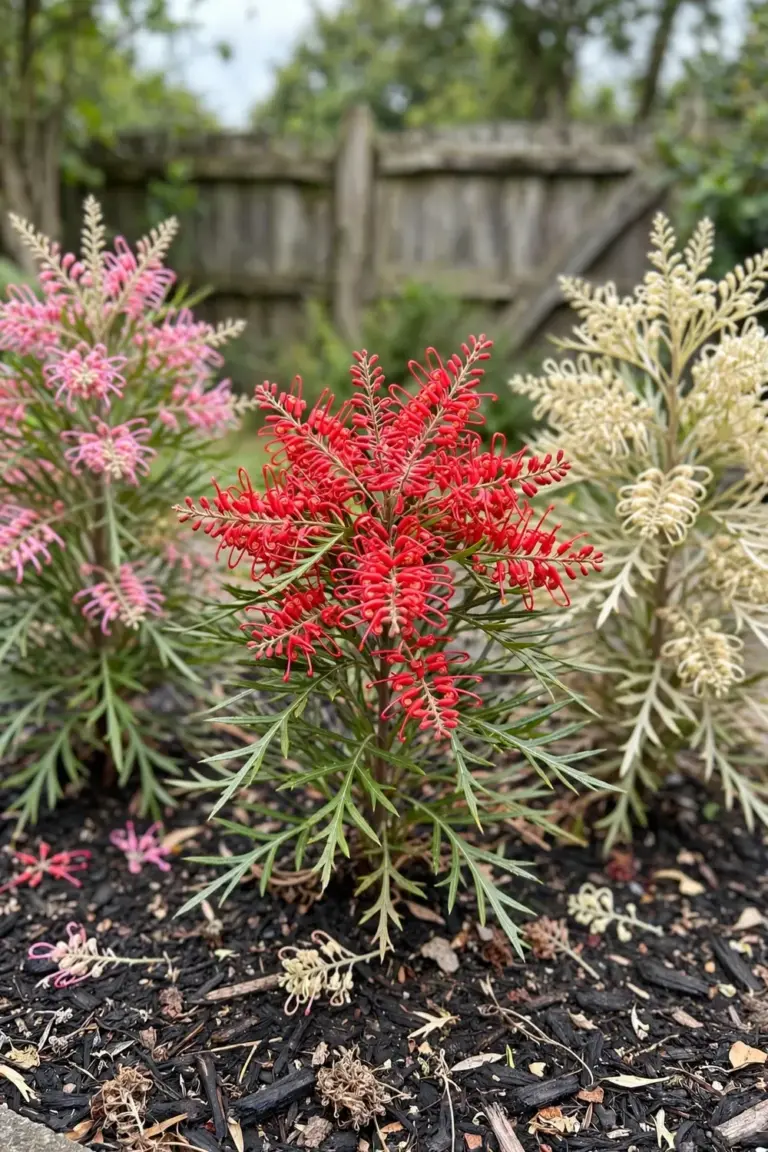
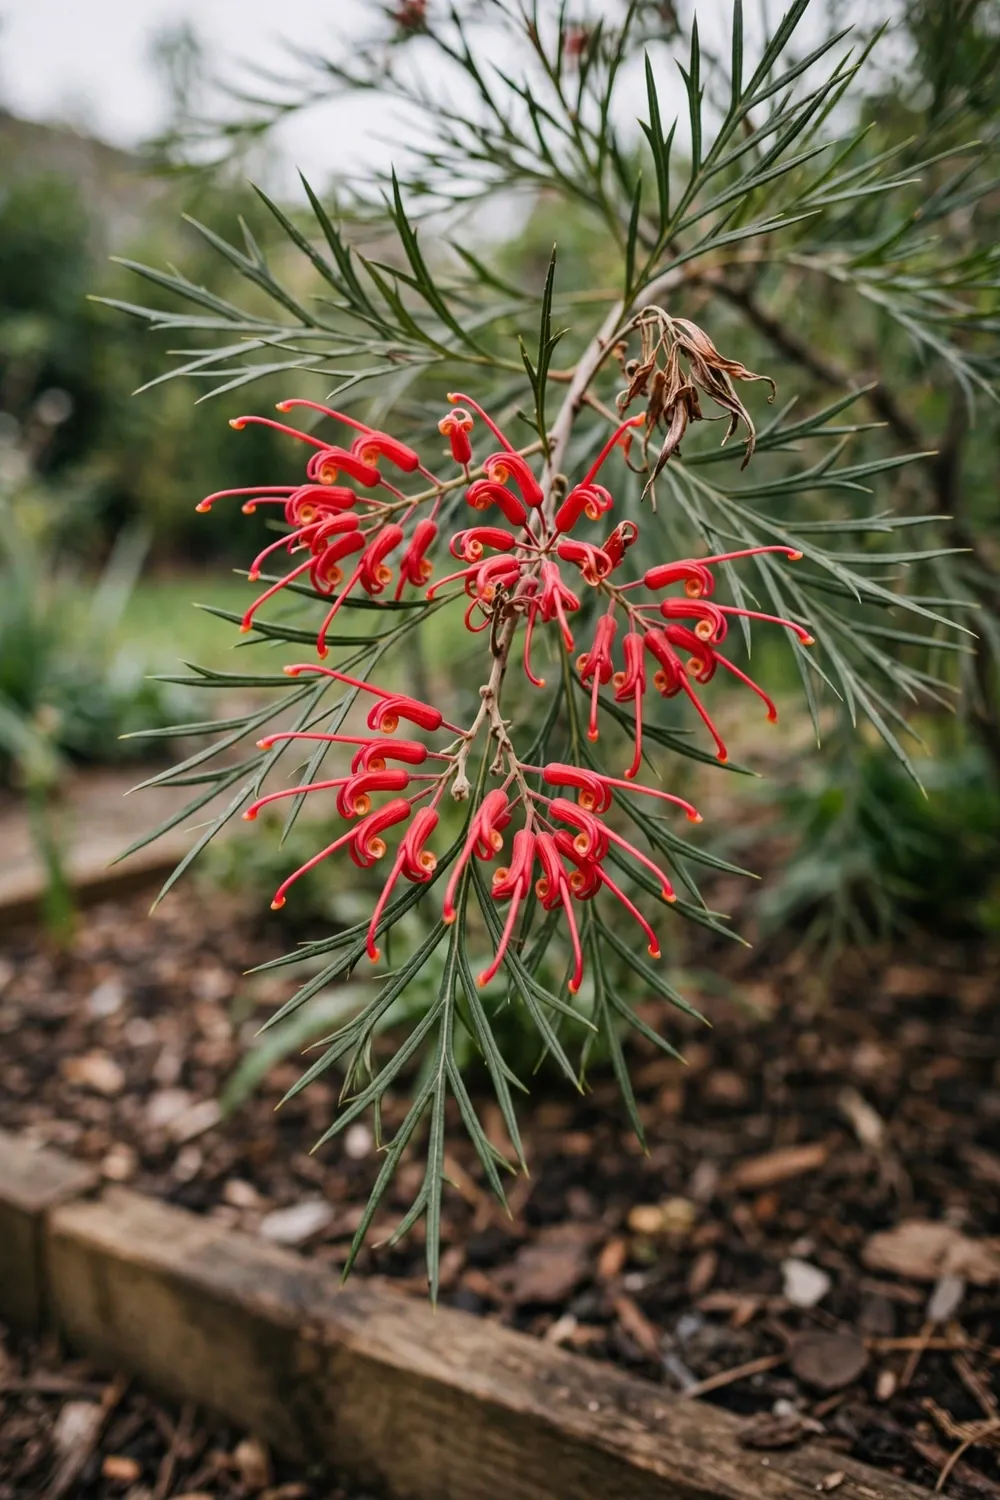
Grevillea is a genus of Australian native shrubs and trees in the Proteaceae family, and its flowers carry long styles that give the bloom a spidery or toothbrush shape. Grevillea flowers feed honeyeaters and insects through long flowering runs. Growing grevillea in Australia rewards drainage first and feeding second. The rest of this page is 12 steps, from choosing a form to fixing yellow leaves.
1. Match Grevillea Form to Climate and Space
Grevillea form decides the planting spot because groundcovers, shrubs, and trees need different room and different exposure.
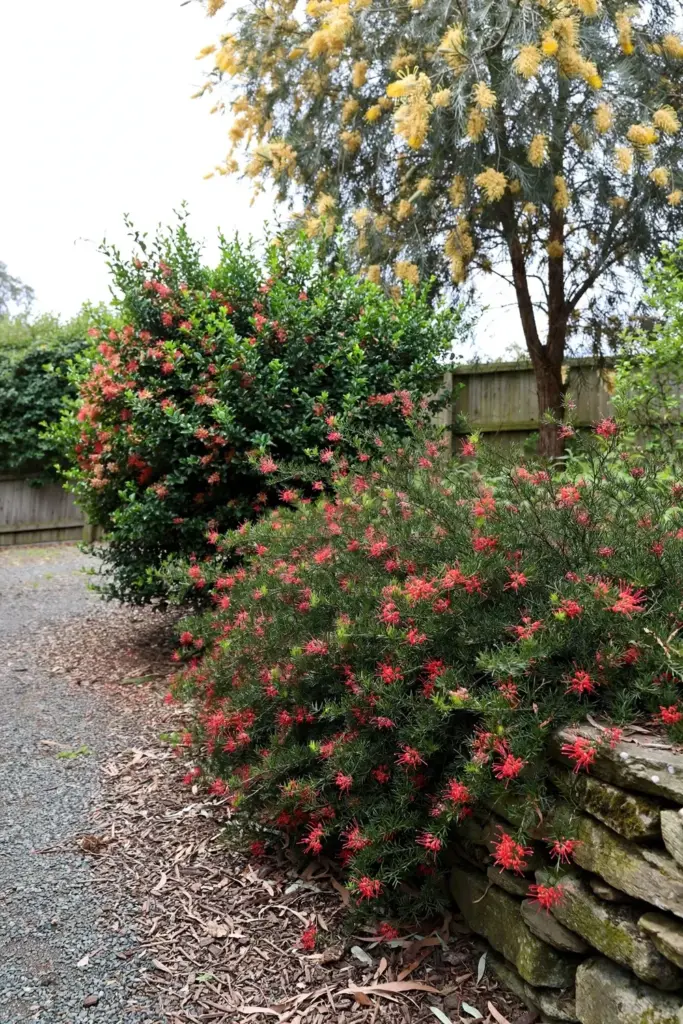
Start with form, not with flower color. A groundcover grevillea spreads low and wide and suits banks, edges, and spill over low walls. A small shrub grevillea suits a mixed border or a hedge line. A large shrub grevillea suits a screen or a windbreak. A tree grevillea suits a lawn specimen or a street-side spot with room for a canopy. Form sets spacing, pruning, and water. Flower color follows form.
Match form to climate next. Grevillea species come from wet forests, dry woodlands, coastal heaths, and cold tablelands. A species from a cold tableland tolerates frost. A species from a humid coast tolerates wet summers. A hybrid bred for gardens often tolerates a wider range than either parent. Read the label for frost tolerance and humidity tolerance. A label that names no tolerance gives no promise.
Match form to soil next. Grevillea roots need air around them. A heavy clay bed suits a raised mound or a pot. A sandy bed suits in-ground planting with mulch. A shady bed suits no grevillea at all, because shade cuts flowering and keeps foliage damp. Full sun gives the most flowers. Half-day sun gives fewer flowers and thinner growth.
| Form | Habit | Best Use |
|---|---|---|
| Groundcover | Spreads low and wide | Banks, edges, spill over walls |
| Small shrub | Dense and compact | Mixed borders, low hedges |
| Large shrub | Tall and bushy | Screens, windbreaks, feature shrubs |
| Tree | Single trunk with a canopy | Lawn specimens, street-side shade |
Name a form example only to fix the picture. Grevillea Poorinda Royal Mantle shows the groundcover form. Grevillea Robyn Gordon shows the dense shrub form. Grevillea robusta shows the tree form and is the silky oak. These three examples illustrate form. They do not rank varieties and they do not replace a variety list.
2. Check the Label for Grafted or Own-Root Stock
A grafted grevillea grows on rootstock that can differ from the top growth, so the label decides how the plant behaves.
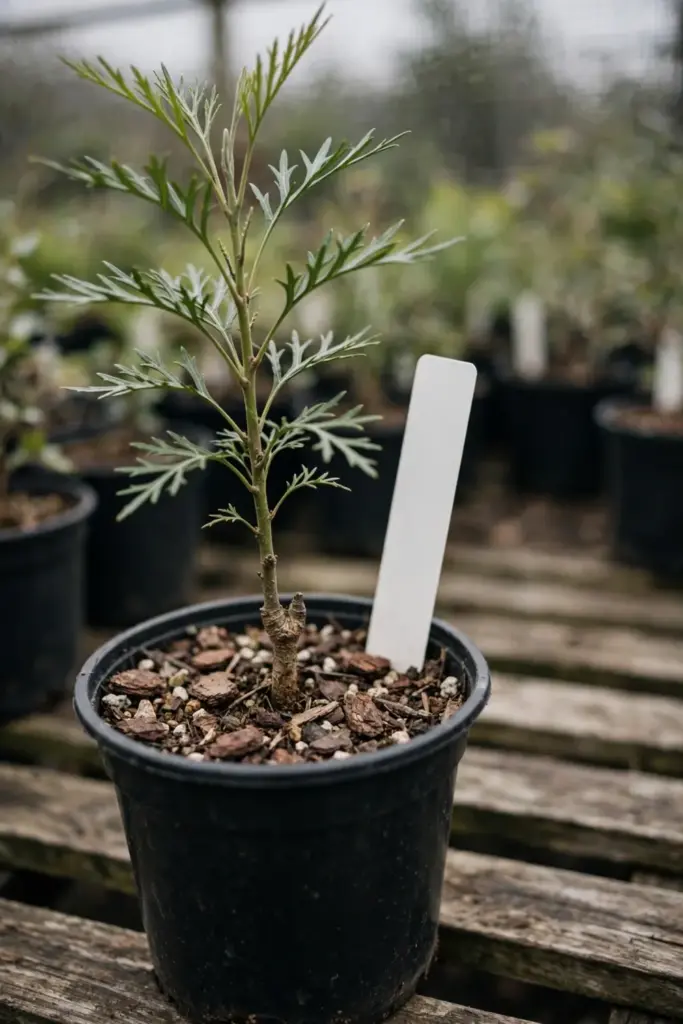
Read the label before you buy. A grafted plant carries a graft union near the base, a swollen joint where the top growth meets the rootstock. An own-root plant shows no such joint. Grafting extends the range of difficult species and can lengthen the life of a cultivar that struggles on its own roots. Grafting also means the rootstock sets part of the tolerance. A top that loves dry soil on rootstock that hates wet feet still hates wet feet.
Check three label facts. First, the full botanical name or cultivar name. Second, the mature form and the expected spread. Third, the frost and humidity tolerance. A label that lists none of these leaves the buyer guessing. A nursery that answers label questions earns the sale.
Check the plant itself. Roots should fill the pot without circling in a dense mat. Stems should feel firm, and leaves should look green and full. A plant with yellow leaves, bare lower stems, or a sour smell from the mix goes back on the bench. A healthy plant establishes fast. A weak plant fights from day one.
Buy tube stock or a small pot when the choice exists. A young plant settles its roots into the new soil fast. A large plant in a big pot carries more top growth than its roots can feed through the first summer. Small plants catch up. Large plants often stall.
Buy in autumn when the choice exists. Autumn planting gives roots months of cool soil to settle before summer heat arrives. A plant bought in high summer needs close attention through its first heatwave, with water every few days and shade on the hottest afternoons. A plant bought in autumn settles while the weather stays mild and the soil holds moisture from rain. Nurseries stock fresh tube stock in autumn, and the range runs widest then, so the buyer finds the form and the tolerance the garden needs. Autumn buying plus autumn planting gives the plant the longest runway before its first dry summer.
3. Plant Your Grevillea High on Free-Draining Soil
Grevillea roots rot in standing water, so plant high and let water move away from the crown.
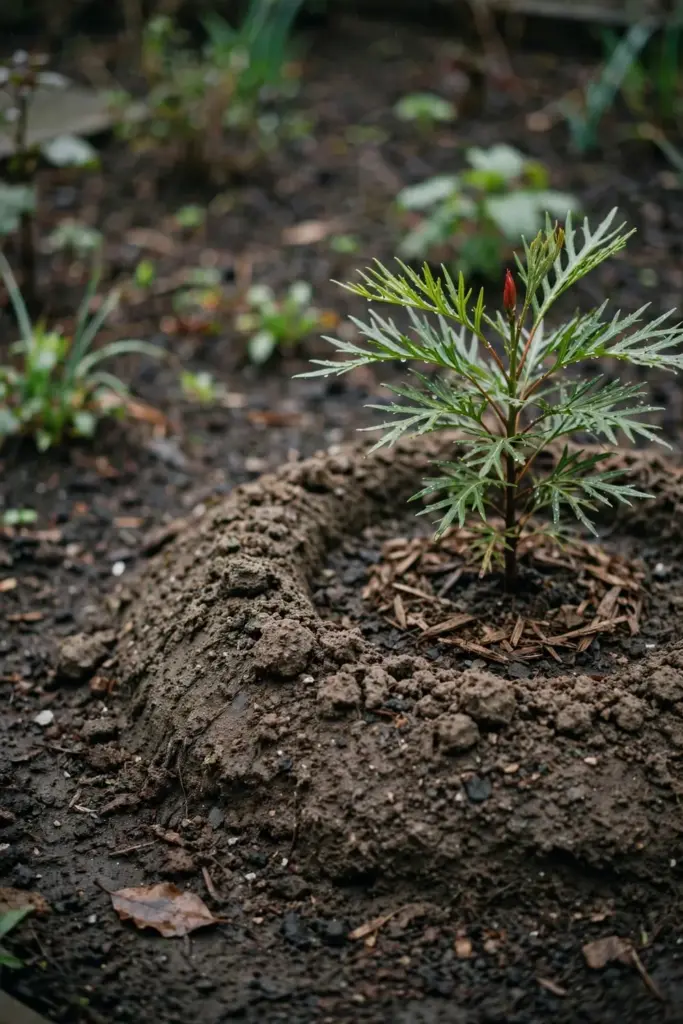
Dig a hole no deeper than the pot and twice as wide. Set the plant so the top of the root ball sits level with the soil surface or a little above it. Backfill with the soil you dug out. Firm the soil with your hands. Water the plant in slowly. A hole dug deep and backfilled with rich mix sinks after rain and holds water against the crown. A shallow hole on a mound drains.
Build a raised mound on clay. Shape a low mound of the existing soil mixed with coarse organic matter. Plant into the mound. The mound lifts the crown above the wet zone and lets water drain away. A flat planting on heavy clay holds water in the hole like a bowl. A mound costs ten minutes and saves the plant.
Space the plant to the mature width on the label. A shrub planted tight against a fence loses air flow on one side and grows thin there. A screen planted tight closes fast and then thins at the base. Air flow keeps foliage dry and cuts leaf spot. A little extra room beats a crowded bed.
Mulch after planting. Spread a thin mulch layer around the plant and keep it clear of the stem. Mulch holds soil moisture and keeps weeds down. Mulch piled against the stem holds damp against bark and invites rot. A clear ring around the stem solves that.
Test drainage before you plant. Dig the hole and fill it with water. Water that drains within the hour suits a grevillea. Water that still sits the next morning needs a mound or a pot. A drainage test takes minutes and beats guessing. A hole that drains well grows a grevillea well, and a hole that holds water grows rot.
Soil health shapes establishment, and building soil health covers the soil side of the job in full. This page covers the planting. The soil page covers the bed.
4. Water Deeply Through the First Two Summers
A new grevillea needs steady water for its first two years, then it lives on rainfall in most gardens.
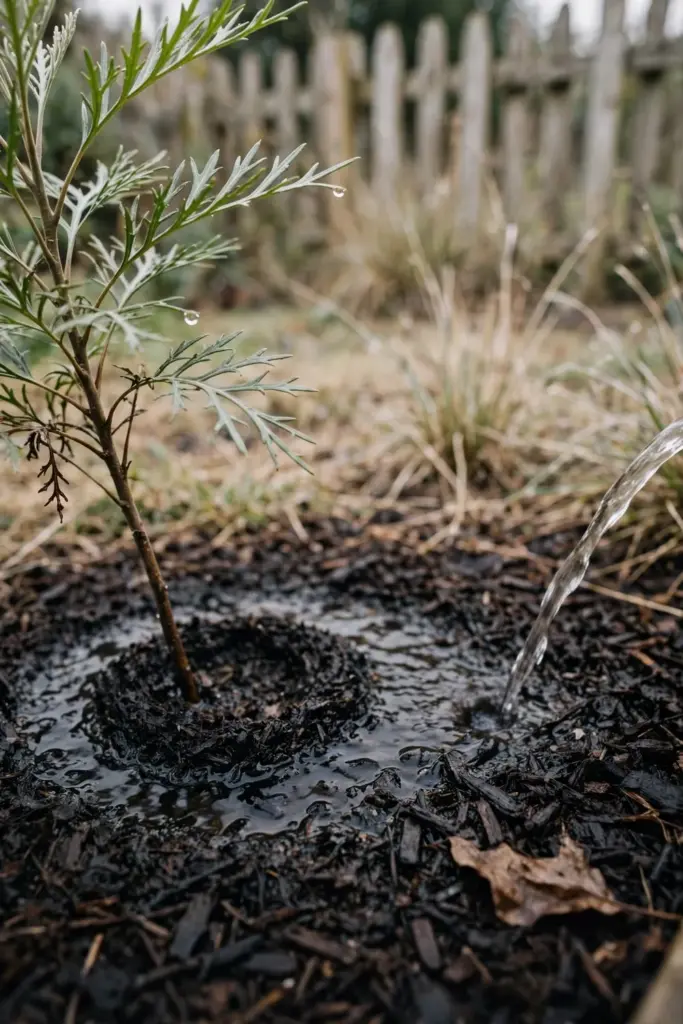
Water a new plant once or twice a week after planting, with extra water in hot spells, and taper to rainfall once the plant stands on its own roots, according to the general grevillea growing guide. Deep watering beats light sprinkling. A deep soak pushes roots down into cool soil. A light sprinkle wets the surface and leaves roots shallow. Shallow roots dry out fast in a heatwave.
Read the plant to set the schedule, starting with leaves that wilt in the morning, since those need water that day. Leaves that wilt only in the afternoon heat and recover by evening need no extra water. Soil that feels damp two knuckles down needs no water, while soil that feels dry at that depth needs a soak. A finger test beats a fixed calendar.
Taper water in the second year. Cut the frequency as the plant shows new growth and holds leaves through dry weeks. An established grevillea tolerates dry spells. A plant watered daily through year two grows soft roots that fail in the first dry summer. Tough love after establishment builds a tough plant.
Water at the base. Wet leaves in humid weather invite leaf spot. A drip line or a slow hose at the base keeps foliage dry. Morning watering lets any splashed leaves dry by noon. Evening watering leaves foliage damp overnight.
5. Feed Low-Phosphorus Native Fertilizer Once in Spring
Grevillea roots take up phosphorus with ease, so standard garden fertilizer burns grevillea leaves.
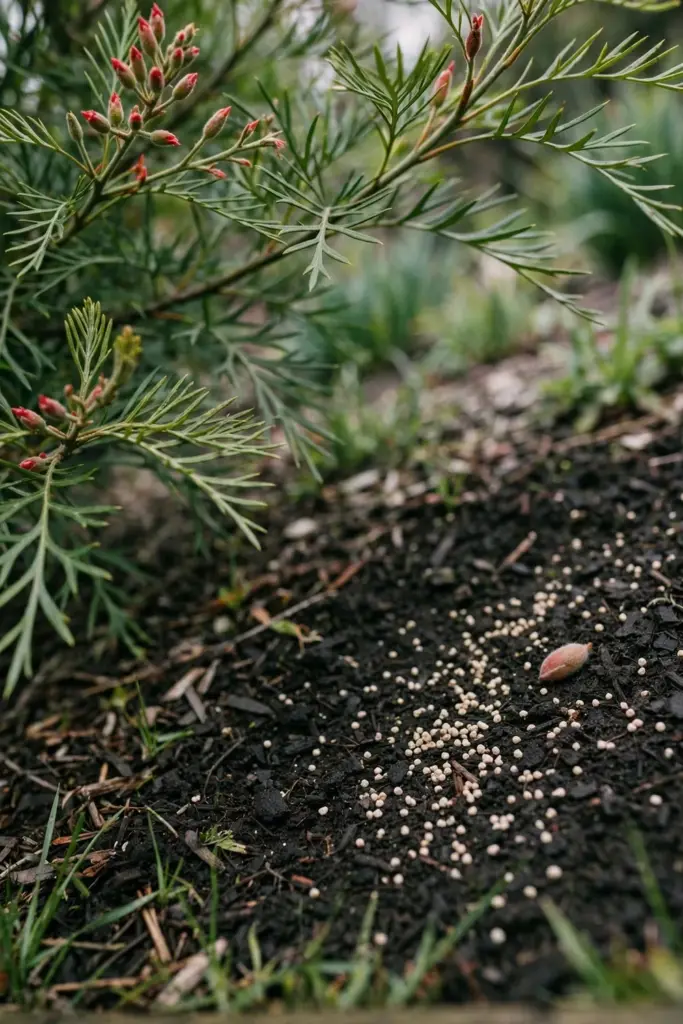
Feed only a slow-release native fertilizer with a phosphorus ratio under 3 percent, according to the Grevillea Royal Mantle growing guide. A standard rose or tomato fertilizer carries far more phosphorus than a grevillea tolerates. One heavy feed can scorch leaf tips and kill branch tips. A light feed of the right product does the job.
Feed once in spring as buds form. Scatter the fertilizer under the drip line, away from the stem. Water it in well. A second light feed in late summer suits a hungry plant in poor soil. A plant in rich soil needs no second feed. More fertilizer never fixes a drainage problem or a shade problem.
Skip fresh manure. Fresh manure burns roots and adds salts. Well-aged compost as mulch feeds soil life without a phosphorus spike. Blood and bone suits some native shrubs, but a bagged native fertilizer gives a known ratio. A known ratio beats a guess.
Watch the leaves after feeding. Leaf tips that yellow then blacken after a feed point to phosphorus damage. Stop all feeding at once. Flush the soil with plain water. Do not add another product to fix the first product. Time and water do the repair.
6. Tip-Prune After Flowering for Dense Growth
Pruning after flowering keeps a grevillea dense, and tip pruning during flowering keeps blooms coming.
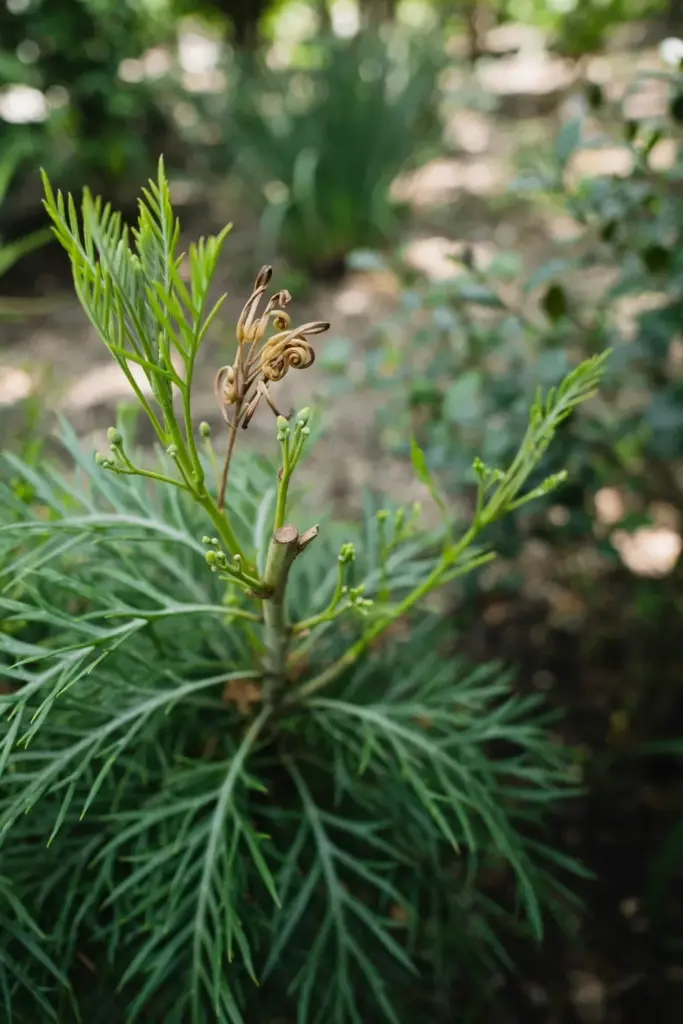
Prune lightly after the main flowering run ends. Cut back the flowered stems to a leafy shoot below the spent bloom. A light prune wakes side buds and fills the shrub. A hard cut into bare old wood leaves stubs that may never reshoot on some cultivars. A few cultivars reshoot from hard wood, but most do not. Light and often beats hard and rare.
Tip-prune through the flowering season. Pinch the soft tips of long shoots. Tip pruning diverts energy into side shoots and new flower buds. A plant left unpruned grows leggy, with flowers only at the ends of long bare stems. A plant tip-pruned through the season holds flowers through the whole canopy.
Cut back by about one-third when a shrub turns leggy. A one-third cut restores shape and wakes dormant buds near the cut. A cut past the last leaves on a branch risks a bare stub. Cut to a live leaf or a live bud every time, because the live bud below the cut carries the regrowth.
Wear gloves for pruning. Grevillea foliage and sap can irritate sensitive skin. Long sleeves and gloves keep sap off skin. Wash secateurs after use. Clean blades cut clean and carry no disease from plant to plant.
Pruning method matters across the garden, and spring pruning techniques covers the general method in full. This page covers the grevillea timing. The pruning page covers the tools and cuts.
7. Propagate Grevilleas From Cuttings for True-to-Type Plants
Cuttings give a true-to-type grevillea, while seed gives a plant that can differ from the parent.
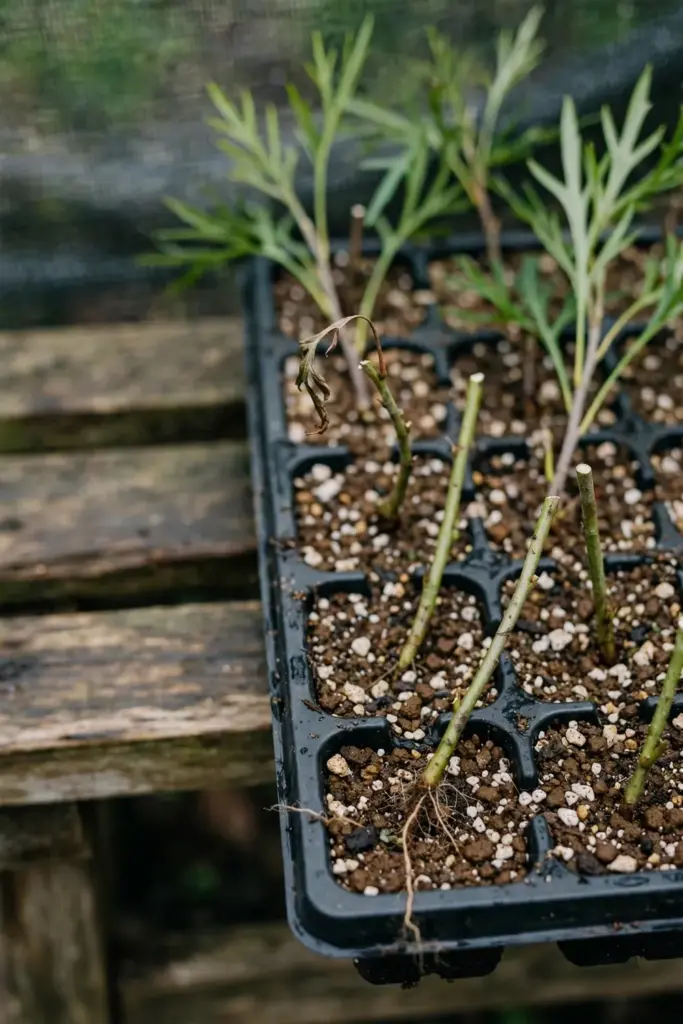
Take semi-hardwood cuttings after flowering. Choose firm stems that bend a little and snap clean. Strip the lower leaves. Trim the cutting to 10 cm long. Set the cutting in a sharp-draining propagation mix. Cuttings of this length root in two to eight weeks under nursery conditions, according to the Australian National Botanic Gardens Grevillea confertifolia guide. Very soft tips wilt and rot in the mix, so remove them before setting the cutting.
Use a rooting hormone on the cut end. A gel hormone coats the cut and speeds rooting. Bottom heat helps in cold months. A propagation mix that drains fast keeps the base of the cutting free of rot. A soggy mix rots the cutting before roots form.
Seed propagation suits species, not named cultivars. A seedling from a named cultivar can differ from the parent in flower, form, and tolerance. Sow fresh seed for the best result. Soak seed in room-temperature water for 24 hours before sowing. Sow into a coarse perlite mix that drains fast. Cuttings of alpine grevillea run 5 to 10 cm long and take six to eight weeks to strike, according to the Australian National Botanic Gardens Grevillea alpina guide.
Grafting suits difficult species and prized cultivars that fail on their own roots. A grafted plant joins a top that flowers well to roots that tolerate the local soil. Grafting needs skill, clean tools, and a matching rootstock. A home gardener buys grafted plants and propagates the rest by cuttings.
Seed starting method applies to the seed side of the job, and seed starting steps covers that method. This page covers the grevillea choice. The seed page covers the trays and mix.
8. Grow Grevilleas in Pots With Native Mix and Sharp Drainage
A pot suits a grevillea when the garden soil stays wet or the gardener needs the plant on a patio.
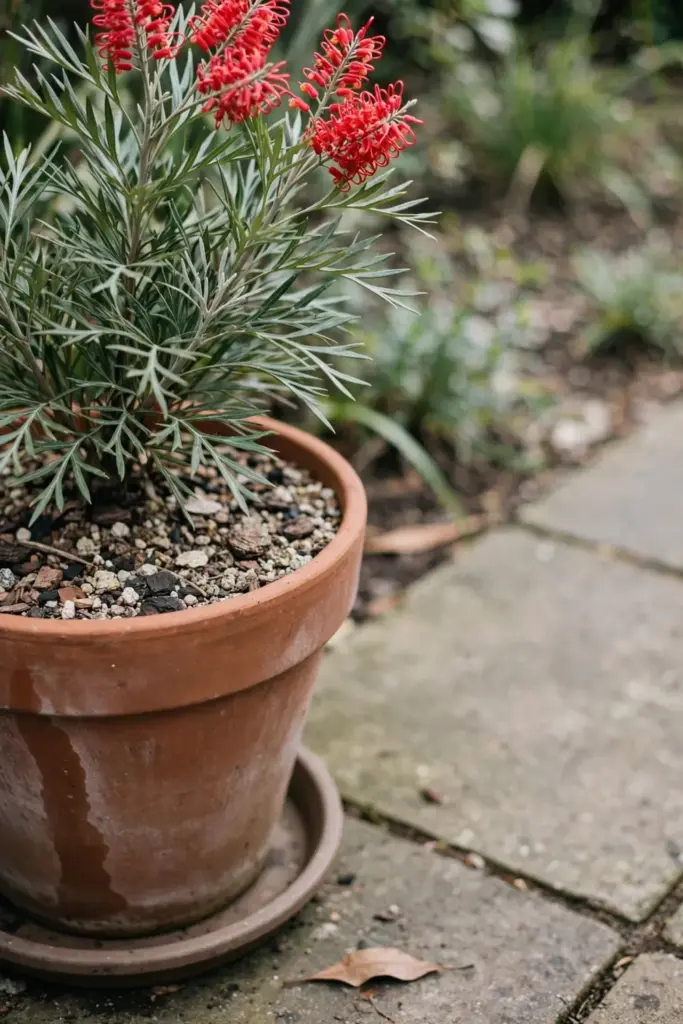
Use a native potting mix, not a general mix. A native mix runs lean on phosphorus and drains fast. A general mix feeds phosphorus at levels a grevillea cannot handle. A pot of native mix plus a handful of coarse perlite drains fast and holds air. Drainage holes must stay open. A blocked hole turns the pot into a bucket.
Pick a pot with room to grow. A pot one size up from the nursery pot suits a new plant. A huge pot holds wet mix around small roots and rots them. Repot as roots fill the pot, one size at a time. A pot-bound plant stops growing and drops leaves.
Water pots more often than beds because pots dry out fast in wind and sun, so check the mix with a finger before watering. Water until water runs from the base, then empty the saucer, since a saucer left full keeps roots wet. A pot in a windy spot needs a sheltered corner.
Move pots under eaves in heavy rain. A pot under open sky fills with rain and stays wet for days, while a pot under eaves sheds the worst rain and dries between showers. Check pots after storms and tip any waterlogged pot to drain the base. A pot that stays wet through winter rots roots before spring, while a dry pot in winter sleeps and wakes clean.
Feed pots lightly. A pot plant uses its mix fast and needs one light native fertilizer feed in spring. A second light feed in late summer suits a heavy flowerer. A pot plant fed like a bed plant burns, and a pot plant starved drops buds.
Grafted weeping standards suit pots well. A standard carries flowers at eye level and keeps the canopy off the ground, while a groundcover in a hanging basket spills over the rim and a large shrub in a small pot outgrows the pot in one season.
9. Spot Root Rot, Leaf Spot, and Scale Early on Grevilleas
Grevillea pests and diseases stay minor when drainage, air flow, and feeding stay right.
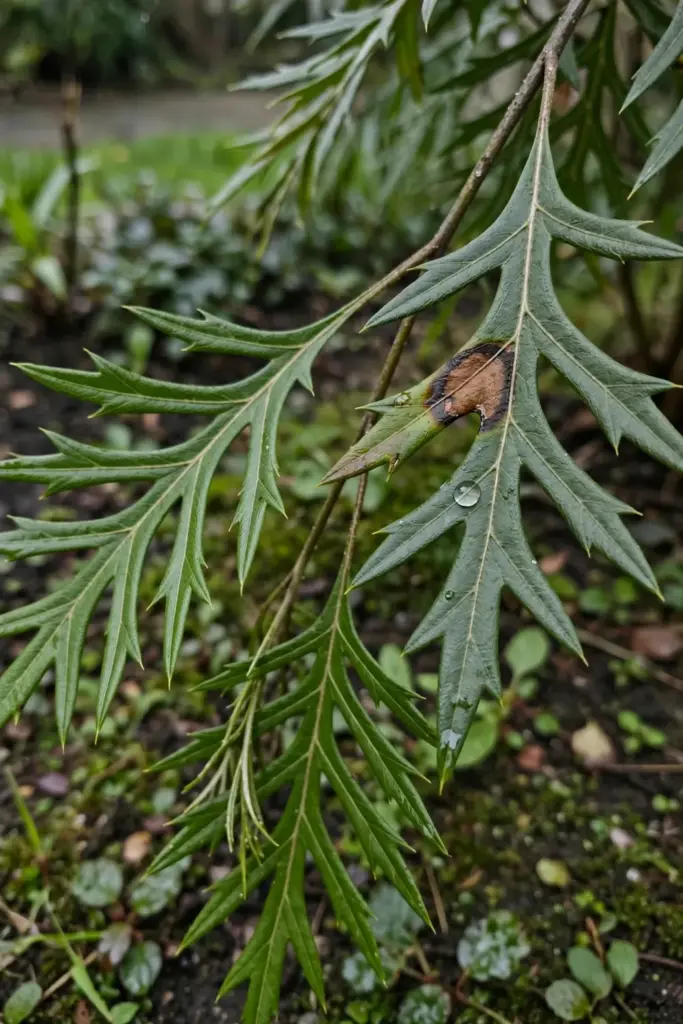
Root rot shows as wilting leaves on a plant in wet soil. Leaves yellow, branches die back, and the crown feels soft. Root rot follows waterlogging. Lift the mulch and check the soil. Soil that stays wet for days after rain needs drainage work, not a spray. A plant on a mound drains. A plant in a bowl rots.
Leaf spot shows as brown or black spots on leaves in humid weather. Spots spread from lower leaves upward. Fallen leaves carry the spores. Rake fallen leaves from under the plant. Open the canopy with a light prune for air flow. Avoid wetting foliage when watering. A dry canopy heals. A wet canopy spreads spot.
Sooty mould shows as a black film on leaves under scale insects. Scale insects sit as small bumps on stems and leaves and exude honeydew. Honeydew feeds the mould. Prune out the worst stems. Wipe small infestations off by hand. Horticultural oil treats a heavy case. Ladybirds and other predators eat scale, so hold the broad spray.
Cinnamon fungus attacks roots in warm wet soil. Leaves wilt and die back fast. No spray saves a badly infected plant, so prevention through free-draining soil, a raised mound, and no overwatering does the work. A plant that collapses in wet soil goes out with its soil, and the spot rests before replanting.
Remove a plant that collapses fast and shows soft bark at the crown. Bag the plant with its soil and bin it. Do not compost infected material, because compost spreads the fungus to healthy beds. Rest the spot for a season and plant a non-Proteaceae shrub there instead. A rested spot with fresh drainage grows a healthy plant next time. A spot replanted at once with another grevillea risks the same collapse.
Wear gloves when handling foliage. Grevillea foliage and sap can irritate sensitive skin, and plant allergies need a plain safety note. Allergies to plants in Australia covers the allergy side in full. This page covers the growing. The allergy page covers the reaction.
10. Fix Yellow Leaves, Legginess, and Frost Damage on Grevilleas
Yellow leaves, bare stems, and frost burn each point to a different fix, so match the symptom to the cause.
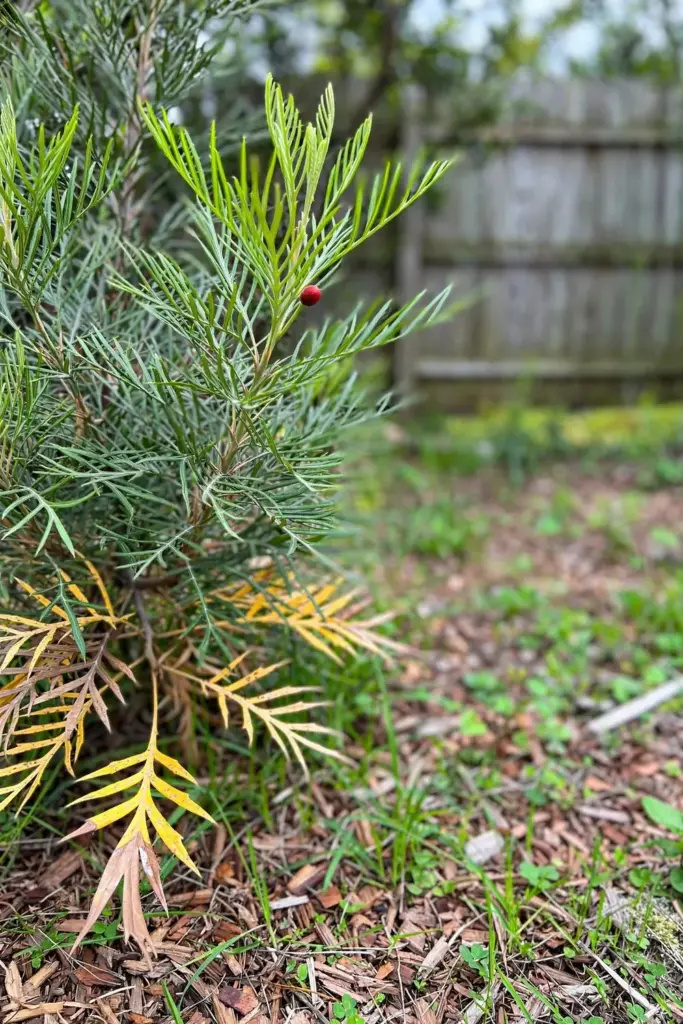
Yellow leaves after feeding point to phosphorus damage. Stop all feeding. Flush the soil with plain water. Wait. New growth shows recovery. Yellow leaves on an old plant in wet soil point to root rot. Check drainage first. Improve the mound or move the plant. Yellow leaves on a shaded plant point to low light. Move the plant or open the canopy above it. One symptom can carry three causes, and the fix follows the cause.
Legginess points to no pruning or low light. Cut back by about one-third to live growth after flowering. Tip-prune new shoots through the season. Move a pot plant into full sun. A leggy plant in shade never fills out, no matter how much fertilizer it gets. Light and pruning fill a plant. Fertilizer does not.
Frost damage shows as blackened tips after a cold night. Leave the damage alone until new growth starts. Cut back to live growth once buds move. A cut made too early removes live wood that would have reshot. A frost-tender cultivar in a cold spot needs a warmer spot or a hardier replacement. A label check before buying beats a rescue after frost.
No flowers points to shade, hard pruning at the wrong time, or heavy feeding. Move a pot into sun. Prune after flowering, not before. Feed native fertilizer once in spring. A plant fed with standard fertilizer grows leaves and drops buds. A plant in sun with a light feed flowers.
| Task | Frequency | Notes |
|---|---|---|
| Tip-prune new shoots | Through flowering | Pinch soft tips to wake side buds |
| Prune flowered stems | After each flowering run | Cut to a leafy shoot below spent blooms |
| Feed native fertilizer | Once in spring | Low-phosphorus product only, watered in |
| Check drainage | After heavy rain | Soil must drain within a day |
| Rake fallen leaves | As they drop | Fallen leaves carry leaf spot spores |
| Inspect for scale | Each month in warm weather | Prune out worst stems, wipe small cases |
Frequently Asked Questions About Growing Grevillea in Australia
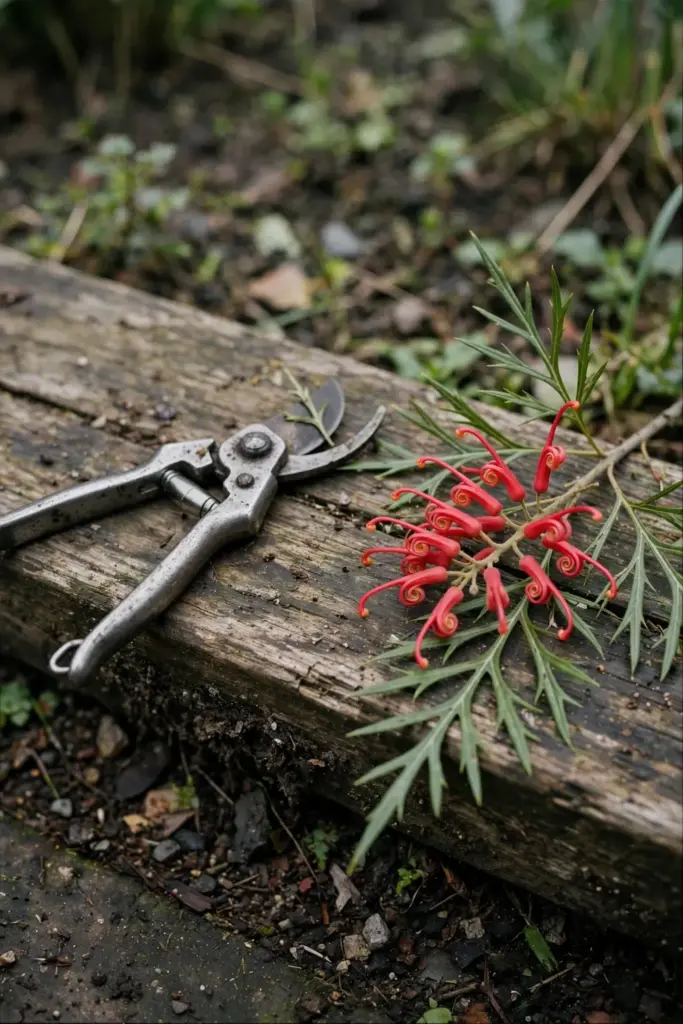
Yellow leaves follow three causes. Phosphorus damage follows a feed with standard fertilizer. Root rot follows wet soil and poor drainage. Low light follows a shady spot. Check the last feed first, then soil moisture, then sun hours. Fix the cause that matches the history. New growth shows recovery once the cause clears.
A pot suits a grevillea when the mix stays lean and drains fast. Use a native potting mix with coarse perlite. Pick a pot one size up from the nursery pot. Water when the mix feels dry a knuckle down. Feed one light native fertilizer dose in spring. Grafted weeping standards suit pots well. Groundcovers suit hanging baskets. Large shrubs outgrow small pots in one season.
Prune lightly after the main flowering run ends. Cut flowered stems back to a leafy shoot below the spent bloom. Tip-prune soft new shoots through the flowering season to wake side buds. Cut back by about one-third when a shrub turns leggy. Never cut past the last live leaf on a branch unless the cultivar reshoots from hard wood. Live buds below the cut carry regrowth.
An established grevillea lives on rainfall in most Australian gardens. Water only in long dry spells. Water at the base in the morning. Wet foliage in humid weather invites leaf spot. A new plant needs weekly water through its first two summers. A plant watered daily through year two grows soft roots that fail in the first dry summer. Taper water as the plant shows new growth.
Grevillea foliage and sap can irritate sensitive skin. Wear gloves and long sleeves when pruning. Keep children from chewing leaves or flowers, and keep pets away from prunings. Teach children to look at flowers without picking them. A plant in a bed behind a low edge keeps small hands off foliage. Data not available on a safe dose for eating grevillea parts, so treat all parts as not for eating.
Close the Season With One Prune and One Feed
A grevillea garden runs on a short yearly rhythm.
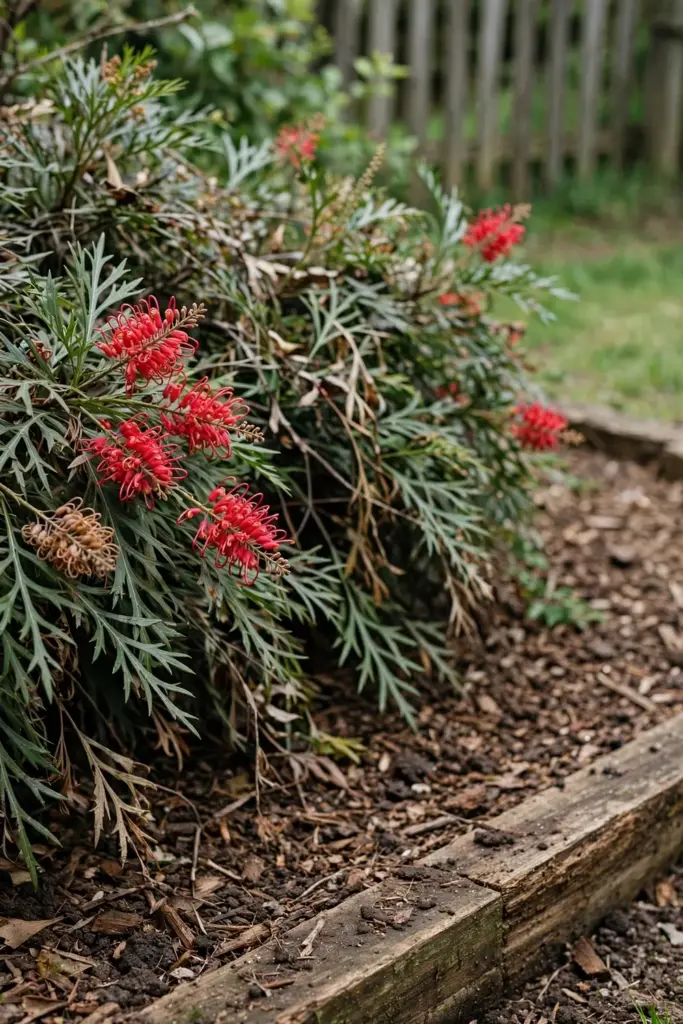
Prune once after the main flowering run, feed once in spring, and water through the first two summers. Check drainage after heavy rain. Rake fallen leaves as they drop. That rhythm holds a grevillea dense, floriferous, and free of most pests. A plant on that rhythm needs no rescue feeds and no hard cuts.
Walk the bed at the end of each season. Note which plant flowered well and which plant stayed thin. A thin plant in shade needs a sunnier spot. A thin plant in wet soil needs a mound. Move the plant or fix the mound, then check feeding when leaves stay yellow. Notes turn one season into the next season plan.
Plant the next grevillea with the same method. Choose form first. Read the label. Plant high on free-draining soil. Water deeply through establishment. Feed low-phosphorus fertilizer once in spring and prune after flowering. A method repeated grows a garden of grevilleas that flower for birds through the year.