
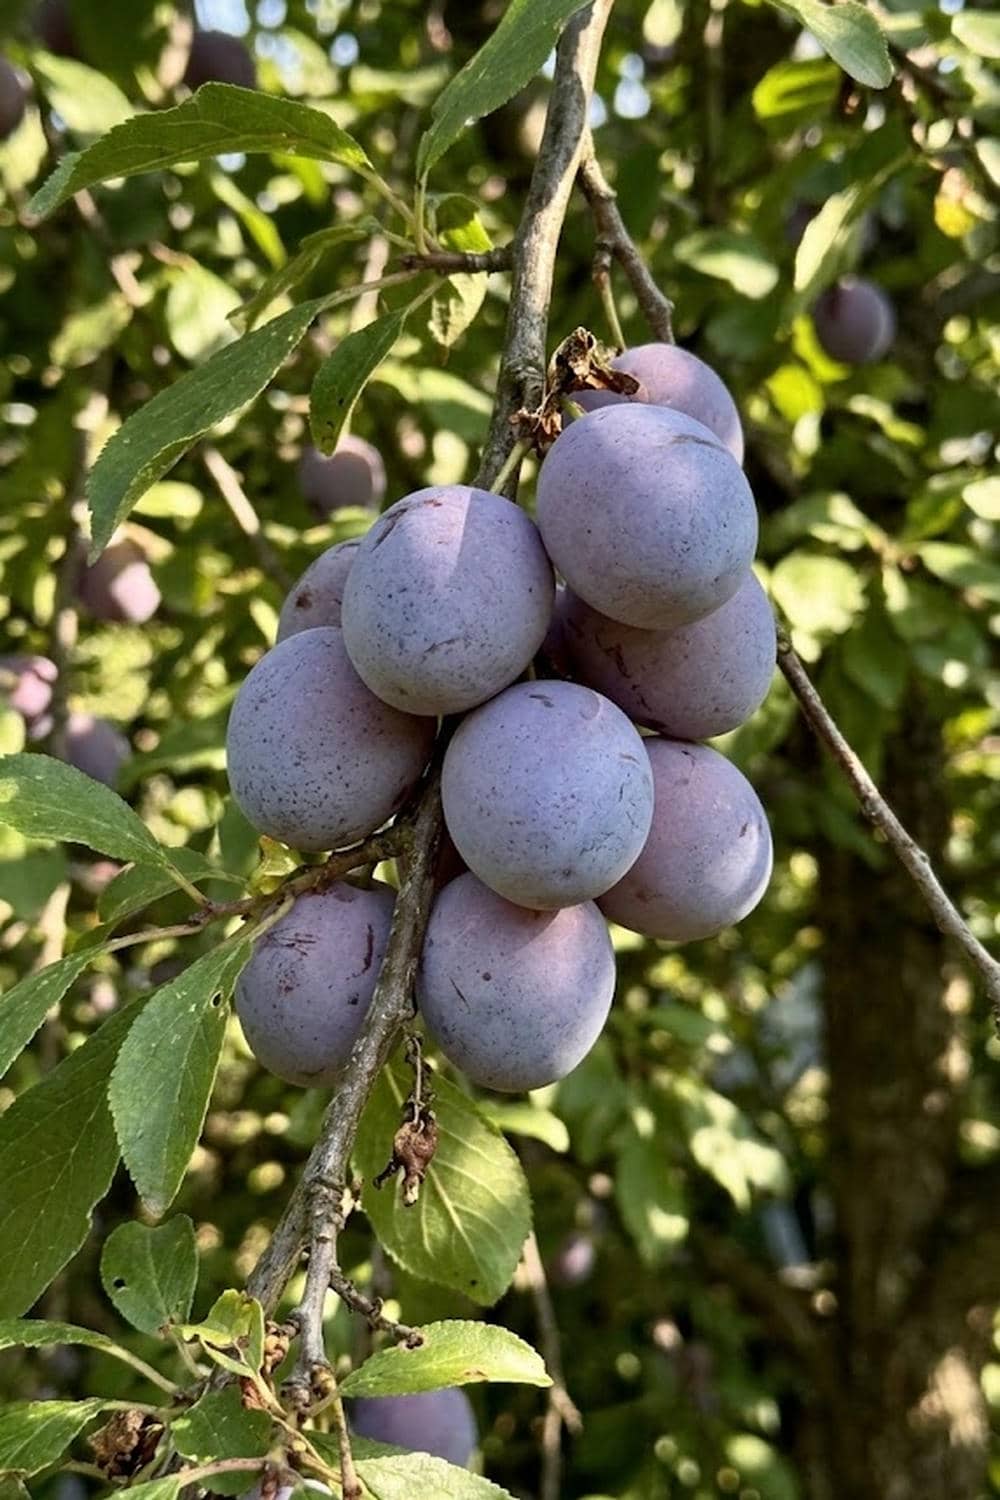

Growing fruit trees sounds romantic until you are staring at a stick in the ground that refuses to produce. You wait years, nurturing your plum sapling, only to get a handful of sour fruits—or worse, nothing at all—because a late frost or the wrong variety choice ruined your efforts. It is deeply frustrating when your investment of time and money yields no sweet reward. Don’t give up on your orchard dreams just yet. I have found that a heavy harvest of Prunus salicina is absolutely possible for home growers when you follow specific, proactive strategies, which I will share with you below.
Selecting the Best Cultivars to Grow Japanese Plum Fruit Successfully
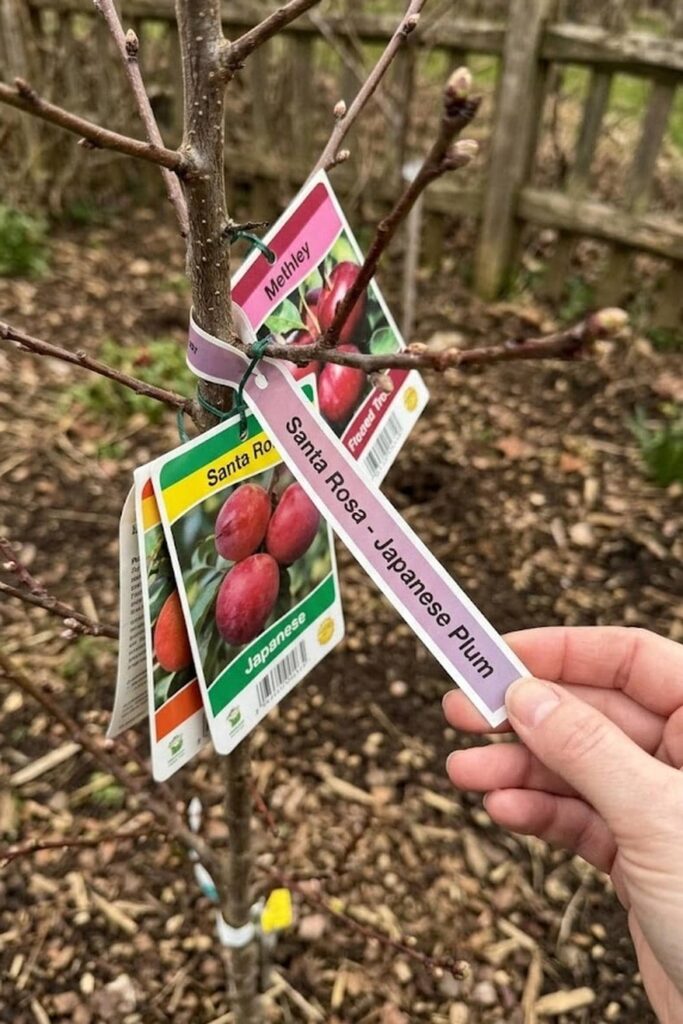
Choosing the right tree is the first critical step I learned, because you cannot fix a fundamental mismatch between your climate and the cultivar later. Japanese plums generally have lower chilling requirements than European types, but you must ensure your selection aligns with your specific winter conditions. These trees bloom very early, so selecting varieties with frost-tolerant blossoms or later bloom times is crucial for protection against yield-killing late spring frosts, which are a major pain point for many fruit growers I talk to.
I always tell people that you should select varieties that not only thrive in your zone but also possess qualities you desire, such as disease resistance or specific harvest windows. The list below highlights several common and reliable Japanese varieties, noting their general traits, which can help you make an informed choice for your personal space.
Top Cultivars for Heavy Harvests
- Santa Rosa: The industry standard for a reason. Self-fertile (though it sets more fruit with a partner), highly productive, and producing large, sweet, red-skinned fruit that tastes incredible right off the tree.
- Satsuma: A classic choice. These produce medium-sized, round fruit with dark red skin and blood-red, wonderfully sweet flesh. This variety absolutely requires a cross-pollinator to set a heavy crop.
- Methley: An early ripener that is partially self-fertile, but like Santa Rosa, you get a much better harvest with another variety. The fruit has purple skin and sweet red flesh.
- Shiro: Known for its heavy, heavy crops. The medium-sized plums have beautiful yellow skin and juicy, sweet yellow flesh. This is an early bloomer that definitely needs a cross-pollinator.
Planning Your Planting Site for Optimal Tree Health
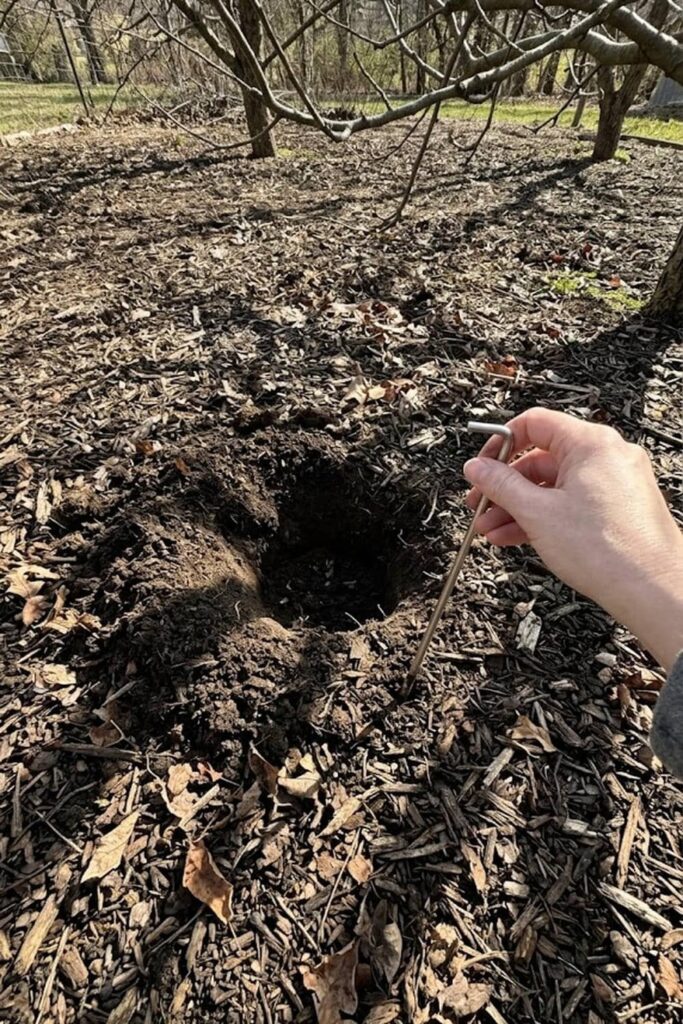
The location where you plant your tree is permanent, so I recommend you plan carefully before any planting. Japanese plums absolutely require full sun—at least 8 hours of direct light—to photosynthesize efficiently, develop strong fruiting spurs, and sweeten the fruit. Planting in shadow or a cramped spot will stunt the growth, making your tree more susceptible to disease and significantly reducing the harvest you can hope for.
When I am assessing a new area, I focus heavily on drainage, which is arguably more critical than sun exposure. Prunus salicina roots will rapidly fail and rot in waterlogged or heavy clay soil that holds onto moisture too tightly, creating a massive, unseen problem. Your soil should be deep, fertile, well-draining loam with a pH between 6.0 and 7.0 for optimal nutrient uptake. Before planting, I suggest you test your soil for proper pH and add organic amendments to improve texture and water flow if your results are less than ideal. Proper site planning ensures your long-term success.
| Factor | Requirement |
| Sun Exposure | Full Sun (8+ hours daily) |
| Soil Type | Deep, well-draining loam |
| Soil pH | 6.0–7.0 |
| Air Drainage | Good; avoid low “frost pockets” |
| Spacing | 12-18 feet (standard); 8-10 feet (dwarf) |
Mastering the Pollination Needs of Japanese Plums
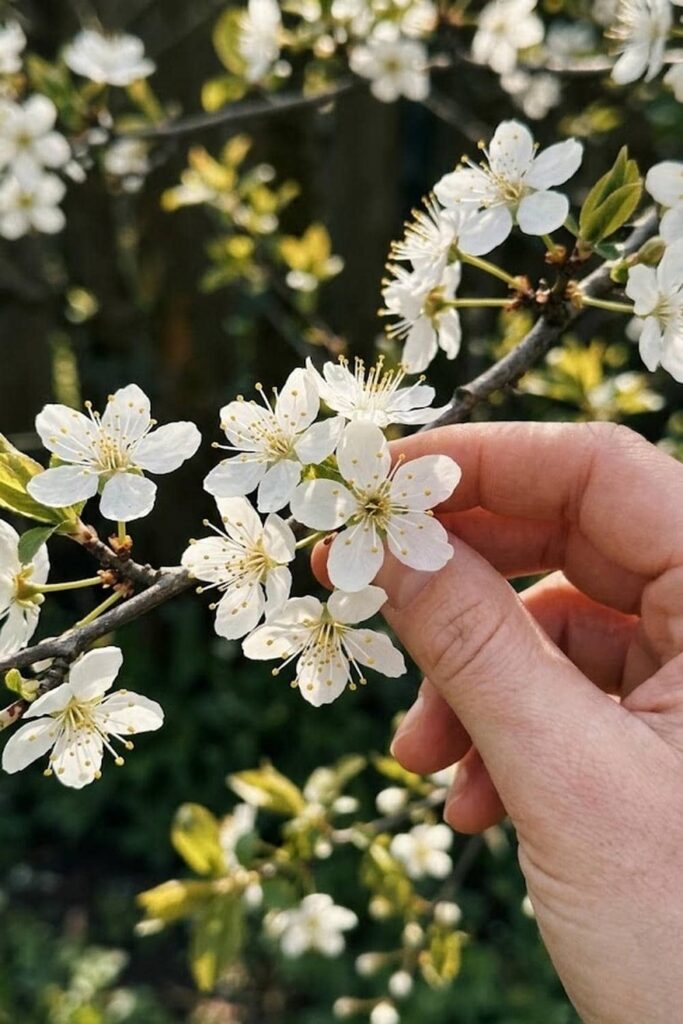
Understanding pollination is the most crucial lesson for anyone aiming to grow Japanese plum fruit successfully, especially because the vast majority of these cultivars are not self-fertile. This means they cannot produce fruit with their own pollen; they absolutely need a compatible “pollenizer” tree planted within a specific distance, typically less than 100 feet. Failure to provide this partner results in trees that may bloom beautifully every spring but never produce a harvest—an incredibly common and preventable issue.
To achieve successful pollination, both trees must belong to the same species (Prunus salicina) or be very specific compatible hybrids, and their blooming periods must overlap significantly. I learned that you cannot plant a random European plum (Prunus domestica) to pollinate a Japanese type; the bloom times and genetics don’t match. Temperature also plays a huge role; if it is too cold or rainy during the short bloom window, bees cannot fly to facilitate the pollen transfer, which will destroy the harvest regardless of variety choice. You must account for these environmental factors.
Key Pollination Rules:
- Pair Varieties: Always research and select two different compatible cultivars.
- Bloom Overlap: Ensure your trees bloom around the same time.
- Distance: Plant the trees relatively close together for bee efficiency.
- Encourage Pollinators: Avoid spraying insecticides during bloom and plant other flowers to attract native bees.
Proper Planting Protocols for Young Saplings
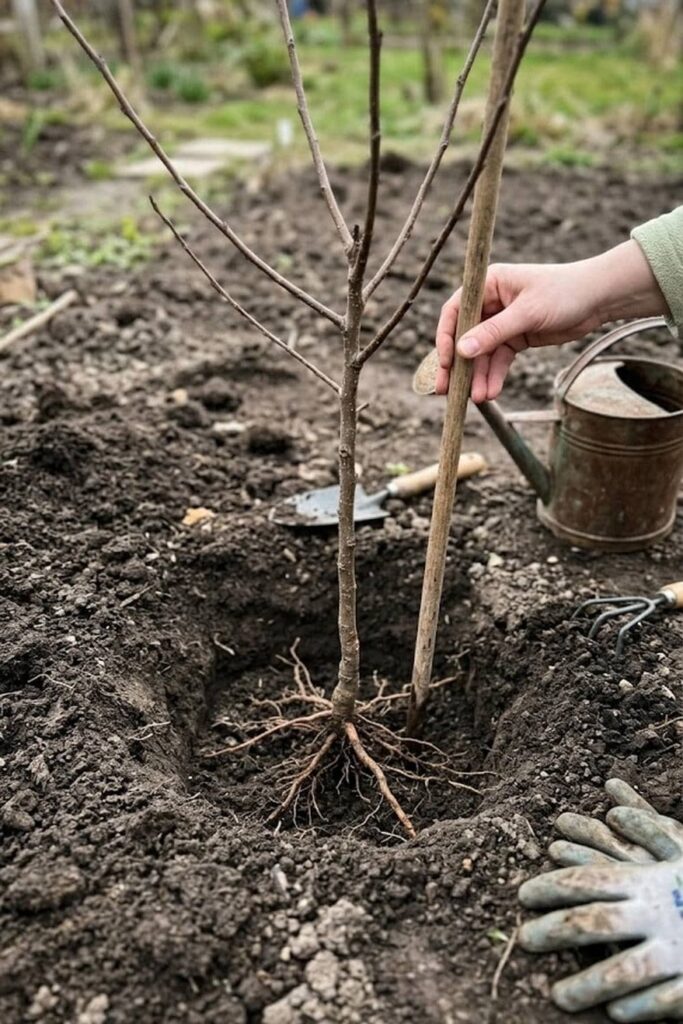
I found that the technique you use during planting sets the tree’s foundation for life. The absolute best time to plant a young plum tree is during its winter dormancy—either late fall or early spring—before any buds have begun to swell. This critical timing allows the roots to establish themselves in the soil and begin absorbing nutrients before they must support new leaf and shoot growth. When I plant, I ensure the hole is twice as wide as the root ball and just as deep, breaking up the surrounding soil to allow easy root expansion.
The most common and devastating mistake you can make is planting the tree too deeply. The graft union—the noticeable bump or curve where the fruiting cultivar meets the rootstock—must remain at least 2 to 3 inches above the final soil line. If you bury this union, the scion (fruiting part) may develop its own roots, potentially overriding the desirable traits of the chosen rootstock, like dwarfism or disease resistance. I suggest you backfill with the native soil, settle it with water rather than compacting it with your boot, and never add fertilizer directly to the planting hole, as this can severely burn tender new roots.
Training and Pruning for an Open Center Canopy
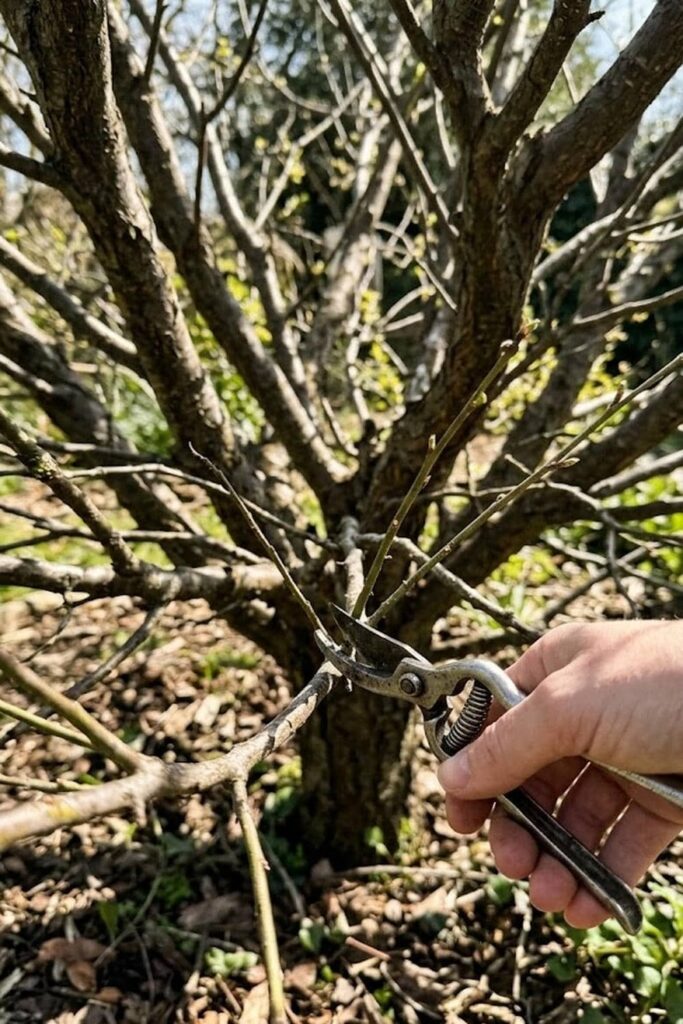
Mastering pruning is the final secret I learned for ensuring a heavy, high-quality Japanese plum harvest. While many new growers are afraid to cut their trees, proactive pruning is essential. Prunus salicina must be trained into an “open center” or “vase” shape, starting from the day it is planted. When you maintain a hollow middle, you encourage essential sunlight and air to reach every interior fruiting spur, resulting in better fruit set and significantly less disease pressure compared to crowded, central-leader trees.
I perform most heavy pruning during late winter dormancy, focusing on structure. You should select three to five strong, well-spaced “scaffold” branches and remove any that are competing or crossing. In addition, you must be relentless about removing fast-growing, vertical branches called “water sprouts” and vigorous suckers emerging from the base. Maintaining this open architecture ensures that the tree directs its limited energy towards fruit production rather than excessive vegetative growth, which you want to prevent.
Pruning Principles for Plum Success:
- Open Center: Always aim for a bowl shape, removing any central trunk.
- Sunlight: Ensure light penetrates to the core of the tree.
- Airflow: Good circulation minimizes fungal disease.
- Lateral Growth: Encourage horizontal fruiting branches rather than vertical non-fruiting shoots.
Feeding and Fertilizing to Boost Fruit Production
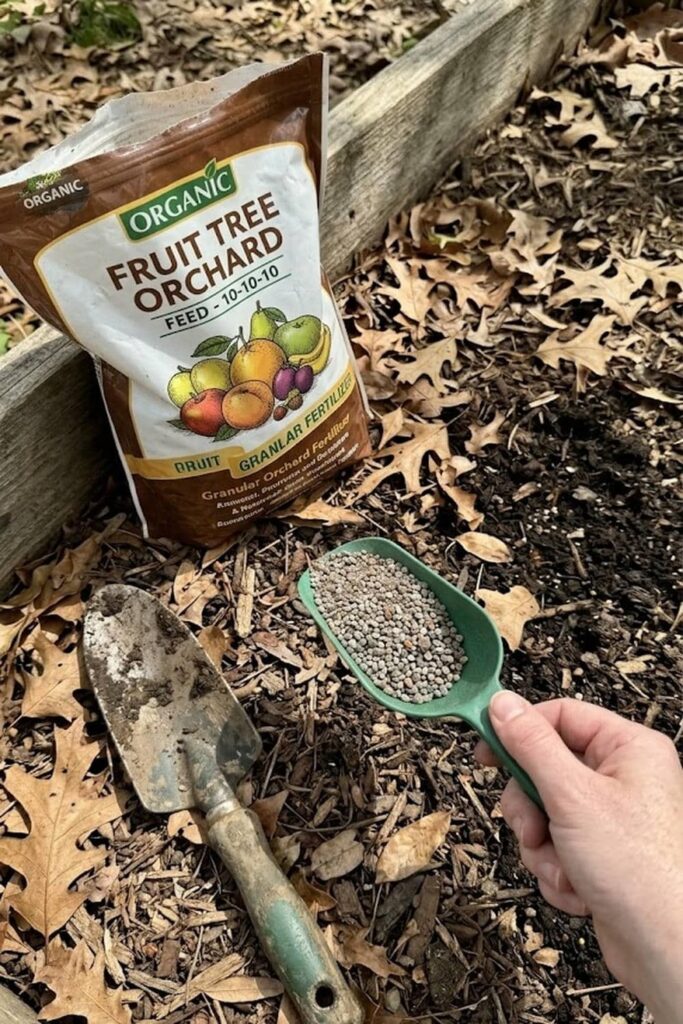
I have found that nutrient management is the engine that drives a heavy harvest, and it is a proactive step that requires you to feed the soil and the tree strategically throughout the season. I begin my fertilization schedule in early spring, just as the buds begin to swell, applying a balanced 10-10-10 or 5-10-10 organic orchard fertilizer. This early application provides the necessary nitrogen for vigorous vegetative growth and the essential phosphorus and potassium needed for flower development and early fruit set, ensuring the tree is not stressed during its peak resource use.
It is very common to over-apply nitrogen, which leads to a massive, lush tree that produces very few fruits because it directs all its energy into leaves rather than reproduction. After the fruit has successfully set, I modify the feeding to prioritize a lower-nitrogen mix with higher potassium, which aids in cellular expansion and enhances the final fruit sweetness, which is your goal. For overall soil health, which minimizes nutritional stress, I also maintain a 3-inch layer of organic mulch around the tree—keeping it several inches away from the trunk—to suppress weeds, conserve moisture, and slowly decompose, adding critical micronutrients and organic matter to the root zone. You will prevent most future yield issues by keeping the tree nutritionally strong and well-hydrated.
Thinning the Fruit for Larger and Sweeter Plums
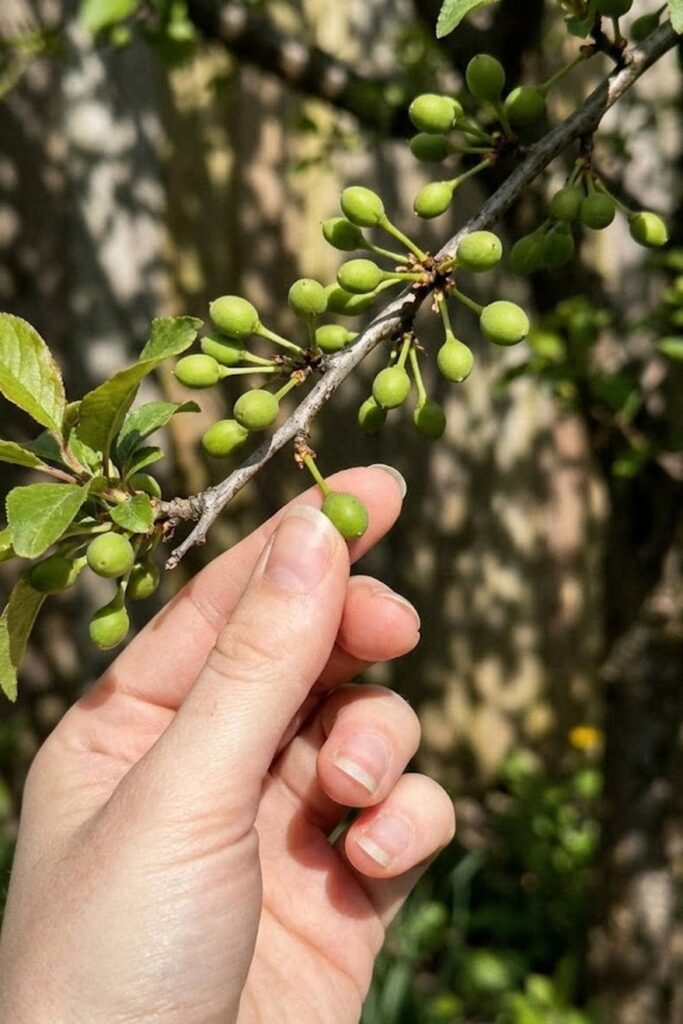
Thinning fruit is the hardest but most essential skill I had to learn, as Prunus salicina is notorious for “over-setting” a crop far larger than it can physically support or ripen. If you fail to thin, the tree will produce hundreds of tiny, bland, seed-filled plums that never properly develop flavor. Even worse, the extreme weight of thousands of fruits frequently causes massive branch failure and structural collapse. You will break the tree’s back rather than increase your harvest. Proactive thinning prevents these catastrophic outcomes.
When the small plums are about the size of a dime—usually a few weeks after bloom—I start the tedious process of removal. You should manually pluck fruitlets so that individual plums are spaced 4 to 6 inches apart on every branch, reducing the crop load by 80 to 90 percent. While this seems incredibly destructive at first, removing most of the competition directs the tree’s photosynthesis and resources into the remaining plums, resulting in a much sweeter, larger, and commercially desirable final harvest. You will protect the tree and ensure the plums are truly worth eating.
Impact of Fruit Thinning
| Parameter | Non-Thinned Trees | Properly Thinned Trees (6-inch Spacing) |
| Fruit Size | Small, variable, mostly skin/pit | Large, uniform, flesh-filled |
| Brix (Sugar) Level | Low, frequently bland | High, complex sweetness |
| Branch Failure | Very High Risk | Minimal Risk |
| Alternate Bearing | Very Likely (Year on/off) | Prevents alternate bearing |
Disease Prevention and Pest Control Strategies
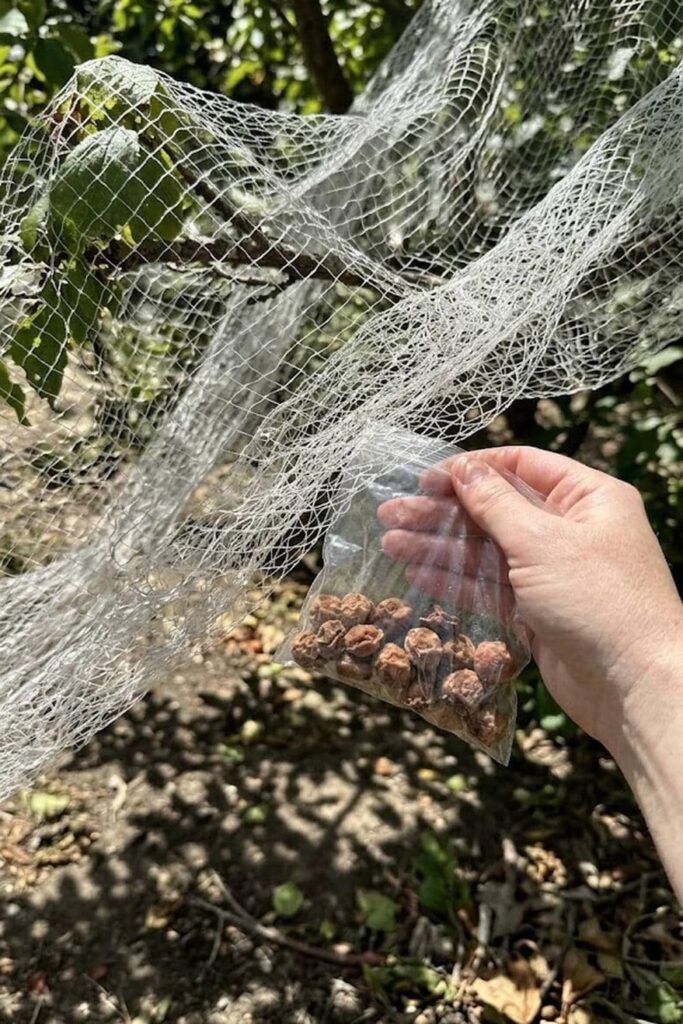
Protecting your investment is a full-season commitment, as Japanese plums are vulnerable to several aggressive fungal diseases and highly destructive insects. The most common and devastating disease I encounter is Brown Rot (Monilinia fructicola), which can rapidly turn a heavy harvest into a mummified, rotting mess just days before ripening. I take a multi-pronged, proactive approach, starting with a dormant spray of copper fungicide in late winter to kill overwintering spores, followed by severe pruning to create maximal internal airflow, which I prevent to decrease fungal risk.
When the fruit begins to size, you must remain vigilant for other issues. Bacterial Canker creates weeping, gummy sores on the bark and will eventually kill the tree if left untreated. For pest control, I rely on sanitation; you should always remove any mummified fruit, fallen plums, or infected wood from the garden, as these act as primary infection vectors for pests and disease. To block physical damage, you should cover your trees with specialized 3/4-inch bird netting just as the plums start to develop their final color, otherwise, local bird and squirrel populations will decimate the crop, destroying the harvest you worked so hard for.
Knowing Exactly When to Harvest Your Plums
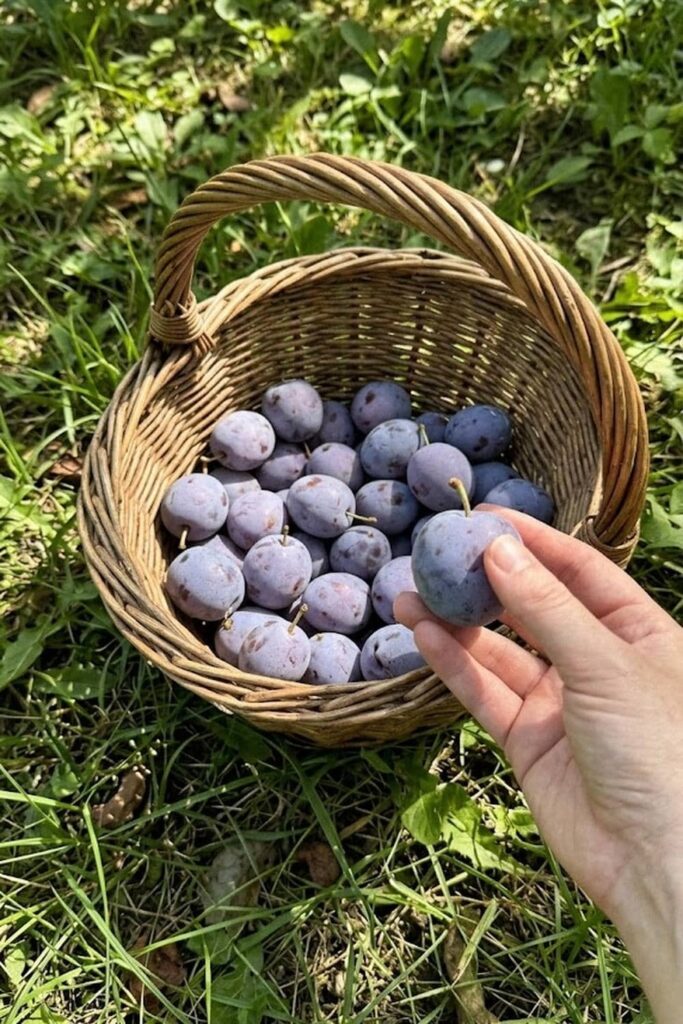
Determining the precise moment to harvest is an art, as Japanese plums reach their peak flavor, sweetness, and complex aroma only when they are fully tree-ripened. Picking too early results in a tart, firm fruit that will never develop its potential, while waiting too long leads to internal breakdown and fruit drop. I learned that you must use multiple sensory cues rather than just looking at the color change, which is often misleading as many varieties “color up” weeks before they are truly ripe and ready to pick.
When the plums appear fully colored, I start my checks. You should gently cradle a plum in your hand; a ripe Japanese plum should have a slight “give” when very softly squeezed. Next, I check the background or “ground color”—the part of the fruit not facing the sun; it should shift from a dull green to a warm yellow or creamy red. I also suggestion you perform a taste test. A ripe plum will separate easily from the stem with a gentle twist and should be incredibly juicy and sweet. Harvesting daily in a natural garden setting ensures you capture every fruit at its absolute peak, maximizing your final yield.
Post-Harvest Care and Winter Dormancy Prep
After the final harvest is complete, I immediately pivot to post-season maintenance, as this reflective period is critical for ensuring the tree remains healthy and productive for the following year. Japanese plums benefit greatly from late-summer or early-fall cleanup to prevent disease vectors. I always rake up and destroy any fallen fruit, leaves, or mummified plums still hanging, as these act as primary infection sites for Prunus salicina pests and fungi overwintering in the soil, preventing common re-infection problems.
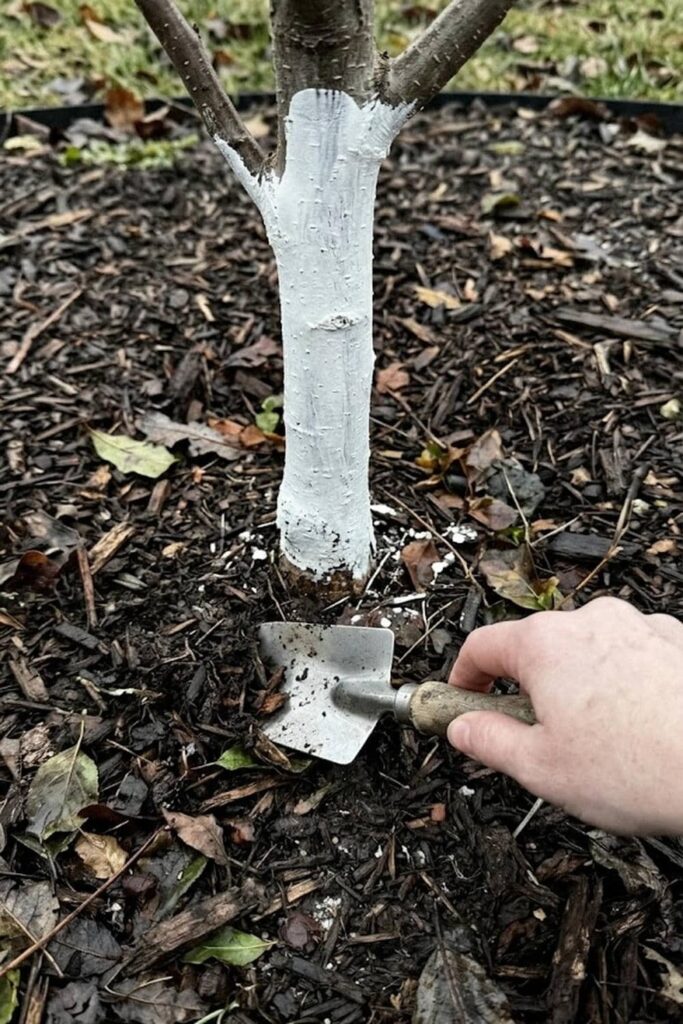
Once the tree is dormant and has lost all its leaves, I begin winter physical protection. In colder zones, the thin bark of young plum trees is susceptible to “sunscald,” where the intense late-winter sun heats the trunk during the day, causing the tissues to split when temperatures rapidly drop at night. You should apply a trunk wrap or white interior latex paint diluted 50:50 with water to reflect this light, keeping the trunk at a stable, cold temperature. I suggest you finalize the season with a new 3-inch layer of wood chip mulch around the base—avoiding the trunk itself—to protect the root system from deep freezes. You are now prepared for dormant pruning and another productive season.
Common Questions About Growing Japanese Plum Fruit (FAQ)
I often field specific questions from fellow growers struggling to maximize their stone fruit yields. Many times, the solutions are simple. Here are direct answers to the most common queries I receive, integrating expert feedback and real-world results, which I have applied to ensure you achieve heavy, rewarding harvests.
FAQ Set
- How long does it take for a Japanese plum tree to bear fruit? You will typically see your first significant harvest 2 to 4 years after planting, especially if you prioritize root development over early feeding, which I prevent to decrease structural stress.
- How to grow Japanese plum fruit for a heavy harvest? Achieve this desire by religiously following proper thinning protocols (spacing to 6 inches) and maintaining a split-application fertilizer schedule, while always protecting from final-color bird theft.
- Can I grow Japanese plums in a small backyard? Yes, you absolutely can by selecting self-fertile or compatible varieties grafted onto specific dwarf rootstocks, such as Citation or Pixy, which limits tree size to about 8 to 10 feet.
- What is the best type of plum? “Best” depends on your climate. I tell people to choose Japanese types for intense, early sweetness, or European types for complex flavor and later ripening.
- Why is my plum tree blooming but not fruiting? The problem is nearly always pollination failure, a late frost destroying blooms, or intense rainy weather blocking bee flight. Plant a compatible pollinizer immediately.
Final Conclusion
I have found that the reflective and slightly informal work of stone fruit cultivation is incredibly rewarding. You should use these detailed protocols as your guide. When you follow these steps, you will prevent the most common future issues, and you will find that a truly heavy harvest of Japanese plums is not just a romantic dream, but a sweet and tangible reality in your own personal space.








