You’ve probably been there—standing in the grocery store, staring at the price of dried beans and thinking, “I could grow these myself!” But then doubt creeps in. Will they even grow in my garden? What if pests ruin them? Or worse, what if I waste time and effort only to end up with a handful of beans? The truth is, growing navy beans isn’t just possible—it’s surprisingly rewarding. These humble legumes are packed with protein, easy to care for, and perfect for beginners or seasoned gardeners alike.
The problem is, many people shy away from growing their own vegetables because they think it’s too complicated or time-consuming. But here’s the thing: navy beans thrive in almost any backyard, container, or raised bed. They’re low-maintenance, nitrogen-fixing powerhouses that improve your soil while feeding you. Still, without the right guidance, mistakes can happen—poor soil prep, overwatering, or pest invasions can derail your efforts. That’s where this guide comes in.
In this article, I’ll walk you through everything you need to know about how to grow navy beans vegetable successfully. From choosing the best location to harvesting your bounty, I’ll share tips, tricks, and personal experiences to help you avoid common pitfalls. By the end, you’ll feel confident enough to start planting and enjoy the satisfaction of growing your own food.
Choosing the Right Location for Navy Beans
When it comes to growing navy beans, location matters—a lot. These plants love sunlight, so picking a spot that gets plenty of it is crucial. Ideally, you want an area that receives at least 6-8 hours of direct sunlight daily. Without enough light, your navy beans might struggle to produce pods, leaving you disappointed come harvest time.
But sunlight isn’t the only factor. Soil quality plays a huge role as well. Navy beans prefer loose, well-draining soil rich in organic matter. If your garden has heavy clay soil, don’t worry—you can amend it with compost or aged manure to improve drainage and fertility. Raised beds are another excellent option if you’re dealing with poor soil conditions. In fact, I’ve found that navy beans thrive exceptionally well in raised beds because the soil warms up faster in spring, giving them a head start. For more on this, check out this guide on creating the perfect raised bed setup.
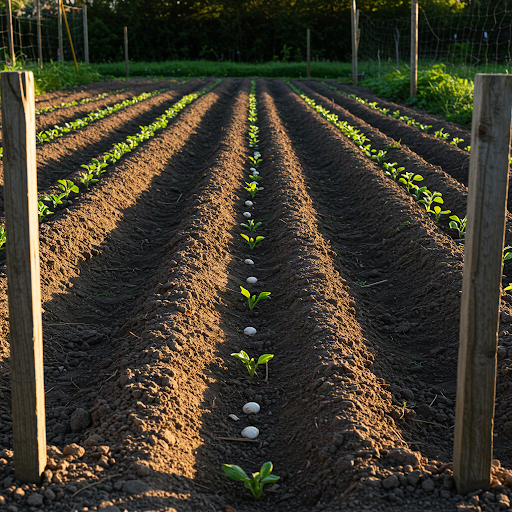
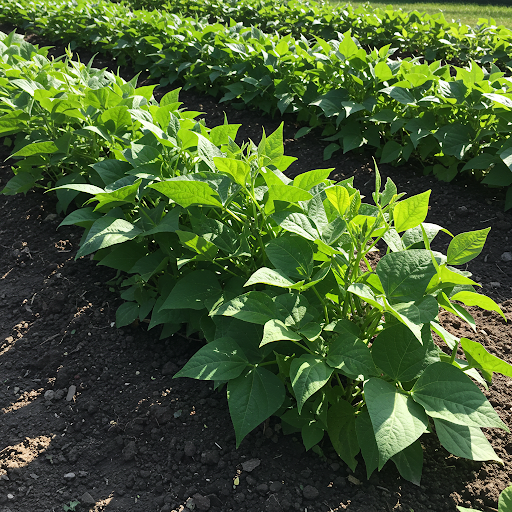
Now, let’s talk about spacing. Navy beans don’t like being crowded—they need room to spread out. Whether you’re planting bush varieties (which stay compact) or pole varieties (which climb), make sure there’s enough space between each plant. Bush beans typically require 2-4 inches between seeds, while pole beans need stakes or trellises spaced about 18-24 inches apart. Proper spacing not only ensures healthy growth but also helps prevent diseases caused by poor air circulation.
One mistake I made early on was planting navy beans too close together. At first, everything looked fine, but as the plants grew, they started competing for resources. Some became stunted, and others developed fungal issues due to lack of airflow. Lesson learned: give them space!
Another tip? Consider companion planting. Certain plants benefit navy beans by repelling pests or enhancing soil health. For example, marigolds are fantastic companions because their strong scent deters aphids and other insects. Corn and cucumbers also pair nicely since they occupy different levels of the garden, maximizing vertical space. You can learn more about effective combinations in this article.
Lastly, think about accessibility. Place your navy bean patch somewhere you can easily reach for watering, weeding, and harvesting. Trust me, bending over awkwardly to pick beans isn’t fun. If mobility is a concern, consider using elevated containers or waist-high raised beds. This small adjustment can make gardening much more enjoyable.
By taking the time to choose the right location now, you’re setting yourself up for success later. Remember, happy plants mean happy harvests!
Preparing the Soil Before Planting
Before you even think about planting navy beans, one of the most critical steps is preparing the soil. Trust me, this part can make or break your harvest. I’ve seen too many gardeners skip over this step, only to end up with stunted plants or poor yields. But don’t worry—I’ll walk you through everything you need to know to get your soil in top shape for growing navy beans vegetable.
Why Soil Preparation Matters
Navy beans are hardy plants, but they still need the right conditions to thrive. The soil acts as their foundation, providing nutrients, water, and stability. If the soil isn’t prepared properly, your navy beans might struggle to establish strong roots, leaving them vulnerable to pests, diseases, and environmental stressors.
The good news? Preparing the soil isn’t rocket science—it just requires some effort and attention to detail. Here’s what you need to focus on:
1. Testing Your Soil
First things first: test your soil. This step is often overlooked, but it’s crucial for understanding what your soil needs. You can buy an affordable soil testing kit online or send a sample to a local extension service for a more detailed analysis.
What you’re looking for:
- pH Level: Navy beans prefer slightly acidic to neutral soil, ideally between 6.0 and 7.5. If your soil is too acidic, you can add lime to raise the pH. If it’s too alkaline, sulfur or organic matter like peat moss can help lower it.
- Nutrient Content: Look for deficiencies in nitrogen, phosphorus, and potassium (NPK). While navy beans fix their own nitrogen, they still benefit from balanced levels of other nutrients.
2. Amending the Soil
Once you know your soil’s condition, it’s time to amend it. Here’s how:
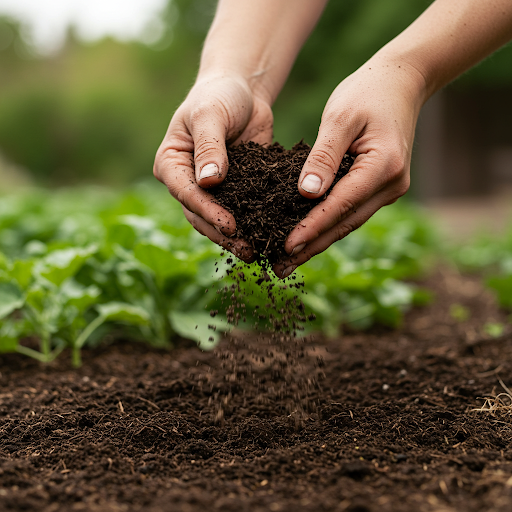
Add Organic Matter
Organic matter improves soil structure, boosts nutrient content, and enhances drainage. Compost is my go-to choice because it’s rich in nutrients and easy to make at home. Spread a 2-3 inch layer of compost over your garden bed and work it into the top 6-8 inches of soil using a garden fork or tiller.
If you don’t have compost, aged manure or leaf mold works well too. Just avoid fresh manure—it can burn young plants.
Improve Drainage
Navy beans hate soggy feet. Poor drainage leads to root rot and other issues, so it’s essential to ensure your soil drains well. If you have heavy clay soil, mix in sand or perlite to loosen it up. Raised beds are another excellent solution if drainage is a persistent problem. For tips on building raised beds, check out this guide.
Aerate the Soil
Compacted soil makes it difficult for roots to spread and absorb nutrients. Use a garden fork or aerator tool to loosen the soil before planting. This step is especially important if you’re working with established garden beds that haven’t been tilled recently.
3. Avoid Over-Fertilizing
One common mistake beginners make is over-fertilizing. Since navy beans are legumes, they have a unique ability to fix nitrogen from the air into the soil. This means they don’t require heavy doses of nitrogen-rich fertilizers. In fact, too much nitrogen can lead to lush foliage but fewer pods.
Instead, focus on phosphorus and potassium, which promote root development and flowering. A balanced fertilizer with an NPK ratio of 5-10-10 is ideal. Apply it sparingly according to the package instructions.
4. Mulching for Moisture Retention
Mulch isn’t just for aesthetics—it plays a vital role in soil health. Adding a 2-3 inch layer of organic mulch (like straw, wood chips, or shredded leaves) helps retain moisture, regulate soil temperature, and suppress weeds.
Weeds compete with navy beans for nutrients and water, so keeping them under control is essential. Mulch also prevents soil erosion, which is particularly helpful during heavy rains. For more on preventing soil erosion, take a look at this article.
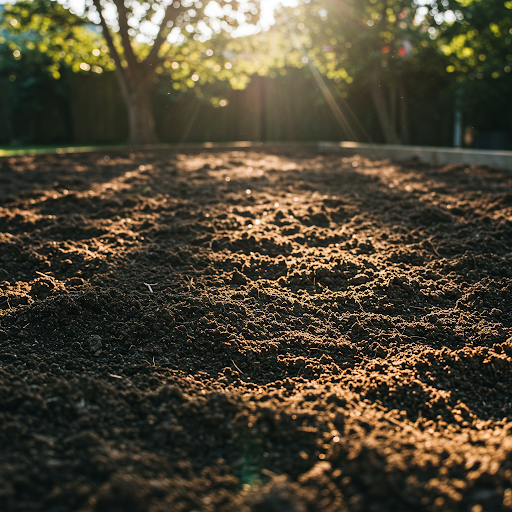
5. Timing Your Soil Prep
Timing matters when it comes to soil preparation. Ideally, you should prep your soil a few weeks before planting. This gives amendments like compost time to integrate fully and allows the soil to settle.
If you’re starting in early spring, wait until the ground has thawed and dried out a bit. Working wet soil can damage its structure, making it harder for roots to grow. To test if your soil is ready, grab a handful and squeeze it. If it crumbles easily, you’re good to go. If it forms a muddy ball, give it a little more time.
Case Study: My First Attempt at Growing Navy Beans
When I first started growing navy beans, I underestimated the importance of soil prep. I planted them in unamended clay soil, thinking they’d adapt. Big mistake! The plants grew slowly, and the pods were small and sparse.
The next year, I took the time to amend the soil with compost and sand. I also added a layer of mulch to retain moisture. The difference was night and day—my navy beans flourished, producing plump pods and a bountiful harvest. Lesson learned: never skimp on soil prep!
Key Takeaways
To summarize, here’s a quick checklist for preparing your soil:
| Step | Action | Why It’s Important |
| Test Your Soil | Check pH and nutrient levels | Ensures optimal growing conditions |
| Add Organic Matter | Mix in compost or aged manure | Improves soil fertility and structure |
| Improve Drainage | Loosen compacted soil; consider raised beds | Prevents root rot and promotes healthy growth |
| Mulch | Apply a 2-3 inch layer of organic mulch | Retains moisture and suppresses weeds |
| Time It Right | Prep soil a few weeks before planting | Allows amendments to integrate fully |
How to Plant Navy Bean Seeds Correctly
Planting navy beans might seem straightforward, but there’s more to it than just tossing seeds into the ground and hoping for the best. Trust me—I’ve been there, and I’ve learned that attention to detail during planting can make all the difference in your harvest. In this section, we’ll dive deep into how to plant navy bean seeds correctly, covering everything from seed preparation to spacing and depth. By the end of this, you’ll feel confident about getting those little seeds into the soil with precision.
Why Proper Planting Matters
Navy beans are resilient plants, but they still need the right start to thrive. If you plant them too shallow, they might dry out before germinating. Plant them too deep, and they could struggle to break through the soil surface. Similarly, overcrowding can lead to competition for nutrients, water, and sunlight, which weakens the plants and reduces yields.
Proper planting isn’t just about following instructions—it’s about setting your navy beans up for success from day one. Let’s break down each step so you can get it right.
1. Preparing Your Seeds
Before you even touch the soil, take a moment to prepare your navy bean seeds. This small step can significantly improve germination rates and give your plants a head start.
Soak the Seeds Overnight
One trick I swear by is soaking navy bean seeds overnight before planting. This softens the outer shell, allowing water to penetrate more easily and kickstart the germination process. Simply place the seeds in a bowl of room-temperature water and let them sit for 8-12 hours. Don’t soak them for longer than that, as they can become waterlogged and rot.
Check for Quality
Not all seeds are created equal. Before planting, inspect your navy bean seeds for cracks, discoloration, or signs of mold. Discard any damaged seeds—they’re unlikely to sprout. High-quality seeds mean healthier plants, so invest in reputable suppliers if possible.
For more tips on selecting the best seeds, check out this guide.
2. Timing Your Planting
Timing is everything when it comes to growing navy beans vegetable. These warm-season crops won’t tolerate frost, so it’s crucial to wait until the danger of frost has passed and the soil temperature has warmed up.
Ideal Soil Temperature
Navy beans germinate best when the soil temperature is between 50°F (10°C) and 85°F (29°C). Use a soil thermometer to check the temperature at a depth of 2-3 inches. If the soil is too cold, the seeds may rot instead of sprouting.
When to Plant
In most regions, the ideal time to plant navy beans is after the last spring frost. For a continuous harvest, consider succession planting—sowing new seeds every two weeks throughout the growing season. This ensures you’ll have fresh beans ready to pick over an extended period.
3. Spacing and Depth
Now let’s talk about spacing and depth—two critical factors that directly impact your navy beans’ growth.
Spacing Requirements
Navy beans need enough room to spread their roots and leaves without competing with neighboring plants. Here’s what you need to know:
- Bush Varieties: Space seeds 2-4 inches apart within rows, with rows spaced 18-24 inches apart.
- Pole Varieties: Space seeds 4-6 inches apart along a trellis or support structure.
Overcrowding leads to poor air circulation, which increases the risk of fungal diseases like powdery mildew. On the flip side, spacing them too far apart wastes valuable garden space and reduces overall yield.
Planting Depth
The general rule of thumb is to plant navy bean seeds about 1 inch deep. This depth provides enough protection from drying winds while still being shallow enough for young shoots to emerge easily.
If you’re planting in heavy clay soil, go slightly shallower—about ½ inch—to prevent the seeds from struggling to break through dense layers. Conversely, in sandy soil, you can plant a bit deeper—up to 1½ inches—to ensure the seeds stay moist during germination.
4. Sowing Techniques
There are a few different ways to sow navy bean seeds, depending on your gardening style and available tools.
Direct Sowing
The simplest method is direct sowing, where you plant the seeds directly into the garden bed. This works well for navy beans since they don’t transplant easily due to their delicate root systems. To direct sow:
- Create furrows in the soil using a hoe or your finger, ensuring they’re evenly spaced and the correct depth.
- Drop the seeds into the furrows, spacing them according to the guidelines above.
- Cover the seeds gently with soil, pressing down lightly to ensure good seed-to-soil contact.
Raised Beds and Containers
If you’re using raised beds or containers, the process is similar, but pay extra attention to drainage. Navy beans hate soggy conditions, so make sure your containers have drainage holes and use a lightweight potting mix designed for vegetables.
For inspiration on container gardening, take a look at this article.
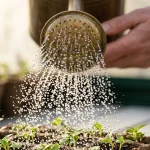
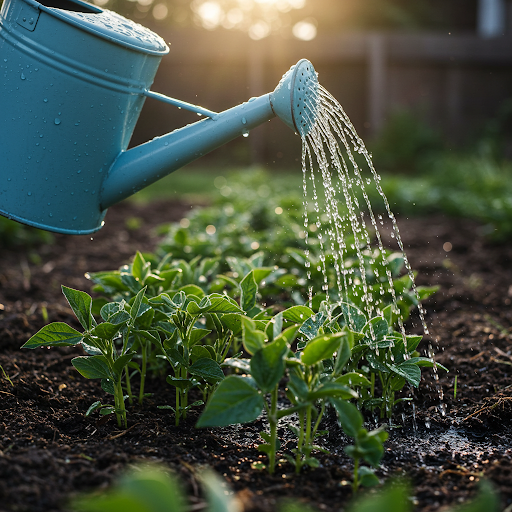
5. Watering After Planting
Once your navy bean seeds are in the ground, it’s important to keep the soil consistently moist—but not waterlogged—until they germinate. Overwatering can cause the seeds to rot, while underwatering can dry them out completely.
Watering Tips
- Use a gentle spray nozzle or watering can to avoid disturbing the seeds.
- Aim to water deeply once or twice a week rather than giving frequent shallow waterings. This encourages strong root development.
- Mulch around the planting area to retain moisture and regulate soil temperature.
6. Marking Rows
It’s easy to lose track of where you’ve planted your navy beans, especially if you’re growing multiple crops in the same bed. To avoid accidentally digging them up or stepping on them, mark your rows clearly.
DIY Row Markers
You don’t need fancy tools to mark your rows. Sticks, stones, or even repurposed plant labels work perfectly. Just make sure they’re visible and durable enough to withstand weather conditions.
Case Study: My First Mistake with Spacing
When I first started growing navy beans, I made the rookie mistake of planting them too close together. At first, everything seemed fine—the seeds sprouted quickly, and the young plants looked healthy. But as they grew larger, problems arose. The crowded plants struggled to access enough sunlight, and airflow was severely restricted.
By midsummer, I noticed yellowing leaves and signs of fungal disease. It was a tough lesson, but it taught me the importance of proper spacing. The next year, I followed the recommended guidelines, and the difference was remarkable. My navy beans were healthier, produced more pods, and required less maintenance overall.
Key Takeaways
To summarize, here’s a quick checklist for planting navy bean seeds:
| Step | Action | Why It’s Important |
| Prepare Seeds | Soak overnight; discard damaged seeds | Improves germination rates and ensures quality |
| Time Planting | Wait until soil reaches 50°F (10°C) | Prevents frost damage and promotes healthy growth |
| Space Correctly | Follow spacing guidelines for bush/pole types | Reduces competition and improves air circulation |
| Plant at Right Depth | 1 inch deep (adjust for soil type) | Ensures proper emergence and root establishment |
| Water Consistently | Keep soil moist but not waterlogged | Supports germination and early growth |
| Mark Rows Clearly | Use DIY markers or labels | Helps track planting locations and prevents damage |
Watering and Caring for Your Navy Beans
Once your navy beans are planted, the real work begins—caring for them as they grow. This stage is where many gardeners either thrive or stumble, and I’ll be honest: I’ve been on both sides of that coin. Overwatering, underwatering, neglecting pests, or forgetting to mulch—these are all mistakes I’ve made in the past. But through trial and error, I’ve learned how to care for navy beans vegetable properly, and now I’m here to share those lessons with you.
In this section, we’ll dive deep into watering schedules, pest management, fertilization tips, and other essential care practices. By the end, you’ll have a clear roadmap for keeping your navy beans healthy and productive throughout the growing season.
Why Consistent Care Matters
Navy beans might be hardy, but they’re not invincible. Proper care ensures they grow strong, produce abundant pods, and resist diseases and pests. Neglecting even one aspect—like watering or pest control—can lead to stunted growth, poor yields, or total crop failure.
The good news? Caring for navy beans isn’t complicated. It’s all about consistency and attention to detail. Let’s break it down step by step.
1. Watering Your Navy Beans
Watering is one of the most critical aspects of caring for navy beans. Too much water can drown the roots, while too little can stress the plants and reduce pod production. Here’s how to get it right:
How Often to Water
- Seedling Stage: Navy bean seedlings need consistent moisture to establish strong roots. Water them every 2-3 days, ensuring the top inch of soil stays damp but not soggy.
- Mature Plants: Once the plants are established (about 4-6 weeks after planting), you can reduce watering frequency to once or twice a week, depending on weather conditions.
How Much Water to Use
- Aim for 1 inch of water per week, including rainfall. If you’re unsure how much water your plants are getting, use a rain gauge or a simple tuna can placed near the plants to measure.
- During hot, dry spells, increase watering slightly to prevent the soil from drying out completely.
Best Time to Water
- Water early in the morning when temperatures are cooler. This gives the plants time to absorb moisture before the heat of the day sets in. Avoid watering late in the evening, as wet foliage overnight can encourage fungal diseases.
Signs of Overwatering or Underwatering
- Overwatered Plants: Yellowing leaves, wilting despite moist soil, and root rot are signs of overwatering.
- Underwatered Plants: Dry, brittle leaves, slow growth, and wilting during the hottest part of the day indicate underwatering.
For more tips on preventing waterlogged soil, check out this guide.
2. Mulching for Moisture Retention
Mulch is one of the simplest yet most effective tools for caring for navy beans. It helps retain soil moisture, regulate temperature, and suppress weeds—all of which contribute to healthier plants.
Types of Mulch
- Organic Mulch: Straw, shredded leaves, grass clippings, or wood chips work well. They break down over time, adding nutrients back into the soil.
- Inorganic Mulch: Plastic sheeting or landscape fabric can also be used, especially in raised beds. However, these don’t improve soil health like organic options do.
How to Apply Mulch
- Spread a 2-3 inch layer of mulch around the base of your navy bean plants, keeping it a few inches away from the stems to prevent rot.
- Replenish the mulch as needed throughout the growing season to maintain its effectiveness.
3. Fertilizing Your Navy Beans
As mentioned earlier, navy beans are nitrogen-fixing legumes, meaning they produce their own nitrogen. However, they still benefit from small amounts of phosphorus and potassium to support root development and flowering.
When to Fertilize
- At Planting: Mix a balanced, low-nitrogen fertilizer (like 5-10-10) into the soil before planting.
- Mid-Season Boost: If your plants seem sluggish or pale, side-dress them with compost or a light application of phosphorus-rich fertilizer.
Avoid Over-Fertilizing
- Too much fertilizer, especially nitrogen, can lead to lush foliage but fewer pods. Stick to minimal applications and rely on organic matter like compost for steady nutrient release.
4. Managing Pests and Diseases
Pests and diseases can quickly derail your navy bean harvest if left unchecked. The key is early detection and prevention.
Common Pests
- Aphids: Tiny insects that cluster on the undersides of leaves, sucking sap and spreading diseases. Spray them off with a strong jet of water or use insecticidal soap.
- Bean Beetles: These pests chew holes in leaves and pods. Handpick them or use row covers to protect young plants.
- Spider Mites: Look for fine webbing and yellow spots on leaves. Increase humidity around the plants and spray with neem oil.
Common Diseases
- Powdery Mildew: White, powdery patches on leaves caused by poor air circulation. Improve spacing and avoid overhead watering. Treat with a baking soda solution or fungicide.
- Root Rot: Caused by overly wet soil. Ensure proper drainage and avoid overwatering.
For more advice on pest-free gardening, take a look at this article.
5. Supporting Pole Varieties
If you’re growing pole navy beans, providing support is essential. Without a trellis or stakes, the vines will sprawl across the ground, making them more vulnerable to pests and diseases.
Options for Support
- Trellises: Build a sturdy trellis using bamboo poles or metal fencing. Train the vines to climb by gently weaving them through the supports.
- Stakes: Drive wooden or metal stakes into the ground and tie the vines loosely with twine as they grow.
Benefits of Vertical Gardening
- Saves space, improves air circulation, and makes harvesting easier. For inspiration, check out this guide.
6. Weeding and Maintenance
Weeds compete with navy beans for nutrients, water, and sunlight. Regular weeding keeps your plants healthy and reduces the risk of pests and diseases.
Tips for Effective Weeding
- Pull weeds by hand or use a hoe to cut them off at the root.
- Mulch heavily to suppress weed growth.
- Avoid disturbing the soil too much, as this can bring dormant weed seeds to the surface.
Case Study: My Battle with Powdery Mildew
One summer, I noticed white, powdery patches appearing on my navy bean leaves. At first, I ignored it, thinking it would go away on its own. Big mistake! Within weeks, the affected leaves turned yellow and fell off, leaving my plants struggling to photosynthesize.
I researched the problem and discovered it was powdery mildew, likely caused by overcrowding and overhead watering. I immediately pruned the affected leaves, improved air circulation by spacing the plants further apart, and switched to watering at the base. I also sprayed the remaining leaves with a homemade baking soda solution.
The effort paid off—my navy beans recovered and produced a decent harvest. Lesson learned: never ignore signs of disease!
Key Takeaways
To summarize, here’s a quick checklist for caring for navy beans:
| Task | Action | Why It’s Important |
| Water Consistently | Provide 1 inch of water weekly | Prevents stress and promotes healthy growth |
| Mulch Regularly | Apply 2-3 inches of organic mulch | Retains moisture and suppresses weeds |
| Fertilize Sparingly | Use low-nitrogen fertilizer | Supports flowering without encouraging foliage |
| Monitor for Pests | Check plants weekly for signs of infestation | Early detection prevents major damage |
| Support Pole Varieties | Use trellises or stakes | Keeps vines off the ground and improves airflow |
| Weed Frequently | Remove weeds by hand or hoe | Reduces competition for resources |
Managing Pests and Diseases in Navy Beans
Even the most carefully tended navy bean plants can fall victim to pests and diseases if you’re not vigilant. I’ve learned this lesson the hard way—there’s nothing more frustrating than discovering a thriving patch of navy beans suddenly under attack by aphids or powdery mildew. But don’t worry; with the right knowledge and proactive measures, you can protect your navy beans vegetable from these threats and ensure a healthy harvest.
In this section, we’ll explore common pests and diseases that affect navy beans, how to identify them, and practical steps to manage or prevent them. By the end, you’ll feel equipped to handle any challenges that come your way.
Why Pest and Disease Management Matters
Pests and diseases are more than just nuisances—they can devastate your navy bean crop if left unchecked. Not only do they weaken plants, but they also reduce yields and compromise the quality of your harvest. The good news is that many issues can be prevented or controlled with early detection and proper care.
Let’s break down the most common culprits and how to deal with them effectively.
1. Common Pests Affecting Navy Beans
Navy beans attract a variety of pests, each with its own feeding habits and damage patterns. Here’s what to watch out for:
Aphids
- What They Do: These tiny insects cluster on the undersides of leaves, sucking sap and spreading viruses.
- Signs of Infestation: Yellowing leaves, stunted growth, and sticky honeydew residue.
- How to Control: Spray them off with a strong jet of water or use insecticidal soap. For severe infestations, introduce natural predators like ladybugs.
Bean Beetles
- What They Do: Adult beetles chew holes in leaves, while larvae feed on roots.
- Signs of Infestation: Skeletonized leaves and damaged pods.
- How to Control: Handpick adults and use row covers to protect young plants. Neem oil can also deter them.
Spider Mites
- What They Do: These microscopic pests suck plant juices, causing leaves to turn yellow and dry out.
- Signs of Infestation: Fine webbing and speckled leaves.
- How to Control: Increase humidity around plants and spray with neem oil or a miticide.
For more advice on keeping pests at bay, check out this guide.
2. Common Diseases Affecting Navy Beans
Diseases can be just as damaging as pests, often spreading quickly through your garden. Here are some of the most common ones:
Powdery Mildew
- What It Is: A fungal disease that appears as white, powdery patches on leaves.
- Causes: Poor air circulation and high humidity.
- How to Prevent: Space plants properly and avoid overhead watering. Treat affected areas with a baking soda solution or fungicide.
Root Rot
- What It Is: A condition caused by overly wet soil, leading to decaying roots.
- Signs of Trouble: Wilting despite moist soil and brown, mushy roots.
- How to Prevent: Ensure proper drainage and avoid overwatering. Raised beds are an excellent solution for preventing root rot. Learn more about combating waterlogging here.
Anthracnose
- What It Is: A fungal disease that causes dark, sunken lesions on pods and stems.
- Signs of Trouble: Discolored spots and shriveled pods.
- How to Prevent: Rotate crops annually and remove infected plant debris. Fungicides may help in severe cases.
3. Prevention Strategies
Preventing pests and diseases is always easier than treating them. Here are some strategies to keep your navy beans healthy:
Crop Rotation
Rotating crops disrupts the life cycles of pests and diseases. Avoid planting navy beans in the same spot year after year. Instead, alternate with unrelated crops like corn or cucumbers.
Companion Planting
Certain plants repel pests or attract beneficial insects. Marigolds, for example, deter aphids and nematodes. Corn provides shade and support for climbing varieties. For inspiration, take a look at this article.
Mulching
Mulch not only retains moisture but also acts as a barrier against soil-borne diseases. Keep it a few inches away from plant stems to prevent rot.
Regular Inspections
Check your plants weekly for signs of trouble. Early detection allows you to address issues before they escalate.
4. Natural Remedies for Pest Control
If you prefer organic methods, here are some natural remedies to try:
Neem Oil
Neem oil is a versatile tool for controlling pests and fungal diseases. Mix it with water according to the package instructions and spray it on affected plants.
Diatomaceous Earth
This fine powder kills soft-bodied insects like aphids and spider mites by dehydrating them. Sprinkle it around the base of your plants or dust it directly onto leaves.
Homemade Garlic Spray
Blend garlic cloves with water, strain the mixture, and spray it on plants to repel pests. Garlic’s strong scent deters many insects.
5. When to Use Chemical Controls
While natural methods are preferable, sometimes chemical controls are necessary for severe infestations. If you choose this route, follow these guidelines:
- Use Targeted Products: Choose pesticides or fungicides specifically designed for the pest or disease you’re dealing with.
- Apply Sparingly: Overuse can harm beneficial insects and pollinators. Always follow label instructions.
- Time Applications Carefully: Apply treatments in the evening when bees and other pollinators are less active.
Case Study: My Battle with Bean Beetles
One summer, I noticed small holes appearing in my navy bean leaves. At first, I thought it was minor damage from wind or rain, but soon entire leaves were skeletonized. Upon closer inspection, I discovered bean beetles feasting on my plants.
I immediately removed the adults by hand and sprayed the remaining plants with neem oil. To prevent future outbreaks, I installed row covers over young seedlings and rotated my crops the following season. The effort paid off—my navy beans recovered beautifully and produced a bountiful harvest. Lesson learned: act fast and stay proactive!
Key Takeaways
To summarize, here’s a quick checklist for managing pests and diseases:
| Issue | Prevention Tips | Treatment Options |
| Aphids | Encourage beneficial insects; avoid overfertilizing | Spray with water or insecticidal soap |
| Bean Beetles | Use row covers; rotate crops | Handpick adults; apply neem oil |
| Spider Mites | Increase humidity; keep plants well-watered | Spray with neem oil or miticide |
| Powdery Mildew | Improve air circulation; avoid overhead watering | Use baking soda solution or fungicide |
| Root Rot | Ensure proper drainage; avoid overwatering | Remove affected plants; improve soil drainage |
| Anthracnose | Rotate crops; remove infected debris | Apply fungicide if necessary |
Harvesting and Storing Navy Beans

After weeks of careful planting, watering, and pest management, the moment you’ve been waiting for has finally arrived: it’s time to harvest your navy beans. This is where all your hard work pays off—literally! There’s nothing quite like the satisfaction of picking plump, healthy pods from plants you’ve nurtured from seed. But harvesting isn’t just about picking; it’s also about timing and technique.
In this section, I’ll guide you through how to identify when navy beans vegetable are ready to harvest, the best techniques for gathering them, and tips for storing your bounty so it stays fresh and flavorful. By the end, you’ll feel confident about maximizing your yield and enjoying the fruits (or beans!) of your labor.
Why Timing Your Harvest Matters
Timing is everything when it comes to harvesting navy beans. Pick them too early, and the beans inside the pods may not be fully developed. Wait too long, and the pods could dry out or become damaged by pests or weather. Knowing exactly when to harvest ensures you get the best flavor, texture, and nutritional value from your crop.
Let’s break down how to tell when your navy beans are ready and the steps to take for a successful harvest.
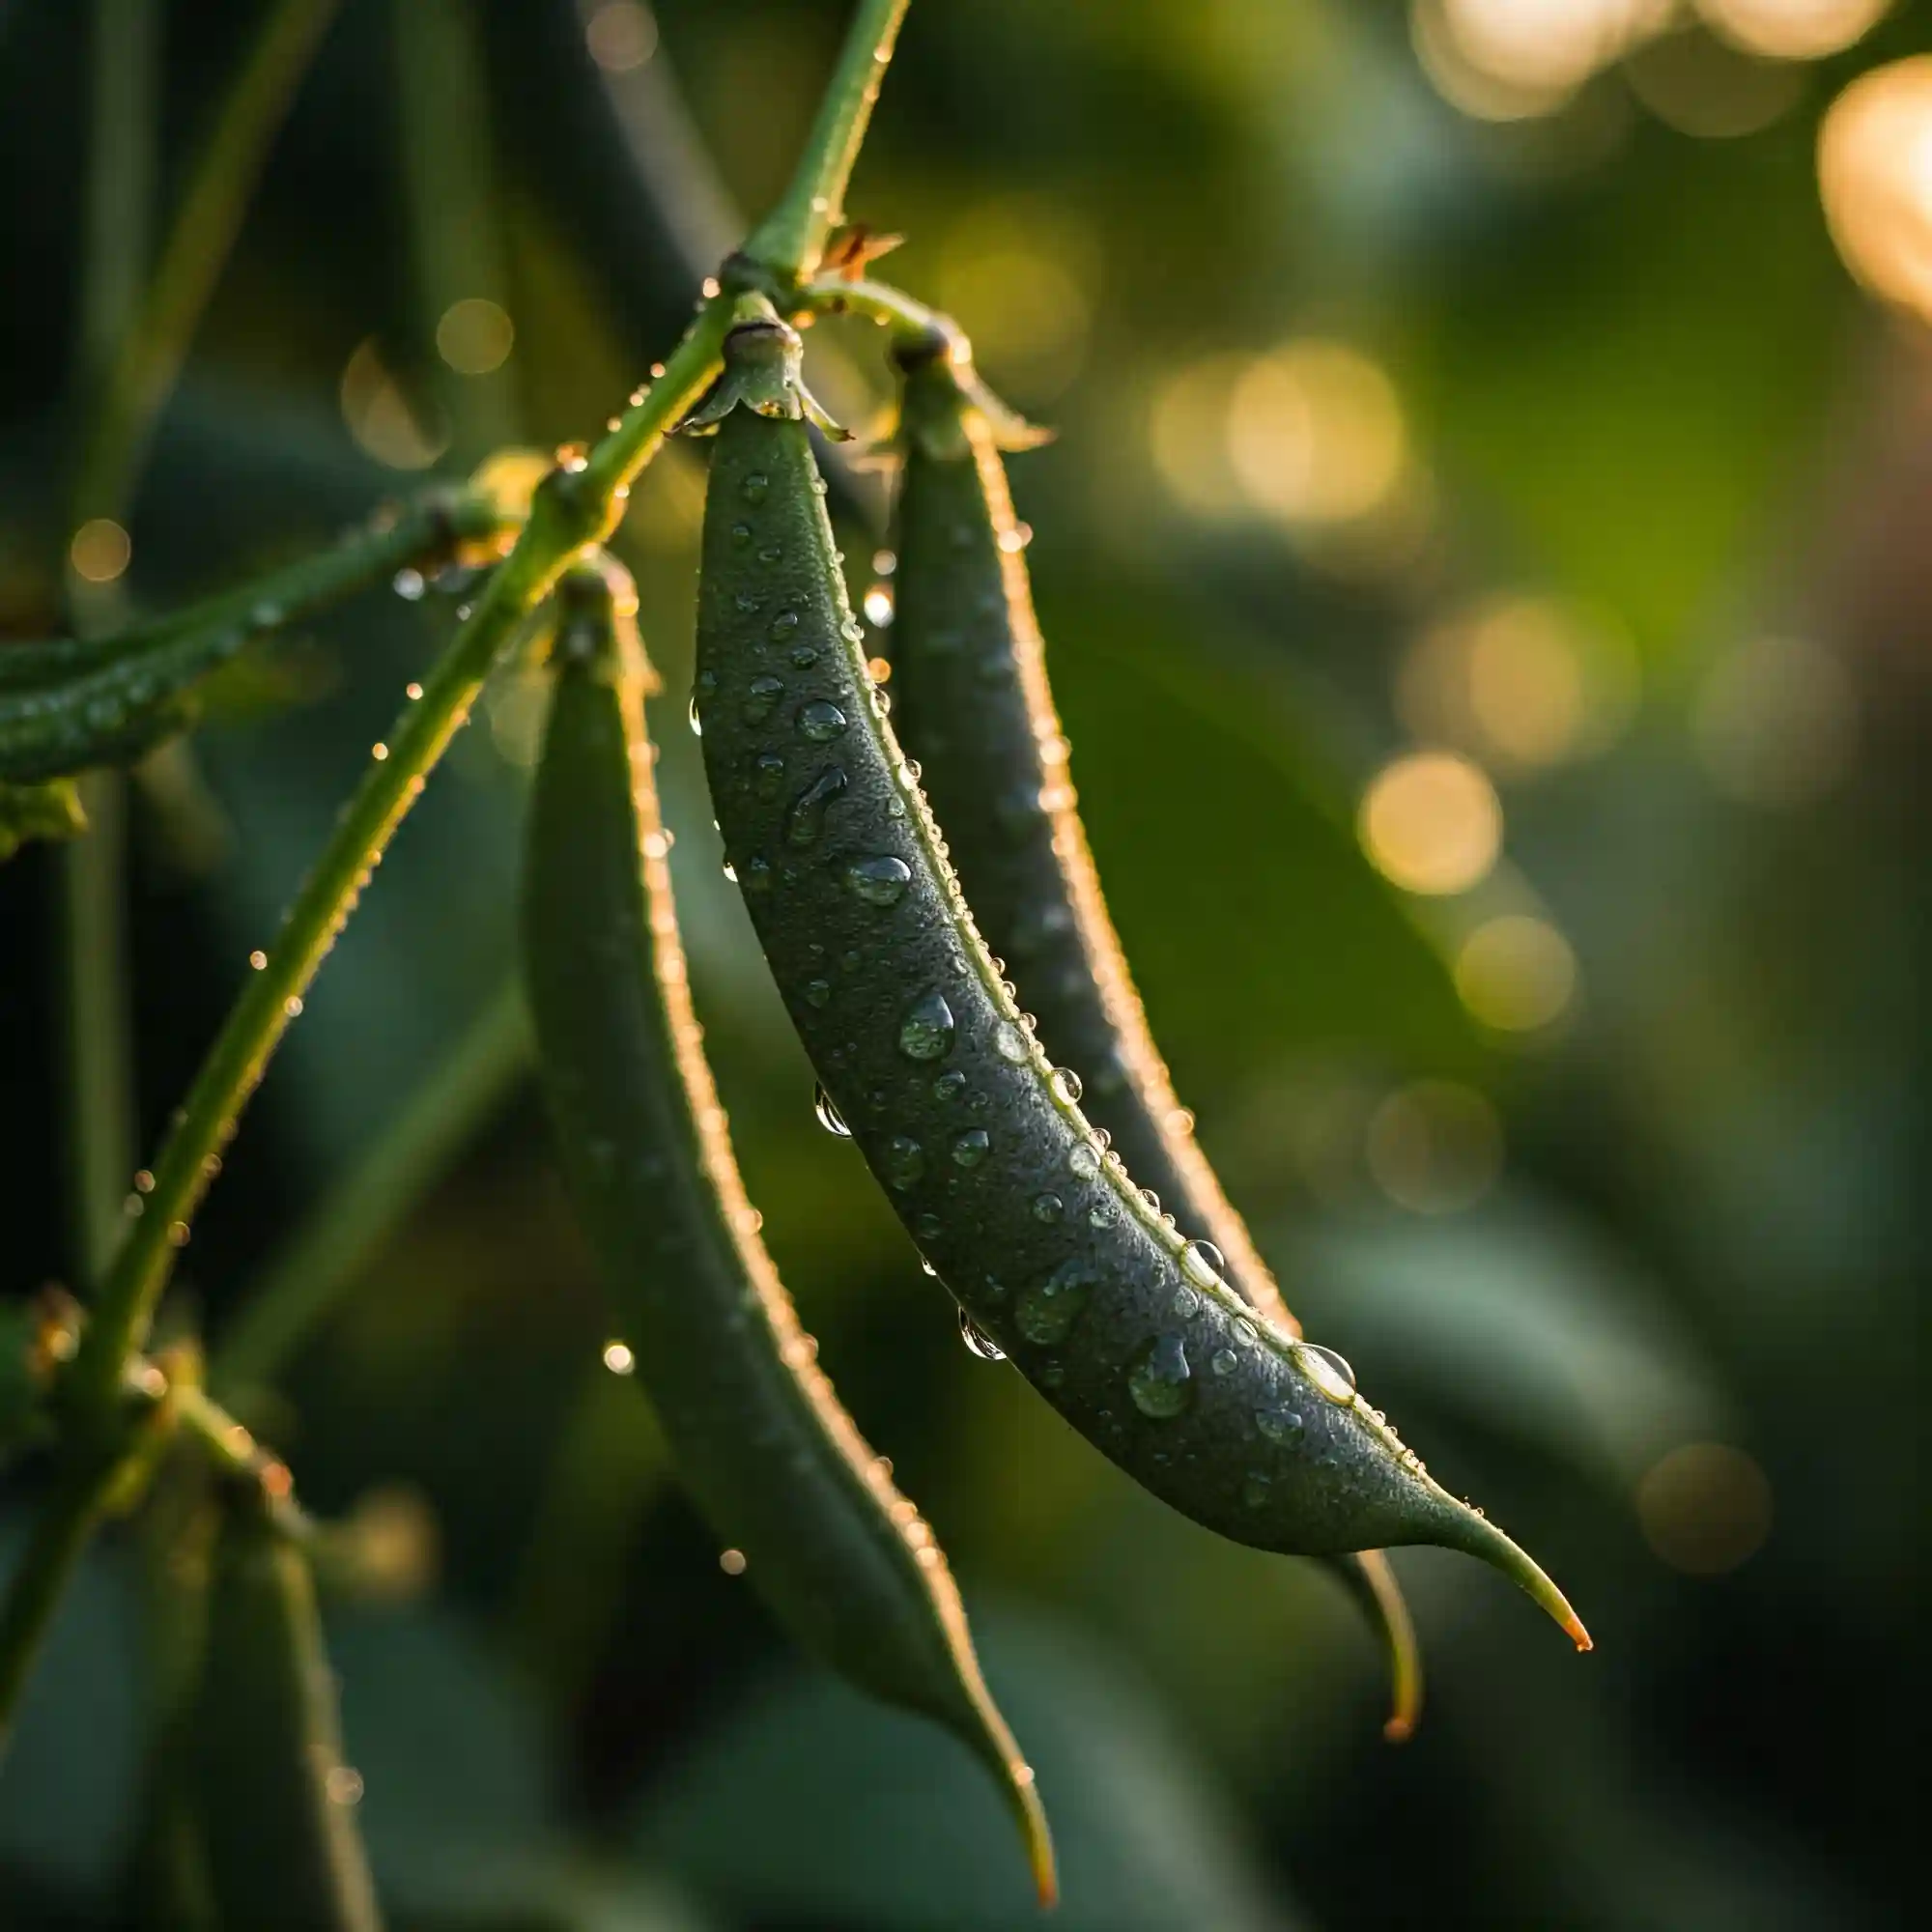
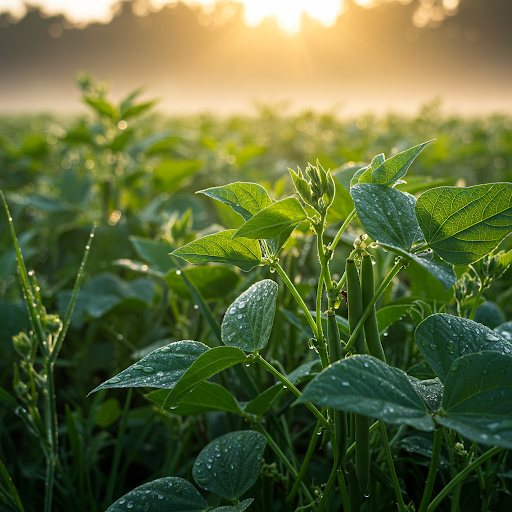
1. Identifying When Navy Beans Are Ready
Navy beans are typically ready to harvest 60-90 days after planting, depending on the variety and growing conditions. Here’s how to know they’re ready:
Visual Cues
- Pod Color: The pods will turn from green to yellow or brown as they mature. For fresh eating, pick them while still slightly green. For dried beans, wait until the pods are fully dry and brittle.
- Pod Texture: Mature pods feel firm and papery to the touch. If they’re still soft and fleshy, give them more time.
Plant Behavior
- Leaves Turning Yellow: As the plant nears the end of its life cycle, the leaves will begin to yellow and drop. This is a natural sign that the pods are reaching maturity.
Test a Pod
- Open a pod to check the beans inside. For fresh use, the beans should be plump and tender. For drying, they should rattle loosely within the pod.
2. Harvesting Techniques
Once you’ve determined your navy beans are ready, it’s time to harvest them. The method depends on whether you’re growing bush or pole varieties and whether you plan to use the beans fresh or dried.
For Fresh Beans
- Use scissors or pruning shears to cut the pods from the plant. Pulling them off by hand can damage the stems and reduce future yields.
- Handle the pods gently to avoid bruising the beans inside.
For Dried Beans
- Allow the pods to dry completely on the plant if possible. Once dry, pull up the entire plant and hang it upside down in a cool, dry place to finish curing.
- Alternatively, if rain or frost threatens before the pods are fully dry, harvest the entire plant and hang it indoors to complete the drying process.
Pro Tip
If you’re growing both bush and pole varieties, stagger your planting dates to extend the harvest season. This way, you won’t have all your beans ready at once, making storage easier.
3. Storing Your Navy Beans
Proper storage is key to preserving the quality of your navy beans, whether you’re keeping them fresh or dried. Here’s how to do it right:
Fresh Beans
- Refrigerate fresh navy beans in a perforated plastic bag or container lined with damp paper towels. They’ll stay crisp for up to a week.
- Avoid washing the beans until you’re ready to cook them, as excess moisture can cause spoilage.
Dried Beans
- Shell the beans from their pods by hand or by threshing (lightly beating the pods against a hard surface).
- Winnow the beans to remove debris by pouring them from one container to another in front of a fan—the breeze will blow away chaff and dirt.
- Store dried beans in airtight containers, such as glass jars or food-grade plastic bins, in a cool, dark place. Properly stored, they can last up to a year.
For more tips on preserving your harvest, check out this guide.
4. Troubleshooting Common Issues
Even with careful planning, things don’t always go perfectly during harvest. Here’s how to handle common challenges:
Pests During Harvest
- Birds and squirrels love dried beans. Protect your crop by covering plants with netting or row covers as the pods mature.
Weather Challenges
- Rain can delay drying and promote mold growth. If wet weather strikes, bring plants indoors to finish drying.
Incomplete Drying
- If some beans aren’t fully dry, spread them out on a baking sheet and let them air-dry for a few more days before storing.
5. Creative Ways to Use Your Harvest
Now that you’ve successfully harvested and stored your navy beans, it’s time to enjoy them! These versatile legumes can be used in countless recipes, from soups and stews to salads and casseroles.
Cooking Tips
- Soak dried navy beans overnight before cooking to reduce cooking time and improve digestibility.
- Add herbs like thyme or bay leaves to enhance flavor during cooking.
Recipe Ideas
- Navy Bean Soup: A classic comfort dish made with onions, carrots, celery, and smoked ham hocks.
- Bean Salad: Toss cooked navy beans with cherry tomatoes, cucumbers, feta cheese, and a lemon vinaigrette.
- Hummus Alternative: Blend navy beans with garlic, olive oil, and tahini for a creamy dip.
For inspiration, take a look at this article on creative ways to incorporate homegrown produce into your meals.
Case Study: My First Big Harvest
The first time I harvested navy beans, I was so excited that I picked them too early. The beans were small and tough, and I ended up having to toss most of them. It was disappointing, but it taught me the importance of patience.
The following year, I paid closer attention to the signs of maturity. I waited until the pods turned yellow and felt papery before harvesting. The result? Plump, flavorful beans that were perfect for soups and stews. Lesson learned: trust the process and let nature do its thing!
Key Takeaways
To summarize, here’s a quick checklist for harvesting and storing navy beans:
| Task | Action | Why It’s Important |
| Check Pod Maturity | Look for color changes and test a pod | Ensures optimal flavor and texture |
| Use Proper Tools | Use scissors or pruning shears | Prevents damage to plants and pods |
| Dry Thoroughly | Cure pods indoors if necessary | Prevents mold and extends shelf life |
| Store Correctly | Use airtight containers in a cool, dark place | Keeps beans fresh and pest-free |
| Experiment with Recipes | Try new dishes to enjoy your harvest | Makes gardening rewarding and fun |
Tips for Growing Navy Beans in Containers
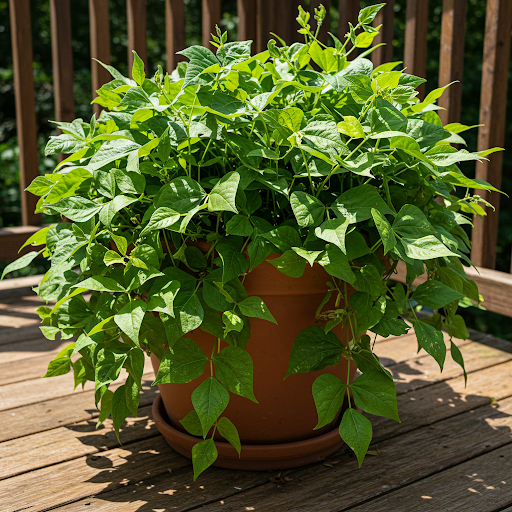
Growing navy beans in containers is an excellent option for gardeners with limited space, such as those living in apartments or urban areas. Container gardening not only saves space but also allows you to control the growing environment more effectively. However, there are specific considerations and techniques to ensure your navy beans thrive in a confined space. In this section, we’ll explore everything you need to know about successfully growing navy beans vegetable in containers—from selecting the right container to managing watering and support systems.
Why Choose Container Gardening?
Container gardening offers several advantages, especially for urban gardeners or those with poor soil conditions. Here’s why it’s worth considering:
- Space Efficiency: You can grow navy beans on balconies, patios, or even windowsills.
- Soil Control: Use high-quality potting mix tailored to the needs of navy beans.
- Pest Management: Easier to monitor and manage pests compared to traditional gardens.
- Mobility: Move containers to optimize sunlight exposure or protect plants from harsh weather.
However, container gardening also comes with challenges, such as limited root space and faster drying soil. With proper planning, these issues can be easily managed.
1. Choosing the Right Container
The container you choose plays a crucial role in the success of your navy beans. Here’s what to look for:
Size
- Minimum Depth: Navy beans require at least 8-12 inches of soil depth to accommodate their roots. For bush varieties, a 5-gallon container is ideal. Pole varieties need larger containers, such as 10-15 gallons, to support their climbing habit.
- Width: Ensure the container is wide enough to allow proper spacing between plants (2-4 inches for bush types and 4-6 inches for pole types).
Material
- Plastic: Lightweight and affordable, but may degrade over time in direct sunlight.
- Ceramic: Stylish but heavy; ensure it has drainage holes.
- Fabric Pots: Promote air pruning and prevent root circling, making them an excellent choice for container gardening.
- Wooden Planters: Durable and aesthetically pleasing, but they may rot over time if not properly treated.
For inspiration on container options, check out this guide.
2. Selecting the Right Soil
Navy beans need well-draining, nutrient-rich soil to thrive in containers. Avoid using garden soil, as it can compact and hinder root growth. Instead, opt for a high-quality potting mix designed for vegetables.
Soil Mix Recipe
If you prefer to make your own mix, combine:
- 2 parts peat moss or coconut coir
- 1 part perlite or vermiculite
- 1 part compost
This blend ensures proper drainage while retaining enough moisture for healthy growth. For more tips on soil preparation, take a look at this article.
3. Providing Adequate Drainage
Proper drainage is critical when growing navy beans in containers. Without it, waterlogged soil can lead to root rot.
Drainage Tips
- Ensure your container has multiple drainage holes at the bottom.
- Place a layer of gravel or broken pottery shards at the base to improve drainage.
- Elevate the container slightly using pot feet or bricks to allow excess water to escape freely.
For more advice on preventing waterlogging, refer to this guide.
4. Watering Techniques
Containers dry out faster than garden beds, so consistent watering is essential. Overwatering and underwatering are common pitfalls, but they can be avoided with careful attention.
How Often to Water
- Check the soil daily by inserting your finger into the top inch. If it feels dry, it’s time to water.
- Water deeply until water drains out of the bottom of the container. This ensures the roots receive adequate moisture.
Watering Tools
- Use a watering can with a narrow spout to avoid disturbing the soil surface.
- Consider installing a drip irrigation system for larger container setups.
For more tips on watering seedlings, check out this article.
5. Supporting Pole Varieties
If you’re growing pole navy beans, providing support is essential. Without it, the vines will sprawl and become tangled, reducing airflow and increasing the risk of disease.
Support Options
- Trellises: Insert a trellis into the container before planting. Train the vines to climb as they grow.
- Stakes: Use sturdy bamboo or metal stakes and tie the vines loosely with twine.
- Tomato Cages: These work well for smaller containers and provide ample support for climbing plants.
For creative ideas on trellises, take a look at this guide.
6. Fertilizing Your Container-Grown Navy Beans
While navy beans fix their own nitrogen, they still benefit from supplemental nutrients, especially in containers where nutrients can deplete quickly.
Fertilizer Recommendations
- Use a balanced, slow-release fertilizer at planting time.
- Supplement with a liquid fertilizer every 2-3 weeks during the growing season.
Avoid over-fertilizing, as this can lead to excessive foliage growth at the expense of pod production.
7. Managing Sunlight
Navy beans require full sun to produce a bountiful harvest. Place your containers in a location that receives at least 6-8 hours of direct sunlight daily.
Maximizing Sunlight
- Rotate the containers every few days to ensure all sides of the plant receive equal exposure.
- If natural light is limited, consider using grow lights to supplement.
For more tips on indoor vegetable gardening, check out this guide.
8. Monitoring for Pests and Diseases
Even in containers, navy beans can fall victim to pests and diseases. Regular inspections help catch problems early.
Common Issues
- Aphids: Spray them off with water or use insecticidal soap.
- Powdery Mildew: Improve air circulation and avoid overhead watering.
- Root Rot: Ensure proper drainage and avoid overwatering.
For more advice on pest-free gardening, refer to this article.
9. Harvesting from Containers
Harvesting navy beans from containers is similar to harvesting from garden beds. Follow the same guidelines for identifying maturity and picking pods.
Pro Tip
To extend your harvest, practice succession planting by sowing new seeds every 2-3 weeks. This ensures a continuous supply of fresh beans throughout the growing season.
Case Study: My First Container Garden
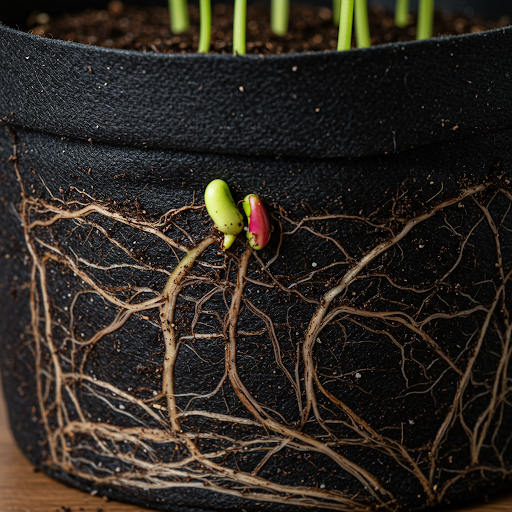
When I first tried growing navy beans in containers, I underestimated the importance of drainage. I used a decorative ceramic pot without proper holes, and within weeks, my plants developed root rot. It was a disappointing experience, but it taught me the value of choosing the right container and ensuring proper drainage.
The next year, I switched to fabric pots and added a layer of gravel at the bottom. The difference was remarkable—my navy beans grew vigorously and produced a generous harvest. Lesson learned: never compromise on drainage!
Key Takeaways
To summarize, here’s a quick checklist for growing navy beans in containers:
| Task | Action | Why It’s Important |
| Choose the Right Container | Select a deep, wide container with drainage holes | Prevents root binding and waterlogging |
| Use Quality Soil | Opt for a well-draining potting mix | Supports healthy root development |
| Provide Support | Use trellises or stakes for pole varieties | Keeps vines off the ground and improves airflow |
| Water Consistently | Check soil daily and water deeply | Prevents stress and promotes healthy growth |
| Fertilize Sparingly | Use balanced, slow-release fertilizer | Supplements nutrients without overfeeding |
| Maximize Sunlight | Place containers in full sun | Ensures optimal photosynthesis |
| Monitor for Pests | Inspect plants weekly | Early detection prevents major damage |
Troubleshooting Common Challenges in Growing Navy Beans in Containers
While growing navy beans in containers offers numerous benefits, it also comes with its own set of challenges. From limited root space to pest invasions, these issues can sometimes feel overwhelming, especially for beginners. However, with the right knowledge and proactive measures, you can overcome these obstacles and ensure a healthy, productive harvest.
In this section, we’ll explore common problems faced when growing navy beans vegetable in containers and provide practical solutions to address them. By the end, you’ll be equipped to handle any hiccups that arise during your container gardening journey.
Why Troubleshooting Matters
Even the most experienced gardeners encounter challenges when growing plants in containers. Navy beans, while relatively low-maintenance, are no exception. Addressing these issues promptly not only saves your crop but also enhances your gardening skills.
Let’s dive into the most common problems and how to solve them effectively.
1. Poor Drainage Leading to Root Rot
One of the biggest challenges in container gardening is ensuring proper drainage. Without it, waterlogged soil can suffocate the roots and lead to root rot—a condition that’s often fatal for plants.
Signs of Root Rot
- Yellowing or wilting leaves
- Mushy, brown roots
- Foul odor emanating from the soil
How to Fix It
- Improve Drainage: Ensure your container has multiple drainage holes. If necessary, drill additional holes or use a pot with better drainage capabilities.
- Use the Right Soil: Opt for a well-draining potting mix specifically designed for vegetables. Avoid heavy garden soil.
- Water Wisely: Check the soil moisture before watering. Only water when the top inch feels dry.
For more advice on preventing waterlogging, refer to this guide.
2. Nutrient Deficiency in Container Soil
Container soil tends to deplete nutrients faster than garden soil, which can result in stunted growth or yellowing leaves.
Signs of Nutrient Deficiency
- Pale or discolored leaves
- Slow growth
- Reduced pod production
How to Fix It
- Fertilize Regularly: Use a balanced, slow-release fertilizer at planting time and supplement with liquid fertilizer every 2-3 weeks.
- Refresh the Soil: Replace the top layer of soil annually or repot the plant with fresh soil to replenish nutrients.
For tips on choosing the best soil for your plants, check out this article.
3. Pests Invading Your Container Garden
Pests like aphids, spider mites, and bean beetles can wreak havoc on navy beans, even in containers. Their small size makes them easy to overlook until significant damage occurs.
Signs of Pest Infestation
- Holes in leaves or pods
- Sticky residue (honeydew) on leaves
- Fine webbing or tiny spots on foliage
How to Fix It
- Inspect Regularly: Check your plants weekly for signs of pests. Early detection makes treatment easier.
- Use Natural Remedies: Spray affected areas with neem oil, insecticidal soap, or a homemade garlic spray.
- Encourage Beneficial Insects: Attract predators like ladybugs and lacewings by planting companion flowers nearby.
For more advice on pest-free gardening, refer to this guide.
4. Insufficient Sunlight
Navy beans require full sun to thrive, but containers can sometimes limit their exposure, especially if placed in shaded areas.
Signs of Insufficient Light
- Leggy, stretched-out stems
- Sparse foliage
- Delayed flowering and pod production
How to Fix It
- Relocate Containers: Move your containers to a sunny spot that receives at least 6-8 hours of direct sunlight daily.
- Use Reflective Surfaces: Place light-colored tiles or reflective mulch around the base of the containers to maximize sunlight absorption.
- Supplement with Grow Lights: If natural light is limited, use grow lights to provide supplemental lighting.
For more tips on indoor vegetable gardening, check out this guide.
5. Overcrowding in Containers
Overcrowding is a common mistake, especially when starting with small seedlings. As the plants grow, they compete for resources, leading to poor air circulation and increased disease risk.
Signs of Overcrowding
- Stunted growth
- Yellowing or dropping leaves
- Increased susceptibility to diseases
How to Fix It
- Thin Out Seedlings: Remove excess seedlings early to give remaining plants enough space to grow.
- Choose the Right Container Size: Ensure your container is large enough to accommodate mature plants. For bush varieties, use 5-gallon containers; for pole varieties, opt for 10-15 gallons.
For creative container ideas, take a look at this guide.
6. Drying Out Too Quickly
Containers dry out faster than garden beds, especially in hot or windy conditions. This can stress your navy beans and reduce yields.
Signs of Drought Stress
- Wilting leaves, especially during midday
- Dry, cracked soil
- Dropping flowers or pods
How to Fix It
- Mulch the Soil: Apply a 1-2 inch layer of mulch to retain moisture and regulate soil temperature.
- Water Deeply: Water until it drains out of the bottom of the container, ensuring the roots receive adequate moisture.
- Use Self-Watering Pots: Consider switching to self-watering containers, which maintain consistent moisture levels.
For more information on self-watering pots, check out this article.
7. Wind Damage
Plants in containers are more vulnerable to wind damage, particularly if placed on balconies or patios. Strong winds can break stems, uproot plants, or dry out the soil.
Signs of Wind Damage
- Broken or bent stems
- Uprooted plants
- Dry, brittle leaves
How to Fix It
- Provide Shelter: Place containers near walls, fences, or other structures to shield them from strong winds.
- Stake Plants: Use stakes or trellises to support climbing varieties and prevent wind damage.
- Group Containers: Arrange containers close together to create a windbreak.
For creative trellis ideas, take a look at this guide.
8. Temperature Extremes
Extreme temperatures—whether too hot or too cold—can stress navy beans and hinder their growth. Containers heat up and cool down faster than garden soil, making plants more susceptible to temperature fluctuations.
Signs of Temperature Stress
- Scorched or bleached leaves (too hot)
- Wilting or frost damage (too cold)
How to Fix It
- Move Containers Indoors: Bring containers inside during extreme weather conditions.
- Use Shade Cloth: Protect plants from intense sun using shade cloth or umbrellas.
- Insulate Containers: Wrap containers with bubble wrap or burlap during cold snaps to retain heat.
Case Study: My Battle with Root Rot
When I first started growing navy beans in containers, I underestimated the importance of drainage. I used a decorative ceramic pot without proper holes, and within weeks, my plants developed root rot. It was a disappointing experience, but it taught me the value of choosing the right container and ensuring proper drainage.
The next year, I switched to fabric pots and added a layer of gravel at the bottom. The difference was remarkable—my navy beans grew vigorously and produced a generous harvest. Lesson learned: never compromise on drainage!
Key Takeaways
To summarize, here’s a quick checklist for troubleshooting common challenges:
| Issue | Solution | Why It’s Important |
| Poor Drainage | Use pots with drainage holes and well-draining soil | Prevents root rot and ensures healthy growth |
| Nutrient Deficiency | Fertilize regularly and refresh soil annually | Replenishes essential nutrients for robust plants |
| Pest Infestations | Inspect weekly and use natural remedies | Protects plants from damage and disease |
| Insufficient Light | Relocate containers or use grow lights | Ensures optimal photosynthesis |
| Overcrowding | Thin seedlings and choose appropriately sized containers | Improves air circulation and reduces competition |
| Drying Out Too Quickly | Mulch soil and use self-watering pots | Maintains consistent moisture levels |
| Wind Damage | Provide shelter and stake plants | Prevents physical damage and stress |
| Temperature Extremes | Move containers indoors or use protective measures | Shields plants from harmful conditions |
Frequently Asked Questions (FAQs) About Growing Navy Beans Vegetable
Growing navy beans can raise many questions, especially for beginners. To help you navigate the process with confidence, we’ve compiled a list of frequently asked questions (FAQs) about growing navy beans vegetable. These answers are designed to address common concerns and provide actionable insights to ensure your gardening journey is smooth and successful.
1. What Are the Best Conditions for Growing Navy Beans?
Answer:
Navy beans thrive in full sun and well-draining soil with a pH between 6.0 and 7.5. They prefer warm temperatures, ideally between 70°F and 85°F (21°C to 29°C). Ensure consistent moisture but avoid waterlogged soil, as navy beans are susceptible to root rot.
Expansion:
For optimal growth, plant navy beans after the last frost date in spring. Rotate crops annually to prevent soil depletion and reduce pest risks. Learn more about soil preparation here.
2. How Long Does It Take for Navy Beans to Grow?
Answer:
Navy beans typically take 60-90 days from planting to harvest, depending on the variety and growing conditions.
Expansion:
Bush varieties mature faster, while pole varieties may require additional time due to their climbing habit. Regular monitoring ensures you harvest at the right stage—fresh or dried. For tips on speeding up germination, check out this guide.
3. Can I Grow Navy Beans in Containers?
Answer:
Yes, navy beans can be grown in containers, provided they have enough space and support.
Expansion:
Use containers that are at least 8-12 inches deep and wide enough to accommodate mature plants. Pole varieties need trellises or stakes for climbing. Ensure proper drainage and use high-quality potting mix. For creative container ideas, refer to this article.
4. Do Navy Beans Need Fertilizer?
Answer:
While navy beans fix their own nitrogen, they benefit from small amounts of phosphorus and potassium for flowering and pod development.
Expansion:
Apply a balanced, low-nitrogen fertilizer at planting and supplement sparingly during the growing season. Avoid over-fertilizing, as excessive nitrogen encourages leafy growth at the expense of pods. For more details, see this guide.
5. How Do I Prevent Pests and Diseases in Navy Beans?
Answer:
Prevent pests and diseases by practicing crop rotation, using mulch, and inspecting plants regularly.
Expansion:
Common pests include aphids and bean beetles, which can be controlled with insecticidal soap or neem oil. Diseases like powdery mildew and root rot can be avoided by improving air circulation and ensuring proper drainage. For pest-free gardening tips, visit this link.
6. When Should I Harvest Navy Beans?
Answer:
Harvest navy beans when the pods turn yellow or brown and feel papery to the touch.
Expansion:
For fresh beans, pick pods while still slightly green. For dried beans, wait until the pods are fully dry and brittle. Test a pod by opening it to check the maturity of the beans inside. For harvesting techniques, read this article.
7. Can I Save Seeds from My Navy Bean Plants?
Answer:
Yes, you can save seeds from your navy bean plants by allowing some pods to fully mature and dry on the plant.
Expansion:
Once the pods are completely dry, shell the beans and store them in an airtight container in a cool, dark place. This ensures viable seeds for next season’s planting. For seed-saving tips, explore this resource.
8. Why Are My Navy Bean Leaves Turning Yellow?
Answer:
Yellowing leaves may indicate overwatering, nutrient deficiency, or pest infestation.
Expansion:
Check the soil moisture level and adjust watering accordingly. Inspect for pests like aphids or spider mites and treat with appropriate remedies. If the issue persists, consider testing the soil for nutrient imbalances. For troubleshooting advice, refer to this guide.
9. How Much Water Do Navy Beans Need?
Answer:
Navy beans require about 1 inch of water per week, including rainfall.
Expansion:
Water deeply once or twice a week, ensuring the top inch of soil stays moist but not soggy. During hot, dry spells, increase watering slightly. Use a rain gauge to measure precipitation accurately. For more watering tips, check out this article.
10. Can I Grow Navy Beans Indoors?
Answer:
Yes, navy beans can be grown indoors under grow lights if outdoor conditions aren’t suitable.
Expansion:
Choose compact bush varieties and use large containers with proper drainage. Place the plants near a south-facing window or supplement with grow lights. Maintain consistent temperature and humidity levels. For indoor gardening inspiration, take a look at this guide.
Conclusion: Mastering the Art of Growing Navy Beans Vegetable
Growing navy beans vegetable is a rewarding journey that combines the joy of gardening with the satisfaction of harvesting your own nutritious produce. Whether you’re planting them in a traditional garden bed or experimenting with container gardening, navy beans offer versatility, resilience, and bountiful yields when given the right care. By following the strategies outlined in this guide—from selecting the ideal growing conditions to troubleshooting common challenges—you can cultivate a thriving navy bean crop that meets your needs and exceeds your expectations.
Why Navy Beans Are Worth the Effort
Navy beans are more than just a crop—they’re a testament to sustainable gardening practices. These legumes enrich the soil by fixing nitrogen, making them an excellent companion for other plants. They’re also packed with nutrients, offering a delicious and healthy addition to your meals. With their relatively low maintenance requirements and adaptability to various growing conditions, navy beans are an ideal choice for both novice and experienced gardeners.
Key Takeaways for Success
To recap, here are the essential steps to ensure a successful navy bean harvest:
- Choose the Right Location: Navy beans thrive in full sun and well-draining soil. Ensure your garden or container setup provides these conditions.
- Prepare the Soil: Use nutrient-rich, well-draining soil and maintain a pH between 6.0 and 7.5. For containers, opt for high-quality potting mix.
- Plant at the Right Time: Sow seeds after the last frost date when soil temperatures reach at least 50°F (10°C).
- Provide Support for Pole Varieties: Use trellises, stakes, or cages to support climbing plants and maximize space.
- Water Wisely: Keep the soil consistently moist but not waterlogged. Mulch to retain moisture and regulate temperature.
- Monitor for Pests and Diseases: Stay vigilant for signs of aphids, spider mites, powdery mildew, and root rot. Address issues promptly with natural remedies or targeted treatments.
- Harvest at the Right Time: Pick fresh pods while still green or allow them to dry fully for storage. Test pods regularly to determine maturity.
- Store Properly: Store dried beans in airtight containers in a cool, dark place to extend shelf life.
For more tips on maximizing your harvest, check out this guide.
The Bigger Picture: Growing Beyond Navy Beans
While this guide focuses on navy beans vegetable, the principles you’ve learned can be applied to other crops as well. Companion planting, pest management, and soil preparation are universal skills that will serve you in any gardening endeavor. Consider expanding your garden with complementary vegetables like tomatoes, peppers, or leafy greens to create a diverse and productive space.
For inspiration on designing a productive garden, explore this article.
There’s no better time to start growing navy beans than now. Whether you have acres of land or a small balcony, these hardy legumes can thrive in almost any environment. Equip yourself with the knowledge from this guide, gather your supplies, and take the first step toward a greener, healthier lifestyle.
If you’re unsure where to begin, consider starting with a simple raised garden bed or container setup. For ideas on creating a small-space oasis, take a look at this resource.
Gardening is more than just a hobby—it’s a way to connect with nature, nurture life, and reap the rewards of your hard work. Growing navy beans vegetable is a perfect example of how even a small effort can yield significant results. As you embark on this journey, remember to enjoy the process, learn from challenges, and celebrate your successes.
Happy gardening, and may your navy bean harvest be abundant and fulfilling!


")