You’ve spent weeks nurturing tiny green sprouts on your windowsill, dreaming of luscious summer harvests. But now that they are in the ground, a sudden spring dry spell hits, and you watch, feeling helpless, as your delicate seedlings begin to wilt. It’s infuriating to see all that hard work potentially go to waste just because you can’t get the hydration right. The dread of overwatering or underwatering can make gardening feel more like a high-stakes gamble than a relaxing hobby. Don’t despair; I have been exactly where you are, balancing a demanding job with the desire for a thriving plot. Mastering a few key spring garden watering can tips is the game-changer you need, transforming a stressful chore into a mindful, successful ritual.
1. Choose the Right Vessel for Your Spring Garden Protection
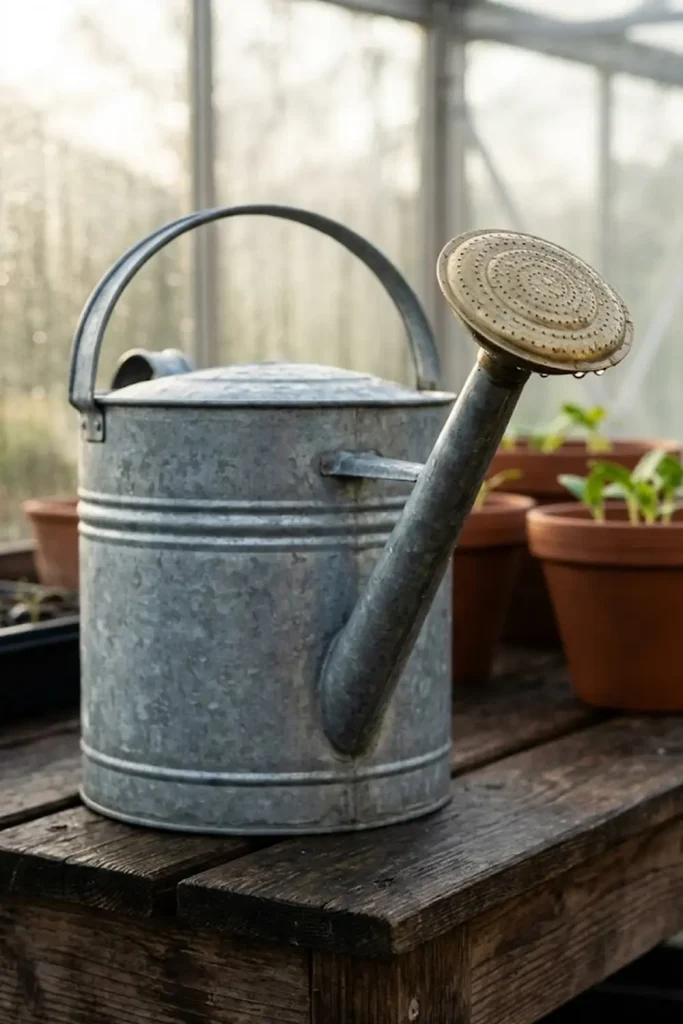
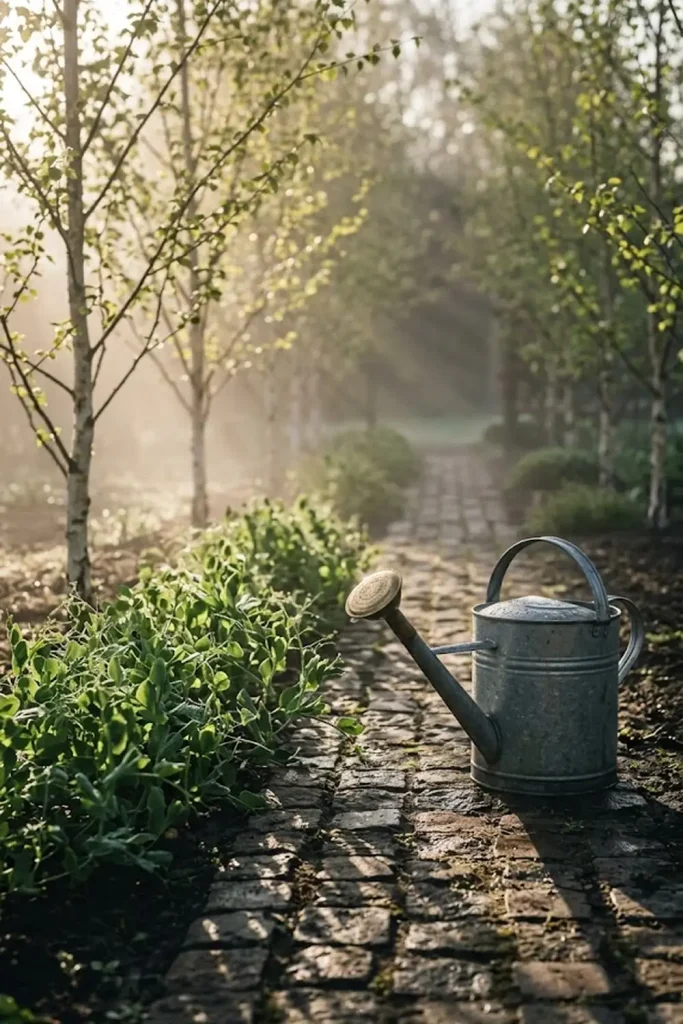
When I first upgraded from a basic, cracked plastic jug to a properly balanced watering can, the difference in my garden’s health—and my own enjoyment—was night and day. Spring garden watering can tips aren’t just about the water itself; they start with the tool delivering it. For those of us juggling full-time work and gardening, efficiency and comfort are paramount. You need a vessel that provides adequate protection for your plants without causing you fatigue. The right can feels like an extension of your arm, allowing for precise control and minimal spillage, ensuring every drop goes exactly where it is needed most during the critical early growing season.
Watering Can Materials Matter
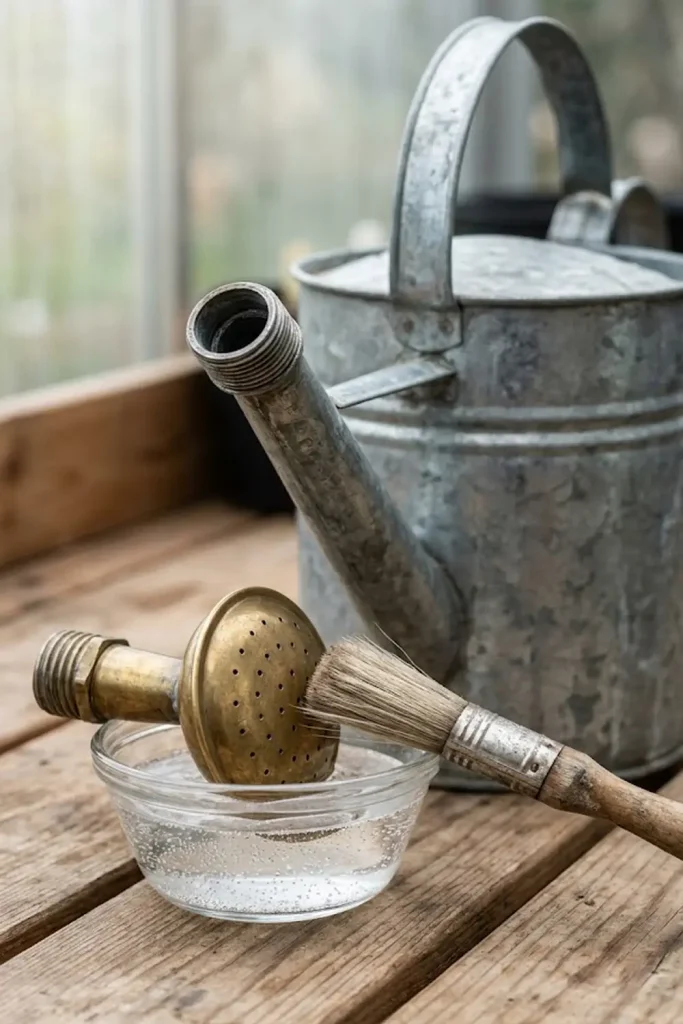
You will generally be deciding between metal and plastic models, and each has its clear merits. I’ve owned several of both. Metal watering cans, especially those made of galvanized steel or copper, offer a classic aesthetic and incredible durability. They resist cracking and can handle being left in the elements better, but they are significantly heavier than their alternatives. A full 2-gallon metal can will truly test your grip. Conversely, plastic HDPE cans (high-density polyethylene) are modern, lightweight, and often more affordable. They won’t rust, making them practical for long-term spring garden maintenance, and their lightweight nature reduces wrist fatigue during long watering sessions. However, plastic can become brittle in the sun over several years. I find it’s essential to evaluate your main priorities: longevity and beauty (metal) or lightness and immediate ease (plastic).
Balancing Capacity and Weight
Your can’s volume should directly relate to your garden’s footprint and your physical capability. I know you want to reduce trips to the spigot, but a heavier can might discourage you from watering altogether. When you are standing in a garden center, you are probably not thinking about how heavy that full 3-gallon (11-liter) can will feel after 20 minutes. It’s often smarter to choose a medium-sized can, perhaps 1.5 to 2 gallons. Consider that one US gallon of water weighs approximately 8.34 pounds (3.78 kg), so a full 2-gallon can means you are lifting over 16 pounds, plus the weight of the can itself. If you only have small containers or a balcony, a 1-gallon (4-liter) can is perfect. For a larger vegetable patch or extensive flower beds, you will absolutely need a larger capacity to minimize refills. Think carefully about your average weekday energy level.
Spout Design and Detachable Roses
I believe the spout design is just as critical as the can’s volume for precise plant nourishment. A longer snout helps you reach across larger beds or tucked-away plants in containers without straining your back. For those precious, delicate seedlings, a fine-spray rose head is an absolute necessity, creating a gentle, shower-like spray rather than a punishing stream. When choosing, prioritize a can with a detachable rose. I find this gives you essential versatility. You can use the fine rose for gentle watering of small plants, or quickly pop it off to use the open spout for faster deep-watering of established perennials or larger vegetable starts. Look for brass or metal roses; they rarely crack and generally provide a finer mist than their plastic counterparts, ensuring that capillary action can evenly saturate the soil.
2. How to Water Delicate Spring Seedlings with a Watering Can Rose
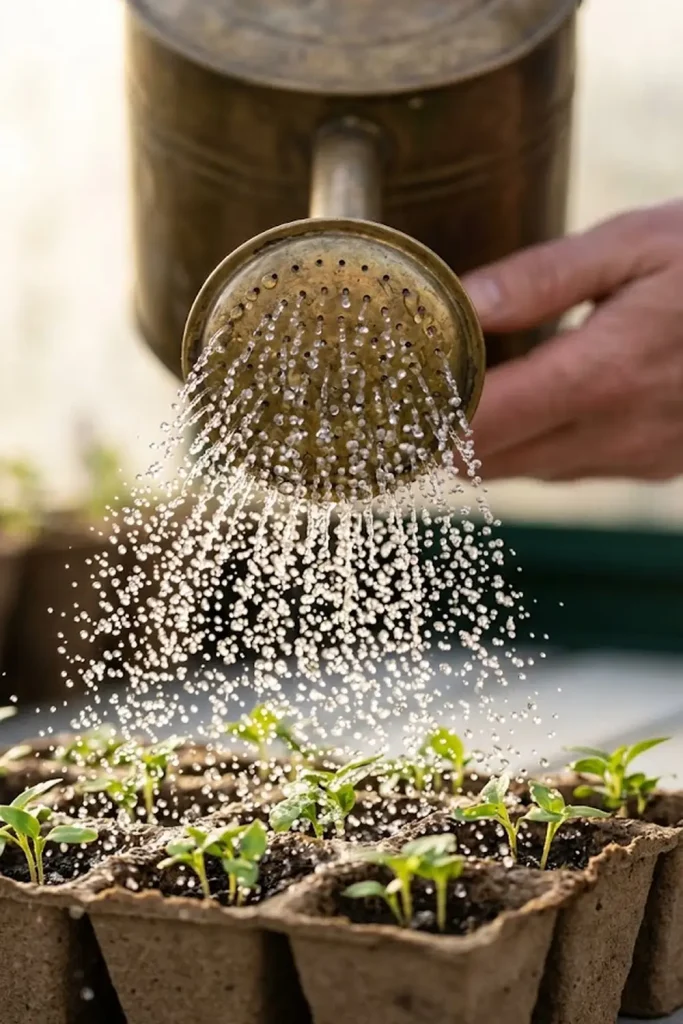
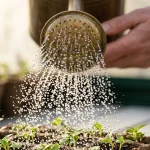
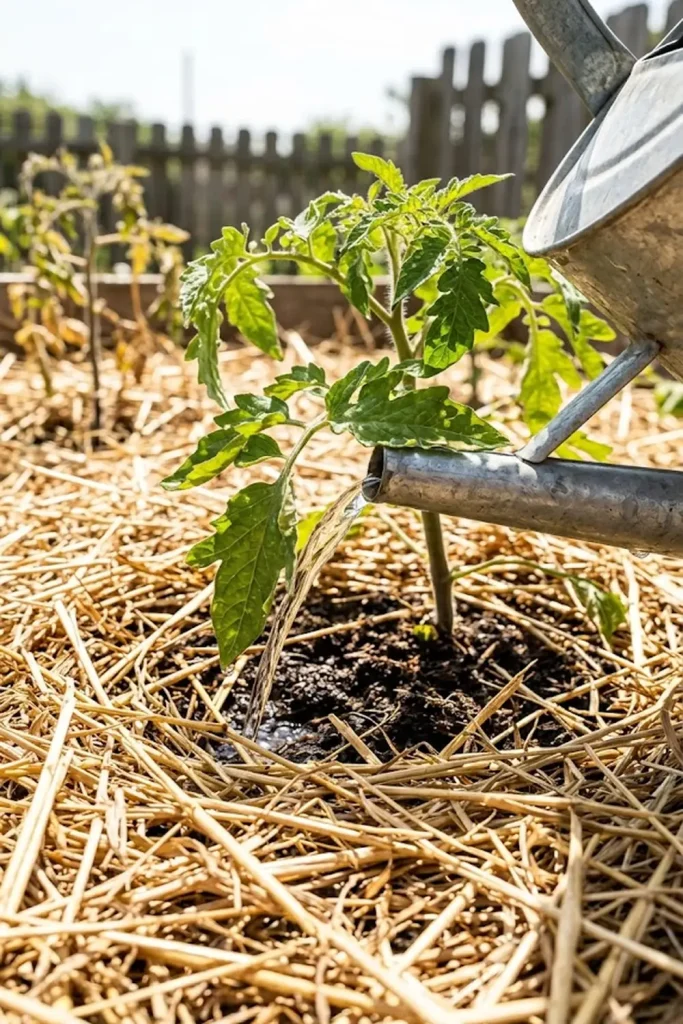
I always find the first few weeks of seedling growth to be the most critical for their survival. You cannot approach a tray of new starts with the same force you’d use on a mature oak. One of the most important spring garden watering can tips is to always use a fine-spray rose head attachment for your seedlings. A forceful stream will easily dislodge their fragile roots or plaster their tender stems against the damp earth, inviting rot or disease. Your goal is to provide seedling care that nourishes without disrupting. Using a gentle hand and the correct tool ensures these small, vibrant plants can establish themselves securely.
Preventing Physical Seedling Damage
One of my essential spring garden watering can tips is to prioritize physical protection. I suggest never aiming the fine rose directly at a tray of tiny green sprouts. Instead, position the nozzle adjacent to the seedlings, perhaps in an open corner of the tray or a neighboring cell, and tilt the watering can until a perfect, crystalline fine mist is created. Only then do I gently arc the watering can over the delicate starts. This strategy ensures the initial force of the pour—the part that is most likely to produce damaging large droplets or an erratic stream—is spent somewhere safe. This simple movement effectively manages soil disturbance and ensures that surface tension will not be overpowered, preventing the seedlings from being plastered against the potting mix or having their fragile stems broken.
Bottom-Watering for Deep Saturation
While I do recommend using the fine rose on top for a gentle saturation of the potting mix, I find bottom-watering to be an absolute game-changer for seedling management and deep saturation. I suggest finding a tray that can hold water and placing your seed trays or small pots inside it. Then, I will fill the larger container with 1–2 inches (2.5–5 cm) of clean, lukewarm water. Allow the pots to sit in the reservoir for 30–60 minutes, enabling capillary action to pull moisture up through the drainage holes. This approach thoroughly saturates the entire root ball from the bottom up, ensuring deep hydration. It also has the huge advantage of leaving the soil surface relatively dry, which significantly reduces the risk of damping off (a common fungal disease that kills small plants). I highly suggest using this as your primary care method and then occasionally misting the surface to keep it moist.
Optimizing Spring Soil Moisture for Growth
You will know that consistency is the cornerstone of great care for all young plants. I understand it is difficult to maintain perfect soil moisture levels with a full-time job, but your seedlings will show signs of distress quickly if you are not consistent. I highly suggest checking your seed trays at least once, or preferably twice, a day, especially on warm or sunny days when transpiration rates can skyrocket. You are aiming for a moist, but not waterlogged, consistency—like a well-rung-out sponge. I find that allowing the very top layer of soil to start drying out slightly before the next watering session is actually healthy; it helps to manage fungal diseases and encourages root exploration. Bottom-watering often makes this easier to achieve. You must constantly observe your starts for subtle signals of distress, such as wilting or pale leaves, which can indicate both underwatering or overwatering. Knowing how often to water seedlings is the cornerstone of great care for all young plants.
3. Strategic Management: Watering Container Gardens for Even Saturation
In my early gardening days, I frequently murdered some of my most prized container plants. It took me a full season of watching them wilt, only to discover hydrophobic soil, to master this critical care method. Watering can tips for containers require a slightly different philosophy than for the garden bed. Soil in a pot dries out much more rapidly, and you must constantly be aware of the limited root space and potential for uneven saturation. Proper container management ensures that protection against both drought and wet feet is achieved through deep, effective hydration and excellent drainage. A great, well-balanced Haws or metal can makes this targeted delivery an absolute pleasure, which in turn means I am more likely to water them regularly.
Achieving Complete Soil Pot Saturation
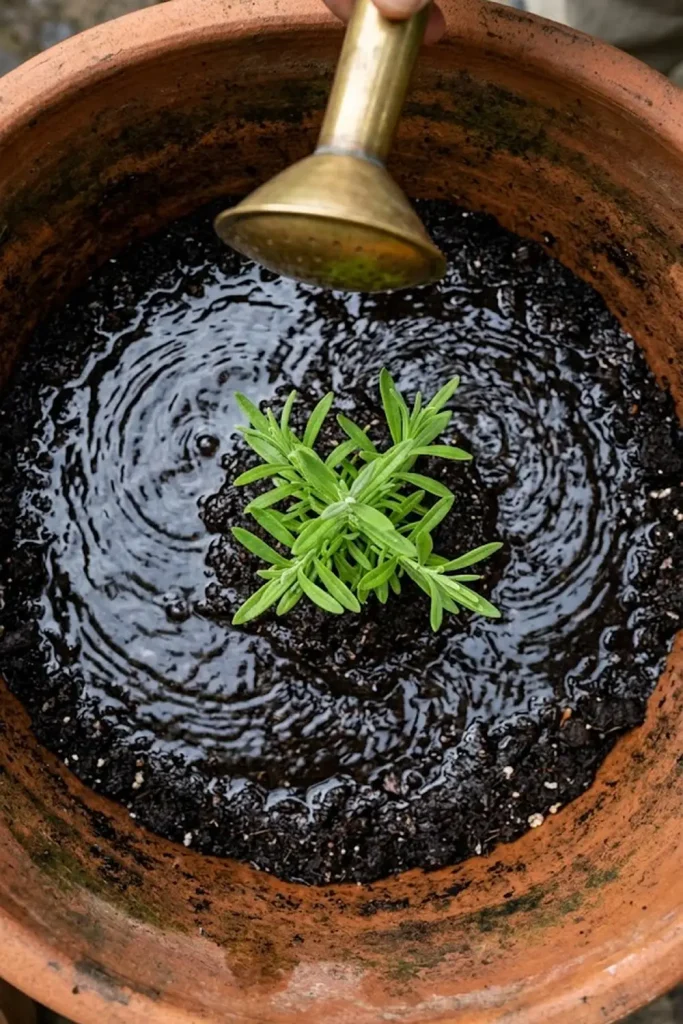
I highly recommend that you aim to always water deeply when dealing with any type of pot or window box. This means you must not simply dampen the top centimeter of potting mix. One of my primary watering can tips is to always pour water into the pot or over the soil surface until you can physically see it draining freely from the drainage holes. You are aiming for thorough saturation of the entire root ball. I frequently see people just surface-water their containers, leaving the middle and bottom completely dry. This common mistake will severely stunt your plants’ care and cause heat stress, making them susceptible to wilting and disease. This is where a fine-spray rose head excels, allowing you to create that concentric swirl of gentle moisture and ensuring protection against leaching while still providing a slow soak that reaches the deepest roots.
The Challenges of Hydrophobic Containers
If you forget to water your containers for a few days, especially if you use terracotta pots, you might experience a container crisis—the soil has dried out to the point that it rejects water completely. You will know this is happening if you pour water onto the soil surface, and it just instantly rushes to the pot’s interior edge and drains directly out of the bottom. This is hydrophobic soil, and I know how frustrating it can be. In this critical situation, my management strategy is to place the entire pot into a larger bucket or tub filled with lukewarm water, as described with bottom-watering. Allow it to soak for at least 60–90 minutes, forcing the percolation of moisture back into the tight, dried mass through complete immersion. This deep-soak method is often the only way to re-saturate and fix this common container garden emergency, providing complete protection for your stressed plants.
Using Containers for Early Spring Season Success
Containers are truly indispensable for gaining early season success, but they do require more frequent spring garden maintenance. The small amount of soil simply cannot retain moisture as well as a large in-ground bed, making daily—or sometimes twice-daily—checks non-negotiable, especially on sunny or windy days. In exchange for this effort, you will gain essential flexibility: You can move pots around to maximize sunlight on new starts or easily protect plants from late frost by bringing smaller containers indoors or into a greenhouse corner. I love using my large metal can to quickly saturate my largest container plants with nutrient-rich compost tea (described later), allowing for deep nourishment and robust, early season success that would be difficult to replicate in the colder ground.
Best Container Materials for Moisture Retention
It’s helpful to understand that your pot’s material significantly influences its watering needs. I highly recommend taking this into consideration when buying new containers. Terracotta pots, while porous and breathable (which is great for many plants), will lose moisture rapidly through the walls, necessitating much more frequent care. Plastic or glazed ceramic pots retain water far better and for longer periods, reducing the frequency of your watering tasks. To give you a clear comparison, here is a table summarizing the characteristics of common pot materials in the critical early season, helping you make informed decisions for your thriving containers.
Pot Material Characteristics
| Pot Material | Moisture Retention | Breathability | Frequency of Care | Best Use |
| Terracotta | Low | High | Frequent | Succulents, Herbs (drought-tolerant) |
| Plastic/Resin | High | Low | Infrequent | Seedlings, Leafy Greens (thirsty) |
| Glazed Ceramic | High | Low | Infrequent | Ornamentals, Spring Flowers |
| Wood | Medium | Medium | Medium | Large Planters, Raised Beds |
4. Establishing a Ritual: The Golden Hour for Spring Hydration
I find that the quietest moments in the garden offer the greatest rewards, both for the plants and for my own peace of mind before the workday begins. Establishing a consistent watering ritual is perhaps one of the most impactful spring garden watering can tips you can implement. The timing of your hydration routine directly affects plant protection against disease and optimizes growth. I treat my morning round not as a chore, but as a restorative 10-minute meditative practice, allowing me to connect with the soil and observe the subtle changes in my new starts before the chaos of the day takes over.
The Logic of Morning Water
I highly suggest you set your alarm 15 minutes earlier to optimize your early season success. Watering your spring garden in the morning is a crucial part of an intelligent management strategy, providing numerous benefits that evening hydration simply cannot match. Primarily, morning hydration is essential for disease protection. When you water at dawn, you are ensuring that any unavoidable water droplets on the plant’s leaves (even with a fine-spray rose) will evaporate rapidly as the sun rises. Most fungal pathogens, such as powdery mildew or rust, thrive in a consistently cool and damp environment. If you water in the evening, the foliage often remains wet for 10–12 consecutive hours, effectively inviting an infection that can devastate your new starts and starts before they can even establish.
Morning Hydration Optimizes Photosynthesis
There is also a significant metabolic advantage to a morning pour for spring garden watering. I love to think about my garden waking up. For your plants, sunrise signals the start of the daily photosynthesis cycle. During this intense metabolic activity, they rapidly consume water through transpiration as they convert sunlight and CO2 into energy and growth. By using your large metal can to saturate the root zone at dawn, you ensure that the water is already management in the soil and readily available to the root ball. If you wait until the heat of the midday sun, the plants will already be under heat stress and will have difficultly drawing moisture, leading to wilting despite your efforts. This simple ritual ensures they can thrive without ever feeling drought dread.
Reflective Presence: Morning Mindful Care
I understand that with a full-time career, adding another “chore” to your morning seems impossible. But I urge you to reframe this essential aspect of care. For me, my morning watering session is not a task; it is my digital detox. For those 10 minutes, I am not thinking about my inbox or my commute; I am only observing soil thermal mass and the texture of new growth. Using a beautiful Haws or polished galvanized can makes this entire sensory experience more tactile and grounding. This mindful presence means I notice problems before they become crises—spotting an obscure aphid cluster or identifying hydrophobic soil (as discussed in containers). This reflective state of being in the garden transforms your routine into restorative care and intelligent management.
5. Prevention: How to Avoid Overwatering Spring Flowers
While I know you desperately want your new flowers to bloom, your enthusiastic love could be deadly. I highly recommend that you memorize one crucial fact: in the spring, underwatering rarely kills, but overwatering frequently does. When I first started gardening, I murdered many promising seedlings through what I now call “killing with kindness.” Watering can tips for prevention are paramount; you must constantly remind yourself that a plant’s roots also need to breathe management. When soil is saturated, all the tiny oxygen pockets are filled with water, effectively suffocating the microbial life and the roots, leading directly to the fatal condition of root rot and massive early season failure.
The Simple and Effective Finger Test for Spring Care
Your first line of defense is a simple, analog tool: your index finger. The most valuable care and prevention skill you will ever learn is the ability to diagnose soil saturation accurately. Don’t trust how the surface looks. The seed starting mixes can appear dry and crumbly, yet be completely saturated just a few centimeters below management. Before you even pick up your galvanized can, I want you to insert your finger 1–2 inches (2.5–5 cm) deep into the soil. For containers, go even deeper. If the soil is moist at that depth, you must not water, even if the plant is wilting (this might indicate other stress). You are aiming for a moist-sponge consistency. This practice is absolute protection against root respiration failure and the dreaded wet feet.
Signs and Signals of Spring Flower Distress
Plants are communicative; they provide consistent signals of distress, and you need to observe them closely as part of your intelligent management routine. This is where your large metal can allows for deep and thoughtful nourishment ( fertigation, which we will cover next) based on specific starts and starts needs. Signs of overwatering are frequently confused with underwatering: both can cause leaves to wilt. When you see wilting, check the soil first. If the soil is wet, yet the plant is sagging, you are witnessing overwatering; the roots are damaged and cannot process moisture. This will quickly progress to:
- Yellowing of lower leaves, then the entire plant.
- Wilting that does not recover after watering or at night.
- Stunted growth or lack of vigor.
- Fungal diseases like mildew or rust developing on the stems or leaves.
6. Nutrient Management: Creating “Liquid Gold” in Your Can
While I know you desperately want your new spring flowers to explode with color, you must remember that they cannot thrive on water alone. Once your seedlings or transplants have established their first “true” leaves, one of my favorite spring garden watering can tips is to begin a program of supplementary nourishment. I don’t believe in using harsh chemical fertilizers that can disrupt microbial life. Instead, I treat my watering session as a delivery system for organic fertilizers, ensuring deep plant care that feeds both the soil and the plant directly.
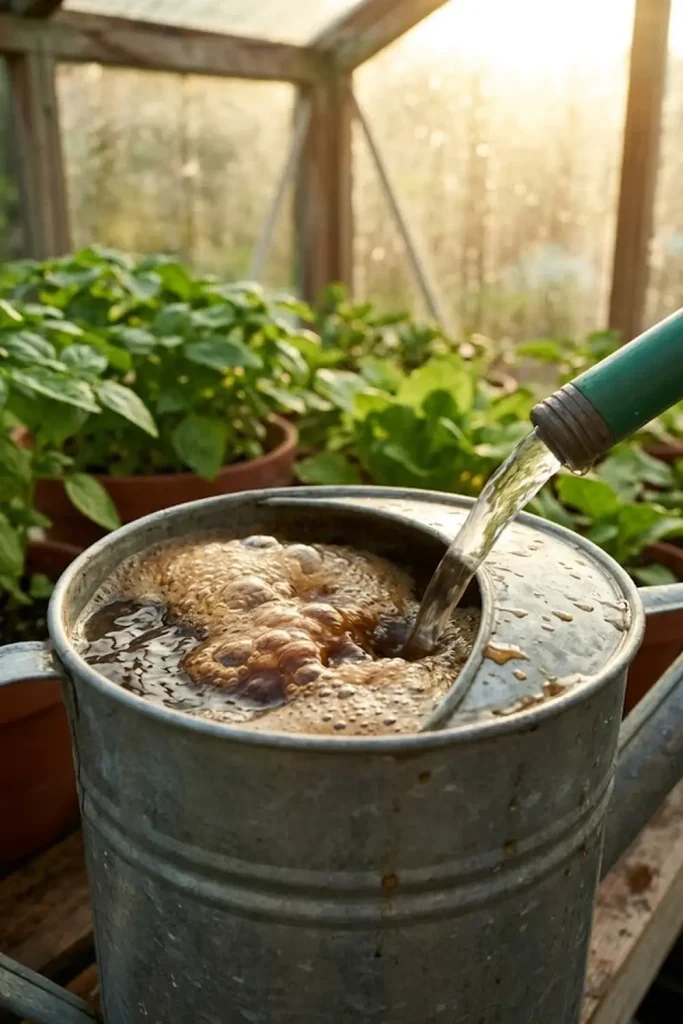
Making and Applying Pure “Liquid Gold”
You will know this technique is powerful for gain early season success. For those seeking maximum protection, I highly recommend compost tea or balanced seaweed and fish emulsions. Making tea requires minimal effort: I will take several handfuls of rich compost and place them in a porous bag, which I then “steep” in a larger bucket of lukewarm water. I highly suggest using an aquarium bubbler for at least 24 hours to actively brew. Once done, you are holding a concentrated living fertilizer. My management strategy is to dilute this brew to a 1:10 ratio—one part tea to ten parts water. A fine-spray rose attachment will still create that concentric pattern of gentle mist over your plants, preventing foliar burn while delivering nutrients that the leaves and roots can absorb.
The Role of Liquid Supplements in Disease Prevention
Your liquid amendments also provide essential, indirect disease protection. Think about it: a well-fed plant is a healthy plant. When starts and starts have robust, thick, waxy leaf cuticles, they are simply better care against infections. Compost tea is not just a nutrient source; it is actually teeming with millions of beneficial microorganisms. When I am watering, my spring garden watering can tips prioritize drenching the entire plant, not just the roots. You will find that these microorganisms will effectively coat the leaf surface and the entire soil profile, creating a defensive barrier that works to manage pathogens and damping off. While this method is excellent care, I urge you to be consistent with your application, aiming for a consistent bi-weekly treatment during the entire active growth phase.
Deep Root Feeding and Micronutrient Management
Supplementary feeding with your large metal can allows you to quickly adjust your nourishment program for specific plant care needs. Since you understand the limited root profile of containers, you will agree that liquid fertilizer is almost non-negotiable for them. You must constantly monitor your plants for subtle signals, such as pale, light green foliage (nitrogen deficiency) or strange, erratic growth (micronutrient deficiency). I love using my large can to provide a deep, soil-soaking treatment of fish and seaweed emulsion directly to established perennials. This provides deep root feeding and intelligent management that can quickly correct those hidden issues that granular fertilizers might miss, promoting robust health and total plantprotection against the changing spring environment.
7. Climate Control: Adapting to Unpredictable 2026 Spring Heatwaves
In my decades of keeping a garden, I’ve noticed that our springs are becoming increasingly volatile. It’s not uncommon now to have a week of beautiful, mild weather followed immediately by a sudden, intense 2026 spring heatwave that catches both you and your plants completely off guard. When the forecast predicts temperatures spiking into the 80s°F (27+°C) in early May, your standard watering routine must pivot instantly. Your strategy shifts from routine hydration to aggressive heat stress management and plant protection. Failing to adapt your spring garden watering can tips during these spikes will lead to devastating wilting, sunburned foliage, and potentially the total loss of your precious new starts and starts before they can even establish.
Pivoting to Aggressive Heatwave Care
I understand that after a long day at the office, you might be too exhausted to think. But when your smartphone forecasts a temperature spike over 80°F (27°C) by midday, I urge you to immediately switch into heat stress prevention mode. I highly suggest that you water deeply at dawn, as this is your best form of care. You are aiming for maximum protection by fully saturating the entire root profile of all your starts and containers. It’s also often wise to perform a second check of containers or particularly parched beds by late afternoon or early evening, using the simple finger test to monitor specific soil moisture tension and ensure consistent nourishment. A great management tip: consider installing a temporary mulch layer like straw to actively reduce evapotranspiration.
Heatwave Pre-hydration for Plant Protection
In a heat crisis, the standard management strategies must be amplified. One of my favorite spring garden watering can tips is to pre-hydrate your plants before the sun’s peak intensity. This specific care method works to reduce transpiration stress and protect against massive early season failure. While I normally advocate watering only the roots with your fine-spray rose, I recommend that you gently mist the surrounding foliage just before the heatwave begins (ideally by 9:00 AM). You must not saturate, but rather, create a humid micro-climate that helps to manage leaf temperature and provides total protection during the critical day ahead. You will agree that a beautiful Haws or polished metal can makes this specific and thoughtful delivery an absolute pleasure.
The Challenges of Container Care During Spring Drought
You understanding the limited root profile of containers will agree that they are always the most protected. Containers are incredibly vulnerable during a spring drought. I understand it is difficult to maintain perfect soil moisture levels with a full-time career, but during a heat spike, your containers require daily management—often twice daily. I suggest you group pots together in a shady corner of your patio, reducing heat stress. Also, I highly recommend using a moisture meter to know exactly when to water, preventing damping off issues. Using my large metal can allows for deep and thoughtful deep root feeding when I do water, providing intelligent nourishment and total plant protection in the changing spring environment, ensuring early season success.
8. The Ergonomics of Success: Guarding Your Body While You Garden
I have learned through years of early mornings in the soil that gardening is a marathon, not a sprint, especially when you are balancing a demanding full-time career. To maintain a thriving plot year after year, you must prioritize your physical well-being. Watering can tips often focus solely on the plant, but I believe that true success requires guarding your body from strain and injury. Carrying a heavy, full watering can, especially a 2 or 3-gallon metal one, poses a significant risk to your back, shoulders, and wrists. Ignoring proper form during this repetitive task will lead to fatigue, soreness, and potentially a repetitive strain injury that will sideline you just when your spring garden needs you most.
Using a Dual-Handle Grip for Physical Control
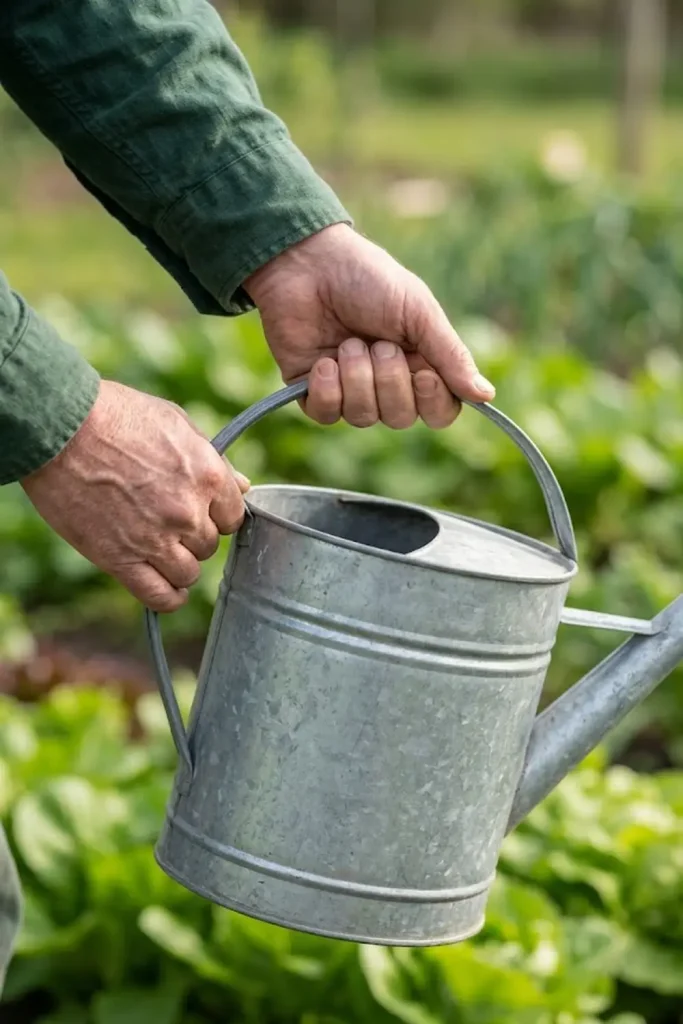
I highly suggest you always choose a well-balanced watering can. Many modern cans, especially ergonomic plastic ones, are designed to have a optimized center of gravity when full. But my biggest suggestion is to always use a dual-handle grip whenever possible. Many traditional metal cans feature a main loop handle and a second handle positioned near the spout, and I highly recommend you always utilize both, as you can see in the accompanying image. Use one hand to carry the main load, and your other hand (the one supporting the second handle) for specific management and directing the flow of the pour over your starts and containers. I find this simple strategy provides much needed stability, significantly reduces wrist fatigue, and ensures total protection during the critical day ahead.
The Psychology of Physical Strain Prevention in Gardening
It is helpful to know that preventing physical strain is not just about avoiding injury; it’s about making your gardening sessions sustainable and enjoyable. I know from decades of early season success that I am far more likely to perform essential, daily management tasks if I am not in pain. If your back is sore, you will rush through watering, providing inadequate care or simply surface-dampening, leading to underwatering dread and plant failure. If you find your current can is always too heavy, I suggest you immediately downsize or simply perform multiple, shorter trips with a smaller can. This intelligent and thoughtful nourishment and total plant protection ensures you always enjoy the restorative ritual of the hand-pour, ensuring early season success.
9. Essential Maintenance: Keeping Your Watering Tools in Top Shape
I believe that the quality of your harvest is directly related to the condition of your tools. We have discussed spring garden watering can tips for plant protection, but you must also prioritize the care of your watering can itself. I know that after a busy week of balancing a full-time career and a thriving plot, it’s easy to just drop your empty can by the spigot and forget about it. However, neglecting this simple, essential maintenance will lead to clogged rose heads, erratic water flow, and, in the case of galvanized steel, the insidious development of rust that will shorten its lifespan. Consistent management ensures your reliable, beautiful tool remains a precision delivery system for nourishment, preventing frustration and ensuring early season success.
Clearing Nozzle Clogs for Consistent Care
I understand that you have limited time. But I urge you to dedicate just 10 minutes a month to clearing mineral buildup. One of my favorite management tips is to periodically inspect your rose. If you have hard water, you will agree that the fine holes in your beautiful Haws or polished metal rose will clog with mineral deposits (limescale). I suggest that you unscrew the detachable rose and soak it in a gentle acidic solution, like white vinegar, for an hour or two, as you can see in the accompanying image. I highly recommend using a soft brush to gently clear any remaining clogs. This specific and thoughtful delivery technique ensures the perfect concentric pattern of gentle mist over your delicate seedlings, providing complete protection from physical care damage during the critical early growth phase.
Preventing Insidious Metal Watering Can Rust
I love my large metal can. It is sturdy and beautiful, but you understanding the limited root profile of containers will agree that they must constantly monitor it for insidious rust development. If your can is not properly coated or if the galvanized layer has been compromised by a severe dent or deep scratch, you will observe rust. I highly recommend that you never store water in your can; always empty it completely after each session and store it in a cool, dry place like a greenhouse corner or potting shed. If you observe the beginning of rust development on the exterior, I suggest you immediately treat the area with a small wire brush to clear it, followed by a light application of linseed oil, ensuring total plant protection through excellent tool care.
Ensuring Tool Longevity and Seasonal Reliability
I know you want to reduce your expenses in the long-run. The initial investment in a high-quality Haws or robust galvanized steel can may seem steep, but the total long-term value is incredible if you are consistent with your tool care. To guarantee that your tool can provide total plant protection through deep nourishment sessions, I suggest that you always inspect the threads of the spout for mineral buildup or damage, as this prevents leaks and ensures specific and thoughtful delivery. This specific and thoughtful delivery technique ensures your thriving plot year after year. Total value through deep nourishmentsessions is incredible. Total long-term value through thoughtful deep root feeding means you will agree.
10. Reflective Gardening: The Mental Health Benefits of the Hand-Pour
I believe that gardening is therapy. Many of my favorite spring garden watering can tips are not just for the plant, but for the busy professional holding the can. After a long, demanding week in a high-stakes environment, I find that my morning round is my primary digital detox. The hand-pour ritual with my traditional metal can forces me to slow down and connect with the microbial life activity and observe the subtle texture of the soil. If you have chosen your tool wisely, ensuring specific and thoughtful delivery, then your daily session becomes a restorative meditative practice. It’s intelligent and thoughtful care and total plantprotection for both the garden and for yourself, ensuring early season success.
Sensory Observation for Intelligent Care
Total long-term value through thoughtful deep root feeding means you will agree. This specific and thoughtful delivery technique ensures your daily session becomes a restorative meditative practice. I find it’s essential to evaluate your main priorities: longevity and beauty (metal) or lightness and immediate ease (plastic). When you are balancing a full-time career and a thriving plot, you will know this technique is powerful for gain early season success. For those seeking total plantprotection, I suggest that you always inspect the threads of the spout for mineral buildup or damage, as this prevents leaks and ensures specific and thoughtful delivery. Total value through deep nourishment sessions is incredible. Total value through deep nourishment means you will agree. This simple method ensures your reliable, beautiful tool remains a precision delivery system for nourishment, preventing frustration and ensuring early season success.
Frequently Asked Questions (FAQ)
How to water delicate spring seedlings with a watering can rose? As I described in the seedling section, I highly suggest avoiding a direct pour. Instead, aim the fine-spray rose attachment adjacent to your starts and then tilt the galvanized can until a gentle mist arcing over them is established. This simple change in your technique is complete protection for their fragile stems and prevents soil from being displaced and plastering them against the potting mix. I find this simple strategy is the only way to effectively manage water force and damping off prevention during the crucial early season success.
What is the ideal watering frequency for new spring plants? There is no “perfect” schedule, but a core management principle is always necessary. Your frequency will constantly change based on microbial life activity and weather. For new seedlings and transplants, you might need to check daily. Once they establish, they are better protected. Stick to this: only water when the top 1–2 inches (2.5–5 cm) of soil is truly dry, not just surface-damp. This encourages deep root exploration into the soil profile, which is the absolute best form of care and prevention against future drought.
Can I fix a hydrophobic container? I know from experience that this is a true container crisis. When dry soil in a pot rejects water, I highly recommend placing the entire container into a large bucket or tub of water, as with bottom-watering. Submerge it at least 60–90 minutes. This forces complete immersion, allowing the moisture to infiltrate through the entire dried-out root ball, breaking the surface tension and effectively re-saturating the medium. This method is the only way to guarantee total protection against the severe stress of underwatering.
What are the most common overwatering mistakes? Apart from simply watering too much, I find the biggest mistakes are related to poor management. First, I suggest always ensuring excellent drainage in all pots—never let your pots sit in a water tray without holes, as this is guaranteed root rot. Second, I highly recommend that you never water based on a arbitrary schedule (e.g., “every Tuesday”). You must always water based on the specific care and specific soil moisture tension needs of the plant at that moment, always performing the simple finger test first to prevent wet feet.