
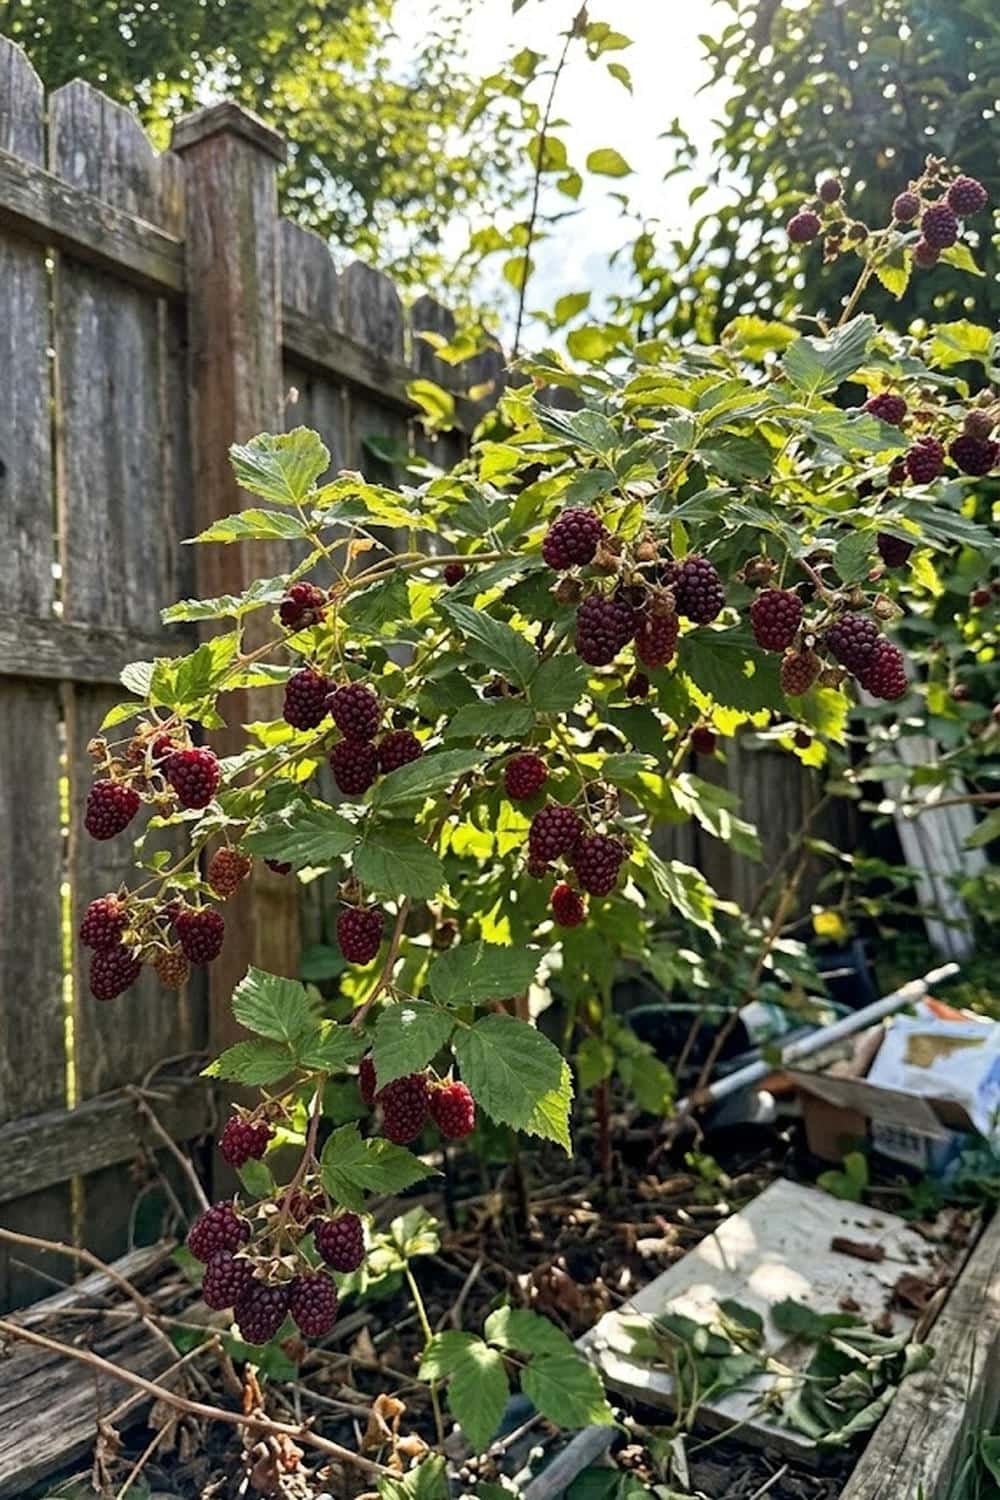

Are you tired of spending your hard-earned money on store-bought berries that are often bland, slightly moldy, or lack that homegrown punch? It is incredibly frustrating to dedicate space in your garden, only to end up with a measly harvest that barely fills a cereal bowl. I have been there, and I know that disappointment. Fortunately, I discovered the secret to filling my freezer every summer: the trailing loganberry. By understanding how to grow loganberry fruit properly, you can transform a single, inexpensive cane into a sprawling, incredibly productive hybrid that yields gallons of tart-sweet, burgundy berries. Let me share my personal roadmap for dominating your berry patch.
Choosing the Right Loganberry Variety
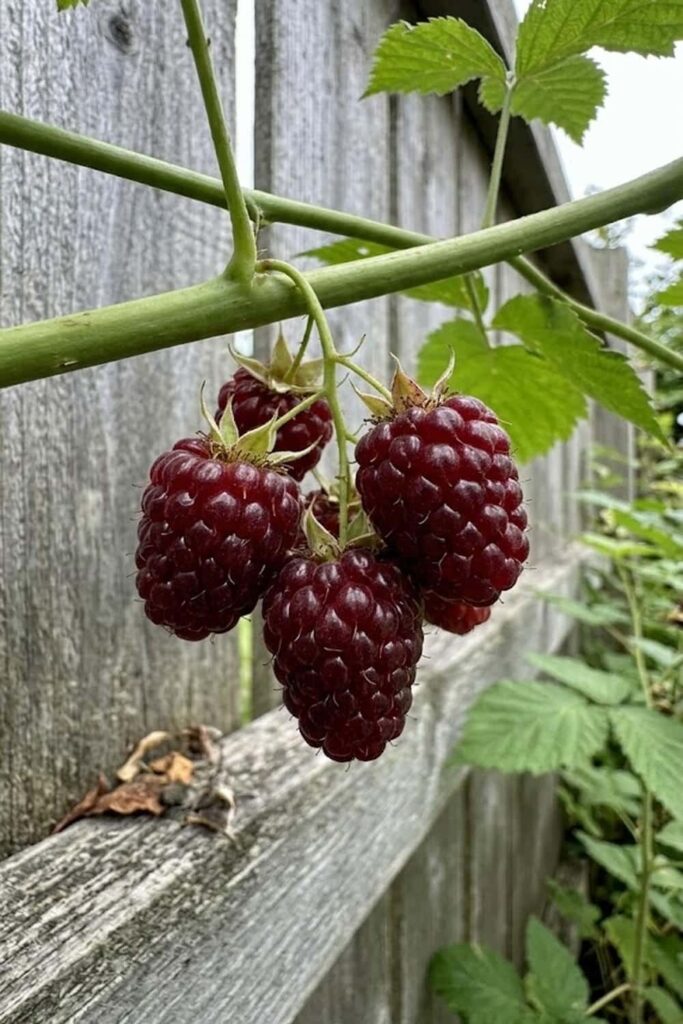
When I first decided to learn how to grow loganberry fruit, I didn’t realize that variety selection makes a huge mechanical difference in your daily garden life. I mistakenly planted the original, thorny type, and let me tell you, pruning became an annual battle against fierce spines. You want to avoid that pain. Modern horticulture has provided excellent, thornless alternatives like ‘LY654’ or ‘American Thornless’. These tissue-cultured varieties offer the exact same hexaploid vigor and complex flavor profile—a mix of raspberry sweetness and blackberry tartness—but they lack the defensive armaments. They are a dream to manage.
For home gardeners aiming for maximum convenience, I exclusively recommend planting thornless Rubus × loganobaccus. Data from trial grounds consistently shows these varieties provide identical yields per plant when compared to their thorny counterparts.
Popular Loganberry Varieties Comparison
| Variety | Attribute | Best For | Spines? |
| ‘LY654’ | Very vigorous, heavy yielding | Home gardens | None |
| ‘American Thornless’ | Slightly more compact | Small spaces | None |
| Original ‘Logan’ | Historic variety, hardy | Cold climates | Severe |
Selecting the Perfect Sunny Site
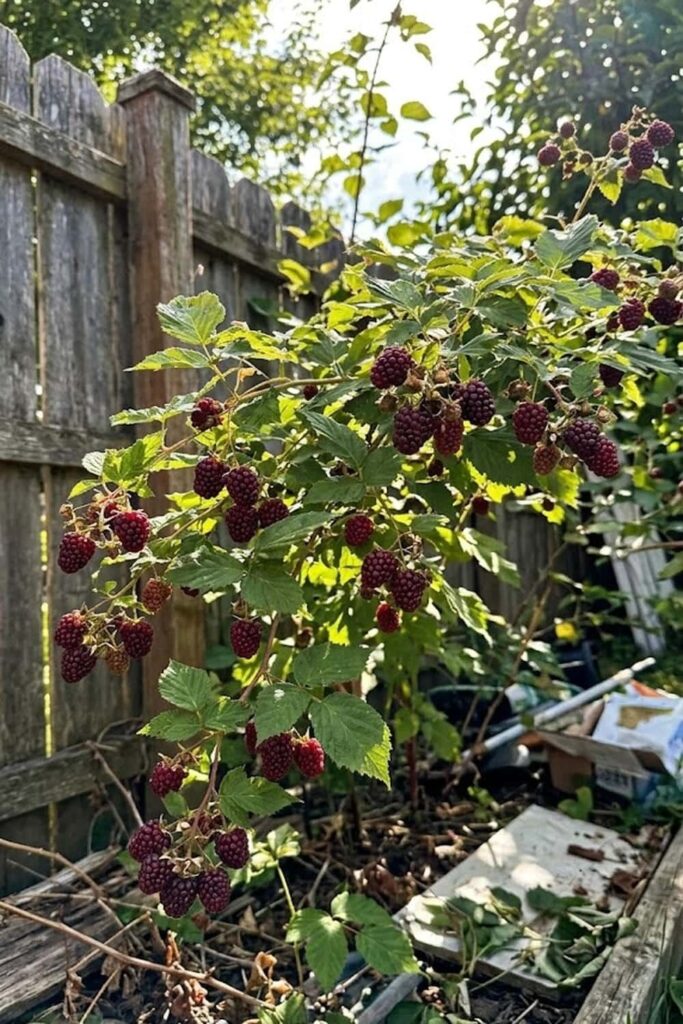
Site selection is where I see most beginners fail when learning how to grow loganberry fruit. They stick the cane in a shaded, damp corner and wonder why it only produces leaves. You must respect the plant’s biological needs: loganberries crave sunlight and hate “wet feet.” In my years of experience, the absolute perfect site is one that faces south or west and receives at least six to eight hours of direct, baking sun daily. This is non-negotiable for fruit sugar development.
While they are generally cold-hardy (tolerating temperatures down to USDA Zone 5 with winter protection), their vigorous, trailing canes are susceptible to physical damage. If you have a windy site, that friction will damage the delicate emerging blossoms. Always plant near a sturdy fence, wall, or structured trellis that can act as a windbreak while still allowing the sun to reach the soil. The soil itself must be free-draining; they will fail completely in waterlogged clay.
Soil Preparation for High Yields
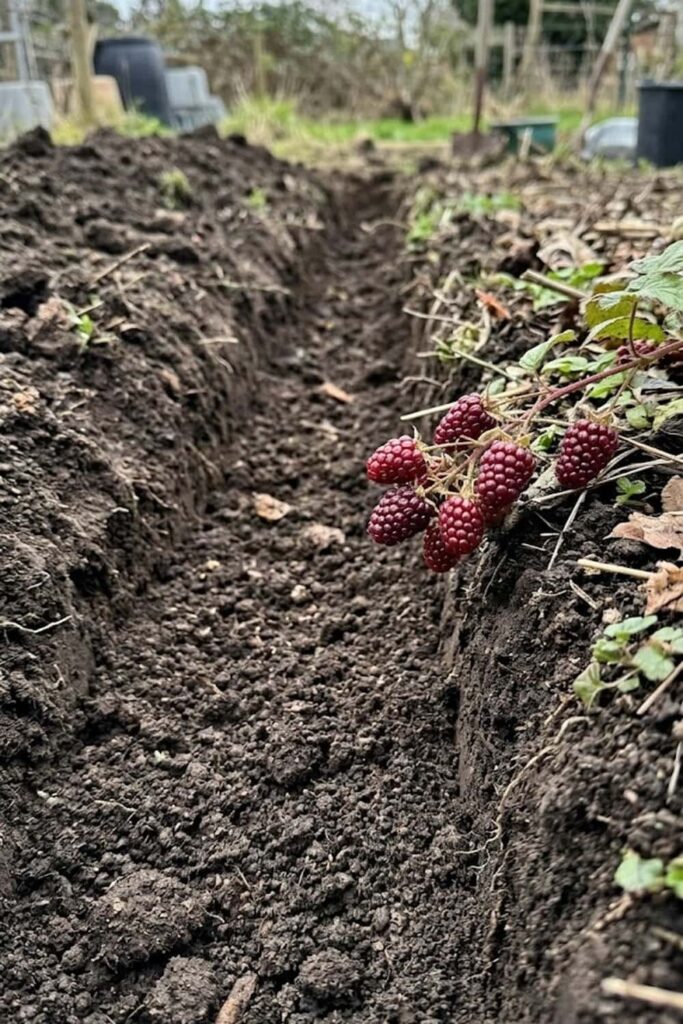
Once you have chosen your site, the next step in how to grow loganberry fruit involves serious soil modification. You cannot simply dig a hole in your existing lawn and expect a “massive harvest.” That is fluff thinking. Loganberries are Rosaceae, and like their rose cousins, they have heavy-duty nutritional demands. They require soil that is rich, moisture-retentive, and full of organic matter. My personal technique involves creating a dedicated “berry trench.”
A month before planting (ideally in early spring), I dig a trench 2 feet wide and 1.5 feet deep. I backfill this area with a 50/50 mix of the existing soil and incredibly rich organic amendments, such as well-rotted manure, garden compost, or leaf mold. I always integrate a handful of balanced organic fertilizer (like 5-5-5) at this stage. It is also a smart mechanical practice to test your soil pH; loganberries prefer it slightly acidic, between 6.0 and 6.5. This foundational management of the root zone ensures the plant has a reservoir of nutrients for years to come.
How to Plant Loganberry Canes Correctly
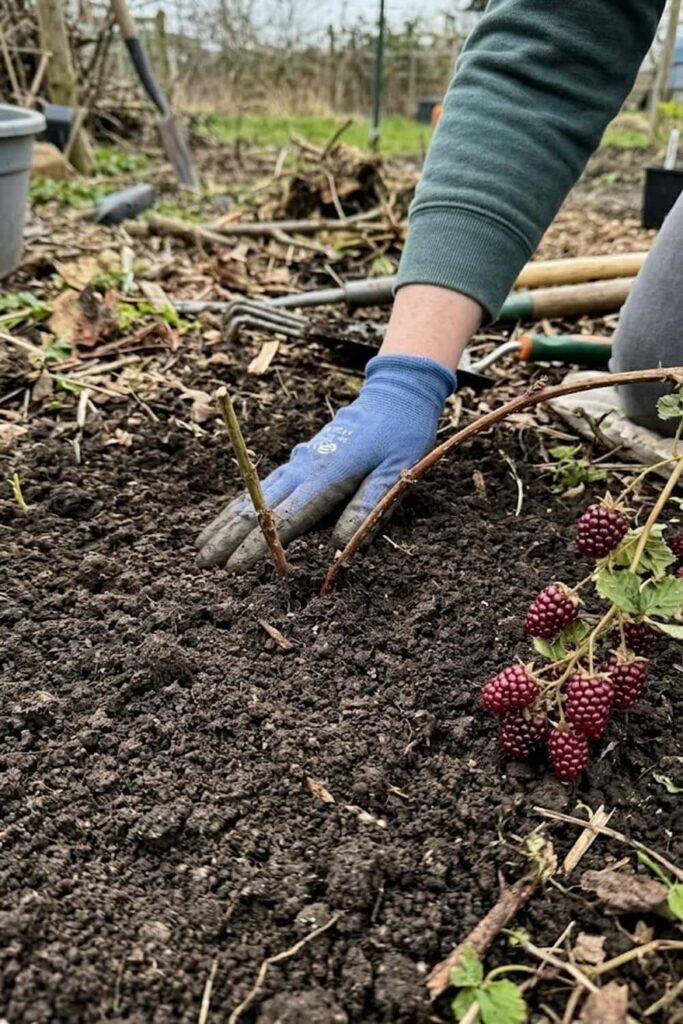
If you have prepared your soil trench and selected your site, you are ready for the crucial planting moment. When gardeners ask me how to grow loganberry fruit correctly, I emphasize two main factors: spacing and depth. I prefer planting bare-root canes in the late dormant season (early spring), but container-grown plants can go in anytime the ground isn’t frozen.
Because these hybrid berries (which are roughly 90% water when ripe, just like watermelon) are extremely vigorous trailing plants, you must provide adequate mechanical separation. Space individual plants 6 to 8 feet apart within the row. If you are planting multiple rows, space the rows 8 feet apart. For the actual mechanics of planting, I set the cane into the soil so that the crown (where the roots meet the stem) sits precisely 2 inches below the surface. This specific depth is vital; if you plant it too shallow, the crown will dry out and die. After planting, I always firm the soil with my hand and apply a significant volume of water to settle the roots and eliminate air pockets. I then prune the existing cane down to just 10 inches to encourage strong, new management of root structure.
Installing a Sturdy Trellis Support
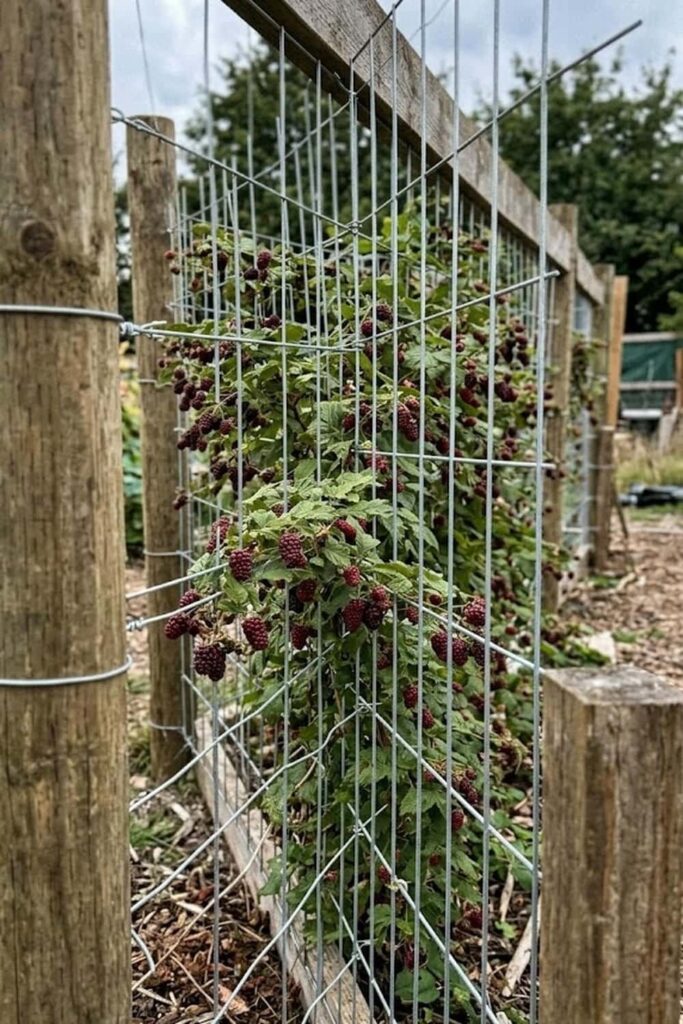
Installing the structural infrastructure is the most significant physical task you face when mastering how to grow loganberry fruit. Do not wait until the canes are sprawling across your lawn. I made that mistake, and untangling a thornless (but still very grabby) loganberry mess is an inefficient use of any gardener’s time. Because loganberries trailing habit is so vigorous, they require robust support to keep the fruit off the damp ground.
The best solution I have ever found is a Post and Wire trellis. You must install sturdy, 8-foot-long timber posts (sunk 2 feet into the ground) at each end of your berry row. If your row is longer than 15 feet, you will need intermediate posts for additional protection against sagging. I then run galvanized steel wire horizontally between these posts. My personal management of the framework involves running three wires at specific intervals: 3 feet, 4.5 feet, and 6 feet from the ground. This system allows you to weave the current year’s fruiting canes (floricanes) and the new year’s vegetative canes (primocanes) separately, which is critical for future pruning.
Watering Schedules for Juicy Berries
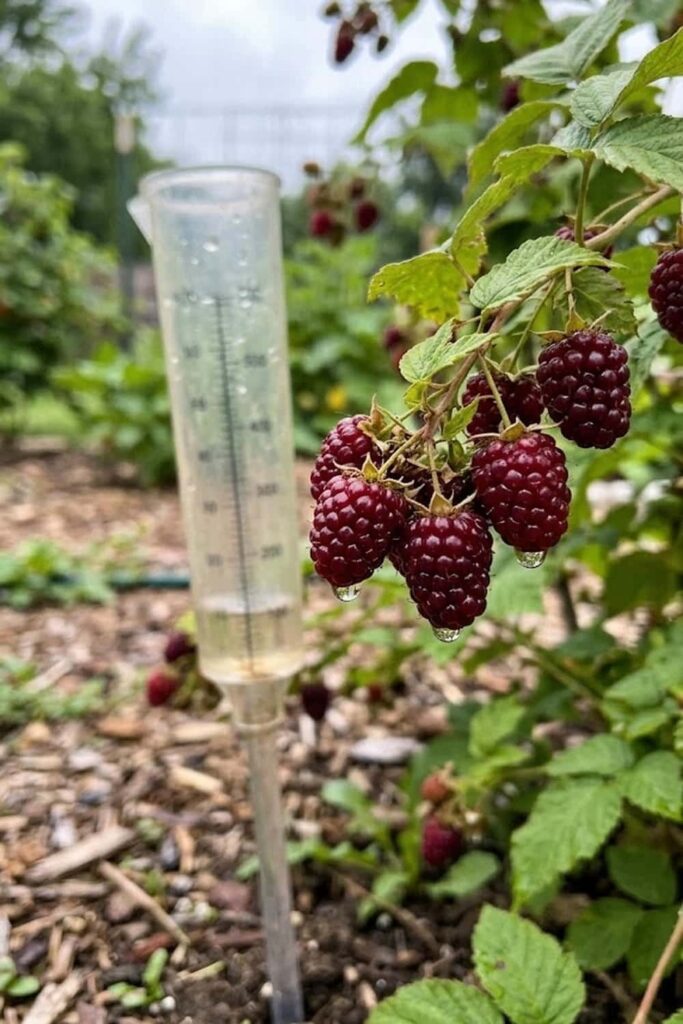
Maintaining a strict watering schedule is a defining factor in how to grow loganberry fruit with significant volume and exceptional flavor. Because loganberries trailing habit involves producing heavy crops of juicy fruit (which are roughly 90% water), consistent soil moisture is non-negotiable. I have found that erratic watering leads to small, dull berries or, even worse, “crumble fruit,” where the individual drupelets fail to bind together properly. You cannot rely solely on rainfall if you are aiming for a massive harvest.
I emphasize deep, regular irrigation over frequent, shallow sprinkles. Your primary management care must be during two critical windows: when the flowers are setting in late spring and throughout the entire fruit-ripening period in mid-summer. A useful fact from Oregon State University research shows that insufficient water during fruiting can reduce overall berry size by up to 40%. I personally rely on a simple rain gauge; if my garden doesn’t receive at least 1 to 1.5 inches of rain per week during the summer, I supplement using a soaker hose system to ensure the water reaches the root zone efficiently without wetting the foliage.
Organic Feeding and Fertilization
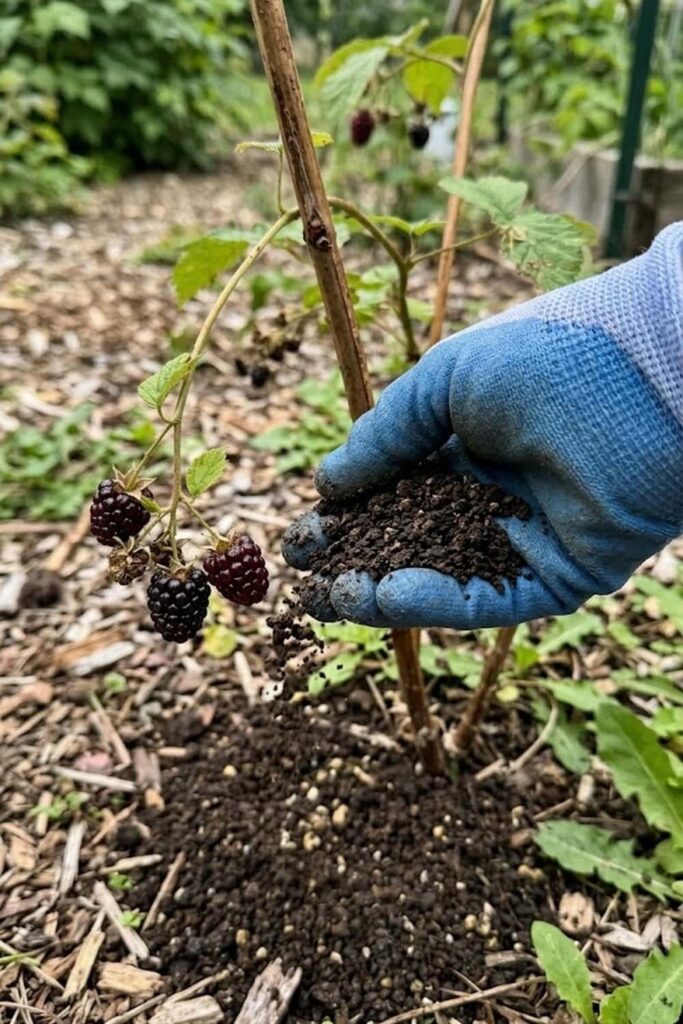
Loganberries are heavy feeders, and understanding their nutritional requirements is essential for a successful how to grow loganberry fruit strategy. I am a strong advocate for an all-organic approach because it supports long-term soil health and produces fruit with a superior flavor compared to those grown with synthetic fertilizers. As I mentioned earlier, loganberries are related to roses, and both respond extremely well to a rich, organic feeding regimen. My personal schedule is straightforward: I feed them twice a year.
My primary application is in early spring, just as the new green shoots (the primocanes) are emerging from the soil crown. This is when I apply a balanced organic berry fertilizer (look for N-P-K ratios like 4-3-4) and top-dress the area around the base with a generous 2-inch layer of well-rotted garden compost or aged manure. This slow-release care ensures a steady supply of nutrients for strong cane growth. Avoid high-nitrogen fertilizers at this stage, as they will encourage lush, abundant leaves but very little fruit.
I then provide a second, light feed in early summer, just after the fruit has set but before it begins to ripen. For this, I exclusively use a liquid seaweed or fish emulsion feed, which I apply as a soil drench or a foliar spray. This provides a quick boost of micronutrients and potassium, which are critical for maximizing both berry size and sugar content. This systematic management of nutrition guarantees the health and productivity of your plants.
Facts for reference:
- Spring Feed: Balanced Organic Fertilizer (e.g., 4-3-4) + 2″ Compost
- Summer Feed: Liquid Seaweed or Fish Emulsion
- Key Nutrient for Fruiting: Potassium
Management of Winter Mulching
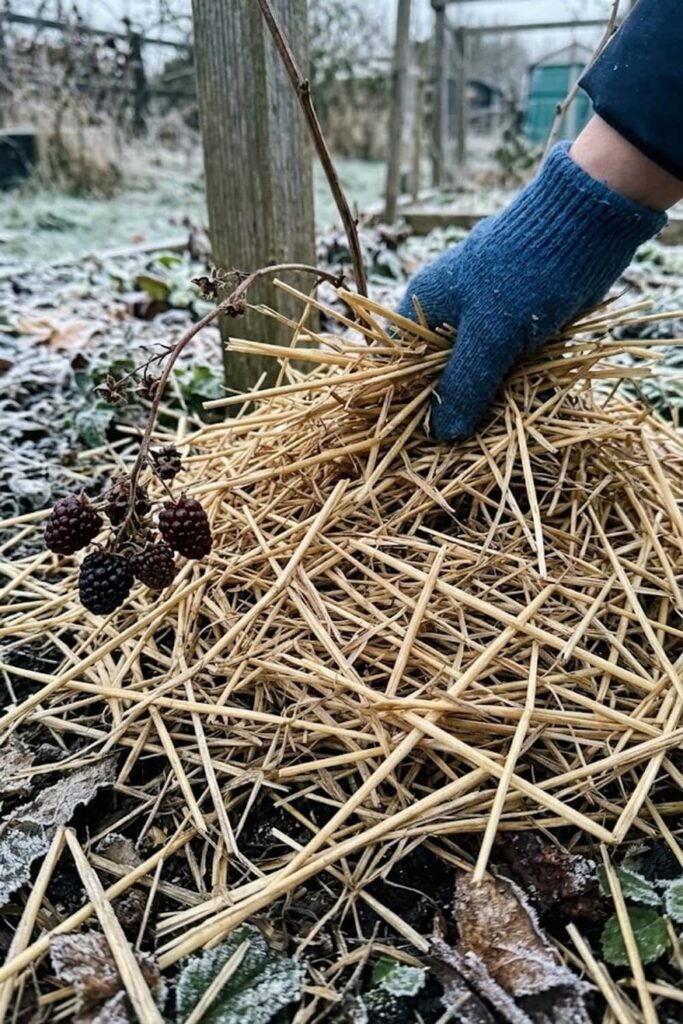
In many regions, winter management is the deciding factor in whether your plant survives to bear fruit the following year. While loganberries are relatively cold-hardy (especially popular thornless varieties like ‘LY654’ and ‘American Thornless’, which tolerate USDA Zones 5-9), their shallow, moisture-loving root systems are very vulnerable to the damaging freeze-thaw cycles of a harsh winter. This is where a strategic, protective mulching routine becomes essential for any gardener looking to maintain a healthy care strategy. You want to keep the soil temperature stable and retain moisture without creating a waterlogged environment.
My seasonal routine begins in late autumn, once the plant has shed its leaves and entered true dormancy. I first clean the base of the plant thoroughly, removing any fallen leaves or old debris that could harbor overwintering fungal spores or pest larvae. I then apply a massive volume of protective mulch directly over the root zone. My preferred winter mulch materials include straw, bracken, or shredded bark, which I heap into a loose, airy pile at least 6 to 8 inches deep around the crown. This airy barrier provides incredible thermal protection against extreme cold.
I avoid using heavy, dense materials like pure woodchips or wet leaves, which can compact and cause waterlogging. In extremely cold climates (USDA Zone 5 and below), I take it one step further by also wrapping the main bundle of trained canes in horticultural fleece to safeguard them from drying, icy winds. This diligent, proactive approach guarantees your plants are insulated and ready to burst into strong, healthy growth the moment spring arrives.
Training Canes for Maximum Airflow
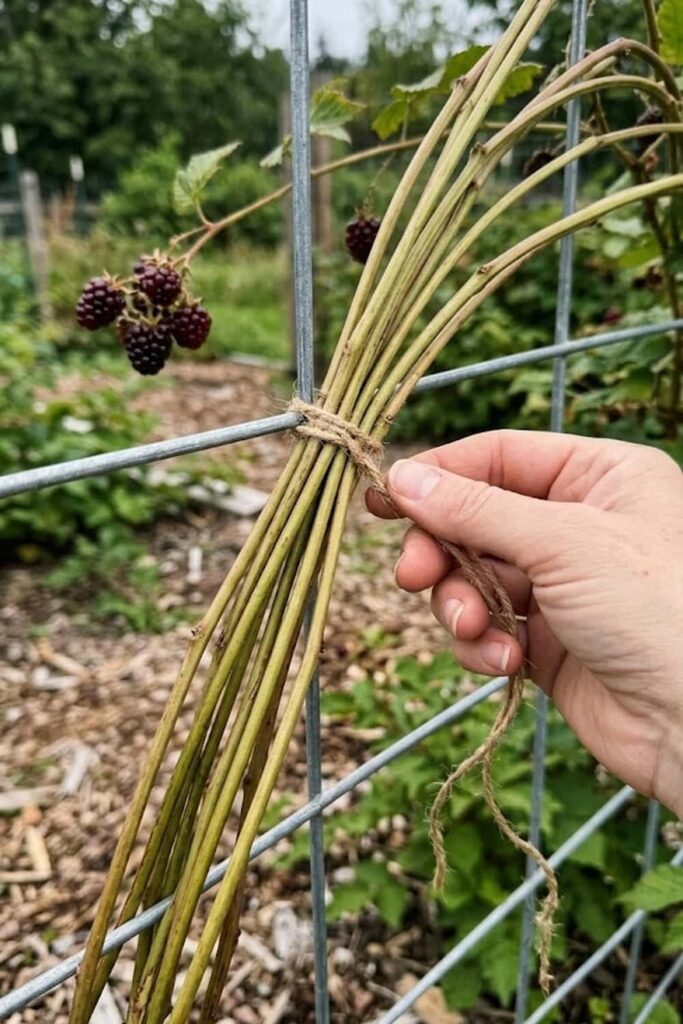
The intricate training of loganberry canes is perhaps the most defining mechanical process in successful how to grow loganberry fruit strategies. In my early gardening years, I just let the new shoots mix with the old ones; the resulting dense jungle created perfect conditions for botrytis (gray mold) to decimate my harvest. You must prevent this. Training isn’t just about aesthetics; it is a critical fungal prevention method designed to maximize both sunlight exposure and essential airflow through the ripening fruit clusters.
The core principle I use relies on separating the two types of canes: the floricanes (this year’s fruiting wood) and the primocanes (next year’s new green shoots). Once all fruiting canes are cut down in autumn, I have a clean slate. As the vigorous new primocanes emerge from the crown in late spring, I do not weave them onto the main trellis wires where the fruit is. Instead, I loosely bundle them together and train them horizontally along the very bottom wire of the trellis system. This unique approach keeps them out of the way, allowing all the light and air to circulate around the developing fruit above. This systematic management of the physical structure is the single most effective step you can take to guarantee a healthy, disease-free, and abundant crop year after year.
Pruning Techniques for Second-Year Wood
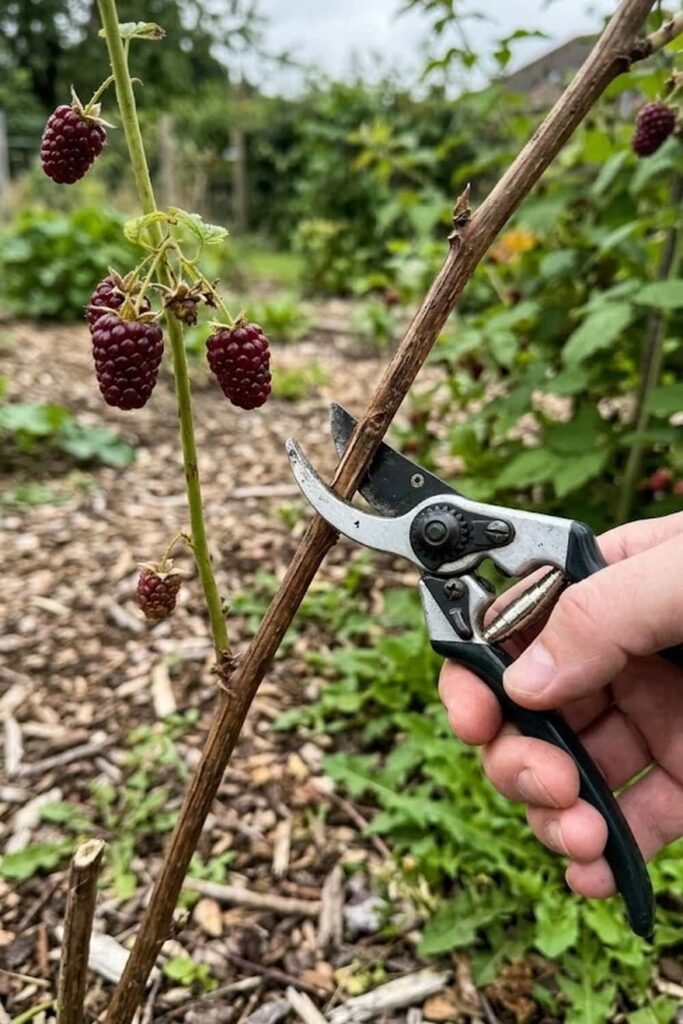
Understanding the simple distinction between first-year and second-year wood is the entire technical secret to successful pruning when mastering how to grow loganberry fruit. Do not approach this task with fear. Loganberries (like their parent raspberries) are technically biennial-caned perennials; the root system lives for decades, but individual canes only live for two specific seasons. Primocanes emerge in year one as lush green shoots. In year two, these same canes develop lateral branches, flower, and become floricanes (fruiting wood). Once they have finished fruiting, they have completed their life cycle and must be physically removed from the care of the plant.
My pruning routine is a simple, late-summer requirement. As soon as the final, massive summer harvest is complete and the last berry is picked, I grab my sharp, clean secateurs. I identify every single floricane that just finished producing fruit—they will typically be browner, woodier, and already starting to look spent. I prune these canes all the way to ground level, leaving no stump. Simultaneously, I identify the new, vigorous green primocanes that have grown during the current season. I carefully lift them and train them onto the wires where the old canes used to be, spacing them out fan-style for maximum protection from crowding. By focusing my pruning only on this finished, second-year wood, I guarantee the plant directs all its energy into developing strong, healthy floricanes for the next season’s bumper crop.
Simple Pruning Facts:
- Year 1: Primocanes emerge (vegetative).
- Year 2: Floricanes develop fruit.
- Post-Harvest Action: Cut all floricanes to the ground.
- Trellis Action: Train next year’s primocanes onto the wires.
Prevention of Common Berry Diseases
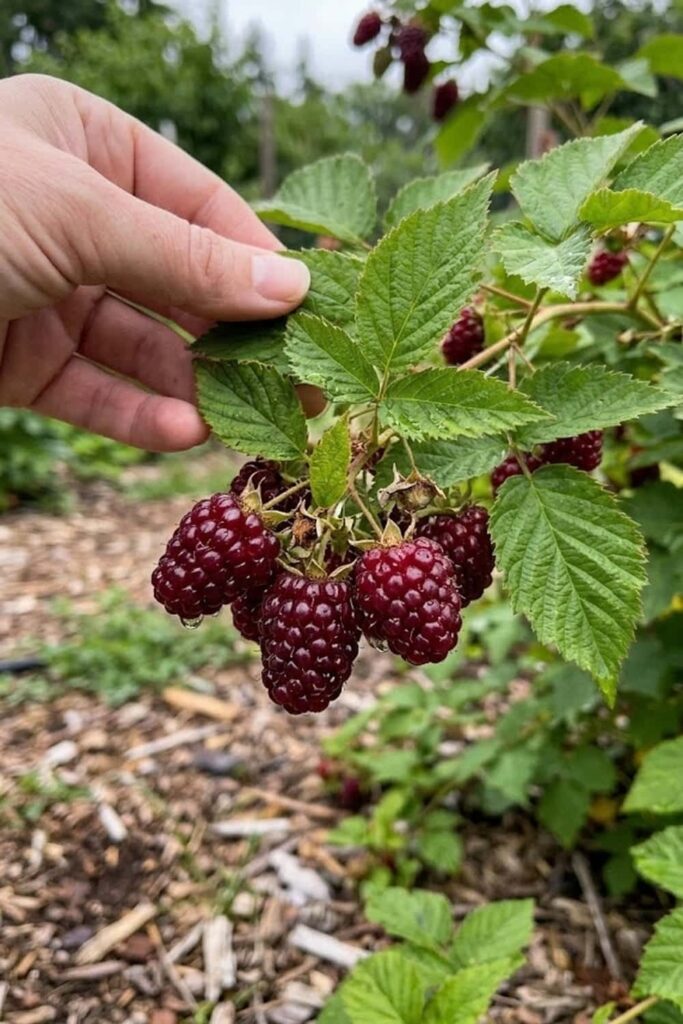
Maintaining a vigilant prevention strategy is essential when learning how to grow loganberry fruit, as these hybrids can fall victim to several costly fungal issues. I have found that a proactive approach is infinitely easier than attempting a control cure. In my early years, I nearly lost an entire row to gray mold (Botrytis cinerea). Fungal spores thrive in the very conditions that loganberries love: moist, rich soil and lush foliage. The technical secret is to eliminate the primary mechanical cause: stagnation.
I focus my disease prevention entirely on the physical structure I’ve already detailed. Proper spacing of 6 to 8 feet between plants is the single most important action you can take; overcrowding kills airflow. Secondly, I strictly manage my irrigation schedule, ensuring I use soaker hoses rather than overhead sprinklers. Wetting the foliage and developing berries directly encourages mold and mildews like Cane Blight (Leptosphaeria coniothyrium) or Anthracnose. If you notice any suspicious, dark, sunken lesions on the canes, remove them immediately with sterile tools. This foundation of physical management guarantees the long-term health of your berry patch.
Control of Garden Pests and Birds
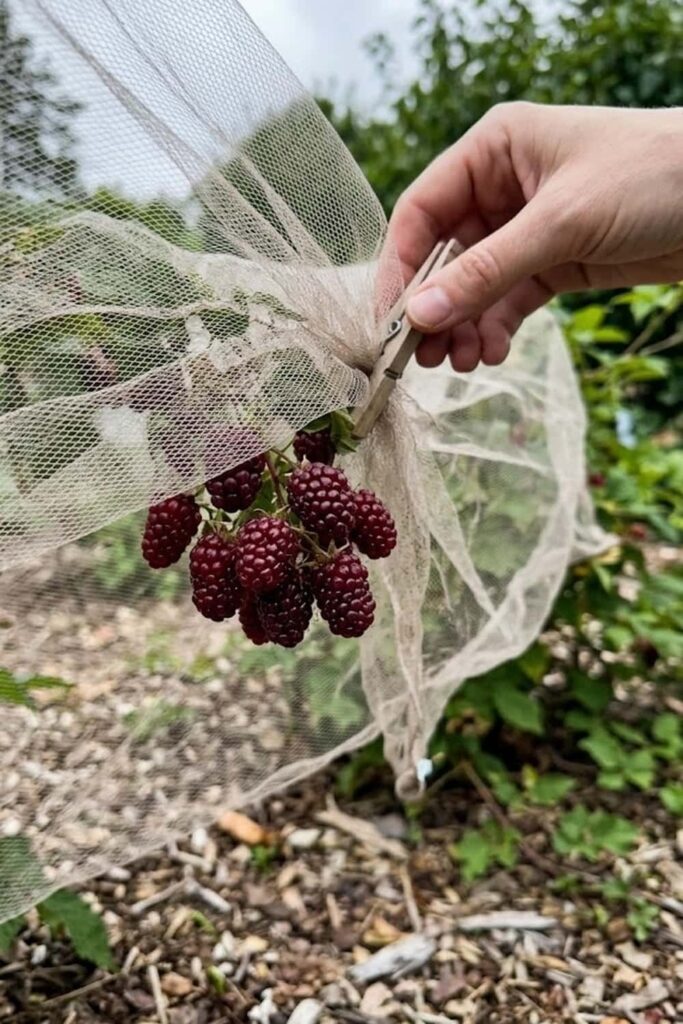
The final defining battle in how to grow loganberry fruit successfully is not against disease, but against the local fauna that also covets your harvest. You have successfully managed the soil and structure, but if you do not implement a strategic control plan, you will only receive a fraction of the available fruit. I separate this into two mechanical realities: managing insect pests like aphids and raspberry beetles, and providing total protection from birds.
Birds (especially blackbirds and thrushes) are perhaps the most serious threat to a massive harvest. They will wait with incredible patience until the berries transition from red to the definitive, deep burgundy, and then they will strip the canes overnight. I enforce 100% bird prevention by using fine, UV-stabilized fruit netting draped securely over the entire trellis structure once the green berries appear. For insect pests like aphids, I rely on regular biological management. Rather than spraying, I introduce thousands of ladybugs and predatory wasps to the patch. This specific environmental care ensures a self-sustaining ecosystem that controls pests naturally, without chemical risk.
Care for Container-Grown Loganberries
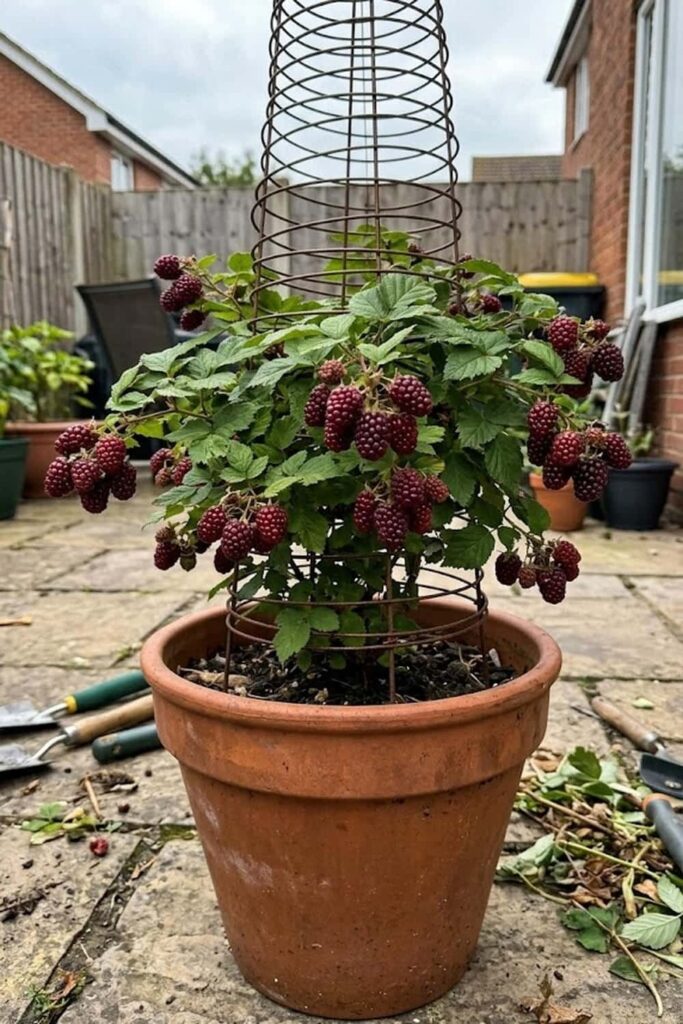
If you do not have a large backyard or a sunny fence line, you do not have to abandon your goal of a how to grow loganberry fruit harvest. These hybrid berries, especially modern thornless varieties like ‘LY654’ and ‘American Thornless’, are surprisingly efficient at producing fruit when grown in large containers. This micro care strategy brings huge mechanical advantages; you can control the soil quality, move the plant to trace the sun, and bring it indoors for winter protection if needed.
The technical secret to success in a pot is satisfying the plant’s huge resource demands. You must use a substantial container—at least 15 to 20 gallons (45cm diameter)—with aggressive drainage holes. Loganberries hate waterlogged soil. I line the bottom with a mechanical layer of pottery shards or heavy gravel before filling with a highly nutritious, moisture-retentive mix. My personal soil strategy is a 50/50 blend of heavy-duty potting compost and well-rotted manure, integrated with a handful of balanced organic fertilizer. To manage the trailing care, I always insert a compact, tripod-style obelisk trellis directly into the pot, training the canes in a tight spiral to maximize productive wood in a minimal space.
Protection Against Harsh Spring Frosts
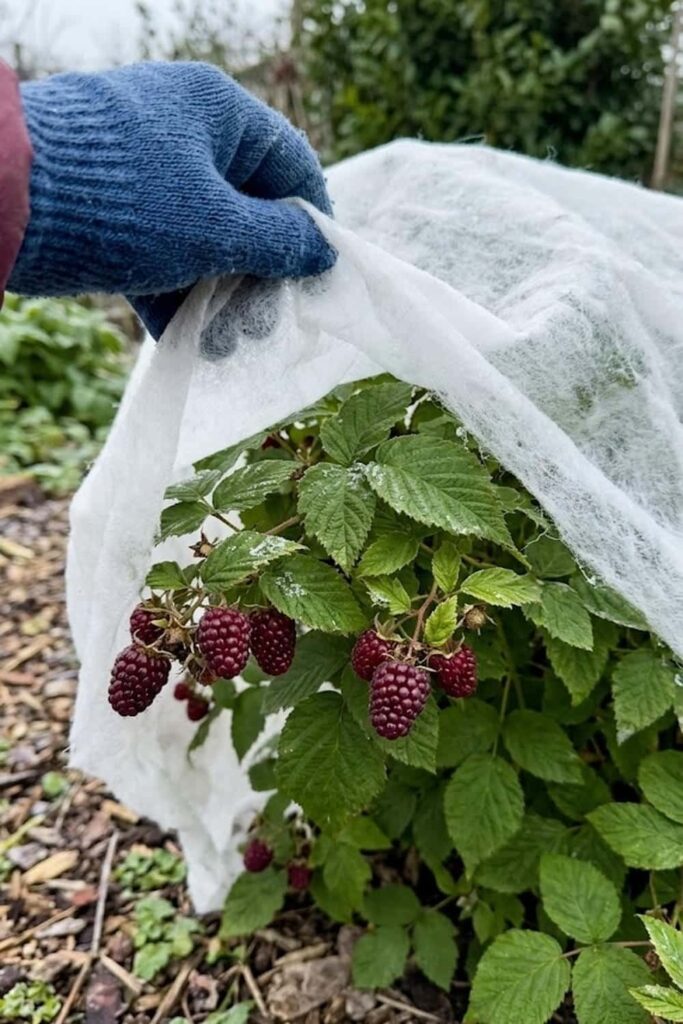
Even with excellent care and a perfect site, you face one significant annual mechanical risk when learning how to grow loganberry fruit: late spring frosts. Loganberries are relatively cold-hardy once dormant, but they are genetically programmed to burst into life very early in the season. As soon as the first weak spring sun arrives, the plants develop tender new fruiting laterals and blossom clusters. These early buds are extremely susceptible to physical damage if temperatures drop unexpectedly.
I strictly enforce an atmospheric prevention strategy throughout the “frost window.” In my region, this critical period spans roughly six weeks. My primary mechanical tool is heavyweight horticultural fleece (30gsm). If the forecast predicts temperatures dropping below 32°F (0°C), you must physically safeguard the early care. I temporarily drape the fleece directly over the main trained canes and the new primocanes emerging at the base. This process creates a stable, slightly warmer microclimate around the tender growth, preventing the developing blossoms from blackening and dying. I have found that a single unprotected frosty night can reduce the season’s entire how to grow loganberry fruit yield by up to 80%. Do not neglect this critical management step.
Harvesting at the Peak of Ripeness
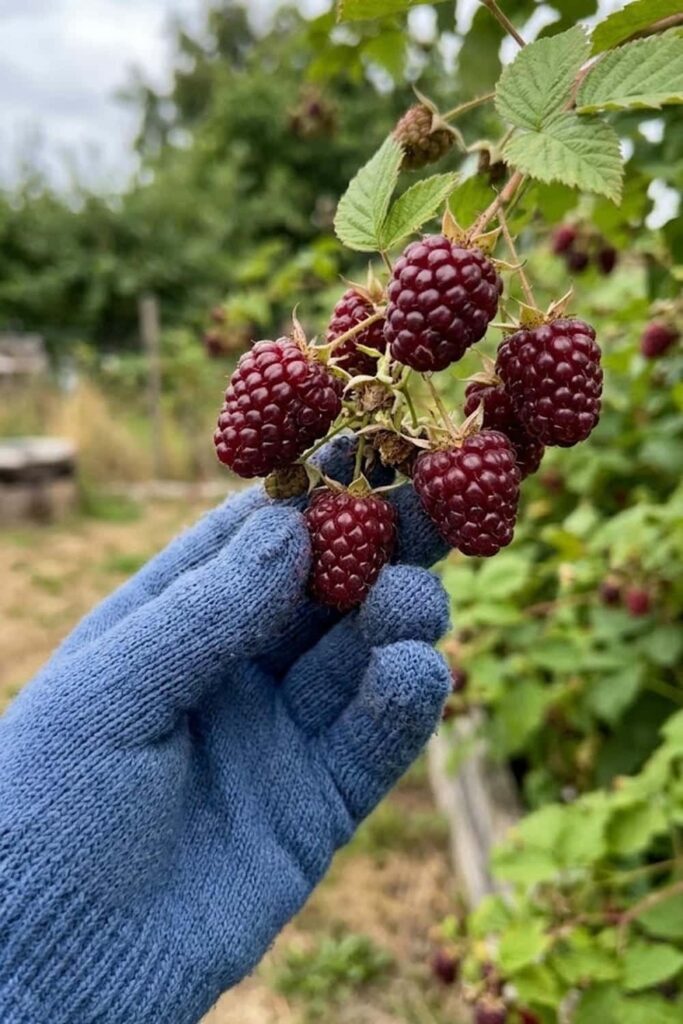
The absolute goal of your how to grow loganberry fruit journey is to harvest at the precise moment the complex, tart-sweet flavor profile is fully developed. I have found that most beginners pick way too early, resulting in a sour, underwhelming berry. You cannot just pick when they look red. A true, ripe loganberry possesses two specific, definitive physical qualities that you must check during your daily management of the harvest.
First, you must ignore the “bright red” phase. When they are red, they are raspberry-tart but lack the blackberry depth and sugar. You want to wait until they transition into a deep, dull, burgundy-purple. The technical difference between a red berry and a deep burgundy berry is a 30% increase in natural sugar content. Secondly, do not pick a firm berry. I perform a mechanical “touch-test”: I place my finger under the berry and lift gently. If it is truly ripe, it will simply dissolve into your hand without any pulling.
Also, it is critical to note that the core (known technically as the torus) stays inside the berry when picked, unlike raspberries where it stays on the plant. Picking at this peak care window provides a berry that is aromatic, incredibly juicy, and sweet enough to eat straight from the cane. This is the moment your diligence is rewarded with a superior, professional-grade fruit that you simply cannot find in any store.
Ripeness Index:
- Red & Firm: Immature, Tart
- Burgundy & Firm: Ripening, Complex
- Deep Purple-Red & Soft: Peak Ripeness, Sweet
- Harvest Technique: Gentle Lift-Test
Propagation Secrets for Free Plants
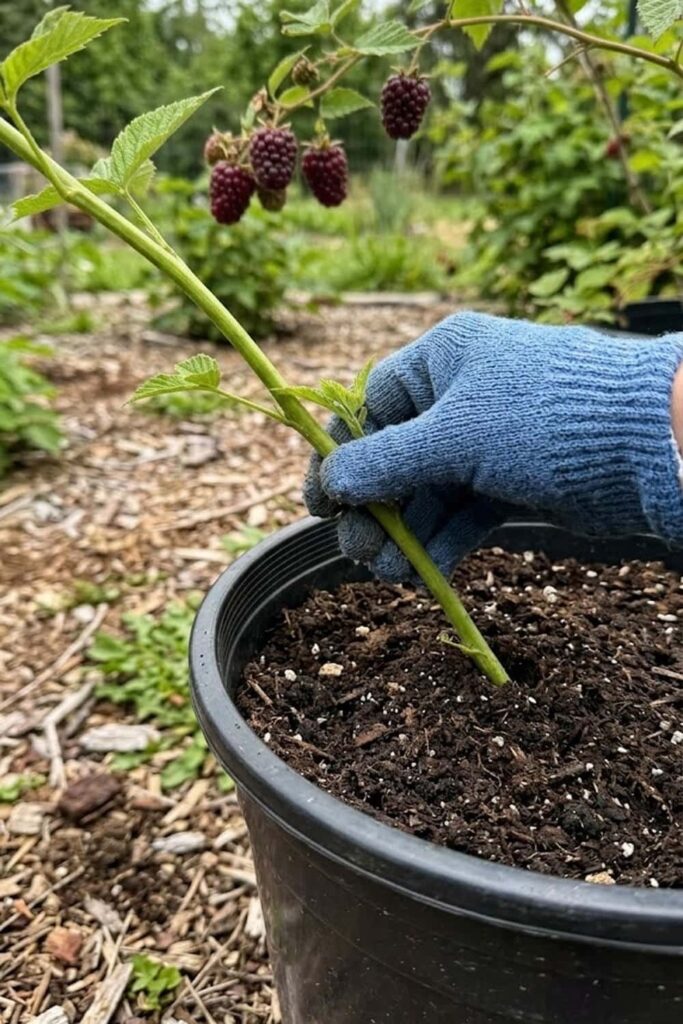
If you wish to increase your harvest without spending any money, you are ready for the simple, mechanical secret that I use to create an unlimited supply of healthy, productive plants. Because you have mastered how to grow loganberry fruit and now own a healthy, vigorous crown, you possess the raw biological capital needed for successful propagation. The most efficient method for multiplying loganberries (and other trailing hybrids like Tayberries) is “Tip Layering.”
This technique exploits the trailing nature of the vigorous new green primocanes that have grown during the current season. Instead of training these long canes onto the trellis wires where the fruit is, I simply allow a few of them to cascade down and physically touch the ground. In late summer (mid-August), I identify a strong, healthy primocane. I prepare a dedicated 5-gallon nursery pot filled with a 50/50 mix of organic compost and manure. I then use a small garden trowel to physically pin the active growing tip of the cane roughly 2 inches deep into the soil of the pot. By using a landscape staple or a heavy stone for mechanical management, I ensure the tip stays firmly buried. Within six to eight weeks, this buried tip will grow an independent, powerful root system. Once the roots are established (usually by the following spring), I simply cut the parent cane roughly 10 inches from the new plant, providing me with an entirely free, genetically identical Loganberry powerhouse ready for its own sunny site. This proactive care guarantees an ever-expanding berry patch for free.
Post-Harvest Cane Maintenance
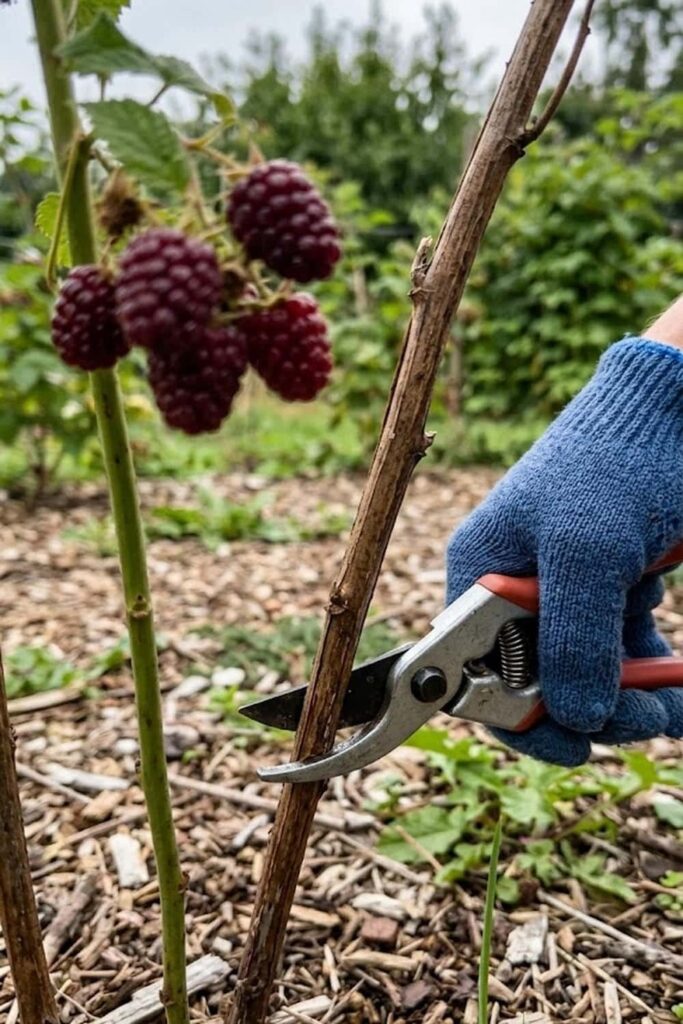
Once your massive harvest is complete and your propagation pots are settled, your active season is finished, but your how to grow loganberry fruit journey is not. The final mechanical step is Post-Harvest Cane Maintenance. This is a crucial sanitation requirement. As you know, loganberries only fruit on second-year wood. After the final berry is picked (late August/early September), the spent floricanes have completed their biennial life cycle and will naturally begin to die back. They cannot produce fruit again.
My immediate post-harvest routine is to physically remove every single one of these brown, woody floricanes that just finished producing fruit. Grab your sharpest, sterile secateurs. Trace each spent cane all the way back to the crown and cut it off at ground level. Simultaneously, I identify the vigorous, new green primocanes that grew during the current season. Instead of leaving them bundled loosely at the bottom of the trellis (where I trained them earlier to maximize airflow), I carefully lift them and train them fanned out across the newly emptied wires where the old canes were. This proactive mechanical management of the physical structure ensures they are exposed to the autumn sun and properly hardened off before winter. Finally, I thoroughly clean the ground around the base, removing any old mulch and debris that could harbor overwintering diseases like Gray Mold, and I top-dress the area with fresh compost for continued healthy care.
Final Checklist for Next Year’s Growth:
- Identify spent floricanes (brown, woody).
- Prune them completely to ground level.
- Sterilize secateurs between plants for disease prevention.
- Lift and train new primocanes (green, vigorous) onto wires.
- Sanitize ground: remove old debris and apply new compost.
FAQ: Mastering Loganberry Growth
FAQ: Mastering Loganberry Growth How long does it take for Loganberry fruit to grow?
I have found that while your newly planted cane will focus entirely on establishing its root system and producing vigorous green primocanes during its first year, you must be patient. You will not see a substantial harvest immediately. By the second year, those same canes (now floricanes) will flower and produce a light crop of berries. However, you can expect the plant to reach its full mechanical maturity and deliver a massive summer harvest from its third season onwards.
Can I grow Loganberries in a small garden?
Yes, you absolute can, and this is where successful structural management makes all the difference. Because loganberries trailing habit can sprawl, I rely on a “fan-training” technique. If you have a sunny fence or wall that is only 6 feet wide, you can train a single Loganberry cane fanned out against it. This proactive structural care maximizes fruit-bearing wood while occupying very minimal ground space, making them highly efficient productive plants.
What is the best soil pH for growing organic Loganberry fruit at home?
Loganberries, like all Rubus species, prefer soil that is slightly acidic. According to technical data from the Royal Horticultural Society, the definitive, ideal pH range is between 6.0 and 6.5. This acidic environment allows for the efficient absorption of key nutrients. If your soil is alkaline, you can adjust it mechanically by integrating significant volumes of composted pine needles, sulfur, or well-rotted organic manure before planting, ensuring long-term protection against nutrient deficiencies.
How to prune Loganberry canes for maximum fruit yield?
Pruning is where the biennial nature of the plant is critical to success. For maximum care and maximum control, I follow a strict biennial management process. As soon as the final summer harvest is complete, I cut all floricanes that just finished producing fruit—they are woody and brown—completely to ground level. Simultaneously, I lift the new, green primocanes that grew during the current season and train them onto the wires where the old canes used to be. This specific care guarantees the plant directs all energy into the strong, healthy canes for the next season’s bumper crop.
When to harvest Loganberries for the sweetest fruit flavor?
The definitive moment for maximum care is often misunderstood. I have found that waiting is essential for the superior flavor profile you are looking for. Do not pick when they are bright red; they will be too tart. Wait until the berries have transitioned to a deep, dark burgundy-purple and feel slightly soft and heavy. The mechanical technical secret is to wait until they detach freely with the gentlest pull. A truly ripe berry will provide a 30% increase in natural sugars and develop the complex, aromatic profile that makes them so valuable.








