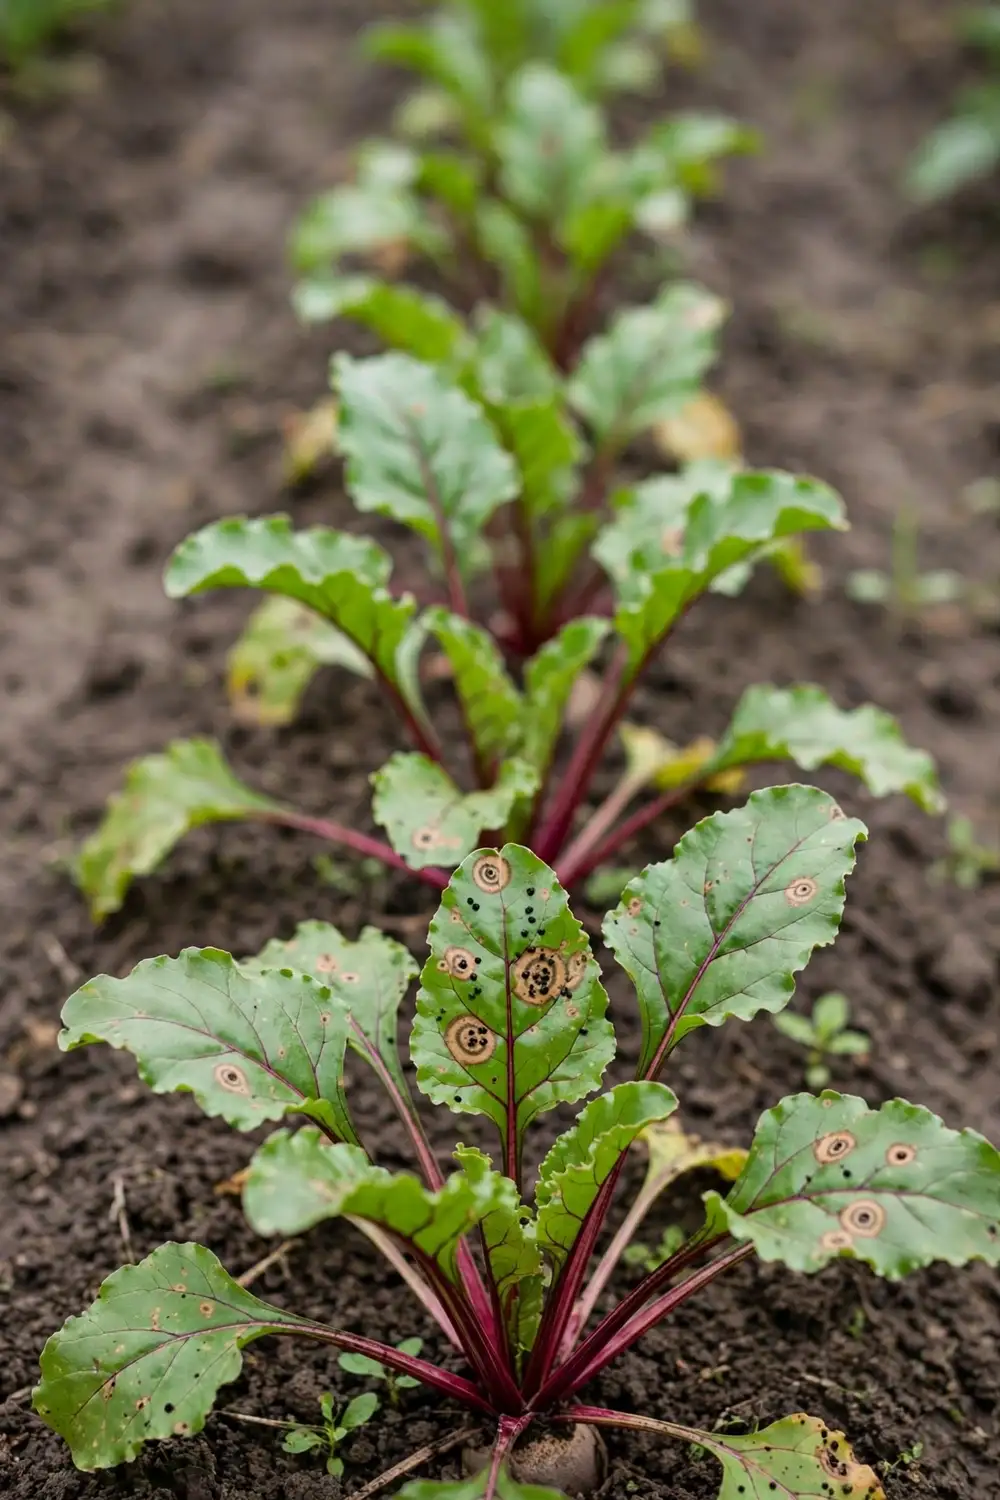

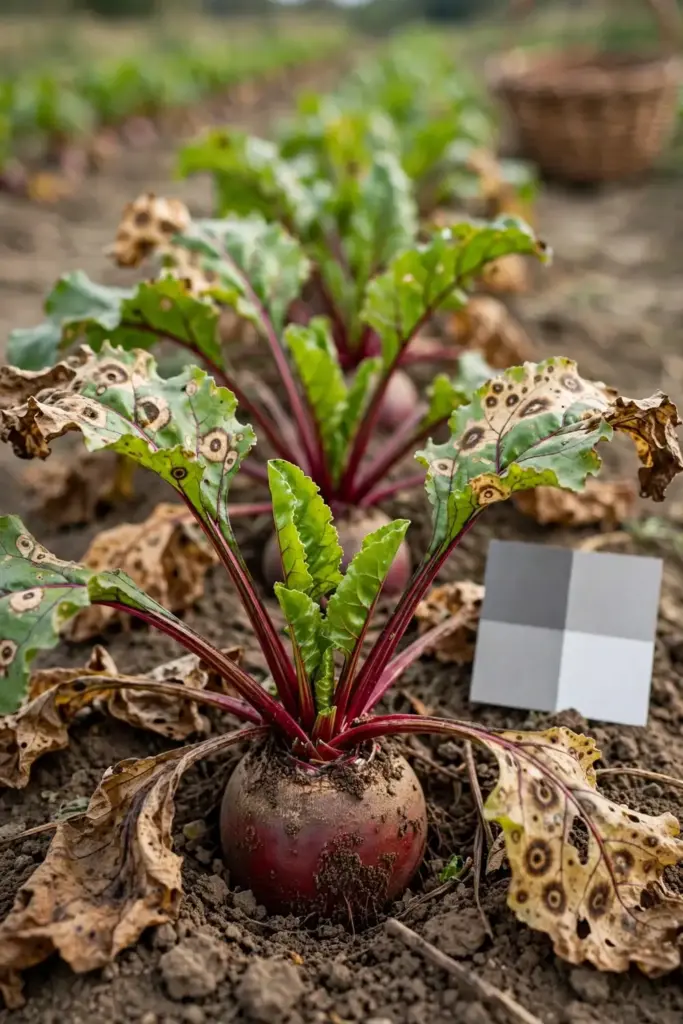
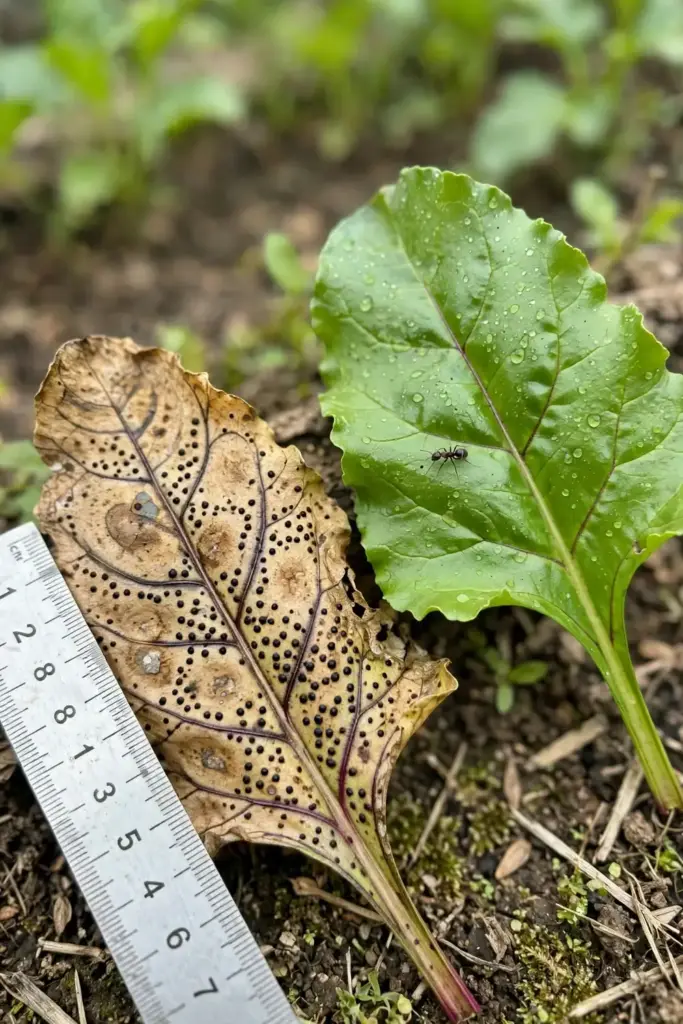
Those tan spots with dark rings on your beet leaves have a name: Phoma leaf spot, caused by the seed-borne fungus Phoma betae. The spots run 1 to 2 centimeters across, and the same fungus rots seedlings at the soil line and scars beet roots from the crown down. Here is the honest part first. On beets you grow for your own kitchen, this disease is mostly cosmetic. This phoma leaf spot treatment guide walks you through identifying it, deciding whether it deserves any action at all, and the seven steps that actually work when it does.
The focus here is table beets and leafy greens like Swiss chard and spinach, the crops home gardeners actually grow. If you came looking for canola or oilseed rape advice, that is a different crop with different economics, and this article will not pretend otherwise. Beets also happen to be a reliable fall vegetables to plant choice, so late-season spots are the most common reason gardeners go looking for answers.
You will get a clear identification routine, a differential table that separates Phoma from its lookalikes, and seven steps ordered by impact. Step 1 is the triage call most guides skip.
What Phoma Leaf Spot Actually Is
Phoma leaf spot is a fungal disease of beets and their relatives caused by Phoma betae (synonym Neocamarosporium betae), a true fungus, not a bacterium or a virus. The same organism causes three problems that look unrelated: leaf spots on mature plants, damping-off that kills seedlings at the soil line, and a dry root rot that starts at the crown and works down into the taproot. Cornell’s vegetable pathology team documents all three phases on table beet.
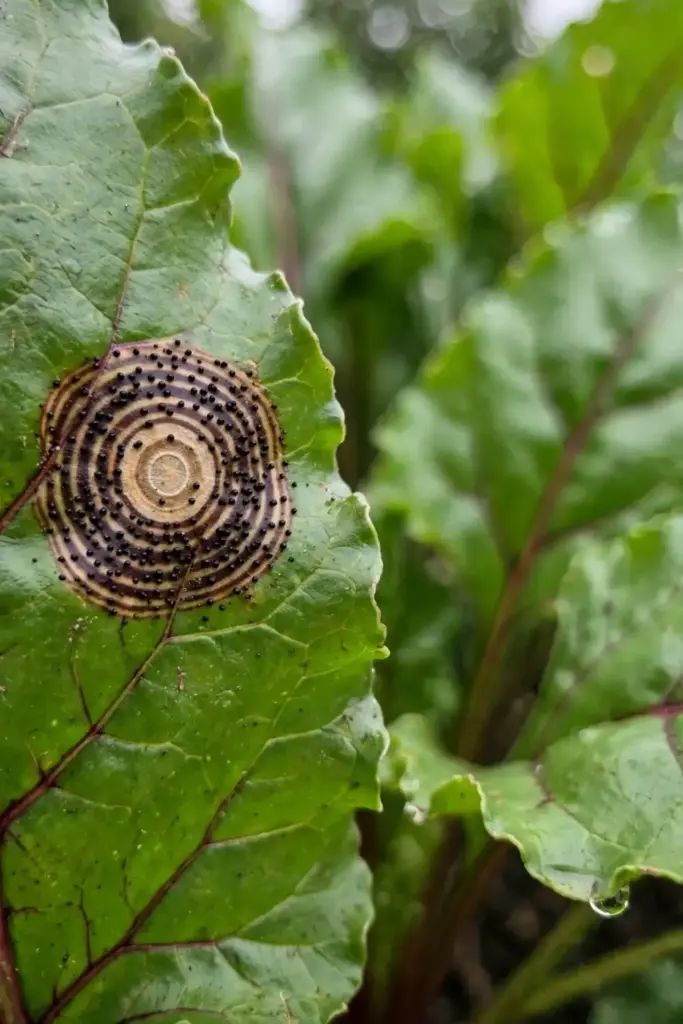
The host list is the Beta family plus a few hangers-on: table beet, sugar beet, Swiss chard, and spinach, with lambsquarters serving as a weed reservoir that keeps the fungus around between plantings. The pathogen is commonly introduced into a garden through infested seed, which is why Step 2 of this guide carries more weight than any spray. Once present, it survives on crop debris and in soil, spreading within a planting through water-splashed spores and over longer distances on the wind.
How to Identify Phoma Leaf Spot on Beet Leaves
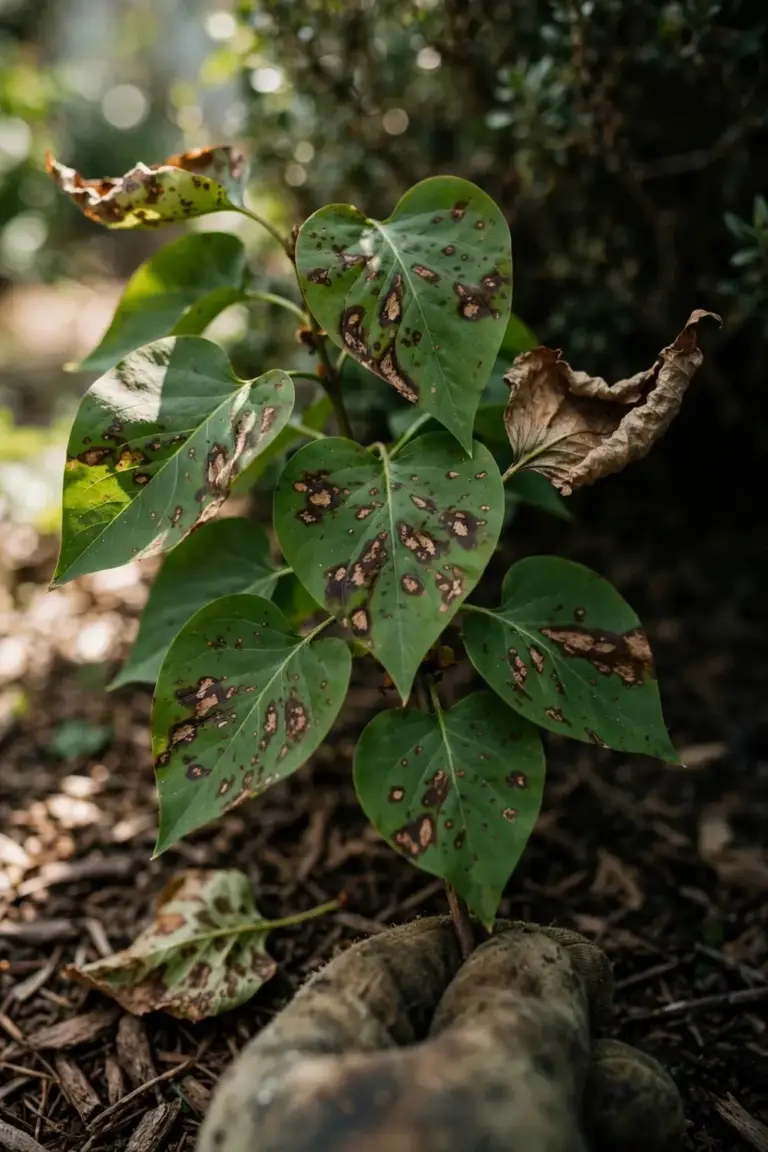
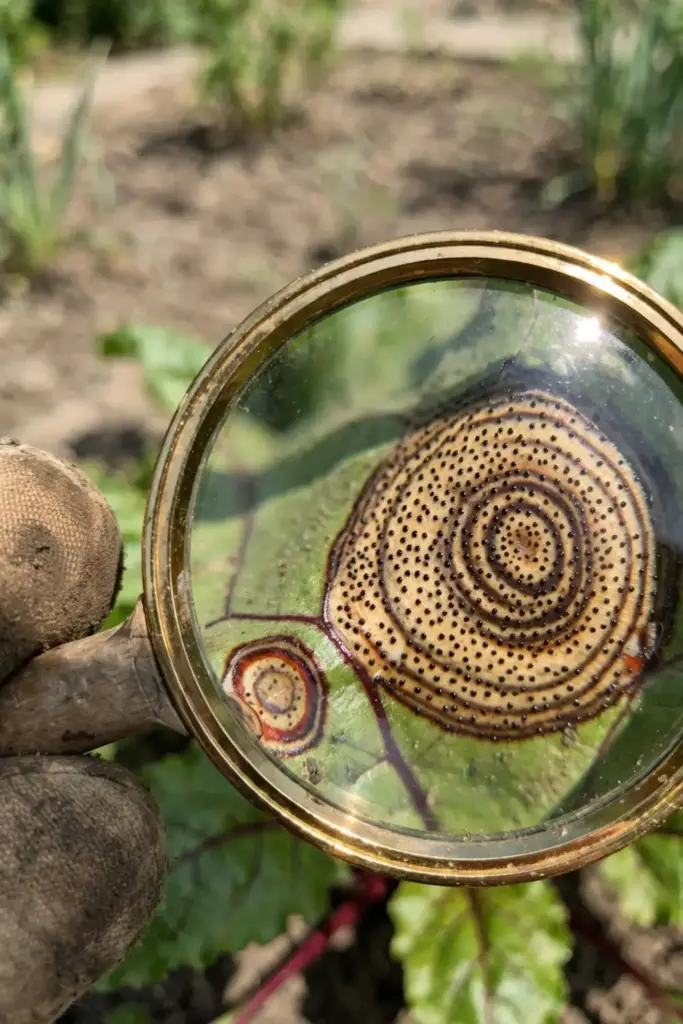
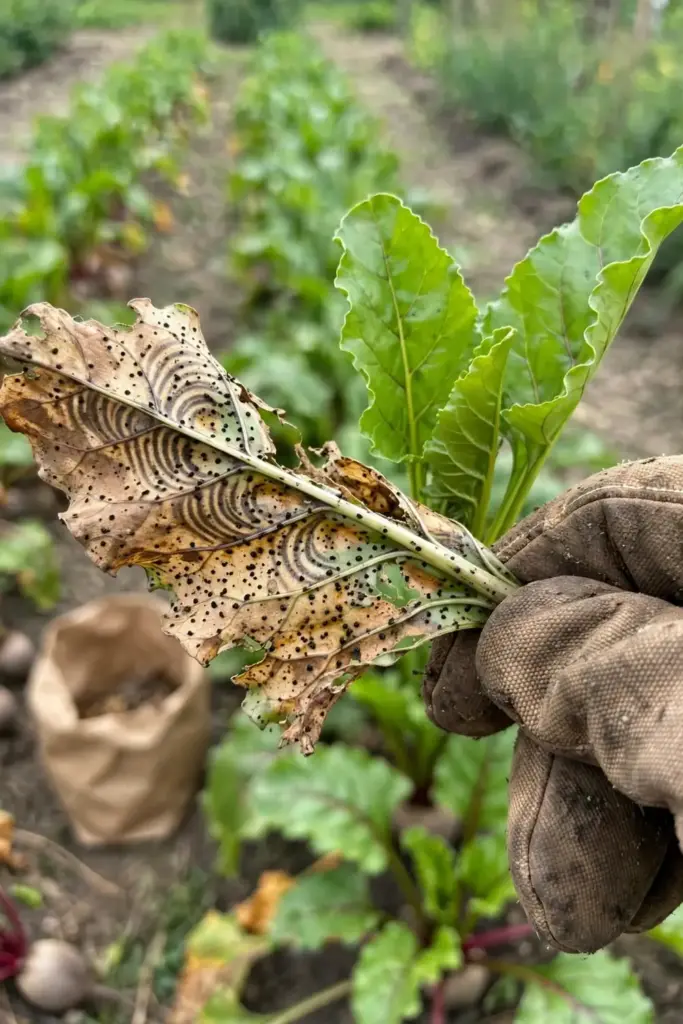
Look for round to irregular leaf spots, usually 1 to 2 centimeters across, in tan to brown with a darker border. The signature detail is a pattern of dark concentric rings inside the spot, like a tiny target. If you look closely, sometimes with a hand lens, you can see minute black dots arranged in those rings. Those dots are pycnidia, the asexual fruiting bodies of the fungus, and they are the single most reliable field mark. No pycnidia, no confident Phoma call.
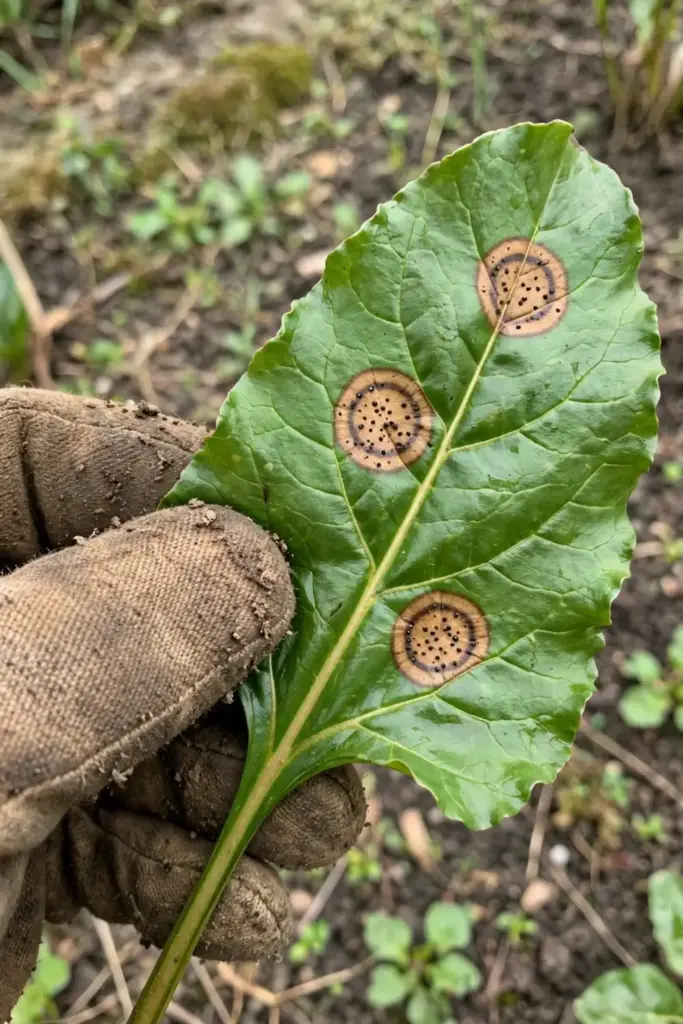
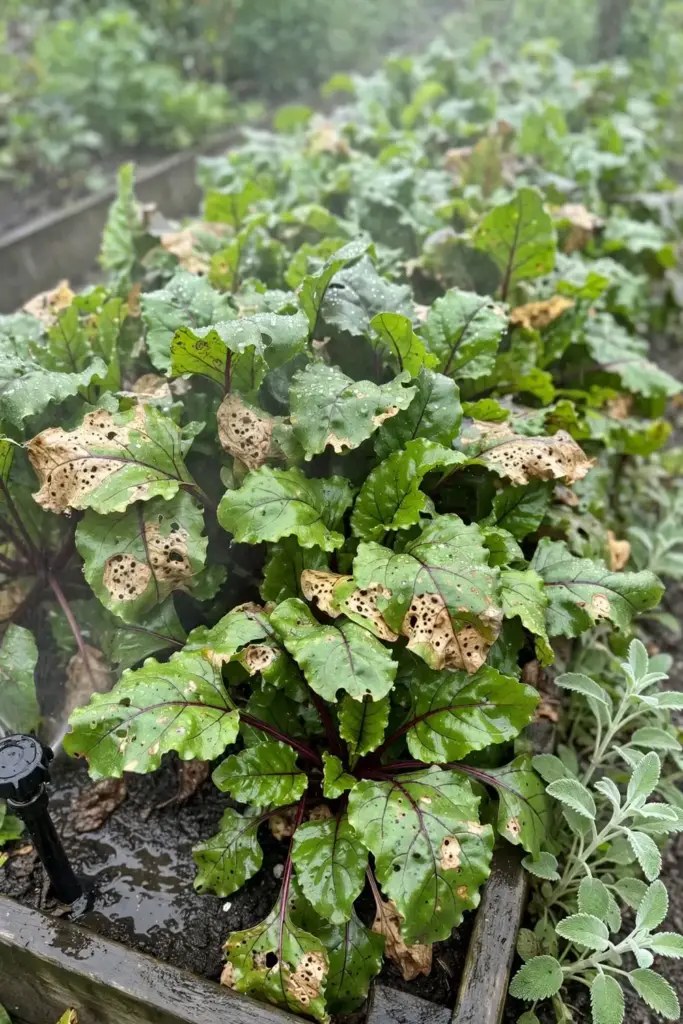
Spots usually start on older, lower leaves and work upward during wet weather. In a bad year the spots merge, the leaf tissue between them yellows, and heavily spotted outer leaves collapse. But scattered spots on a few outer leaves, with the heart of the plant still pushing clean new growth, is the normal picture in a home garden. That distinction matters because it drives the Step 1 decision.
There is also a seasonal rhythm worth learning. Early infections often show up four to six weeks after emergence, following the first stretch of cool, rainy weather. A second wave can hit in early fall when dew gets heavy and days shorten, which is exactly when many gardeners sow their fall beet crop. Spots that appear during a hot, dry spell and stall when the weather breaks are behaving like Phoma. Spots that explode overnight after a hailstorm or a rough thinning are more likely mechanical damage with secondary fungi moved in. The calendar is a diagnostic tool, not just background.
How to Identify Phoma on Seedlings and Roots
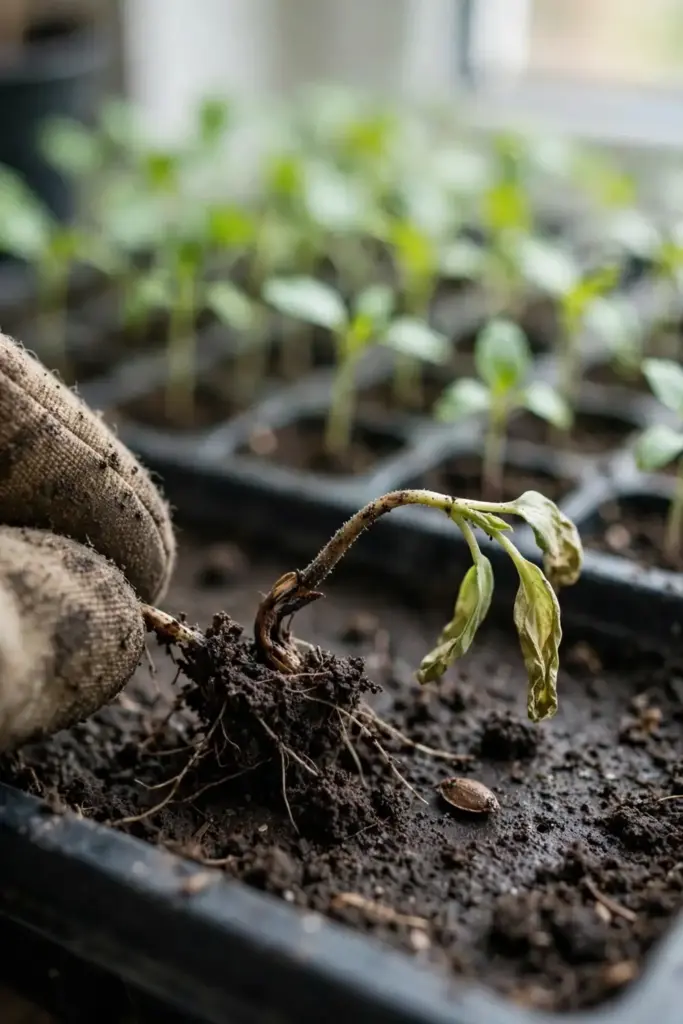
The seedling phase looks nothing like the leaf spots, which is why gardeners miss the connection. Infected seedlings keel over at the soil line or emerge weak and then stall. Cornell notes that seedling infection can result in damping-off and reduced stands. If your beet row has gaps where seedlings vanished within days of emergence, and the survivors show the leaf spots described above, Phoma belongs high on the suspect list.
On roots, the disease shows as dark brown, dry lesions with a shrunken, pinched look, typically beginning in the center of the crown and spreading downward into the taproot. Slice a suspect root open: Phoma lesions stay dry and brown. That dryness separates it from the mushy, water-soaked rots caused by other organisms. Roots with mild crown scarring are still usable in the kitchen after trimming. Roots that are distorted or heavily lesioned should be discarded, not stored, because the damage invites secondary decay in storage.
Which Beets and Greens Get Hit Hardest
Red table beets take the worst of it. A New York cultivar trial published in Plant Health Progress found significant differences in susceptibility: non-red cultivars like Avalanche, Boldor, and Chioggia Guardsmark developed less disease than red cultivars including Falcon, Merlin, Rhonda, Red Ace, and Ruby Queen. If Phoma recurs in your garden year after year, switching to a less susceptible cultivar is one of the cheapest interventions available.
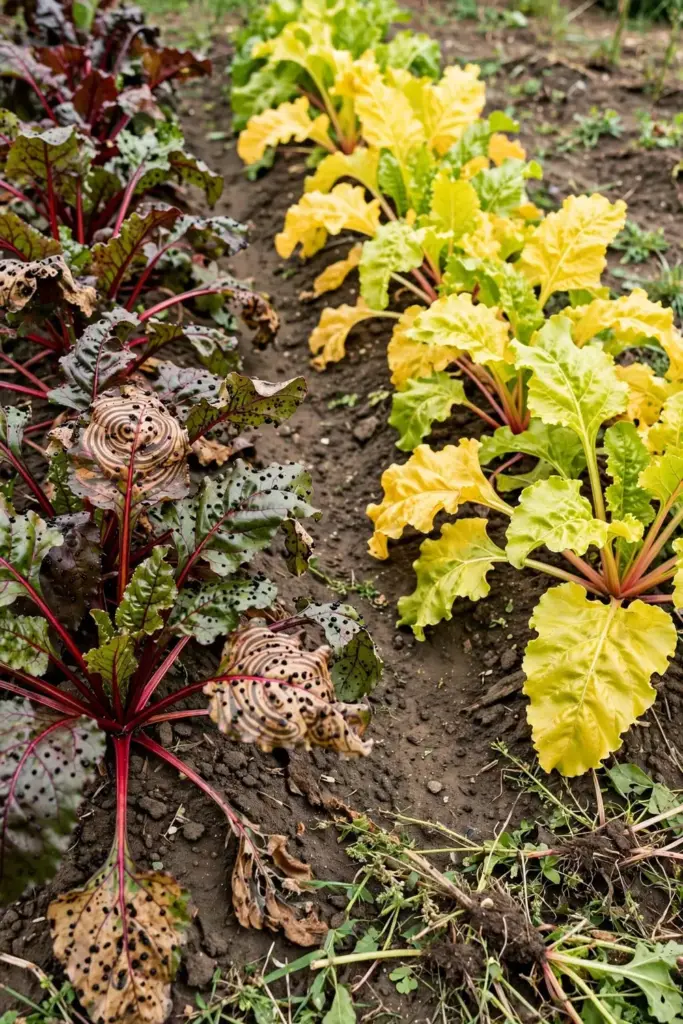
Swiss chard and spinach sit in the same host family and can carry the disease, though leaf spots on chard grown for its leaves are more of a market-appearance issue than a plant-health crisis. Spinach grown in the same rotation deserves the same three-year break as beets, since the fungus does not distinguish between the crops the way gardeners do. The wild card is lambsquarters, the common goosefoot weed. It hosts the fungus without anyone noticing, then sheds spores back onto your beets. A weedy bed edge can undo every other control measure, which is why weed management appears in Step 4 rather than as an afterthought.
Phoma Leaf Spot vs Cercospora vs Bacterial Spot vs Boron Deficiency
Four problems get confused on beet foliage and roots. The table sorts them by what you can actually see, because that is what you have in the garden.
| Feature | Phoma Leaf Spot | Cercospora Leaf Spot | Bacterial Leaf Spot | Boron Deficiency |
|---|---|---|---|---|
| Spot color and shape | Tan-brown, round, 1-2 cm | Smaller ash-gray centers with reddish-purple borders | Dark, water-soaked, irregular | No leaf spots; heart leaves stunted and distorted |
| Signature mark | Dark concentric rings with black pycnidia dots | Tiny black dots too, but no ring pattern | Yellow halo, no fruiting bodies | Cracked, blackened heart of the root |
| Root symptom | Dry brown crown lesions spreading down | Rarely affects roots | Soft rot, foul smell | Internal black heart rot |
| Seed-borne? | Yes, commonly | Can be | Sometimes | No, it is nutritional |
| First move | Clean seed next planting | Remove spotted leaves, improve airflow | Avoid overhead water, sanitize tools | Soil test, then borax per test rates |
The boron row earns its place. Cornell specifically warns that boron deficiency causes a heart rot of beet roots that looks similar to Phoma root rot, and beets have a high boron requirement. If your roots show internal blackening without the dry crown lesions, get a soil test before blaming the fungus. Treating a nutrition problem with fungicide is the most expensive way to learn nothing.
Why the Seed Is the Whole Story
Every Phoma outbreak in a home garden starts in one of two places: the seed packet or last year’s debris. The seed route dominates. Phoma betae rides inside and on beet seed, and infected seedlings damp off before you ever see a leaf spot. That is why experienced beet growers treat seed quality as disease control, not just germination insurance.
Once the fungus is in the planting, the cycle runs on moisture. The black pycnidia in each lesion exude spores in a gelatinous mass when wet, and splashing water carries them to neighboring leaves. Later in the season the fungus produces a sexual stage on debris, and those ascospores travel on the wind to start the cycle farther away. The pathogen also survives as mycelium in soil for more than two years, according to Montana State University extension. Cornell puts the sweet spot for infection at 57 to 65 degrees Fahrenheit with high humidity in late spring or early summer, which describes a huge fraction of the beet-growing calendar.
Understanding this cycle reframes the whole management plan. Sprays chase symptoms. Seed, spacing, rotation, and sanitation break the cycle.
One more cycle detail earns its keep. The wind-borne ascospore stage means inoculum can arrive from a neighboring garden or a weedy fencerow, not just your own beds. You cannot control the wind, but you can shrink the local spore load so far that a few incoming spores never build into an epidemic. That is the logic behind every sanitation step below: you are not building a wall, you are draining the swamp the fungus needs.
What Makes Phoma Worse in a Home Garden
Five conditions stack the deck. First, overhead watering that keeps foliage wet into the evening; every splash moves spores, and a single rainy week can do more spreading than a month of dry weather. Second, tight spacing that holds humidity between the rows, especially in raised beds where gardeners push density to maximize harvest. Third, planting beets, chard, or spinach in the same bed year after year, which lets the soil population build past the point where rotation alone recovers quickly. Fourth, saved seed of unknown health, the most common way the fungus enters a new garden. Fifth, a lambsquarters fringe along the bed that nobody weeds because it is not in the way.
None of these is a moral failing. They are just how small gardens work: limited beds, saved seed, and watering with a hose. The steps below are ordered so that the highest-impact, lowest-effort changes come first.
Step 1: Decide Whether Treatment Is Worth It
Here is the triage call. If you grow beets for your own table and the spots are confined to outer leaves while the roots size up normally, the honest answer is that phoma leaf spot treatment buys you almost nothing. Pick off the worst leaves, keep watering at the base, and harvest on schedule. The roots do not care about spotted foliage.
Treatment earns its effort in three cases. You sell at a farmers market, where spotted leaves get your bunches rejected. Seedlings are damping off in patches, which threatens the stand itself. Or the same bed shows the disease three years running, which means the soil and seed pipeline needs an overhaul, not a spray. Everything below is calibrated to those three situations, in order of impact.
Step 2: Start With Clean Seed
Because the fungus arrives on seed more often than any other route, this single step prevents more disease than everything else combined. Buy certified disease-free seed from a reputable supplier, and prefer fungicide-treated seed where it is available; Cornell lists treated seed among its core cultural recommendations. Utah State University extension is blunter: use certified disease-free seed, full stop.
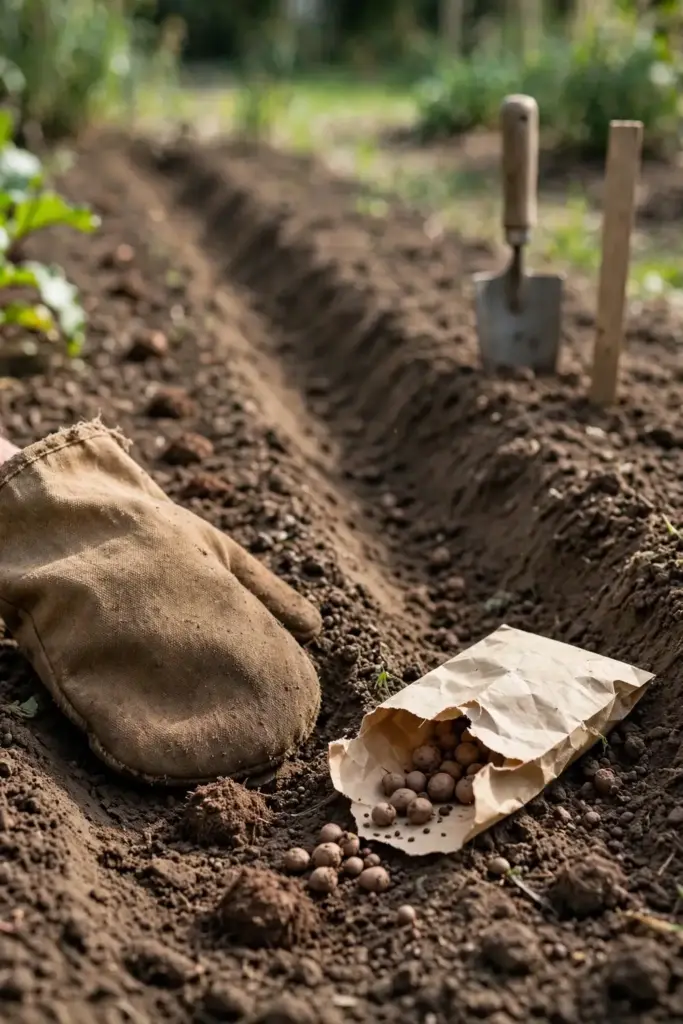
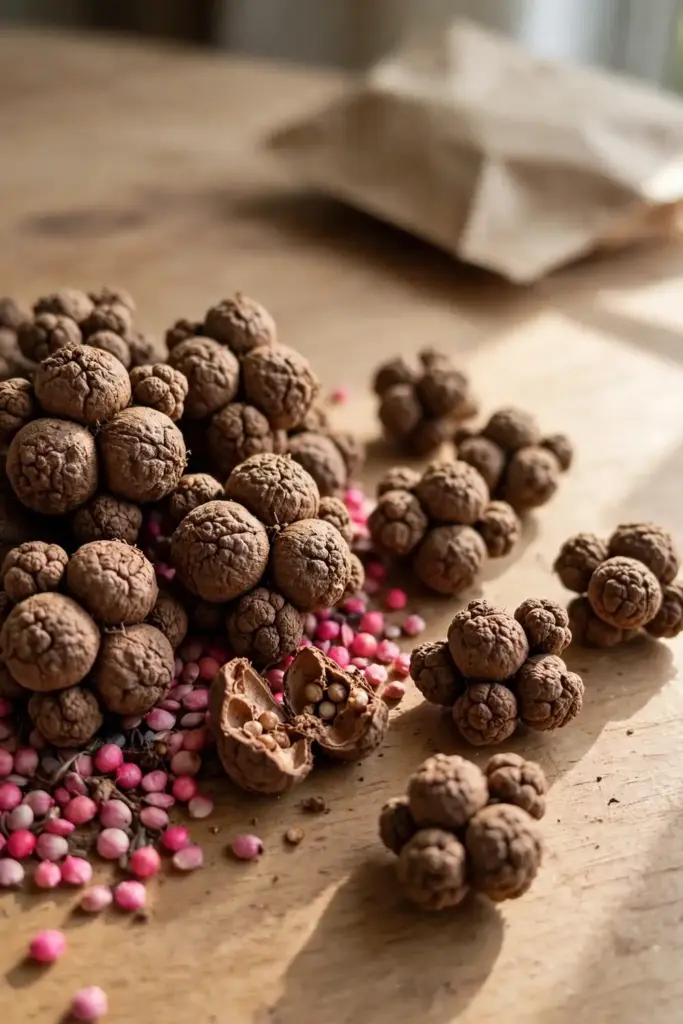
Do not save seed from a planting that showed leaf spots or damping-off. Home-saved beet seed is the classic way a one-year problem becomes a permanent resident. This is especially important because beet “seed” is actually a dried fruit cluster containing several true seeds, which gives the fungus more surface to colonize than a smooth seed coat would. If you start your own transplants, the same seed-starting hygiene that prevents damping-off in other crops applies here: fresh mix, clean trays, and no reused soil from the beet bed. Our seed starting guide covers the routine in detail.
One caution on treated seed: fungicide-treated seed is dyed, usually pink or green, so you can recognize it. The treatment protects the seedling during the vulnerable germination window and then wears off. It does not protect the mature plant’s leaves months later. That limitation is fine, because the seedling stage is exactly where Phoma does its real damage.
Step 3: Give the Leaves Room to Dry
The fungus needs wet leaves. Take away the wetness and you take away most epidemics. Space beet rows wide enough for air to move, and orient rows with the prevailing breeze where you can. Cornell’s table beet guidance notes that wider row and plant spacing improves air circulation and leaf drying, which also helps roots size up.
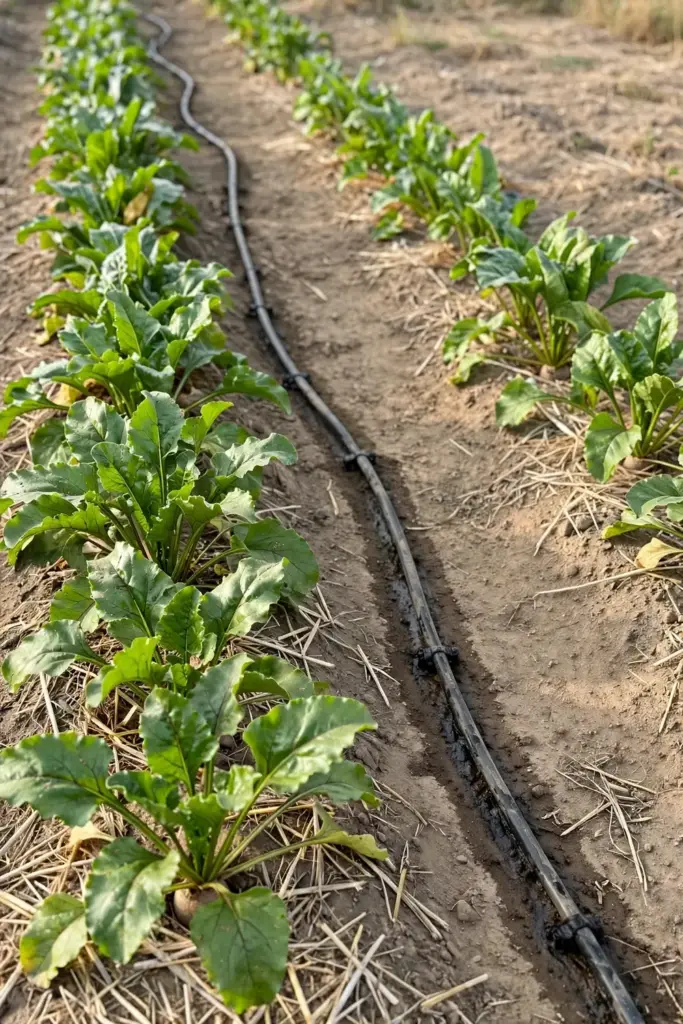
Water at the base in the morning so any splash dries fast. Drip lines or soaker hoses beat overhead sprinklers for this crop by a wide margin. If you must use a sprinkler, run it early enough that foliage dries before evening. As a rule of thumb, beet foliage should be dry by mid-morning on most days; if your leaves are still wet at noon, the spacing is too tight or the watering runs too late. Mulch between rows helps too, by blocking soil splash, but keep it pulled back a few inches from the crowns so the stems stay dry.
Step 4: Rotate Beds and Starve It Out
Do not plant beets, chard, or spinach in the same bed two years running. Cornell recommends at least three years of rotation with non-host crops; Utah State University extension matches that number. The fungus survives on debris and in soil, so rotation starves it out while the population declines.
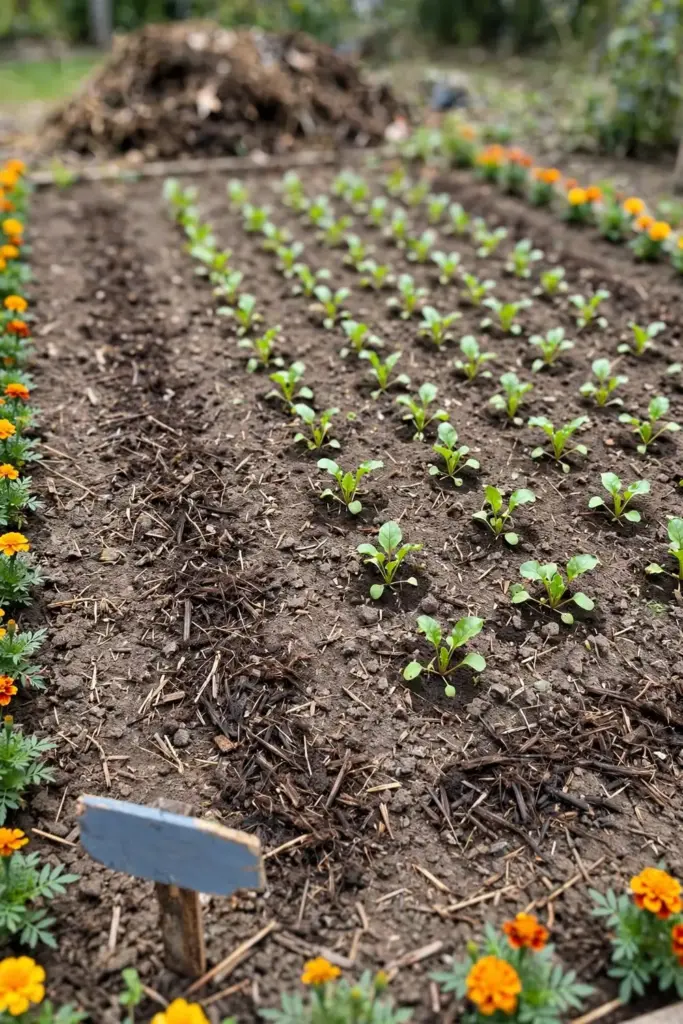
At season’s end, till under or remove beet tops rather than leaving them as a mulch layer. Diseased residue is next year’s inoculum wearing a disguise. A shallow till that buries residue speeds its breakdown and the breakdown of the pycnidia with it, though deep plowing is unnecessary in a home bed. And walk the bed edges for lambsquarters. That weed is an alternate host, and a single unweeded fringe can reintroduce the fungus to a freshly rotated bed. A fall cover crop in the off year adds organic matter and keeps the bed productive while the rotation clock runs.
Step 5: Feed the Plants, Not the Fungus
Vigorous plants outgrow mild infections, and beets have one nutritional quirk that matters here. They need more boron than most vegetables, and boron deficiency produces an internal black heart rot that mimics Phoma root rot. Cornell flags the confusion explicitly. If your roots show blackened hearts without the dry crown lesions described earlier, run a soil test before you spend a dollar on disease control.
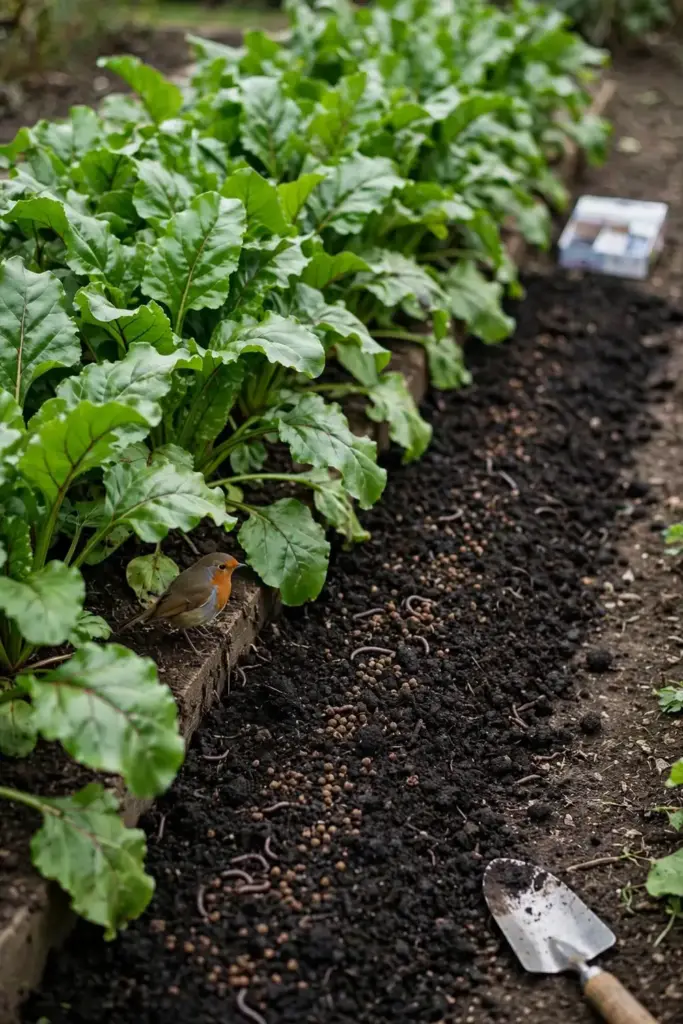
Beyond that, keep nutrition balanced and avoid pushing soft, rapid growth with heavy nitrogen right before a wet spell. Soft tissue is easier for the fungus to colonize. Compost and balanced fertility build the plant; excess nitrogen builds the buffet. Healthy soil biology is part of a garden that recovers fast, as our soil health guide explains. No soil program cures Phoma outright.
Step 6: Rogue Out the Worst of It
During the season, strip the worst spotted outer leaves and get them out of the garden. Do not compost them in a cold pile; the fungus survives on debris. Bag them or hot-compost only. Roguing slows the splash cycle enough to protect the new growth coming from the heart, even though it cannot reverse an established epidemic.
At harvest, rogue out diseased roots before storage. Cornell advises removing infected beets and, if you store roots, keeping storage conditions optimal with good air circulation. One rotting beet in a storage crate spreads decay to its neighbors. Trim lightly spotted roots for immediate kitchen use and store only clean, undamaged ones.
Step 7: Spray Only When It Earns Its Keep
Here is the honest fungicide picture for home gardeners. Utah State University extension lists seed treatment as the only chemical management option it names, and that happens before planting, not after spots appear. Foliar fungicides for Phoma on home beets sit in an awkward spot: the disease is usually cosmetic by the time you notice it, the harvest is weeks away, and the sprays protect new growth without healing spotted leaves.
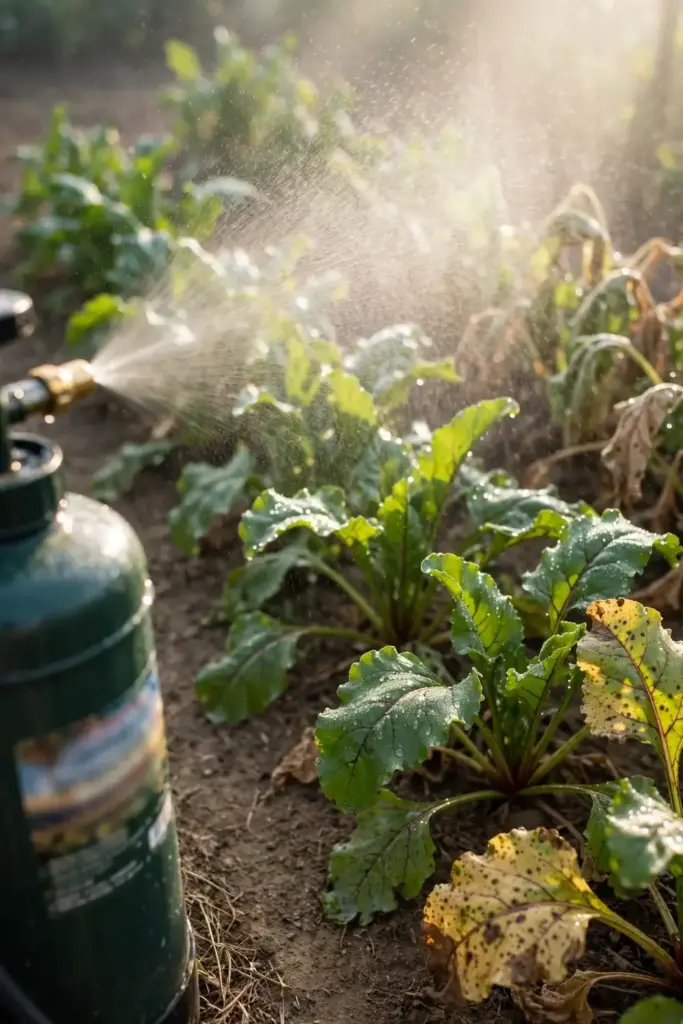
If you fall into one of the Step 1 situations where treatment is warranted, choose a product labeled for leaf spot on beets or leafy vegetables in your state, and read the label as law, especially the pre-harvest interval. Copper and chlorothalonil-class products are the common home-garden options where labeled. Spray on a dry morning, cover new growth, and stop once the weather turns dry. Two applications ten to fourteen days apart is a typical home-garden program; more than that usually means the cultural steps were skipped, and no spray schedule compensates for infected seed. Keep a simple log of what you sprayed and when, because the pre-harvest interval on the label is a legal requirement, not a suggestion.
And keep expectations calibrated: a spray program without clean seed and rotation is an expensive treadmill. That is the full phoma leaf spot treatment picture for a home garden, and it is deliberately weighted toward prevention.
Living With Beets That Already Have Phoma
So the spots are here and the season is underway. Harvest beets at normal size; spotted foliage does not poison the root. Wash roots well, trim away any crown lesions generously, and use lightly affected roots fresh rather than storing them. Spotted leaves are edible if you are comfortable with the appearance, though most gardeners compost the worst ones and eat the clean hearts.
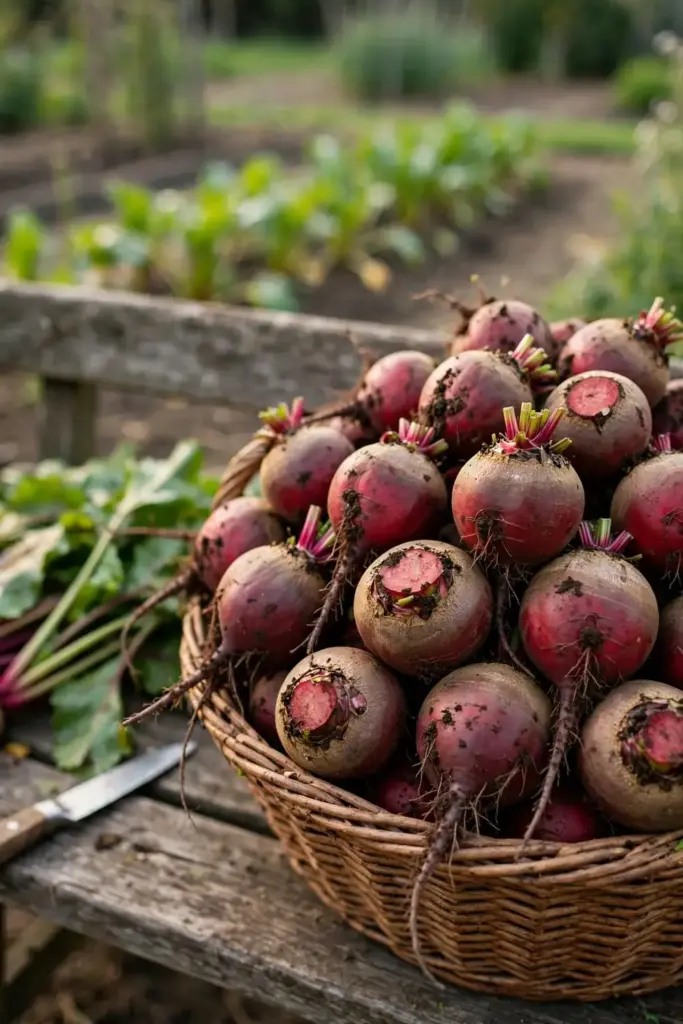
For next season, write yourself a note while it is fresh: which bed, which cultivar, where the seed came from. That note is worth more than any product. Rotate the bed, buy certified seed, and consider one of the less susceptible cultivars from the trial data in the host section. If you store beets through winter, check the crate monthly and remove any root that softens; one decaying root in a closed crate can take its neighbors with it. Gardens do not need to be disease-free. They need to be managed so that diseases stay below the level where they matter.
Frequently Asked Questions
Yes. Phoma leaf spot is a plant disease, not a food safety issue, and spotted foliage does not make the roots unsafe. Wash the roots well and trim away any lesioned crown tissue. Most gardeners discard the worst spotted outer leaves and eat the clean inner growth. Store only undamaged roots, since lesions invite secondary decay.
It stays within its host family. Beets, Swiss chard, spinach, and the weed lambsquarters are the hosts that matter in a home garden. Your tomatoes, peppers, and brassicas are not at risk from this fungus. That host specificity is also why a three-year rotation with non-host crops works so well.
Rarely. Mature plants tolerate it as a cosmetic leaf problem, and roots usually size up normally. The dangerous phase is at the seedling stage, where infected seed can cause damping-off and wipe out sections of a row. If your established plants are collapsing, look for a different cause, because Phoma leaf spot alone does not do that.
Check the lesion pattern. Phoma spots are larger, tan-brown, and show dark concentric rings with tiny black pycnidia dots inside the rings. Cercospora spots are smaller with ash-gray centers and reddish-purple borders, and they lack the ring pattern. When in doubt, the differential table above walks through the full comparison.
Not for leaf spots alone. Pull and discard plants only if the roots show the dry brown crown lesions spreading into the taproot, or if seedlings are damping off across the row. For foliage symptoms, strip the worst leaves and let the plant keep growing. Premature pulling costs you a harvest that the disease was never going to take.
No. Phoma betae is commonly seed-borne, and saving seed from an infected planting is the most reliable way to guarantee the disease next year. Buy certified disease-free seed instead. This applies to beet, chard, and spinach seed alike, since the fungus crosses between them.
Where to Go From Here
Phoma leaf spot looks alarming and acts mild, which is exactly the combination that wastes gardeners’ money on sprays they do not need. The identification routine is simple: tan spots, dark concentric rings, black pycnidia dots. The management routine is simpler than it looks: clean seed first, dry leaves second, rotation third, and sprays only when the economics say so.
Your one next action: check where your beet seed comes from before the next sowing. If it is saved seed from a spotted planting, replace it. That single change does more than the other six steps combined, and it costs less than a bottle of fungicide.