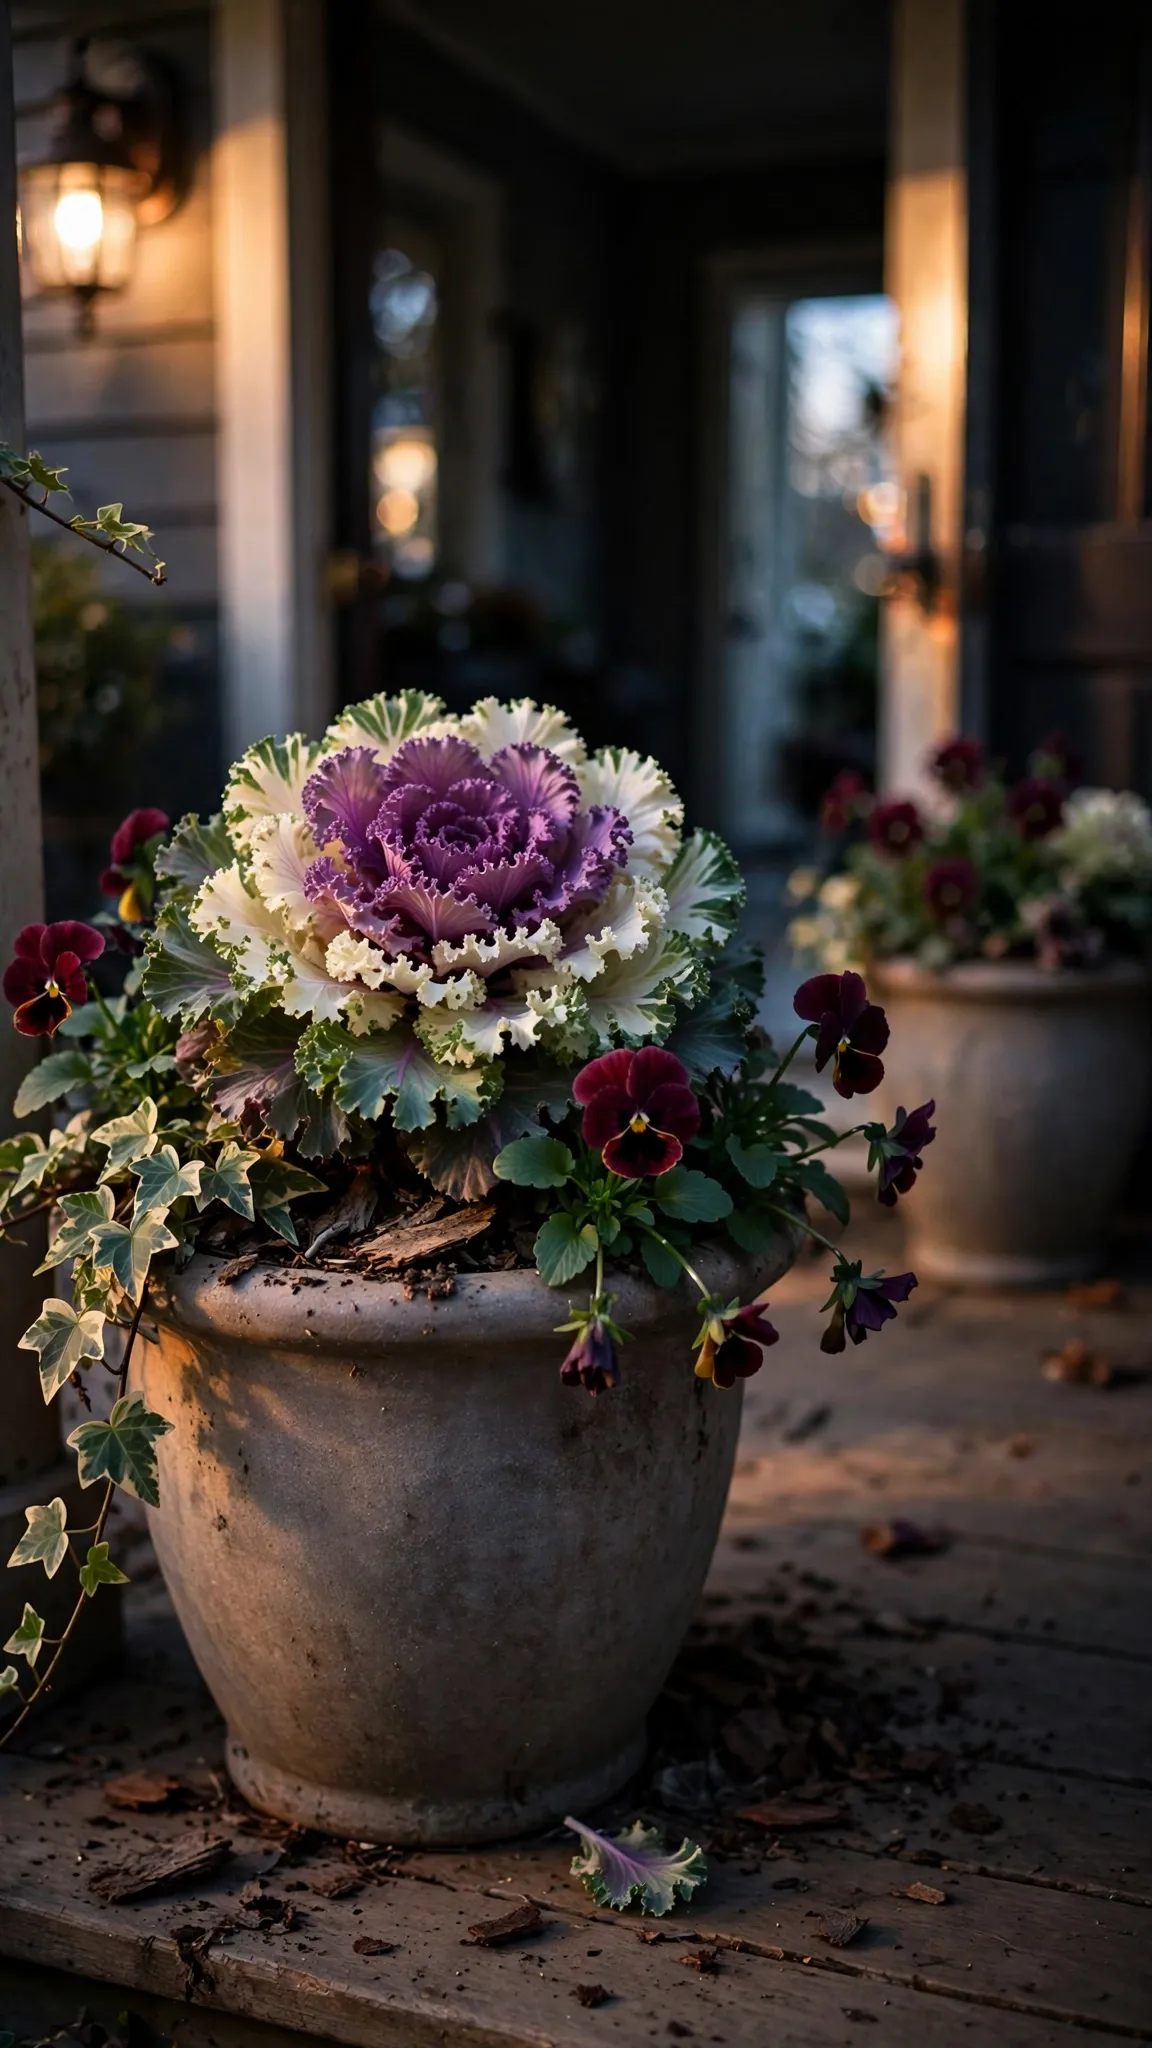

Cut 30 stems of ornamental kale, herbs, and grasses from the yard on Saturday morning, then build your first five pots before lunch. That is thanksgiving planter ideas done the garden way: the yard supplies the plants, and you supply the pots. The rest of this page is 21 ideas, from the first cut to the compost pile.
Work the porch cluster first if Thursday is near. Cut in the morning. Build in the shade. Water every pot before the sun drops.
Thanksgiving Yard Decorations runs porch planters as one of its 21 items; this page is the deep dive on the pots themselves: vessels, plant palettes, and build instructions. A foraged jug of mixed evergreens for the table is a different job, and that cut lives on the site’s thanksgiving centerpieces. This page stays on containers.
Build Every Pot on the Thriller-Filler-Spiller Formula
One tall plant stands in the center, a ring of mounding plants packs the middle, and trailers spill over the rim. That is the whole formula, and every pot on this page follows it. A purple fountain grass or a rosemary cone makes the thriller. Ornamental kale, pansies, or mums fill. Variegated ivy, sweet alyssum, or trailing sedum spill.
Scale the counts to the pot. A 40 cm pot takes one thriller, three fillers, and two spillers. A 30 cm pot takes one thriller, two fillers, and one spiller. Plant the thriller first, set at the same depth it grew in the nursery can, then tuck the fillers tight around it. Crowded roots drink from the same soil ball within days.
A pot with three thrillers reads as a fight. A pot with no spiller reads as a bowl of salad from across the porch. The spiller is what tells the eye the pot is finished, so give it the rim and let it hang 15 to 20 cm over the edge.
Hold the palette to three colors per pot, because orange, burgundy, and green carry the harvest without shouting while white, green, and silver suit a gray porch. Five colors in one pot read as a garden center shelf. Restraint is the difference between a display and a pile. Three colors. Not five.
Match the Vessel to the Recipe
Every vessel on this page needs drainage holes, except the pumpkin. Drill them before you plant: four 12 mm holes in a 40 cm pot, spaced near the rim of the base. Galvanized tubs and wooden crates need the same treatment. A pot without drainage is a swamp by Wednesday, and no plant palette survives a swamp.
Mix one part finished compost into three parts bagged potting mix for every pot. The compost feeds the fillers for the month, and the coarse potting mix keeps the water moving. That is the same compost-first logic the site uses for building soil health in the beds, shrunk to pot scale. Top-dress with 2 cm of bark chips to hide the soil line and slow surface drying.
Set every porch pot on a saucer. The saucer catches the drain water and protects the porch boards. Tip the saucer out after watering. A pot sitting in its own water rots from the bottom.
Raise the pots on feet. Pot feet lift the base off the porch floor so water drains and air moves. Three clay feet under a 40 cm pot. A pot sitting flat on the boards traps water underneath and stains the wood by spring.
Use cachepots for the indoor pots. A cachepot with no holes holds the nursery can inside and catches the water, so the table never sees a drop. Lift the can to water, let it drain, set it back. The table stays dry and the plant stays drainable.
The six recipes below cover every situation on this page. Pick the recipe, then pick the idea that builds it.
| Recipe | Plant Palette | Vessel | Cold Handling |
|---|---|---|---|
| Frost-Hardy Porch Urn | Ornamental kale, pansies, dusty miller | 40 cm ceramic urn, drainage holes | Pansies bloom best above 0 C; kale colors after the first frost |
| Mum and Pumpkin Tub | Garden mums in bud, mini pumpkins tucked between | Galvanized tub, 50 cm, holes drilled | Move under cover below minus 4 C; buds outlast open flowers |
| Herb Table Pot | Parsley, thyme, upright rosemary | 30 cm terracotta | Shelter at 0 C; snip herbs for Thursday dinner |
| White Monochrome Pot | White pansies, white ornamental cabbage, dusty miller | Glazed ceramic, 35 cm | Same frost handling as the porch urn |
| Evergreen Bridge Pot | Juniper cuttings, pine boughs, dried hydrangea | Any deep pot, 30 cm or wider | Holds through December; mist in dry spells |
| Pumpkin Vessel | Pansies or succulents set in a hollowed pumpkin | One large pumpkin, 25 cm or wider | About a week in cool shade; compost after |
1. Anchor the Door With Two Matching Urns
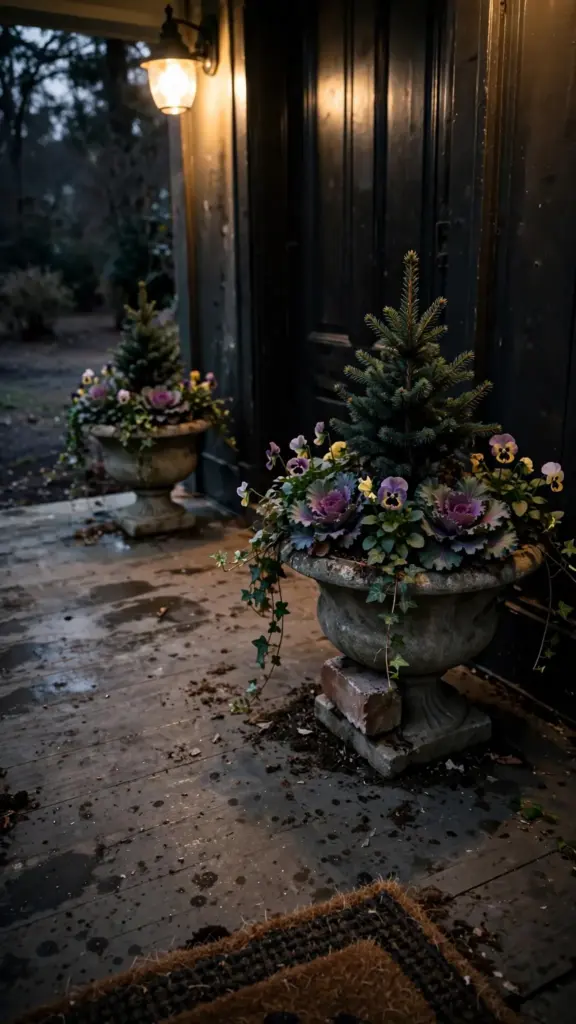
Set one large urn on each side of the front door, matched in pot and soil level, and let the plants differ slightly. Symmetry at the door reads as intention from the street. Two different pots read as leftovers from August.
Build each urn on the formula. A dwarf Alberta spruce or an upright rosemary cone stands center as the thriller. Ornamental kale and pansies pack the middle. Variegated ivy spills over the rim. Plant the spruce at the depth it grew in the can, then wedge the fillers in tight. Loose fillers wobble in the first wind.
A pot under 35 cm wide flips in the first November gale. Go 40 cm or wider, and set a brick under the front rim if the porch floor slopes. The brick also breaks the saucer seal so the pot drains instead of sitting in its own water.
Set the urns where the porch light hits them. A pot in the dark corner by the door disappears at dusk, when guests actually arrive. The porch bulb is part of the display. If the door faces north and the corner stays dim, move the urns 60 cm toward the light.
2. Fill a Galvanized Tub With Mums and Mini Pumpkins
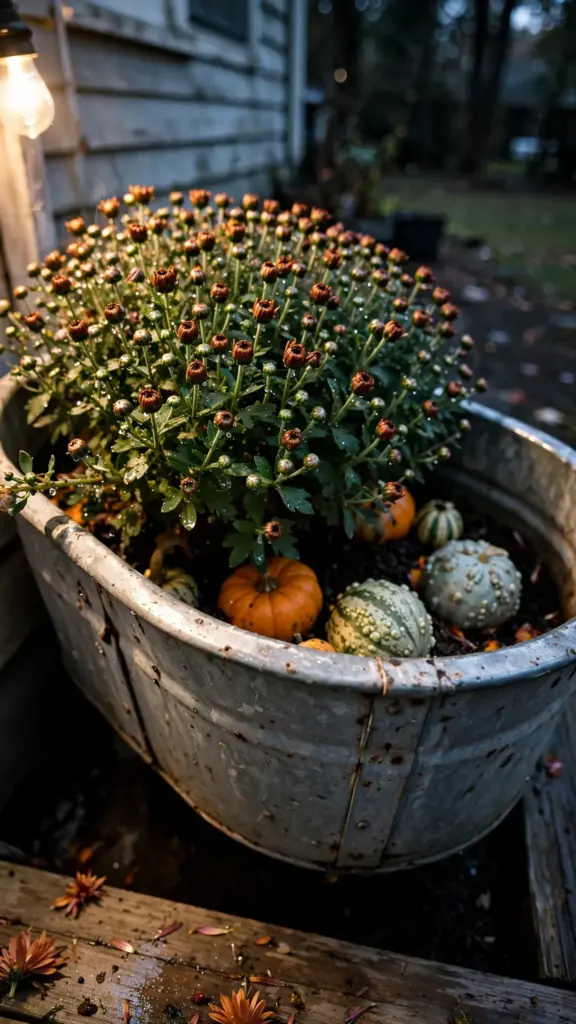
Drill six 12 mm holes in the bottom of a 50 cm galvanized tub before anything goes in. Tubs ship without drainage, and a sealed tub holds a week of rain like a bathtub. Tip the tub and drill from the inside out so the burrs face down.
Set three garden mums in tight bud across the back half, then tuck mini pumpkins and gourds into the front half on top of the soil. The mums bloom through the week while the pumpkins carry the harvest look. Buy the mums showing color in the buds, not in full flower. Full flowers brown in ten days; buds open over two weeks in cool air.
Pick two mum colors that sit next to each other: bronze and gold, or burgundy and rust. Neighbors harmonize; opposites shout. The tub is one composition, not three soloists.
Water at the base until it runs from the holes. Wet mum foliage in cold air invites gray mold, and mold spreads across a crowded tub in days. If the forecast drops below minus 4 C, drag the tub under the porch roof for the night.
Let the tub weather. New galvanized steel shines bright enough to distract from the plants. One season of rain dulls it to a soft gray that suits the mums. Do not paint the inside. Paint flakes into the soil, and rust at the seams is cosmetic. The plants do not mind.
3. Plant a Turkey Planter for the Porch Step
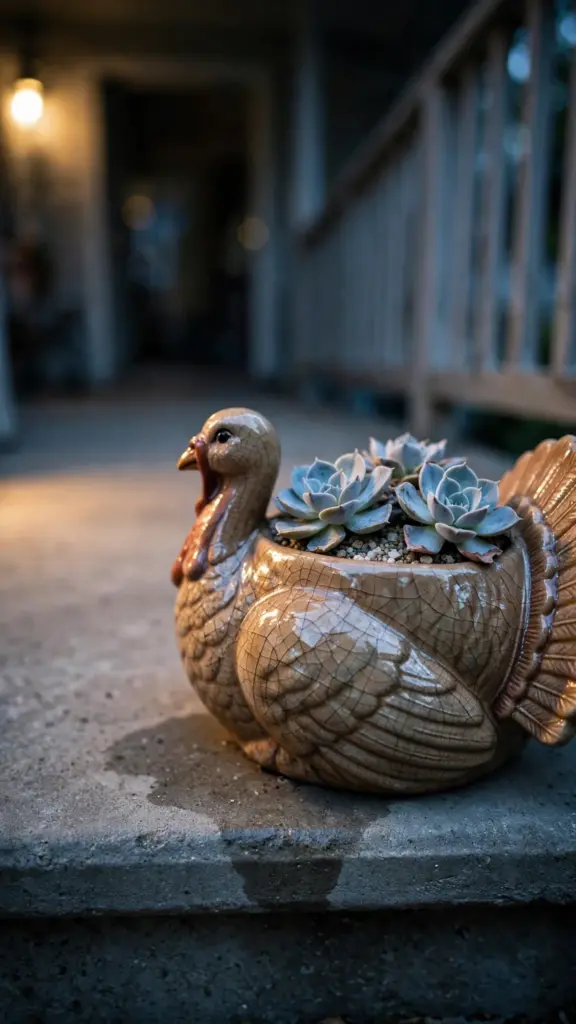
Set a ceramic or resin turkey on the porch step and plant it with succulents or pansies. The turkey carries the holiday message on its own, so the planting can stay simple: three echeveria rosettes, or five pansies in mixed fall colors. One plant type reads as designed; a scramble of six types reads as a junk drawer.
Succulents need no water for the whole week, which suits a vessel with poor drainage. Pansies need a drink every other day. Match the plant to your habits. A turkey planter is a small vessel, and small vessels punish forgetful watering or overwatering equally.
Skip the turkey with no drainage and no saucer. Drill a hole in the base with a masonry bit, or set a plastic liner inside and lift it out to water. Water standing in the tail feathers rots the roots and stains the step.
Size the turkey to the step. A 25 cm turkey suits a standard step; a 40 cm turkey needs the porch floor. A turkey too large for its step looks stranded. Set it where guests pause: beside the door, not behind the urns.
4. Hang Cool-Season Baskets Beside the Door
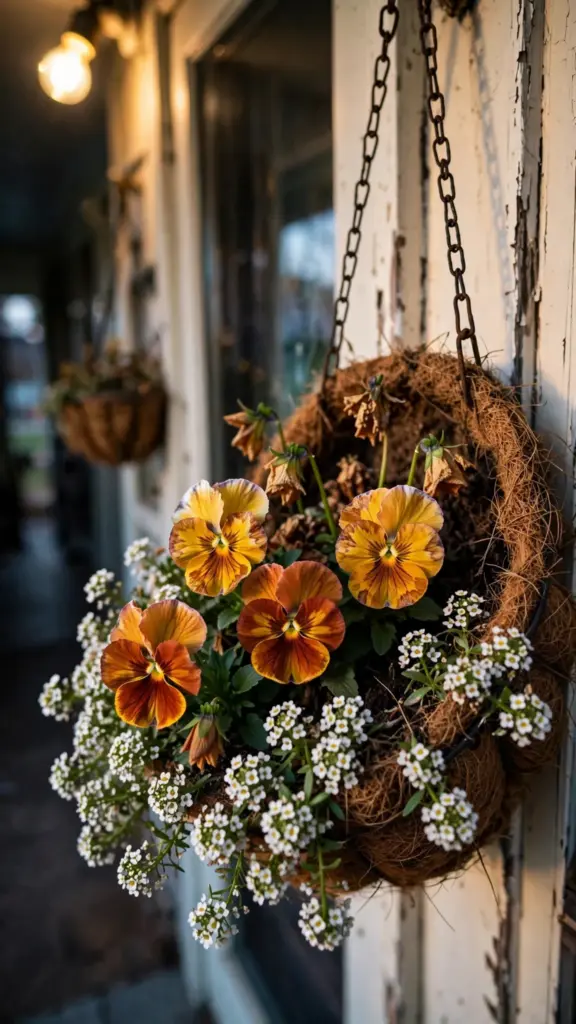
Hang two baskets flanking the door at head height, planted with pansies and trailing sweet alyssum. Small porches have no floor space, so the door frame does the work. Baskets at head height also stay out of the wind that scours the steps.
Line wire baskets with coir. Fill with potting mix to 3 cm below the rim. Plant five pansies per 30 cm basket and let the alyssum trail over the edge. Pansies are the most reliable cool-season color for a hanging basket. Sweet alyssum spills over the rim without training.
Hanging baskets dry faster than any other vessel on this page. Check them daily with a finger. A basket that dries out completely needs a full soak in a bucket, not a sprinkle from the can.
Choose coir liners over moss liners. Coir holds its shape for the season; moss liners shed and thin by week two. Soak the coir in a bucket before fitting it. A dry liner wicks water away from the mix.
5. Stage One Hero Urn on the Formula
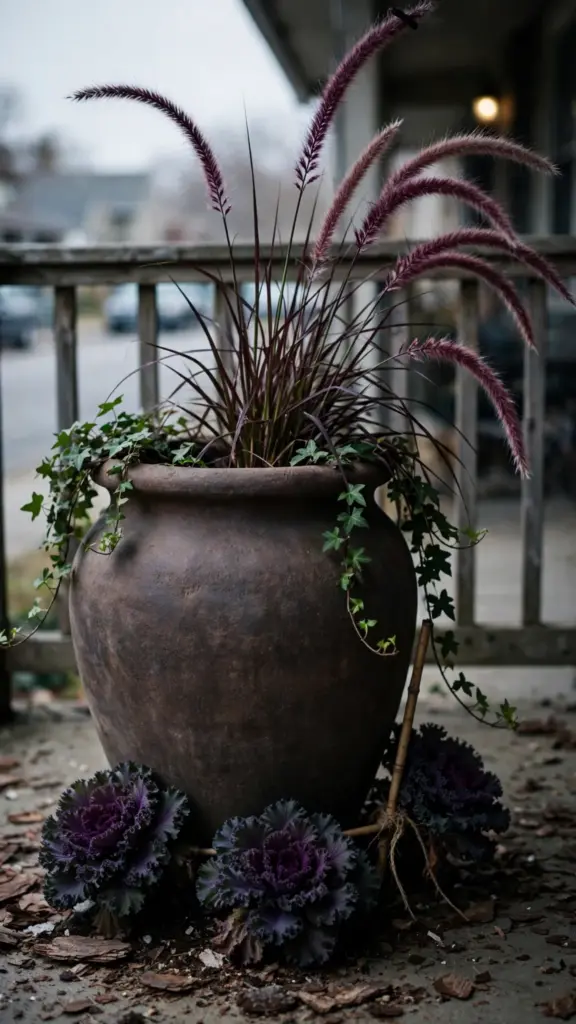
Build one oversized urn as the porch focal point, following the formula to the letter. One purple fountain grass stands center, three ornamental kale rosettes ring it, and two ivy plants spill over opposite rims. The grass gives 90 cm of height; the kale gives the color; the ivy gives the finish.
Set the grass first and step back before adding the fillers. The thriller must read from the street, not just from the porch. If the grass leans, straighten it with a bamboo stake tied low, where the kale will hide the tie. A leaning thriller makes the whole urn look tired.
Feed nothing at planting. Soft new growth from late feeding freezes first, and the color you want comes from cold, not nitrogen. The kale colors up after the first frost, which is exactly when you need it to.
Stake the grass on windy sites. A 90 cm grass in a 40 cm pot is a sail, and the first November gale lays the whole urn over. One bamboo stake, tied low where the kale hides the tie, holds it. Check the tie after the first storm.
6. Wrap Cheap Pots in Burlap for a Porch Row
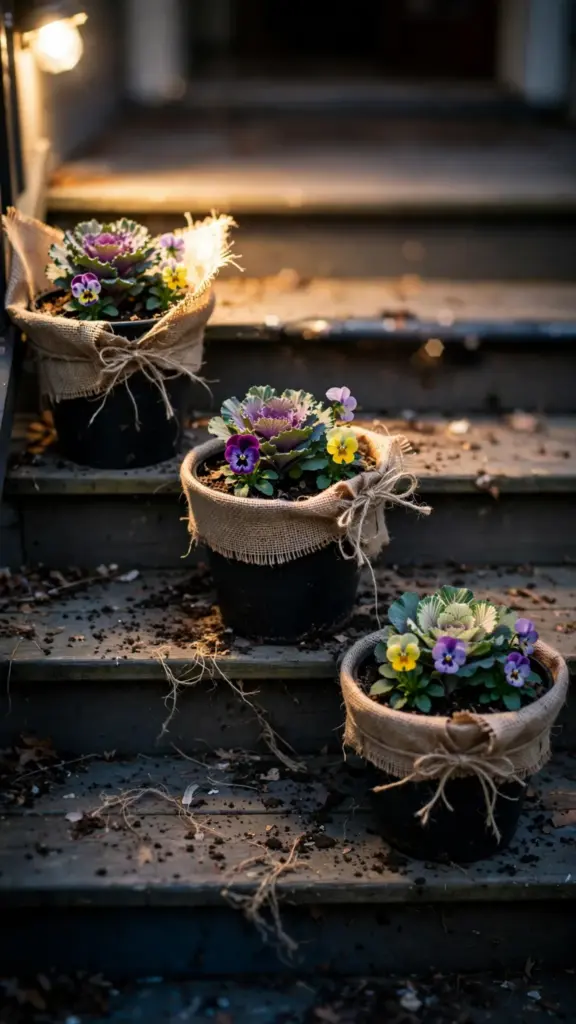
Wrap black nursery cans in burlap and line three or five of them down the porch steps. The burlap hides the plastic and the row gives the steps a finished edge. Cut the burlap 10 cm taller than the can, fold the top edge down 5 cm for a cuff, and tie with jute twine.
Plant each can with one ornamental cabbage and three pansies. One plant type per can keeps the row calm; the repetition down the steps does the decorating. Odd numbers read as gathered; even numbers read as placed.
Keep the burlap dry. Burlap wicks water from a wet saucer and rots against the can within the month. Set each wrapped pot on a saucer, and strip the burlap off in December. The cans go back to the potting bench; the burlap goes to the compost.
Vary the heights down the steps. Put the tallest can on the lowest step and step the heights down as you climb, or the reverse. A flat row of identical cans reads as a production line. Three heights read as a display.
7. Fill a Window Box With Kale and Pansies
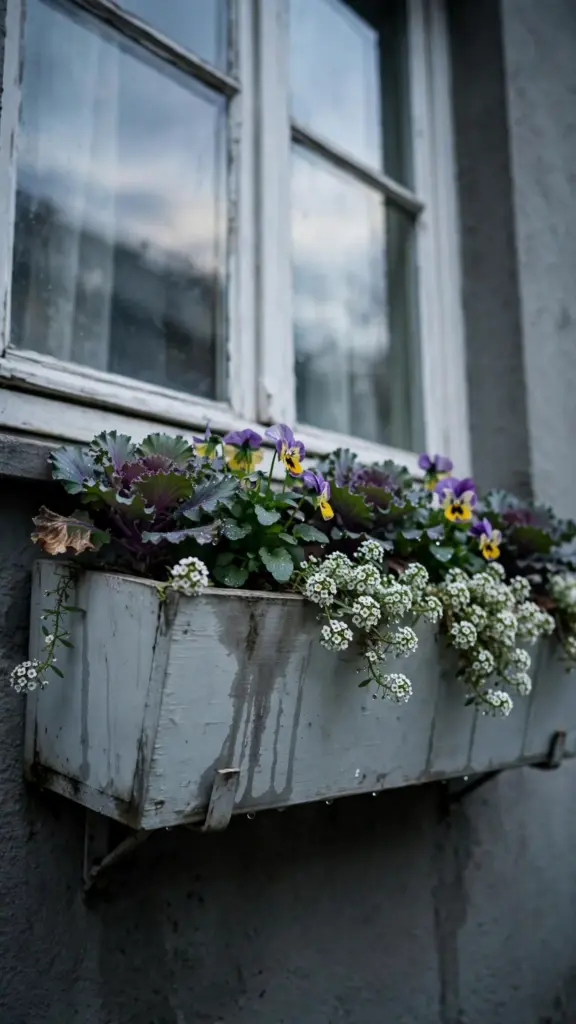
Plant the window box under the front window with alternating ornamental kale and pansies, and let sweet alyssum trail from the front edge. The box sits at eye level for anyone walking up, so it earns close inspection. Alternate the plants strictly: kale, pansy, kale, pansy. A strict rhythm reads as planted, not stuffed.
Window boxes hold little soil and freeze solid before any pot on the porch. Water in the morning so the mix is damp but not soaked by nightfall. A soaked box freezes into a brick; a damp box rides out a light frost.
Line the box with a sheet of bubble wrap behind the soil on the outer face in cold zones. The insulation buys the roots a few degrees. It hides behind the plants, and nobody sees it.
Water the box from the window, not from the ladder. A small can with a narrow spout reaches the box from inside the house if the window opens. Hauling water up a ladder in November is how the box gets skipped. The box that gets skipped dies first.
8. Cut Ornamental Kale From the Vegetable Bed
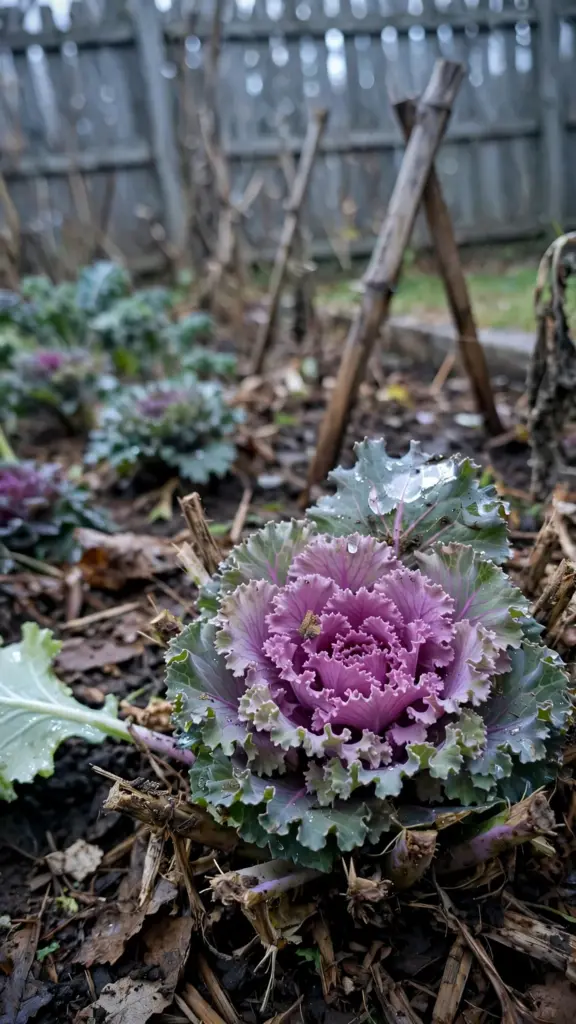
Harvest ornamental kale from the vegetable bed instead of buying flats. Cut the outer leaves first, leaving the center rosette to keep growing. One mature kale plant gives six to eight usable leaves per cut, and the plant keeps producing for weeks in cool weather.
Pot three kale rosettes per 40 cm urn as the filler ring around a grass thriller. Kale colors up after the first frost, when the centers turn purple, pink, and cream. Before frost it looks like plain cabbage. Plant the pots two weeks before Thanksgiving so the roots settle before the cold.
Skip the fertilizer entirely. Late nitrogen pushes soft growth that freezes first, and the cold is what makes the color. Water at the base. Wet kale crowns rot where leaves sit on wet soil.
Start kale seed in July for next year’s pots. One packet sown in a corner of the vegetable bed gives a dozen rosettes by November, and the cost is nothing. Transplant the seedlings 25 cm apart in August. By Thanksgiving they are full rosettes, free for the cutting.
9. Harvest Herbs for the Table Pot
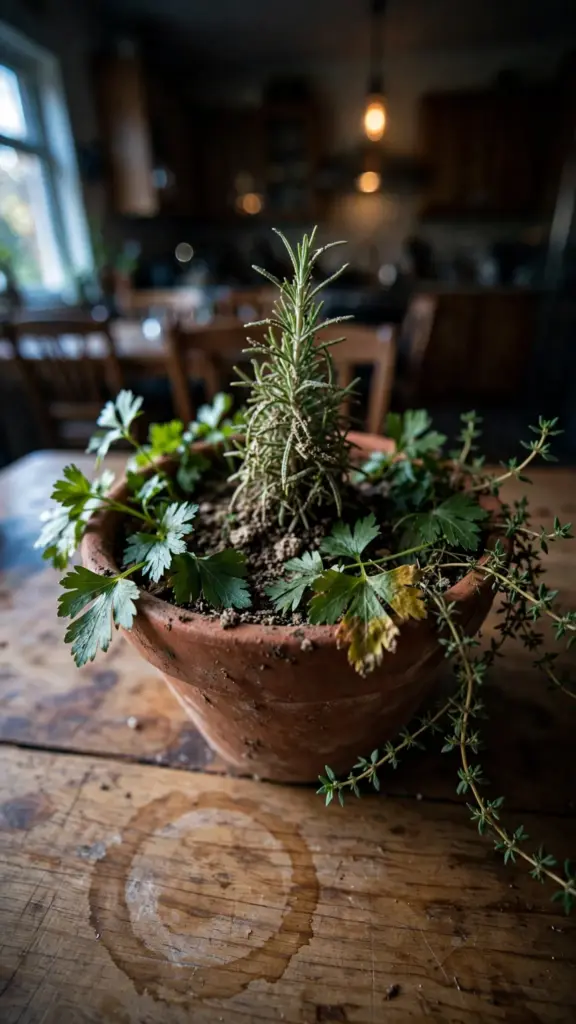
Dig parsley, thyme, and upright rosemary from the herb bed and pot them together in a 30 cm terracotta pot. The pot sits on the table as the centerpiece and does double duty at dinner. Snip what you need for the stuffing and the gravy, right at the table.
Pot one rosemary cone center, three parsley plants around it, and let thyme trail over the rim. Herbs from the garden beat nursery herbs for this job because they are already hardened to your weather. Nursery herbs grown under glass sulk in the first cold night.
Bring the pot in when the forecast drops below 0 C. Herbs handle cool nights but not a hard freeze in a small pot. Set it by a bright window and it keeps producing through December.
Pot the herbs a week before Thanksgiving. Not the morning of. A week in the pot lets the roots settle and the plants stop sulking. Water once at potting, then leave them in the shade for two days. The pot on the table should look settled, not freshly jammed.
10. Snip Hydrangea Heads for Dry Accents
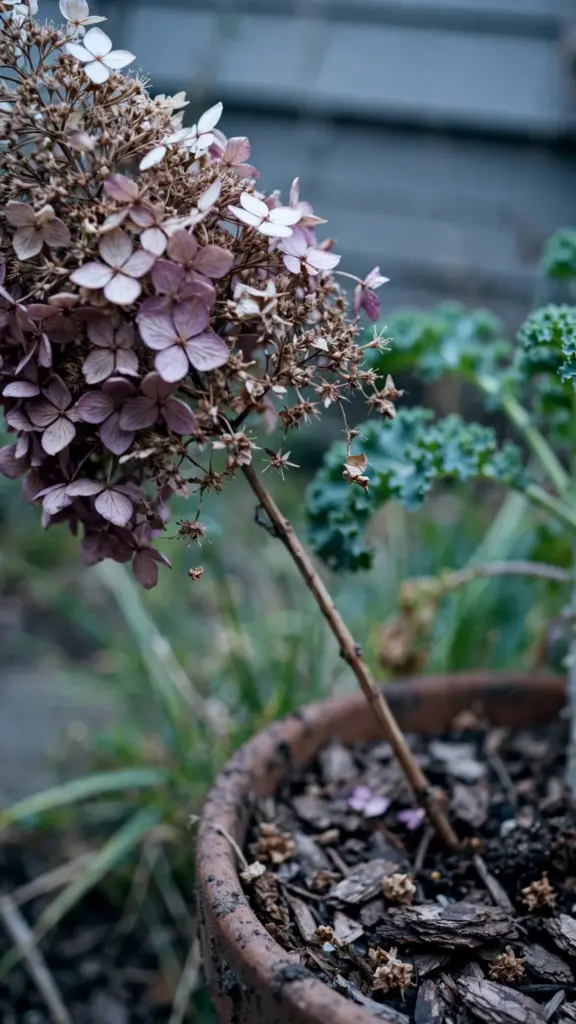
Cut dried hydrangea heads from the shrubs and tuck them into the pots as accents. Cut when the florets feel papery and the color has set, usually after the first light frost. Strip the leaves. Leaves dry brown and crumble; the heads dry clean.
Push the stems 10 cm into the potting mix at an angle, three heads per 40 cm pot. They sit above the kale and below the grass, filling the middle layer that pots often leave empty. One dried head per 15 cm of pot diameter keeps the proportion right.
Cut more than you need. Hydrangea heads shatter if you squeeze them, and the extras cover the losses. Store the spares in a paper bag in the garage, not plastic. Plastic traps moisture and the heads mold.
Cut hydrangea heads with 20 cm of stem. Short stems disappear into the pot; long stems let you angle the heads into the middle layer. If the heads shatter when you cut them, they were not ready. Wait for the next frost and cut again.
Dry the heads in the garage, not the house. The garage is cool and dark; the house is warm and the heads dry too fast and shatter. Hang the stems in bunches of five from a rafter. Two weeks in the garage and they are ready for the pots.
11. Cut Ornamental Grasses for Height
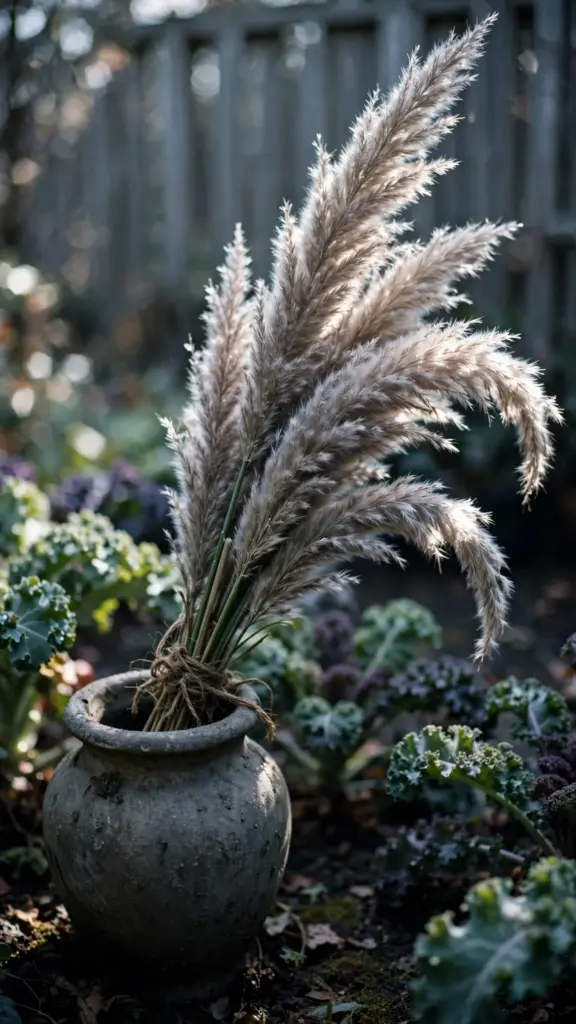
Cut plumes from ornamental grasses already growing in the yard for the thriller position. Purple fountain grass, miscanthus, and switchgrass all cut well. Cut the stems 60 to 90 cm long, depending on the pot, and strip the lower leaves.
Stand one grass clump center in a 40 cm urn and pack kale around its base. The grass gives the pot its vertical line. Without height, a pot is a plate of color at knee level, and the street never notices it.
Dry a spare bundle upside down in the garage for the winter pots. Tied with twine and hung from a rafter, the plumes keep for months, and the December pots get the same grasses for free.
Cut grasses on a dry day. Wet plumes clump and dry crooked. Bundle ten stems with twine and hang them upside down in the garage for a week before using. A fresh-cut plume keeps shedding; a dried one holds.
Wear gloves. Miscanthus leaves cut like paper, and a hand sliced open on a grass blade ends the building session. Long sleeves too. The grasses do not care about your hands. Protect them anyway.
12. Pot a Single Show Mum in Bud
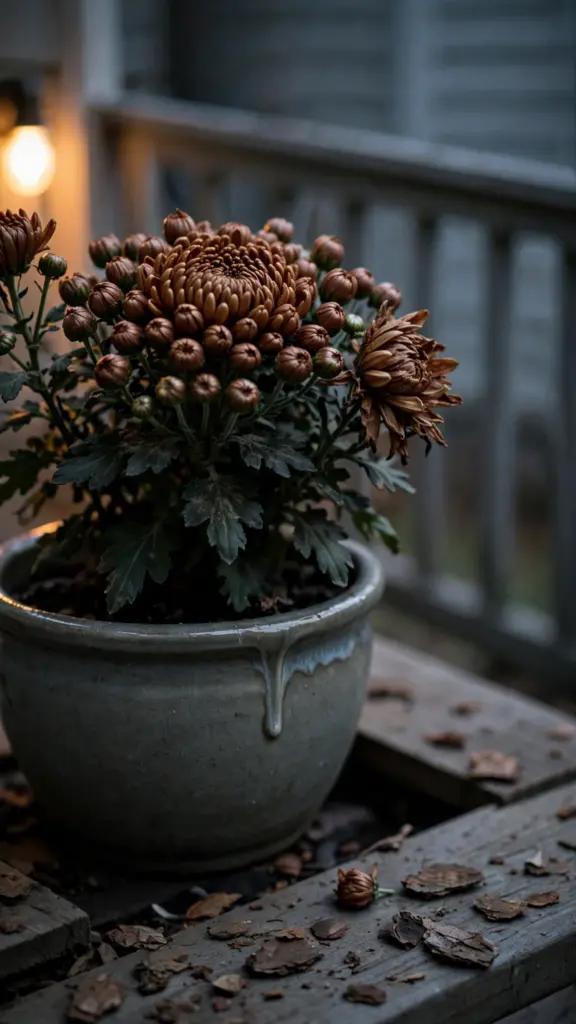
Buy one garden mum in tight bud and give it a pot of its own. A single mum in a 35 cm glazed pot, one color, no companions, reads as deliberate. Bronze reads best against brick. White reads best against dark siding.
Move the mum out of its nursery can into the larger pot the day you buy it. Ohio State Extension’s mum notes say mums perform drastically better when transplanted out of the pot they were purchased in, because the roots need room to expand and handle stress. The same notes recommend buying mums before the buds open if you want the display to last, and spacing garden-planted mums 46 to 76 cm apart for airflow.
Water at the base until it runs from the holes. Do not water the foliage. Wet flowers in cold air brown from the outside in, and a browned mum is done for the season.
Deadhead the mum daily. Pinch each spent flower off at its stem with your fingers, working top to bottom. A mum with brown heads on the street side looks done for the season. Ten minutes of pinching buys another full week of color.
Set the show mum where the afternoon sun hits it. Mums open best in full sun, and a mum in shade opens slowly and unevenly. Six hours of sun a day is the minimum for full color. The porch corner that catches the western sun is the mum’s spot.
13. Build the White-and-Green Monochrome Pot
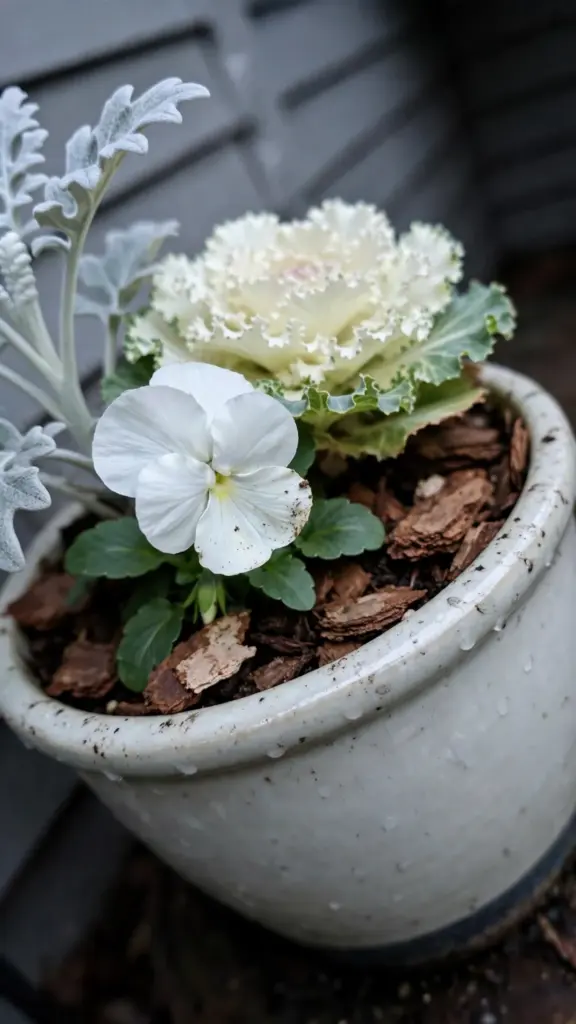
Plant white pansies, white ornamental cabbage, and dusty miller in a 35 cm glazed pot for a monochrome scheme. One palette, three textures: the pansy faces, the cabbage ruffles, the miller’s silver felt. The scheme suits a gray porch or a house with white trim, where orange would shout.
Set the cabbage center. Ring with five white pansies. Tuck dusty miller between them. The miller cools the white and keeps the pot from reading as a snowdrift. Silver foliage is the difference between designed and accidental.
White flowers show every speck of soil. Top-dress with bark chips after planting and water at the base. A mud splash on a white pansy stays visible all week.
Photograph the white pot in morning light. White flowers blow out in phone photos under the porch bulb, and the pot you cannot photograph is the pot nobody remembers. No flash. The photo is the record of what worked.
14. Set a Hollowed Pumpkin Vessel on the Table
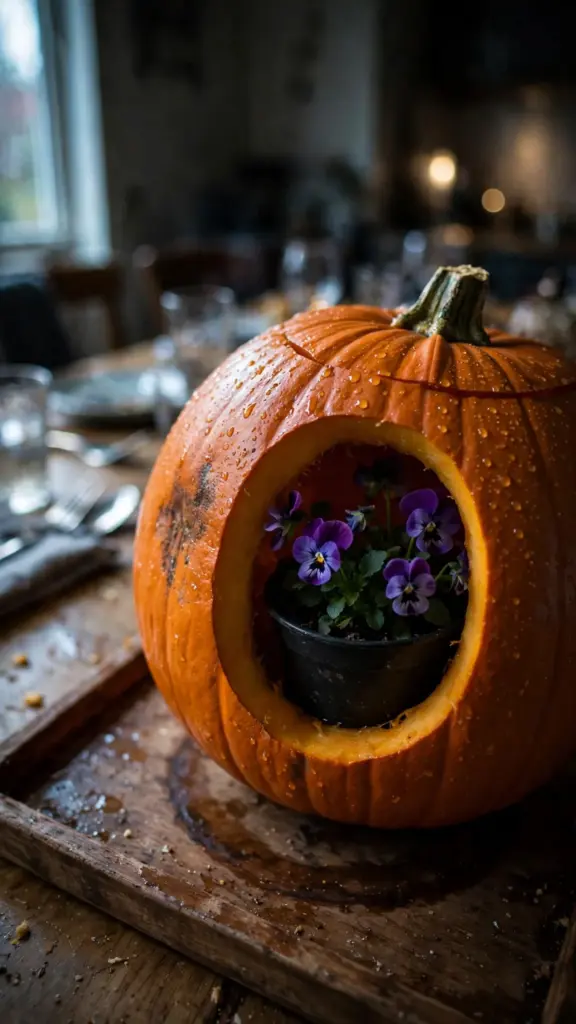
Hollow a large pumpkin and set a potted plant inside it for the table. Scoop the pulp, leave 3 cm of flesh on the walls, and drop in a 15 cm pot of pansies or succulents. The pot inside the pumpkin means the pumpkin never holds wet soil, which is what kills it.
Choose the pumpkin the way the University of Georgia’s pumpkin harvest notes describe: cut the stem with shears and leave a 10 to 13 cm handle, cure at 27 to 29 C for 10 days, then store at 10 to 13 C in a single layer with air moving around it. A cured pumpkin with its stem intact lasts the week on the table. An uncured one softens by Friday.
Set the vessel on a tray. Even a lined pumpkin weeps a little condensation onto the tablecloth. A tray catches it, and the tray goes back in the cupboard after.
Choose a pumpkin with a flat base. A wobbling pumpkin on the table is a spill waiting for the gravy boat. Set it on the table and press gently. If it rocks, shave a thin slice off the base with a knife.
Pick a pumpkin wider than the pot inside it. The pot should drop in with 2 cm to spare all around. A pot jammed tight cracks the pumpkin wall from the inside. Measure the pot first, then pick the pumpkin.
15. Plant Pansies in a Wooden Crate
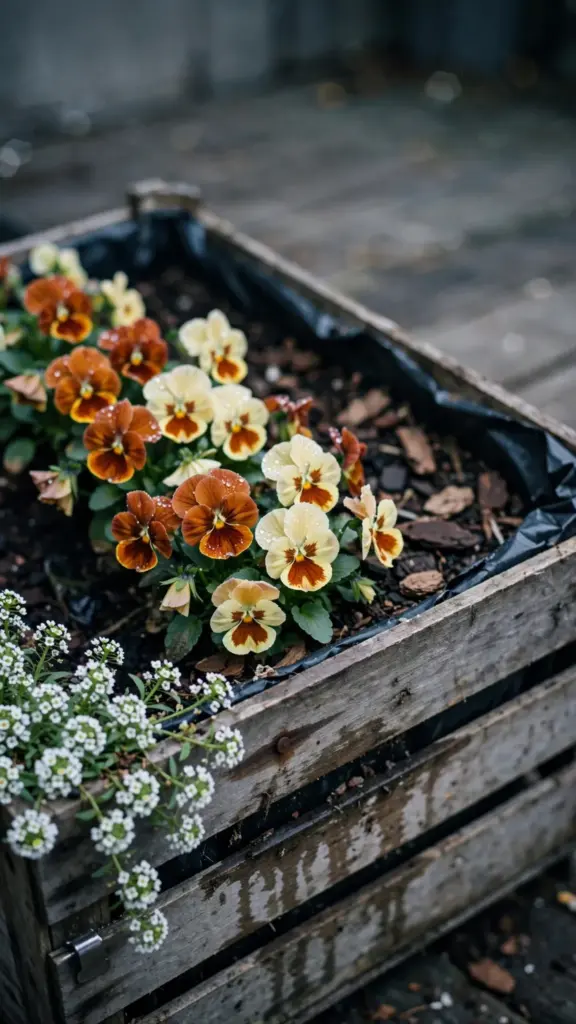
Line a wooden crate with plastic, slit the plastic for drainage, and plant it with pansies in two fall colors. The crate reads as harvest on the porch, and the pansies bloom through the month. Use one color for the back row and a second for the front. Two colors read as planted; four read as a garden center shelf.
Clemson Extension’s fall container notes name pansies and violas the best annuals for cool-season color, blooming best when temperatures stay above 0 C, and recommend trailing plants like sweet alyssum for the edge. Let alyssum spill from the front corners of the crate. The spill softens the crate’s hard lines.
Drill the crate base before lining it. An unlined crate rots in one season; a lined crate with no drainage rots the plants first. Slit the liner with a knife in six places so water escapes.
Set the crate out of the drip line. The drip off the porch roof soaks whatever sits under it, and a crate in the drip line stays wet for days. Move it 30 cm out from the wall or 30 cm in. The middle of the porch floor is the dry zone.
16. Build the Edible Greens Centerpiece
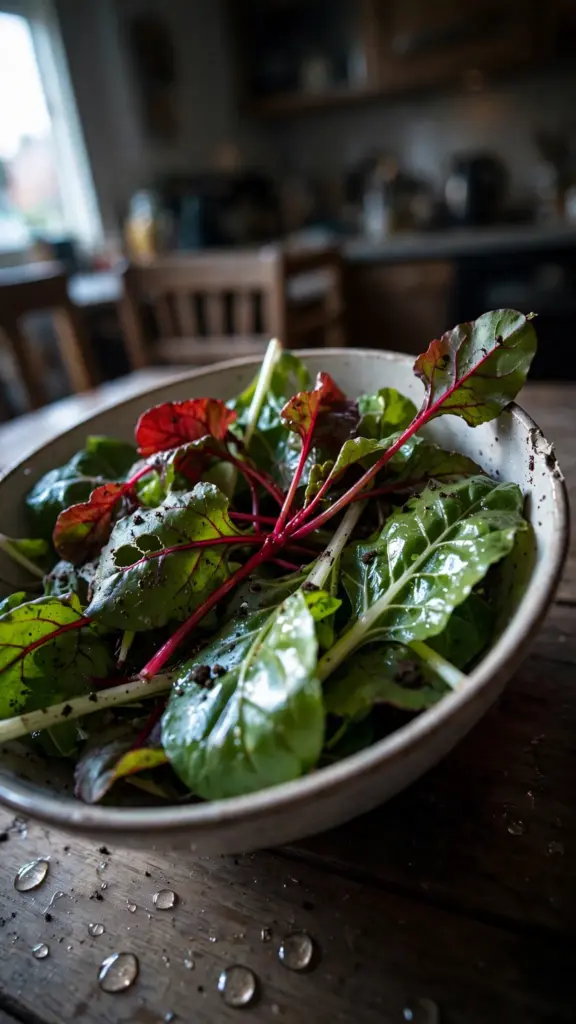
Plant a wide shallow bowl with Swiss chard, leaf lettuce, and red mustard for a centerpiece the table can eat. The reds and greens carry the harvest colors without a single flower. Set the bowl on the table Thursday, then harvest it for salads through the weekend.
Sow or transplant the greens 10 cm apart in the bowl, because crowded greens stretch and flop while spaced greens form full rosettes. Cut the outer leaves for the salad and leave the centers growing. A bowl harvested this way feeds a family twice.
Keep the bowl in full sun on the porch until Thursday morning. Greens want light. A week in a dim dining room turns them leggy, so bring the bowl in only for the meal.
Label nothing. Guests will ask what the red leaves are, and the answer starts the conversation. Red mustard, beet tops, and red lettuce all read as decoration until someone tastes them. The edible centerpiece earns its place twice: Thursday as decor, the weekend as salad.
17. Fill a Stone Urn With Evergreen Cuttings Early
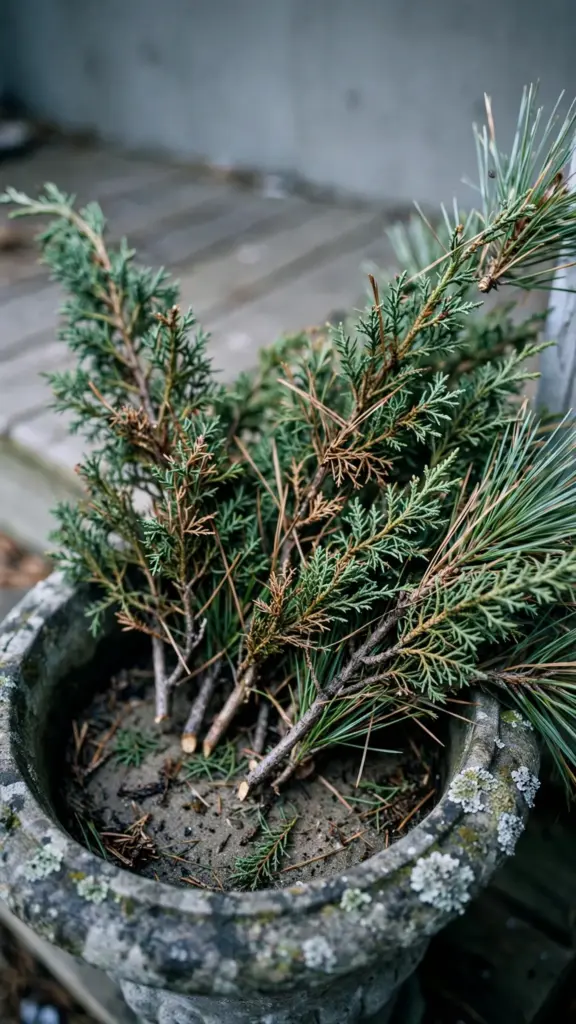
Fill a stone urn with fresh evergreen cuttings two weeks before Thanksgiving. Juniper, pine, and fir boughs cut from the yard hold their needles for a month in cool air. Cut 60 cm lengths, strip the lower 15 cm, and push them into damp sand or potting mix in the urn.
Cut with bypass shears and make each cut just above a side branch, the clean-cut habit that spring pruning techniques teaches for every stem. Clean cuts heal and drink; crushed cuts seal shut and shed. Angle the boughs outward like a fountain and let the tips arc over the rim.
Mist the cuttings once a week if the urn sits under the porch roof. Covered porches block the rain that keeps cut evergreens supple. A light misting on a still morning keeps the needles flexible for the month.
Cut boughs from the back of the shrubs, never the front. The back fills in by spring; the front shows every cut all winter. Take one bough per shrub and move on. The yard should not look plundered when the guests walk past it.
18. Pot Dusty Miller and Violas for the Shady Corner
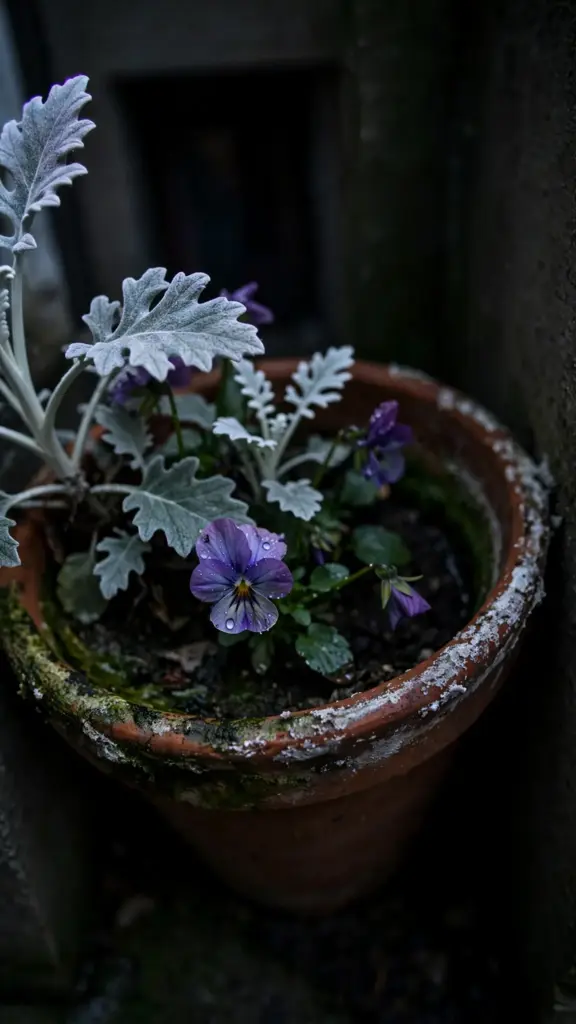
Plant dusty miller and violas in the pot that sits in the shady corner by the door. Shade pots get no direct sun, so the planting must carry on foliage and small flowers. Silver miller plus purple violas reads clearly in dim light where orange mums would muddy.
Set three miller plants center and ring with seven violas in a 35 cm pot. Violas bloom smaller than pansies. They produce more flowers and need less deadheading. Pinch the spent viola flowers with your fingers as they fade; the pinching takes minutes and keeps new buds coming.
Shade pots stay wet longer than sun pots. Check the mix before watering, every time. A shade pot watered on a schedule rots from the bottom while the top looks fine.
Rotate the shade pot a quarter turn midweek. The side facing the door gets all the attention and all the wear. A quarter turn evens the exposure and hides the thin side. The pot reads as full from every angle.
19. Tuck Berry Branches and Pinecones Around the Base
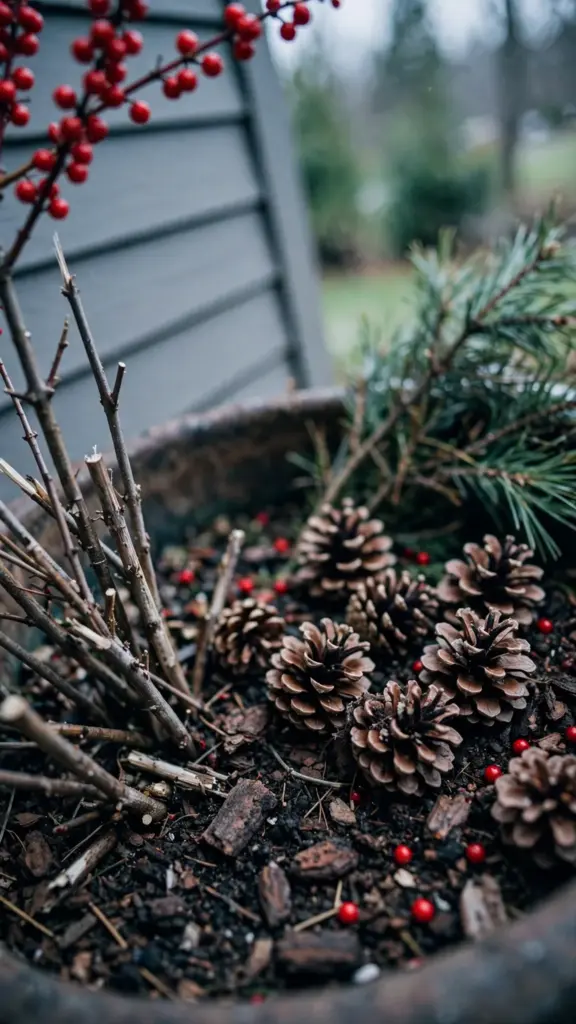
Cut berry branches from the yard and stick them into the established pots as vertical accents. Bittersweet, beautyberry, and winterberry all hold their fruit into November. Push the stems 12 cm into the mix behind the thriller, three branches per 40 cm pot.
Scatter pinecones around the base of the plants as a mulch. The cones hide the soil, slow surface drying, and read as harvest. Use cones with the scales open; closed cones are still holding moisture and will open indoors as they dry.
Gather pinecones from the yard, not the craft store. Yard cones are free and already weathered to the right gray-brown. Bake them at 120 C for an hour to kill anything living inside. The oven does what the craft store charges for.
Set berry pots on a tray. Berries drop, and dropped berries stain porch boards. Check the branches midweek and pull any stem that has shed its fruit. A bare stem with no berries is just a stick.
Cut berry branches with 40 cm of stem. Short stems vanish into the pot; long stems give the vertical line the berries deserve. Strip the lower leaves so the stem reads clean against the evergreens. Leaves left on a cut stem wilt in a day.
20. Stage the Mini Pumpkin Trough
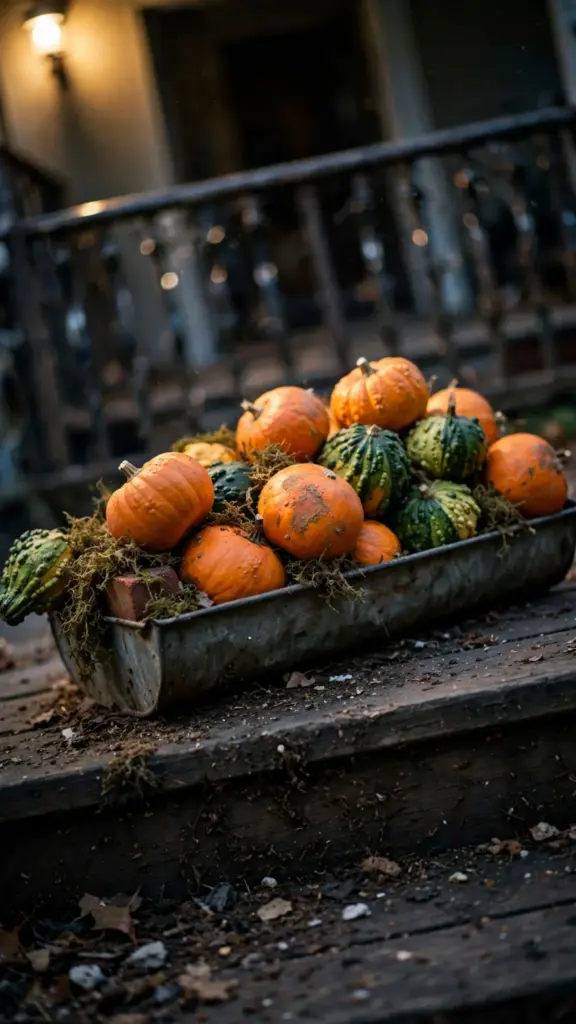
Fill a low trough with mini pumpkins, gourds, and dried moss for the porch rail or the steps. No plants, no soil, no watering. The trough is pure harvest display, and it goes up in twenty minutes. Stack the largest pumpkins at the back, the mediums in the middle, and scatter the minis in front.
Tuck dried moss into the gaps. The moss hides the trough floor and stops the pumpkins rolling. One rotten pumpkin in a trough spreads soft spots to its neighbors, so check the trough daily and pull anything soft the same day.
Compost the whole trough Friday morning. Chop the pumpkins first; whole pumpkins take months to break down. The moss goes in as brown material. The trough wipes clean and stores flat.
Weigh the trough. A trough of pumpkins on a porch rail catches the wind, and a light trough walks off the rail in a gale. Set a brick inside under the moss, or move the trough to the steps. The display that blows over is not a display.
Buy minis by the bag, not by the piece. A bag of 20 mini pumpkins costs less per pumpkin and fills the trough with spares. The spares replace the ones that soften midweek. A trough with spares never looks thin.
21. Plant the Winter Bridge Pot
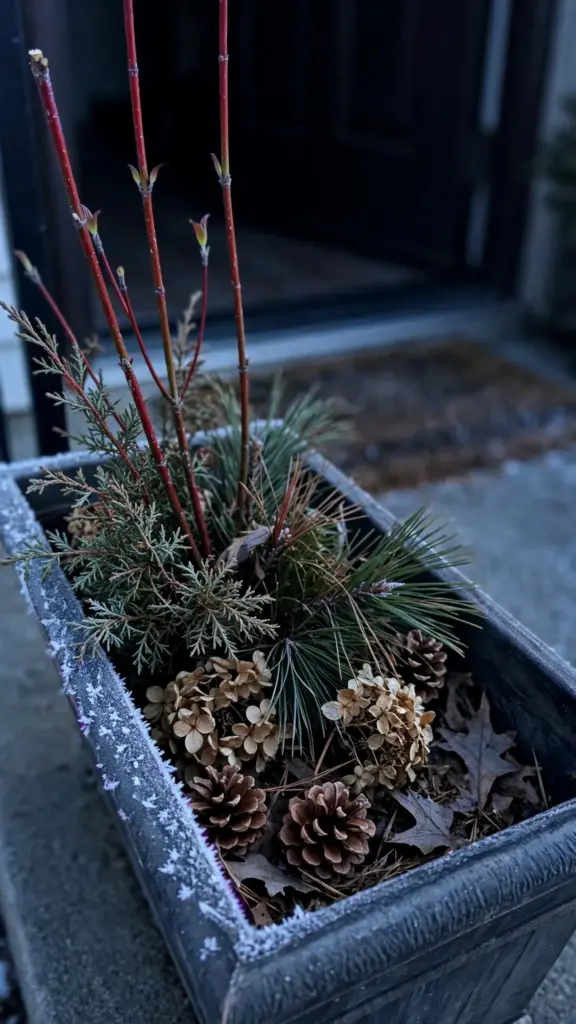
Build one pot to carry December, not Thanksgiving. Fill a 40 cm pot with juniper and pine cuttings, dried hydrangea heads, redtwig dogwood stems, and pinecones. No flowers. The pot looks right on Thanksgiving and stays right through the new year.
Push the tallest stems in first, then the evergreens, then the accents. The order matters: tall stems set the skeleton, evergreens fill the body, accents finish the surface. A bridge pot built backward looks poked full of sticks.
Leave this pot alone after Thursday. The Thanksgiving pots get torn down and composted; the bridge pot stays. One pot that survives into January is worth five that peak on Thursday and die on Friday.
Water the bridge pot once in December and once in January. Evergreen cuttings drink almost nothing in the cold, but the mix should not go bone dry. A dry pot in a freeze heaves and cracks. One deep watering per month is enough.
Watering and Frost Care
Water at the base of each plant until it runs from the drainage holes. Containers dry faster than beds, and wind off the street dries them faster still. Check the mix with a finger every morning. If the top 3 cm are dry, water. If they are damp, walk away.
Move the tender pots under the porch roof when the forecast drops below minus 4 C. Mums in bud survive a light frost under cover; mums in flower do not. Kale, pansies, and dusty miller ride out frosts that finish the mums, and their color improves after the first cold nights.
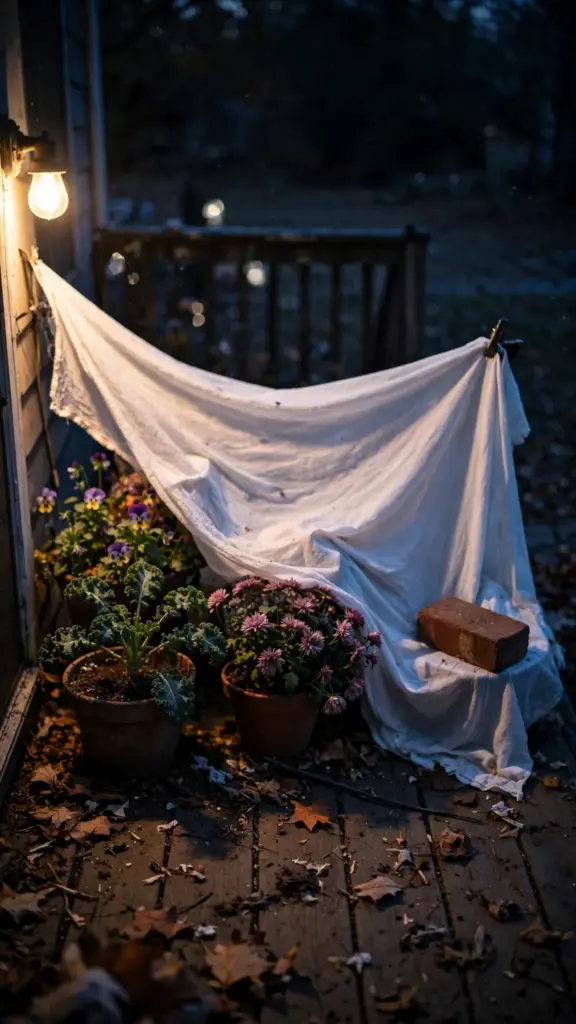
Cover with a frost cloth on the coldest nights, not plastic. Plastic traps moisture against the leaves and the freeze burns where the plastic touches. Drape the cloth loosely and weight the corners with bricks.
Water in the morning. Morning water soaks in before the cold night; evening water sits in the pot and freezes around the roots. A frozen root ball heaves the plant up and breaks the fine roots. The morning habit is the whole of winter watering.
Count the rain. A week of steady rain waters the pots for you; check the saucers instead and tip out the standing water. A dry November of wind means watering every other day. The sky sets the schedule, not the calendar.
Transition the Pots to Winter
Pull the spent mums and the tired pansies the weekend after Thanksgiving. Leave the kale, the grasses, and the evergreens. They are the winter structure. The pots look thin for a day, then the evergreen cuttings fill the gaps.
Push fresh pine and juniper boughs into the gaps where the mums came out. The winter bridge pot from idea 21 shows the shape: evergreens first, accents after. Water once more, then let the cold slow everything down.
Mulch the pots with 3 cm of shredded leaves after the swap, because the leaves insulate the roots and break down over winter. Pull the mulch back from the stems. Wet mulch against a stem rots it.
Stop feeding entirely. No plant in these pots wants nitrogen in December. The compost in the mix carries what the evergreens need until spring.
Save the grasses for the spring pots. Cut the plumes off the winter bridge pot in March and compost the stems. The grasses that carried November carry the first spring containers too, dried and silver. Nothing on this page is single-use.
Tear Down and Compost the Leftovers
Chop the pumpkins and gourds before they go to the compost. Whole pumpkins take months to break down; chopped pieces take weeks. Split each pumpkin with a spade, scoop the seeds for the birds, and toss the pieces in.
Shake the soil off the spent annuals and compost the tops. Spread the used potting mix on the beds or save it for spring containers, cut half and half with fresh mix. Used mix is tired but not dead; the beds take it gladly.
Scrub the pots with a stiff brush and stack them dry in the garage. Clean pots in spring save an hour of scraping. Burlap, twine, and moss all compost. The turkey planter wipes clean and goes on the shelf for next year.
Keep the burlap and twine, because folding the burlap and coiling the twine for dry storage means next November they wrap the pots again. Burlap lasts three seasons if it stays dry in storage. The consumables budget for this page is nearly zero after the first year.
Photograph the Pots Before Guests Arrive
Shoot the pots Thursday morning in the hour after sunrise. The light is soft, the porch is clean, and nobody has moved anything yet. Photograph each pot from the angle the guests will see it: the street view for the urns, the table view for the centerpiece.
Take one wide shot of the whole porch and one close shot of each pot. The close shots show what worked; the wide shot shows the composition. Save them in a folder with the year. Next November, open the folder before you cut a single stem.
Note what failed while it is fresh. The pot that flopped, the color that clashed, the pumpkin that softened early. Write it on the back of the plan or in the phone notes. Memory edits itself by spring; the note does not.
Shoot the failures too. The pot that flopped teaches more than the pot that worked, and the photo is the only honest record. One line on what went wrong, saved with the photo, prevents the same mistake next November. The folder is the teacher.
Close the Season With Clean Empty Pots
Stack the clean pots in the garage by size, saucers nested inside. The porch goes bare for a week, and that is fine. A bare porch in December looks rested, not neglected, once the bridge pot stands alone by the door.
Order nothing now. The seed catalogs arrive in January, and the kale seed for next fall’s pots goes on that order. One packet of ornamental kale seed replaces a dozen nursery flats, and the plants cut from the vegetable bed are free.
The garden supplied the plants, the pots supplied the structure, and Thursday supplied the deadline. That is the whole method, and it repeats every November.
Start one new thing next year. A new vessel, a new plant, one experiment. Twenty pots the same as last year is a routine; nineteen the same and one new is a garden. The new thing is what keeps November interesting.
Thanksgiving Planter FAQ
How Long Do Thanksgiving Planters Last Outdoors?
A planted pot lasts three to four weeks in November weather if you water it and move it under cover on the coldest nights. Mums in bud hold longest; open flowers brown within ten days. Kale, pansies, and dusty miller keep going into December. A hollowed pumpkin vessel lasts about a week in cool shade. Check every pot daily and pull anything soft before it spreads.
Can I Leave Planters Out in a Frost?
Kale, pansies, violas, and dusty miller handle light frosts, and kale colors up after the first one. Pansies bloom best when temperatures stay above 0 C. Mums in bud survive a light frost under the porch roof; mums in full flower do not. Move the tender pots under cover when the forecast drops below minus 4 C, and drape frost cloth, never plastic, on the coldest nights.
What Plants Survive November in a Pot?
Ornamental kale and cabbage, pansies, violas, dusty miller, and chrysanthemums in bud carry November color. Herbs like parsley, thyme, and upright rosemary work in sheltered pots. Evergreen cuttings of juniper, pine, and fir hold through December. Sweet alyssum trails over the rim until hard frost. Buy mums showing color in the buds, not in full flower, for the longest display.
How Do I Keep a Pumpkin Planter From Rotting?
Set a potted plant inside the hollowed pumpkin instead of planting directly in it. Leave 3 cm of flesh on the walls and set the vessel on a tray to catch condensation. Start with a cured pumpkin: cut the stem with shears, leave a 10 to 13 cm handle, and keep it cool and dry. Check the pumpkin daily and compost it at the first soft spot, before the rot spreads.
Should I Use Potting Soil or Garden Soil in Planters?
Use bagged potting mix, not garden soil. Garden soil compacts in a pot, drains poorly, and carries weed seeds. Mix one part finished compost into three parts potting mix for a month of feeding. Every vessel needs drainage holes, four 12 mm holes in a 40 cm pot, except the pumpkin. Top-dress with 2 cm of bark chips to hide the soil line and slow surface drying.