Standing in front of your rose bushes in late winter, seeing those first few buds swelling, can feel incredibly daunting. You know that making the right cuts is essential for their health, but the fear of doing it wrong, of somehow killing your favorite plant or ruining this year’s flowers, is real. It’s easy to feel paralyzed and just walk away, leaving them untended for another year, but you also know deep down that avoiding it only leads to a messy, tangled bush with fewer, weaker blooms. This inaction guarantees a poor display and increases disease risk. The good news is that I have faced that same paralyzing fear, and I am here to tell you that there is a straightforward path forward. By following a clear, structured set of rules for pruning roses in spring, you can confidently manage their growth and unlock a season of unparalleled vibrancy, ensuring your garden becomes the productive sanctuary you’ve always wanted. Let’s get started.
1. Timing Your Cut: When is it Too Late for Pruning Roses in Spring Safely?
Getting the timing right is the absolute foundation of everything we are trying to achieve. If you prune too early, a sudden late frost can severely damage the new, tender growth that your cuts have just encouraged. Conversely, if you wait until the plant is already in full leaf, you are forcing it to waste precious energy and nutrients it has already invested, which significantly sets back its overall development for the entire season. I have made both of these mistakes in my early gardening years, and I can tell you from experience that the resulting weak growth and poor flowering are incredibly frustrating. The goal is to maximize the plant’s health and potential while minimizing seasonal stress.
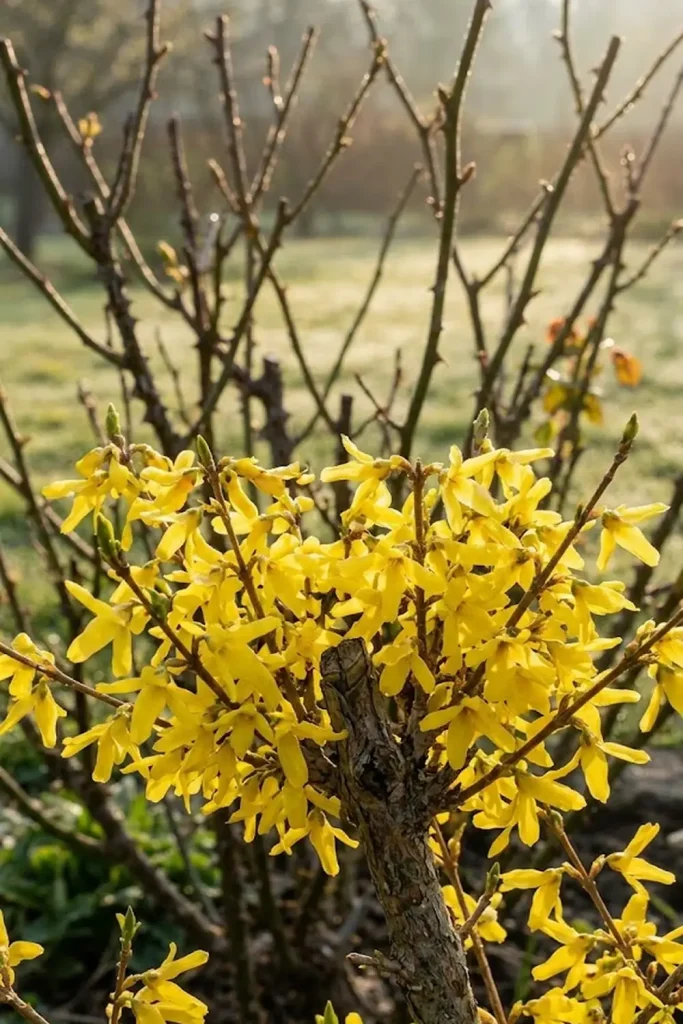
To find that perfect moment, I always recommend looking at nature’s subtle cues. My favorite, and most reliable, indicator is the blooming of the Forsythia bushes. This vibrant yellow shrub generally flowers at the precise moment that roses are beginning to “wake up” and their buds are swelling, but before they have fully committed to pushing out leaves. When you see those first yellow Forsythia petals, that’s your starting pistol. You want to make your spring rose pruning cuts during this exact transition window to capture maximum plant vigor. It’s a moment of delicate balance that I’ve learned to respect, watching the weather closely to ensure no major frosts are predicted immediately following my work.
Avoiding Latent Winter Issues
The management of this critical timing is key to prevent future problems. Think of it as preventative care: you are acting when the plant is dormant enough to tolerate the cuts but active enough to heal quickly.
2. Gear Up: Essential Tools for Pruning Roses in Spring Without Damaging Stems
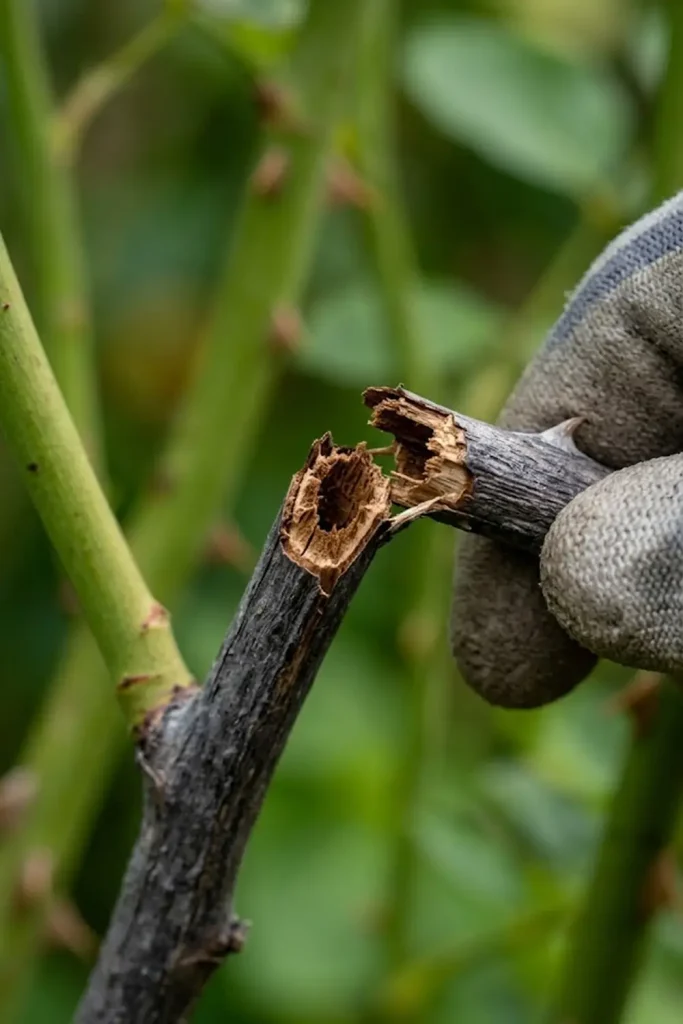
Before I ever make that first cut, I always take time to prepare my tools. It’s an act of respect for the plants and for the significant investment in my garden. Starting with the wrong equipment, or tools that have become dull, is the most common and damaging mistake I see beginner gardeners make. A blunt blade won’t slice cleanly; instead, it will damage and crush the delicate cambium layer of the rose stems. This kind of trauma doesn’t just look sloppy; it creates a jagged, raw wound that is an open invitation for pests, such as borer insects, and fungal pathogens to enter. The simple management of your equipment, therefore, directly impacts your roses’ disease control and ultimate vibrant health.
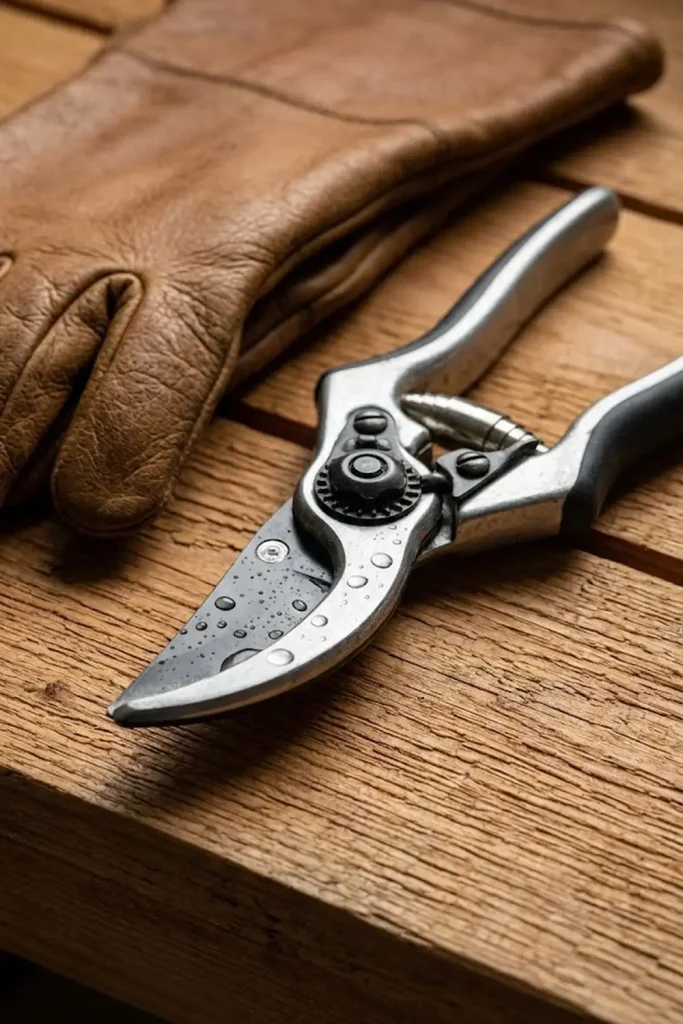
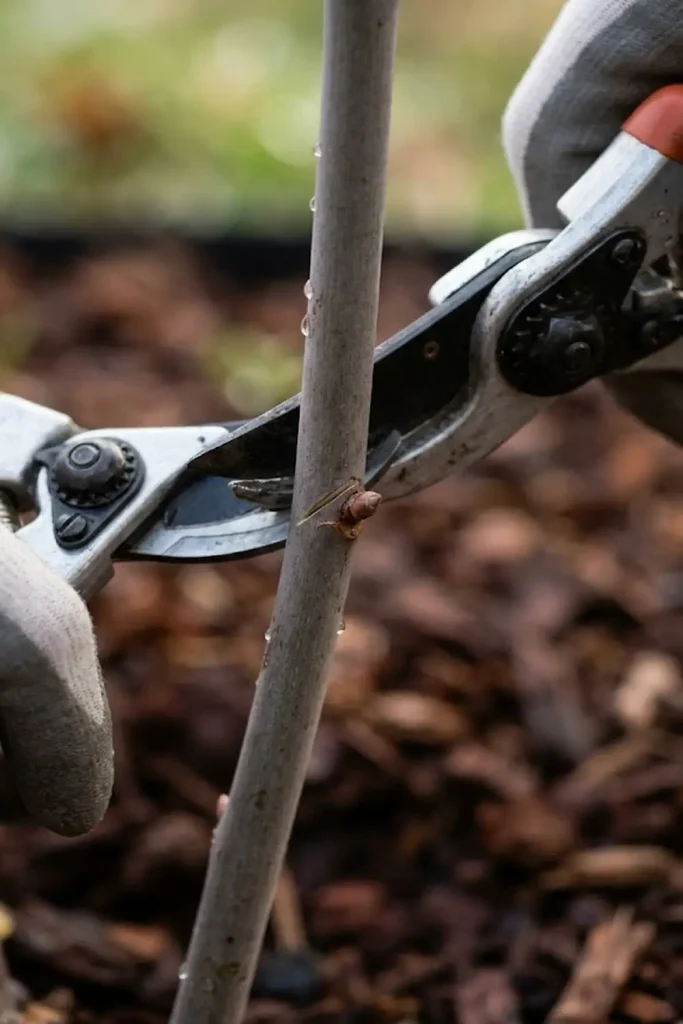
The choice of pruners is, without a doubt, the most important single tool decision you will face. I will always, without hesitation, advocate for using only Bypass pruners on living wood. You can recognize these by the curved, moving blade that slides past a thick base, much like a pair of high-quality scissors. This design provides a clean, precise slice that heals quickly and is crucial to effective spring rose pruning. On the other hand, you will see Anvil pruners, which operate by crushing a blade down against a flat, metal surface. These are excellent for clearing dry, dead twigs, but they are absolutely disastrous for live canes, resulting in painful crush injuries that often lead to stem Dieback. Spending a few extra dollars on a quality, ergonomic set of bypass pruners from a trusted brand, like Felco, is not just about the technical results; it’s about the physical protection of your hands. If your fingers are comfortable, you are more likely to make precise, focused cuts throughout your gardening session, preventing injury and ensuring great plant care.
Mastering Your Equipment
To help you get organized, here is a breakdown of what my essential pruning kit includes. Your own requirements may vary slightly, but this is a reliable and safe baseline.
Essential Pruning Tool Kit
| Tool Name | Primary Purpose for Roses | Crucial Feature to Look For |
| Bypass Pruners | Cutting stems up to 3/4″ (pencil-thin to finger-thick) | Ergonomic handles and replaceable blades |
| Bypass Loppers | Cutting thicker canes (up to 1-1/2″) or in difficult, tight spots | High leverage with extendable handles |
| Gauntlet Gloves | Hand and forearm protection against thorns | Supple goat or cowhide with puncture resistance |
| Isopropyl Alcohol | Sanitizing tools between cuts to prevent disease spread | Spray bottle application is most convenient |
| Folding Pruning Saw | Removing old, thick, or crowded canes at the ground | Sharp, triple-ground teeth |
| Sharpening Stone | Maintaining the clean edge of all blades for optimal health | Dual-grit whetstone |
3. The “Three Ds”: Foundation of Rose Management
With your tools sharp, sanitized, and your timing correct, we are finally ready to step in and begin the actual process of shaping. It can still feel intimidating to know where to begin, but I’ve found that the best starting point is to focus on the absolute basics of rose bush management. Before you worry about the overall form, you have to prioritize care and cleanup. I always advise starting with what is undeniably harmful or useless to the plant, and this is where the simple rule of “The Three Ds”—removing Dead, Damaged, and Diseased wood—is your guiding light. Following this straightforward sequence allows you to clear away the literal and figurative dead weight, which is essential to long-term plant care and health.
This initial cleanup gives you a much better perspective on the plant’s basic structure and allows you to make more informed decisions about the remaining canes. If you have been hesitant about pruning roses in spring in the past, starting with the Three Ds is the perfect confidence booster. It’s hard to mess up a decision about removing something that is already dead, and seeing the plant respond to your care is incredibly rewarding. Let’s break it down further so you know exactly what to look for and how to effectively manage each issue.
Eliminating Dead Wood
To successfully complete the prevention phase, you must hunt down and remove all dead wood. Identifying dead canes is usually straightforward. They look dry, brittle, and often turn a uniform dark brown or grey color. I suggest making a test cut near the top of the cane. A truly dead cane will show brown, dry pith through its center. If you see any creamy white or green tissue, the cane is still alive at that point. Once identified, your management strategy is to use your sharpest Bypass pruners and cut the entire dead cane back all the way to its origin at the graft union or a main healthy cane. Be ruthless with this care step; you do not want to leave any stubs, which are an open invitation for pests to gain protection inside the plant.
Addressing Damage from Stress
Your management of the rose bush must also include any stems with obvious structural or environmental damage. Winter winds can severely snap or break living canes, while larger branches rubbing against each other can create raw wounds. Don’t be gentle with these damaged canes. They are weak and unlikely to produce any significant, vibrant blooms. Your clear action, therefore, is to prune them back below the injury to a healthy, outward-facing bud. This protection measure helps the plant direct its precious resources toward creating more robust, new growth, ensuring its long-term health and vitality. It’s about proactive prevention.
Controlling Disease Spread
When you find canes displaying signs of serious disease, such as the distinct, purplish black spots or lesions of black spot or the dry, sunken, brown canker areas, your immediate and highest priority becomes disease control and management. It is crucial to remember that your highest responsibility in this situation is the protection of the entire rest of your garden. Using sharp, recently sterilized tools, you must make pruning cuts that are well below any visible signs of infection. Your goal with this specific care is to cut all the way back until you see a perfectly clean, green-white healthy center. This aggressive management is the best defense against a season-long disease struggle and ensures that you are providing the best possible care for your rose plant’s future. It’s all about the safety and health of the remaining plant material.
4. Opening the Center: Pruning Roses in Spring for Better Airflow
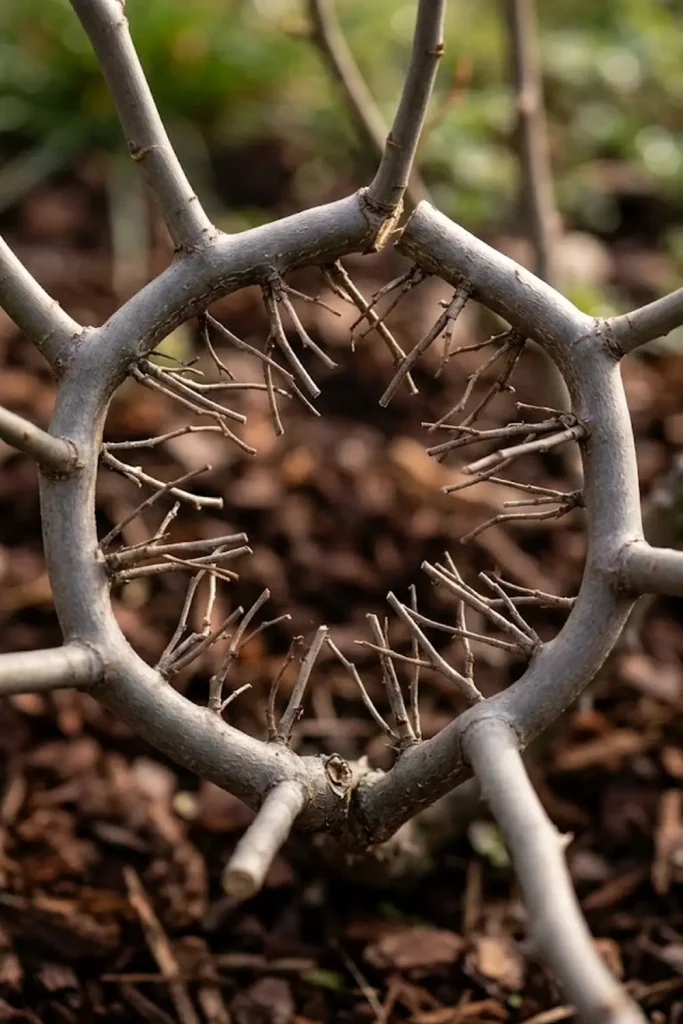
Once you have addressed the “Three Ds,” your focus must shift from pure cleanup to strategic structural care. This is where many gardeners hesitate, fearing they are taking too much off, but I assure you, this step is vital for the prevention of debilitating fungal diseases later in the summer. Your goal now is to look at the overall architecture of the bush and create an open, airy structure. I always envision a vase or a wine glass when doing this—you want the major canes to form the outer bowl, leaving the center of the plant completely clear. This management technique ensures that sunlight can reach every leaf and, crucially, that wind can breeze through the center, rapidly drying dew and rain. If you skip this step, you are practically inviting black spot and powdery mildew to take up residence in the stagnant, humid air of a crowded rose bush.
Reconfiguring the Plant Structure
To achieve this open, healthy form, you must make purposeful pruning cuts that prioritize airflow and structural integrity over simply maintaining the plant’s height.
- Remove Cross-Over: Your first action in this phase of care is to identify any canes that are crossing through the center or rubbing against other canes. This management step is crucial. Rubbing creates open wounds, which provide protection and entry points for disease. Cut these conflicting canes back to their origin.
- Thinning the Center: Be ruthless in clearing out the small, twiggy growth, often called “lateral shoots,” that inevitably congests the heart of the plant. This weak, internal growth will never produce significant flowers and only blocks essential airflow and light. Effective protection means prioritizing the healthy, outward-growing canes.
- The Power of Light: Sunlight penetration is another essential component of rose health. By opening the center, you are ensuring that lower buds receive the energy they need to push out strong, new, flowering wood, rather than the plant becoming “leggy” with blooms only at the very top.
5. Master the Technique: How to Start Pruning Roses in Spring for Beginners
If you are just beginning, do not worry; the actual mechanics of pruning are straightforward once you understand the target. For effective care, your goal is to make every single cut with precision and with the plant’s future growth in mind. Each snip you make is not just about reducing height; it is a management decision, a signal to the plant. Think of it as protection for the future structure: you want the new stems to grow outward, away from the dense center of the bush, not inward.
This simple yet foundational management technique involves two critical, interconnected steps that ensure your roses have the perfect blueprint for success. This isn’t complex science, but rather a simple logic that I will happily share to help you provide the best possible care for your roses.
Perfecting the Cut
The first technical skill for plant care is mastering the anatomy of the cut. This is not just an aesthetic choice; it’s about managing water and directing growth.
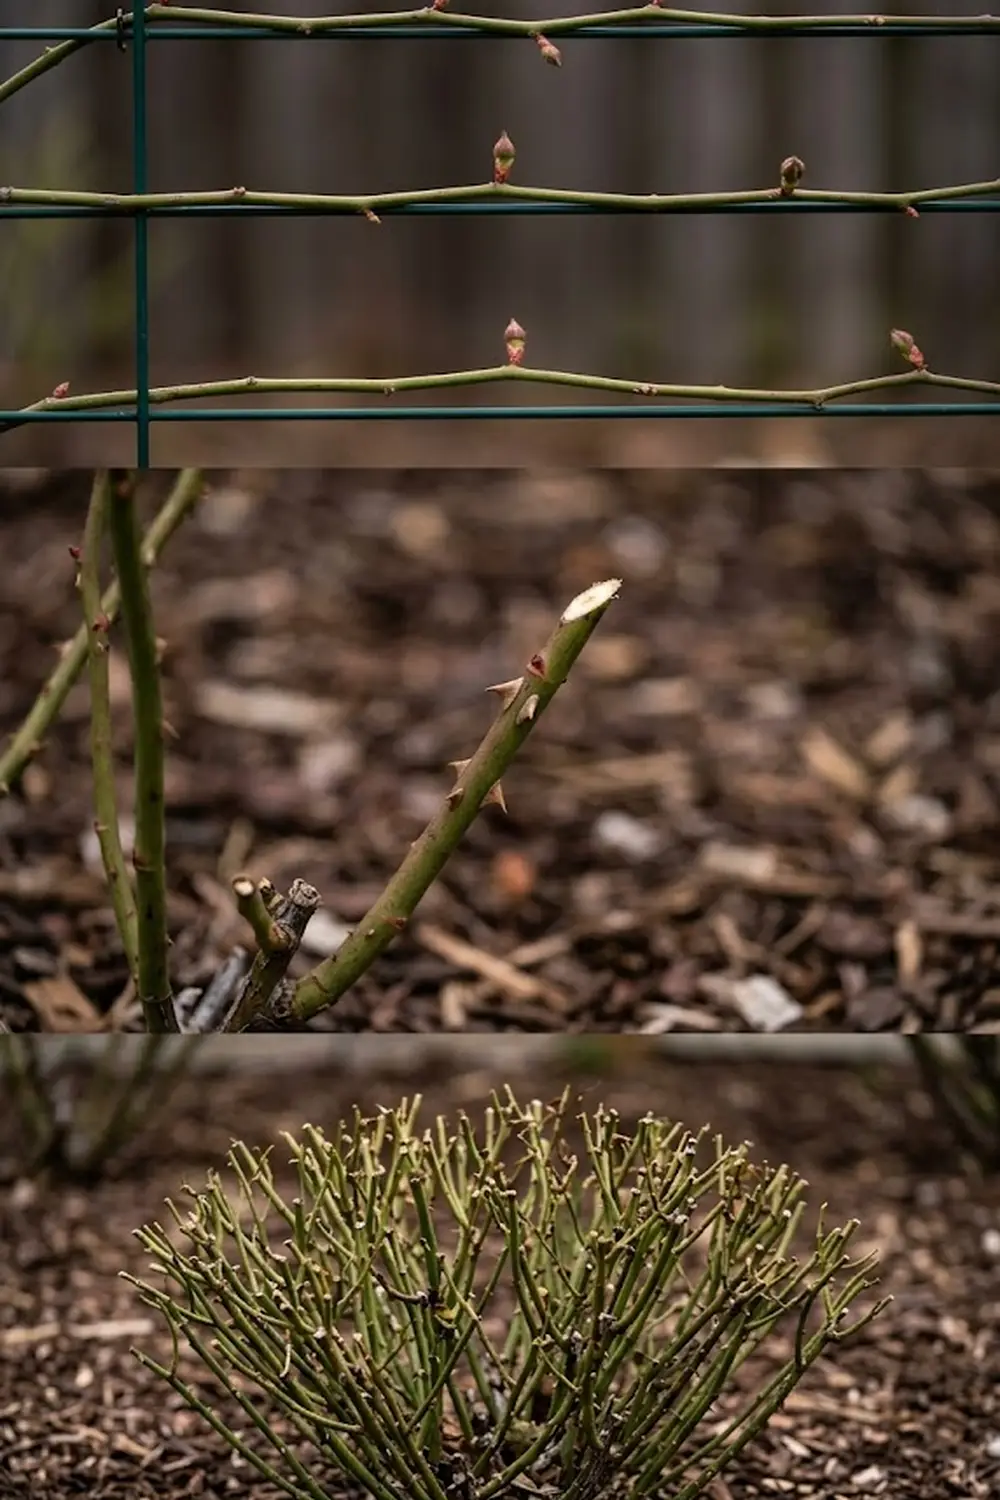
- The Angle of Health: You must always make your pruning cuts at a steep, 45-degree angle. This crucial piece of care is not arbitrary. This steep slope prevents water from pooling on the fresh cut, where it would sit and create a perfectly humid environment for fungal spores to germinate. This prevention measure directly impacts long-term plant health.
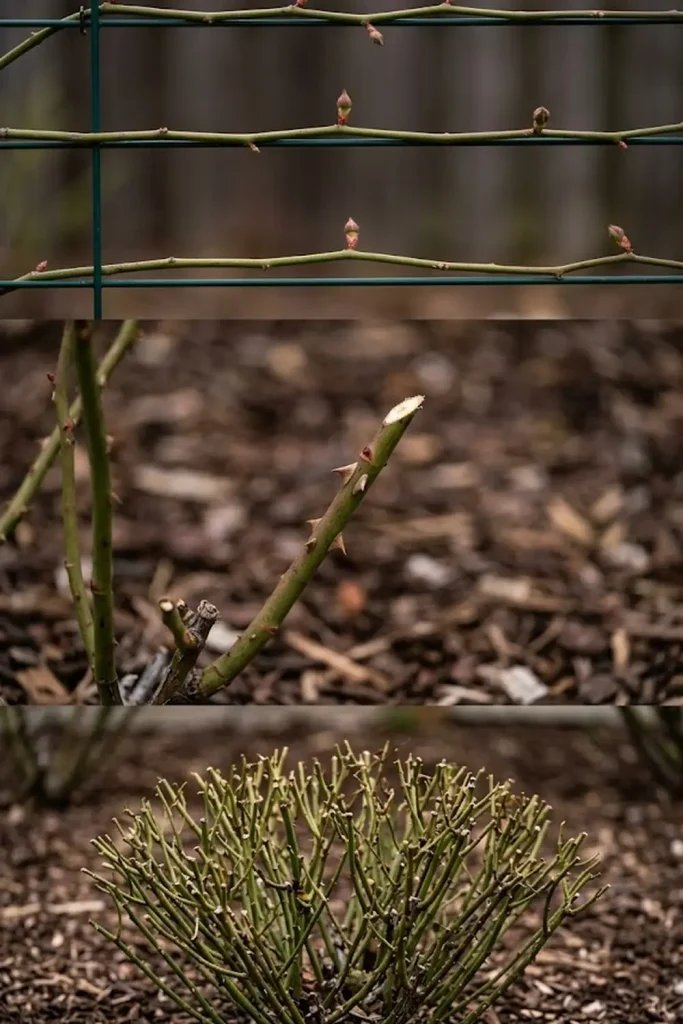
- The Outward-Facing Bud: Your next essential management task is to locate a single bud, that tiny swelling along the cane that indicates new growth. But don’t just cut anywhere. You must identify a bud that is facing outward, away from the dense center of the plant. Why? This is how you control the plant’s structure; the new branch will grow in the direction the bud is pointing.
- Optimal Placement: Making the cut is about precise protection. Aim to place your sharp bypass pruners approximately 1/4 inch (about 6mm) above that chosen outward-facing bud. This specific distance is vital for effective management. Any higher, and you create a large, useless stub that will eventually die, rot, and invite pests. Any lower, and you are far too close, risking damage to the tender bud eye itself. Precision is key to proper care.
Executing the Perfect Snip
| Component of Cut | Technical Best Practice | Critical Reason |
| Angle | 45-degree slope away from the bud | Prevents water pooling; directly avoids fungal infection. |
| Direction | Must be above an outward-facing bud | Directs new, open growth; prevents future crowding and tangle. |
| Placement | Exactly 1/4 inch above the bud eye | Optimal distance for rapid healing; avoids destructive cane dieback. |
| Result | A clean, precise, and sloped surface | Best blueprint for a healthy, vibrant, and productive cane. |
6. Variety Specifics: Pruning Different Roses for Maximum Summer Blooms
Not all roses are treated equally; effective care requires you to adapt your strategy. I will always remember the early frustrating mistakes I made, treating my robust climbing roses like they were just big, messy shrubs, resulting in a disastrous, tangled mess of non-flowering vines. The logic of pruning roses in spring does not apply to all varieties, and you must understand the unique flowering habits of your plants. Providing specific management for each category is essential to ensure that you are maximizing their health and potential. Your care of a Hybrid Tea, for example, is radically different from your care of a once-blooming Rambler. Adapting your pruning cuts to the individual’s needs is the foundation of successful, long-term plant care.
Mastering Specific Variety Care
To help you get organized, here is a practical breakdown of how you should adapt your spring rose pruning to the specific needs of your plants. This is not arbitrary; it is crucial for a productive garden.
- Hybrid Teas & Floribundas: These modern marvels bloom beautifully on new growth that pushes out after you make your cuts. To encourage the strongest, most prolific flowering canes, you must perform a severe, “hard prune.” This means using your bypass pruners to cut them back aggressively, often to a height of just 12 to 18 inches. You are aiming for just 3 to 5 strong, robust canes, spaced evenly to form a clear “vase.” This dramatic management technique triggers the plant to send its resources into producing large, vibrant blooms all summer long.
- Climbing Roses: If you are lucky enough to have these elegant plants, you must understand their special structure. For effective management, do not prune the long, main canes, often called the “structural canes,” that grow horizontally along your fence or trellis. Instead, focus your care on the short, horizontal side-shoots, or laterals, that sprout from those main canes. After clearing the “Three Ds,” prune these laterals back to just 2 to 3 buds. This is how you control their messy growth while ensuring a spectacular and complete vertical display of flowers.
- Shrub & Knock Out Roses: These roses are incredibly easy-going and require much simpler care. Forget the delicate, technical cuts. For effective management, simply give them a “haircut” with hedge shears or large bypass loppers, reducing their overall height and width by about 1/3 to 1/2. You are not trying to create a specific, open center or follow precise bud eye placement; you are merely thinning the exterior to maintain a dense, well-shaped, and productive hedge of flowers all season long.
7. Post-Pruning Aftercare: Nutrition and Protection
Once you have made the last precision cut on your rose varieties, your initial plant care and protection strategy is complete. However, your essential management is not done. This is the moment I call the “recovery” phase. After your pruning session, your rose bush has been effectively stimulated, creating a massive push for new, vibrant blooms that will require a high-energy diet. This post-care phase is about providing nutrition and protection for the fresh, open wounds you have created, ensuring they heal quickly and cleanly. I’ve found that many gardeners neglect this critical management step, allowing the plant to struggle, rather than ensuring its ultimate long-term health and productivity.
Nourishing the New Growth
Your final management task for plant health is to give your roses the massive nutritional boost they have been waiting for.
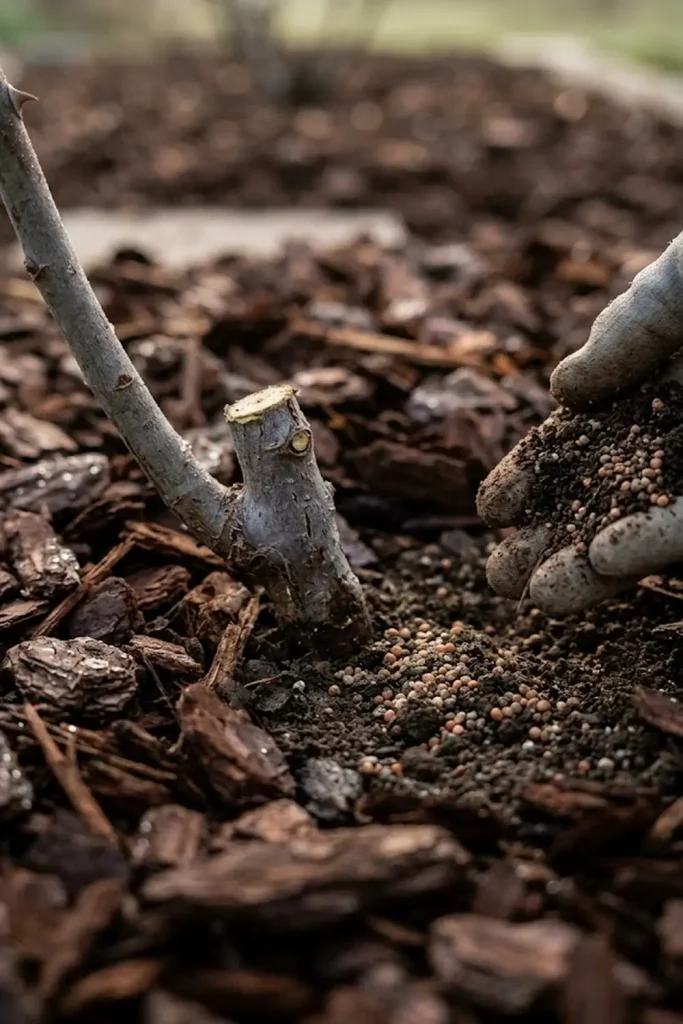
- The Power of Nutrition: I always advice applying a robust, slow-release granular rose fertilizer with a high phosphorus content immediately after pruning. Why phosphorus? This vital nutrient focuses on strong root development and, more importantly, fuel for those vibrant blooms that will cover your bush all summer long. This complete care is not arbitrary; it is crucial for a productive garden.
- The Miracle of Mulching: After feeding, your highest protection responsibility is to lock that good nutrition and all the valuable soil moisture into the root zone. You can achieve this by spreading a 2- to 3-inch layer of rich, dark organic mulch, such as shredded cedar bark, all around the base of the plant. This simple management step is not just about aesthetics; it directly avoids moisture loss through evaporation, suppressing weed competition, and insulating the roots against any potential late-spring frost events. I have learned to respect this final act of care.
Post-Pruning Recovery Plan
| Care Aspect | Specific Action | Critical Prevention |
| Feeding | Apply granular rose fertilizer (high-phosphorus) | Prevents nutritional stress; supports robust flowering. |
| Soil Protection | Spread 3-inch layer of dark organic mulch | Directly avoids moisture loss; suppresses weed competition and frost danger. |
| Pest Control | Seal large cuts with wood glue | Prevents borer insects from gaining entry and causing dieback. |
| Watering | Water the base of the bush deeply | Ensures the nutrients reach the root zone. |
FAQ: Your Top Questions on Spring Rose Care
As I have shared my own experiences with pruning roses in spring with you, I know that even with the best rules, common anxieties and unique situations always arise. I’ve compiled the most frequent questions I receive—the same questions I once asked—to provide you with immediate clarity and help for your specific gardening challenges. This is about ensuring you have the precise care and management information you need to move forward confidently with your plant health strategies.
How to start pruning roses in spring for beginners guide? I always advise beginning with the easiest and most obvious care steps to build your confidence. Start by identifying and removing any canes that are dead, damaged, or diseased (The Three Ds). This cleanup requires minimal technical judgment but immediately improves airflow and plant health. Once those are gone, focus on opening the center of the bush to create a vase-like shape, removing thin, twiggy, or crowded growth. Your ultimate goal is to cut back to a healthy, outward-facing bud on each remaining cane, which directs the how to grow your own roses productive, and robust structure. This simple, sequential approach to management removes the paralyzing fear of “doing it wrong” and sets you on the path to successful, long-term plant care.
What are the essential tools for pruning roses in spring without damaging stems? You can’t achieve professional results without the correct equipment. I have learned to respect that for the prevention of injury, you absolutely must invest in a sharp pair of bypass pruners (secateurs). These tools operate like scissors, providing a clean, precise, and healthy slice through living tissue. You will also need bypass loppers for managing any canes thicker than a pencil and potentially a sharp pruning saw for larger, older wood that needs thinning near the ground. Your highest protection priority for your own hands must be a reliable pair of leather gauntlet gloves, which defend you against those unavoidable sharp rose thorns. This foundational spring garden tool maintenance equipment makes all your work efficient and safe.
Pruning roses in spring to encourage maximum summer blooms—how much do I take off? This is the single most important decision for control and productivity. For the vast majority of modern, repeat-blooming roses—especially Hybrid Teas and Floribundas—you should cut them back significantly and aggressively to just 12 to 18 inches in height. This dramatic pruning triggers the dormant base buds to send out strong, vigorous, and incredibly prolific flowering canes. I suggest aiming for just 3 to 5 strong canes, which forms a robust, open “vase” that focuses the plant’s energy into creating continuous, vibrant blooms all season long. Do not be gentle; severe pruning results in the highest production.
When is it too late for pruning roses in spring safely? Your goal is efficient and timely management. It is always best to perform your pruning before the leaves fully unfurl. While I do not recommend it, if your rose bush has already started pushing new leaves, you can still prune, but I advise you to be significantly more conservative with your cuts. Aggressive, late pruning forces the plant to waste valuable stored energy that it has already invested, which will significantly set back its overall vigor and bloom timing for the entire summer. Your efficient management means acting decisively during the ideal transition window to prioritize plant health over unnecessary stress.
Final Tip for the Weekend Gardener
Pruning roses in spring may initially feel like a formidable task, but you must remember that roses are remarkably resilient and vigorous plants. They truly want to grow. I suggest you approach this essential ritual not with fear, but as your single most important act of management for the entire season—a focused weekend spent designing the incredible floral display that will greet you every single morning when you leave for work this summer. By applying these 7 critical rules, you are providing the best possible care and protection, unlocking your best valentines day roses full, vibrant potential.
Your dedicated, proactive, and timely management of your garden is a valuable skill that pays massive dividends in both beauty and personal satisfaction. I’ve been right where you are, feeling intimidated by the shears, but I am confident that you can do this. Trust in your technical ability to execute these clear steps, and enjoy the process of bringing structure, health, and unparalleled vibrancy back to your backyard sanctuary.