Standing in my garden during those first warm weekends, I know the anxiety you feel. You look at your dormant hydrangeas—those stark, gray sticks—and wonder if you are about to ruin the summer spectacular before it even begins. It is terrifying to think that one wrong cut today means zero flowers in July. We all work hard, and when we finally get time to relax in the yard, we want to see vibrant blooms, not an embarrassing bush of nothing but leaves. The fear of accidentally cutting off every single developing bud is real, and I have made that mistake myself in my earlier gardening days.
But pruning hydrangeas in spring does not have to be a gamble. I have learned that by following a few specific management steps, you can remove the guesswork and approach your shrubs with confidence. The solution isn’t to avoid the pruners entirely; it is to understand exactly what your plant needs right now for optimal care. This guide is designed as a straightforward list, focusing on the essential techniques that provide both protection for future flowers and control over the plant’s health. Let’s walk through how you can master this essential spring task and ensure your garden is the envy of the neighborhood.
1. Identify Your Variety Before You Cut
I cannot stress this enough: you must know what you are growing. The single biggest mistake I see (and have made) is treating a Paniculata like a Macrophylla. These plants are not the same, and their requirements for pruning hydrangeas in spring are vastly different. If you make a mistake here, you will absolutely lose your blooms for the entire year on certain varieties. I always tell people to think of them in two primary categories based on when they set their flower buds.
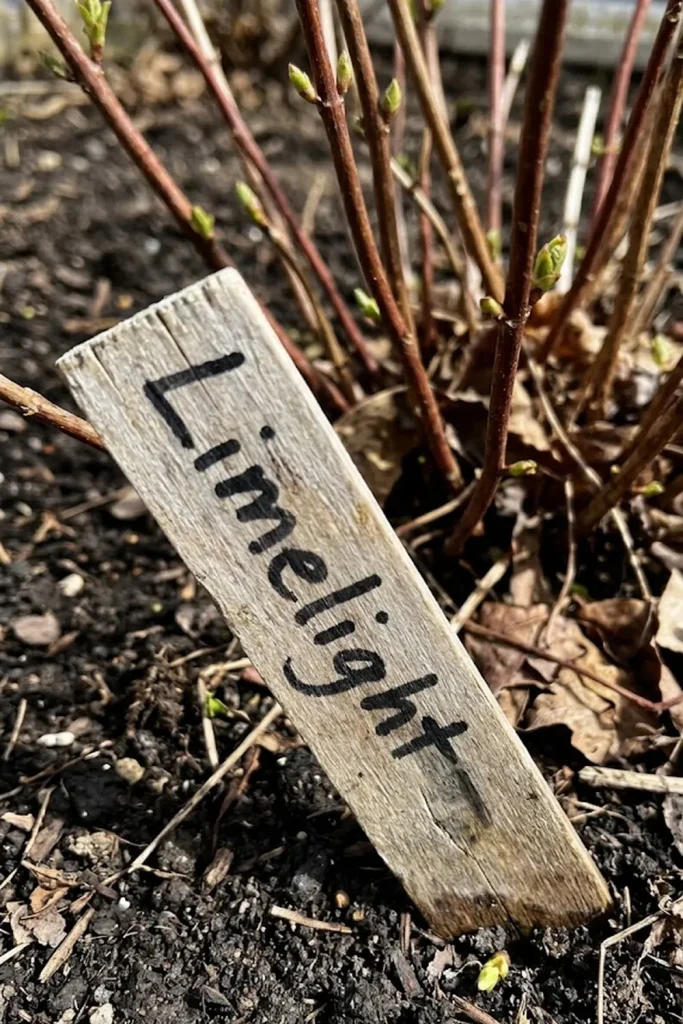
You have the “Old Wood” group and the “New Wood” group. Old Wood hydrangeas—the ones that produce the classic blue or pink mopheads (H. macrophylla)—actually form their flower buds for next year last summer. If you go out in early spring and prune these stems down, you are physically removing all the potential flowers. The “New Wood” group, like the ubiquitous ‘Limelight’ panicles (H. paniculata), grow their flower buds on the growth they make this year. These varieties give you far more management flexibility in the spring because you can cut them back hard without risking the summer show. Spend five minutes now identifying your plant; it is the most crucial step of care you will take all season.
2. Focus on Removing the Three D’s
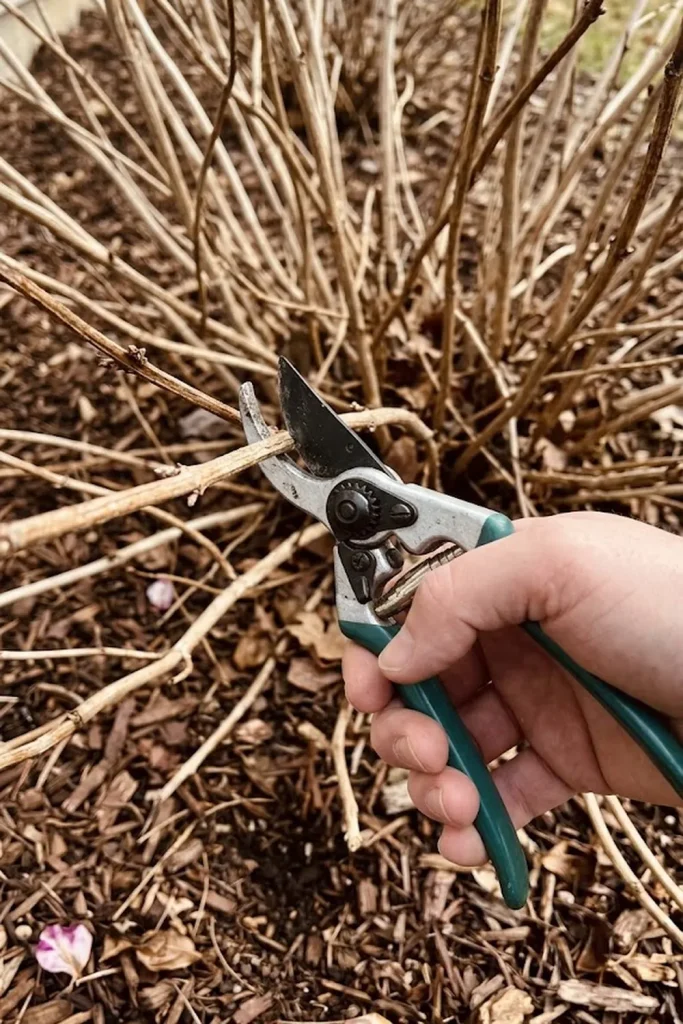
Regardless of what kind of hydrangea you have, every single gardener must start with this fundamental step. The “Three D’s” stand for Dead, Damaged, and Diseased wood. Removing these is not just an aesthetic choice; it is essential care for the overall health and protection of your shrub. When I see stems that are brittle, gray, or obviously snapped from winter snow, I prioritize their removal before doing anything else. This provides excellent control over potential pest and disease issues.
You are not risking any future flowers by doing this, even on old-wood varieties. Those dead sticks will never bloom again, and they actually hinder the plant by restricting light and air movement into the center. Fungal diseases love stagnant, crowded, damp conditions. By clearing out the debris and winter damage, you dramatically improve prevention. When you look at the plant, deadwood often has a different texture and color—it lacks that subtle luster of a living stem and has zero green cambium underneath the bark if you scratch it gently. This is your safe zone. You can cut these all the way down to the base or back to where you finally see healthy, green growth emerging from the wood.
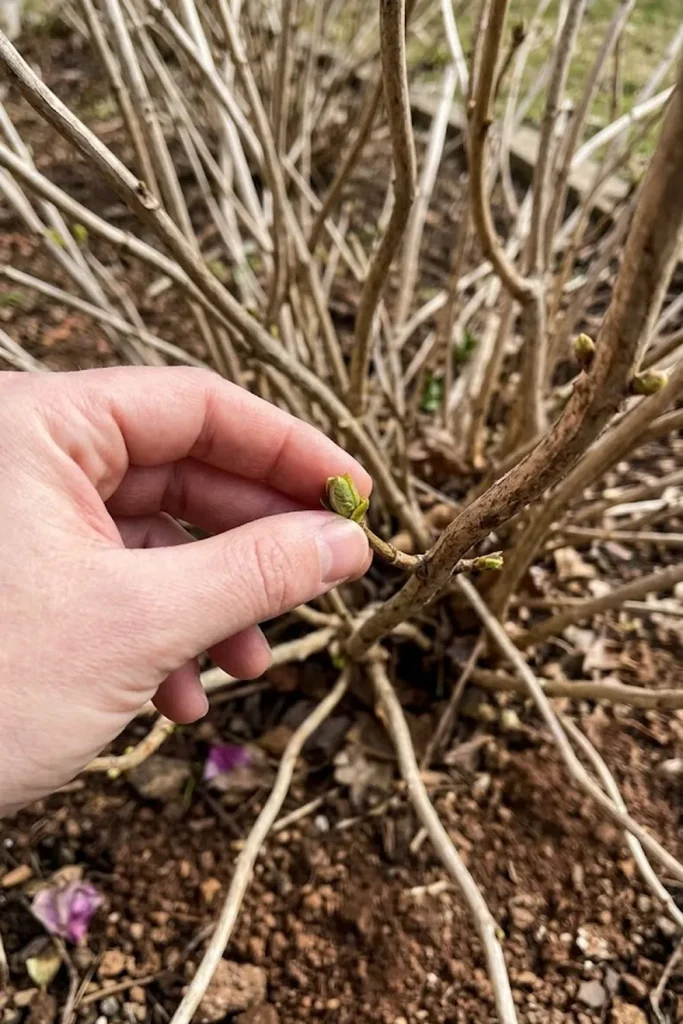
3. Time Your Cuts Based on Bud Swell
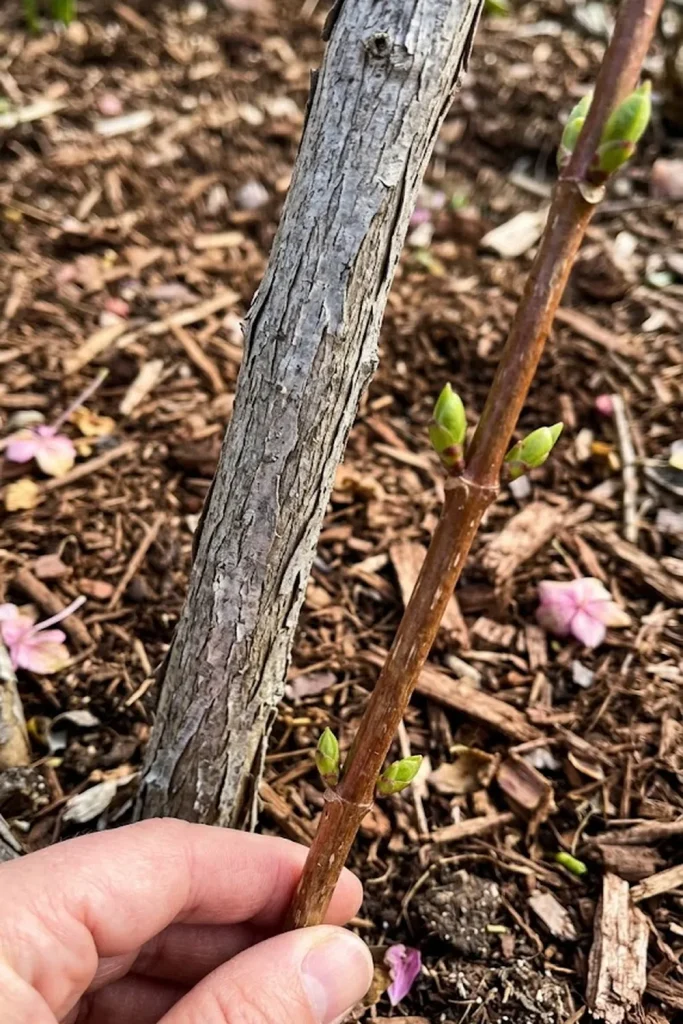
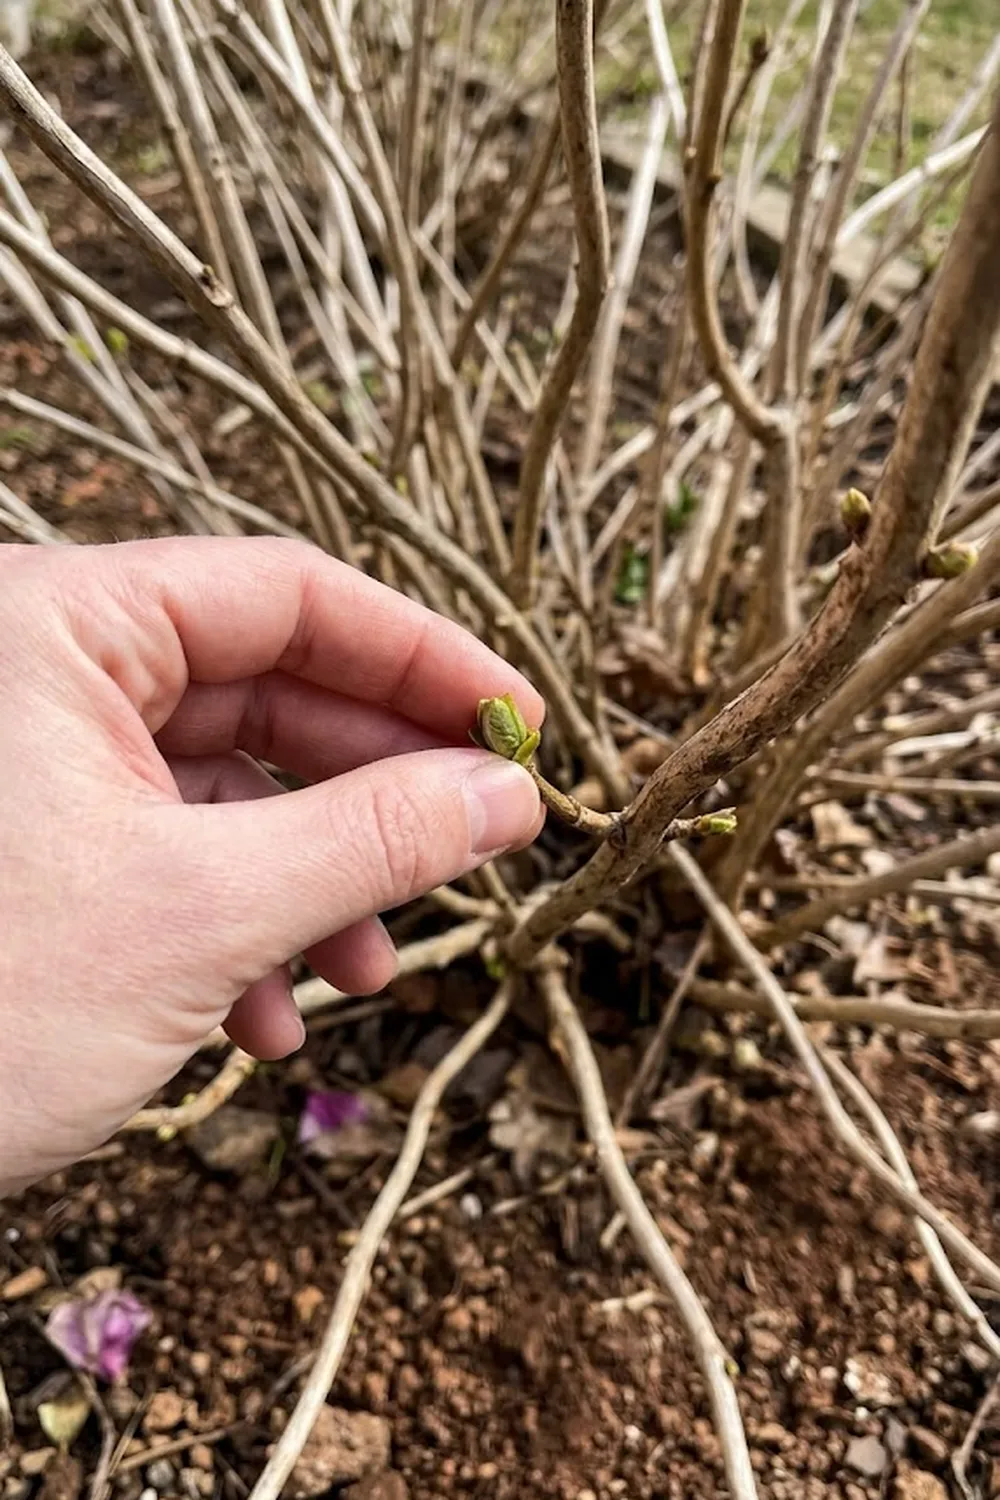
I have found that patience is a massive virtue when it comes to pruning hydrangeas in spring. The most reliable indicator for when to start isn’t a date on the calendar; it is the plant itself. Specifically, you want to wait until you see the new buds begin to swell. I often refer to this as the “green bean” stage. Those tiny, dormant brown nodes will suddenly start to enlarge and show a hint of bright, vibrant green. This is the moment your shrub is telling you exactly where it is alive.
This timing provides essential protection because it removes the guesswork. You can clearly see which stems have survived the winter and which are dead sticks that you must remove (referencing the “Three D’s”). By waiting, you avoid pruning too early and accidentally cutting off a stem that was just slow to wake up. This management strategy ensures you are only cutting what needs to be cut. In my own garden, I wait until the buds are about a quarter-inch long before making my move. That way, I can make accurate, definitive cuts just above a strong pair of new, swelling buds, which directs the plant’s energy exactly where I want it.
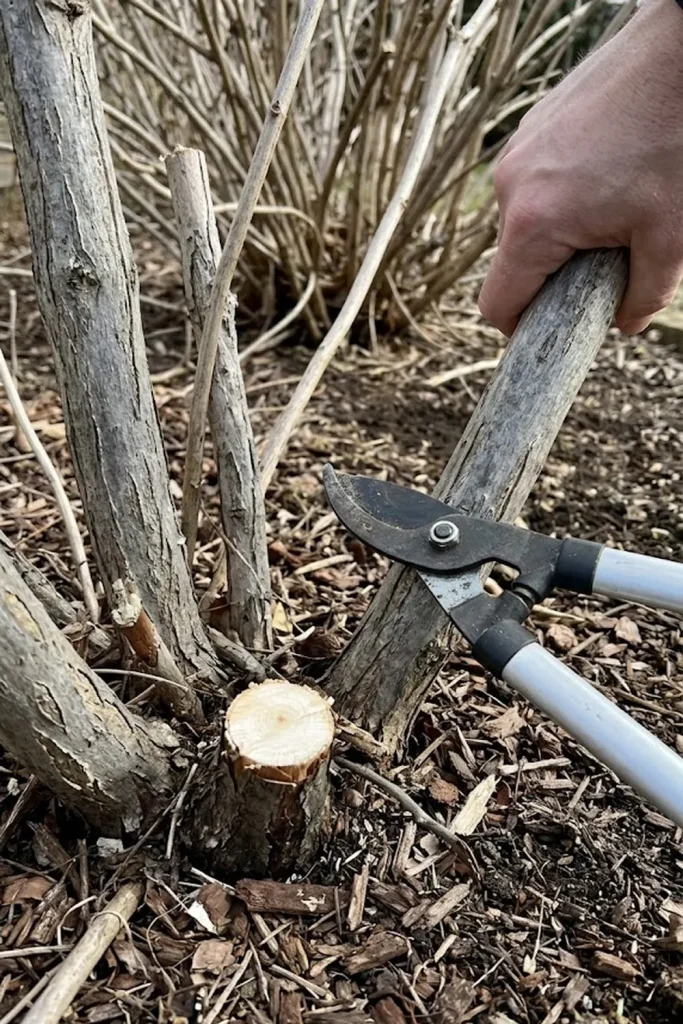
4. Use the One-Third Rule for Better Airflow
When dealing with a mature, established, or slightly overgrown hydrangea, I always implement the “one-third rule” of thinning. This technique is excellent for long-term management and provides vital protection against one of the hydrangea gardener’s biggest enemies: powdery mildew. Effective prevention of disease starts with structure. A congested shrub with too many stems creates a humid, stagnant environment where fungal spores thrive. We want to avoid that entirely.
The rule is simple: each year, you identify and remove up to one-third of the oldest, thickest woody stems, cutting them right down to the ground. You want to prioritize the oldest wood because it generally produces smaller flowers and less vigorous growth than the newer, younger stems. By aggressively removing these old candidates, you open up the interior of the shrub, allowing sunlight to penetrate and air to circulate freely. You are essentially doing surgery to ensure the long-term health and vibrant flower production of the remaining stems. This is a crucial step of care, and while it feels dramatic, it pays off with a much stronger, healthier plant by mid-summer.
5. Sanitize Your Tools for Disease Prevention
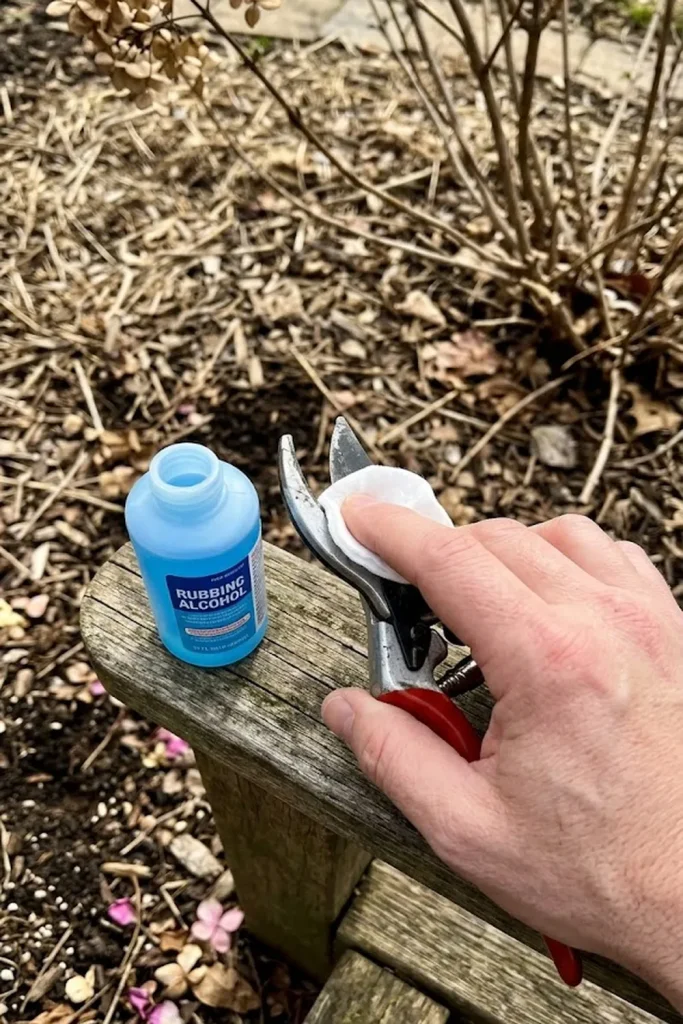
This is a critical step that I often see gardeners overlook in their rush to get the job done. While we are focused on the mechanical act of cutting, we must maintain robust disease prevention. Your pruners are sharp metal instruments, and just like surgery tools, they can easily transfer pathogens from one plant to another. If you just finished pruning a potentially diseased rose and move immediately to your hydrangea, you are taking a major risk. This is where active management and care merge. We want to avoid cross-contamination at all costs.
Fortunately, the solution is easy: make it a habit to sanitize your blades between every single plant you prune. I carry a small bottle of isopropyl alcohol and a clean cloth in my garden caddy. You can also use a solution of 10% bleach (one part bleach to nine parts water), but I find alcohol is easier to work with. Wiping down the blades takes less than 30 seconds and provides definitive protection for your entire landscape. It is a pro-level habit that will save you massive headaches down the road, and you should never make a cut on a new plant with dirty tools. It is the best form of proactive hygiene we can practice in the garden, ensuring that your healthy pruning hydrangeas in spring work does not accidentally become a vector for disease.
6. Handle Old Wood vs. New Wood Species
Now we get to the core of the problem that causes so much anxiety: distinguishing between old wood and new wood. I cannot emphasize enough how critical this understanding is for successful management of your shrubs. If you skip this step, you are gambling with your summer blooms. This is where you must apply specific care based on your plant’s biology. It boils down to a simple question: when did your hydrangea make its flower buds? The answer dictates your entire strategy for pruning hydrangeas in spring.
Old wood species, like the popular H. macrophylla (Bigleaf/Mopheads) and H. quercifolia (Oakleaf), set their buds last year. For these, my care advice is minimal. In spring, your goal is protection, not reduction. Only prune to remove the Three D’s or to lightly shape. If you cut these back hard now, you are removing this year’s flowers. Conversely, new wood species, primarily H. paniculata (Panicle types like ‘Limelight’) and H. arborescens (Smooth types like ‘Annabelle’), can be handled with much more control. Since they form buds on new growth, you can prune them significantly in early spring to shape the plant and encourage stronger stems, ensuring they don’t flop under the weight of summer blooms. The difference is everything.
7. Post-Pruning Care and Protection
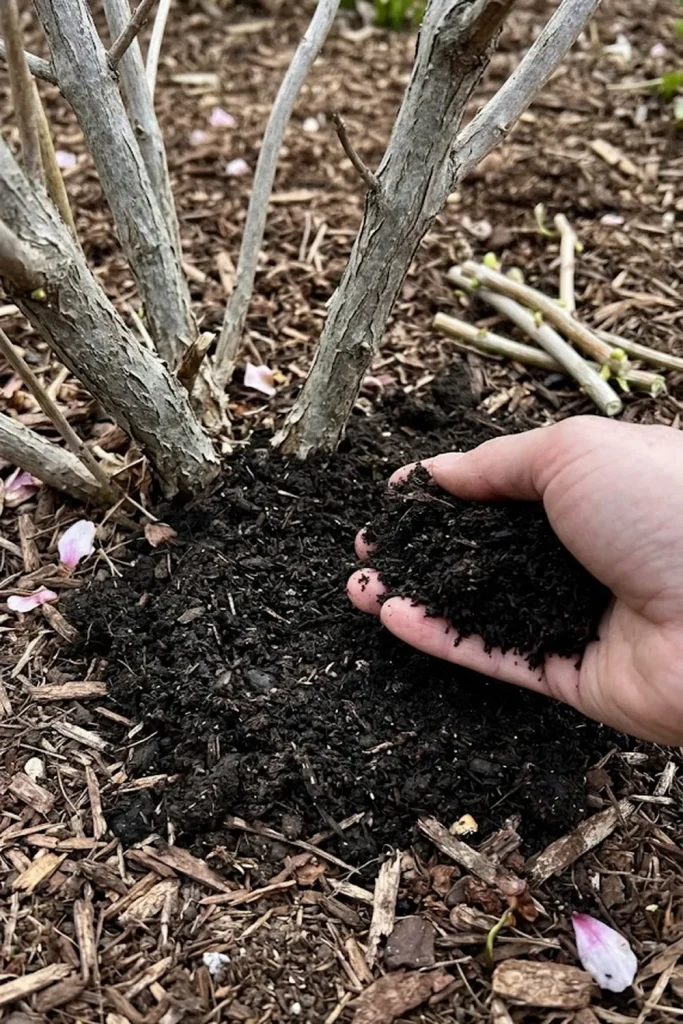
Your work doesn’t end when you put the shears away. In fact, what you do right after you finish pruning hydrangeas in spring is just as vital as the cuts themselves. This final step is all about proactive care and long-term management. We need to ensure that the recovery phase is flawless. The primary goal here is protection of the raw wood from desiccation and pathogens, while simultaneously giving the plant the resources it needs to push out vigorous new growth. I have learned that a little empathy for the plant goes a long way. Think about it: you’ve just performed surgery. It needs support.
I always recommend applying a thin layer of compost or a slow-release, granular fertilizer designed for acid-loving shrubs around the base of the plant. This provides essential nutrients for growth. However, make sure you don’t pile the fertilizer directly against the woody stems; leave a few inches of breathing room. Following this, I re-apply a fresh layer of mulch. This is critical for moisture management. Hydrangeas have shallow roots and require consistent moisture, especially as temperatures rise in late spring. This simple combination of feeding and mulching is the best form of proactive care, providing the ultimate protection for your newly managed shrub and guaranteeing a stunning, healthy performance when summer finally arrives.
Frequently Asked Questions
When we talk about pruning hydrangeas in spring, I hear the same worries coming up time and time again. Let’s address some of your common anxieties directly.
Hydrangea Pruning Quick Reference
| Hydrangea Type | Blooms On… | Primary Spring Pruning Action |
| Bigleaf (H. macrophylla) | Old Wood | MINIMAL. Remove dead wood/Three D’s only. |
| Panicle (H. paniculata) | New Wood | Aggressive (if desired). Shape and reduce. |
| Smooth (H. arborescens) | New Wood | Aggressive (if desired). Cut back hard. |
| Oakleaf (H. quercifolia) | Old Wood | MINIMAL. Shape lightly only. |
| Mountain (H. serrata) | Old Wood | MINIMAL. Remove Three D’s only. |
Common Spring Pruning Questions
Can I finish pruning hydrangeas in spring if I see leaves?
Yes, but you must move quickly and be very selective. If the plant is fully leafed out, you have missed the ideal window. I would limit your management exclusively to removing the Three D’s and avoiding any structural changes until next year.
How do I manage pruning hydrangeas in spring without losing this year’s flowers?
The secret is plant identification. You must determine if your variety blooms on old wood or new wood. For old wood types, you must prioritize bloom protection, which means only removing dead tips. For new wood types, you have far more control.
Is spring the best time for prevention of “flopping” stems?
Yes, but only for specific varieties like H. arborescens (‘Annabelle’) and H. paniculata (‘Limelight’). If you prune these new wood types back hard in early spring, it creates a much thicker, sturdier woody base, providing the structure needed for effective bloom protection against heavy summer rains.
What is the best tool for hydrangea protection during pruning?
Always use high-quality bypass pruners. You want to make clean, scissor-like cuts. I strongly advise against anvil pruners, which crush the stem. Crushed stems are susceptible to disease, so proper tool selection is crucial for long-term plant care and management.