
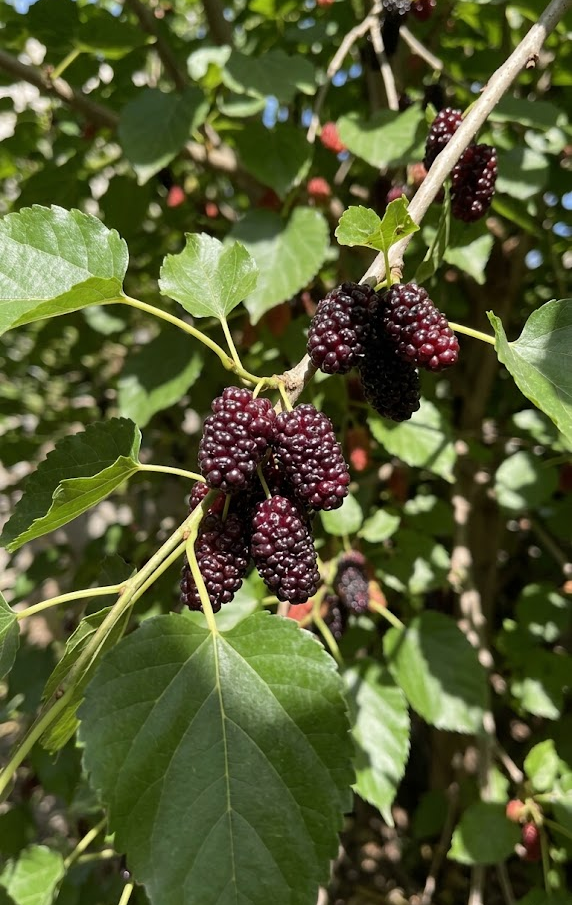

Do you crave the sweet, intense flavor of homegrown berries but worry that your busy full-time job leaves you no time to care for demanding fruit trees? You are likely frustrated by the limited, often tasteless selection at the grocery store, yet terrified by the horror stories of people whose driveways were permanently ruined by aggressive, staining mulberry juice. It’s maddening. You have the desire to grow your own food, but the risk of creating a messy, invasive nightmare that neighbors complain about keeps you planting the same boring tomatoes every year. I was in that same position, balancing a career and a garden, until I discovered the secrets to taming this surprisingly resilient tree. I will show you exactly how to grow mulberry fruit responsibly, turning it into a managed, highly productive investment that gives you bowls of delicious fruit without the chaos. Let’s look at the first few secrets I learned through personal experience.
1. Select the Right Mulberry Species for Your Zone
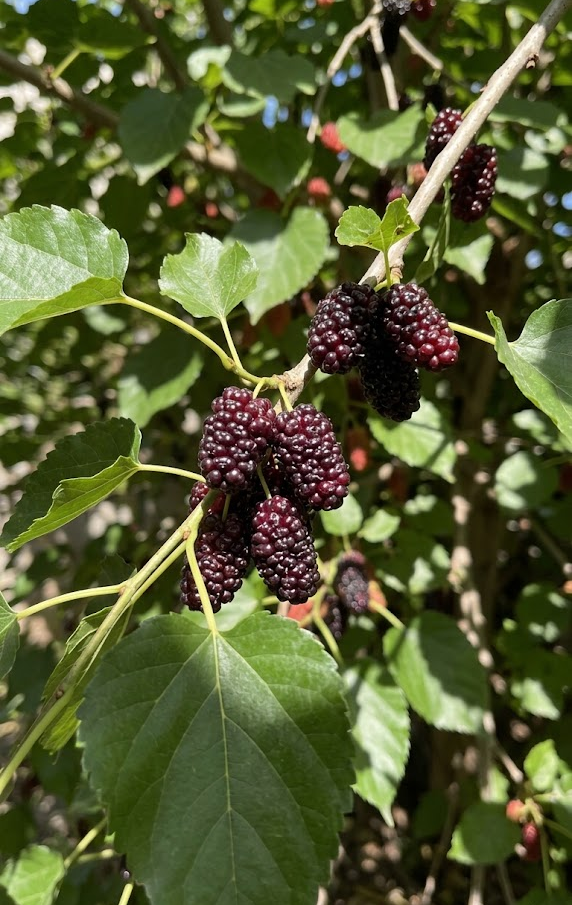
Successfully establishing a mulberry starts long before you dig a hole; you must select the right species (Morus genus). When I first started researching, I didn’t realize the massive difference between the options, and it cost me a full season of growth. The three main contenders are Black (Morus nigra), Red (Morus rubra), and White (Morus alba). Each has distinct characteristics and specific climate preferences (USDA Hardiness Zones). If you want that deep, complex tart-sweet flavor, the Black mulberry is unrivaled. It has smaller leaves and grows more slowly, often taking longer to produce fruit, but the wait is worthwhile. Be aware, though, that Black mulberries are generally only hardy to Zone 7 or 6b, requiring milder winters. I learned this the hard way with a tree that struggled significantly during an unexpected cold snap.
For gardeners in colder climates, such as Zones 4 or 5, the White mulberry is often the primary option due to its extreme resilience. It grows incredibly fast and often fruits sooner than the others. Some varieties of White mulberry produce very sweet fruit, but it generally lacks the complex acidity of the Black species. The Red mulberry is a native North American tree, often found in forests, which offers good flavor and falls somewhere between the other two in terms of hardiness and growth. You must check your specific USDA zone and confirm the requirements of the cultivar you buy.
The critical decision you have is balancing cold hardiness against fruit quality. To help you navigate this, I have put together a breakdown of the primary species and their main traits in this comparison.
Mulberry Species Comparison
| Species | Primary Benefit | Hardiness (Zone) | Growth Rate | Fruit Mess Level |
| Morus nigra (Black) | Best flavor, rich and complex | 7 – 9 | Slow/Moderate | High |
| Morus alba (White) | Very hardy, useful for wildlife | 4 – 9 | Fast | High (if not fruitless) |
| Morus rubra (Red) | Native species, balanced flavor | 5 – 9 | Fast | Moderate/High |
2. Master the Soil Mix for Rapid Root Development
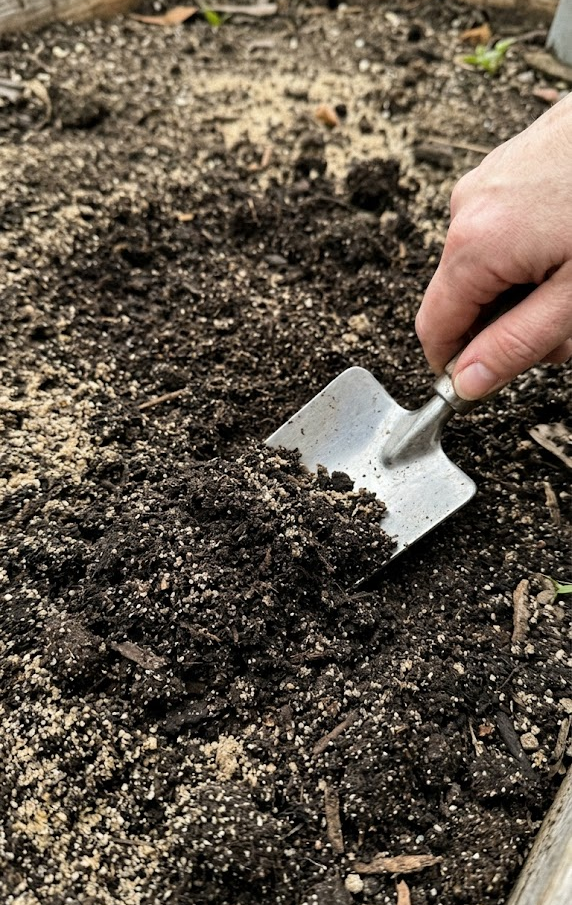
Once you have chosen your tree, you need to understand that the soil you plant it in is everything. I can tell you from personal experience that mulberries possess an extremely deep taproot system; it’s one of the reasons they are so drought-tolerant when mature. If you plant them in shallow, compact clay soil that hinders that vertical descent, the tree will remain stunted and weak for years. You must provide a soil mix that is deep, friable, and drains exceptionally well. Mulberries are remarkably adaptable, but they truly thrive in a slightly acidic to neutral range (pH 6.0 to 7.0) and in rich, loamy textures.
I learned to treat the planting hole with meticulous care. I always dig a hole that is at least twice as wide as the root ball, but more importantly, I ensure the ground below the hole is loosened to help that critical taproot descend quickly. To maximize your tree’s start, you should consider amending the backfill soil with organic matter. I generally mix my existing native soil with high-quality compost or well-aged manure, but I avoid using heavily synthetic fertilizers at the initial planting, as this can easily burn the delicate new roots and hinder, rather than help, initial growth. If you provide this structured, supportive environment right away, the tree can establish its massive root architecture quickly, leading to a much stronger and faster-fruiting tree.
3. Optimize Sunlight Exposure for Sweetness
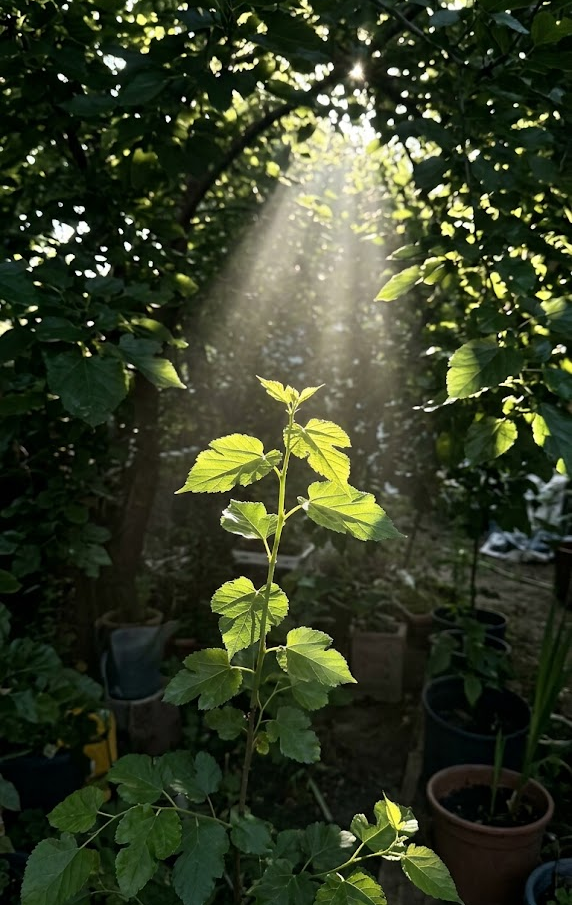
The single most impactful factor for maximizing the flavor, sweetness, and quantity of your mulberry fruit is sunlight. While the tree itself is tough and may survive in partial shade, light is the energy source that drives photosynthesis and sugar synthesis. I can’t emphasize this enough: for a truly massive, high-quality harvest, you must provide your tree with at least 8 to 10 hours of direct, unobstructed sunlight every day during the growing season. This intense exposure maximizes the conversion of nutrients into the complex sugars that define the flavor of the berry, especially with the high-anthocyanin varieties like Black mulberries. If you plant the tree in a shaded area, you will be deeply disappointed by a sparse, slow-to-ripen crop of relatively bland, tart berries.
In my experience, when selecting a planting site, you must think of the tree’s mature size. Avoid placing a standard-sized mulberry too close to buildings, large fences, or existing shade trees that will eventually block its access to the sun. This is particularly crucial if you are a weekend gardener with limited time; a tree in full sun is simply more productive and resilient, making it a high-return investment.
I have summarized the different sunlight requirements for optimal mulberry production in this essential summary.
Sunlight and Mulberry Production
- Ideal (Full Sun): 8+ hours of direct light. This is the goal for maximized sweetness, consistent fruit set, and massive yields.
- Marginal (Partial Shade): 4–6 hours of light. Expect significantly reduced yields, smaller fruit size, and a less complex, potentially bland flavor profile. The tree will still grow but will not reach its productive potential.
- Poor (Heavy Shade): Less than 4 hours of light. I do not recommend planting here; the tree may become weak, produce minimal fruit, and is highly susceptible to disease.
4. Strategic Watering for Juicy Berry Harvests
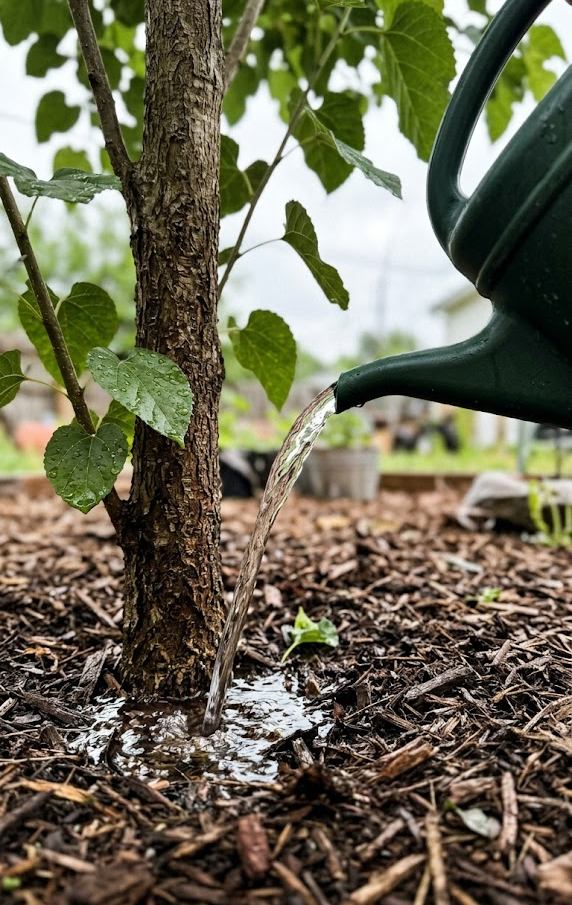
While the mulberry tree is famous for its extreme drought tolerance once it is fully established, you must care for its specific water needs, especially during its first two years and throughout the critical fruiting phase. Think of it this way: a tree that is water-stressed cannot produce a high volume of plump, juicy fruit. In fact, if the tree experiences moisture deficit during fruit development, it may either abort the fruit, causing a “berry drop,” or produce smaller, dry, and underdeveloped berries. For young trees, deep, consistent hydration is crucial to facilitate the initial root architecture I mentioned earlier. During the first two years, you should provide at least one inch of water per week, ensuring it penetrates deeply to the taproot. For mature, fruiting trees, I recommend a deep watering schedule (once or twice per week) starting in spring when blossoms appear and continuing until the harvest is complete. I was once inconsistent with my watering during a particularly dry summer, and the result was a sparse harvest of small, relatively tasteless berries; I never made that mistake again. Consistent moisture is the single most controllable factor you have for increasing the juice content of your fruit.
5. Apply Proper Mulching to Protect the Root System
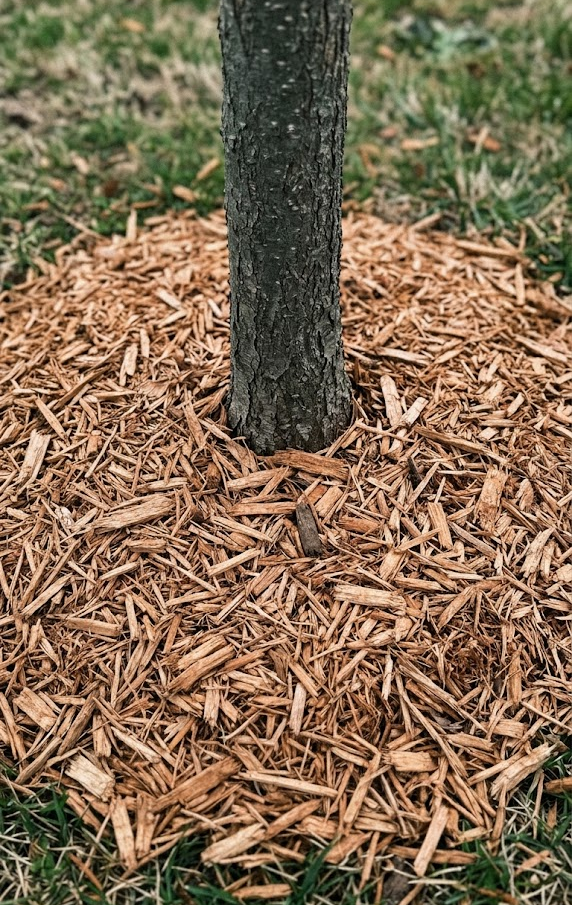
Once you have planted your tree in a well-draining soil mix and established a watering routine, you must protect that investment. The best and easiest way to do this is with proper, consistent mulching. Applying a thick, 3- to 4-inch layer of organic mulch around the base of the tree is not a cosmetic choice; it is essential tool for managing soil health. I use arborist wood chips because they degrade slowly and improve the soil structure over time, but you can also use shredded bark or straw. This organic layer serves three critical functions: it significantly reduces soil water evaporation (complementing your watering efforts), it suppresses competitive weeds (which would steal nutrients from your tree), and it stabilizes soil temperature (protecting the roots from extreme heat). When I started mulching properly, I immediately noticed my trees required deep watering less frequently.
Crucially, mulberries offer another unique, highly specific benefit to mulching: the soft layer of mulch provides a cushioned landing for falling fruit, which reduces bruising and limits soil splash-back. I’ve summarized the essential steps I use for a high-performance mulching program below.
High-Performance Mulching Steps
- Maintain a 3–4 Inch Depth: You need this specific depth to achieve effective weed suppression and moisture retention. Thinner layers are ineffective.
- Maintain the “Mulch Volcano” Gap: Never pile mulch against the tree trunk. This allows trapped moisture to rot the bark and creates an entry point for pests. Always leave a clear 3- to 5-inch air gap between the mulch and the trunk.
- Extend to the Drip Line: The critical root zone extends at least as far as the widest branches. Ensure your mulch ring covers this entire area.
- Refresh Annually: As the organic material breaks down, it improves the soil. Top off your mulch layer every spring to maintain the proper depth.
6. Fertilizing Schedules for Maximum Growth
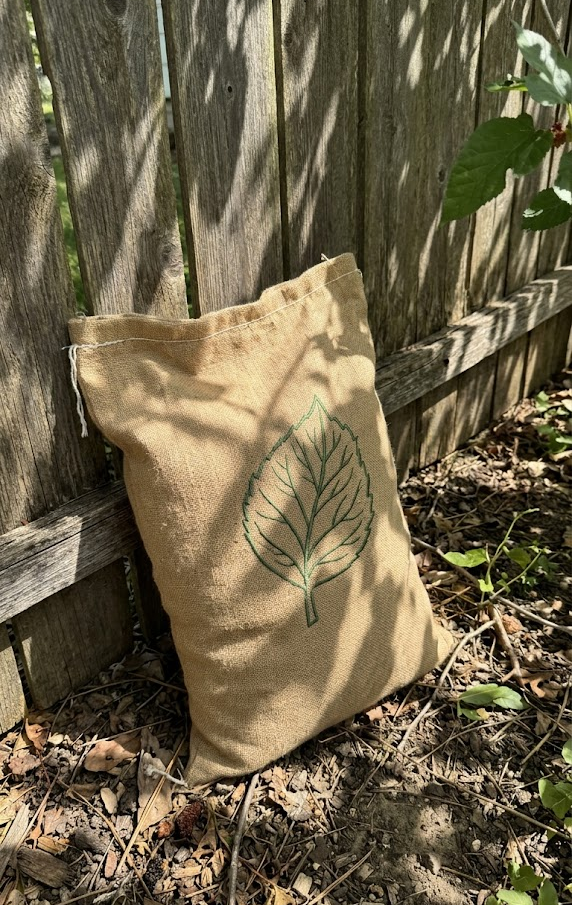
You may think that because mulberries are tough, they don’t need supplementary feeding, but I can assure you that disciplined fertilizing is essential if you desire that massive, high-yield harvest. While a tree planted in ideal, deep soil can survive on minimal input, establishing a consistent nutrient schedule is how you push the tree to its productive limit. I generally advise a conservative, organic-first approach to feeding. Starting in early spring, just as the buds begin to break dormancy, you should amend the soil around the base. My preferred method is top-dressing with 1 to 2 inches of rich, finished compost. For an additional boost, I apply a balanced organic fruit tree fertilizer (look for a 5-5-5 or 10-10-10 NPK ratio) according to the package directions, right before that critical early-spring growth surge. This provides the tree with a foundational resource to build large leaves and healthy fruit buds. If you are a weekday gardener with limited time, this simple spring feeding is often sufficient for excellent results.
I’ve summarized a basic, reliable feeding program for maximize growth:
Fruiting Season Feeding Plan
- Early Spring (Bud Break): Apply heavy compost top-dressing (1–2 inches) and a slow-release, balanced organic fertilizer (e.g., 5-5-5 NPK).
- Mid-Spring (After Fruit Set): If your tree has heavy fruit load, consider a light application of high-potassium organic fertilizer (like seaweed extract) to support berry development.
- Late Summer (Post Harvest): Stop all fertilization. This is crucial to prevent soft, new growth that will easily be damaged by the winter cold.
7. Pruning Techniques for Better Fruit Access
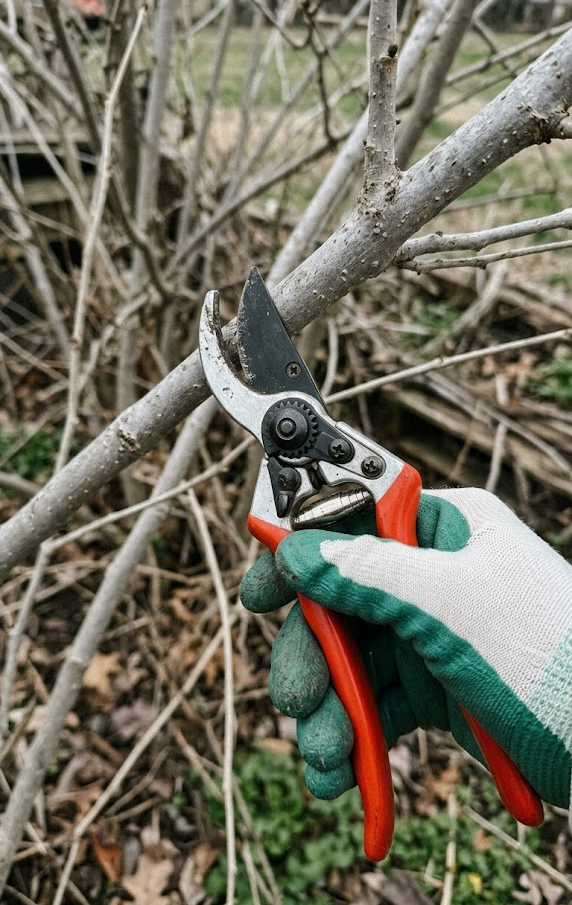
Once your tree is established, you must commit to annual dormant pruning. I tell every gardener this: if you do not prune your mulberry, it will quickly turn into an aggressive, unmanageable monster. The goal is to maximize sunlight and airflow, while crucially keeping the fruit within arm’s reach. This is especially vital for the weekend gardener who doesn’t want to be climbing unstable ladders for their morning berries. I perform my primary pruning in the late winter when the tree is fully dormant, as this minimizes sap bleeding and reduces the entry risk for diseases. I first remove the “three Ds” (dead, damaged, or diseased wood) and then focus on structure. I strategically eliminate crossing branches and aggressive, upright “water sprouts” that contribute little to fruiting but much to height.
By maintaining an open, accessible canopy, you are essentially concentrating the tree’s energy into productive, lower-level wood. I successfully used pruning to keep a massive, sprawling Illinois Everbearing cultivar under ten feet tall, making harvesting a simple walk-up task. If you master this one skill, you can manage almost any variety responsibly and enjoy effortless fruit access.
8. Effective Pest Control for Berry Protection
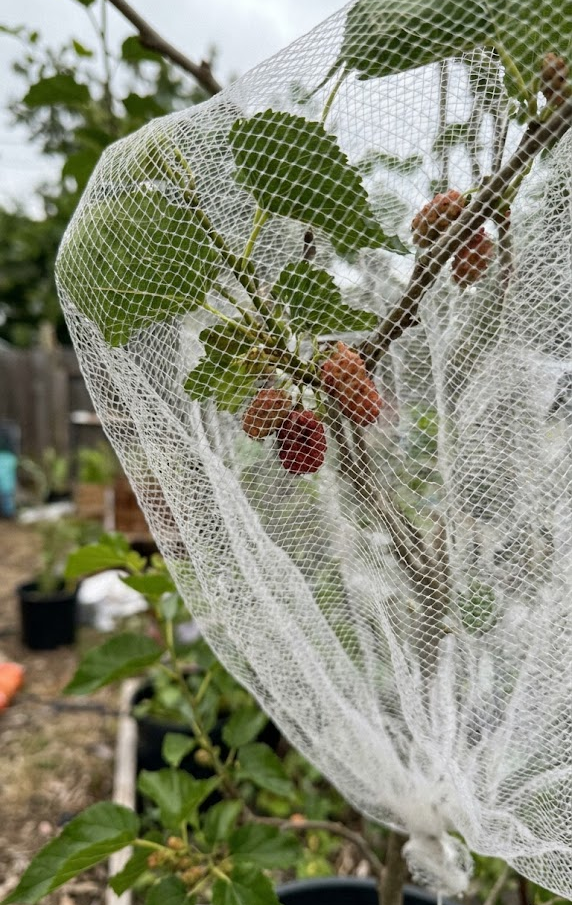
When the berries begin to ripen, you will realize that you are not the only one desiring them. Successful pest control often means competing directly with the entire neighborhood’s avian population. I used to be frustrated, losing entire potential crops in a single afternoon to birds. The only comprehensive protection for a high-yield, managed tree is a physical barrier. You must invest in high-quality, fine-mesh bird netting to drape over your pruned tree, and you should install it securely, ensuring there are no gaps at the bottom; otherwise, birds will easily find their way inside.
I learned from experience that if you want a reliable harvest, you can’t rely on scare tactics. While I still have luck with some reflective flash tape to annoy a few initial scouts, the real victory requires comprehensive exclusion. Netting is a simple, effective solution that pays for itself in just one season. However, for full transparency, you should note that for standard wide-canopy trees, netting is incredibly laborious. This is another critical reason I advocate for strict, height-limiting pruning: a ten-foot tree is significantly easier to net responsibly than a twenty-foot monster. I successfully protected my Mojo Berry dwarf from entire flocks using this disciplined exclusion method.
9. Disease Control: Preventing Popcorn Disease
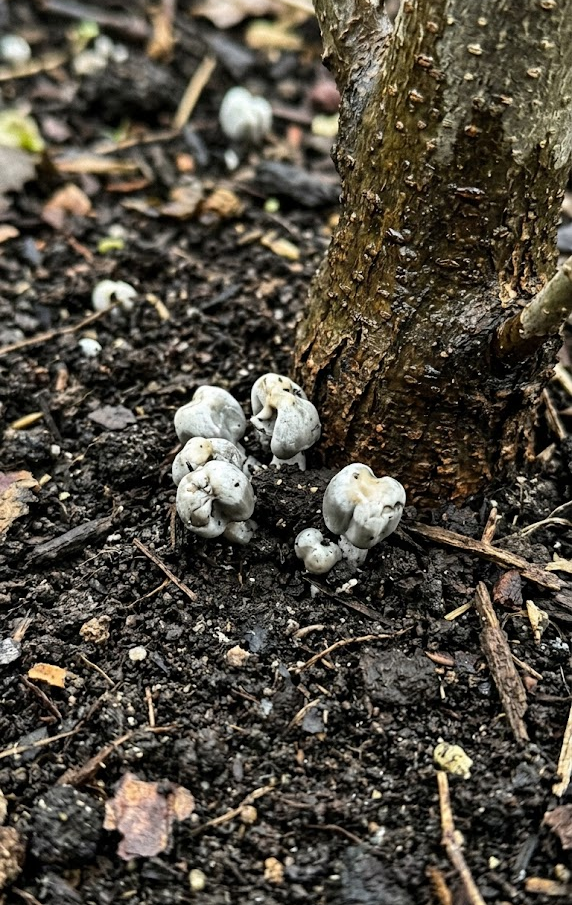
While very tough, mulberries have one primary fungal vulnerability you must master: popcorn disease. I emphasize this because I once had a beautiful crop wiped out, leaving me with a tree full of weird, white, shriveled pellets instead of juicy fruit. Popcorn disease, caused by the fungus Ciboria carunculoides, creates hard, inedible, distorted fruits that resemble unpopped kernels. Once you see the physical symptoms, the berry is lost. Effective disease control requires absolute garden sanitation. I can assure you that the most important preventative step is to meticulously remove all fallen fruit, leaves, and debris from beneath the tree immediately after the harvest ends, as this breaks the fungal spores’ lifecycle and stops re-infection.
Additionally, to minimize initial infection, you must select your planting site for high ventilation. I successfully avoided Popcorn disease in subsequent years by maximizing the distance between trees and ensuring consistent air movement through the dormant pruning process I detailed previously. You can also minimize the wet environment that favors fungi by monitoring your water application: focus hydration at the soil surface, not on the leaves, during development.
Here is a simple preventative maintenance program to manage fungal risk:
Annual Fungal Prevention Schedule
- Late Winter (Dormant): Perform disciplined structural pruning. Remove all crossing branches to maximize ventilation and ensure maximum sunlight penetration into the canopy center.
- Late Spring (Fruiting): Water consistently but avoid wetting the canopy. Apply hydration only at the base, directly into the soil. Monitor for the first sign of shriveled berries.
- Post-Harvest (Summer): Remove all debris, including fallen berries, from the soil surface under the drip line. Replace the annual layer of protective organic mulch to cover any remaining pathogens.
10. Drainage Requirements for Healthy Taproots

When I first learned about mulberries, everyone emphasized their massive root systems, which is true. But they rarely stressed how vulnerable those roots are to drowning. While the mature tree is incredibly drought-tolerant, its young taproot system possesses very zero tolerance for saturated, anaerobic soil conditions. Saturated soil essentially suffocates the primary roots, leading to root rot, which I successfully managed to kill a promising sapling with in my first year. The tree requires excellent drainage, meaning water must pass freely through the soil architecture. If you are a gardener managing heavy clay, I can assure you that you should never simply dig a hole and place the tree inside; you must instead plant it on a significant, 18-inch-high mound of imported, loamy soil mixed with organic matter to ensure the primary roots remain above the water table.
If you provide this initial raised environment, the critical taproot can establish itself successfully above any temporary saturation. Once the tree is mature, the massive, established root network can handle the clay below, but for that crucial first year, you must commit to this high-drainage strategy for healthy survival.
11. Propagation via Hardwood Cuttings
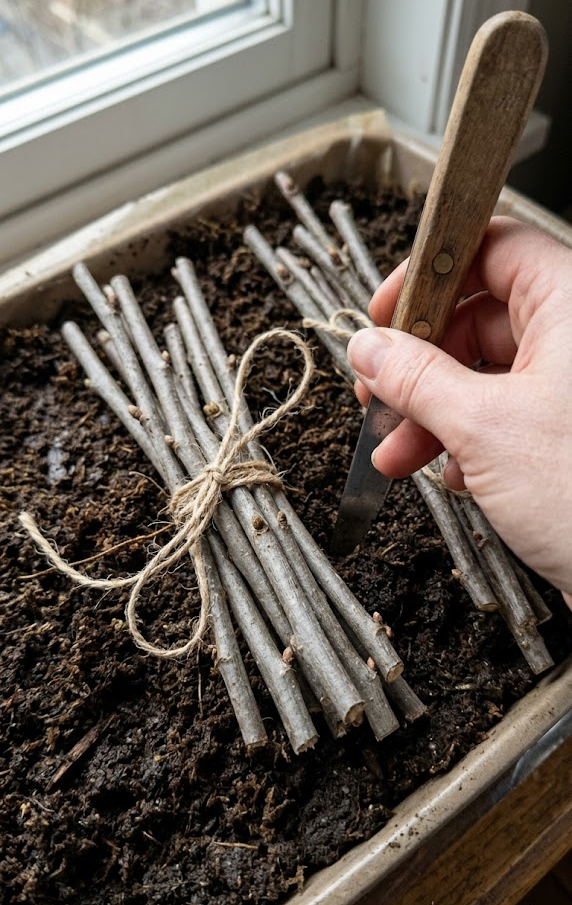
Growing new, free trees to increase your fruiting collection is incredibly satisfying. I learned that mulberries offer multiple successful propagation methods, but for a busy full-time employee, the most efficient technique is via dormant hardwood cuttings taken in late winter, which allows you to clone a high-yielding tree with minimal active care. While you can use softwood cuttings, they require intensive humidity management, something I rarely had time for. To achieve a successful strike rate with hardwood, I always select vigorous, young wood—ideally vigorous pencil-thick one-year-old branches.
I find that taking 8- to 10-inch long cuttings with at least 3-4 healthy buds is optimal. I can assure you that ensuring you make a clean, diagonal cut just below the lowest bud and then applying a quality rooting hormone maximizes your success. I then bundle my cuttings and store them horizontally in a damp medium (like peat moss) in the refrigerator for the winter, allowing a protective callus to form. By early spring, I remove them and plant them deeply in a warm, well-draining soil mix, with only the top bud exposed, ensuring consistent moisture for root initiation. With a managed hardwood propagation program, you can rapidly and responsibly multiply your favorite varieties for free, satisfying your long-term goal of high-volume fruit production without excessive weekend labor.
12. Harvesting Without the Purple Mess
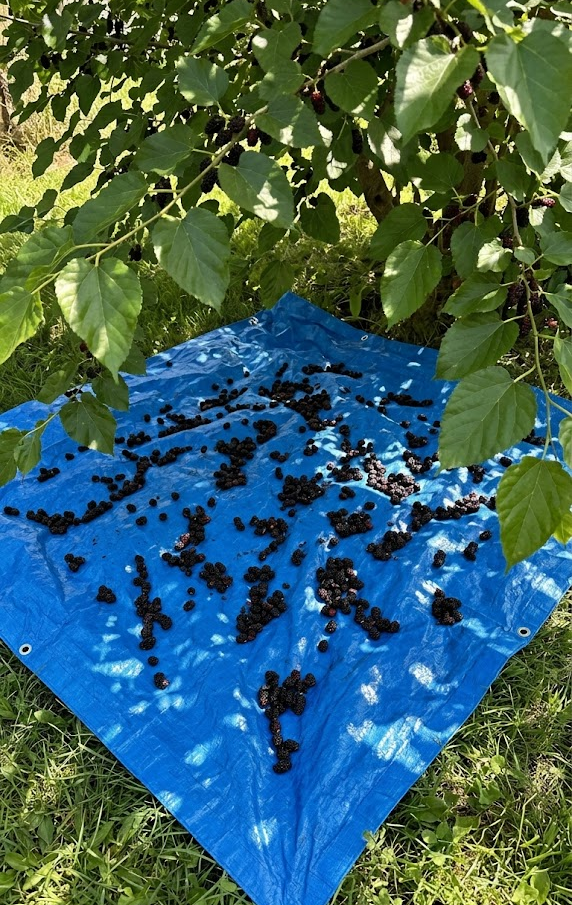
This is the secret every homeowner is searching for: how to enjoy massive, high-volume harvests without permanently staining your environment, your clothes, and your relationship with your neighbors. If you want a controlled, responsible, and efficient harvest, you must abandon hand-picking from the tree. To achieve maximum juice production without the associated mess, I use the highly optimized tarp and shake method: I lay a clean, heavy-duty tarp across the ground under the entire drip line of the tree and then gently shake the primary branches, causing only the perfectly ripe berries to release and fall onto the cushioned surface.
I find that for the highest yields, you should only shake once every two days, as this allows sufficient berries to fully ripen on the branch. The tarp cushions their fall, minimizing damage and keeping them completely off the soil, preventing staining splash-back when you go to gather them. Once the branches are clear, I just gather the four corners of the tarp, concentrating all the fruit into the center for effortless collection into waiting bowls. If you utilize this disciplined harvesting system, you can effectively gather gallons of fruit per tree, completely mess-free, making the tree a truly rewarding addition to your property, satisfying your personal goal of sustainable, productive fruiting that fits your busy life.
13. Proper Storage to Keep Berries Fresh
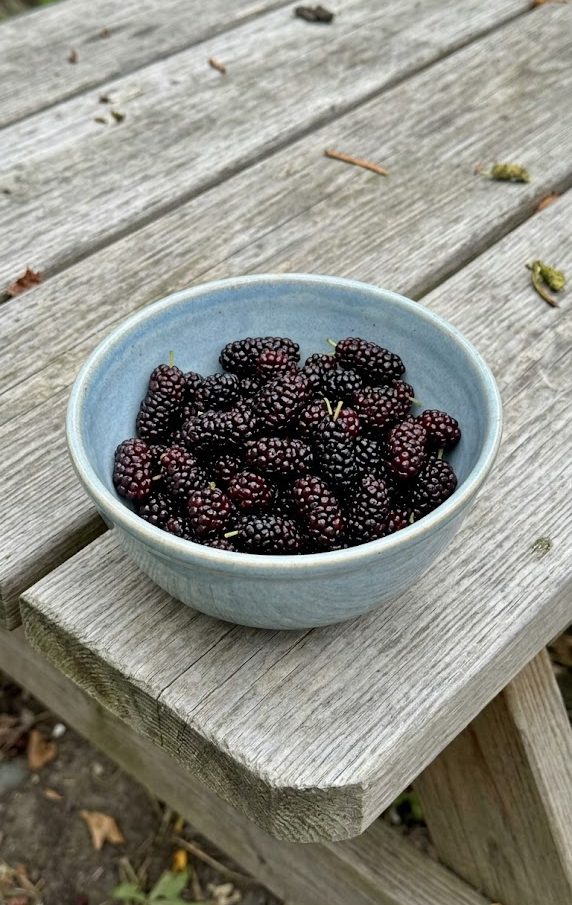
Once you have utilized the efficient tarp harvesting system to gather gallons of juice-laden fruit, you must address their critical vulnerability: they possess a highly perishable nature. I can assure you that mulberries will begin to ferment and develop mold within just 4 to 6 hours of being picked if you do not implement proper storage protocols immediately. For a busy weekday gardener, the most reliable method for maintaining post-harvest freshness is to sort your berries immediately into shallow containers (ideally no deeper than two inches) and then transfer them directly to the refrigerator without washing them. I use large rimmed baking sheets lined with paper towels to spread the berries thinly, maximizing ventilation and preventing bruising. You should only wash the berries immediately before you plan to consume them, as moisture is the absolute accelerator for spoilage. When you implement this immediate-cooling protocol, you can reliably extend their fresh shelf life to three or four days, satisfying your personal need for high-quality, homegrown flavor with excellent nutritional value, fulfilling your goal of making the most of your abundant harvest.
14. Monitoring for pH Balance
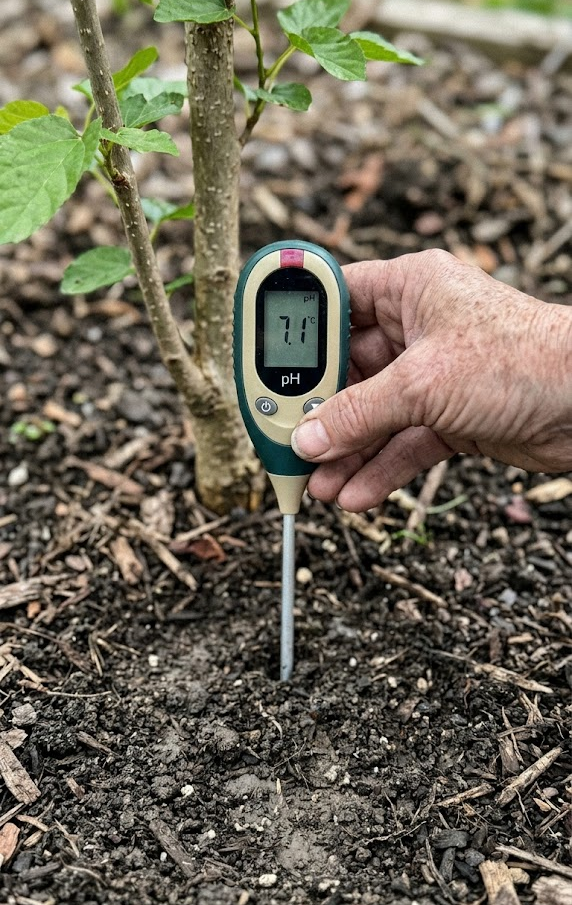
You can plant your tree in full sun, water deeply, and mulch appropriately, but you will still achieve disappointing results if you are not actively monitoring the soil’s pH balance. I can assure you that mulberries cannot efficiently absorb essential nutrients—especially iron and manganese—if the ground is either highly acidic (pH below 5.5) or strongly alkaline (pH above 7.5). The result will be a weak tree with chlorotic (yellowing) leaves and reduced juice production, regardless of how much fertilizer you apply. I use an accurate digital soil pH meter to check the levels around the drip line of my trees twice per year, in early spring and late summer.
If you discover your soil is outside the optimal range, you should take corrective control measures immediately. You can apply agricultural lime to effectively raise the pH if your soil is too acidic, or utilize elemental sulfur to slowly lower it if it is too alkaline. I have successfully satisfied the long-term health needs of my massive Illinois Everbearing tree, fulfilling my goal of sustainable, high-volume production, by implementing a disciplined monitoring program that keeps the soil consistently between pH 6.0 and 6.8.
15. Repotting and Container Care for Dwarf Trees
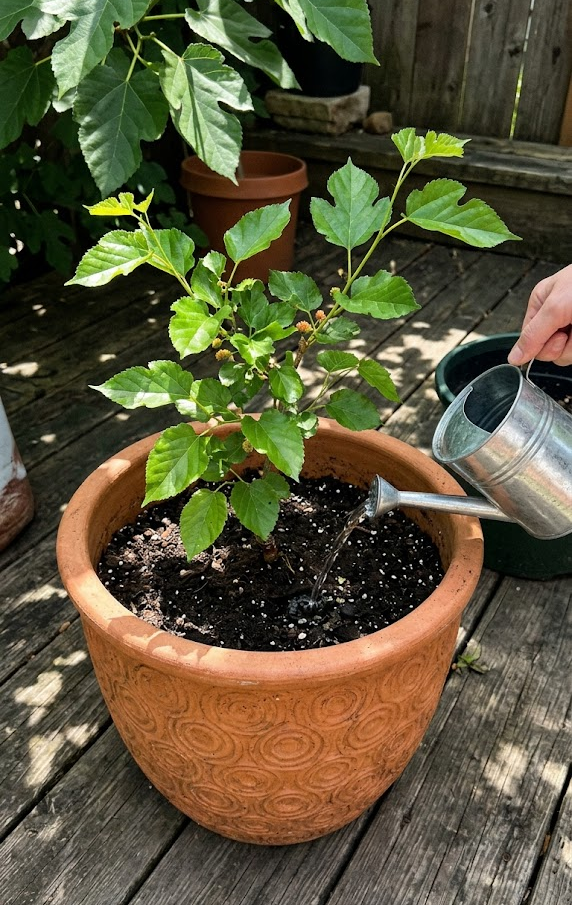
If you are a gardener managing space constraints, I can assure you that growing mulberries responsibly is perfectly achievable using high-quality dwarf cultivars in containers. However, you cannot simply set them and forget them; they require intensive care of their restricted root systems. I found through experience that the most critical maintenance task for potted trees is disciplined, bi-annual repotting. Potted mulberries—even dwarf ones like the Mojo Berry—are highly vigorous and will utilize the available soil mix nutrients quickly, becoming severely root-bound in just two to three years.
I tell every container gardener that you must repot your tree into a container that is one size larger (ideally by 2 to 4 inches in diameter), or you should prune the roots heavily and refresh the old soil with fresh, nutrient-dense compost. I achieve the best results with my potted Everbearing variety by repotting in early spring. To ensure healthy drainage, which is paramount in containers, I only utilize a high-quality loam-based potting mix that has been heavily amended with perlite. This meticulous, regular refreshing satisfied the long-term health needs of the tree, fulfilling my goal of sustainable, high-volume production even on a small weekend patio.








