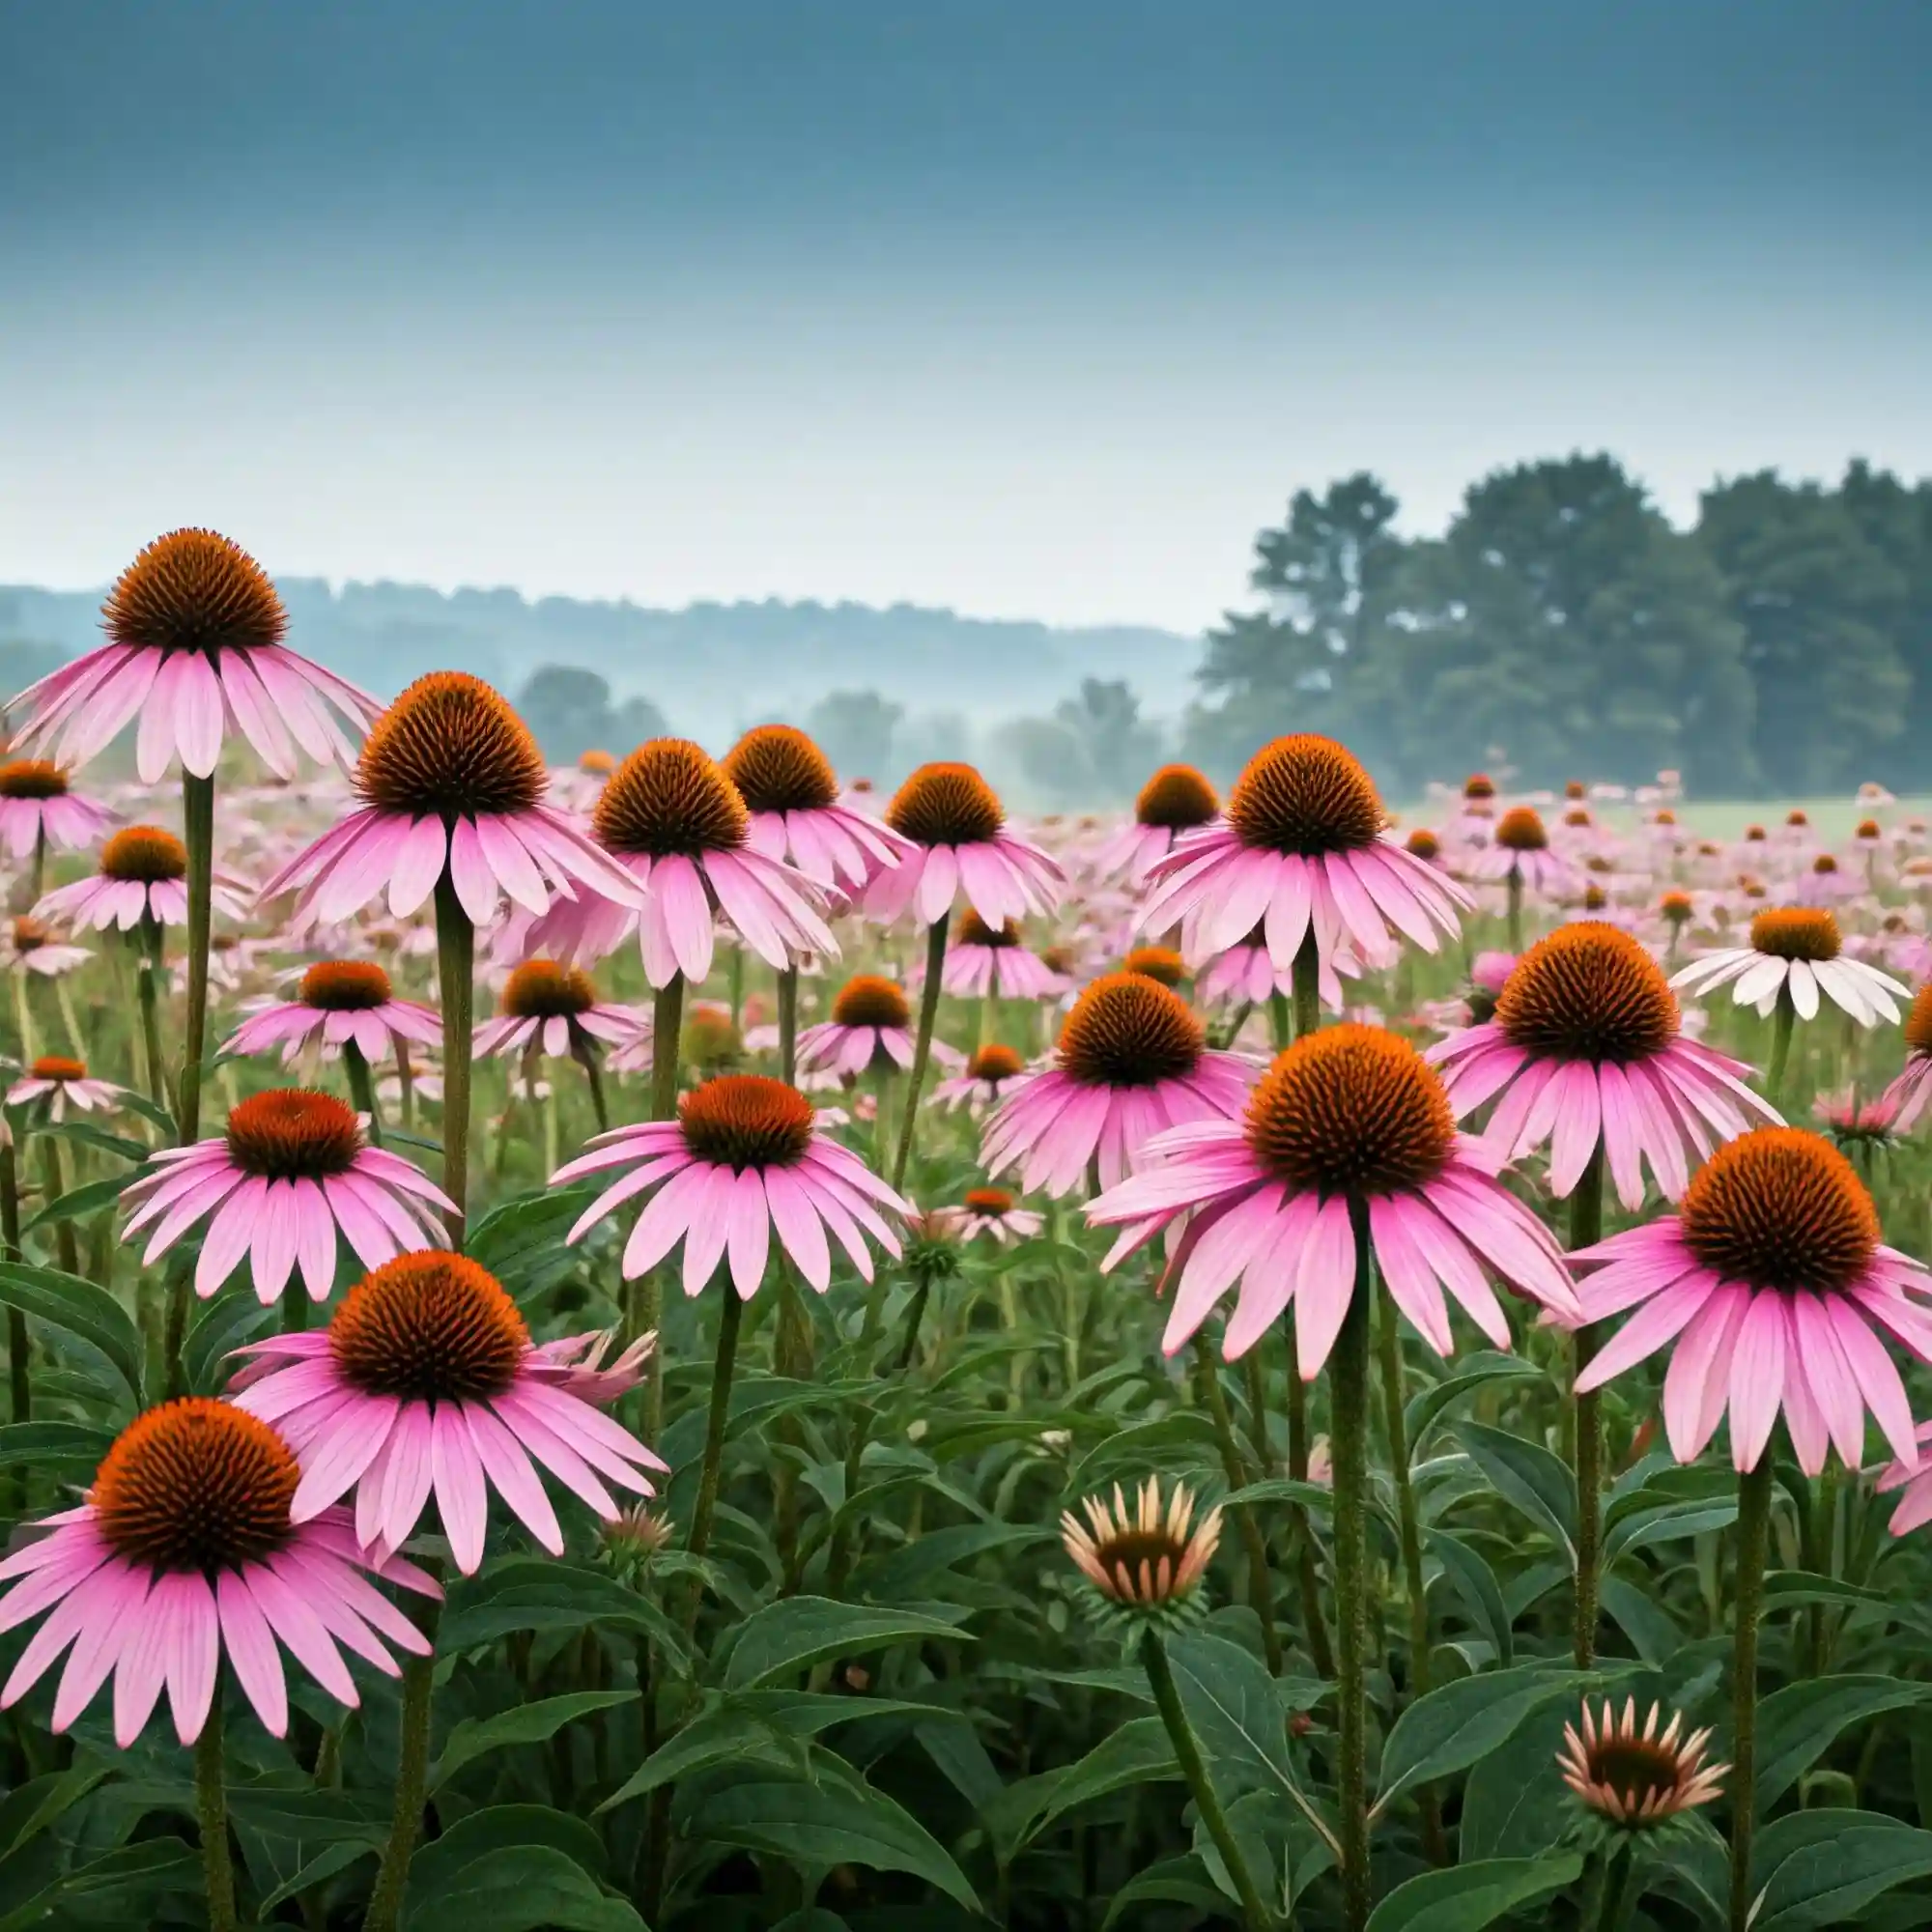
Are you longing for a garden bursting with vibrant color and natural remedies? Do you dream of harvesting your own herbs for soothing teas and immune-boosting tinctures? I know the feeling. Many gardeners, especially those juggling busy lives and careers, find it challenging to cultivate thriving herbs. They struggle with understanding the specific needs of different plants, leading to disappointment and frustration. Echinacea, with its beautiful blooms and medicinal properties, can be particularly tricky if you don’t know the right approach. But what if I told you that growing Echinacea herbs can be easier than you think? By following a few essential tips, you can transform your garden into a haven of healthy, flourishing Echinacea. This guide will walk you through everything you need to know, from choosing the right variety to harvesting your own potent herbs.
1. Choosing the Right Echinacea Variety for Your Garden
When I first started gardening, I quickly learned that selecting the right plant variety is half the battle. This is especially true for Echinacea. There’s more than just the classic purple coneflower out there, and each variety has its own nuances. You see, understanding these differences is key to successful cultivation. You’ll want to consider your local climate, available space, and desired aesthetic.
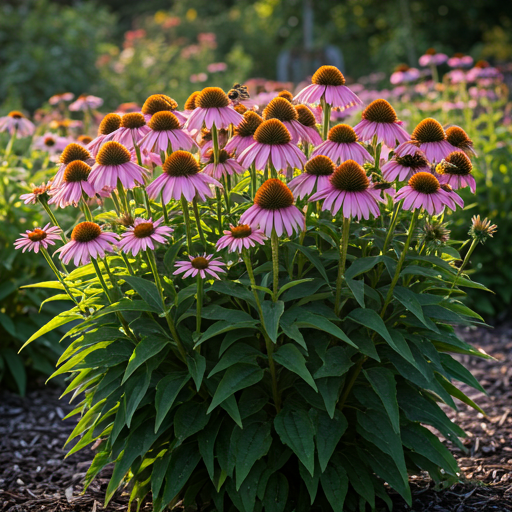
Echinacea purpurea (Purple Coneflower): The Classic Choice
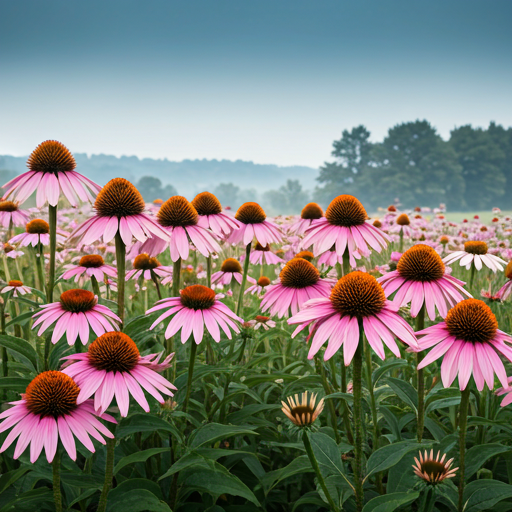
This is the variety you likely picture when you think of Echinacea. It’s the most common, readily available, and, in my experience, a reliable grower. The vibrant purple petals surrounding a prominent central cone make it a striking addition to any garden. It’s also the most widely studied for its medicinal properties. Echinacea purpurea is a robust perennial, meaning it will come back year after year, providing you with a consistent supply of beautiful blooms and beneficial herbs. It usually grows to be around 2-4 feet tall and 1-2 feet wide.
Echinacea angustifolia (Narrow-leaved Coneflower): A Native Beauty
If you’re interested in native plants and drought tolerance, Echinacea angustifolia is an excellent choice. This variety is native to North America and is well-adapted to drier conditions. Its petals are narrower than those of Echinacea purpurea, giving it a slightly different look. It is often shorter than E. purpurea, reaching heights of 1-2 feet. I’ve found this variety to be particularly resilient in hot, dry summers.
Beyond the Basics: Exploring Other Echinacea Varieties
While purpurea and angustifolia are the most common, there are other Echinacea species and numerous hybrids worth exploring. Echinacea pallida (Pale Purple Coneflower) offers a softer color palette with its delicate, drooping pale pink or white petals. Then there are other species like Echinacea paradoxa with its unique yellow flowers, and Echinacea tennesseensis known for its upward-sweeping petals. Hybridizers have also created many cultivars with unique colors, flower forms, and even double blooms. These newer varieties often offer improved disease resistance and longer blooming periods.
Matching Echinacea to Your Hardiness Zone
Your hardiness zone is a crucial factor in choosing the right Echinacea variety. This zone, determined by average minimum winter temperatures, dictates which plants can survive in your area. Most Echinacea varieties are hardy in zones 3-9, but it’s always best to check the specific requirements of the variety you choose. I recommend consulting a hardiness zone map specific to your region (like the USDA Plant Hardiness Zone Map for the US) to ensure you select a variety that will thrive in your local climate. Planting outside of the recommended hardiness zone can lead to winterkill or poor performance.
Considerations for Choosing Your Echinacea
Here are some additional factors to consider when selecting your Echinacea:
- Available Space: Some varieties are more compact than others. If you have a small garden or are growing in containers, choose a smaller variety.
- Desired Color and Form: Echinacea comes in a range of colors, from the classic purple to pink, white, yellow, orange, and even red. Flower forms also vary, from single blooms to double blooms and even pom-pom-like flowers.
- Medicinal Use: If you plan to use Echinacea for medicinal purposes, Echinacea purpurea and Echinacea angustifolia are the most studied and commonly used varieties.
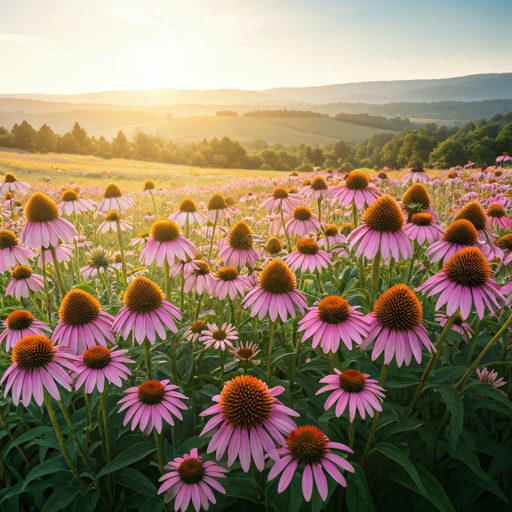
- Attracting Pollinators: Echinacea is a valuable plant for attracting pollinators like bees and butterflies. All varieties will attract pollinators, but some may be more attractive than others.
Comparison of Common Echinacea Varieties
| Variety | Flower Color(s) | Height (feet) | Hardiness Zones | Key Features |
| Echinacea purpurea | Purple, Pink, White | 2-4 | 3-9 | Most common, widely available, robust grower |
| Echinacea angustifolia | Pale Pink/White | 1-2 | 3-9 | Drought-tolerant, native to North America |
| Echinacea pallida | Pale Pink/White | 2-3 | 3-8 | Delicate, drooping petals |
By carefully considering these factors, you can choose the perfect Echinacea variety to enhance your garden and provide you with a beautiful and beneficial herb.
2. Starting Echinacea from Seed: A Step-by-Step Guide
From my experience, starting Echinacea from seed is one of the most rewarding ways to cultivate these beautiful herbs. It allows you to nurture them from their earliest stages and gives you access to a wider variety of Echinacea than you might find at your local garden center. It may seem a bit daunting at first, but with a little patience and the right approach, you can successfully grow your own Echinacea from seed.
Timing is Key: When to Start Your Seeds
The timing of seed starting is crucial for successful Echinacea cultivation. You have two main options: starting seeds indoors or direct sowing them into your garden.
- Starting Seeds Indoors: If you live in an area with a shorter growing season, I recommend starting your Echinacea seeds indoors about 6-8 weeks before the last expected frost. This gives the seedlings a head start and allows them to develop a strong root system before being transplanted into the garden.
- Direct Sowing: In regions with longer growing seasons, you can direct sow Echinacea seeds directly into your garden after the last frost has passed and the soil has warmed up. However, keep in mind that direct-sown plants may not bloom in their first year.
The Magic of Cold Stratification
Many Echinacea varieties, especially native species like Echinacea angustifolia, benefit significantly from cold stratification. This process mimics the natural winter conditions that these seeds experience in the wild and helps to break their dormancy, leading to improved germination rates.
- How to Cold Stratify: To cold stratify your Echinacea seeds, you’ll need to create a cold and moist environment for them. Here’s how I do it:
- Place your seeds in a damp paper towel or coffee filter.
- Put the paper towel or filter inside a sealed plastic bag or container.
- Place the bag or container in your refrigerator for 4-6 weeks.
- Make sure the paper towel or filter stays moist throughout the stratification period.
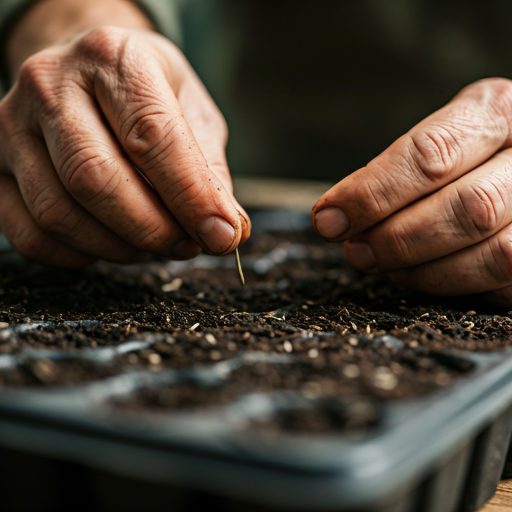
Sowing Your Echinacea Seeds: A Gentle Touch
Once your seeds have been cold stratified (if needed) or if you’re direct sowing, it’s time to get them into the soil.
- For Indoor Starting:
- Fill seed starting trays or small pots with a well-draining seed starting mix.
- Sow the seeds about ¼ inch deep.
- Gently water the soil until it’s moist but not soggy.
- Place the trays or pots in a warm location with bright, indirect light.
- For Direct Sowing:
- Prepare your garden bed by loosening the soil and removing any weeds or debris.
- Sow the seeds about ¼ inch deep, spacing them according to the variety’s mature size.
- Gently water the soil.
Creating the Ideal Germination Environment
Echinacea seeds need consistent moisture and warmth to germinate successfully.
- Moisture: Keep the soil consistently moist but avoid overwatering, which can lead to fungal problems. I use a spray bottle to mist the soil regularly.
- Temperature: The ideal germination temperature for Echinacea is between 65-75°F (18-24°C).
- Light: Once the seedlings emerge, they’ll need plenty of light. If you’re starting seeds indoors, place them under grow lights or in a sunny window.
Patience is a Virtue: Waiting for Germination
Germination time for Echinacea can vary depending on the variety and conditions. Typically, you can expect to see seedlings emerge within 10-20 days. However, some varieties may take longer. Don’t be discouraged if you don’t see sprouts right away. Just be patient and continue to provide the necessary moisture and warmth.
Troubleshooting Common Echinacea Seed Starting Problems
| Problem | Possible Cause(s) | Solution(s) |
| Poor germination | Seeds not viable, improper stratification, incorrect temperature, overwatering | Use fresh seeds, ensure proper stratification, maintain correct temperature, avoid overwatering |
| Seedlings damping off | Overwatering, poor air circulation | Improve air circulation, reduce watering frequency, use a fungicide if necessary |
| Seedlings leggy (tall and spindly) | Insufficient light | Provide more light, move seedlings closer to grow lights or a sunny window |
Growing Echinacea from seed is a rewarding process that allows you to connect with the plant from its very beginning. By following these steps and providing the right care, you can successfully cultivate these beautiful and beneficial herbs in your own garden.
3. How to Plant Echinacea Seedlings or Bare Roots
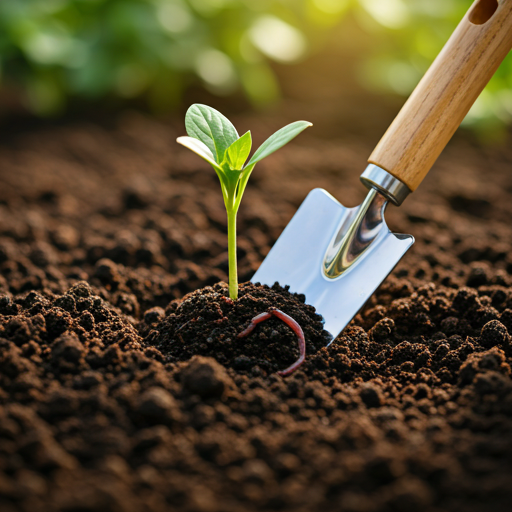
After you’ve nurtured your Echinacea seedlings indoors or if you’ve opted for bare roots from a nursery, the next exciting step is transplanting them into their permanent home in your garden. This transition is crucial, and providing the right conditions will set your Echinacea up for vigorous growth and abundant blooms. I’ve learned that careful planning and attention to detail during this stage pay dividends later in the season.
Choosing the Perfect Spot: Location, Location, Location
Echinacea thrives in sunny locations, so selecting the right spot in your garden is paramount.
- Sunlight Requirements: Aim for a location that receives at least 6 hours of direct sunlight per day. This will ensure your Echinacea plants produce plenty of flowers and maintain strong, healthy growth. While they can tolerate some partial shade, especially in hotter climates, they won’t bloom as profusely.
- Well-Drained Soil: A Must for Echinacea
- One of the most important factors for growing healthy Echinacea is well-drained soil. These plants are susceptible to root rot if their roots sit in waterlogged soil.
- Testing Your Soil: If you’re unsure about your soil’s drainage, you can perform a simple drainage test. Dig a hole about 1 foot deep and fill it with water. If the water drains away within a few hours, your soil has good drainage. If it takes longer, you’ll need to amend the soil to improve drainage.
- Improving Drainage: To improve drainage, you can amend your soil with organic matter like compost, well-rotted manure, or coarse sand. This will help to create air pockets in the soil and allow water to drain away more quickly.
Preparing the Planting Area: A Foundation for Success
Proper soil preparation is essential for giving your Echinacea a strong start.
- Amending the Soil: Before planting, amend the soil with compost to improve its fertility and drainage. Compost provides essential nutrients and helps to create a healthy soil structure. I like to work the compost into the top 6-12 inches of soil.
- Removing Weeds and Debris: Clear the planting area of any weeds, rocks, or other debris. This will prevent competition for nutrients and water and create a clean environment for your Echinacea to grow.
Planting Your Echinacea: A Gentle Touch
Whether you’re transplanting seedlings or planting bare roots, handle them with care to avoid damaging their delicate root systems.
- Transplanting Seedlings:
- Gently remove the seedlings from their containers, being careful not to disturb the roots too much.
- Dig a hole in the prepared planting area that is slightly larger than the root ball.
- Place the seedling in the hole, ensuring that the top of the root ball is level with the surrounding soil.
- Backfill the hole with soil and gently firm it around the base of the plant.
- Water thoroughly.
- Planting Bare Roots:
- Soak the bare roots in water for about 30 minutes before planting. This will help to rehydrate them.
- Dig a hole that is large enough to accommodate the roots without crowding them.
- Create a small mound of soil in the center of the hole.
- Place the bare roots over the mound, spreading them out evenly.
- Backfill the hole with soil, ensuring that the crown of the plant (where the roots meet the stem) is just below the soil surface.
- Water thoroughly.
Spacing Your Echinacea: Giving Them Room to Grow
Proper spacing is crucial for allowing your Echinacea plants to thrive.
- Recommended Spacing: Space your Echinacea plants 1-3 feet apart, depending on the mature size of the variety you’re growing. This will provide adequate air circulation and prevent overcrowding, which can lead to disease problems.
Post-Planting Care: Setting Them Up for Success
After planting, provide your Echinacea with the care they need to establish strong roots.
- Watering: Water regularly during the first year, especially during dry periods. Once established, Echinacea is relatively drought-tolerant.
- Mulching: Apply a layer of mulch around the base of the plants to help retain moisture, suppress weeds, and regulate soil temperature.
By following these planting guidelines, you’ll provide your Echinacea herbs with the best possible start, ensuring they thrive in your garden for years to come.
4. Providing the Ideal Growing Conditions for Echinacea Herbs
Once your Echinacea plants are settled into their new home, providing the right growing conditions is crucial for their long-term health and abundant flowering. I’ve observed that Echinacea, while relatively adaptable, truly flourishes when its basic needs are met. This section will delve into the essential environmental factors that contribute to a thriving Echinacea patch.
Soaking Up the Sun: Echinacea’s Love for Sunlight
Echinacea is a sun-loving plant, and adequate sunlight is essential for its growth and flowering.
- Minimum Sunlight Requirements: Aim for at least 6 hours of direct sunlight per day. This will ensure your plants produce plenty of vibrant blooms. I’ve noticed that plants receiving less than 6 hours tend to have fewer flowers and may become leggy (tall and spindly).
- Partial Shade Tolerance: While Echinacea prefers full sun, it can tolerate some partial shade, especially in hotter climates. In these areas, afternoon shade can help protect the plants from excessive heat stress. However, keep in mind that too much shade will reduce flowering.
The Importance of Well-Drained Soil: Avoiding Root Rot
As I mentioned earlier, well-drained soil is absolutely crucial for Echinacea. These plants are highly susceptible to root rot, a fungal disease that thrives in waterlogged conditions.
- Understanding Soil Drainage: Well-drained soil allows excess water to drain away quickly, preventing the roots from becoming waterlogged. This is important for providing oxygen to the roots, which is essential for their health and function.
- Improving Soil Drainage: If your soil is heavy clay or tends to retain water, you’ll need to amend it to improve drainage. Here are some effective methods:
- Adding Compost: Incorporating compost into the soil is one of the best ways to improve drainage and soil structure. Compost helps to create air pockets in the soil, allowing water to drain away more easily.
- Adding Coarse Sand or Perlite: Mixing coarse sand or perlite into the soil can also improve drainage. These materials help to create larger pore spaces in the soil, allowing water to flow through more quickly.
- Creating Raised Beds: If you have particularly heavy clay soil, consider creating raised beds. This will elevate the planting area and improve drainage significantly.
Watering Wisely: Finding the Right Balance
Proper watering is essential for establishing healthy Echinacea plants, but it’s important to avoid overwatering.
- Watering Frequency: During the first year, water your Echinacea plants regularly, especially during dry periods. Once they are established, they become relatively drought-tolerant and require less frequent watering.
- Deep Watering: When you do water, water deeply, ensuring that the water reaches the root zone. This encourages the roots to grow deeper, making the plants more drought-tolerant.
- Avoiding Overhead Watering: Avoid watering the foliage, as this can promote fungal diseases. Instead, water at the base of the plant.
- Watering Time: The best time to water is early in the morning. This allows the foliage to dry before nightfall, reducing the risk of fungal diseases.
Temperature and Humidity: Creating a Comfortable Environment
Echinacea is adaptable to a range of temperatures and humidity levels, but understanding its preferences can help you optimize its growth.
- Temperature Tolerance: Echinacea is hardy in zones 3-9, meaning it can tolerate a wide range of temperatures. However, it prefers moderate temperatures and can struggle in extreme heat or humidity.
- Humidity Considerations: In areas with high humidity, good air circulation is especially important to prevent fungal diseases. Space your plants adequately and avoid overcrowding.
Ideal Growing Conditions for Echinacea
| Factor | Ideal Conditions | Considerations |
| Sunlight | Full sun (at least 6 hours per day) | Tolerates some partial shade, especially in hot climates |
| Soil | Well-drained, fertile | Amend heavy clay soil with compost, sand, or perlite; consider raised beds |
| Watering | Deep and infrequent, water at the base of the plant | Avoid overwatering and overhead watering; water early in the morning |
| Temperature | Hardy in zones 3-9 | Prefers moderate temperatures; can struggle in extreme heat or humidity |
| Air Circulation | Good air circulation | Space plants adequately to prevent overcrowding |
By providing these ideal growing conditions, you can create a thriving environment for your Echinacea herbs, ensuring they flourish in your garden for many years.
5. How to Water Echinacea Effectively
Proper watering is essential for establishing healthy Echinacea plants, but it’s important to avoid overwatering. I’ve found that finding the right balance can be tricky, but with a little attention to detail, you can master the art of watering Echinacea effectively.
Understanding Echinacea’s Water Needs
Echinacea plants have moderate water needs, especially during their first year as they establish their root systems. Once established, they become relatively drought-tolerant.
- Watering Frequency: During the first year, water your Echinacea plants regularly, especially during dry periods. Aim to water deeply once a week, or more frequently during hot, dry weather.
- Established Plants: Once your Echinacea plants are established, they’ll require less frequent watering. Water deeply only when the top inch of soil is dry to the touch.
- Avoiding Overwatering: Overwatering can lead to root rot, a serious fungal disease that can kill your Echinacea plants. Avoid watering too frequently or allowing the soil to become waterlogged.
Watering Techniques for Healthy Echinacea
Here are some effective watering techniques to keep your Echinacea plants healthy and thriving:
- Water at the Base of the Plant: Water at the base of the plant, avoiding wetting the foliage. This will help to prevent fungal diseases.
- Water Deeply: When you water, water deeply, ensuring that the water reaches the root zone. This encourages the roots to grow deeper, making the plants more drought-tolerant.
- Water Early in the Morning: The best time to water is early in the morning. This allows the foliage to dry before nightfall, reducing the risk of fungal diseases.
- Use a Soaker Hose or Drip Irrigation: These methods deliver water directly to the root zone, minimizing water waste and reducing the risk of fungal diseases.
Watering During Different Stages of Growth
Echinacea plants have different water needs at different stages of growth.
- Seedlings: Keep the soil consistently moist but not waterlogged for newly germinated seedlings.
- Young Plants: Water regularly during the first year to establish a strong root system.
- Established Plants: Water deeply only when the top inch of soil is dry to the touch.
Watering in Different Climates
Your local climate will also affect how often you need to water your Echinacea plants.
- Hot, Dry Climates: In hot, dry climates, you’ll need to water more frequently, especially during the summer months.
- Humid Climates: In humid climates, good air circulation is essential to prevent fungal diseases. Space your plants adequately and avoid overcrowding.
Watering Guide for Echinacea
| Stage of Growth | Watering Frequency | Watering Technique |
| Seedlings | Keep soil consistently moist | Water at the base of the plant |
| Young plants | Water deeply once a week | Water at the base of the plant |
| Established plants | Water deeply only when the top inch of soil is dry | Water at the base of the plant |
By following these watering tips, you can provide your Echinacea plants with the moisture they need to thrive while avoiding the problems associated with overwatering.
6. Fertilizing Echinacea for Optimal Growth and Blooms
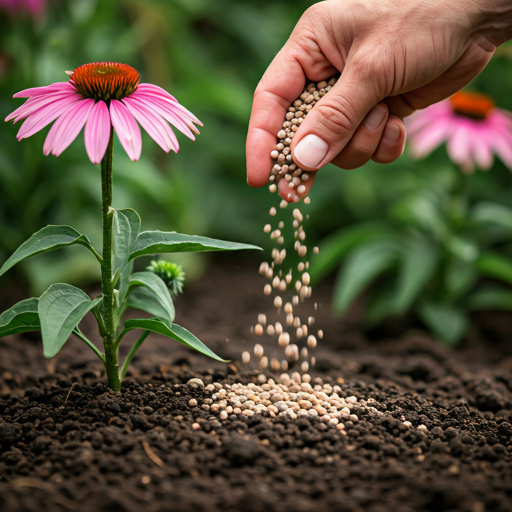
While Echinacea isn’t a heavy feeder, a little boost of nutrients can go a long way in promoting vigorous growth and an abundance of those beautiful, daisy-like blooms. In my experience, understanding the right type of fertilizer and the proper application methods can make a noticeable difference in the health and vitality of your Echinacea patch.
Understanding Echinacea’s Nutrient Needs
Echinacea plants benefit from a balanced supply of nutrients, particularly during their active growing season.
- Macronutrients: These are the primary nutrients that plants need in larger quantities:
- Nitrogen (N): Promotes leafy green growth.
- Phosphorus (P): Supports root development and flowering.
- Potassium (K): Enhances overall plant health and disease resistance.1
- Micronutrients: These are essential nutrients that plants need in smaller quantities, such as iron, zinc, and manganese.
Choosing the Right Type of Fertilizer
When it comes to fertilizing Echinacea, you have a few options:
- Balanced Granular Fertilizer: A balanced granular fertilizer with an N-P-K ratio of 10-10-10 or similar is a good all-purpose choice.
- Compost: Compost is a fantastic organic amendment that provides a slow-release source of nutrients and improves soil structure.
- Liquid Fertilizer: Liquid fertilizers can provide a quick boost of nutrients, but they need to be applied more frequently.
When and How to Fertilize Echinacea
The timing and method of fertilization are crucial for maximizing its benefits and avoiding potential problems.
- Timing:
- Spring: Apply a balanced granular fertilizer in early spring as new growth emerges.
- Summer: You can apply a diluted liquid fertilizer or side-dress with compost in mid-summer to encourage continued blooming.
- Fall: Avoid fertilizing in the fall, as this can encourage new growth that may be susceptible to winter damage.
- Application Methods:
- Granular Fertilizer: Sprinkle the granules evenly around the base of the plant, avoiding contact with the foliage. Gently work the granules into the top inch of soil and water thoroughly.
- Compost: Spread a 1-2 inch layer of compost around the base of the plant, keeping it away from the stem.
- Liquid Fertilizer: Dilute the liquid fertilizer according to the instructions on the product label and apply it to the soil around the base of the plant.
Tips for Fertilizing Echinacea
- Avoid Over-Fertilizing: Over-fertilizing can lead to excessive foliage growth at the expense of flowers and can also make the plants more susceptible to pests and diseases.
- Water After Fertilizing: Water thoroughly after applying granular or liquid fertilizer to help distribute the nutrients to the roots.
- Consider a Soil Test: If you’re unsure about your soil’s nutrient levels, consider conducting a soil test. This will provide you with valuable information about your soil’s specific needs and help you choose the right type and amount of fertilizer.
By following these fertilizing tips, you can provide your Echinacea plants with the nutrients they need to thrive and produce an abundance of beautiful blooms.
7. How to Deadhead Echinacea to Encourage More Blooms
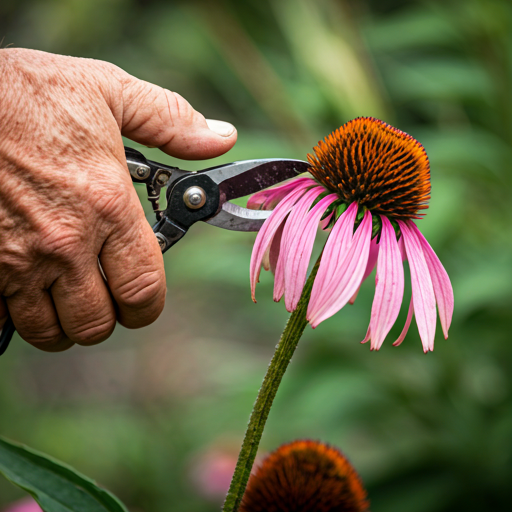
Deadheading, the simple act of removing spent flowers, is a gardening technique that can significantly prolong the blooming period of many plants, including Echinacea. From my experience, it’s a small effort that yields big rewards, keeping your Echinacea patch vibrant and colorful for much longer.
Understanding the Benefits of Deadheading
When a flower finishes blooming, it begins to produce seeds. This process requires energy that the plant could otherwise use to produce more flowers. By deadheading, you redirect the plant’s energy towards new growth and blooms.
- Encourages Continuous Blooming: Deadheading prevents seed production, prompting the plant to produce more flowers in an attempt to reproduce.
- Improves Plant Appearance: Removing spent flowers keeps the plant looking tidy and attractive.
- Prevents Unwanted Self-Seeding: If you don’t want your Echinacea to spread too aggressively, deadheading can help to control self-seeding.
When to Deadhead Echinacea
The best time to deadhead Echinacea is as soon as the flowers begin to fade. You’ll notice the petals starting to droop and lose their vibrant color.
- Regular Deadheading: For continuous blooming throughout the season, deadhead your Echinacea plants regularly, removing spent flowers every few days or once a week.
How to Deadhead Echinacea
Deadheading Echinacea is a simple process that requires only a pair of sharp pruning shears or scissors.
- Cut the Stem: Cut the stem just below the spent flower head, making a clean cut at a slight angle.
- Remove Entire Flower Head: Make sure to remove the entire flower head, including the developing seed head.
Allowing Some Flowers to Go to Seed
While deadheading encourages more blooms, it’s also a good idea to allow some flowers to go to seed.
- Natural Reseeding: This allows for natural reseeding, which can help to establish new plants in your garden.
- Attracting Birds: The seed heads also provide food for birds during the fall and winter months.
Deadheading vs. Cutting Back
It’s important to distinguish between deadheading and cutting back.
- Deadheading: Removing spent flowers to encourage more blooms.
- Cutting Back: Cutting the plant back to the ground in the fall or early spring.
By following these deadheading tips, you can keep your Echinacea plants blooming beautifully throughout the growing season and enjoy their vibrant color and beneficial properties for longer.
8. Protecting Echinacea from Pests and Diseases
Echinacea is generally a robust and disease-resistant plant, but like all plants, it can occasionally encounter problems with pests or diseases. In my years of gardening, I’ve learned that early detection and proper management are key to keeping these issues from becoming serious problems.
Common Pests of Echinacea
While Echinacea isn’t particularly prone to pest infestations, here are a few common pests to watch out for:
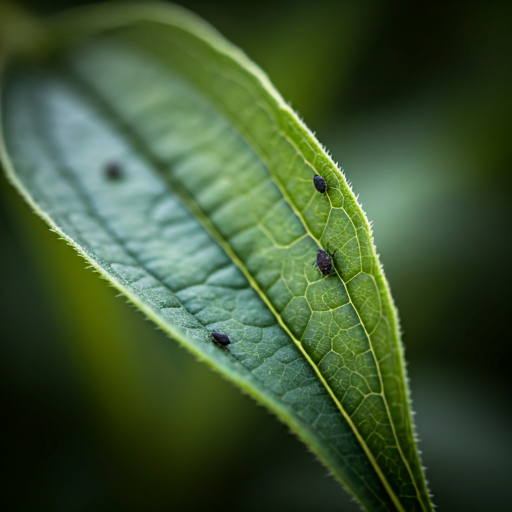
- Aphids: These small, soft-bodied insects can cluster on new growth and suck plant sap, causing distorted leaves and reduced vigor.
- Japanese Beetles: These metallic green beetles can feed on the flowers and foliage, causing significant damage if left unchecked.
- Spider Mites: These tiny mites can be difficult to see with the naked eye, but their presence is often indicated by fine webbing on the leaves. They can cause stippling and discoloration of the foliage.
Managing Pests on Echinacea
Here are some effective strategies for managing pests on your Echinacea plants:
- Handpicking: For larger pests like Japanese beetles, handpicking them off the plants and dropping them into a bucket of soapy water can be an effective control method.
- Strong Spray of Water: A strong spray of water from a garden hose can dislodge aphids and spider mites from the plants.
- Insecticidal Soap or Neem Oil: These organic insecticides can be effective against aphids, spider mites, and other soft-bodied insects. Be sure to follow the instructions on the product label.
Common Diseases of Echinacea
Echinacea can also be susceptible to a few fungal diseases:
- Powdery Mildew: This fungal disease appears as a white or grayish powdery coating on the leaves and stems.
- Root Rot: This fungal disease occurs in waterlogged soil and can cause the roots to rot and the plant to wilt and die.
Preventing and Managing Diseases
Here are some tips for preventing and managing diseases on your Echinacea plants:
- Good Air Circulation: Ensure good air circulation around your plants by spacing them adequately and avoiding overcrowding.
- Avoid Overhead Watering: Water at the base of the plant to avoid wetting the foliage, which can promote fungal diseases.
- Well-Drained Soil: Plant your Echinacea in well-drained soil to prevent root rot.
- Fungicides: If necessary, you can use a fungicide to control fungal diseases like powdery mildew. Be sure to follow the instructions on the product label.
Promoting Overall Plant Health
The best way to protect your Echinacea from pests and diseases is to promote overall plant health.
- Provide Optimal Growing Conditions: Ensure your plants receive adequate sunlight, well-drained soil, and proper watering.
- Fertilize Properly: Provide your plants with a balanced supply of nutrients.
- Remove Debris: Remove any fallen leaves or other debris from around the base of the plants to prevent the buildup of fungal spores.
By following these tips, you can keep your Echinacea plants healthy and free from pests and diseases, allowing them to thrive and provide you with their beautiful blooms and beneficial properties.
9. How to Harvest Echinacea for Medicinal Use
Echinacea is renowned for its potential medicinal properties, particularly its purported ability to support the immune system. If you’re growing Echinacea with the intention of using it for herbal remedies, understanding the proper harvesting and drying techniques is essential. From my own experience, I’ve learned that timing and careful handling are key to preserving the plant’s valuable compounds.
Which Parts of Echinacea to Harvest
Different parts of the Echinacea plant contain different concentrations of active compounds.
- Roots: The roots are generally considered to have the highest concentration of active constituents, particularly in Echinacea angustifolia.
- Leaves: The leaves also contain beneficial compounds, although in lower concentrations than the roots.
- Flowers: The flowers are often used for making teas and tinctures and contain some active compounds as well.
When to Harvest Echinacea
The timing of harvest depends on which part of the plant you’re using.
- Roots: The best time to harvest Echinacea roots is in the fall, after the plant has finished flowering and the aerial parts have begun to die back. At this time, the plant’s energy is concentrated in the roots. It is generally recommended to wait until the plant is at least three years old before harvesting the roots to allow it to establish a strong root system.
- Leaves: Leaves can be harvested throughout the growing season, but it’s best to harvest them before the plant flowers.
- Flowers: Flowers can be harvested when they are fully open and their petals are still vibrant.
How to Harvest Echinacea
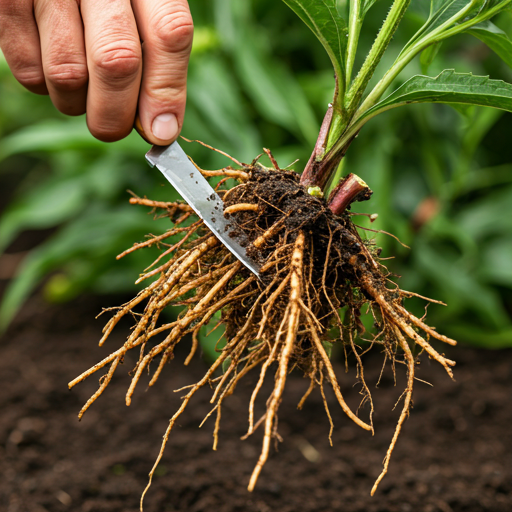
- Roots:
- Carefully dig up the entire plant using a garden fork or shovel.
- Wash the roots thoroughly to remove any soil or debris.
- Cut the roots into smaller pieces.
- Leaves:
- Harvest leaves by snipping them off the plant with scissors or pruning shears.
- Choose healthy, undamaged leaves.
- Flowers:
- Harvest flowers by cutting the stems just below the flower head.
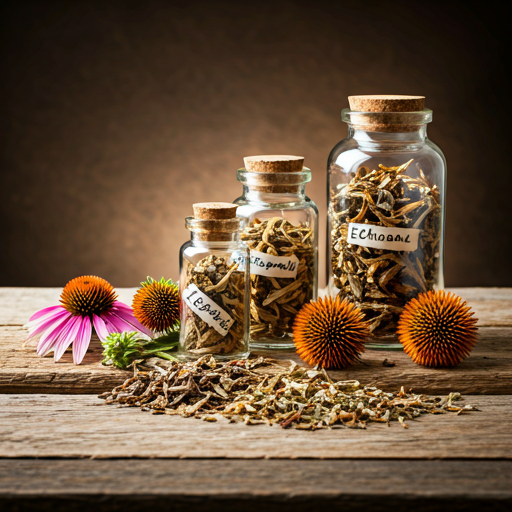
Drying and Storing Echinacea
Proper drying and storage are essential for preserving the quality of your harvested Echinacea.
- Drying:
- Spread the roots, leaves, or flowers in a single layer on a screen or tray in a well-ventilated area.
- Allow them to air dry completely, which can take several days or even weeks depending on the humidity.
- You can also use a dehydrator set to a low temperature to speed up the drying process.
- Storing:
- Once the plant parts are completely dry, store them in airtight containers in a cool, dark place.
By following these harvesting and drying tips, you can ensure that you’re getting the most out of your Echinacea plants and preserving their potential medicinal benefits.
10. Winter Care for Echinacea Plants
As the vibrant colors of fall fade and winter approaches, it’s time to prepare your Echinacea plants for the colder months. Proper winter care is essential for ensuring their survival and promoting vigorous growth the following spring. From my experience, a few simple steps can make a significant difference in how well your Echinacea plants weather the winter.
Cutting Back Echinacea in the Fall
One of the key aspects of winter care is deciding whether or not to cut back your Echinacea plants in the fall.
- To Cut Back: Some gardeners prefer to cut back the foliage to the ground in late fall or early winter after the first frost. This helps to tidy up the garden and can also help to prevent the spread of diseases.
- Not to Cut Back: Others prefer to leave the dried flower heads standing throughout the winter. This provides winter interest in the garden and the seed heads provide food for birds.
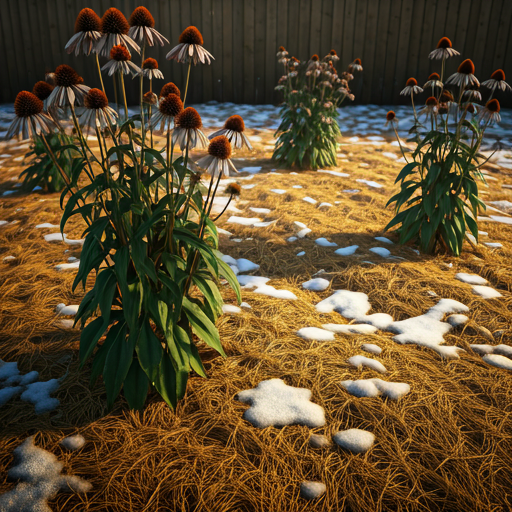
Protecting the Roots with Mulch
Applying a layer of mulch around the base of your Echinacea plants is crucial for protecting the roots from freezing temperatures and fluctuating winter conditions.
- Types of Mulch: You can use a variety of mulches, such as straw, shredded bark, or compost.
- How to Apply Mulch: Apply a 2-4 inch layer of mulch around the base of the plants, keeping it away from the stems to prevent rot.
Protecting Container-Grown Echinacea
If you’re growing Echinacea in containers, they’ll need extra protection during the winter.
- Move to a Protected Location: Move the containers to a protected location, such as a garage or shed, to protect them from freezing temperatures and harsh winter weather.
- Insulate the Containers: You can also insulate the containers by wrapping them in burlap or bubble wrap.
Spring Cleanup
In early spring, after the danger of frost has passed, it’s time to clean up your Echinacea plants.
- Remove Mulch: Remove any excess mulch from around the base of the plants.
- Cut Back Remaining Foliage: If you didn’t cut back the foliage in the fall, do so now.
- Fertilize: Apply a balanced fertilizer to encourage new growth.
By following these winter care tips, you can ensure that your Echinacea plants survive the winter and return in the spring with renewed vigor, ready to provide you with their beautiful blooms and beneficial properties once again.
11. Frequently Asked Questions (FAQ) About Growing Echinacea Herbs
Growing any plant, especially one with as many uses and benefits as Echinacea, often comes with a lot of questions. I remember when I first started, I had a whole list of things I was unsure about. So, I’ve compiled some of the most frequently asked questions I’ve encountered over the years, along with concise and helpful answers to guide you on your Echinacea-growing journey.
General Growing Questions
- How to grow Echinacea herbs successfully in containers?
- Choose a pot with good drainage holes to prevent waterlogging, which can lead to root rot.
- Use a high-quality, well-draining potting mix rather than garden soil, which can become too compacted in containers.
- Select a container that is appropriately sized for the mature size of the Echinacea variety you are growing.
- Place the container in a location that receives at least 6 hours of sunlight per day.
- Water regularly, allowing the top inch of soil to dry out between waterings.
- Fertilize lightly in the spring with a balanced fertilizer.
- How to grow Echinacea herbs organically and prevent common diseases?
- Start with healthy, disease-free seeds or plants from a reputable source.
- Plant Echinacea in well-drained soil and provide good air circulation to prevent fungal diseases.
- Use organic fertilizers, such as compost or well-rotted manure, to provide nutrients.
- Practice crop rotation to prevent the buildup of soilborne diseases.
- Monitor plants regularly for signs of pests or diseases and take action promptly if any problems arise.
- How to grow Echinacea herbs and attract pollinators to your garden?
- Plant Echinacea in a sunny location, as pollinators are more attracted to flowers in full sun.
- Plant a variety of Echinacea species and cultivars to attract a wider range of pollinators.
- Avoid using pesticides, as they can harm beneficial insects.
- Provide a water source for pollinators, such as a shallow dish of water with pebbles for them to land on.
Climate and Location Specific Questions
- How to grow Echinacea herbs in hot and humid summer climates?
- Choose heat-tolerant Echinacea varieties, such as Echinacea angustifolia.
- Provide afternoon shade to protect plants from the intense heat.
- Ensure excellent drainage to prevent root rot in humid conditions.
- Mulch around the base of the plants to help retain moisture and regulate soil temperature.
- How to grow Echinacea herbs in heavy clay soil with proper drainage?
- Amend the soil with organic matter, such as compost, well-rotted manure, or leaf mold, to improve drainage and soil structure.
- Create raised beds or mounds to elevate the planting area and further improve drainage.
- Incorporate coarse sand or gravel into the soil to increase pore space and drainage.
Harvesting and Propagation Questions
- How to grow Echinacea herbs for medicinal purposes and harvest correctly?
- Harvest roots in the fall after the plant has finished flowering, ideally from plants that are at least three years old.
- Harvest leaves and flowers during the growing season, preferably before the plant sets seed.
- Dry harvested plant parts thoroughly in a well-ventilated area or using a dehydrator.
- Store dried herbs in airtight containers in a cool, dark place.
- How to grow Echinacea herbs from root divisions for faster propagation?
- Divide the roots in early spring or fall when the plant is dormant.
- Carefully dig up the plant and separate the roots into sections, each with at least one growing point.
- Replant the divisions immediately in well-prepared soil.
Specific Use Questions
- How to grow Echinacea herbs and dry the flowers for homemade tea?
- Harvest flowers when they are fully open and their petals are still vibrant.
- Spread the flowers in a single layer on a screen or tray in a well-ventilated area.
- Allow them to air dry completely, which can take several days.
- Store dried flowers in airtight containers in a cool, dark place.
I hope these FAQs have addressed any lingering questions you may have about growing Echinacea. If you have any further questions, feel free to ask in the comments below – I’m always happy to help fellow gardeners!