Are you tired of looking at your dull and uninspiring garden? Do you feel like your outdoor space lacks personality and charm?
It can be frustrating to spend time in a garden that doesn’t reflect your style or bring you joy. You might feel overwhelmed by the endless possibilities and unsure where to start. The thought of transforming your garden into a beautiful and inviting space can seem daunting, especially if you’re on a budget or lack DIY skills.
Don’t worry! With a little creativity and some practical tips, you can easily enhance your garden with unique and affordable décor options. Whether you have a small balcony or a spacious backyard, there are countless ways to add charm and character to your outdoor space. In this comprehensive guide, I’ll share 15 creative garden décor options that will inspire you to transform your garden into a personal oasis.
Whimsical Sculptures
Garden sculptures are a fantastic way to add a touch of whimsy and personality to your outdoor space. They come in various shapes, sizes, and materials, allowing you to choose pieces that reflect your style and complement your garden’s theme. Here are some ideas and tips for incorporating whimsical sculptures into your garden décor.
Types of Garden Sculptures
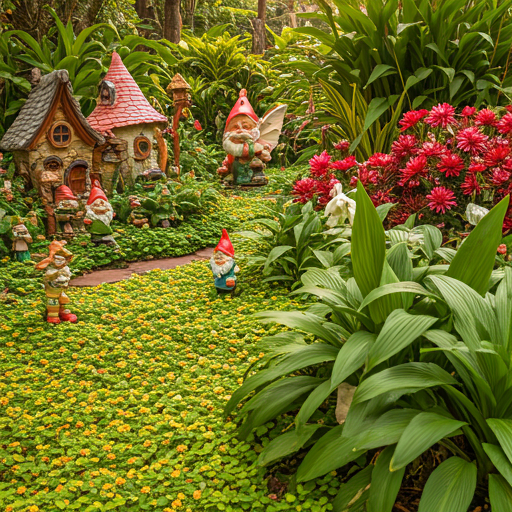
- Garden Gnomes: These classic garden ornaments have been a favorite for generations. Garden gnomes come in various poses and styles, from traditional bearded figures to modern, quirky designs. They can add a playful touch to your garden and are perfect for tucking into flower beds or placing near pathways.
- Fairy Houses: Fairy houses are miniature structures designed to look like tiny homes for fairies. They can be made from various materials, including wood, stone, and resin. Placing fairy houses in your garden can create a magical atmosphere, especially if you have children who enjoy imaginative play.
- Animal Statues: Animal statues can bring a sense of life and movement to your garden. You can choose from realistic representations of animals like birds, rabbits, and deer, or opt for more whimsical designs like mythical creatures or abstract animal forms.
- Abstract Sculptures: If you prefer a more modern aesthetic, abstract sculptures can be a great addition to your garden. These pieces often feature bold shapes and lines, adding a contemporary touch to your outdoor space.
Placement Tips
- Create Focal Points: Use sculptures to create focal points in your garden. Place them in areas where they will draw the eye, such as at the end of a pathway, in the center of a flower bed, or near a seating area.
- Group Sculptures Together: For a more dramatic effect, group several sculptures together. This can create a sense of cohesion and make a stronger visual impact.
- Consider Scale: When choosing sculptures, consider the scale of your garden. Large sculptures can overwhelm a small space, while tiny pieces might get lost in a large garden. Aim for a balance that complements your garden’s size and layout.
- Blend with Nature: Integrate sculptures with the natural elements of your garden. Place them among plants, rocks, and other natural features to create a harmonious look.
Materials and Maintenance
Garden sculptures can be made from various materials, each with its own advantages and maintenance requirements:
- Stone: Stone sculptures are durable and weather-resistant, making them ideal for outdoor use. They can develop a beautiful patina over time, adding to their charm. However, they can be heavy and difficult to move.
- Metal: Metal sculptures, such as those made from iron, bronze, or stainless steel, can add a sleek and modern touch to your garden. They are generally durable but may require occasional maintenance to prevent rust and corrosion.
- Wood: Wooden sculptures can bring a rustic and natural feel to your garden. They may need regular treatment to protect them from the elements and prevent decay.
- Resin: Resin sculptures are lightweight and often more affordable than stone or metal. They can be molded into intricate designs and are usually weather-resistant. However, they may fade or become brittle over time with prolonged exposure to sunlight.
By carefully selecting and placing whimsical sculptures in your garden, you can create a unique and enchanting outdoor space that reflects your personality and style.
Elegant Lighting

Lighting plays a crucial role in garden décor, not only for practical purposes but also for creating ambiance and highlighting key features. Here are some elegant lighting options to consider for your garden.
Types of Garden Lighting
- String Lights: String lights are versatile and can be used in various ways to add a warm and inviting glow to your garden. You can drape them over trees, along fences, or across pergolas to create a magical atmosphere.
- Lanterns: Lanterns come in many styles, from traditional to modern, and can be placed on tables, hung from hooks, or set along pathways. They provide a soft, ambient light that enhances the garden’s charm.
- Solar-Powered Lights: Solar-powered lights are an eco-friendly option that harnesses the sun’s energy during the day and illuminates your garden at night. They come in various designs, including stake lights, string lights, and lanterns.
- Spotlights: Spotlights can be used to highlight specific features in your garden, such as sculptures, trees, or water features. They create dramatic effects and add depth to your garden’s nighttime appearance.
- Pathway Lights: Pathway lights are essential for safety and can also enhance the beauty of your garden. They come in various styles, including solar-powered options, and can be placed along walkways, driveways, and garden paths.
Creating a Cozy Evening Ambiance
- Layer Your Lighting: Use a combination of different lighting types to create layers of light. This adds depth and dimension to your garden, making it more visually interesting.
- Focus on Key Areas: Highlight key areas of your garden, such as seating areas, pathways, and focal points. This not only enhances the garden’s beauty but also improves functionality and safety.
- Use Warm Light: Opt for warm white or soft yellow lights to create a cozy and inviting atmosphere. Avoid harsh, bright lights that can create a stark and unwelcoming environment.
- Incorporate Candles: For a touch of romance, incorporate candles into your garden lighting. Use lanterns or hurricane lamps to protect the flames from the wind and create a soft, flickering glow.
Energy-Efficient Options
- LED Lights: LED lights are energy-efficient and have a long lifespan, making them a great choice for garden lighting. They come in various colors and styles, allowing you to customize your garden’s look.
- Solar-Powered Lights: As mentioned earlier, solar-powered lights are an eco-friendly option that reduces energy consumption. They are easy to install and require minimal maintenance.
- Motion Sensor Lights: Motion sensor lights are a practical and energy-efficient option for security and convenience. They only turn on when motion is detected, saving energy and providing light when needed.
By incorporating elegant lighting into your garden décor, you can create a beautiful and functional outdoor space that you can enjoy day and night.
Bird Baths
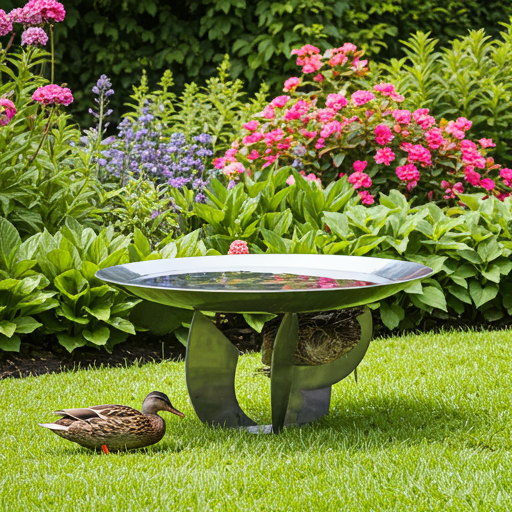
Bird baths are a wonderful addition to any garden, providing a water source for birds and adding a decorative element to your outdoor space. Here are some tips and ideas for incorporating bird baths into your garden décor.
Benefits of Bird Baths
- Attracting Birds: Bird baths attract a variety of birds to your garden, providing them with a place to drink and bathe. This can enhance your garden’s biodiversity and create a lively and dynamic environment.
- Supporting Wildlife: By providing a water source, bird baths support local wildlife, especially during hot and dry periods. They can also attract other beneficial creatures, such as butterflies and bees.
- Aesthetic Appeal: Bird baths come in various designs and materials, adding beauty and interest to your garden. They can serve as focal points or blend seamlessly with your garden’s natural elements.
Different Styles and Materials
- Classic Stone Bird Baths: Stone bird baths are durable and timeless, adding a touch of elegance to your garden. They can be carved with intricate designs or kept simple for a more understated look.
- Ceramic Bird Baths: Ceramic bird baths come in a wide range of colors and patterns, allowing you to add a splash of color to your garden. They are often glazed to protect against the elements.
- Metal Bird Baths: Metal bird baths, such as those made from copper or cast iron, can add a rustic or modern touch to your garden. They are durable and can develop a beautiful patina over time.
- Resin Bird Baths: Resin bird baths are lightweight and often more affordable than stone or metal options. They can be molded into various shapes and designs, making them a versatile choice.
Placement Tips
- Visibility: Place your bird bath in a visible location where you can easily watch the birds. This could be near a window, patio, or seating area.
- Safety: Ensure the bird bath is in a safe location, away from potential predators like cats. Place it near shrubs or trees that provide cover and perching spots for birds.
- Accessibility: Make sure the bird bath is easily accessible for cleaning and refilling. Regular maintenance is essential to keep the water clean and safe for birds.
Maintenance Tips
- Regular Cleaning: Clean your bird bath regularly to prevent the buildup of algae and bacteria. Use a scrub brush and mild detergent, and rinse thoroughly with clean water.
- Refill Frequently: Refill the bird bath with fresh water every few days, especially during hot weather. This ensures a constant supply of clean water for the birds.
- Winter Care: In colder climates, consider using a heated bird bath or adding a bird bath heater to prevent the water from freezing. Alternatively, you can bring the bird bath indoors during the winter months and replace it with a shallow dish of water that can be easily refilled.
By incorporating a bird bath into your garden décor, you can create a welcoming environment for birds and add a beautiful, functional element to your outdoor space.
DIY Plant Labels
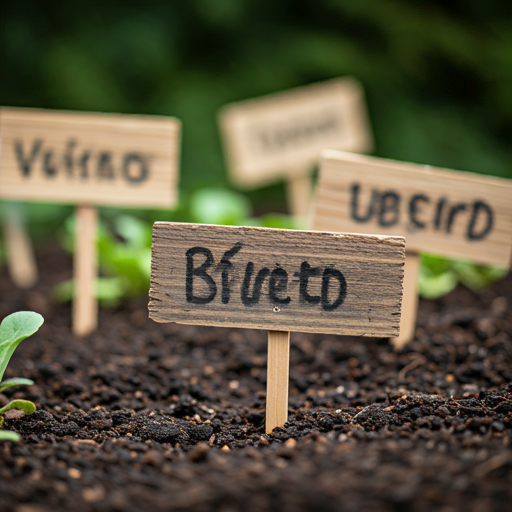
Creating your own plant labels is a fun and practical way to add a personal touch to your garden. Not only do they help you keep track of your plants, but they also serve as decorative elements that can enhance the overall look of your garden. Here are some creative ideas and tips for making DIY plant labels.
Creative Ideas for Handmade Plant Markers
- Wooden Spoons: Repurpose old wooden spoons by painting them and writing the plant names on the handles. You can use acrylic paint and a waterproof marker to ensure they withstand the elements.
- Rocks and Pebbles: Collect smooth rocks or pebbles and paint them with the names of your plants. This is a great way to add a natural and rustic touch to your garden.
- Wine Corks: Save wine corks and attach them to wooden skewers or metal stakes. Write the plant names on the corks with a permanent marker. This is an eco-friendly option that adds a bit of charm to your garden.
- Chalkboard Labels: Use small pieces of chalkboard paint on wooden stakes or metal tags. You can write the plant names with chalk or a chalk marker, allowing you to easily change the labels as needed.
- Clay Tags: Create your own clay tags using air-dry clay or polymer clay. Roll out the clay, cut it into shapes, and use a stamp or a toothpick to write the plant names. Once dry, attach them to stakes or hang them from the plants.
Materials You Can Use
- Wood: Wooden stakes, spoons, or popsicle sticks are easy to find and work well for plant labels. They can be painted or left natural, depending on your preference.
- Metal: Metal tags or stakes are durable and can be reused year after year. You can find blank metal tags at garden centers or online.
- Plastic: Recycle plastic containers or old plant pots by cutting them into strips and writing the plant names with a permanent marker.
- Natural Materials: Rocks, pebbles, and shells can be used to create unique and natural-looking plant labels.
Step-by-Step Guide to Making Your Own
- Gather Materials: Collect the materials you need for your chosen type of plant label. This might include wooden spoons, rocks, wine corks, paint, markers, and stakes.
- Prepare the Labels: Clean and dry the materials if necessary. For wooden or metal labels, you may want to sand them lightly to create a smooth surface for writing.
- Decorate: Paint or decorate the labels as desired. Use waterproof paint or markers to ensure the labels last through the seasons.
- Write Plant Names: Write the names of your plants on the labels. Be sure to use clear, legible handwriting or print the names if you prefer.
- Seal (Optional): If you want to add extra protection, you can seal the labels with a clear varnish or sealant. This is especially useful for wooden or painted labels.
- Place in Garden: Insert the labels into the soil near the corresponding plants. Make sure they are secure and visible.
By making your own plant labels, you can add a personal and creative touch to your garden while keeping it organized and easy to navigate.
Vertical Gardens
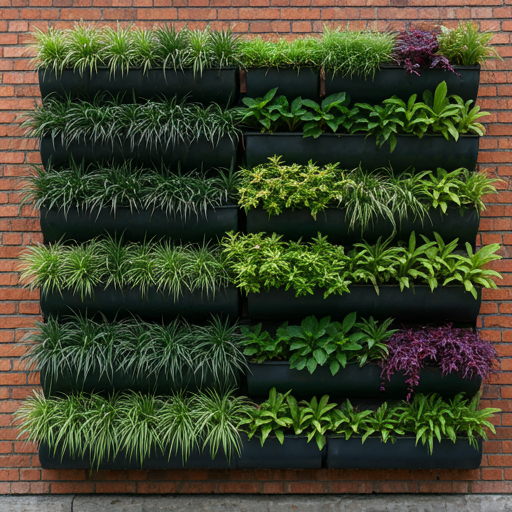
Vertical gardens are an excellent solution for maximizing space, especially in small gardens or urban environments. They allow you to grow a variety of plants vertically, creating a lush and vibrant display. Here are some ideas and tips for creating and maintaining vertical gardens.
Advantages of Vertical Gardening
- Space-Saving: Vertical gardens make the most of limited space, allowing you to grow more plants in a smaller area. This is ideal for balconies, patios, and small yards.
- Aesthetic Appeal: Vertical gardens can create stunning visual displays, adding height and dimension to your garden. They can also serve as living walls or privacy screens.
- Improved Air Quality: Plants in vertical gardens can help improve air quality by absorbing pollutants and releasing oxygen.
- Ease of Maintenance: Vertical gardens can be easier to maintain than traditional gardens, as they often require less bending and kneeling.
Ideas for Vertical Garden Structures
- Trellises: Trellises are a classic choice for vertical gardening. They can support climbing plants like vines, beans, and peas. You can attach trellises to walls, fences, or free-standing frames.
- Wall-Mounted Planters: Wall-mounted planters come in various designs, from simple pots to elaborate systems with multiple tiers. They are perfect for growing herbs, flowers, and small vegetables.
- Pallet Gardens: Repurpose wooden pallets by turning them into vertical planters. You can fill the gaps with soil and plant a variety of herbs, flowers, and succulents.
- Hanging Gardens: Use hanging baskets or pots to create a vertical garden. You can hang them from hooks, pergolas, or balcony railings. This is a great way to add greenery to small spaces.
- Living Walls: Living walls, also known as green walls, are vertical structures covered with plants. They can be created using modular panels, felt pockets, or hydroponic systems. Living walls are ideal for creating a lush, green backdrop.
Plant Recommendations for Vertical Gardens
- Climbing Plants: Vines, ivy, and climbing roses are excellent choices for vertical gardens. They can quickly cover trellises and walls, creating a lush and green display.
- Herbs: Herbs like basil, thyme, and mint are perfect for vertical gardens. They are compact, easy to grow, and can be harvested regularly.
- Succulents: Succulents are low-maintenance plants that thrive in vertical gardens. They come in various shapes and colors, adding visual interest to your garden.
- Flowers: Flowers like petunias, marigolds, and nasturtiums can add a splash of color to your vertical garden. Choose varieties that are suitable for vertical growth.
- Vegetables: Small vegetables like cherry tomatoes, lettuce, and peppers can be grown in vertical gardens. They are easy to harvest and can provide fresh produce throughout the season.
Tips for Creating and Maintaining Vertical Gardens
- Choose the Right Location: Select a location that receives adequate sunlight for the plants you want to grow. Most vertical gardens need at least 6 hours of sunlight per day.
- Use Quality Soil: Use high-quality potting soil that provides good drainage and nutrients. Consider adding compost or organic matter to improve soil fertility.
- Watering: Vertical gardens may require more frequent watering than traditional gardens, as the soil can dry out quickly. Use a drip irrigation system or water the plants regularly to keep the soil moist.
- Fertilizing: Feed your plants with a balanced fertilizer to ensure they receive the necessary nutrients. Follow the recommended application rates for the specific plants you are growing.
- Pruning and Maintenance: Regularly prune and trim your plants to keep them healthy and encourage new growth. Remove any dead or diseased foliage to prevent the spread of pests and diseases.
By creating a vertical garden, you can maximize your gardening space and enjoy a beautiful and productive outdoor area.
Colorful Garden Gates
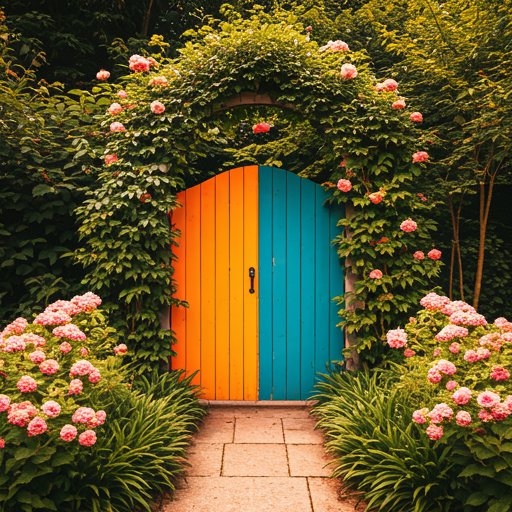
A colorful garden gate can serve as a striking focal point and add charm to your garden entrance. It can also reflect your personality and style, making your garden feel more inviting and unique. Here are some ideas and tips for incorporating colorful garden gates into your garden décor.
How a Vibrant Gate Can Enhance Your Garden’s Entrance
- Creates a Focal Point: A brightly colored gate can draw attention and create a focal point in your garden. It can serve as a visual anchor that guides visitors’ eyes and sets the tone for the rest of the garden.
- Adds Personality: A colorful gate can reflect your personal style and add character to your garden. Whether you prefer bold and vibrant colors or soft and pastel hues, a painted gate can make a statement.
- Welcomes Visitors: A cheerful and inviting gate can make your garden feel more welcoming. It can create a sense of anticipation and curiosity, encouraging visitors to explore further.
Design Ideas and Color Choices
- Bold and Bright Colors: Choose bold and bright colors like red, yellow, or turquoise to make a strong statement. These colors can create a lively and energetic atmosphere in your garden.
- Pastel Shades: Soft pastel shades like lavender, mint green, or baby blue can create a calming and serene ambiance. These colors are perfect for cottage-style gardens or romantic settings.
- Two-Tone Designs: Combine two complementary colors to create a unique and eye-catching design. For example, you can paint the gate frame one color and the panels another, or use contrasting colors for a striped effect.
- Patterns and Stencils: Add patterns or stenciled designs to your gate for extra visual interest. You can create geometric patterns, floral motifs, or even whimsical designs like polka dots or stripes.
- Natural Wood with Color Accents: If you prefer a more natural look, you can keep the wood’s natural finish and add color accents. For example, paint the gate’s hardware, trim, or decorative elements in a contrasting color.
DIY vs. Purchasing Pre-Made Gates
- DIY Gates: Building your own garden gate can be a rewarding project that allows you to customize the design and color to your liking. You can use materials like wood, metal, or even recycled items to create a unique gate. DIY gates can be more affordable and give you the satisfaction of creating something with your own hands. However, they may require more time, effort, and basic carpentry skills.
- Pre-Made Gates: Purchasing a pre-made gate can save you time and effort. There are many options available in various styles, colors, and materials. Pre-made gates are often professionally crafted and can be more durable and reliable. They can be a bit more expensive, but they offer convenience and a wide range of choices.
Installation Tips
- Measure Accurately: Before installing your gate, measure the opening accurately to ensure a proper fit. Consider the height, width, and any additional space needed for hinges and latches.
- Choose the Right Hardware: Select sturdy and weather-resistant hardware for your gate, including hinges, latches, and handles. Ensure they are compatible with the gate material and design.
- Prepare the Posts: If you are installing a new gate, make sure the posts are securely anchored in the ground. Use concrete or gravel to stabilize the posts and prevent them from shifting over time.
- Align and Level: When attaching the gate to the posts, make sure it is properly aligned and level. Use a spirit level to check the alignment and make any necessary adjustments.
- Test the Gate: Once installed, test the gate to ensure it opens and closes smoothly. Make any final adjustments to the hinges or latches as needed.
By adding a colorful garden gate, you can create a welcoming and visually appealing entrance to your garden that reflects your personal style.
Recycled Planters
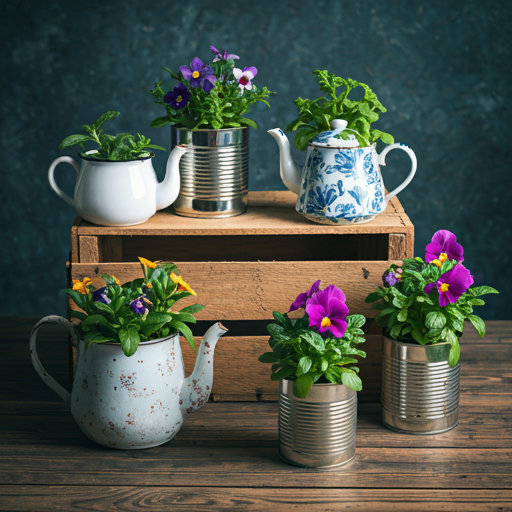
Using recycled planters is an eco-friendly and creative way to add unique elements to your garden décor. By repurposing old containers, you can reduce waste and create charming planters that add character to your outdoor space. Here are some ideas and tips for using recycled planters in your garden.
Benefits of Recycling in Garden Décor
- Eco-Friendly: Recycling old containers reduces waste and helps protect the environment. It promotes sustainability and encourages the reuse of materials that might otherwise end up in landfills.
- Cost-Effective: Using recycled planters can save you money, as you can repurpose items you already have or find inexpensive containers at thrift stores or garage sales.
- Unique and Personal: Recycled planters add a unique and personal touch to your garden. Each planter can tell a story and reflect your creativity and resourcefulness.
Creative Ideas for Recycled Planters
- Vintage Teapots: Old teapots can make charming planters for small flowers or herbs. Their unique shapes and designs add a touch of whimsy to your garden.
- Wooden Crates: Wooden crates can be used as large planters for flowers, vegetables, or even small shrubs. They add a rustic and natural look to your garden.
- Tin Cans: Clean and paint old tin cans to create colorful and fun planters. They are perfect for small plants and can be hung on walls or fences for a vertical garden effect.
- Old Boots: Repurpose old boots or shoes as quirky planters. They can add a playful and unexpected element to your garden décor.
- Baskets: Woven baskets can be used as planters for flowers and herbs. Line them with plastic or burlap to hold the soil and prevent water from leaking out.
- Glass Jars: Glass jars can be used as planters for succulents or small herbs. They can be placed on windowsills, tables, or hung from hooks for a decorative touch.
Tips for Using Recycled Planters
- Ensure Proper Drainage: Make sure your recycled planters have proper drainage to prevent waterlogging. Drill holes in the bottom of containers if necessary, or add a layer of gravel or stones to improve drainage.
- Use Quality Soil: Fill your planters with high-quality potting soil that provides good drainage and nutrients. Consider adding compost or organic matter to improve soil fertility.
- Choose the Right Plants: Select plants that are suitable for the size and type of container you are using. Consider the plant’s growth habits, root space requirements, and sunlight needs.
- Decorate and Personalize: Get creative with decorating your recycled planters. Paint them, add stickers, or use decoupage to personalize them and make them stand out.
- Group Planters Together: For a more cohesive look, group several recycled planters together. This can create a visually appealing display and make a stronger impact.
By using recycled planters, you can create a unique and eco-friendly garden that reflects your creativity and commitment to sustainability.
Water Features
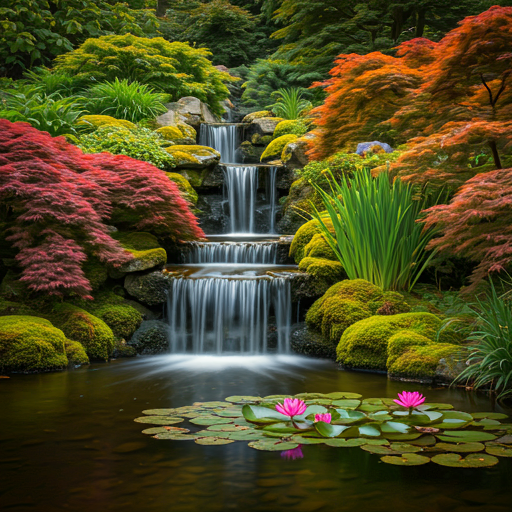
Adding a water feature to your garden can bring a sense of tranquility and beauty to your outdoor space. The sound of flowing water can create a calming atmosphere, and water features can also attract wildlife, such as birds and butterflies. Here are some ideas and tips for incorporating water features into your garden décor.
Types of Water Features
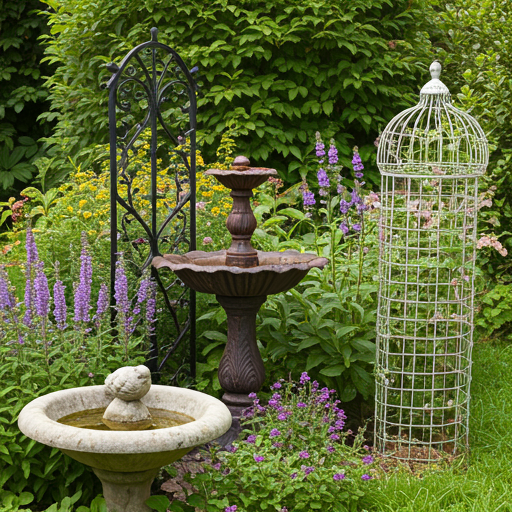
- Fountains: Fountains come in various styles and sizes, from small tabletop fountains to large, elaborate designs. They can be made from materials like stone, metal, or ceramic and can be powered by electricity or solar energy.
- Ponds: Ponds can be a beautiful addition to any garden, providing a habitat for fish, frogs, and aquatic plants. They can be designed in various shapes and sizes, from small container ponds to larger, more elaborate installations.
- Waterfalls: Waterfalls can add a dramatic and dynamic element to your garden. They can be incorporated into ponds or standalone features, and they can be designed to fit various garden styles, from naturalistic to modern.
- Streams: A small stream can create a natural and serene atmosphere in your garden. It can be designed to flow through different areas of your garden, connecting various features and creating a cohesive look.
- Birdbaths: Birdbaths are a simple and elegant way to add a water feature to your garden. They provide a water source for birds and can be designed in various styles and materials.
Benefits of Adding a Water Feature
- Aesthetic Appeal: Water features can enhance the beauty of your garden, adding visual interest and creating focal points. They can be designed to complement your garden’s style and theme.
- Calming Atmosphere: The sound of flowing water can create a peaceful and relaxing environment. It can help mask unwanted noise and create a sense of tranquility.
- Attracting Wildlife: Water features can attract a variety of wildlife to your garden, including birds, butterflies, and beneficial insects. This can enhance your garden’s biodiversity and create a lively and dynamic environment.
- Cooling Effect: Water features can help cool the surrounding area, making your garden more comfortable during hot weather. The evaporation of water can create a natural cooling effect.
Installation and Maintenance Tips
- Choose the Right Location: Select a location for your water feature that receives adequate sunlight and is easily accessible for maintenance. Consider the proximity to electrical outlets if your water feature requires power.
- Ensure Proper Water Flow: Make sure your water feature has a reliable water source and proper drainage. Check for leaks and ensure the water flow is consistent and smooth.
- Use Quality Materials: Choose durable and weather-resistant materials for your water feature. This will ensure it lasts longer and requires less maintenance.
- Regular Cleaning: Clean your water feature regularly to prevent the buildup of algae, debris, and bacteria. Use a scrub brush and mild detergent, and rinse thoroughly with clean water.
- Winter Care: In colder climates, take steps to protect your water feature during the winter months. Drain and cover fountains and ponds, or use a pond heater to prevent the water from freezing.
By adding a water feature to your garden, you can create a serene and beautiful outdoor space that you can enjoy year-round.
Outdoor Furniture
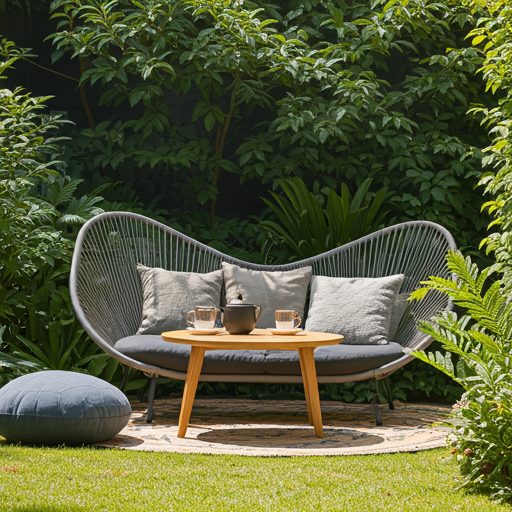
Outdoor furniture is essential for creating a comfortable and inviting garden space where you can relax, entertain, and enjoy the beauty of your surroundings. Here are some tips and ideas for choosing and arranging outdoor furniture in your garden.
Choosing Stylish and Comfortable Seating
- Material Considerations: Outdoor furniture comes in various materials, each with its own advantages and maintenance requirements. Common materials include wood, metal, wicker, and plastic. Choose a material that suits your garden’s style and your maintenance preferences.
- Comfort and Durability: Look for furniture that is both comfortable and durable. Cushions and padding can enhance comfort, while weather-resistant materials ensure longevity. Consider investing in high-quality pieces that will withstand the elements.
- Style and Design: Choose furniture that complements your garden’s aesthetic. Whether you prefer a modern, rustic, or traditional look, there are plenty of options available. Mix and match different pieces to create a cohesive and stylish outdoor space.
Ideas for Arranging Furniture
- Create Zones: Divide your garden into different zones for various activities, such as dining, lounging, and entertaining. Use furniture to define these areas and create a sense of structure.
- Consider Traffic Flow: Arrange furniture in a way that allows for easy movement and access. Avoid overcrowding and ensure there is enough space for people to walk around comfortably.
- Use Rugs and Accessories: Outdoor rugs, cushions, and accessories can add color and texture to your garden furniture. They can also help define different zones and create a cozy and inviting atmosphere.
Incorporate Shade: Provide shade for your seating areas with umbrellas, pergolas, or shade sails. This will make your garden more comfortable during hot weather and protect your furniture from sun damage.
- Add Lighting: Enhance your outdoor seating areas with lighting. String lights, lanterns, and solar-powered lights can create a cozy and inviting ambiance for evening gatherings.
- Use Multi-Functional Furniture: Consider using multi-functional furniture, such as benches with storage or tables that can be adjusted in height. This can help maximize space and add versatility to your garden.
Materials and Durability Considerations
- Wood: Wooden furniture adds a natural and timeless look to your garden. Teak, cedar, and eucalyptus are popular choices due to their durability and resistance to weather. Regular maintenance, such as sealing and staining, can help prolong the life of wooden furniture.
- Metal: Metal furniture, such as wrought iron or aluminum, is durable and can add a sleek and modern touch to your garden. Look for powder-coated finishes to prevent rust and corrosion. Metal furniture may require occasional touch-ups to maintain its appearance.
- Wicker: Wicker furniture, made from natural or synthetic materials, offers a classic and cozy look. Synthetic wicker is more weather-resistant and requires less maintenance than natural wicker. Regular cleaning and covering during harsh weather can help extend its lifespan.
- Plastic: Plastic furniture is lightweight, affordable, and easy to maintain. It comes in various styles and colors, making it a versatile option. However, it may not be as durable as other materials and can fade over time with prolonged sun exposure.
Tips for Maintaining Outdoor Furniture
- Regular Cleaning: Clean your outdoor furniture regularly to remove dirt, dust, and debris. Use mild soap and water for most materials, and avoid harsh chemicals that can damage the finish.
- Protective Covers: Use protective covers to shield your furniture from the elements when not in use. This can help prevent weather damage and prolong the life of your furniture.
- Store During Winter: If possible, store your outdoor furniture indoors during the winter months to protect it from harsh weather conditions. Alternatively, use heavy-duty covers and ensure the furniture is securely anchored.
- Inspect and Repair: Regularly inspect your furniture for any signs of wear or damage. Tighten loose screws, replace worn-out cushions, and touch up any chipped paint or rust spots.
By choosing stylish and comfortable outdoor furniture and arranging it thoughtfully, you can create a welcoming and functional garden space that you can enjoy year-round.
Artistic Pathways
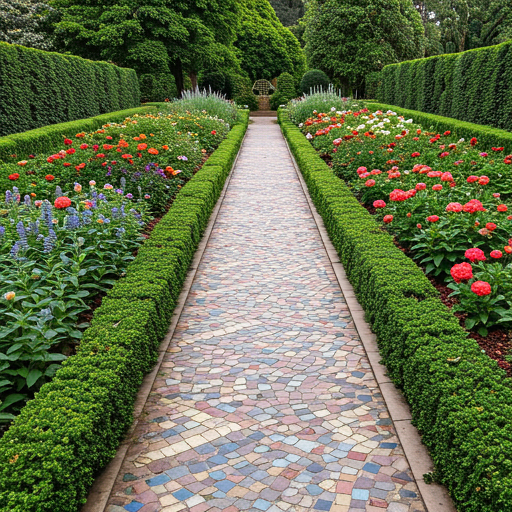
Creating artistic pathways in your garden can enhance its beauty and functionality. Pathways guide visitors through your garden, highlight key areas, and add a decorative element to your outdoor space. Here are some ideas and tips for designing and installing artistic pathways.
Creating Pathways with Mosaic Tiles, Stepping Stones, or Gravel
- Mosaic Tile Pathways: Mosaic tiles can create stunning and intricate designs for your garden pathways. You can use a variety of colors and patterns to create a unique and eye-catching look. Mosaic tiles are ideal for small sections of pathways or as decorative accents.
- Stepping Stones: Stepping stones are a versatile and easy-to-install option for garden pathways. They come in various shapes, sizes, and materials, such as concrete, stone, or wood. You can arrange them in a straight line, staggered pattern, or create a winding path.
- Gravel Pathways: Gravel is a cost-effective and low-maintenance option for garden pathways. It provides good drainage and can be used to create both straight and curved paths. Gravel comes in various colors and sizes, allowing you to customize the look of your pathway.
Design Tips for Functional and Aesthetic Pathways
- Plan the Layout: Before installing your pathway, plan the layout to ensure it connects key areas of your garden, such as seating areas, flower beds, and entrances. Consider the natural flow of movement and how visitors will navigate through your garden.
- Choose the Right Materials: Select materials that complement your garden’s style and theme. For example, natural stone or wood can create a rustic look, while mosaic tiles or concrete can add a modern touch.
- Incorporate Curves: Curved pathways can create a more natural and organic look in your garden. They can also add a sense of mystery and intrigue, encouraging visitors to explore further.
- Add Edging: Use edging materials, such as bricks, stones, or metal, to define the edges of your pathway. This helps keep the pathway materials in place and creates a clean and polished look.
- Consider Accessibility: Ensure your pathways are wide enough for comfortable walking and accessible for all visitors. Avoid steep slopes or uneven surfaces that can pose a tripping hazard.
DIY vs. Professional Installation
- DIY Pathways: Creating your own garden pathways can be a rewarding project that allows you to customize the design and materials. DIY pathways can be more affordable and give you the satisfaction of completing a project with your own hands. However, they may require more time, effort, and basic landscaping skills.
- Professional Installation: Hiring a professional to install your garden pathways can save you time and ensure a high-quality result. Professionals have the expertise and equipment to create durable and well-designed pathways. While it may be more expensive, professional installation can provide peace of mind and a polished finish.
Maintenance Tips for Garden Pathways
- Regular Cleaning: Keep your pathways clean by sweeping away leaves, dirt, and debris. This helps maintain their appearance and prevents the buildup of slippery materials.
- Weed Control: Regularly check for and remove weeds that may grow between the pathway materials. Use a weed barrier or apply a weed control solution to prevent weed growth.
- Repair and Replace: Inspect your pathways for any signs of damage, such as cracked tiles or loose stones. Repair or replace damaged materials promptly to maintain the pathway’s integrity and appearance.
- Seasonal Care: In colder climates, take steps to protect your pathways during the winter months. Remove snow and ice promptly to prevent slipping hazards and avoid using harsh chemicals that can damage the materials.
By creating artistic pathways in your garden, you can enhance its beauty and functionality, making it a more enjoyable and inviting space.
Garden Mirrors
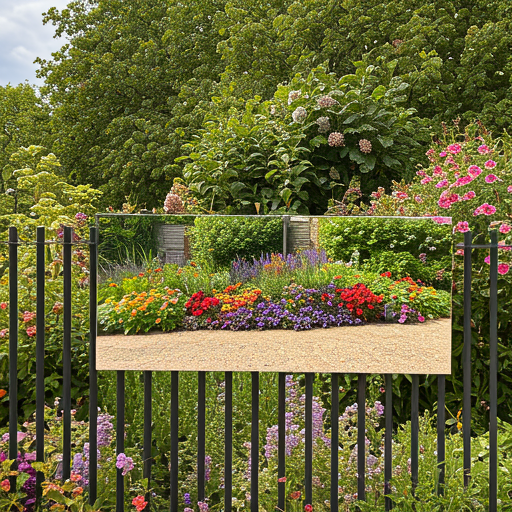
Using mirrors in your garden can create the illusion of space, add light, and enhance the overall aesthetic. Garden mirrors can reflect the beauty of your plants and create interesting visual effects. Here are some ideas and tips for incorporating mirrors into your garden décor.
Using Mirrors to Create the Illusion of Space
- Reflective Surfaces: Mirrors can make small gardens appear larger by reflecting light and creating the illusion of depth. Place mirrors strategically to reflect open spaces, pathways, or focal points.
- Double the Greenery: Position mirrors to reflect your plants and flowers, creating the illusion of more greenery. This can make your garden feel more lush and vibrant.
- Create Focal Points: Use mirrors to highlight specific areas of your garden, such as a seating area, water feature, or sculpture. This draws attention to these features and enhances their visual impact.
Placement Tips and Safety Considerations
- Strategic Placement: Place mirrors in areas where they can reflect light and create interesting visual effects. Avoid placing them in direct sunlight, as this can create glare and potentially start fires.
- Secure Installation: Ensure mirrors are securely mounted to prevent them from falling or breaking. Use sturdy brackets or frames designed for outdoor use.
- Weather-Resistant Materials: Choose mirrors made from weather-resistant materials, such as acrylic or specially treated glass, to withstand the elements. Avoid using indoor mirrors that may not be durable enough for outdoor conditions.
- Safety First: Be mindful of the placement of mirrors to avoid creating hazards. Ensure they are not positioned in a way that could cause birds to fly into them or create blinding reflections for visitors.
Types of Mirrors Suitable for Outdoor Use
- Acrylic Mirrors: Acrylic mirrors are lightweight, shatter-resistant, and weather-resistant, making them ideal for outdoor use. They can be cut into various shapes and sizes to fit your garden’s design.
- Glass Mirrors: Specially treated glass mirrors designed for outdoor use can add a touch of elegance to your garden. They are more durable than regular glass mirrors and can withstand the elements.
- Mirrored Panels: Mirrored panels can be used to create larger reflective surfaces in your garden. They can be mounted on walls, fences, or trellises to create a dramatic effect.
- Decorative Mirrors: Decorative mirrors with ornate frames or unique shapes can add a touch of artistry to your garden. Look for mirrors with weather-resistant frames that complement your garden’s style.
By incorporating mirrors into your garden décor, you can create the illusion of space, add light, and enhance the overall aesthetic of your outdoor space.
Hanging Baskets
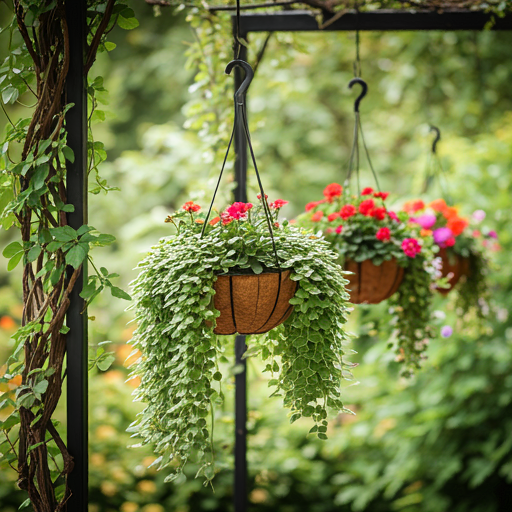
Hanging baskets are a versatile and attractive way to add greenery and color to your garden. They can be used to decorate walls, fences, pergolas, and other vertical structures. Here are some tips and ideas for using hanging baskets in your garden décor.
Benefits of Hanging Baskets in Garden Décor
- Space-Saving: Hanging baskets are perfect for small gardens or areas with limited ground space. They allow you to grow plants vertically, making the most of available space.
- Versatility: Hanging baskets can be used in various locations, such as balconies, patios, and porches. They can also be moved easily to change the look of your garden.
- Aesthetic Appeal: Hanging baskets add height and dimension to your garden, creating a layered and dynamic look. They can be filled with a variety of plants to add color and texture.
Plant Choices for Hanging Baskets
- Flowers: Choose flowering plants like petunias, geraniums, and fuchsias for a burst of color. These plants are well-suited for hanging baskets and can create a vibrant display.
- Herbs: Herbs like basil, thyme, and parsley are perfect for hanging baskets. They are compact, easy to grow, and can be harvested regularly for cooking.
- Succulents: Succulents are low-maintenance plants that thrive in hanging baskets. They come in various shapes and colors, adding visual interest to your garden.
- Trailing Plants: Trailing plants like ivy, lobelia, and trailing petunias can create a cascading effect in hanging baskets. They add a lush and full look to your garden décor.
Maintenance and Watering Tips
- Regular Watering: Hanging baskets can dry out quickly, so regular watering is essential. Check the soil moisture daily and water as needed to keep the soil consistently moist but not waterlogged.
- Fertilizing: Feed your hanging basket plants with a balanced liquid fertilizer every two weeks during the growing season. This provides the necessary nutrients for healthy growth and abundant blooms.
- Pruning and Deadheading: Regularly prune and deadhead your plants to encourage new growth and prolong blooming. Remove any dead or yellowing leaves to keep the plants looking fresh and healthy.
- Rotate Baskets: Rotate your hanging baskets every few weeks to ensure even light exposure and growth. This helps prevent the plants from becoming lopsided or leggy.
By incorporating hanging baskets into your garden décor, you can add height, color, and texture to your outdoor space, creating a dynamic and visually appealing garden.
Garden Arches
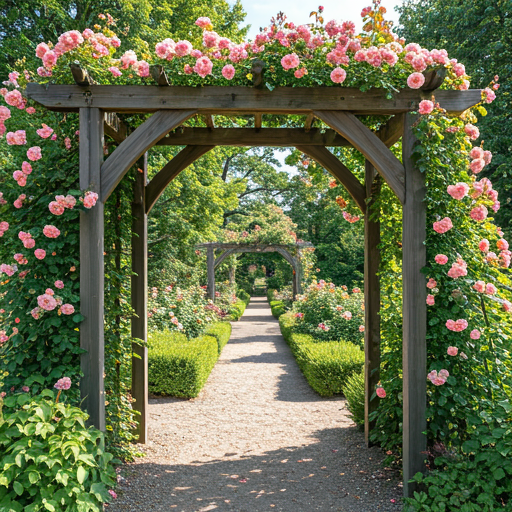
Garden arches are a beautiful and functional addition to any garden. They can create stunning entryways, support climbing plants, and add vertical interest to your garden design. Here are some ideas and tips for incorporating garden arches into your garden décor.
Adding Arches to Create Focal Points and Entryways
- Entryway Arches: Use garden arches to create inviting entryways to different areas of your garden. They can frame pathways, gates, or seating areas, adding a sense of structure and elegance.
- Focal Points: Place arches strategically to create focal points in your garden. They can draw attention to specific areas, such as flower beds, water features, or sculptures.
- Connecting Spaces: Use arches to connect different garden zones, creating a cohesive and harmonious design. They can guide visitors through your garden and enhance the overall flow.
Design Ideas and Materials
- Wooden Arches: Wooden arches add a natural and rustic look to your garden. They can be left untreated for a weathered appearance or painted to match your garden’s color scheme. Cedar and teak are popular choices for their durability and resistance to decay.
- Metal Arches: Metal arches, such as those made from wrought iron or steel, can add a sleek and modern touch to your garden. They are sturdy and can support heavy climbing plants. Look for powder-coated finishes to prevent rust and corrosion.
- Vinyl Arches: Vinyl arches are low-maintenance and weather-resistant. They come in various styles and colors, making them a versatile option for any garden. Vinyl arches are lightweight and easy to install.
- Living Arches: Create living arches by training climbing plants over a simple frame. This can be done with materials like bamboo, wire, or metal. Living arches can create a lush and green entryway that changes with the seasons.
Planting Around Garden Arches
- Climbing Roses: Climbing roses are a classic choice for garden arches. They produce abundant blooms and can create a romantic and fragrant entryway.
- Clematis: Clematis is a versatile climber that comes in various colors and bloom times. It can be trained to grow over arches, adding a splash of color and texture.
- Wisteria: Wisteria is known for its cascading clusters of fragrant flowers. It can create a dramatic and enchanting effect when grown over garden arches.
- Honeysuckle: Honeysuckle is a fast-growing climber with sweetly scented flowers. It can quickly cover garden arches, providing a lush and fragrant display.
- Ivy: Ivy is a hardy and evergreen climber that can create a dense and green covering for garden arches. It is low-maintenance and can thrive in various conditions.
Installation Tips
- Secure Anchoring: Ensure your garden arch is securely anchored in the ground to prevent it from tipping over. Use concrete or metal stakes to stabilize the arch.
- Proper Spacing: Place the arch in a location that allows enough space for the plants to grow and spread. Consider the mature size of the plants when planning the placement.
- Regular Maintenance: Regularly check the arch and plants for any signs of damage or overgrowth. Prune the plants as needed to maintain their shape and prevent them from becoming too heavy for the arch.
By adding garden arches, you can create beautiful entryways and focal points that enhance the overall design and functionality of your garden.
Seasonal Decorations
Seasonal decorations can add a festive and dynamic element to your garden, allowing you to celebrate different times of the year with style. Here are some ideas and tips for incorporating seasonal decorations into your garden décor.
Ideas for Decorating Your Garden According to the Seasons
- Spring: Celebrate the arrival of spring with fresh flowers, pastel colors, and garden ornaments like bunnies and butterflies. Plant spring bulbs like tulips and daffodils for a burst of color.
- Summer: Embrace the warmth of summer with vibrant flowers, outdoor lighting, and garden furniture. Add tropical plants, colorful cushions, and lanterns to create a lively and inviting atmosphere.
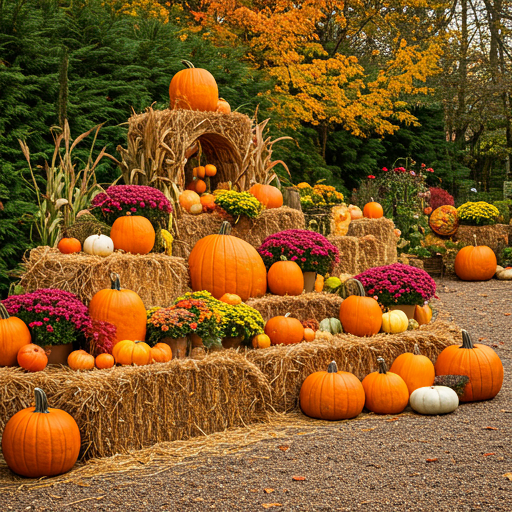
- Autumn: Decorate your garden with autumnal colors like orange, red, and yellow. Use pumpkins, gourds, and fall foliage to create seasonal displays. Add cozy elements like blankets and fire pits for cooler evenings.
- Winter: Add festive touches to your garden with holiday lights, wreaths, and evergreen plants. Use decorations like snowflakes, reindeer, and ornaments to create a winter wonderland. Consider adding a bird feeder to support wildlife during the colder months.
Tips for Easy-to-Change Seasonal Décor
- Use Portable Decorations: Choose decorations that are easy to move and change, such as potted plants, lanterns, and garden ornaments. This allows you to update your garden décor with minimal effort.
- Focus on Key Areas: Concentrate your seasonal decorations in key areas of your garden, such as entryways, seating areas, and focal points. This creates a cohesive and impactful display.
- Incorporate Natural Elements: Use natural elements like flowers, foliage, and branches to create seasonal displays. This adds an organic and authentic touch to your garden décor.
- Store Decorations Properly: Store your seasonal decorations properly when not in use to keep them in good condition. Use labeled bins or boxes to organize and protect your decorations.
Examples of Seasonal Decorations
- Spring: Flower wreaths, pastel-colored pots, butterfly stakes, and garden flags.
- Summer: String lights, tropical plants, colorful cushions, and outdoor rugs.
- Autumn: Pumpkin displays, fall foliage garlands, scarecrows, and hay bales.
- Winter: Holiday lights, evergreen wreaths, snowflake ornaments, and bird feeders.
By incorporating seasonal decorations, you can celebrate the changing seasons and keep your garden looking fresh and festive throughout the year.
Garden Signs
Garden signs are a fun and functional way to add personality and organization to your garden. They can be used to label plants, provide information, or simply add a decorative touch. Here are some ideas and tips for using garden signs in your garden décor.
Using Signs to Add Personality and Function
- Plant Labels: Use garden signs to label your plants and herbs. This helps you keep track of what you have planted and provides useful information for visitors.
- Inspirational Quotes: Add signs with inspirational quotes or messages to create a positive and uplifting atmosphere in your garden. Choose quotes that resonate with you and reflect your garden’s theme.
- Directional Signs: Use directional signs to guide visitors through your garden. This can be especially useful in larger gardens or those with multiple zones.
- Decorative Signs: Add decorative signs with fun designs or images to enhance your garden’s aesthetic. These can be whimsical, rustic, or modern, depending on your style.
DIY Sign-Making Ideas
- Wooden Signs: Use reclaimed wood or wooden planks to create rustic garden signs. Paint or stain the wood and use stencils or freehand writing to add the text.
- Slate Signs: Slate is a durable and weather-resistant material that can be used for garden signs. Use a white paint pen or chalk marker to write on the slate.
- Metal Signs: Metal signs can add a sleek and modern touch to your garden. Use metal sheets or repurpose old metal objects, and use a metal engraver or paint to add the text.
- Clay Signs: Create your own clay signs using air-dry clay or polymer clay. Roll out the clay, cut it into shapes, and use stamps or a toothpick to write the text. Once dry, paint or seal the signs.
Inspirational Quotes and Messages for Garden Signs
- “Bloom where you are planted.”
- “Gardeners know all the dirt.”
- “Welcome to my garden.”
- “Plant dreams, pull weeds, and grow a happy life.”
- “Life begins the day you start a garden.”
By adding garden signs, you can personalize your garden and make it more inviting and organized. They can serve both practical and decorative purposes, enhancing the overall charm of your outdoor space.
FAQ Section
For small spaces, consider vertical gardens, hanging baskets, and compact furniture. Vertical gardens maximize space by allowing you to grow plants upwards, while hanging baskets add greenery without taking up ground space. Compact furniture, such as foldable chairs and tables, can be easily stored when not in use.
To make your garden décor eco-friendly, use recycled materials for planters and decorations. Choose sustainable and natural materials like wood, stone, and metal. Incorporate native plants that require less water and maintenance, and use solar-powered lights to reduce energy consumption.
For beginners, start with simple projects like DIY plant labels, bird baths, and easy-to-install lighting. These projects are straightforward and can significantly enhance your garden’s appearance. Choose low-maintenance plants and decorations that require minimal upkeep.
Regular maintenance is key to keeping your garden décor items in good condition. Clean them regularly to remove dirt and debris, and check for any signs of wear or damage. Use protective covers for furniture and decorations during harsh weather, and store delicate items indoors during the winter months.
You can find unique garden décor items at local garden centers, home improvement stores, and online retailers. Websites like Etsy offer handmade and one-of-a-kind pieces from independent sellers. Thrift stores and flea markets are also great places to find vintage and recycled items.
Conclusion
Enhancing your garden with creative décor options can transform it into a beautiful and inviting space that reflects your personality and style. Whether you choose whimsical sculptures, elegant lighting, or recycled planters, there are countless ways to add charm and character to your garden. By incorporating these ideas and tips, you can create a garden that you and your visitors will enjoy year-round. Don’t be afraid to experiment and let your creativity shine. Happy gardening!