
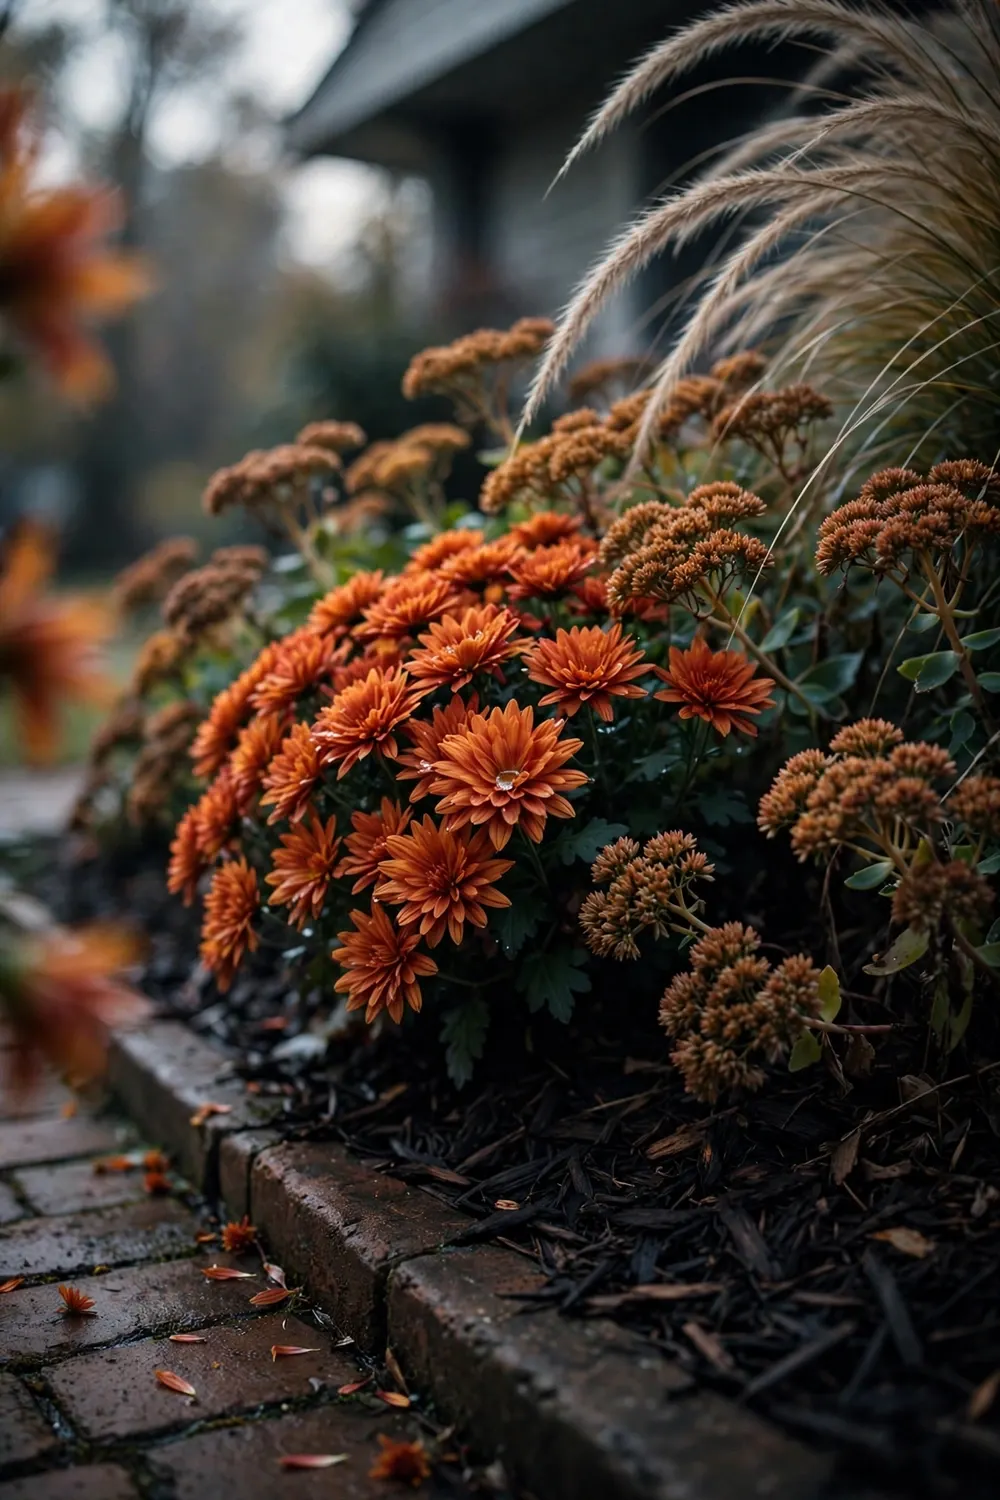

Stand on the curb and spend 10 minutes photographing your front garden at 4 p.m. That is a fall garden design: a plan that makes the front yard carry color, texture, and structure from September to first frost, judged from the street where most of the looking happens. The rest of this page is 21 ideas, from the first anchor shrub to the last string light.
October is the working month. Set woody plants 4 to 6 weeks before your average first frost date so roots establish before the ground freezes, per Garden Design’s fall landscaping guide. Take the curb photographs this week. Move containers and decor next.
For plant picks, two companions go deeper: the fall blooming perennials roster for color and the fast-growing shrubs to plant in fall list for anchors and structure. This page is about placement: where each plant goes, which principle puts it there, and what the curb sees. For the soil tests and compost behind the design, the fall gardening tips checklist covers the task list.
The Principles Behind the 21 Ideas
Every idea below names the principle it uses. The principles come from designers who think in them all season. Dyck Arboretum’s six elements of a beautiful fall garden builds the fall show on texture, seedheads, layers, lines, fall color, and light. The Gardener’s Path fall garden design guide frames the same job as color, texture, shape, and light. Learn the seven below once. Each numbered idea cites one.
Use the legend as a checklist, not a textbook. When a border looks wrong and you cannot say why, run down the seven. Usually one is missing. Most failing fall gardens are short on structure or light, not on plants. Walk the yard with the legend in hand before you buy a single plant.
| Principle | What It Controls | The Fall Payoff |
|---|---|---|
| Color | Which hues dominate, and which one cools them | A palette that reads as one decision from the curb |
| Texture | Fine against coarse: grass blades, seedheads, bold leaves | Beds that hold interest after the flowers fade |
| Shape | Silhouettes: vase, mound, spike, arch | Structure that survives leaf drop |
| Light | Where sun and lamps hit, morning and evening | Backlit grasses, glowing foliage, a lit path home |
| Structure | Evergreens and bones that stay through winter | A garden that still looks designed in January |
| Layering | Tall behind, middle in the center, low in front | Every plant visible, nothing swallowed |
| Line | Curves, edges, and the route the path takes | A small yard that feels larger than it is |
Read the table once, then work the groups in order. Palette first, because every later choice answers to it. Then foliage, then the bones. Path, porch, and beds after that. Light last: it only works once there is something worth lighting.
Color Palettes
Color hits first and from farthest away. Get the palette right and every later idea has something to answer to.
1. Commit to One Dominant Hue
Pick one hue and let it own two-thirds of the visible border. Gold, rust, or plum. That is the color principle: one dominant hue reads as a decision from the curb, and three equal hues read as leftovers from the nursery sale.

Warm hues do the carrying in fall. The fall landscaping guide linked above pairs silvery or blue foliage with warm reds, yellows, and oranges for contrast, which means the warm side has to dominate before the cool side can contrast against it. Count the plants in your curb photograph. If no single color family wins, the palette has no winner.
Do the audit with shears in hand. Cut one stem of every color in the border, lay them on the path, and pull out the color family with the fewest stems. What stays is the palette. Buy only inside it for the rest of the season. Photograph the laid-out stems before you discard the losers; the photo becomes next year’s shopping list.
Skip the one-of-every-color border. Equal parts red, yellow, purple, and pink is not a palette. It is noise at 10 m. Commit to the hue, then spend the cool accent.
2. Cool the Warm Border With Blue Evergreens
Set one blue or silver evergreen behind every drift of warm fall color. That is color contrast: the cool anchor makes the warm side look warmer.

The fall landscaping guide linked above pairs silvery lamb’s ear and artemisia, or blue ‘Blue Star’ juniper and Colorado blue spruce, with plants in warmer hues of red, yellow, and orange. The cool plant sits still while the warm foliage turns, which keeps the bed composed in November after the maples drop.
Set the evergreen 60 to 90 cm behind the warm drift so the two layers read separately from the curb. Water the new shrub at planting and mulch the root zone. The contrast needs one full season to settle, and the payoff starts the second fall.
Skip the all-warm border. Red, orange, and gold with nothing cool behind them blur into one hot mass by mid-October. One blue spruce fixes it.
3. Thread Pink Through the Autumn Border
Add one pink note to a warm border: a pink aster, a pink-tinged grass plume, a pink pumpkin by the steps. That is the color principle working by surprise. One off-palette note proves the palette was chosen.

The fall landscaping guide linked above suggests adding pink to a fall garden for an unexpected twist against the standard warm colors. Pink reads cooler than gold and warmer than blue, so it bridges the two sides of the border without belonging to either.
One pink aster in a 30 cm pot by the steps does the job. Or tuck three pink pumpkins among gold mums. Keep the pink inside one container or one drift so it reads as a note, not a section.
Skip the pink-everywhere border. One note is a decision. Five notes are a different palette. Keep it to a single drift or a single pot.
Foliage and Texture
Flowers fade. Foliage and seedheads carry the garden through the long middle of fall, and texture is what keeps them interesting up close.
4. Stand Coneflower Seedheads Against Red Grass Stems
Leave coneflower stems standing and plant little bluestem behind them. That is texture: dark brown coneflower seedheads punch out of slender red stems.
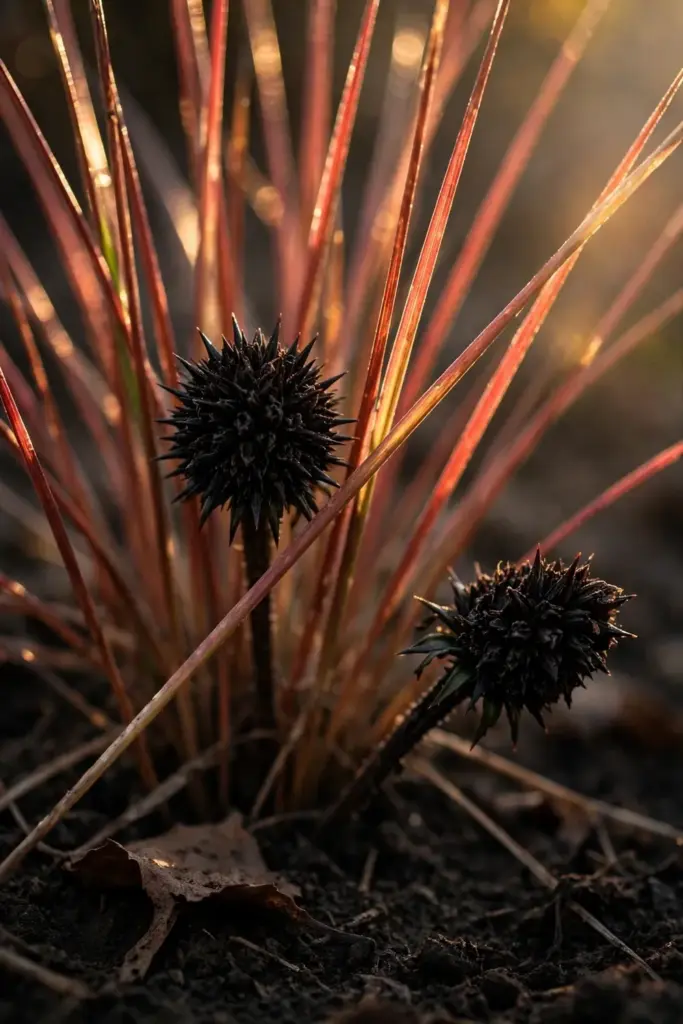
Dyck Arboretum’s six-elements guide pairs exactly this combination, noting that grasses provide texture and movement while the dark seedheads stand out in the red stems. The pairing peaks after the petals fall, which is when most borders go flat.
Plant the bluestem in groups of three behind every five coneflowers. Cut nothing in fall. In March, cut the whole planting to 15 cm and compost the debris before new growth starts.
Cut the seedheads down in October and the texture leaves with them. The goldfinches lose their seed source too. Leave the stems standing until spring.
5. Set Feathery Grass Against Bold Sedum
Plant a feathery ornamental grass next to a bold-leafed sedum. That is texture contrast: fine against coarse, and the eye reads both more clearly.

The fall landscaping guide linked above recommends pairing feathery grasses with bold-leafed sedum, and sets the finely textured foliage of Arkansas blue star, which turns brilliant golden yellow in fall, against the oval red leaves of burning bush. Two textures side by side make each one louder.
Set the grass 45 cm from the sedum crown so the fine blades overlap the bold leaves without swallowing them. One grass and one sedum, repeated three times along the border, makes the rhythm.
Skip the fine-on-fine bed. Three grasses and a fern read as one green blur from the curb. One bold leaf per drift is the minimum.
6. Keep One Amsonia for the Butter-Yellow Finale
Give one Amsonia hubrichtii a front-row seat. That is the color principle with a texture bonus: threadlike blue-green foliage all summer, butter yellow in fall.

Dyck Arboretum’s guide calls Amsonia hubrichtii a favorite for multiple seasons of interest as it turns butter yellow. The plant does its work without intervention and still delivers the last bright note before frost.
Plant it where the low sun hits from the side. Backlit butter-yellow foliage glows, while front-lit it looks flat. The plant settles into most garden soils and asks for no fall care beyond leaving it alone.
Cut it back in late summer and you remove the foliage that would have turned. The show shrinks to a stump. Leave it standing.
Structure and Evergreens
Structure is the part of the design that works in January. Plant it in October while the soil is still workable.
7. Give the Border One Vase-Shaped Statement Tree
Plant one vase-shaped tree where the curb view lands first. That is structure: a single strong silhouette organizes everything around it.
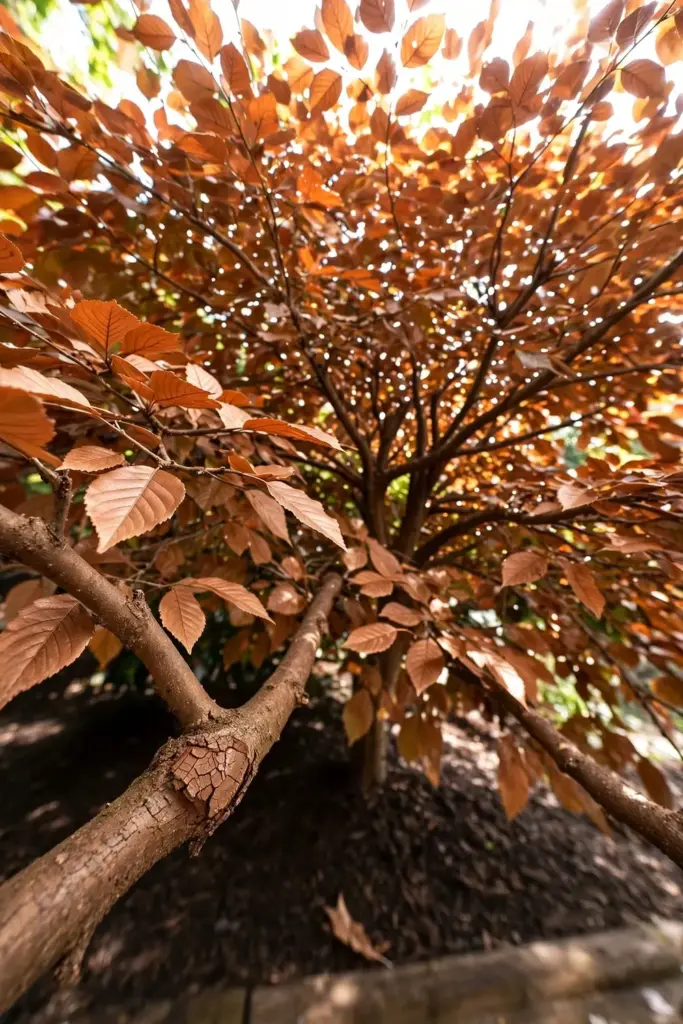
The fall landscaping guide linked above builds structure from a vase-shaped ‘Sango Kaku’ Japanese maple paired with a mounding Virginia sweetspire and spiky ‘Prairie Winds’ little bluestem. Vase, mound, spike. Three shapes, one composition, and the tree’s branching holds the design after the leaves drop.
Dig the hole twice as wide as the root ball and no deeper. Set the tree so the root flare sits at grade. Stake only if the site is windy, and remove the stake after one season.
Skip the three matching trees in a row. A row of identical silhouettes is a fence, not a design. One statement, then supporting shapes.
8. Hold the Winter Line With Broadleaf Evergreens
Anchor each bed with a broadleaf evergreen that holds its leaves through winter. That is structure for the months after the color ends.

The fall landscaping guide linked above recommends conifers and broadleaf evergreens for year-round color and structure, noting that heavenly bamboo, pigsqueak, and coral bells shift hue in the cold. The bed keeps its bones when the perennials collapse.
Place the evergreen at the bed’s corners or at both ends of a long border. Two anchors frame the bed the way bookends frame a shelf. Water through the first fall and mulch the root zone. After that, they carry themselves.
Design only for October and the garden looks abandoned by January. The evergreen is the part of the design that works while you are indoors.
9. Step the Canopy Down in Three Layers
Put the tallest plants at the back and step down toward the sun in three bands. That is layering: canopy, middle, ground.
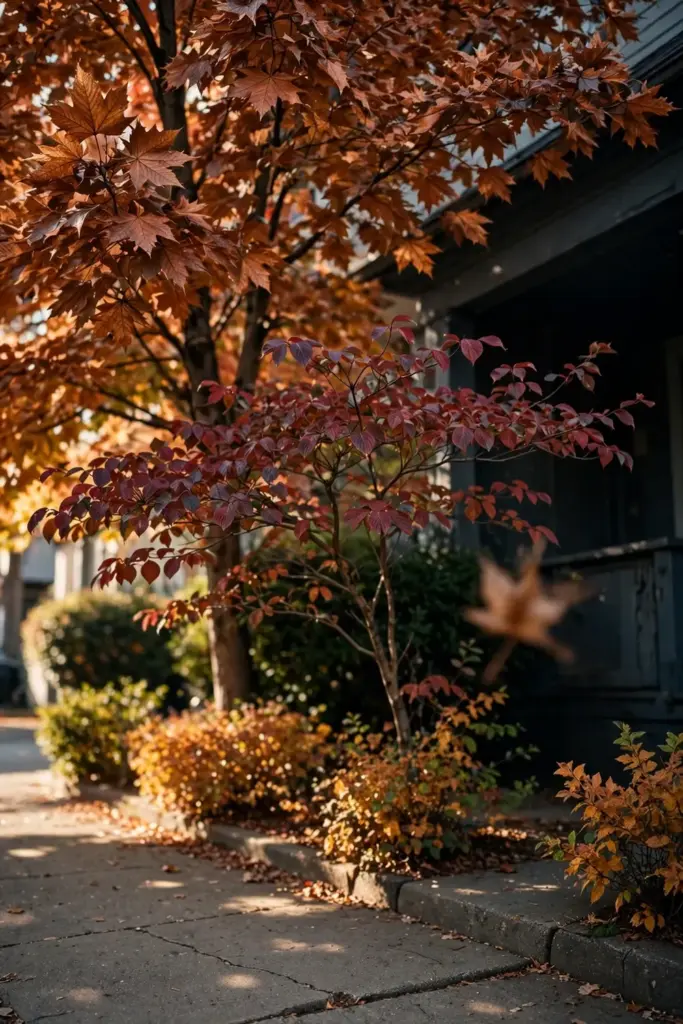
Dyck Arboretum’s guide steps maples and oaks at the back down to dogwoods, viburnums, serviceberries, and crabapples in the middle, with wildflowers, grasses, and shorter shrubs like sumac spreading into the sunlight in front. Each layer gets light. Nothing swallows anything.
Measure the bed’s depth and divide it into three bands. Back band: the tallest plants. Front band: the shortest. Anything that outgrows its band moves in spring. Shearing a plant into submission every year is a maintenance contract you did not sign.
Plant tall in front and the back half of the bed disappears. Every plant behind a tall grass is invisible from the curb. Tall goes back.
Paths and Sightlines
The path decides what gets seen and in what order. Design the route before you design the planting.
10. Curve the Path to Borrow Extra Space
Bend the path in one gentle curve instead of running it straight. That is the line principle: a curve suggests the garden continues past what the eye can see.
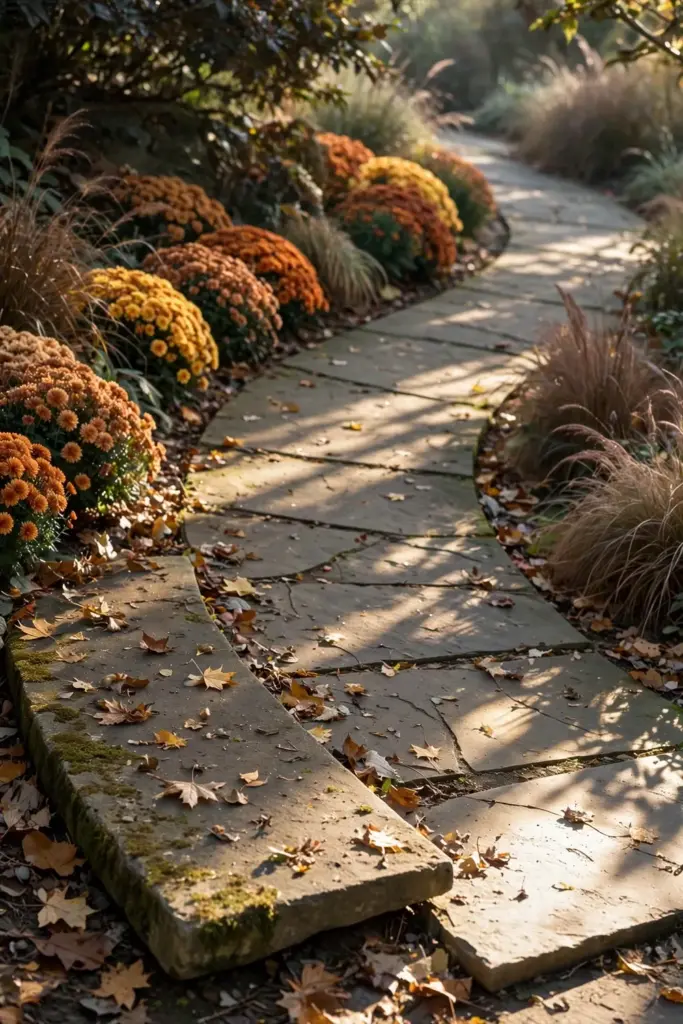
Dyck Arboretum’s guide recommends undulating borders over straight lines, noting that curves give the illusion of extra space while drawing the eye along the border. Edge the curve with ‘October Skies’ aromatic aster or a short grass like Bouteloua ‘Blonde Ambition’ for the full effect.
Lay a garden hose on the ground and walk the curve before you dig. The bend should hide at least part of the destination. Edging holds the line; without it the lawn reclaims the curve by spring.
Run the path dead straight and the whole garden reveals itself in one glance. The eye arrives and leaves. One curve buys a second look.
11. Frame the View Toward a Single Focal Point
Point the path at one thing worth looking at: a bench, an arbor, a stone lantern. That is the focal-point principle. The path is the arrow.
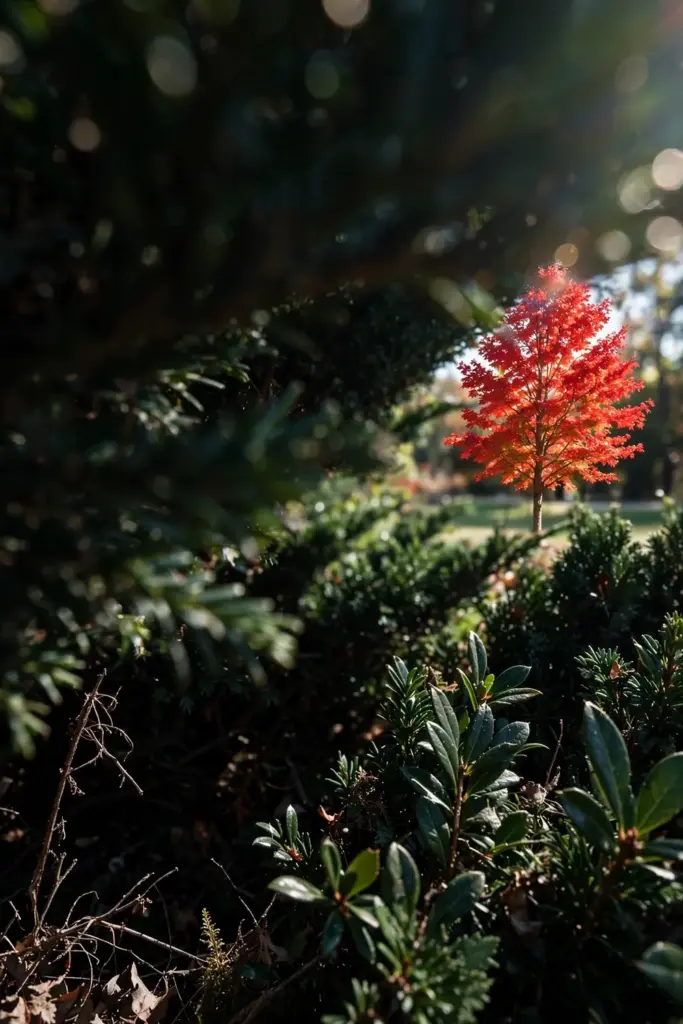
Dyck Arboretum’s guide frames views with a narrow swath of lawn flanked by perennials and shrubs on either side, leading the eye to a bench or a piece of art. The planting on both sides narrows the view the way a hallway narrows a room.
The focal point has to earn the sightline: a bench with a view back at the house, an arbor with a vine, a stone lantern with moss. Size it to the garden. A bench lost in a big yard is a rumor, not a destination.
Aim the path at the compost bin and the design fails at its best moment. Walk the route before you plant. The focal point earns the straightest sightline.
12. Darken the Mulch Frame Around Bright Beds
Spread fresh dark mulch under the fall color and keep it off the foliage. That is color contrast at ground level: dark mulch makes gold and rust look brighter.
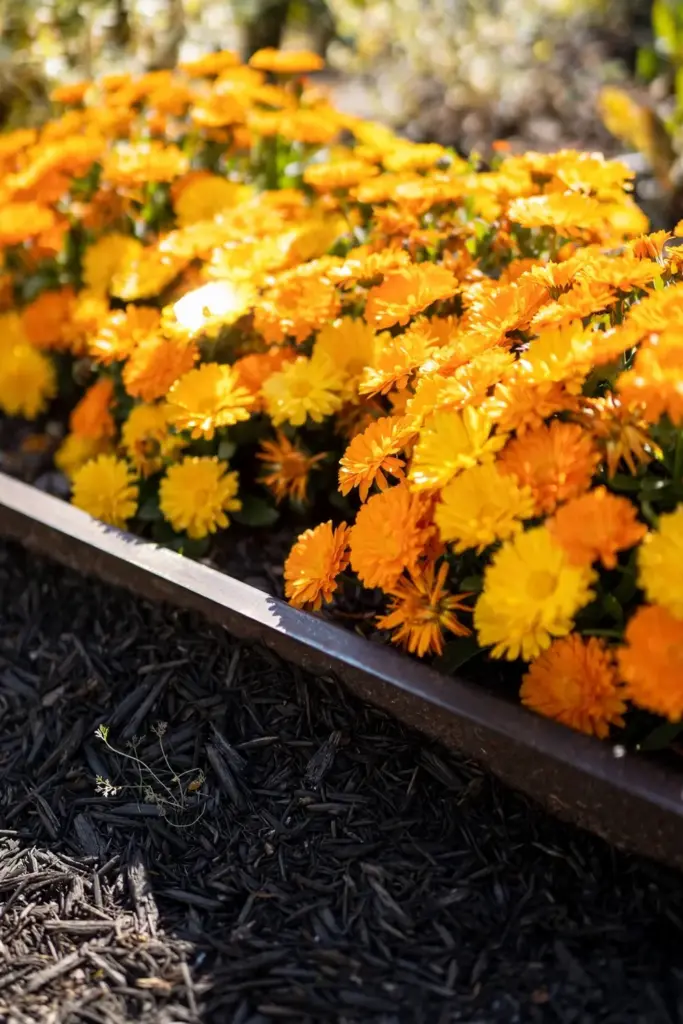
The fall landscaping guide linked above advises mulching before the ground freezes for extra winter protection. The design bonus comes free: a dark frame around bright beds reads as intentional, the way a mat frames a photograph.
Spread 7 to 8 cm of dark bark mulch, keeping it 5 cm clear of stems and trunks. The frame should read as a clean edge from the curb. Top it up once, in October, and it holds through winter.
Leave the soil bare and pale, and the border’s edge dissolves into the lawn. The color has nowhere to start. Mulch draws the line.
Containers and the Porch
The porch is the close-up. Containers work at arm’s length, so every shape and color choice shows.
13. Build Each Pot in Thriller, Filler, Spiller
Give every fall pot three shapes: one tall thriller, one mounding filler, one trailing spiller. That is the shape principle in a 40 cm pot.
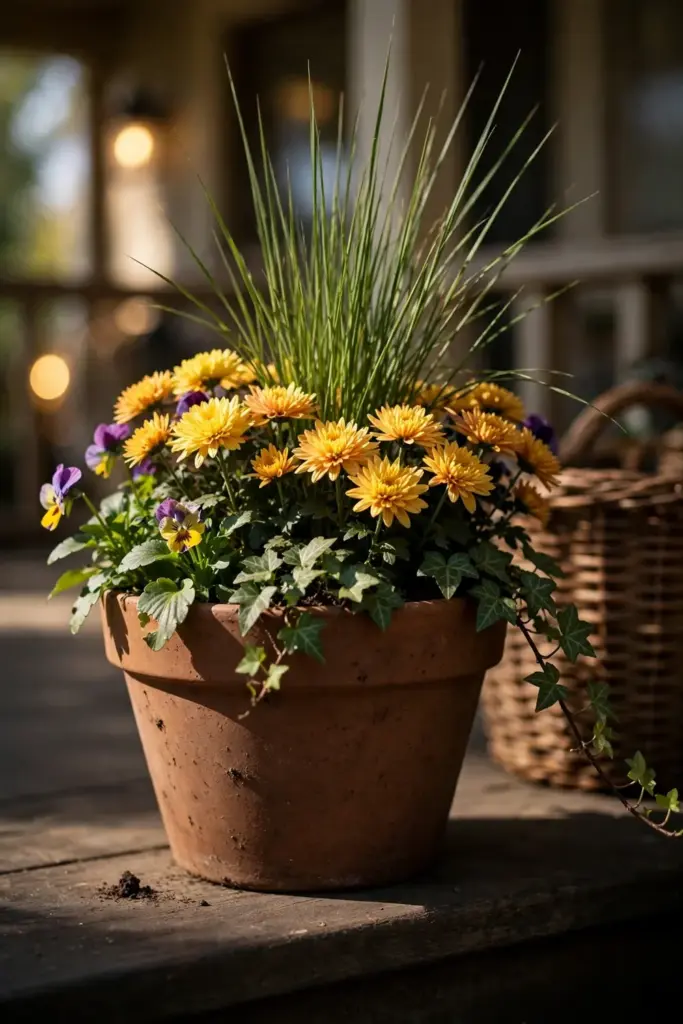
The fall landscaping guide linked above builds fall containers from a tall ornamental grass thriller, a bushy mum or aster filler, and a creeping Jenny spiller, and recommends grouping containers together for greater visual impact. One pot with three shapes beats three pots with one shape each.
Use a pot at least 35 cm wide. Three shapes need elbow room. Thriller goes in the center or at the back, filler around it, spiller over the edge. Water until it drains from the bottom; fall pots dry slower than summer ones.
Plant three mums at the same height and the pot looks like a ball on a stick. Height difference is the whole design. Skip the flat pot.
14. Flank the Door With a Matched Evergreen Pair
Set two identical evergreen pots, one on each side of the front door. That is symmetry: the pair tells visitors the house is cared for before they knock.
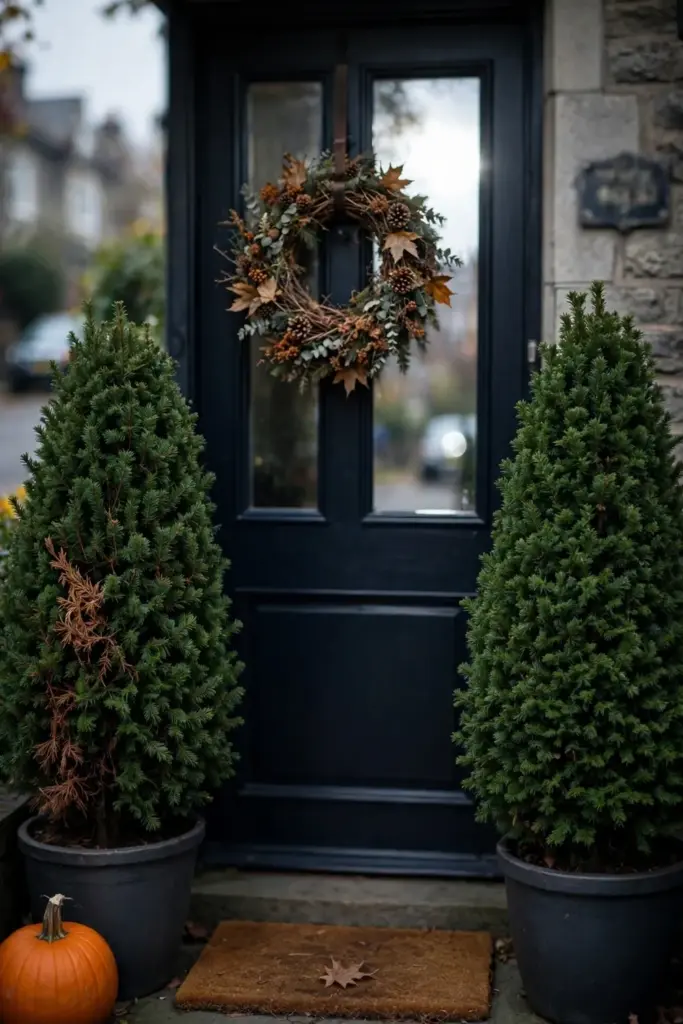
The fall landscaping guide linked above places large decorative containers on either side of the front door planted with evergreens such as boxwood or holly, dressed with twinkling lights for a display that runs through winter. The pair outlasts every mum by months.
Choose pots 40 cm or wider so the pair reads from the street. Boxwood or holly, the same cultivar on both sides. Wrap the lights in late October and leave them through winter; the pair then works two seasons.
Use two different pots and the symmetry breaks. The eye reads mismatch as accident. Match the pots, match the plants, then add the lights.
15. Plant the Pumpkins Into the Border, Not Beside It
Nestle pumpkins and gourds among the plants instead of lining them on the steps. That is color placed where the garden already works.
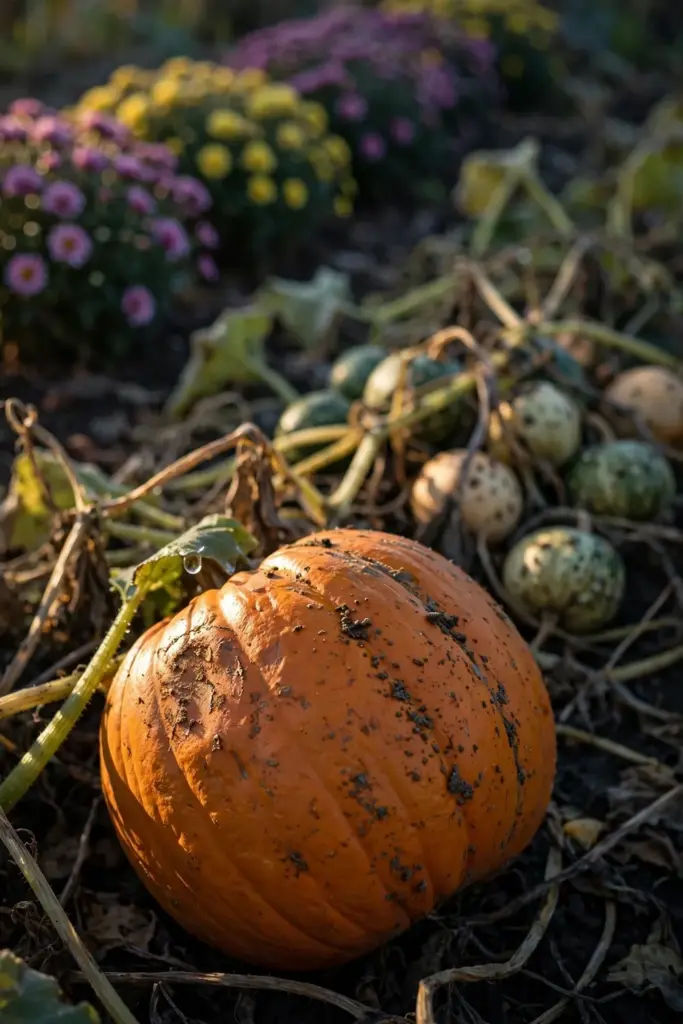
The fall landscaping guide linked above intersperses potted mums and dried cornstalks through the front-yard border rather than isolating them on the porch. A pumpkin sitting in mulch among asters looks harvested. A pumpkin alone on concrete looks stored.
Set each pumpkin on a flat stone or a tile so the bottom stays dry. Tuck them where the mulch shows between plants. Three per bed is plenty; the eye counts to three and stops.
Line twelve pumpkins on the steps and the porch becomes a farm stand. Three pumpkins in the bed beat twelve on the stairs.
Cottage Beds
Cottage beds are where the plant lists meet the design principles. Repetition turns a collection into a composition.
16. Plant Asters in Drifts of Five or More
Plant asters in drifts of five or more, never in singles. That is repetition: one plant repeated reads as a design choice, and one plant alone reads as a leftover.

The fall landscaping guide linked above plants ornamental grasses, blue star, and asters in drifts for greater visual impact. Buy five of one thing instead of one of five things. The drift shows from the street.
Space the five plants 30 to 40 cm apart so they knit into one mass by October. Odd numbers read as natural; even numbers read as soldiers. Water at planting, then leave them to the rain.
Dot single asters through the bed and each one disappears. Repetition is the cheapest design tool in the garden. Skip the polka dots.
17. Leave Seedheads Standing for the Finches
Leave black-eyed Susan and coneflower seedheads standing through winter. That is structure with a second job: the seedheads feed birds after the color ends.

The fall landscaping guide linked above notes that black-eyed Susan and purple coneflower seed feed chickadees, sparrows, and goldfinches, while winterberry, crabapple, viburnum, chokeberry, and dogwood berries feed a wide range of wildlife. The winter garden stays alive in both senses.
The one exception: cut down anything diseased. Mildewed foliage harbors next year’s trouble. Healthy stems stay. Mark the clumps with a short stake so spring cleanup does not scalp the crowns.
Cut everything to the ground in October and the bed goes silent. Bare soil in January is a design failure and a food failure. Leave the stems.
18. Dress the Trellis in Virginia Creeper
Train Virginia creeper or Boston ivy up the trellis, arbor, or fence. That is vertical interest: the design gains a third dimension for the price of a vine.

The fall landscaping guide linked above uses vines with fall color on trellises and arbors along borders, patios, and buildings. A flat bed with one vertical flame behind it reads twice as deep.
Plant the vine 30 cm from the trellis base and lean the stems toward the support. Tie loosely with twine, not wire. One growing season covers a 2 m trellis; prune in late winter to keep it off the gutters.
Leave the trellis bare and it is a skeleton with no body. The vine is the cheapest height in the garden. Plant it where the curb view needs lifting.
Light After Dark
October days shorten fast. The garden gets a second shift after sunset, and light is the only principle that works it.
19. Backlight the Grasses at Golden Hour
Plant ornamental grasses where the low autumn sun hits them from behind. That is the light principle: backlighting turns seedheads into lanterns.

The fall landscaping guide linked above urges using the low angle of the sun to showcase grasses, Japanese maples, and burning bush, noting that backlighting illuminates the colors for a fiery display. Position grasses to catch the first morning rays or the last late-afternoon ones. Dyck Arboretum’s guide adds that late evening light illuminates native grasses in exquisite ways.
East-facing beds catch the morning backlight, west-facing beds the evening show. If the bed faces south, the light comes from overhead and the effect flattens. Move the grasses, not the sun.
Plant the grasses on the north side of the house and the backlight never happens. The sun does the lighting design for free. Give it something to shine through.
20. Uplight One Tree and Leave the Rest Dark
Set one warm uplight at the base of the statement tree and leave everything else unlit. That is the light principle after dark: one lit object reads as design, and ten read as a parking lot.
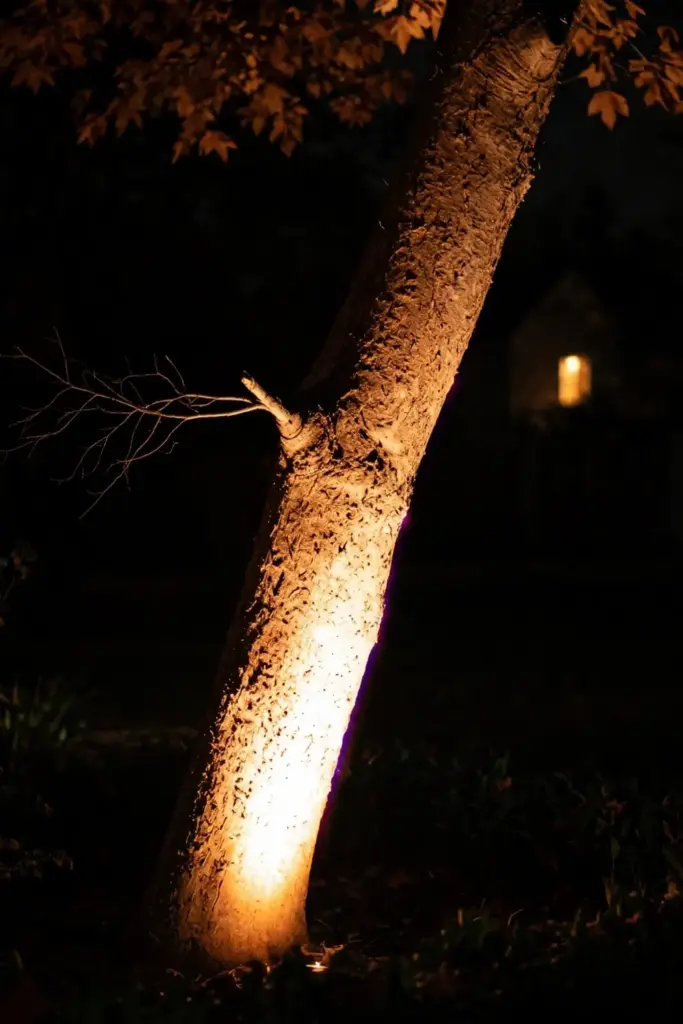
The fall landscaping guide linked above recommends spotlights or uplights to highlight statement trees, adding that warm yellow or amber lights accentuate fall foliage. One fixture, one tree, warm color. The dark around it is part of the design.
Set the fixture 60 cm from the trunk, aimed up into the canopy. Warm white at 2700K or lower reads as firelight; cool white reads as a security light. One fixture per tree. Bury the cable 10 cm deep along the bed edge.
Flood the whole yard with cool white light and the fall color washes out. Warm and low beats bright and everywhere. Skip the stadium.
21. String Lights Low Over the Seating Corner
Hang string lights low over the patio chairs, not high over the yard. That is light at human scale: the glow lands on faces and laps, not on the roof.
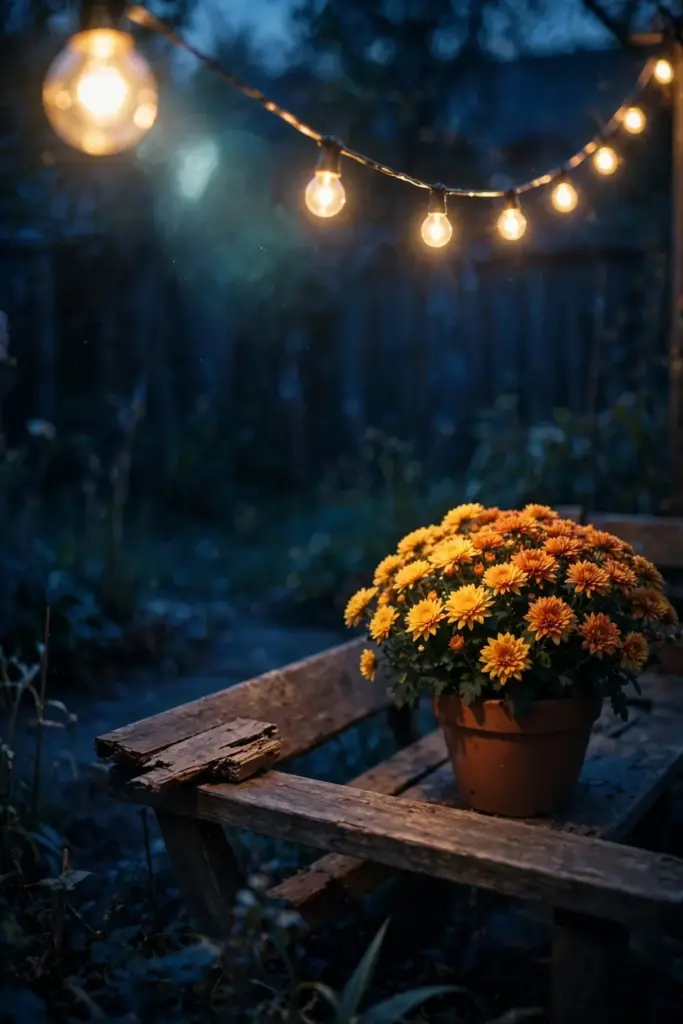
The fall landscaping guide linked above dresses patios with string lights or candles and runs twinkling lights on the porch display through winter. Low lights stretch the evening by an hour. High lights just light the siding.
Hang the strand 2 to 2.5 m high so heads clear it but the glow stays close. Outdoor-rated strands only; indoor strands fail at the first rain. A timer saves the nightly walk to the plug.
String them across the whole yard and the seating corner loses its room. Light the place where people sit. Leave the lawn to the moon.
The 21 Ideas at a Glance
Scan the table to find your starting point, then read the full idea for the how and the why. The budget column keeps the plan honest.
| # | Idea | Principle | Best Spot | Budget / Effort |
|---|---|---|---|---|
| 1 | Commit to one dominant hue | Color | Whole border | Low, an afternoon of editing |
| 2 | Cool with blue evergreens | Color contrast | Behind warm drifts | Medium, one shrub |
| 3 | Thread pink through the border | Color surprise | One drift or one pot | Low, one plant |
| 4 | Coneflower seedheads on red grass | Texture | Mid-border | Low, leave stems standing |
| 5 | Feathery grass against bold sedum | Texture contrast | Front of border | Low, two plants |
| 6 | Amsonia for the yellow finale | Color and texture | Front row | Low, one perennial |
| 7 | One vase-shaped statement tree | Structure, shape | Curb sightline | Medium, one tree |
| 8 | Broadleaf evergreen anchors | Structure | Bed corners | Medium, one or two shrubs |
| 9 | Three stepped layers | Layering | Any deep bed | Low, rearrange planting order |
| 10 | Curve the path | Line | Front walk | Medium, a weekend of edging |
| 11 | Frame one focal point | Line, focal point | Path destination | Low, one bench or arbor |
| 12 | Darken the mulch frame | Color contrast | Under bright beds | Low, one mulch delivery |
| 13 | Thriller, filler, spiller pots | Shape | Porch and steps | Low, three plants per pot |
| 14 | Matched evergreen door pair | Symmetry, structure | Flanking the door | Medium, two pots and lights |
| 15 | Pumpkins planted into the border | Color | Among the asters | Low, three pumpkins |
| 16 | Aster drifts of five or more | Repetition | Cottage beds | Low, one variety in quantity |
| 17 | Standing seedheads for finches | Structure, wildlife | Back of border | Free, do not cut |
| 18 | Virginia creeper on the trellis | Vertical interest | Fence or arbor | Low, one vine |
| 19 | Backlit grasses at golden hour | Light | East or west exposure | Free, placement only |
| 20 | One warm uplight on the tree | Light | Statement tree base | Medium, one fixture |
| 21 | String lights low over seating | Light | Patio chairs | Low, one strand |
Where Each Idea Lands: Sun, Zone, and Timing
Sun first. The fall landscaping guide linked above sites the fall garden in full sun to partial shade with well-draining soil, and adds that an area catching direct sun early or late in the day produces the backlighting that makes grasses glow. Ideas 19 and 20 only work if the sun or the fixture can reach the plant. Walk the yard at 8 a.m. and 5 p.m. before placing a single grass.
Zone second. Every plant named above has a hardiness range, and the range decides whether it survives your winter. The zone tags live on the plant lists: the fall blooming perennials guide and the fast-growing shrubs guide carry them per variety. Buy to your zone, not to the photograph.
Timing third. Set woody plants in that 4-to-6-week window before the average first frost named above, so roots establish before the ground freezes. Asters and goldenrods carry blooms into September and October, per Dyck’s guide, which sets the design’s calendar: color peaks while the planting window is still open. For the task sequence behind the design, the fall gardening tips pillar runs the October checklist.
Containers follow the same sun rule. A pot in full shade grows a leggy mum and a pale kale. Group pots in threes on the porch: one tall, one mounding, one trailing, echoing the thriller-filler-spiller build of idea 13. Odd numbers hold the eye; even numbers split it.
Front-yard framing decides the order of work. The curb sees the foundation bed, the path, and the porch in one glance, so start there and work inward. The backyard can wait for spring. Curb appeal is triage: fix what the street sees first.
Six Mistakes That Flatten a Fall Design
Read the list before you buy anything. Each mistake below has a fix that costs less than the plant it replaces.
Designing from the porch. The porch view is the one you see least. The curb view is the one the neighborhood sees daily. Fix it with the 10-minute curb photograph from the opener, and design to that frame.
The photograph also settles arguments. When two people disagree about the border, the curb frame shows who is right.
Planting one of everything. A bed of singletons has no repetition and no drift. Fix it by buying five of one aster instead of one of five plants.
Pull three singletons this fall and replant them as one drift. The bed loses nothing and gains its first repetition.
Keeping every plant the same height. A flat bed has no layering and no structure, so the eye slides straight past it. Fix it by stepping the border in three bands: tall at the back, low at the front.
Stand a tall grass behind the asters this weekend and watch the bed gain a back wall. One height change reorganizes everything in front of it.
Running all warm color with no cool anchor. Red, orange, and gold blur into one mass. Fix it with one blue spruce or silver artemisia behind the warm drift.
The cool anchor does not have to be big. One silver artemisia at the drift’s shoulder cools the whole bed.
Lighting the yard like a parking lot. Cool white floods wash out fall color. Fix it with one warm uplight on the statement tree, string lights low over the chairs, and darkness everywhere else.
Walk the yard at 9 p.m. after the change. If you can read a book anywhere except the seating corner, there is too much light.
Dressing the porch and starving the beds. Pumpkins on the steps with bare soil behind them split the design in two. Fix it by carrying three pumpkins and one grass into the nearest bed. Leave soil work, tests and compost, to the bed-prep job.
Stand at the curb after the change. If the porch and the nearest bed read as one composition, the split is healed.
FAQ
Yes. “Fall landscaping ideas” and “fall garden design” describe the same thing: planting and layout under “design,” yard-scale curb appeal under “landscaping ideas”. This article covers both: the planting and layout side under “design,” the yard-scale and curb-appeal side under “landscaping ideas.” Splitting them into two articles would divide the topic.
October is the working month. Set woody plants 4 to 6 weeks before your average first frost so roots establish before the ground freezes, and move containers and decor any time the nurseries discount them. The design itself starts earlier: photograph the curb view in September, pick the dominant hue, and buy to the plan instead of the impulse.
Warm hues carry the season: red, orange, yellow, and gold foliage and flowers. Pair them with one cool anchor, a blue spruce, a silver artemisia, or a blue-green juniper, so the warm side reads brighter by contrast. Add one surprise note, pink asters or a pink pumpkin, to prove the palette was chosen. Three warm hues plus one cool anchor is the full formula.
Curve the path instead of running it straight; the bend suggests the garden continues out of sight. Plant in drifts rather than singles so the eye reads masses instead of counting plants. Point the view at one focal point, a bench or an arbor, framed by planting on both sides. One curve, one drift rhythm, one destination.
Asters and goldenrods bloom into September and October, and ornamental grasses carry seedheads with texture and movement into winter. Broadleaf evergreens like boxwood and holly hold structure all winter, and some shift hue in the cold. For the full plant lists with per-variety zone tags, see the fall blooming perennials and fast-growing shrubs guides named above.
Repetition costs nothing: divide one aster clump into a drift of five instead of buying five varieties. Leave seedheads standing instead of buying decor. Darken the mulch frame, curve the path with edging you own, and backlight the grasses you already have. Design is placement, and placement is free.
Design From the Street, Not the Porch
Photograph the curb view once a week through October. The camera catches what the daily walk misses: the flat stretch, the missing layer, the color with no anchor.
Change one thing each week. By first frost the design holds. Next spring, plant to the photograph instead of the impulse.
The design never finishes. That is the point. Each October the light returns, the grasses glow, and the curb view tells you what to move next.
Keep the photographs. Five Octobers of curb views teach more about your garden than any book.








