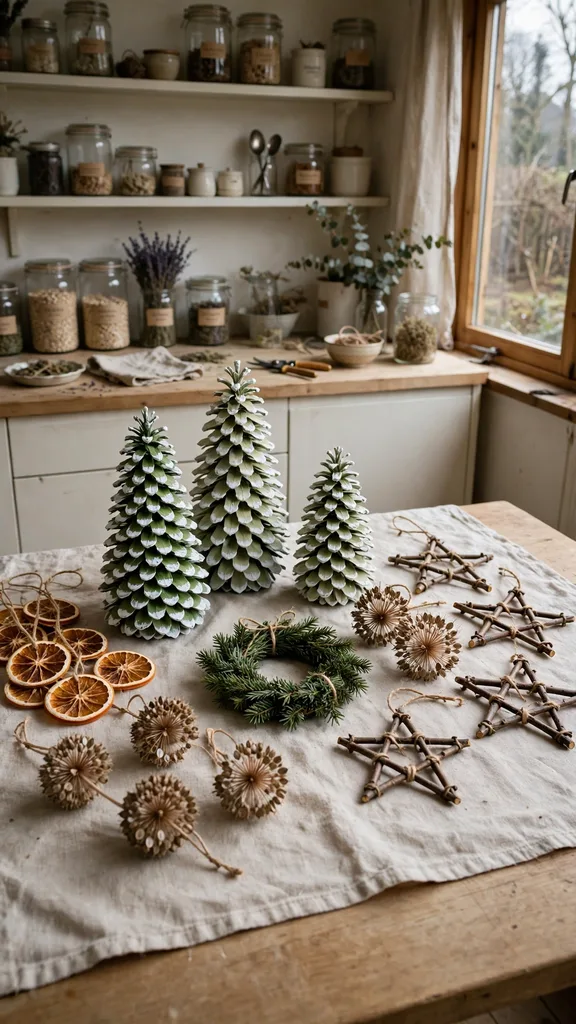
Christmas garden crafts for kids start with a basket and a walk: pinecones under the conifers, clippings from the hedge trim, seed heads standing in the spent borders, and citrus from the kitchen. Everything in this list of 45 comes from the garden or the fruit bowl, costs almost nothing, and ends as an ornament, a card, a garland, or a gift. Adult jobs are flagged inside each craft, because knives, ovens, and hot glue stay grown-up work while the collecting, painting, threading, and arranging belong to the kids.
Work in the order the garden gives you the materials. Cones and seed heads collect from autumn onward and keep for months in a dry box, evergreen clippings cut best in December when they are needed fresh, and citrus drying takes an afternoon of oven time before the threading starts. I keep a craft basket by the back door from November, and it fills itself a little more after every garden tidy. Set a washable mat under the work, put paint in jars rather than bottles, and let each child finish a craft fully before starting the next; finished pieces motivate more than five half-done ones.
| Craft | Best Ages | Time | Main Material |
|---|---|---|---|
| Pinecone Bird Feeders | 3 and up | 20 minutes | Pinecones, peanut butter, seed |
| Dried Orange Slice Ornaments | 5 and up | 30 minutes plus drying | Oranges, twine |
| Twig Star Ornaments | 6 and up | 20 minutes | Twigs, string |
| Mini Evergreen Wreaths | 5 and up | 25 minutes | Evergreen clippings, wire ring |
| Seed Mosaic Cards | 4 and up | 30 minutes | Seeds, card, glue |
| Popcorn and Cranberry Garland | 6 and up | 40 minutes | Popcorn, cranberries, needle |
| Painted Stone Snowmen | 3 and up | 20 minutes | Flat stones, paint |
| Herb Salt Jars | 7 and up | 20 minutes | Dried herbs, salt, jars |
1. Pinecone Christmas Trees
Stand a big open pinecone on a cork or a blob of clay and it is already tree-shaped; paint it green, dab white on the scale tips for snow, and glue on tiny pompoms, beads, or sequins as baubles. A star cut from gold card or a small dried flower glues to the top. Let the paint dry fully before the decorating starts, because small fingers will hold the cone by its branches.
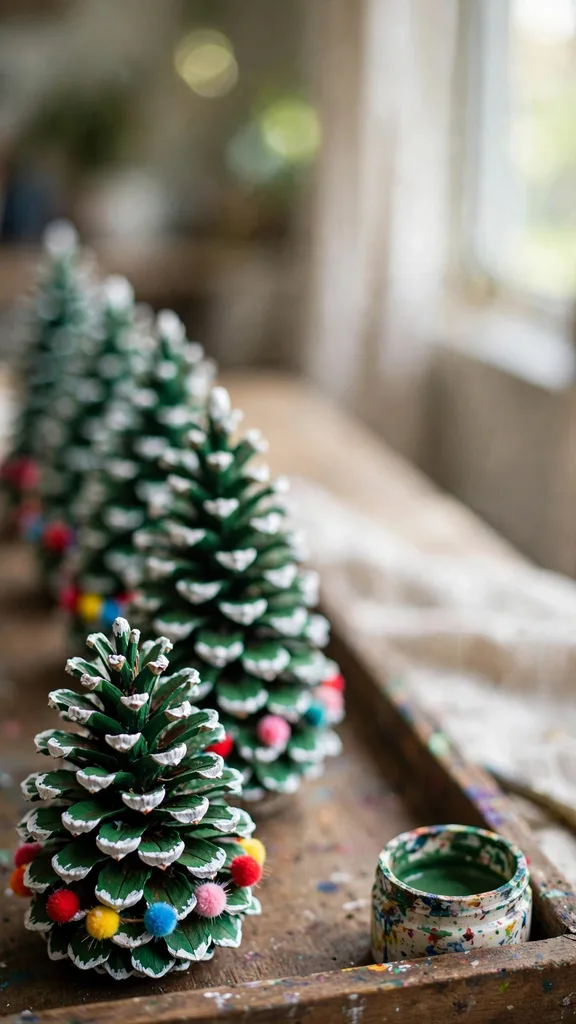
Make a forest rather than one tree: a tray of cone trees in different sizes becomes a table centerpiece or a windowsill village with cotton wool snow. Cones collected damp need a day indoors to open fully before painting, and a low oven hour on a cool setting dries a whole batch at once, an adult job. Painted cone trees keep for years stored in egg boxes.
2. Pinecone Reindeer
Turn a pinecone on its side for the body, glue a smaller cone or an acorn at the front for the head, and add twig antlers, a red berry or bead nose, and googly eyes. A loop of ribbon around the middle makes a saddle, and a thread at the top hangs the reindeer on the tree. Use a glue gun only with an adult working it; school glue works with patience and a drying rest.
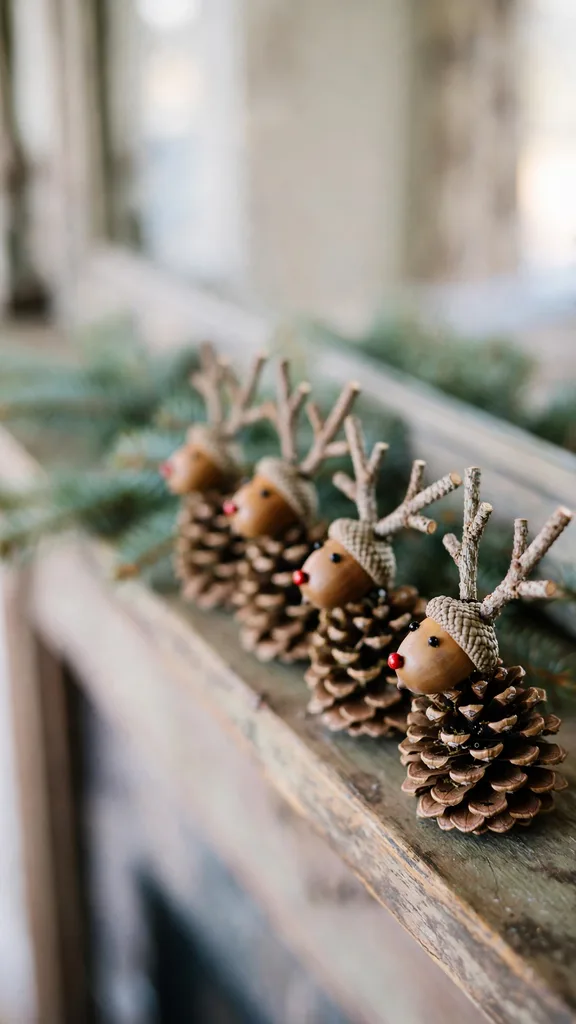
Reindeer read best in a team. Make four or eight, line them along the mantel with a sprig of greenery as their forest, and thread them onto a garland later if the mantel display ends. Dark cones need no paint at all, which makes this the fastest craft on the list for impatient makers, and every reindeer comes out with a different expression.
3. Pinecone Owls
Owls are the pinecone craft that suits the youngest children. Glue two big felt or paper eyes near the top of an upright cone, add a tiny triangle beak of orange card, and felt wings at the sides. The cone’s scales do all the feather work for you. Sit finished owls in a row on a branch laid across a shelf, and the shelf becomes a winter woodland.
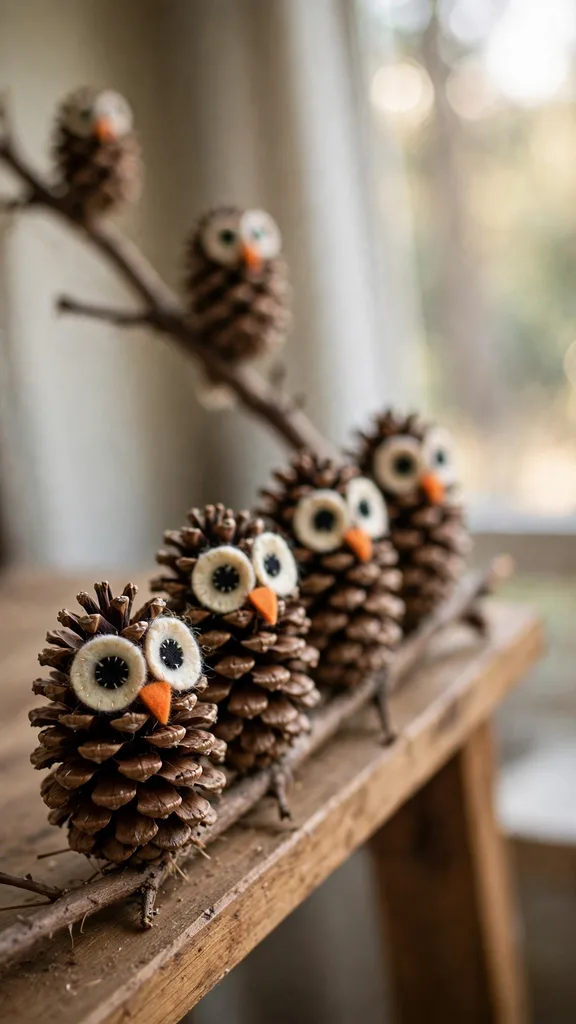
Felt in brown, gray, and white gives three owl species from one template, and a dusting of white paint on the scale tips turns any of them into a snowy owl. Owls also work as place markers at the Christmas table, one per seat with a name card tucked under the wing. Keep a few spare eyes cut and ready, because eyes are the part small makers want to redo.
4. Pinecone Door Wreath
Wire or glue pinecones around a ring base, a cut cardboard circle or a wire frame, until the ring disappears under the cones. Children lay the cones in place and choose the pattern, alternating big and small or pointing them all outward like a sun, while an adult runs the glue gun or twists the wire. A bow of ribbon or a cluster of dried flowers fills the gap every wreath seems to leave at the top.
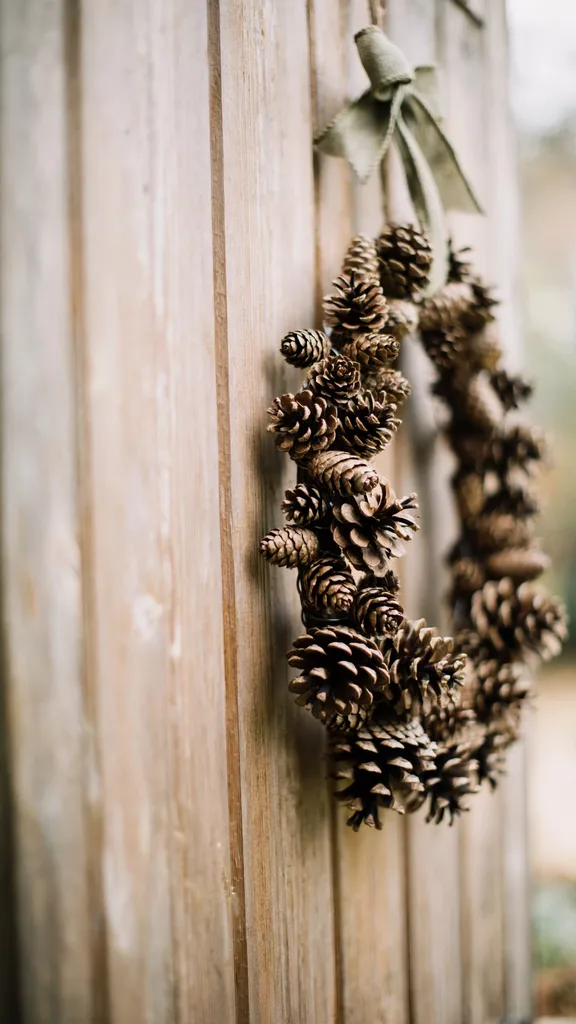
Hang the finished wreath on a bedroom door, a gate, or the front door under cover. Cones weather well but glue does not love rain, so outdoor wreaths do better wired than glued. A wreath built on a cardboard ring is light enough for a child’s own door, which is where most of these end up, decorated further with every small treasure December produces.
5. Frosted Pinecone Ornaments
Brush the tips of a pinecone’s scales with white glue, then roll the cone in coarse salt, Epsom salt, or fine glitter for a frosted finish that catches the tree lights. Tie twine around the top scales before you start so the hanging loop is built in. Work over a tray, because the salt sheds, and let each cone dry standing up so the frost stays where it was rolled.
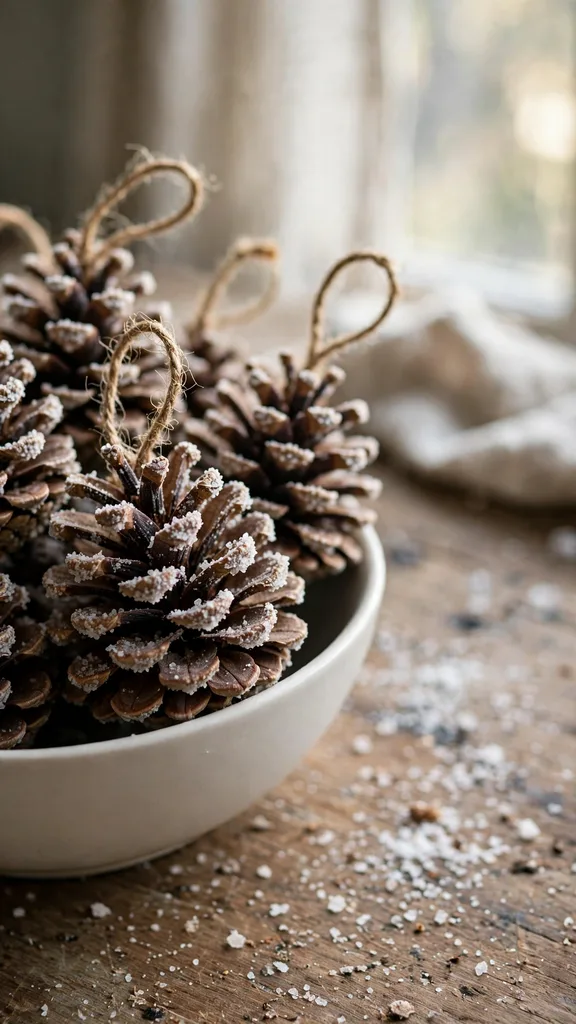
Frosted cones look best in clusters: three on one branch, a bowl of them on the table, a row along the windowsill. Salt frost is not waterproof and dulls in a steamy room, so keep these ornaments for indoor trees. A second coat on the tips after the first dries gives the deep-frost look, and a tiny red berry glued at the top adds the color note.
6. Pinecone Bird Feeders
Tie twine firmly around the top of a large open cone, spread unsalted peanut butter or soft suet into the scales with a blunt knife, and roll the cone in birdseed until every scale holds seed. Hang it from a branch where the family can watch from a window. Penn State Extension’s winter bird feeding basics cover the foods birds need in cold weather and why feeders and feeding areas need regular cleaning, so wash hands after making and hang feeders where you can take them down and clean around them.
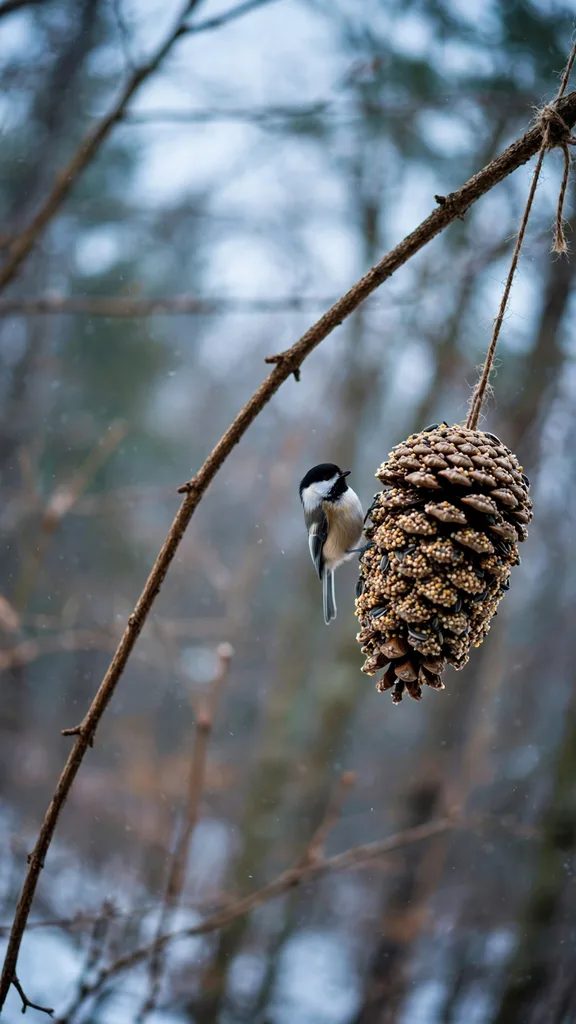
Chickadees, nuthatches, and woodpeckers find a fresh cone feeder within days in cold weather. Skip this craft in warm spells, when soft fat can spoil and smear feathers; December cold is exactly its season. When the seed is gone, the cone goes in the compost and a new one takes its place, which gives children a reason to make feeders all winter long.
7. Pinecone Fairies With Felt Hats
A pinecone becomes a fairy or elf with a wooden bead head, a felt cone hat, and felt or leaf wings glued at the back. Draw the face with a fine pen once the glue dries, add yarn hair if the maker insists, and thread a loop through the hat tip for hanging. The cone’s scales read as a layered skirt or a winter cloak depending on which way up it stands.
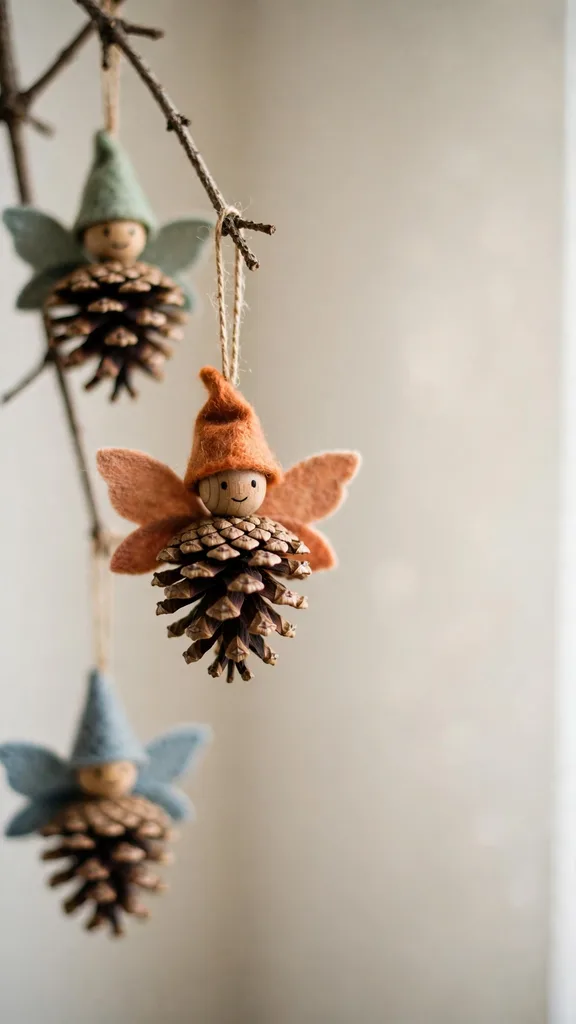
Fairies reward slow makers: the details are small and the results are charming enough to give as gifts. Make them in family sets, one per person, and hang the set together on one branch. Felt scraps from other projects cover the hats for a whole batch, and acorn caps make an alternative hat for a woodland look that skips the sewing basket entirely.
8. Pinecone Fire Starters
These are a gift children assemble and adults use. Pack the scales of dry cones with bits of candle wax an adult has melted, or wrap each cone in a twist of waxed paper and tie with twine; a few drops of scented oil on the cone before wrapping adds cinnamon or orange smell. Basket them with a handwritten label and they become a present for anyone with a fireplace or a fire pit.
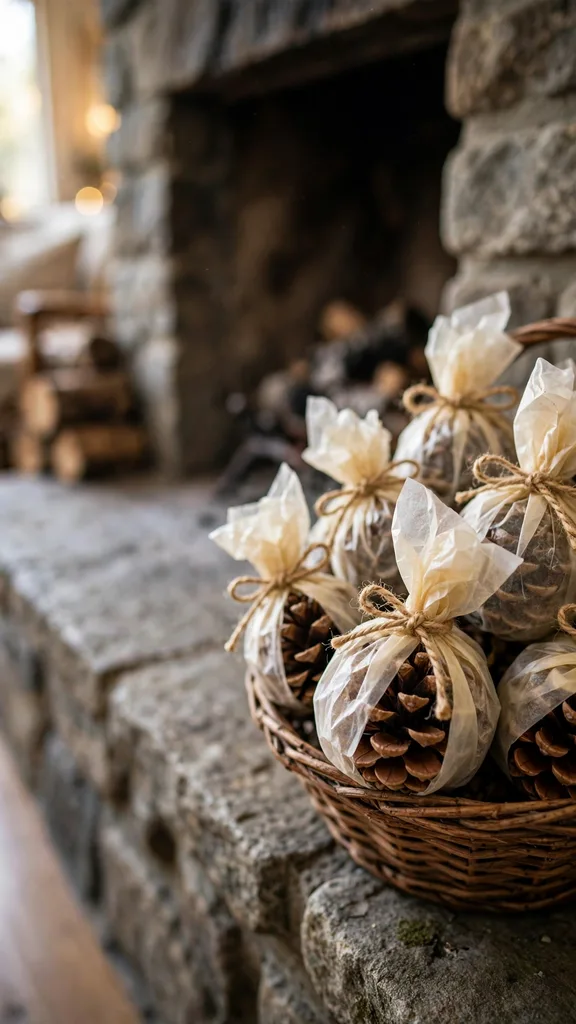
Be strict about the division of labor: children collect, sort, wrap, and label, and adults handle every step involving melted wax and every step involving fire. Store finished starters in their basket away from the hearth until use. A cone starter lights kindling reliably and burns long enough to matter, which makes this the rare kids’ craft the adults genuinely ask for again.
9. Mini Pinecone Garland
Thread small cones onto twine by wrapping the twine around each cone’s top scales and tying a knot, spacing the cones a hand’s width apart. Alternate cones with dried orange slices, cinnamon sticks, or felt stars for a mixed garland, or keep it all cones for the woodland look. Young children can hold cones in place while an adult or older child ties.
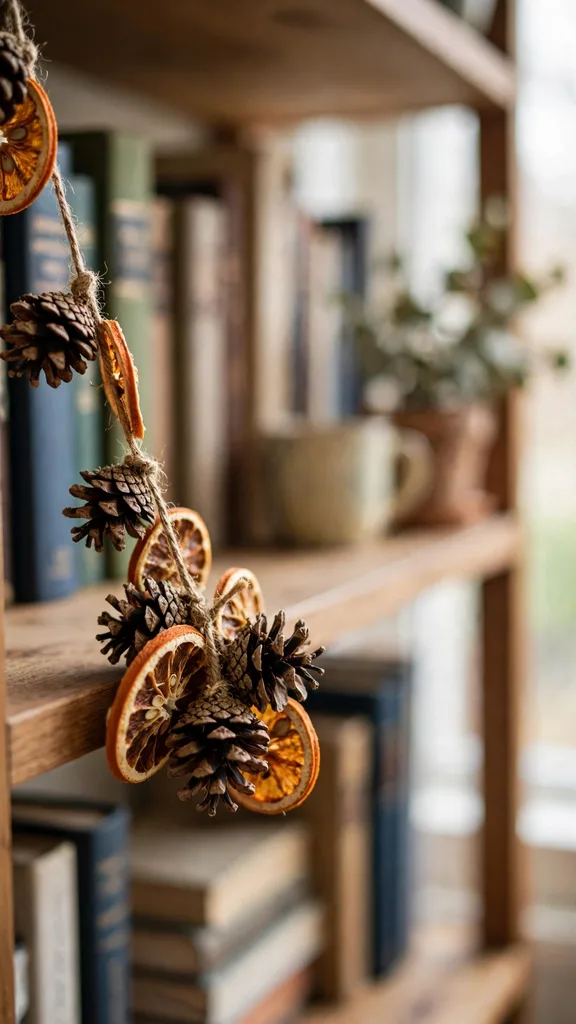
A mini garland suits the places big garlands cannot go: across a bookshelf, around a bedroom door frame, along the front of the mantel, or down the stair rail. Measure the span first and cut twine a third longer than the measurement, because knots and cone wraps eat length. The garland packs away flat in a box and comes out every year.
10. Mini Evergreen Wreaths
Bend a short length of wire or a pipe cleaner into a small ring, then wrap and tuck short evergreen clippings around it until the wire hides. Cedar, juniper, and boxwood clippings bend without snapping; fir and spruce work for bigger rings. Tie on a tiny bow, a dried flower, or three red berries, and add a hanging loop. Small wreaths finish fast, which suits short attention spans.
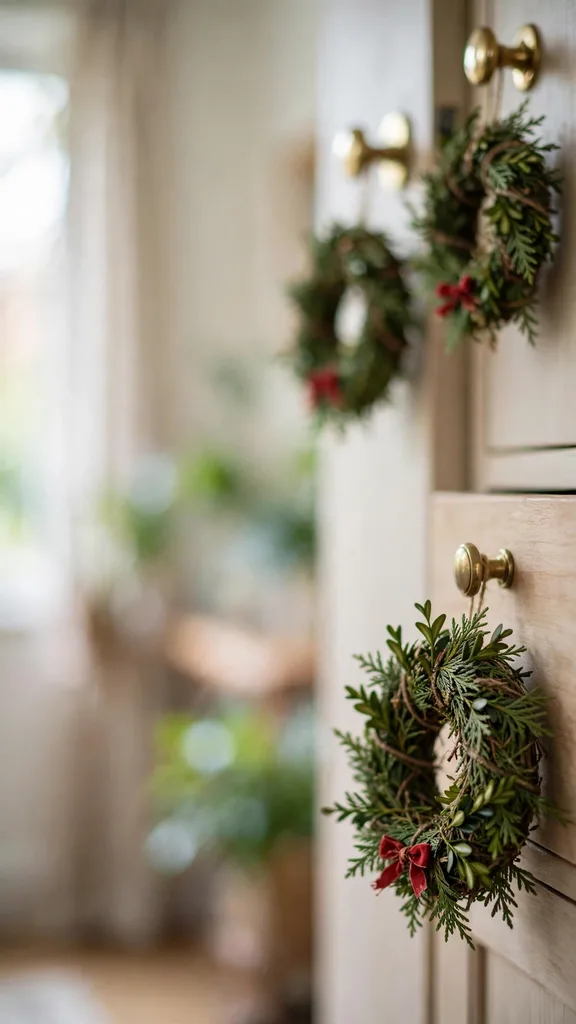
Hang mini wreaths on door handles, drawer knobs, the backs of dining chairs, and the tree itself. A set of six matching minis made in one sitting looks planned rather than homemade, in the good way. Clippings cut the same day stay green for weeks indoors; a mist of water every few days keeps them fresher, and browning clippings swap out in minutes since the skill is now practiced.
11. Evergreen Table Runner, Laid by Small Hands
The easiest evergreen craft needs no glue, wire, or tools: lay clippings flat down the middle of the table, overlapping the stems, until a green runner runs the table’s length. Children do the laying and the pattern decisions, tucking in pinecones, orange slices, and candles in jars as they go. What took adults an hour of wiring takes kids ten minutes of arranging.
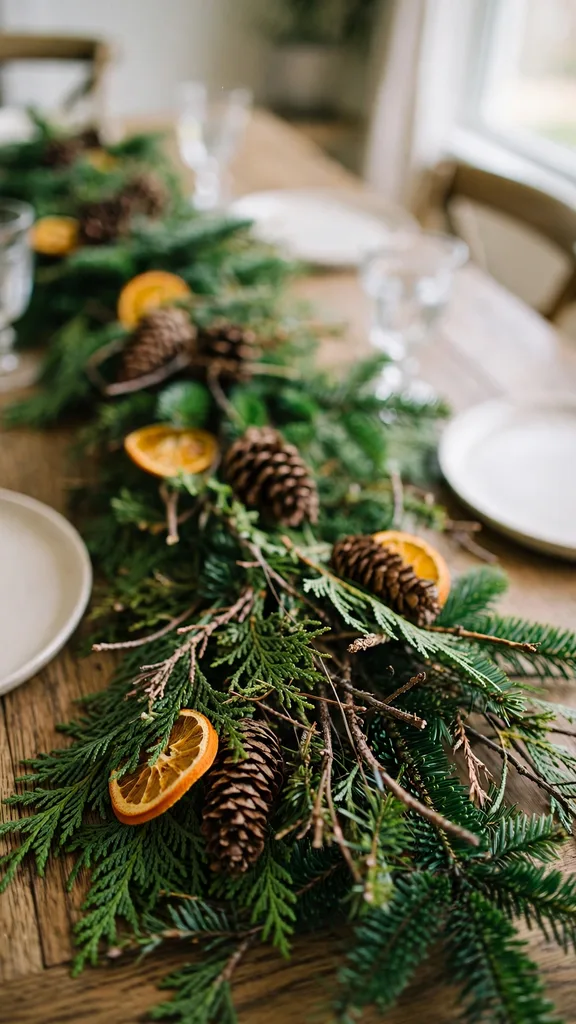
The runner comes apart after the meal and the clippings go to the compost, so there is nothing to store and nothing to break. Lay it on a washable cloth if the table marks easily, since resinous clippings can leave spots on polished wood. For a longer table, two children starting from opposite ends and meeting in the middle finish before the argument about the middle starts.
12. Scented Evergreen Sachets
Sew or glue two small squares of fabric into a pouch, fill with dried evergreen needles, lavender, and a few cloves or a cinnamon chip, and tie or stitch it closed. Children measure and pour the filling and choose the scent mixes; an adult runs any needlework or the glue gun. Cedar and juniper needles hold scent longest, and a drop of the tree’s own resin on the fabric is free perfume.
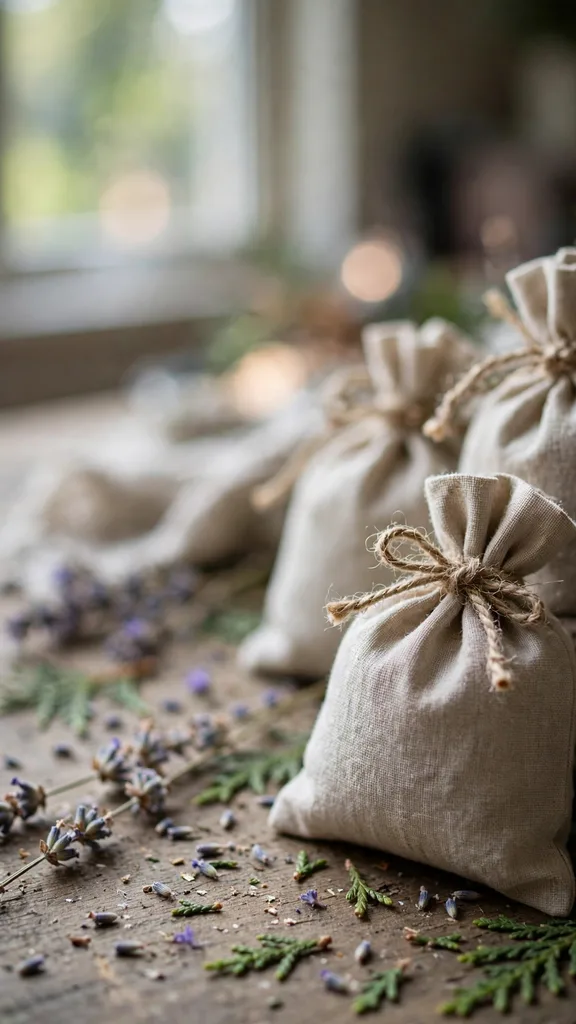
Sachets scent drawers, hang on the tree, and tuck into gift parcels and coat pockets. Make them in Christmas fabrics and they read as presents rather than crafts. The filling refreshes next year with a squeeze and a drop of scented oil, so a sachet made this December can work for several. Small hands that cannot sew can still tie the gathered-neck version: a fabric circle, filling in the middle, twine around the neck.
13. Twig Star Ornaments
Collect five straight twigs of equal length, lay them into a five-pointed star, and tie or glue each crossing point. String and yarn wrappings in red or gold turn the ties into the decoration. An adult with secateurs cuts twigs to length; children sort, match, and assemble. A loop at the top point hangs the star, and a dusting of white paint on the tips suggests frost.
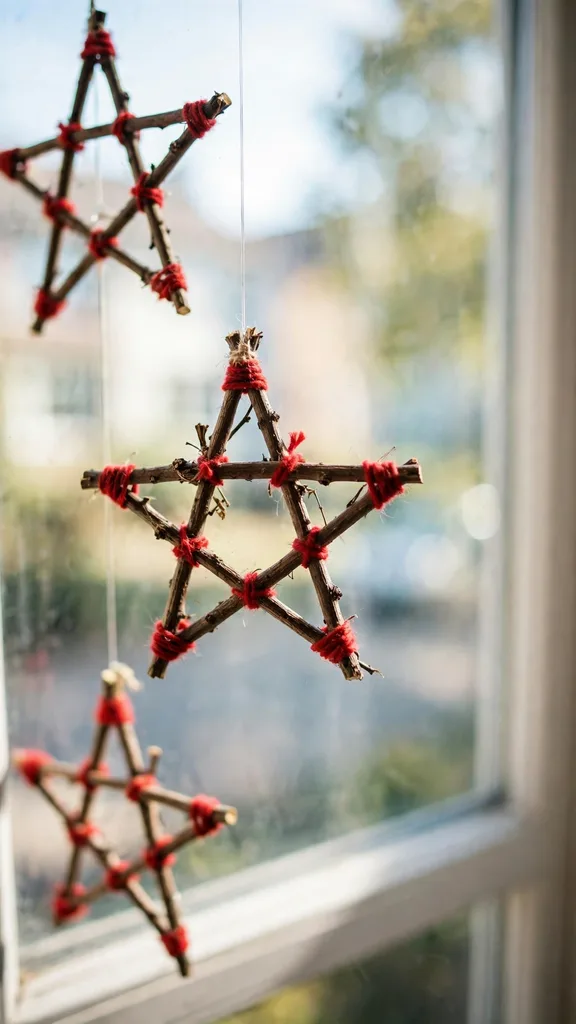
Stars scale beautifully: small ones for the tree, a big one for the front door, a row of medium ones across a window. Willow and dogwood twigs bend slightly and forgive rough handling; brittle twigs snap and teach gentleness the hard way, so collect spares. Twig stars also top the tree proudly when the family star is a child’s own work, wired to the leader by an adult.
14. Evergreen Crowns
A ring of evergreen clippings wired or tied to a bendy willow or vine base makes a crown fit for the king or queen of the Christmas dinner. Children choose the clippings and the decorations, berries, tiny cones, dried flowers, and an adult secures the base ring and any wire ends. Measure the crown on the head it will crown; too big is fixable with one more tie, too small is a restart.
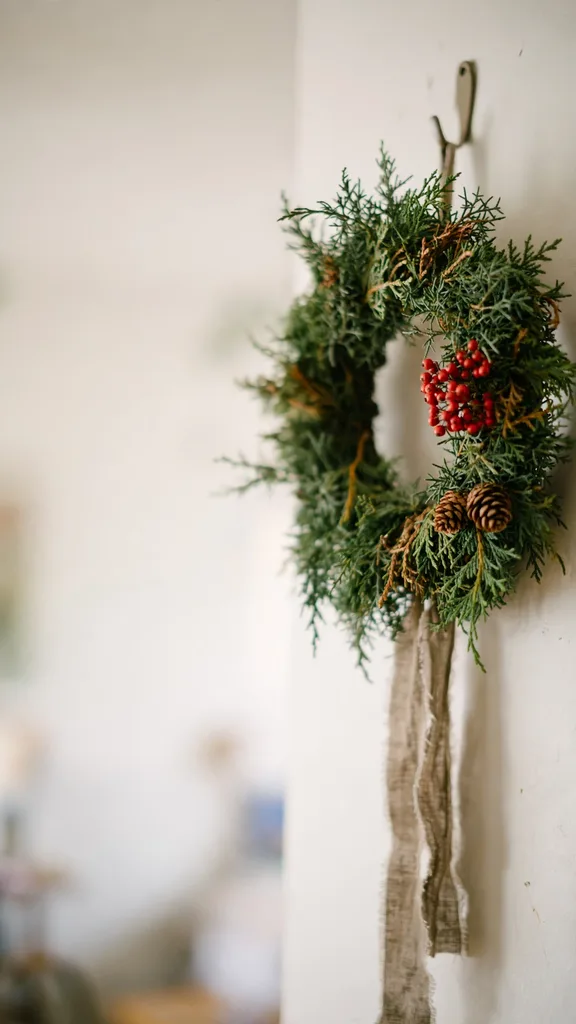
Crowns last a day or two worn and a week on a hook, so make them on Christmas Eve or the morning of the party. A crown per child at the table photographs beautifully and settles the question of who sits where if names are tucked into the greenery. Keep the decorations light, because a crown heavy with cones slides forward into the gravy.
15. Clipping Christmas Cards
Glue short evergreen clippings onto card blanks as trees, wreaths, and borders: one triangular clipping is a Christmas tree with a drawn star, a ring of small leaves is a wreath, a single sprig in the corner is minimal and elegant. Press the cards under a book for an hour so the clippings dry flat against the card, and write the greeting after the glue sets.
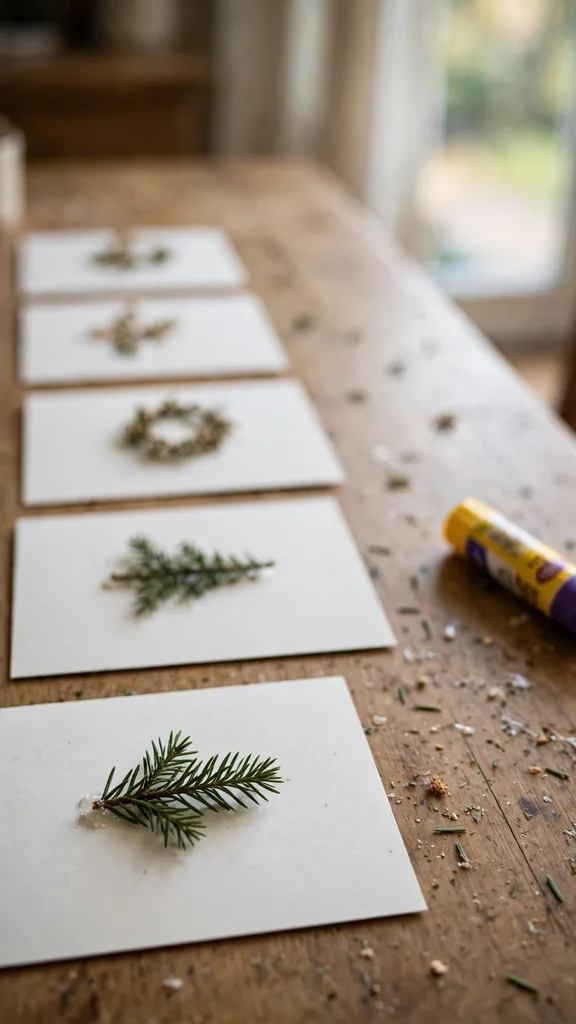
These cards carry the garden’s smell into the post, faintly, and the real thing beats any printed imitation. Clippings dry out over a week or two on display, so make clipping cards for hand delivery and near neighbors, and keep posted cards to the flatter crafts. A card-making session produces a dozen cards in an hour with two children working, enough for the whole class or street.
16. Mini Kissing Balls
Push short evergreen clippings into a small ball of florist foam, an old tennis ball covered in fabric, or a tight ball of scrunched paper wrapped in tape, until the ball is a green pompom. Add a ribbon loop at the top and a bow, and hang it in a doorway at grown-up head height. Children do the pushing-in, which is deeply satisfying work, and choose where the berries and bows go.
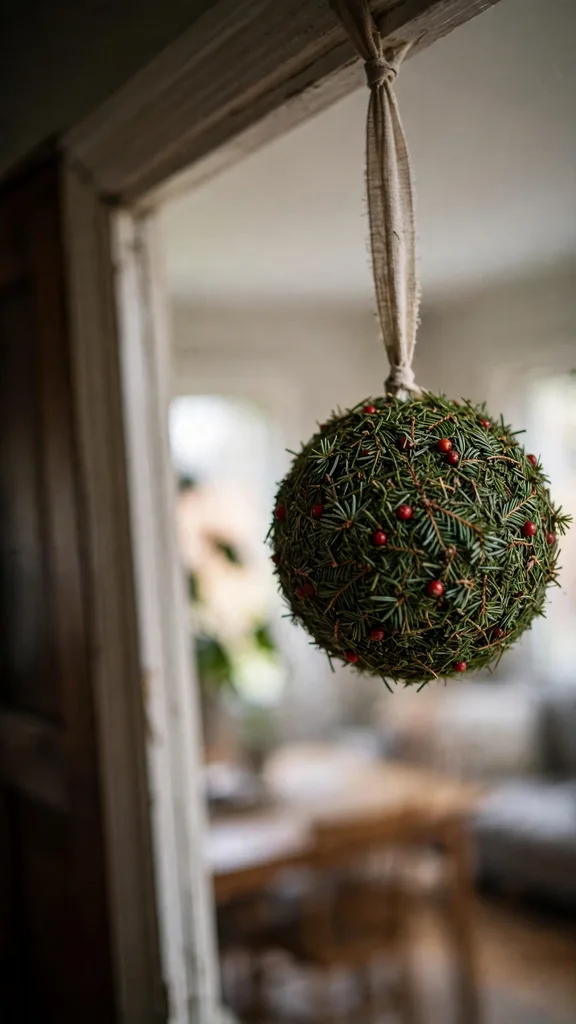
Kissing balls look impressive and are mostly patience: the clippings must point outward in every direction, and bald spots show. Work over a tray and turn the ball as you go. Foam balls hold clippings best; paper balls need each clipping dipped in glue. A finished ball keeps two to three weeks indoors and can be re-greened by pushing fresh clippings into the gaps.
17. Gate and Fence Swags
A swag is a bunch of long evergreen clippings tied at the stems, fanned at the tips, and hung by the tie: the simplest outdoor decoration in this list. Children gather and grade the clippings by length, lay the fan, and choose the bow, while an adult ties the twine tight and fixes the swag to the gate, fence, or porch post. Three berries or a cone wired into the knot finishes it.
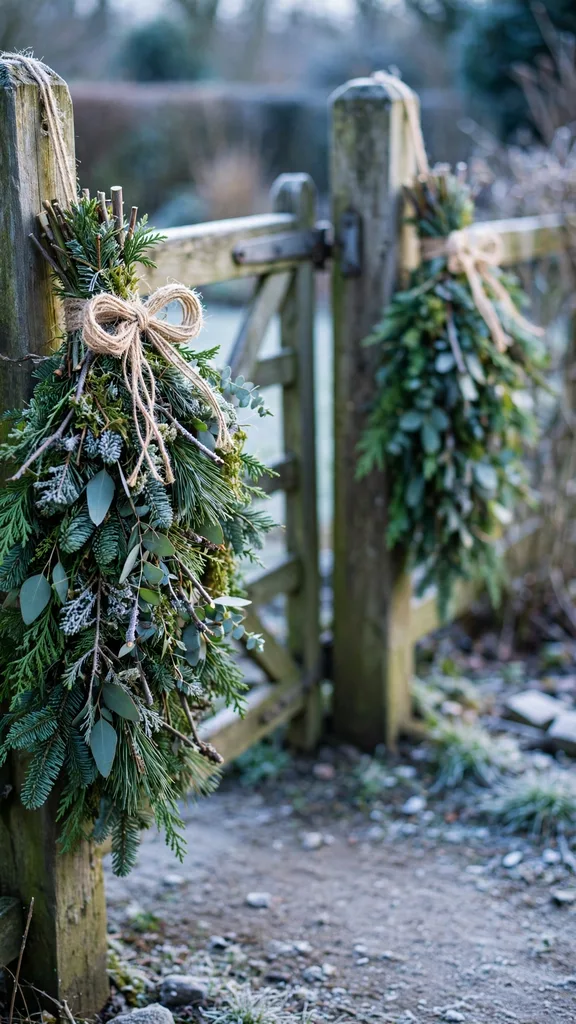
Swags dress the parts of the garden visitors actually pass, and they take five minutes each once the clippings are cut. Make them thick; a thin swag reads as an accident. Outdoor swags last all season in cold weather and compost in January without a trace. A matching pair on the gate posts looks like the work of a much more organized household.
18. Cedar Place Cards
Cut small cards, write each guest’s name, and clip or glue a tiny cedar or juniper sprig above the name. Alternatively, write the name on a card and stand it in a pinecone’s scales, which hold a card upright with no clip at all. Children with neat writing do the names; children without write the drawings on the back, which guests keep.
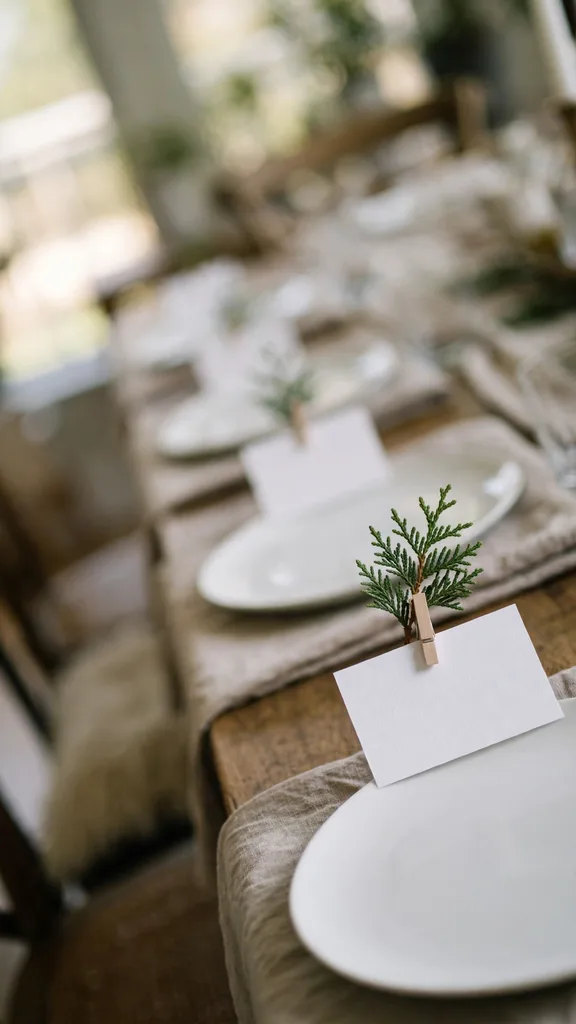
Place cards are the craft that teaches the point of making things: a table with a card at every seat feels like an occasion before any food arrives. Make two spares with blank fronts for the guest list changes December always brings. Cedar and juniper stay green and scented through the meal; soft fir clippings wilt faster and suit same-day making.
19. Painted Poppy Head Baubles
Dried poppy seed heads are ready-made baubles: round, ribbed, and topped with a natural crown. Paint them gold, silver, or white, shake on a little glitter while the paint is wet, and glue a loop of thread to the stem stub. The heads are light, so they hang on the thinnest branches without dragging them down, and a tree of them looks like a jeweler’s window.
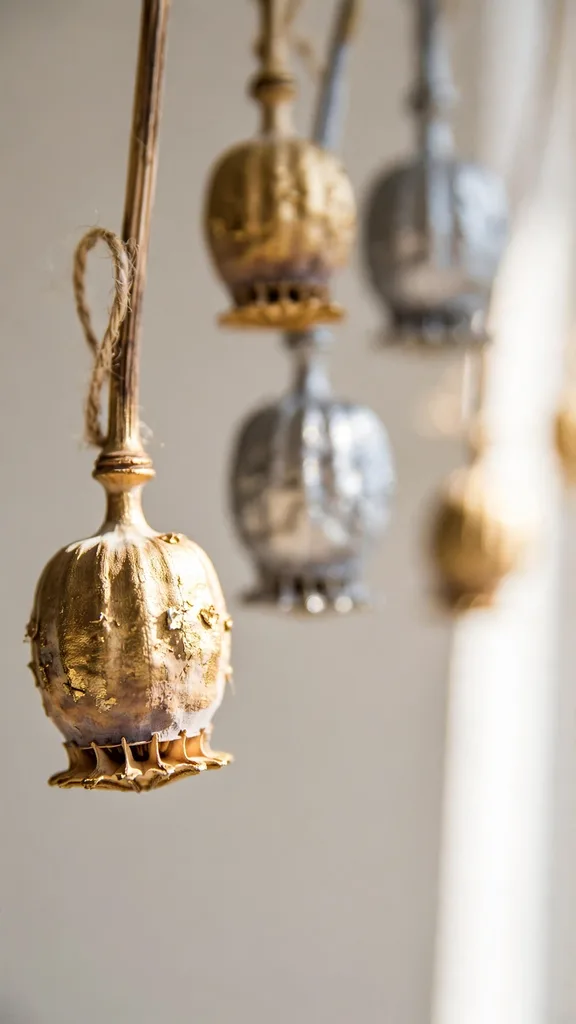
Collect poppy heads in summer when they rattle, and store them in a box where they cannot be crushed. The heads are brittle, so this is a craft for careful hands and a good second project for a child who has mastered the cones. A bowl of unpainted heads on the table is beautiful too, which makes the painting optional rather than required.
20. Seed Mosaic Cards
Draw a simple shape on card, a star, a tree, a robin, spread glue inside the lines, and fill the shape with seeds: dark poppy seeds, pale sesame or sunflower, red lentils from the kitchen jar, corn kernels for gold. Children pour, sprinkle, and pat; the mosaic builds itself. Shake off the loose seeds over a tray once the glue dries, and the picture appears.
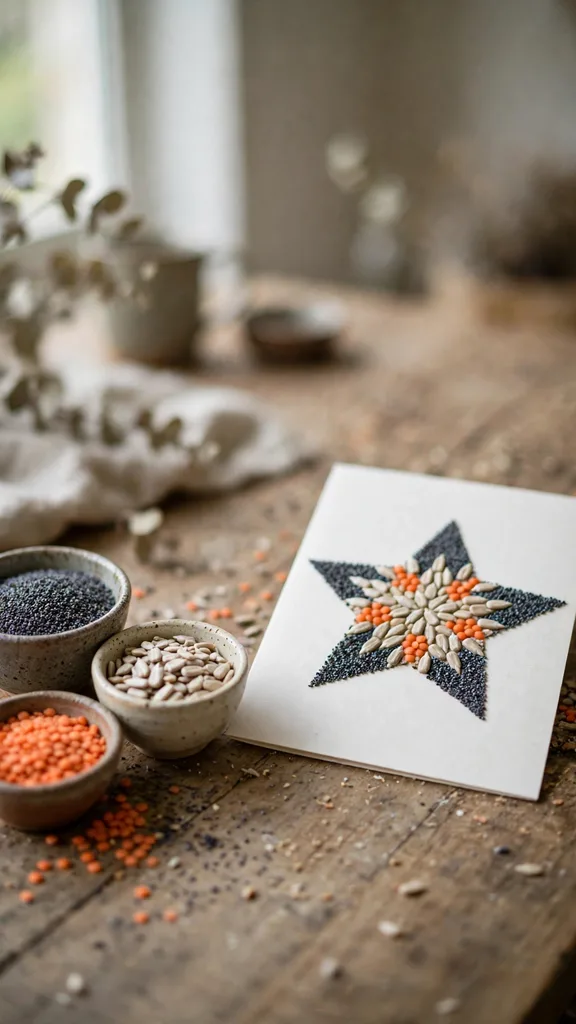
Mosaics forgive everything, because a wobbly line hides under texture. Garden seeds work as well as kitchen ones, and a mixed seed packet bought for spring gives colors no kitchen has. Keep finished cards flat for a day while the glue fully cures; a seed mosaic that bends sheds. These cards are heavy enough to need hand delivery or a padded envelope.
21. Sweetgum Ball Ornaments
The spiky balls that fall from sweetgum trees are natural ornaments with a starburst in every direction. Spray or brush them gold, silver, or white, add glitter if your household allows it, and tie thread around a spike to hang. Unpainted, they fill bowls and wreaths with texture nothing bought can copy. Collect them with gloves, because the spikes are genuinely sharp for small fingers.
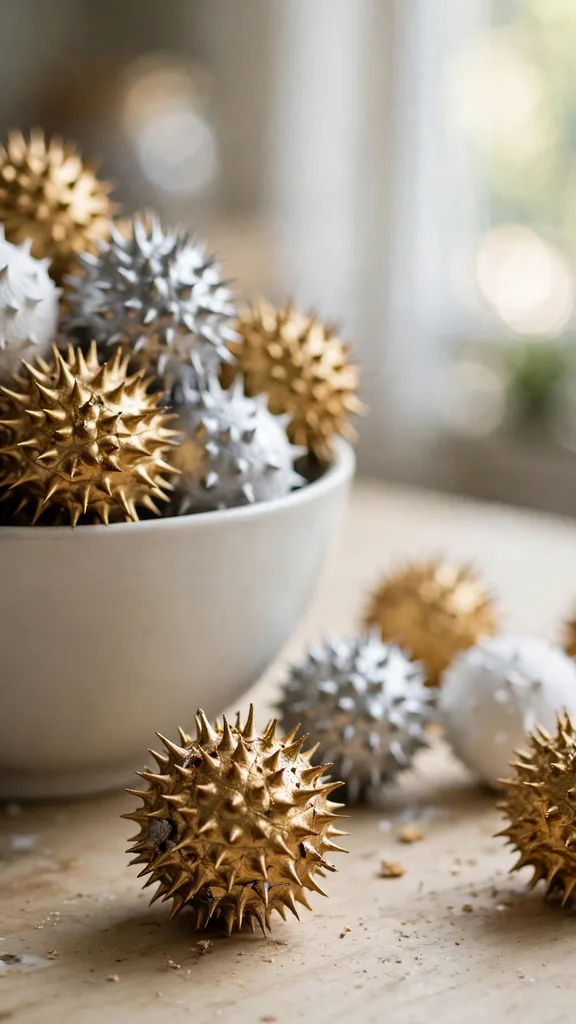
Sweetgum balls also string into a fierce-looking garland that reads as pure decoration from two steps away. Paint them in batches on newspaper outdoors, since spray paint is an adult, outdoor job, while brush painting suits the table. A single perfect ball on a ribbon makes a present topper that the recipient keeps, which spreads your garden across other people’s trees.
22. Painted Acorn Cap Jewels
Acorn caps are tiny bowls waiting to be jeweled. Paint the inside gold, red, or bright blue, add a dot of glitter glue, and glue the cap to a thread loop or onto cards and parcels as a raised jewel. Whole acorns paint into miniature baubles and Santas with the cap as the hat. Children sort caps by size and do all the painting; the caps’ smallness slows everyone down pleasantly.
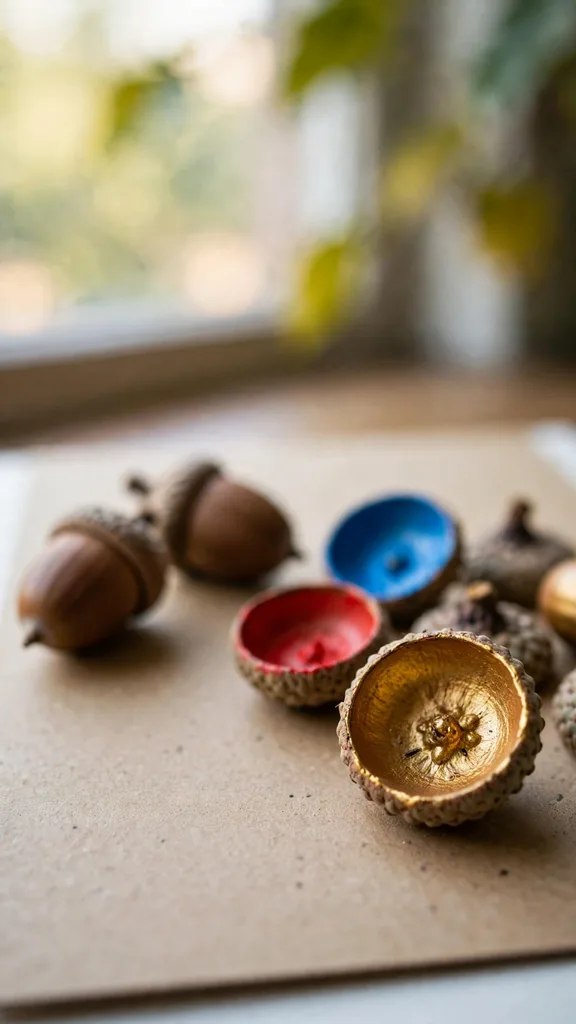
Caps gather by the hundred under a good oak, so this craft never runs short. Wash collected acorns and caps and dry them well before painting, since stored damp acorns mold and can harbor weevils; a low oven hour, adult-run, settles both problems. Cap jewels glued around a plain bauble or a jar lid ring make a decoration far richer than the materials suggest.
23. Honesty Pod Moon Ornaments
Honesty, also called silver dollars, dries into translucent silver discs when the outer pod peels away. Rub the pods gently between finger and thumb to release the seeds and the outer skins, and the moon-like membrane remains. Glue a thread loop to the top, or write a name on the disc with a fine pen for a place setting that glows against dark green.
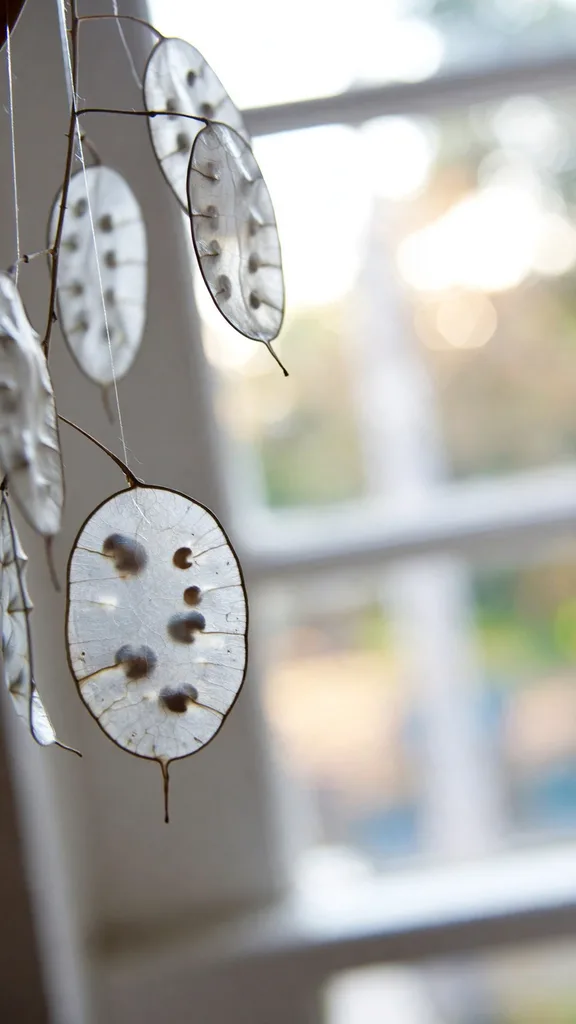
The peeling is the craft: it takes a light touch and produces a small pile of treasure from a papery pod, which children find quietly magical. Handle finished discs by the edges and store them between paper, since the membrane creases. Honesty grows as a biennial in many gardens; sow it in summer and next year’s craft box fills itself while this year’s discs hang on the tree.
24. Seed Head Wands
A tall dried seed head on its stem, teasel, echinacea, or ornamental grass plume, becomes a wand with ribbon streamers tied below the head and a coat of paint or glitter on the head itself. Children choose their wand’s colors and powers; adults accept the resulting magic with good grace. Teasel heads are prickly, so wrap their stems in tape or ribbon where small hands grip.
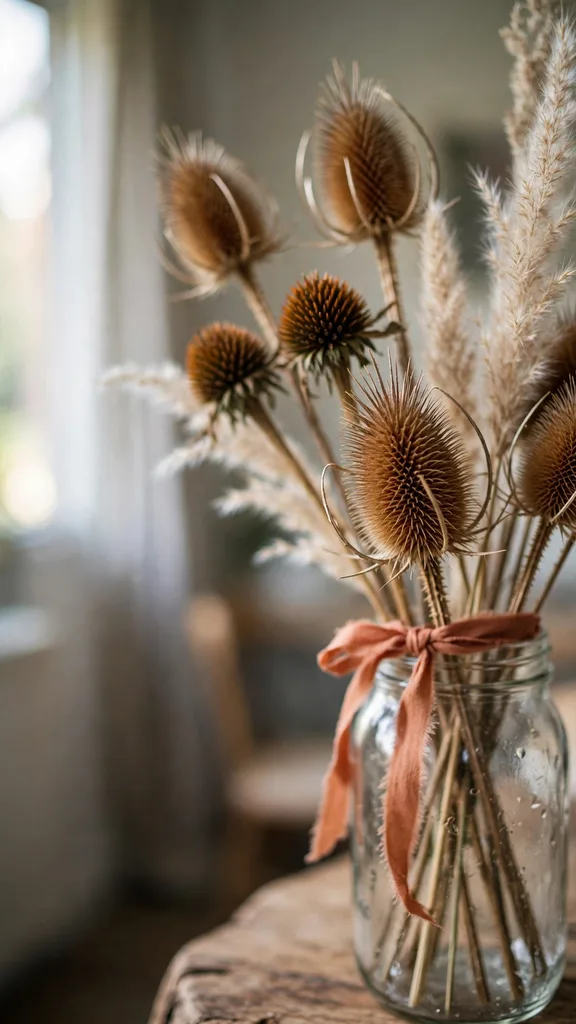
Wands double as plant markers stuck in pots after Christmas and as the stars of the season’s photographs. Make one per child plus a spare for the cousin who arrives unannounced. Grass plumes shed, so give them a light spray of hairspray or craft fixative, adult job, outdoors, before the ribbons go on, and they will hold through the holidays.
25. Milkweed Pod Angels
Open milkweed pods split into two curved shells shaped like wings or a gown. Glue two shells back to back as an angel’s dress and wings, add a wooden bead head and a thread halo, and the pod’s silky seed parachutes, if any remain, become hair. Where milkweed does not grow, any large smooth pod or two curved bark pieces make the same figure.
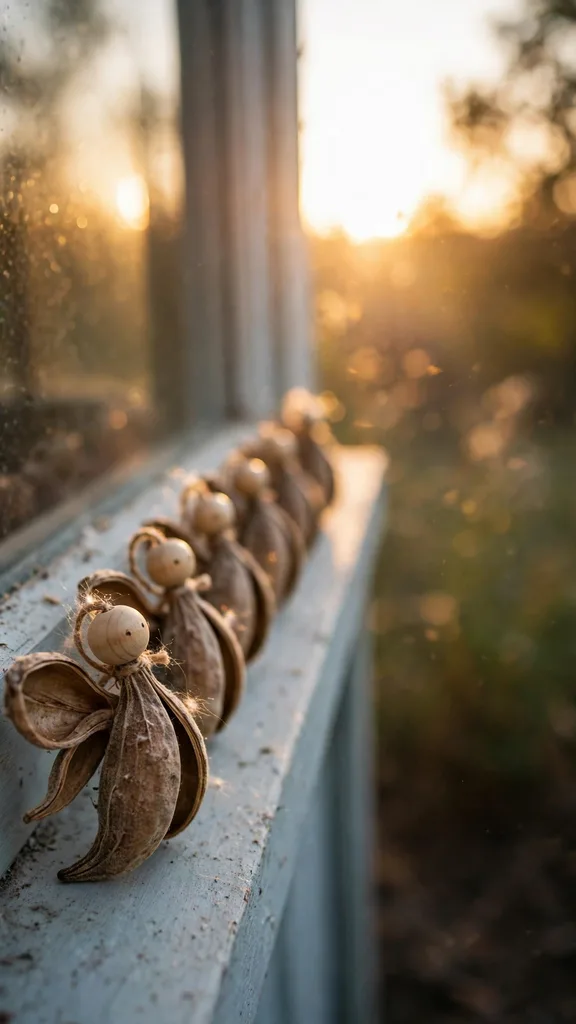
Angels are the fiddliest craft in this section and suit older children with an adult beside them. They are also the ones grandparents request by name. Keep the faces undrawn or minimal; the pod’s shape does the work. A row of pod angels along a windowsill, lit from behind by low winter sun, is the prettiest sight this list produces.
26. Seed Head Garland
String dried seed heads, poppy, echinacea, teasel, allium, onto twine by tying each stem or threading the twine through with a large needle, adult-guided. Space the heads evenly or cluster them by type in sections along the string. The garland reads as a botanical specimen line, and children who collected the heads can name every plant on it by December.
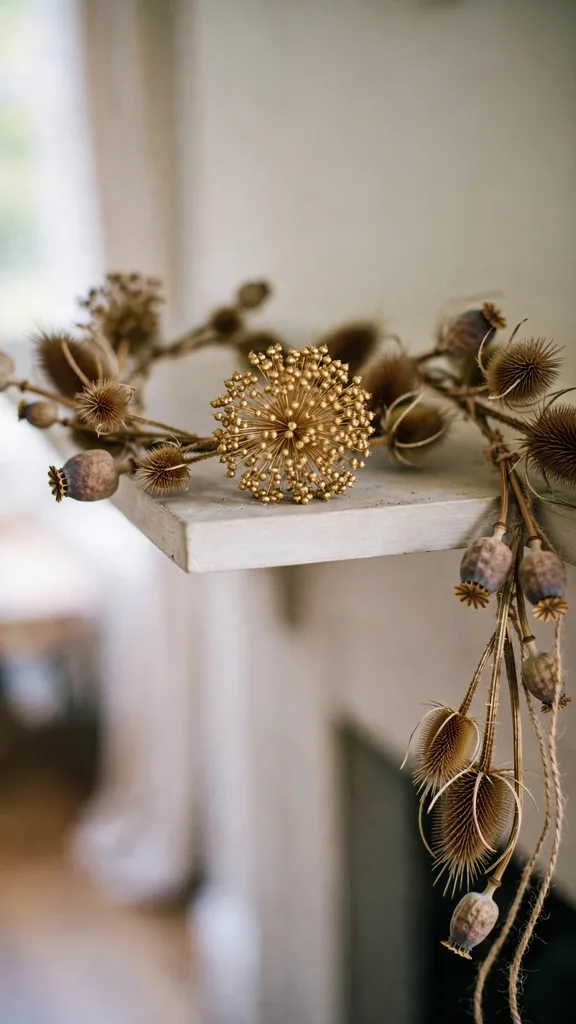
Hang seed head garlands indoors, where rain cannot soften the stems, across a mantel, a bookshelf, or a window. Allium heads sprayed gold carry the Christmas note; the rest stay natural. After the holidays, hang the garland outside in January and the birds strip the remaining seed, which closes the loop the craft opened.
27. Dried Sunflower Head Wreath
A dried sunflower head, seeds picked out by birds or fingers, is a wreath in waiting: a ring of ray petals around a patterned disk. Glue the head to a card ring if it needs backing, add a bow at the base, and hang it on a door or wall. Smaller heads cluster into a group display. Children paint the disk’s spiral or leave it as nature patterned it.
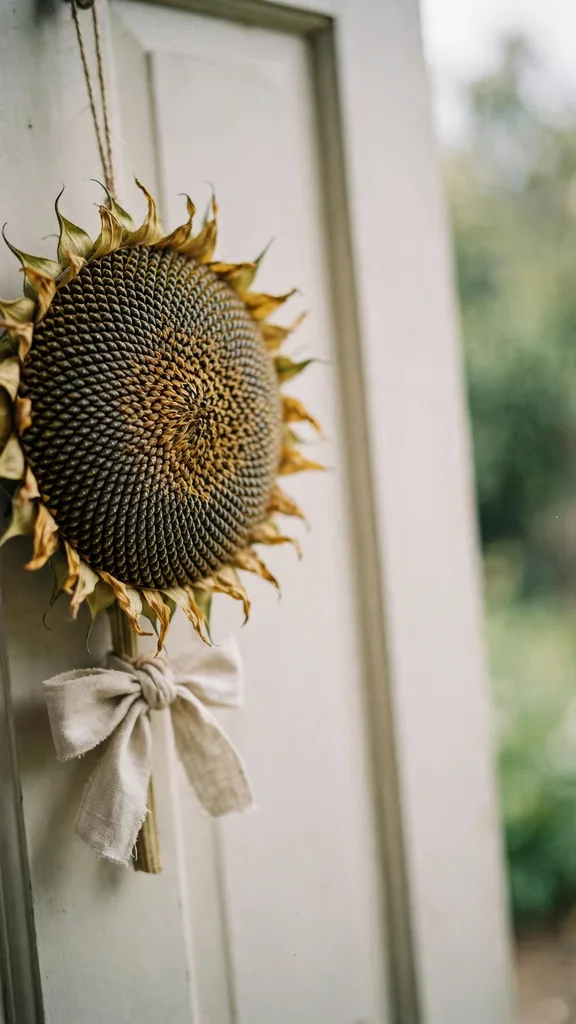
Sunflower heads dry on the plant through autumn; cut them when the backs yellow and finish drying indoors where mice cannot reach. A head that fed the birds first carries a few gaps, which read as rustic rather than ruined. This wreath is big, bold, and free, and it starts conversations at the door all December.
28. Dried Orange Slice Ornaments
An adult slices oranges thin and dries them low and slow; children thread the finished slices with twine and hang them where light shines through. Clemson Extension’s guide to drying oranges for holiday decorations gives the method: slices cut a consistent 1/8 inch thick, dried in a 175°F oven, flipped every 30 minutes, for about 3 to 5 hours. Backlit on a tree or in a window, a dried slice glows like stained glass.
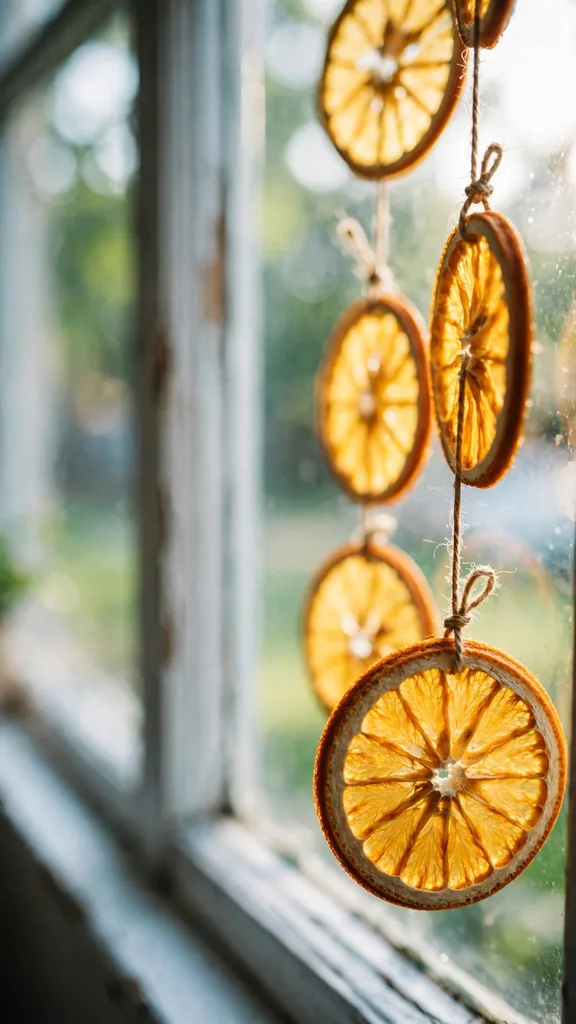
Cut more oranges than the tree needs, because the threading session eats breakages and the cook eats the failures. Slices dried fully keep for years in an airtight box; slices dried nearly keep for one season and then mold, so patience at the oven stage is the whole secret. Thread through the flesh near the rind with a blunt needle, or tie through a hole poked with a skewer.
29. Citrus and Clove Pomanders
Push whole cloves into an orange in patterns, rows, spirals, stars, until the fruit is studded and the room smells like Christmas itself. A ribbon tied around the middle, pinned or glued, hangs the pomander or finishes it for a bowl. Clove pushing takes thumb strength; a cocktail stick or skewer, adult-started, pre-pierces holes for younger children, and a thimble saves every thumb.
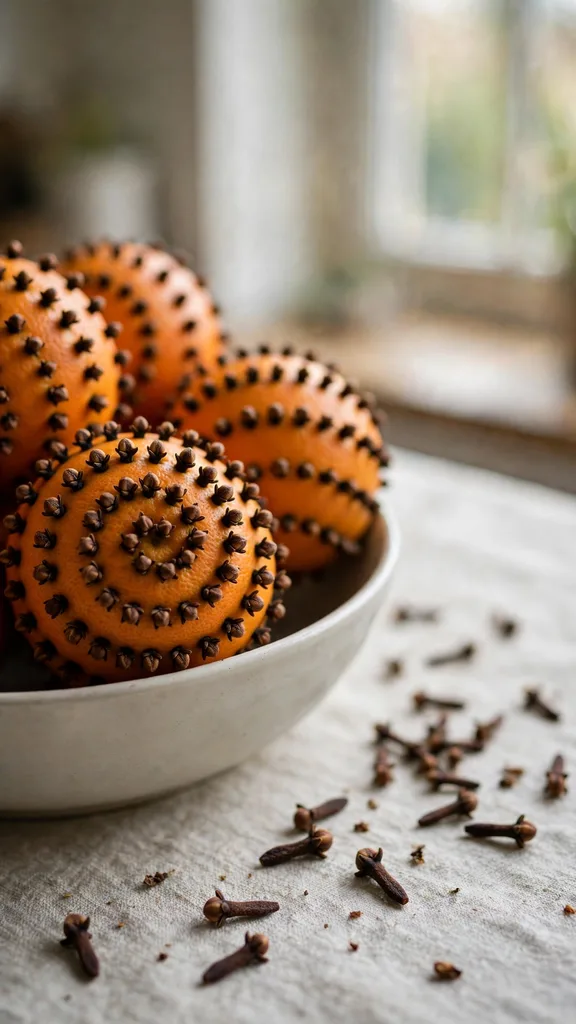
Pomanders dry slowly over weeks, shrink slightly, and keep their scent for months, scenting drawers long after December. Roll a finished pomander in mixed spice for the traditional finish, or leave it bright. One pomander per child is a sitting’s work; a bowl of them is a family’s. Hang drying pomanders where air moves, since a pomander dried in a still corner can mold before it cures.
30. Dried Citrus Garland
Thread dried orange, lemon, and lime slices onto twine with a blunt needle, alternating colors and sizes, with bay leaves, cinnamon sticks, or wooden beads between sections. Children lay out the pattern along the table first, then thread in order. The garland smells faintly of citrus and spice and glows wherever light passes behind it.
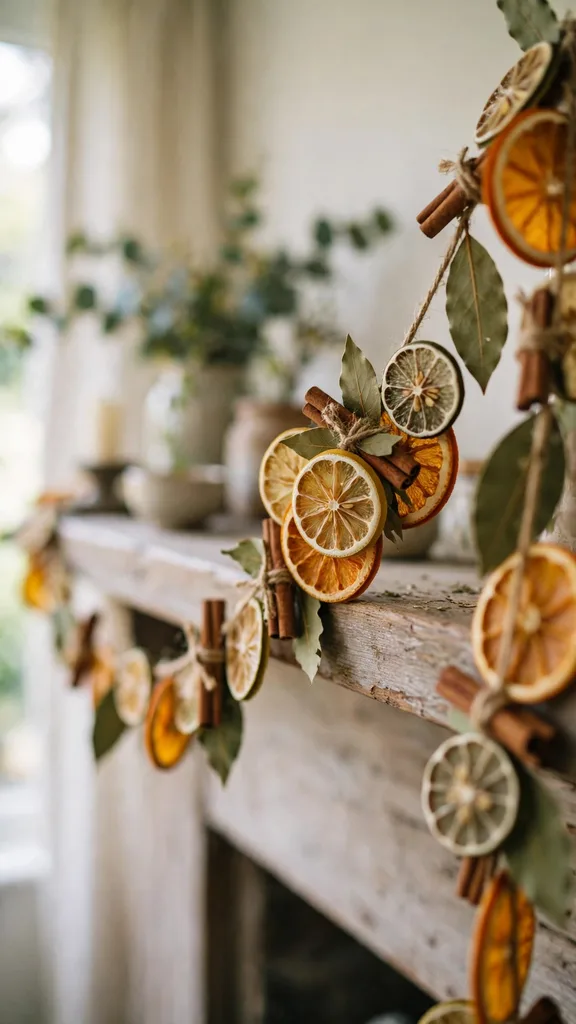
Citrus garlands suit windows, mantels, and the front of a dresser, and they pack flat in a box with tissue between layers. Mixed citrus gives the stained-glass range: orange amber, lemon gold, lime green. Replace any slice that darkens next year and the garland runs for seasons. An adult should do the needle for the youngest threaders; a bodkin or a blunt needle lowers the stakes for everyone.
31. Cinnamon and Rosemary Bundles
Tie three cinnamon sticks with a sprig of rosemary and a strip of ribbon or twine into a small fragrant bundle. The rosemary comes straight off the garden bush, cut the same morning, and the bundle scents a room, a stocking, or the wrapping of a parcel. Children tie and trim; an adult with secateurs cuts the rosemary and any ribbon ends that need a clean finish.
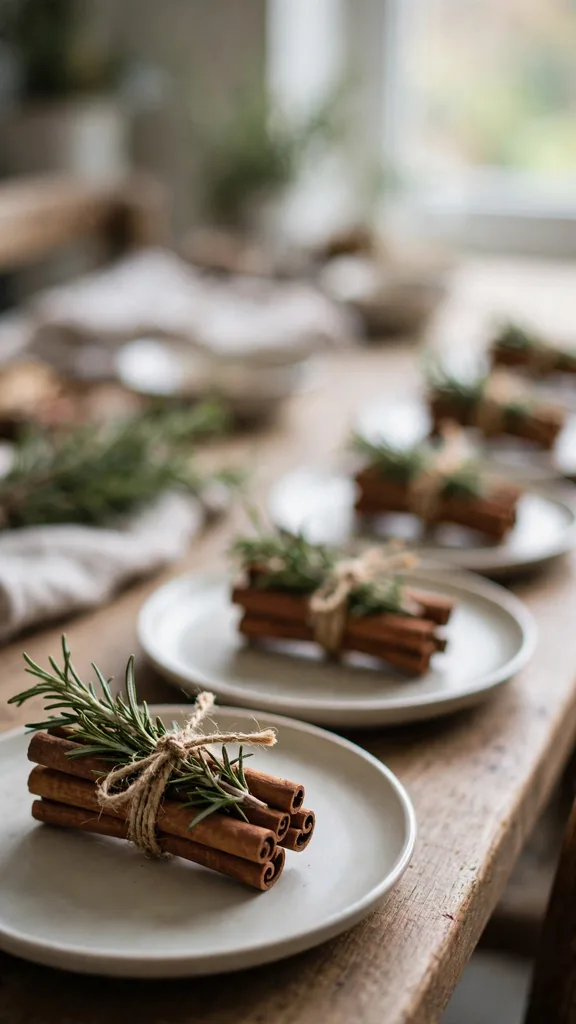
Bundles multiply fast, so set a production line: one child cuts ribbon lengths, one ties, one stacks. A bundle on every plate at the Christmas table doubles as a place marker with a name tag threaded through the tie. The rosemary dries in place and keeps its shape; the scent fades by the New Year, and the cinnamon goes to the compost with its work done.
32. Dried Apple Stars
An adult slices apples across the core, and the seed cavity appears as a star in every slice. Dried the same way as the orange slices, at low heat until leathery, the star slices thread into garlands, hang as ornaments, or top parcels. Children brush the slices with lemon water before drying to slow browning, and they spot the best stars as the tray comes out.
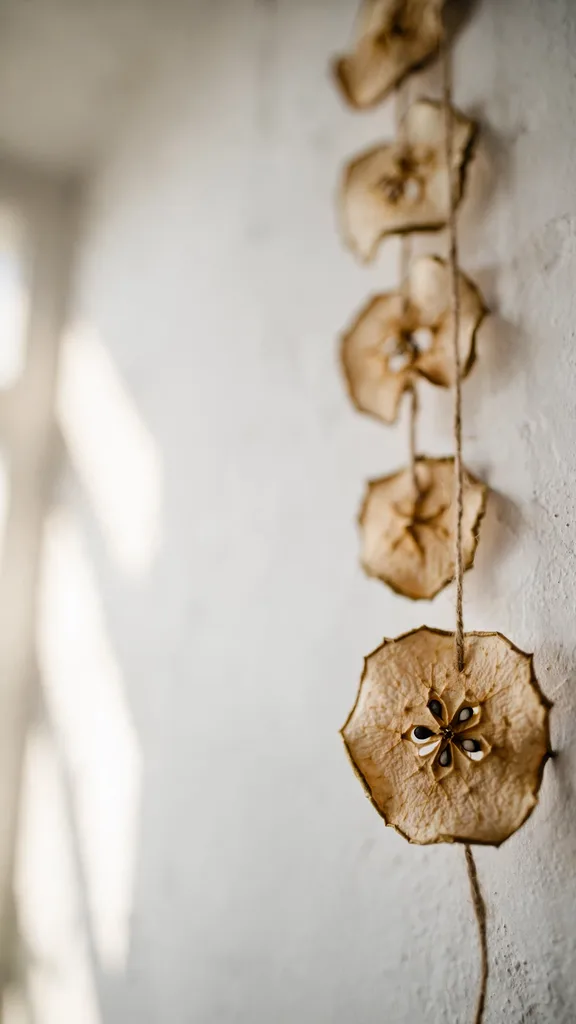
Apple stars are the discovery craft of the list: the star was inside the apple all along, which lands with children like a magic trick. Red-skinned apples give a pink rim to the star. Eat the end slices, dry the middle ones, and expect a few slices to vanish warm from the tray. Fully dried apple keeps a season; chewy slices are snacks, not ornaments.
33. Mini Bay Leaf Wreaths
Thread fresh bay leaves onto a short length of wire or strong thread, overlapping them like scales, and tie the ends into a small ring. The leaves dry in place, holding their shape and scent, and the wreath hangs on the tree, a cupboard knob, or a bottle neck. Children thread and overlap; bay leaf stems are stiff enough for small fingers to manage with a needle started by an adult.
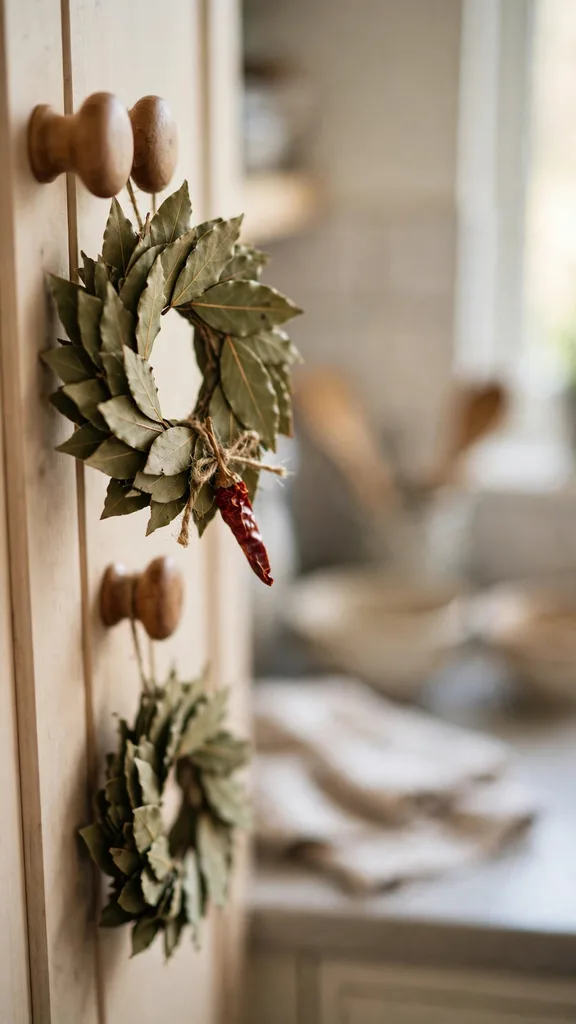
Bay grows as a shrub or small tree in mild gardens and in pots elsewhere, and a handful of leaves is a light pruning. Make the wreaths in November and they are dry, dark, and fragrant by December. A single red chili or berry threaded at the knot gives the color pop. Bay wreaths also flavor nothing and scent everything, which is the right way round for a decoration.
34. Herb Salt Jars
Strip dried rosemary, thyme, and sage leaves from their stems, crumble them fine, and mix with coarse salt in a bowl; spoon the mix into small clean jars and label them by hand. Children strip, crumble, mix, and label; the jars become presents for every cook the family knows. The garden’s summer herbs, harvested and dried in autumn, end the year as the most useful gift in this list.
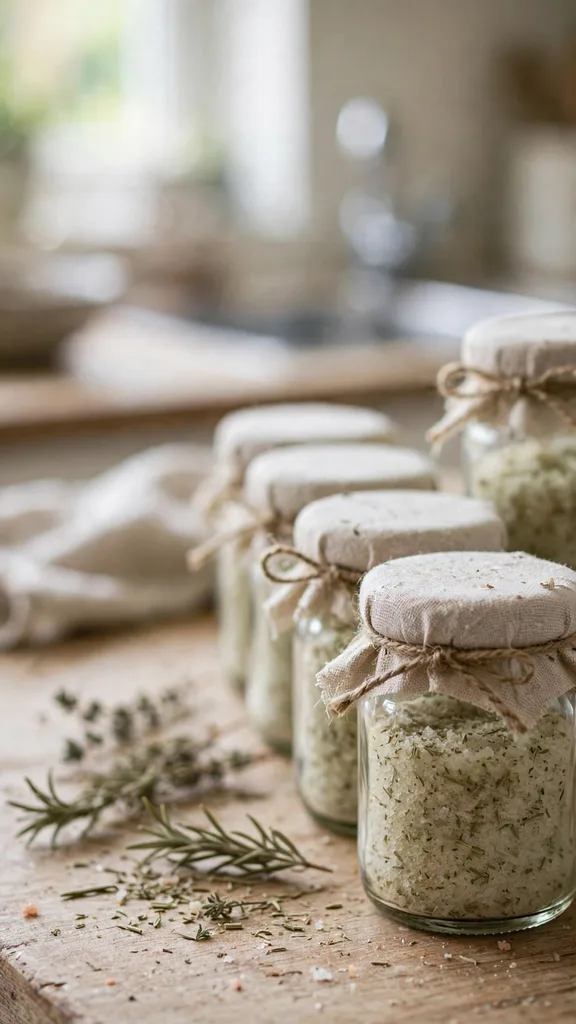
Work out a house blend and write it on the label: two parts salt to one part mixed herbs is a sound start, with chili flakes for the brave jars. Jars must be dry inside or the salt clumps, so wash and dry them the day before. A square of fabric under the lid ring and a twine tie finish the jar, and the label in a child’s handwriting is the part recipients photograph.
35. Popcorn and Cranberry Garland
The classic edible garland: thread plain popped popcorn and fresh cranberries onto strong thread with a needle, in patterns of three white to one red or as the maker pleases. Adults pop the corn the day before, since day-old popcorn threads without crumbling, and supervise needles; children thread, count patterns, and eat the broken pieces, which is the traditional wage.
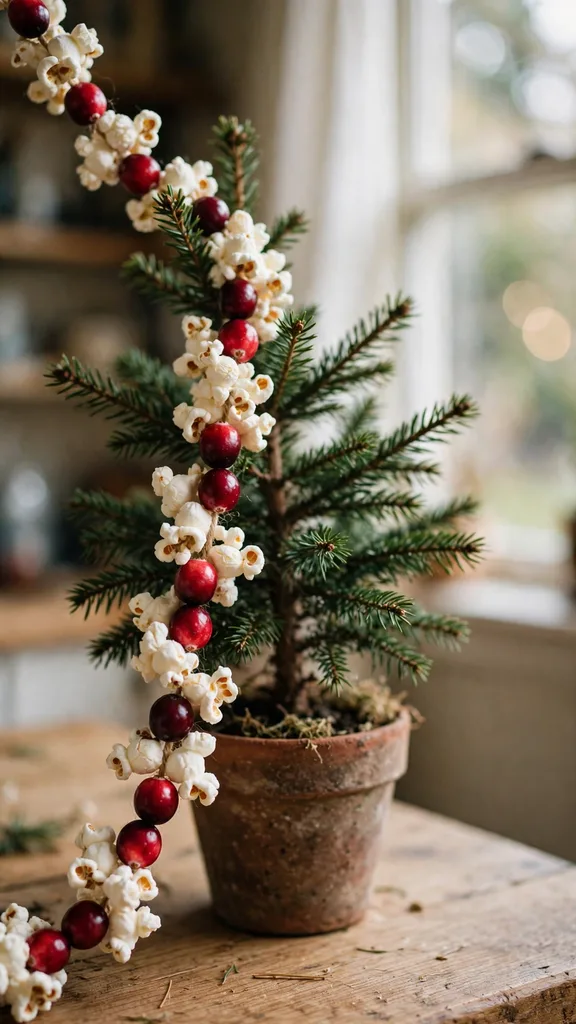
Hang the finished garland on the tree indoors for a week of glory, or straight outside for the birds if the household cats own the tree. Cranberries thread raw and keep their color for weeks in cold air. Work with the thread no longer than a child’s arm span, or the tangles will end the session; join finished lengths on the tree instead.
36. Orange Peel Roses
Peel an orange in one long spiral, an adult with the knife, and roll the spiral from one end so the peel coils into a rose, colored side out. Pin it with a cocktail stick or let it dry holding its shape, and the peel rose scents and decorates bowls, wreaths, and parcels. Children roll and arrange; a bowl of peel roses on the table perfumes the whole room by evening.
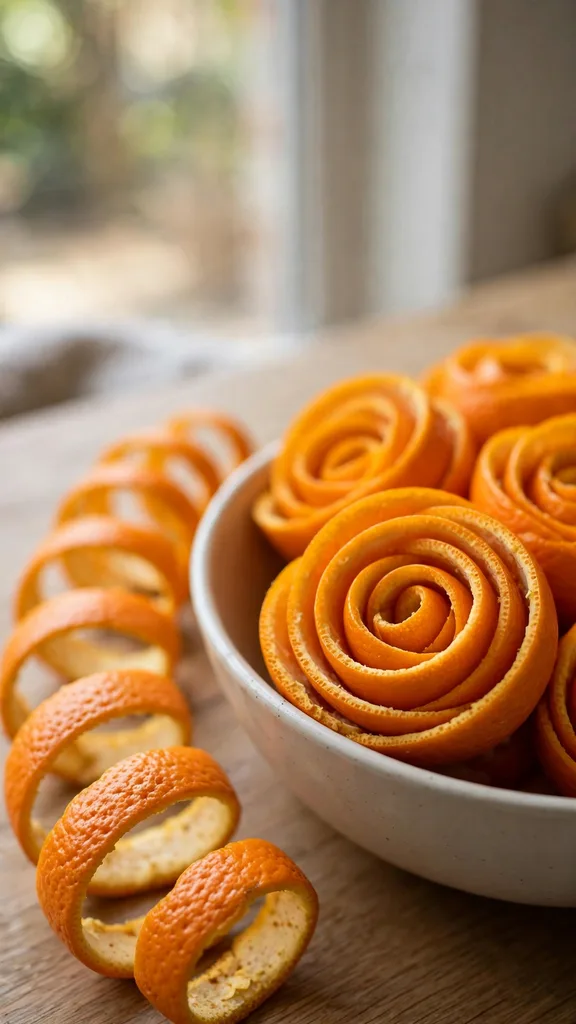
Peel roses dry over a few days near warmth and keep their shape for the season. Practice on the oranges already sliced for drying, since every sliced orange yields a peel spiral as a by-product. A rose glued to the top of a plain parcel turns wrapping into decorating, and a row of them down the table runner needs no other centerpiece.
37. Leaf Rubbing Cards
Place a leaf vein-side up under a sheet of thin paper or a card blank, and rub the side of a crayon across it until the leaf’s shape and veins print through. Evergreen leaves, fern fronds, and any leaf with strong veins print best. Children choose leaves, hold paper steady for each other, and layer colors; the same rubbing technique made the leaf cards in our Thanksgiving crafts for kids earlier this year.
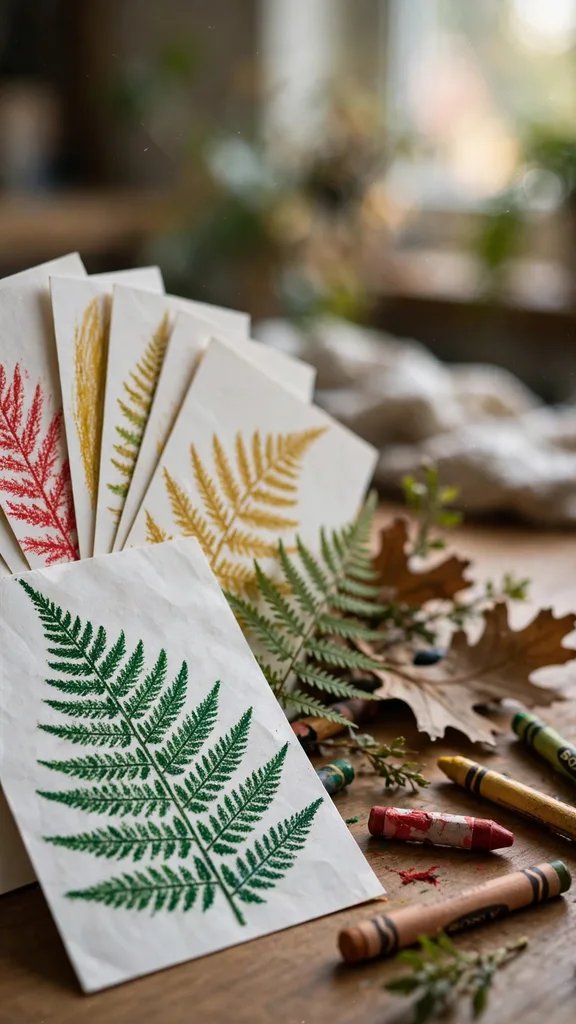
Rubbings stack into card sets: one leaf per card, a border of small prints, or a wreath ring of overlapping rubbings. Metallic crayons on dark card give the Christmas version. Collect leaves on a dry day and press them flat in a book for an hour first if they curl; a curled leaf prints a curled picture, which some makers prefer. Label the tree each leaf came from on the back, and the card carries a botany lesson.
38. Painted Stone Snowmen
Find three flat-ish stones in graduating sizes, or paint one stone per snowman with the three sections stacked in paint. White paint, a black hat, an orange triangle nose, and dot eyes turn a garden stone into a snowman that never melts. Children hunt the stones, wash them, and paint; stone hunting is half the craft and all of the walk.
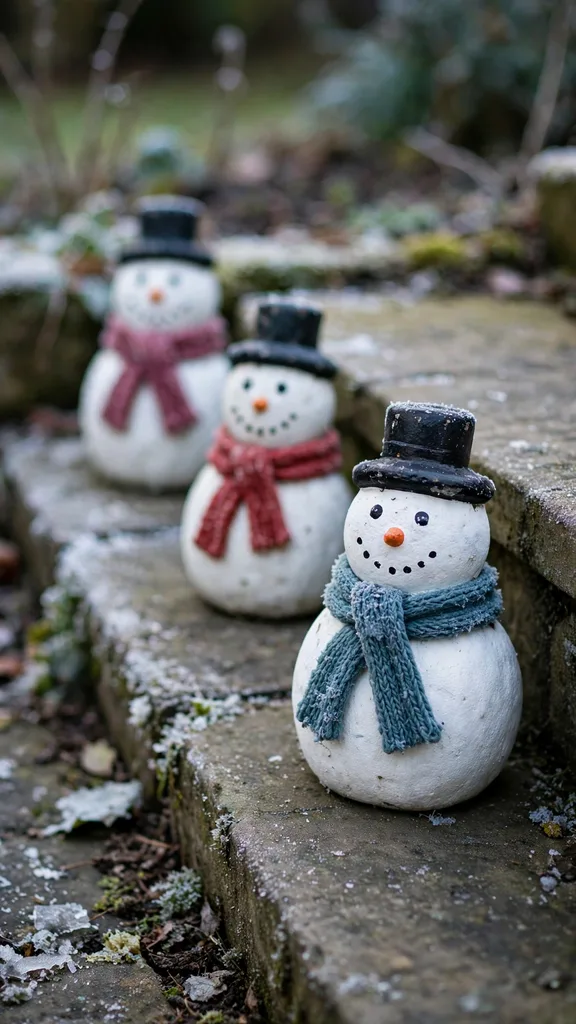
Stone snowmen line paths, sit on steps, and hold down the corners of the table runner. Seal painted stones with an adult-applied coat of outdoor varnish if they will live outside, or keep them as indoor ornaments. A family of stone snowmen, one per person with the right scarf color, becomes a fixture of the front step for the whole winter.
39. Stick Reindeer Ornaments
Glue three twigs into a triangle for the reindeer’s head and neck, add two branched twigs as antlers, a red bead nose, and eyes. The classic camp craft works because the shape is unmistakable at any skill level. Children gather and match twigs; an adult runs the glue gun, since stick joins need hot glue’s grip, or lash the joins with thread for a no-glue version.
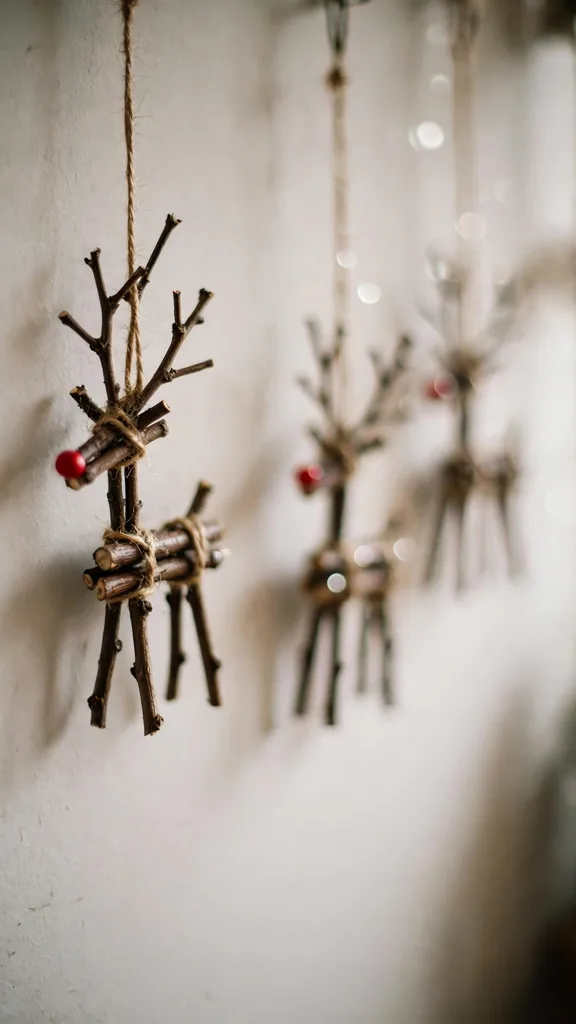
Hang stick reindeer on the tree, tie them to parcels, or stand a herd along the windowsill with cotton wool snow. Twig choice decides the character: straight twigs give tidy reindeer, crooked ones give comedians. Collect twigs after a windy night when the garden floor offers the best selection of the year, and dry them indoors before gluing.
40. Pressed Leaf Wreath
Glue pressed autumn leaves in overlapping rings onto a card or willow ring base, mixing colors and shapes until the base disappears. Children arrange and glue; the pressing happened weeks earlier in books, the same books as the pressed flowers, so an autumn pressing session stocks two crafts. A bow and a hanging loop finish the wreath, and a light spray of fixative, adult job, slows the crumbling.
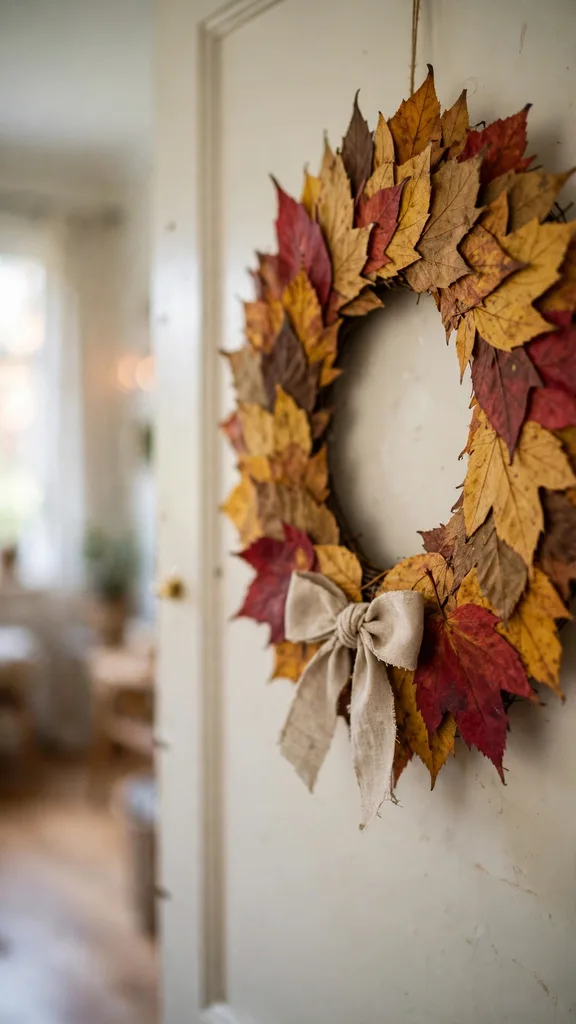
Leaf wreaths are fragile and glorious, best on an inside door or a wall away from knocks. Red and gold leaves carry the season; green pressed leaves read as summer and suit a different ring. Photograph the wreath the day it is made, because its peak is brief, and let the photograph be the keepsake when the leaves retire to the compost in January.
41. Twig Picture Frames
Tie or glue four twigs into a square, add cross twigs at the corners for strength, and mount a photograph or a child’s drawing on card behind the frame. Children build and decorate the frame with tiny cones, seeds, and dried flowers glued along the twigs; an adult trims twig ends square with secateurs. A twine loop or a kickstand twig at the back finishes it.
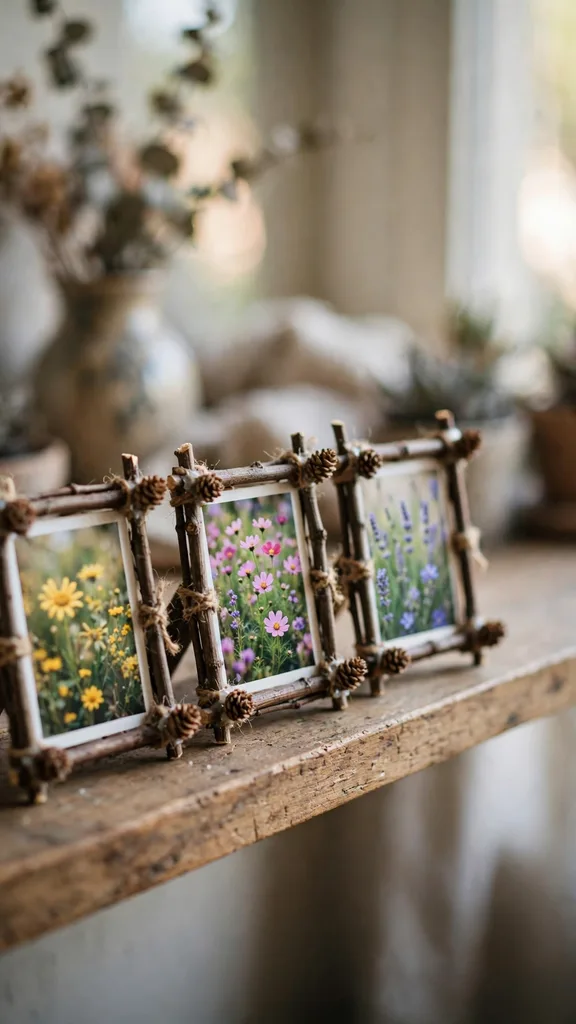
Framed photographs of the garden in summer, or of the makers mid-craft, are grandparent presents of the first order. Make the frame to the photo, not the other way round: lay the twigs around the mounted picture and mark the cuts. A set of three small frames in a row on a shelf turns one afternoon’s work into a gallery.
42. Nature Find Advent Calendar
Fill 24 small bags, envelopes, or jars with one garden find each: a perfect cone, a feather, a seed head, a smooth stone, a dried flower, a written clue to something outside. Number them, hang them on a branch in a vase or line them on a shelf, and open one each December morning. Children who collected all year have the stock; adults help with the numbering and the hiding of the calendar’s location.
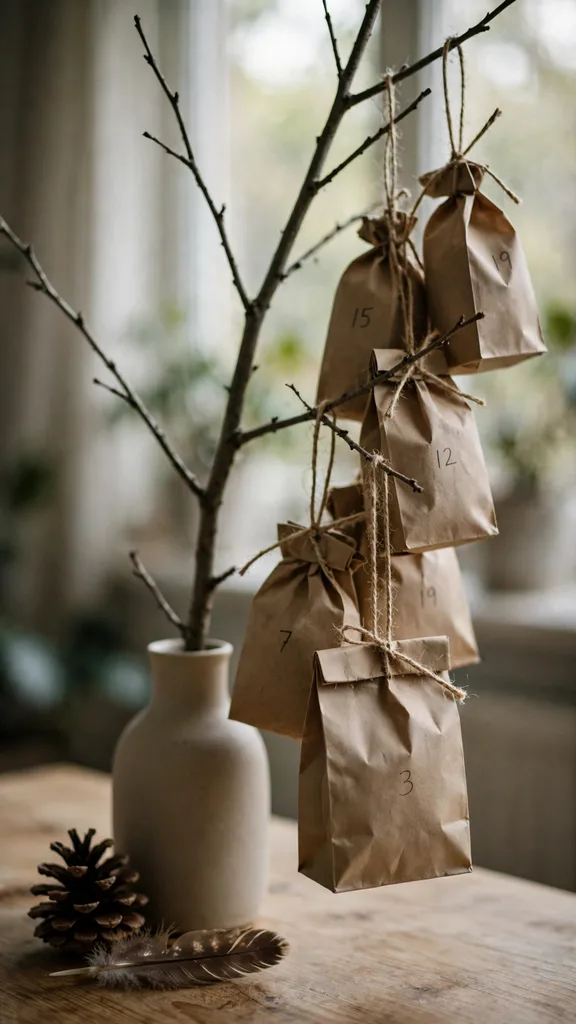
This calendar costs nothing and out-charms the chocolate kind by the second week, because every day is a small museum. Keep finds dry and light, and save the best cone for the 24th. Younger children can run a 12-day version from mid-December. Next year’s collecting starts on Boxing Day, when the first walk finds the first treasure for the next calendar.
43. Garden Snow Globe Jars
Glue a tiny arrangement, a mini cone tree, a seed head, a small stone snowman, to the inside of a jam jar lid, fill the jar with water and a pinch of glitter or fake snow, and screw the lid on tight, adult-checked, so the scene snows when shaken. Children design the scenes and choose the snow; adults seal the lids, with a ring of waterproof glue for any jar that will live with a toddler.
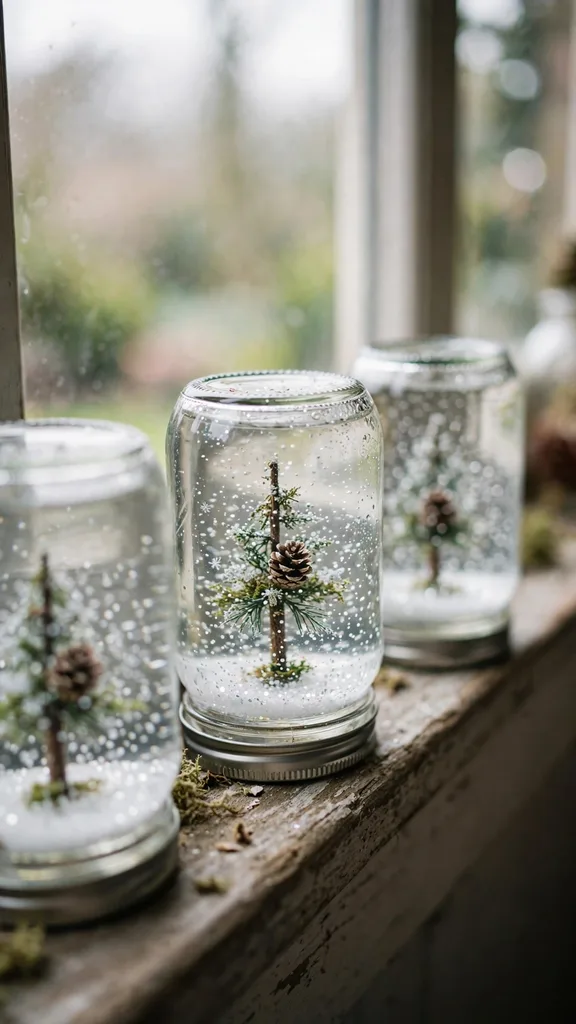
Snow globes line up beautifully on a windowsill, one per maker, and each holds a piece of that maker’s garden. Distilled water stays clearest, and a drop of glycerin slows the snowfall if the cupboard has it. Label the maker’s name under the lid before sealing; by the second year, nobody remembers whose globe is whose, and the argument is annual.
44. Painted Leaf Bunting
Collect the biggest, flattest leaves you can find, press them for a day, and paint them in Christmas colors and patterns: red with white dots, gold stars, green with snow edges. Punch a hole at each stem end or fold the stem over twine and glue, then string the leaves into bunting. Children paint and pattern; the stringing suits anyone who can thread.
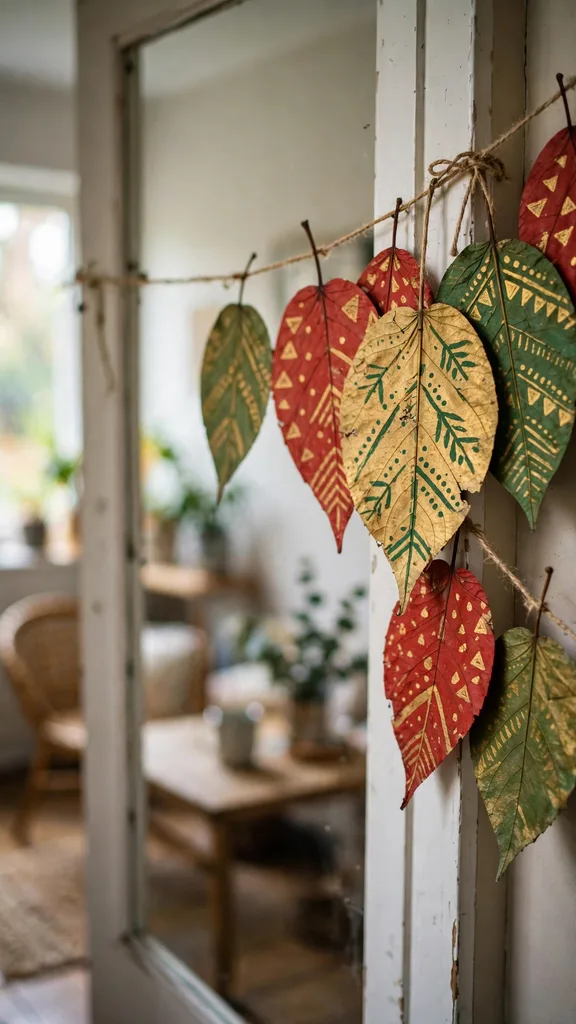
Leaf bunting dresses a doorway, a mantel, or the front of a table for a party, and its impermanence is part of the charm. Paint both sides if the bunting will hang where air moves it. Leaves painted with outdoor paint last outdoors for a few weeks; indoor bunting in poster paint does the season. Photograph it fresh, compost it in January, and repaint next year’s fall.
45. The Finished Craft Table
The last craft is the display. Cover a table or a tray with a cloth, arrange the month’s making by maker or by material, cones with cones, citrus with citrus, and set the whole collection where visitors see it first. Children curate: every maker chooses their best three pieces for the front row and tells the story of each. A small handwritten label per section turns the table into an exhibition.
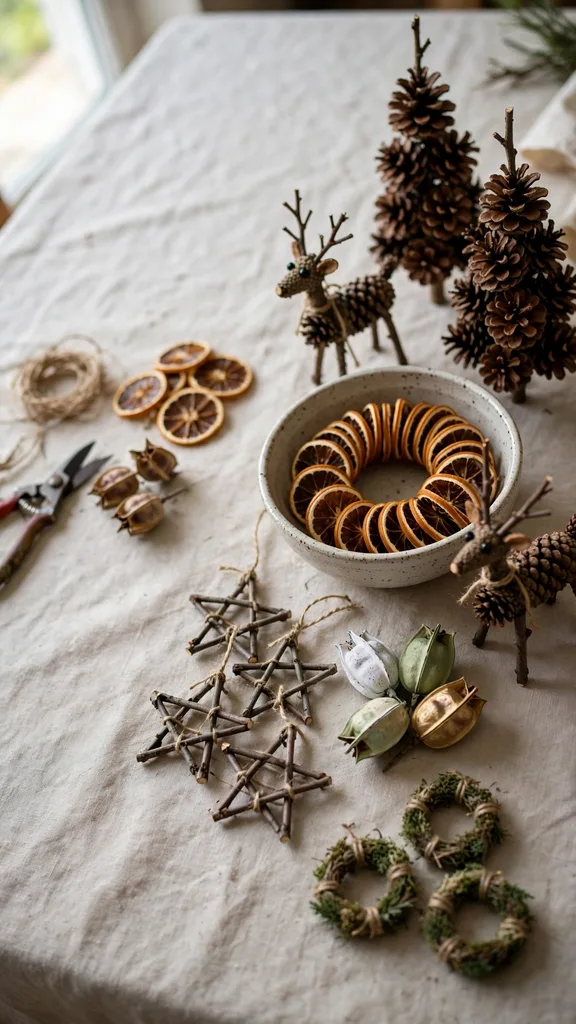
Photograph the table before pieces start leaving as gifts, because they will leave: the crafts in this list were always meant for doors, trees, tables, and other people’s houses. What stays is the habit, a basket by the door that fills every autumn and empties every December. For the other 55 ideas in the full set, the Christmas garden ideas pillar holds the complete collection this craft list grew from.
Frequently Asked Questions
Most crafts here suit ages 4 to 10 with an adult nearby, and the table at the top flags the youngest-friendly ones: pinecone bird feeders and painted stones work from age 3, while pod angels and seed mosaics reward ages 7 and up. Match the craft to the child rather than the other way round, and let younger children own the collecting, sorting, and painting stages of any project.
Start with pinecones and seed heads from autumn onward, because they keep for months in a dry box and anchor half the crafts on this list. Cut evergreen clippings in December when they are needed, since freshness decides how long they last. Citrus dries in an afternoon whenever you are ready. A basket by the back door, filled a little after every garden tidy, stocks the whole season.
Keep small pieces, beads, berries, and glitter crafts on a table that toddlers cannot reach, and treat some garden berries as decoration only, never snacks. Adults keep the knives, ovens, secateurs, and hot glue. Wash hands after bird feeder making and after handling collected materials. Paints and glues should be the child-safe, water-based kind, and anything mouthed by a toddler should be big, plain, and washable.
Evergreen crafts last two to four weeks indoors before they dry and drop, and all season outdoors in cold weather. Dried citrus, cones, seed heads, and stones keep for years stored dry in boxes, so a craft box builds up over several Christmases. Pressed and glued paper crafts last a season on display. Photograph the fragile pieces on the day they are made and the record outlives them.
Ask a neighbor with a hedge, collect fallen cones and leaves from parks where local rules allow taking fallen material, and use a window box or a single potted conifer as your clipping source. Never cut from other people’s plants or protected areas, and take only what has already fallen in public spaces. The kitchen half of the list, citrus, popcorn, herbs, and salt, needs no garden at all.