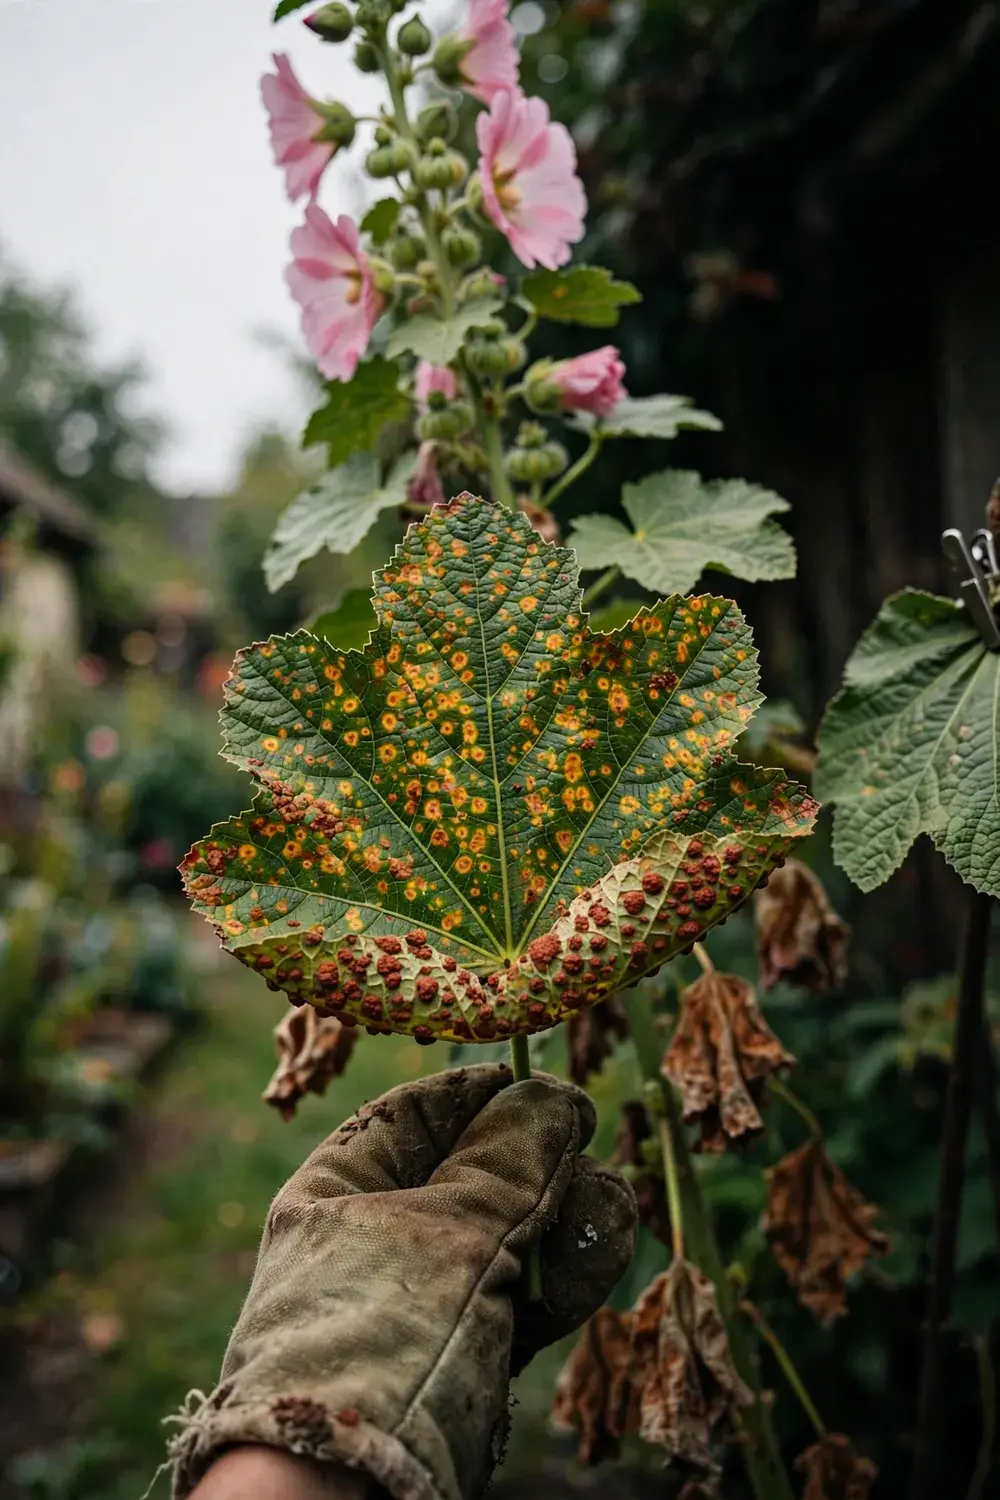

Check the underside of the lowest leaf. Raised brown-red bumps under a yellow-orange spot mean hollyhock rust, and the 9 strategies below tell you how to confirm it, slow it, and decide whether spraying is worth it at all.
Hollyhock rust spots the lowest leaves first, then works up the plant through the season. Badly hit leaves turn lacy, shrivel, and drop. The plant usually survives and still flowers, which is why the right response is steady sanitation rather than panic.
The rest of this page runs in the order a gardener should follow. Identify the disease on leaves, stems, and flowers. Separate it from leaf spot and nutrient deficiency. Then work the 9 steps from the first stripped leaf to next spring’s plan. I have learned that the lowest leaves tell the truth first, and a weekly look at them beats any spray bought after the damage shows.
What Hollyhock Rust Actually Is
Hollyhock rust is a fungal disease of hollyhocks. The fungus Puccinia malvacearum causes hollyhock rust.
Wisconsin’s diagnostic clinic places the same fungus in the newer genus Leptopuccinia. This article uses Puccinia malvacearum throughout, since that is the name most garden references still use. Either name points at one fungus and at nothing else.
Hollyhock rust is the most common fungal leaf disease of hollyhocks. It belongs to the rust family, a group of highly specialized parasites that feed on living plant tissue. Rust fungi do not rot the plant or poison it. They drain it leaf by leaf, which is why a rusted hollyhock looks ragged long before it looks doomed.
The fungus infects only the mallow family. Hollyhock, rose mallow, Lavatera, Malva, hibiscus, abutilon, flowering maple, Malvastrum, and Sidalcea all sit inside that family. No plant outside the mallow family catches hollyhock rust. That boundary matters when you decide what to pull, what to keep, and what to worry about.
How to Identify Hollyhock Rust on Leaves
Start with the lowest leaves. Hollyhock rust almost always shows there first, then climbs the plant as spores splash upward.
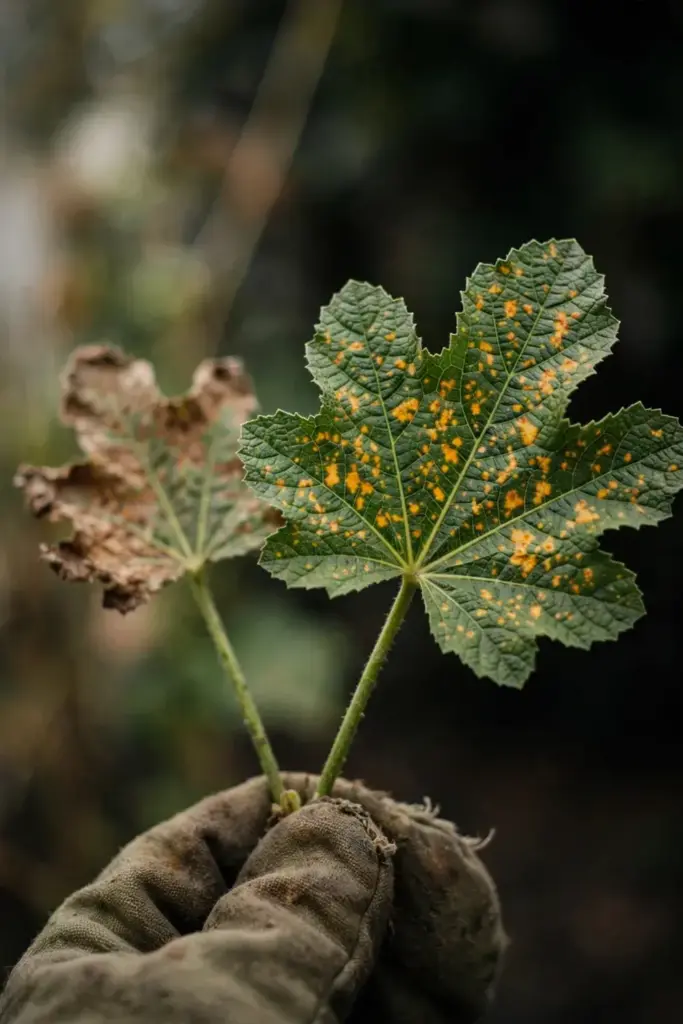
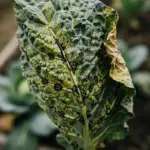
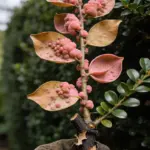
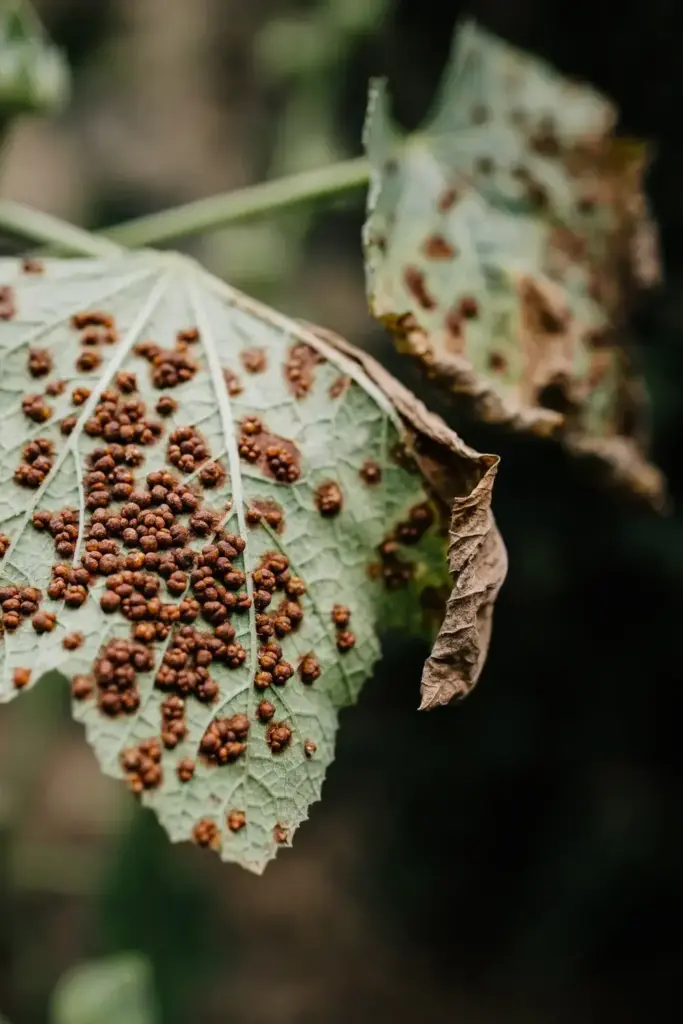
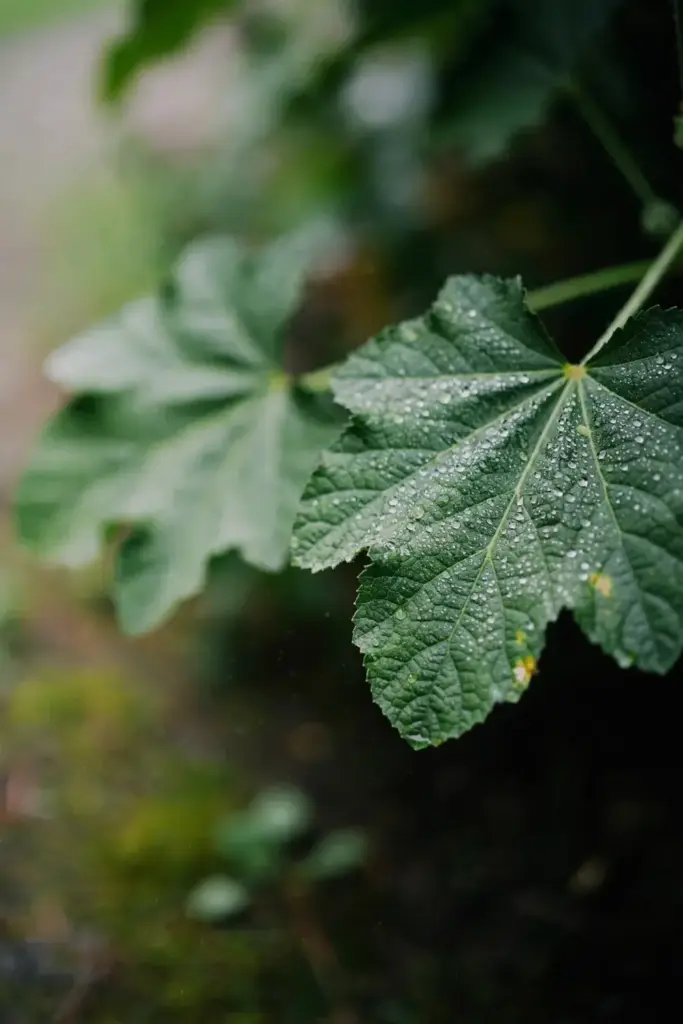
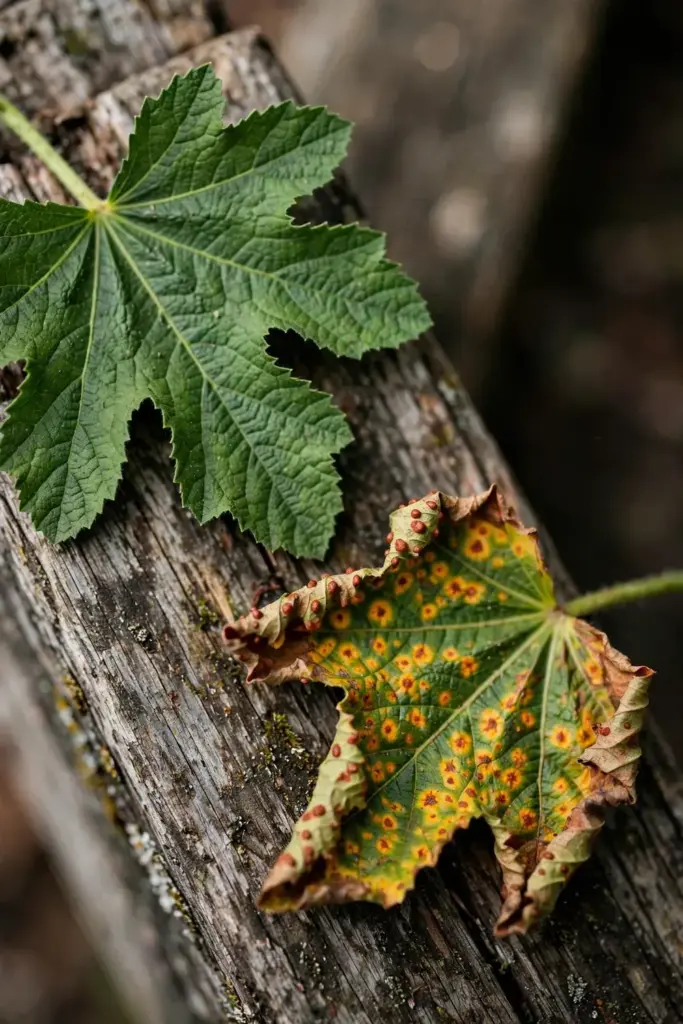
The University of Wisconsin-Madison Plant Disease Diagnostics Clinic hollyhock rust fact sheet describes the first symptoms as orange to yellow spots roughly 0.3 to 0.6 cm across on lower leaves. Those spots sit on the upper leaf surface. Flip the leaf over. Brown to dark-red raised bumps sit on the underside directly beneath the spots. Those bumps are pustules, the structures that release spores.
Severely affected leaves develop holes that give them a lacy look. The holes open where tissue around the pustules dies. The leaf then shrivels and drops. A plant that loses its lower leaves in midsummer while the top still flowers is showing the classic rust pattern, not a watering failure.
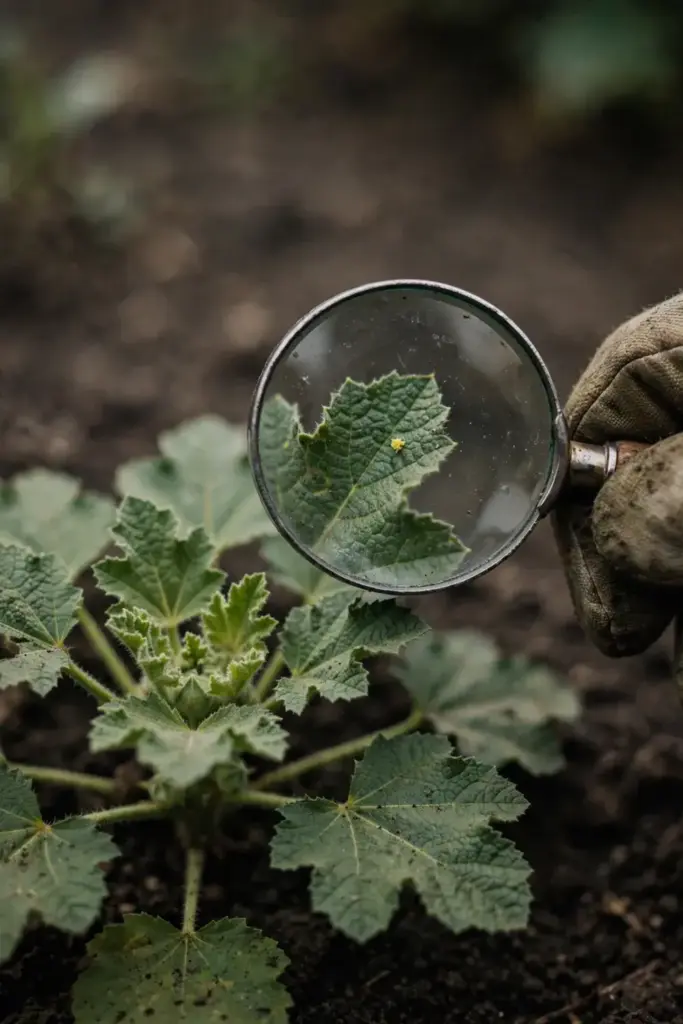
Run one finger lightly across the underside of a spotted leaf. Rust pustules feel raised, like coarse sandpaper. A flat spot that feels smooth on both sides is something else, and the differential section below sorts out which. A hand lens makes the check certain. Pustules stand up from the surface. Flat spots do not.
How to Identify Hollyhock Rust on Stems and Flowers
Check the stems after the leaves. Hollyhock rust reaches petioles and stems once the lower leaves carry pustules.
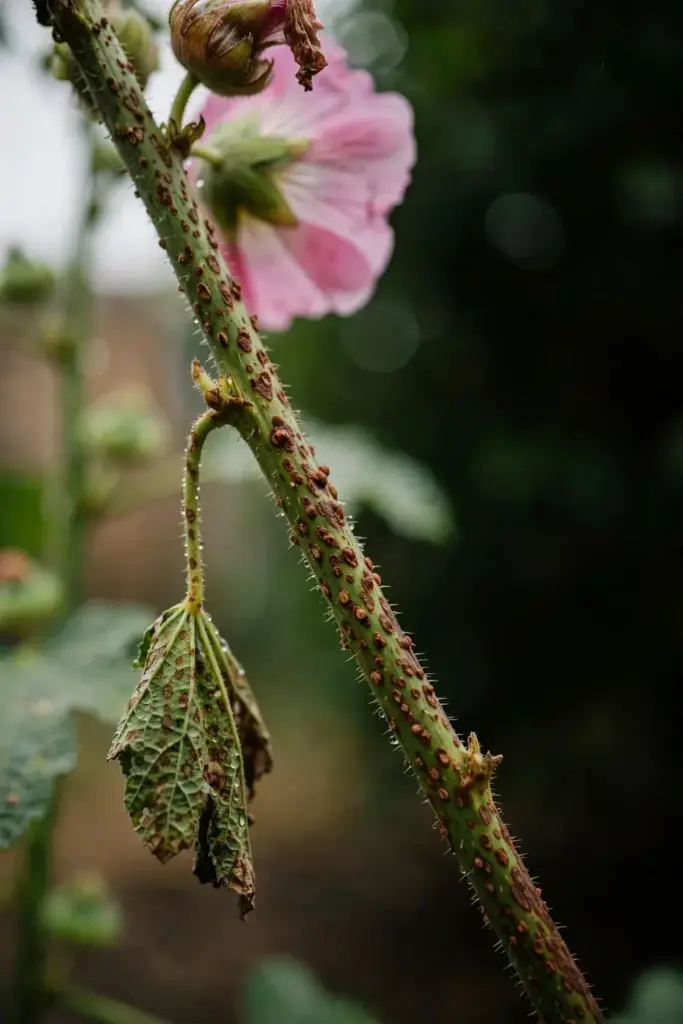
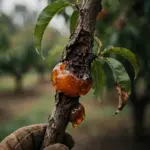
Irregular brown areas develop on stems. Pustules break through on petioles and on the stem surface itself, in the same brown-red color as the leaf pustules. A stem that shows brown patches with raised bumps carries the same disease as the spotted leaves below it. A stem that only browns, with no bumps, needs a closer look before you call it rust.
Flowers suffer indirectly. The fungus rarely attacks the petals themselves. It strips the leaves that feed the plant, so a heavily rusted hollyhock throws shorter spikes with fewer flowers. The blooms that do open look normal. A plant that flowers poorly while its lower leaves drop one by one is usually losing leaf area to rust, not failing to bloom.
Cut stems tell the same story after harvest. A stalk stripped of leaves by rust still shows brown patches and pustule scars. Those stalks carry spores into the fall, which is why Step 5 removes every scrap rather than leaving stalks standing.
Which Hollyhocks and Mallow Relatives Get Hit Hardest
Common hollyhock takes the worst of it. Alcea rosea is the flagship host, the plant the disease is named for, and the plant that shows the full syndrome first.
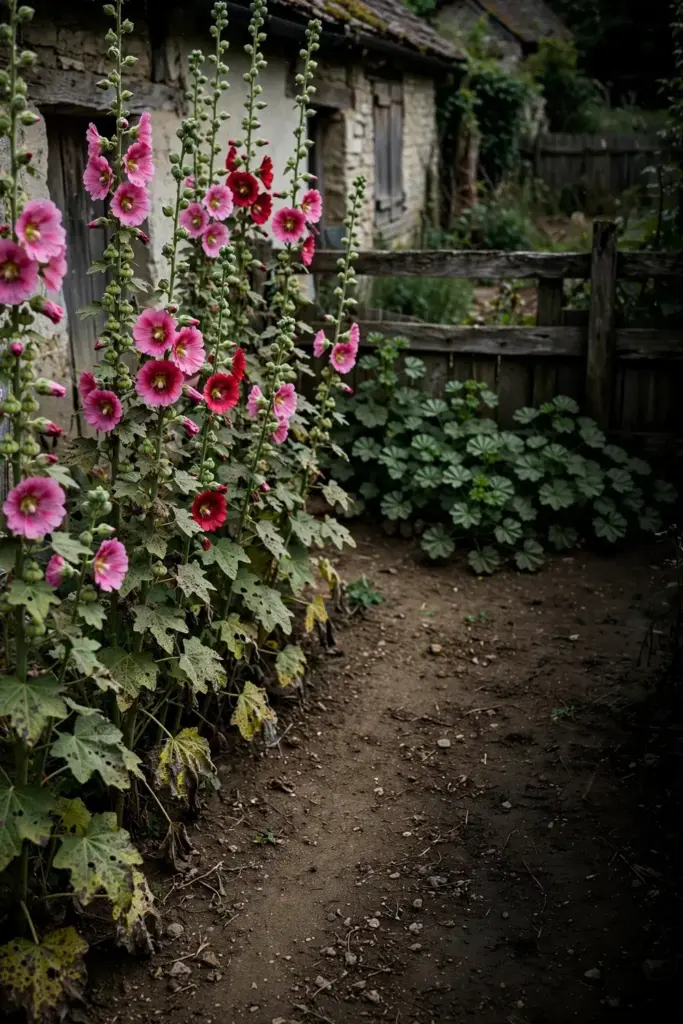
Other mallow relatives catch the same fungus. Rose mallow can infect hollyhock, and hollyhock can infect rose mallow, since one fungus covers the whole family. Lavatera, Malva, hibiscus, abutilon, flowering maple, Malvastrum, and Sidalcea all host Puccinia malvacearum. A hibiscus beside a rusted hollyhock deserves the same weekly leaf check as the hollyhock itself.
Common mallow is the weed reservoir. Malva neglecta grows in paths, bed edges, and waste ground, and it carries the fungus between seasons. A garden with clean hollyhocks and weedy mallow along the fence still holds rust inoculum a few steps from the border. Pulling that weed is plant protection, not tidiness.
No plant outside the mallow family catches this rust. Roses, tomatoes, beans, and grasses stay safe beside a rusted hollyhock. That boundary keeps the response narrow. You pull mallow weeds and strip hollyhock leaves. You do not strip the whole border.
Hollyhock Rust vs Leaf Spot vs Nutrient Deficiency
Check the underside first, then the texture. Hollyhock rust is the only one of the three that raises pustules on the leaf underside. Leaf spot diseases stay flat. Nutrient deficiency stays flat too.
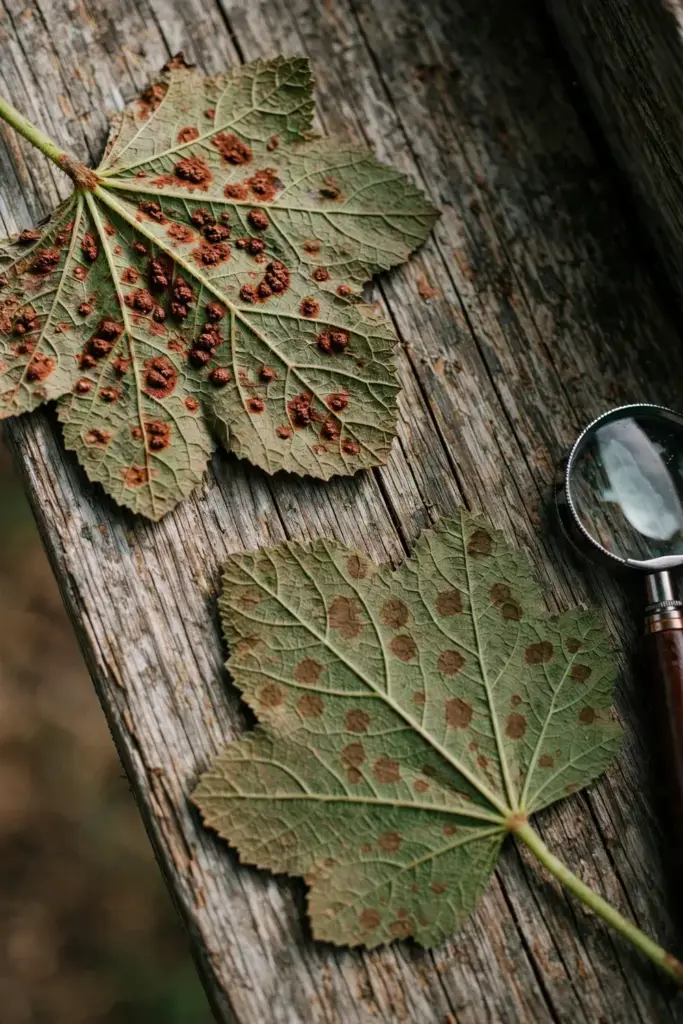
| Sign | Hollyhock Rust | Leaf Spot Diseases | Nutrient Deficiency |
|---|---|---|---|
| Cause | Fungus. Puccinia malvacearum | Fungi or bacteria, grouping-level label, not one disease | Missing or locked-up nutrient, not a pathogen |
| Leaf surface | Yellow-orange spots on top, raised brown-red pustules beneath | Flat spots, often with defined margins, sometimes with a dark edge | Yellowing or pale tissue, often between veins, no spots with edges |
| Underside feel | Raised bumps, like coarse sandpaper | Smooth, no bumps | Smooth, no bumps |
| Spore dust | Orange-brown powder rubs off pustules onto a finger | No powdery spore dust on the spot | No powder of any kind |
| Progression | Starts on lowest leaves, climbs the plant | Starts where water sits, often scattered across the plant | Shows on older leaves or new growth depending on the nutrient, plant-wide pattern |
| Leaf loss | Leaves turn lacy, shrivel, and drop | Spotted leaves may drop in bad cases | Leaves usually stay on the plant, discolored |
| First move | Strip and bag spotted leaves, then run the 9 steps | Remove spotted leaves, improve airflow, identify the specific disease if it spreads | Check watering, soil, and pH before adding any fertilizer |
Leaf spot is a grouping-level label, not one disease. Many fungi and a few bacteria cause flat spots on leaves, and they differ from each other. The grouping still works for this check, because every leaf spot in the group shares the trait that matters here. None of them raises pustules. A flat spot with no bumps is not rust, whatever leaf spot it turns out to be.
Nutrient deficiency confuses gardeners because yellow leaves look like disease. Deficiency yellows tissue without pustules, without spore dust, and without the bottom-up march of rust. A plant short of a mobile nutrient yellows its older leaves first, while a plant short of an immobile nutrient yellows new growth first. Either way, the leaf feels smooth on both sides. A magnifying glass settles it. Pustules mean rust. No pustules mean something else, and the fix follows the real cause.
When the check still leaves doubt, treat the leaf as rust and strip it. Stripping one spotted leaf costs nothing. Leaving a rusted leaf costs spores. A professional diagnosis settles a plant-wide problem that keeps spreading after stripping, and that call is cheaper than a season of wrong sprays.
Why Hollyhock Rust Keeps Coming Back
Hollyhock rust needs no second host. Spores from one hollyhock reinfect the same plant, its neighbors, and the mallow weeds along the fence. No alternate host stands between seasons. The fungus overwinters where the plant stood.
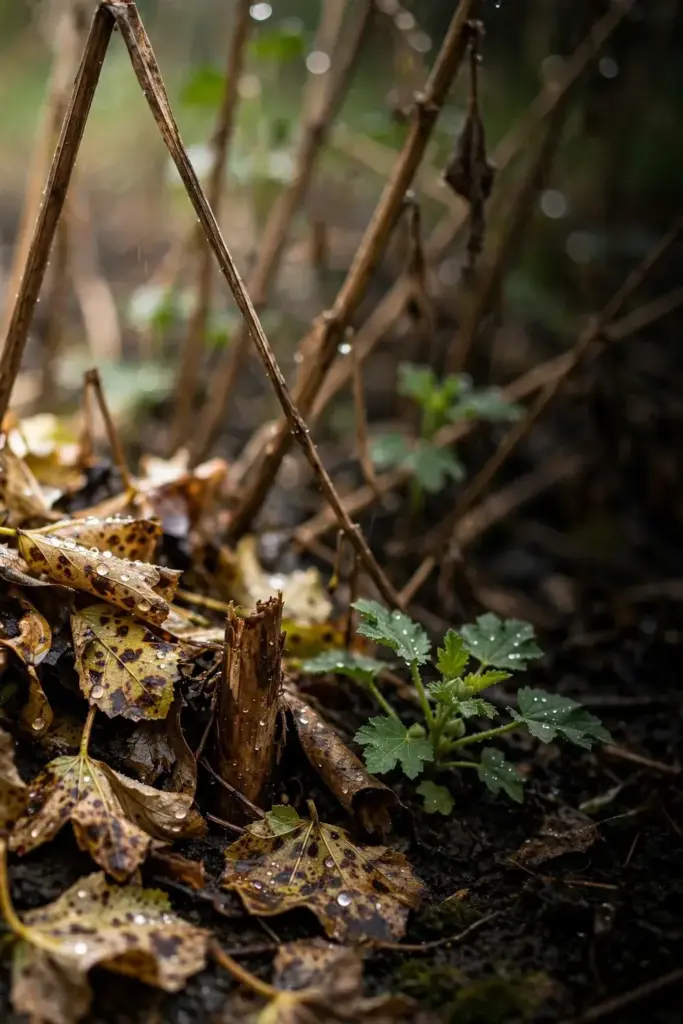
Wind carries spores long distances, so new spores arrive from surrounding gardens and wild plants all season. Local spread runs on splashing rain and sprinkler water. Warm and humid weather favors the fungus. A wet week in midsummer does more for rust than a whole dry month does against it.
The fungus survives winter in hollyhock leaf and stem debris. Fallen leaves, cut stalks left standing, and debris under the plant all shelter it. Spring rain splashes spores from that debris onto the lowest new leaves. The cycle restarts at the base of the plant, exactly where it started last year.
That cycle is why hollyhock rust is managed, never cured. No spray, no stripping, and no cleanup kills every spore in a neighborhood where wind delivers fresh ones. The work lowers pressure each year. It never reaches zero, and a gardener who expects zero will call every program a failure. The honest goal is fewer spotted leaves, slower spread, and flowers that still open.
What Makes Hollyhock Rust Worse in a Home Garden
Dense planting feeds rust. Crowded hollyhocks dry slowly after rain, and slow drying holds the leaf wet through the hours spores need. Airflow is the cheapest fungicide a garden has, and tight spacing throws it away.
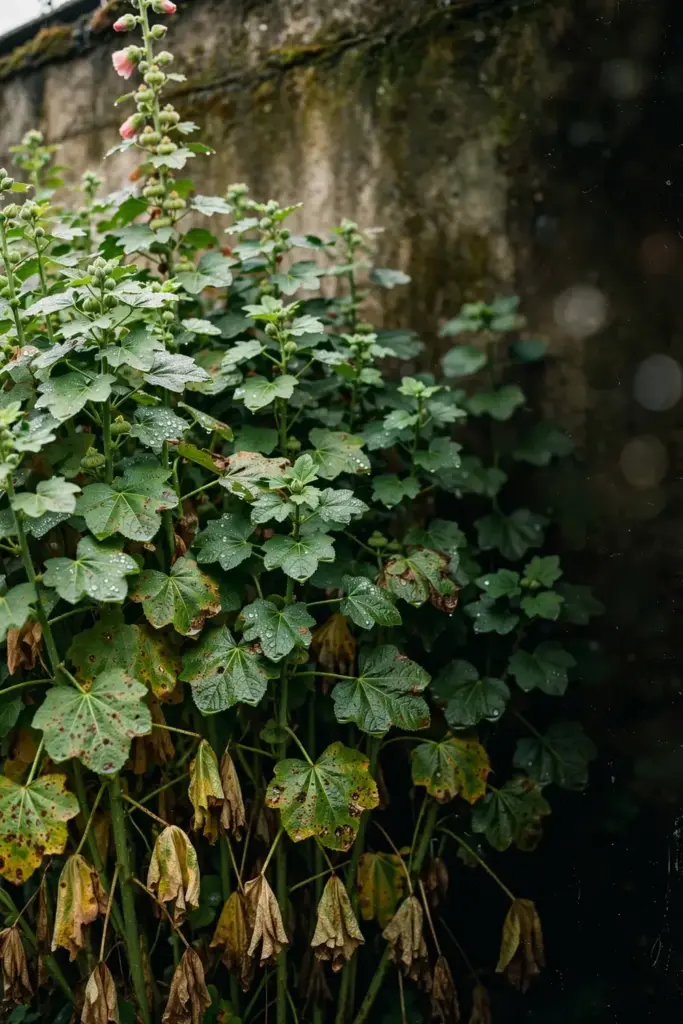
Overhead watering feeds rust too. A sprinkler wets leaves and splashes spores upward from debris and lower leaves. The same water delivered at the base leaves the canopy dry. A garden watered from above every evening holds its hollyhocks wet through the warmest, most humid hours of the night.
Leaving infected leaves on the plant feeds rust. Every pustule on a standing leaf releases spores onto the leaves above it. A leaf left for a week seeds the next tier. A leaf stripped on the day its spots appear seeds nothing.
Mallow weeds feed rust. Common mallow along paths and bed edges carries the fungus while the hollyhocks stand clean. A garden that strips hollyhock leaves and ignores mallow weeds keeps its reservoir intact. The weed is the disease, not just a weed.
Saving seed from infected plants risks carrying the problem forward. Do not use seed from affected plants. Buying infected transplants imports the problem in one pot. Inspect new hollyhock plants for rust symptoms before purchase, and leave a spotted plant at the nursery.
Step 1: Decide Whether Treatment Is Worth It
Count the damage before you reach for a spray. Hollyhock rust rarely kills a hollyhock. It disfigures leaves, weakens growth, and strips the lower plant. In rare instances it kills the plant. Most home cases sit far from that end of the range.
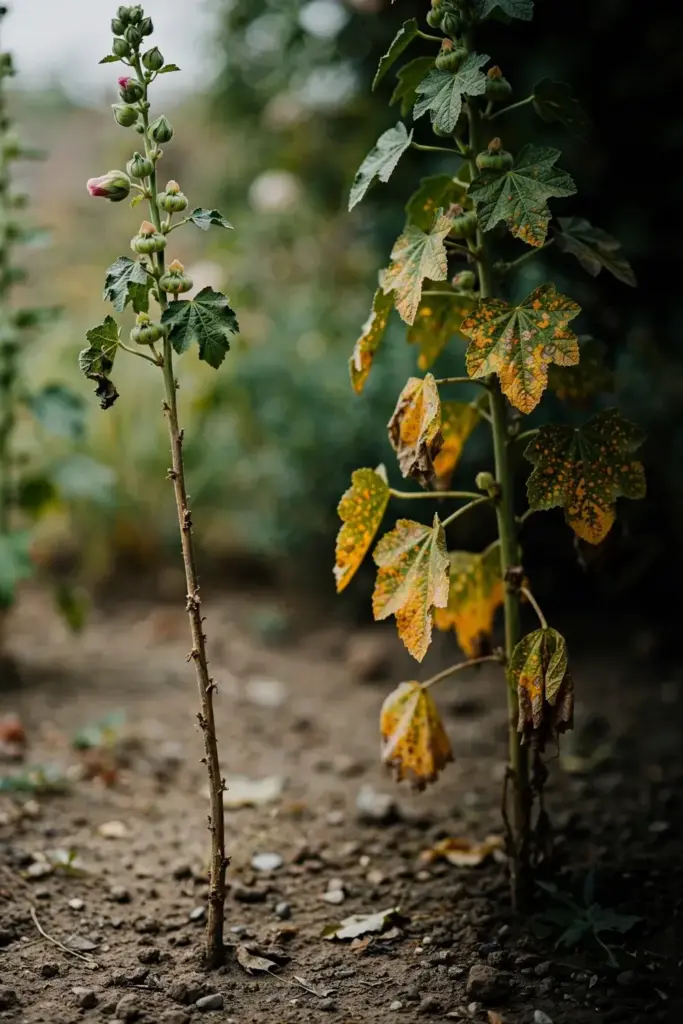
A hollyhock grown for flowers earns light work. The plant still blooms while its lower leaves drop, and a few stripped leaves plus fall cleanup often hold the disease to a cosmetic problem. A hollyhock grown as a showpiece at the front of a border earns the full program, because the leaves are the display there.
Spraying after symptoms appear wastes money. Protective sprays shield healthy tissue before infection. They do not cure leaves that already show pustules. A gardener who sprays a fully spotted plant buys protection for leaves that are already lost, and the spray does nothing for them.
Ask one more question before you spend anything. Is the planting worth a season of weekly work? A row of hollyhocks you love earns it. A single self-sown plant at the back of the bed may not. The honest answer for a weak plant is removal, and Step 5 covers that call. Treatment is a choice, not a duty.
Step 2: Strip Infected Leaves Early and Bag Them
Strip the first spotted leaves the day you see them. Early removal is the single move that slows rust fastest, because each stripped leaf takes its pustules out of the garden.
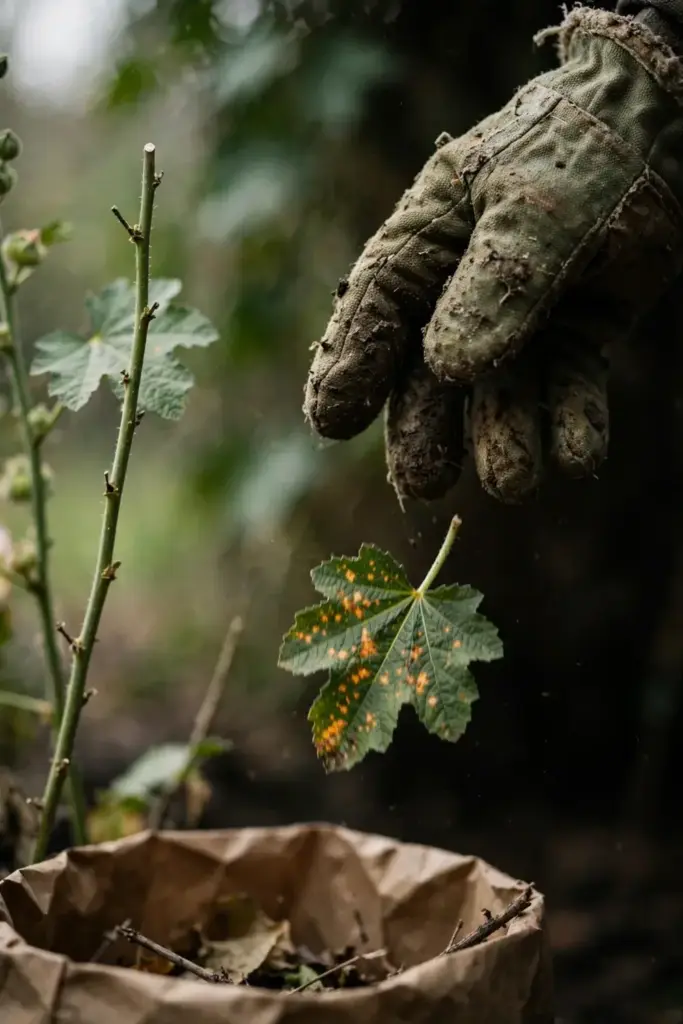
Work when the foliage is dry. Wet leaves smear spores onto tools, gloves, and healthy leaves. Start at the lowest leaves and work up. Pinch or snip the spotted leaf at its petiole. Drop it straight into a bag or a bucket. Do not drop stripped leaves on the soil and carry them out later. Every minute a stripped leaf sits on the soil is a minute its spores wash back onto the plant.
Bag the leaves for trash, or bury them deep where local rules allow. Never compost infected leaves. A home compost pile rarely runs hot enough to kill rust fungi in leaf tissue, and the finished compost then spreads spores back across the garden with every wheelbarrow. Burning works where local rules allow it. Bagging works everywhere else.
Disinfect the snips after the job. Wash gloved hands and tools with soap and water, or wipe blades with a disinfectant, before moving to healthy plants. The habit costs two minutes. It stops the tool from becoming the vector. Repeat the strip every week through the season, and strip again after rain, since wet weeks move the disease fastest.
Step 3: Water at the Base and Give Plants Air
Water the soil, not the leaves. A soaker hose or drip line puts water at the root zone and leaves the canopy dry. A sprinkler does the opposite, wetting every leaf and splashing spores upward from debris and lower leaves.
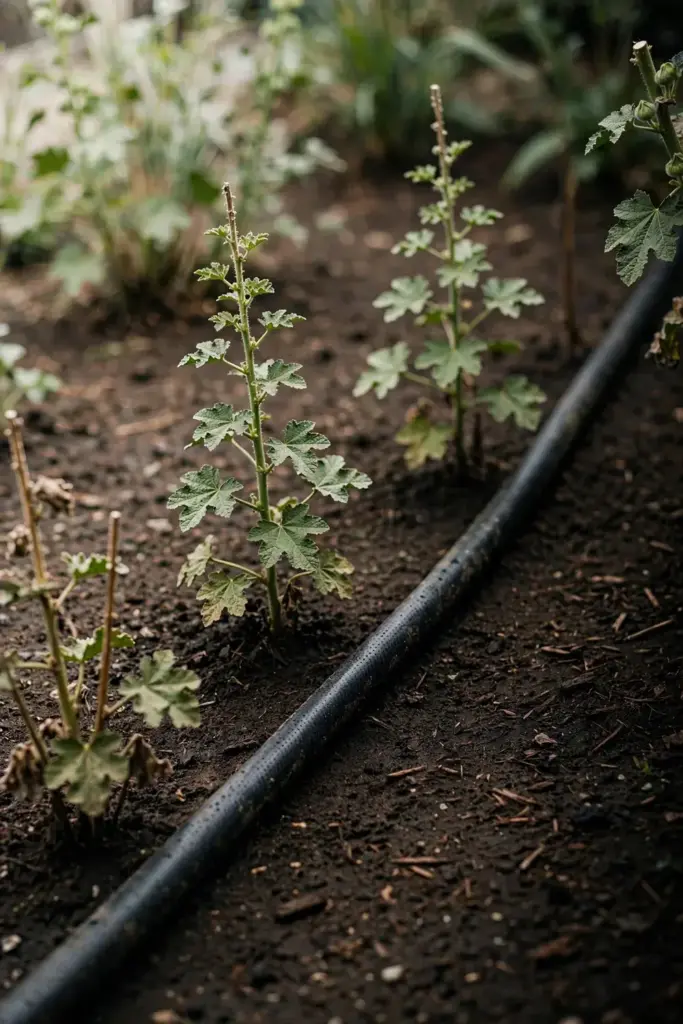
Water in the morning when you water by hand. Morning water gives the canopy the day to dry. Evening water keeps leaves wet all night, and a wet night after a warm day is the infection event. If the soil surface stays damp between waterings, wait. Hollyhocks want steady moisture, not a swamp.
Space plants so air moves between them. Avoid planting hollyhocks densely, since tight spacing holds humidity and slows drying. Thin crowded self-sown seedlings to one strong plant per spot rather than keeping a clump. A single plant with air around it dries faster and rusts slower than three plants sharing one damp pocket.
Mulch under the plants to cut soil splash. A layer of clean mulch between the soil and the lowest leaves blocks the splash that lifts spores from debris onto new growth. Keep mulch off the stems. Mulch piled against a stem holds bark wet and invites other trouble. Building soil health covers the soil side of this job, since vigorous plants with sound roots carry disease better than starved ones.
Step 4: Pull Mallow Weeds and Mind the Neighbors
Pull common mallow wherever it grows near hollyhocks. Common mallow is the weed reservoir for this fungus, and a patch of it along the fence feeds spores into the border all season. Pull it roots and all, and bag it with the stripped leaves rather than composting it.
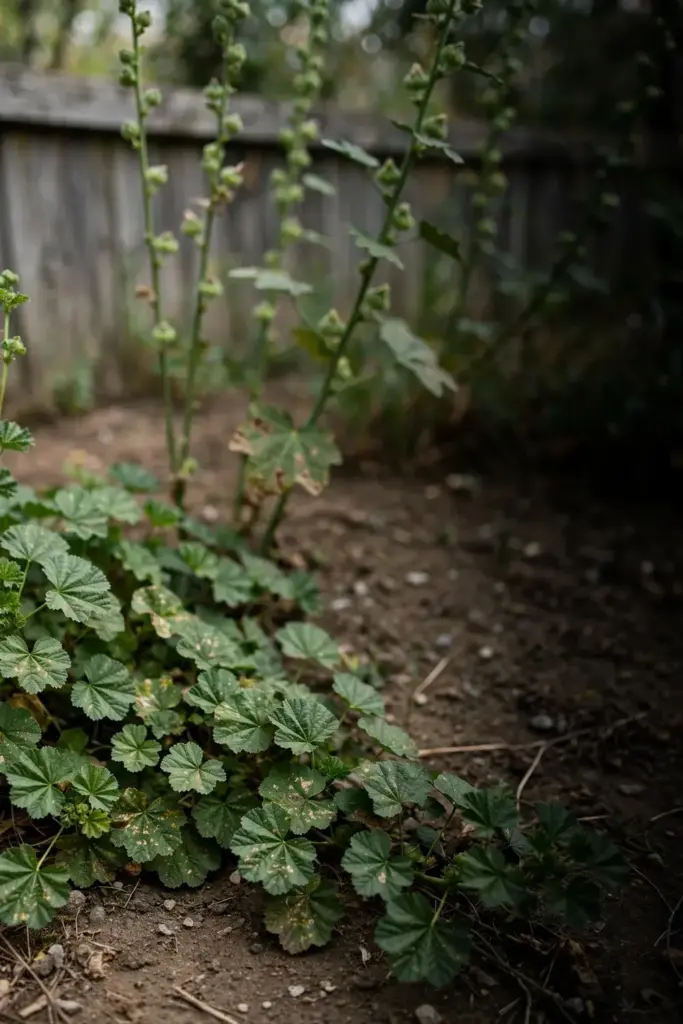
Check the other mallow relatives in the garden. Rose mallow, Lavatera, Malva, hibiscus, abutilon, flowering maple, Malvastrum, and Sidalcea all host the same fungus. A rose mallow beside a rusted hollyhock is not a bystander. Inspect it with the same weekly leaf check, and strip its spotted leaves the same way.
Avoid growing other plants in the mallow family right beside prized hollyhocks if hollyhocks are an important feature of the garden. Separation does not guarantee zero infection, since spores travel long distances on the wind. Separation still lowers the dose that lands on the prized plants, and a lower dose means a slower epidemic.
Inspect new plants before purchase. A hollyhock bought with a few spotted lower leaves imports rust into a clean garden in one pot. Check the undersides of the lowest leaves at the nursery. Leave a spotted plant there. One rejected plant saves a season of stripping.
Step 5: Cut Plants Down and Clear Every Scrap in Fall
Cut the stalks to soil level after flowering. Remove all hollyhock debris from the bed, including fallen leaves, cut stalks, and flower stalks once the flowers fade. The fungus overwinters in that debris, so a bed left littered restarts the cycle in spring exactly where it ended in fall.
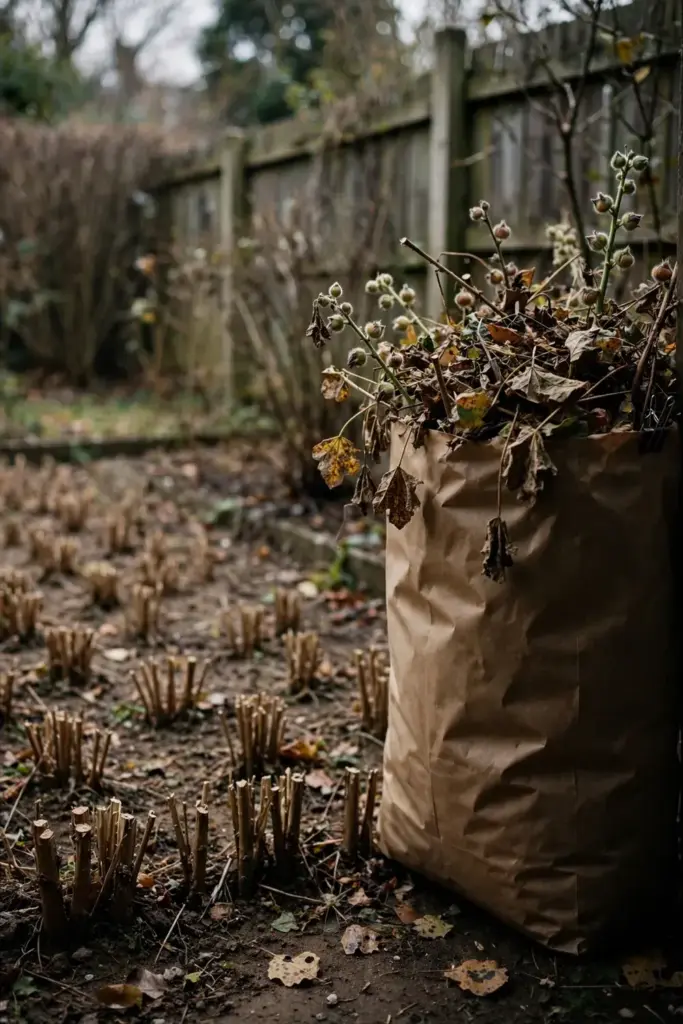
The Michigan State University Extension hollyhock rust page states that plants should be cut back as soon as flowering is done, and that plant debris should be removed and destroyed, not composted. That rule is unanimous across the sources for this article. No source treats composting infected debris as safe.
Bag the debris for trash, bury it deep, or burn it where local rules allow. Do not leave prunings in a brush pile beside the bed. A brush pile is a spore bank with a roof. Do not leave stalks standing for winter interest. A standing stalk sheds spores onto the soil all winter and greets the new rosette with them in spring.
Dispose of heavily infected plants whole. A plant that lost most of its leaves by midsummer and kept rusting despite stripping has become a spore factory. Pull it, bag it, and start fresh. The fall garden bed prep guide covers the bed-level half of this job, including what to do with the cleared ground once the debris is gone.
Step 6: Grow Hollyhocks as Biennials and Sow Fresh Seed
Treat hollyhocks as biennials, discarded after flowering. Hollyhocks live for several years, and keeping them that long gives rust a permanent host in the same spot. A two-year plant that flowers and leaves denies the fungus its third season.
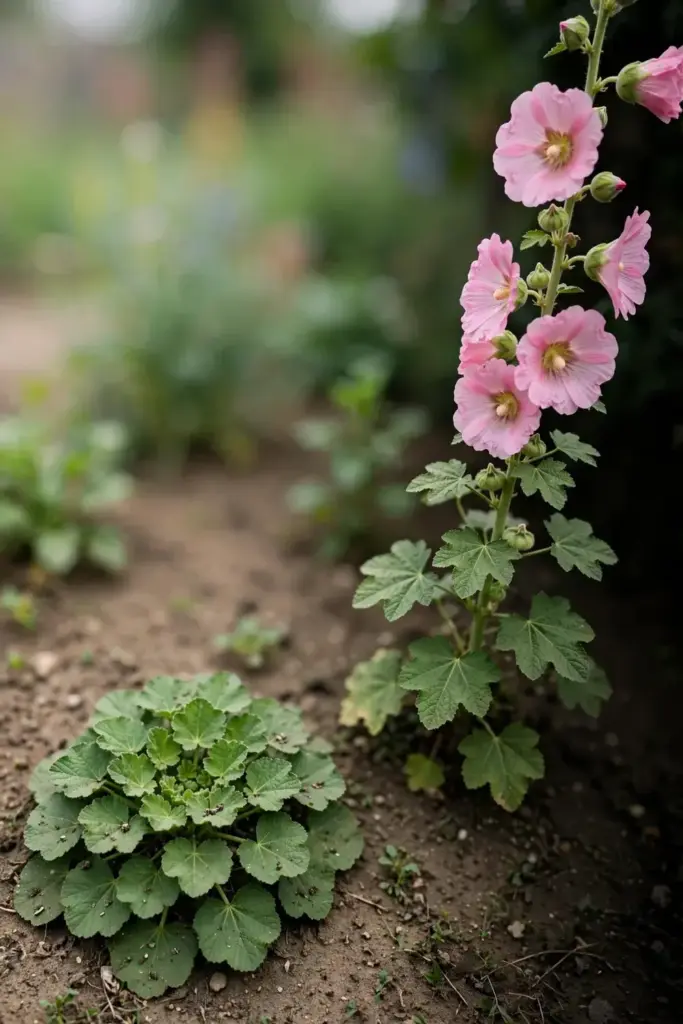
The Royal Horticultural Society hollyhock rust advice page lists growing hollyhocks as biennials, discarded after flowering, among its non-chemical controls. The same page advises cutting plants right down to soil level in autumn and disposing of all leaf debris from around them when keeping plants for more than one flowering season. Either path ends with clean ground, and clean ground is the point.
Sow fresh seed every year for a rolling supply of first-year rosettes and second-year spikes. Do not use seed from affected plants. Buy clean seed or save it only from plants that stayed rust-free. The seed starting guide covers the sowing half of this step, from tray to transplant.
Hide the symptoms while the system runs. Grow somewhat shorter plants in front of hollyhocks to hide the leaf symptoms while the flower spikes still show above them. The trick does not cure anything. It keeps a rusted row looking like a garden instead of a clinic, and that is worth something in a border you look at every day.
Step 7: Try Resistant Varieties Without Betting on Them
Try resistant varieties, and keep expectations modest. Some hollyhock varieties resist some, though not all, variants of Puccinia malvacearum. Resistant varieties may not prove reliable for control in all situations. That caveat comes from Wisconsin’s diagnostic clinic, and it should sit next to every resistant label you read.
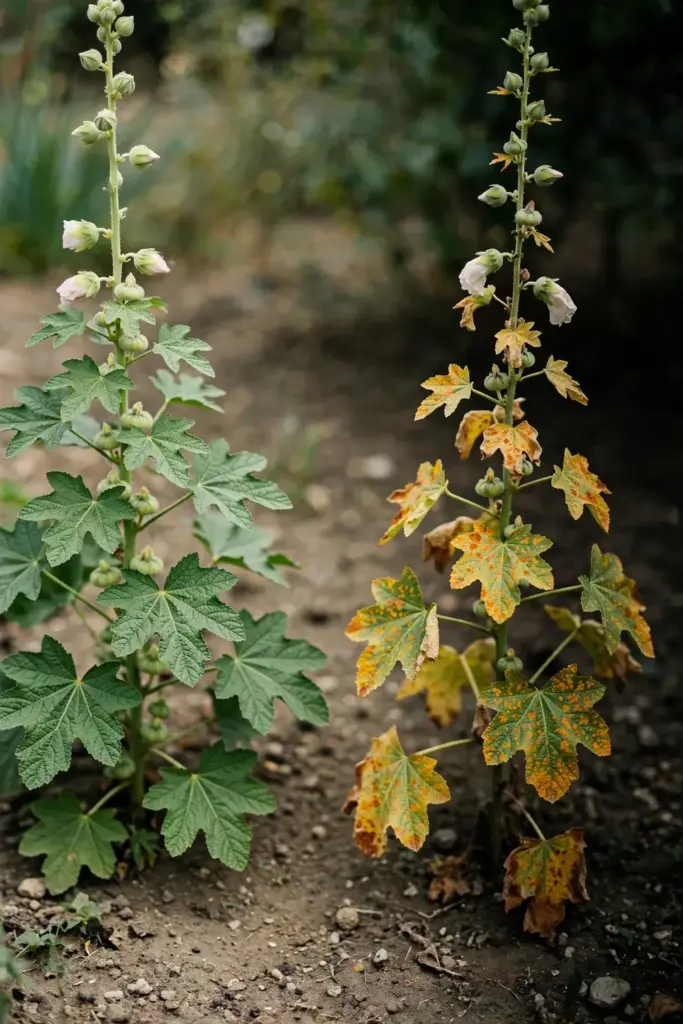
Sellers describe several varieties as resistant. Halo Series, Happy Lights, Black Knight, Pastorale, and Antwerp Mixed all appear on that list. Treat each name as a claim to test in your own garden, not as a guarantee. A variety that resists one variant of the fungus may still rust under another.
Fig-leaved hollyhock earns a separate note. Alcea ficifolia, sold as Antwerp hollyhock, is reported as more resistant to rust than common hollyhock in a garden column in the Akron Beacon Journal. Its leaves are palmate, finger-lobed rather than round, so it looks different in the border too. A gardener who has lost Alcea rosea to rust three years running has little to lose by trying the fig-leaved species in the same spot.
Buy one packet, not ten. Plant the trial variety beside your usual hollyhocks and compare them through one full season. A variety that stays clean beside rusting neighbors earns a bigger planting next year. A variety that rusts with the rest earns no second chance.
Step 8: Use Protective Fungicides Last, With the Conflict in View
Reach for fungicides only after the first seven steps are running. Fungicides protect healthy tissue before infection. They do not cure leaves that already show pustules. A spray program on a garden with no sanitation protects leaves that the debris below keeps reinfecting, and that is money and chemistry spent against your own cleanup.
The advice splits here, and the split is honest. The Royal Horticultural Society recommends against fungicides, noting that fungicides may reduce pollinators, impact soil health, and carry wider adverse environmental effects. Other sources list protective fungicides as a legitimate last resort for gardens where sanitation alone cannot hold the disease. Both positions are on the record. This article reports the split rather than picking a side for you.
If you decide to spray, pick products labeled for hollyhocks or for ornamental flowering plants. Wisconsin’s diagnostic clinic names chlorothalonil, mancozeb, myclobutanil, tebuconazole, and triticonazole as active ingredients labeled for this use. When making more than one application, alternate at least two active ingredients with different modes of action, since myclobutanil, tebuconazole, and triticonazole share one mode of action and do not count as alternation with each other. Read the product label and follow it exactly. The label carries the timing, the rate, and the safety rules for your area.
Kansas State University Extension’s hollyhock rust guidance sets the interval at every two weeks during warm, moist weather, until dry weather returns. The same guidance names sulfur and myclobutanil as options, and it carries the sulfur caveat. Sulfur may damage leaves if the temperature rises above 29.4 degrees Celsius within 24 hours of application. A sulfur spray on a hot morning burns the leaves it was meant to protect, so check the forecast before you spray, and skip sulfur on any day headed past that mark.
Spray before symptoms appear for the best effect. A protective spray on clean leaves shields them. A protective spray on spotted leaves shields nothing, since the infection is already inside. Start the program when warm, moist weather arrives and the first leaves are still clean, and stop it when dry weather returns. A spray calendar that runs all season regardless of weather wastes product and needlessly exposes pollinators.
Step 9: Plan Next Spring Before This Season Ends
Start next year’s plan while this year’s debris is still in the bag. Rust returns on the schedule you set in fall, so the fall decisions are the spring decisions.
Log what happened. Note which plants rusted first, which month the first spots appeared, and which steps you actually ran. A plant that rusted first in June two years running is the plant to cull or replace, not the plant to spray harder. A bed that stayed clean until August has a system worth repeating.
Order clean seed in winter. Buy from a supplier whose plants arrive clean, and inspect every new plant before it goes into the ground. A spring purchase with spotted lower leaves undoes a winter of clean planning. The nursery check costs one minute per plant.
Walk the bed weekly from the first spring growth. Check the undersides of the lowest leaves, and strip the first spotted leaf the day it shows. The whole program reduces to that walk. Nine strategies sound like a system, and they are, but the system runs on one habit. Look low, look early, and bag what you find.
Living With Hollyhock Rust Damage You Cannot Undo
Some damage stays. A hollyhock that lost its lower leaves still flowers on the upper stem. A plant that lost most of its leaves still sets seed. The season is not ruined because the bottom half looks rough.
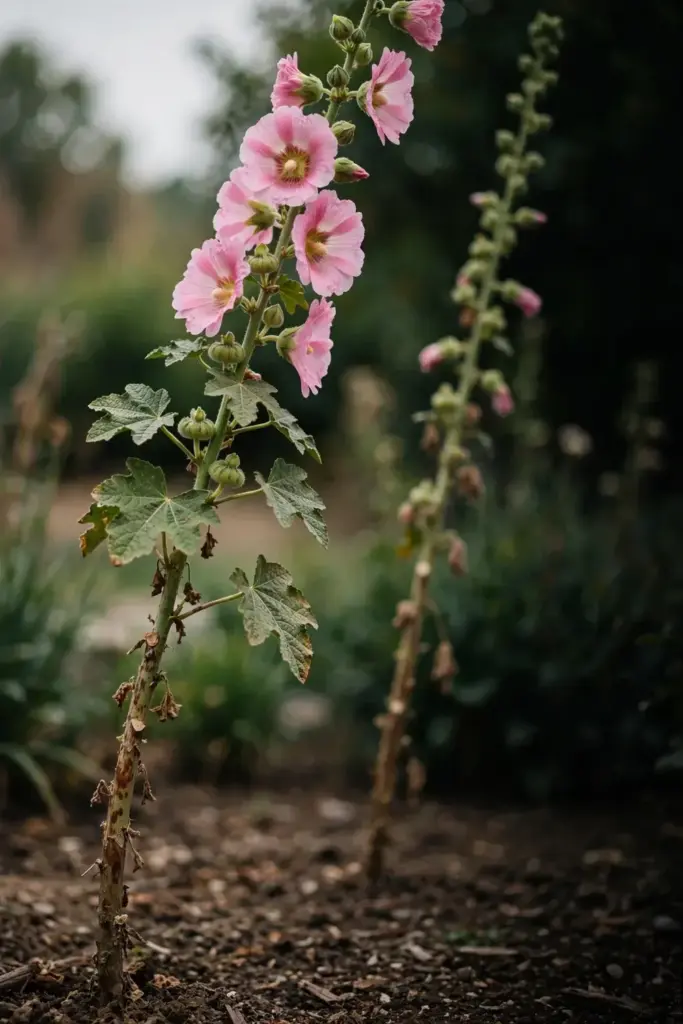
Keep a plant with light to moderate leaf loss. Strip the spotted leaves, water at the base, and let the top keep flowering. The plant feeds itself on the leaves it has left, and a hollyhock with half its leaves still throws a respectable spike. Cull a plant that lost nearly every leaf and keeps rusting despite stripping. That plant feeds spores, not flowers, and its space serves a fresh seedling better.
Match the treatment to the disease. Daylily rust is a different fungus on a different host, and the guide to daylily rust covers its own response. A rust spray on a bacterial infection wastes a season, and a bacterial treatment on rust wastes one too. The differential table above is the tool that keeps those treatments pointed at the right disease.
Cut the plant down and clear the bed when the season ends, even for plants you kept. Tolerance in July and cleanup in fall are not opposites. The cleanup is what keeps this year’s damage from becoming next year’s epidemic, and a garden that tolerates rusted leaves in July, then clears every scrap in fall, grows better hollyhocks than a garden that sprays all summer and leaves the stalks standing.
Frequently Asked Questions
Hollyhock rust rarely kills a hollyhock. The fungus strips leaves, weakens growth, and thins the plant from the bottom up, and the plant usually survives and still flowers. In rare instances a severe infection kills the plant, and that outcome is the exception rather than the rule. A plant that keeps rusting despite stripping and cleanup earns removal, since it feeds spores into the next season.
No. Never compost infected hollyhock leaves, stalks, or debris. A home compost pile rarely runs hot enough to kill rust fungi in leaf and stem tissue. The finished compost then spreads spores back across the garden with every load. Bag infected material for trash, bury it deep, or burn it where local rules allow. Clean leaves from healthy plants still belong in the compost pile.
No spray is required in most home gardens. Stripping spotted leaves, watering at the base, pulling mallow weeds, and clearing fall debris hold hollyhock rust to a cosmetic problem for many gardeners. Sprays protect healthy leaves before infection and cure nothing once spots appear. If you spray, use a product labeled for hollyhocks, follow the label exactly, and treat spraying as the last step, not the first.
Hollyhock rust spreads only within the mallow family. Rose mallow, Lavatera, Malva, hibiscus, abutilon, flowering maple, Malvastrum, and Sidalcea can all catch it. No plant outside the mallow family catches this rust, so roses, tomatoes, beans, and grasses stay safe beside a rusted hollyhock. Common mallow weeds are the reservoir to pull, since they carry the fungus between seasons.
Do not save seed from affected plants. Buy clean seed, or save seed only from plants that stayed rust-free through the season. Sow fresh seed every year so a rolling supply of first-year rosettes and second-year spikes replaces plants you discard after flowering. Treating hollyhocks as biennials keeps the fungus from holding one plant for years.
Check the leaf underside with a hand lens. Hollyhock rust raises brown-red pustules on the underside beneath yellow-orange spots, and orange-brown powder rubs off the pustules onto a finger. Leaf spot diseases stay flat, with no bumps and no powder. Nutrient deficiency yellows tissue with no pustules and no powder either. Pustules mean rust, and flat spots mean something else.
Where to Go From Here
Start with the walk. Check the undersides of the lowest leaves, and strip the first spotted leaf into a bag today.
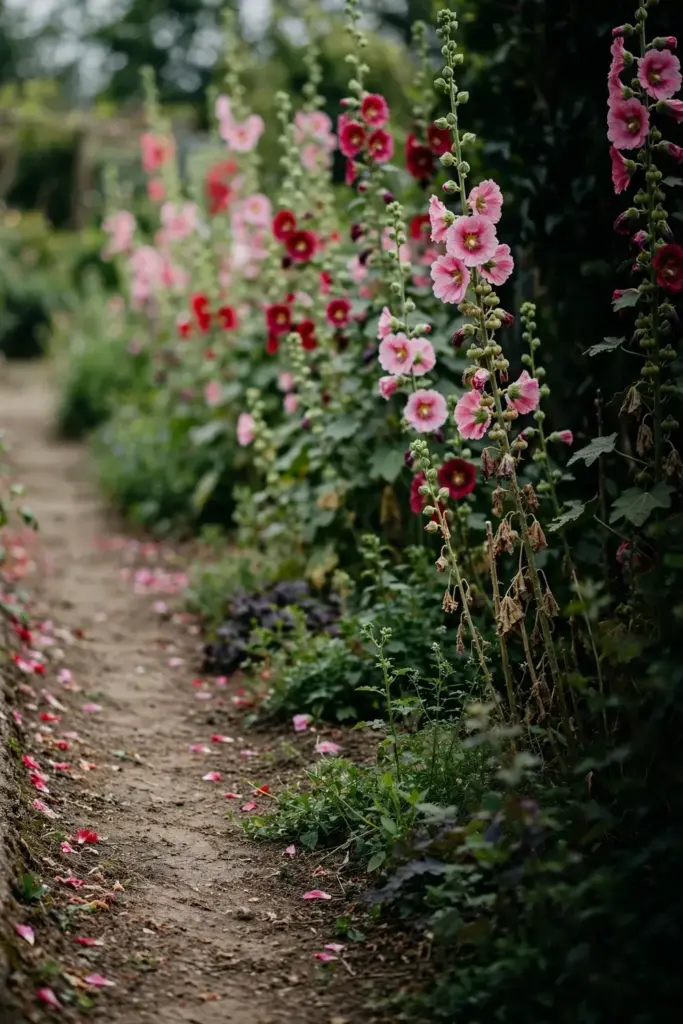
The order is identify, decide, strip, water low, pull mallow, clear the fall bed, sow fresh, try resistant varieties, spray last, and plan next spring now. One next action beats ten good intentions. Look low, look early, and bag what you find.