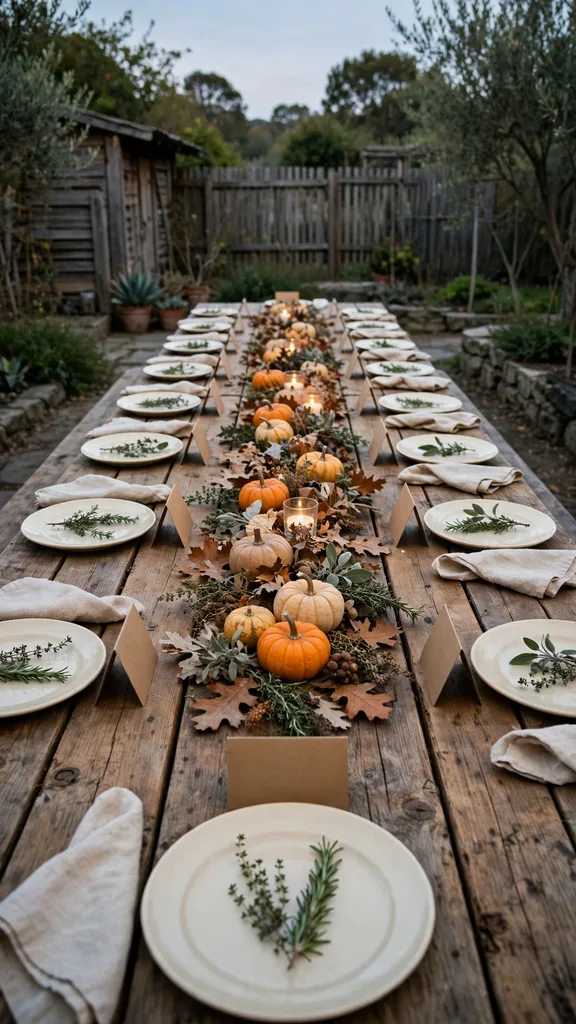

An outdoor Thanksgiving table faces wind, cold air, and fading light, so the setting must solve weather first and decoration second. This collection gathers 45 alfresco settings from the garden, grouped by windproofing, rain plans, food warmth, guest comfort, evening light, garden centerpieces, and seating layouts, so a host can move the feast outside with a plan for every gust and every cold chair.
Each idea names its build, its material, and its timing, and the quick-pick table at the end matches each group to a yard, a patio, a balcony, or a fire pit evening. Wind ideas suit an open lawn, rain ideas suit a table under trees, food ideas suit a long serving line, and comfort ideas suit guests who feel cold first.
I once watched a tablecloth lift in a single gust and take the place cards with it, and that one gust taught me to anchor every outdoor table before a single plate goes down.
1. Wind Anchor Tablecloth with Clips and Weights
A wind anchor tablecloth starts with a heavy cotton cloth cut 30 centimetres (12 inches) longer than the table on each side, so the cloth hangs past the edge and gives clips a firm grip. Clip the cloth to the table edge at intervals of 60 centimetres (24 inches), and hang a smooth garden stone in a small cloth pouch from each clip on the underside, so the weight pulls straight down and the cloth stays flat in a gust.
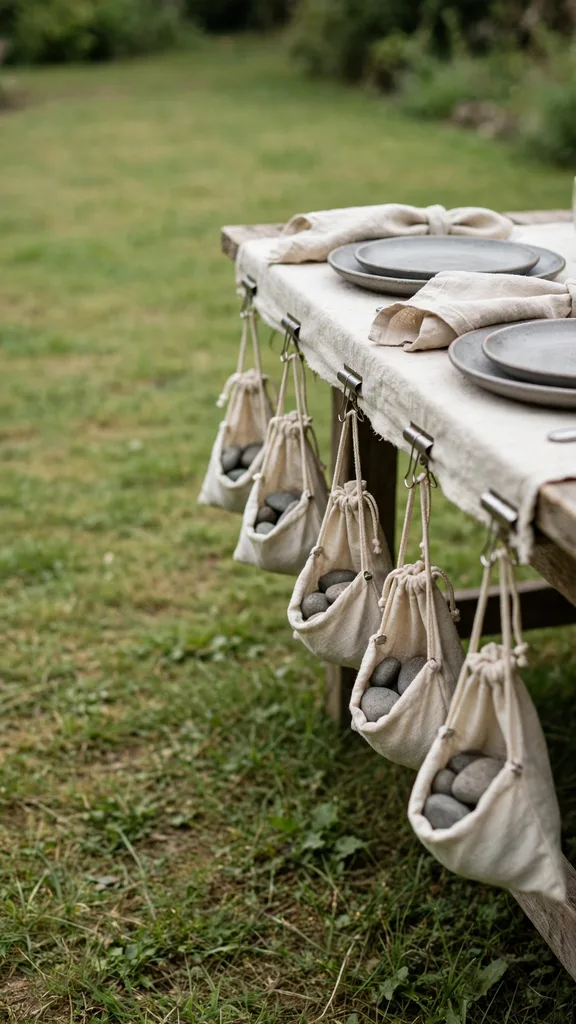
Test the anchor before guests arrive by tugging one corner sharply and watching the cloth settle back into place. Choose stones 8 centimetres (3 inches) wide and free of sharp edges, keep the pouches clear of chair legs, and set the clips first on the windward side, because wind hits one edge first and a loose windward edge lifts the whole cloth.
2. Low Centerpiece Rule for a Windy Table
A low centerpiece rule keeps every middle decoration below 30 centimetres (12 inches) tall on a windy table, so wind passes over the display instead of catching it. Build the middle row from flat trays of moss, short pumpkins, and low bowls of leaves, and leave 15 centimetres (6 inches) of clear table between the row and the nearest plate, so a tipped piece stops before it reaches food.
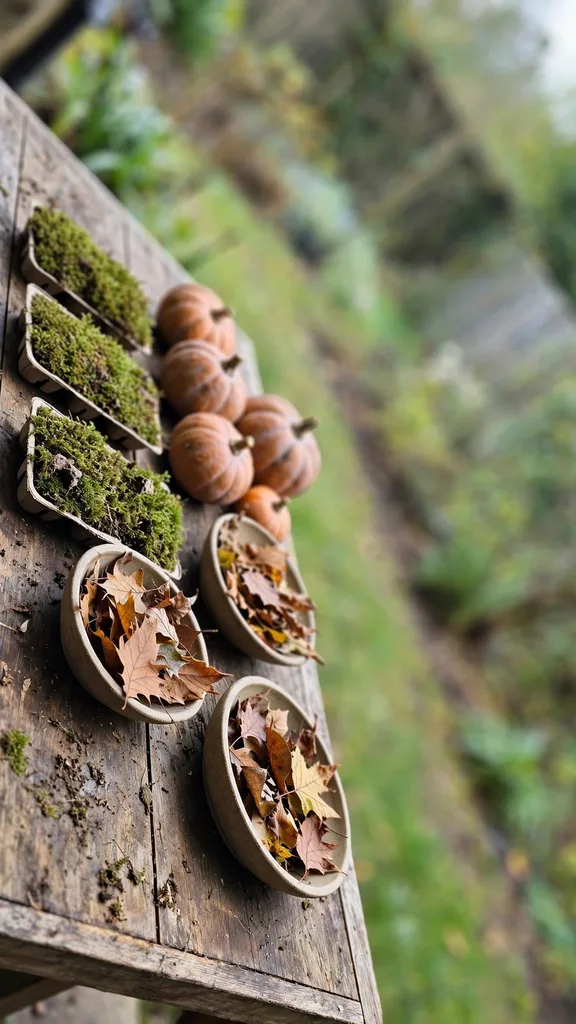
Measure the row with a ruler on setup day, and cut every stem that rises past the limit. A low row also keeps sight lines open across the table, so guests talk across the middle row with ease, and a gust that topples one short pumpkin moves one piece, never a tall vase full of water.
3. Heavy Stoneware over Light Plates Outdoors
Heavy stoneware suits an outdoor table because a plate 900 grams (2 pounds) in weight resists a gust that slides a light plate across a cloth. Set one stoneware plate at each seat, keep the plate flat on the placemat with no folded cloth under one edge, and place the cutlery tight to the plate, so wind finds no lifted edge to catch.
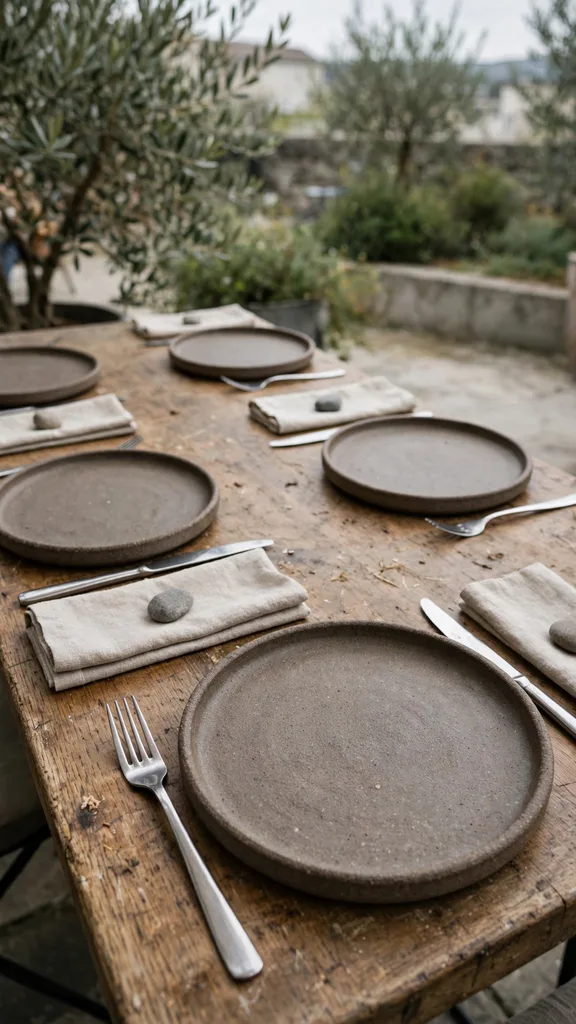
Stoneware also holds heat longer than thin plates, so a hot serving stays hot a few minutes longer at a cold table. Stack the plates near the serving line, carry two at a time on a windy day, and choose plates with a flat rim, because a rim with a raised lip catches wind and tips a stacked plate.
4. Weighted Napkin Rings from Garden Stones
A weighted napkin ring uses a smooth garden stone with a hole drilled through the centre, threaded with twine, to hold a rolled napkin flat on a windy table. Roll each napkin tight, slide the stone ring to the middle of the roll, and lay the roll across the plate, so the stone weight sits at the centre and the napkin stays put when wind crosses the table.
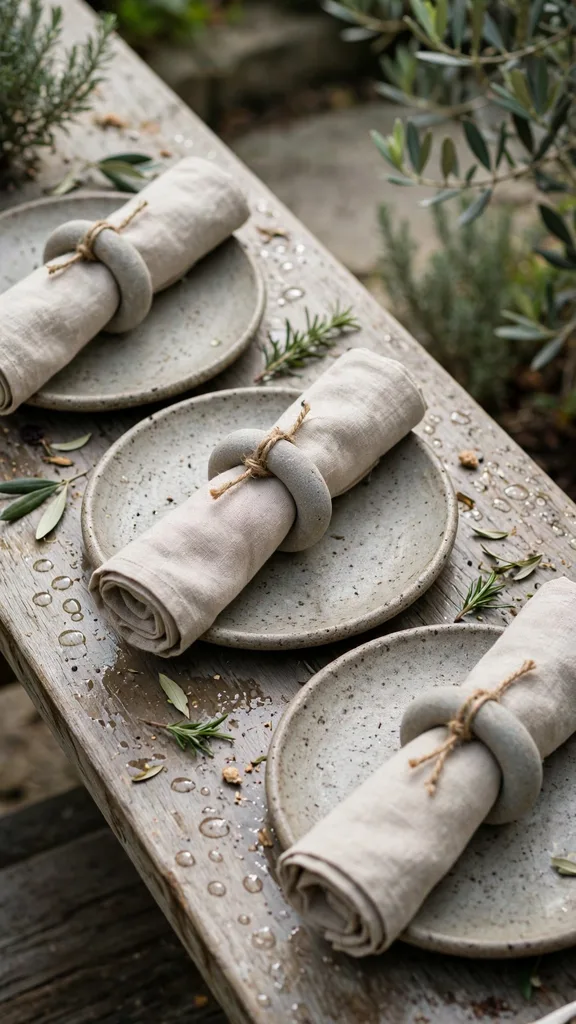
Drill the stones a week ahead, smooth every drilled edge with sandpaper, and test one ring by blowing across the table at plate height. Use stones 5 centimetres (2 inches) wide, keep the twine short so the ring hugs the roll, and set a spare ring at each end of the table for a napkin that comes undone.
5. Windproof Place Cards in Slotted Holders
A windproof place card sits in a slotted holder cut from a short length of branch, so the card stands upright and wind presses it deeper into the slot instead of lifting it away. Cut branch lengths 8 centimetres (3 inches) tall, saw one slot 3 centimetres (1 inch) deep across the top, and slide a stiff card into the slot, so the card face stays readable from the seat.
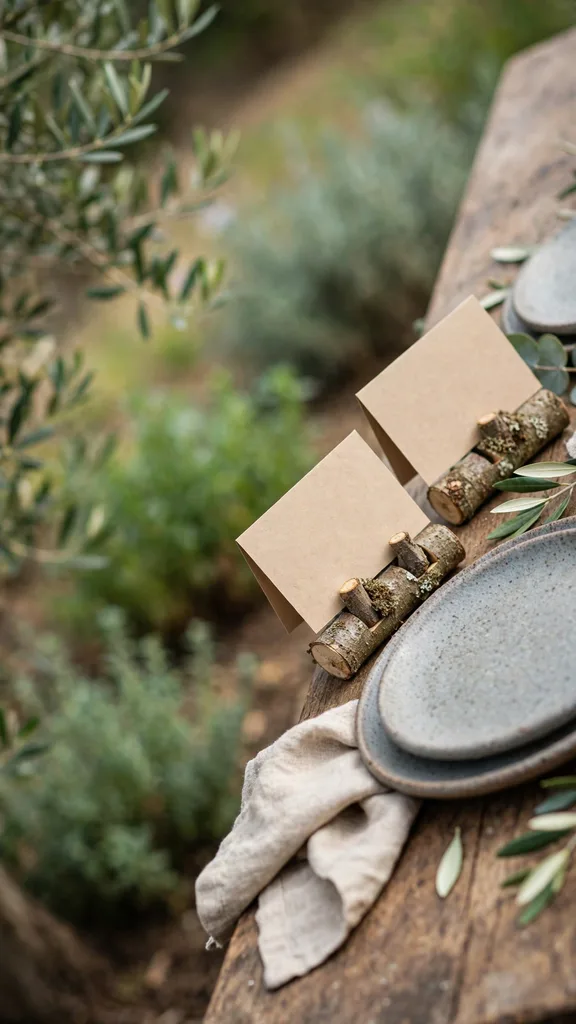
Choose branches 5 centimetres (2 inches) thick, sand the cut smooth, and set each holder behind the plate, clear of elbows. Stiff card matters more than pretty paper outdoors, because thin paper bends in wind and a bent card hides the name, while a stiff card in a deep slot stays legible through dinner.
6. Cloche Covers for Single Servings in Wind
A cloche cover protects one serving from wind, leaves, and insects, because a glass dome over a plate blocks the gust and still shows the food. Set one cloche over each plated salad or dessert at an outdoor table, lift the dome only when the guest sits down, and keep the dome base flat on the plate, so wind cannot slide under the rim.
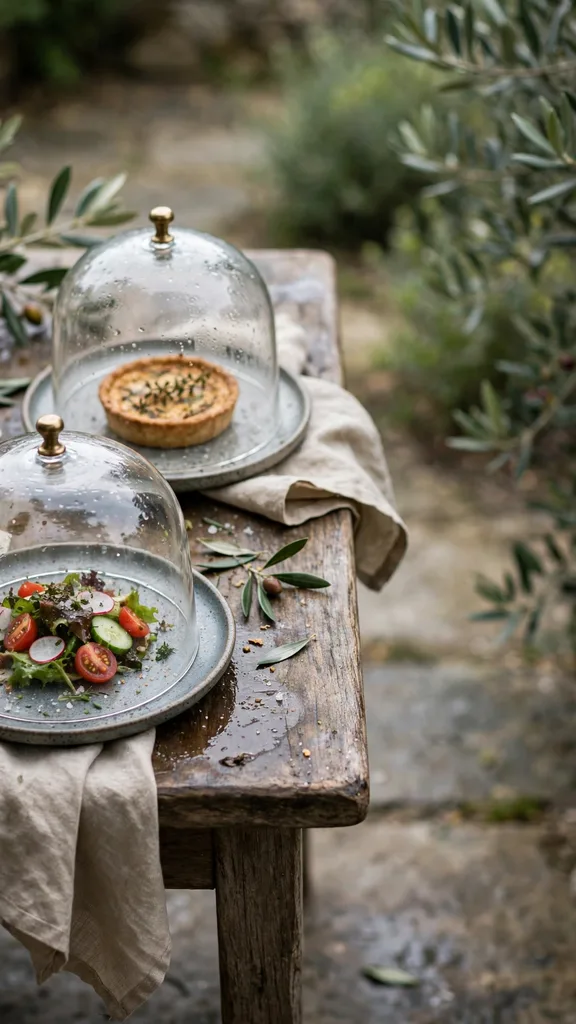
Glass domes need a safe home between courses, so set a tray at the end of the table for lifted domes. Choose domes 25 centimetres (10 inches) wide, wash each dome before dinner, and skip domes over hot dishes, because trapped steam condenses on glass and drips onto the food.
7. Shelter Side Windbreak from Potted Evergreens
A shelter side windbreak uses potted evergreens lined along the windward side of the table, so dense foliage slows the gust before it reaches plates and glasses. Set pots 60 centimetres (24 inches) apart in one row, use evergreens 90 centimetres (36 inches) tall in pots 30 centimetres (12 inches) wide, and leave a gap of 30 centimetres (12 inches) between the row and the nearest chair, so guests pass with ease.
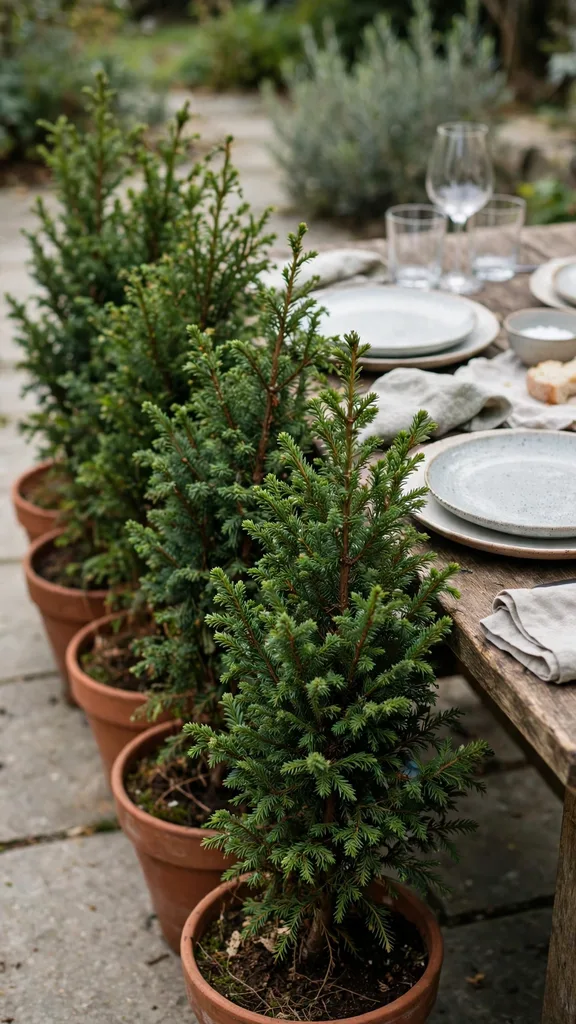
Water the pots the day before, so the soil weight anchors each pot, and tie tall stems to a short stake inside the pot. A windbreak row also frames the table like a hedge, and the evergreen scent reaches the table in small amounts, which suits an outdoor feast better than a solid fence that blocks the view.
8. Rain Check for a Table Under a Tree Canopy
A rain check for a table under a tree canopy starts one day ahead, because a canopy holds rain and then drops it in heavy drips long after the shower ends. Stand under the chosen tree during a watering test, watch where drips fall, and move the table 60 centimetres (24 inches) to one side of the heaviest drip line, so plates sit clear of the drip zone.
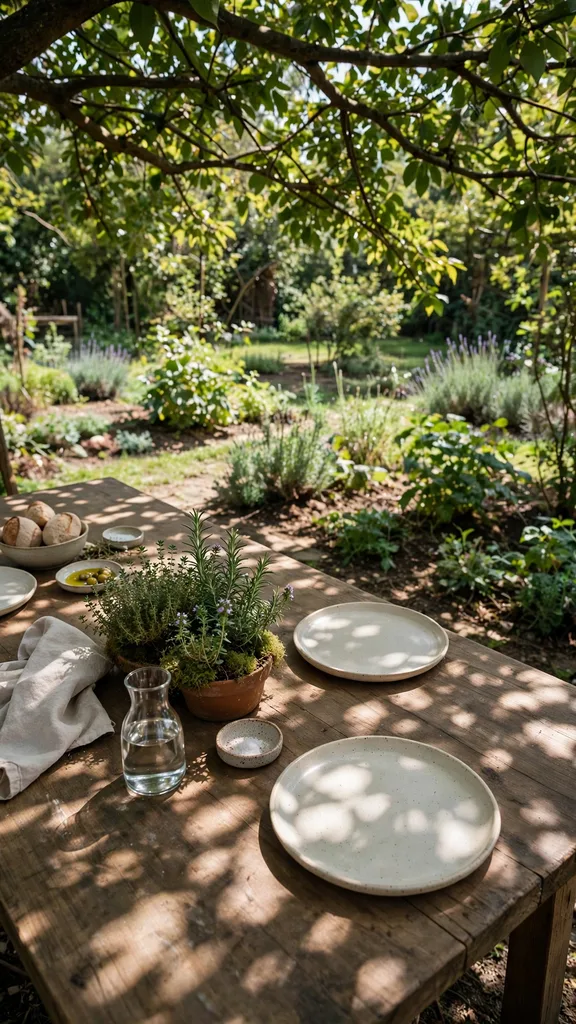
Shake one low branch gently before dinner and watch for a second shower of stored water. A canopy table also needs a quick cover plan, so keep a spare cloth folded at the end of the table, and set the serving dishes under the densest canopy, because a serving dish takes more harm from one drip than a single plate.
9. Quick Rain Cover Plan with a Spare Tarp
A quick rain cover plan keeps one clean tarp, four clips, and two poles folded at the end of the table, so two hosts can cover the table in less than 2 minutes when rain starts. Size the tarp 60 centimetres (24 inches) longer than the table on each side, clip one edge to the table first, and raise the far edge on the poles, so rain runs off one side instead of pooling in the middle.
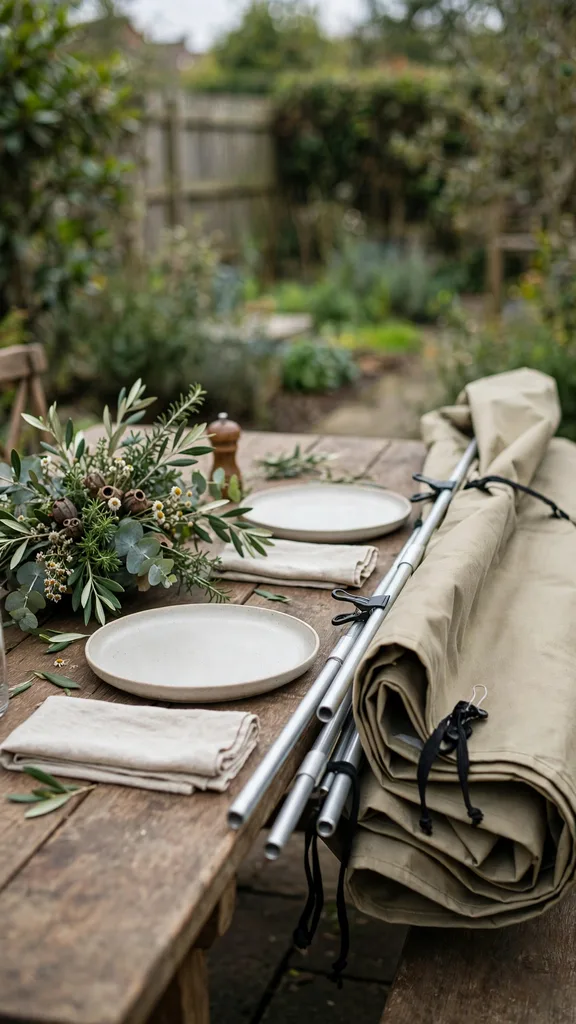
Practice the cover once before dinner, with the same two hosts who will run it during the meal. Store the tarp dry and folded, keep the clips in a pouch tied to the tarp, and choose a tarp in a plain colour, because a bright tarp changes the whole table look in one move.
10. Waterproof Table Runner from Oilcloth
A waterproof table runner from oilcloth protects the cloth beneath it, because oilcloth sheds a spill and wipes clean while a cotton runner soaks through. Cut the runner 30 centimetres (12 inches) wide and 60 centimetres (24 inches) longer than the table, lay it flat down the middle, and weight each end with a small potted herb, so the runner stays flat in wind.
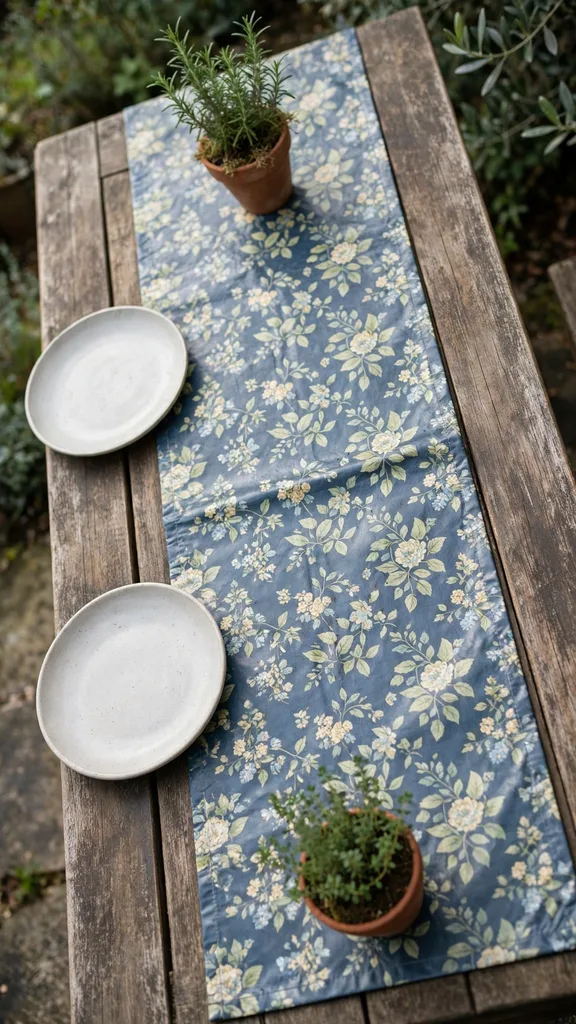
Wipe the runner before guests arrive, and test one spill of water on a corner to confirm the surface beads. Oilcloth also suits a table that stays outside overnight, because morning dew wipes off in one pass, and a runner that dries fast keeps the middle row safe for a second day of serving.
11. Raised Serving Stands to Beat a Wet Table
A raised serving stand lifts each dish 15 centimetres (6 inches) above a wet table, so a spill or a rain puddle spreads under the stand instead of into the food. Set one stand under each serving bowl, keep the stand base wider than the bowl, and leave the table surface clear between stands, so a cloth can mop one spill without moving every dish.
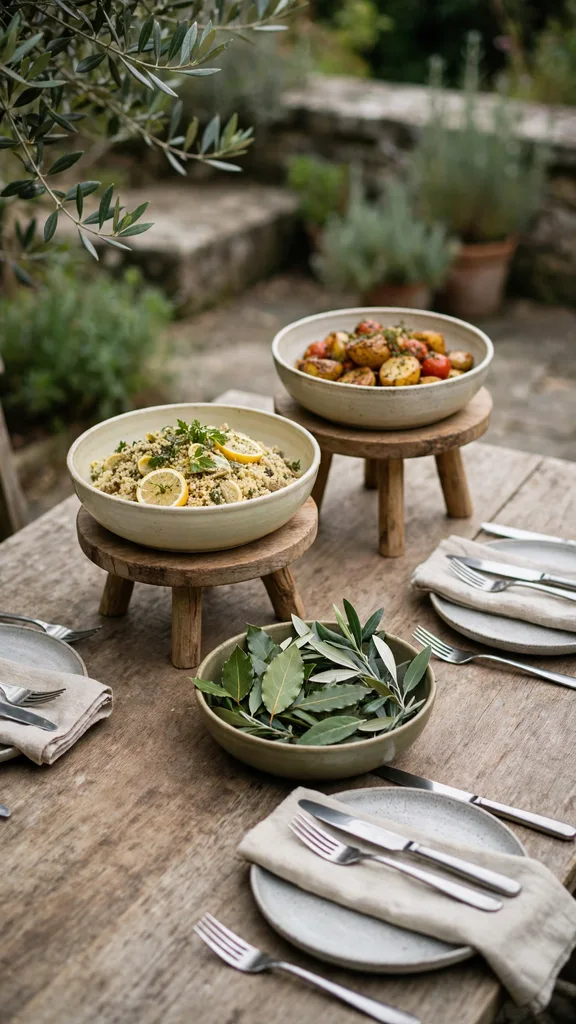
Choose stands in wood or metal with a flat top, test each stand with a full bowl before dinner, and set the heaviest bowl on the lowest stand. Raised stands also help guests serve with ease, because a bowl at hand height needs no lifting from a flat table, and a wet table stays a cleaning job, never a food safety job.
12. Covered Serving Dishes for Sudden Showers
A covered serving dish keeps food safe through a sudden shower, because a lid blocks rain and wind while the dish waits on the serving line. Use dishes with tight lids for every dish that sits outside longer than 15 minutes, lift each lid only to serve, and set the lids on a clean tray beside the dish, so a lid never lands on a dirty surface.
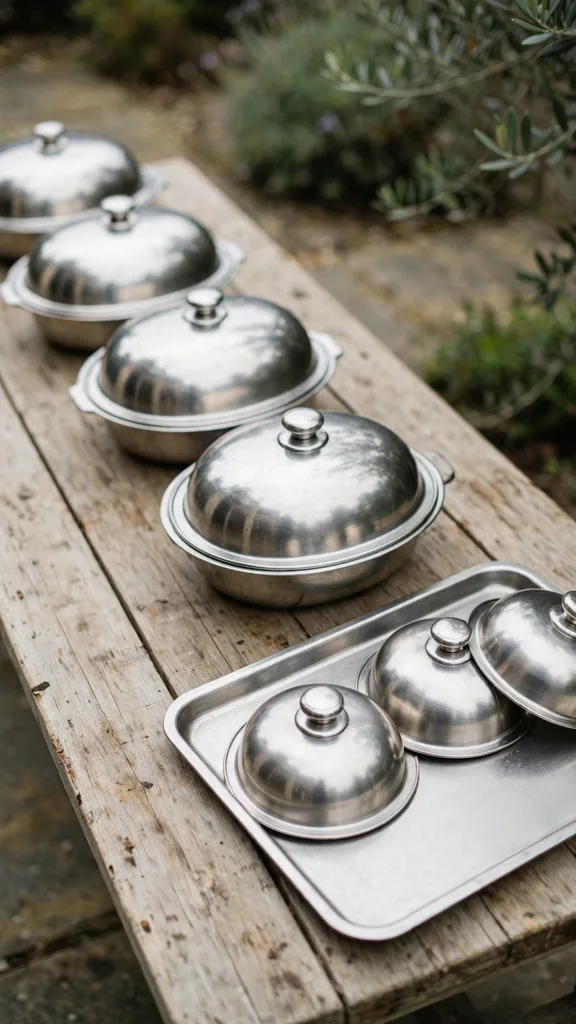
Label each lid on the underside with the dish name, so a helper returns the right lid fast during a shower. Covered dishes also keep flies off food on a mild day, and a table with lids in place looks finished, while a table with open dishes looks exposed to every gust.
13. Drainage Mat Under the Table
A drainage mat under the table lets rain pass through instead of pooling under chairs, because a mat with open slats or holes drains water to the ground below. Lay one mat under the full table footprint, extend it 30 centimetres (12 inches) past the chairs on each side, and check the ground slope, so water runs away from the seating area instead of toward it.
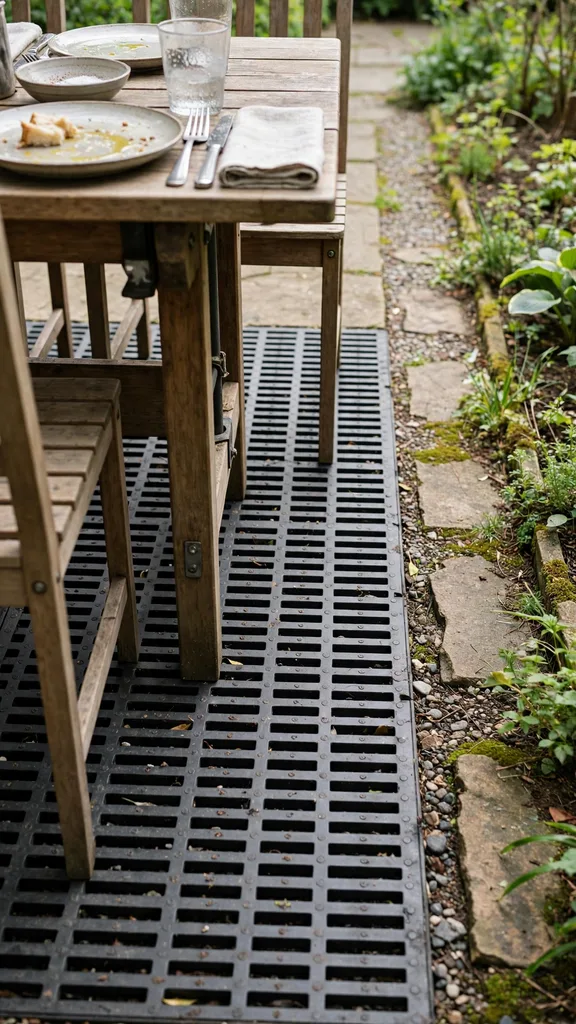
Sweep the mat before dinner, and lift one corner to confirm the ground beneath stays firm. A drainage mat also protects a lawn from chair legs, because the mat spreads the weight, and a table on a mat feels level, while a table on wet grass sinks one leg at a time through dinner.
14. Chafing Dish Wind Guards for Hot Food
A chafing dish wind guard shields the flame from wind, because a gust that blows out a burner leaves a hot dish cooling fast on a cold table. Set a metal guard on the windward side of each burner, keep the guard 10 centimetres (4 inches) from the flame, and check each flame every 30 minutes, so a dead burner gets relit before the food cools. Illinois Extension states that hot food should be held at 60 degrees Celsius (140 degrees Fahrenheit) or higher, so a guarded flame serves a safety purpose, and a wind guard keeps that heat steady.
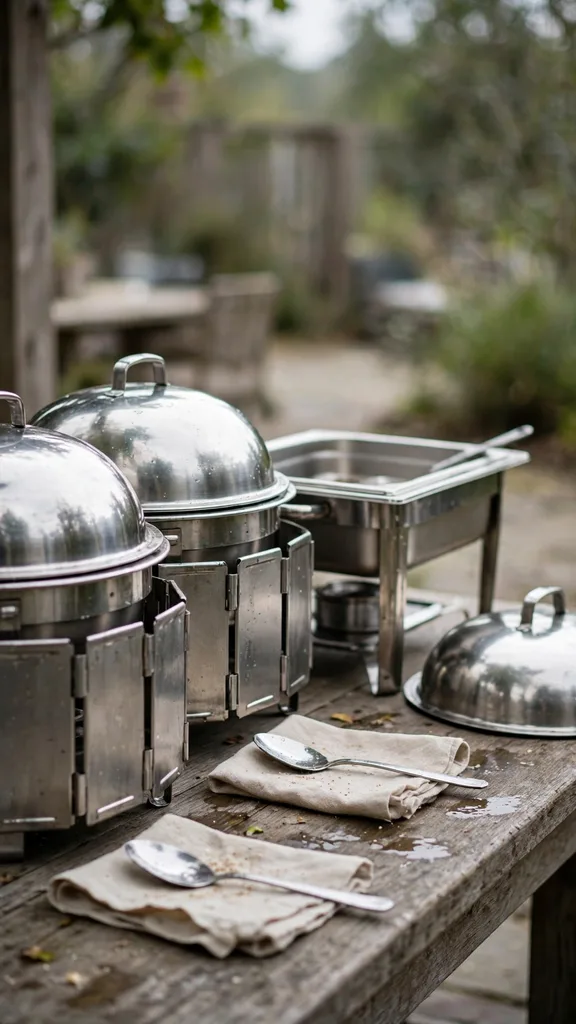
Test the guards on setup day with the same fuel that dinner will use, and keep spare fuel in a dry box beside the serving line. A guarded chafing dish also protects the tablecloth, because the guard blocks direct flame contact, and a steady flame means the host checks food temperature, never chases a flame that keeps dying.
15. Insulated Carriers for the Turkey Trip Outdoors
An insulated carrier moves the turkey from the kitchen to the outdoor table without losing heat, because thick walls and a tight lid slow cooling during the trip. Preheat the carrier with a pot of hot water for 15 minutes, empty the water, set the covered roasting pan inside, and close the lid tight, so the turkey travels in its own heat.
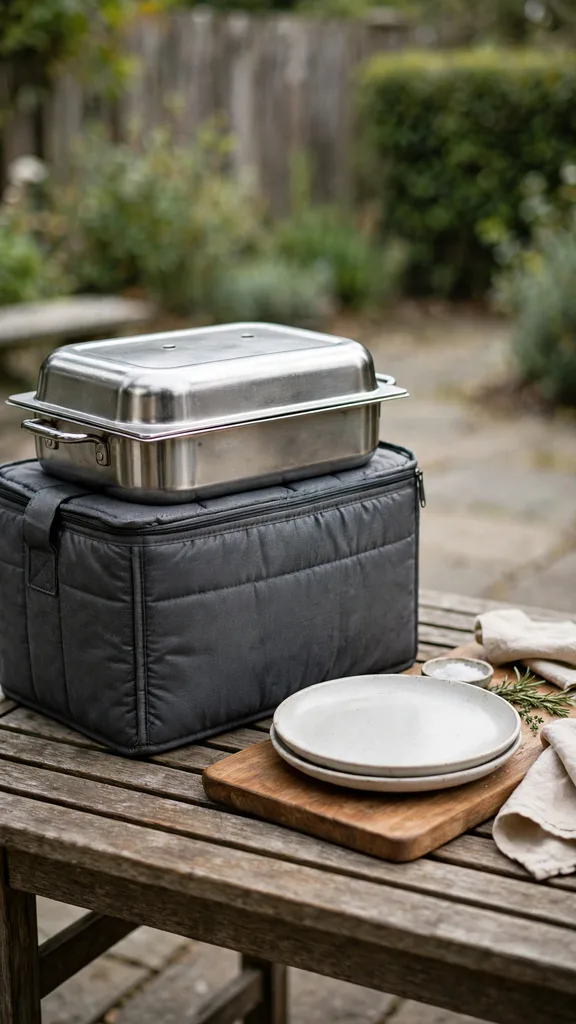
Carry the pan with two hosts on a calm path, set the carrier on the serving table, and open it only when carving starts. A carrier also frees the kitchen oven for side dishes, because the turkey holds in the carrier while the oven finishes the rest, and a turkey that arrives hot carves clean, while a cooled turkey tears.
16. Small Batch Serving to Keep Food Hot
Small batch serving keeps food hot by sending out one small dish at a time, because a small dish empties fast and the next dish arrives fresh from the kitchen. Fill each serving bowl only halfway, keep the rest hot indoors, and refill a bowl when it reaches one quarter full, so no bowl sits outside long enough to cool. The United States Department of Agriculture states that perishable food should sit out for no longer than 2 hours, and for no longer than 1 hour when the air passes 32 degrees Celsius (90 degrees Fahrenheit), so small batches keep the serving clock short.
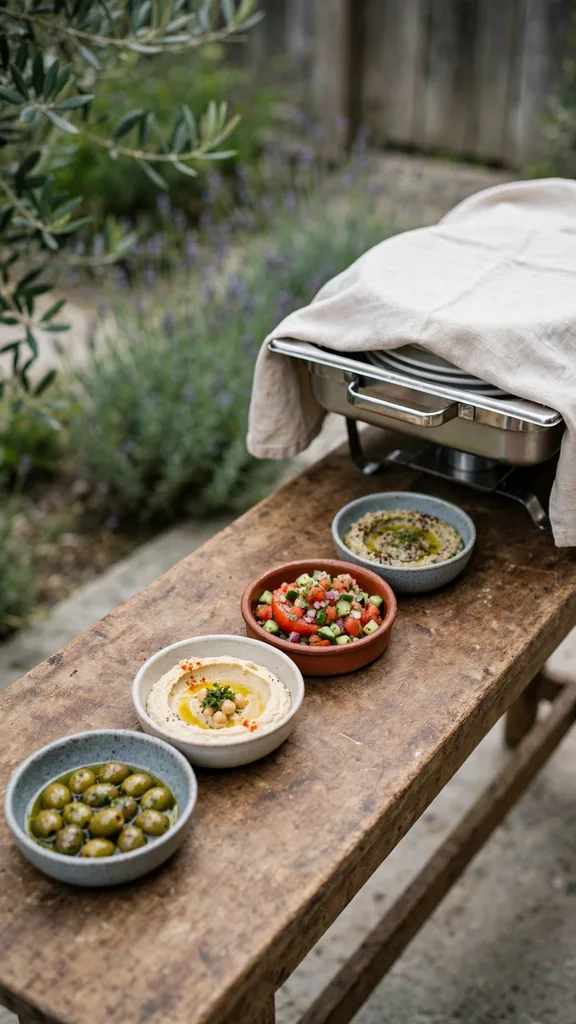
Assign one helper to watch bowl levels, and keep a written list of which dishes sit outside and when each bowl went out. Small batches also keep the table tidy, because a half full bowl looks generous, while a large bowl half eaten looks tired, and a fresh refill at the right moment keeps the feast looking new.
17. Two Hour Serving Clock for Outdoor Food
A two hour serving clock tracks every dish from the moment it leaves the kitchen, because outdoor food cools and warms with the air and the clock sets a firm end point. Write the out time on a small card beside each dish, set a timer for 2 hours, and move any dish still out at the timer back indoors, so no dish drifts past its safe window.
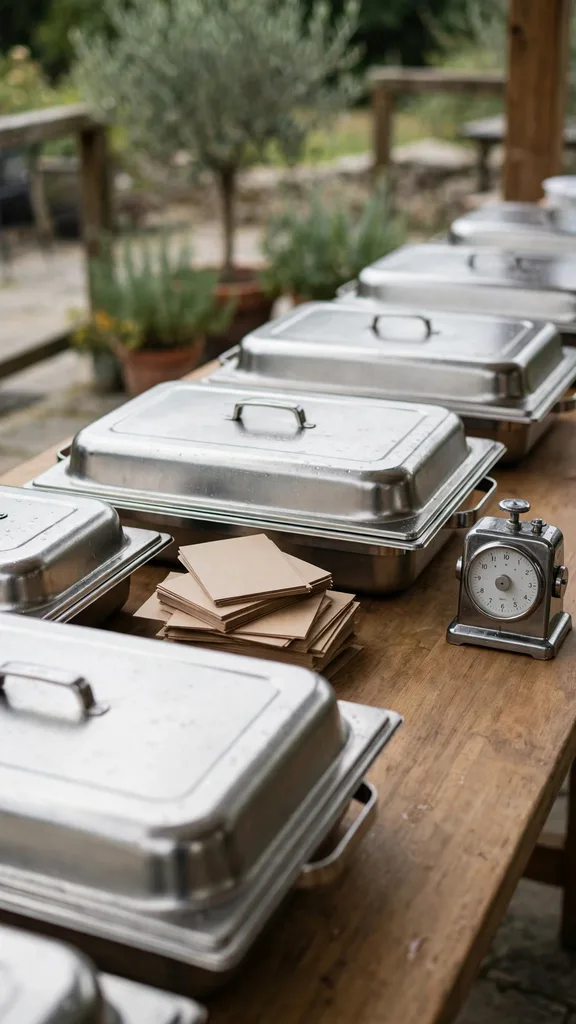
Start the clock when the first dish goes out, and reset the clock only for a fresh dish from the kitchen, never for a dish that went back indoors and came out again. A visible clock also settles guest questions, because the card shows the plan, and a host who tracks time serves with confidence instead of guessing.
18. Cold Dishes Nested in Ice Bowls
A cold dish nested in an ice bowl stays cold outdoors, because the outer bowl of ice chills the inner dish from every side. Set a large bowl of ice on the serving line, nest a smaller dish of salad or cranberry sauce inside it, and refill the ice when half of it melts, so the inner dish stays at serving cold through the meal.
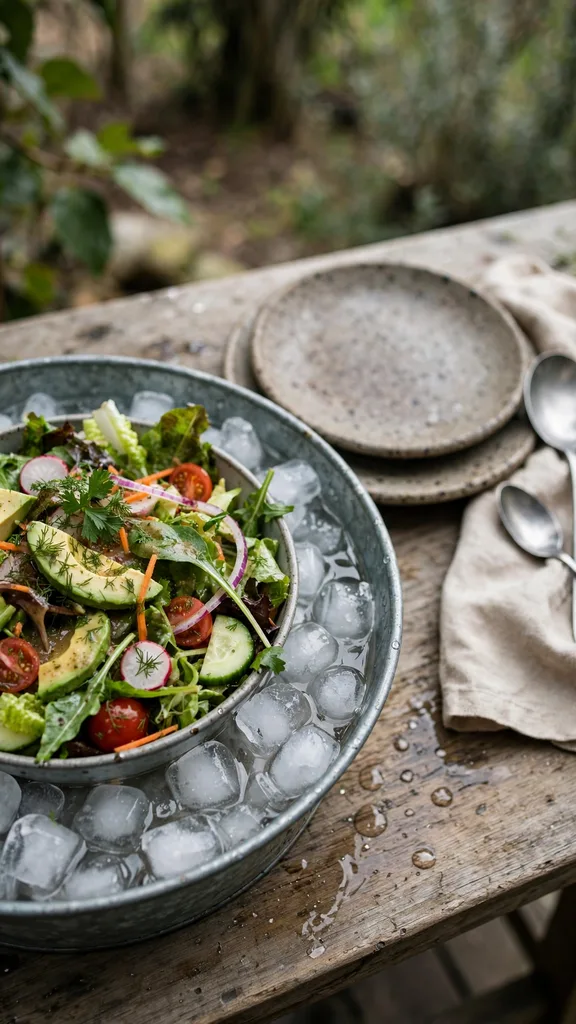
Keep the ice bowl in shade, and set a small towel under it to catch melt water. Nested ice also suits a table with no power, because ice needs no outlet, and a cold dish that stays cold tastes crisp, while a dish that warms on a mild day turns soft before the second serving.
19. Gravy in an Insulated Jug
Gravy in an insulated jug stays pourable outdoors, because a sealed jug holds heat far longer than an open boat on a cold table. Heat the gravy to a full simmer indoors, pour it into a preheated jug, close the lid tight, and pour at the table, so each serving arrives hot and smooth.
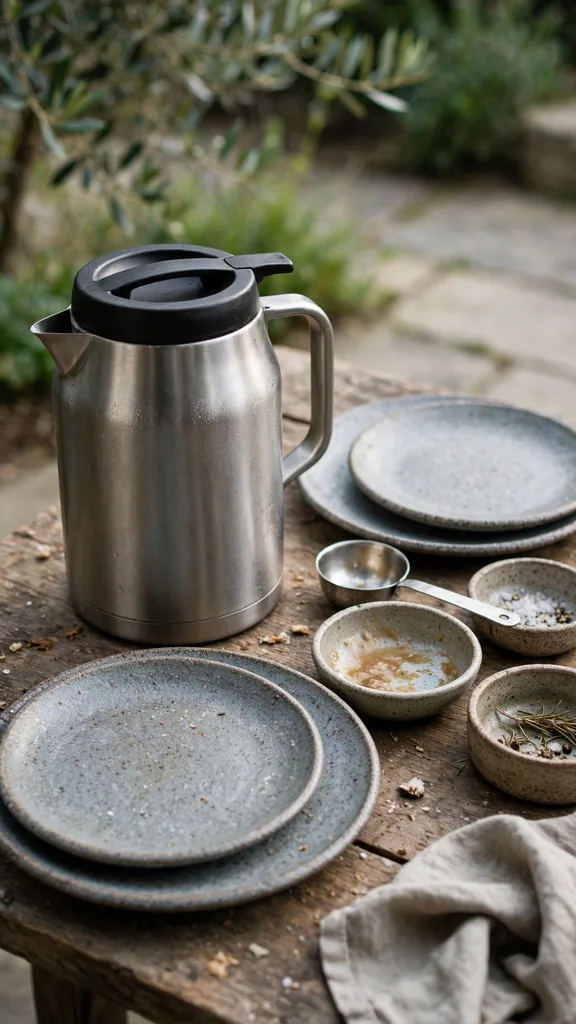
Preheat the jug with hot water for 10 minutes, empty it fully, and test one pour before guests sit down. An insulated jug also ends gravy skin, because a sealed jug blocks air, and a jug that pours clean keeps the tablecloth free of drips, while an open boat skins over and drips at every pass.
20. Hot Drink Station Apart from the Food Table
A hot drink station apart from the food table keeps cider and coffee hot without crowding the serving line, because a separate table gives the drink pots room and keeps spills away from food. Set the drink table 2 metres (7 feet) from the food table, keep the pots on a stable surface, and set cups in one row with handles facing out, so guests serve with ease.
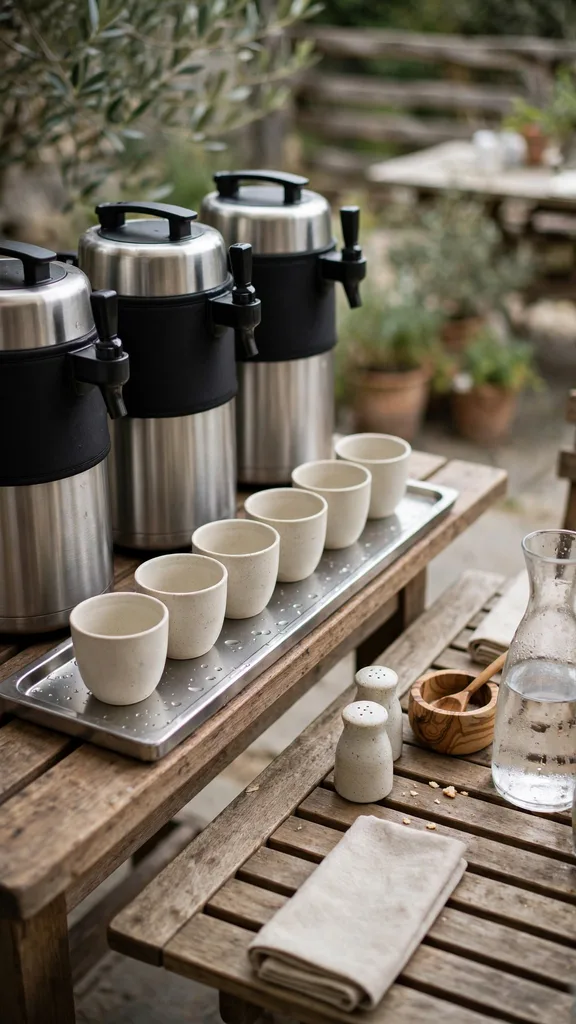
Use insulated pots with lids, refill each pot when it reaches one quarter full, and set a tray under the pots for drips. A separate drink station also shortens the food line, because drink guests step aside, and a table with one purpose stays tidy, while a mixed table turns crowded at every course.
21. Blanket Basket at Every Third Seat
A blanket basket at every third seat puts warmth within reach, because a guest who feels cold grabs a blanket fast instead of leaving the table. Fill one basket with three folded blankets, set one basket at every third seat along the table, and choose blankets 150 centimetres (5 feet) long, so one blanket covers lap and shoulders at once.
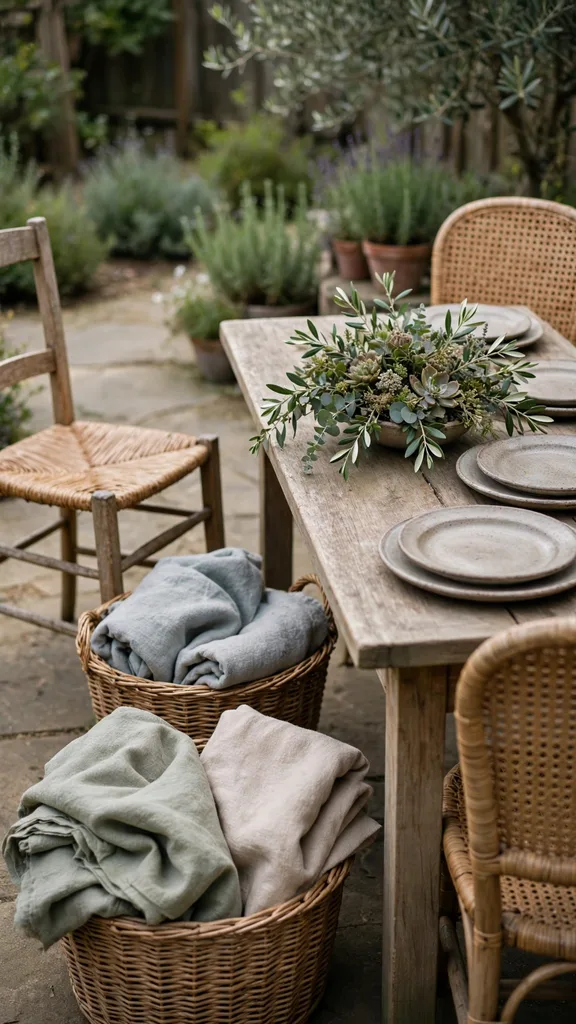
Wash the blankets before dinner, fold each blanket the same way, and set the baskets on the ground beside the chairs, clear of feet. A basket plan also beats one large pile, because a pile at one end serves one end only, while baskets spread along the table serve every seat with equal speed.
22. Heated Seat Pads on Cold Chairs
A heated seat pad warms a cold chair before guests sit down, because a cold seat steals body heat fast on a late November evening. Set one battery pad on each chair 30 minutes before dinner, switch each pad to its low setting, and check that every pad lies flat, so the guest sits on warmth, never on a folded edge.
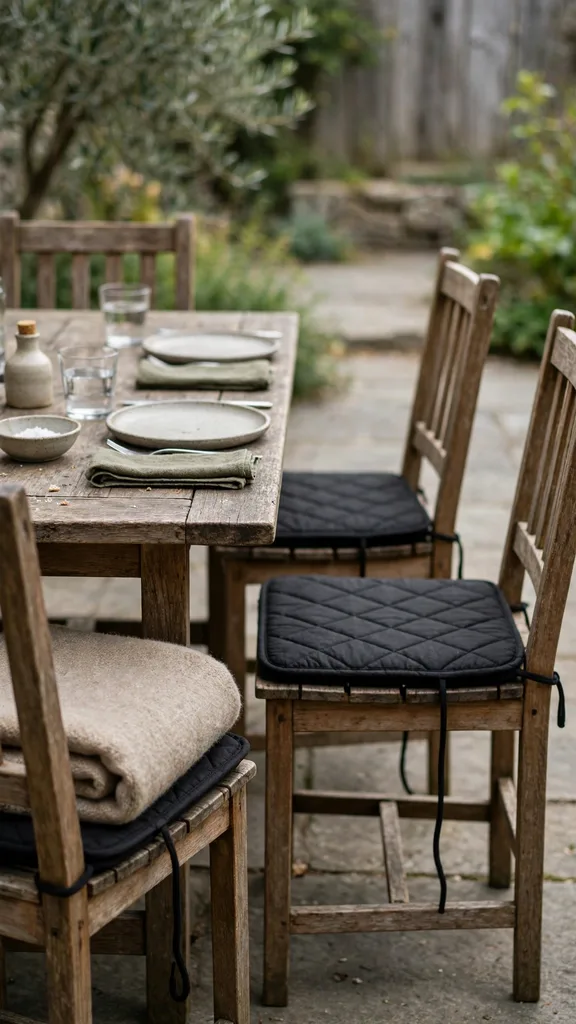
Charge the pads fully the day before, keep spare pads in a dry box, and collect the pads at the end of the meal. A heated pad also helps guests stay longer, because a warm seat holds a guest at the table, while a cold seat sends guests indoors before dessert.
23. Windproof Throws Clipped to Chairs
A windproof throw clipped to a chair stays with the guest, because a clip at each top corner stops the throw sliding off in a gust. Drape one throw over each chair back, clip the top corners to the chair frame, and leave the lower half free, so the guest pulls the throw forward over the lap with ease.
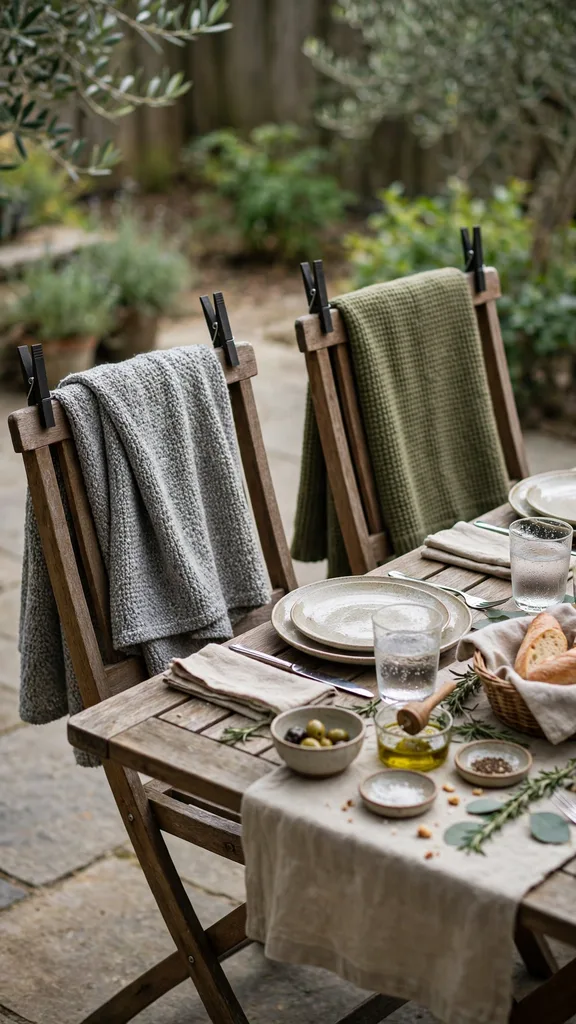
Choose throws 130 centimetres (4 feet) long, test each clip by tugging the throw sharply, and keep the clips in a pouch for reuse. A clipped throw also saves the host from chasing blankets across the lawn, because a throw that stays put serves all evening, while a loose throw ends up on the ground.
24. Foot Warmth with Straw Mats and Rugs
Foot warmth with straw mats and rugs starts at ground level, because cold ground chills feet through thin shoes all evening. Lay one straw mat under each chair, add a flat rug down the middle of the seating area, and keep the mats 60 centimetres (24 inches) wide, so both feet rest on insulation, never on bare ground.
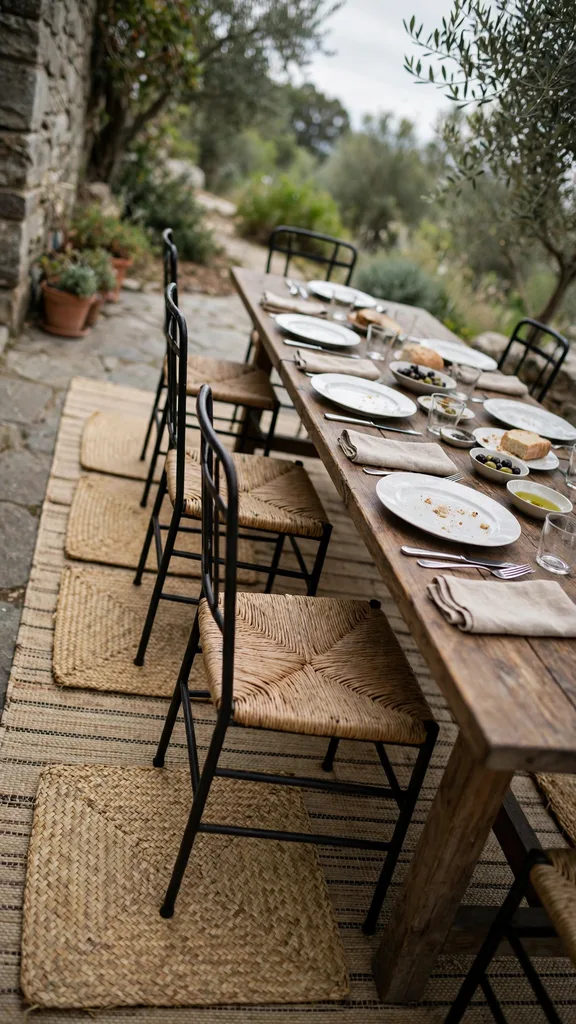
Sweep the mats before dinner, and check that no mat edge curls up into a trip risk. Ground insulation also suits a table on stone, because stone holds cold longer than soil, and a guest with warm feet stays at the table, while a guest with cold feet shifts and fidgets through every course.
25. Warm Hand Towels from a Covered Basket
Warm hand towels from a covered basket give guests a hot towel at the start of the meal, because a warm towel on cold hands feels like a welcome indoors. Heat damp towels in a covered pot for 15 minutes, move them to a covered basket lined with cloth, and hand one towel to each guest as guests sit down, so the towels stay hot to the last seat.
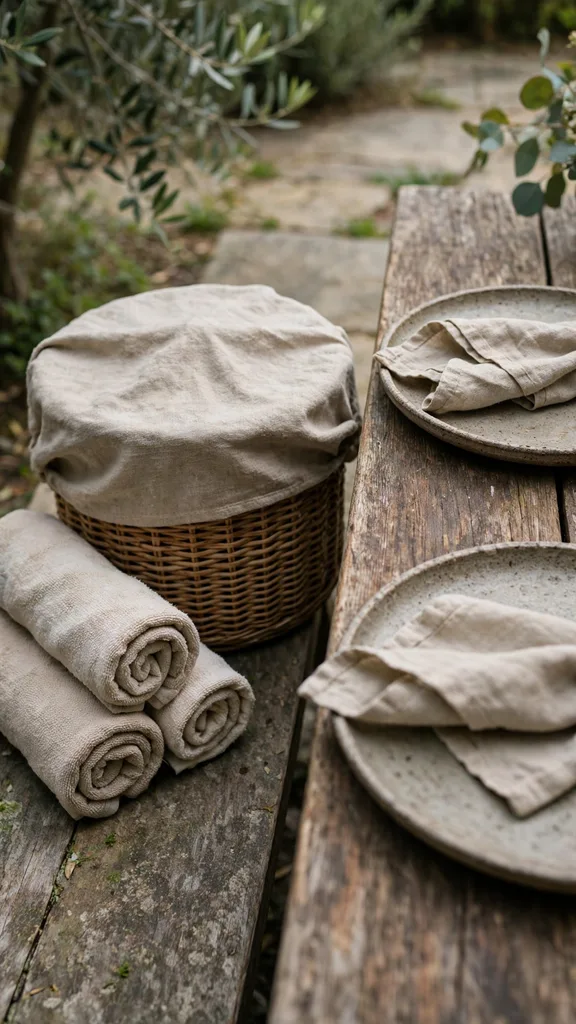
Use plain cotton towels 30 centimetres (12 inches) square, keep the basket lid closed between servings, and collect used towels in a second basket. A warm towel also cleans hands before food, because outdoor tables lack a sink nearby, and a guest who starts clean settles into dinner with ease.
26. Child Warmth Corner with Extra Layers
A child warmth corner sets one sheltered end of the table for children, with extra blankets, a low windbreak, and seats near the heat source, because children lose heat faster than adults and feel cold first. Place the corner at the end nearest the house wall, stack two blankets per child seat, and keep the corner clear of the serving path, so children stay warm and safe.
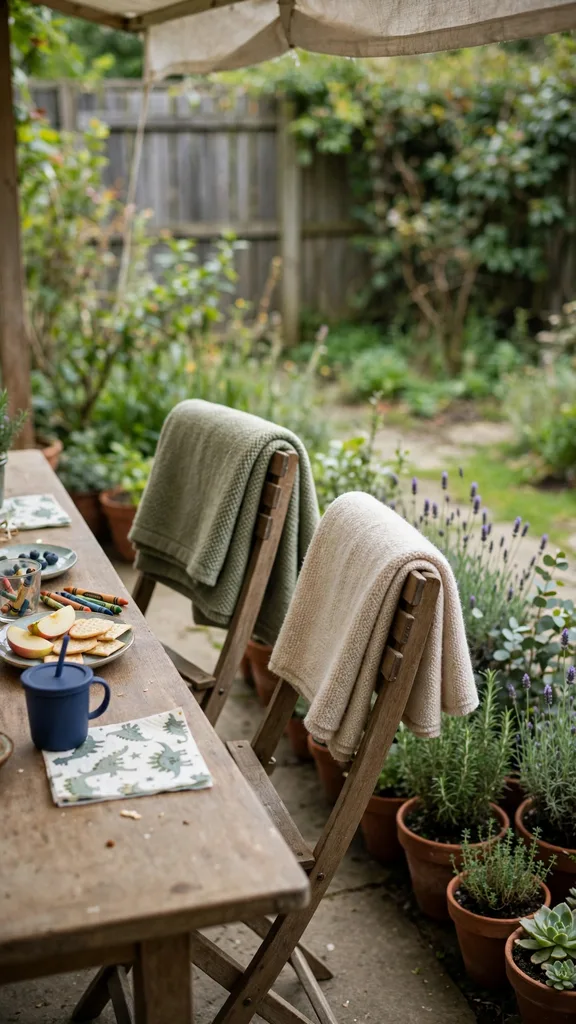
Check the corner every 30 minutes, and keep spare socks and mittens in a basket at the corner. A warmth corner also helps parents relax, because a warm child stays seated, while a cold child leaves the table and pulls a parent away from dinner.
27. Elder Guest Seat Near the Heat Source
An elder guest seat near the heat source puts the guest who feels cold first closest to steady warmth, because a seat 1 metre (3 feet) from a patio heater or fire bowl gains heat all evening. Choose the seat with the shortest walk from the house door, add a thick seat pad and a blanket, and keep the path to that seat clear of mats and cords, so the guest arrives safe.
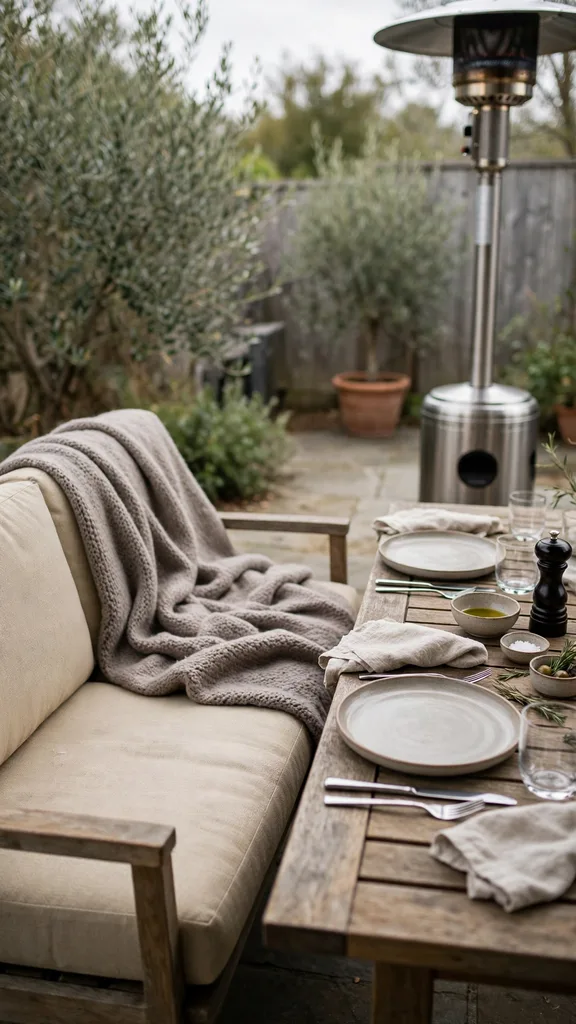
Check the seat temperature before dinner by sitting in it for 5 minutes, and adjust the heater distance until the seat feels steady. A near heat seat also honours the guest, because a host who plans for comfort shows care, and a guest who stays warm joins every course instead of watching from indoors.
28. String Lights Hung High and Tight
String lights hung high and tight light the table without drooping into food, because a taut line 2 metres (7 feet) above the table keeps bulbs clear of heads and dishes. Run the line between two firm posts or tree limbs, pull it tight, and space bulbs 30 centimetres (12 inches) apart, so light falls even across every seat.
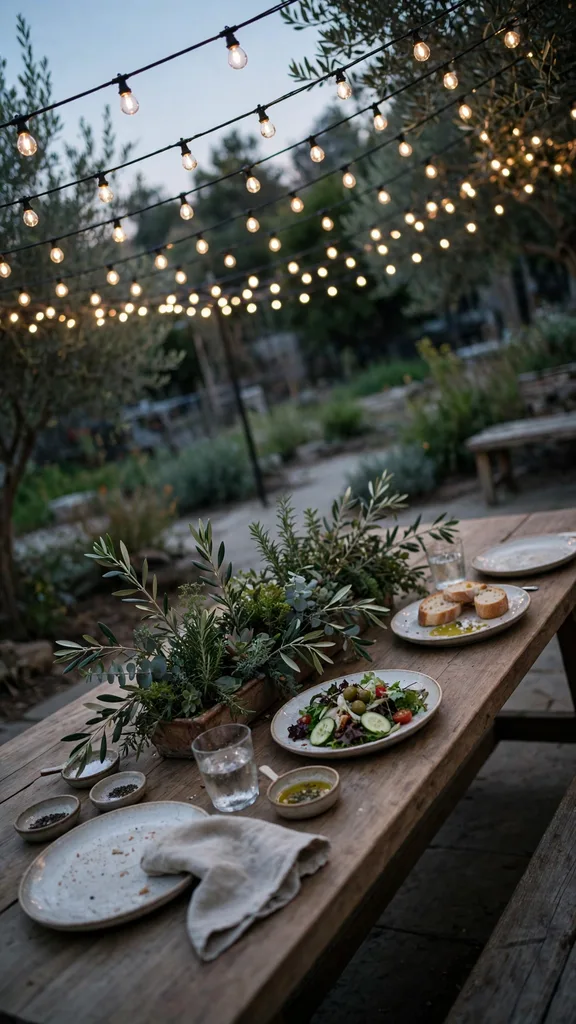
Test the lights at dusk before dinner, and keep spare bulbs in a pouch at the end of the table. High tight lights also survive wind, because a taut line sways less than a loose line, and even light helps guests see food, while a drooping line drops shadows on plates.
29. One Lantern Cluster as the Table Glow
One lantern cluster as the table glow gathers three lanterns of different heights at one end of the middle row, so the table gains one warm light source instead of a scattered set of flames. Set the tallest lantern 30 centimetres (12 inches) high, flank it with two shorter lanterns, and keep the cluster 60 centimetres (24 inches) from the nearest plate, so light reaches the table and flames stay clear of food. This table keeps lanterns as one light component among many, so the cluster glows without taking over the whole setting.
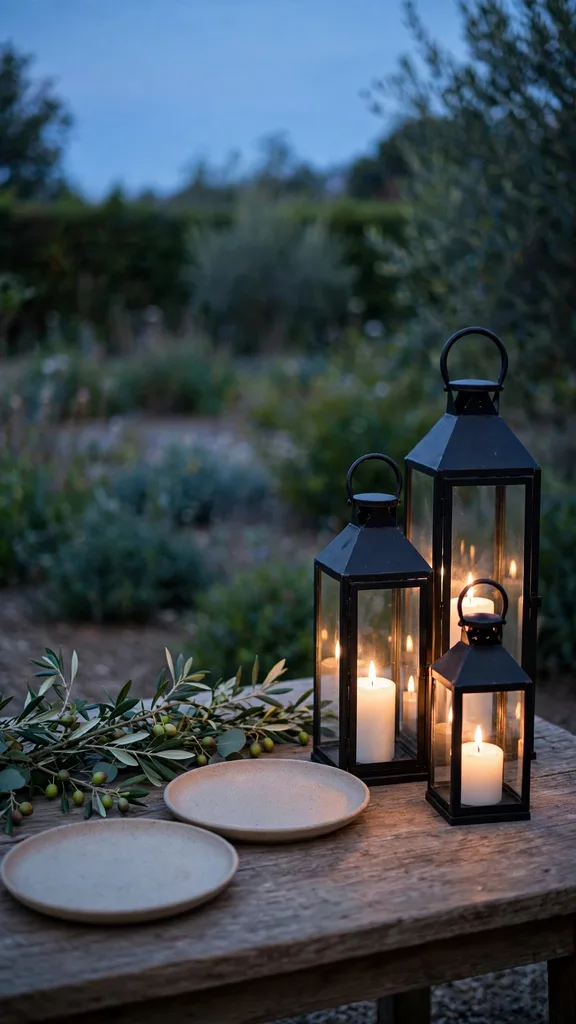
Use battery candles inside the lanterns on a windy night, and check each lantern glass for cracks before dinner. A single cluster also simplifies lighting, because one cluster lights in one pass, while lanterns spread down the whole row need relighting all evening, and a cluster at one end leaves the rest of the row free for food and flowers.
30. Solar Path Lights to the Table
Solar path lights to the table guide guests from the house door to the seats, because a lit path prevents a stumble on a dark lawn. Set one solar light every 1 metre (3 feet) along both sides of the path, charge the lights in full sun during the day, and check the path at dusk, so every step shows clear before guests arrive.
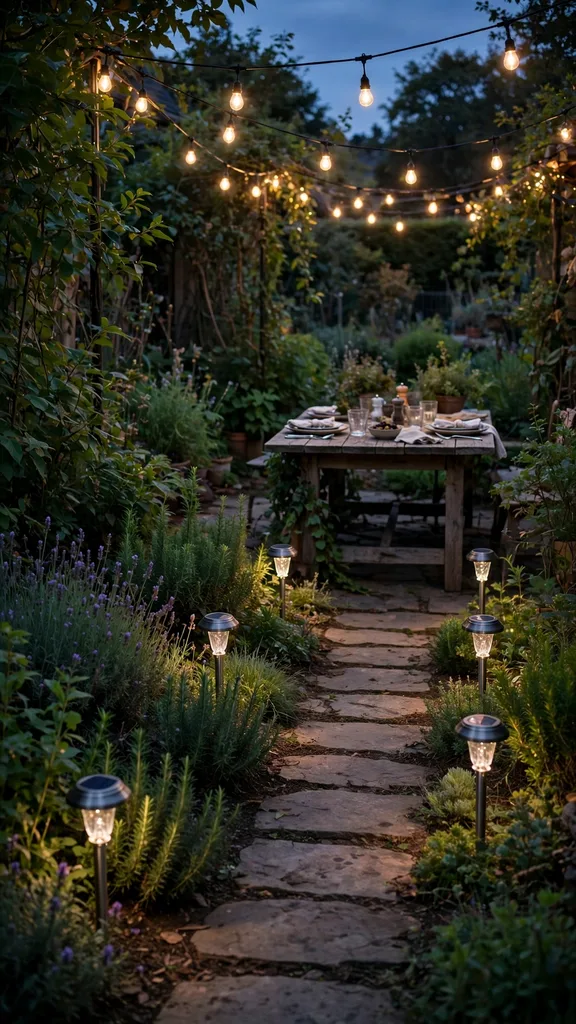
Clean each solar panel before dinner, and keep spare lights in a box for a light that fails to charge. A lit path also marks the table as a destination, because guests follow light with ease, and a dark path hides the table, while a lit path welcomes guests from the door.
31. Candle Safety in Open Air
Candle safety in open air starts with hurricane glass, because a tall glass shield blocks wind and keeps a flame steady while still showing light. Set each candle inside glass 20 centimetres (8 inches) tall, keep the glass 30 centimetres (12 inches) from any napkin or leaf, and trim each wick to 5 millimetres (one fifth of an inch) before lighting, so the flame stays small and steady.
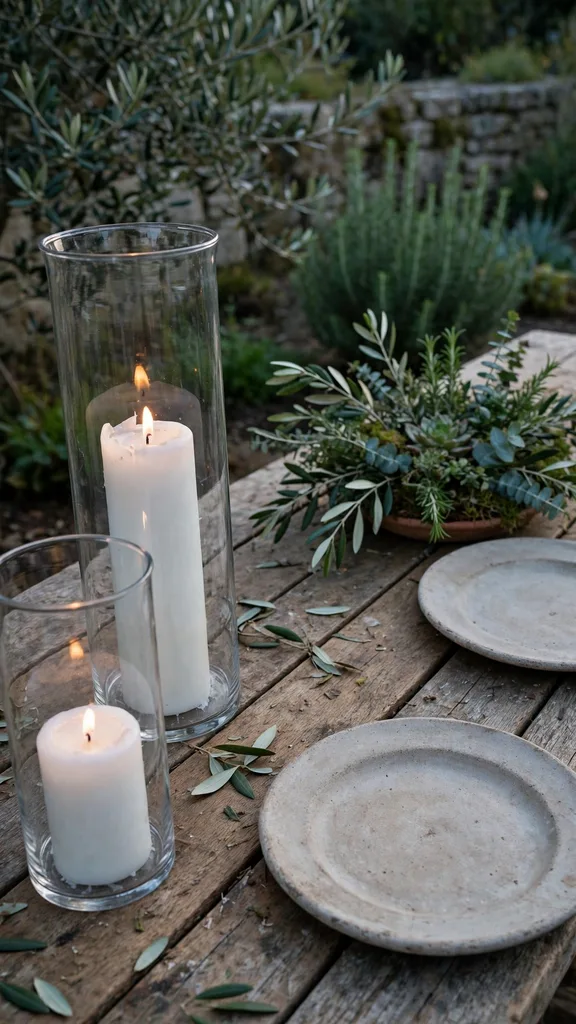
Light the candles only when guests sit down, and assign one host to watch flames through dinner. Hurricane glass also protects the tablecloth, because a shield catches drips, and a safe candle plan lets the host enjoy dinner, while an unshielded flame needs watching at every gust.
32. Dusk Dimmer Plan with Lights On Before Dark
A dusk dimmer plan switches lights on 30 minutes before sunset, because eyes adjust slow and a table that lights early never sits in sudden dark. Set a timer for the string lights and the path lights, check the table light at sunset, and add one extra lantern only if a seat still sits in shadow, so every seat gains light at the same pace as the sky dims.
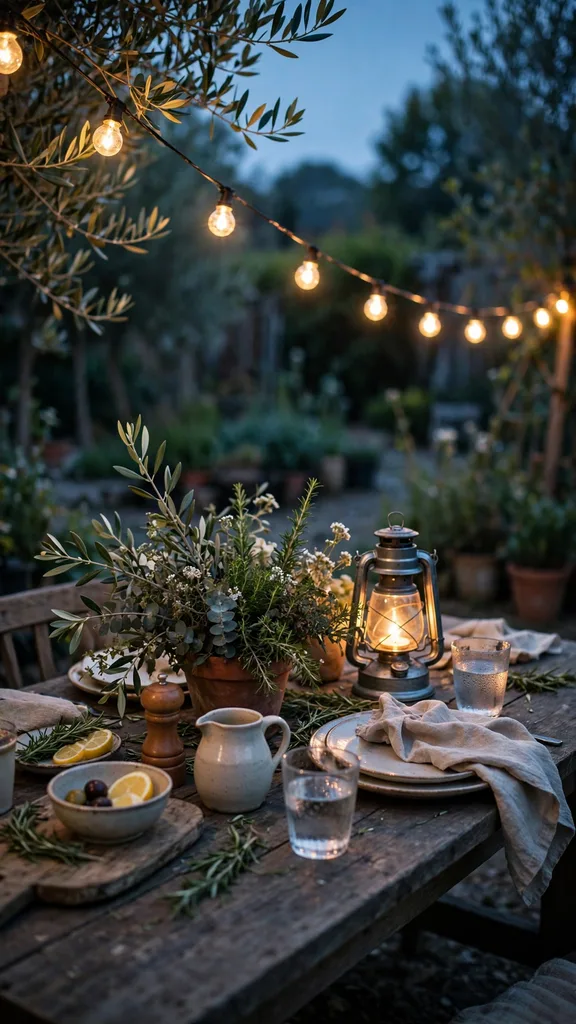
Walk the table at sunset and look at each plate, because a plate in shadow hides food. A timed plan also frees the host, because lights switch on their own, while a host who lights by hand leaves guests in dark during the busiest serving minutes.
33. Garden Herb Runner Down the Middle
A garden herb runner down the middle lays fresh herb sprigs in a continuous line, because herbs give scent, colour, and a cutting garnish in one row. Lay sprigs of rosemary, thyme, and sage end to end down the centre, keep the row 20 centimetres (8 inches) wide, and trim every sprig to 25 centimetres (10 inches), so the row reads as one line, never as scattered stems.
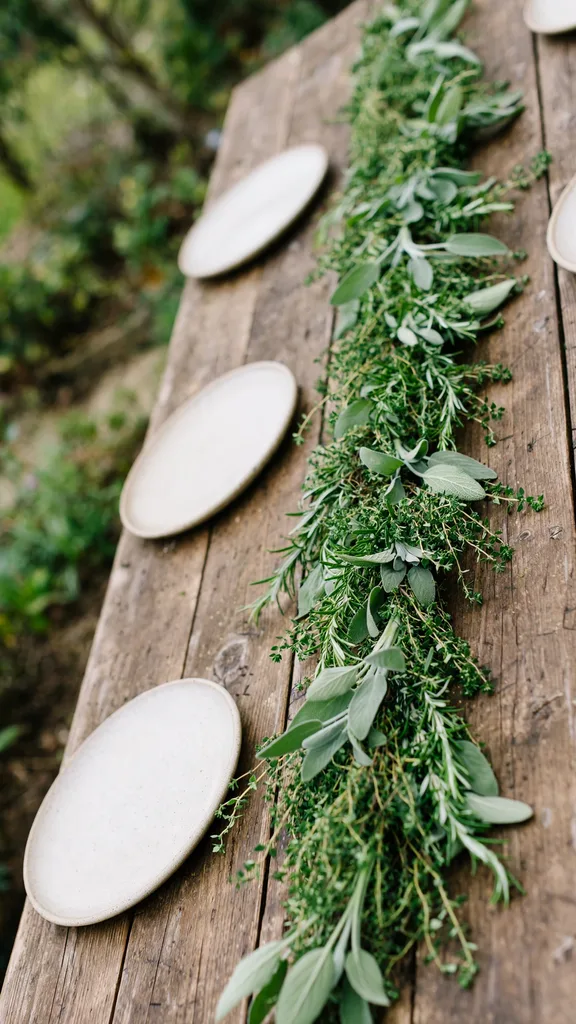
Cut the herbs on the morning of the meal, mist them once before guests arrive, and set small scissors at one end for guests who snip garnish. A herb runner also survives wind, because low sprigs catch little air, and a runner that smells like the garden suits an outdoor feast better than a tall arrangement that blocks faces.
34. Pumpkin Row Centerpiece Low and Heavy
A pumpkin row centerpiece low and heavy sets small pumpkins in a straight line down the middle, because heavy pumpkins resist wind and low pumpkins keep sight lines open. Choose pumpkins 15 centimetres (6 inches) wide, space them 30 centimetres (12 inches) apart, and set a flat leaf under each pumpkin, so the row reads even and each pumpkin sits stable. For a single arrangement that fills the middle of a table on its own, see Thanksgiving centerpieces.
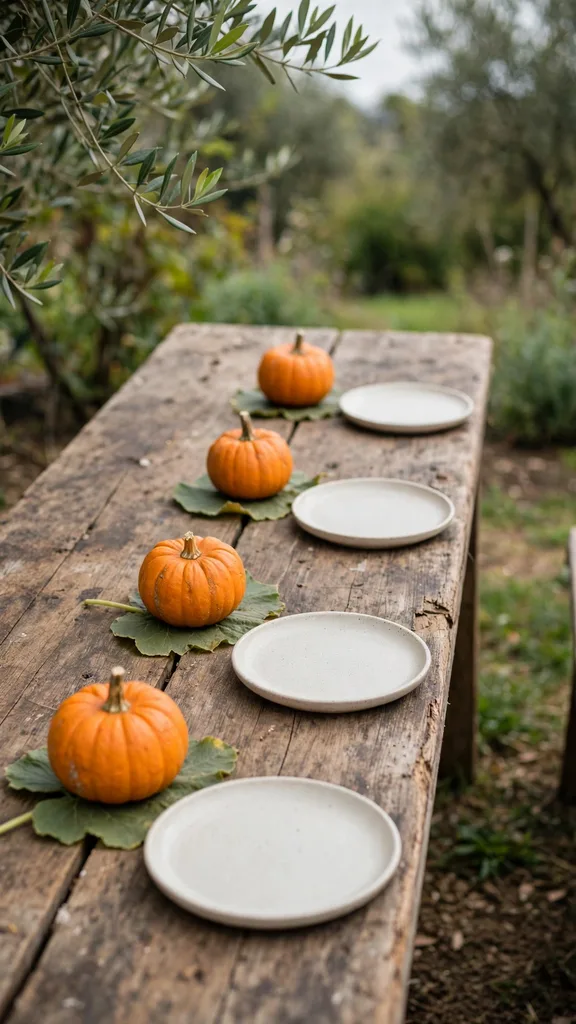
Pick pumpkins with stems still attached, wipe each pumpkin clean, and test the row by pressing one pumpkin gently to confirm it stays put. A pumpkin row also lasts for weeks, because pumpkins hold at room temperature, and a row built a week ahead frees setup day for food and seating.
35. Leaf and Branch Runner from Prunings
A leaf and branch runner from prunings turns garden cleanup into table decoration, because fresh prunings give length, colour, and structure at no cost. Lay long branches down the middle with leaves facing out, overlap each branch by 15 centimetres (6 inches), and keep the runner 25 centimetres (10 inches) wide, so the line looks full from every seat.
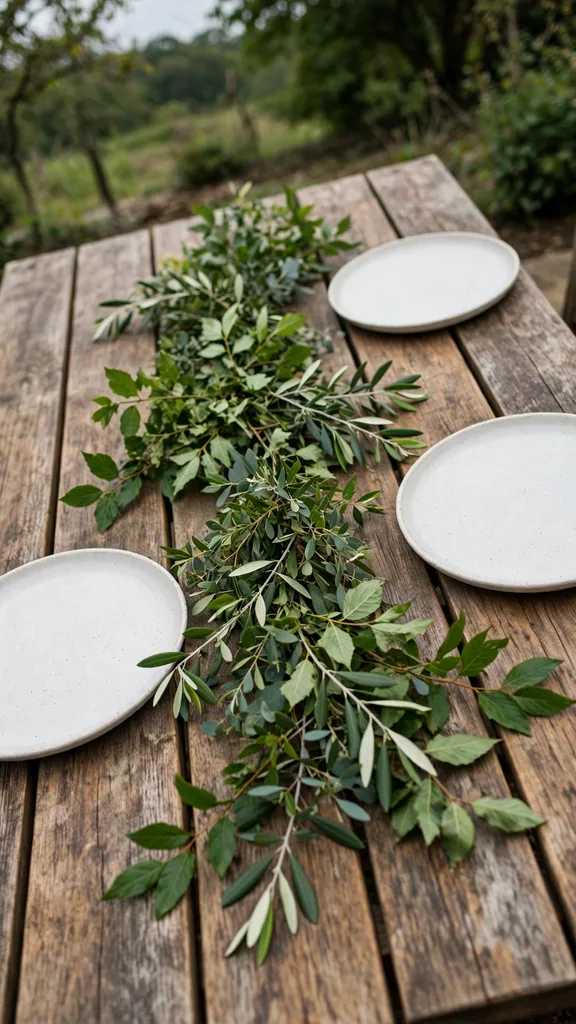
Prune on the morning of the meal, strip leaves from the underside that touches the table, and mist the runner once before dinner. A pruning runner also suits a large table, because long branches cover length fast, and a runner from the garden ties the table to the yard that grew it.
36. Potted Herbs as Edible Place Markers
Potted herbs as edible place markers set one small potted herb at each seat, because a living pot marks the seat, scents the place, and travels home as a favour. Choose pots 10 centimetres (4 inches) wide, water them the day before, and tie a name card to each pot with twine, so the guest finds the seat and the favour in one move. For pots that suit a small plant at a table seat, see Thanksgiving planter ideas.
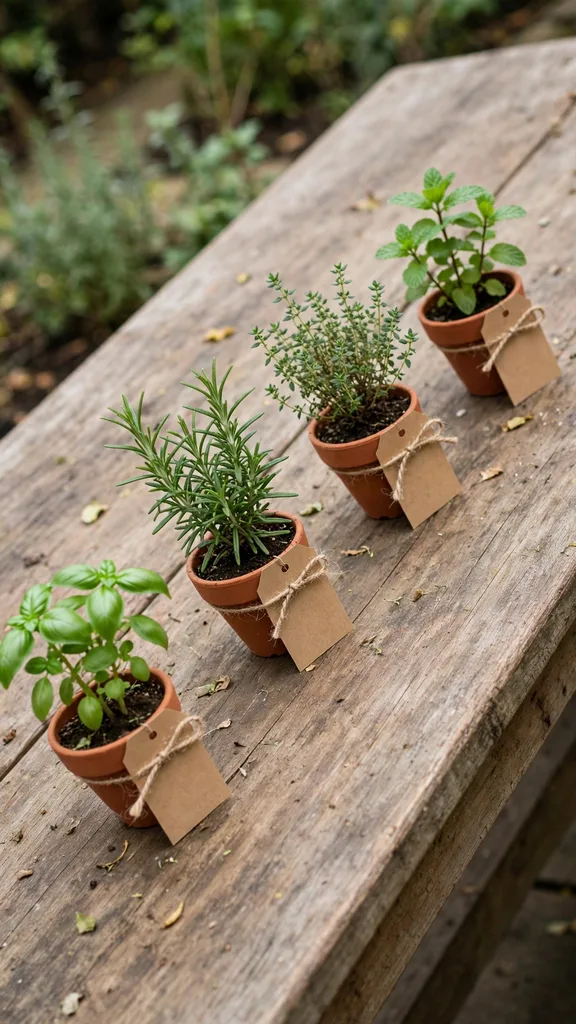
Set each pot on a small saucer, so soil water stays off the placemat, and choose herbs guests cook with, such as thyme, rosemary, and sage. A potted marker also survives wind, because a pot with soil weight stays put, while a paper card alone lifts away in the first gust.
37. Fruit Bowl Centerpiece from Orchard Harvest
A fruit bowl centerpiece from orchard harvest piles apples, pears, and quinces in a wide shallow bowl, because fruit gives colour, height, and a dessert course in one piece. Choose a bowl 40 centimetres (16 inches) wide, fill it with firm fruit, and set the bowl at the middle of the table, so guests reach fruit with ease and the bowl anchors the whole setting.
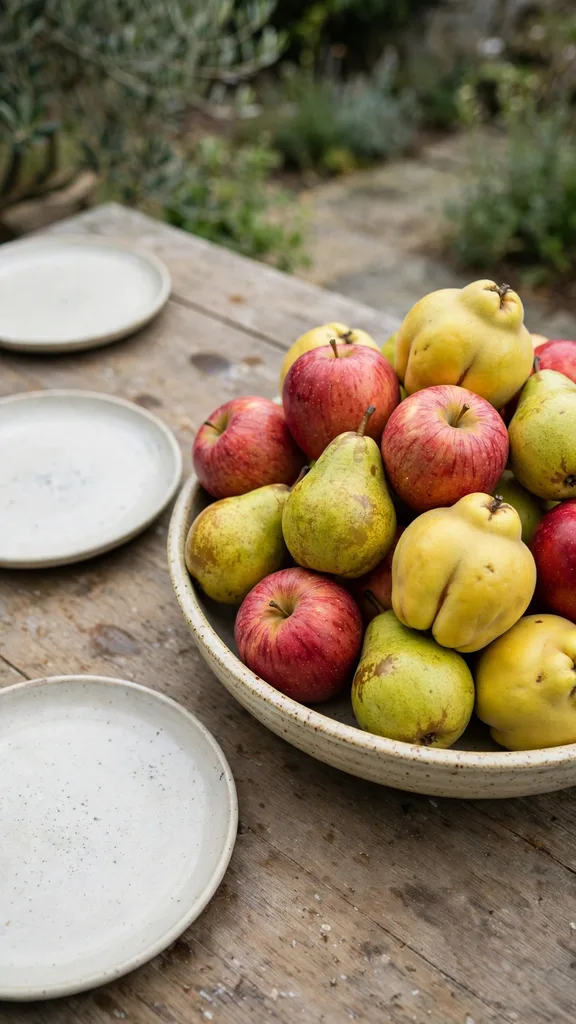
Pick fruit with firm skins and no bruises, wash each piece before dinner, and refill the bowl when it reaches half empty. A fruit bowl also suits a long dinner, because fruit holds at outdoor temperature for hours, and a bowl that empties through dessert shows a feast enjoyed, never a decoration wasted.
38. Fresh Flower Low Bowls for the Middle
Fresh flower low bowls for the middle set short stems in shallow bowls, because low bowls give flower colour without blocking faces or catching wind. Cut stems to 15 centimetres (6 inches), arrange five stems per bowl, and space bowls 60 centimetres (24 inches) apart down the middle, so colour repeats along the table with gaps for serving dishes. For fresh flowers that fill the middle of the table, see Thanksgiving floral centerpieces.
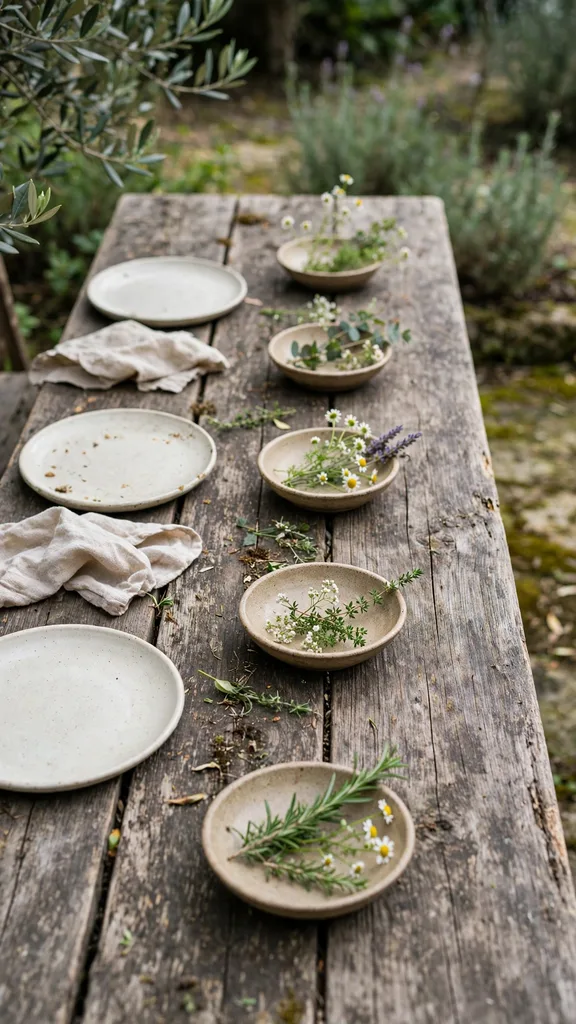
Cut the stems on the morning of the meal, fill each bowl with cool water, and check water levels once before guests sit down. Low bowls also suit a windy table, because a shallow bowl with a wide base tips less than a tall vase, and flowers at low height scent the table without hiding the guest across it.
39. Dried Seed Head Display for a Dry Day
A dried seed head display for a dry day sets tall seed heads in a heavy jar, because dried heads give height without water and hold their shape all evening. Choose seed heads 60 centimetres (24 inches) tall, set five heads in a jar 20 centimetres (8 inches) wide, and weight the jar base with stones, so wind moves the heads, never the jar.
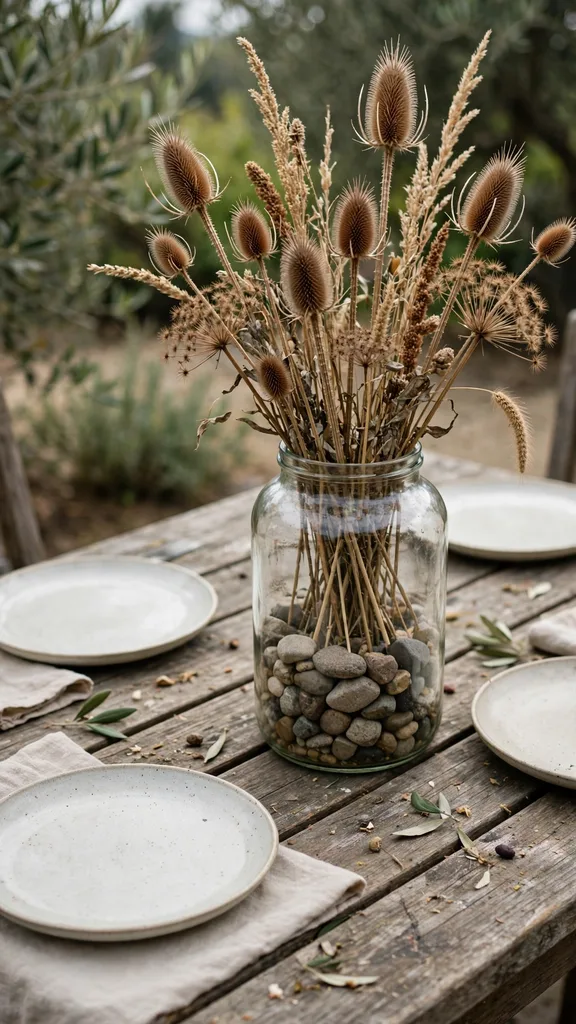
Keep the display for a dry forecast only, and move it indoors at the first rain, because wet seed heads droop and shed. A dried display also suits a table set days ahead, because dried heads need no water, and a display that holds its shape through dinner looks the same at dessert as it did at the first course.
40. Long Banquet Table Under One Tree Line
A long banquet table under one tree line seats twelve guests in one row, because a single long table under trees gains shade, shelter, and a natural ceiling in one move. Set the table parallel to the tree line, leave 90 centimetres (36 inches) behind each chair for passing, and run one low centerpiece down the full length, so the table reads as one feast, never as joined small tables.
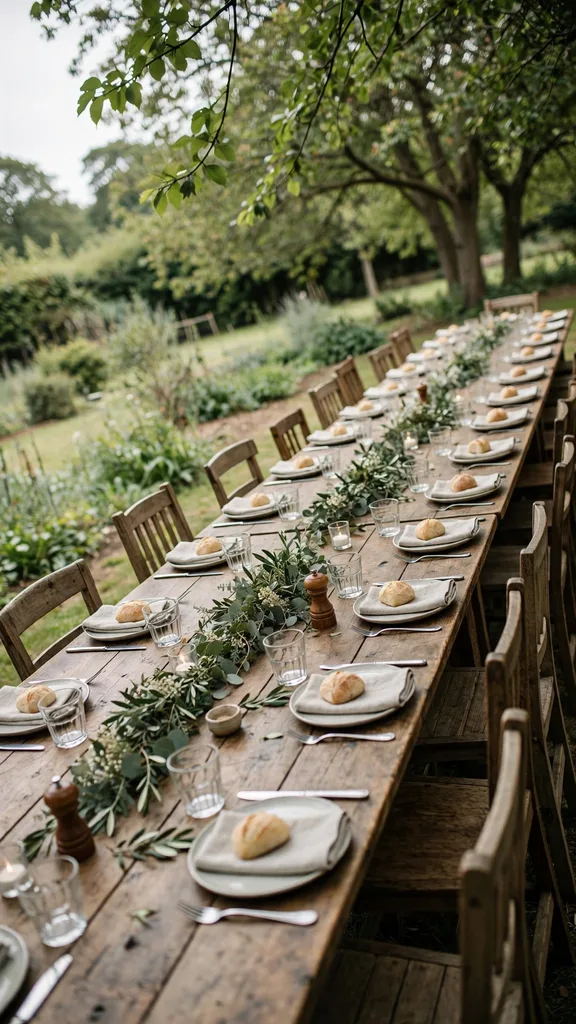
Level the table on uneven ground with small wedges under short legs, and test the level with a glass of water before setting plates. A banquet table also suits a large family, because one table holds one conversation, while separate tables split the feast into groups that never meet.
41. Round Table for a Wind Sheltered Corner
A round table for a wind sheltered corner suits a patio corner where two walls block wind, because a round table gives every guest an equal view and no guest sits at a far end. Choose a table 150 centimetres (5 feet) wide for eight guests, set one low bowl in the centre, and leave 60 centimetres (24 inches) between chairs, so elbows stay clear and serving dishes pass with ease.
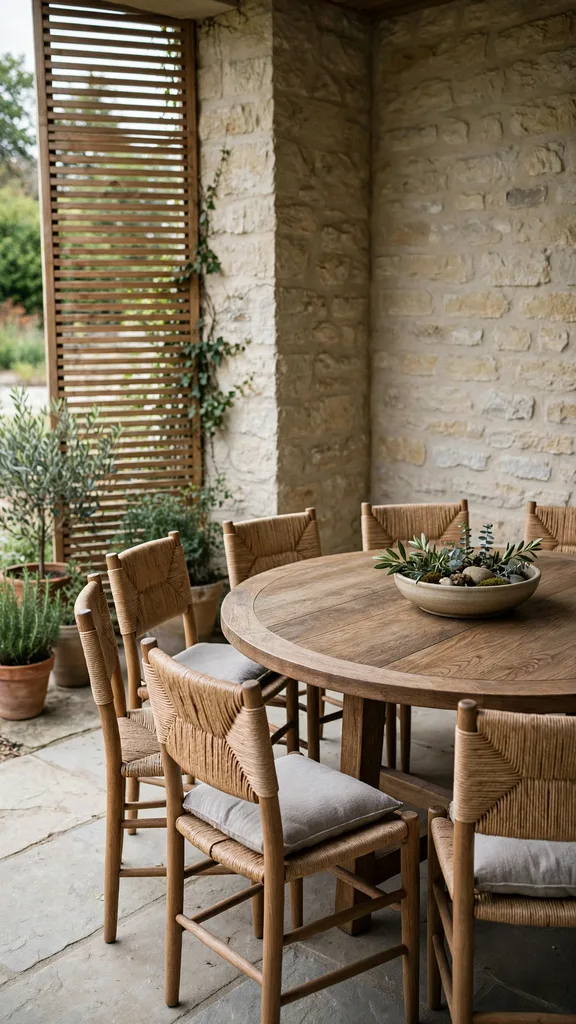
Test the corner wind by holding a ribbon at table height on setup day, and move the table 30 centimetres (12 inches) toward the wall if the ribbon streams. A round table also suits a small feast, because conversation crosses a round table fast, while a long table leaves far guests talking only to neighbours.
42. Small Patio Table for Four Outdoors
A small patio table for four outdoors keeps the feast close, because four seats at a table 120 centimetres (4 feet) wide let every guest reach every dish. Set one low centerpiece in the centre, keep the serving dishes on a side cart, and leave the table surface clear for plates, so a small table never feels crowded.
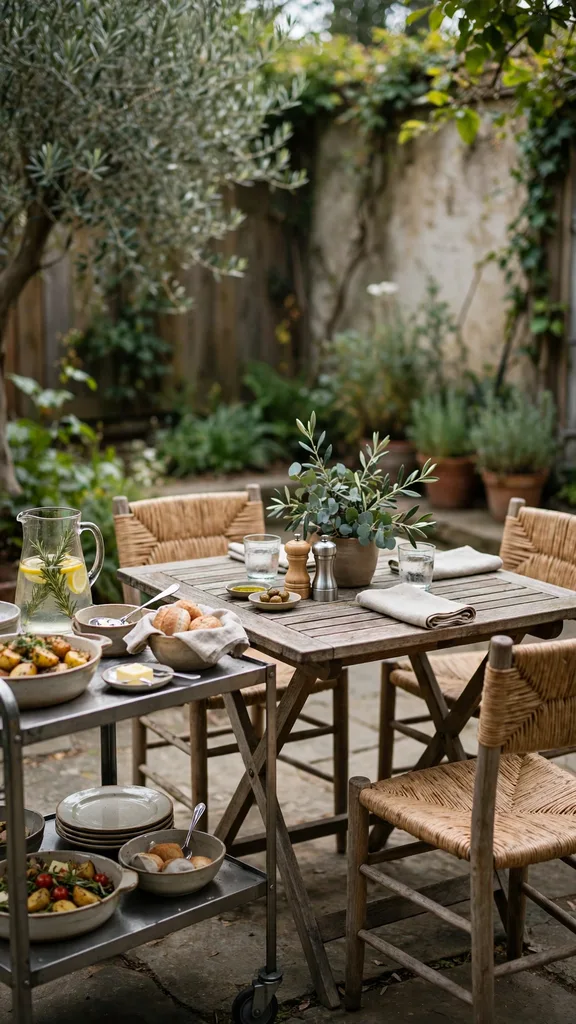
Use a side cart for refills, and set the cart 60 centimetres (24 inches) from the table end, so refills arrive fast without blocking a seat. A small table also suits a first outdoor feast, because a host learns wind, warmth, and light on a small scale, and a small success builds confidence for a larger table next year.
43. Balcony Rail Table for a Tiny Space
A balcony rail table for a tiny space hangs from the rail, because a rail table gives a feast surface where no floor table fits. Fix the rail table firm to the rail, test it with a full plate and a glass before dinner, and keep the table depth at 30 centimetres (12 inches), so plates sit stable and chairs still pass behind.
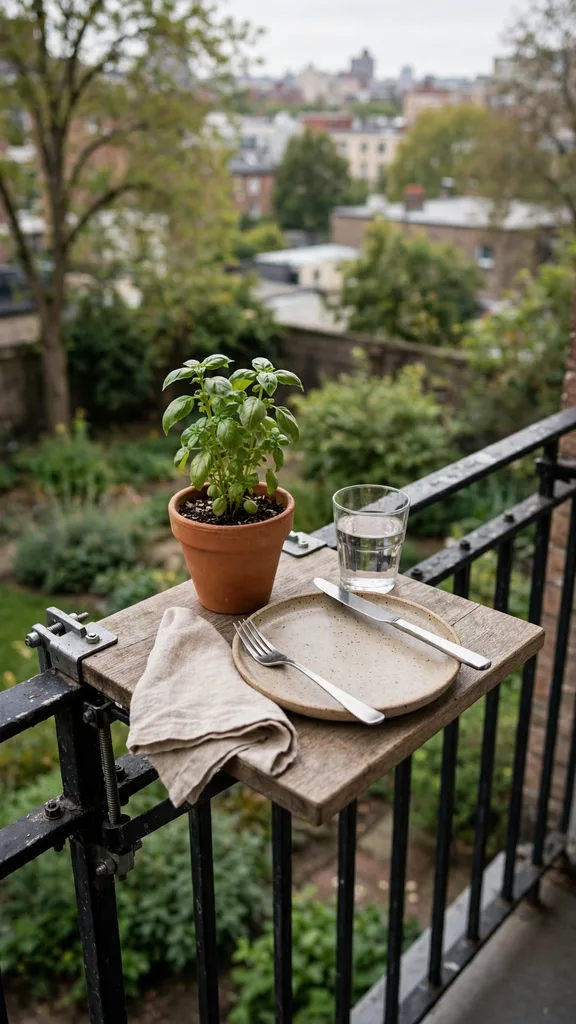
Set the centerpiece as one small potted herb, serve food from the kitchen in small batches, and keep a tray inside the door for used plates. A rail table also suits a city feast, because a balcony with a rail table hosts dinner with a view, while a balcony with no table hosts standing guests only.
44. Fire Pit Ring Table for Late Evening
A fire pit ring table for late evening sets small tables in a ring around a fire bowl, because guests eat at tables and warm hands at the fire between courses. Place each table 1 metre (3 feet) from the fire bowl, set two seats per table, and keep a clear path between tables, so guests move to the fire with ease and return to food.
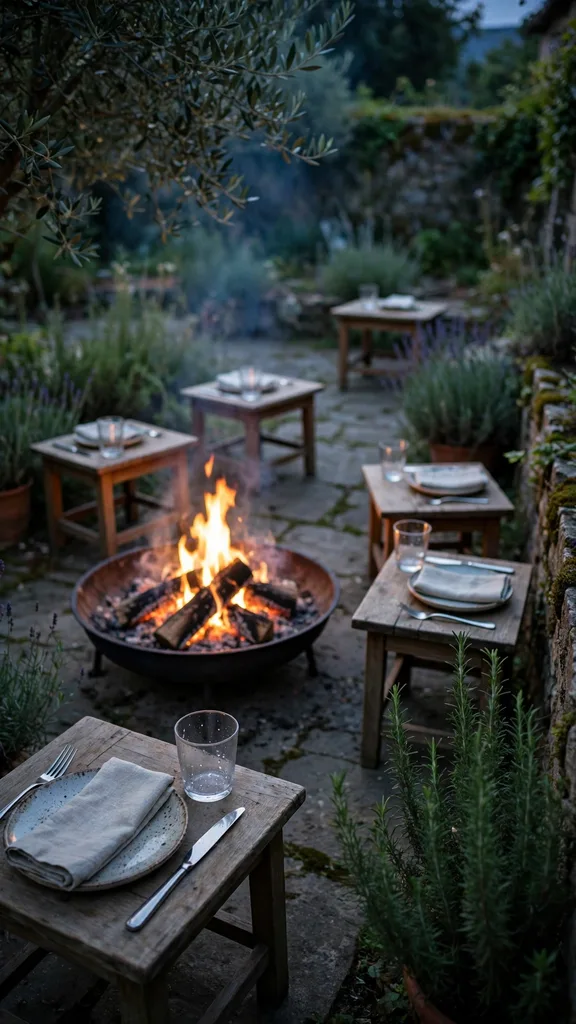
Use metal tables that resist heat, keep napkins clear of the fire side, and assign one host to tend the fire all evening. A fire ring also extends dinner past sunset, because warmth from the fire holds guests outdoors, while a table far from heat empties as soon as the air cools.
45. Full Dusk Alfresco Display for the Whole Gathering
A full dusk alfresco display brings every idea together, with wind anchors on the cloth, a low centerpiece row, guarded chafing dishes, blankets at every third seat, and lights switched on before dark, so the whole table reads as one planned outdoor feast. Set the longest table the yard allows, keep the middle row below 30 centimetres (12 inches), and check the table from the garden path before guests arrive, because a table that looks even from the path welcomes every guest who walks in.
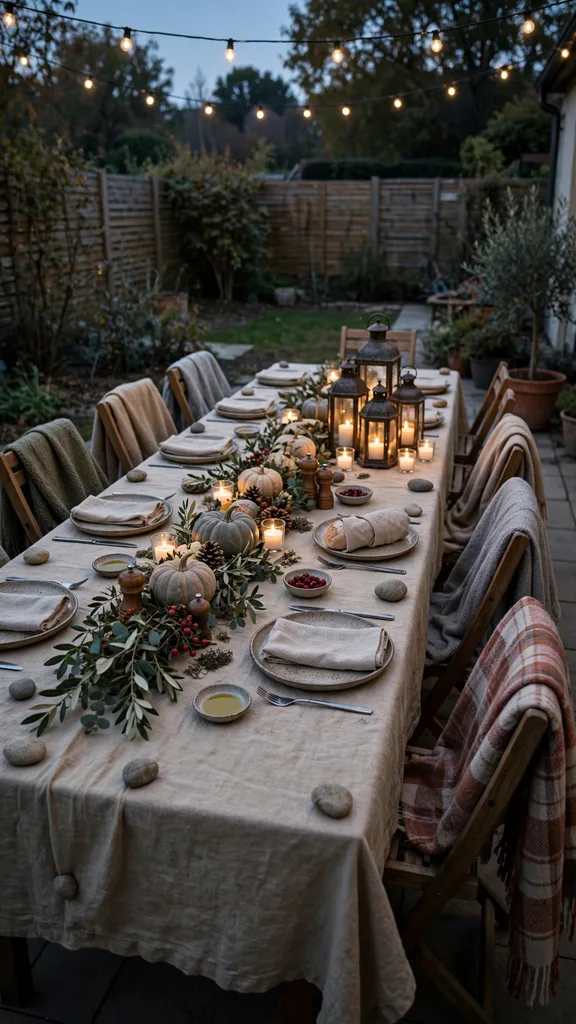
A full display needs a setup order, so anchor the cloth first, set the windbreak second, place food guards third, and light the table last. A display built in order holds through wind, rain, and cold, because each layer protects the next, and a feast that survives weather outdoors feels more memorable than a feast that never left the dining room.
Quick-Pick Table
| Group | Best for | First item to set | Set it when |
|---|---|---|---|
| Windproofing | An open lawn | Clips and stone weights | Morning of the meal |
| Rain plan | A table under trees | Spare tarp and lids | Before guests arrive |
| Food warmth | A long serving line | Guarded chafing dishes | When food goes out |
| Guest comfort | A cold evening | Blankets and heated pads | 30 minutes before dinner |
| Evening light | Dinner past sunset | String lights and one lantern cluster | 30 minutes before sunset |
| Garden centerpiece and seating | A yard, patio, or balcony | Low herb runner and potted markers | Morning of the meal |
Outdoor Thanksgiving Table FAQ
Hot food should stay at 60 degrees Celsius (140 degrees Fahrenheit) or higher while it sits out, and perishable food should sit out for no longer than 2 hours in total. When the air passes 32 degrees Celsius (90 degrees Fahrenheit), that window shortens to 1 hour. Move dishes back indoors at the timer, and serve fresh batches from the kitchen instead of letting one dish sit all evening.
Clips at intervals of 60 centimetres (24 inches) plus a smooth stone weight hung from each clip on the windward side hold a cloth flat in a gust. A heavy cotton cloth that hangs 30 centimetres (12 inches) past the table edge gives clips a firm grip. Test one corner with a sharp tug before guests arrive, and clip the windward edge first, because wind lifts that edge before any other.
Blankets at every third seat, heated pads on cold chairs, straw mats under feet, and one seat near the heat source for the guest who feels cold first cover warmth from four sides. Set pads out 30 minutes before dinner, and check the coldest seat by sitting in it for 5 minutes. Guests who stay warm stay at the table through dessert.
String lights hung high and tight 2 metres (7 feet) above the table give even light across every seat, and one lantern cluster at one end adds glow without scattered flames. Switch lights on 30 minutes before sunset, so eyes adjust as the sky dims. Keep candles inside hurricane glass, and keep every flame 30 centimetres (12 inches) from napkins and leaves.
Yes, with a plan made before dinner. Keep one clean tarp, four clips, and two poles at the end of the table for a cover in less than 2 minutes, and keep serving dishes lidded so a shower never reaches food. If rain turns heavy, move food first, then centerpieces, then guests, because food takes harm fastest and guests follow once the table is safe.