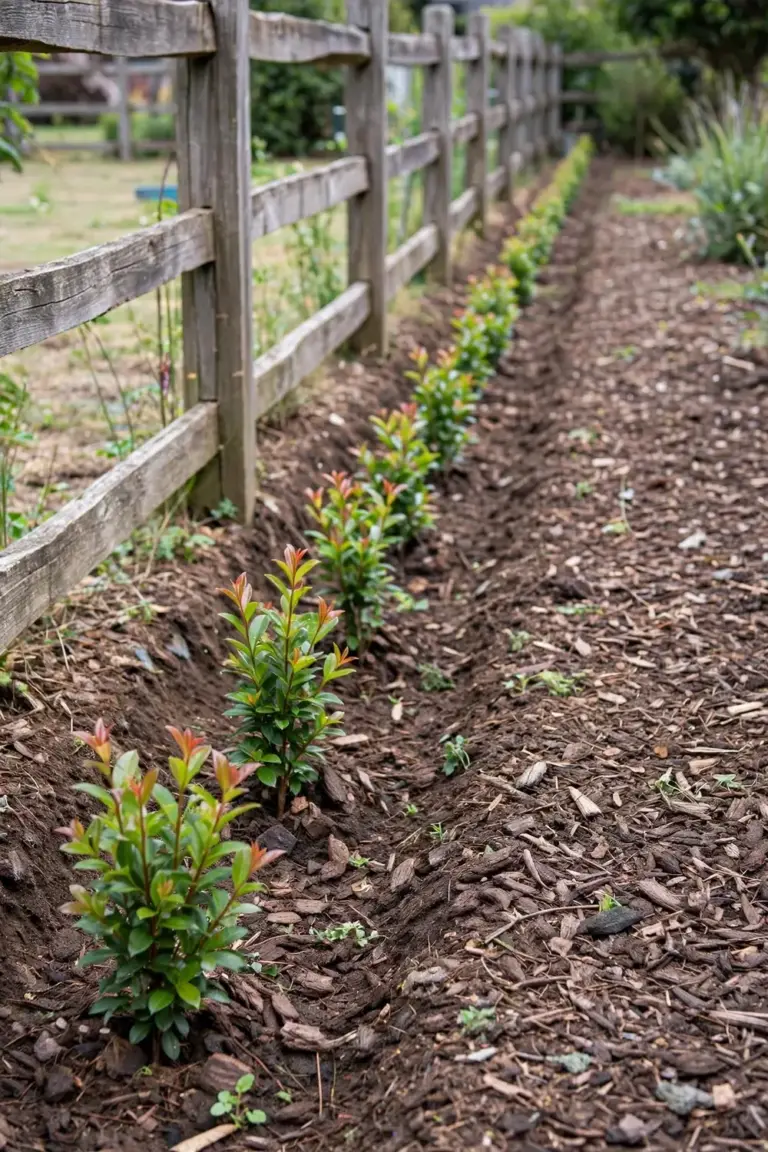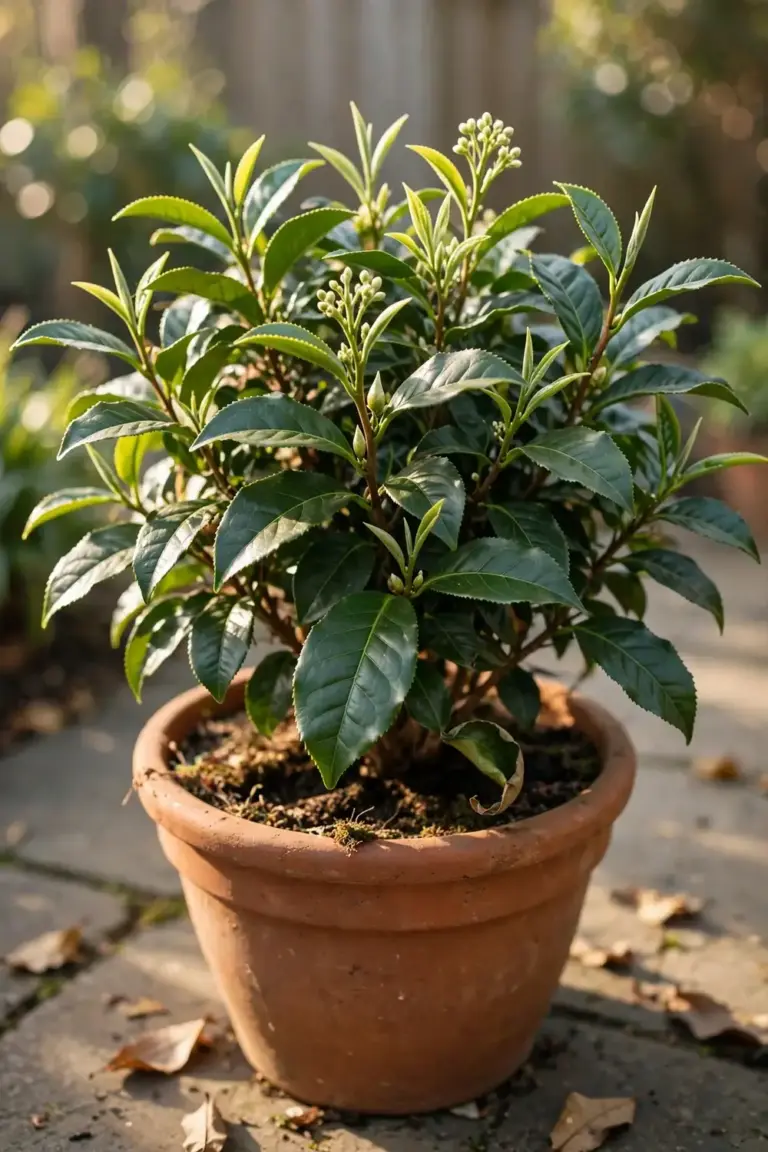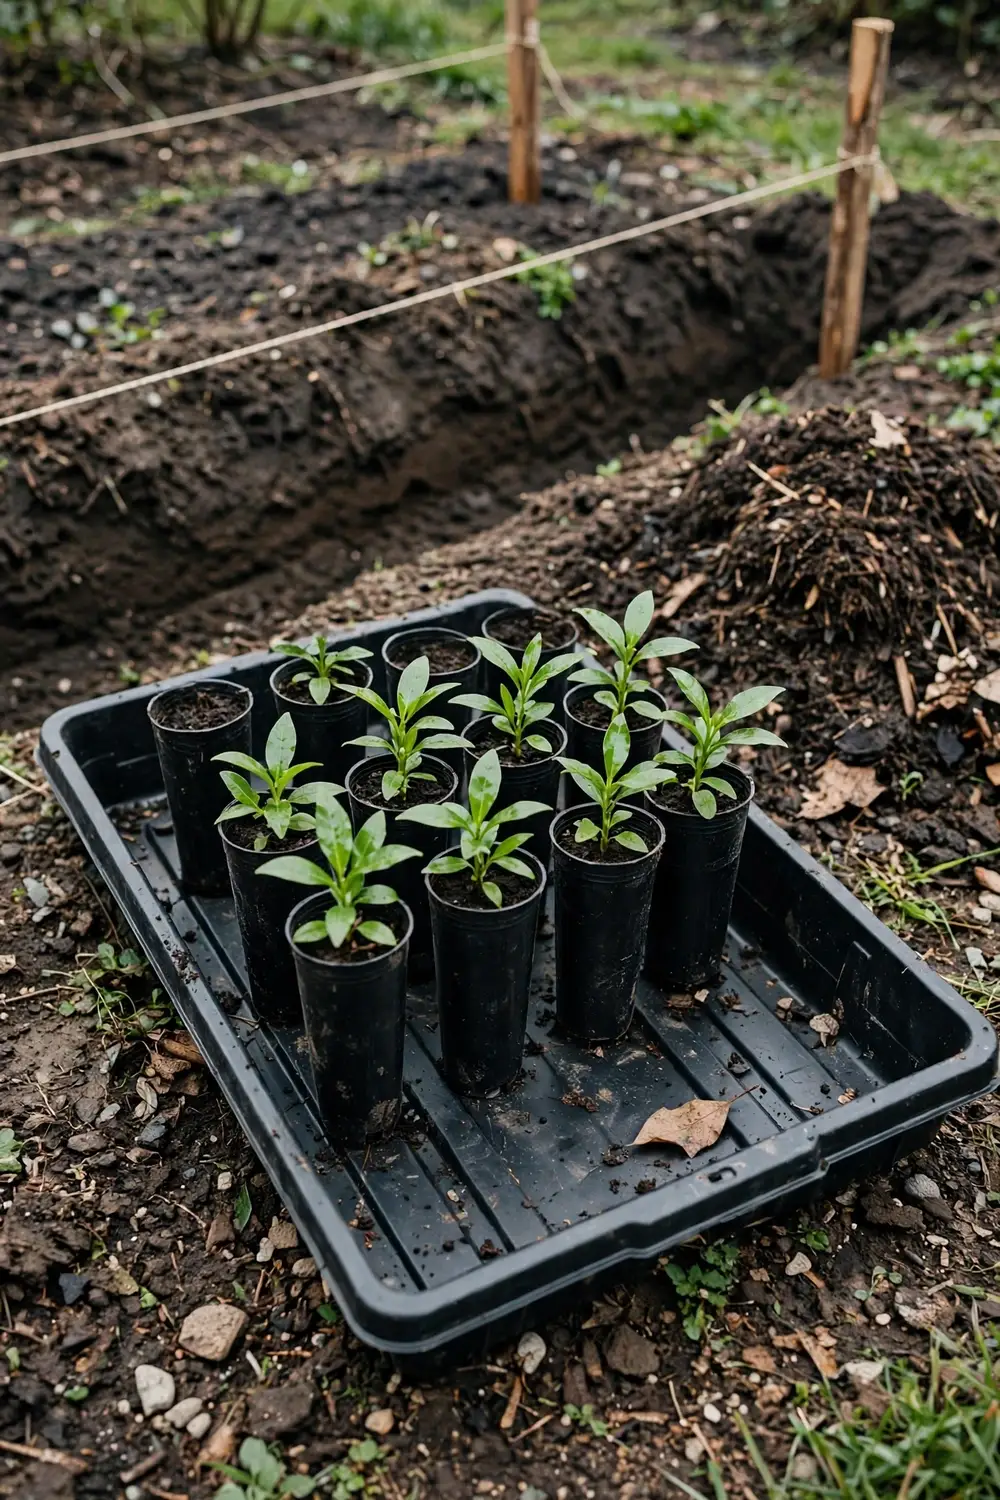

Buy 10 tubes for a 6 m hedge run, dig one trench, and set each tube at soil level. That is how to plant lilly pilly tube stock. Tube stock is a young plant in a narrow tube pot, commonly 42 mm across, with roots that filled the tube and little top growth. The rest of this page is 6 moves, from buying the right stock to the first trim.
Tube stock is a rooted young plant, not a cutting and not a seedling in a punnet. The nursery grew it from a cutting or a seed until its roots filled the tube. The tube pot is narrow and deep, so the roots grow down instead of circling. That root shape is the point of tube stock. A plant with downward roots settles fast and anchors deep. A plant with circling roots keeps circling after planting.
I have learned that the tube I tip-prune on planting day fills in low down, while the one I leave alone grows tall and bare at the base.
1. Buy Tubes for a Long Run, Advanced Stock for an Instant Screen
Tubes beat advanced stock on a long run. A tube costs less per plant, and a young plant settles faster than a big one. A hedge planted from tubes catches up within two to three seasons, so a long run planted from tubes ends up level with the same run planted from larger stock. Advanced stock wins only when the screen must look finished this season. A tube hedge looks thin on day one. That thin start is the price of the cheaper run.
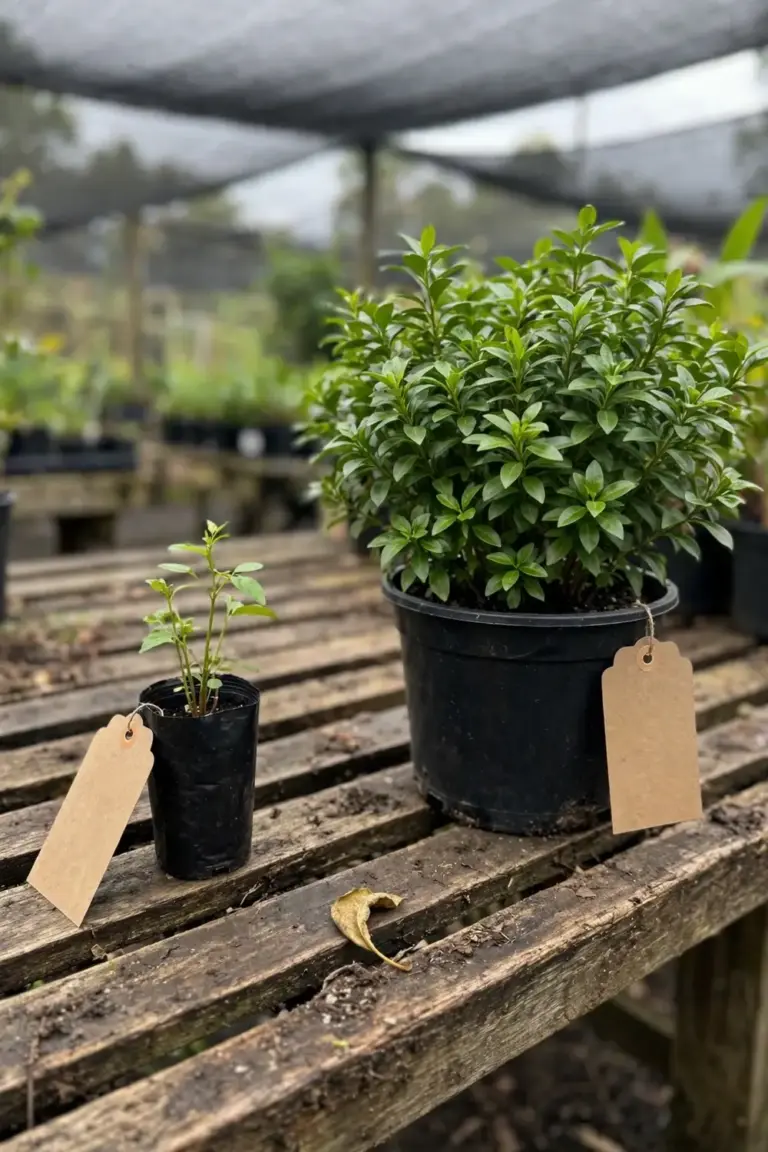
Check each tube before you buy it. Tip the tube and look at the drainage holes. White root tips at the holes mean a live root system, while black mush at the base means rot. Squeeze the tube gently. The root ball should hold together. A root ball that crumbles means the plant never filled the tube. Look at the top growth. Leaves should read green and firm. Yellow leaves on a tube can mean a plant that sat wet for weeks.
Ask the nursery for a psyllid-resistant type. Psyllid distorts new growth into pimpled leaves. Resistant types hold clean foliage where older types suffer. The nursery label carries the type name. Read the label for the mature height as well, since the label tells you the size class and the size class sets the spacing in the next section.
Check the nursery shipping notes for your state before you order. Some nurseries do not ship tubes across state lines. Order ahead of your planting weekend so the tubes arrive while the soil still holds warmth. Plant the tubes the week they arrive. A tube left in its pot dries out fast.
The nursery will ask what the run is for. A hedge run wants compact types that hold leaves to the ground, a screen run wants taller types that rise fast, and a pool edge wants a type that stays tidy with light trimming. Tell the nursery the run length, the purpose, and the sun on the site. The nursery can then match the size class to the job. Take a photo of the site with you. A photo of the fence line, the sun, and the soil tells the nursery more than a description.
Buy from a nursery that grows lilly pilly. Fresh tubes carry firm root balls. Tubes that sat on a shelf for weeks carry dry root balls. A nursery that grows its own stock waters the tubes daily and turns them over fast. Ask when the tubes arrived. Tubes that arrived this week beat tubes that arrived last month.
Carry the tubes home upright and shaded. A tray or a box stops them tipping over. Never leave tubes in a hot car, where heat cooks a small root ball in an hour. Stand the tubes in shade at home and water them if planting waits a day. A tube that arrives dry needs a soak before planting. Stand it in a bucket of water until the bubbles stop rising, then drain it.
2. Space Tubes by Size Class: 50 cm to 1 m
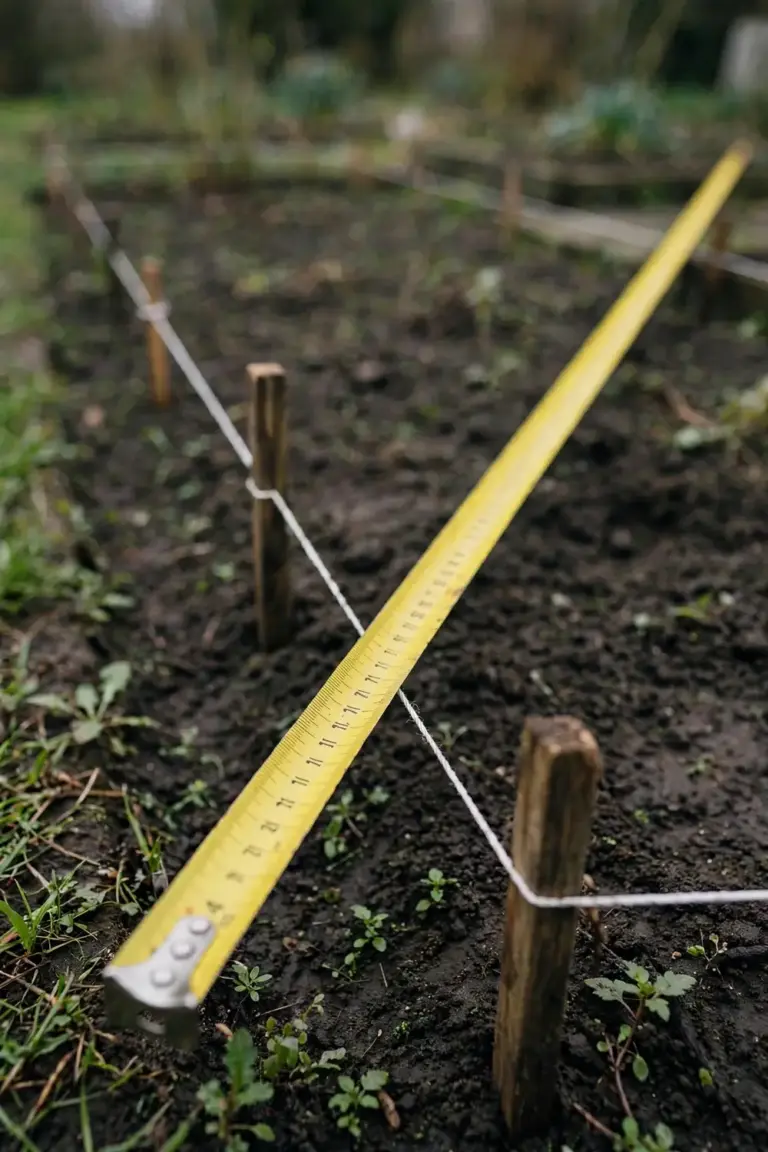
Spacing sets the hedge. Plant too wide and the hedge never closes. Plant too tight and you waste plants without closing the gap faster. Australian nursery guidance puts hedge spacing at 50 cm to 1 m, depending on the size class and how dense you want the hedge. Flower Power’s lilly pilly hedge guide puts spacing at 50 cm to 1 m, with dwarf or compact types planted more closely. Evergreen Trees puts a formal hedge at 80 cm and an informal screen at 1 to 1.5 m apart. Nursery Near Me puts a dense screen at 800 mm to 1 m apart, and warns that closer than that wastes plants without closing the gap faster. The table below turns that band into a plan by size class.
| Size Class | Spacing | Plants per Metre | Best For |
|---|---|---|---|
| Dwarf or compact formal hedge, kept 1 to 1.5 m tall | 50 to 60 cm | About 2 | Low borders and pool edges |
| Mid-size formal hedge, kept 1.5 to 2.5 m tall | 60 to 80 cm | 1 to 2 | Boundary hedges |
| Tall informal screen, kept 2.5 m and taller | 80 cm to 1 m | 1 | Privacy screens |
| Avenue or feature planting, single trees | 1 to 1.5 m | 1 per 1 to 1.5 m | Specimen trees along a drive |
Syzygium australe and Syzygium smithii cover most hedge tubes sold in Australia. Both follow the same spacing bands.
Count the plants before you order. Measure the run in metres. Divide the run length by the spacing. Add one plant for the end of the run, so a 10 m run at 60 cm spacing needs 17 tubes, the same run at 80 cm spacing needs 13, and the same run at 1 m spacing needs 11. Buy two spare tubes for replacements. A gap in a young hedge never fills on its own. Spare tubes from the same batch match the hedge.
Check what runs under the hedge line before you dig. Pipes, cables, and drains sit under garden beds more often than people expect. Walk the line and look for inspection covers, taps, and meters, since a spade through a cable or a drain costs more than the hedge. Move the line if a cover sits in it. A hedge that sits a metre off a drain line stays clear of trouble for its whole life.
A curved hedge follows the same spacing. Measure along the curve, not across the chord. A string line follows the curve. Stakes on a curve sit on the line itself. The count rule stays the same: run length divided by spacing, plus one plant for the end. Run a string line down the row so the hedge stays straight. Walk the line and check the spacing by eye before you dig, since moving a stake now keeps the hedge straight for years. Keep the hedge clear of water mains and sewer lines. Lilly pilly roots run strong on an unclipped tree, and a clipped hedge still wants room. A metre clear of pipes and paving keeps the hedge out of trouble.
3. Dig a Trench and Set Each Tube at Soil Level
A trench beats a row of holes for a hedge run. One continuous trench gives every plant the same soil, the same depth, and the same water. A row of holes gives each plant its own pocket, and the pockets dry at different rates. Dig the trench 30 cm wide and one spade deep. Loosen the base of the trench with a fork so roots can push down. Mix compost into the backfill. Evergreen Trees recommends enriching the planting area with compost and aged manure for a strong establishment phase. Soil health sets the whole run up: loose soil with organic matter holds water and lets roots spread.
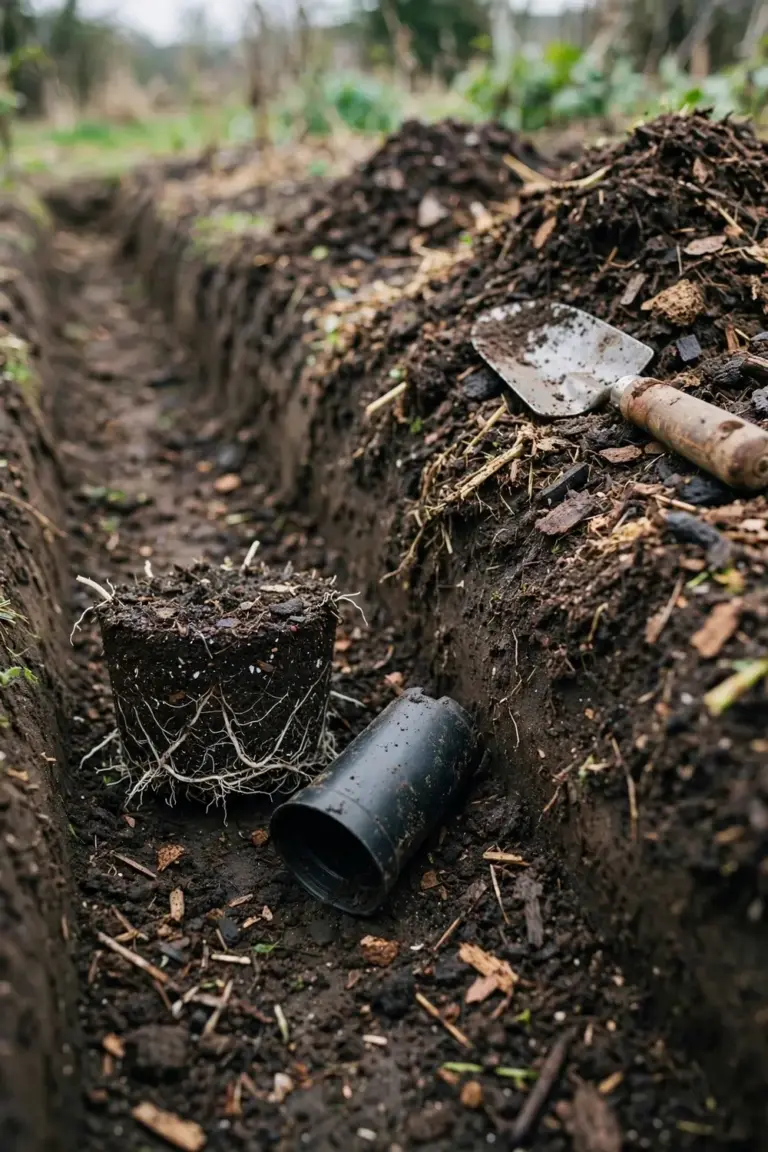
Dig from one end of the line to the other. Pile the excavated soil on one side of the trench. Work along the string line so the trench stays straight. Break up clods as you go. A trench full of clods backfills unevenly and leaves air pockets around the root balls. Mix the compost through the piled soil before you backfill. Mixed backfill feeds every plant the same way.
Clay soil needs extra work. A spade in heavy clay leaves smooth walls, and roots slide along smooth walls instead of pushing through them. Rough the walls up with a fork before backfilling. Mix compost through the backfill so the soil stays open, and give sandy soil the opposite fix. Sand drains fast and holds little water. Compost in the backfill holds water near the roots. Either way, the trench soil should crumble in your hand, not clump and not run through your fingers.
Test the drainage before you plant. Dig a test hole in the trench line. Fill it with water. Watch it drain. Water that drains within a few hours means the ground drains well enough. Water that still sits after hours means the ground stays wet. Raise the planting line into a low mound, or pick a drier line. Tubes in wet ground rot.
Plant in autumn or spring. Autumn planting gives roots a cool season to settle before summer heat. Spring planting gives roots a warm season to grow before winter. Avoid planting in extreme heat or in a frost week. Soak the tubes before planting day. Stand the tubes in a bucket of weak seaweed solution until the bubbles stop rising. A soaked root ball starts wet and stays wet through the first days.
Get each tube out without tearing roots. Squeeze the sides of the tube to loosen the root ball. Hold two fingers around the base of the plant. Invert the tube and tap it free. Never pull the plant out by the stem, since pulling tears the roots from the stem. The WSBN tubestock planting guide gives the same method: squeeze the tube, invert it, tap gently, and never pull by the stem. The same guide notes that tube walls carry ridges that stop roots circling, so there is no need to tease the roots apart. If roots circle tightly around the root ball, loosen the ends gently with your fingers.
Set each tube at the same level it sat in the pot. The top of the root ball should sit level with the surrounding soil. A tube planted too deep rots at the stem. A tube planted too high dries out and rocks in the wind. Backfill with the compost mix. Firm the soil gently to remove air pockets. Do not stamp the soil hard. Hard soil squeezes air out of the root zone.
Plant on a cool, overcast day when you can, since cool air slows water loss from the leaves while roots settle. Keep the spare tubes shaded while you work. A tube left in sun on the path dries out in half an hour. Work down the trench one plant at a time. Set the tube, backfill, firm, and water before you move to the next one. Planting this way keeps every root ball wet from pot to soil.
Water each tube in with seaweed solution. Flower Power recommends watering in well with a seaweed solution to reduce transplant shock. The seaweed solution wets the root ball and settles the backfill around it. Tip-prune each tube on planting day. Snip the growing tip off the top of the stem. Removing the tip pushes side shoots, and side shoots fill the base. A tube left unpruned grows one tall stem with bare legs.
4. Water Deep Through the First 12 Weeks
Water decides whether tubes live. A tube carries a small root ball and a small water reserve. The root ball dries faster than the surrounding soil. Check the soil twice a week through the first 12 weeks, and water when the top 5 cm feels dry. Water deep. A deep soak pushes roots down. A light sprinkle keeps roots at the surface.
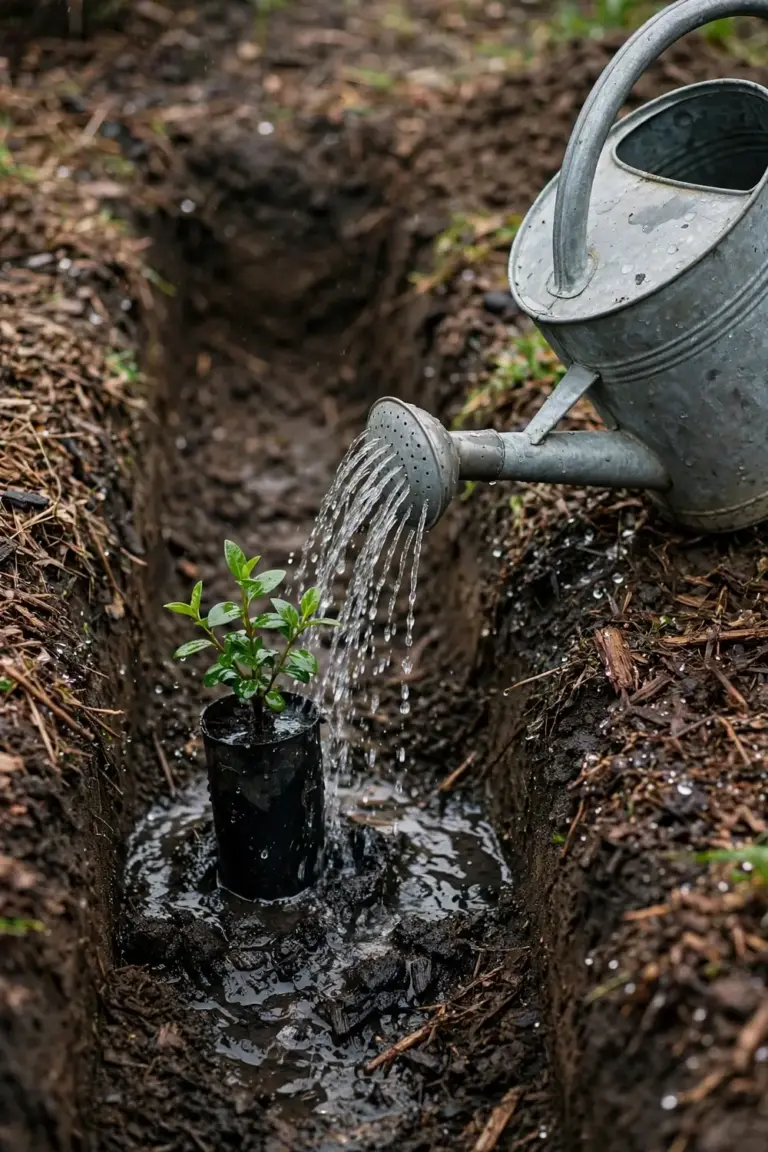
Run the first 12 weeks in three blocks. Weeks 1 and 2: check every two or three days, since the root ball is still learning the soil. Water when the top 5 cm dries. Weeks 3 to 6: check twice a week. Water deep each time the soil dries. Weeks 7 to 12: check once a week, and water deep in dry or windy weather. The WSBN tubestock guide calls for extra watering through the first few weeks and over the first summer. Evergreen Trees advises watering deeply through the first two summers. The 12-week rhythm above is the article’s own plan, built on those two pieces of guidance.
Water in the morning when you can. Morning water soaks in before the heat of the day. Evening water runs second. Midday water in heat evaporates before it reaches the roots. Soak until the trench line stays damp 10 cm down. Check with a finger or a screwdriver. A screwdriver that pushes in easy means damp soil, and one that stops means dry soil. Windy sites dry faster than sheltered sites. A hedge on a windy fence line needs checking more often than a hedge in a courtyard.
Read the plants. Wilted tips on a hot afternoon mean water. Yellow lower leaves on wet soil mean too much water. Pull the mulch back and check the soil before you water again. Give a plant that wilts every afternoon a deeper soak; give a plant that stays yellow in wet soil drainage and hold the water.
Rain counts as water. Skip the soak in a week with steady rain. Check the soil anyway, since light rain wets only the mulch. A week of drizzle can leave the root balls dry under a wet mulch layer.
Watch for signs that the hedge is settling. New growth shows by week 4 to 6 in warm weather. Stems firm up. Daily wilting stops. A tube that still wilts every afternoon after week 4 needs a check. Pull the mulch back and push a finger into the root ball itself. A root ball that reads dry while the surrounding soil reads damp never joined the soil. Water the root ball directly and slowly until it wets through. A root ball that reads wet while the plant wilts means the roots never grew out. Leave it alone and check again in a week. Most slow tubes come good once roots push into the trench soil.
Keep watering through the first summer. Tubes planted in autumn need water through their first summer. Tubes planted in spring need water from day one. Once the hedge holds its own through a full summer, water only in long dry spells. A mature lilly pilly hedge handles dry weather. A tube hedge does not.
5. Mulch 5 to 7 cm, Clear of Every Stem, and Feed in Spring
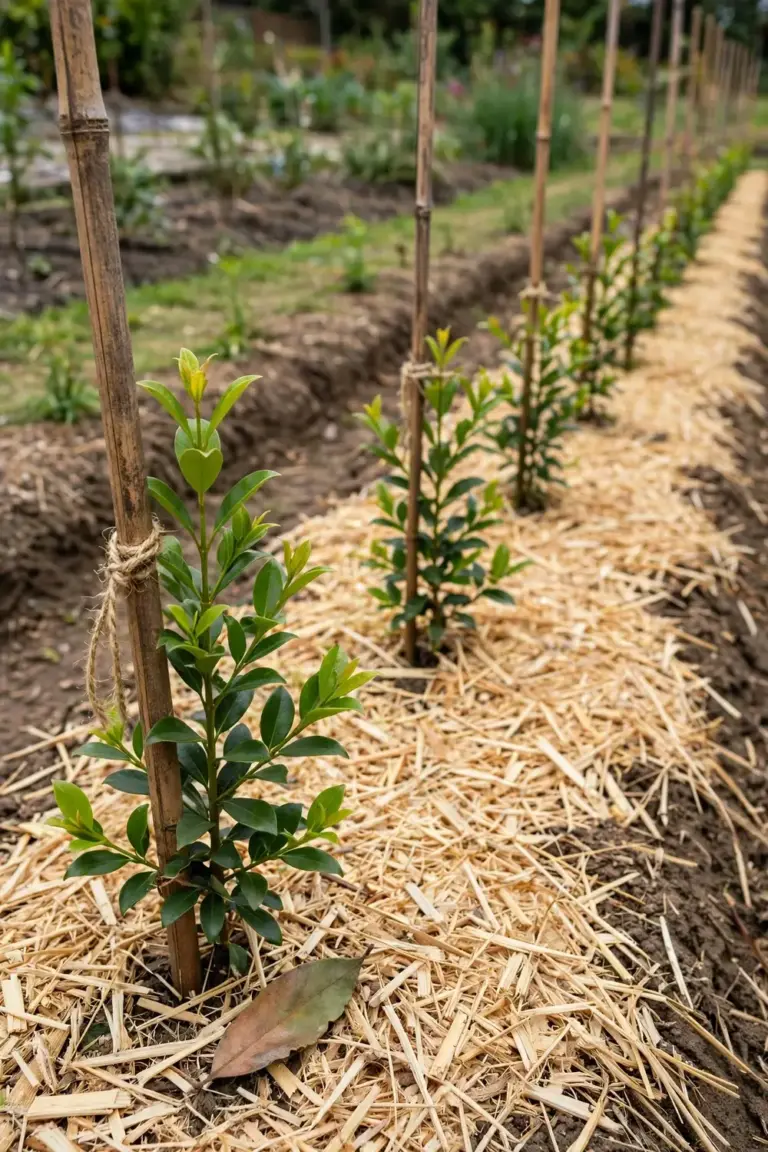
Mulch holds the water you just gave the tubes. Spread organic mulch 5 to 7 cm deep over the trench. Flower Power puts the mulch layer at 5 to 7 cm and keeps it clear of the stem. Sugar cane mulch breaks down fast and suits a hedge you top up each year. Bark lasts longer and suits a hedge you mulch once a year. Pea straw sits light and lets water through. Any of the three works. Mulching covers the full trade-off between mulch types.
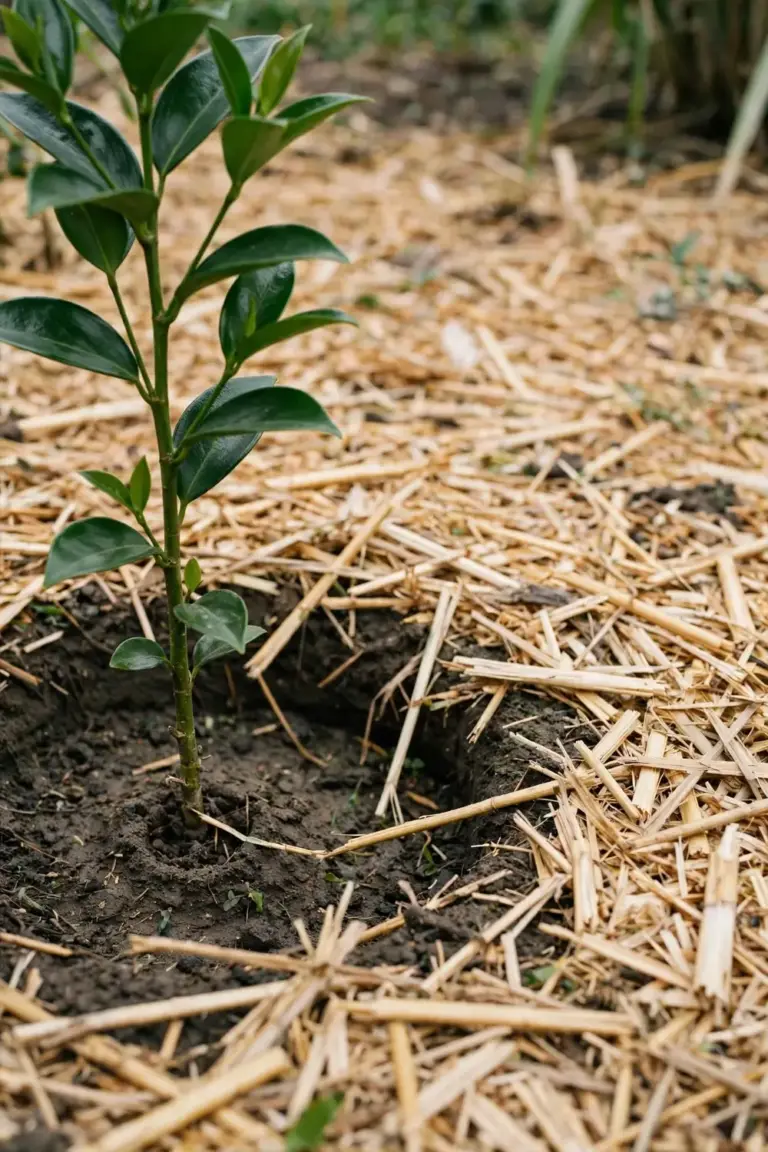
Keep the mulch clear of every stem. Leave a gap of 5 cm between the mulch and each stem. Mulch piled against a stem holds moisture on the bark. Wet bark rots. The rot is called collar rot, and it kills the plant at ground level. The WSBN tubestock guide gives the same warning: apply mulch around the plant and keep it away from the stem.
Mulch does not feed the hedge. Mulch holds water and blocks weeds. Feed still comes from the spring fertilizer. Mulch that breaks down fast needs topping up twice a season. Bark mulch lasts longer and needs one top-up a year.
Top the mulch up as it settles. Mulch breaks down and sinks. Check the depth each month through the first season. Top up when the layer drops below 5 cm. Keep the stem gap clear every time you top up. Wind and watering push mulch against stems over time. A quick pass with your hand clears the gap. Mulch that sits against a stem all winter rots the bark by spring.
Feed in spring with a slow-release native plant fertilizer. Flower Power feeds in spring with a slow-release native plant fertilizer, and Evergreen Trees feeds in spring with a controlled-release native fertilizer. Native fertilizer runs low in phosphorus. Lilly pilly is an Australian native, and high-phosphorus fertilizer burns native roots. Scatter the fertilizer over the mulch and water it in. Feed once in spring. A second feed in early summer suits a hedge that grows fast. Skip feeding in autumn. Autumn feed pushes soft growth into winter.
6. Trim After the First Flush, Then Leave the Shears Alone
Trim after the first flush of growth. The first flush is the soft new growth that follows planting. It shows a few weeks after planting in warm weather. Wait until that growth firms up. Then trim lightly. Trim the sides and the top. Flower Power trims both the sides and the top of the hedge as it grows. A light trim after the first flush pushes more side shoots. Side shoots thicken the hedge.
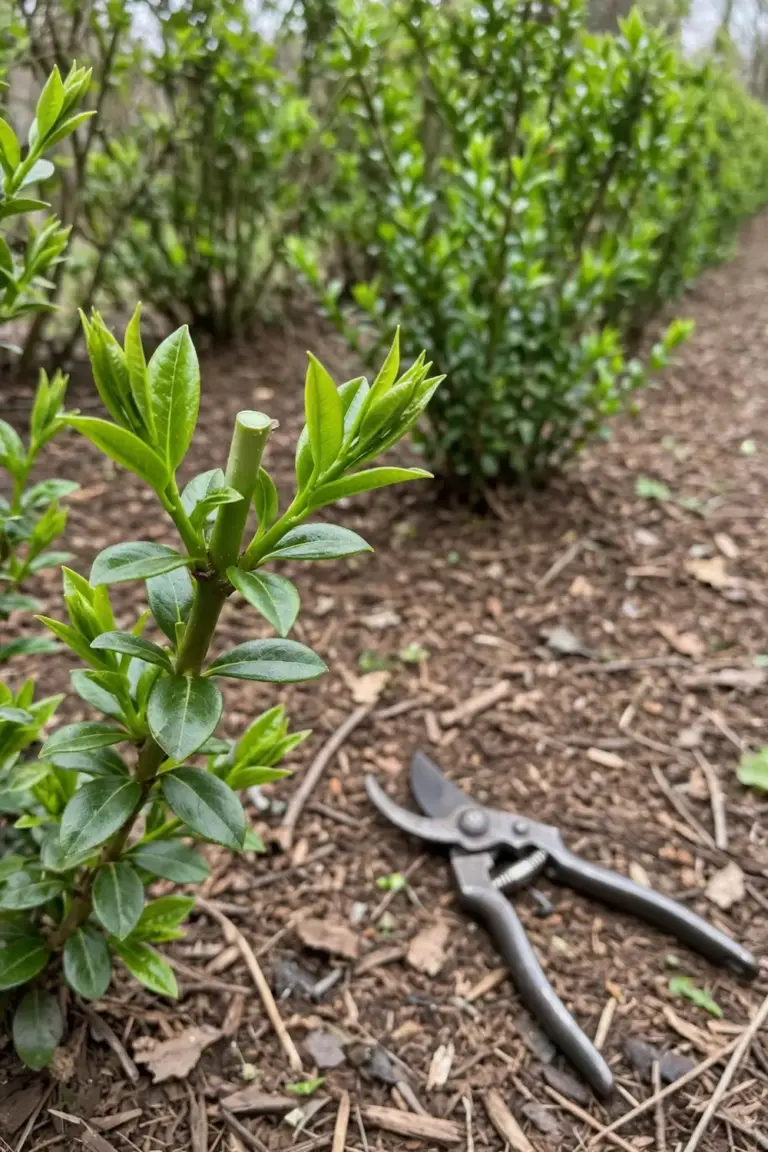
Keep trimming light and often. Evergreen Trees trims two or three times through the warmer months, taking a little each time rather than cutting hard once a year. One hard cut a year leaves bare wood. Light trims keep leaves on the wood. A light trim takes 5 to 10 cm of soft tip growth. Never cut into bare wood on a young hedge. Young lilly pilly reshoots from old wood, but a young hedge recovers slowly from a hard cut.
Time the last trim of the season before autumn. Late trims push soft growth into cold weather. Soft growth burns in the first frost. Stop trimming six weeks before your first frost. The hedge then hardens off and meets winter with firm growth.
Do not cut the leader until the hedge reaches the height you want. The leader is the upright stem at the top of the plant. Cutting the leader stops upward growth. A hedge topped early stalls short and takes a season to recover its upward push. Trim the sides only until the hedge reaches the target height. Then trim the top as well. The hedge will hold the height you set, and the sides will stay full.
The full trimming method lives in the linked guides. Spring pruning techniques covers the cut itself. Hedge trimmers 101 covers choosing the tool. Hand shears suit a short run, while a hedge trimmer suits a long run. This page stops at the rhythm: light trim after the first flush, then two or three light trims through each warmer season.
Frequently Asked Questions
Two to three seasons for most runs. Tubes start small, so the hedge looks thin in the first season. Growth picks up in the second season as roots fill the trench. The hedge closes when neighbouring side shoots touch. Nursery Near Me puts the close at two to three years for a hedge planted from 300 mm pots at 1 m spacing in Brisbane or Sydney. Tubes sit at the slower end. Closer spacing closes the gap sooner.
Avoid planting in extreme heat. Heat dries a tube root ball in hours. Plant in autumn or spring when the soil holds moisture and the air stays mild. The WSBN tubestock guide advises against planting just before or in the heat of summer, and names early to mid-spring and late summer to mid-autumn as the best windows. If summer planting is the only option, plant in the evening and water deep at once.
Count from the spacing. Divide the run length by the spacing. Add one plant for the end of the run. A 10 m run at 60 cm spacing needs 17 tubes, the same run at 80 cm spacing needs 13, and the same run at 1 m spacing needs 11. Buy two spare tubes for replacements. A gap in a young hedge never fills on its own. Spare tubes from the same batch match the hedge.
No. Tube walls carry ridges that stop roots circling. The WSBN tubestock guide states that there is no need to tease the roots, since the ridged tubes prevent root circling. Squeeze the tube, invert it, and tap the root ball free. If roots circle tightly around the root ball, loosen the ends gently with your fingers. Never pull the plant out by the stem, because pulling tears roots from the stem.
Replace it at once. Pull the dead tube and plant a spare in the same spot. Check the soil before you replant. A dead tube in wet soil means the spot stays wet. A dead tube in dry soil means the spot dried out. Fix the water before the replacement goes in. A gap left open through the first season stays open, because neighbouring plants do not spread sideways fast enough to close it.
Plant the Run This Weekend
Measure the run. Count the tubes. Dig one trench. Set each tube at soil level, tip-prune it, and water it in with seaweed solution. Mulch 5 to 7 cm clear of every stem. Water deep through the first 12 weeks. The hedge will look thin on day one. Give it two to three seasons, and the tubes will close the gap. That is how to plant lilly pilly tube stock: one trench, one spacing rule, and steady water.