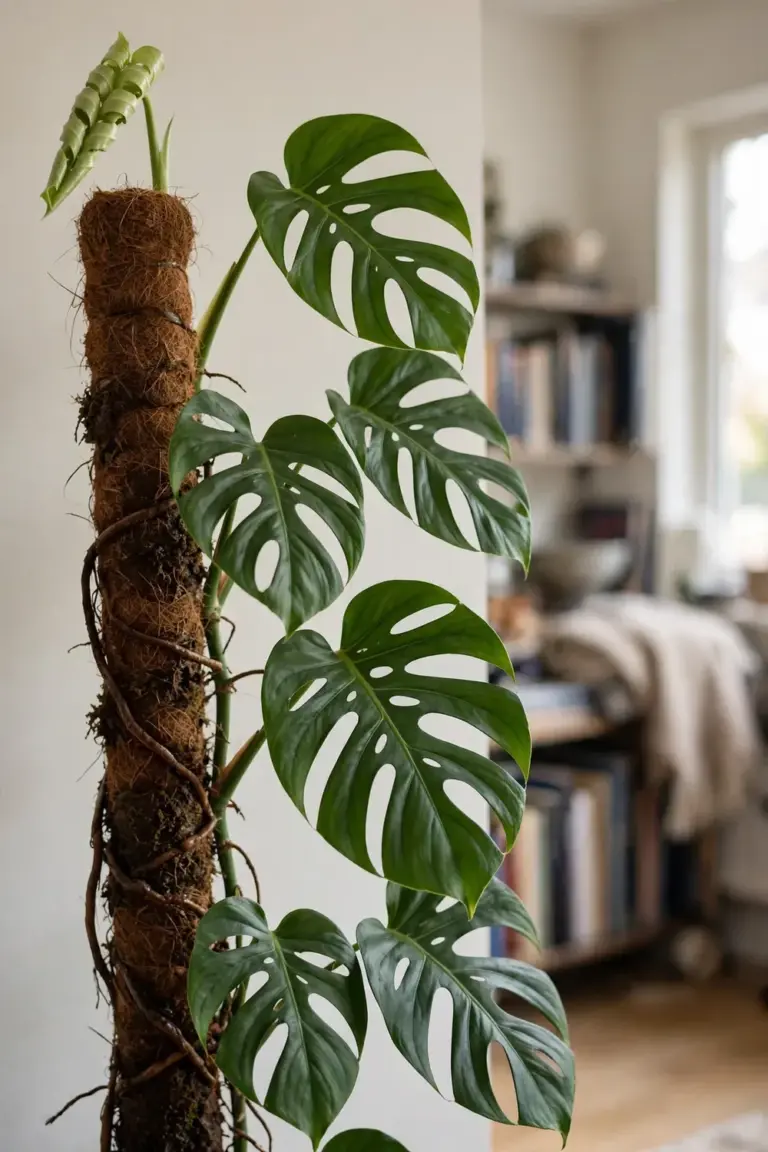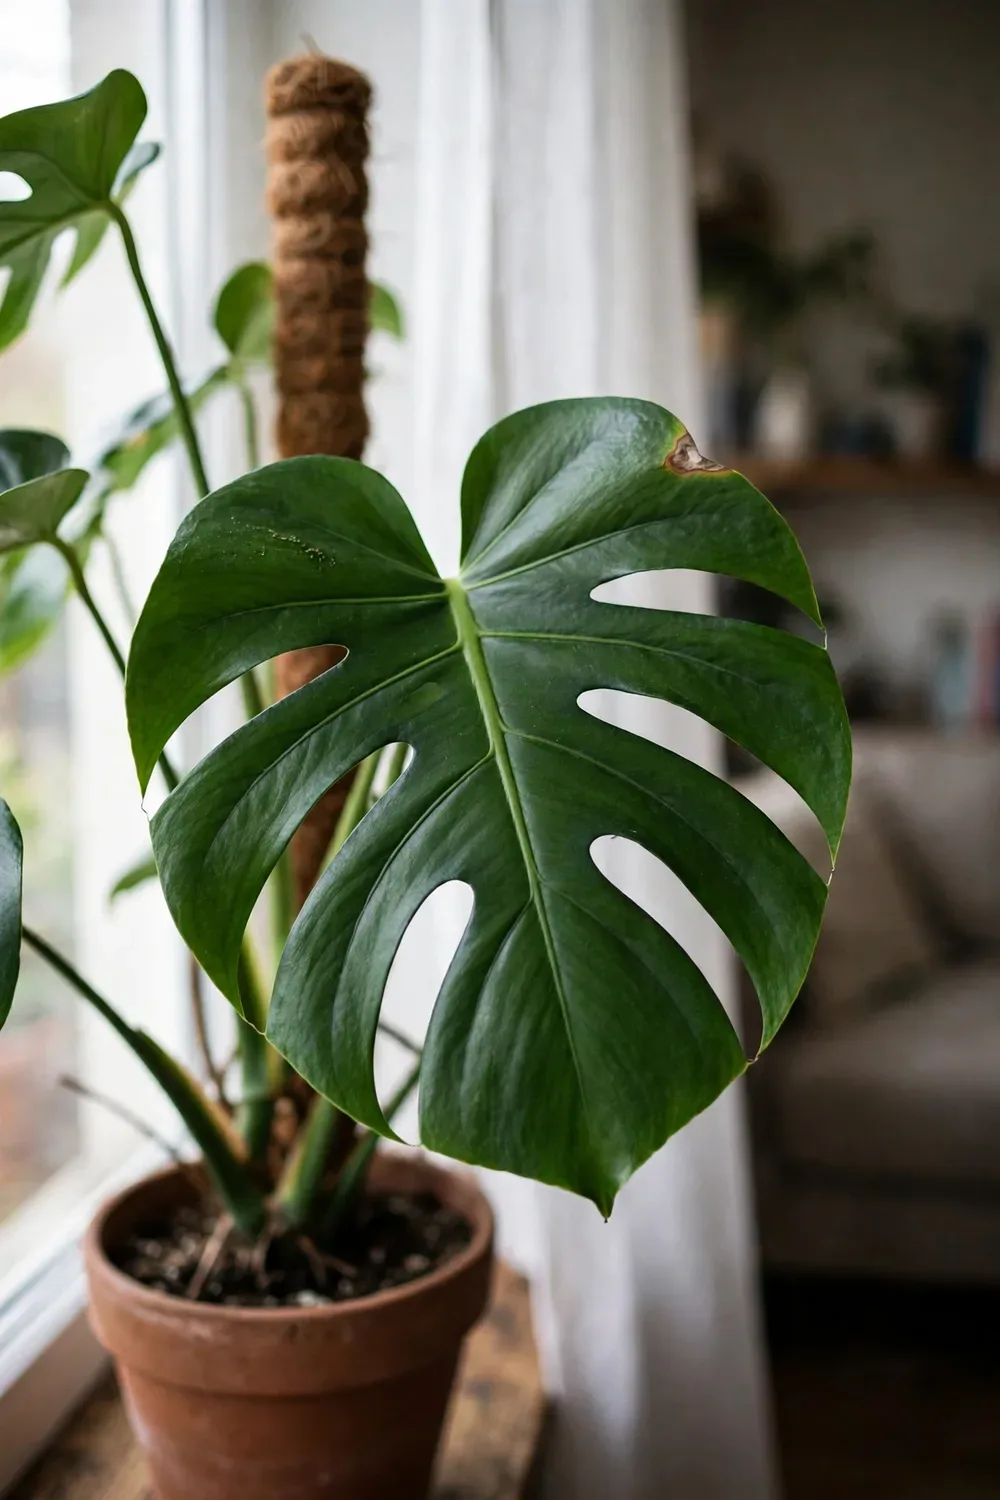

Push the pot 1 to 2 metres back from your brightest window, tie the main stem to a damp moss pole, and give the plant two full growing seasons. That combination is what earns a monstera its fenestrations.
Learning how to grow monstera indoors means recreating the patch of forest floor it climbs from: bright filtered light, a chunky mix that drains fast, and air that holds real moisture. The rest of this page is 13 moves, from why the leaves split to the fruit you should almost never expect.
Botanically the plant is Monstera deliciosa Liebm., a member of the aroid family (Araceae) native from Mexico to Panama. Nurseries still print “split leaf philodendron” on the tag, but it is not a philodendron at all. A philodendron is a different genus, and the name stuck because the two share a family. In my experience, the single change that unlocked fenestrations on a stubborn plant was the moss pole, not a new fertilizer. For the indoor-plant basics that sit around this guide, the site keeps a green-oasis walkthrough for setting up a whole room of houseplants.
| Need | Target | Note |
|---|---|---|
| Light | Bright indirect, near an east or north window | Direct afternoon sun burns leaves |
| Water | Top 5 cm of mix dry between waterings | Soggy mix rots the roots |
| Humidity | Above 50 percent, ideally 60 percent or more | Group pots or run a humidifier |
| Temperature | 16 to 29°C (60 to 85°F) | Keep it clear of drafts and vents |
| Soil | Chunky aroid mix of bark, coir and perlite | Never dense garden soil |
| Feeding | Monthly through spring and summer | Stop feeding in winter |
| Support | Moss pole or coir totem from day one | Mist the pole so aerial roots grip |
| Pets | Toxic to cats and dogs | Hang it out of reach |
Understand Why Fenestrations Appear Only on Mature, Well-Lit Leaves
Fenestrations are the plant’s maturity signal, not a decoration you can force. Monstera deliciosa starts life producing small, solid, heart-shaped leaves. The holes and deep splits arrive only on later leaves, after the vine has climbed, the stem has thickened, and the light is strong enough to pay for the bigger canopy.
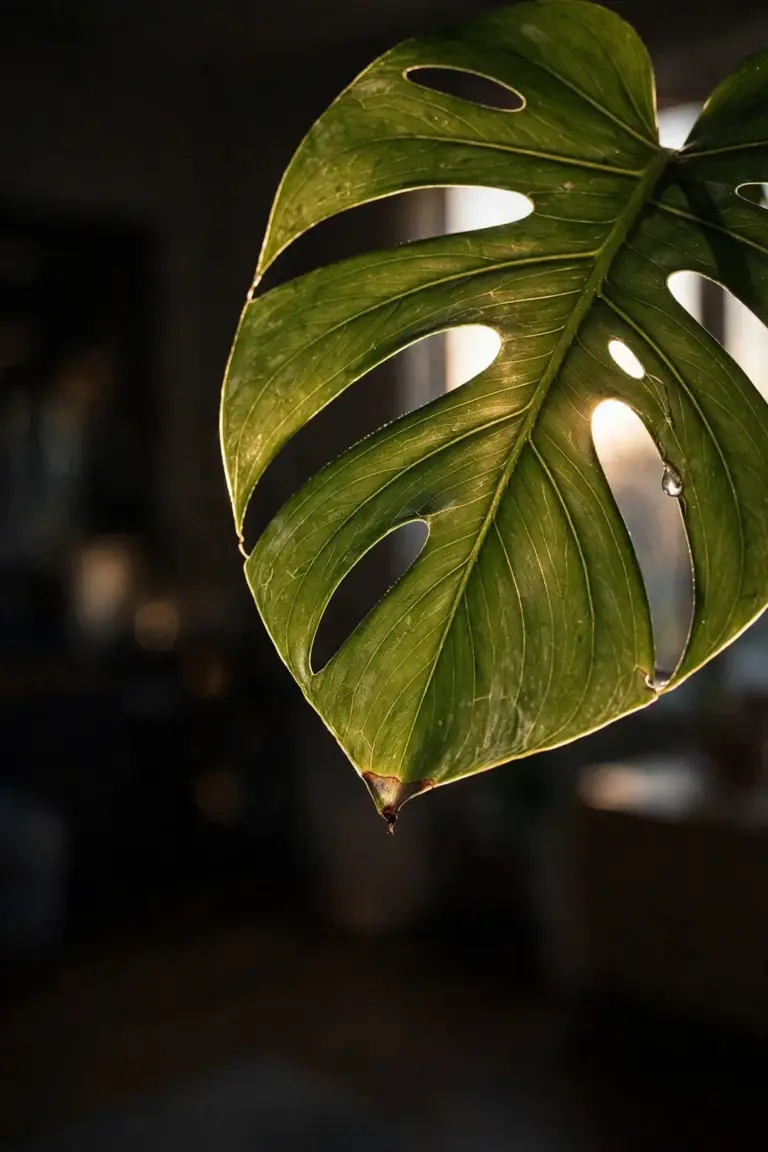
No product triggers this shift. A moss pole does not create fenestrations by itself, and neither does fertilizer. Light and maturity create them. Dim rooms keep a genetically adult monstera producing juvenile leaves indefinitely, and a plant with no support to climb stays smaller-leaved than the same plant trained upward. If your monstera is older than two years and still solid-leaved, the fix is almost always more light, not a different pot.
The two relatives buyers confuse with this plant get one line each. Monstera adansonii, the Swiss cheese vine, is a different species with smaller leaves and heavier perforation, and it stays a trailer rather than a big climber. Monstera obliqua is a rare collector’s plant that sulks without near-greenhouse humidity. Everything below is Monstera deliciosa only.
Park the Pot in Bright Indirect Light, 1 to 2 Metres From Glass
Place the pot beside a window that throws bright light without a hard sun patch on the leaves. An east-facing window is the classic answer, and in Australia a north- or northeast-facing window is the recommended spot, since the sun tracks through the northern sky there. NC State Extension describes the plant’s preference as moderate brightness without direct sunlight, which matches the filtered light of the rainforest understory it evolved under, per the NC State Extension plant toolbox page for Monstera deliciosa.
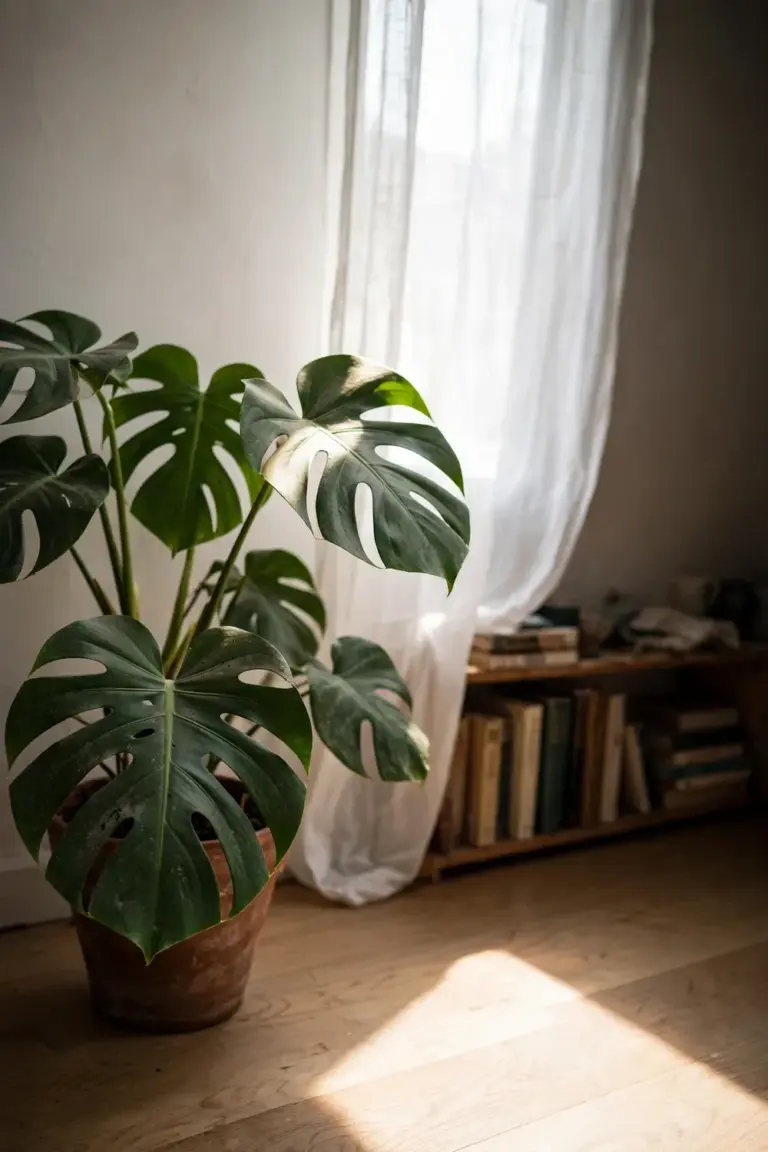
Direct afternoon sun burns the leaf tissue. The damage shows as bleached, papery patches that never heal. The plant survives low light. It does not thrive there: the internodes stretch, new leaves emerge smaller, and fenestrations stop developing. Variegated forms need a touch more light than the plain green type to hold their markings.
Rotate the pot a quarter turn every two or three weeks. Monstera deliciosa leans hard toward the light, and rotation keeps the crown symmetrical instead of one-sided. Wipe dust off the leaves with a damp cloth every month or two, because a dusty leaf photosynthesizes less, and the same notes from NC State recommend regular dusting as part of routine care.
Water Deeply, Then Wait Until the Top 5 cm of Mix Dries
Soak the pot until water runs freely from the drainage holes, empty the saucer, and then leave the plant alone until the top quarter to one-third of the mix has dried. That dry-back rhythm comes straight from the Extension notes on this plant, and it is the most quoted watering rule for monstera.
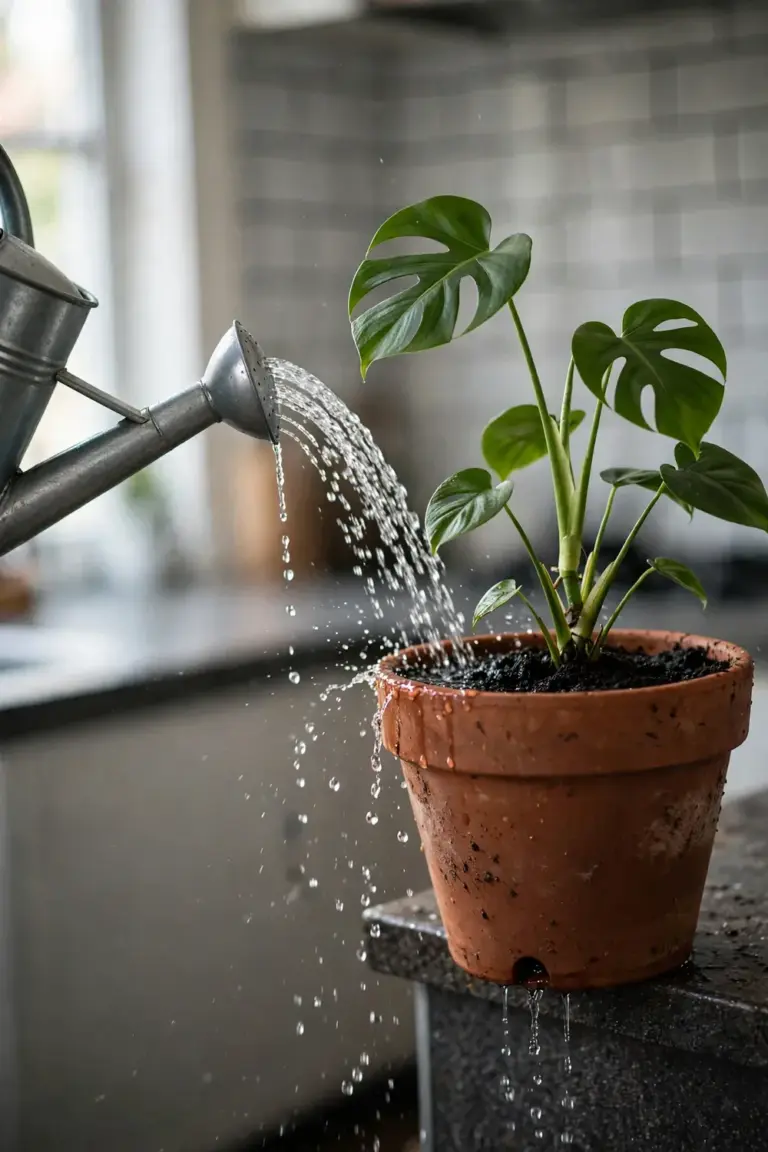
Overwatering kills more monsteras than any pest. The thick roots sit in a sealed pot, and a mix that never dries breeds the rot that turns stems black and mushy at the base. Underwatering is kinder. A thirsty monstera droops and its leaf edges crisp, but one deep soak revives it, while rot rarely reverses. In winter, when growth stalls and the mix dries slowly, stretch the interval and let the pot go a little drier between drinks.
Room-temperature water is the honest choice. Cold water straight from the tap shocks warm roots, and softened water leaves sodium behind in the mix. If your tap water is heavily chlorinated, fill the can the night before and let it sit uncovered.
Mix a Chunky Aroid Blend That Drains Like Bark, Not Mud
Build the mix for air first and moisture second. A working recipe is roughly equal parts orchid bark, coco coir and perlite, with a handful of horticultural charcoal if you keep it on the shelf. The bark holds the structure open, the coir holds moisture without compacting, and the perlite keeps drainage fast. Standard all-purpose potting soil compacts around monstera roots within months and stays soggy in the center of the pot.
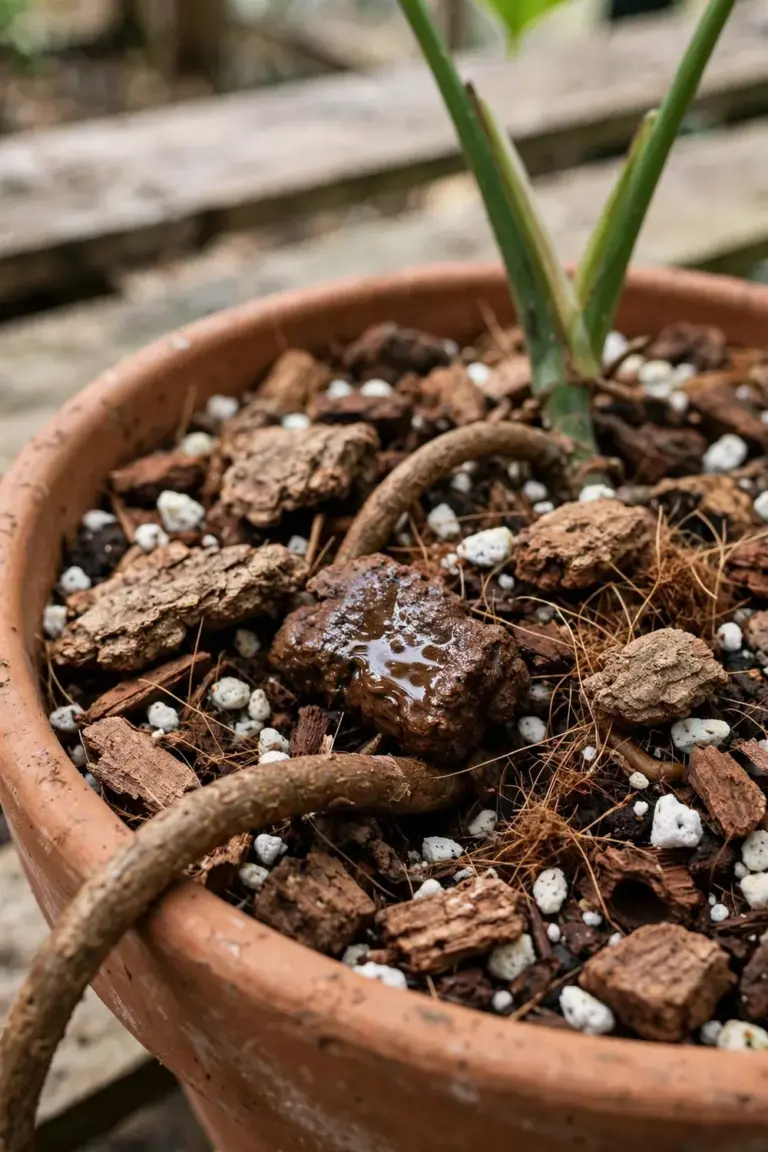
In the wild the plant begins life on the forest floor and then turns epiphytic, climbing tree trunks on thick aerial roots once it finds a sturdy host. A chunky mix mimics that bark-and-debris habitat better than any soil-based recipe. Always use a pot with drainage holes, and never let the plant sit in a decorative cachepot full of standing water.
Refresh the top 3 to 5 cm of mix once a year if you are not repotting. Mineral salts crust on the surface over time, and a fresh top layer restores drainage at the exact zone where new surface roots feed.
Hold Humidity Above 50% and Room Temperature Between 16 and 29°C
Keep the room between 16 and 29°C, which is the metric reading of the 60 to 85°F range NC State Extension lists as the plant’s preferred temperature. Below 10°C the plant stalls, and a cold draft off a window in winter does more damage than a cool room does. Keep the pot away from heating vents and air-conditioner blasts. Sudden temperature swings stress the leaves faster than a steady cool spell.
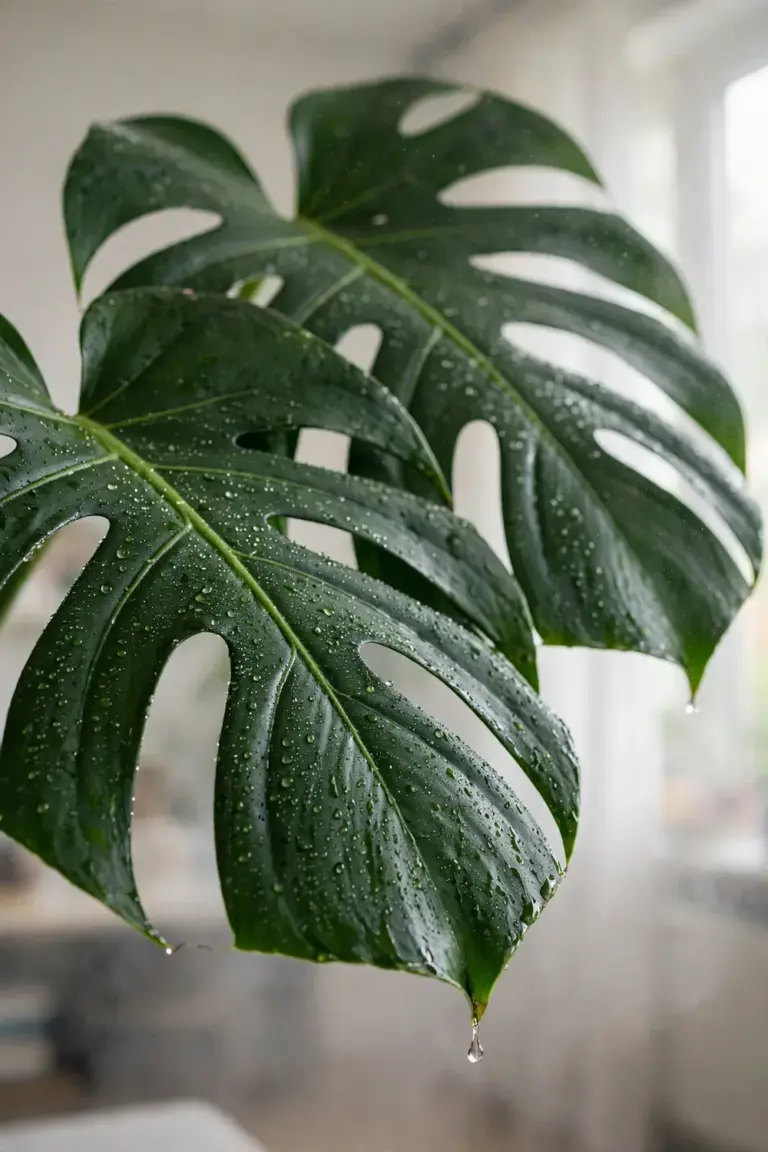
Humidity matters more than most beginners expect. The rainforest air this plant comes from stays humid year-round, and dry indoor air in winter is the usual cause of brown, papery leaf edges on an otherwise healthy monstera. Aim for humidity above 50 percent, ideally 60 percent or more, the band an Australian monstera care guide recommends. A small humidifier near the plant beats daily misting, which wets the leaves for minutes and changes nothing measurable. Grouping several houseplants together also lifts the local humidity a few points, and a pebble tray under the pot adds a little more.
New leaves unfurl slowly when the air is dry. If a fresh leaf sticks inside its sheath and tears as it emerges, low humidity is the usual suspect, and raising it solves the problem faster than any fertilizer will.
Tie the Stem to a Moss Pole and Keep the Pole Damp
Install a moss pole, coir totem or rough wooden plank at potting time, before the root ball fills the pot. Pushing a pole in later spears established roots. Sink it deep, press the mix firm around its base, and tie the main stem to it with soft plant ties or strips of cloth, looped loosely below each node. Never cinch a tie around a node, because the node is where new growth and aerial roots emerge.
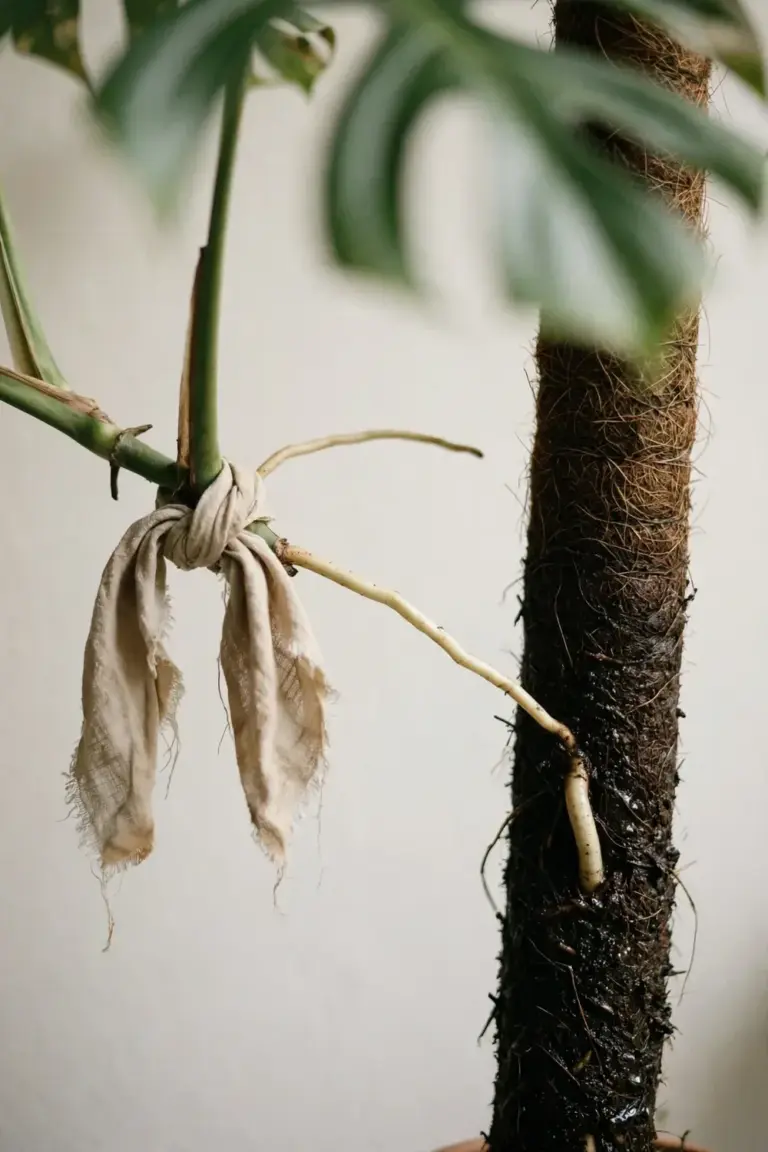
Mist the pole itself, not just the leaves. Aerial roots press against a damp pole and grip it the way they would grip wet bark in the forest, and a plant whose roots have purchase produces noticeably larger, more fenestrated leaves than the same plant left to sprawl. Let the pole dry out completely and the roots lose interest and dangle instead. A plant with no support grows sideways, wastes energy on long internodes, and keeps its leaves small.
Extend the pole as the vine climbs. Stackable coir poles or a second pole lashed to the first keep the support taller than the leading stem. If the vine outruns every pole you own, that stem is your propagation material, which the next section covers.
Feed Monthly Through Spring and Summer, Then Stop
Feed a balanced liquid houseplant fertilizer at half the label rate, once a month from the first spring growth flush through late summer. The plant is a fast grower in warm months and uses the nitrogen for leaf size, but it rests in winter, and fertilizer salts sitting in cool, inactive mix burn roots.
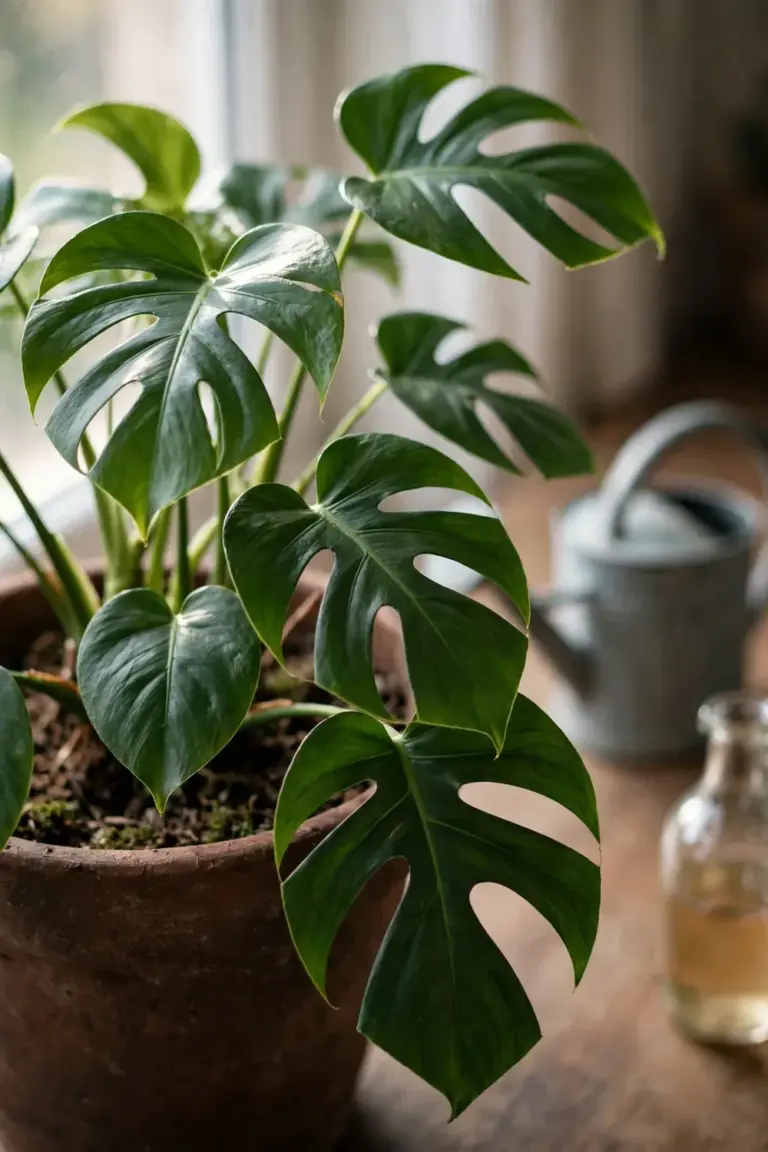
Pale new leaves with dark veins point to a hungry plant mid-season. Brown leaf tips on a plant that gets regular fertilizer point the other way, toward salt buildup. Flush the pot twice a year: run clean water through the mix several times in succession and let it drain fully. The flush carries accumulated minerals out of the root zone, and the plant visibly perks up within a week or two when salt was the problem.
Skip the fertilizer spikes and the slow-release prills pushed toward houseplants. A monthly liquid feed gives you control. If you forget a month, the plant forgives you. It does not forgive a winter feed followed by a salt-burned root ball.
Move Up One Pot Size When Roots Circle the Drain Holes
Repot when roots circle the inside of the pot, push through the drainage holes, or lift the root ball above the rim. A fast-growing young plant may reach that point yearly, while a mature specimen can sit happily for a couple of seasons. Spring is the right season, because the plant enters active growth and repairs root damage quickly.
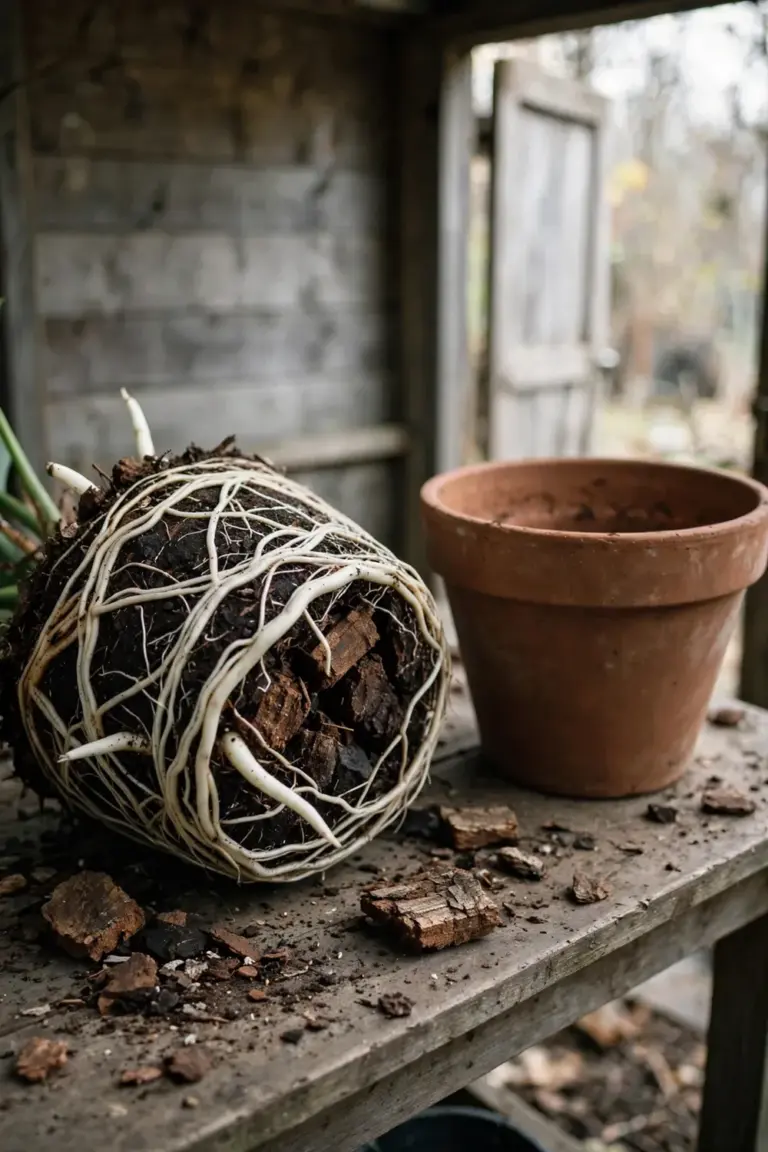
Choose a pot one size up, not three. An oversized pot holds a reservoir of wet mix the roots cannot reach, and that wet ring is where rot starts. Set the plant at the same depth it grew before. Burying the stem deeper invites stem rot at the soil line.
Tease circling roots gently apart with your fingers. Cut away only the black, slimy sections with clean pruners, and leave the white healthy roots alone. Water thoroughly after repotting to settle the mix, then resume the normal dry-back rhythm. Expect a sulk of a week or two. Drooping after a repot is transplant shock, and steady light and patience resolve it.
Cut Below a Node to Clone Your Monstera in Water or Mix
Take cuttings from a healthy stem in spring or early summer, when the plant roots fastest. Every cutting needs one node, the knobby joint where a leaf meets the stem, and ideally one aerial root already forming. Cut with a clean, sharp blade about 2 cm below the node. A crushed cut from dull shears heals slowly and invites rot.
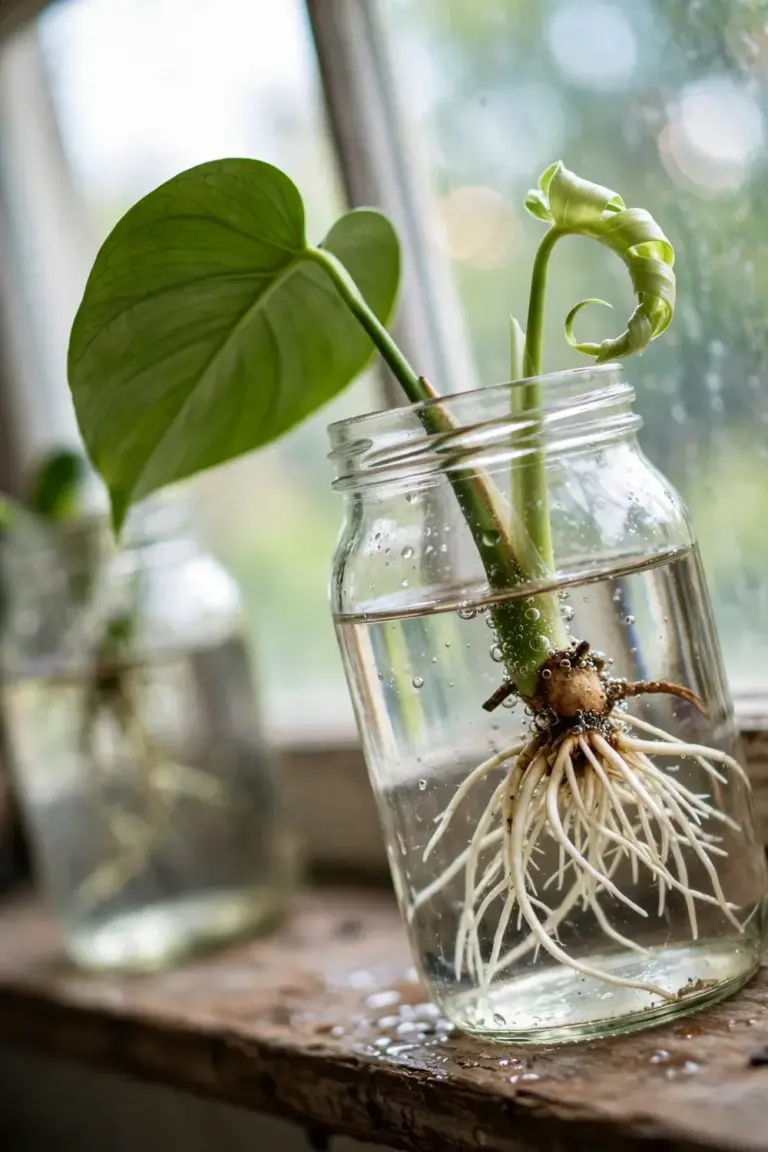
Root the Cutting in Water First
Stand the cutting in a jar of room-temperature water with the node submerged and the leaf above the rim. Change the water every few days so it stays oxygenated. Roots usually push out over the following weeks. Pot the cutting into chunky aroid mix once the new roots are a few centimetres long, because water roots adapt poorly if left swimming for months. Expect the first new leaf within a month or two of potting, and expect it to be small and solid. Fenestrations arrive on later leaves.
Root the Cutting Directly in Mix
Press the node into moist chunky mix, burying the aerial root if one is present. Keep the mix lightly moist, not wet, and give the cutting bright indirect light. Direct-in-mix cuttings skip the water-to-soil transition and often establish faster, though you cannot watch the roots develop. A clear plastic bag tented over the pot holds humidity around the cutting for the first two weeks. Vent it daily so condensation does not invite mold.
Air Layer a Tall Stem Before You Cut It
Air layering roots a stem while it is still attached to the parent, so the new plant never goes through a rootless phase. Choose a leggy stem with at least one node, wound a shallow ring of bark just below the node, and wrap the wound in damp sphagnum moss held with plastic wrap. Roots grow into the moss. When a healthy tuft shows through the wrap, cut below the rooted section and pot it up. This is the safest way to propagate a prized variegated monstera, because the cutting never sits in water or dry mix while it is vulnerable. For more propagation methods across the garden, the site’s free plant propagation guide covers layering, division and cuttings for other species too.
Check Leaf Axils Weekly for Thrips, Spider Mites and Mealybugs
Indoors, three pests do nearly all the damage. Thrips are tiny, fast and leave silvery streaks and black specks on the leaf surface. Spider mites announce themselves with fine webbing under the leaves and a dusty, stippled look. Mealybugs sit as white cottony clusters where the leaf meets the stem, and scale appears as small waxy brown bumps along stems.
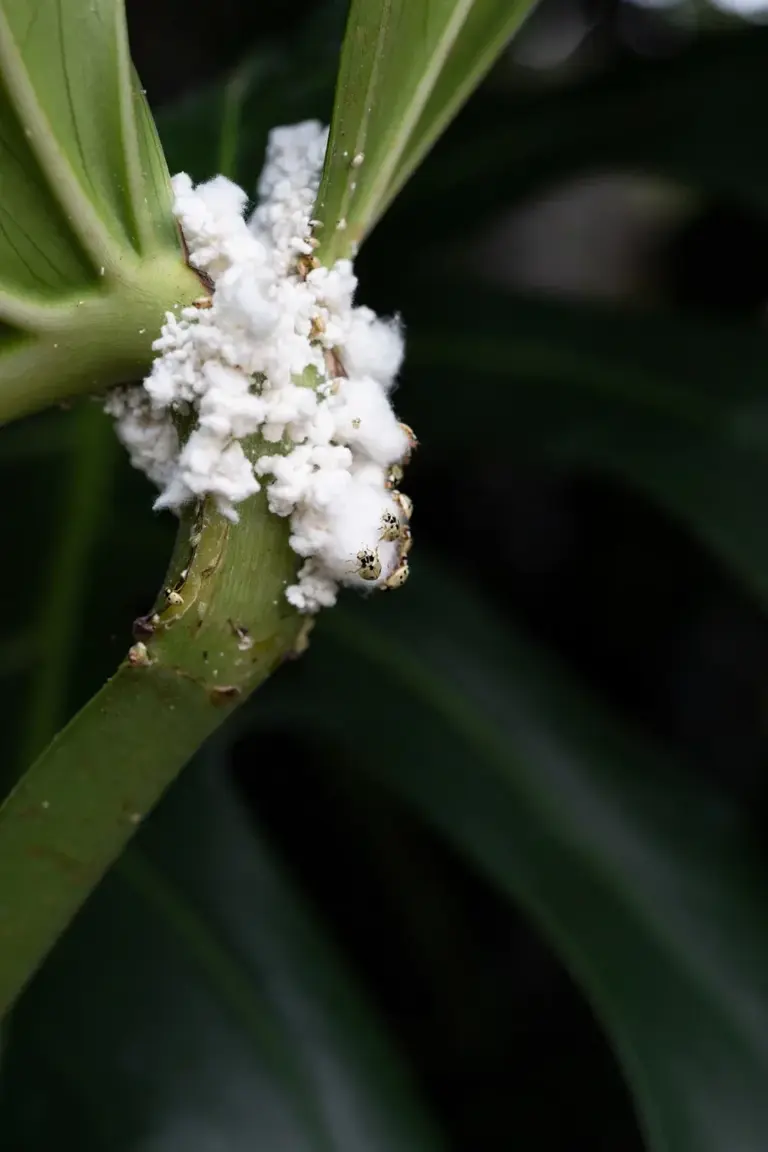
Catch them early and the fix is manual. Wipe mealybugs and scale off with a cotton swab dipped in rubbing alcohol, and rinse spider mites off in the shower with a strong but gentle spray. Neem oil or insecticidal soap handles a spreading infestation, sprayed thoroughly on both leaf surfaces. Isolate a badly infested plant from its neighbors for two weeks so the pests do not walk across touching leaves.
Prevention is mostly hygiene. Quarantine every new plant for two weeks before it joins the collection, wipe leaves during the monthly dusting, and never let fallen leaves sit on the mix. A plant under the right light and water resists pests better than a stressed one, so most infestations trace back to a care problem first.
Hang the Plant Out of Reach of Cats, Dogs and Small Hands
Every part of Monstera deliciosa except fully ripe fruit carries insoluble calcium oxalate crystals. Chewing a leaf drives microscopic needle bundles into the mouth and throat, and the result is immediate burning, drooling, swelling and vomiting. The ASPCA lists the plant as toxic to both cats and dogs on its toxic plant lists for cats and dogs, and the same crystals irritate human mouths too.
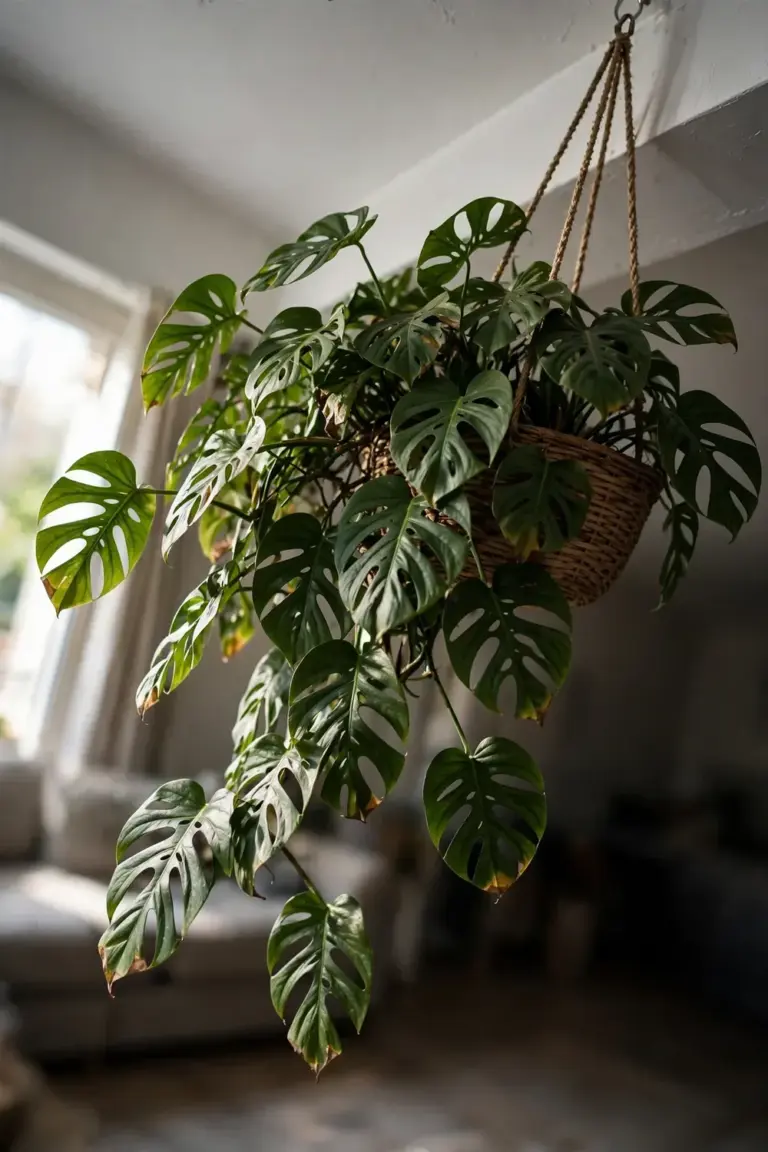
Placement is the whole strategy. A hanging basket, a high shelf, or a room the pets do not enter keeps everyone safe without giving up the plant. Bitter sprays and training help, but a determined cat climbs, and a bored puppy chews whatever is at nose height. If a pet does chew a leaf, rinse the mouth gently, remove plant fragments, and call your veterinarian. Do not induce vomiting unless the vet instructs it.
Keep Monstera Indoors in Warm Regions: It Escapes Outdoors
In frost-free climates this plant stops being a houseplant and starts being a weed. Monstera deliciosa is considered an environmental weed in Australia and is not recommended for outdoor growing there, with growers advised to check state or council regulations before planting one outside. That is the position of the same Australian guide quoted on humidity above. Escaped stems root where they land, climb the nearest tree, and colonize damp ground in warm regions.
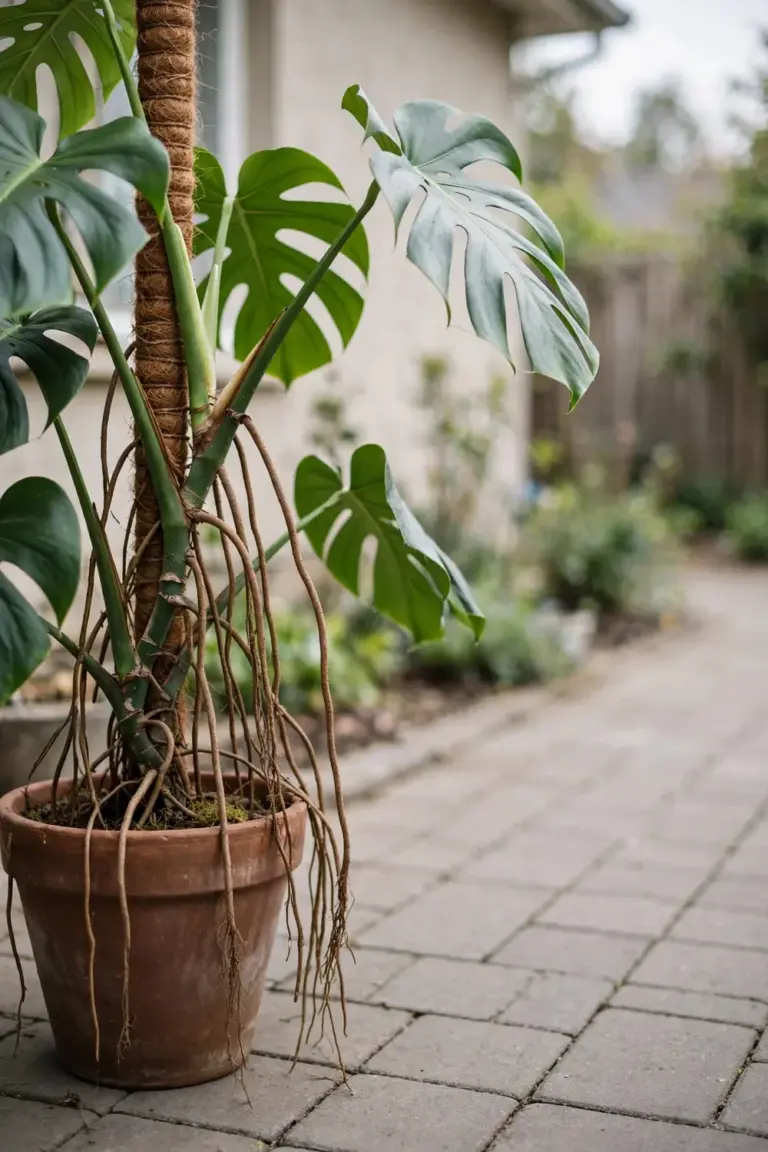
The rule is simple everywhere warm. Grow it in a pot, indoors or on a paved patio, and never plant it in the ground in a frost-free zone. Composted monstera stems survive home compost heaps, so bag trimmings with the general waste or dry them fully in the sun before binning them. In Australia, check your state or council weed listings before planting anything in the ground, because declared-weed rules vary by jurisdiction.
This applies beyond Australia. Any subtropical or tropical region with wet summers and no frost gives an escaped monstera exactly the conditions it evolved for, and the plant is naturalized on Pacific islands and in parts of Hawaii for the same reason.
Treat Unripe Fruit as Off-Limits: Only Fully Ripe Fruit Is Edible
A mature monstera in a warm climate can flower, producing a cream spathe, and the fruit that follows ripens over about 12 months, according to Bunnings’ monstera growing guide. Indoors this almost never happens. The plant needs years of maturity, strong light and tropical humidity to even attempt a flower.
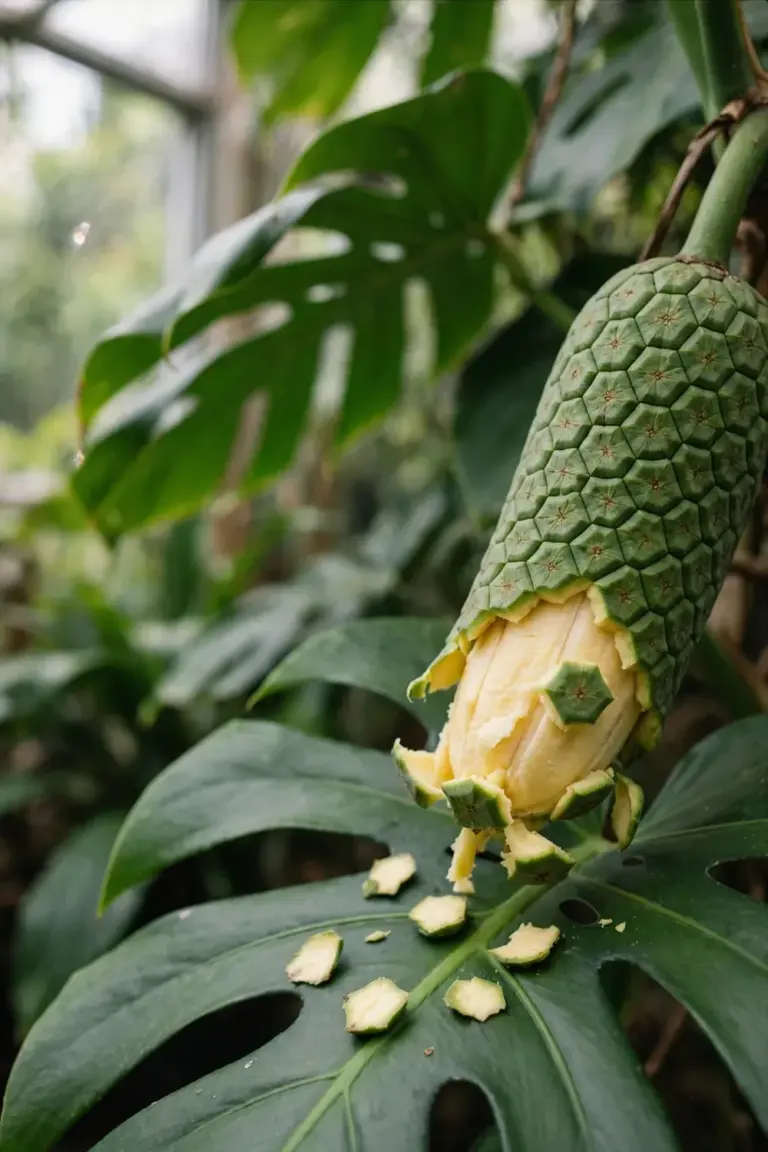
The ripeness rule is absolute. Unripe monstera fruit carries the same calcium oxalate crystals as the leaves, and eating it burns the mouth and throat badly. Ripe fruit is the one edible part of the plant, and it announces itself: the green hexagonal scales loosen and fall away, and the exposed flesh turns creamy yellow like a ripe banana. Eat only the flesh from sections where the scales flick off easily, and leave any section still tight on the fruit. One impatient bite of an unripe section teaches the lesson once.
Frequently Asked Questions
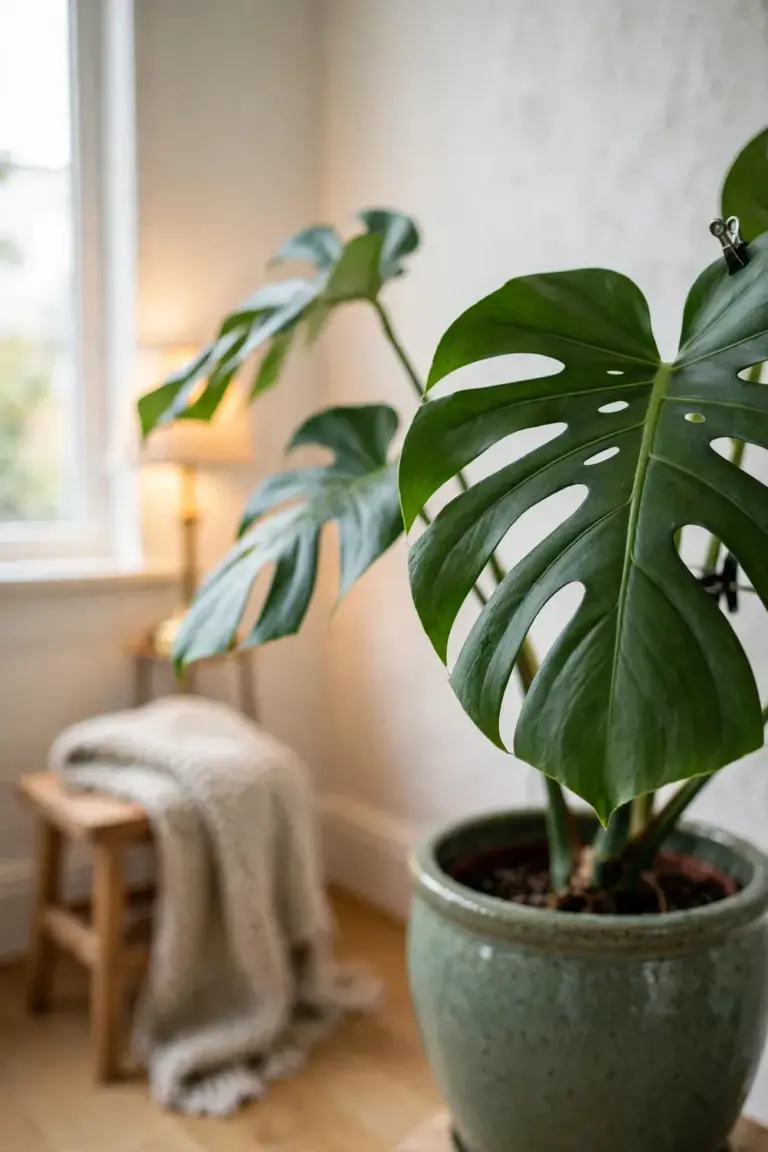
Fenestrations appear only on mature leaves with enough light behind them. A young plant, a dim corner, or a vine with no support to climb all produce solid juvenile leaves. Move the pot closer to bright indirect light, tie the stem to a damp moss pole, and wait for the next two or three leaves. The change shows in new growth, never in leaves that already unfurled.
It survives low light but it does not thrive there. Growth slows, internodes stretch, new leaves stay small and solid, and the plant becomes more vulnerable to overwatering because the mix dries slowly. If the only available spot is dim, accept a smaller plant, water less often, and skip the expectation of fenestrations until the light improves.
There is no fixed schedule. Water deeply when the top quarter to one-third of the mix feels dry, which runs about weekly in a bright warm room during the growing season and closer to fortnightly in winter. Pot size, light and humidity change the rhythm, so check the mix with a finger or a wooden chopstick rather than watering by the calendar.
Yes. The ASPCA lists Monstera deliciosa as toxic to cats and dogs, and every leaf, stem and root carries the calcium oxalate crystals that burn the mouth on chewing. Keep the plant in a hanging basket or a room pets cannot enter. If a cat chews a leaf, rinse its mouth, remove fragments, and call your veterinarian promptly.
You can, but in frost-free regions you probably should not. The plant is recorded as an environmental weed in parts of eastern Australia, and it naturalizes readily wherever winters stay warm and summers stay wet. Keep it in a pot on a paved surface, dispose of stem trimmings with general waste rather than green waste, and check local weed listings before planting in the ground.
Keep the Vine Climbing and the Splits Will Come
Light, a chunky mix, a dry-back watering rhythm, and a damp pole to climb. Those four habits produce the fenestrated leaves everyone buys the plant for, and they prevent nearly every problem in the bargain. The plant asks for patience more than skill: each new leaf is a report card on the last two months of care, and the splits arrive exactly when the plant can afford them.