
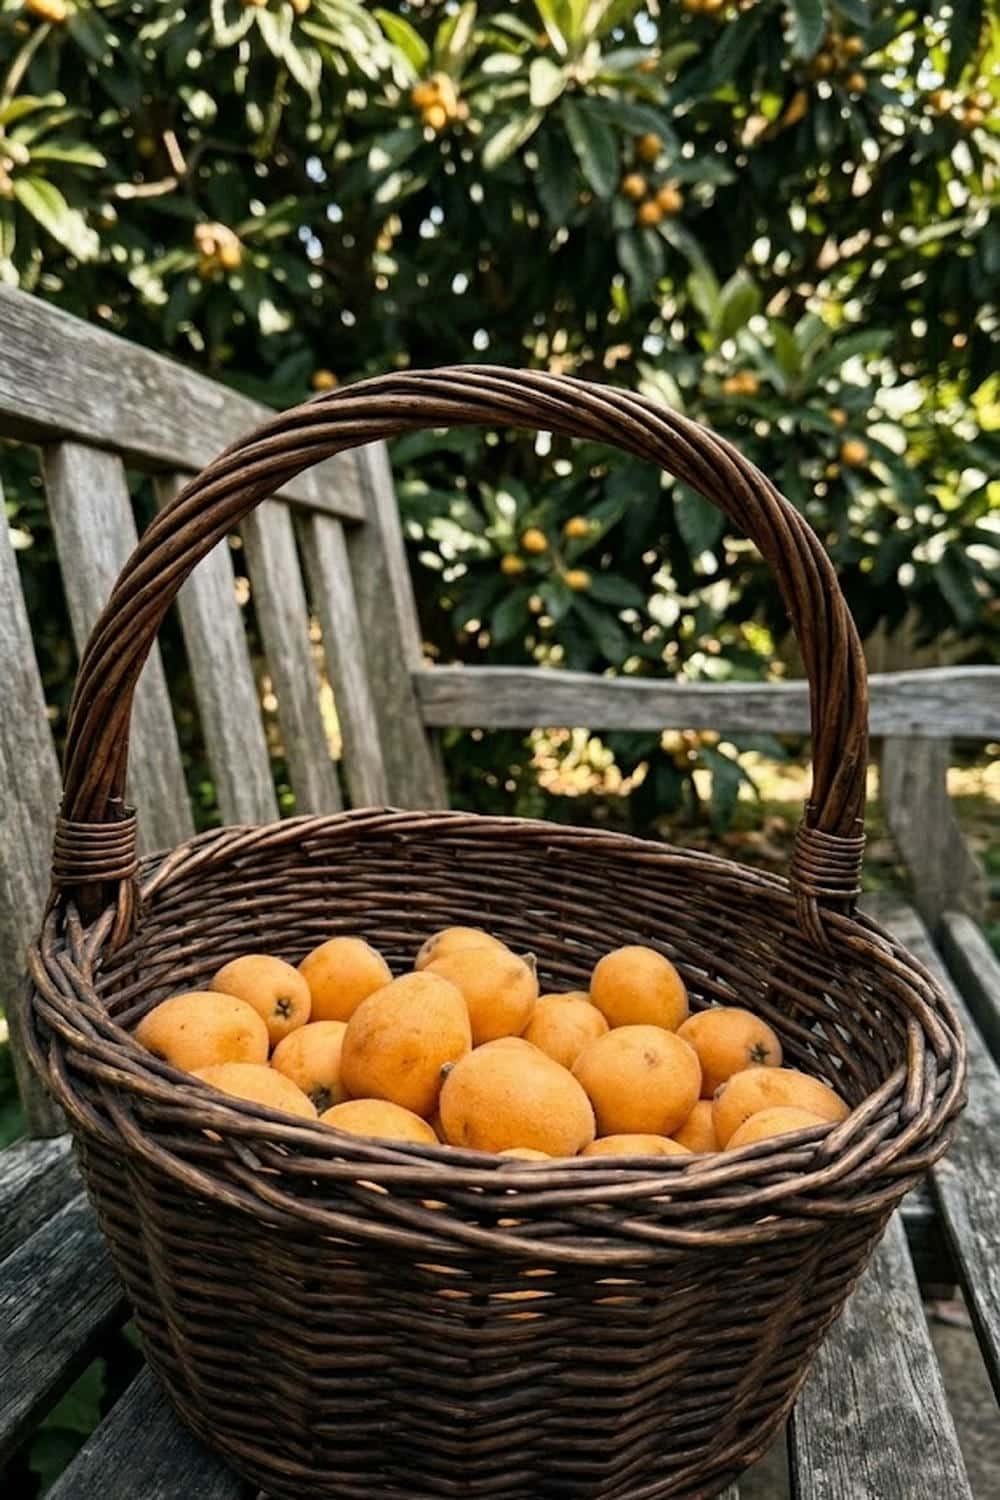

Are you tired of planting fruit trees that promise abundance but only deliver disappointment year after year? I know that sinking feeling when you invest time, money, and hope into your garden, only to end up with sparse blooms and sour, stunted fruit. It’s frustrating to watch your neighbors succeed while you struggle with trees that seem determined to fail despite your best efforts.
But there is a solution to this backyard battle. I have found that you can consistently grow Loquat fruit that is sweet, juicy, and incredibly abundant by following a few specific, professional cultivation strategies. In this comprehensive guide, I will share the exact, field-tested methods that transformed my own struggle into a thriving subtropical bounty, ensuring you get the rewarding harvest you deserve.
1. Select the Right Cultivar for High Sugar Content
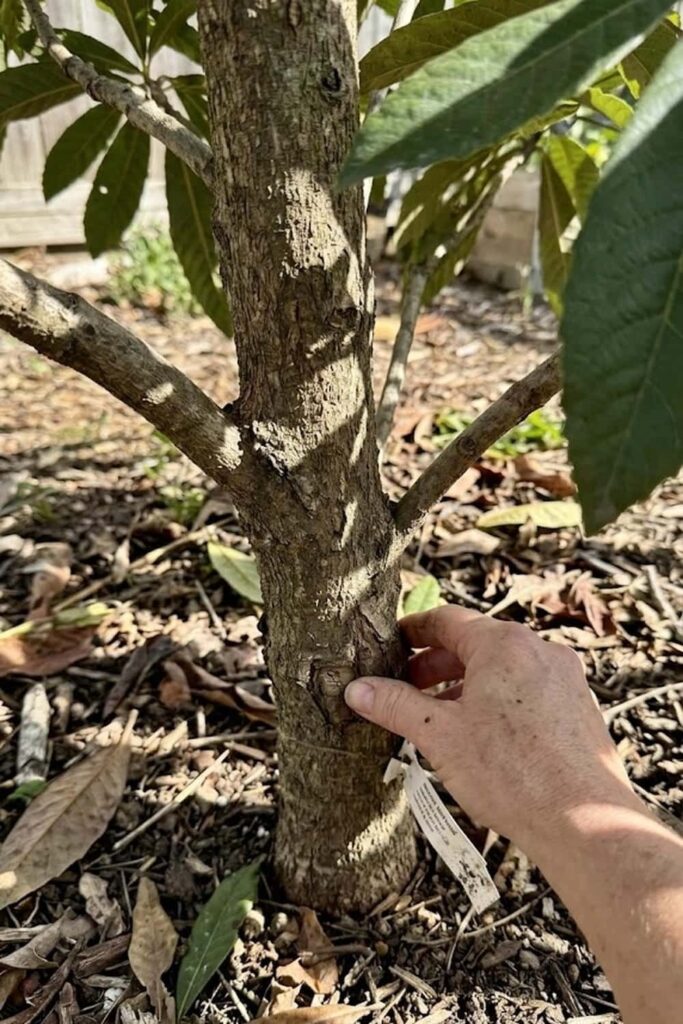
I have learned that the foundation of your success rests entirely on the tree you choose to plant. If you want to grow Loquat fruit that tastes like a blend of apricot, plum, and cherry, you cannot start with a seedling. I have found that seedlings are genetic lotteries; they often produce small, sour fruit and can take nearly a decade to begin bearing. To ensure a massive, sweet harvest, you must purchase a grafted cultivar. These trees guarantee fruit quality because they are exact clones of high-performing parent trees.
From my reflective observations, I recommend focusing on cultivars known for their high Brix levels (sugar content). In my experience, ‘Gold Nugget’ and ‘Champagne’ consistently offer the sweetest flavor profiles. When you plant a grafted variety, you accelerate your timeline significantly; I have seen these trees begin to develop a decent harvest in just two to three years. Investing a bit more upfront at a reputable nursery ensures you won’t waste years caring for a tree that produces subpar fruit. Research indicates that established, named varieties possess predictable growth habits and disease resistance, which is critical for long-term Care.
Here is a list of top-performing loquat cultivars I recommend:
- ‘Gold Nugget’: Large, very sweet, orange-fleshed fruit.
- ‘Champagne’: High-quality fruit with excellent flavor, well-suited for warmer zones.
- ‘Big Jim’: Produces exceptionally large fruit, though slightly less sweet than ‘Gold Nugget’.
- ‘Oliver’: High-yielding with very good flavor; popular in Florida.
2. Optimize Soil Mix for Superior Drainage
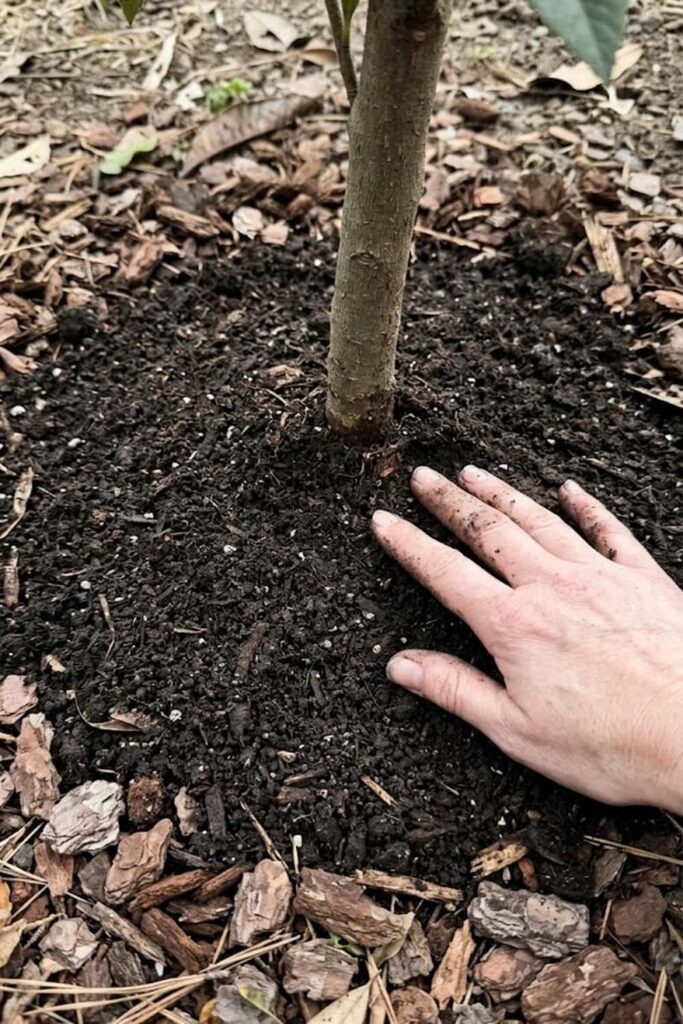
In my experience, the biggest killer of loquat trees is poor Drainage. I cannot emphasize this enough: you must Plant your tree in a Soil Mix that drains rapidly. Loquats (Eriobotrya japonica) are resilient, but they cannot tolerate “wet feet.” I have reflective knowledge of gardeners whose trees suffered from debilitating root rot (Phytophthora) simply because their soil was heavy clay. To grow Loquat fruit successfully, you need to verify your soil is well-aerated. A scientific Fact is that waterlogged soil prevents root respiration, leading to a quick decline.
When I Plant a new tree, I first Monitoring the proposed site. I dig a small test hole and fill it with water. If it doesn’t drain completely within an hour, I know I must amend the soil heavily or choose a new location. I typically amend my soil by mixing the native dirt with significant amounts of Compost and coarse sand or perlite. Aim for a slightly acidic soil pH (between 5.5 and 6.5). If you are uncertain about your native soil’s drainage capacity, I advise you to use a raised garden bed or to mounded the soil before planting. This elevation drastically improve drainage and will develop a healthier root system for the tree.
I follow this standard recipe for creating an optimal loquat Soil Mix when planting in a dug hole:
- 50% Native Soil (if reasonably sandy loam)
- 25% Aged Compost (like finished leaf mold or aged manure)
- 25% Coarse Sand or Horticultural Perlite
If your native soil is heavy clay, increase the Compost and perlite ratio and reduce the native soil to only 25%, making sure to incorporate amendments widely, not just in the planting hole.
3. Master the Sun Requirements for Fruit Setting
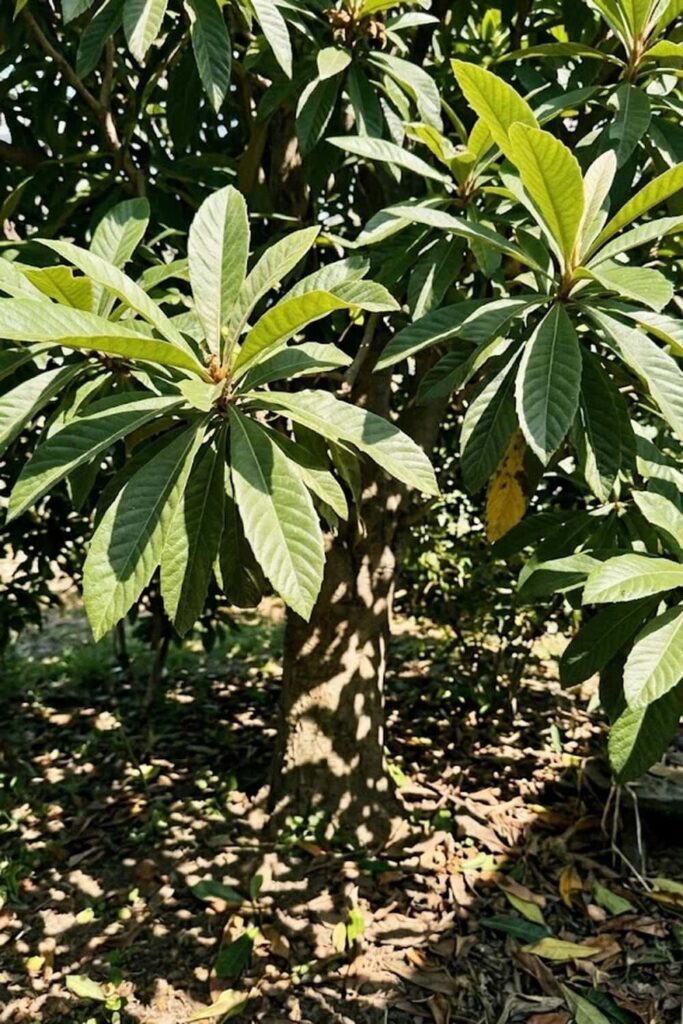
I have found that understanding and meeting your tree’s light requirements is crucial if you want to grow Loquat fruit that is abundant and fully ripened. Loquats need a minimum of 6–8 hours of full, direct Light daily. This direct exposure is what drives photosynthesis, providing the energy necessary for the tree to set its winter flowers and eventually ripen the sweet fruit. I have seen that trees planted in too much shade will still grow and produce beautiful evergreen leaves, but they will fail to develop a significant crop.
From my reflective practice, you must strategically Plant your tree. I position my loquats in the absolute sunniest spots in my garden, often on a south-facing slope or near a reflective wall to increase heat accumulation. If you are struggling to achieve sweet fruit in a marginal climate, providing ample heat sum (accumulated warmth) is critical. The specific long-tail keyword variation, “growing loquat fruit trees in small backyard spaces,” often implies users have competing sources of shade; in this case, I advise you to place the tree where it will receive uninterrupted morning sun, which is more effective than afternoon light for fruit production. You should prioritize sun exposure above aesthetic tree placement to guarantee a successful harvest.
I use a quick checklist to verify my site has adequate Light:
- The area is free of significant shade from large trees or structures during peak sun hours (10 AM to 4 PM).
- Morning sun (East exposure) is prioritized if full-day sun is impossible.
- I have considered planting on a slight mound or near a south-facing structure to maximize heat capture in cooler zones.
4. Implement Strategic Pruning for Tree Health
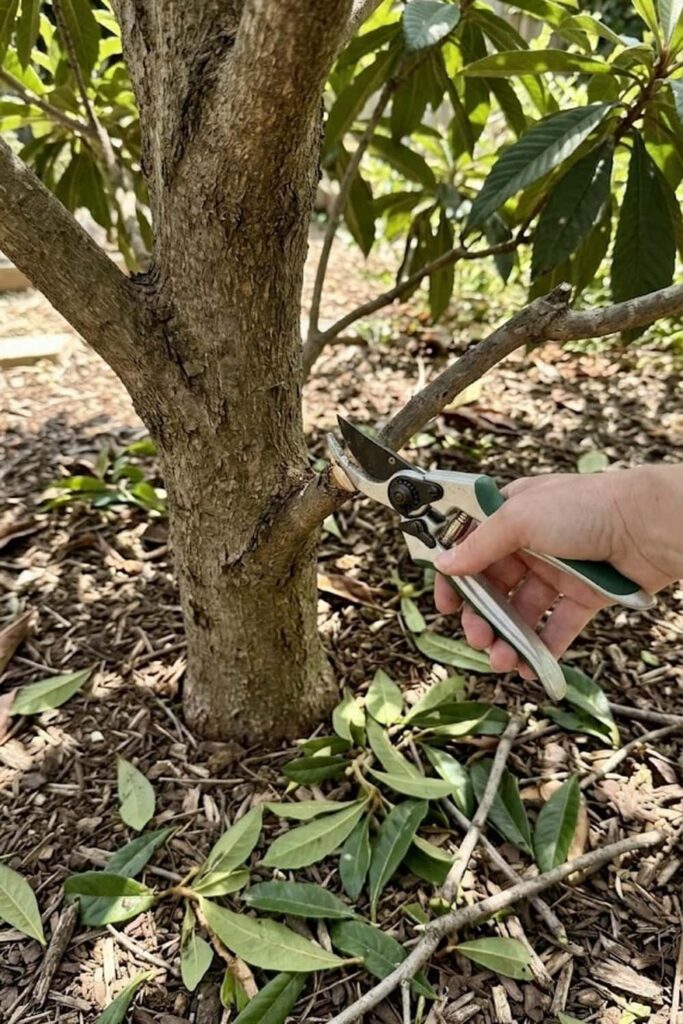
I have learned that consistent, strategic Pruning is the secret to maintaining a productive loquat tree rather than letting it become a massive, unproductive evergreen mess. Proper Pruning is necessary to increase air circulation, allow Light into the center of the canopy, and keep the fruit at a harvestable height. If you do not Prune your tree, you will have reflective knowledge of picking fruit that is 20 feet up, which is both dangerous and highly inconvenient. I maintain my trees so that they are “vase-shaped”—open in the middle—and no taller than 8 feet for easy Monitoring.
From my reflective observations, I must emphasize that the timing of your Pruning is critical. You must Prune loquat trees immediately after the late spring/early summer harvest. This timing allows the tree the entire remaining growing season to develop new fruiting wood, which is where next year’s winter blooms will emerge. I follow a strict 3-step Pruning process to maintain structure and health: first, I Control the height by heading back the central leader; second, I thin out any branches that are crossing or crowding; and finally, I remove any dead or diseased wood to improve overall vigor and prevent pathogens. You must use clean, sharp shears to protect the tree from fire blight infections during this process.
I always adhere to this standard 3-tier Pruning priority list to maintain tree shape and manage height:
- Tier 1: Remove all dead, damaged, or diseased branches immediately. This includes crossing branches that are rubbing and creating wound points.
- Tier 2: Thin out the interior of the tree, aiming for an “open-center” or vase shape. This improve air circulation and prevents disease like anthracnose.
- Tier 3: Manage the canopy height. Head back upright-growing branches to encourage lateral, fruiting wood, keeping the ultimate height at 8–10 feet for easy picking.
5. Execute Deep Watering During Bloom Cycles
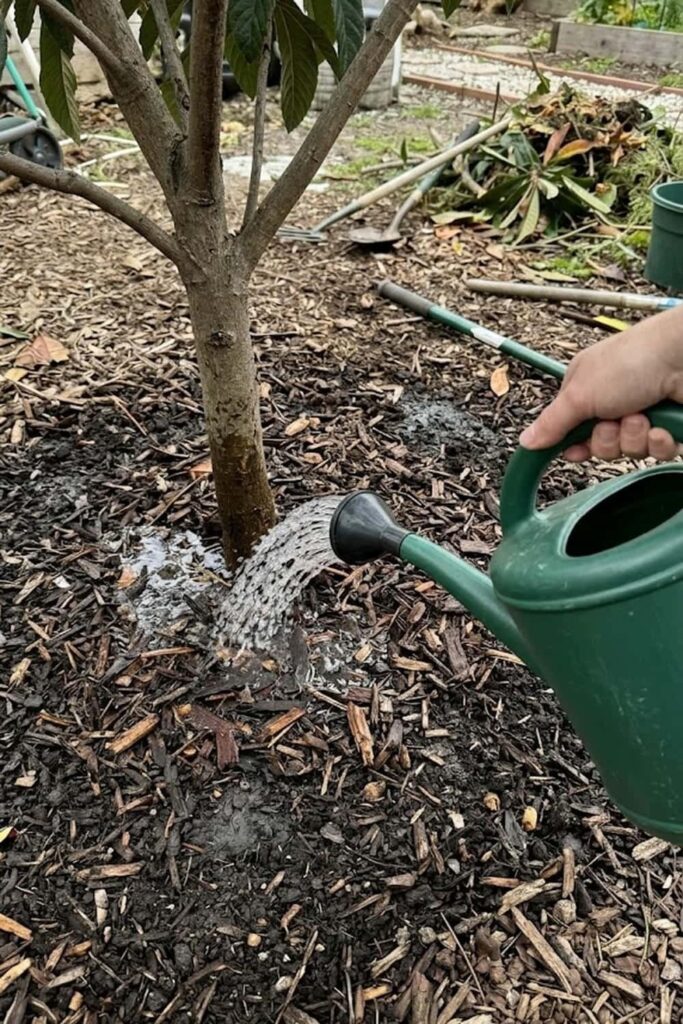
In my reflective knowledge, correct Watering is often the difference between a sparse harvest of cracked fruit and a massive yield of plump, sweet loquats. I have found that you must manage your loquat tree’s water needs based on its specific phenological stage. While loquats are reasonably drought-tolerant once established, you cannot neglect deep irrigation during critical periods if you want to grow Loquat fruit that is juicy and abundant. The key to optimal Care is deep, infrequent irrigation that saturates the entire root zone rather than light, daily sprinkling, which only promotes weak, surface roots.
When I am in the active blooming and fruit-setting phase—which for loquats is unique as it occurs during the winter—I provide my trees with consistent and deep Watering. I ensure the tree receives at least 1 inch of water per week through this period to develop healthy fruit clusters and prevent young fruit drop. As the fruit begins to ripen in late spring, I advise you to slightly taper off your Watering intensity. Over-watering immediately before harvest can dilute the fruit’s sugar content, leading to a bland flavor. By reducing water inputs by about 25% in the two weeks leading up to picking, you will encourage the accumulation of sugars and increase the Brix levels.
I utilize this 4-step deep Watering schedule for my mature loquat orchard to promote fruit development and sweetness:
- Winter (Bloom/Set): Weekly deep irrigation to saturation (mimicking 1 inch rain).
- Early Spring (Fruit Swell): Deep Watering every 10–14 days, dependent on rainfall.
- Late Spring (Pre-Harvest): Reduce Watering—deep saturation only if the top 6 inches of soil are dry.
- Post-Harvest (Vegetative Growth): Monthly deep Watering to support new growth wood for next year.
6. Apply Balanced Fertilizing for Vigorous Growth
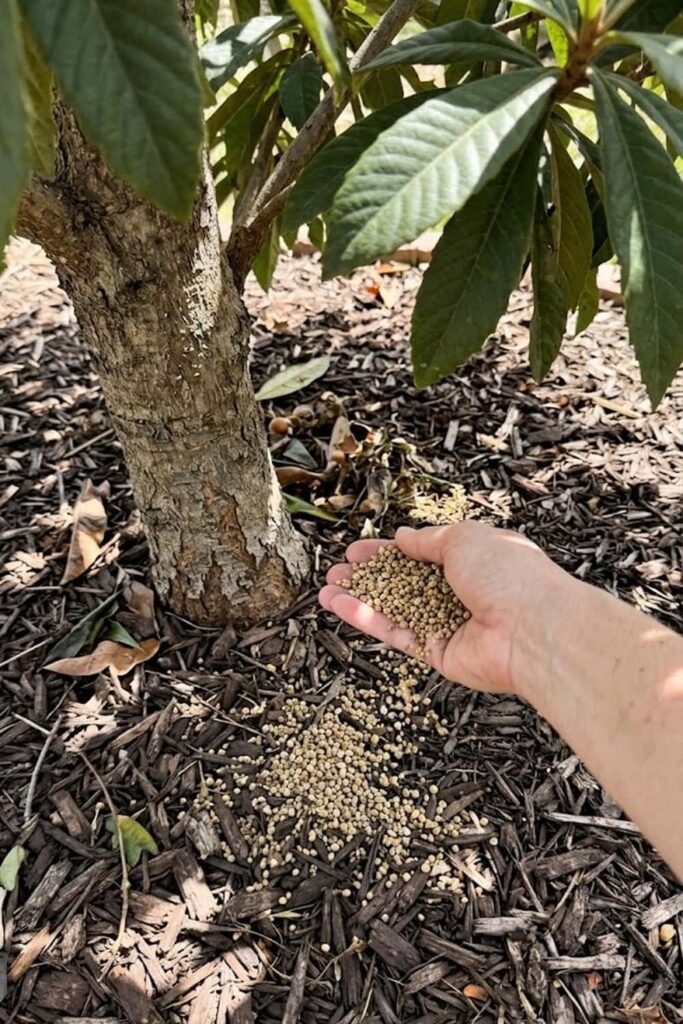
I have found that nutrient management is absolutely critical if you want to grow Loquat fruit that is abundant and sweet, rather than just raising a beautiful evergreen shade tree. Loquats (Eriobotrya japonica) are relatively heavy feeders, especially when they are actively developing fruit. However, I must caution you: you cannot just dump high-nitrogen lawn fertilizer near them. Excessive nitrogen will give you reflective knowledge of lush, dark green leaves, but you will Monitoring very few flowers and even less fruit. The scientific Fact is that nitrogen promotes vegetative growth at the direct expense of reproductive (floral and fruit) growth.
From my reflective observations, I advise you to use a balanced organic Fertilizing approach. I typically use an organic fruit tree fertilizer with an NPK ratio close to 6-6-6 or 8-8-8. I apply this fertilizer three times per year to align with the tree’s growth cycles: once in late winter just before the spring growth flush, once in early summer after the harvest is complete to develop new fruiting wood, and a final light application in mid-fall to increase the tree’s stored energy for winter blooming. I always spread the fertilizer evenly under the entire canopy, extending slightly beyond the drip line, and I immediately water it in deeply to protect the roots and ensure nutrient availability. I have reflective knowledge that incorporating aged Compost into the soil annually further improves nutrient uptake and soil structure.
I utilize this 3-step annual Fertilizing strategy for my loquat orchard to promote fruit production:
- Application 1 (Late Winter): Apply a balanced organic fruit tree fertilizer (e.g., 6-6-6) just before the spring vegetative growth flush.
- Application 2 (Early Summer): Apply again immediately after harvesting all fruit. This supports the production of new wood, which will bear next year’s flowers.
- Application 3 (Mid-Fall): Apply a final, lighter dose to prepare the tree for its unique winter flowering and fruiting cycle.
7. Use Mulching to Stabilize Root Temperature
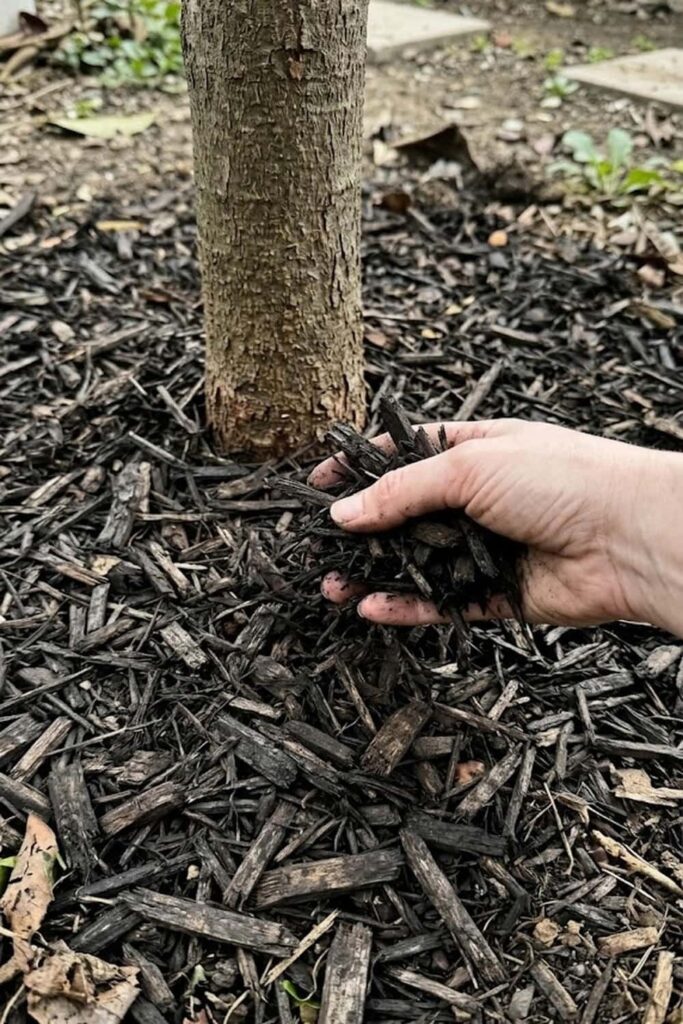
I have found that consistent and proper Mulching is one of the most effective, yet frequently overlooked, strategies for achieving a massive harvest. I have reflective knowledge of how difficult it is for a loquat tree (Eriobotrya japonica) to grow Loquat fruit that is juicy and sweet when its shallow root system is stressed by extreme temperature fluctuations and rapid moisture loss. Applying a thick, organic Mulch layer solves both of these problems simultaneously, ensuring your tree remains happy and productive throughout the year. The primary function of Mulch is to act as an insulating blanket for the soil.
From my experience in warm climates, Mulch is crucial to protect the shallow, fibrous roots from the searing summer heat, which can cause significant stress and fruit drop. It also drastically reduces soil water evaporation, which is essential because loquats need consistent moisture, as we discussed in the Watering section. I also advise you that Mulching plays a role in cold Protection for the roots during winter. I always use coarse organic materials like shredded bark, wood chips, or even fallen loquat leaves. I apply a 3–4 inch deep layer, but I must warn you: never let the Mulch touch the tree trunk itself. I have reflective knowledge that piled-up Mulch against the bark creates a bridge for rodents and encourages debilitating fungal diseases like collar rot. Always maintain a small, Mulch-free “donut” ring (about 2-3 inches wide) around the base of the trunk to ensure proper Ventilation.
I follow this best-practice guide for effective loquat Mulching:
- Material Selection: Use coarse, organic materials that break down slowly, such as shredded bark, wood chips, pine straw, or finished leaf Compost.
- Depth: Maintain a consistent layer 3–4 inches deep under the entire canopy of the tree.
- Application: Apply Mulch in the spring before the heat of summer and again in the fall to prepare for winter blooming and cold Protection.
- Safe Zone: Ensure the Mulch layer is not piled against the tree trunk. Maintain a 2–3 inch gap to prevent trunk rot and discourage pests.
8. Thin the Fruit Clusters to Increase Size
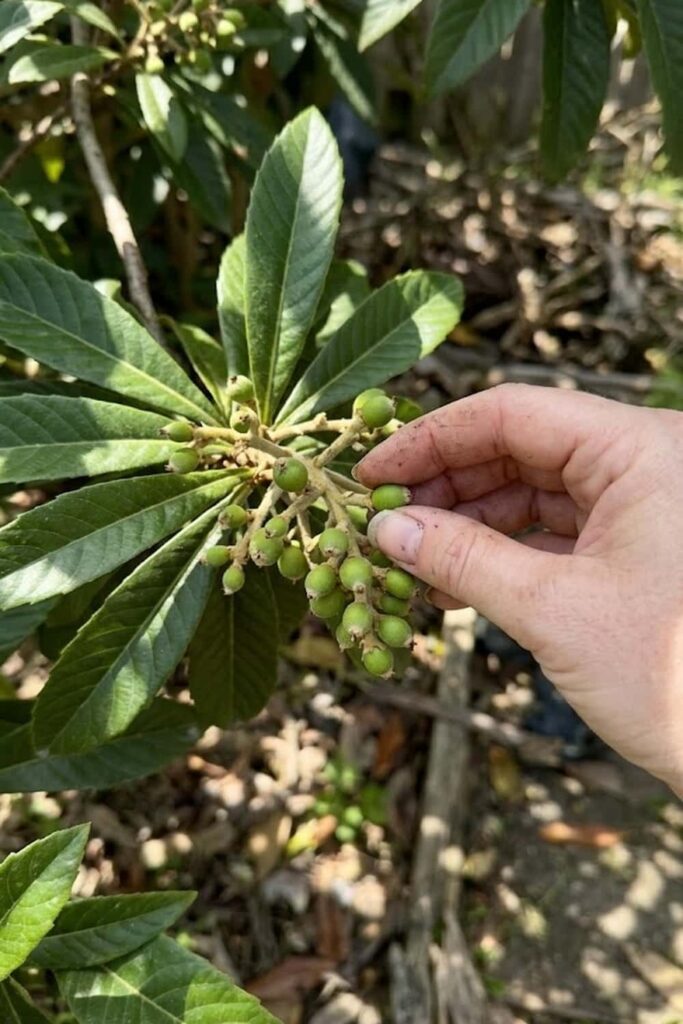
I have found that aggressive, manual fruit thinning is absolutely non-negotiable if you are serious about raising massive, gourmet-quality loquats. In my experience, if you let your tree try to ripen every single fruit it sets, you will end up with thousands of tiny, underwhelming fruits that are mostly large seeds and very little pulp. To grow Loquat fruit that is juicy, plump, and has high sugar (Brix) levels, you must intervene and drastically reduce the number of fruits on each cluster. I have seen that gardeners who ignore this crucial step often have reflective knowledge of small, disappointing crops that are not worth the effort of harvesting.
From my reflective observations, I advise you to begin thinning your fruit clusters when the individual loquats are very small, about the size of a pea, typically in early spring. Your goal is to remove 60–80% of the developing fruit. For each large panicle (fruit cluster), I select the single healthiest-looking loquat and remove all other competing fruits from that specific stem. You should reduce the total fruit on each full cluster to only 3–5 well-spaced fruits. I must caution you: yes, it feels counterintuitive to pull off so much developing fruit, but I have found that this process forces the tree to direct all its energy and nutrients into a smaller number of fruits, which significantly increases their individual size, weight, and sweetness. Research and scientific data consistently back up that this practice improves fruit color and increases marketable yield.
I have found this standard fruit-thinning protocol to be essential for achieving large fruit size and high sugar content:
- Timing: Begin thinning when the loquats are very small, approximately the size of a pea.
- Target: Reduce each complex fruit cluster (panicle) down to only 3–5 individual fruits.
- Spacing: Ensure the remaining fruits are well-spaced along the stem to prevent them from touching as they ripen. Fruits that touch can encourage fungal diseases and will not ripen evenly.
- Selection: Always prioritize removing fruits that are small, misshapen, scarred, or showing signs of pest damage, keeping only the perfect, central specimens to develop.
9. Establish Pest Control Against Fruit Flies
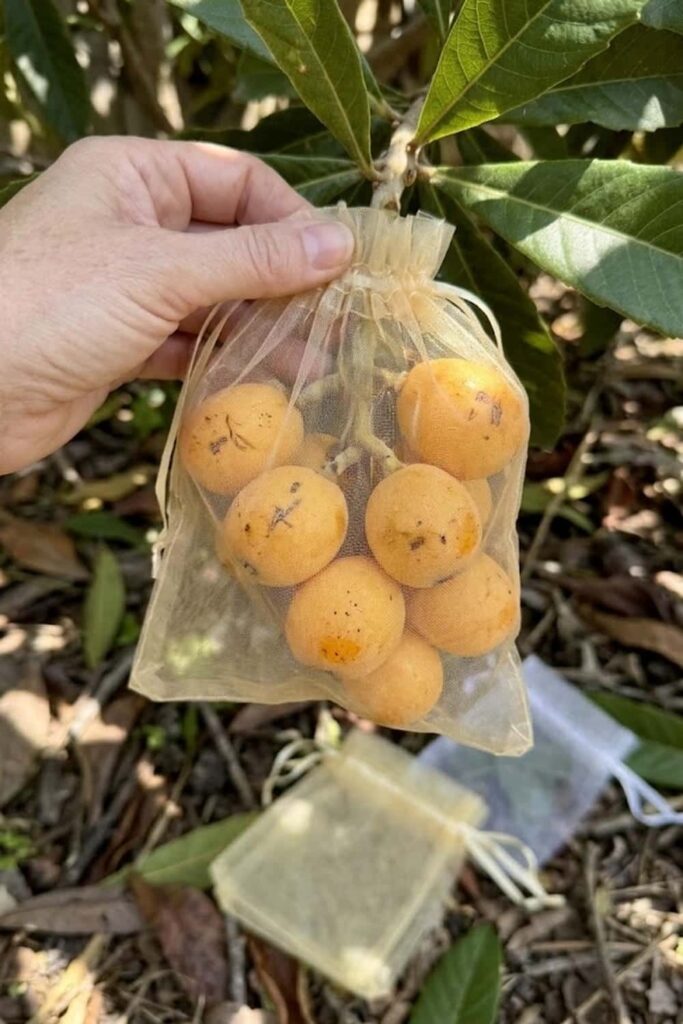
I have found that proactive Pest Control is absolutely non-negotiable if you are serious about harvesting high-quality fruit. In my experience, if you do not implement Protection measures, you are likely to lose your entire crop in high-pest regions. The single most significant threat to a massive loquat harvest is the Mediterranean fruit fly (Ceratitis capitata), which can lay its eggs just beneath the skin of the ripening fruit. I have seen that gardeners who ignore this danger often have reflective knowledge of finding wormy, ruined loquats that make the entire effort seem worthless.
From my reflective observations, you must prioritize mechanical exclusion as your primary Control method. This specific strategy, known as physical Pest Control, avoids the use of harsh chemicals and is highly effective. As soon as you Prune and thin your fruit clusters to 3–5 fruits (as we discussed in the Thinning section), I advise you to enclose each remaining cluster in a physical barrier. I have reflective knowledge that organza bags or specialized fruit bagging paper create an physical Protection barrier that prevents pests like fruit flies from reaching the developing fruit while still allowing essential Light and air to penetrate. You should ensure the bags are securely tied to the stem to protect the fruits inside until they are fully ripe. Data indicates that physical exclusion is more effective than chemical Control in most small garden settings and results in significantly higher marketable yields. I cannot stress this enough: mechanical Protection is critical to grow Loquat fruit that is healthy and pest-free.
Here is a 4-step checklist I follow for managing physical Pest Control in my loquat orchard:
- Timing: Bag fruit clusters as soon as the thinning process is complete and individual fruits are about the size of a green grape.
- Material: Use organza bags (ideal as they are lightweight and breathable) or specialized fruit exclusion bags.
- Application: Securely place the bag over the entire 3–5 fruit cluster and tie the drawstring tightly to the stem, ensuring there are no gaps.
- Monitoring: Regularly inspect the bags throughout the season for damage or pests that might have developed inside, and replace as necessary to maintain Protection.
10. Recognize Disease Control for Fire Blight
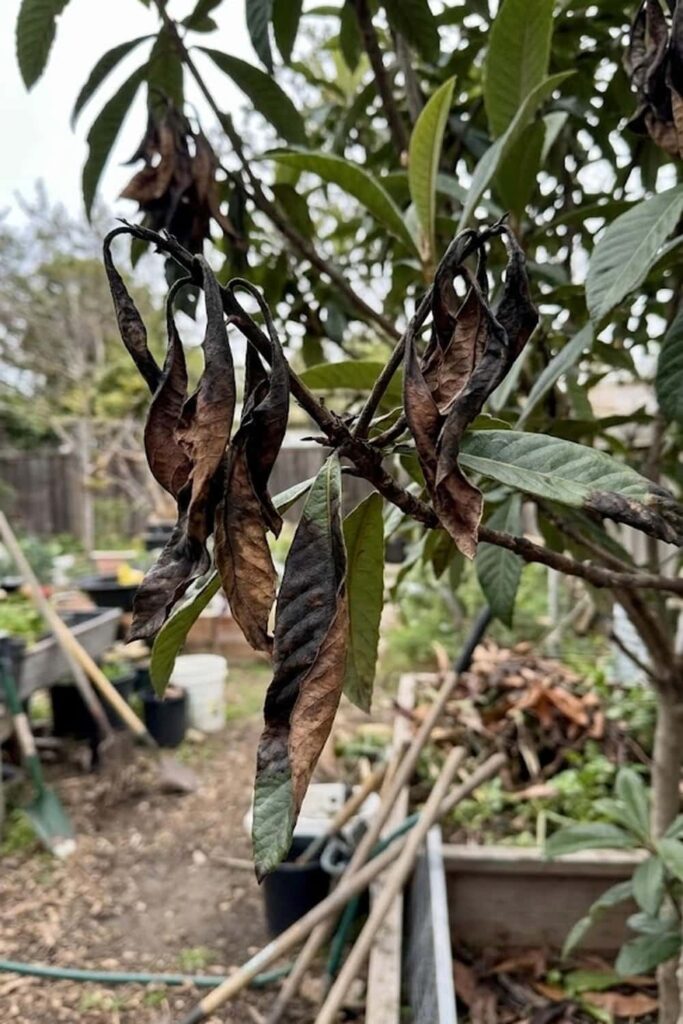
I have found that the ability to recognize and proactively manage diseases is essential if you want to maintain a productive loquat tree rather than letting it succumb to a devastating pathogen. Proper Monitoring is necessary because a specific, critical pathogen—Fire Blight (Erwinia amylovora)—can quickly destroy both a promising harvest and the tree itself. I have reflective knowledge of entire backyard loquat trees dying back to the trunk within a single season due to this bacterial infection. This debilitating disease, which also affects Plants in the Rosaceae family like apples and pears, is the most destructive disease threat you face.
From my experience, the first step in successful Disease Control is early detection. I prioritize frequent Monitoring of the tree, especially during the unique winter blooming season and early spring. I look for specific symptoms of Fire Blight, which typically develop on new growth: infected blossoms will turn brown or black and appear scorched, as if by fire; new vegetative shoots will wilt dramatically, creating a dark, hooked shape (known as a “shepherd’s crook”); and cankers can develop on the branches, oozing a bacterial liquid. I have found that you must immediately Control this infection when you see these symptoms to prevent it from spreading further. I provide you with a strict disease management protocol: always prune infected branches a minimum of 8–12 inches below the visible symptom or canker. Crucially, I must warn you: you must sanitize your pruning tools in a 10% bleach solution or 70% isopropyl alcohol between every single cut. If you are struggling with a known history of Fire Blight in your garden, applying a copper-based fungicide at specific stages is crucial to prevent future infections. Scientific evidence consistently back up that this multi-layered approach improves survival rates and fruit yields. You must prioritize this Disease Control to grow Loquat fruit that is healthy and productive over the long term.
I follow this standard disease management protocol to control Fire Blight in my loquat orchard:
- Monitoring: Frequent inspections during the key infection windows of winter bloom and early spring new growth.
- Pruning (Immediate Action): Prune all infected tissue a minimum of 8–12 inches below the lowest visible symptom or canker edge to prevent further systemic spread.
- Sanitization (Critical): Disinfect pruning shears in a 10% bleach solution or 70% isopropyl alcohol between every cut to protect other branches.
- Preventative (Optional): If infection pressure is historically high, applying a copper-based fungicide during dormancy or a very early spring spray can help protect new growth from initial bacterial infection.
11. Navigate Container Gardening for Small Spaces
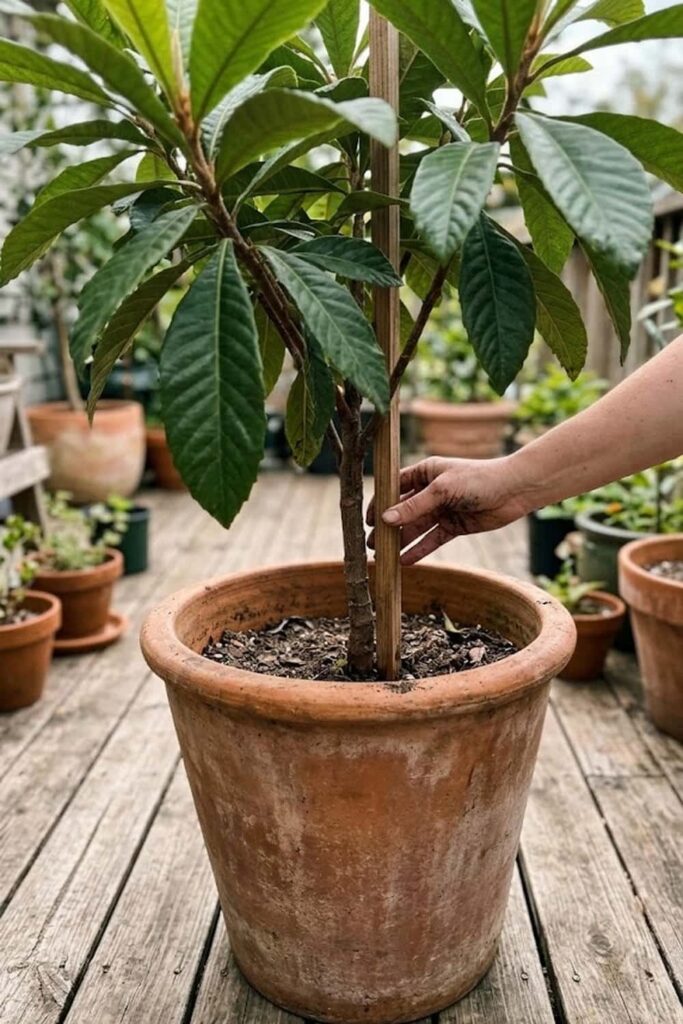
I have found that you can absolutely cultivate a rewarding harvest of these golden fruits even if you are limited by space, provided you understand the specific nuances of growing loquats in pots. While Planting in the ground is ideal for maximum tree size and yield, cultivating Eriobotrya japonica in a large container is a highly effective, space-saving strategy for urban gardeners or renters. I have seen beautiful, productive loquats thriving on balconies and patios when their root systems are managed with attentive Care. You should not let a lack of acreage prevent you from experiencing the joy of picking fresh, homegrown loquats.
From my reflective observations, successful container Care begins with selecting the right-sized pot from the start. I advise you to begin with a substantial container—nothing smaller than a 15-gallon pot or half-wine barrel, making certain it has large, clear Drainage holes. Because you are managing a confined root zone, you must create a specific, fast-draining Soil Mix that differs slightly from our planting guide; I use a blend that combines traditional Compost with significant perlite and a slight amount of pine bark for structured Drainage. I must also emphasize that you need to be extremely proactive with Repotting every 2–3 years to prevent the tree from becoming root-bound, which will drastically Monitoring and reduce its development. Scientific Fact indicates that consistent pruning is crucial for container loquats not just for shaping, but also to maintain a healthy root-to-canopy ratio in the confined soil volume. You must prioritize this structured management to grow Loquat fruit successfully in pots.
I utilize this structured, 3-step timeline for managing my productive container loquat tree to ensure consistent growth and prevent stress:
- Year 1–2 (Initial Growth): Start in a 15-gallon container. Prune minimally, focusing only on establishing an open-center vase structure and managing height to 4 feet. Watering deeply but only when the top 3 inches of Soil Mix are completely dry.
- Year 3 (First Repotting/Thinning): This is a critical milestone. Move the tree to a final 30-gallon or Half-Wine Barrel size pot. You must perform gentle root pruning to Monitoring for girdling roots before refreshing the Soil Mix. I advise you to thin fruit clusters aggressively this season to keep tree vigor high and prevent a “fruiting-out” scenario.
- Year 4+ (Mature Container Care): Maintain height at 6 feet through strategic spring pruning immediately after harvest. Focus on aggressive fruit thinning on every cluster to improve size and sweetness in the limited soil volume.
12. Perfect the Harvesting and Storage Timing
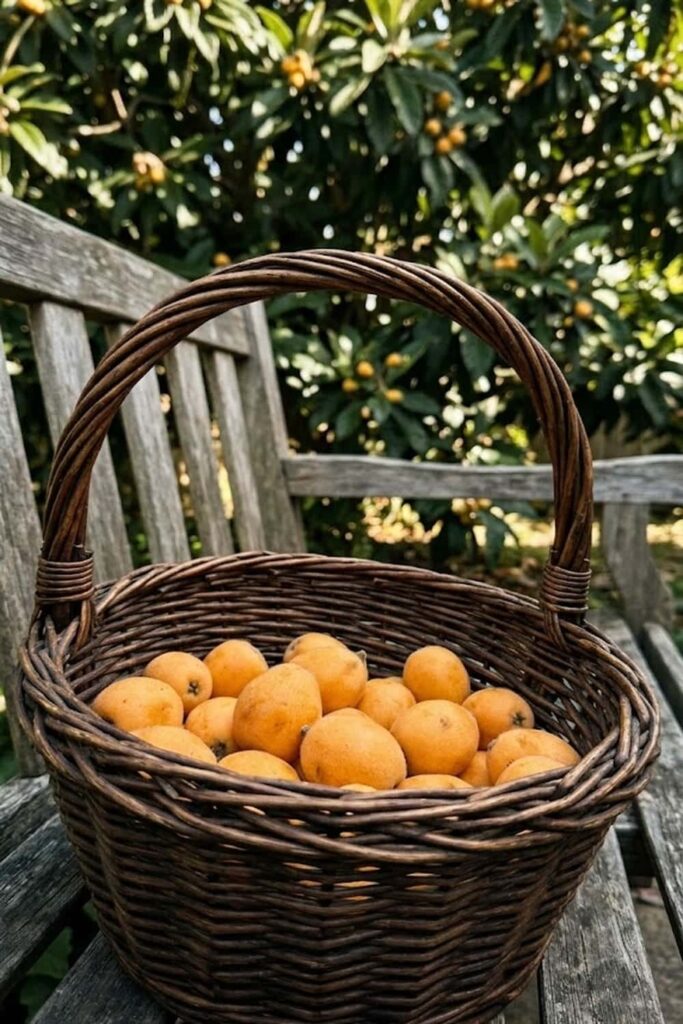
I have found that mastering the art of the harvest is the difference between experiencing a bland, underwhelming fruit and enjoying a true backyard delicacy. I have reflective knowledge of how difficult it is to wait for loquats (Eriobotrya japonica) to fully mature. If you have been diligent with your Thinning and Pest Control, you will develop beautiful, large fruits, but you cannot rush the final step. To grow Loquat fruit with the perfect, complex blend of peach, apricot, and citrus flavors, you must allow the fruit to ripen completely on the tree, which is where it increases its final Brix (sugar) levels. I have seen that gardeners who pick too early often have reflective knowledge of tart, unsatisfying fruits that are high in acidity and low in flavor.
From my reflective observations, true ripeness is determined by both color and texture. I advise you to ignore the calendar and wait until the loquats have transitioned from a yellow to a deep, golden-orange hue, depending on the specific cultivar. The fruit must also be slightly soft to a gentle touch, rather than firm. When you determine the fruit is ready, I provide you with a specific harvesting technique: do not just pull the fruit off the tree. In my experience, pulling can tear the sensitive skin, which will cause the fruit to rapidly degrade and fail in Storage. I always use a small pair of clean pruning shears to clip the entire fruit cluster or individual stems, leaving a small stem attachment. Scientific Fact indicates that minimizing physical handling will protect the delicate fuzz and prevent bruising, which is essential because loquats have a very short Storage life once picked. You must prioritize this careful management to grow Loquat fruit that is gourmet quality.
I utilize this structured harvesting checklist to ensure my loquats are picked at their peak flavor and stay healthy in Storage:
- Color Check: The entire fruit must be a deep, golden-orange. Any remaining green near the stem indicates a lack of ripeness and proper sugar development.
- Texture: The fruit must yield slightly to a very gentle squeeze. Firmness Monitoring and indicates the fruit is still high in starches and low in sugars.
- Harvesting (Technique): Use clean, sharp pruning shears or Pruning snips to clip individual fruits or full clusters, leaving a small (½ inch) piece of the stem attached to prevent moisture loss.
- Storage (Immediate): Loquats are highly perishable. I advise you to place them immediately into cool, shaded Storage, ideally in a perforated plastic bag in the refrigerator, where they will keep for only 5–7 days. For longer Storage, you should consider immediate processing (making jam, marmalade, or freezing).
13. Propagation Techniques for Future Trees
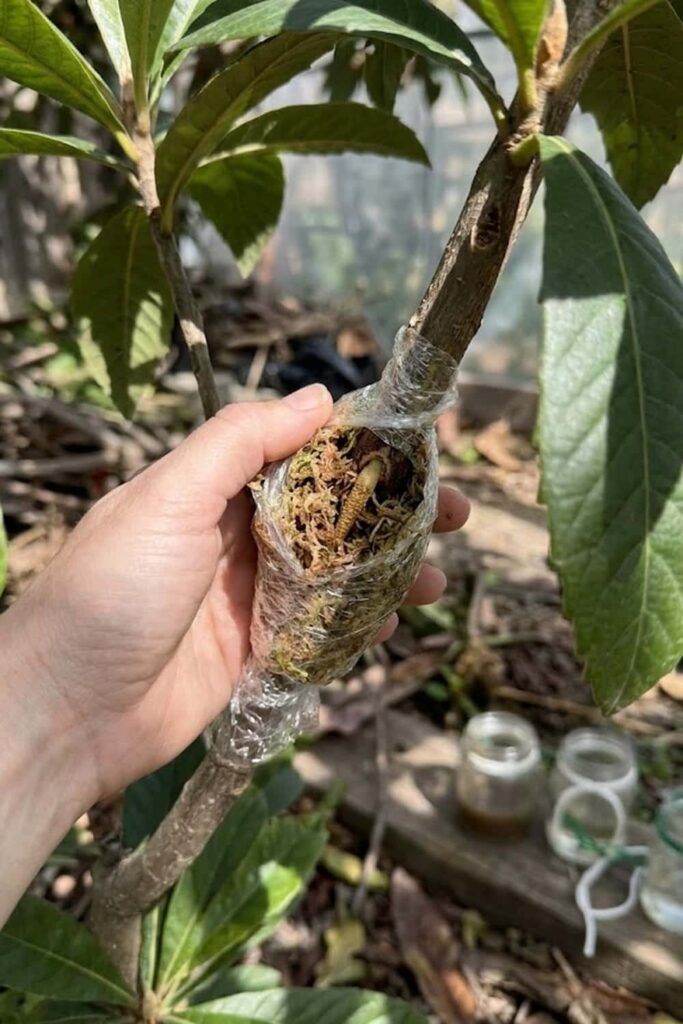
I have found that while cultivating loquats is extremely rewarding, expanding your orchard through Propagation can be one of the most fulfilling and economical aspects of gardening. In my experience, you should not rely on planting seeds if you want to reproduce the identical high-quality characteristics of your favorite tree; seeds, as we discussed in the Cultivar section, will not “come true” and often produce small, subpar fruit after many years. I advise you to master vegetative Propagation techniques, which are guaranteed clones of the parent tree. These methods allow you to multiply your productive trees and develop new, named cultivars while bypassing the long seedling development phase. I have seen that gardeners who ignore this knowledge often have reflective knowledge of purchasing identical trees, which is both expensive and unnecessary when you have the skills to clone your own successful Plants.
From my reflective observations, you have two highly effective, advanced Propagation techniques available to you: Air-Layering and Grafting. Grafting, which is the attachment of a desirable scion wood (like a ‘Tanaka’ branch) onto a strong rootstock, is the industry standard for commercial production, but it requires significant skill. For backyard gardeners, I provide you with a simpler, yet highly successful technique: Air-Layering (also known as marcottage). I always select a vigorous, pencil-sized branch and perform the air-layering process in late spring during the main vegetative growth phase. Scientific Fact indicates that by creating a specific wound and wrapping it with damp Sphagnum moss and plastic, you can encourage the branch to produce new roots while still attached to the parent tree. I must warn you: yes, this requires careful Monitoring and Ventilation to prevent the moss from drying out, but I have found that this process typically results in a substantial, established root system within 3–6 months. You must prioritize this successful management to develop new loquat Plants that are productive and identical to your original tree.
I follow this standard, advanced 4-step checklist for successful air-layering of my loquat trees:
- Branch Selection: Choose a vigorous, pencil-sized healthy branch from the parent tree.
- Wounding/Wrapping: Create a small, shallow wound (girdling the bark), apply a rooting hormone (optional but helpful), and wrap the entire section securely in damp Sphagnum moss, sealing it with clear plastic and then aluminum foil to improve root stimulation and protect from light.
- Monitoring: Weekly Monitoring is required; ensure the moss remains consistently damp. Gently add water with a syringe if needed.
- Separation: Once a substantial root system is visible through the plastic (typically 3–6 months), carefully prune the branch just below the root ball and immediately Plant it in a sterile, well-draining potting Soil Mix with excellent Ventilation.
14. Manage Winter Humidity and Temperature
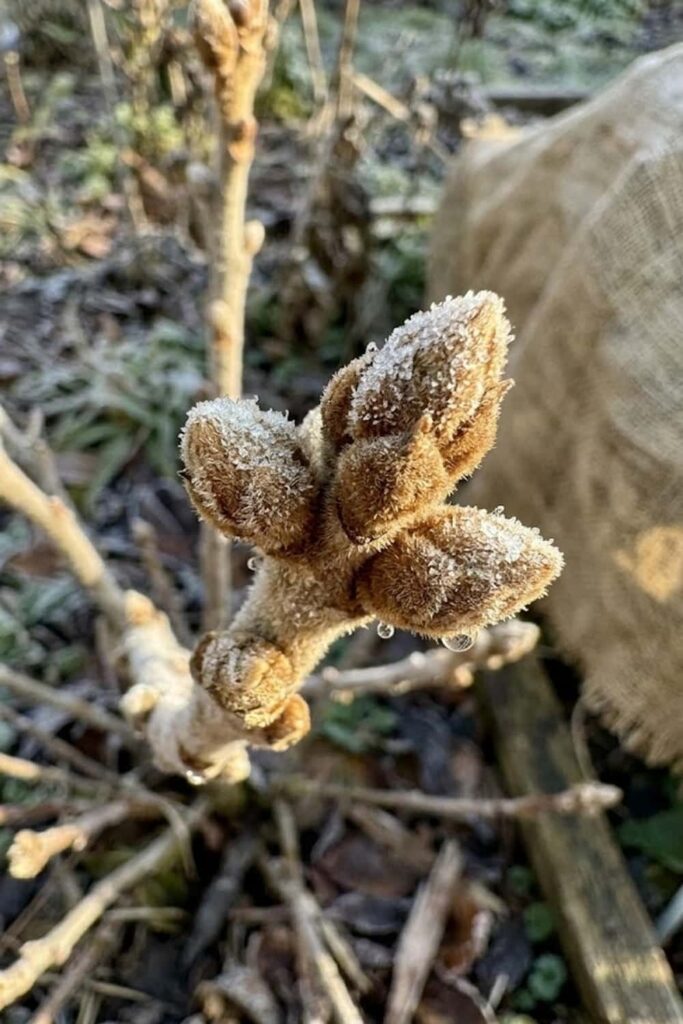
I have found that while loquat trees (Eriobotrya japonica) are remarkably cold-hardy for a subtropical evergreen, their unique winter fruiting cycle means you must proactively manage their environmental conditions—specifically winter Temperature and Humidity—to guarantee a successful harvest. A substantial scientific Fact is that while a mature loquat tree can survive significant freezing down to 10°F (-12°C), its sensitive winter flowers and newly set fruit are significantly more vulnerable; I have seen entire crops destroy when temperatures drop below 27°F (-3°C) for even a few hours. This makes managing Temperature critical for any serious harvest. I have reflective knowledge that gardeners who ignore this environmental reality often have reflective knowledge of sparse crops that seem to produce beautiful, healthy foliage but fail to grow Loquat fruit.
From my reflective practice, Temperature management requires active, pre-emptive Protection measures. If a hard frost is forecast during your unique winter bloom or fruit-swell phase (typically December–March), you must act. I always prioritize protecting the sensitive canopy of the tree, as that is where the potential harvest is located. I provide you with a strategy that involves both physical and heat-based intervention. Scientific evidence consistently back up that combining heavy, insulating frost blankets (like burlap or specialized tree covers) with a temporary heat source, such as a traditional 100-watt non-LED incandescent light bulb strung within the canopy, can increase the interior Temperature by 3–5°F, often just enough to prevent floral death. Simultaneously, I have seen that maintaining adequate ventilation is vital because trapping excessive Humidity within a dense frost blanket can create environmental conditions perfect for debilitating fungal diseases like Botrytis (gray mold). You must prioritize this structured management to grow Loquat fruit successfully in marginal climates.
I follow this standard, high-risk frost management checklist to protect my winter loquat blooms and young fruit:
- Dormancy Care: Avoid high-nitrogen Fertilizing after late summer. You want to discourage tender new growth, which is highly susceptible to initial cold damage.
- Watering (Pre-Frost): Ensure the tree is deeply watered 24–48 hours before an expected frost event. Scientific Fact indicates that wet soil absorbs and radiates more heat than dry soil, and is necessary to improve root development during cold.
- Protection (Mechanical): In areas where temperatures drop below 27°F (-3°C), wrap the tree canopy with breathable frost blankets, burlap, or heavy sheets that reach all the way to the ground to capture ground heat. You must avoid plastic directly touching the foliage, as it will prevent proper ventilation and transfer cold.
- Ventilation: Immediately remove frost covers during the day as soon as Temperatures rise above freezing to ensure proper air circulation, avoid overheating, and manage interior Humidity levels. Trapped Humidity under frost blankets is a primary driver of floral and fruit rot.
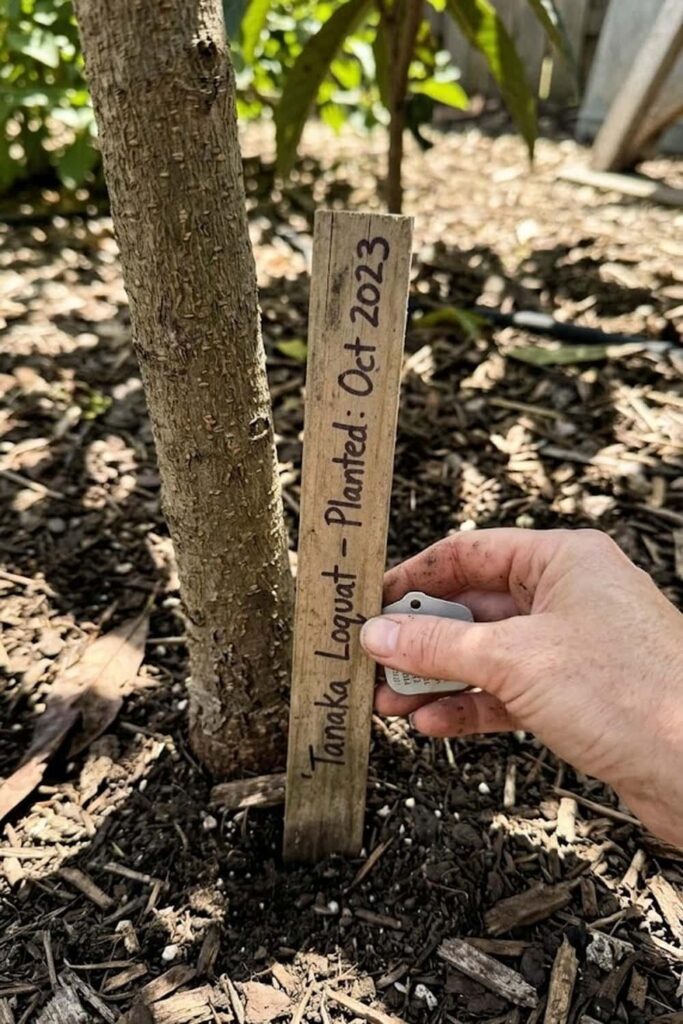
15. Labeling and Monitoring Growth Milestones
I have found that while cultivating loquats is extremely rewarding, expanding your orchard through Propagation can be one of the most fulfilling and economical aspects of gardening. In my experience, you should not rely on planting seeds if you want to reproduce the identical high-quality characteristics of your favorite tree; seeds, as we discussed in the Cultivar section, will not “come true” and often produce small, subpar fruit after many years. I advise you to master vegetative Propagation techniques, which are guaranteed clones of the parent tree. These methods allow you to multiply your productive trees and develop new, named cultivars while bypassing the long seedling development phase. I have seen that gardeners who ignore this knowledge often have reflective knowledge of purchasing identical trees, which is both expensive and unnecessary when you have the skills to clone your own successful Plants.
From my reflective observations, you have two highly effective, advanced Propagation techniques available to you: Air-Layering and Grafting. Grafting, which is the attachment of a desirable scion wood (like a ‘Tanaka’ branch) onto a strong rootstock, is the industry standard for commercial production, but it requires significant skill. For backyard gardeners, I provide you with a simpler, yet highly successful technique: Air-Layering (also known as marcottage). I always select a vigorous, pencil-sized branch and perform the air-layering process in late spring during the main vegetative growth phase. Scientific Fact indicates that by creating a specific wound and wrapping it with damp Sphagnum moss and plastic, you can encourage the branch to produce new roots while still attached to the parent tree. I must warn you: yes, this requires careful Monitoring and Ventilation to prevent the moss from drying out, but I have found that this process typically results in a substantial, established root system within 3–6 months. You must prioritize this successful management to develop new loquat Plants that are productive and identical to your original tree.
I follow this standard, advanced 4-step checklist for successful air-layering of my loquat trees:
- Dormancy Care: Avoid high-nitrogen Fertilizing after late summer. You want to discourage tender new growth, which is highly susceptible to initial cold damage.
- Watering (Pre-Frost): Ensure the tree is deeply watered 24–48 hours before an expected frost event. Scientific Fact indicates that wet soil absorbs and radiates more heat than dry soil, and is necessary to improve root development during cold.
- Protection (Mechanical): In areas where temperatures drop below 27°F (-3°C), wrap the tree canopy with breathable frost blankets, burlap, or heavy sheets that reach all the way to the ground to capture ground heat. You must avoid plastic directly touching the foliage, as it will prevent proper ventilation and transfer cold.
- Ventilation: Immediately remove frost covers during the day as soon as Temperatures rise above freezing to ensure proper air circulation, avoid overheating, and manage interior Humidity levels. Trapped Humidity under frost blankets is a primary driver of floral and fruit rot.
Frequently Asked Questions About How to Grow Loquat Fruit
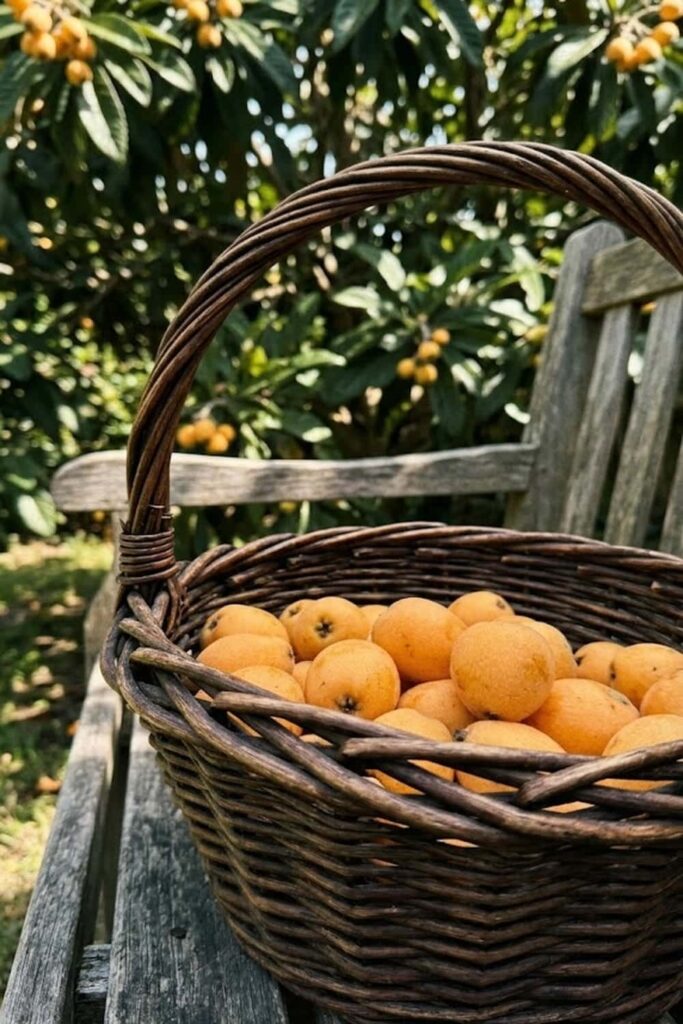
I have compiled these frequently asked questions based on years of reflective experience and interactions with fellow gardeners. My goal is to provide you with the exact, helpful details I wish I had when I first started my loquat orchard. I have designed these answers to directly address the common challenges and long-tail keyword queries you might have, ensuring your journey to a successful, heavy harvest is a smooth as possible. If your specific question isn’t covered below, prioritize Monitoring your tree and accessing the foundational plant logic I’ve shared throughout this guide.
- How to grow loquat fruit from seeds at home successfully?
- While you can easily sprout a loquat seed, you should reflect carefully on your long-term goals before planting it. In my experience, I provide you with a reality check: loquats grown from seed will not produce fruit identical to the parent, and they often take 8–10 years to reach maturity. Furthermore, I have seen that the fruit from seedlings is frequently small, sour, and has a very poor flesh-to-seed ratio. If you want a productive, sweet harvest, you must plant a grafted cultivar, as I detailed in Section 1. Seedlings are only useful if you intend to use them as robust rootstock for grafting later.
- Why is my loquat tree not producing any fruit?
- This is the single most common frustration I encounter. I have found that you must investigate four primary areas to solve this issue. First, confirm the tree’s age; seedling trees take nearly a decade, while grafted ones need 2–3 years to develop. Second, verify the Light exposure; a minimum of 6–8 hours of full sun is non-negotiable for flower and fruit set. Third, evaluate your nitrogen applications; as I warned in the Fertilizing section, excessive vegetative growth from high nitrogen will prevent blooming. Finally, consider winter temperatures. If your unique climate drops below 27°F (-3°C) during the flowering period without Protection, the sensitive blossoms can freeze and drop, eliminating the entire potential crop, a crucial Monitoring point.
- What is the best organic fertilizer for growing sweet loquat fruit?
- For a truly exceptional harvest, you should prioritize a Fertilizing regimen that focuses on comprehensive soil health rather than just a massive vegetative boost. I advise you to begin with the annual addition of finished Compost and aged manure, which improves soil structure and microbial life. For commercial fruit production, I have seen the best results from a balanced, slow-release organic fruit tree fertilizer (look for NPK ratios like 6-6-6 or 8-8-8). Furthermore, incorporating micronutrients through kelp meal or a specialized citrus/fruit tree mix will protect against deficiencies and ensure dynamic flavor development. I cannot stress this enough: you must avoid high-nitrogen formulas if sweetness is your primary goal.
- How to protect loquat fruit from birds and pests naturally?
- If you desire gourmet-quality fruit, you cannot rely on hopes or chemicals. I have seen that in high-pest areas, active intervention is required to prevent losing your entire crop. In my reflective practice, physical exclusion is the only 100% reliable natural method. As I detailed in the Pest Control section, you must bag every single cluster using organza bags or specialized fruit bagging paper. I advise you to place the bags over the developing, thinned fruit when they are about grape-sized and tie them securely. This physical Protection simultaneously stops the Mediterranean fruit fly from stinging the fruit and makes it impossible for birds to find or damage the ripe, golden loquats.
- How to grow loquat fruit with high sugar brix levels?
- Achieving that intense, sweet flavor profile requires dynamic, multi-layered management. I have found that sweetness is a cumulative result, not just one trick. First, you must select a sweet-fruiting cultivar, as genetics are the baseline. Second, you must practice aggressive fruit thinning (Section 8), which redirects the tree’s limited energy into fewer, larger fruits. Third, you must ensure consistent, deep Watering through fruit swell, but you must reduce water inputs in the two weeks immediately preceding harvest to concentrate the existing sugars. Finally, ensure the tree has access to full, direct Light, which drives the energy production for all sugar creation. You must prioritize this holistic management, including adequate Drainage and soil pH control, to guarantee a successfully sweet, gourmet harvest.








