
Set one firm rhizome piece in a 12-inch pot of free-draining mix, hold it at 70 to 80 degrees until sprouts appear in 3 to 8 weeks, move it outdoors once nights stay above 50 degrees, and lift the rhizomes 8 to 10 months later when the leaves yellow. That is how to grow black turmeric (Curcuma aeruginosa) in a temperate climate. One warm season in a pot, one dry winter rest indoors, and a fresh rhizome harvest each autumn.
I have learned to check the botanical name on the label before I buy, because the common name alone does not settle which species is inside. Most rhizomes sold as black turmeric belong to a different species, Curcuma caesia, and the two plants share a warm-season rhythm yet differ underground. This guide names the species every time so you buy, grow, and harvest the right one.
Black turmeric grows from rhizome pieces, much like the common turmeric in the guide to growing turmeric for beginners. The difference sits underground, in the color of the cut rhizome, and in the leaf markings that separate one Curcuma species from another. Learn those two field marks first, and every later step gets easier.
1. Confirm You Are Buying Black Turmeric, Not Kali Haldi
Buy only rhizomes labeled Curcuma aeruginosa. The name black turmeric covers two species, and most sellers use it for the wrong one. Curcuma aeruginosa is the Indonesian temu ireng, also called temu hitam. Curcuma caesia is the Indian kali haldi. A label that says only black turmeric tells you nothing. A label that gives the full botanical name tells you everything.
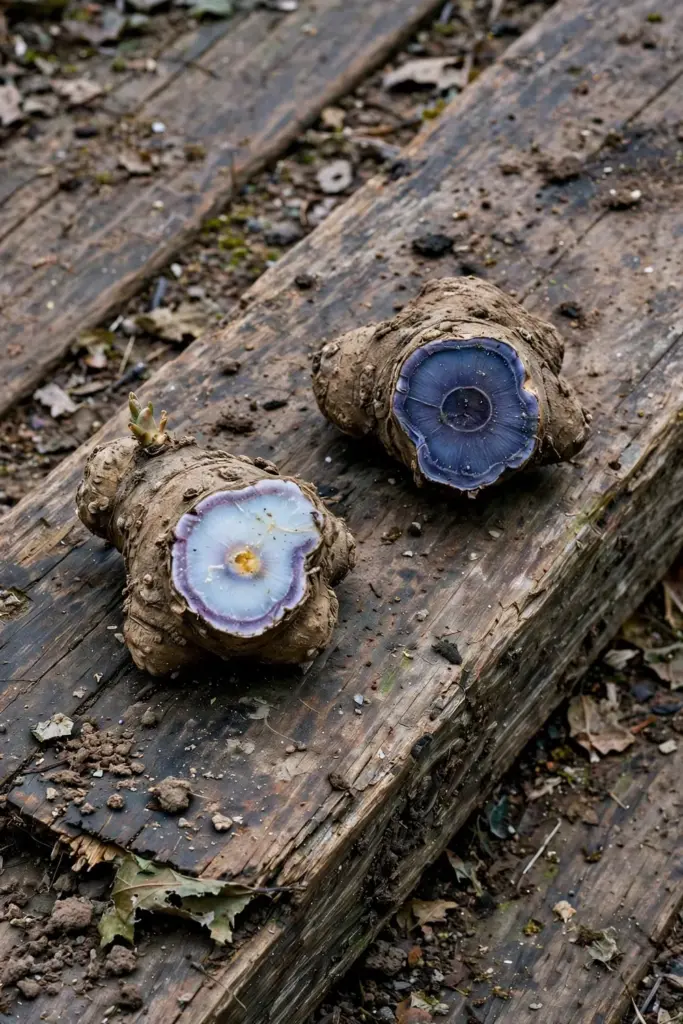
Cut a small branch rhizome and look at the interior. A Malaysian market study that separated the two species records Curcuma aeruginosa with a purplish outer ring and a yellowish core in the main rhizome, and pale blue to blue flesh in the branched rhizomes, with a faint sweet aromatic scent. Curcuma caesia shows pale blue to purple flesh with a yellowish core that grows more intense toward the edge, and a strong aromatic to slightly pungent scent. The color test works only on a fresh cut. Dried slices and powders hide it.
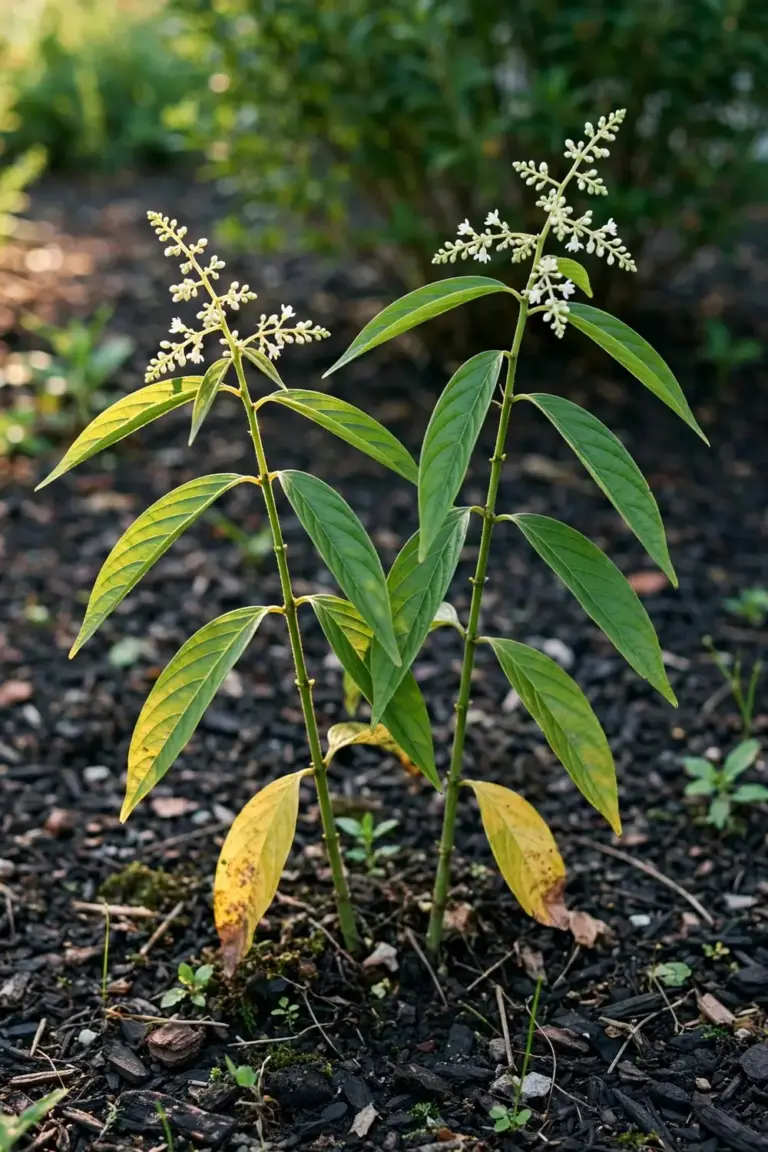
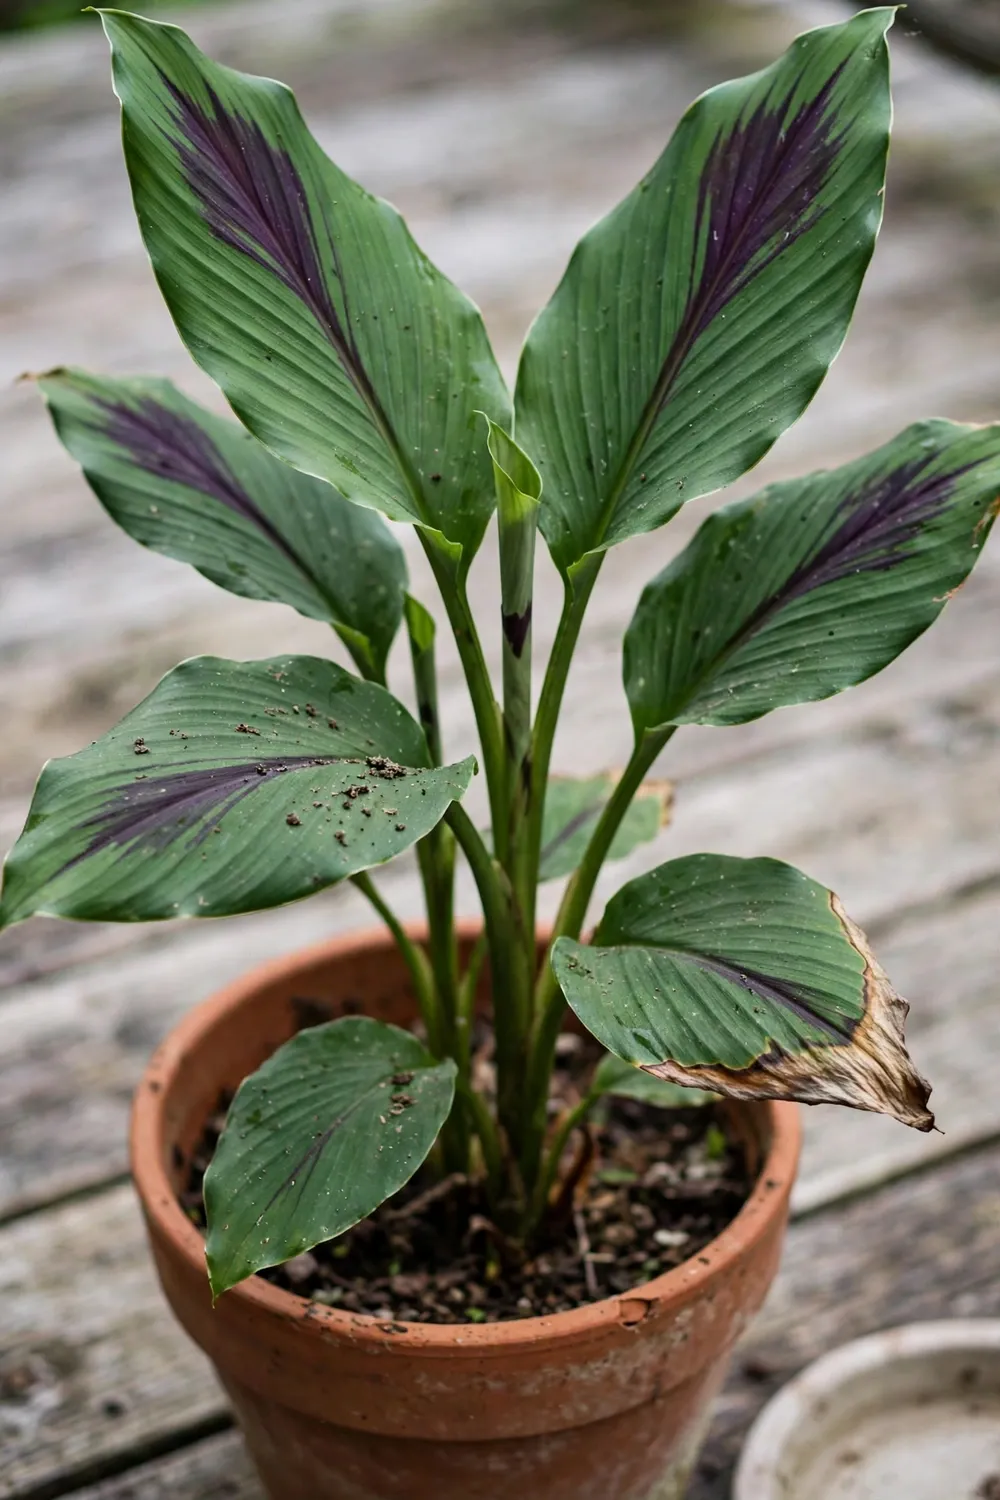
Check the leaves too. Curcuma aeruginosa carries a purple patch along the upper third to half of the leaf blade near the tip, and the patch fades as the leaf matures. Curcuma caesia carries a purple patch over half to three quarters of the leaf length. Curcuma aeruginosa reaches about 1.5 m in the field, while Curcuma caesia reaches about 1 m. Both measurements come from the same market study, and both describe field-grown plants, not pot-grown ones.
The table below compares the four species that share turmeric names.
| Species | Sold As | Rhizome Interior | Leaf Mark |
|---|---|---|---|
| Curcuma aeruginosa | Black turmeric, temu ireng | Pale blue branches, purplish outer ring with yellowish core | Purple patch on the upper third to half of the leaf, fading with age |
| Curcuma caesia | Black turmeric, kali haldi | Pale blue to purple, yellowish core, deeper toward the edge | Purple patch over half to three quarters of the leaf |
| Curcuma longa | Common turmeric, yellow turmeric | Yellow-orange flesh | Plain green leaf, no purple patch |
| Curcuma zedoaria | White turmeric, zedoary | Pale flesh | Purple patch along the midrib in many plants |
If a listing shows no botanical name, skip it. If a seller cannot say which species the rhizome came from, the rhizome is not worth a season of your time. Curcuma aeruginosa produces a branched rhizome with a pale blue interior. Curcuma caesia produces a rhizome with a deeper blue-purple interior. That single color difference decides which plant you grow.
2. Match Black Turmeric to Your Temperate Climate
Grow black turmeric as a container plant that summers outdoors and winters indoors. Curcuma aeruginosa is a tropical perennial. Frost kills the leaves and rots the rhizome in wet soil. A pot lets you move the plant with the season, which is the whole method in a temperate climate.
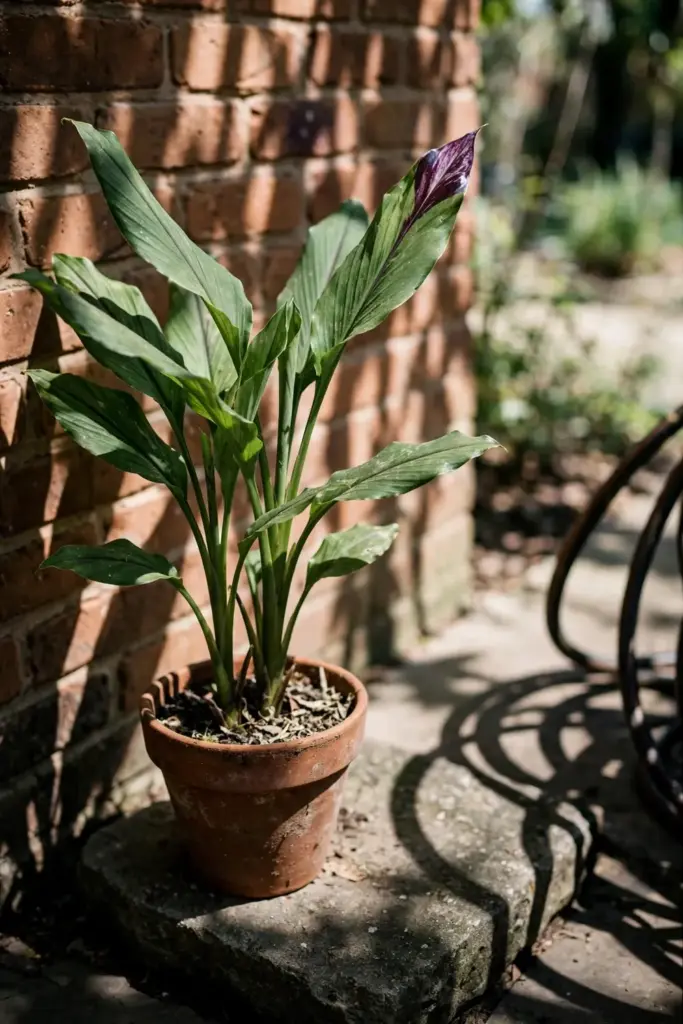
The University of Vermont Extension gives zones 8 to 10 for growing turmeric in containers, with indoor growing for colder zones. That range describes common turmeric, Curcuma longa. No published hardiness trial for Curcuma aeruginosa was found, so this guide treats the turmeric range as the working limit and keeps the plant frost-free everywhere. Data not available means no guess. The pot comes inside before the first frost, in every zone.
Curcuma aeruginosa grows wild across mainland Southeast Asia and the islands. Kew’s Plants of the World Online lists it as native to Bangladesh, Cambodia, Java, Laos, Malaya, Myanmar, Thailand, and Vietnam, and introduced into India. The Indonesian name temu ireng ties the plant to Java, where it grows in warm, wet lowlands. A temperate garden cannot copy that climate. A pot, a heat mat, and a sunny window can copy enough of it for one season.
Like lemongrass grown from seed, black turmeric summers outside and winters on a windowsill. The rhythm is the same. Warmth and water while the leaves stand, dryness and cool rest while they sleep. A short summer still produces a harvest, because the rhizome keeps growing until the leaves yellow, even in a small pot.
Microclimate buys you weeks. A pot against a warm wall that faces the morning sun warms earlier in spring and cools later in autumn than a pot standing in open shade. Cold air pools in low spots, so set the pot on a raised surface rather than in a hollow. These small choices stretch the season without any extra equipment.
3. Choose a 12-Inch Pot and a Free-Draining Mix
Use a pot at least 12 inches across with drainage holes. One rhizome piece per pot gives the branching rhizome room to spread sideways. A pot that is wider than it is deep suits the plant, because Curcuma rhizomes branch outward near the surface rather than driving deep.
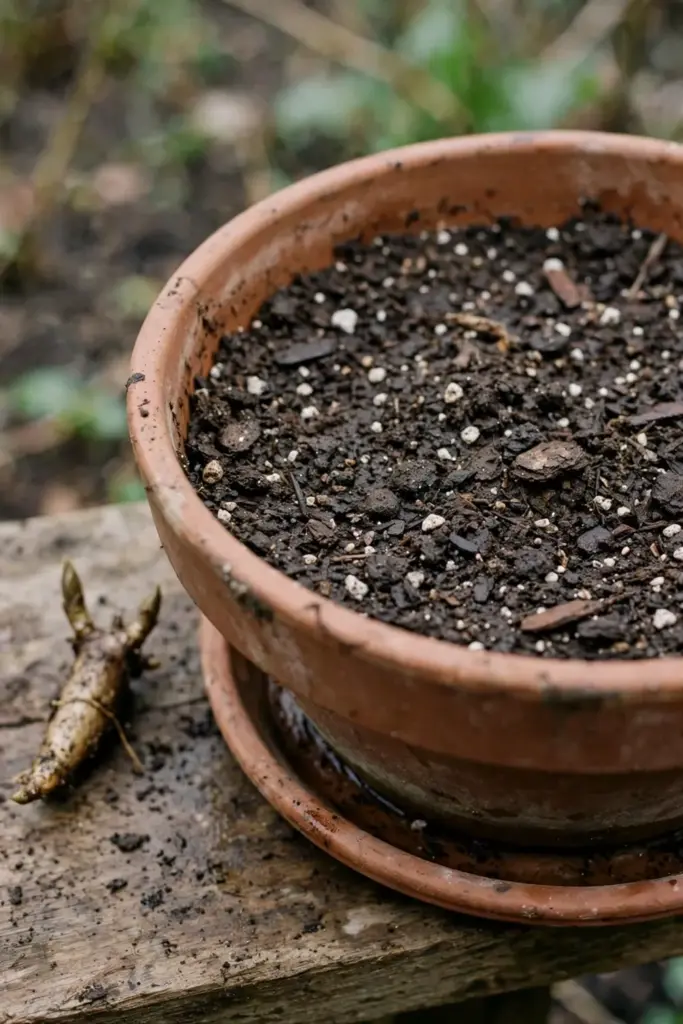
The University of Vermont Extension directs growers to choose a pot at least 12 inches in diameter and fill it with a nutrient-rich soil that drains well. That single sentence carries the two decisions that matter most. Size sets the harvest. Drainage sets survival. A pot without holes, or a mix that stays wet for days, rots the rhizome before it sprouts.
Build the mix from potting soil, compost, and a drainage ingredient such as perlite or coarse bark. The compost feeds the early growth. The perlite keeps air in the mix after watering. A heavy garden soil from the yard compacts in a pot and holds water against the rhizome, so keep it out of the container. A wide pot also suits small spaces, and the creative container garden ideas show how pots turn a balcony or patio into a working herb bed.
No published pH trial for Curcuma aeruginosa was found. Data not available is the honest answer for a species-specific pH target. A free-draining mix matters more than a precise pH reading. If your tap water is very hard, rainwater suits the plant better, because it leaves no mineral crust on the mix.
Raise the pot on feet and empty the saucer after watering. Standing water under the pot defeats the drainage holes. A dark pot warms faster in spring sun, which helps sprouting, but move it out of harsh midday sun once the leaves are up so the mix does not bake.
4. Buy Firm Rhizomes with 2 to 3 Buds Each
Buy firm rhizome pieces, each 2 to 3 inches long with 2 to 3 buds. The University of Vermont Extension describes cutting a firm rhizome into 2 to 3 inch pieces, each carrying at least 2 to 3 buds. The buds are the small pointed eyes where shoots emerge. A piece with no visible buds can still sprout, yet it adds weeks of uncertainty, so choose pieces that already show life.
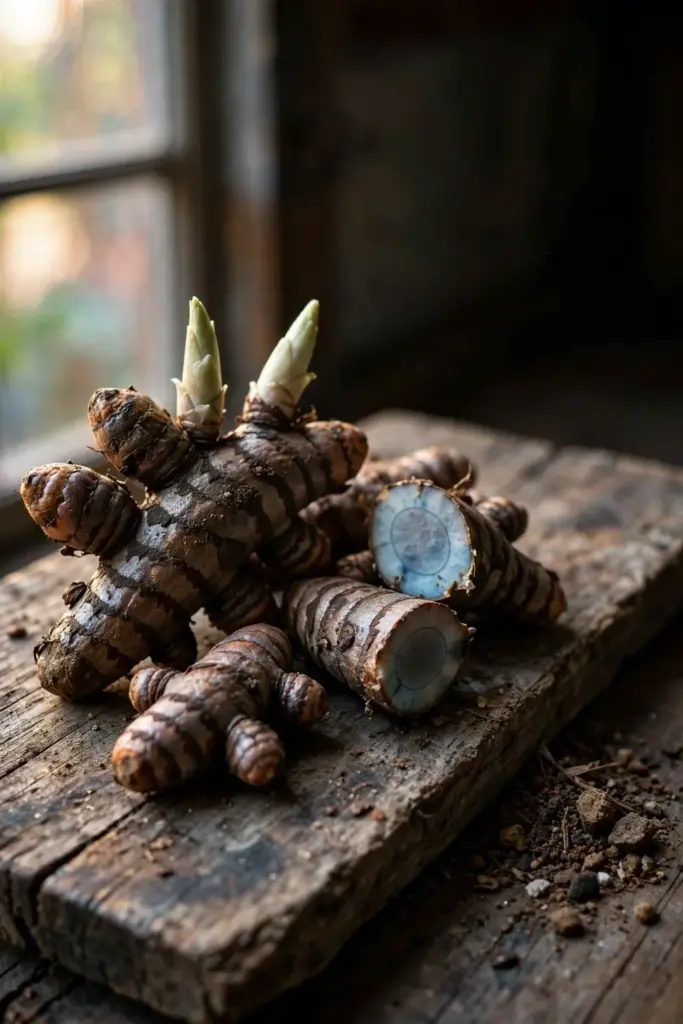
Firmness tells you more than size. A good piece feels heavy and solid, with smooth skin and no soft spots. Reject anything shriveled, moldy, or soft at the cut end. Soft flesh means rot has already started, and rot spreads in a warm pot. The same firmness test works for ginger grown at home, because ginger and turmeric share the rhizome habit.
Cut large rhizomes with a clean knife on the day you plant. Each piece needs at least 2 buds and enough flesh to feed the first flush of leaves. A larger piece carries more stored energy, so it sprouts faster and grows stronger in the first month. Small finger pieces from the edge of a clump work, yet they start slower and need warmer soil to catch up.
Order from a seller who names Curcuma aeruginosa on the label. Ask for a photo of a cut rhizome and a photo of the leaf before you pay. A seller who grows the species will have both. A seller who resells mixed stock will have neither. Store planting rhizomes in a cool, dry, shaded spot until planting day. A paper bag in a dark cupboard beats a sealed plastic bag, because trapped condensation starts rot.
5. Pre-Sprout Rhizomes Indoors at 70 to 80 Degrees
Hold planted pots at 70 to 80 degrees until sprouts show. The University of Vermont Extension puts the pot in a warm location at 70 to 80 degrees, and notes that sprouts take 3 to 8 weeks to appear. Turmeric sprouts later than ginger, so patience matters more here than in most container crops.
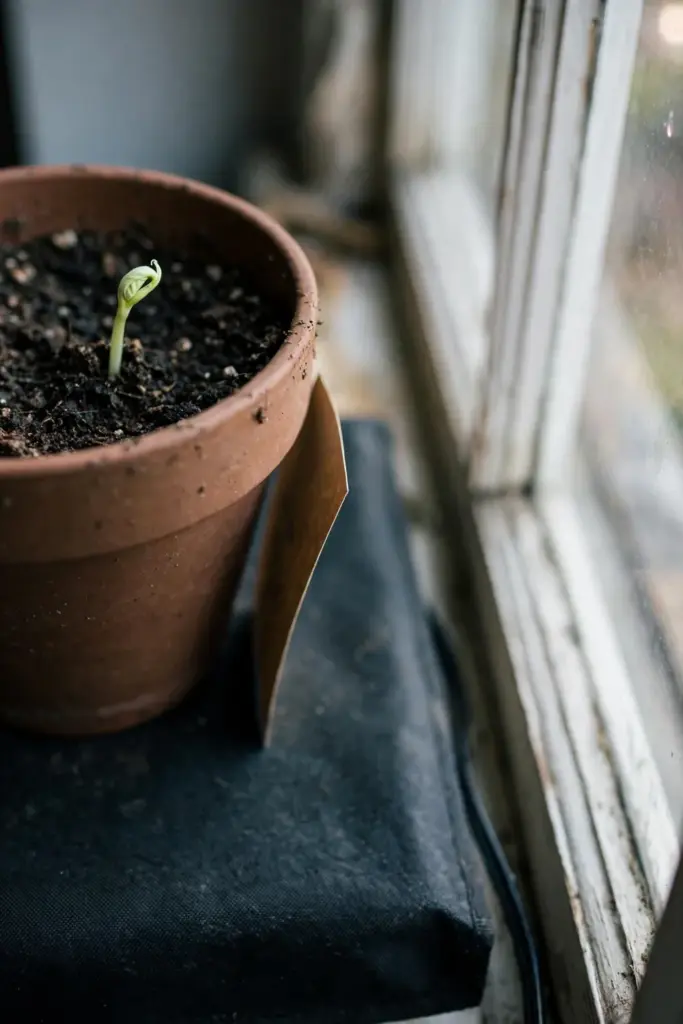
Use a seedling heat mat under the pot if the room runs cool. The University of Vermont Extension advises removing the pot from the heat mat once sprouts appear. Steady bottom heat wakes dormant rhizomes faster than room air alone. A cold pot on a cold windowsill can sit for weeks without a sprout, and the grower blames the rhizome when the temperature was at fault.
Water sparingly until sprouts appear. The University of Vermont Extension keeps the soil moist and never wet, because too much moisture rots the rhizome. A light watering after planting settles the mix around the piece. After that, water only when the top layer dries. The rhizome carries its own stored water, so it needs warmth more than it needs water before sprouting.
Starting 8 weeks before your last frost covers the slow end of the 3 to 8 week range. Sow by that date and the sprouts will be up before the move outdoors. Label each pot with the species name and the planting date. A label costs seconds and prevents the classic mistake of forgetting which pot holds which Curcuma. Move the pot to a sunny window once sprouts appear, and add a grow light if the window stays dim.
6. Plant Rhizomes 2 Inches Deep with Buds Facing Up
Lay each piece horizontally, buds up, under about 2 inches of mix. The University of Vermont Extension sets the rhizome on the surface with the eyes facing up and covers it with about 2 inches of soil. Buds pointing down still sprout, yet the shoot must curve around the rhizome to reach the surface, which wastes stored energy.
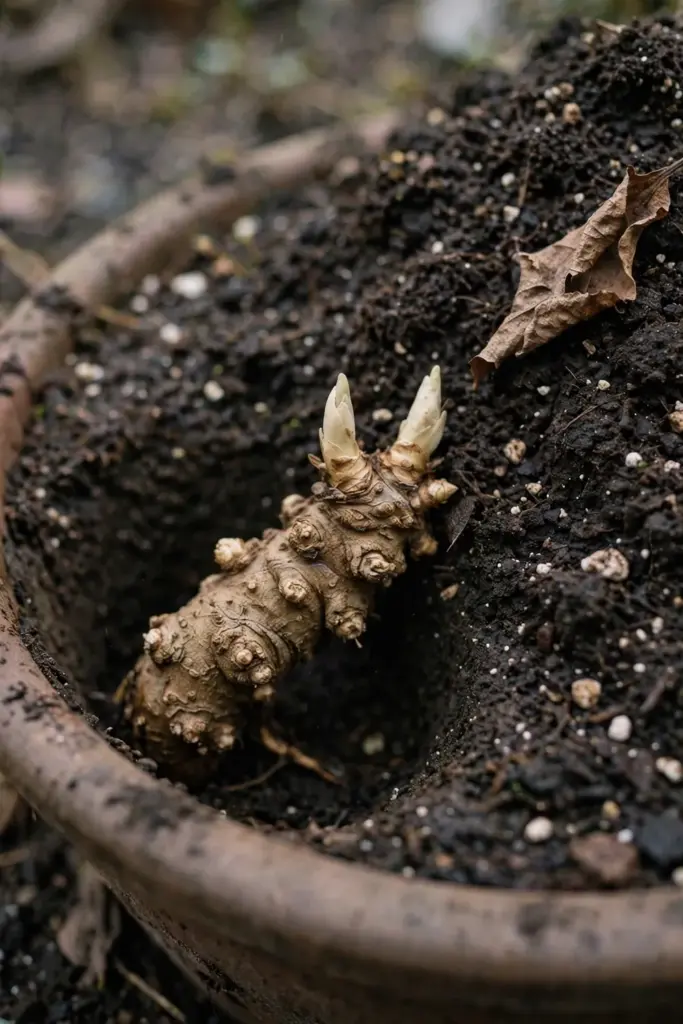
The table below lays out the planting steps in order.
| Step | Action | Time |
|---|---|---|
| 1 | Fill a 12-inch pot with free-draining mix, leaving room for a 2-inch cover | Planting day |
| 2 | Cut firm rhizomes into 2 to 3 inch pieces, each with 2 to 3 buds | Planting day |
| 3 | Lay one piece horizontally on the mix, buds facing up | Planting day |
| 4 | Cover with about 2 inches of mix and press gently | Planting day |
| 5 | Water lightly to settle the mix around the piece | Planting day |
| 6 | Set the pot on a heat mat at 70 to 80 degrees and label it | Until sprouts appear |
Give each piece its own pot in the first season. Sharing a pot saves space, yet the branching rhizomes tangle and the harvest turns into a sorting job. One piece per pot also isolates rot. If one rhizome fails, the rest of the batch keeps growing.
Press the mix gently after covering. Air pockets dry out the buds, and hard packing squeezes out the air the roots need. The right feel is firm enough that the piece stays put when you tip the pot slightly, and loose enough that a finger pushes in with light pressure. Water lightly after planting, then wait. The heat mat does the rest.
7. Move Pots Outdoors After Nights Stay Above 50 Degrees
Move pots out when daytime temperatures reach at least 68 degrees and nights stay above 50 degrees. The University of Vermont Extension sets those two thresholds for moving ginger and turmeric outdoors. A single cold night below 50 degrees will not always kill the plant, yet it stalls growth and invites rot in wet mix, so wait for a steady warm forecast.
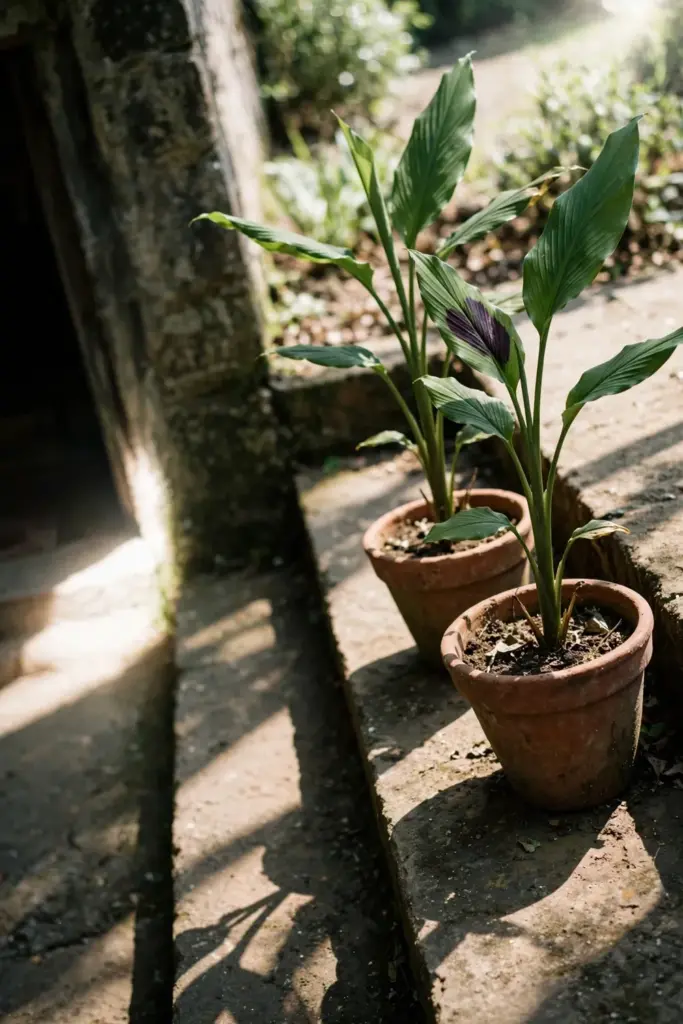
Harden the plant off over several days. The University of Vermont Extension advises introducing the plants to sunlight gradually over several days to avoid burning the foliage. Start with a shaded, sheltered spot for a few hours, then lengthen the stay and the sun exposure. Leaves grown under glass scorch in direct sun, and scorched leaves never recover.
Give the pot bright light with shelter from harsh midday sun. Morning sun with afternoon shade suits black turmeric in most temperate gardens. A spot under light tree cover, or beside a wall that shades the pot after midday, gives the leaves energy without burning their edges. Watch the leaves. Edges that brown and crisp in midsummer signal too much sun. Pale stretched leaves signal too little.
Bring the pot back inside when temperatures drop below 50 degrees. The University of Vermont Extension gives that same threshold for the return trip. Check the forecast in early autumn and act on the first cold warning, not on the first frost. Frost on Curcuma leaves ends the season at once, and a wet autumn pot rots faster than a dry one.
8. Water for Steady Moisture, Never Soggy Soil
Keep the mix moist, never wet. Wet mix rots the rhizome before it sprouts and rots the roots after it leafs out. The University of Vermont Extension repeats the same rule at every stage: water as needed to keep the soil moist, and mist often if the air is dry. Moist means the mix feels like a wrung-out sponge. Wet means water squeezes out when you press it.
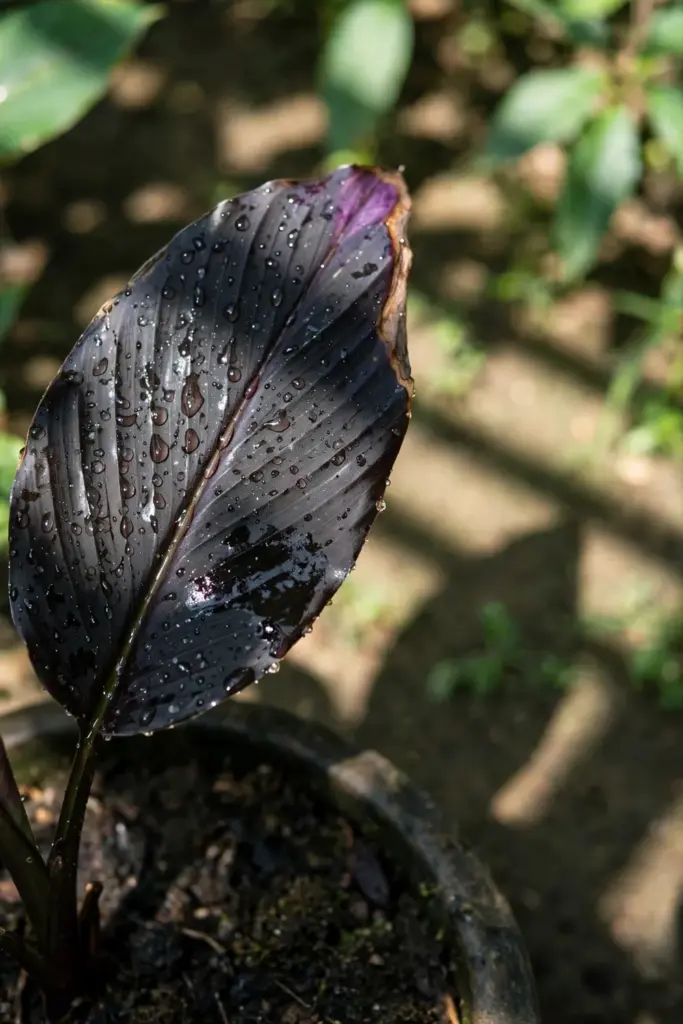
Water when the top layer dries. Push a finger into the mix and feel below the surface. If the top layer feels dry and the mix below still holds moisture, water lightly. If the mix below feels wet, wait. A deep watering that drains freely from the holes beats a daily sprinkle, because it pulls air down into the mix as it drains.
Rain changes the math. A pot left in a week of steady rain stays wet no matter how careful the watering. Move pots under an overhang during wet spells, or tip the saucer and let the pot drain. Pots dry faster than beds, so check them daily in heatwaves. Water in the morning so foliage dries before nightfall, which keeps leaf diseases down.
Cut water hard when the leaves yellow in autumn. The plant is shutting down, and water without leaves has nowhere to go. A dry pot in dormancy is a healthy pot. A wet pot in dormancy is a rotting pot. That single change in autumn saves more rhizomes than any fertilizer.
9. Feed Black Turmeric Lightly Through Summer
Feed lightly through the growing season and stop when the leaves yellow. A nutrient-rich mix at planting carries the early growth, and the rhizome itself stores energy for the first flush of leaves. Heavy early feeding buys nothing. Light feeding through summer supports steady leaf growth. Steady leaves build a steady rhizome.
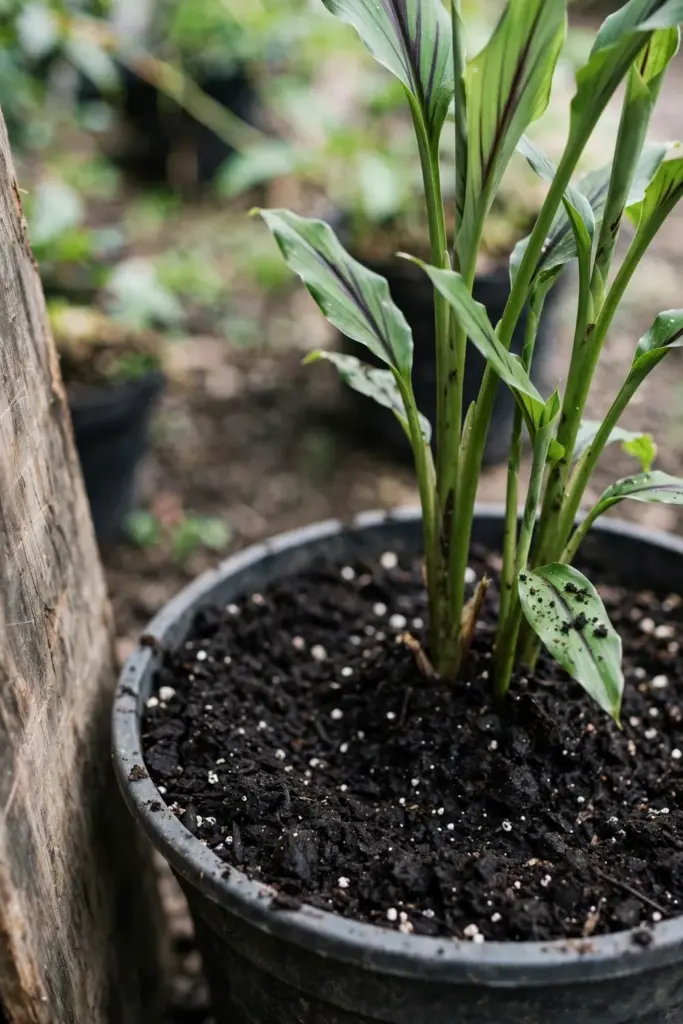
Top up the pot with compost once the leaves stand fully open. A thin layer over the surface feeds the soil as it breaks down, and it holds moisture through hot weeks. A liquid feed mixed at the rate on its own label works too, applied through summer while the plant grows actively. The label rate is the safe rate. Doubling it burns roots and pushes soft growth that the coming dormancy cannot support.
Stop all feeding when the leaves begin to yellow in autumn. Late fertilizer pushes soft leaf growth on a plant that is shutting down. The rhizome needs to harden, not to grow new leaves. A plant fed into autumn enters dormancy weak, and weak rhizomes store poorly through winter.
Pots leach nutrients with every watering, so container plants need steadier feeding than bed plants. A small regular feed beats a rare heavy one. If the leaves stay deep green and the plant keeps adding height, the feeding is right. If the leaves pale while the mix stays moist, a light feed is the first fix to try.
10. Watch for Pests and Rhizome Rot in Pots
Check leaves weekly and rhizomes at planting. Rot from wet mix kills more black turmeric plants than insects do. The weekly check takes a minute. Look under the leaves, look at the soil surface, and look at the stem base where it meets the mix. Early trouble is easy to fix. Late trouble is not.
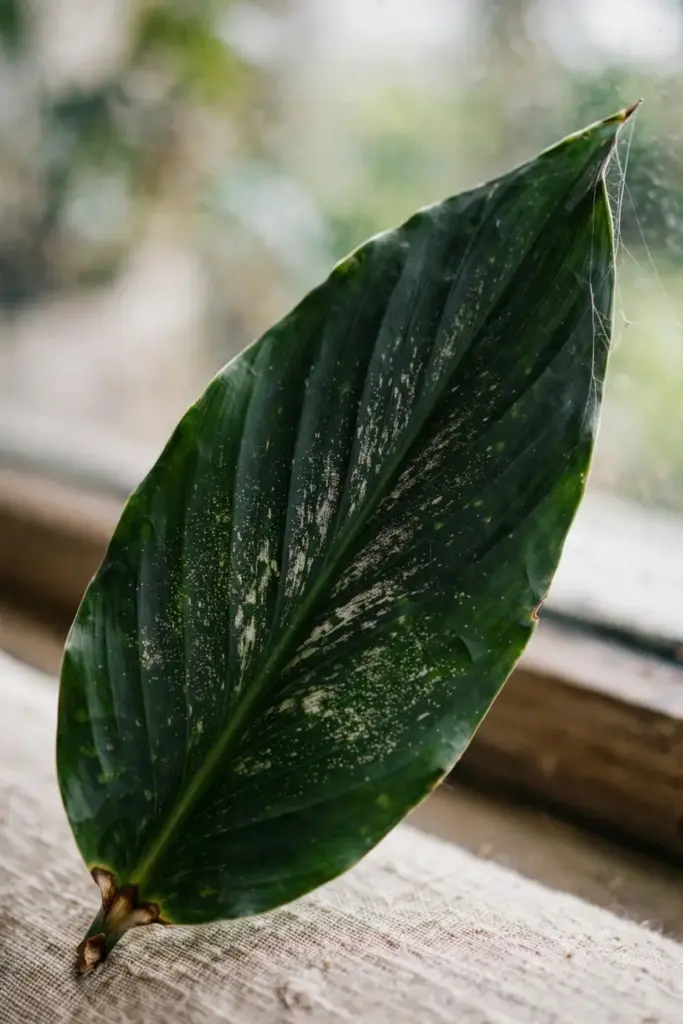
Spider mites favor dry indoor air. The University of Vermont Extension advises misting often if the air is dry, and misting also discourages mites. Fine webs and stippled leaves mark their work. Move the pot to a more humid spot, wipe the leaves with water, and repeat. Fungus gnats mark wet mix. Let the top layer dry between waterings and the gnats lose their breeding ground.
Inspect stored rhizomes for mealybugs. These small waxy insects cluster in the crevices of stored rhizomes and travel with planting stock. Check every piece before planting and before storage. Discard anything soft or moldy rather than planting it beside healthy stock. A clean start beats a rescue.
Cut rot out fast. Lift the plant, shake off the mix, and cut away every soft or darkened section with a clean knife. Let the cut surfaces dry for a day, then replant in fresh mix. Keep the rescued piece warm and barely moist until new growth shows. The plant may recover, and the lesson costs less than a full season.
11. Harvest Black Turmeric at 8 to 10 Months When Leaves Yellow
Lift the whole pot 8 to 10 months after planting, once the foliage has yellowed and dried out. The University of Vermont Extension uses that yellowing as the harvest signal for turmeric, and the same signal works for black turmeric. The leaves have finished feeding the rhizome. Waiting longer adds nothing, and wet autumn soil subtracts plenty.
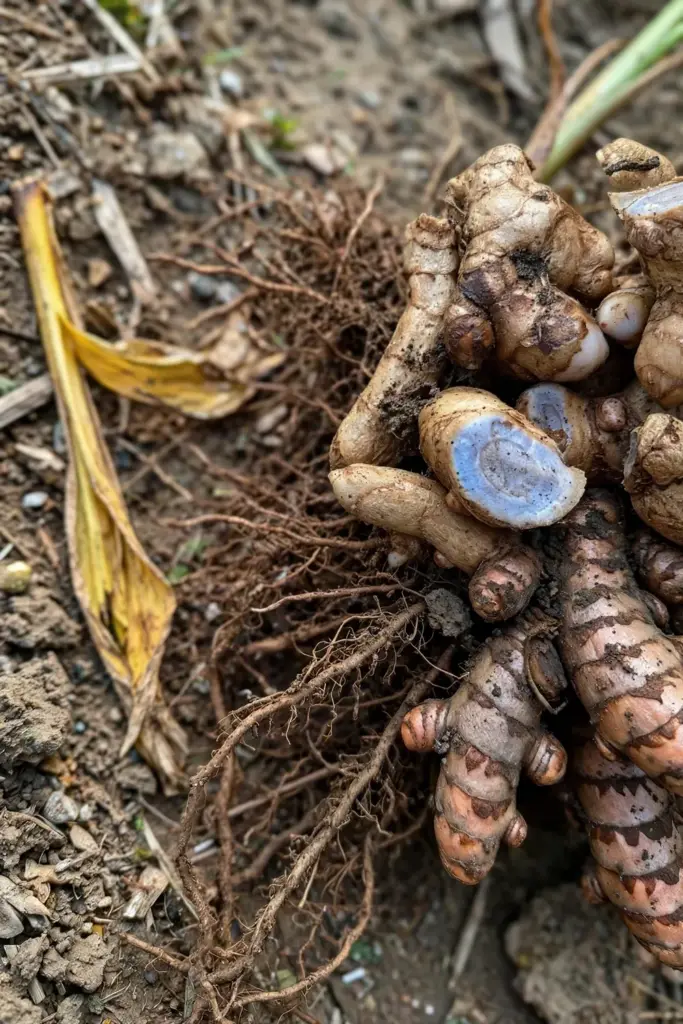
Tip the pot out onto a sheet and work the clump free by hand. Brush the soil away from the rhizomes and cut the stalk off at the crown. Save a piece or two of the firmest rhizomes to replant, following the same 2 to 3 bud rule from planting. Rinse the rest and let it dry before use or storage. The cut interior of a fresh rhizome shows the pale blue flesh that confirms Curcuma aeruginosa.
Handle the harvest like fresh ginger. The rhizome stains hands, boards, and cloth, so wear old gloves for the washing step and wipe boards at once. Slice what you plan to use fresh, and keep the rest whole until needed. Whole rhizomes dry out slower than cut pieces, so they store better.
The University of Vermont Extension stores whole turmeric rhizomes in the refrigerator for up to three months, or cut in pieces in the freezer for up to six months. Those storage windows suit black turmeric too. Label every bag with the species name and the harvest date. An unlabeled rhizome in a freezer becomes a mystery by spring, and a mystery rhizome never gets planted.
12. Store and Replant Rhizomes Through Winter
Keep dormant rhizomes cool and dry indoors through winter. They rest, then sprout again in spring. Dormancy is not death. The leaves die back, the rhizome sleeps, and the plant waits for warmth. A gardener who understands that rest keeps the same stock going for years.
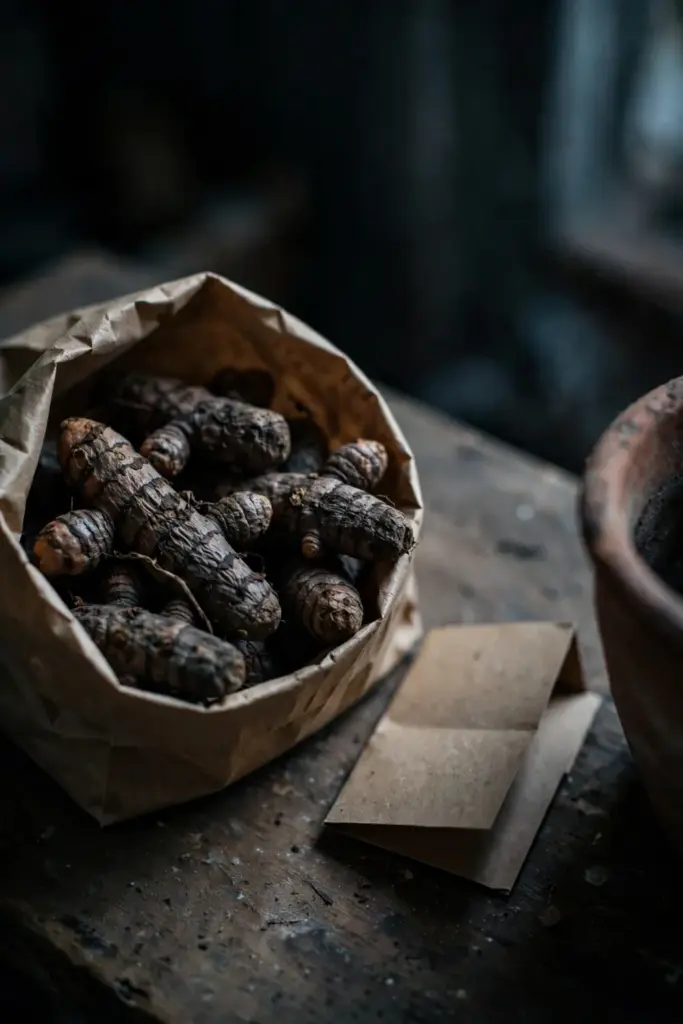
Two storage routes work. Leave the rhizomes in their pot, stop watering, and keep the dry pot in a cool room. Or lift the clump, brush off the mix, and store the rhizomes in a paper bag or a box of dry mix. The dry route suits damp houses, because a pot left in a wet room can rot even without watering. The pot route suits dry houses, because it skips handling and keeps the rhizome undisturbed.
Check stored rhizomes once a month. Look for mold, soft spots, and mealybugs. Discard anything soft or moldy at once, because rot spreads between pieces in storage. A quick monthly check takes less time than one rescue in spring.
Replant in spring on the same cycle. Set the saved pieces in fresh mix, warm them at 70 to 80 degrees, and wait for sprouts. Fresh mix matters. Old mix carries last season’s salts and any pests that settled in the pot. A new season starts with new mix, a clean pot, and a firm piece with buds.
13. Use Black Turmeric as an Ornamental and Kitchen Rhizome
Grow black turmeric for its foliage, its flower spike, and its kitchen rhizome. Treat traditional health uses as background only. What follows is growing information, not medical advice. No dosage and no efficacy promise appears here, because a growing guide is the wrong place for either.
The chemistry differs from common turmeric. A GC-MS study of Curcuma oils from Nepal found curzerenone at 59.6 percent of the Curcuma aeruginosa oil, while common turmeric oil was dominated by turmerones, with ar-turmerone at 25.5 percent. The two species smell different, taste different, and color food differently. Do not swap one for the other in a recipe that expects yellow turmeric color.
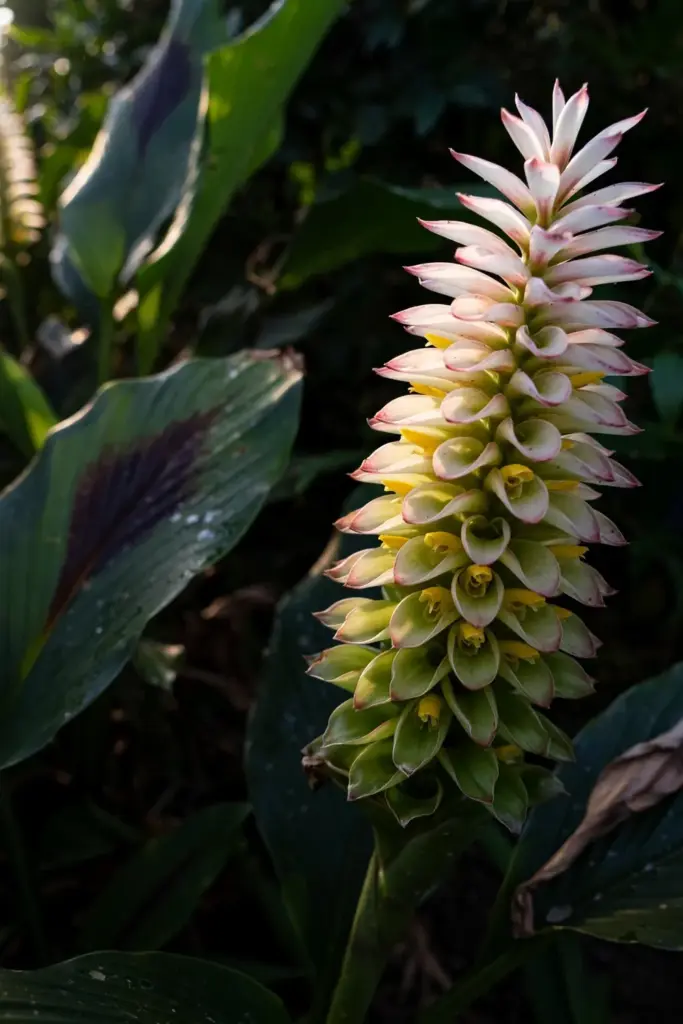
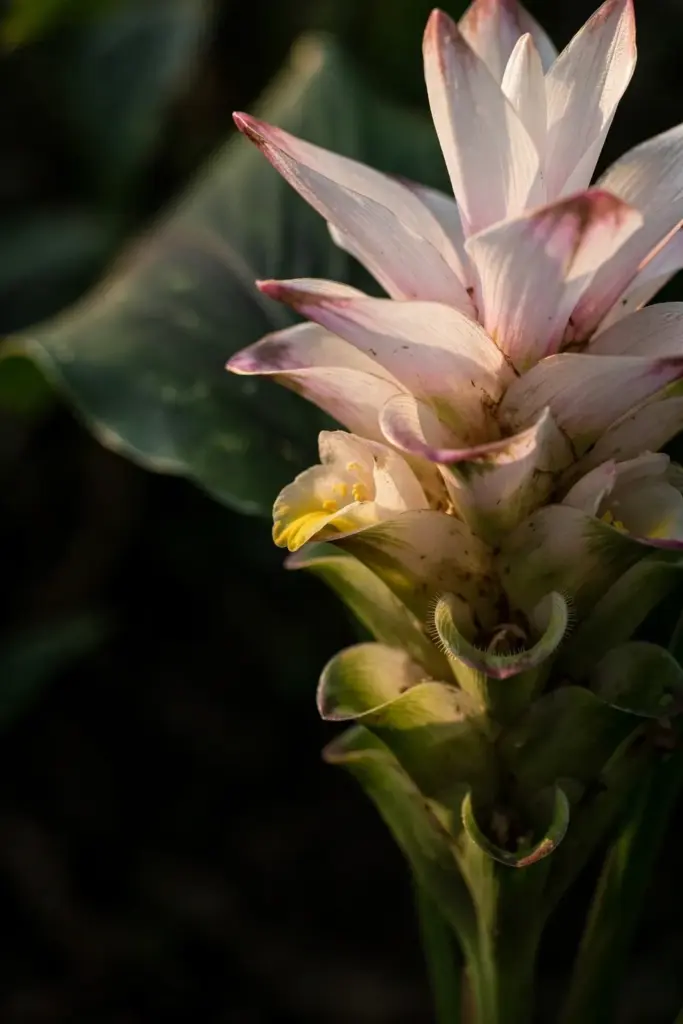
The plant earns its pot on looks alone. The same market study that separated the species records Curcuma aeruginosa reaching about 1.5 m in the field, with broad leaves marked by a fading purple patch. The flower spike rises on its own stalk with the cone-shaped bracts that mark the genus. A pot-grown plant stays smaller, yet the leaves still carry the purple mark that identifies the species.
Use the fresh rhizome as its own ingredient. Grate it into spice pastes, slice it into teas, or pickle it. The flavor runs camphor-like and bitter beside the warm earthiness of common turmeric. Start with a small amount and judge the dish. The rhizome is a seasoning, and seasoning works by balance.
14. Fix 6 Common Black Turmeric Failures
Most failures trace to cold, wet mix, or the wrong species. Each fix below names the cause first, because the same symptom can come from two causes and the fixes differ.
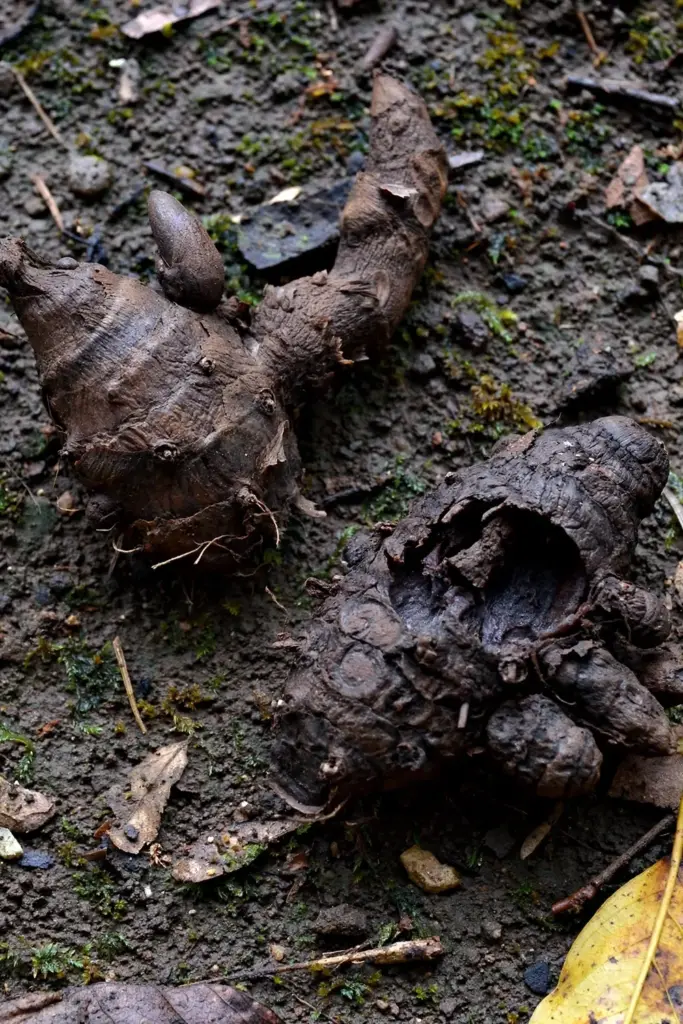
No sprouts after 8 weeks usually means cold soil. Move the pot onto a heat mat at 70 to 80 degrees and check that the mix is moist, not wet. A rhizome in cold wet mix sits dormant while rot moves in. Warmth and light moisture wake it. If the piece feels soft when you check, it has rotted, and no amount of heat will save it.
A mushy rhizome means wet mix. Lift the plant, cut away every soft section, let the cuts dry for a day, and replant in fresh free-draining mix. Then water less. A pot that stays wet for days after watering needs a lighter mix, not a new plant.
Leggy pale leaves mean low light. Move the pot to a brighter window or add a grow light. Leaves grown in dim rooms stretch toward the light and never thicken. New growth after the move comes in shorter and greener, which tells you the fix worked.
Leaf edges that brown and crisp mean too much sun. Move the pot into morning sun with afternoon shade. Scorched edges never heal, yet the plant recovers once the new leaves open in gentler light. That is how to grow black turmeric on a hot balcony: sun in the morning, shade after midday.
A small harvest after a full season usually means a late start. Starting indoors 8 weeks before the last frost gives the plant the longest possible season. A plant set out in midsummer still grows, yet it misses the weeks that build rhizome weight.
A cut rhizome that shows deep orange flesh means the wrong species. The plant in the pot is common turmeric, not black turmeric. The growing method still works, and the harvest still seasons food, yet the plant is not Curcuma aeruginosa. Order again from a seller who names the species on the label.
15. Answer 6 Black Turmeric Questions Before You Plant (FAQ)
No. Kali haldi is Curcuma caesia, an Indian species with a deep blue-purple rhizome interior. Black turmeric here means Curcuma aeruginosa, the Indonesian temu ireng, with pale blue branch rhizomes and a purplish outer ring around a yellowish core. The two species share a common name and a warm-season growing rhythm. They differ underground, in leaf markings, and in chemistry. Always check the botanical name before you buy.
Only if the rhizome is labeled Curcuma aeruginosa and shows firm flesh with live buds. Most grocery rhizomes sold as turmeric are common turmeric, Curcuma longa, with orange flesh. Some are mislabeled entirely. A nursery or specialist seller who names the species on the label gives you a far better start. Ask for a photo of a cut rhizome and a photo of the leaf before you pay.
Plan on 8 to 10 months from planting to harvest. Sprouts take 3 to 8 weeks to appear indoors at 70 to 80 degrees. The plant then grows through summer outdoors and finishes when the leaves yellow in autumn. That yellowing is the harvest signal. Lift the whole pot, brush the soil away, and save a firm piece with buds for next season. A late start shortens the season and shrinks the harvest.
No. Bring the pot inside before temperatures drop below 50 degrees. Frost kills the leaves, and wet winter soil rots the rhizome. Keep dormant rhizomes cool and dry indoors through winter, either in their dry pot or lifted and stored in a paper bag. Check stored pieces monthly for mold and mealybugs. Replant in fresh mix in spring, once warm weather returns and the heat mat is running again.
Black turmeric wants bright light with shelter from harsh midday sun. Morning sun with afternoon shade suits it in most temperate gardens. Indoors, a sunny window works, and a grow light helps in dim rooms. Leaves that scorch at the edges get too much direct sun, while pale stretched leaves get too little. Move the pot until the new growth comes in deep green and compact, which shows the light is right.
Use it as its own rhizome, not as a yellow turmeric substitute. Curcuma aeruginosa oil is dominated by curzerenone, while common turmeric oil is dominated by turmerones, so the flavor, aroma, and color differ. The fresh rhizome seasons spice pastes and teas with a camphor-like bitter note. This guide gives growing information only, with no dosage and no health promise. Start with a small amount and judge the dish.
16. Save One Rhizome and Grow It Again Next Year
Save one firm rhizome piece with buds at every harvest. That piece is next season. Label it with the species name Curcuma aeruginosa and the harvest date, then store it cool and dry through winter. A labeled piece gets planted. An unlabeled piece gets forgotten.
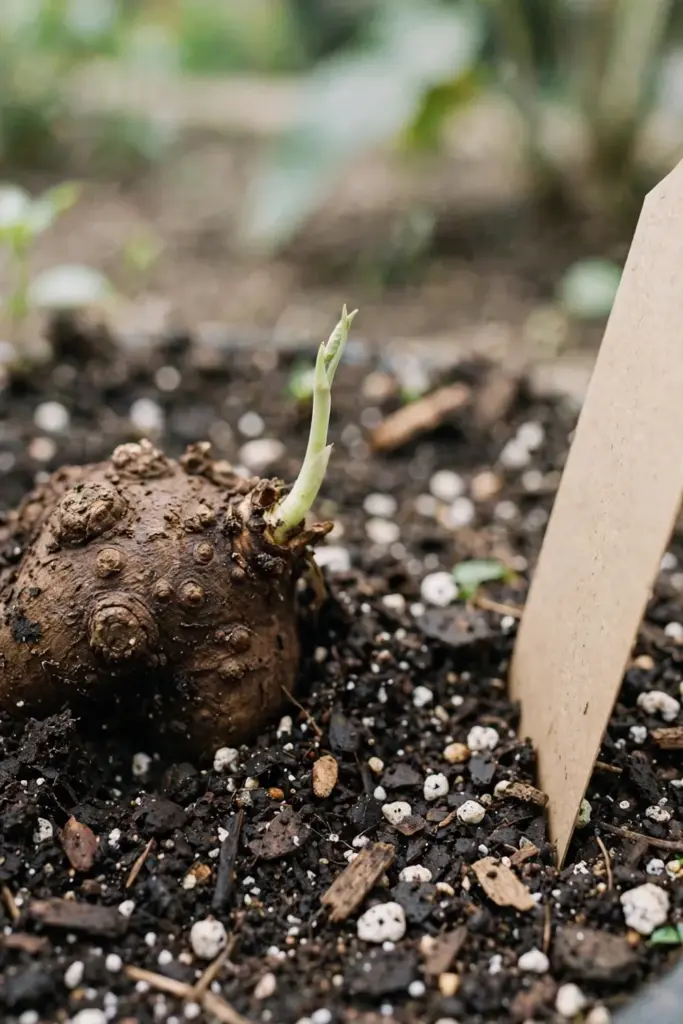
Start again in spring on the same cycle. Fresh mix, a 12-inch pot, warmth at 70 to 80 degrees, and patience through the 3 to 8 weeks of sprouting. That is how to grow black turmeric year after year from one purchase. The first season teaches the rhythm. Every season after that runs on the same simple loop: warm start, summer outdoors, autumn harvest, dry winter rest.