
A spooky garden does not need a truckload of store-bought props. Most halloween garden ideas worth copying start with what the fall garden already produces: pumpkins, gourds, dried seed heads, cornstalks, and dark-leaved plants. This list gathers 150 of them, grouped into 13 clusters so you can pick one theme and finish a whole display in a single weekend.
Start where visitors actually look. The front walk, the porch, and the biggest tree in the yard carry almost the whole show, so the pumpkin, lighting, and graveyard ideas sit early in the list. If the beds themselves still need attention before you decorate, work through the fall gardening tips first, then come back and build on clean edges and rested soil.
I have learned that the houses people remember in November did one theme completely instead of trying a little of everything. Pick one cluster below, repeat it three times across the yard, and add light after dark. Repetition is what turns scattered props into a scene.
| Cluster | Ideas | Best First Move |
|---|---|---|
| Pumpkins & Gourds: Display & Carving | 1-20 | The three-pumpkin topiary by the steps (Idea 1) |
| Gothic Plants: Black, Purple & Blood-Red | 21-35 | Black mondo grass along the darkest bed edge (Idea 21) |
| Containers & Planters | 36-47 | Mums planted inside a hollowed pumpkin (Idea 38) |
| Graveyard & Front-Yard Haunts | 48-60 | A foam tombstone graveyard in the side yard (Idea 48) |
| Lighting After Dark | 61-75 | Solar pumpkin lanterns down the driveway (Idea 61) |
| Porch & Front Door | 76-85 | Cornstalk bundles framing the door (Idea 78) |
| DIY Crafts From the Garden | 86-100 | Scarecrows built from old clothes and straw (Idea 89) |
| Kid-Friendly, Not Too Scary | 101-110 | Painted pumpkins instead of carved ones (Idea 101) |
| Party & Table | 111-120 | Mini pumpkins as place card holders (Idea 112) |
| The Fall Garden Itself | 121-130 | Garlic planted now for next summer (Idea 123) |
| Paths & Walkways | 131-138 | Paper bag luminaries along the path (Idea 131) |
| Fast & Budget | 139-145 | Everything you own, clustered at the door (Idea 141) |
| After Halloween | 146-150 | Every pumpkin into the compost (Idea 146) |
Pumpkins & Gourds: Display & Carving
1. Stack a Three-Pumpkin Topiary by the Front Steps
Stack three graduated pumpkins into a topiary beside the front steps. The whole build takes ten minutes. A tall, tapered silhouette fills a bare corner with no extra structure behind it, and the finished stack looks deliberate from the street and from the porch. That is why it ranks among the most photographed halloween garden ideas.
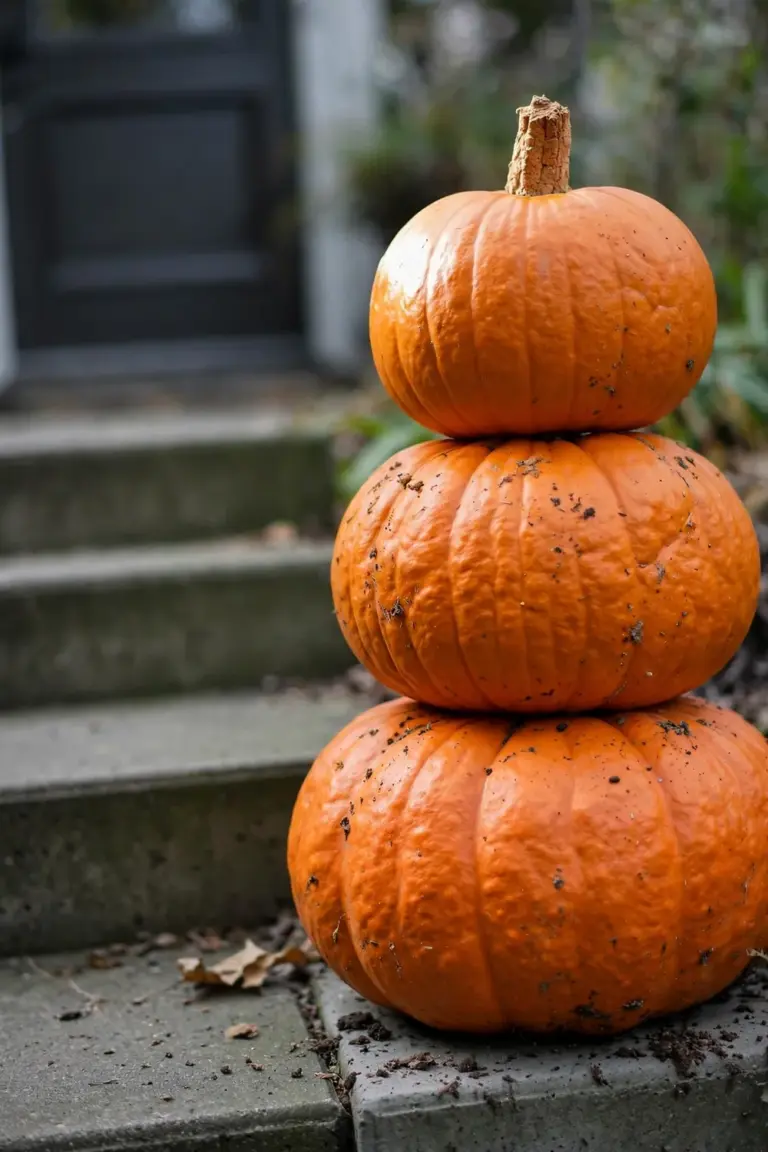
Pick three pumpkins in descending sizes. Large, medium, small. Stack them largest to smallest on the ground, then push a 60-centimeter wooden dowel down through all three fruits to lock the tower together. The dowel does the holding. Trim it flush with the top stem and the support disappears.
2. Carve a Classic Jack-o’-Lantern With a Serrated Kitchen Knife
A serrated kitchen knife beats a specialty carving kit for most beginners. The saw teeth bite thick rinds and slip less, so lines stay cleaner and hands stay safer. Keep the design simple. Bold triangle eyes and a jagged grin read clearly from the sidewalk after dark. Fussy detail does not.
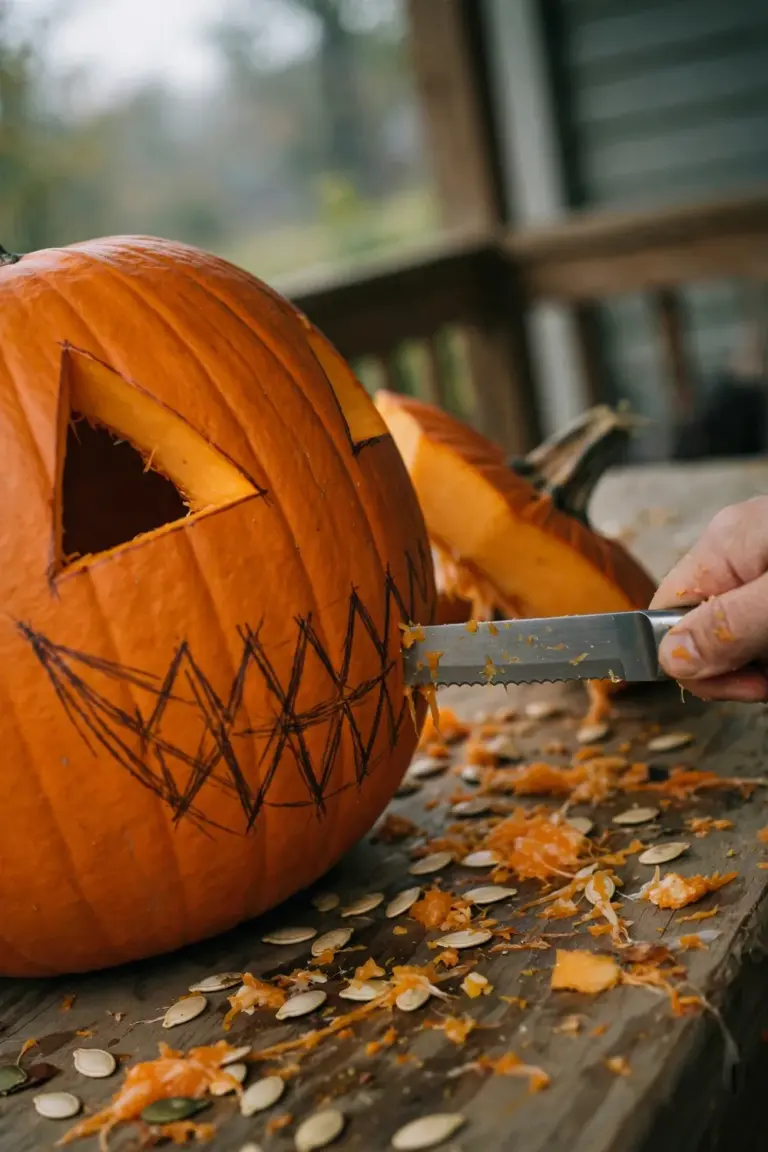
Cut the lid at a slight angle. It seats itself afterward and never drops in. Scoop the interior until the walls measure about 2 centimeters thick, sketch the face in marker, then saw with short strokes and let the blade do the work. Park the finished lantern in shade. A carved pumpkin holds its detail for five to seven days in cool weather.
3. Try a Warty ‘Knucklehead’ Pumpkin for Instant Creep Factor
The green warts on a ‘Knucklehead’ pumpkin do the creeping for you. No carving. The hybrid grows its rough skin on its own as the fruit matures, so every pumpkin carries a different pattern, and the bumps throw light and shadow in ways a smooth rind never manages. Gardeners who dislike power tools get the full drama from an uncarved fruit.
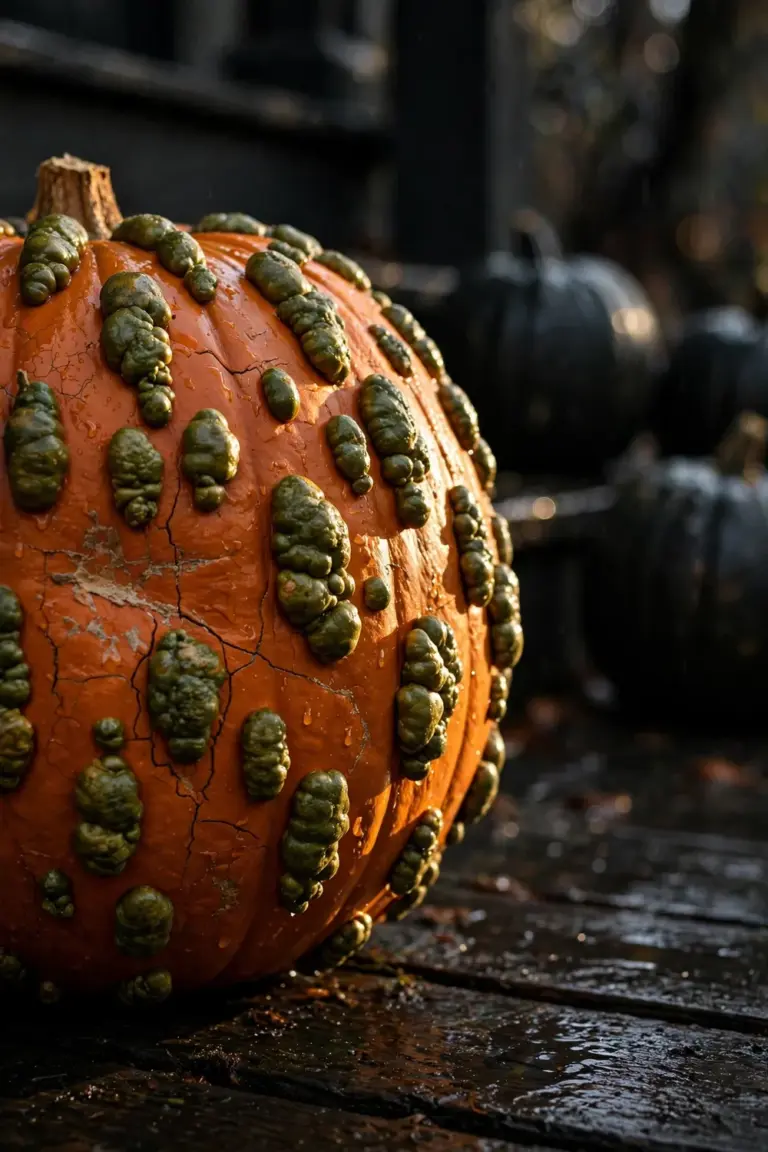
Buy the fruit at a farm stand, or grow the seed like any pumpkin. The vines need about 1 meter of spacing. Harvest when the rind resists a thumbnail press and the stem turns corky, then set the pumpkin on a dark porch where the green bumps stand out against orange skin. The thick rind stores for ten to twelve weeks indoors.
4. Line the Walkway With Mini Pumpkins and Tea Lights
Small pumpkins alternating with tea lights turn a plain walkway into a glowing guide for trick-or-treaters. The light stays low. Nobody walks into a floodlight glare, guests stay on the path, and feet stay out of the flower beds. Mini pumpkins cost little and weigh almost nothing, so kids can carry and place them.
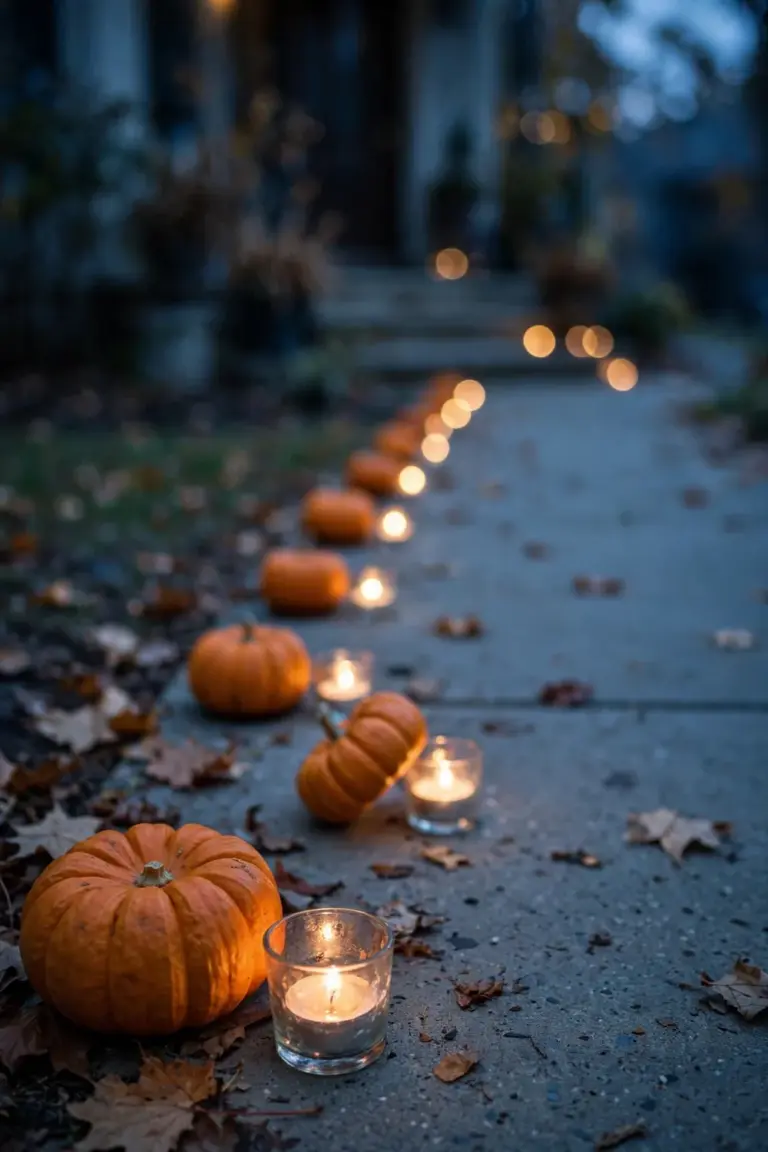
Set one mini pumpkin every 60 centimeters along both edges of the walk. Tuck a battery tea light beside each fruit. Skip real candles on a path children crowd. Choose fruits with flat bottoms so the line stays straight through the evening, and expect twelve to sixteen mini pumpkins to cover a standard suburban walkway. After the season, compost the soft ones.
5. Build a Pumpkin Arch Over the Garden Gate
A curved arch of pumpkins over the garden gate builds the entrance guests remember. It frames every arrival photo. The overhead row also announces that the whole yard joined the celebration, not just the porch. Use foam or hollowed pumpkins so the structure stays light enough for a simple wire frame, and tuck greenery between the fruits to hide every fastener.
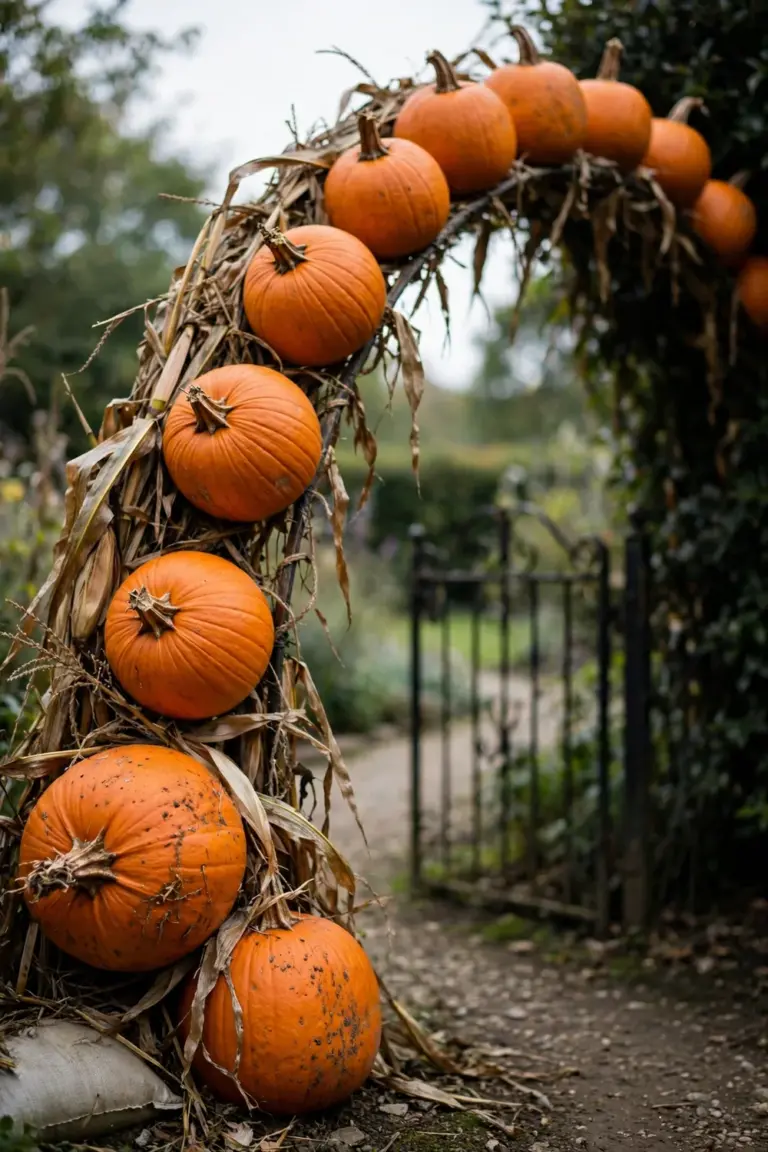
Bend a half-circle of 10-millimeter rebar, or curve a wire tomato cage, into the arch. Wire twelve to fifteen medium pumpkins along the frame with the stems facing out. Anchor the base with sandbags; wind finds arches fast. Weave dried corn stalks between the fruits to fill the gaps, then check every tie after the first storm.
6. Carve a Silhouette Scene Instead of a Face
Carve a moonlit scene instead of a face. The pumpkin stops traffic. Silhouettes of bats, a haunted house, or a bare tree read cleanly once the candle glows behind them, and the technique uses the same cuts as face carving, arranged as a landscape. A scene also hides uneven knife work. A symmetrical face never does.
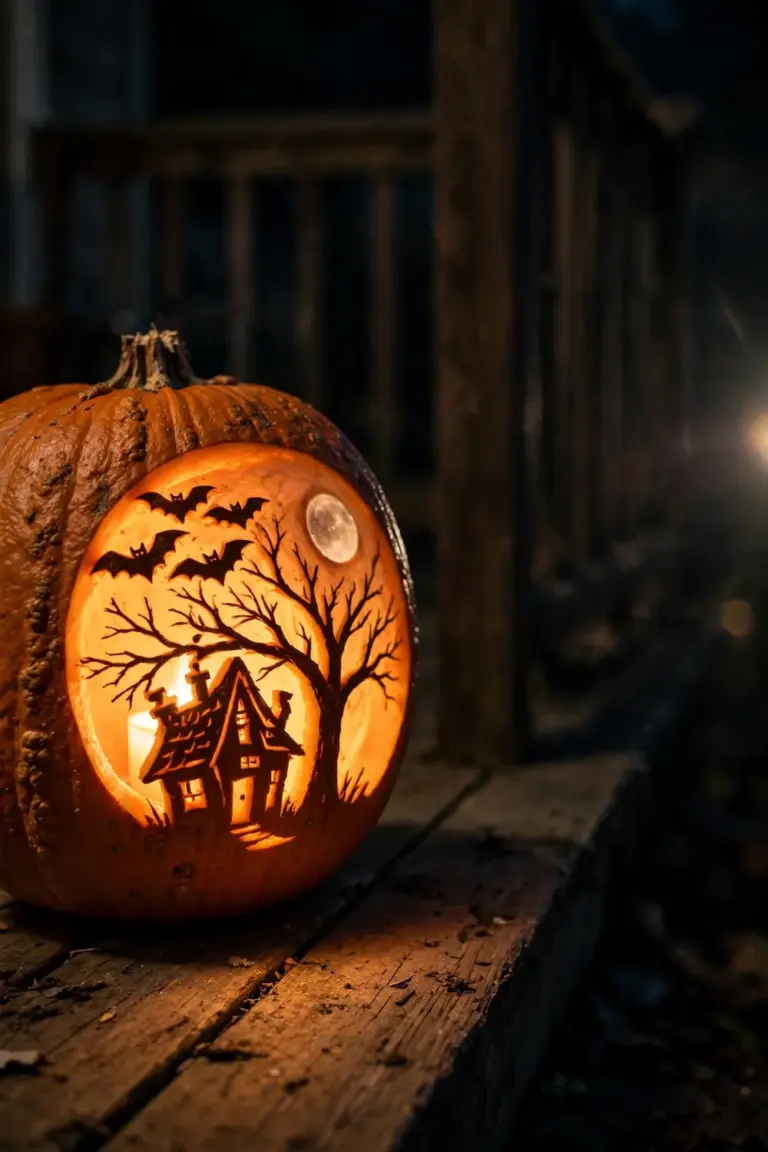
Pick a pumpkin with a tall, smooth face. More canvas. Sketch the scene in marker, cut the sky areas completely through, and shave the moon thin instead of cutting it out. Thin the shaved areas to 5 millimeters so light glows through the flesh and the wall still holds. Set the lantern 3 meters back from the walkway so the whole scene reads at once.
7. Grow Your Own Jack-o’-Lanterns Starting in Early Summer
Grow your own carving pumpkins and the size and shape stop being a store-bin lottery. The vines sprawl hard. Kids watch green fruits swell through August, and a jack-o’-lantern you raised from seed carries a story no purchased fruit has. The patch also yields more pumpkins per dollar than any farm stand.
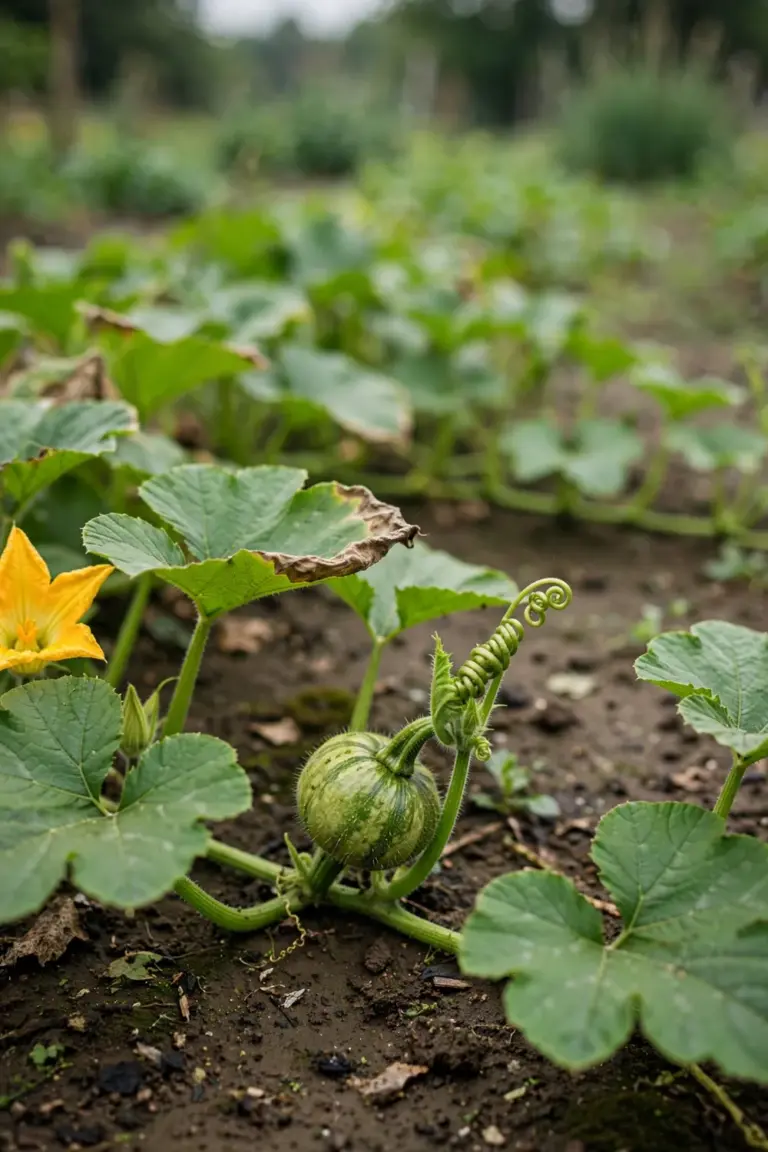
Sow seeds directly outdoors two weeks after the last frost date. Give each hill 2 meters of space and water deeply once a week, then side-dress with compost when the first flowers open. Carving varieties need 90 to 100 days to mature, so an early-summer sowing ripens on schedule. Harvest with 5 centimeters of stem attached for longer storage. The University of Georgia Extension counts 80 to 100 days from sowing to mature fruit for standard carving pumpkins, which is why early summer is the honest start line.
8. Paint Pumpkins Matte Black for a Gothic Look
One coat of matte black paint turns an ordinary orange pumpkin into a gothic sculpture. The flat finish swallows light. Neighboring orange pumpkins look brighter against it, and a row of black fruit along a dark porch builds real drama after sunset. Painting also rescues blemished or lopsided pumpkins that would embarrass a carver.
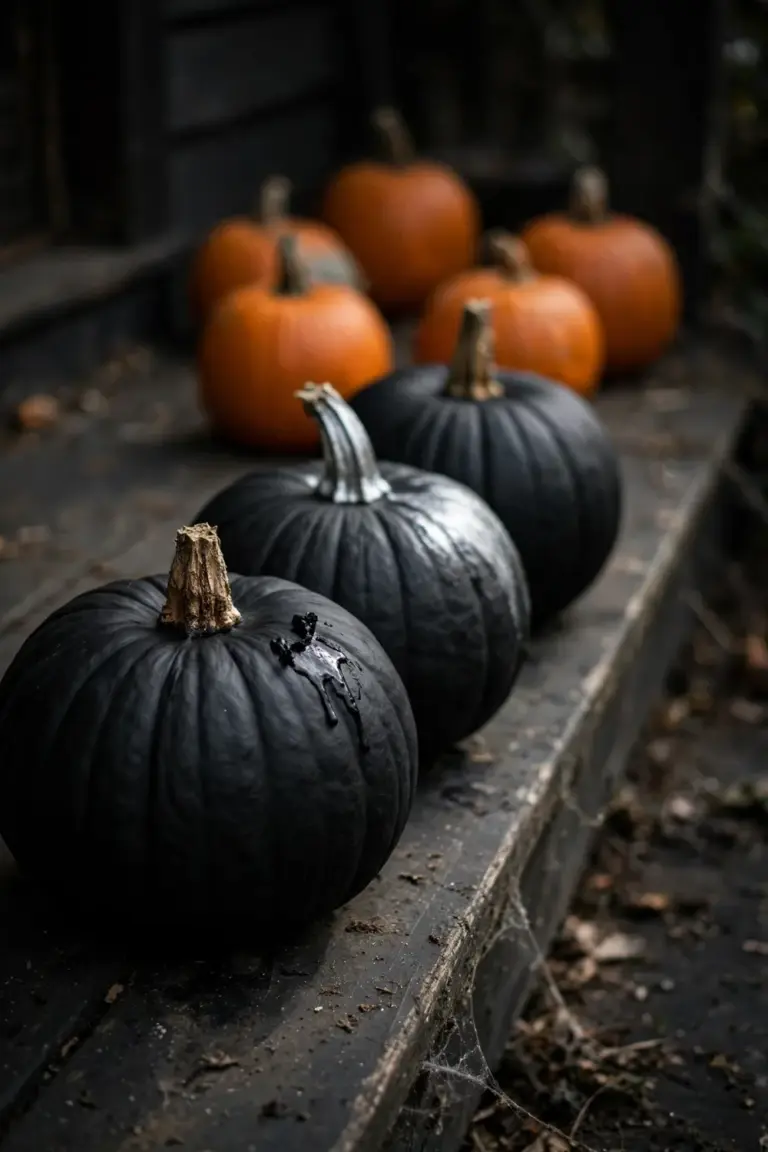
Wipe the rind clean. Dry the fruit completely before painting. Spray two thin coats of matte black acrylic with one hour between coats, and rest the pumpkin on a jar lid so the base dries without sticking to the porch boards. Add a single gold or silver stem accent if the look needs softening. Painted pumpkins keep for three to four weeks outdoors.
9. Hollow a Giant Pumpkin Into a Candy Bowl
A hollowed giant pumpkin serves candy with more theater than any plastic bowl. The opening is wide. Small hands reach in easily, the supply stays visible from the street, and guests remember the house with the pumpkin bowl long after the candy runs out. Thick walls insulate the candy from evening chill, too.
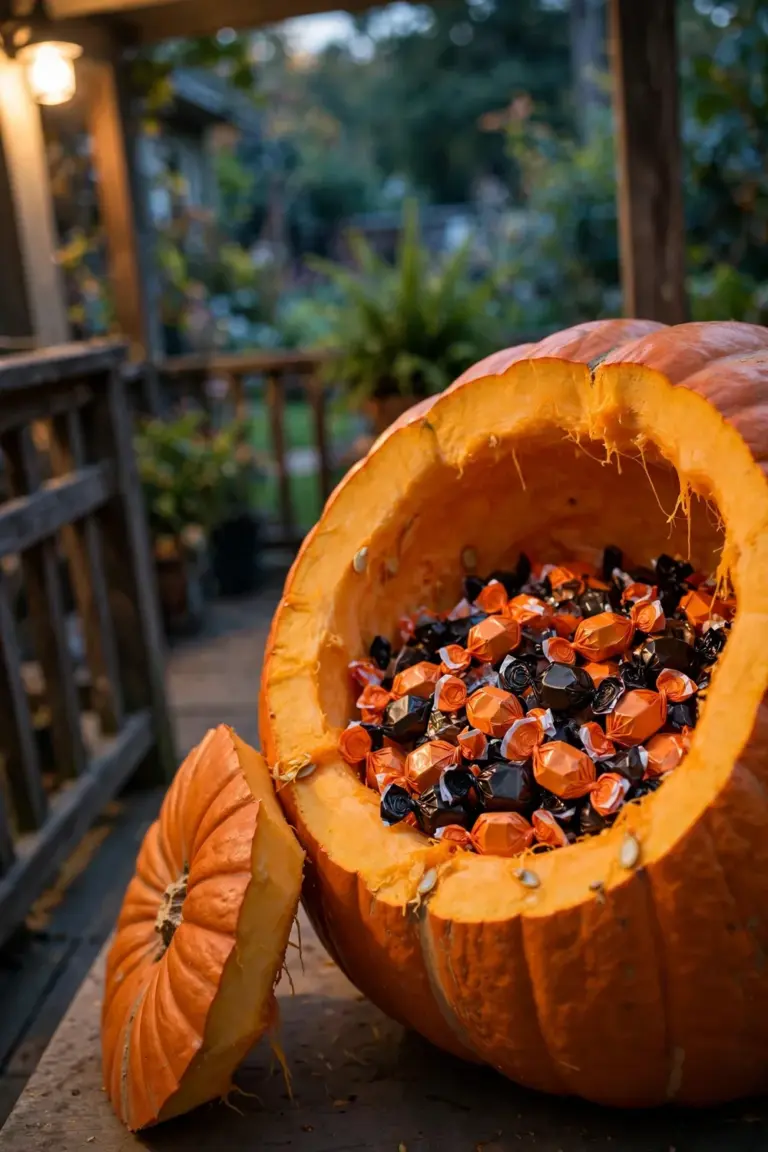
Choose a pumpkin at least 40 centimeters across with a flat base. Cut a wide lid. Scoop the interior completely and line the cavity with a food-safe bag, because loose candy should never touch raw rind. Fill with wrapped candy only. The bowl holds up for one evening of heavy traffic; move leftovers indoors before midnight to keep the fruit fresh.
10. Float Mini Pumpkins in the Birdbath
Float mini pumpkins in the birdbath. The spot already draws eyes, and the water keeps the fruit fresh for days while the surface catches candlelight after dark. Birds ignore the floaters. The display decorates the garden without disturbing the wildlife that uses the bath, and it costs nothing beyond a few small pumpkins.
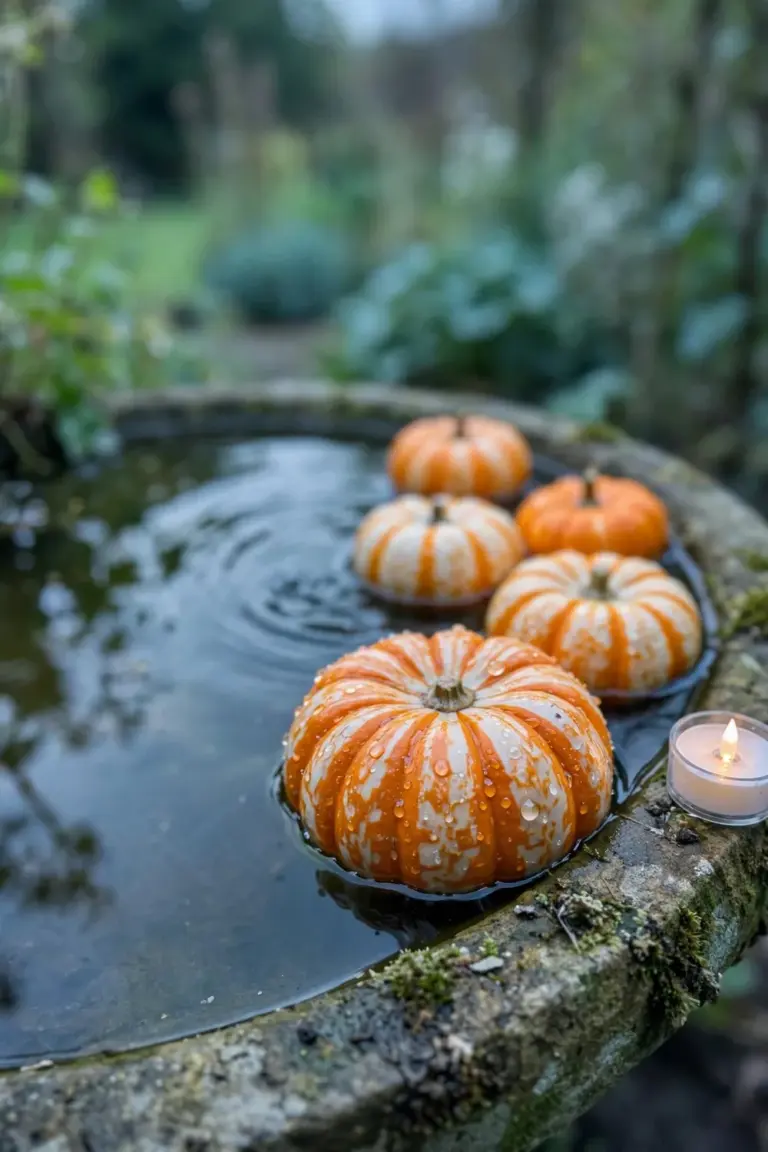
Fill the birdbath to 5 centimeters below the rim. Float five to seven mini pumpkins in a mix of orange and white, then set a few battery tea lights on the rim for evening glow. Change the water every three days. Slime builds fast in still water. Pull the pumpkins before the first hard freeze so the bath stays usable.
11. Stack Flat ‘Cinderella’ Pumpkins Like a Totem
The deep ribs of ‘Cinderella’ pumpkins stack into a totem that looks carved by nature itself. Flat fruit sits flat. The stack needs no hidden supports because each flattened pumpkin grips the one below, and the blue-gray rind reads spooky against orange companions. A ‘Cinderella’ stack suits a porch that skips the cartoonish look.
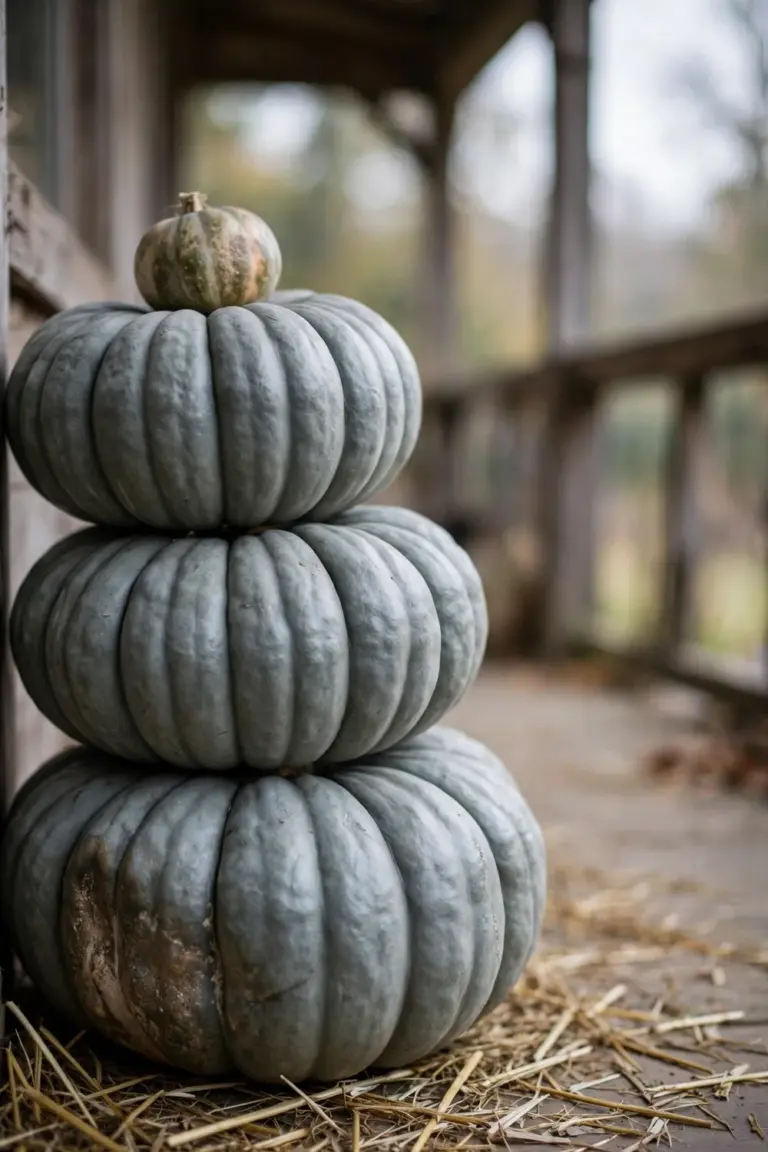
Select three ‘Cinderella’ fruits in descending widths of about 35, 28, and 20 centimeters. Stack them stem-up in a sheltered spot out of direct rain, and nudge each fruit until it sits level on the one below. Top the tower with a small gourd or a bundle of dried wheat. The stack stands safely for six to eight weeks.
12. Drill Star Patterns Into Pumpkins for Lantern Light
A drill turns a pumpkin into a constellation lantern. Holes do the work. Starlight spills across the porch from every angle, unlike a flat face with one good side, and the technique suits anyone whose knife hand shakes. Kids design the pattern. An adult runs the drill.
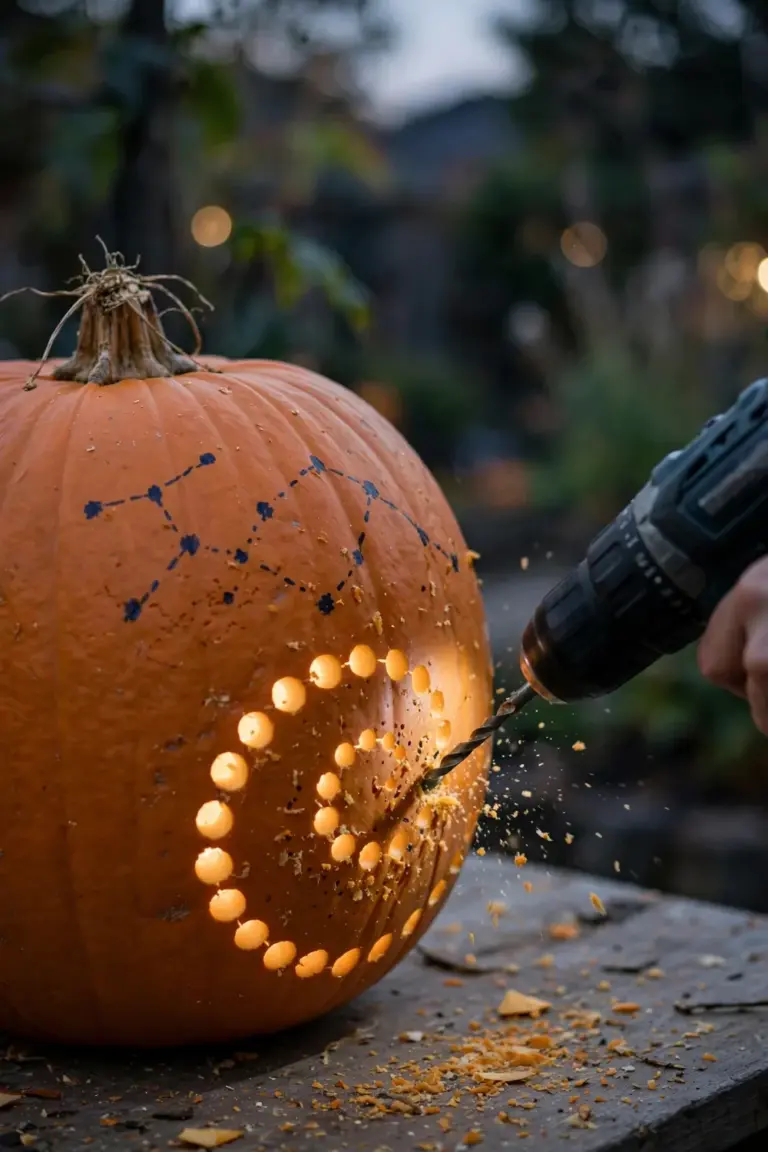
Mark the pattern in marker on an uncarved pumpkin, then scoop the interior first so the drill meets less resistance. Drill holes from 3 to 10 millimeters wide and mix the sizes for depth. Fit a battery candle inside and set the lantern where the light throws far. A drilled pumpkin glows for seven to ten nights.
13. Use White ‘Casper’ Pumpkins for Ghost Piles
Pile white ‘Casper’ pumpkins in a dark corner and the corner fills with ghosts. No sheet. No costume. The pale rinds catch moonlight and porch glow, so the pile shines faintly on its own, and ‘Casper’ fruit bruises less visibly than orange varieties, which keeps the pile neat for weeks. Shady porches get the strongest effect.
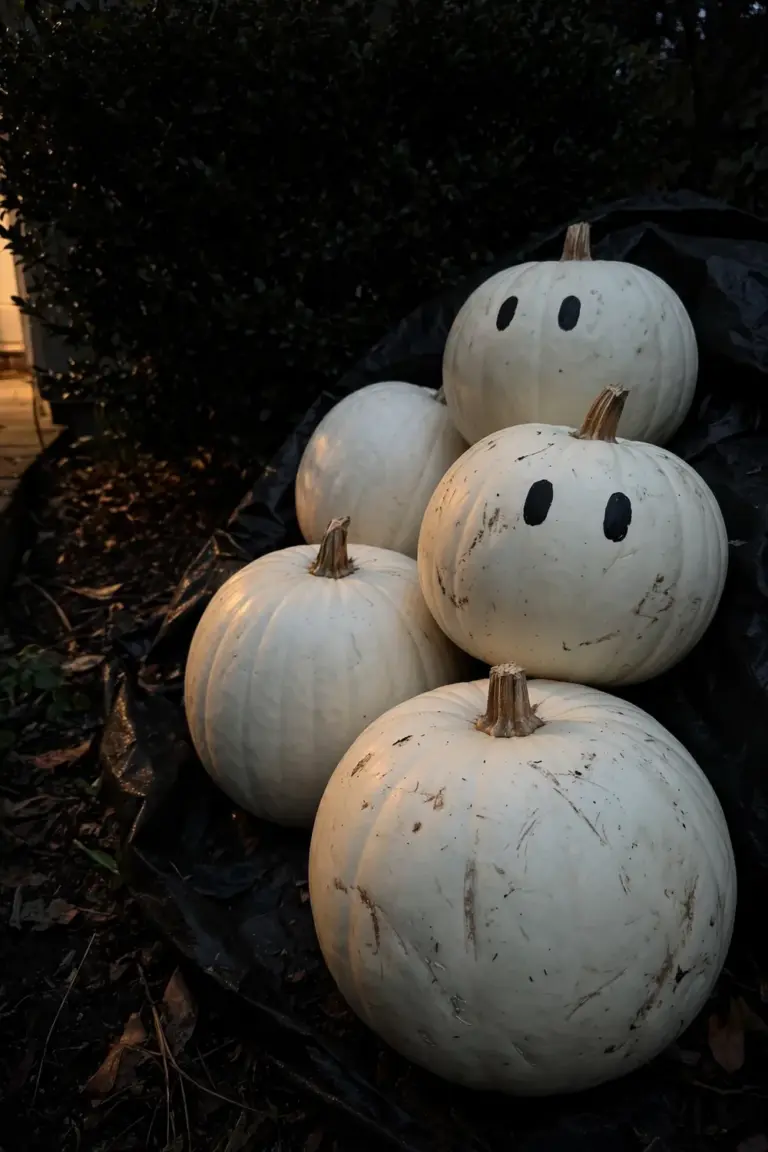
Gather five to nine ‘Casper’ pumpkins in mixed sizes and pile them in a pyramid against a dark fence or hedge. Tuck black fabric behind the pile to deepen the contrast. Skip the carving. Paint simple black oval eyes on two fruits and let the rest stay blank. The uncarved pile lasts four to five weeks outdoors.
14. Fill a Wheelbarrow With Pumpkins and Cornstalks
A wheelbarrow heaped with pumpkins and cornstalks fills a driveway or lawn corner fast. The rusted steel suits the season better than any plastic tub. Cornstalks supply the vertical height that carries the arrangement to the road, and the display puts an underused garden tool to decorative work for once.
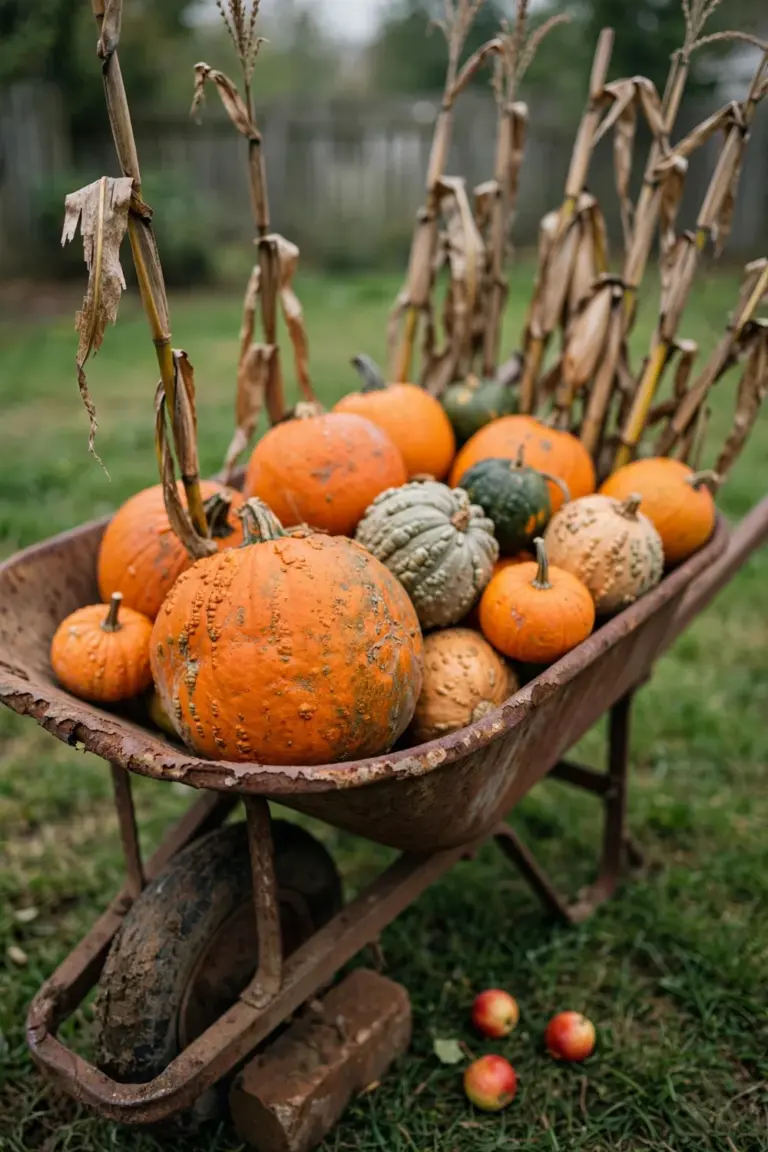
Park the wheelbarrow on level ground. Brace the wheel with a brick. Stand six to eight cornstalks upright in the back corners, fill the bed with ten to fourteen pumpkins and gourds of mixed sizes, and let a few small fruits spill over the sides for abundance. The arrangement holds for four to six weeks.
15. Carve House Numbers Into a Porch Pumpkin
Carve the house numbers into a porch pumpkin and the decoration does a job. The glowing digits read from the street on dark evenings, so visitors and delivery drivers find the door faster. The pumpkin earns its porch space twice over. Neighbors copy the idea once they see it lit.
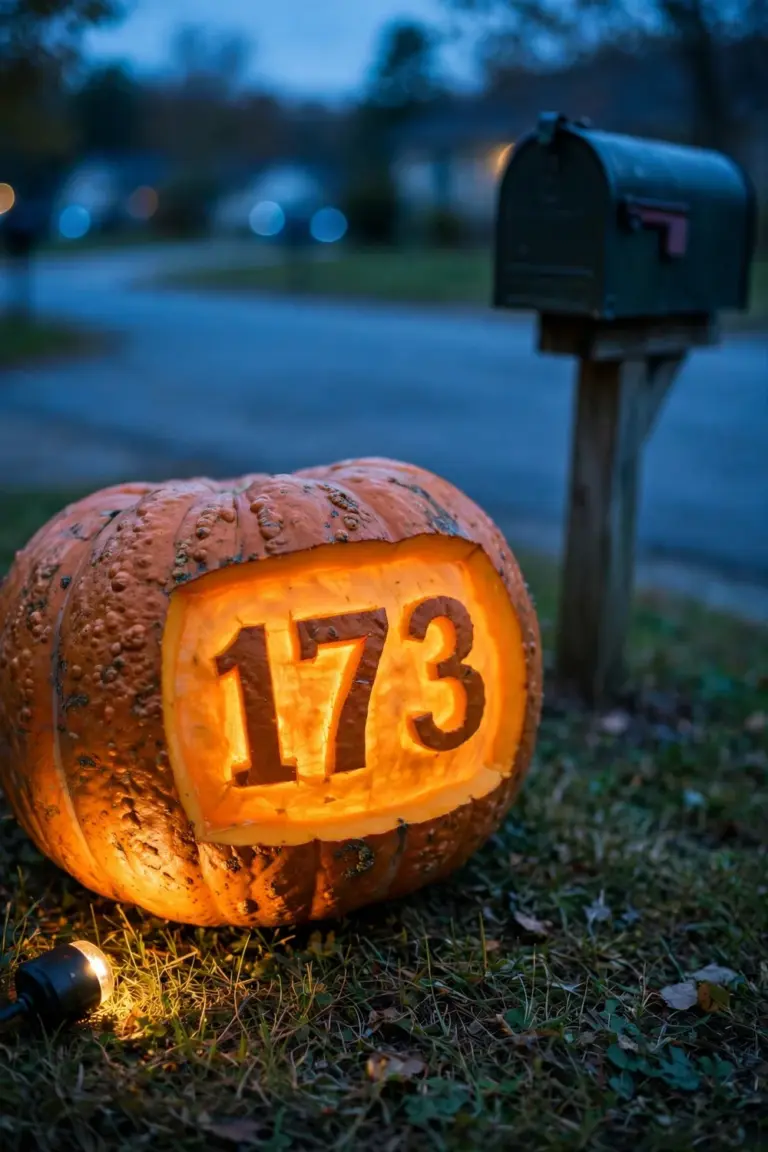
Choose a pumpkin with a smooth, broad face at least 25 centimeters wide. Sketch the numbers in marker. Carve each digit fully through the rind, then thin the surrounding flesh to 1 centimeter so the whole panel glows around the numbers. Set a battery light inside and place the pumpkin by the mailbox. Recarve when the edges brown.
16. Display Snake Gourds for Creepy Curves
Snake gourds curl and twist into shapes that look grown in a haunted greenhouse. Their long necks drape over porch rails and trellises with no arrangement effort at all. The pale green skin deepens to cream as the fruits dry. Fresh becomes ghostly on its own schedule, and gardeners who grow their own vines get the most dramatic curves.
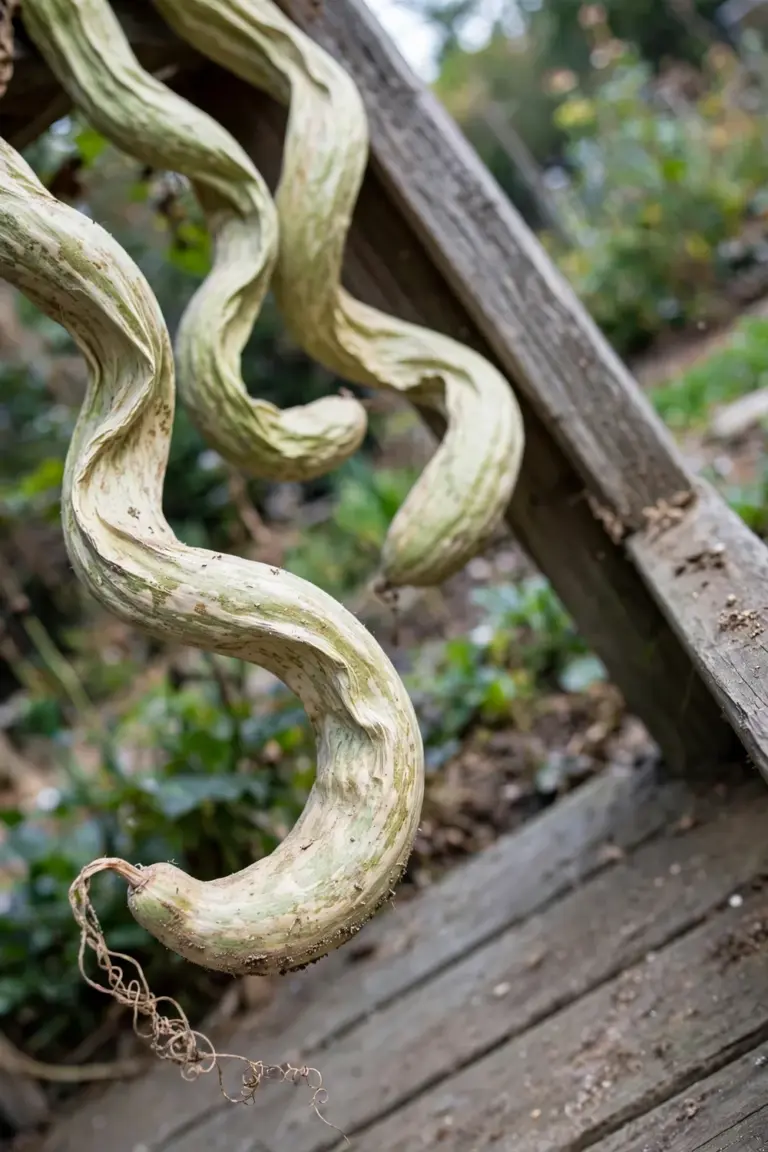
Harvest snake gourds when the stems brown and the skin hardens. Dry the fruits in a ventilated shed for four to six weeks before display. Drape three to five gourds over a porch rail or an arch and leave them. The dried gourds keep their shape for years indoors; mist the display lightly if dust dulls the surface.
17. Preserve Carved Pumpkins With a Vinegar Bath
A vinegar bath slows the bacterial softening that collapses a carved pumpkin within days. The mild acid discourages mold on the cut edges and leaves the design untouched. Treated lanterns hold their carved lines longer than untreated ones. The treatment costs almost nothing and takes ten minutes.
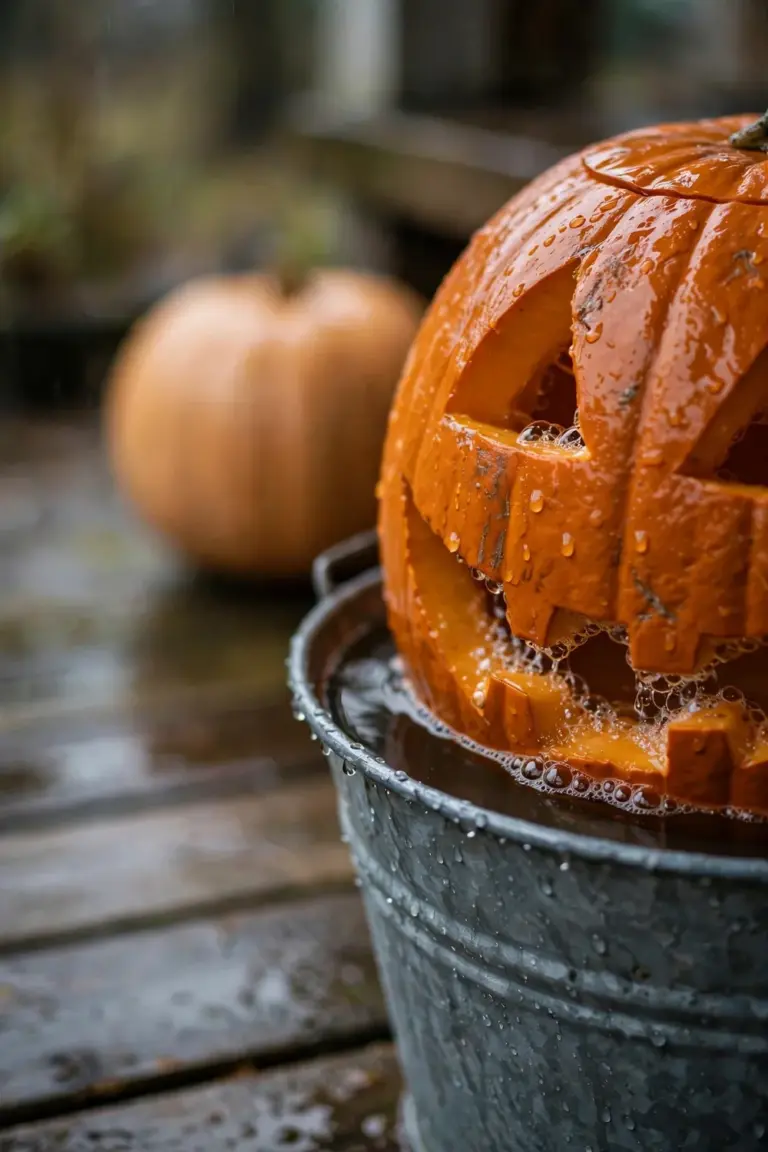
Mix three parts water with one part white vinegar in a bucket large enough to submerge the pumpkin. Soak the carved fruit for 30 minutes, cut side down. Dry it completely before lighting the candle inside, and repeat the soak every three days for best results. The bath extends display life by about a week.
18. Grow Tiny ‘Jack Be Little’ Pumpkins for Bowl Fillers
‘Jack Be Little’ pumpkins fit in a child’s palm. That size makes them scattered fillers for bowls, wreaths, and tablescapes, and the miniature fruits ripen in clusters, so one vine produces dozens of decorations. Small porches and apartment balconies can still play. Kids harvest these pocket-sized pumpkins themselves.
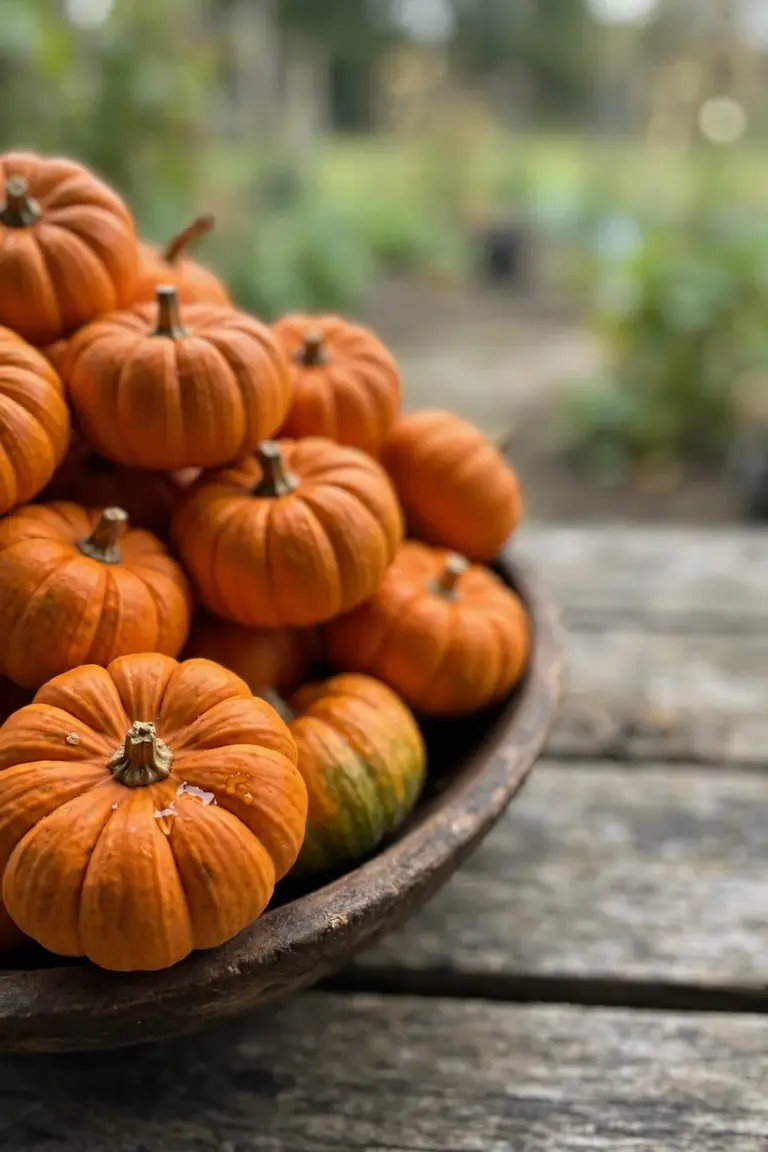
Sow seeds after the last frost in hills spaced 1 meter apart. Each vine yields 15 to 25 mini pumpkins over the season. Harvest when the fruits turn deep orange and the stems harden, then cure the minis in a warm, dry spot for one week. Stored cool and dry, the tiny pumpkins keep for two to three months.
19. Arrange an Ombre Pumpkin Lineup From Green to Orange
Line pumpkins up from green to orange and foot traffic stops. The gradient reads as deliberate design, and a single patch supplies the full ripening sequence if you pick across the bed. The lineup also photographs well for anyone sharing seasonal decor online.
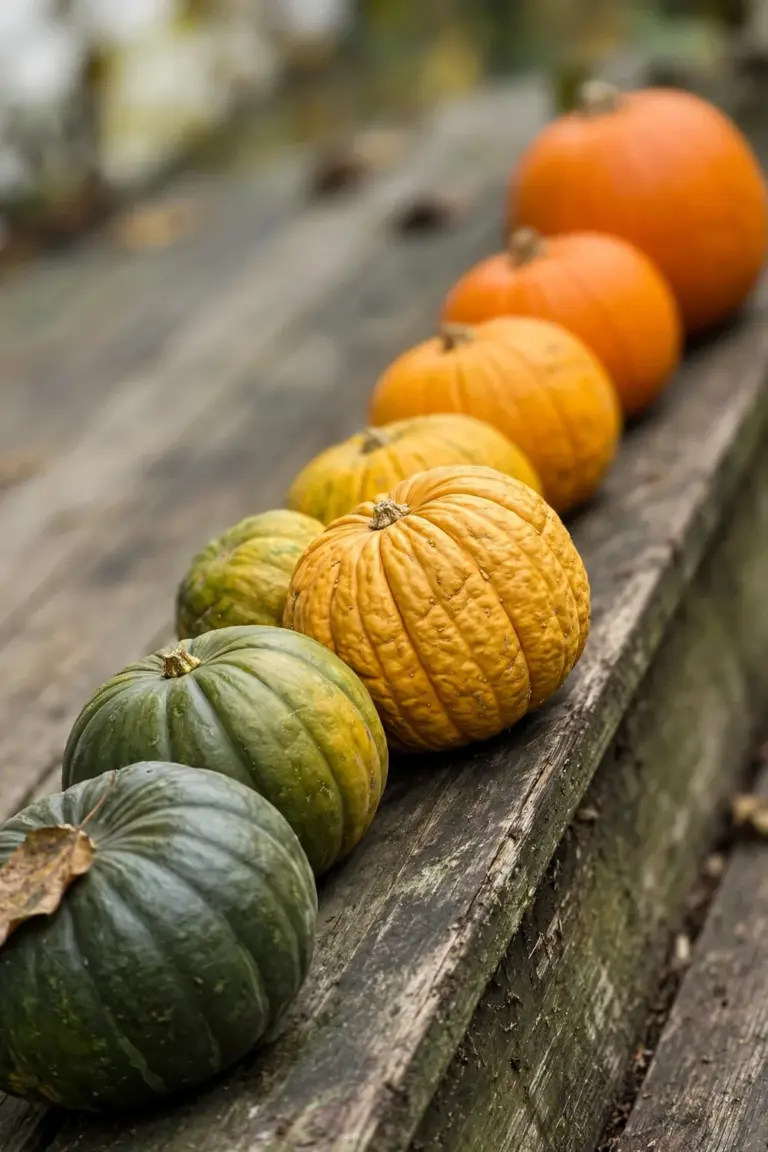
Collect seven to nine pumpkins spanning the ripening spectrum. Order them from deepest green through gold to full orange along a porch step or a low wall. Space each fruit 10 centimeters apart so every color reads on its own. Swap out any fruit that softens and the gradient stays clean. The lineup displays well for three to five weeks.
20. Leave One Pumpkin Uncarved for the Long Haul
One sturdy uncarved pumpkin outlasts every carved lantern on the porch by weeks. The intact rind resists mold, frost, and curious squirrels far better than cut flesh does. Carve early if you like. This fruit is the anchor that survives the whole season, and it moves straight into Thanksgiving decor afterward.
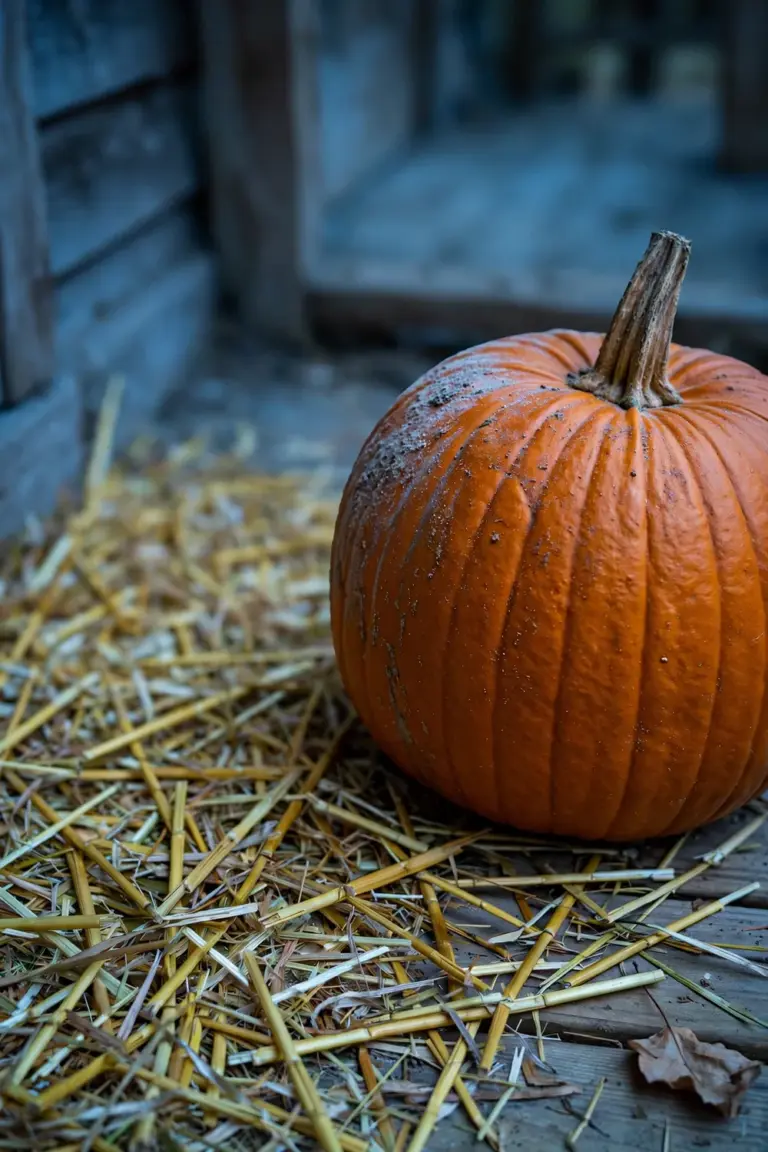
Pick a thick-rinded variety with no soft spots and no stem damage. Set the pumpkin on a bed of straw. Bare concrete rots the bottom. Wipe the rind with a dry cloth every week and check for blemishes while you work. A healthy uncarved pumpkin keeps for eight to twelve weeks in cool shade; compost the fruit when the bottom finally softens.
Gothic Plants: Black, Purple & Blood-Red
21. Plant Black Mondo Grass for a Dark Groundcover Carpet
Black mondo grass spreads into a carpet of near-black blades that makes orange pumpkins glow by contrast. The foliage is evergreen. The gothic effect holds through winter, long past October, and this slow-growing groundcover suits the shady edges where little else thrives. One planting buys a permanent Halloween backdrop.
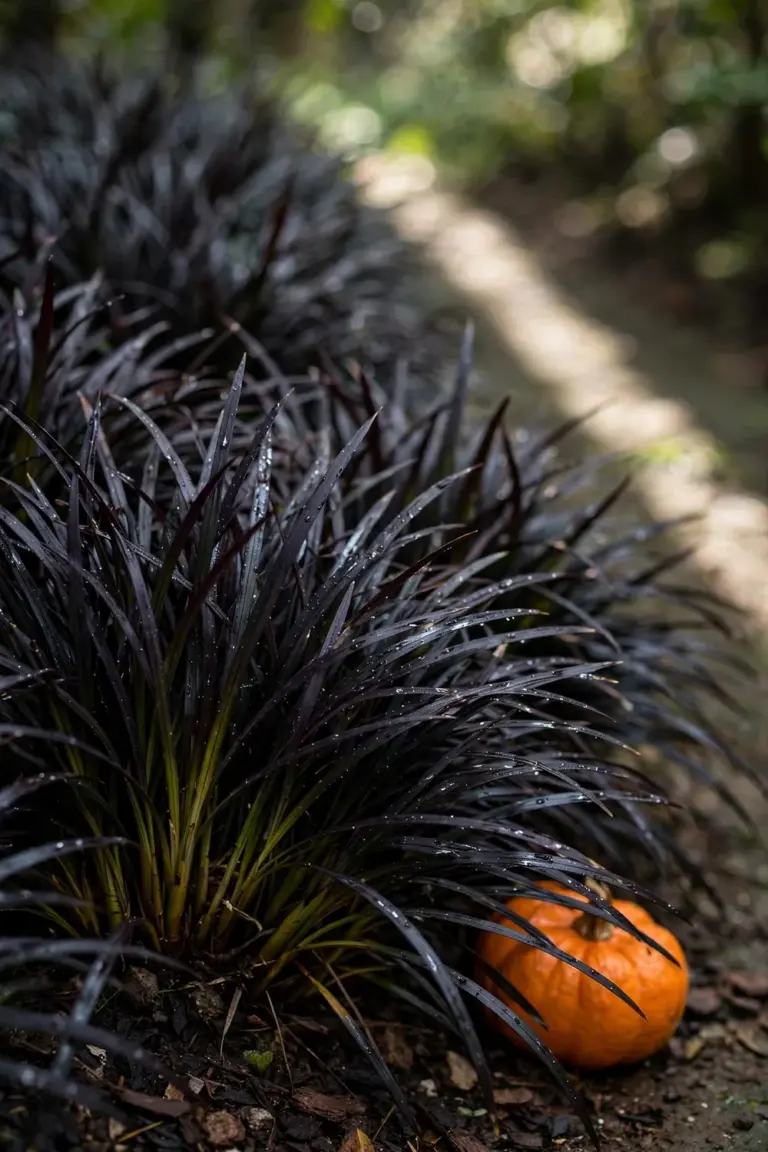
Plant plugs 15 centimeters apart in moist, humus-rich soil. Water regularly through the first growing season until the roots establish, then mulch lightly to hold moisture. Each clump spreads 20 to 30 centimeters wide over two years. Trim tattered blades in early spring to refresh the carpet.
22. Grow ‘Black Beauty’ Elderberry for Near-Black Foliage
‘Black Beauty’ elderberry unfurls near-black leaves that read as pure Halloween from across the yard. Pink flower clusters soften the shrub in spring. Birds strip the dark berries in late summer, so the plant earns its space ecologically too. A single specimen anchors a gothic planting bed.
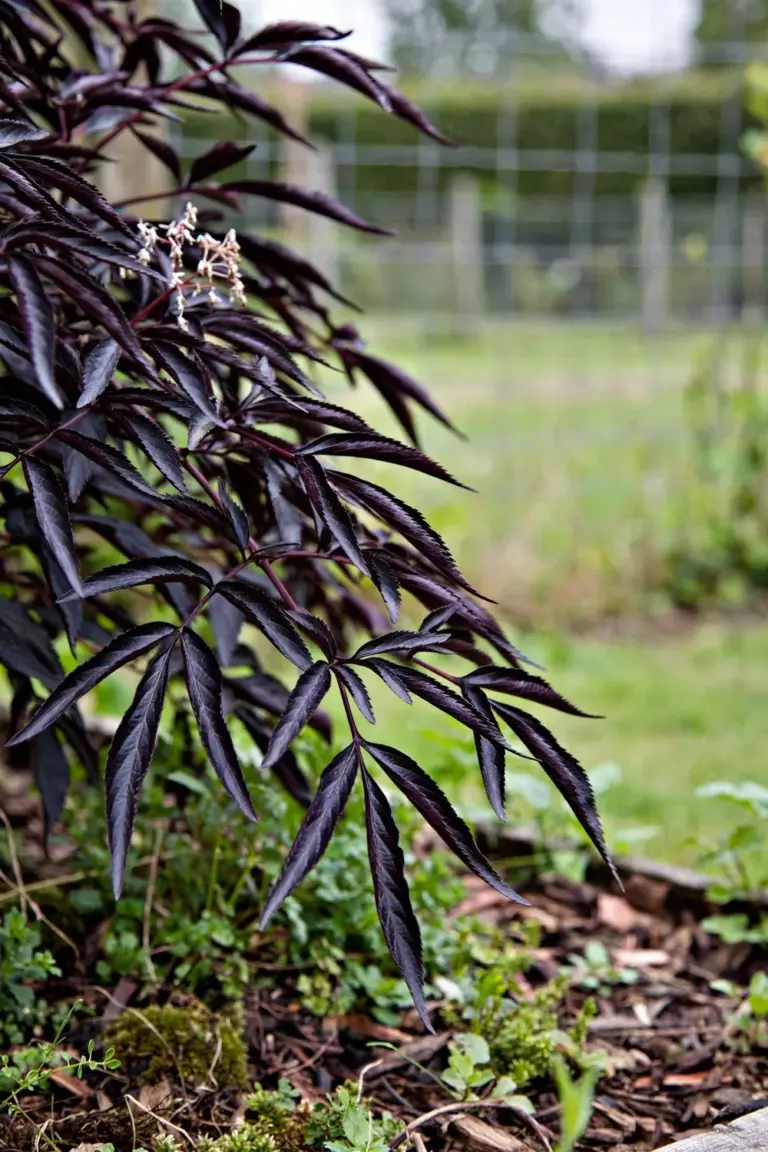
Plant in full sun to partial shade and leave room for a 2-meter spread. Prune in late winter to keep the shrub compact and push fresh dark foliage. An established ‘Black Beauty’ grows 60 to 90 centimeters per year. Water deeply during dry spells, and skip pesticides. The berries feed wildlife.
23. Pot Up Heuchera ‘Obsidian’ for a Dark-Leafed Porch Pot
Heuchera ‘Obsidian’ packs glossy near-black leaves into a tidy mound that fits a porch pot. White pumpkins pop beside it. Silver accents do too. The perennial survives winter in the container, so the same pot works year after year, and coral bells tolerate the dry shade that defeats most porch plants.
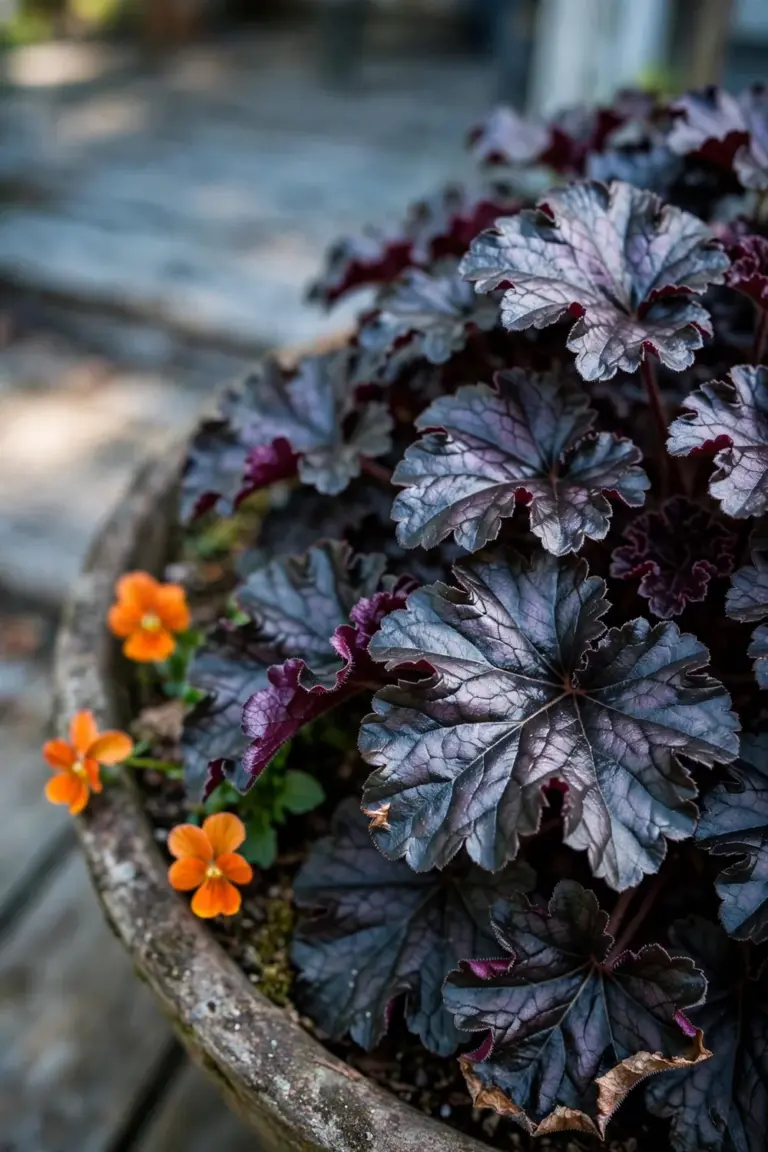
Fill a 30-centimeter pot with well-draining potting mix. Center one ‘Obsidian’ plant and ring it with three small orange violas for contrast. Water when the top 2 centimeters of soil feel dry. Divide the clump every three years in spring. The evergreen leaves hold their color through light frosts.
24. Let Purple Fountain Grass Keep Its Plumes Into October
Purple fountain grass keeps its feathery plumes standing into late autumn, after most ornamentals have collapsed. The burgundy seed heads sway in the wind and catch low sunlight. Vertical drama, no work. The plumes also dry on the plant, ready for indoor arrangements later.

Plant in full sun after the last frost, spacing clumps 60 centimeters apart. The grass reaches 90 centimeters tall by midsummer. Leave the foliage standing through fall instead of cutting it back, and in cold climates treat the grass as an annual and replant each spring. Cut plumes for drying once they feel papery.
25. Grow Black Dahlia ‘Karma Choc’ in a Statement Pot
Black dahlia ‘Karma Choc’ opens deep burgundy-black blooms that look almost unreal against green foliage. The dark flowers stand out hard beside orange pumpkins and lanterns. Deadhead and the plant keeps blooming, so one pot supplies weeks of gothic color. A single statement pot by the door sets the tone for the whole display.
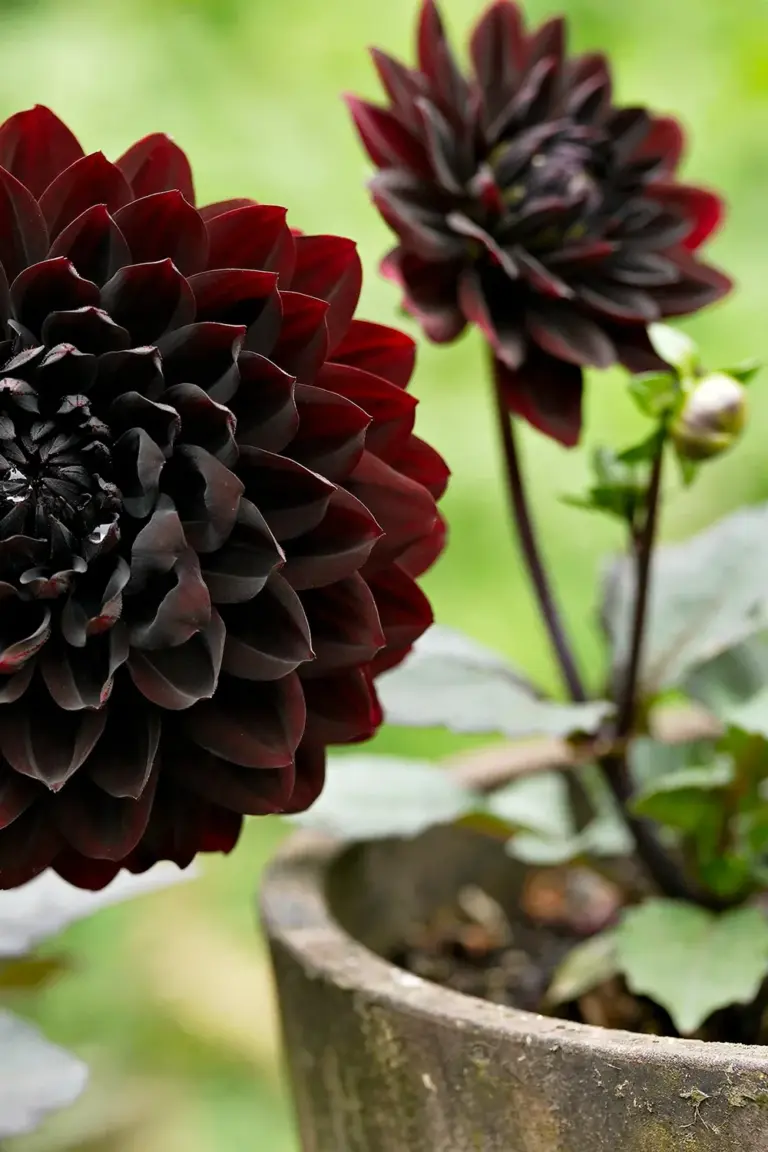
Plant one tuber 10 centimeters deep in a 35-centimeter pot after the last frost. Stake the stem when it reaches 30 centimeters tall. Deadhead spent blooms every week to keep new flowers coming, because ‘Karma Choc’ grows 90 to 120 centimeters tall in a season and flowers on new cuts. Lift and store the tubers indoors before the first hard freeze.
26. Cluster Black Pansies With Orange Mums for Maximum Contrast
Ring orange mums with black pansies. The contrast is instant. Near-black petals read as velvet against the bright orange blooms, and the whole pairing photographs well at dusk when other colors go flat. Pansies keep flowering through light frosts. This combination holds its color long after the summer annuals have faded to straw.
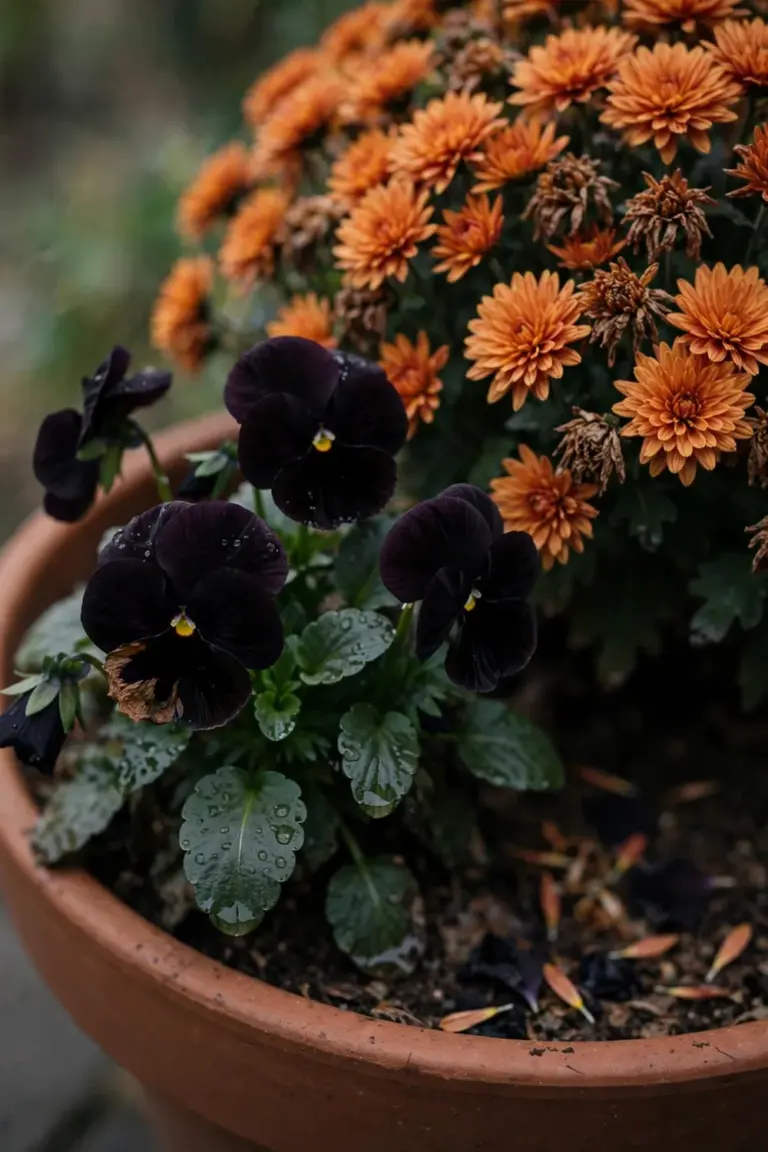
Set one mum in the center of a wide pot or a bed corner. Ring it with five to seven pansy plants spaced 6 inches apart and water the whole ring deeply right after planting, so the roots settle into the soil before the first cold nights arrive. Unwatered transplants sulk. Watered ones settle in and bloom.
27. Weave Hyacinth Bean Vines Over the Trellis for Purple Pods
Weave hyacinth bean vines over the trellis. The pods do the decorating. Glossy purple seed pods dangle like ornaments against the autumn light, and the vines climb fast enough to cover a bare structure within weeks. The magenta deepens as temperatures drop.
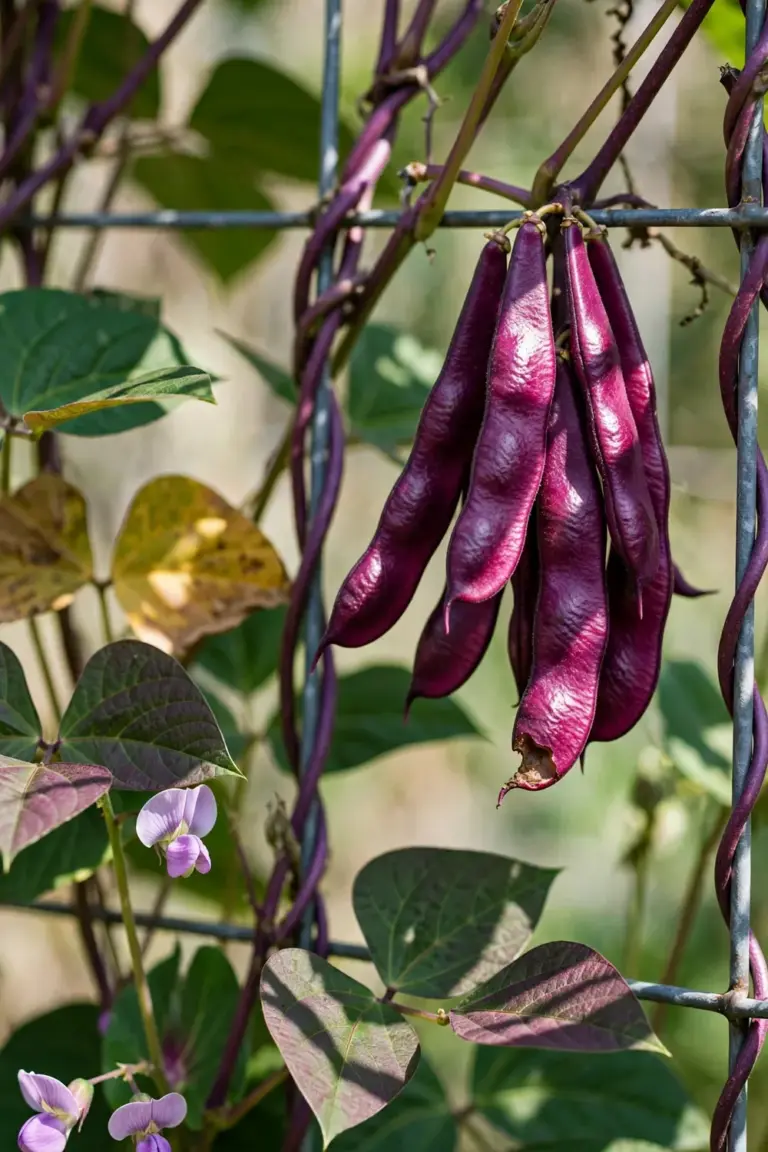
Sow the seeds 1 inch deep and 6 inches apart at the trellis base after the last spring frost, then guide the first tendrils onto the wires by hand. After that, stand back. The vines reach 10 to 15 feet by early fall with no further training.
28. Fill a Cauldron Pot With ‘Black Magic’ Elephant Ears
Fill a cauldron-shaped pot with ‘Black Magic’ elephant ears. The leaves are enormous. Each arrowhead leaf can span 2 feet in the deepest purple-black, foliage that looks borrowed from a witch’s garden. Heat and humidity keep it full-leafed through the warm weeks of early fall.
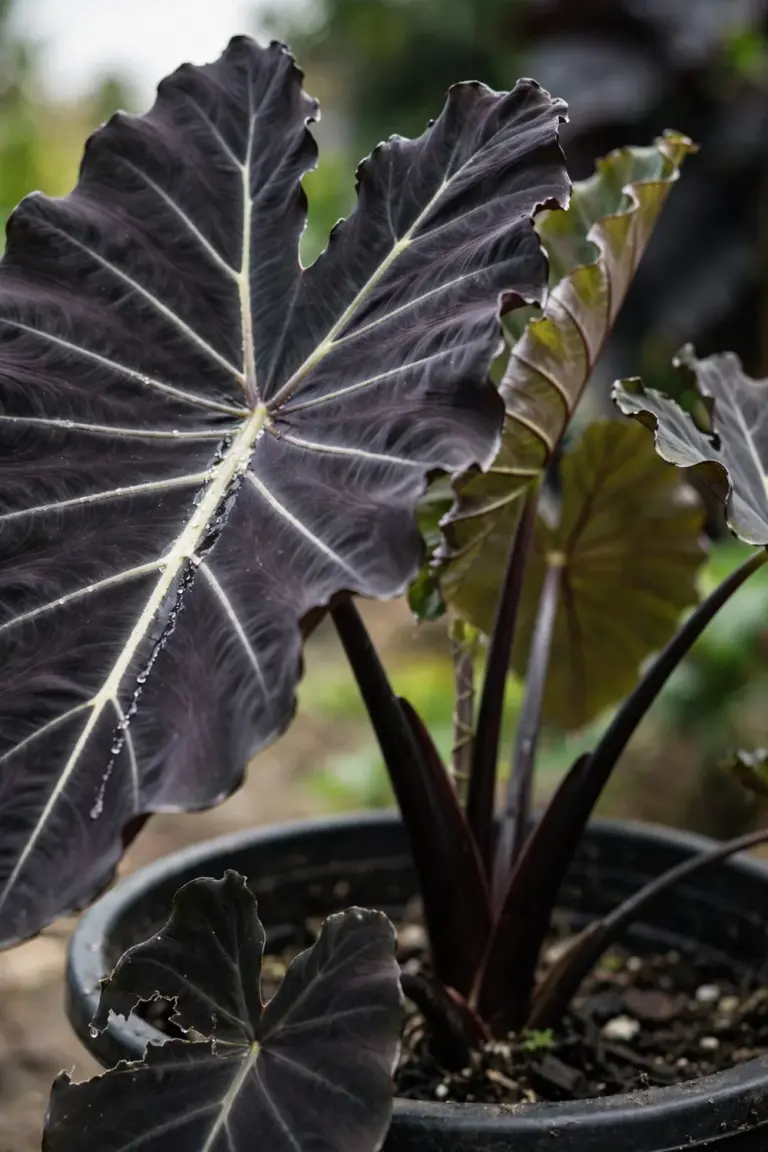
Pick a pot at least 18 inches wide with drainage holes. Plant one corm 4 inches deep in rich potting mix and keep the soil evenly moist. Dry soil shrinks the leaves. Before the first hard frost, haul the pot indoors so the corm survives the winter.
29. Edge Beds With Ajuga ‘Black Scallop’ for Creeping Darkness
Edge the beds with Ajuga ‘Black Scallop’. The scalloped leaves are near-black bronze, and they spread into a dense mat that frames brighter plantings like a dark picture frame. Shade is no obstacle. Ajuga darkens corners that most dark plants cannot reach.
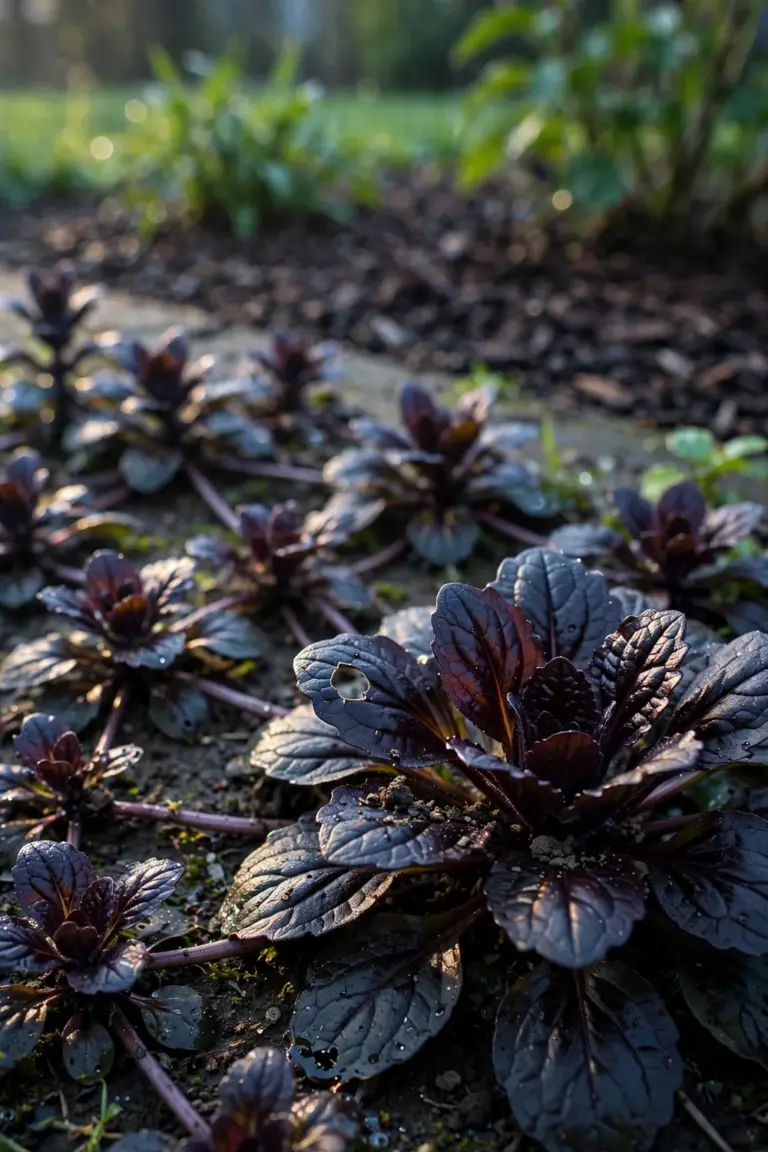
Space young plants 8 to 12 inches apart along the bed edge in spring or early fall and water them well for the first 2 weeks. The runners knit into a continuous dark border by the following season. Trim any flowers that appear. The foliage stays the star.
30. Try ‘Black Pearl’ Ornamental Peppers for Dark Fruit
Grow ‘Black Pearl’ ornamental peppers for glossy black fruit on compact purple-black plants. Two colors ride on one plant. The round peppers start black and ripen to deep red, while the foliage stays dark even in full sun. Few black plants hold up this well in a container.
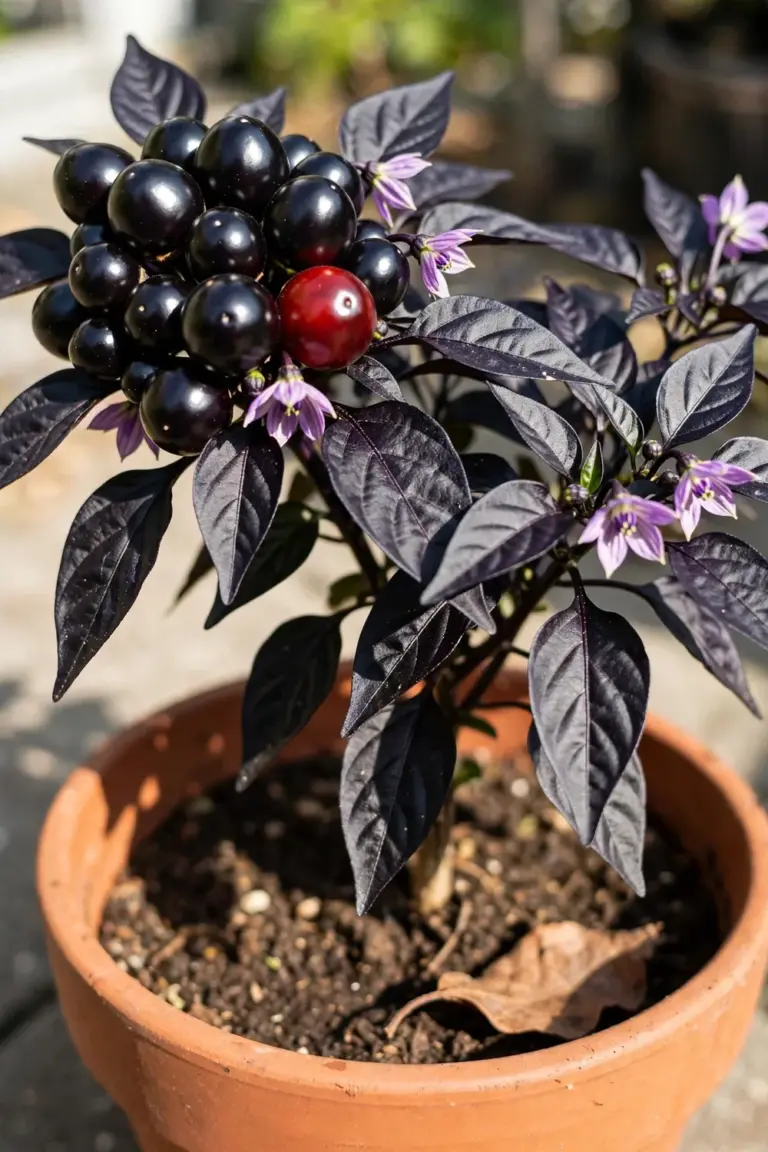
Plant seedlings 12 inches apart in a sunny spot after all frost danger passes, and water regularly so the fruit stays glossy from midsummer into the first frosts of fall. The plants reach about 18 inches tall. Pinch the first flower buds. Bushier growth follows, and the fruit set gets heavier.
31. Plant Weeping ‘Black Dragon’ Cryptomeria as a Year-Round Sentinel
Plant a weeping ‘Black Dragon’ cryptomeria where the path turns. It stands guard all year. The slow-growing conifer holds its near-black green through winter, and the drooping branches read like a hooded figure beside the walk. One tree anchors the whole gothic corner.
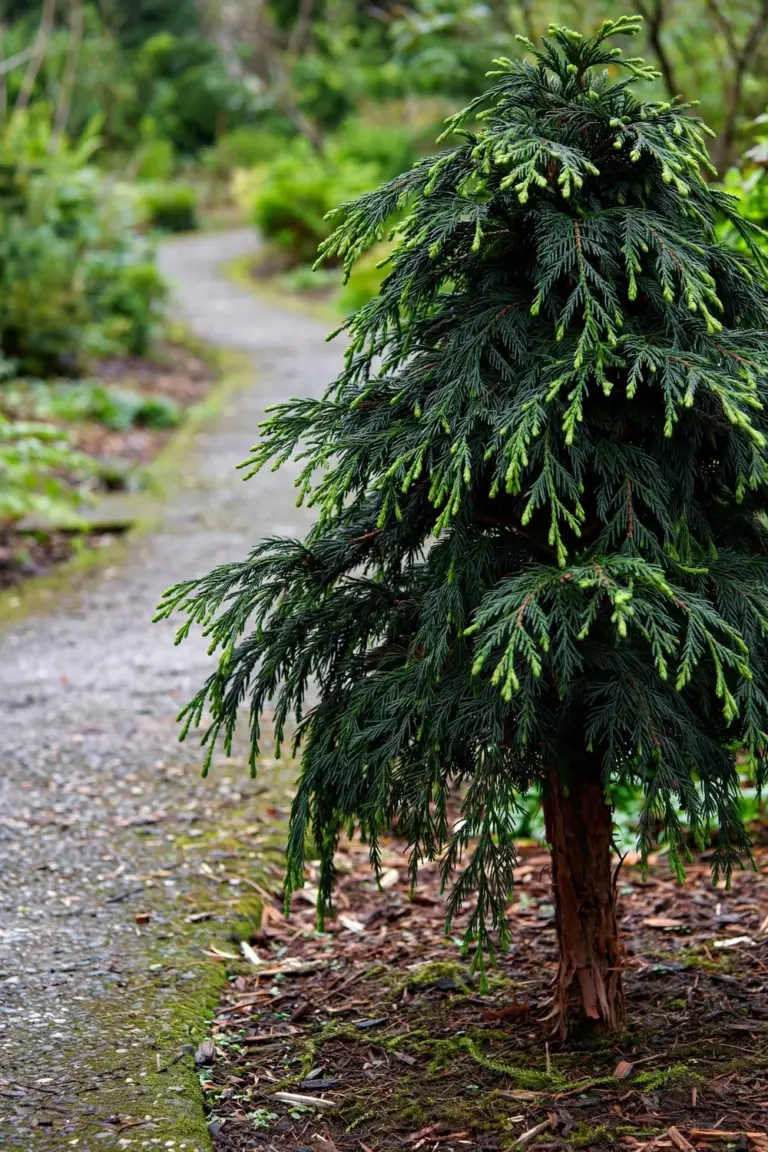
Dig the hole twice as wide as the root ball and set the tree at the same depth it grew in the nursery pot, then water deeply through its first dry season. ‘Black Dragon’ grows only 5 to 6 feet in 10 years. Give it the prominent spot. It will not outgrow it.
32. Grow ‘Diabolo’ Ninebark for Deep Burgundy Branches
Grow ‘Diabolo’ ninebark for wine-dark foliage on arching branches. The color holds from spring through fall. Clusters of pink-white flowers open in early summer against the burgundy, and older stems peel in cinnamon layers that catch the low autumn light.
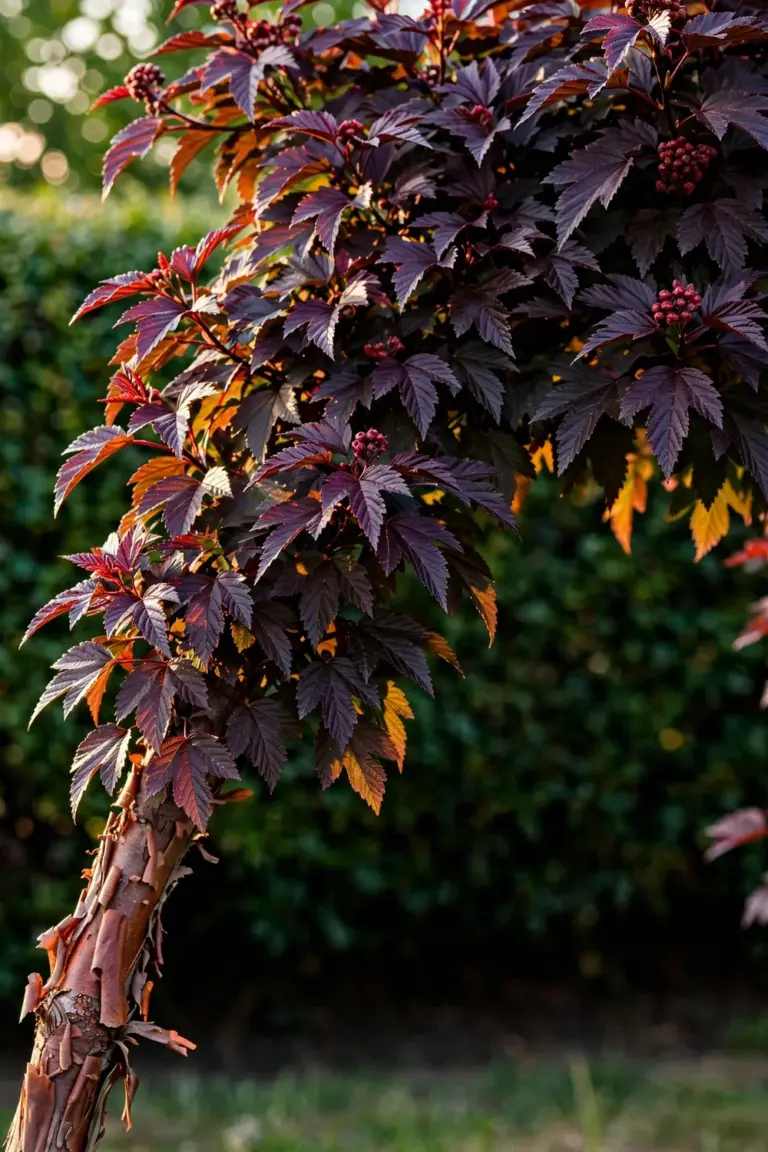
Plant it 6 feet from walkways and foundations. ‘Diabolo’ reaches 8 to 10 feet tall and wide, so crowding it ends in constant pruning. Cut the oldest stems to the ground every 3 years to renew the shrub, and spread a layer of mulch 3 inches deep to keep roots cool and moisture steady through summer.
33. Let Ornamental Cabbage ‘Osaka Red’ Take Center Stage
Set ornamental cabbage ‘Osaka Red’ at the center of the bed. One head looks like a giant rose blooming straight from the soil, ruffled leaves in deep rose-red. Cool nights intensify the color. Light frosts that finish off tender annuals leave this plant untouched.
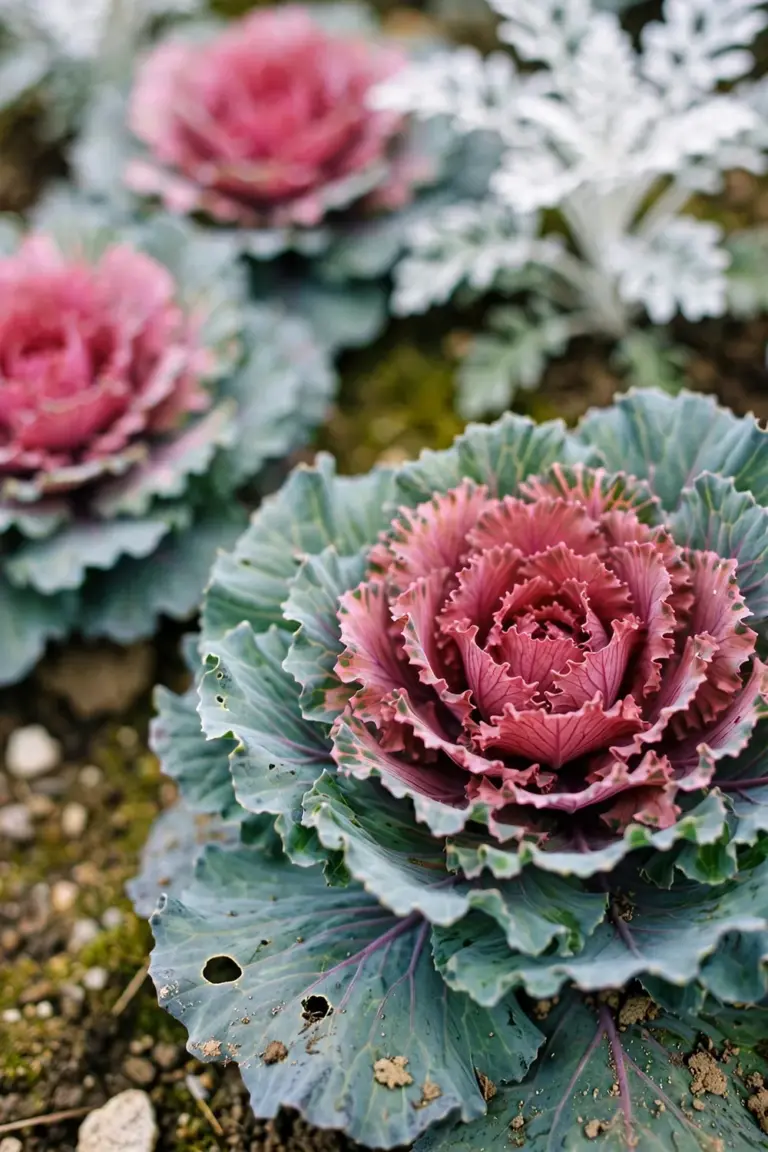
Set transplants 12 inches apart in full sun 4 to 6 weeks before the first expected frost, and water at the base so the leaves stay dry. The rosettes hold their color until temperatures drop into the low 20s. Pair the heads with silver dusty miller. Red against silver reads clearly from the street.
34. Leave Seed Heads Standing for Silhouette Drama
Among all halloween garden ideas, leaving seed heads standing costs nothing. It also looks striking. Dried allium globes, echinacea cones, and grass plumes turn into black silhouettes against a gray sky, and frost coats them with crystals. Birds work the seeds all winter.
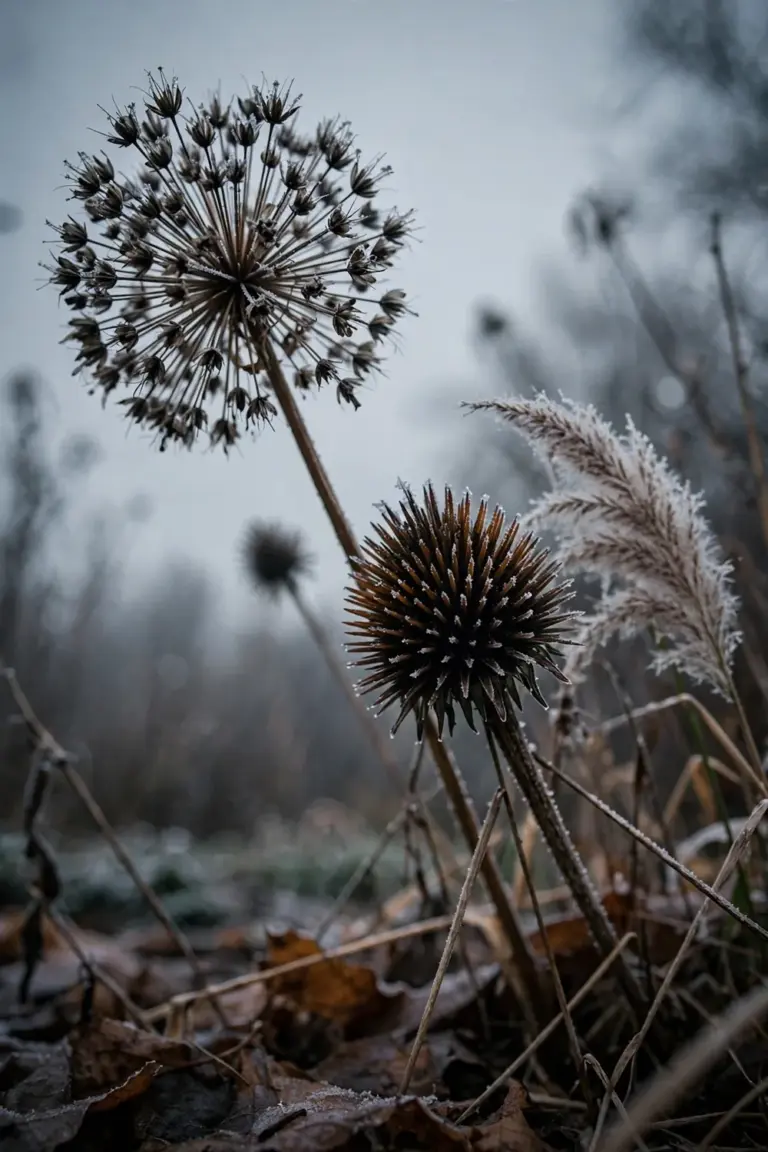
Resist the urge to cut perennials back in fall. Leave the stems standing until late winter, then cut everything down to 3 inches in March and compost the old stems once new green shoots emerge from the crowns. The hollow stems shelter overwintering beneficial insects through the cold months. Tidiness can wait.
35. Plant ‘Queen of Night’ Tulips Now for a Gothic Spring
Plant ‘Queen of Night’ tulips now for near-black blooms next spring. The petals are deep maroon, so dark they read as black in shade. These are among the darkest tulips available. Underplant pale perennials beneath them and the flowers pop harder when they open.
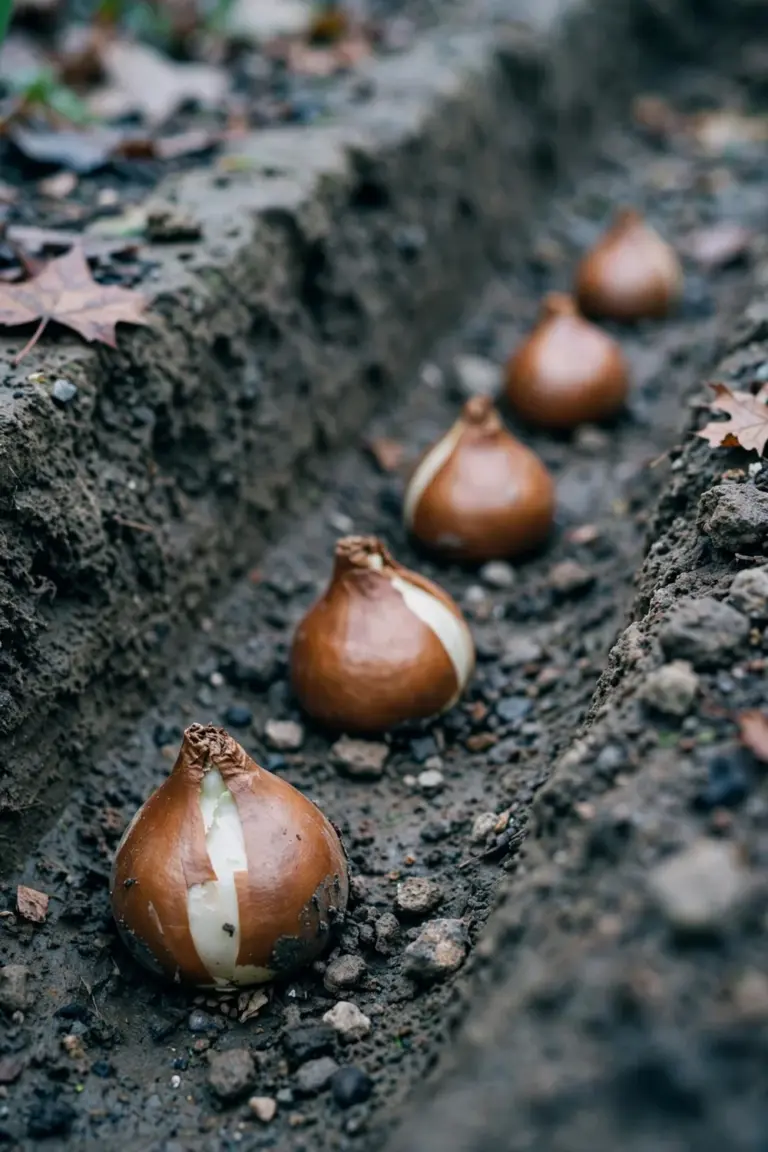
Push each bulb 6 inches deep and 4 to 6 inches apart, pointed end up, about 6 weeks before the ground freezes. Water once after planting. Winter cold does the rest. Plant in groups of at least 10 bulbs, because single bulbs vanish and a drift reads as one dark mass.
Containers & Planters
36. Turn a Plastic Cauldron Into a Bubbling Planter
Turn a plastic cauldron into a bubbling planter. It is the cheapest statement pot on the porch. The black pot already reads as a witch’s brew vessel, and trailing plants spilling over the rim finish the illusion. Fill it with anything dark or orange. Guests photograph it before they ring the bell.
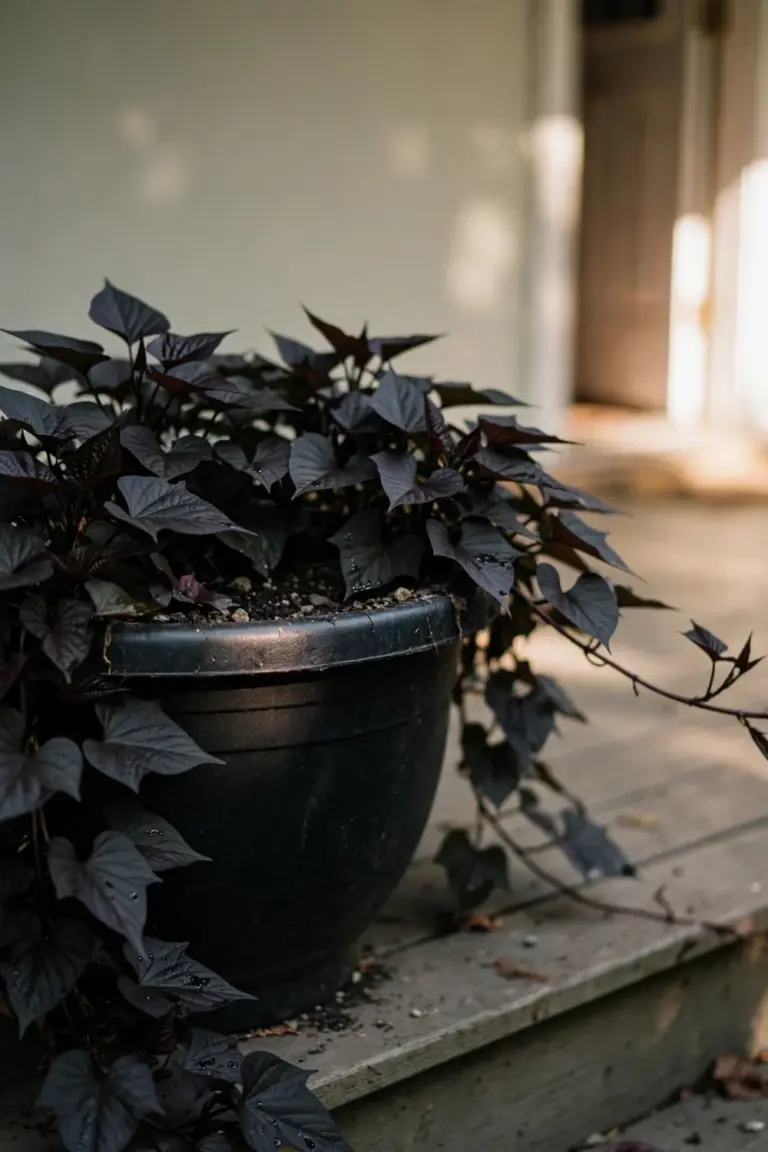
Drill five half-inch drainage holes in the bottom and add 2 inches of gravel before the potting mix goes in. Plant three dark-leafed sweet potato vines around the edge. Within 3 weeks of planting, the vines cascade over the sides. No drainage means soup. Drill the holes.
37. Plant a Coffin-Shaped Box With Succulents
Plant a coffin-shaped box with succulents. The shape does the spooky work. The plants stay simple rosettes in dusty greens and purples, and the whole graveyard miniature needs almost no water. Neglect cannot hurt it. The box looks deliberate on the porch all season.
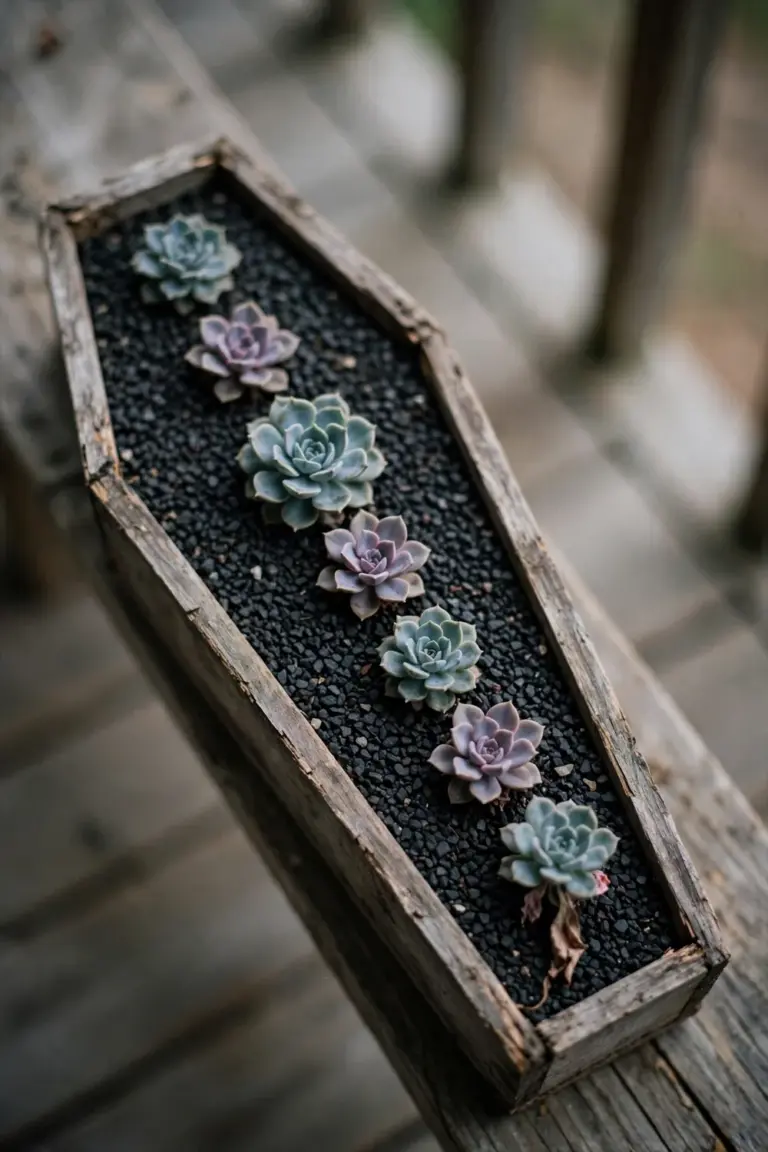
Line the box with plastic, add 1 inch of gravel, then fill it with cactus potting mix. Set in 7 to 9 small succulents and water lightly every 2 weeks, moving the box under cover when heavy rain arrives. A top dressing of black gravel hides the soil. The graveyard look sharpens.
38. Hollow a Pumpkin and Plant Mums Inside
Hollow a pumpkin and plant mums inside. No carving required. The orange shell frames the blooms like a natural vase, and the arrangement rots gracefully into the compost when the season ends. Kids love picking the pumpkin. They love choosing the flower color even more.
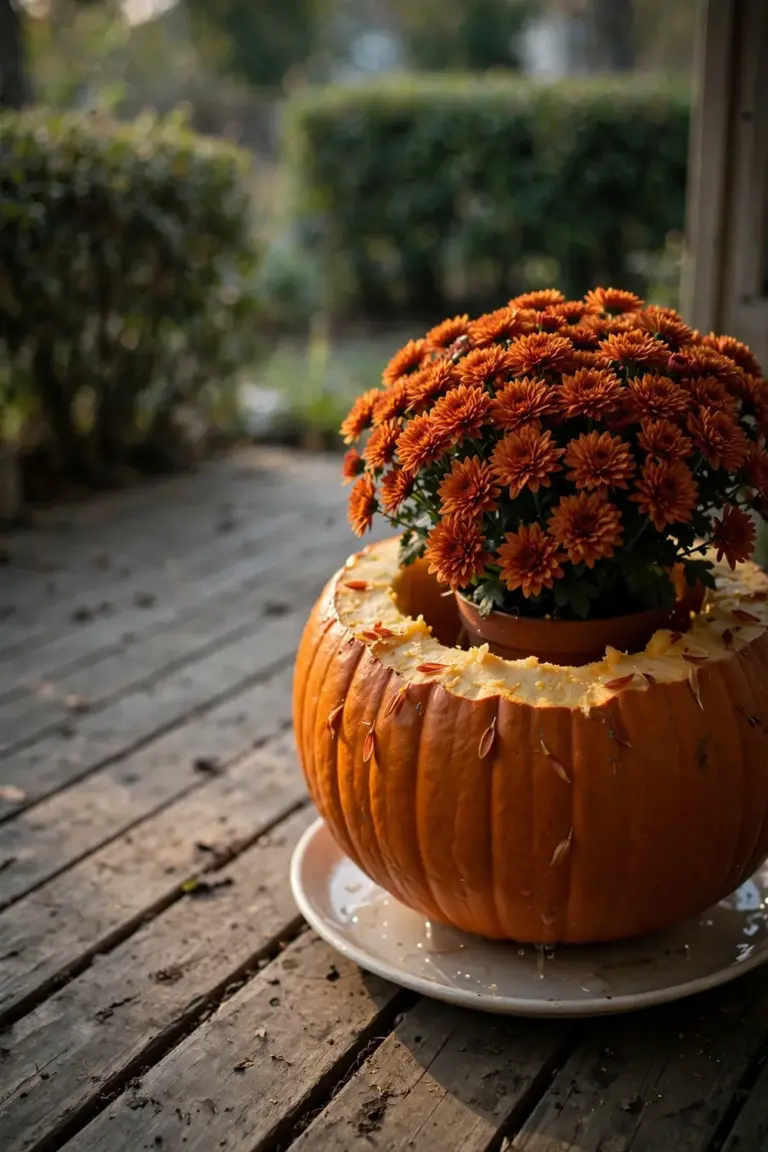
Cut a wide lid and scoop out the seeds and strings, then drop a 4-inch mum pot straight into the cavity. The pumpkin lasts about 2 weeks. Build this one close to Halloween for peak freshness, and set it on a saucer to catch drips and keep the porch dry.
39. Paint Terracotta Pots Like Monster Faces
Paint terracotta pots like monster faces. Crooked eyes sell it. Jagged teeth help too, and the plant on top becomes the creature’s wild hair. Wobbly lines only make the monsters funnier, so this project suits beginners.
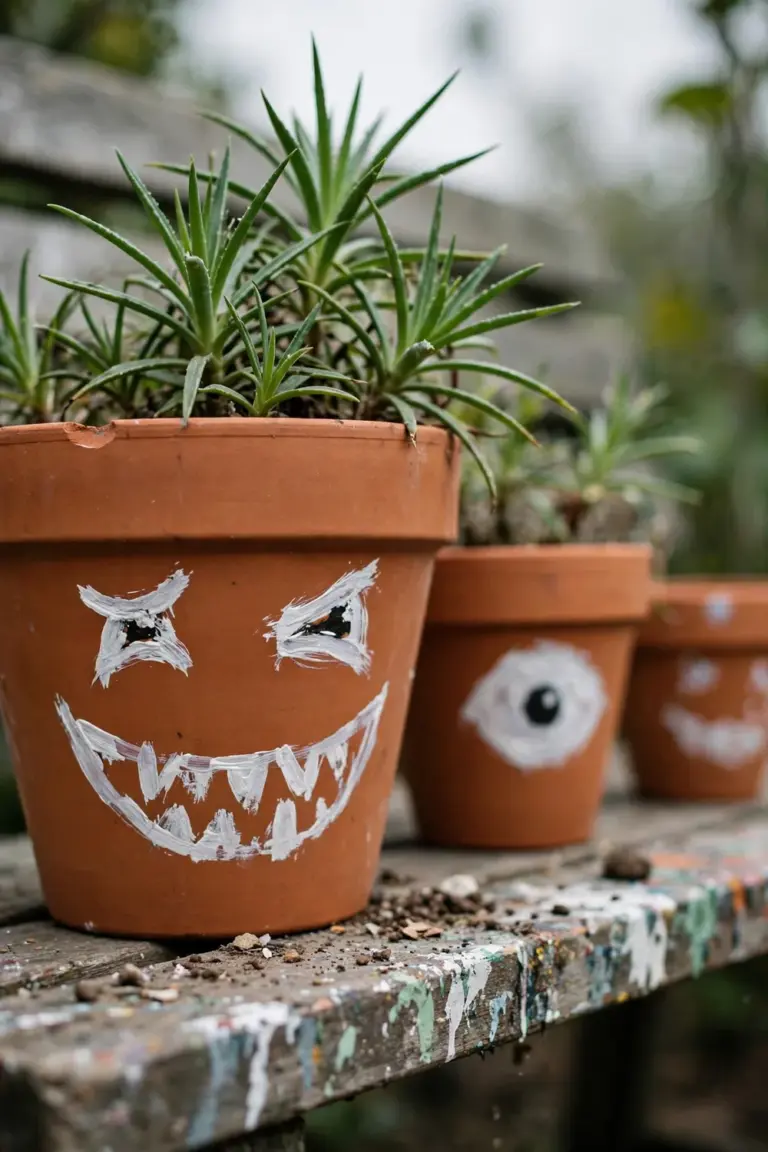
Clean the pot and apply one coat of white primer, then paint the faces with outdoor acrylics in 2 thin coats. Let each coat dry 1 hour before the next layer goes on. Seal the finished faces with a clear matte spray. Rain will not wash the monsters away.
40. Build ‘Witch Legs’ Planters With Striped Stockings
Build ‘witch legs’ planters with striped stockings, because the crashed-witch gag never fails. Stuffed legs in black-and-white stripes poke upside down out of a planter or hedge, old shoes at the ends, and visitors stop to photograph it every time. Kids most of all.

Stuff two striped stockings with newspaper and tie old shoes to the foot ends, then push the legs 8 inches deep into the planter soil. Angle them slightly apart. They should look dropped from the sky. Surround the legs with low dark plants so the stripes stand out against the foliage.
41. Fill a Wooden Crate With Gourds and Trailing Ivy
Fill a wooden crate with gourds and trailing ivy. Rough wood suits bumpy gourds. Ivy spills over the sides and softens every corner, which gives the arrangement a wild edge. It works on porches, beside gates, or at the end of a garden path.
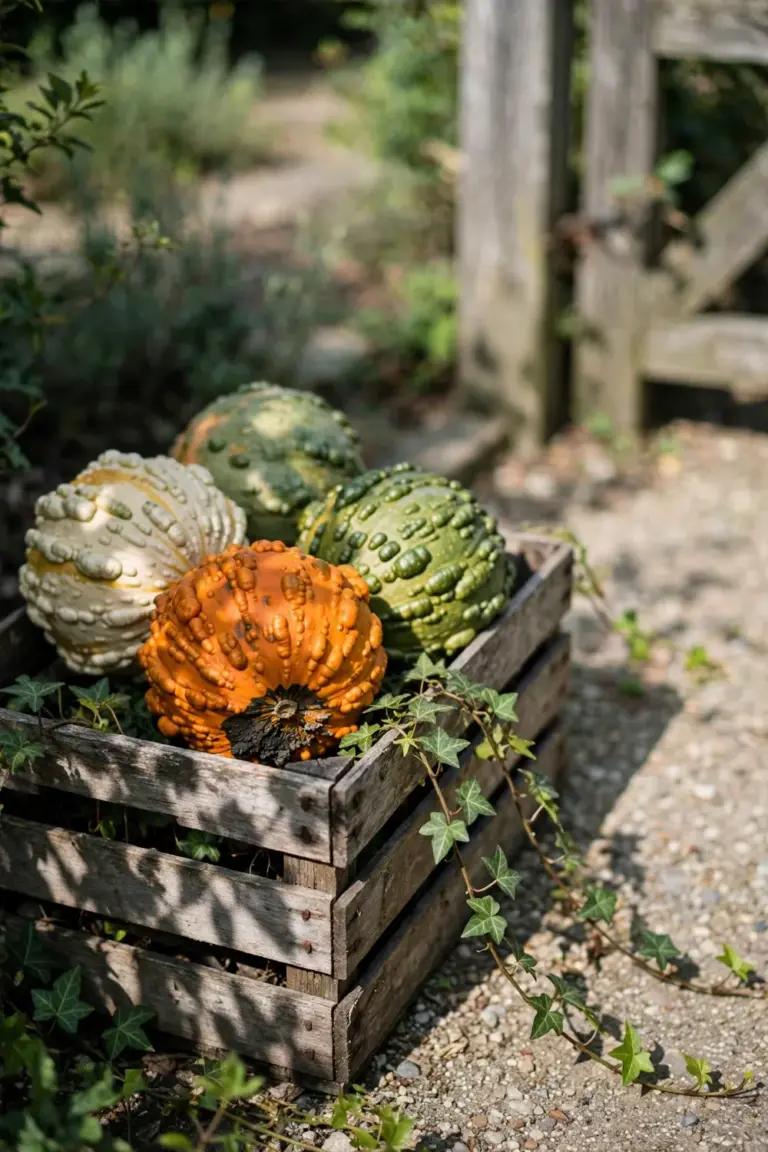
Line the crate with landscape fabric and add 3 inches of potting mix, then nestle in 4 to 5 gourds of different shapes. Tuck 3 ivy plants along the front edge. Within a month the vines trail down the crate front. Skip the fabric and the mix washes out.
42. Make a Topiary Ghost From a Tomato Cage
Make a topiary ghost from a tomato cage. It costs almost nothing. The cage supplies the cone shape, white fabric draped over the top hides the metal frame completely, and at night the fabric glows from within while the ghost sways gently in the breeze.
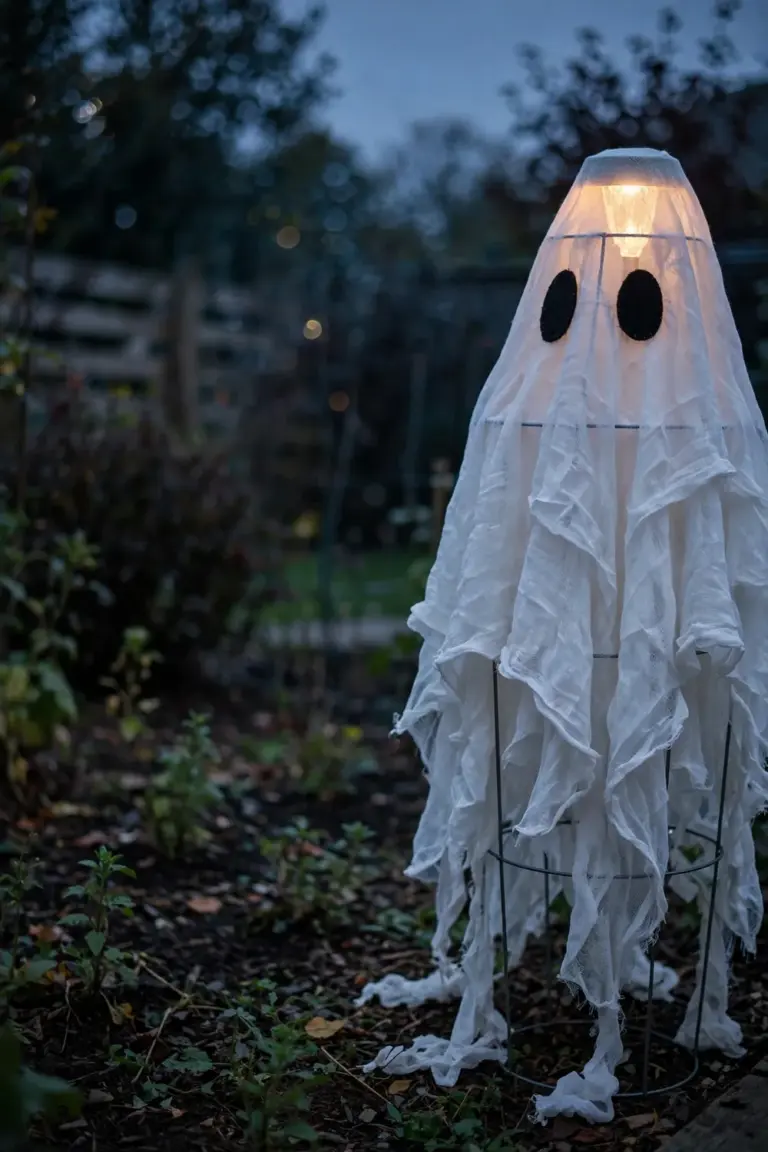
Flip a standard 42-inch tomato cage upside down and secure the prongs in the soil, then drape 2 yards of white cheesecloth over the frame and add black felt eyes. Tuck a solar light inside the top. The finished ghost stands about 3 feet tall once the fabric settles.
43. Plant a ‘Graveyard’ Fairy Garden in a Wide Bowl
Plant a ‘graveyard’ fairy garden in a wide bowl. The whole cemetery shrinks to tabletop size. Tiny tombstones, a twig fence, and a moss lawn carry the scene, and kids rearrange the pieces daily. The display never goes stale.
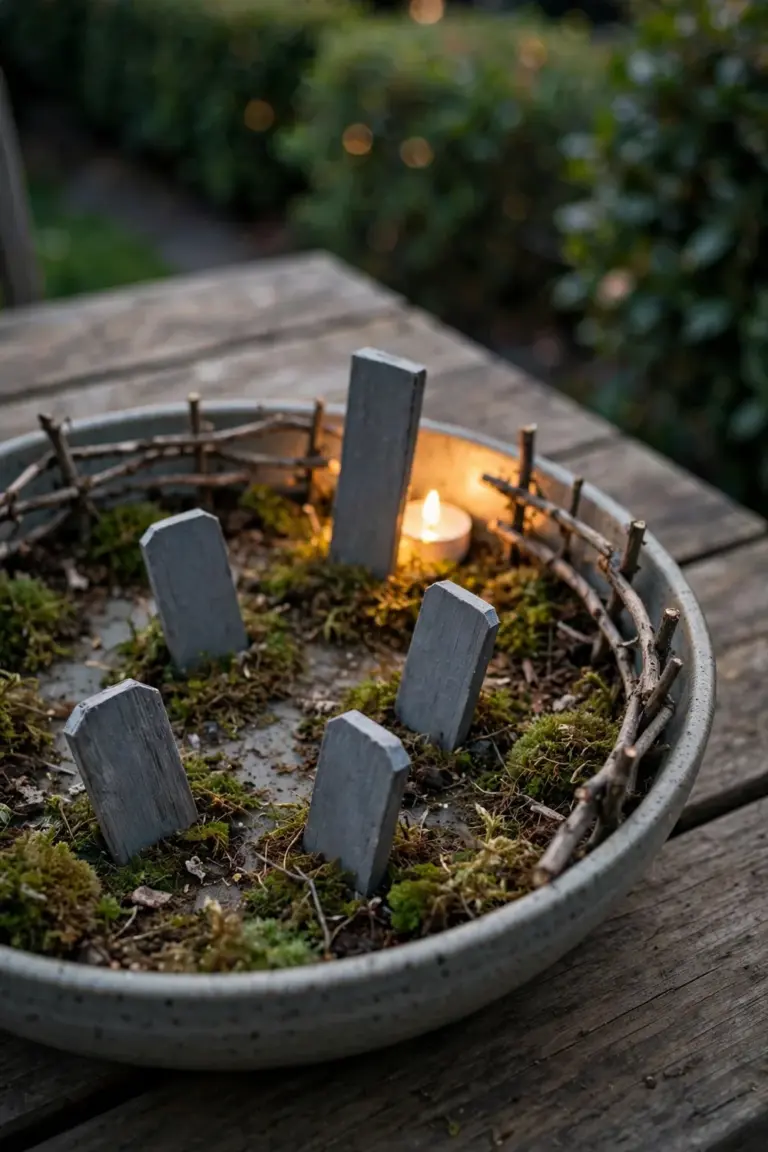
Fill a bowl at least 14 inches wide with potting mix and press in 5 to 7 small craft-stick tombstones, then add a pinch of moss between the stones and water lightly. Keep the bowl in bright indirect light. Tuck a tiny LED tea light behind one tombstone. The scene glows after dark.
44. Turn Galvanized Buckets Into Candy-Corn Planters
Turn galvanized buckets into candy-corn planters. The signal is unmistakable. A bucket’s tapered shape already echoes a candy corn, three painted bands finish the look, and buckets planted with orange mums read as giant candy from across the street.
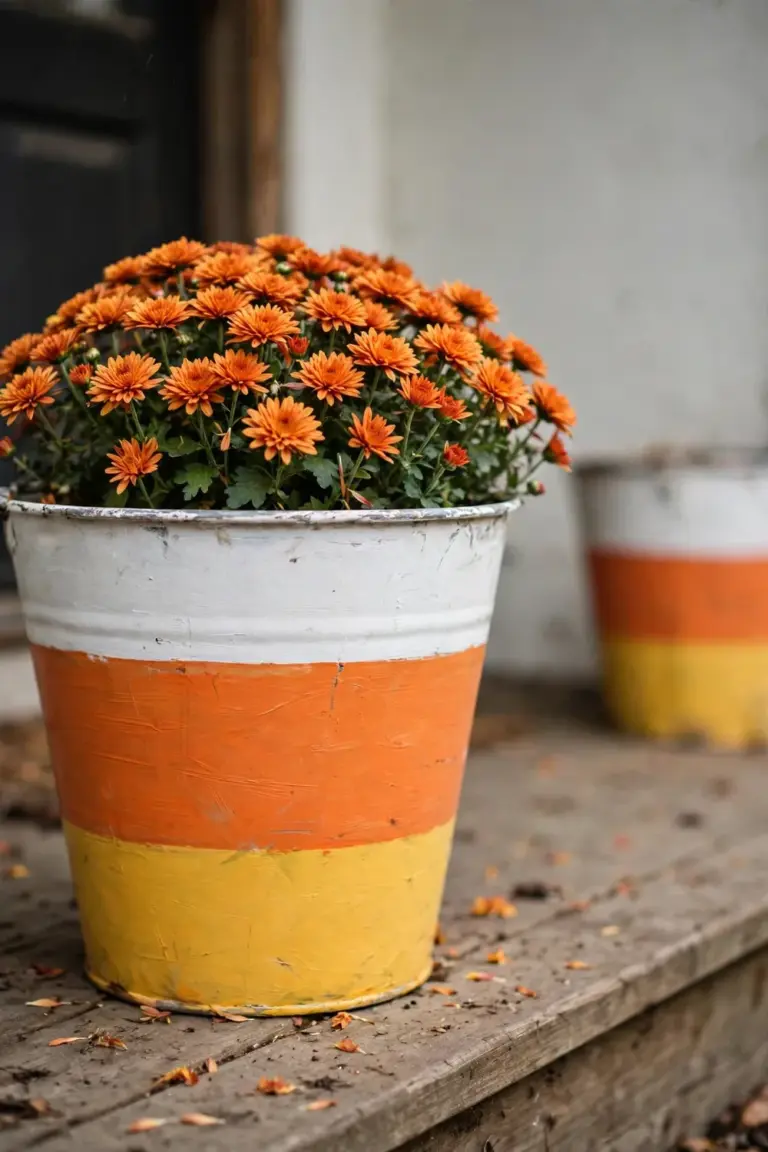
Sand the bucket lightly, then paint horizontal bands: white at the rim, orange in the middle, yellow at the base. Let the paint cure 24 hours, drill drainage holes, and drop in a 6-inch mum pot. Use outdoor acrylic paint so the colors survive rain. Two buckets flanking the door make a matching pair.
45. Stack Pots Into a Crooked Haunted Tower
Stack pots into a crooked haunted tower. Every pot tilts. Each one leans a few degrees off the one below, so the whole tower sags like a haunted house, and paint in black with orange rims turns it into a vertical accent for a dull porch corner.
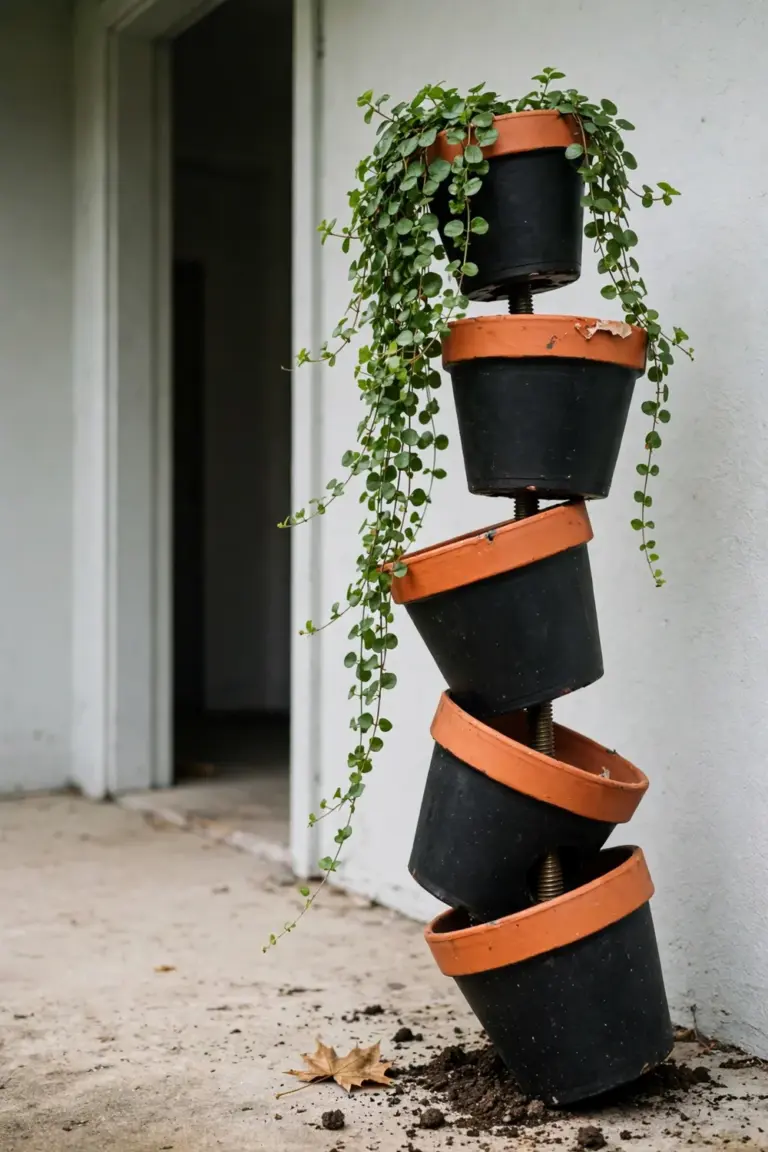
Thread five 8-inch pots onto a 4-foot wooden dowel driven into a heavy base pot, tilting each pot slightly as you stack. Fill the top pot with a trailing plant. Water from the top. Every level drains down to the next.
46. Use a Rusty Wheelbarrow as a Mobile Pumpkin Bed
Use a rusty wheelbarrow as a mobile pumpkin bed. Roll it anywhere. The weathered metal adds instant age, the deep basin holds soil, pumpkins, and trailing plants together, and the whole display parks by the door on party night. The next morning it wheels back to the garden bed.
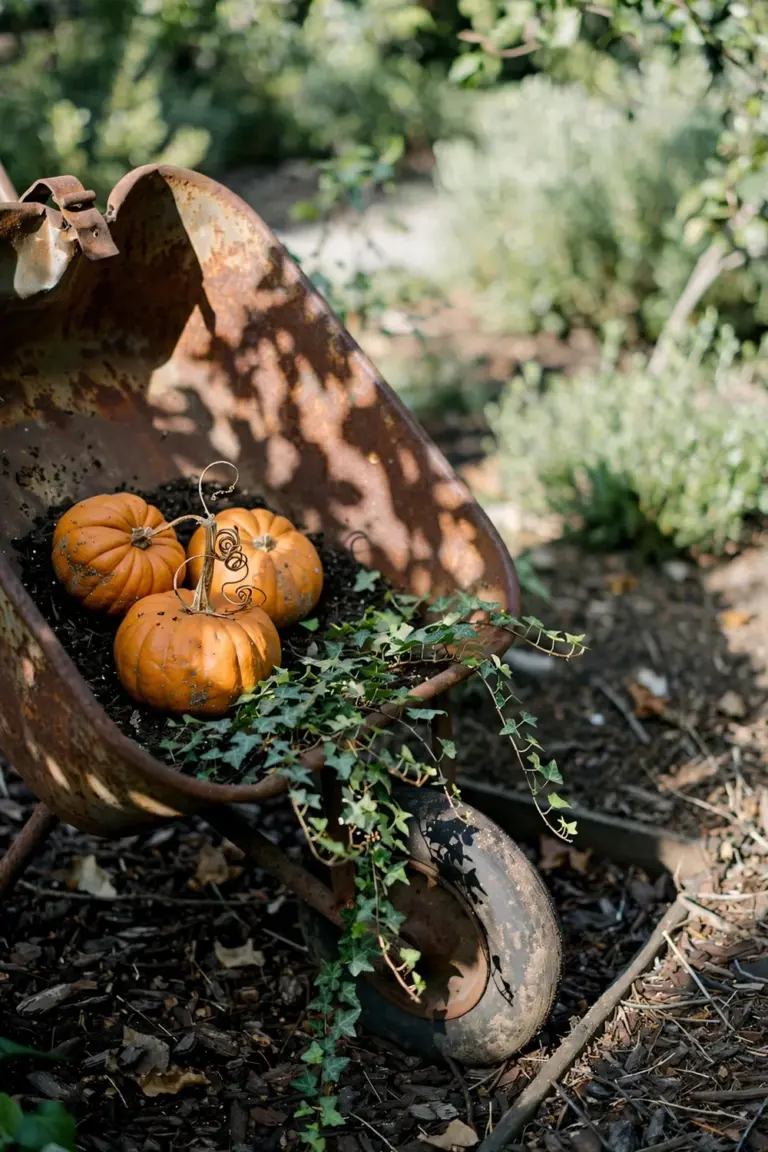
Drill six half-inch drainage holes in the basin and add 3 inches of potting mix, then nestle in 3 to 4 small pumpkins. Tuck trailing ivy between the pumpkins. The vines spill over the wheelbarrow’s edge.
47. Line a Window Box With Black Fabric and Orange Blooms
Line a window box with black fabric and plant orange blooms. The liner does the heavy lifting. Black fabric makes orange marigolds and mums glow like embers, especially in morning light, and the whole window dresses for the season fast.
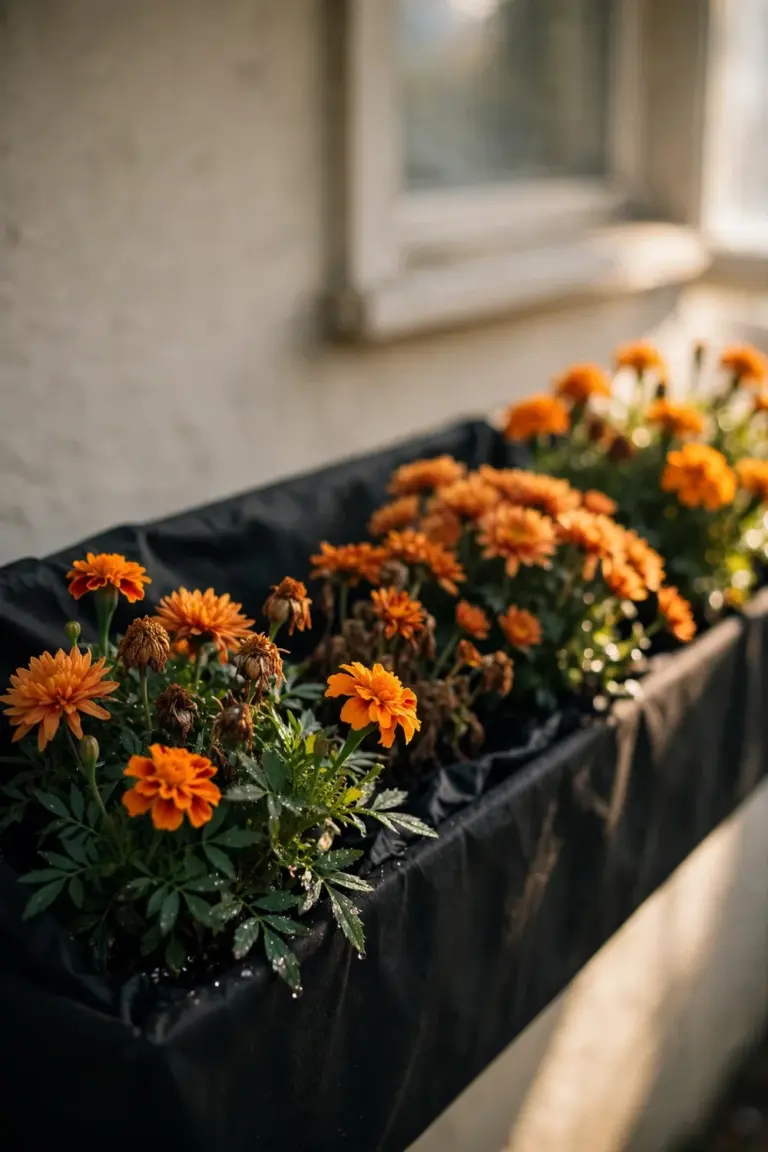
Fit landscape fabric inside a 24 to 36 inch box, fill it with potting mix, and plant 6 to 8 orange blooms 4 inches apart. Water every 2 to 3 days. Window boxes dry out faster than ground beds, and deadheading spent flowers weekly keeps new buds coming until frost.
Graveyard & Front-Yard Haunts
48. Build a Foam Tombstone Graveyard in the Side Yard
Build a foam tombstone graveyard in the side yard. This is the classic scene. Foam stones carve easily, cost little, and stand up to wind that topples heavier props, and clustered at different angles with mulch mounded at their bases they read as a real forgotten cemetery.

Cut 6 to 8 stones from 2-inch foam board, each 18 to 24 inches tall, and letter them with gray outdoor paint. Push a wooden stake 6 inches into the ground behind each stone and tie the stone to it with wire. Vary the heights. Vary the tilt angles. An even row looks new, and new is wrong here.
49. Half-Bury Skeleton Arms in the Mulch
Half-bury skeleton arms in the mulch. Hands claw up from the ground. One cheap prop delivers maximum scare for minimum effort in any bed with dark mulch, and arms placed near the walkway edge ambush trick-or-treaters at foot level.

Push 3 to 4 plastic skeleton arms into the mulch at a 45-degree angle with the fingers curled upward, and anchor each arm with a 6-inch landscape staple so wind and curious kids cannot pull them loose. Mound extra mulch around each wrist to hide the seam. Aim one small spotlight low. The hands cast long shadows.
50. Hang a Skeleton Climbing the Downspout
Hang a skeleton climbing the downspout. Nobody sees it at first. The vertical climb draws eyes up the house on the second look, the pose tells a funny story without a single word, and the house behind it gives the display scale that photographs well from the street.
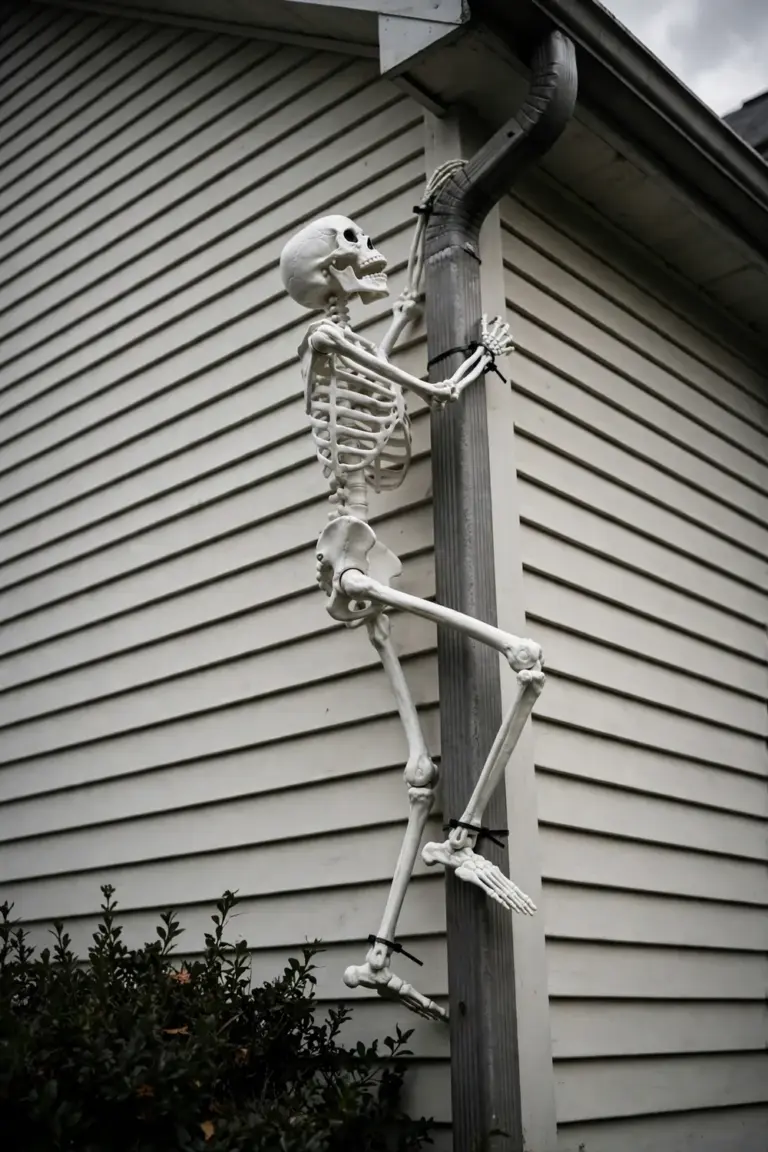
Pose the skeleton’s limbs around the downspout and fasten it with zip ties every 12 inches, hanging it 6 to 8 feet up so it clears heads below. Check the ties after the first windy night. A white skeleton against a dark downspout reads best from a distance.
51. Pose Skeletons Gardening in the Flower Bed
Set a plastic skeleton to work among the perennials. The whole yard suddenly has a story. A skeleton gripping a trowel, or pushing a wheelbarrow of leaves, turns a static flower bed into a scene drivers slow down to photograph. Gardeners recognize the pose instantly. Funny beats scary.
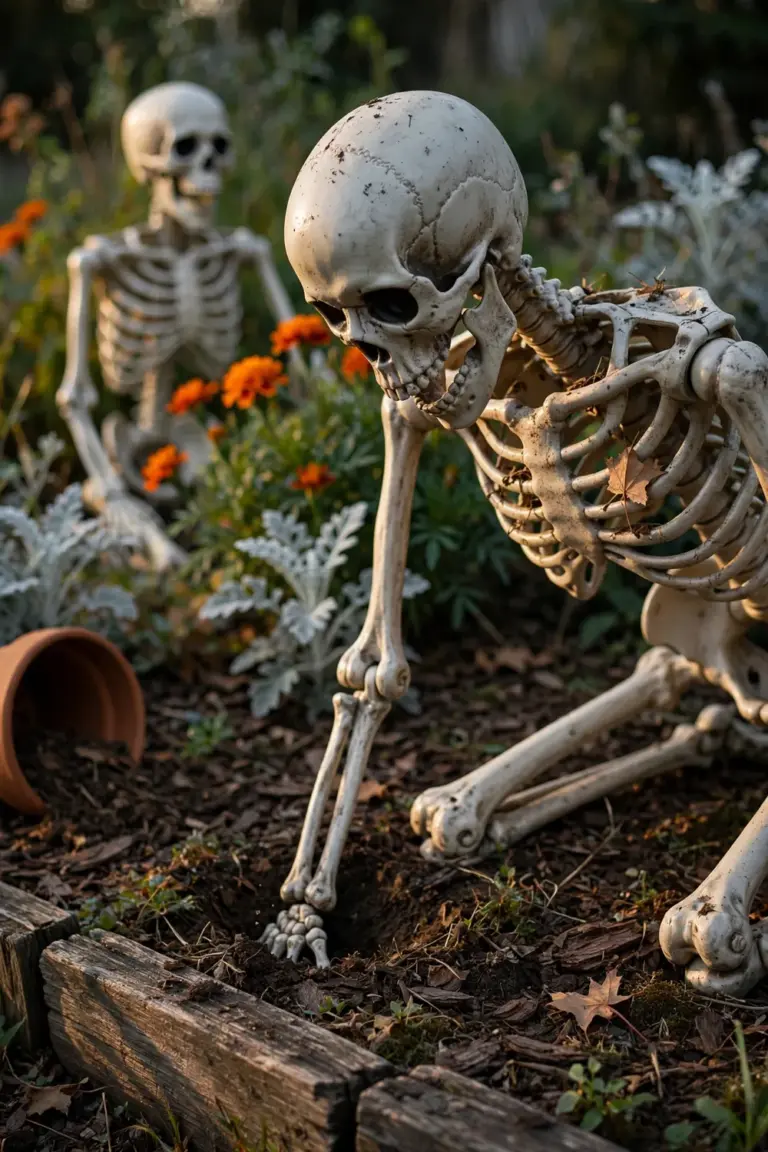
Pose the skeleton kneeling with both hands on a hand trowel. Wire the arm joints with floral wire. A breeze will not collapse it. Hide the hollow skull seam with a straw hat and give the figure a gardener’s silhouette. Two props carry the whole joke: the trowel in its hands and the wheelbarrow of leaves beside it.
52. Scatter Faux Crows on the Fence Posts
Perch a few matte-black crows along the fence line. The yard gains watchers. Birds do storytelling work that big props cannot, because they signal that something unseen has claimed the whole yard. One lone crow reads as decoration. A scattered flock reads as a warning. Drivers notice the posts first.
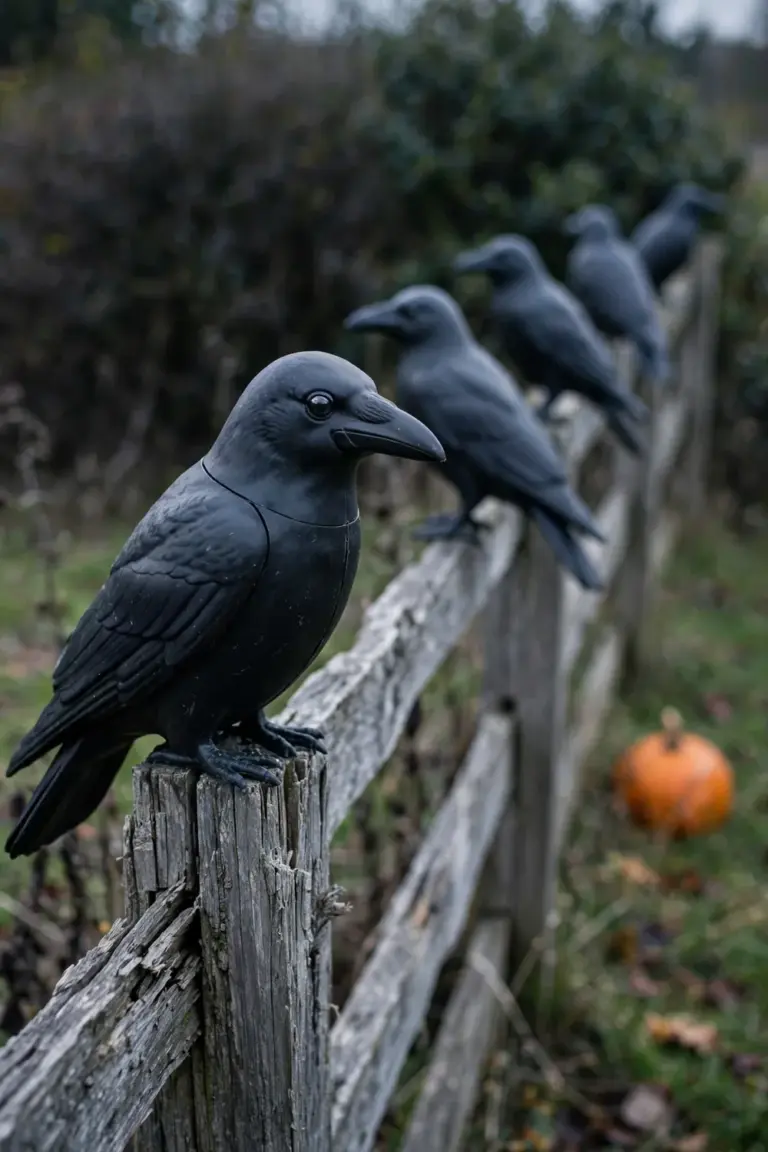
Zip-tie one crow to every second fence post along the whole run. The spacing looks natural, never staged. Angle each bird a different direction for a restless, alert look. Choose crows with wire feet. Wire feet survive wind; clip-on feet do not. Five crows along a 6.1 m run hits the sweet spot between spooky and cluttered.
53. Stretch Spider Webs Between the Shrubs
Stretch a giant web between two shrubs. The gap becomes the scariest part of the yard. Webs catch the porch light and throw shadows far beyond their real size. A single web across the walkway forces visitors to duck. The ducking makes the scare physical. Few decorations deliver this much effect for this little effort.
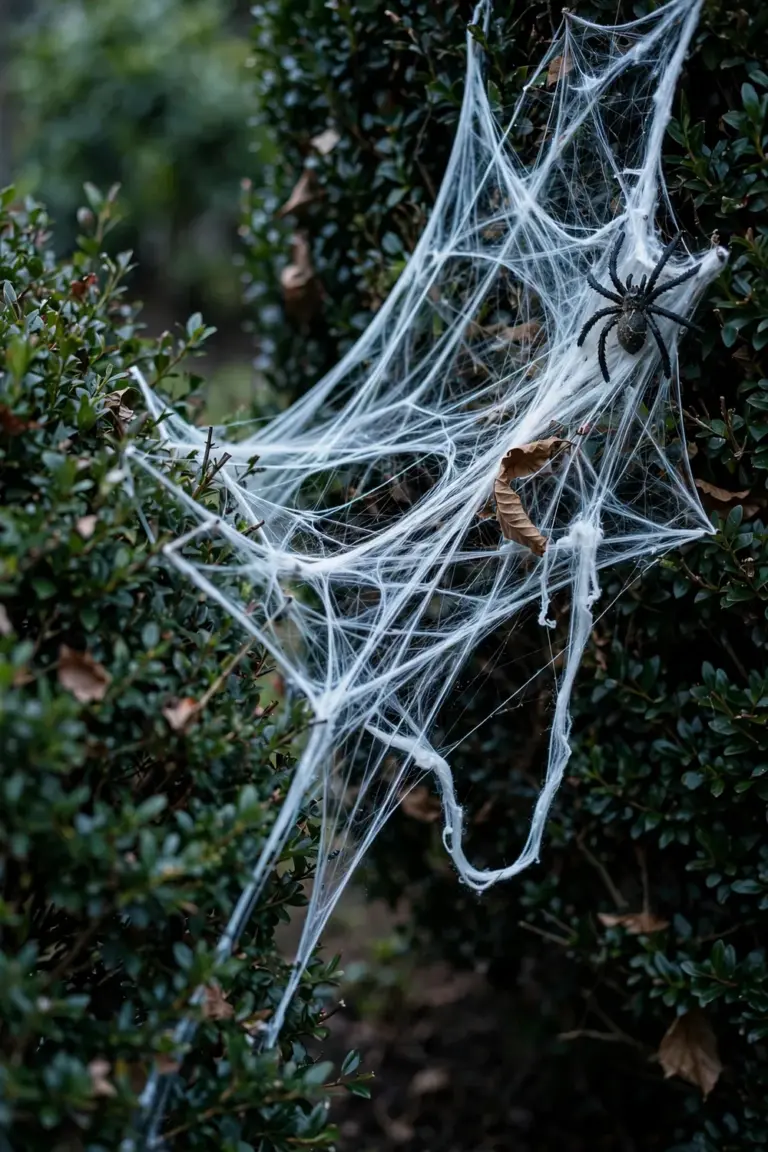
Hook the web’s outer ring to branches. Loop the inner rings loosely so the web sags like a real one. Stretch it about 1.8 m wide for a walkway. Anything narrower reads as a cobweb and loses the drama. Tuck a palm-sized spider off-center. Remove the web before the first hard frost, or the fibers shred.
54. Add a Fog Machine Behind the Tombstones
Roll a fog machine in behind the tombstones. The graveyard drops ten degrees in mood. Low fog hides the stone bases and erases the giveaway that they are foam. The stones appear to float. The camera reads depth where the eye fills it in. It photographs well.
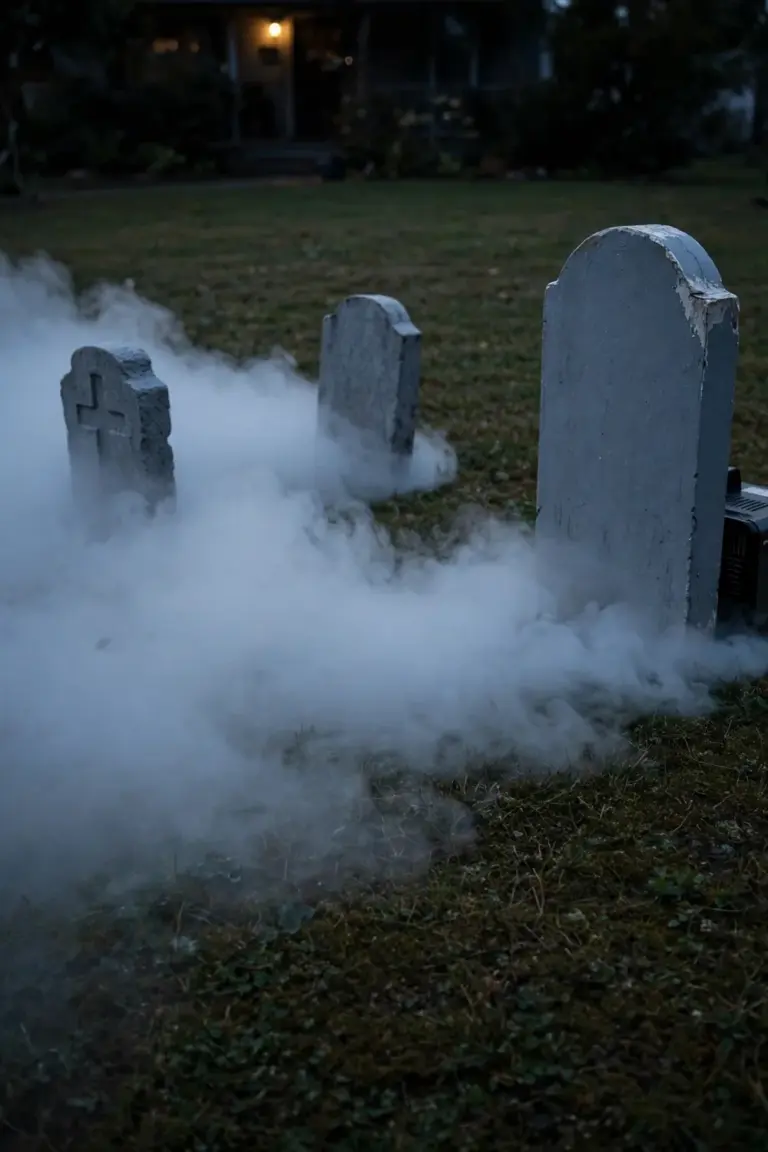
Set the machine 1.8 to 2.4 m behind the stones, aimed low across the lawn. Run it in 30-second bursts instead of continuously. Short bursts keep the fog hugging the ground. A standard 400-watt machine covers a typical front-yard graveyard without soaking the grass. Shelter the machine under a plastic tub with the nozzle exposed. Drizzle will not kill it.
55. Write Funny Epitaphs on Each Tombstone
Paint a joke on every tombstone. The graveyard becomes the funniest stop on the block. Epitaphs pull visitors in to read, which slows them down inside the display. Garden puns land hardest here. A cemetery of puns turns fear into laughter.

Write each epitaph with a white paint pen in block letters at least 5.1 cm tall. The path reader needs that height. Keep every joke to two lines. A third line turns a tombstone into a paragraph. Test the wording on a scrap of cardboard first. Six stones with six different jokes give visitors a reason to walk the whole row.
56. Light the Graveyard With Ground-Level Spotlights
Aim spotlights up from the ground. The tombstones grow taller in shadow. Uplighting is the oldest theater trick in the book, because light from below makes familiar shapes unfamiliar. The stones throw long shadows across the lawn. The whole graveyard reads bigger and older after dark.
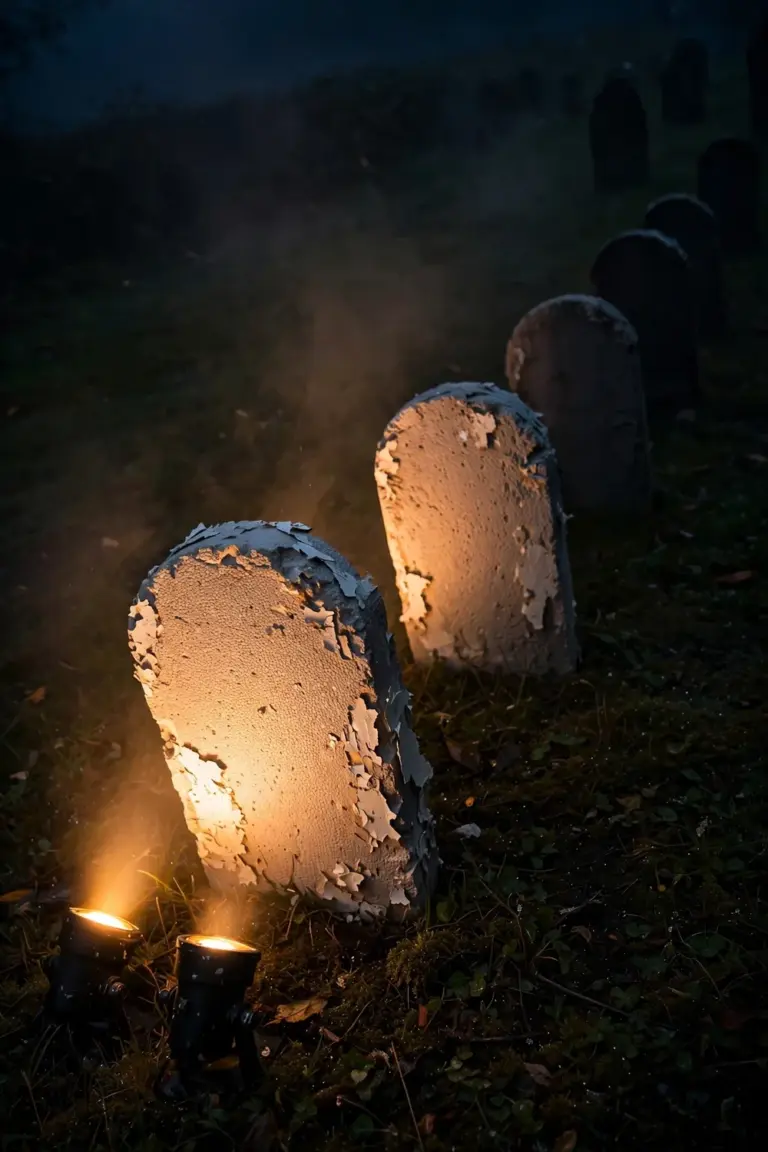
Place one solar spotlight at the base of every other stone, angled up at 45 degrees. Warm white bulbs read as moonlight. Green bulbs read as toxic. Space the lights about 0.9 m from each stone for a soft wash instead of a harsh hotspot. Set the panels facing south during the day. A full day facing south means a full overnight charge.
57. Stage a ‘Witch Crashed Into the Hedge’ Scene
Stick striped legs and a broom into the hedge upside down. The whole street gets the joke instantly. The scene works because everyone already knows the story, and the hedge supplies the punchline. Legs kicking skyward from a shrub need no explanation. Fastest laugh in the playbook.
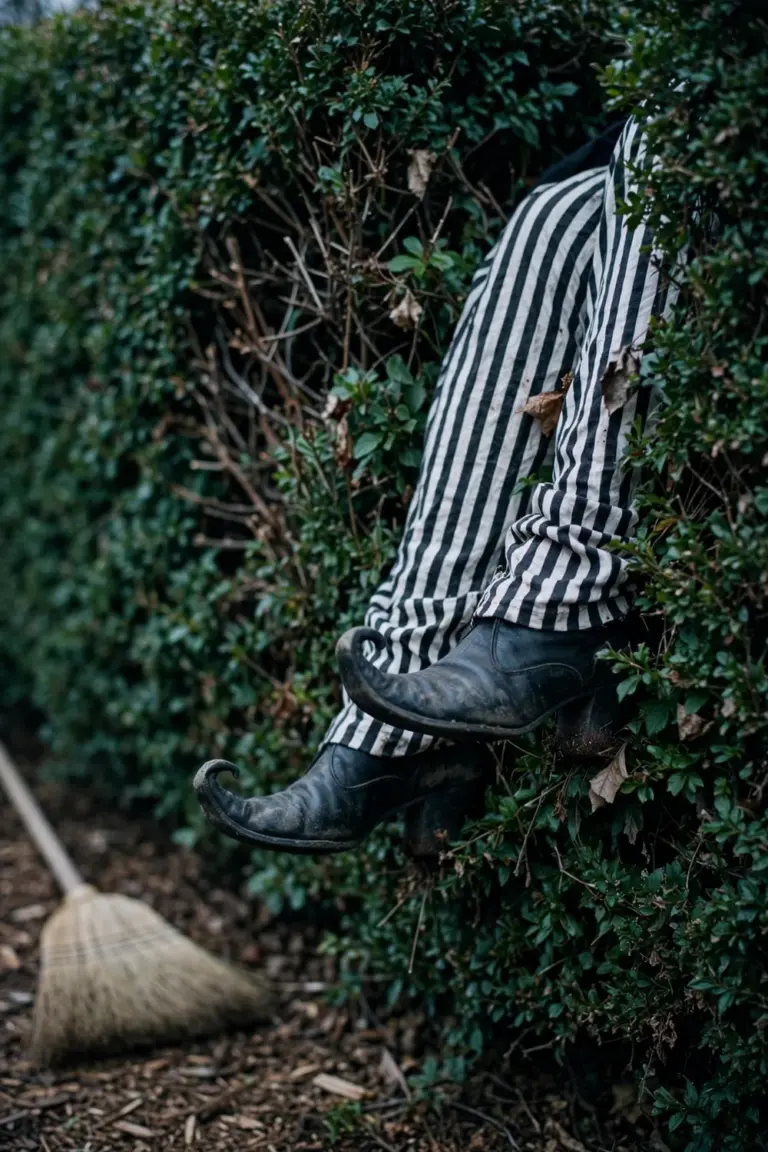
Push two stuffed stocking legs into the top of a dense hedge about 1.2 m off the ground. Cross a broomstick beneath the legs at a diagonal for the crash angle. Snag the witch’s pointed hat on a lower branch nearby. Keep the legs shoulder-width apart. The silhouette must read clearly from passing cars.
58. Hang Ghosts From the Low Tree Branches
Hang white sheet ghosts from the lowest branches. The tree starts haunting itself. Ghosts earn their place because they move, and movement is the whole trick. Every breeze gives the display new life. A still yard feels decorated. A yard with swaying ghosts feels occupied. Kids love them. Spooky without the scare.
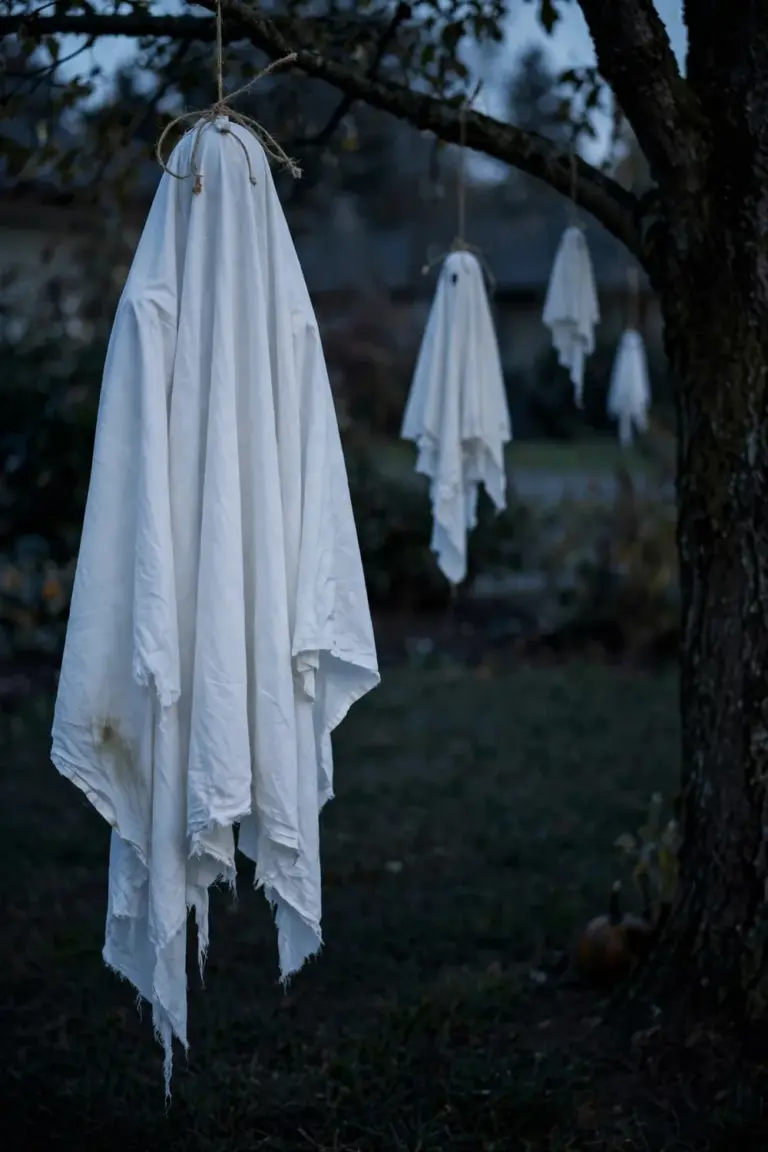
Drape a 0.9 m square of cheesecloth over a foam ball and tie it with twine. Hang each ghost from a branch at least 1.8 m high so visitors walk beneath without ducking. Space the ghosts 0.6 to 0.9 m apart for a floating flock. Add a battery tea light inside every third ghost. The inner glow sells it.
59. Place a Life-Size Skeleton in the Porch Chair
Seat a life-size skeleton in the porch chair. The house suddenly has a host. A skeleton lounging by the front door greets every visitor personally. The pose does the comedy: crossed legs, one arm draped over the chair back, head tilted toward the street. People will pose for photos beside it all evening.

Sit the skeleton deep in the chair and zip-tie its pelvis to the seat frame. It cannot slide forward. Cross the legs at the knee and rest one bony hand on the armrest. Drape a spare jacket over its shoulders for a lived-in look. Set the candy bowl in its lap. Park the chair two steps from the door.
60. Rope Off the Haunt With Caution Tape
String yellow caution tape across the yard’s edge. The display instantly looks official. Tape creates a boundary that makes the haunt feel like a real scene. Visitors respect the line. Feet stay off the flower beds. The tape frames the display like a stage for everyone on the sidewalk.
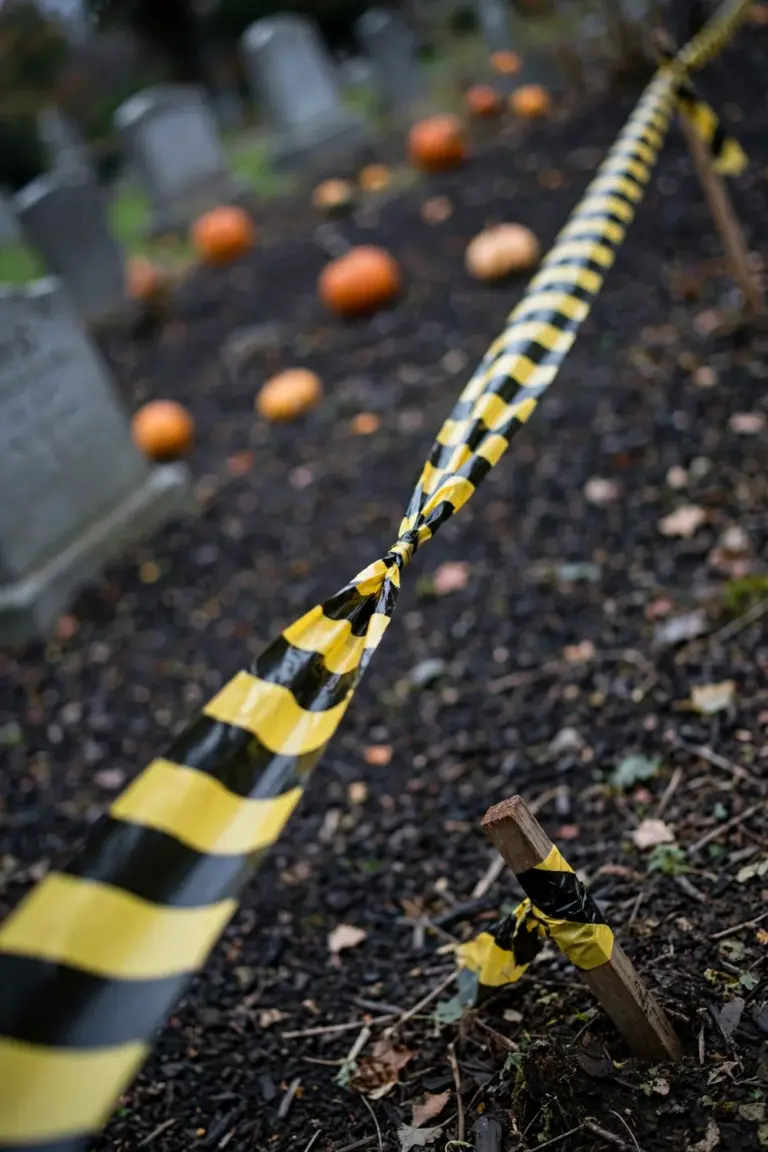
Run the tape between garden stakes about 0.9 m high along the front of the display. Twist the tape once between stakes so it catches the wind without tearing. Spell out HAUNTED on the tape with a black marker for a custom touch. Two parallel strands read as a serious perimeter. One strand reads as an afterthought.
Lighting After Dark
61. Line the Driveway With Solar Pumpkin Lanterns
Line the driveway with solar pumpkin lanterns. Guests follow a glowing trail to the door. These halloween garden ideas shine brightest after dark, when every lantern becomes a guidepost. Solar lights charge all day and switch on by themselves. The runway builds itself. The effect welcomes mixed-age crowds arriving after sunset.
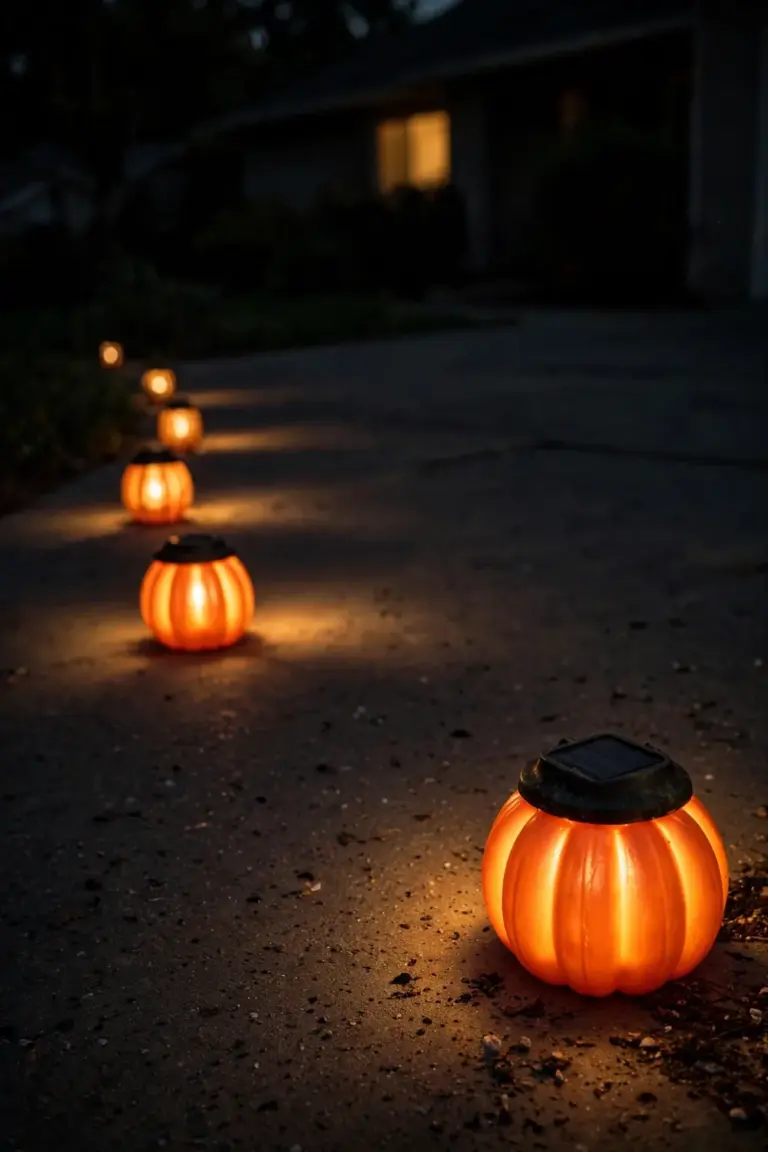
Set one lantern every 1.2 m along both edges of the driveway for a continuous line of light. Push each stake firmly into soft soil. The lantern cannot tip. Clear dead leaves from every solar panel weekly. A shaded panel charges poorly. Twelve lanterns dress a standard two-car driveway without gaps.
62. Uplight the Biggest Tree in Purple
Wash the biggest tree in purple light. It becomes the neighborhood landmark. Purple uplighting turns familiar bark into something theatrical. The color reads as Halloween instantly, even from a block away, so one dramatic tree anchors the display and gives every decoration a backdrop.
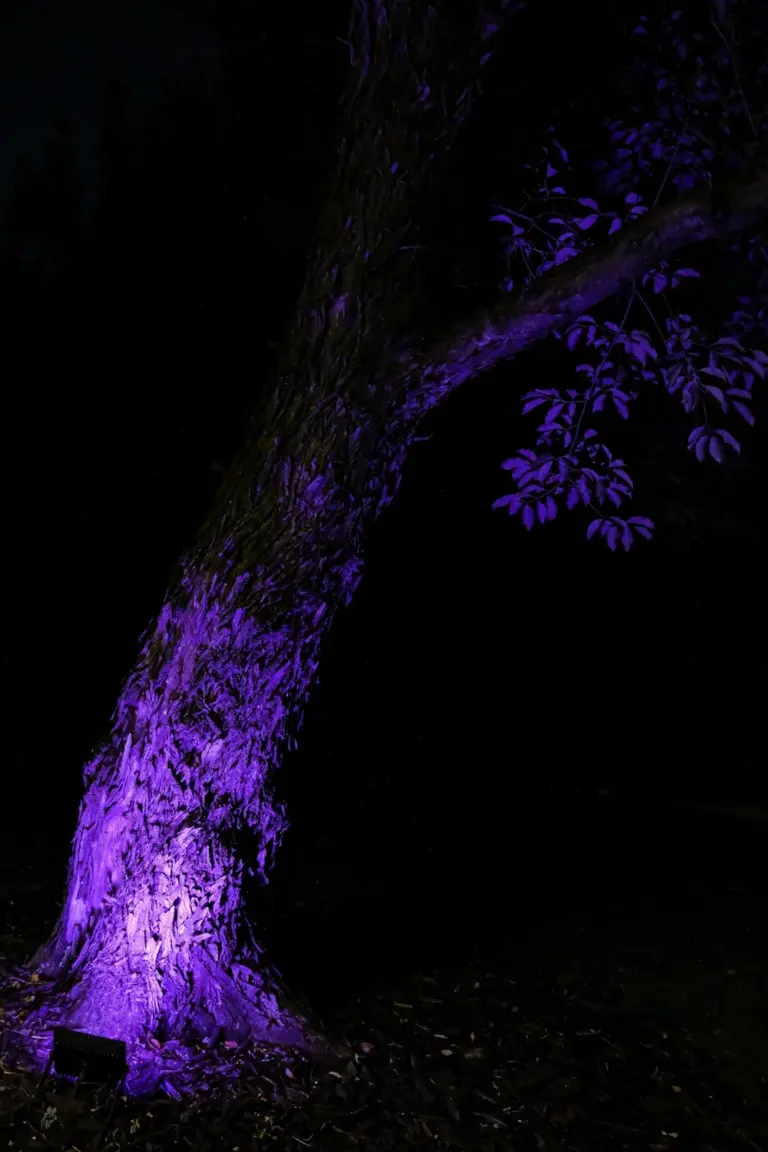
Set two weatherproof spotlights at the trunk base, one on each side, angled up into the canopy. Purple LED bulbs draw little power and last the whole season. Position each light about 0.6 m from the trunk. Closer scorches a hotspot. Aim the beams to overlap in the branches for an even wash.
63. Hang Mason Jar Lanterns From Shepherd’s Hooks
Hang mason jar lanterns from shepherd’s hooks. The path glows at walking height. Jars soften LED light into something warm and old-fashioned. The hooks lift the glow above the flower beds, where ground lights would hide. Visitors feel guided rather than spotlighted. The mood stays warm.
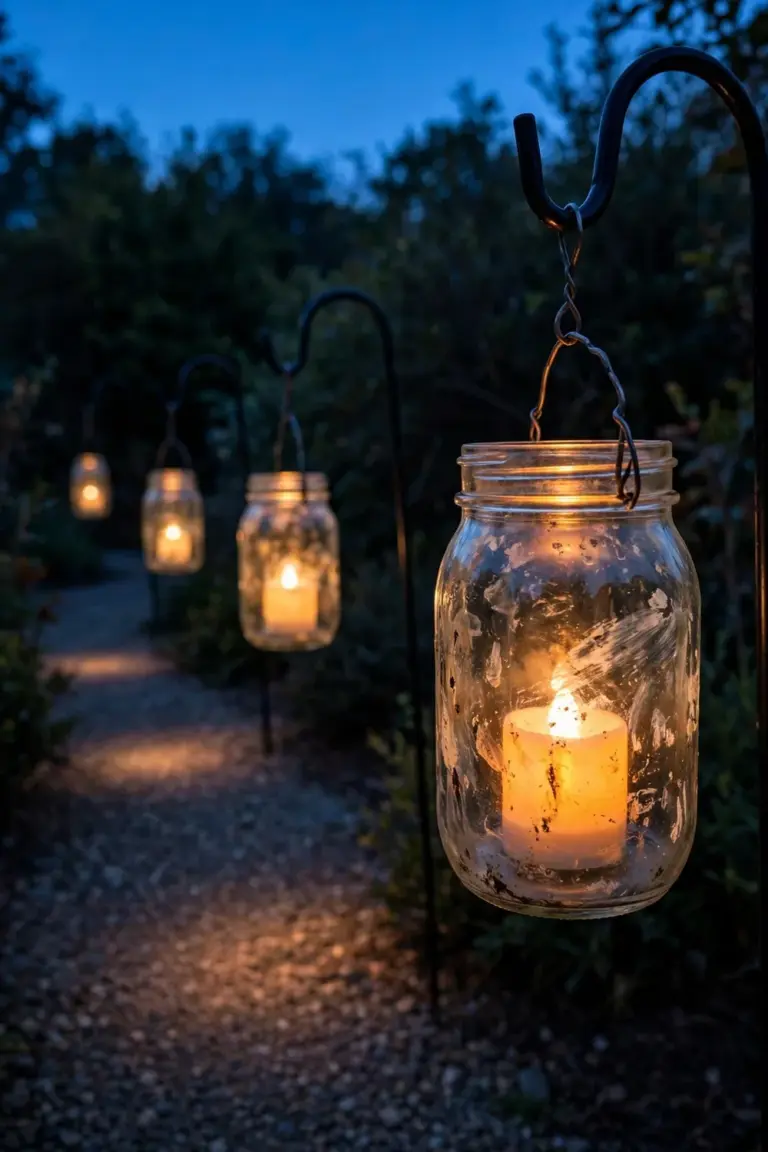
Drive one shepherd’s hook into the soil every 1.8 m along the path. Drop a battery tea light into each quart-size jar and hang the jar from the hook’s curve. Frost the jars with spray paint for a diffused glow. Five hooks make a short path feel intentional. One hook looks lost.
64. Project Bats Onto the Garage Door
Project a loop of flying bats onto the garage door. The biggest blank wall becomes a show. Projection covers more square footage than any prop for the price of one device. The moving silhouettes read as alive from the street. Neighbors slow their cars to watch the swarm.
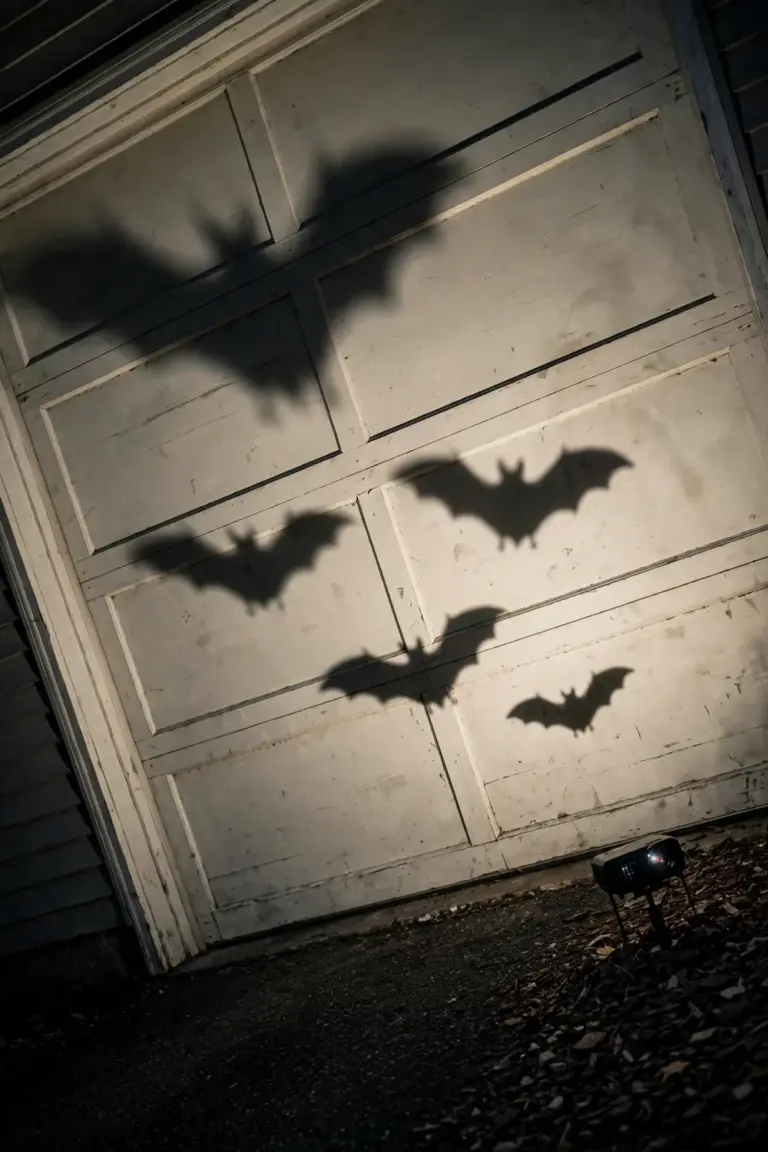
Mount the projector on a tripod about 4.6 m from the door for a crisp image. Choose a loop with at least twenty bats, because fewer repeats the pattern and breaks the spell. Angle the projector slightly upward to fill the full door. Run the show only after full dark. Daylight washes the image out.
65. Swap Porch Bulbs for Orange LEDs
Swap the porch bulbs for orange LEDs. The whole entrance shifts into Halloween mode in the time it takes to screw in a bulb. Orange light flatters pumpkins. It warms wood tones, and it costs almost nothing to run. The change takes two minutes. It does more for the house than any single prop, and every photo at the door will glow.
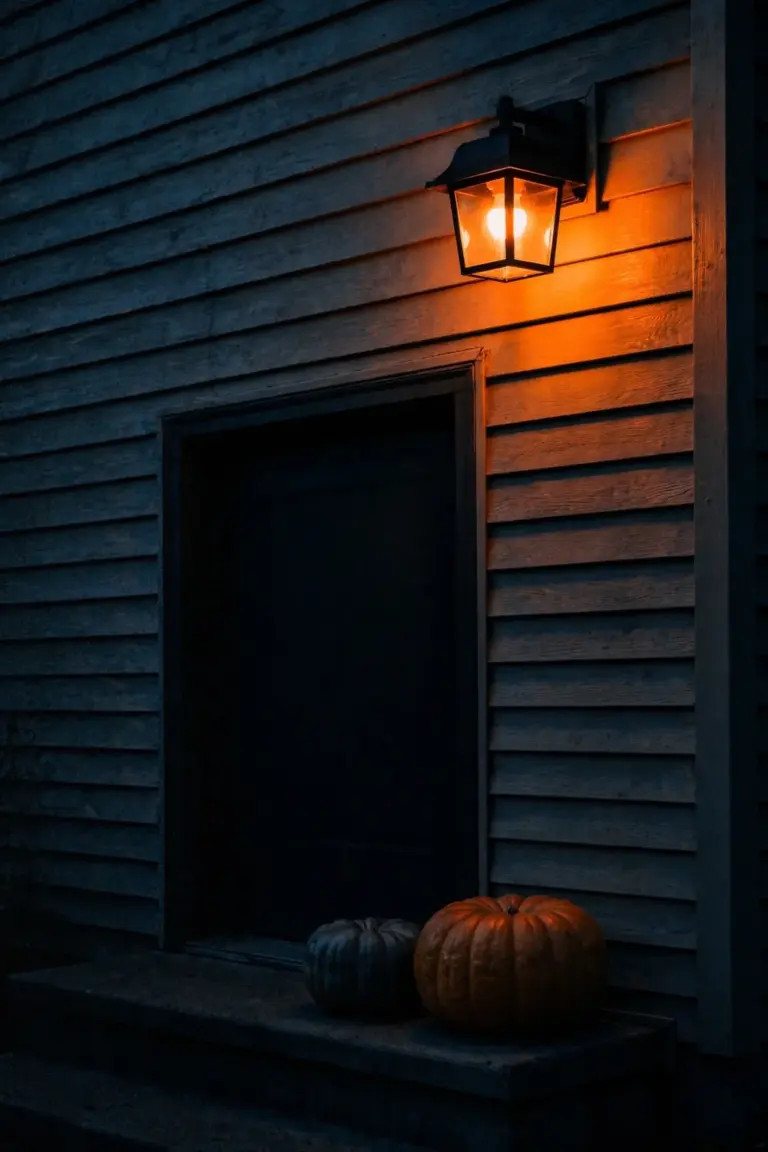
Replace each porch bulb with an orange LED of matching base size and similar brightness. Choose a warm orange over neon for a candlelit feel. Keep one white bulb in the fixture nearest the steps. Visitors need to see where they walk. Store the originals in a labeled bag for November.
66. Float LED Candles in the Water Feature
Float LED candles in the water feature and watch the pond start glowing from within. Moving water doubles the effect because every ripple multiplies the light. The candles drift slowly, so the display never sits still. A lit water feature becomes the quiet centerpiece of the yard.

Drop six to eight waterproof LED candles into the basin and let the current arrange them. Choose candles with a flicker mode for a flame-like shimmer. Anchor one candle with fishing line if the pump pushes them all to one side. Retrieve the candles before the first freeze. Ice ruins the seals.
67. Outline the Roofline With Purple String Lights
Outline the roofline with purple string lights. The house wears its costume. Rooflines define the house’s silhouette after dark, so lighting them frames everything below. Purple keeps the look Halloween-specific instead of Christmas-adjacent. The outline shows up in photos from across the street.
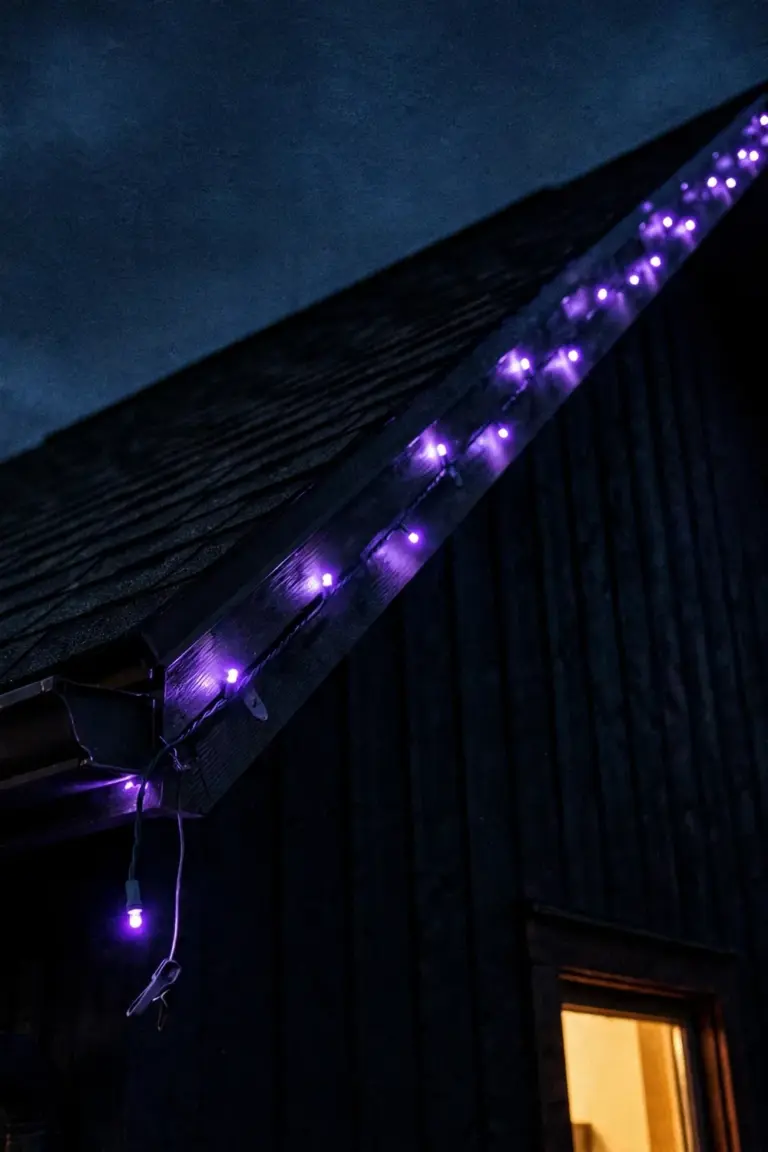
Clip one string of outdoor-rated lights along the front eave with plastic gutter clips. Space the clips every 30 cm so the line hangs straight. Connect no more than three strings end to end per the manufacturer’s rating. Plug the run into a dusk-to-dawn timer. The display manages itself.
68. Place Flickering Lanterns Inside Paper Bag Luminaries
Set flickering lanterns inside paper bag luminaries, and the walkway glows like an old village street. Luminaries are the cheapest dramatic lighting in the Halloween toolkit. The paper diffuses the light into a soft amber pool around each bag, and a row of them turns an ordinary path into a procession route.
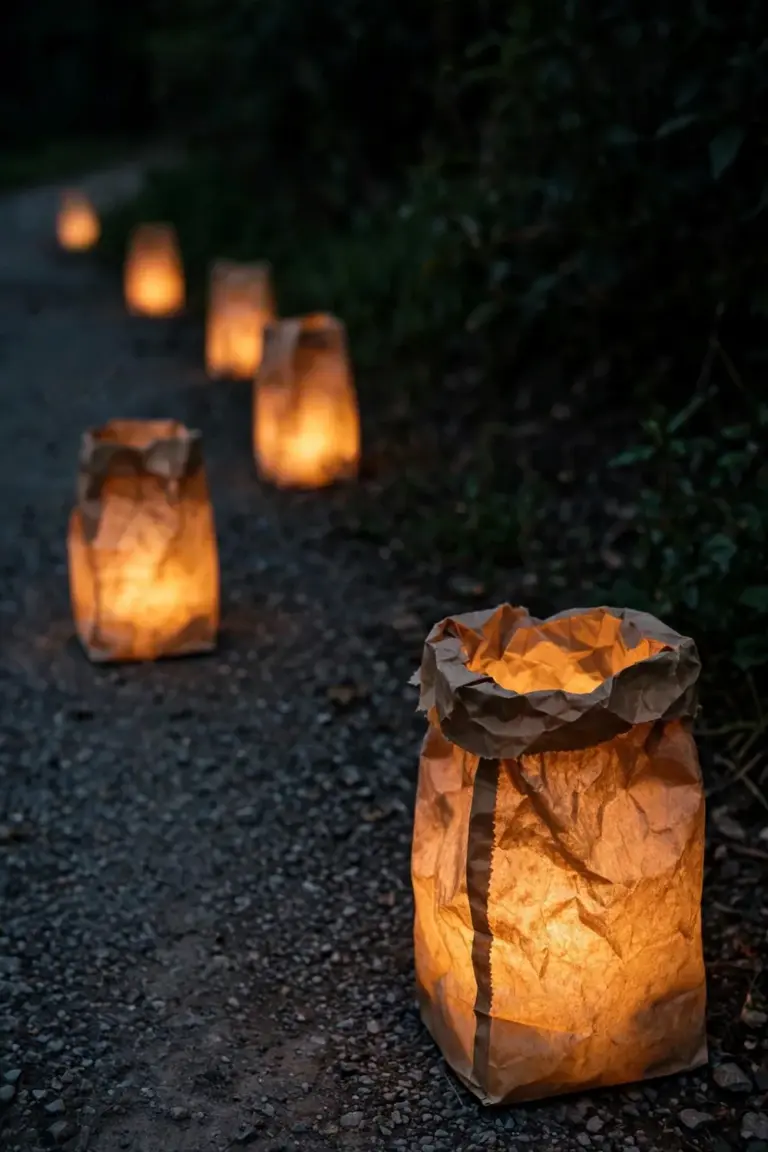
Fold the top of each lunch-size paper bag down 5.1 cm for stability. Set a battery lantern inside each bag and line the bags 0.6 m apart along the path. Weight each bag with a scoop of sand. Wind cannot topple it. Ten bags light a typical front walk from curb to porch.
69. Spotlight the Tombstones From Below
Spotlight the tombstones from below. The lettering casts shadows that double the text. Low light rakes across carved surfaces and makes every groove visible. The stones look ancient rather than foam. Visitors read epitaphs they would miss in flat daylight.
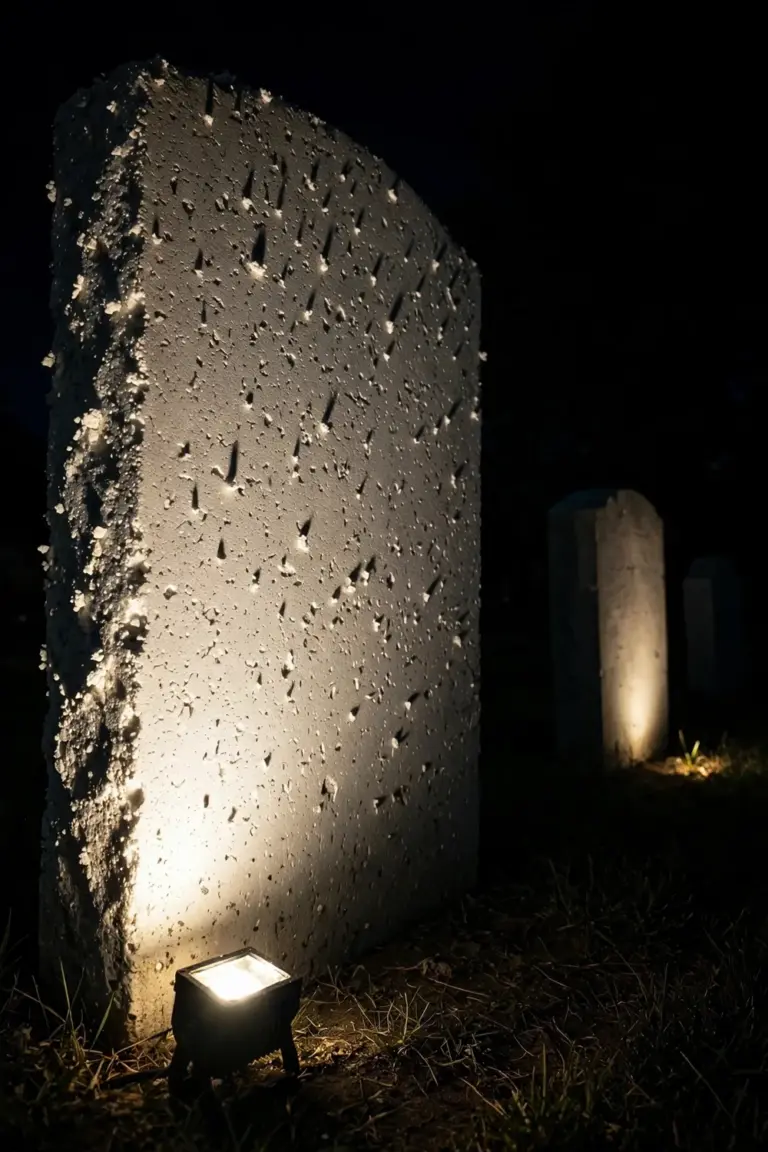
Lay one small spotlight flat on the ground in front of each featured stone. Tilt the beam up at a shallow angle so it grazes the carved face. Use cool white bulbs for a moonlit read or amber for candlelight. Light three stones at most. Lighting all of them flattens the drama.
70. Use a Strobe Light Sparingly Behind the Fog
Fire a strobe light behind the fog in short bursts, and the graveyard flickers like a silent film, all lightning and no sound. The effect works because it is brief, since constant strobing annoys and a flash every few seconds startles. Save this trick for the peak trick-or-treat hour.

Place the strobe at least 3 m behind the fog source so the bursts read as distant flashes. Set the rate to one flash every three seconds for maximum unease. Warn neighbors with light sensitivities before the big night. Run the strobe for one hour only. Then switch back to steady light.
71. Wrap the Trunk in Green ‘Slime’ Lights
Wrap the trunk in green lights, and the tree starts oozing atmosphere. Green reads as swamp slime and science experiment at once. The color is unexpected enough to make people stop and stare. A green trunk beside purple uplighting gives the yard a two-color theme that looks designed.
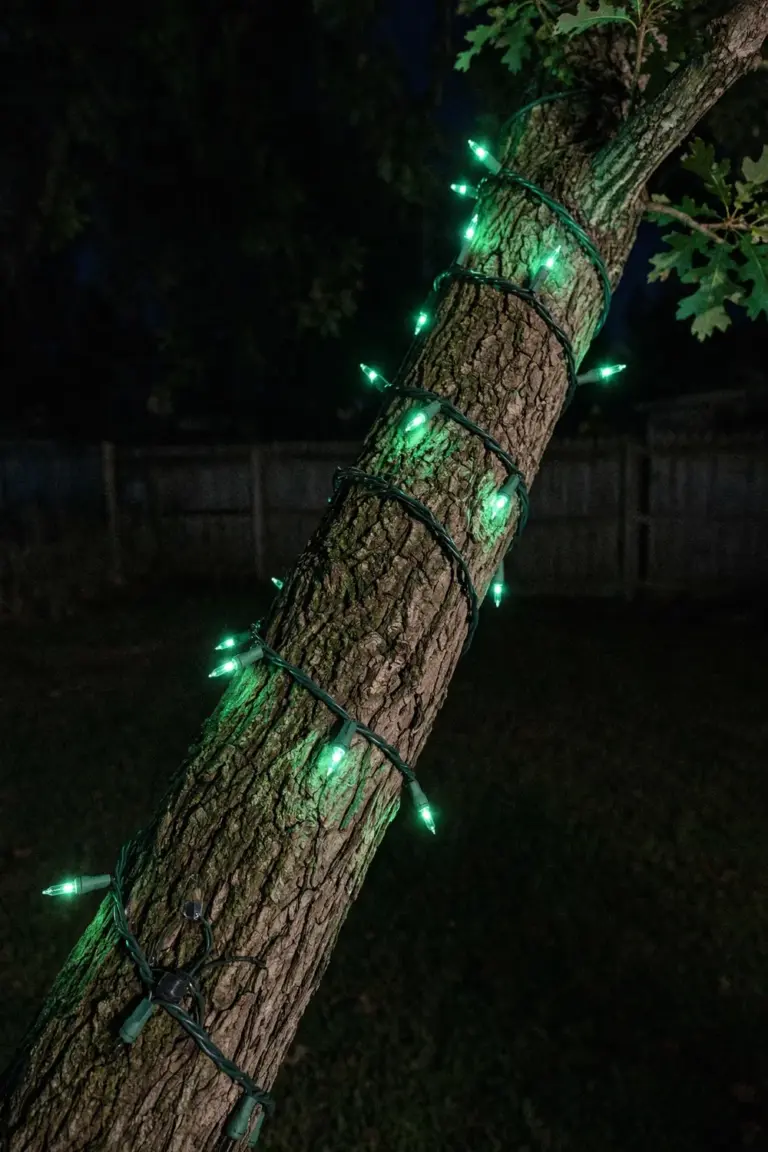
Spiral one fifty-bulb string from the base to the lowest branches, spacing the wraps 15 cm apart. Tuck the plug end near the trunk base for a tidy connection. Green LEDs use minimal power, so one string covers a medium trunk. Unplug the string during heavy rain. Wet connections are not worth the risk.
72. Put Glow-in-the-Dark Paint on Garden Edging Stones
Paint the edging stones with glow-in-the-dark paint. The garden beds outline themselves at night. Charged stones release a soft green glow for hours after sunset. The effect defines the yard’s layout without any wiring. Trick-or-treaters get a lit path that needs no electricity at all.
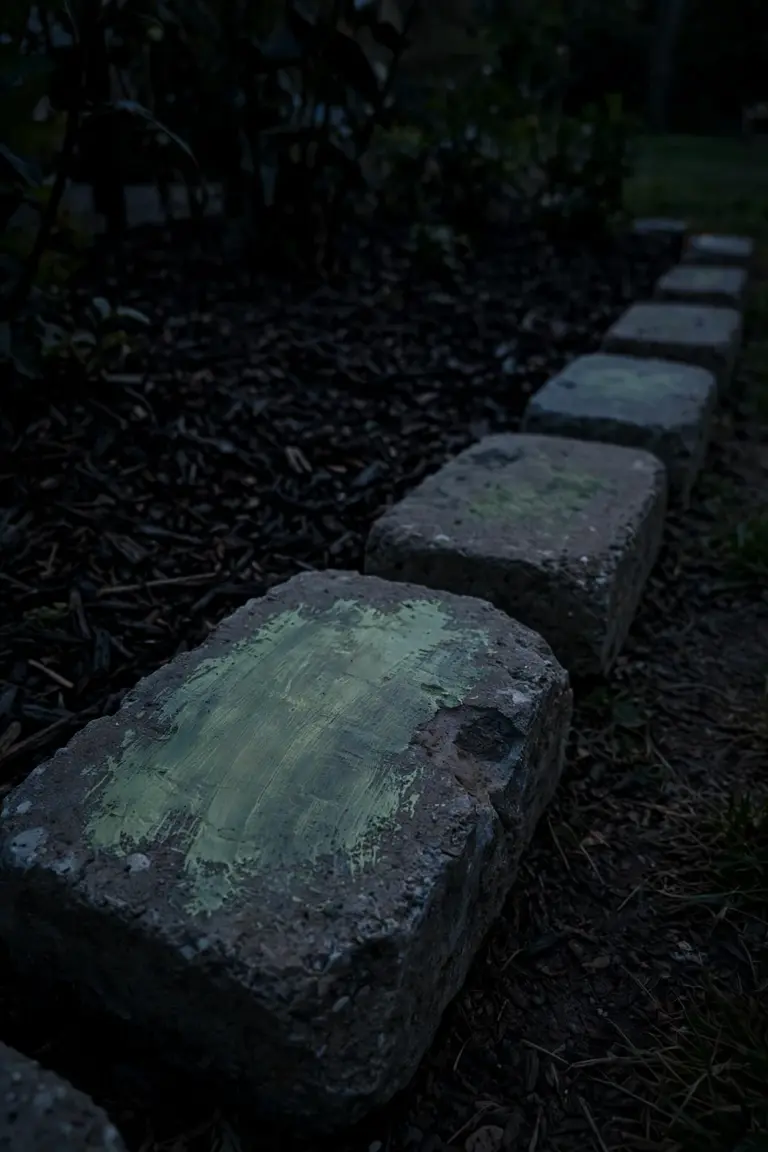
Brush two coats of exterior glow paint onto the top face of each edging stone. Let the first coat dry four hours before adding the second. Place the painted stones along the bed edge facing the walkway. Sunlight charges the paint daily. No maintenance needed through the season.
73. Hang a Chandelier of Tiny Ghost Lights in the Gazebo
Hang a chandelier of tiny ghost lights in the gazebo. The structure becomes a haunted ballroom. A single glowing fixture draws every eye upward. The gazebo turns from a daytime sitting spot into the yard’s evening crown. Guests will wander over just to stand beneath it.
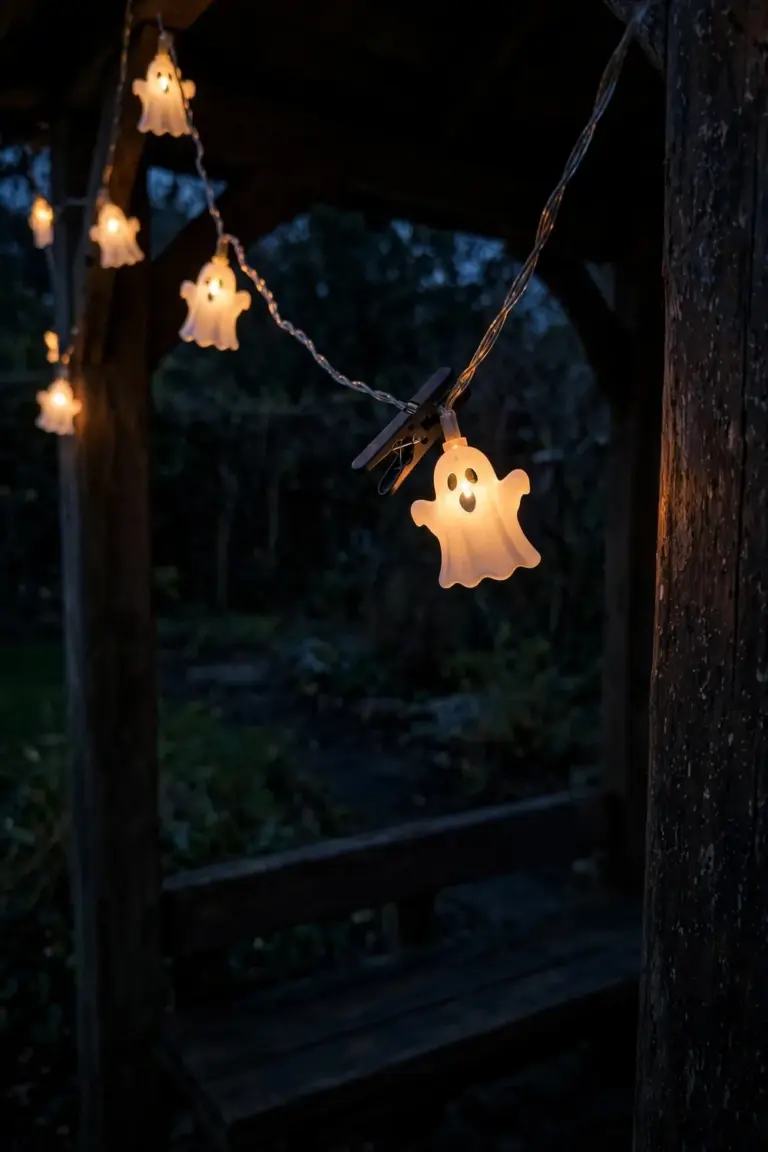
Suspend a grapevine ball from the gazebo’s center beam with sturdy twine. Weave one string of warm white fairy lights through the ball. Hang six miniature sheet ghosts from the ball’s lower half. Plug the lights into an outdoor timer set for dusk, then let the timer remember for you.
74. Light the Pumpkin Topiary From Inside Each Fruit
Light the pumpkin topiary from inside each fruit. The whole stack glows like a totem. Internal light turns carved faces into lanterns that shine in every direction. The stack becomes visible from down the street. A lit topiary outshines any single jack-o’-lantern on the block.

Cut a lid in the back of each pumpkin rather than the top for a cleaner look. Set one battery tea light inside each fruit before stacking. Stack the pumpkins largest to smallest and pin them with a wooden dowel through the centers. Three lit fruits make a classic topiary. Five make a showpiece.
75. Replace Every Real Flame With Battery-Operated LEDs
Replace every real flame with battery-operated LEDs. The display stays spooky without the fire risk. Real candles and dry autumn leaves are a dangerous combination on a windy night. LEDs flicker convincingly and never blow out. The swap protects the house, the yard, and every costume that brushes past.
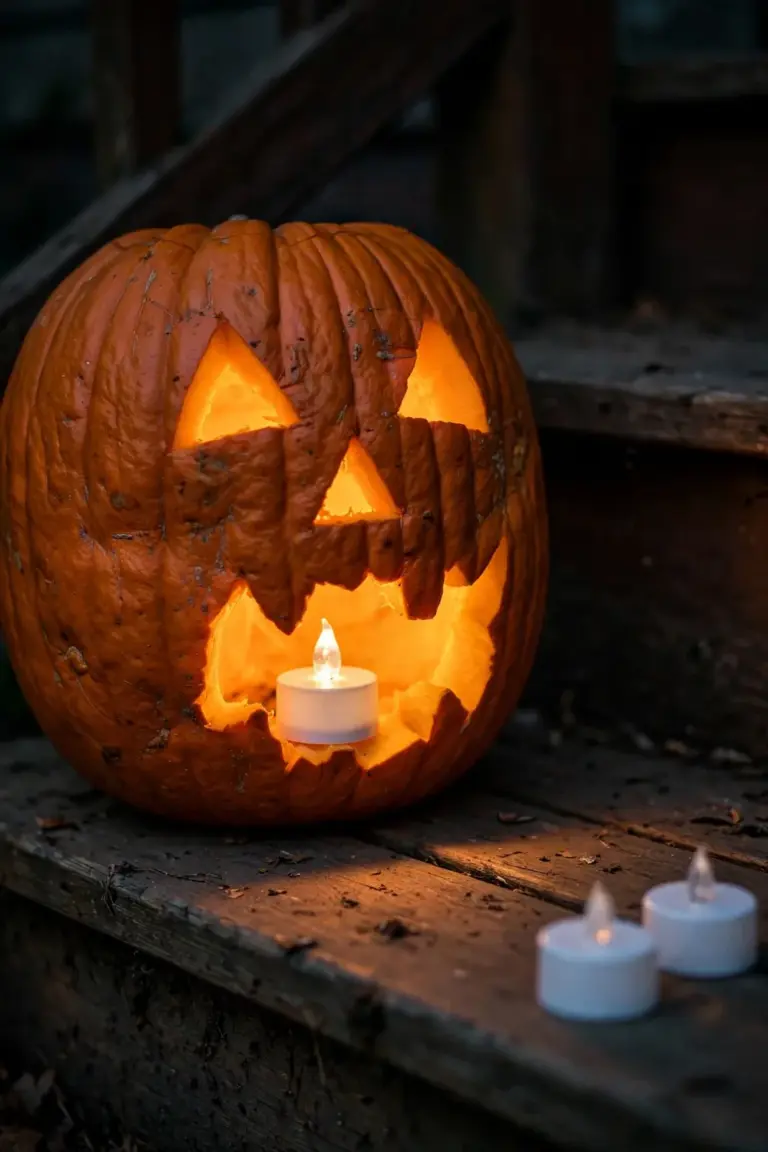
Swap each tea light and taper for an LED version in the same holder. Choose flicker-mode bulbs for carved pumpkins and steady-mode for luminaries. Stock spare batteries in a porch drawer for mid-evening replacements. One evening of testing shows which holders need brighter bulbs.
The National Park Service, citing National Fire Protection Association figures, puts the toll at an average of 1,000 decoration fires a year, causing 6 deaths, 53 injuries, and $16 million in direct property damage.
Porch & Front Door
76. Hang a Grapevine Wreath With Mini Skulls
A grapevine wreath studded with mini skulls gives the front door Halloween identity fast. Natural vine texture plays against pale skull shapes. It reads spooky from the street.
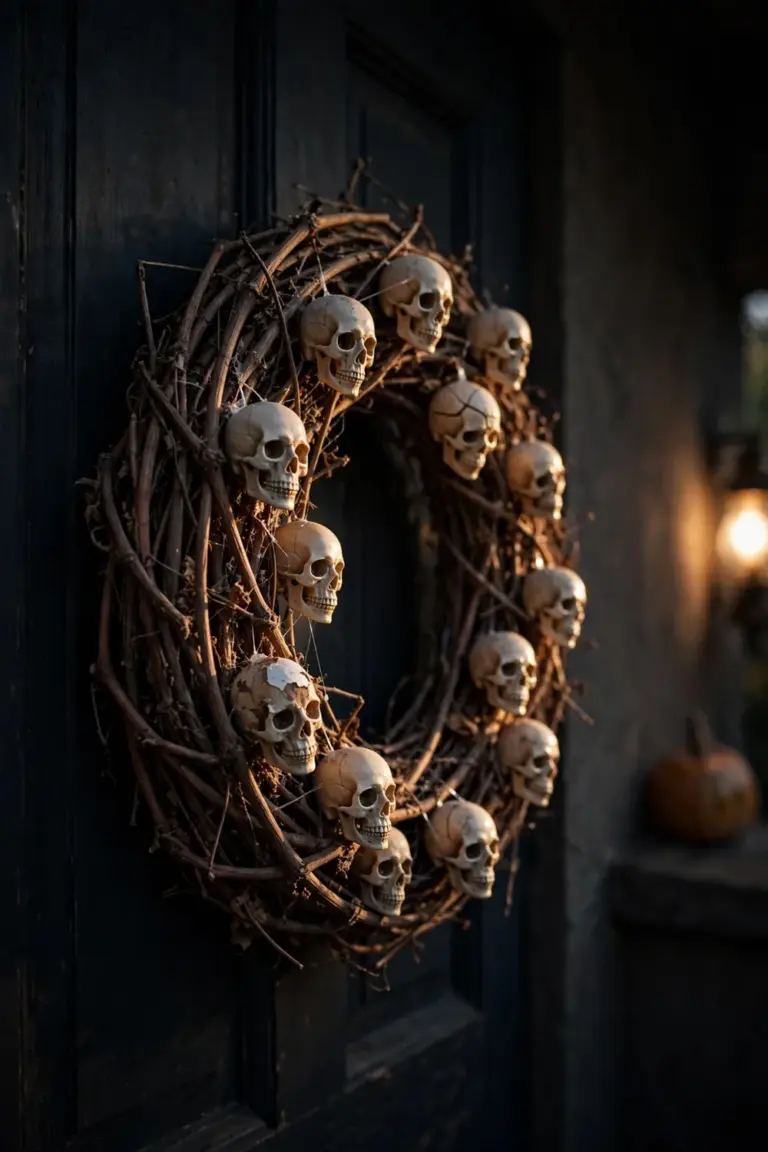
Press fifteen mini skulls into the weave, about three inches apart. Dot hot glue behind each one. Hang the wreath at eye level, roughly sixty inches up, on an over-the-door hook rated for at least five pounds. Nudge it straight if one side hangs heavy.
77. Layer Two Doormats for a Spooky Welcome
Two doormats beat one. A big plain mat underneath frames a smaller Halloween mat on top, and the layered edge hides muddy corners. The entry looks decorated before guests reach the door.
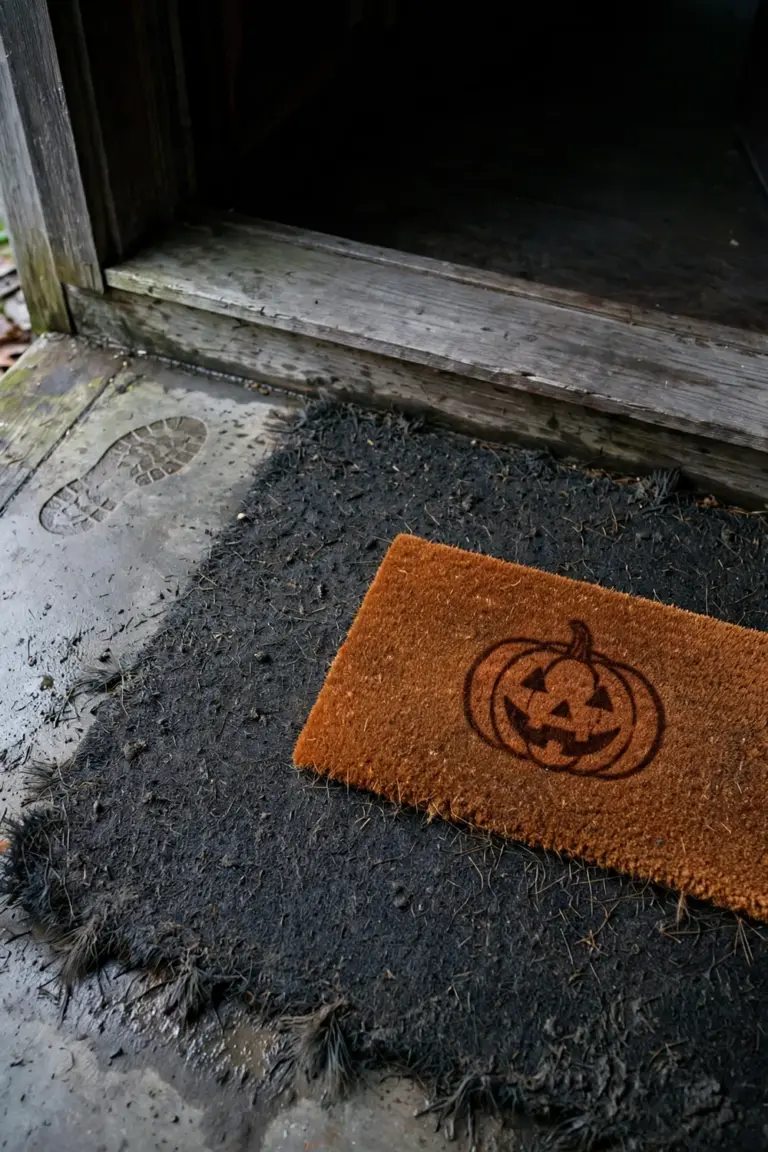
Use a base at least thirty inches wide, with the top mat no wider than twenty. Center the small mat on the large one, flush with the threshold. Shake both out after two rainy nights. Mildew moves fast.
78. Frame the Door With Cornstalk Bundles
Cornstalk bundles turn a plain doorway into a harvest gateway. The tall dried stalks add height on both sides, and the gold color pops against pumpkins at the base. Plain siding disappears behind them. This classic framing shows up in nearly every roundup of halloween garden ideas. For good reason.
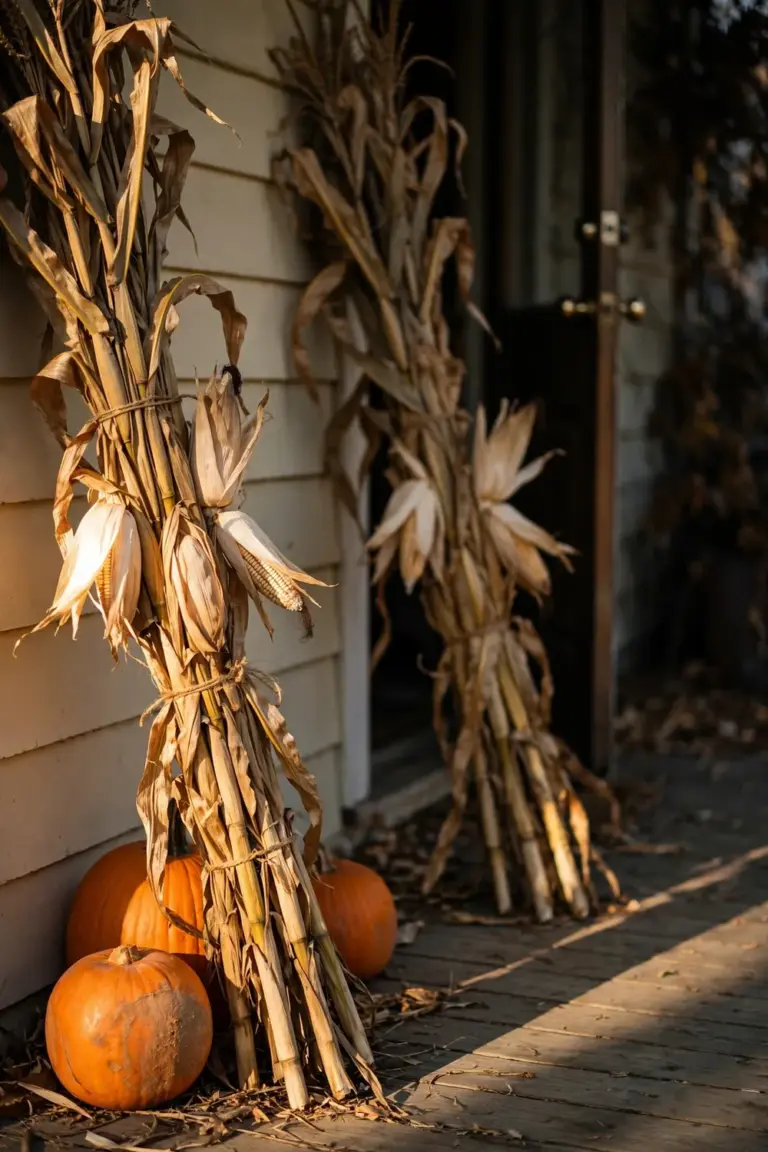
Tie six to eight stalks per bundle with twine at two points. Lean each bundle against the doorframe at a slight angle. Sandbag the bases. Keep every bundle twelve inches from any light fixture. Heat and dry stalks are a bad pair.
79. Drape Cheesecloth Cobwebs Over the Porch Rail
Cheesecloth is the cheapest cobweb in the store. Pull it. Tear it. Drape it. White cloth glows under the porch light while gray reads older and creepier.
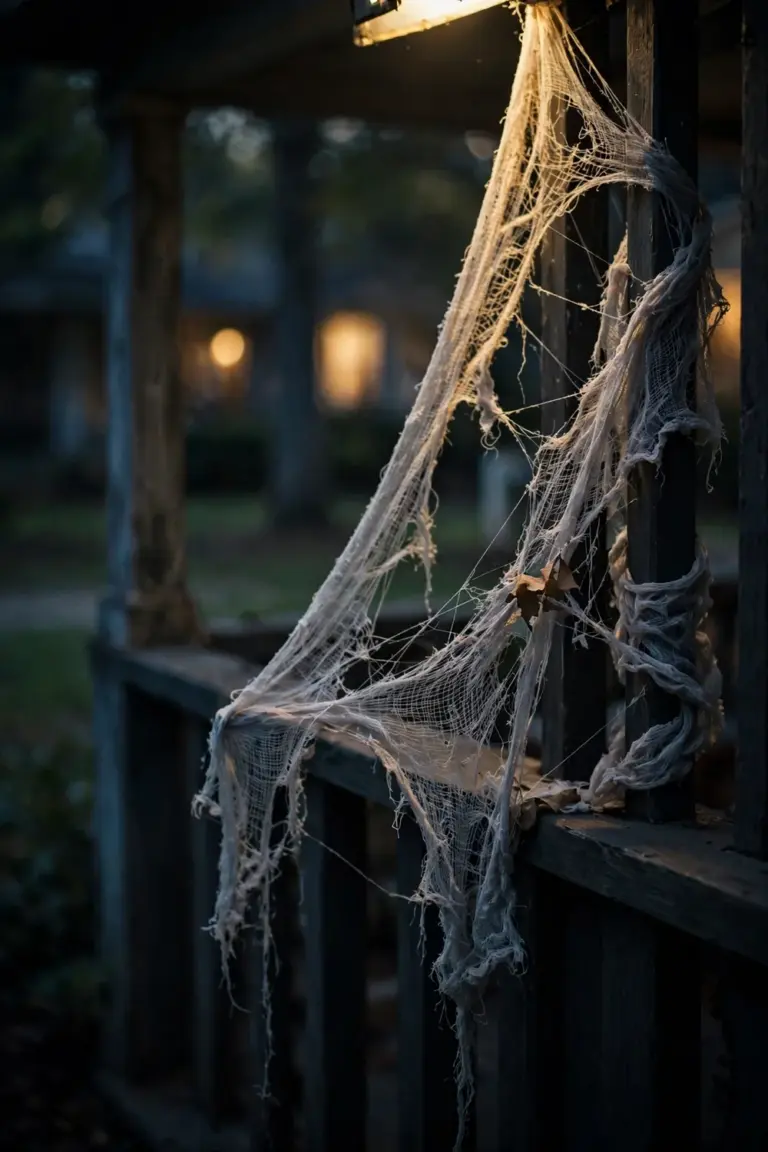
Stretch a three-foot length from both ends until the weave opens into webbing. Drape two lengths over the rail and tuck the ends behind the balusters. Clip loose corners every eighteen inches. Strip the webs off the morning after Halloween. Dew stains the rail paint if they stay.
80. Set a Broom and Cauldron by the Door
A broom and a cauldron tell the whole witch story in seconds. No power. No wiring. Kids peek inside the pot every time.
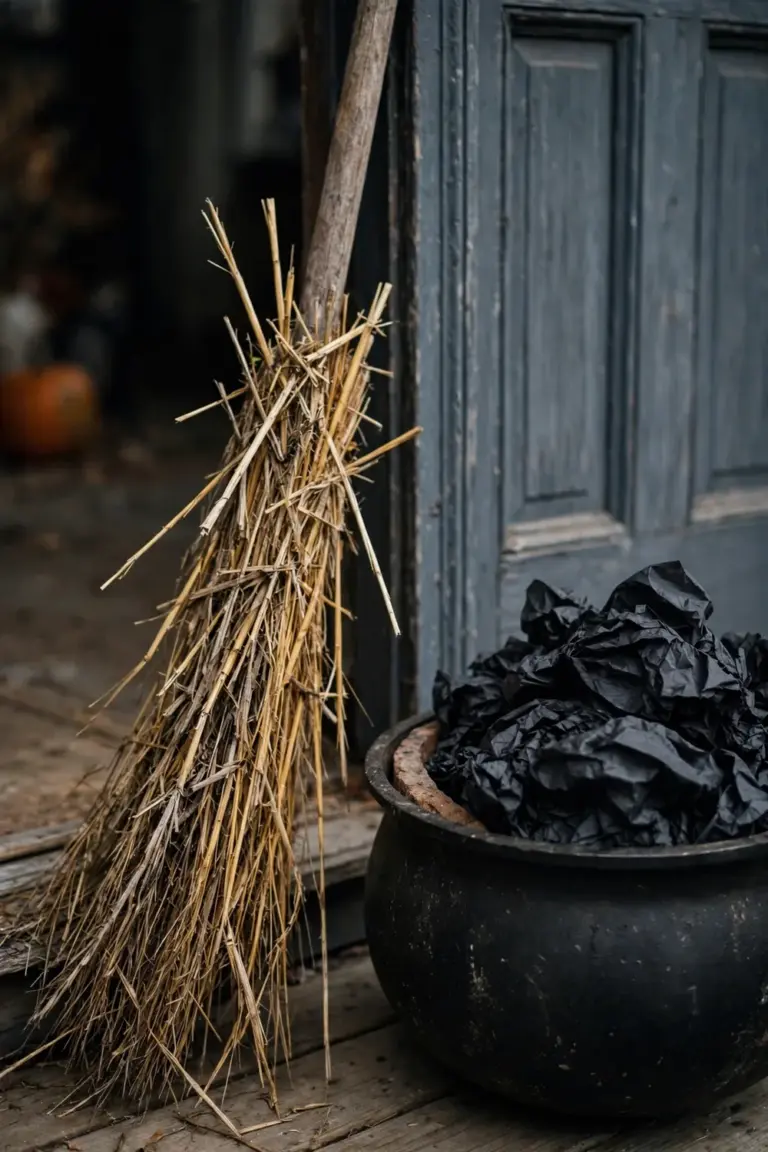
Lean a five-foot straw broom at a seventy-degree angle, bristles touching the floor. Set a twelve-inch cauldron beside it and fill it with crumpled black tissue for the bubbling illusion. Drop a brick inside so wind cannot tip it. Bring both indoors in heavy rain.
81. Greet Guests With a Motion-Sensor Skeleton
A motion-sensor skeleton beats a yard of static props. It waits. Then it lunges. Timing is the whole scare.

Stake it about six feet from the walkway, sensor angled toward the path. Test the trigger distance, usually ten to fifteen feet. Set the volume to medium. A scare works better without angry neighbors. Switch the unit off after ten at night.
82. Place Mums and Pumpkins in Odd Numbers by the Steps
Odd numbers look natural. Even numbers look staged. Three mums and five pumpkins land on the natural side.
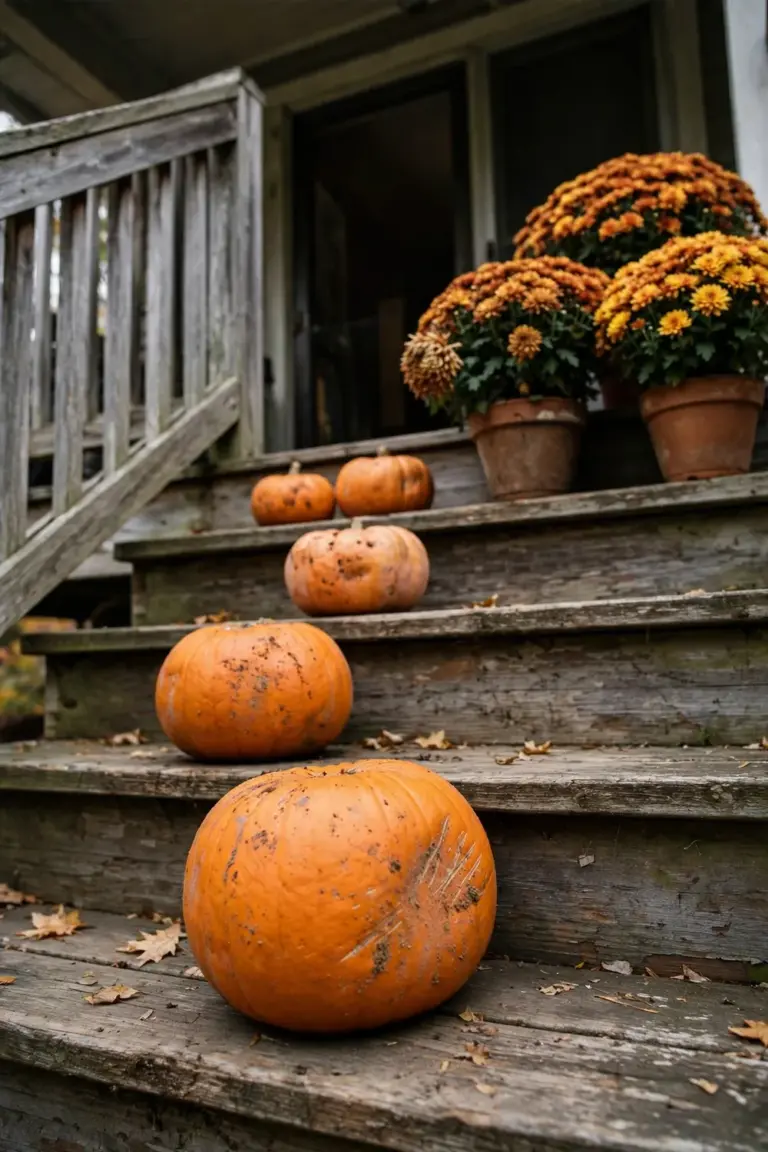
Set three potted mums on the top step and five mixed-size pumpkins on the lower two. Vary pumpkin heights between six and fourteen inches for a stepped silhouette. Water the mums every three days. Spin the outer pumpkins halfway through the display period for even sun.
83. Drape a Black Cloth Over the Porch Table
A black cloth turns a porch table into a display stage. It hides the clutter underneath. Orange pumpkins pop against the dark.
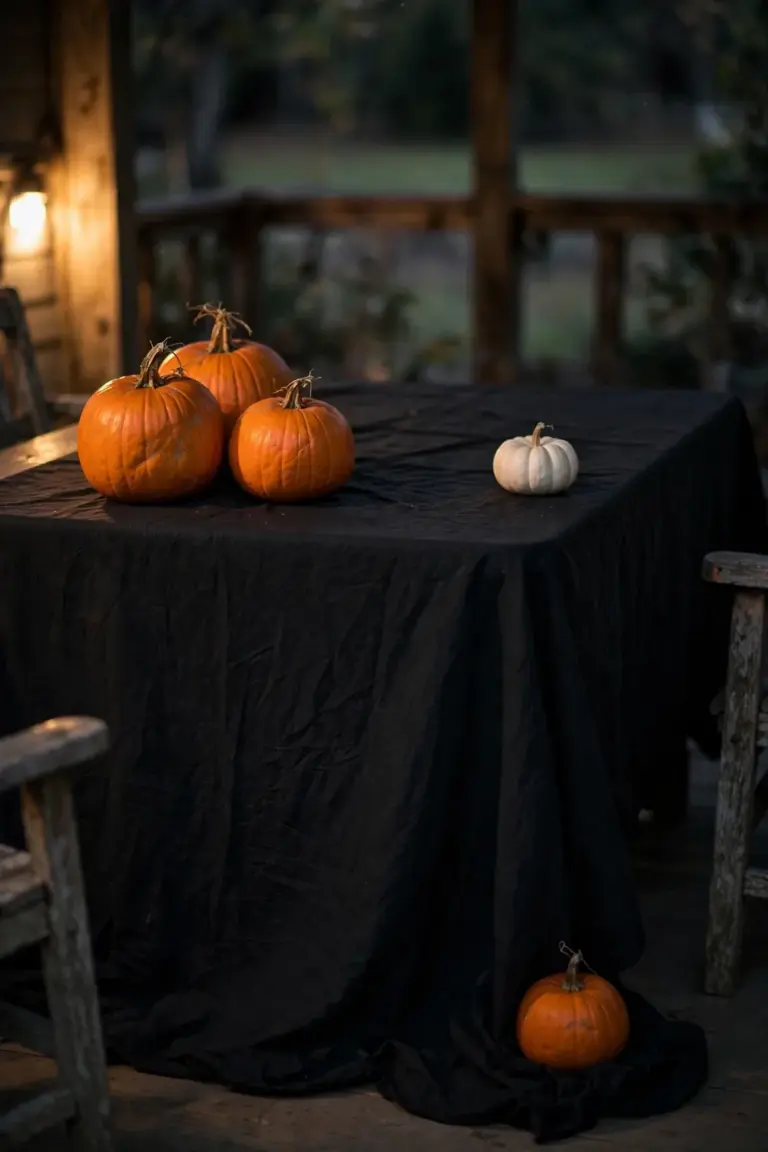
Cut or hem the cloth floor-length on all four sides, usually about ninety inches square for a standard card table. Weight the corners with small pumpkins. Wind lifts unweighted fabric. Iron each panel for two minutes to kill the creases.
84. Add a ‘Witch Parking’ Sign to the Porch Post
A ‘Witch Parking’ sign does two jobs. It makes visitors smile, and it softens the scarier props nearby for young trick-or-treaters. Hand-lettered beats store-bought. The joke lands before they knock.
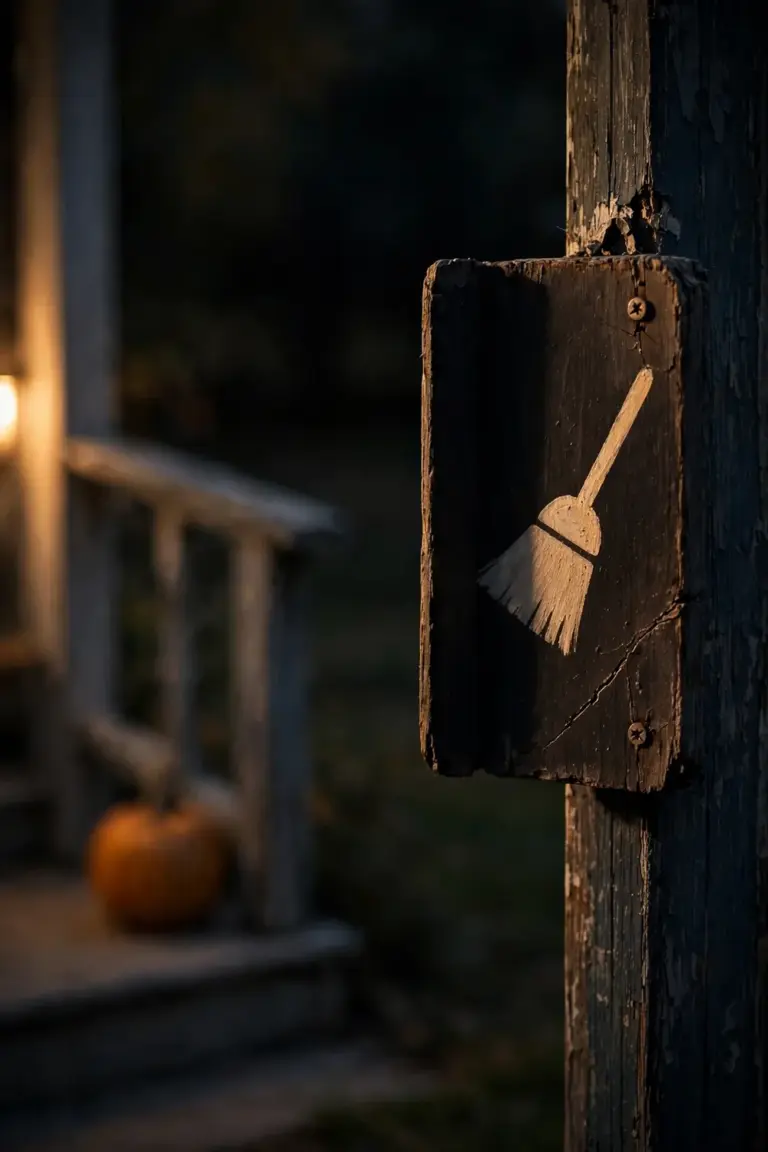
Paint the message on a twelve-by-eighteen-inch board with outdoor acrylic paint. Stencil a small broom silhouette in one corner. Screw it to the post at eye level, about sixty inches high, with two screws. Seal it with one coat of clear outdoor varnish. Rain blurs unsealed paint.
85. Keep the Candy Bowl Lit and the Steps Clear
Light the bowl. Clear the steps. Guests see the treat from the sidewalk, and nobody trips on a prop in the dark.
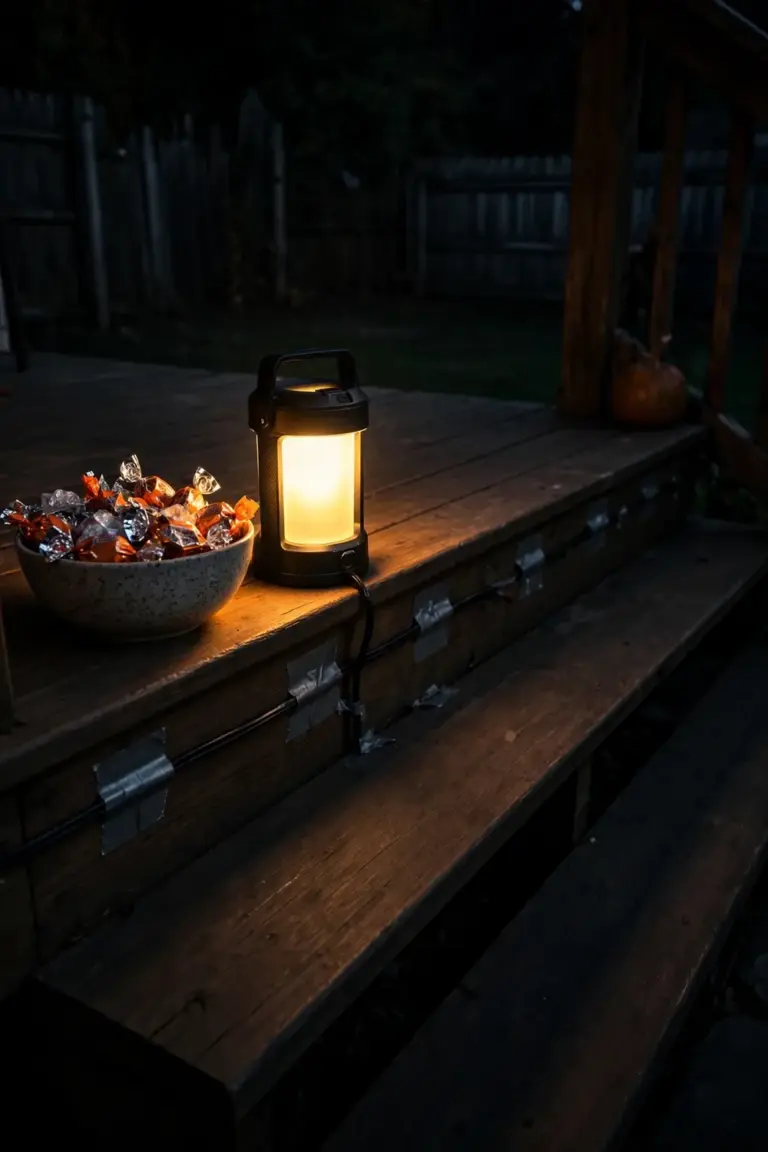
Set a battery lantern within twelve inches of the candy bowl so the treats glow. Pull every prop at least twenty-four inches back from the step edges. Tape down any cords crossing the walkway with outdoor tape. Walk the route after dark yourself. If your shoe catches it, move it.
DIY Crafts From the Garden
86. Turn Pinecones Into a Litter of Baby Spiders
Pinecone spiders are the cheapest scare on the porch. The cone body already looks segmented. Bent pipe-cleaner legs sell the lie.
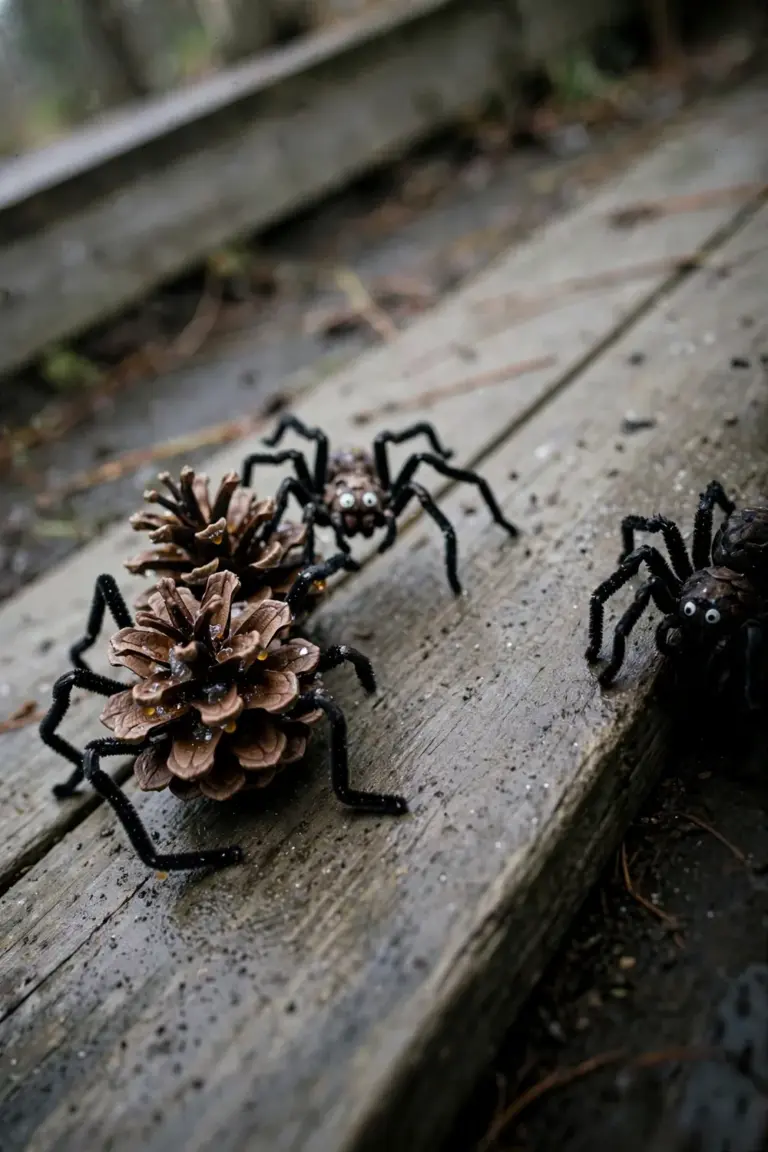
Glue eight four-inch black pipe cleaners to each cone, four per side, and bend each leg at two joints. Dot two white paint eyes on the front. Scatter twelve spiders around the porch base in loose clusters of three. Bring them in when rain threatens. Wet pipe cleaners rust within a day.
87. Weave a Wreath From Pruned Grape Vines
A grapevine wreath costs nothing if you prune your own vines. Fresh-cut vines bend into a ring. The ring holds its shape as it dries.
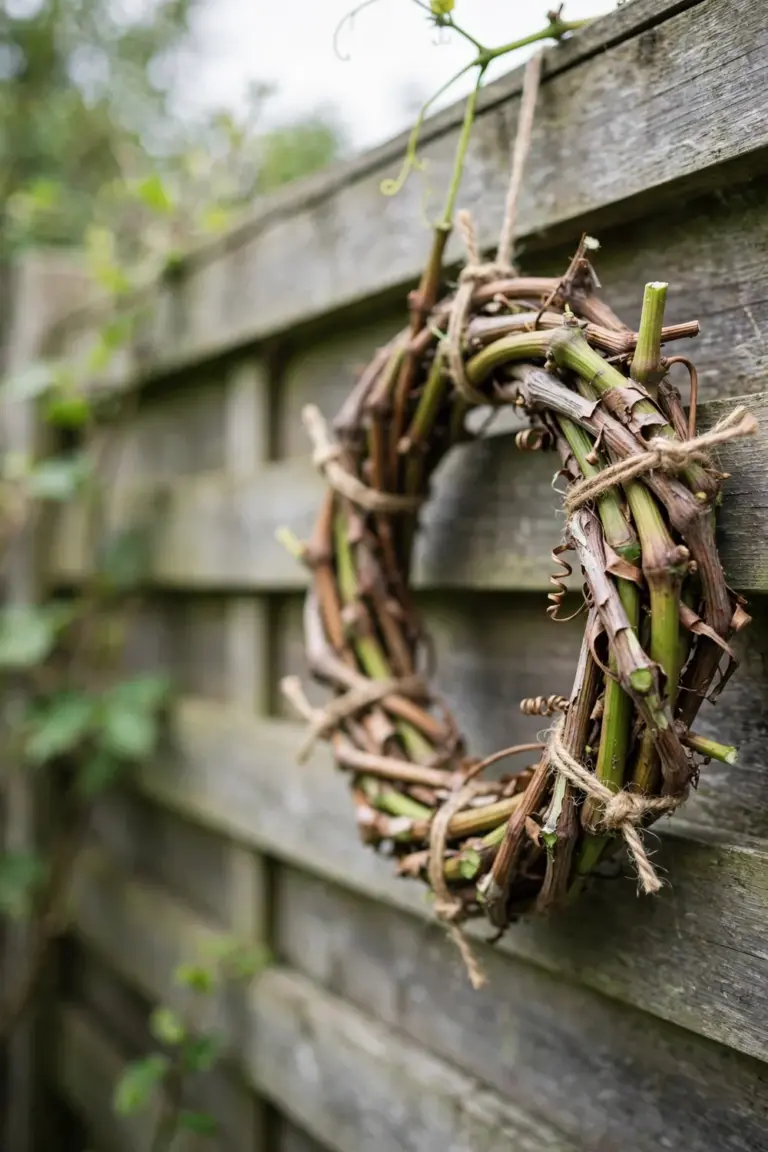
Soak six four-foot lengths in water for two hours. Coil them into a sixteen-inch ring, tucking each end under the last coil. Tie the ring with twine at four evenly spaced points. Hang it for one week to set. Then decorate.
88. Make Seed-Head Ghost Ornaments From Dried Alliums
Dried allium heads are free ghosts. The round head is the skull. The stiff stem is the hanger. White paint does the rest.
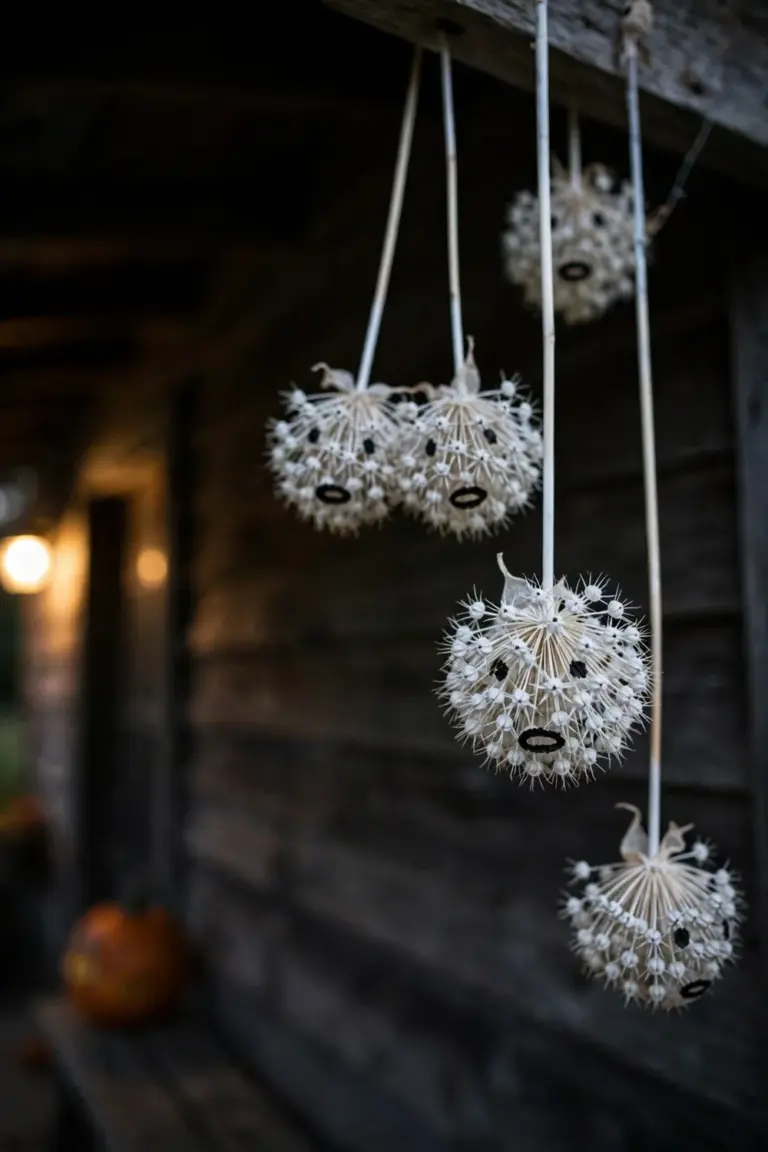
Cut ten stems to eight inches and spray the heads white in two light coats. Dot two black eyes and one oval mouth on each head with a paint marker. Loop six inches of fishing line around each stem for hanging. Space the ghosts twelve inches apart. Crowded heads knock together in the wind.
89. Build Scarecrows From Old Clothes and Straw
Stuff an old shirt and pants with straw and you have a guard with personality. Stuffed sleeves. A straw-filled head. A crooked grin on burlap turns the farm tool into a Halloween character, and the figure anchors the corner display where the street can see it.

Cross two five-foot stakes. Lash them at the shoulder joint with twine. Stuff the shirt and pants with three handfuls of straw and tie the cuffs shut, then draw the face on a burlap sack head with black marker and pack the head with two more handfuls. Drive the center stake eighteen inches into the soil. Wobble is the failure.
90. Paint Gourds Like Woodland Creatures
Painted gourds soften the scary stuff. Owls. Foxes. Whatever the kids pick. A row of them welcomes younger visitors.
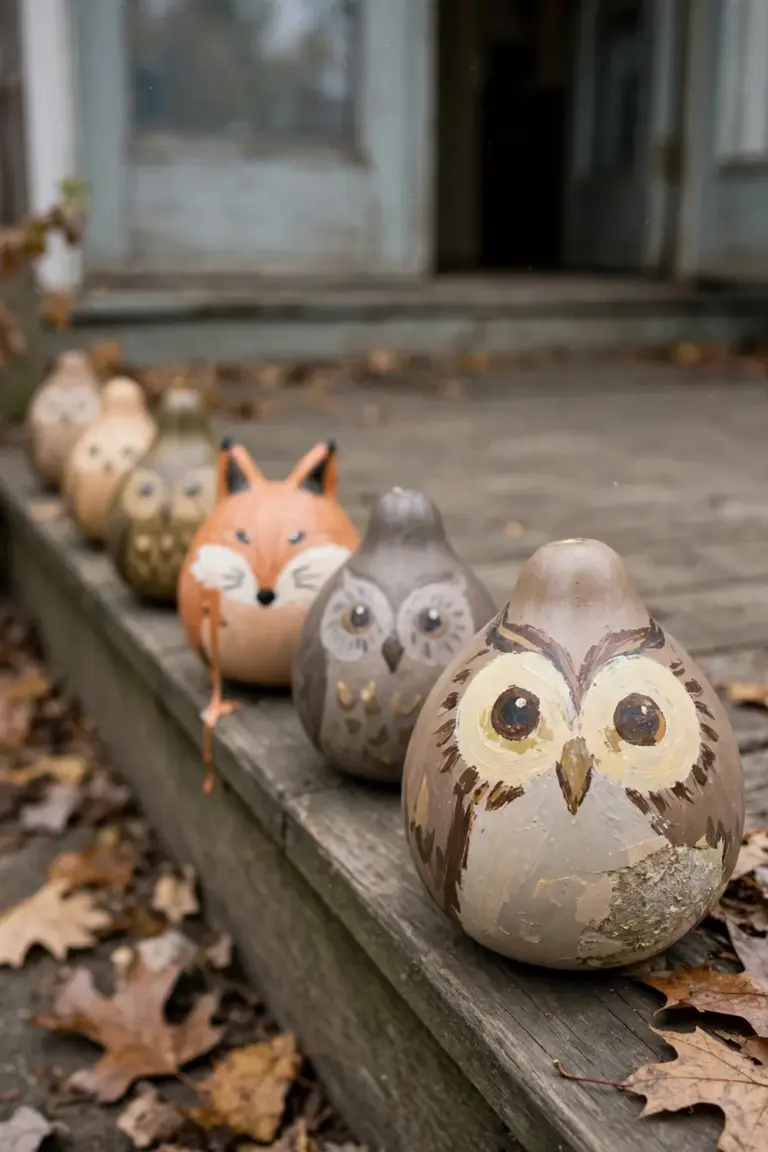
Wipe six gourds clean and apply one coat of white primer, then let the primer dry for one hour before painting faces and features with acrylic craft paint and a half-inch flat brush. Two coats of clear sealer, thirty minutes apart. Then line the row along the step edge.
91. String Dried Corn Into a Garland
A corn garland fills a wide doorway with one craft. Red, purple, and gold kernels catch the light. No plastic anywhere.
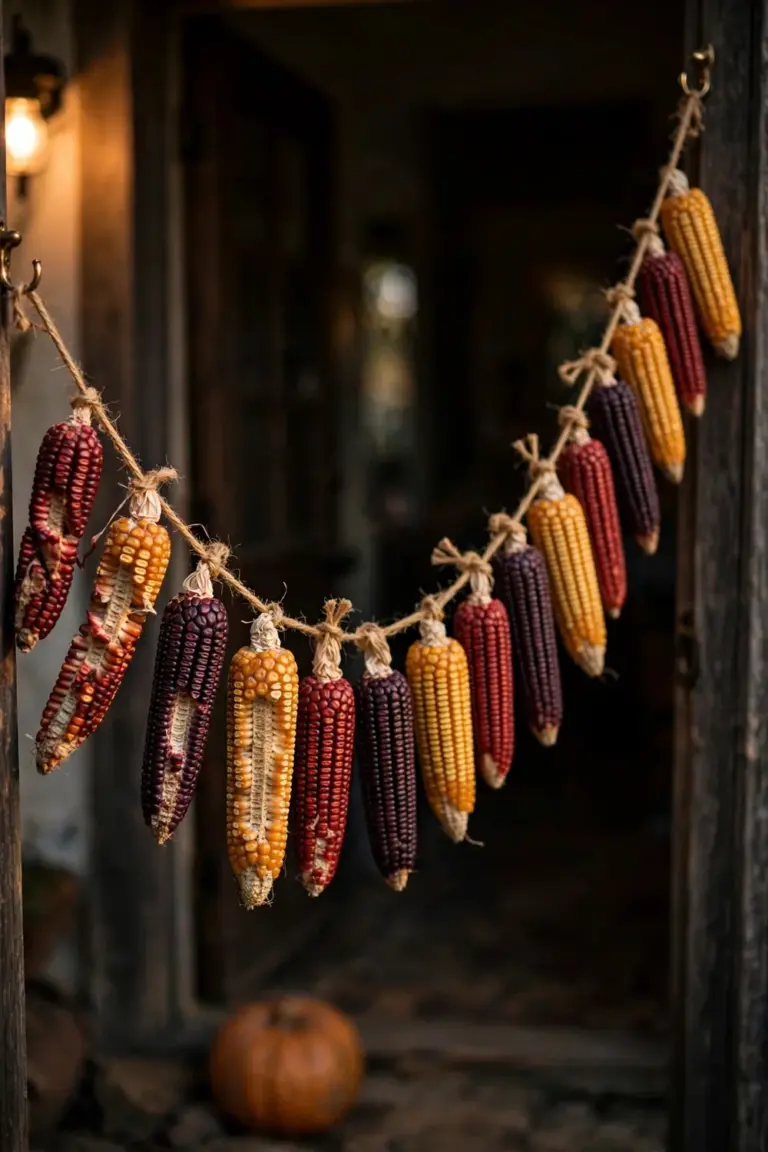
Drill twenty dried ears at the base with a one-eighth-inch bit. Thread them onto six feet of jute twine, alternating colors. Knot the twine after every fourth ear so the corn cannot slide together. Hang the strand with two cup hooks screwed into the doorframe.
92. Carve Turnips the Old Irish Way
Turnips came before pumpkins. Irish families hollowed them and set candles inside to ward off spirits. The small glow looks ancient.
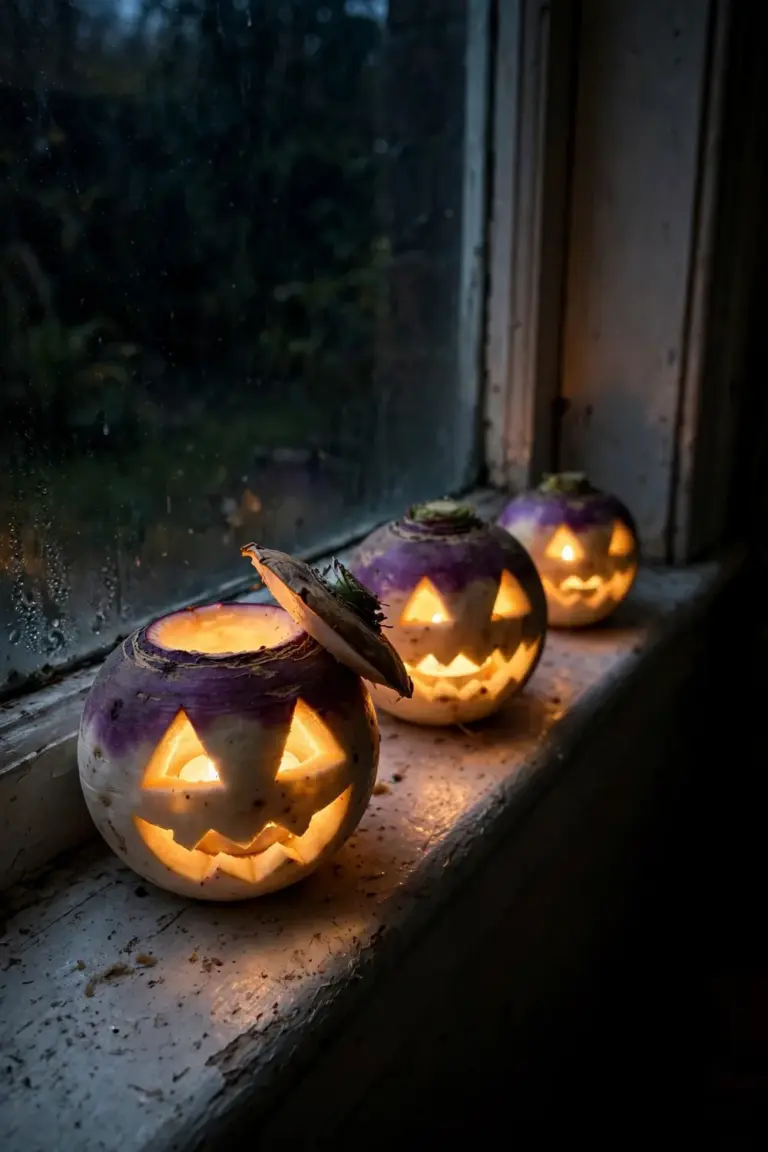
Slice the top off and scoop the flesh with a melon baller, leaving walls half an inch thick. Cut triangle eyes and a jagged mouth with a paring knife. Drop in a tea light. Swap the candle after four hours of burning. Line the turnips on the windowsill so the glow shows through glass.
93. Make a Bat Mobile From Fallen Twigs
Fallen twigs make a free mobile frame. Paper bats dangle below it. The whole thing spins in the breeze.
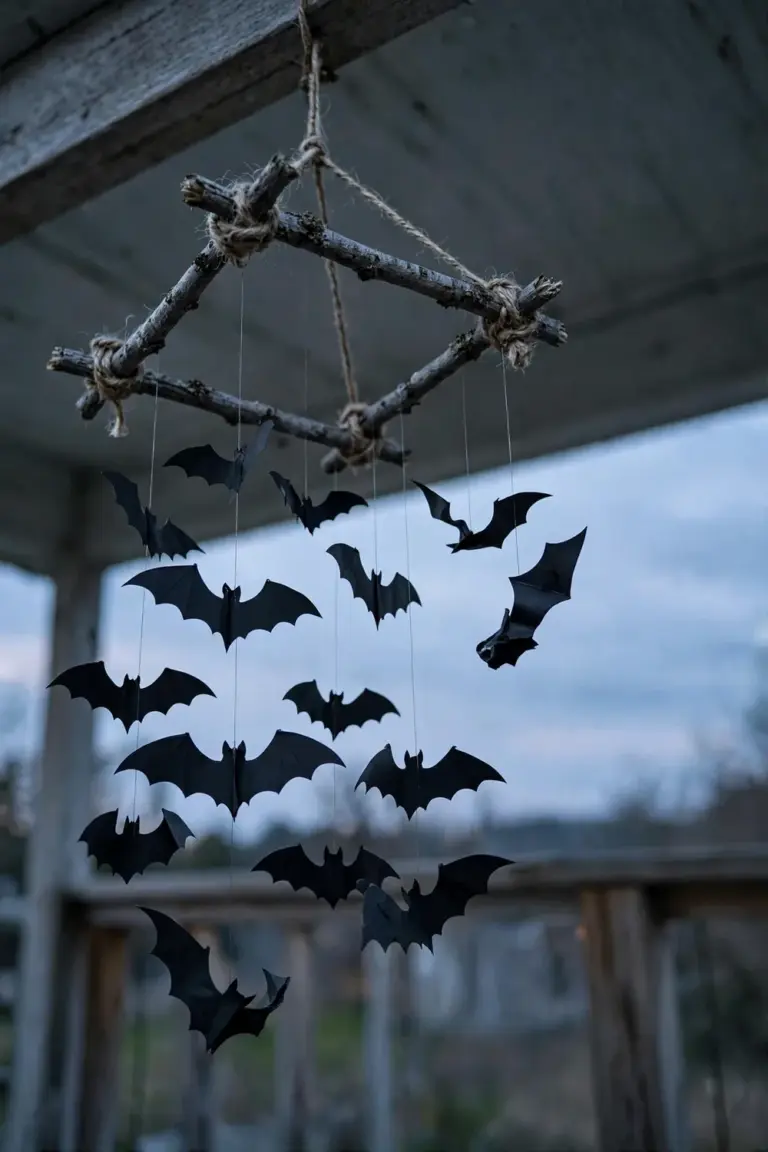
Lash four two-foot twigs into a square, twine at each corner. Cut twelve bat silhouettes from black cardstock, each about four inches wide. Hang them from the frame on fishing line cut to six-to-fourteen-inch lengths. Suspend the finished mobile from a porch beam with a sturdy hook.
94. Press Leaves Into Halloween Luminaries
Fall cleanup becomes glowing decor. Real leaves pressed between paper panels show every vein. Sealed leaves glow for weeks.
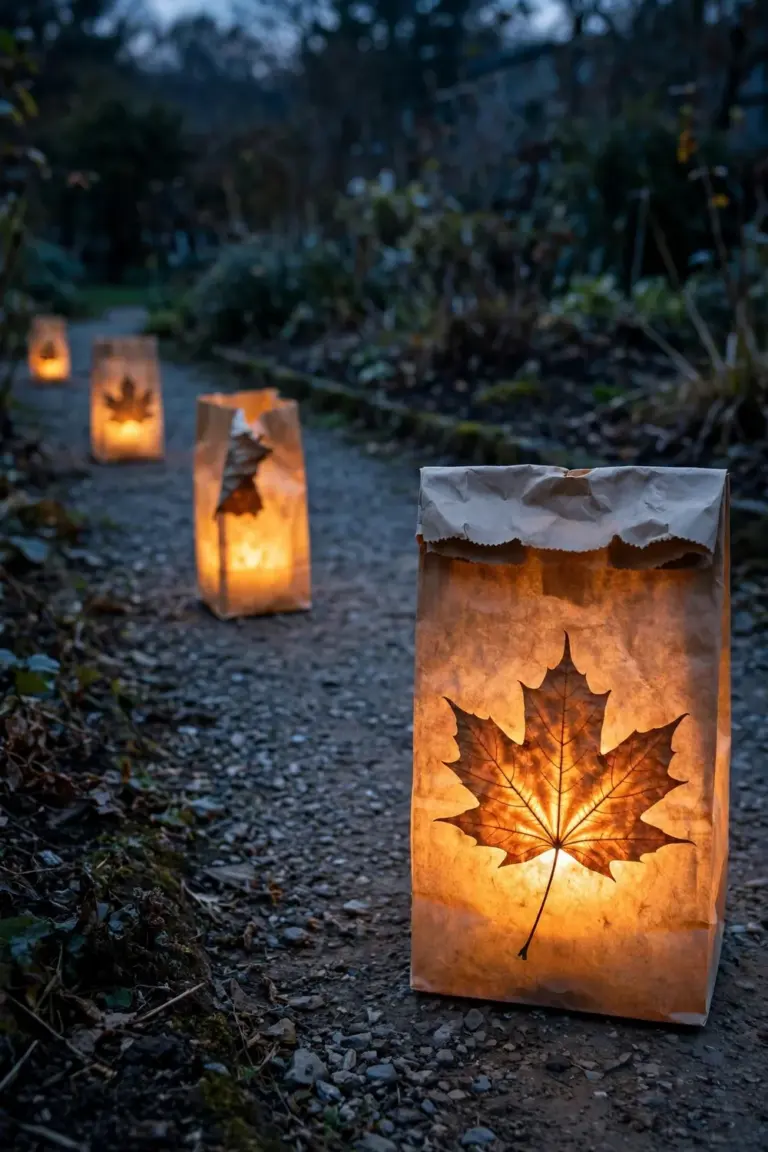
Brush decoupage glue on one side of eight paper lunch bags and press a flat leaf onto each. Fold a two-inch cuff at the top of every bag. Drop a battery tea light inside. Space the luminaries three feet apart along the path. Bring them in if rain threatens. Wet paper collapses.
95. Stuff Old Tights Into Witch Legs for the Garden Bed
Striped witch legs under a shrub read instantly. Everyone gets the joke. The most photographed corner of the display, for the cost of worn hosiery.
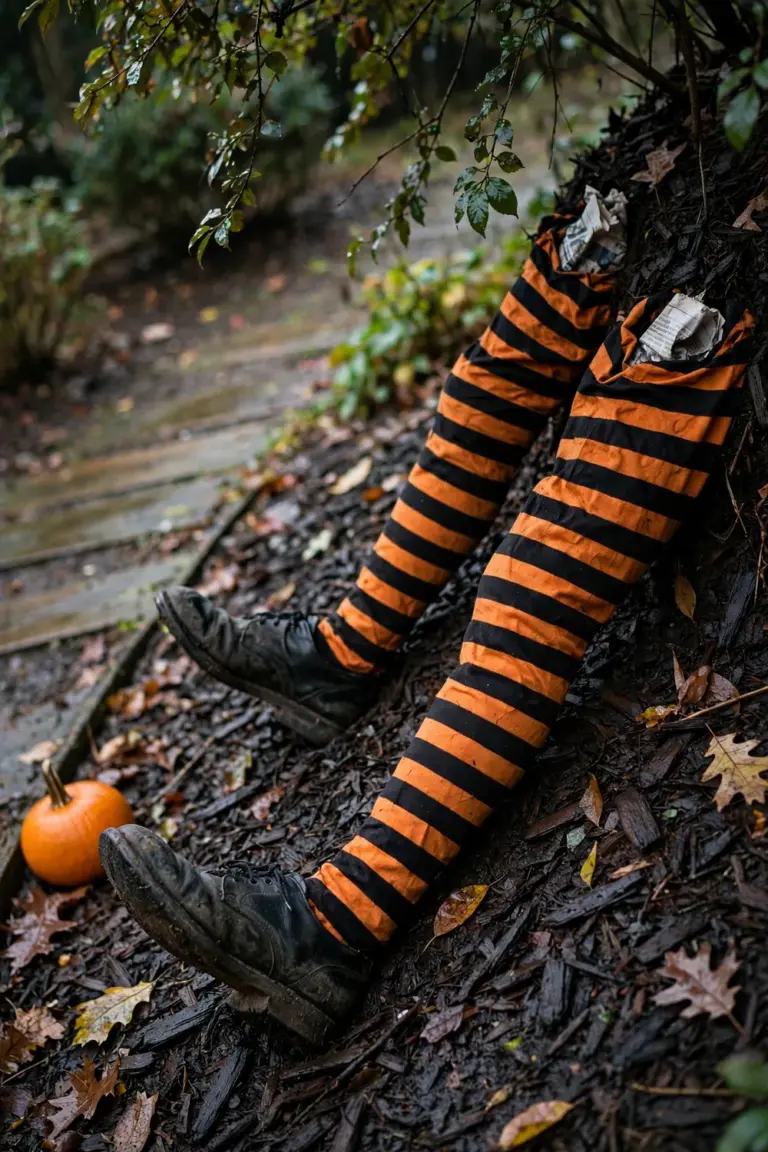
Fill two old tights with newspaper, leaving six inches empty at the top for the shoe. Paint stripes on or glue striped fabric around each leg. Shove a pair of old black shoes onto the stuffed feet. Bury the top ends in mulch at a forty-five-degree angle. They should look like they plunged in.
96. Build a Twig Trellis Shaped Like a Spider Web
A twig web does two jobs: Halloween focal point now, real trellis next season. The radial pattern reads from across the yard. Few garden crafts pull double duty this well.
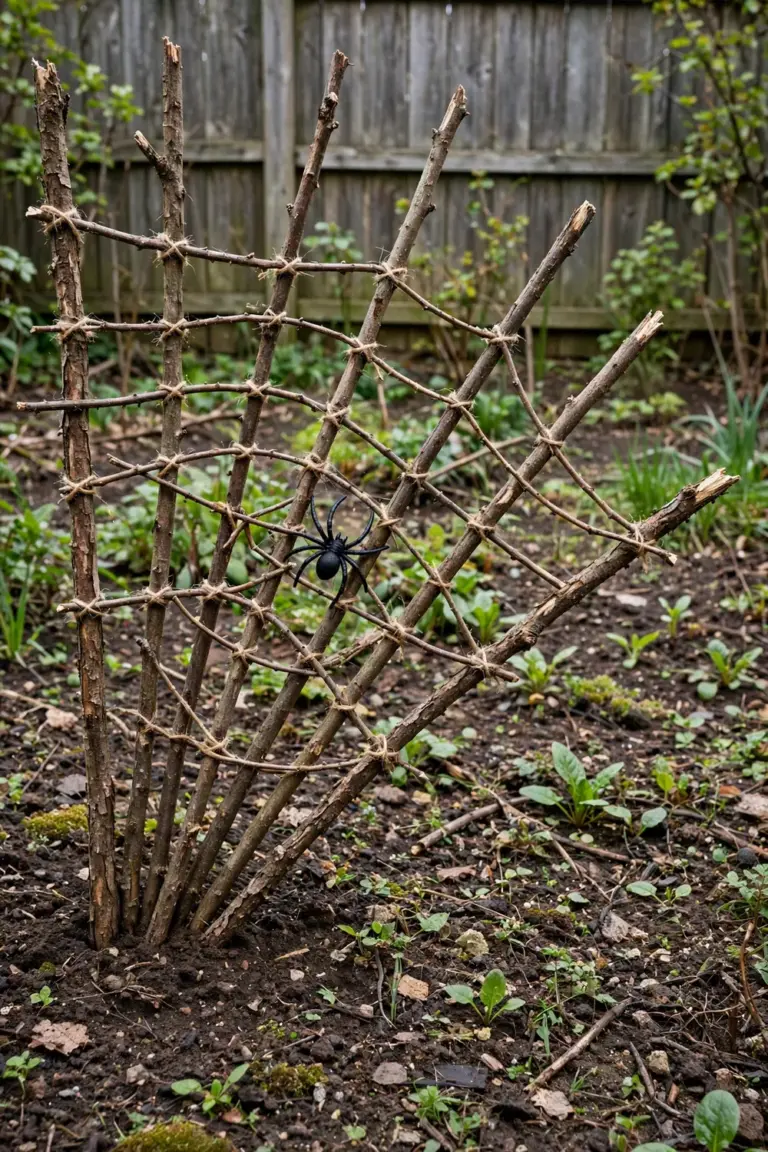
Push eight four-foot twigs into the soil in a fan, six inches apart at the base. Weave thinner twigs through at four heights: six, twelve, eighteen, and twenty-four inches. Lash each crossing with twine. Stick one large plastic spider at the center. Scale matters.
97. Dry Hydrangea Heads and Spray Them Black
Black hydrangeas turn a familiar flower unfamiliar. The pompom shape holds for months. Against orange accents, they suit the elegant porch. The gory displays can keep their red roses.
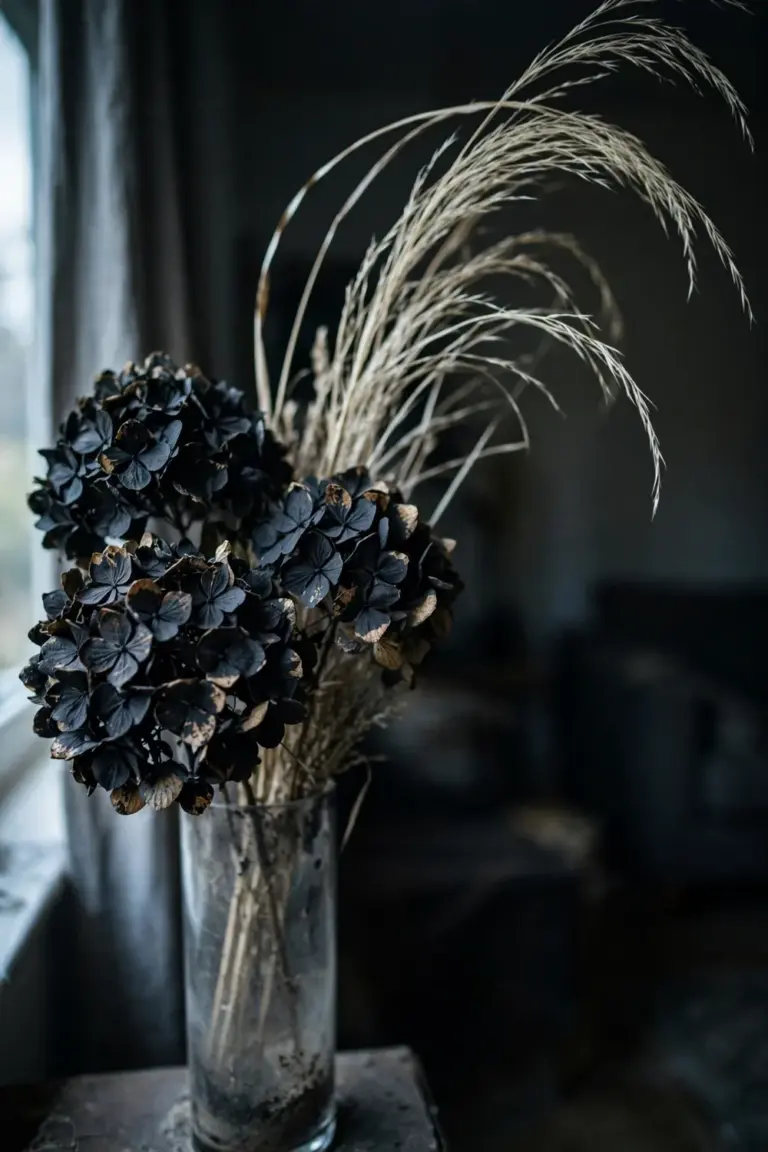
Cut twelve stems when the blooms feel papery, about six weeks before the first frost. Hang them upside down in a dark shed for two weeks. Spray with black matte paint in two light coats, drying one hour between coats. Arrange the heads in a tall vase with dried grasses.
98. Turn a Fallen Log Into a Coffin Planter
A log coffin is the boldest planter on the block. Rough bark keeps the edge. Planted black pansies keep it alive. Storm-fallen wood skips the burn pile.
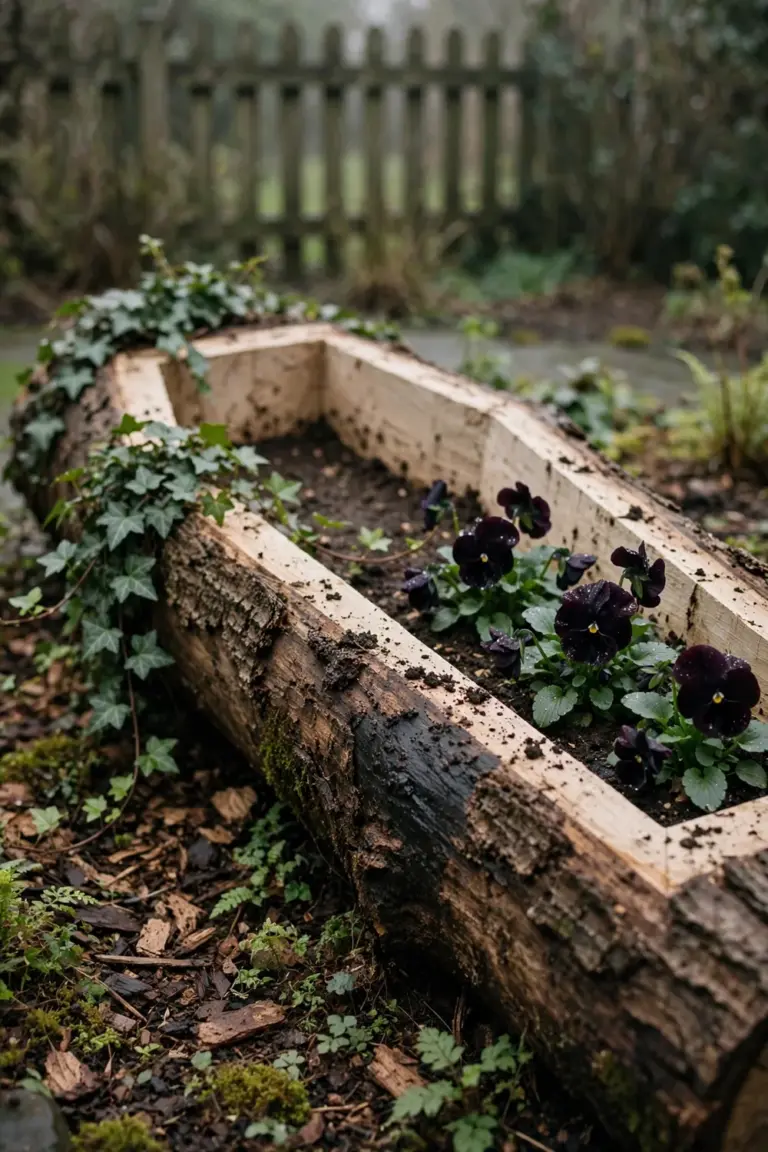
Pick a log at least three feet long and twelve inches across. Chisel the top down six inches, leaving two-inch walls. Drill three half-inch drainage holes through the bottom. Fill the cavity with potting soil and plant black pansies or trailing ivy. Seal the cut edges with linseed oil.
99. Make Corn Husk Dolls in Costume
Corn husk dolls take paint, fabric scraps, and tiny hats. Kids invent the characters. Adults handle the hot glue. The mantel row charms every age.

Soak twenty husks in warm water for thirty minutes. Roll six into a body, tie the waist with twine, and fan four into a skirt. Glue on a husk head and paint a simple face. Dress each doll in a scrap-fabric cape and add a paper witch hat.
100. Save Seeds From This Year’s Pumpkins for Next Year
Saving seeds closes the loop. The carving pumpkin on the porch becomes next year’s patch. Kids see where pumpkins come from. Stored right, seeds wait patiently.
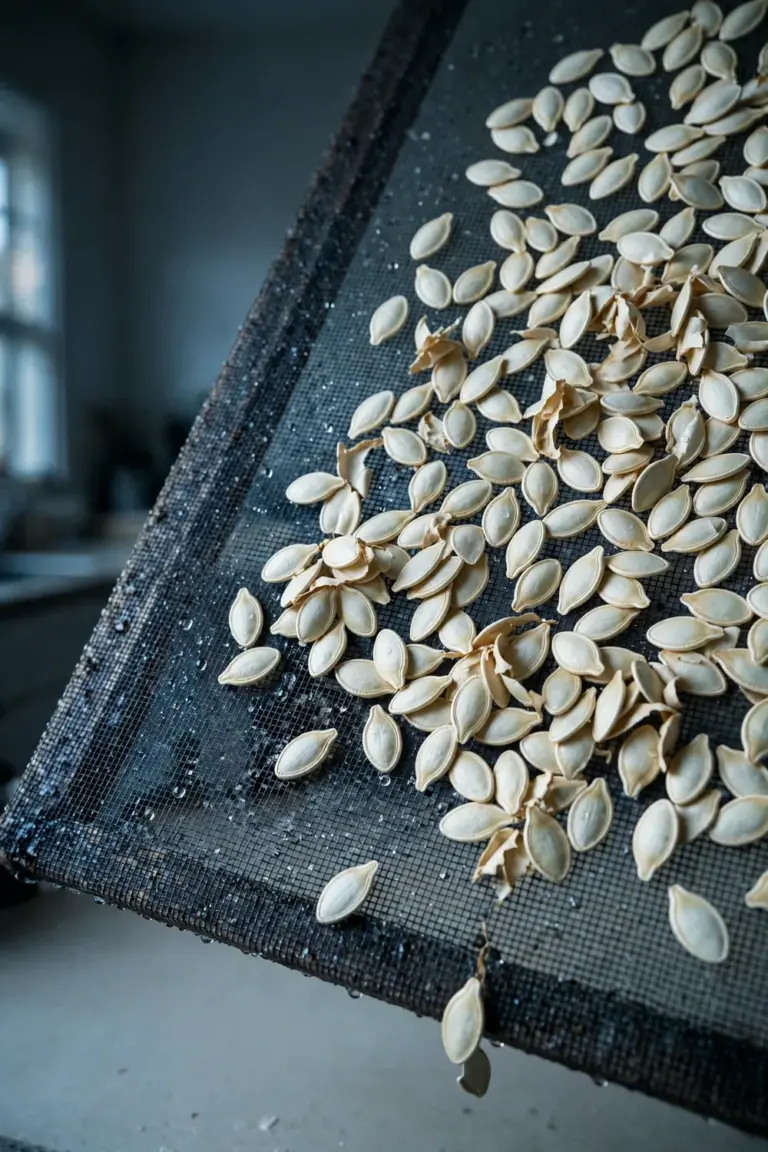
Scoop seeds from the healthiest pumpkin and rinse them in a colander under cool water. Spread them in one layer on a screen and dry for two weeks in a cool room. Store the dry seeds in a paper envelope labeled with the variety name. Plant outdoors after the last frost, when the soil reaches seventy degrees.
Kid-Friendly, Not Too Scary
101. Paint Pumpkins Instead of Carving Them
Skip the carving knife. Hand toddlers washable paint and let them go. Painted faces and full galaxy scenes anchor the family corner of most halloween garden ideas, and nobody handles a blade. The skin stays intact. That is why a painted pumpkin holds its shape for three weeks on a covered porch while a carved one slumps.

One tray of washable tempera paint and two cups of water per child. That is the whole setup. Tempera rinses off hands and clothes, and acrylic markers add eyebrows and stars once the base coat dries. Spray a light coat of clear sealer over finished work when the forecast stays dry for 24 hours. Then cluster five pumpkins together on the steps so every small painter finds their own in the lineup.
102. Set Up a ‘Find the Hidden Ghost’ Garden Hunt
Hide ten small ghosts in the beds. Then turn the kids loose at dusk. A garden hunt turns a familiar yard into an adventure course, and the running burns off sugar before bedtime. Cut the ghosts from white felt so damp grass cannot wreck them. Number each one. The count stays honest.

Five ghosts go low, tucked at the path edges. Five sit higher, in shrubs, for the older kids. Laminate the paper clues if rain is due within 48 hours. Finish at the porch steps with a prize basket. One small treat per ghost found, handed out as each kid reports back.
103. Make Friendly Tissue Ghosts for the Flower Beds
Float tissue ghosts above the flower beds. Decoration, yes. Scary, no. A small foam ball under white tissue paper makes a face that sways in the breeze, and kids draw the features with black markers, so no two ghosts match. The bed keeps its plants. The ghosts just add height over low autumn plantings.
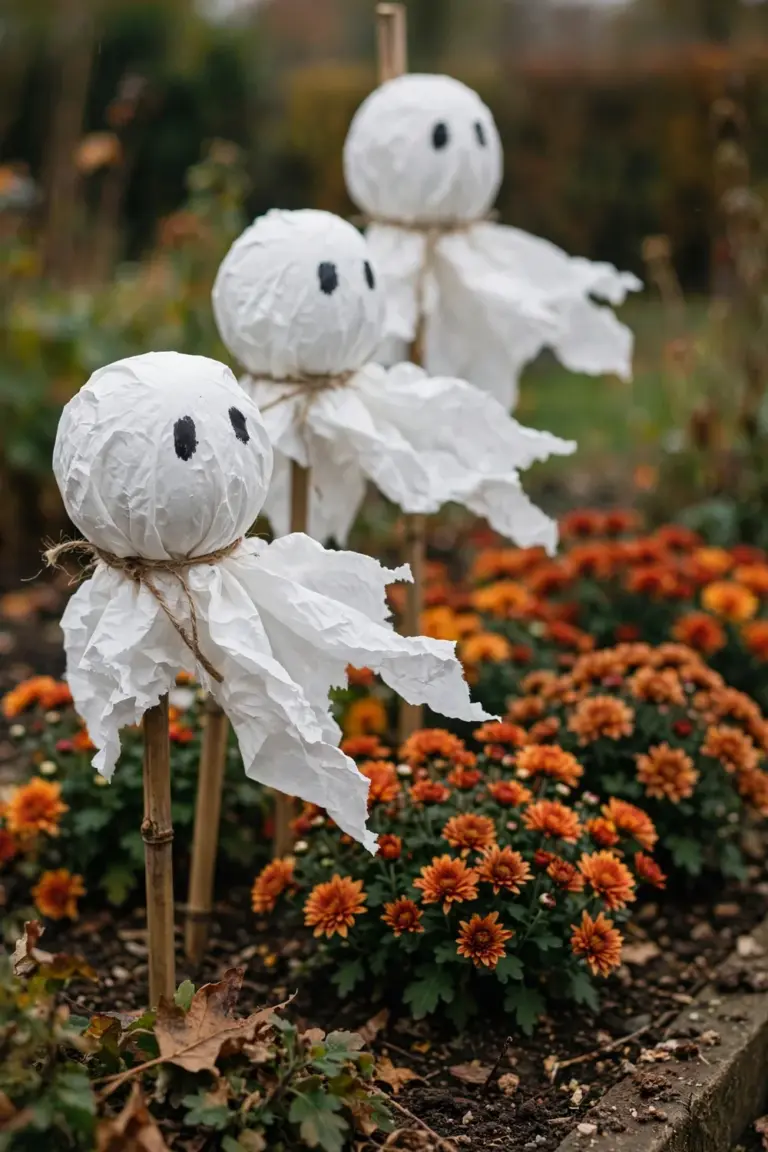
Wrap one 12-inch square of tissue around each ball. Tie the neck with twine. Push 18-inch bamboo stakes six inches into the soil and mount a ghost on each one, spacing the stakes two feet apart so every figure reads on its own. Wind changes the rules. Bring the tissue ghosts inside when gusts top 30 miles per hour.
104. Host a Costume Parade Down the Driveway
Turn the driveway into a runway. Kids parade their costumes down it before dark, and every costume gets its moment. Neighbors watch from the lawn. Nobody rings a bell. Music plays from a portable speaker, luminaries line both edges, and parents clap from the lawn chairs.
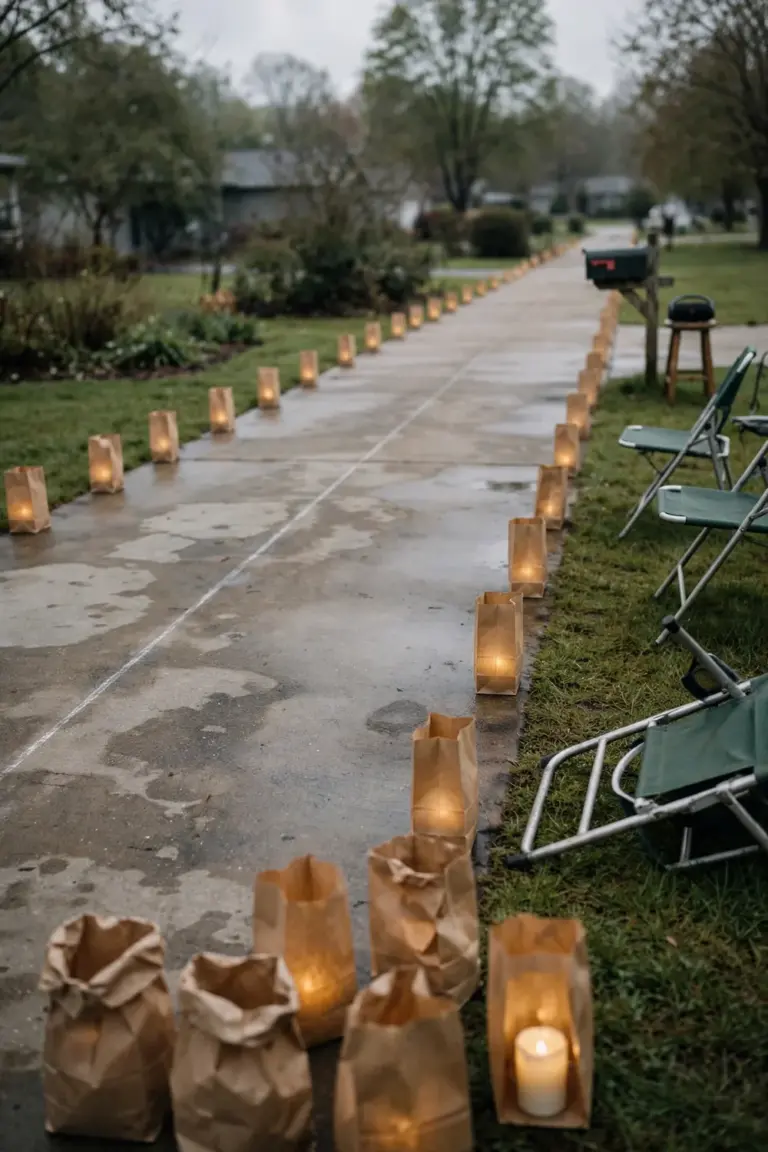
Chalk a straight 30-foot lane so walkers know the route. Announce each child by costume name at the mailbox. 15 minutes, no more. Small legs tire fast. Close with a group photo on the porch steps, full costume, everyone in.
105. Build a Pumpkin Bowling Lane on the Lawn
Roll small pumpkins at plastic bottles. That is the whole game, and it suits every age on the lawn. No scorekeeping app. No store-bought set. The pumpkins roll true on short grass, the bottles clatter on impact, and a new round resets in seconds because kids write the rules as they go.
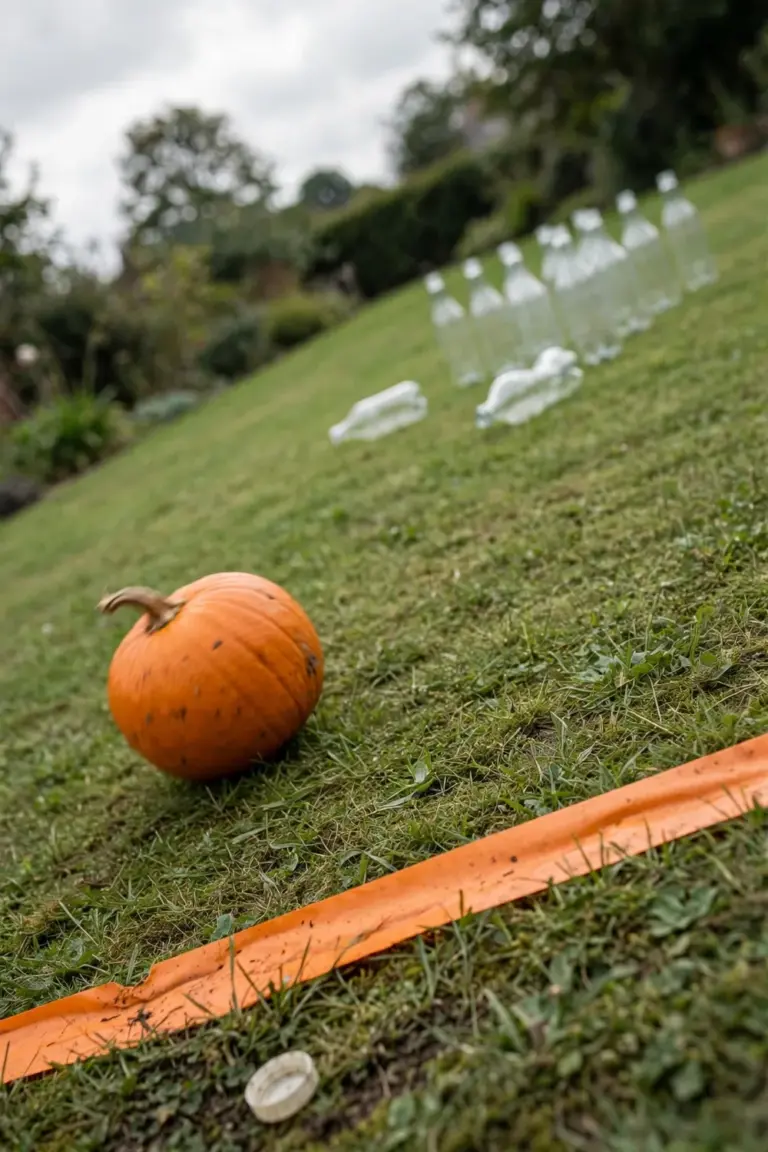
Set ten bottles in a triangle 20 feet from the throwing line. Pick pumpkins under four pounds; small arms have to lift them. Two inches of sand in each bottle keeps it standing when the wind picks up. A strip of orange tape marks the foul line.
106. Create a ‘Monster Mash’ Dance Corner With String Lights
String lights over one corner of the yard. Call it the dance floor. A dance corner gives restless kids somewhere to burn energy between houses, the lights marking the space while a speaker on a stool sets the beat. Kids pick the playlist. Grown-ups guard the snacks.
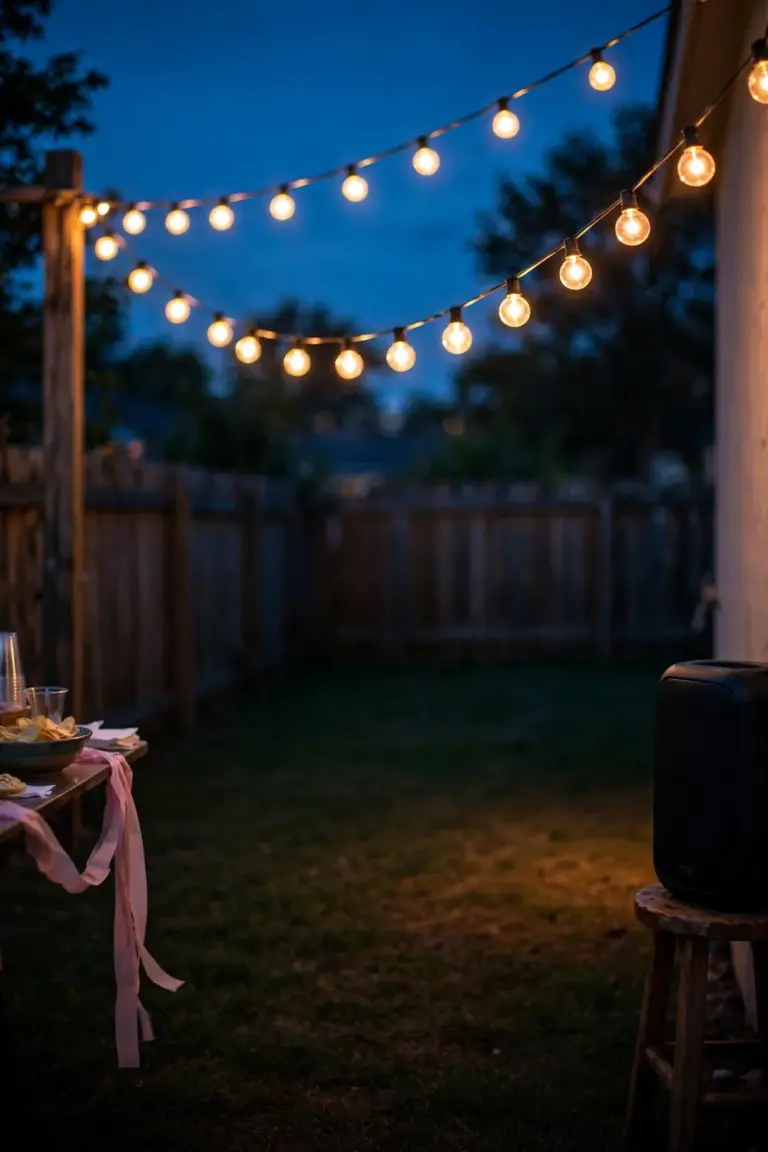
Hang two strands of lights eight feet high, fence to house wall. Keep the zone at least ten feet from the street. Play three-minute songs. Freeze-dance every fourth track. When the party ends, coil the cords. Loose cords trip people in the dark.
107. Let Kids Design the Tombstone Epitaphs
Hand the kids the markers and stand back while the jokes land. Let them write the tombstone epitaphs. Kid-written epitaphs land funnier than anything an adult drafts, and the stones turn into a family keepsake. Puns work. Inside jokes work better. A graveyard written by its own kids feels personal.
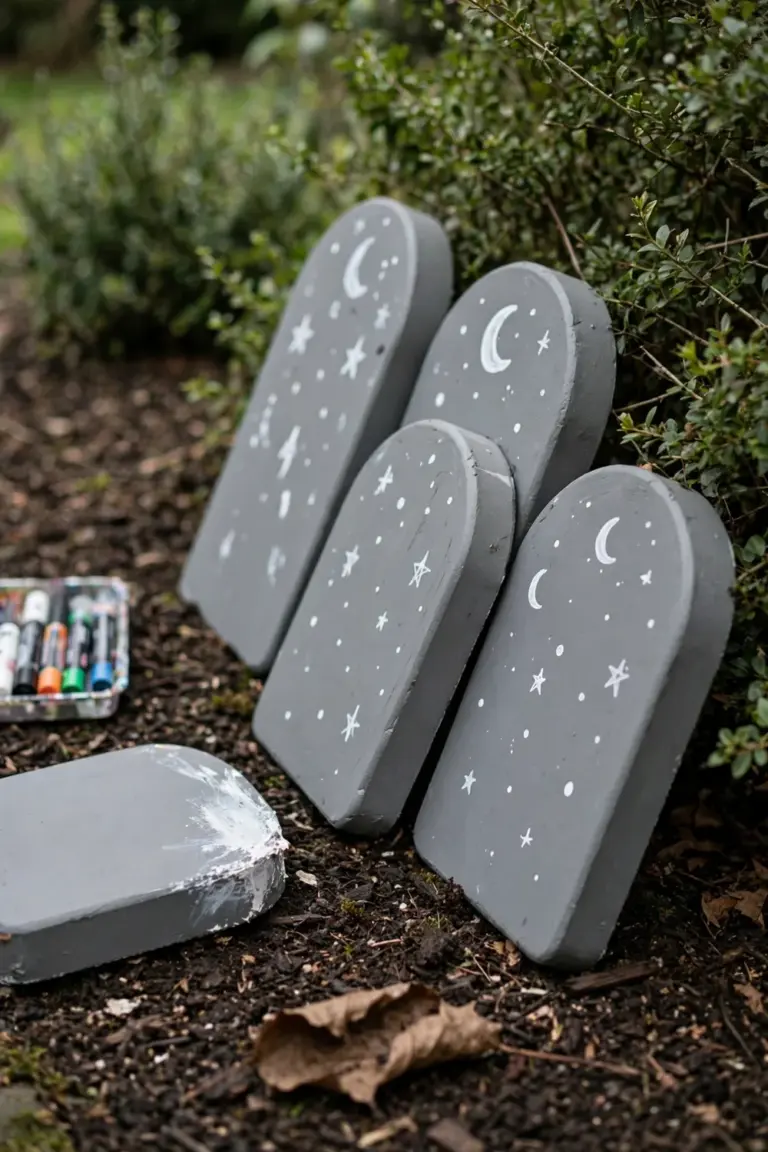
Cut the stones from foam board at 18 inches tall; kid-friendly proportions matter when small hands carry them. Outdoor paint pens keep rain from smearing the jokes for two weeks. Stake each stone six inches into the mulch on a wooden dowel. Then step back. The kids place their own stones where the layout feels right.
108. Serve Apple Cider From a Pumpkin Cooler
Hollow out a big pumpkin. Fill it with ice and cider bottles. Done. A pumpkin cooler works as decoration and drink station in one piece, so the snack table stays clear. Thick walls insulate. The ice holds for hours, and guests remember the presentation long after the cider runs out.

Start with a pumpkin at least 14 inches wide. A standard ice bag has to fit. Line the cavity with a food-safe bag, add two inches of ice, and nestle six bottles upright in it. Refill as guests empty them. And compost the pumpkin within three days of the party, before it turns.
109. Make Handprint Bats for the Fence
Trace small hands on black paper. Fold at the thumb and pinky. You have a bat. Handprint bats personalize the whole fence line, and kids spot their own on every walk-by. The fence turns into a gallery, every picket claimed by a tiny contributor.
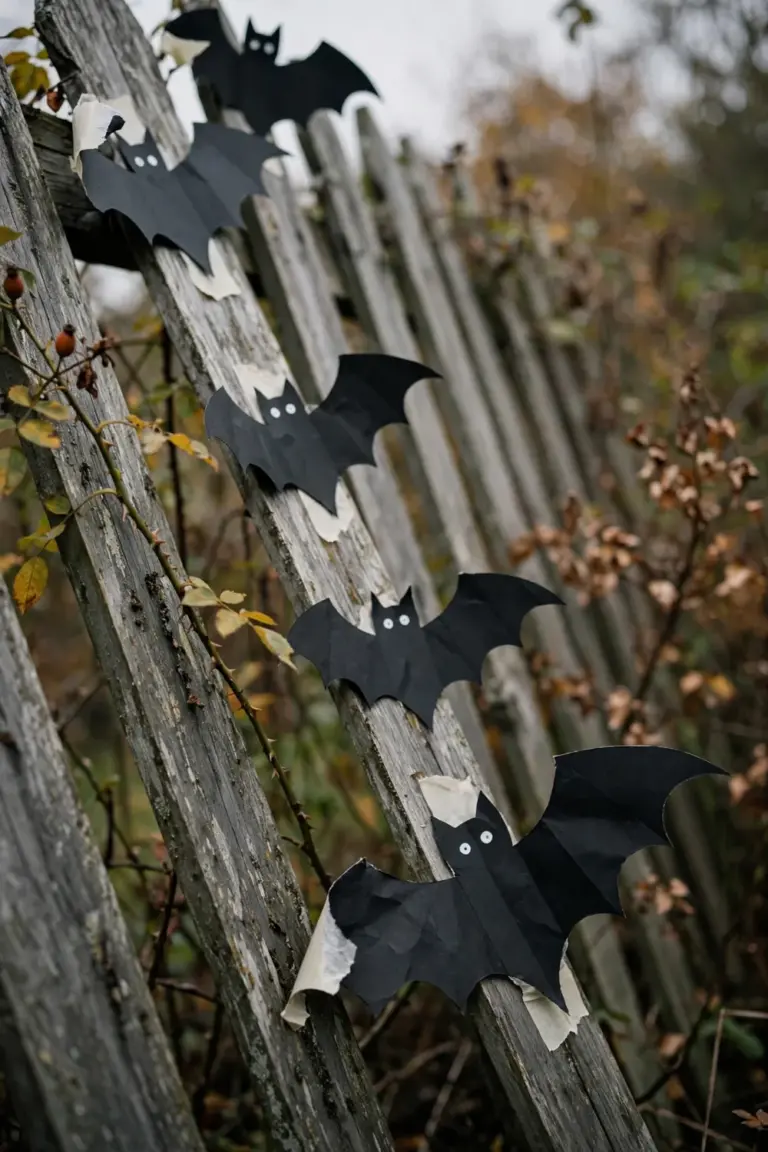
One sheet of 9-by-12-inch construction paper yields two bat bodies per child. Glue on white paper eyes. Allow 20 minutes of drying time. Then tape each bat to the pickets with painter’s tape, three-foot intervals down the line. Take them down after one week. Rain softens paper fast.
110. End the Night With a Glow-Stick Walk
Hand every child a glow stick and walk the block after trick-or-treating. The walk winds the night down. Moving lights look magical from the porches, and drivers see the kids coming. Best of all, the loop marks a clear ending. Bedtime starts without a fight.
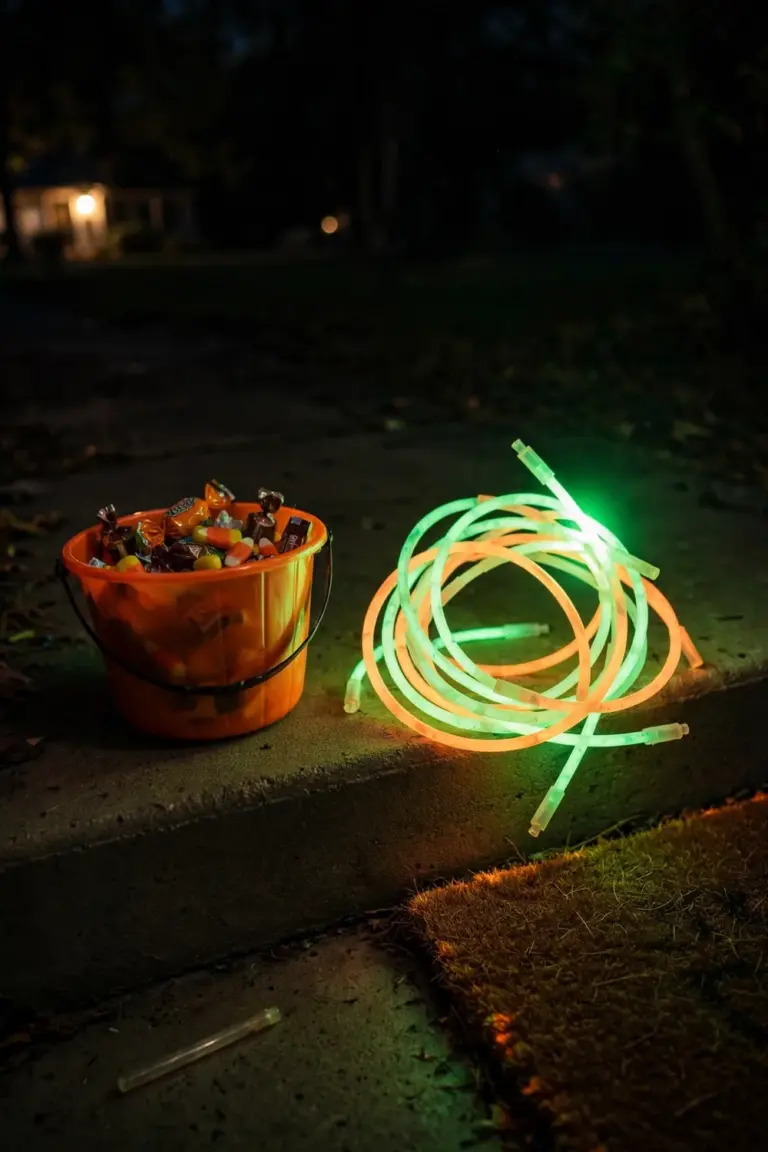
Crack each stick five minutes before you leave so the glow peaks on the route. Choose the eight-inch sticks; they stay bright for six hours. One loop of the block runs about half a mile in most neighborhoods. Loop the string through a belt loop and small hands stay free for the candy bucket. Collect the spent sticks at the door.
Party & Table
111. Set a Black Tablecloth With Orange Napkins
Spread a black tablecloth. Set out orange napkins. The table is done. High contrast does the decorating, so the centerpiece can stay simple, while the dark cloth hides spills and the orange pops in every photo. Guests read the theme before they sit down.
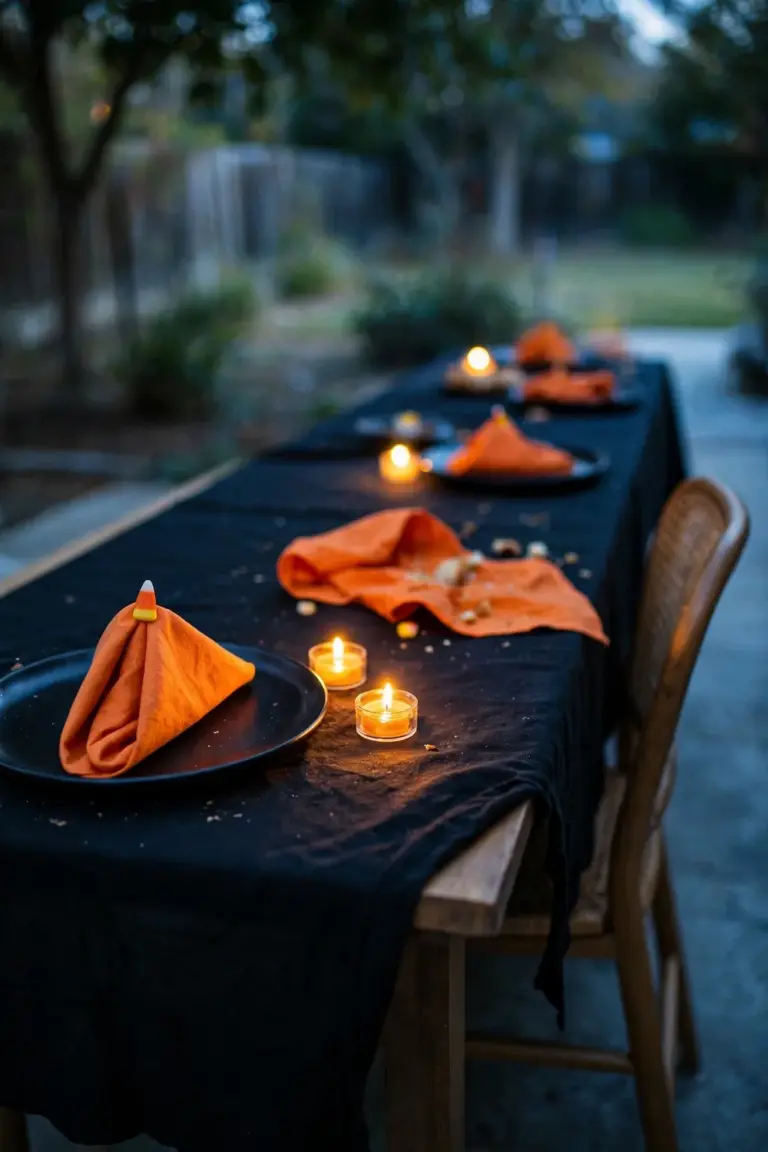
Pick a cloth that hangs 12 inches past the table edge on all sides. Fold each napkin into a triangle. Top it with one candy corn. Two battery tea lights per place setting give the warm glow without a flame near paper. After the party, shake the crumbs outside and wash the cloth.
112. Use Mini Pumpkins as Place Card Holders
Slit the top of a mini pumpkin. Slide in a name card. That is the place setting. Pumpkin cards beat paper tents because guests take them home as favors, the orange shells echo the table theme at no extra cost, and kids hunt for the card with their name first.
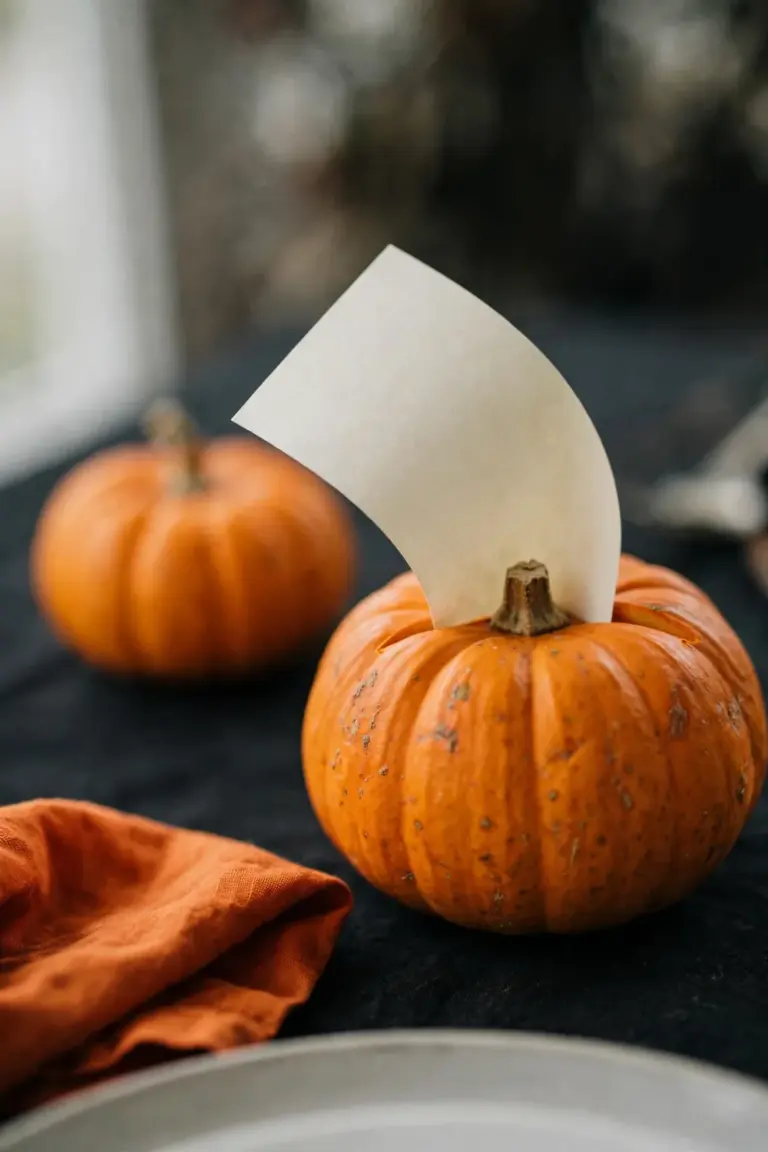
Pick pumpkins three inches tall so the cards stand clear of the plates. A paring knife cuts a half-inch slit. Wedge the card in firmly and write names with a gold paint pen; gold reads best against orange. Set one pumpkin at each plate an hour before guests arrive.
113. Build a Grazing Board on a Wooden Coffin Tray
Arrange cheese, fruit, and crackers on a coffin-shaped wooden tray. A standard grazing board becomes the table’s conversation piece. The dark wood frames the food, the narrow shape keeps portions tidy, and nobody has to reach across the table to graze.
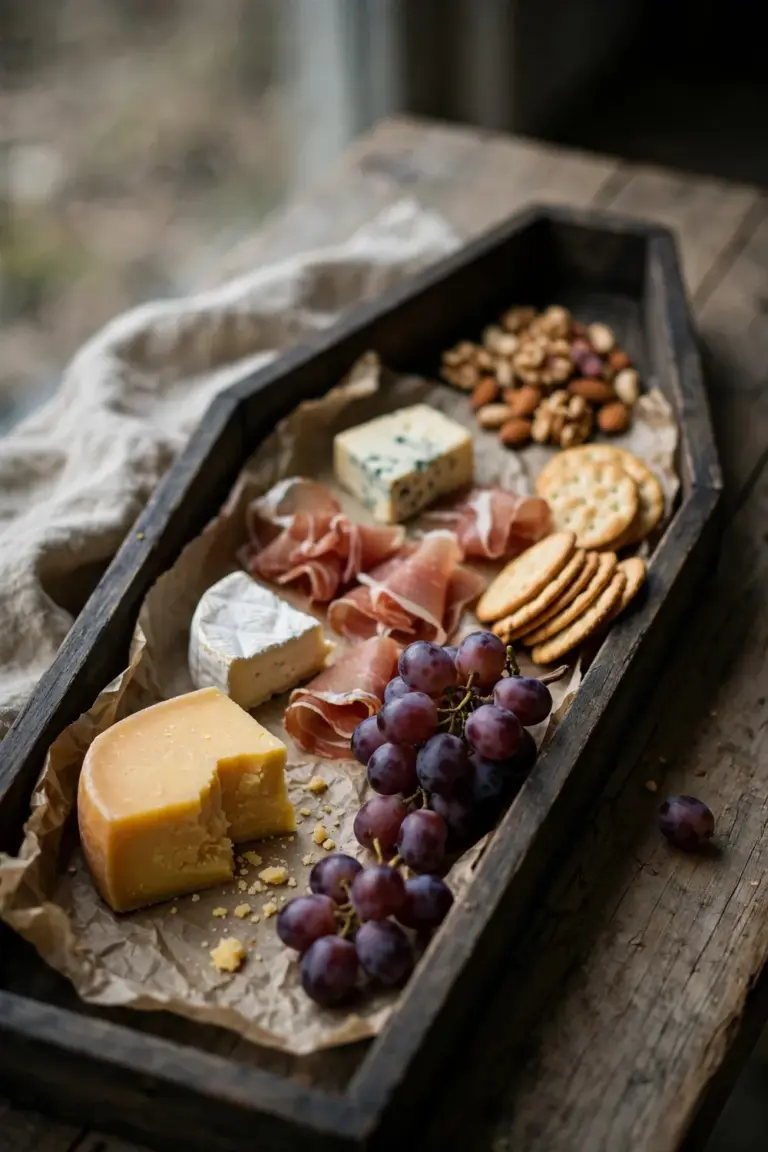
Parchment first. It makes cleanup a one-minute job. Zone the board: three cheeses, two cured meats, a handful of grapes. Chill the cheeses 30 minutes before the party so they slice cleanly. Refill the nuts every hour; small bowls empty fast. Wash the tray in warm soapy water the same night.
114. Serve Spiced Cider From a Hollowed Pumpkin Punch Bowl
Ladle warm spiced cider from a hollowed pumpkin and watch the station draw a crowd. The punch bowl perfumes the whole station with cinnamon, guests serve themselves, and no host hovers with a kettle. The round shape holds heat well. By default, the bowl is the centerpiece.

Pick a pumpkin ten inches wide and scoop the cavity clean. Drop in a two-quart glass bowl as a liner; cider should never touch raw flesh. Warm one gallon of cider with three cinnamon sticks for 20 minutes. Watch the level. Refill when it drops below half.
115. Freeze Gummy Worms Into Ice Cubes
Drop gummy worms into the ice tray. Then fill it with water. Worm cubes surprise every guest who looks into a glass, and kids beg for refills just to fish them out. The worms hang suspended as the water freezes. Cheapest decoration at the drink station.

One worm per cube. A tray of 14 cubes takes 14 worms. Freeze six hours, or overnight for crystal-clear cubes; boiled water clears better than tap, though tap works fine for a party. Pop the cubes into the punch bowl as guests arrive. Keep a second tray freezing for round two.
116. Label Dishes With Tiny Tombstone Cards
Prop gray tombstone cards in front of every dish. The label names the dish and its allergens in one glance, so guests with restrictions can relax and eat. The cards match the theme. The handwriting feels personal. A styled buffet, no extra props.
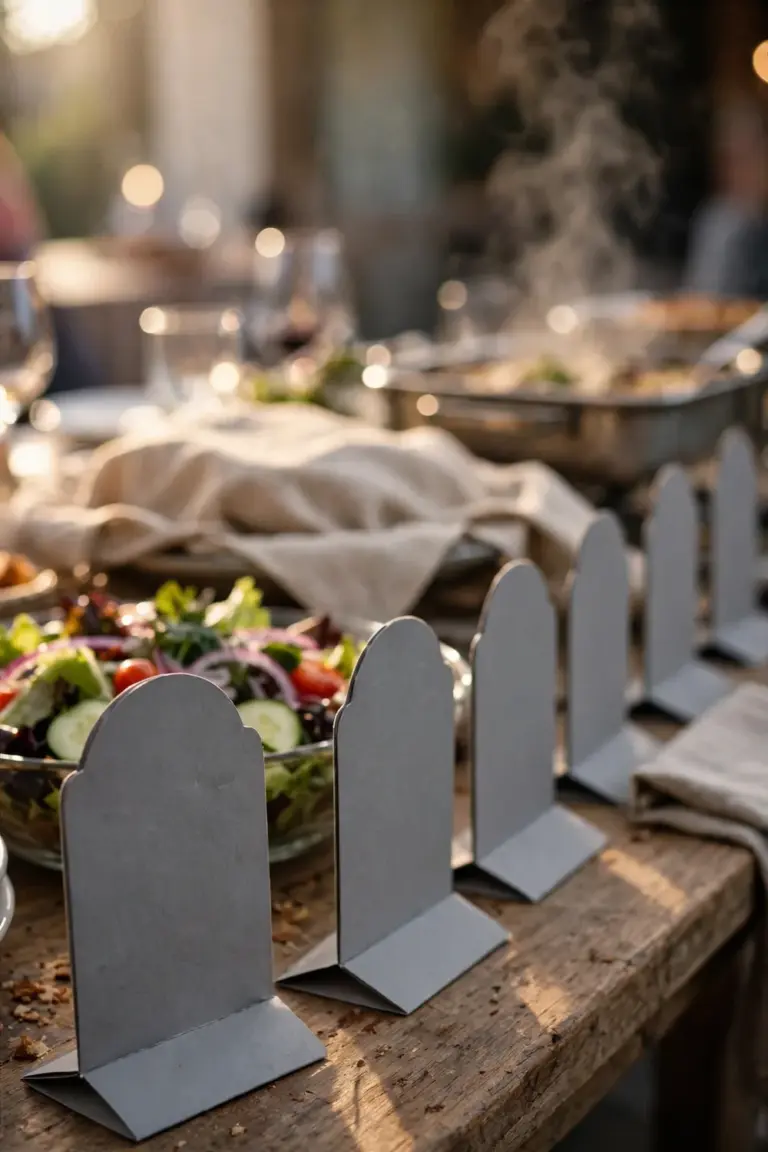
Cut cards four inches tall from gray cardstock; smaller text disappears on a buffet line. Write the dish name in black marker, the top two allergens underneath. Fold a one-inch base into each card so it stands alone. After the party, collect the set. Next year’s buffet is already labeled.
117. Hang String Lights Low Over the Table
Hang string lights two feet above the table. A canopy of warm light. Low light flatters faces and makes food look better in photos, and the table turns into the brightest spot in the yard after dark. Guests linger. Good light does that.
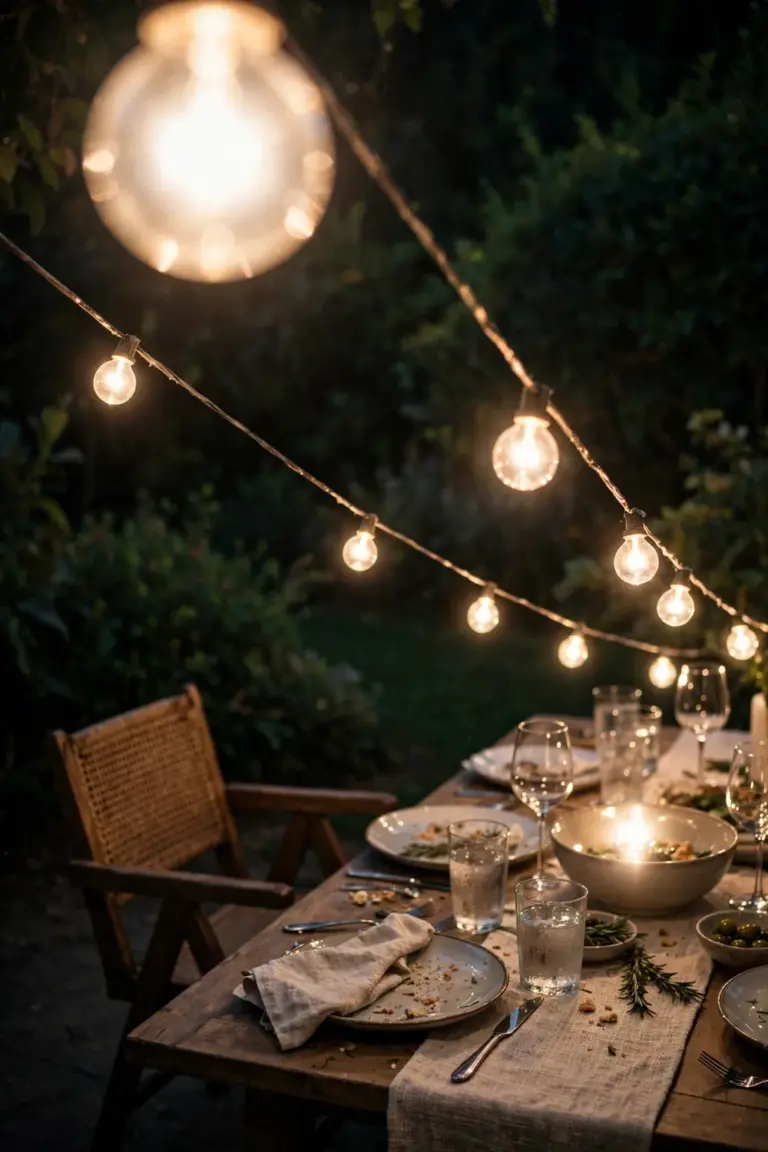
String three strands across a ten-foot table for even coverage. Warm-white bulbs at 2700 kelvin read like candlelight. Removable hooks rated for five pounds hold the runs. Outdoor-rated strands shrug off one light rain. Flip the switch 30 minutes before sunset so the table already glows when guests arrive.
118. Offer a Caramel Apple Dipping Station
Set out warm caramel and sliced apples. Let guests build their own. A dipping station feeds a crowd cheaply, the kitchen smells like autumn, and kids treat the bar as dessert and activity in one. The table needs nothing else sweet.

Slice six apples into wedges. 30 minutes in lemon water stops the browning. Warm two cups of caramel sauce in a slow cooker on low, and set out crushed peanuts, mini chips, or sprinkles for toppings. Replenish the apple slices every hour; a picked-over tray kills the station.
119. Scatter Dried Leaves Down the Table Runner
Scatter dried leaves down the table runner. Cost: nothing. Fallen leaves bring real texture to the table, the colors need no arranging, and a pretty leaf goes home in a guest’s pocket. The runner stays the hero. Leaves fill the gaps.
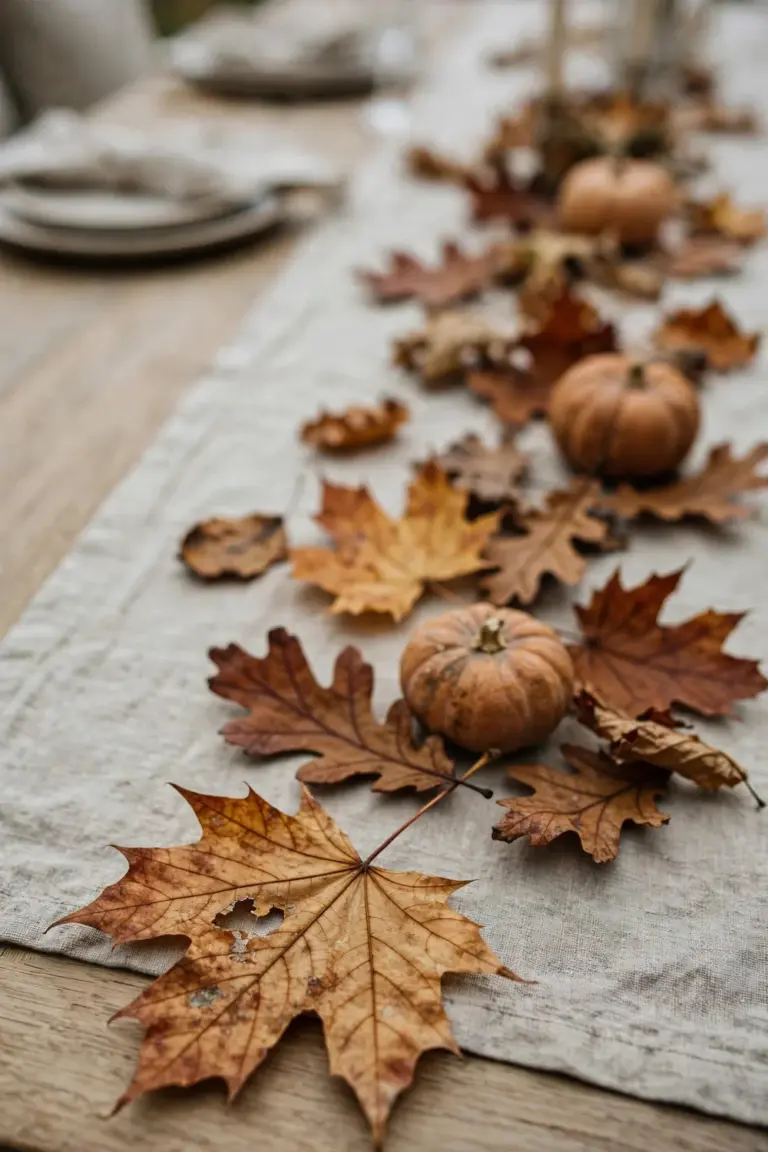
Gather 30 dry leaves the morning of the party. Freshest color, same day. Curling leaves press flat between books in two hours. Oak and maple hold their color longest on the table. Tuck three small pumpkins among the leaves as anchors, and sweep the whole scatter into the compost when the party ends.
120. Send Guests Home With Seed Packets
Hand each guest a seed packet on the way out. The favor costs little, weighs nothing, and grows. Guests sow the seeds in spring and the party comes back to them. No plastic trinkets. A favor that fits the gardening theme exactly.
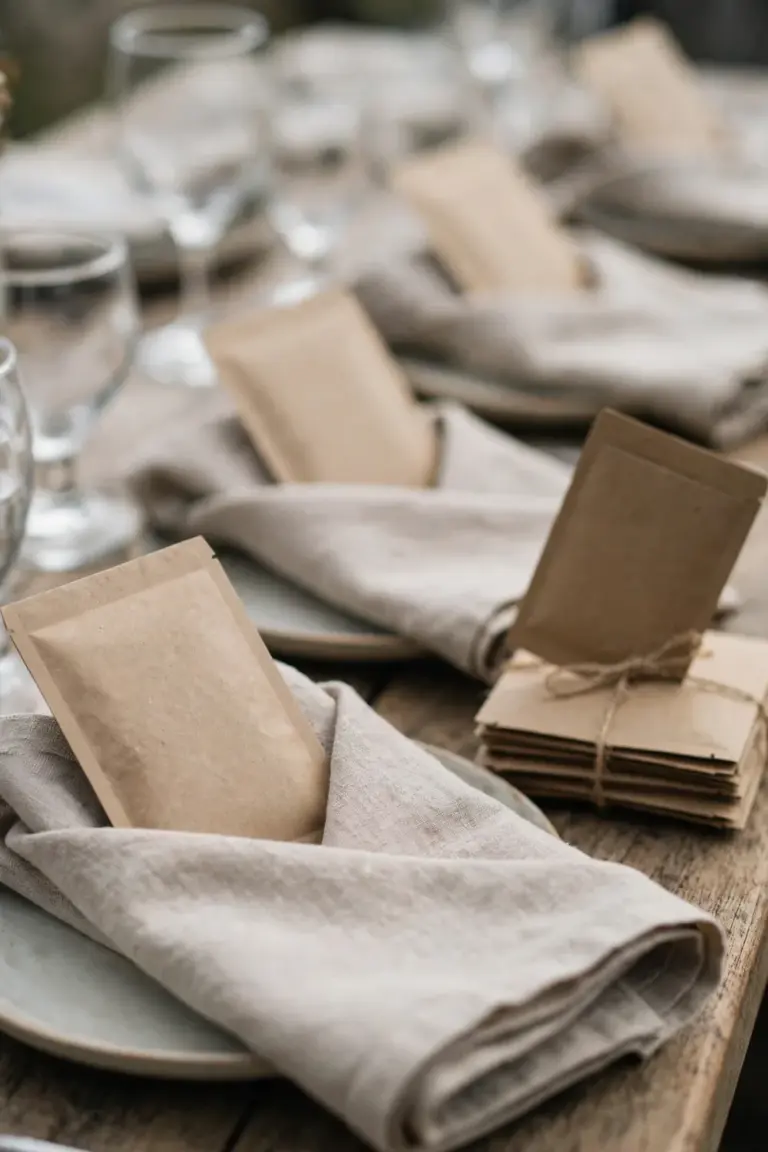
Buy packets of easy annuals like marigolds. 25 packets cover a full guest list. Tuck one into each napkin fold before guests sit down, and add a handwritten note: sow one-quarter inch deep. Marigold seeds stay viable for about three years in proper storage. Store the packets in a cool, dry drawer until spring.
The Fall Garden Itself
121. Let the Last Roses Bloom as ‘Blood Roses’
Stop deadheading in early autumn. Let the last roses open all the way. The final blooms deepen to a dark red that reads gothic against gray skies, and leaving them lets hips form. Hips feed birds through winter. The bed earns its keep after the show.
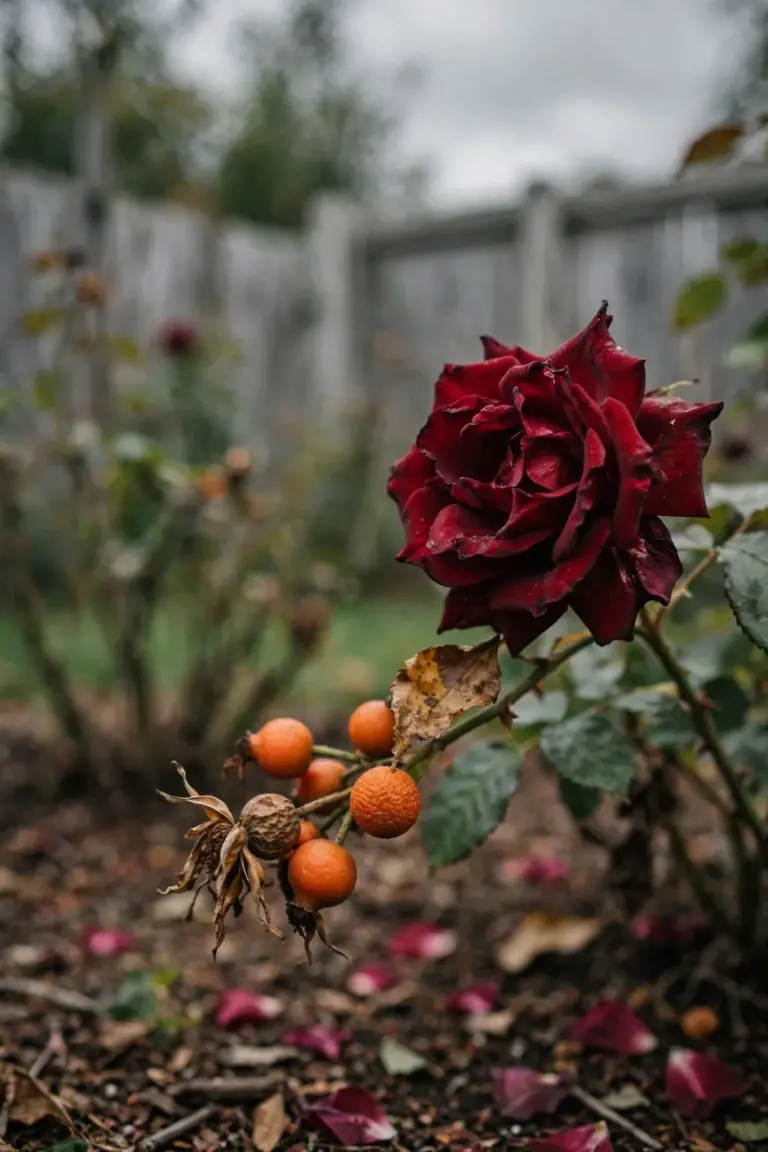
Cut the last spent stems back to an outward-facing bud. 45 degrees, always. From six weeks before the first frost, leave the final flush untouched. Rake fallen petals out of the bed crown; wet petals invite disease. After the ground cools, mulch the base with three inches of shredded bark.
122. Rest the Vegetable Beds Under a Straw Mulch Blanket
Spread straw over the empty vegetable beds once the last harvest is in and the soil lies bare. A straw blanket takes the winter rain so the soil does not have to. Weeds cannot settle in. The soil stays workable, worms keep feeding underneath, and spring planting starts weeks ahead of bare ground.
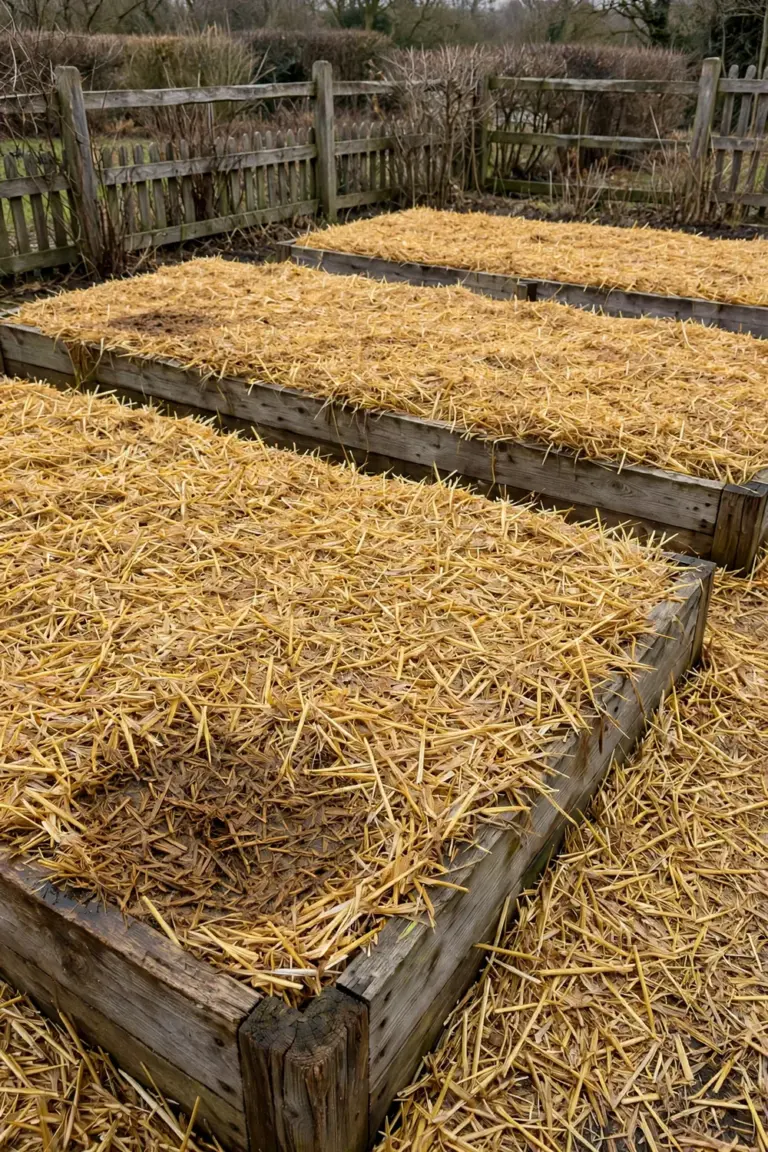
Pull the last spent plants first. Then lay the straw four to six inches deep and tuck the edges under the bed frames where wind cannot lift them. Water once to settle the layer before the first hard freeze. Come spring, pull the straw aside and compost whatever broke down.
123. Plant Garlic Now for Next Summer’s Harvest
Push garlic cloves into the soil in late autumn. Bulbs follow next summer. Garlic needs cold to form proper bulbs, so fall planting beats spring planting every time, and the cloves root before the ground freezes. Green shoots show with the first warm days.
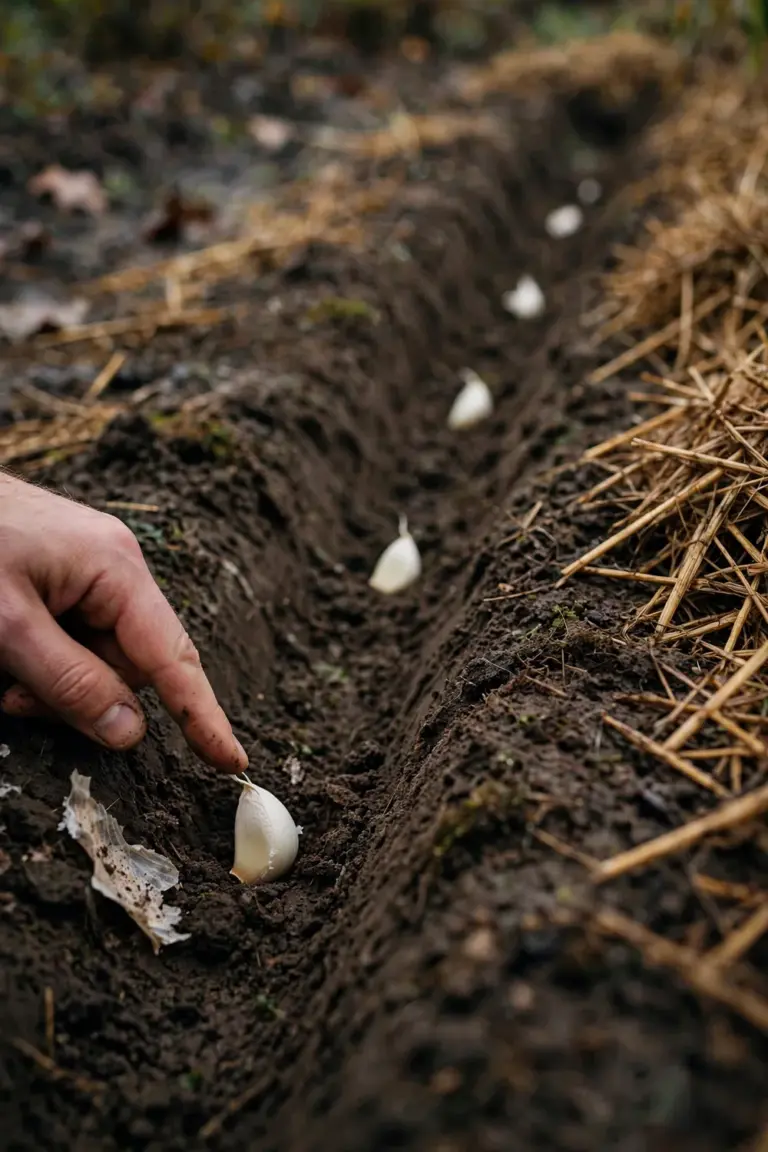
Plant each clove two inches deep, six inches apart, pointy end up. Four inches of straw mulch goes over the bed after planting. Water once. Autumn rain takes over from there until the ground freezes. Harvest when the lower three leaves turn brown in summer. The Fall Planting Calendar pins garlic planting to the weeks before the ground freezes hard, which is exactly the window this idea uses.
124. Photograph the Garden at Dusk for a Haunted Keepsake
Take the camera out at dusk. Shoot the garden in the blue light. Dusk turns ordinary shrubs into silhouettes, low light flatters every planting, and the photos hold the season better than any midday shot. Print the best one for the mantel.
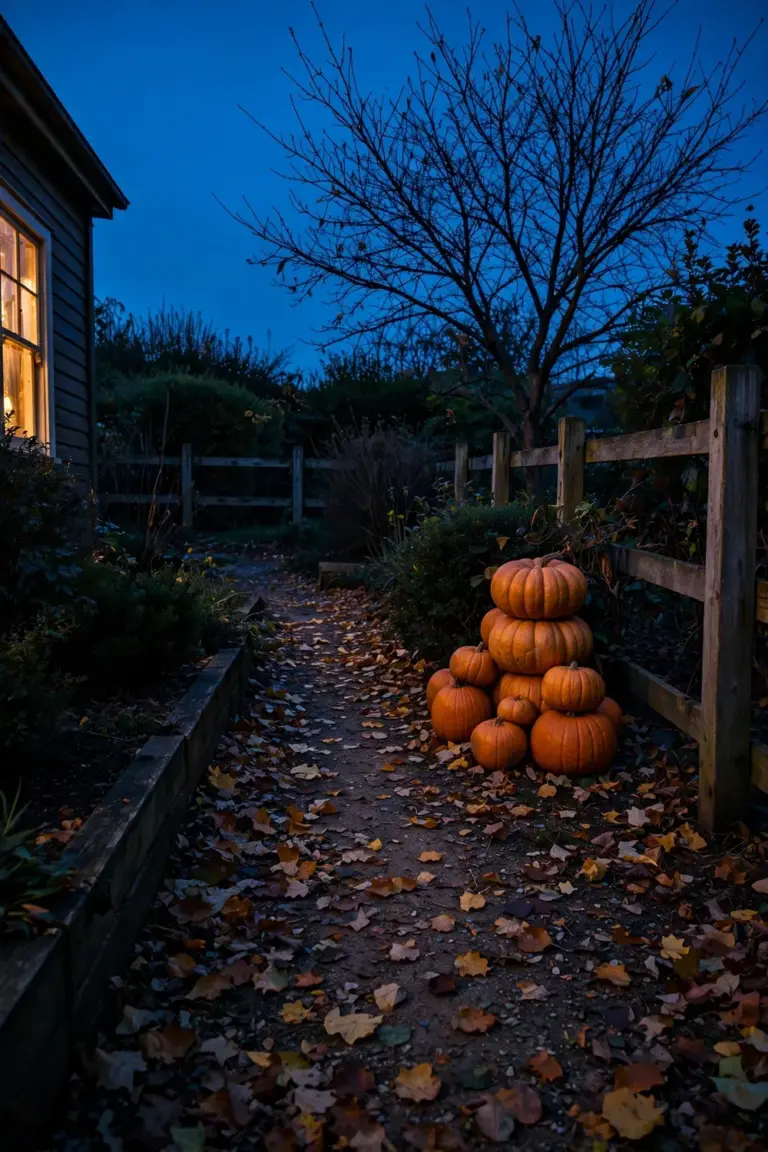
The window is short: the 20 minutes after sunset, while the sky still holds color. Rest the camera on a fence post or tripod for a steady one-second exposure. Frame one strong silhouette. The bare tree. The pumpkin stack. Save the files in a folder labeled with the planting year.
125. Compost Spent Summer Annuals Before They Collapse
Pull the finished summer annuals now. Compost them before they turn to mush. Clearing the beds stops disease from overwintering in dead stems, and the pile gets one last nitrogen boost before winter. The beds look cared for through the holidays.
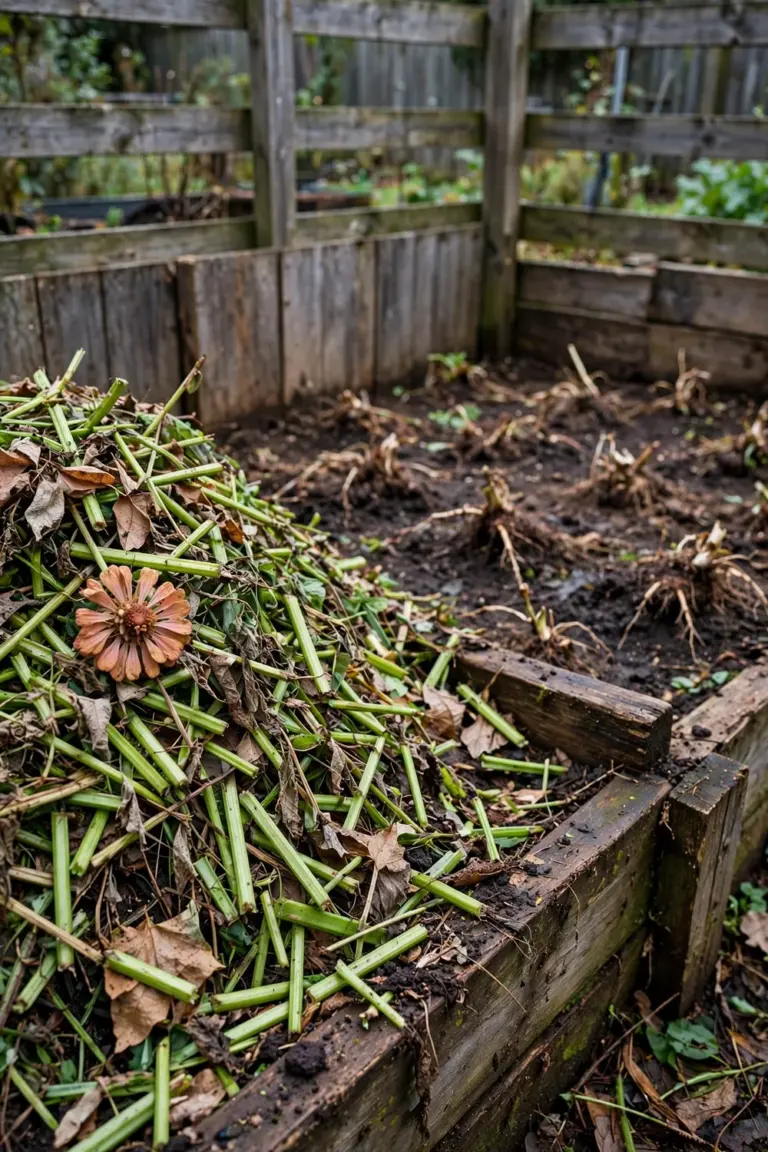
Chop stems into six-inch pieces; they break down within eight weeks. Layer greens with dry leaves at one part greens to three parts browns. Skip any plant that showed mildew or blight this season. After two weeks, turn it once. Finished compost goes on the beds in spring.
126. Divide Overgrown Perennials on a Cool Morning
Overgrown perennials crowd each other out of sunlight and water. Divide them on a cool morning. Every clump gets room to breathe, and spring growth comes back stronger. Daylilies and hostas split well in autumn. The work fills bare spots around the yard for free. Roots settle in while the soil still holds warmth, so divided beds return fuller next season without a single nursery purchase.
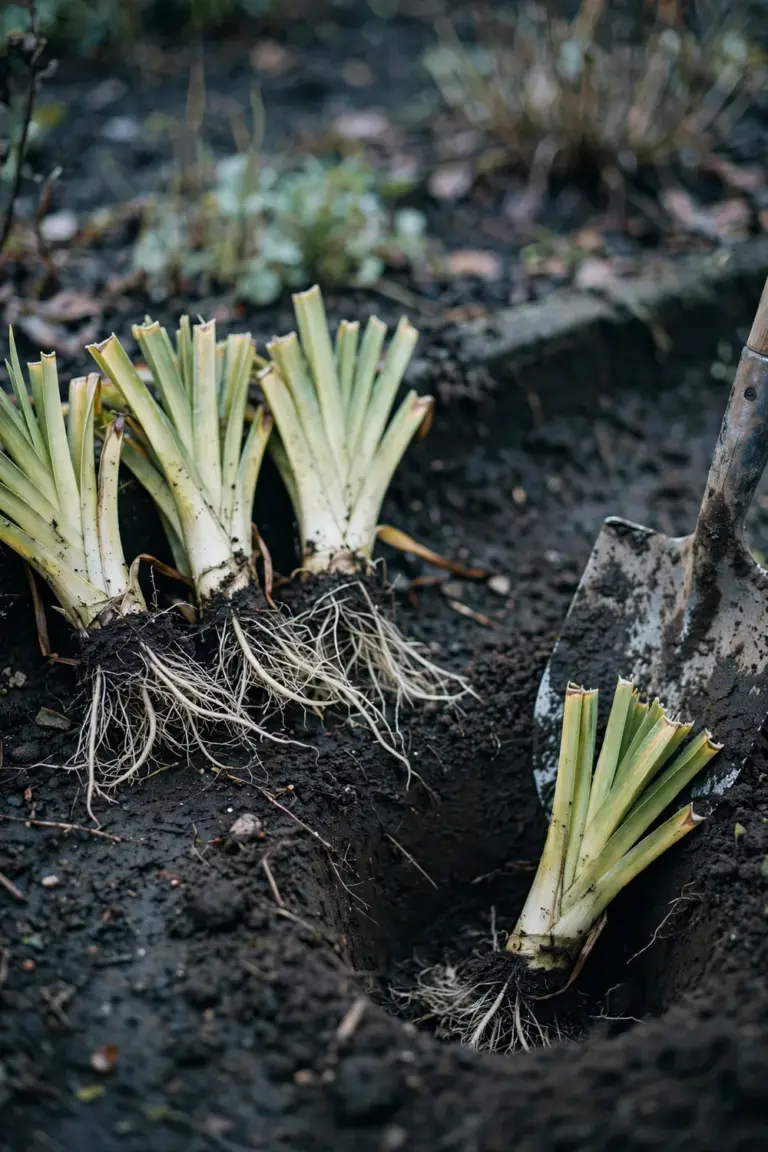
Lift the whole clump with a spade on an overcast morning. Shake off the loose soil. Pull the crown apart with two garden forks set back to back. Replant each division at the same depth it grew before, then water the transplants deeply once. Work while daytime highs stay below 60 degrees Fahrenheit to keep foliage stress low. Most perennials tolerate division every three years.
127. Leave Sunflower Heads Standing for the Birds
Dried sunflower heads feed goldfinches and chickadees straight through winter. The seed heads add sculptural height to the dormant bed. Birds find the supply fast. Then they visit daily. Seed heads also shelter overwintering insects under their bracts, so a standing sunflower patch turns a quiet yard into a winter birding spot. It needs no maintenance. It costs nothing.
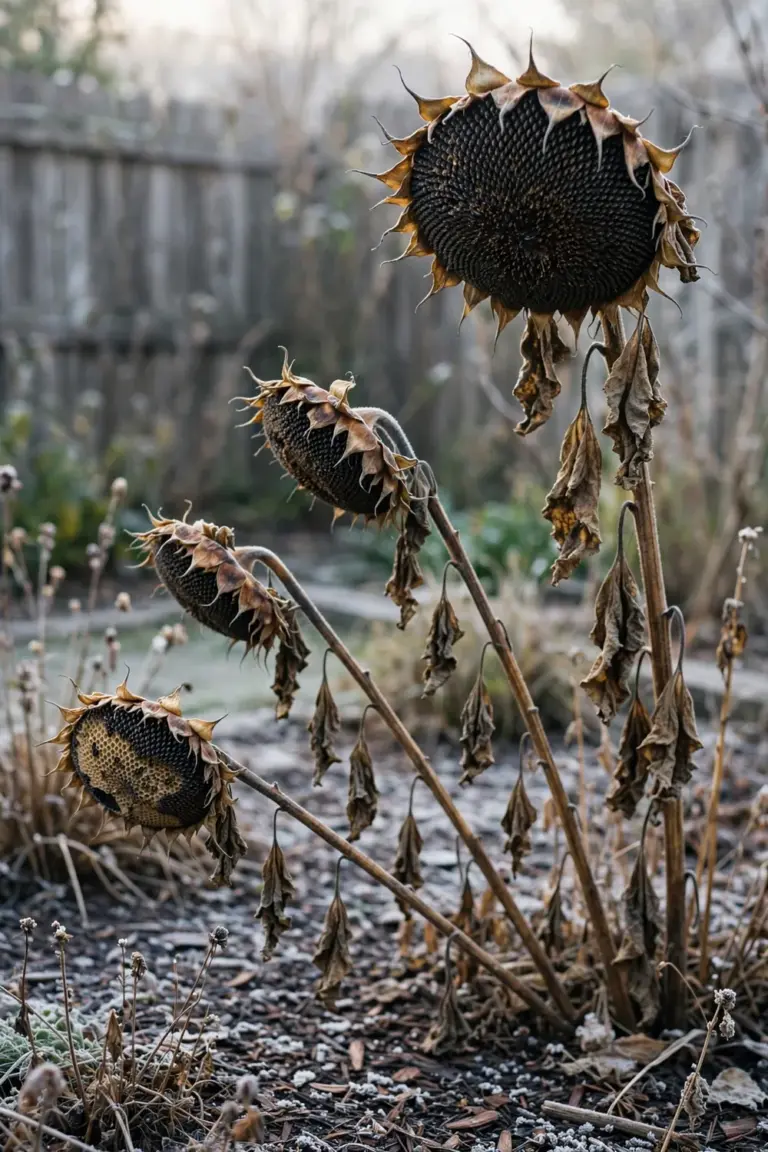
Cut the stalk to about five feet after the petals drop. Leave the head upright on the stem. Plant sunflowers in a back-corner row so the bare skeletons stay clear of the main view. Each head holds hundreds of seeds. Each seed feeds a bird. Remove the stalks in spring before new growth starts.
128. Rake Leaves Into the Beds as Free Mulch
Fallen leaves make a mulch that feeds the soil as it breaks down. Earthworms pull the leaf litter underground. Soil structure improves. A leaf layer insulates roots against freeze-thaw cycles and suppresses early spring weeds at the same time. The leaves cost nothing. They arrive exactly when beds need cover, and beds mulched with leaves wake up richer and darker in spring.
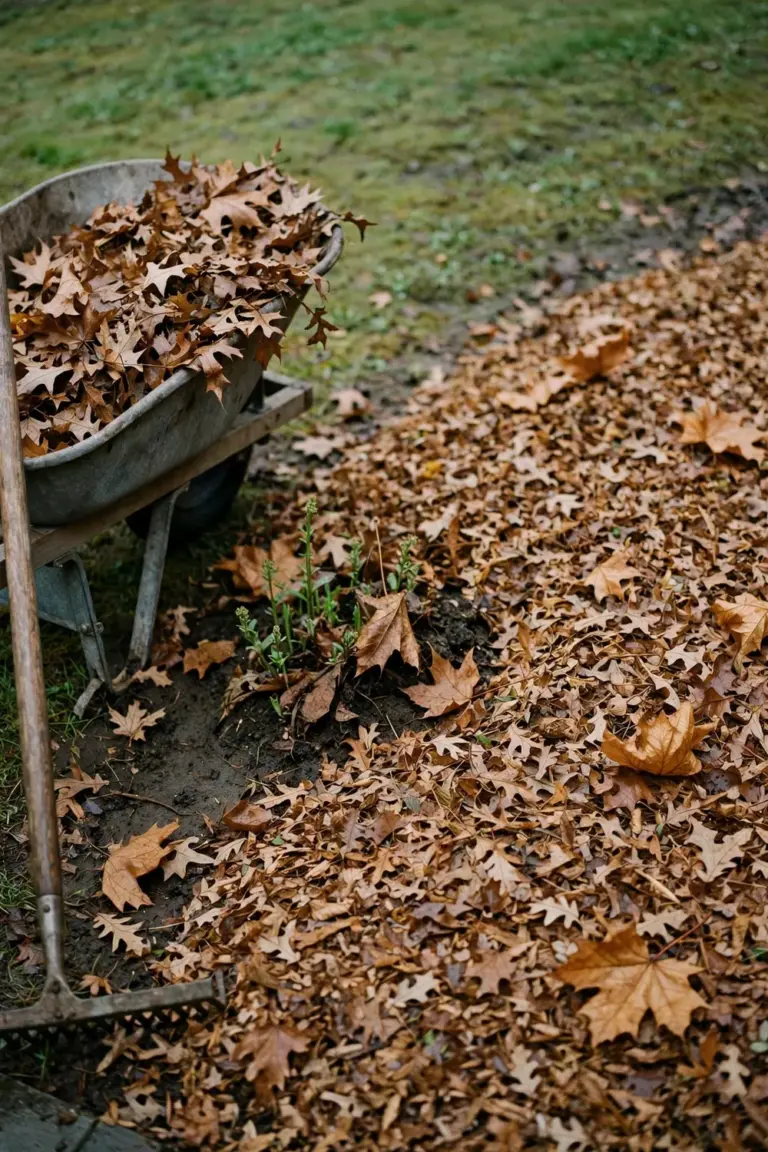
Skip the bags. Rake leaves directly onto the beds. Shred them with a mower first, because whole leaves mat down and shed rain while shreds settle flat and soak it up. Spread the shredded leaves three inches deep around perennials. Keep the mulch pulled back from woody stems; oak and maple leaves break down fastest. Top up the layer after heavy wind.
129. Take Cuttings of Tender Plants Before the First Frost
Tender plants die at the first hard freeze. Cuttings preserve the genetics for free. Coleus and geraniums root on a windowsill, and one mother plant yields dozens of new starts. Indoor cuttings grow through winter under a simple shop light. The technique saves the cost of replacing annuals every spring. Favorite varieties stay alive year after year.
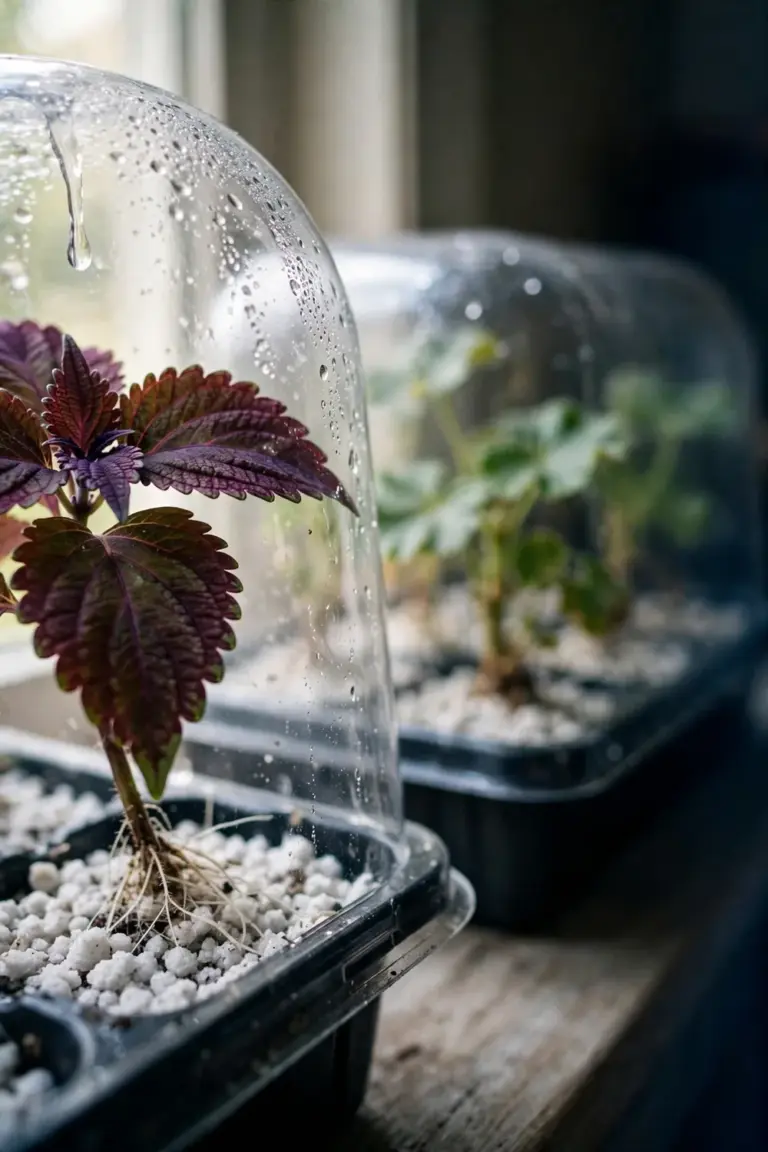
Snip four-inch stem tips just below a leaf node. Strip the lower leaves. Stick the cuttings in moist perlite and cover the tray with a clear dome to hold humidity. Roots form in about two weeks. Take the cuttings when nights first dip near 50 degrees Fahrenheit. Label every variety before the mother plant dies back.
130. Sketch Next Year’s Beds While the Structure Shows
Bare autumn beds reveal the true structure of the garden. Fences and evergreen bones stand out without foliage. Sketch it now. A quick drawing records what worked and what crowded, and winter planning turns those observations into orders. The sketch becomes a shopping list for spring plant sales. You plant with confidence. No impulse buys.
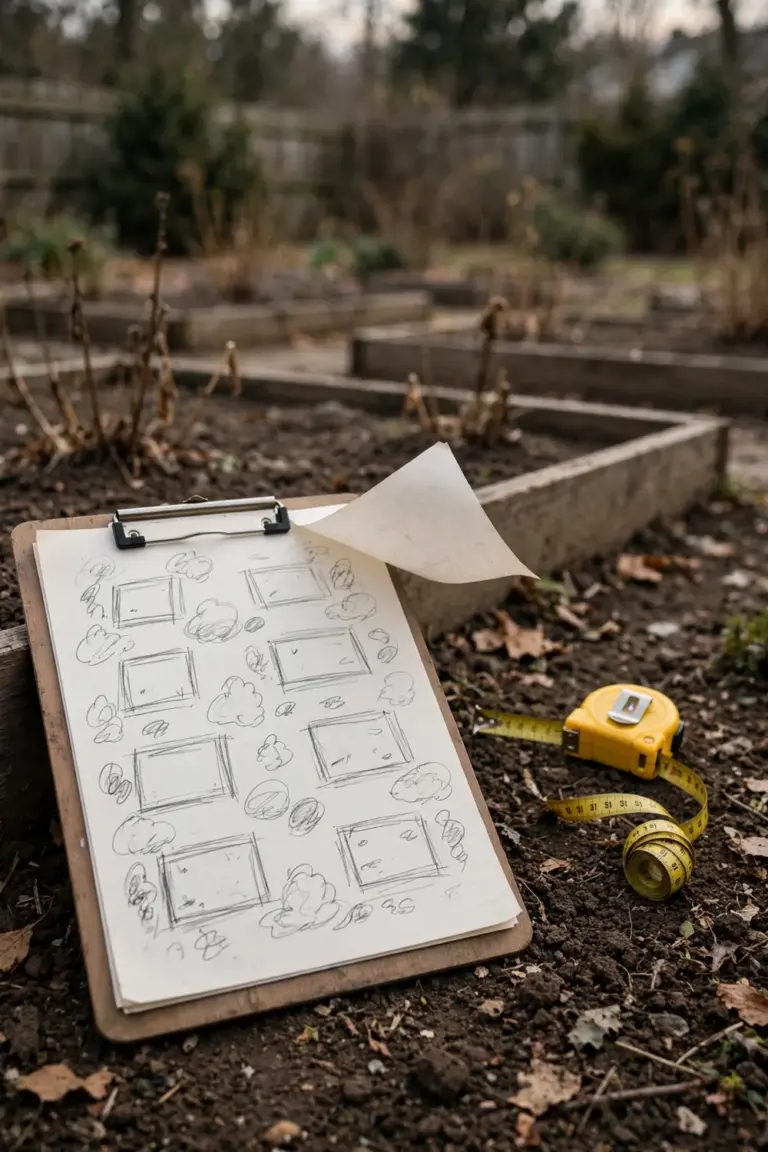
Walk the beds with a clipboard on a dry afternoon. Mark the spots that stayed empty. Mark the corners that overflowed. Note the sun angles while shadows run long, then measure each bed with a tape and write the dimensions on the sketch. One page per bed keeps the plan readable. File the sketches with the seed catalogs over winter.
Paths & Walkways
131. Edge the Path With Luminaries in Paper Bags
Paper bag luminaries line a walkway with warm flickering light. The bags glow from within. Guests reach the door safely. Each luminary costs almost nothing to build, and a row of twenty bags changes an ordinary path completely. The light reads festive, never harsh. Sand anchors every bag against the wind.
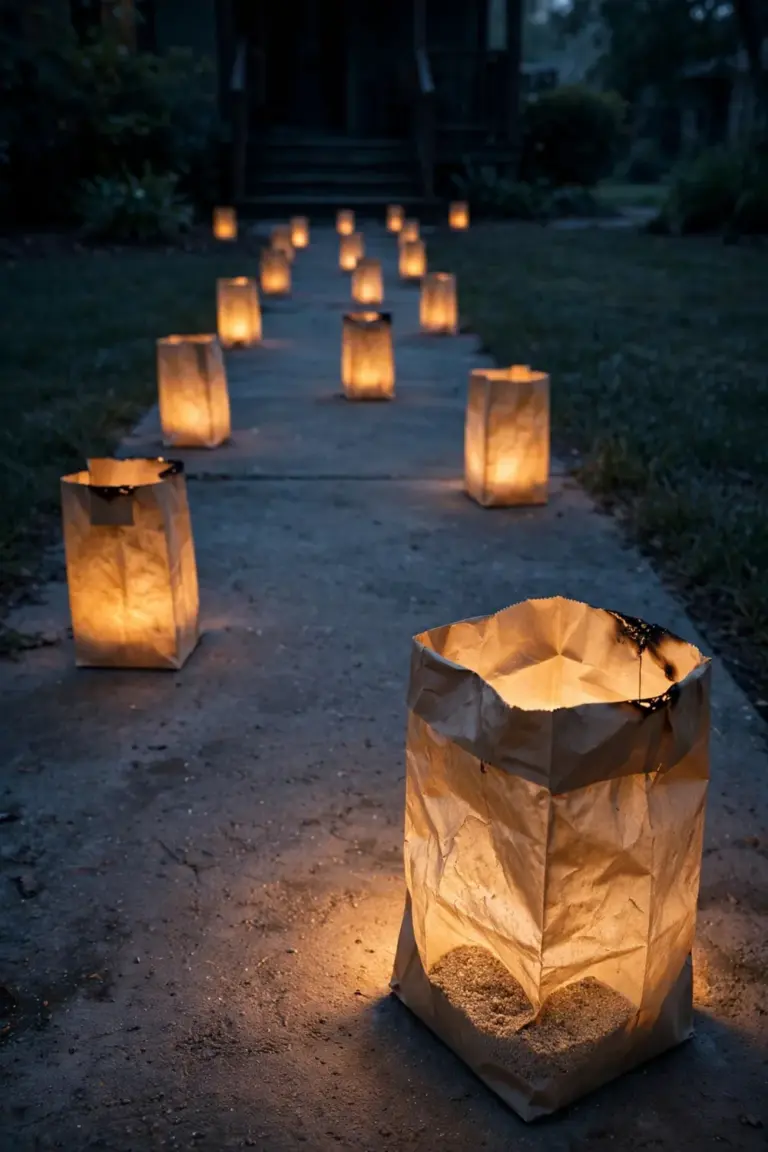
Fold the top of each bag down two inches for a finished cuff. Pour two cups of sand into the bottom and nestle a battery candle in it. Space the bags three feet apart on alternating sides. Light them shortly before guests arrive, and collect the bags after the night ends.
132. Stagger Pumpkins Along Both Sides of the Walk
Pumpkins staggered along a walk create rhythm. The eye moves forward. Alternating sides keeps the line from looking stiff, and mixed sizes add depth to the display. Uncarved pumpkins last the whole season outdoors. The arrangement frames the entrance on its own. Visitors follow the pumpkin line straight to the candy bowl.
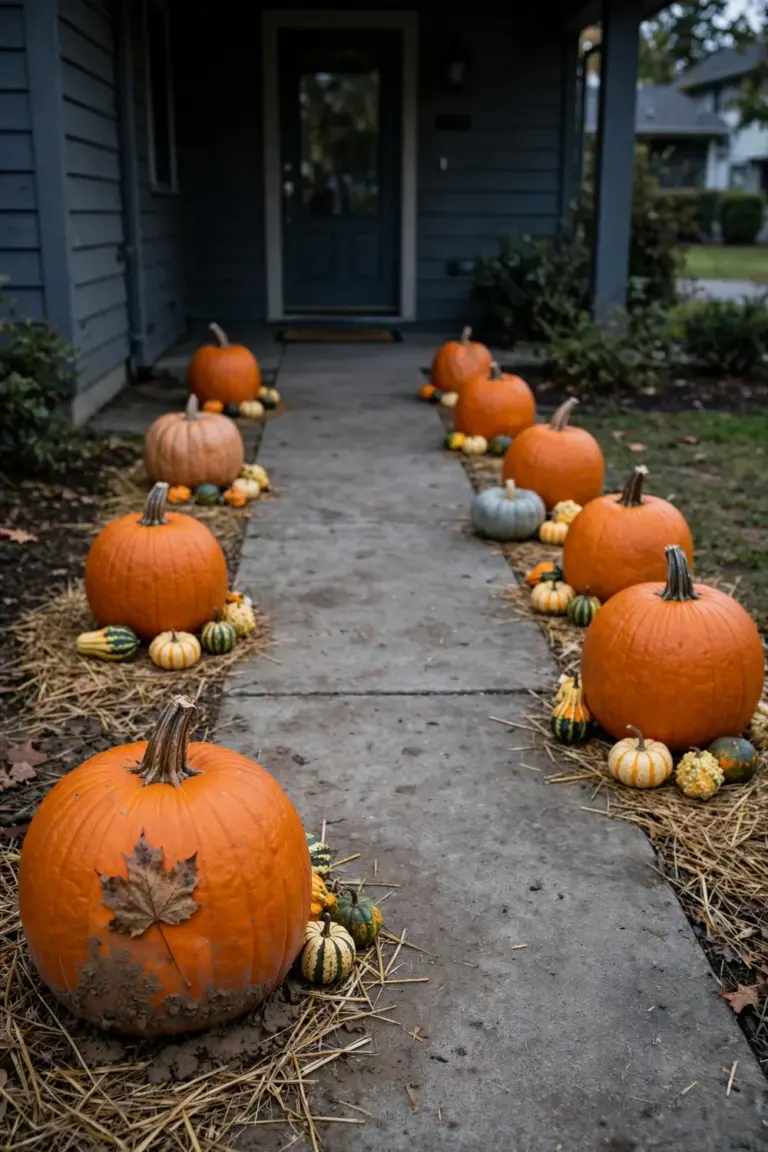
Place the largest pumpkin nearest the street, then alternate sides every two feet. Tuck small gourds between the big pumpkins and set each pumpkin on a bed of straw to slow rot. Use an odd count for a natural look. Nine pumpkins fill a standard walkway nicely.
133. Hang Lanterns at Kid Height and Adult Height
Lanterns at two heights light both the path and the faces along it. Kids see where they step. Adults see the decorations around them. The layered light looks deliberate, and battery lanterns hang safely from shepherd’s hooks along the whole route. Two heights also keep the walk bright if one lantern dies.
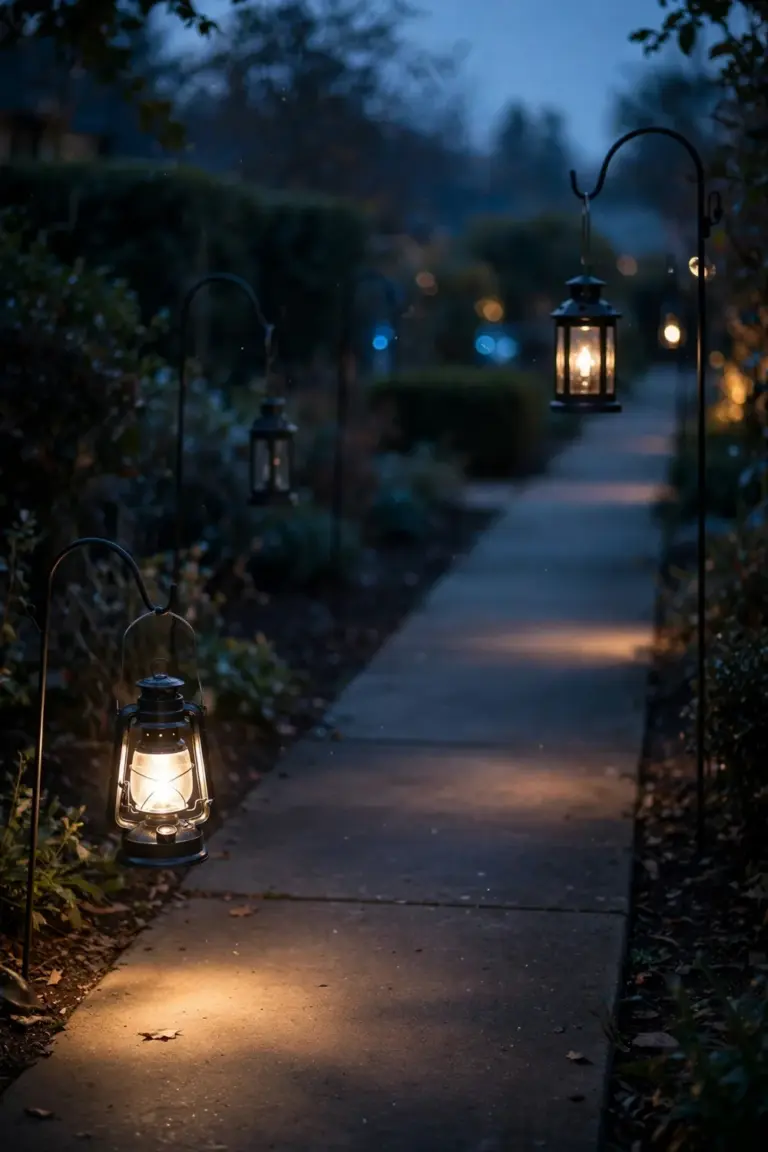
Hang the lower row at three feet for small trick-or-treaters and the upper row at six feet for adults. Alternate the heights along opposite sides, using warm-white LEDs for a candle feel. Space the hooks six feet apart. Test the glow after dark before the first guest arrives.
134. Paint Arrows on the Lawn Pointing to the Candy
Painted arrows turn the lawn into a playful treasure map. Kids follow them with excitement. The paint washes away with the next rain, and the arrows steer foot traffic off delicate beds at the same time. The game costs nothing beyond a can of paint. Every arrow builds anticipation for the candy at the end.
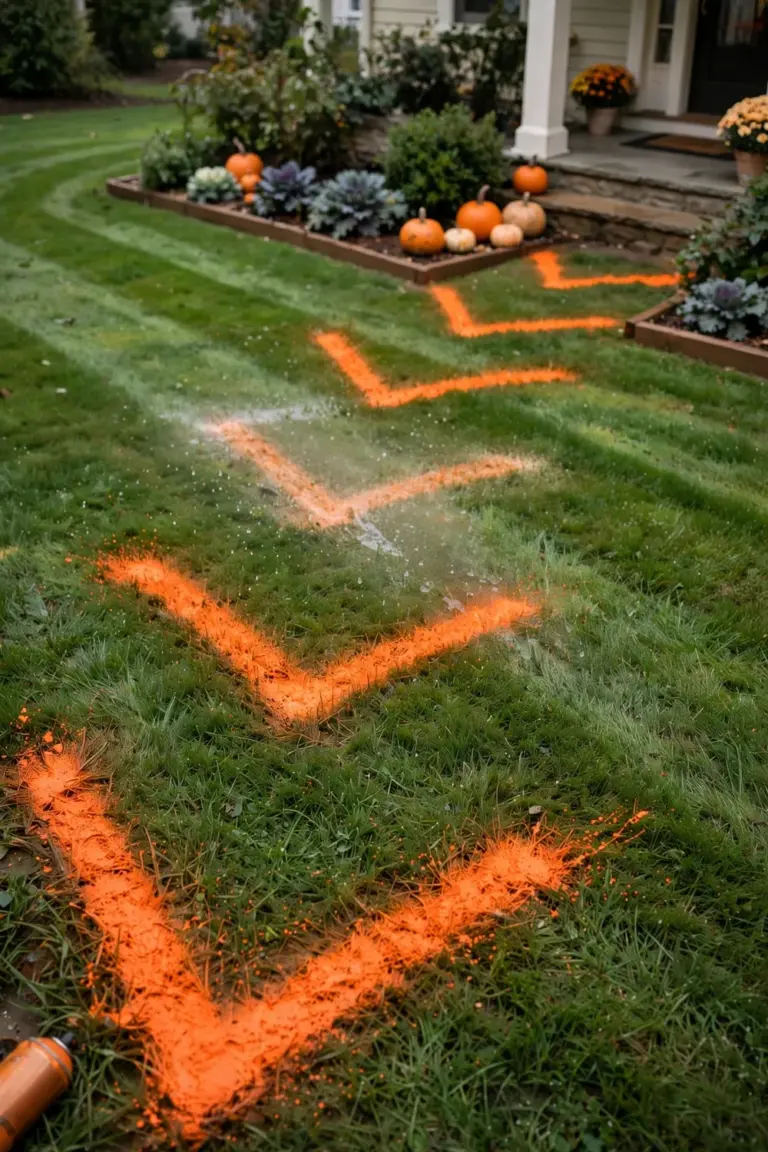
Use washable field-marking paint from the hardware store. Spray each arrow about two feet long. Lay the arrows six feet apart along the route and curve the trail around beds and obstacles. Point the final arrow at the porch. Refresh the paint if rain fades the trail early.
135. Lay a ‘Red Carpet’ of Fall Leaves to the Door
A thick lane of red and gold leaves makes a grand entrance. The leaves crunch underfoot. They smell like autumn. The carpet costs nothing to build. Rake a defined lane and it looks deliberate, where scattered leaves read as mess. Guests photograph the walkway before they ring the bell. The display celebrates the season without a single prop.
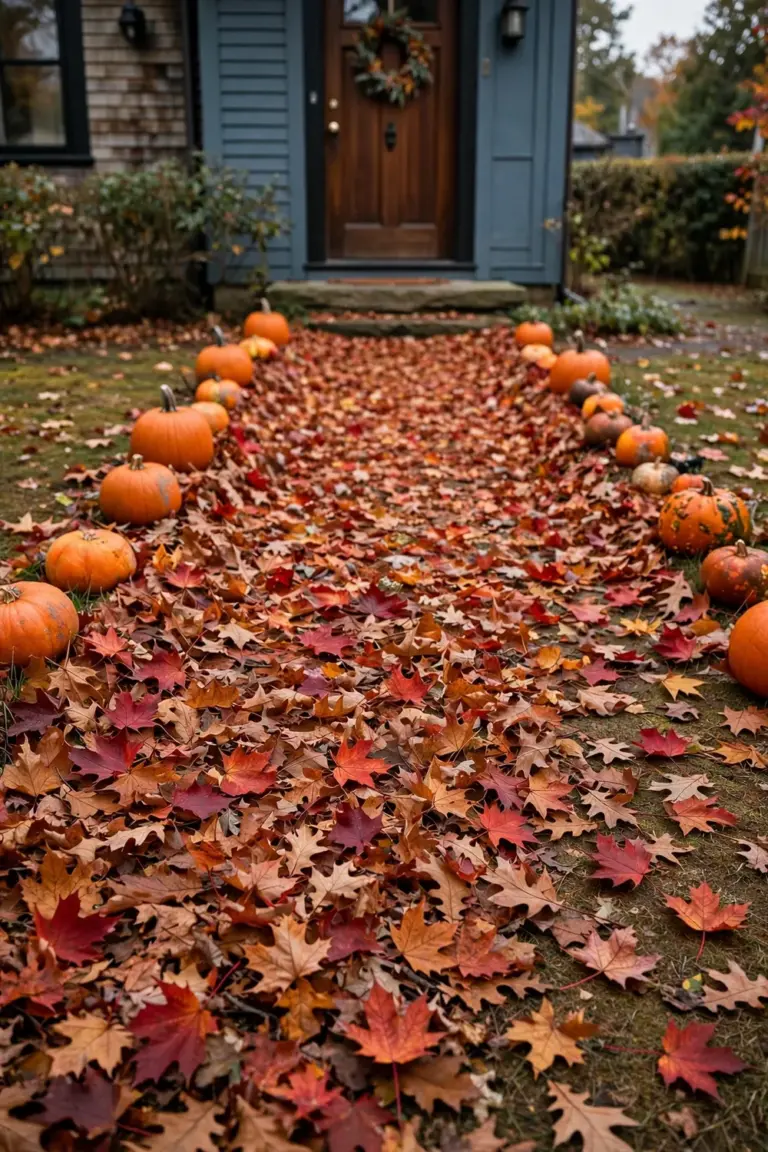
Rake maple and oak leaves into a lane four feet wide. Build the layer two inches thick. Edge the lane with a line of pumpkins to hold the shape. Replenish the lane after windy nights. When the season ends, sweep the lane into the beds. The leaves become mulch where they land.
136. Mark the Steps With Glow Tape
Glow tape on step edges prevents trips after dark. Guests see every riser clearly. The tape charges in daylight and glows for hours, so the steps stay visible even if the power fails. The fix takes minutes to apply. Small safety details make a display feel professional.
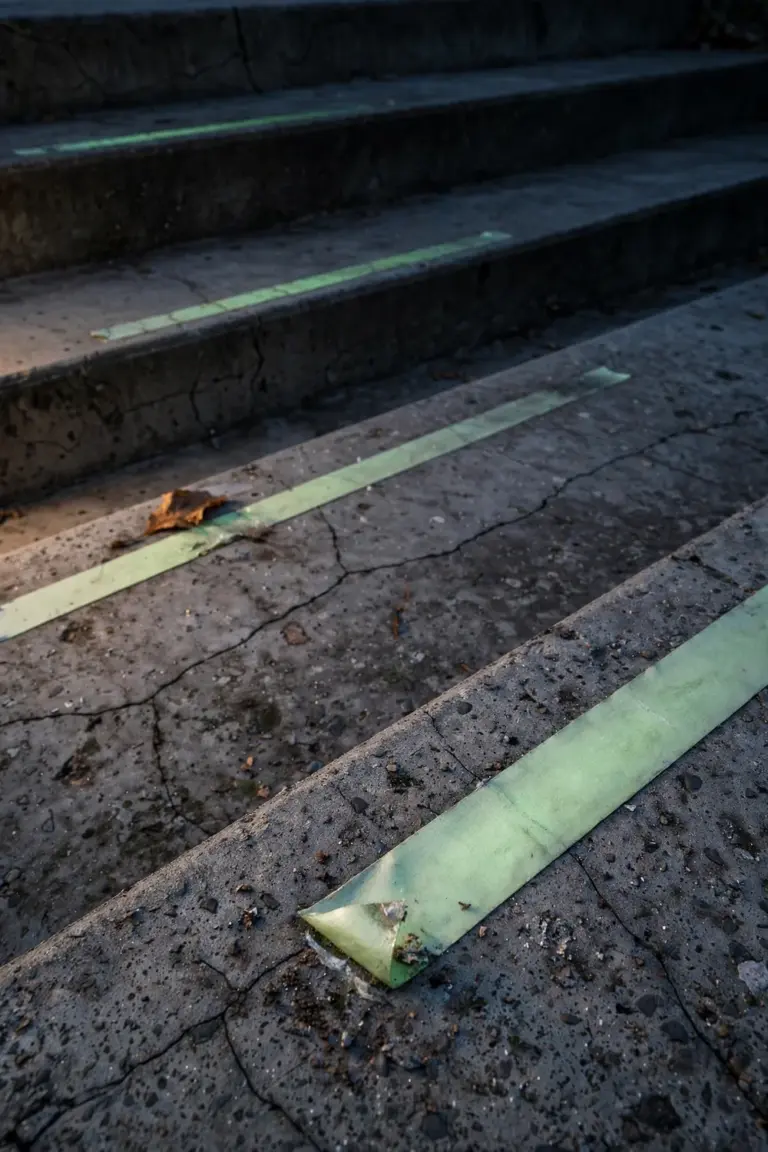
Cut the tape into six-inch strips. Press one strip across the nose of each step. Wipe the step clean first. Dirty concrete sheds tape by morning. Charge the tape with a flashlight for thirty seconds, replace any strip that peels after rain, and keep a spare roll for touch-ups. Apply the strips in daylight so the adhesive bonds well.
137. Flank the Gate With Two Matching Urns
Matching urns frame a gate with symmetry and weight. The pair signals a planned display. Fill the urns with bare branches and small pumpkins. Symmetry pleases the eye from the street, and the urns anchor the whole entrance composition at the same time. Two urns cost less than a pile of scattered props.
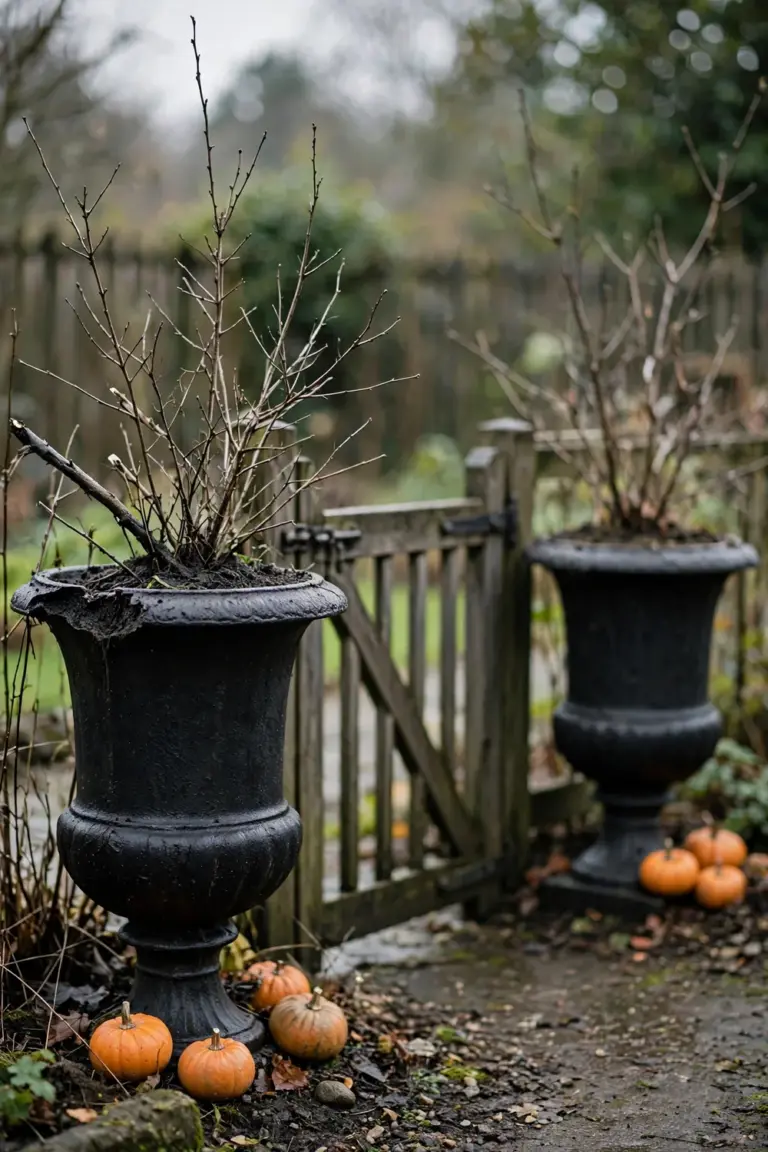
Choose urns at least eighteen inches tall for presence, because short urns vanish behind the gate posts. Fill the base with soil or sand. Stability matters. Stick bare branches upright in the center and tuck small pumpkins around the base. Mirror the arrangement on both sides. Water any live plants tucked inside.
138. Test-Walk the Route After Dark Before Guests Arrive
A test walk reveals every dark patch and tripping hazard. The route looks different at night than at noon. Cords hide in shadows. So do low props. Walking the path finds the problems before guests do, and the check takes ten minutes. Hosts walk with confidence once the route passes inspection.
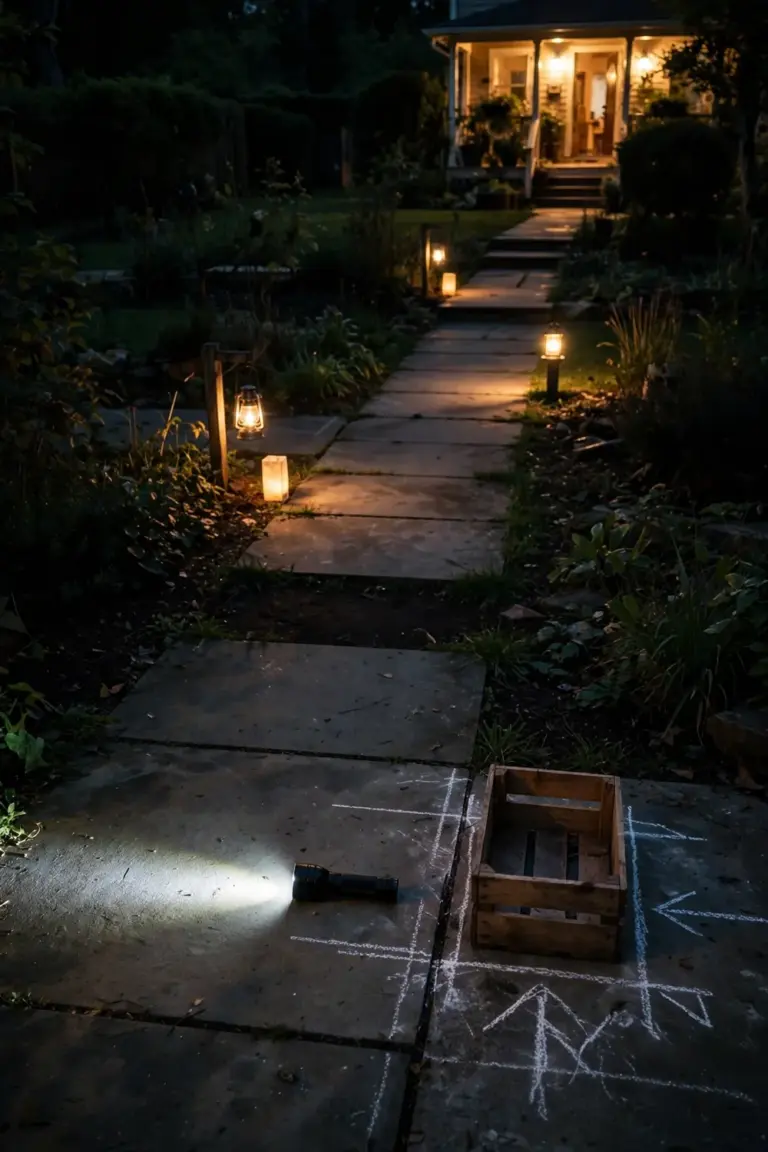
Walk the full route after sunset the night before. Carry a flashlight. Mark dark spots with chalk. Move or light every obstacle you find, check that the candy station stays bright, and trim any branch below seven feet over the path. Repeat the walk on party night after setup.
Fast & Budget
139. Stake Hand-Lettered Signs in the Flower Beds
Hand-lettered signs add personality for the price of scrap wood. Funny warnings and spooky greetings make guests smile. The signs look homemade. That is the charm. Kids can paint their own, and the stakes push into soft soil in seconds. A bed of signs turns an ordinary border into a story.
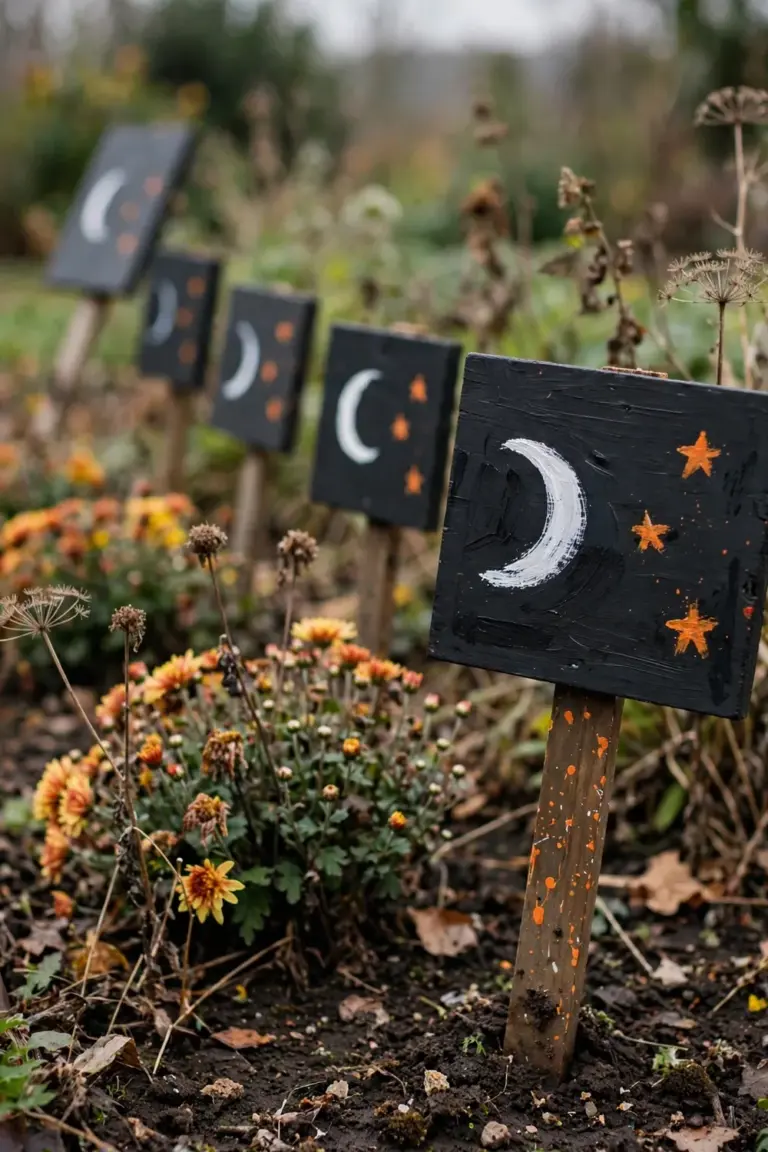
Cut pine boards into twelve-inch plaques. Paint a dark background. Letter in white or orange. Attach each plaque to an eighteen-inch garden stake and seal the wood with exterior varnish. Space the signs two feet apart. Pull the stakes before the first hard freeze.
140. Drape One Big Spider Web Across the Biggest Shrub
One oversized web on the largest shrub delivers maximum impact with minimum effort. The shrub becomes the yard’s centerpiece. Stretch webbing reads spooky from the street. The project takes fifteen minutes. A single web beats ten small ones scattered around the yard. Scale makes the decoration memorable.
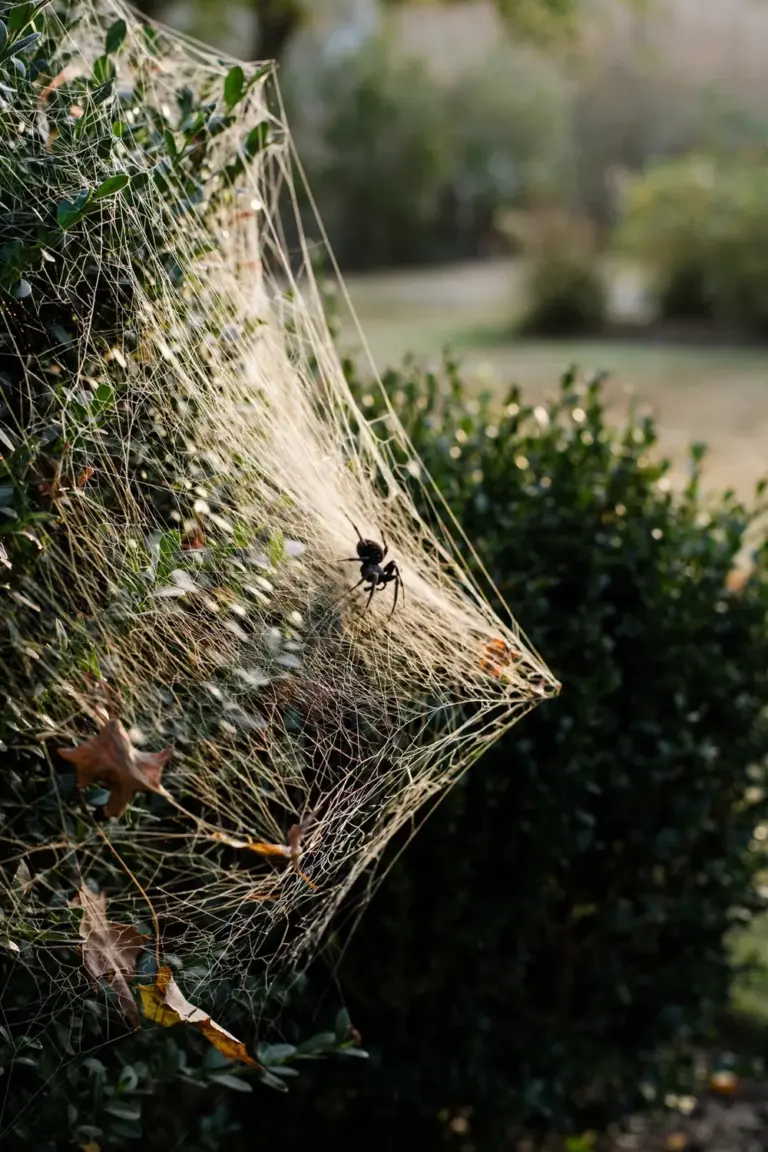
Buy one bag of stretchable spider webbing. Anchor the center to the top of the shrub. Stretch the web outward to the branch tips and pull the strands taut so wind does not collapse them. Add one large plastic spider at the center. Remove the webbing before it tangles in new growth.
141. Cluster Everything You Own by the Front Door
Clustering every decoration at the entrance concentrates the impact, and one dense display reads richer than props spread thin. Guests see everything in a single glance, and the front door becomes the photo spot. Clustering simplifies setup and takedown too. A full doorway beats a sparse yard every time.
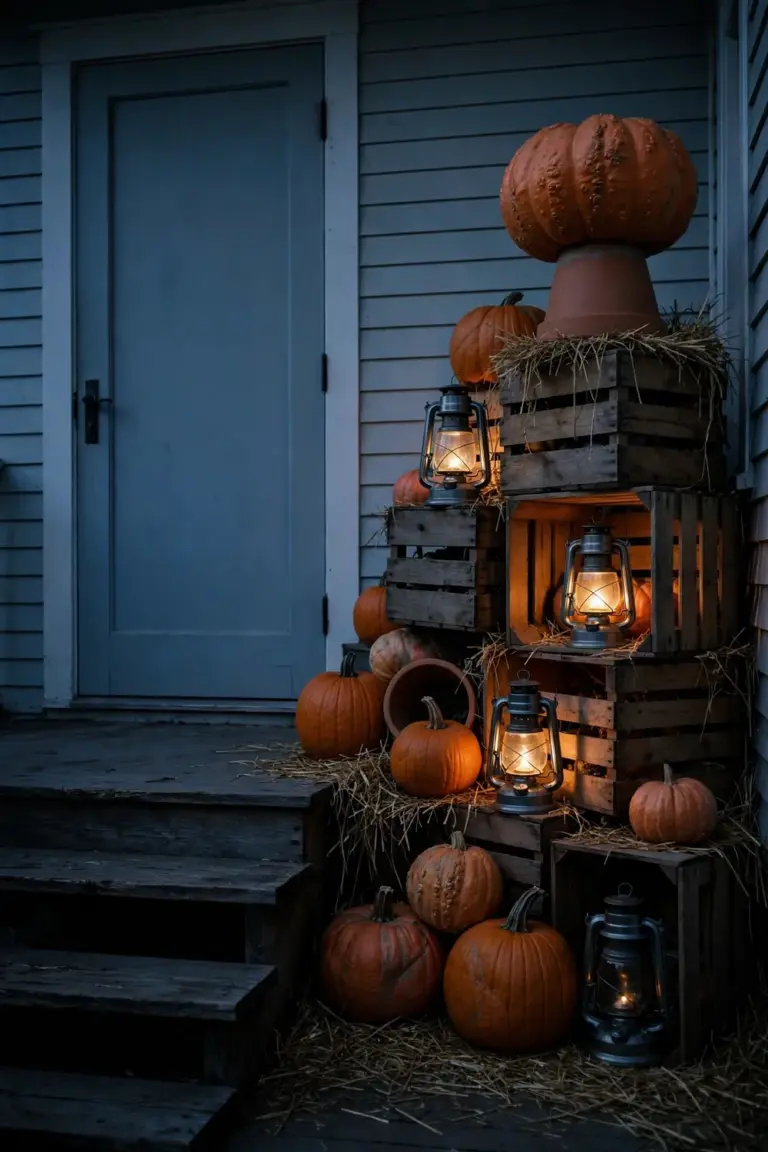
Pull every pumpkin and lantern into one six-foot zone. Layer the heights. Crates and overturned pots do the lifting. Tuck lights deep inside the cluster, keep the door swing and steps clear, and aim for odd groupings of three or five. Step back to the curb. Check the balance.
142. Borrow a Fog Machine for One Night
Borrowed fog changes a yard for a single evening. Mist rolls over the lawn and looks expensive, while the rental or favor costs nothing. Fog hides ordinary landscaping. Mystery arrives free. The effect peaks in the first hour, and one night of fog beats a week of static props.

Ask a friend or party store about a one-night loan. Place the machine behind the tombstones or shrubs. Aim the nozzle low across the grass. Run the machine in short bursts every ten minutes and keep the fluid reservoir full. Store the machine dry after the night.
143. Raid the Dollar Store for String Lights
Dollar store string lights stretch a decorating budget the farthest. Orange and purple strands cost a fraction of boutique lights, and multiple strands cover trees, rails, and fences without a fight. Battery strands go anywhere. No outlets needed. The lights reuse for years, and cheap lights look identical to expensive ones after dark.
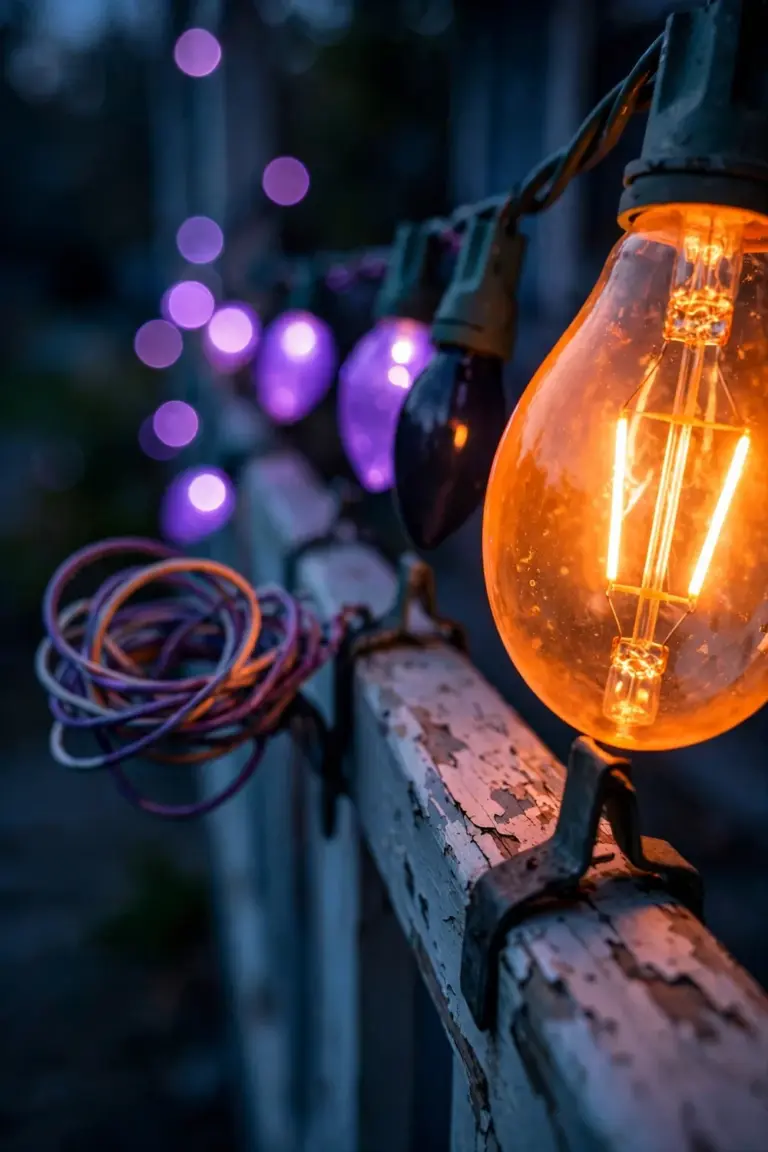
Buy strands labeled for outdoor use. Test every strand before hanging. Space the support clips two feet apart along the rail and wrap the extra strands around trunks and shrubs. Keep plugs dry under an overhang. Coil loosely for storage. Unplug the lights during heavy storms.
144. Use What the Garden Already Gave You
The garden already holds the raw materials for spooky decor. Dried stalks cost nothing. Fallen branches cost nothing. Cornstalks bundle into columns, and bare branches sprayed black become eerie silhouettes against the porch light. Using garden materials keeps the display cohesive. The yard decorates itself with a little editing.
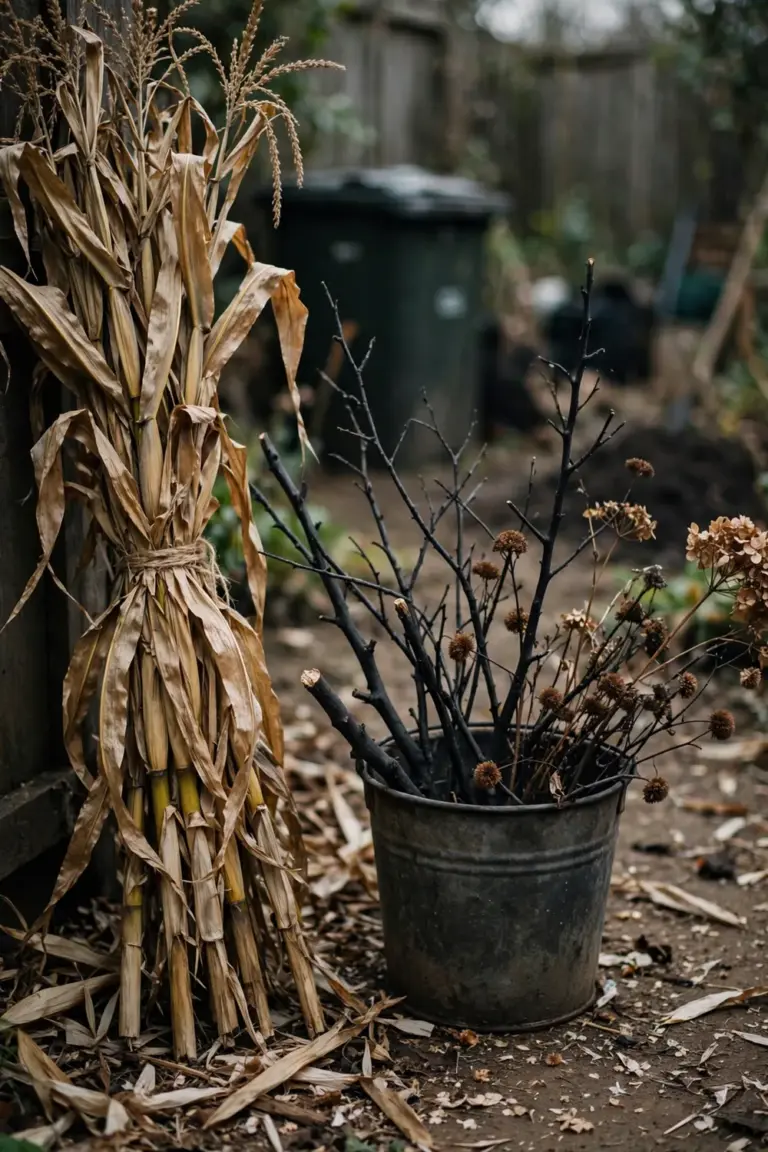
Cut cornstalks to six feet. Tie them in bundles of six. Spray bare branches matte black outdoors and arrange seed heads in old buckets. Save the straightest branches for stakes. Stand the bundles in corners where the wind cannot topple them. Compost the leftovers after the season. Nothing bought means nothing wasted.
145. Do One Thing Well Instead of Ten Things Thinly
One polished display impresses more than ten half-finished ones. Focus lets every detail shine. A single graveyard scene beats scattered props. Guests remember the one great thing. Limited time demands ruthless editing, and restraint reads as style. Crowded yards tire the eye before guests reach the door.
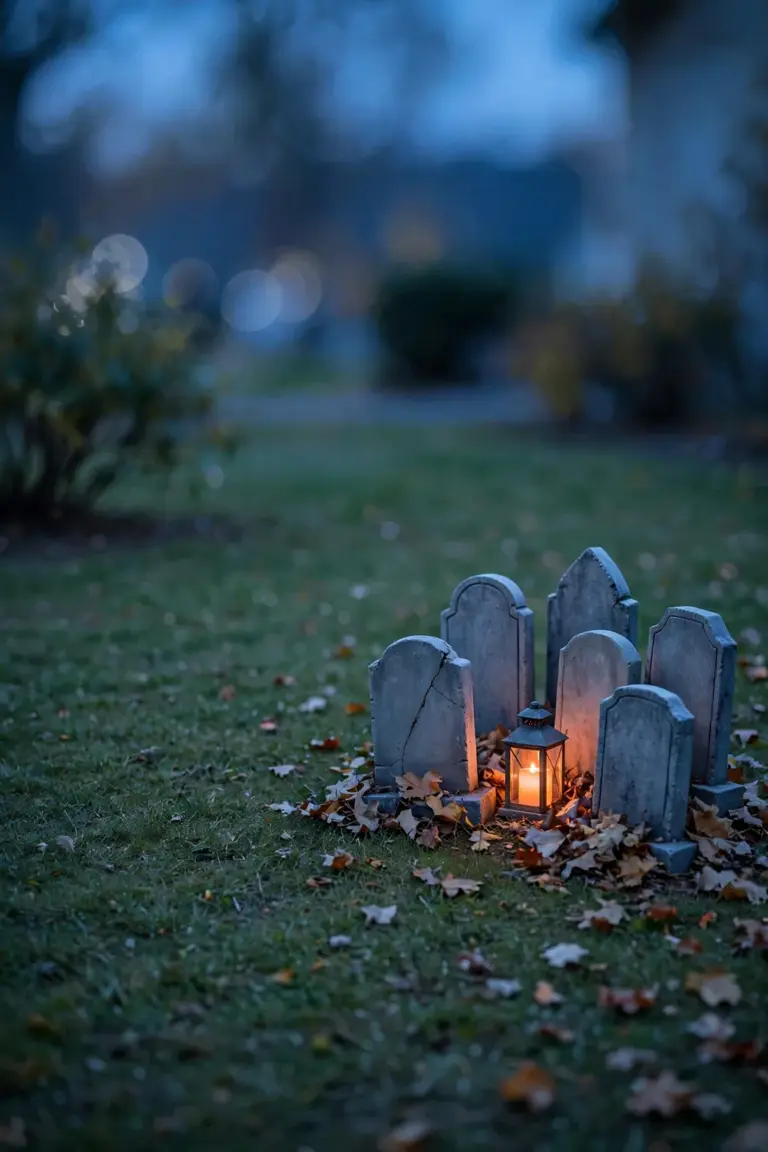
Pick the one display that excites you most and spend the whole decorating budget on it. Build it to a finished standard. Remove anything that distracts from it. Photograph the result at dusk, then write down the single idea so you repeat it on purpose. Repeat the winner next season. Add one improvement.
After Halloween
146. Compost Every Pumpkin Before It Rots on the Porch
Pumpkins left on the porch collapse into a smelly mess. Cold rain speeds the rot. Compost them. The pile welcomes pumpkin flesh, the nutrients stay in your soil, and early composting avoids scrubbing the porch later. A clean porch starts the holiday season right.
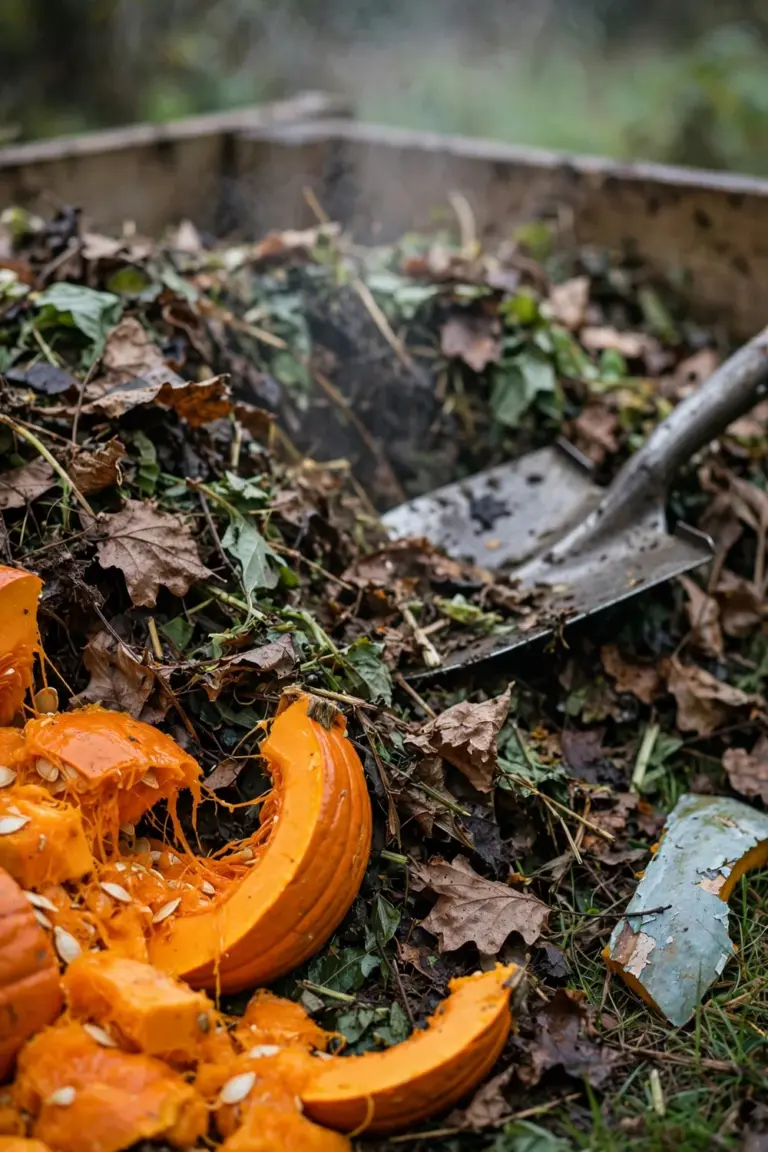
Smash each pumpkin with a shovel. Then compost it. Mix the pieces into the pile at a one-to-three ratio with dry leaves and turn the pile once after two weeks. The flesh breaks down in about a month. Remove any painted skin first. Keep the pile moist, never soggy. The University of Illinois Extension gives the scale of the alternative: over one billion pumpkins are thrown out every year, and pumpkins buried in landfills release greenhouse gases instead of breaking down.
147. Roast the Seeds With Salt for a Garden Snack
Pumpkin seeds roast into a crunchy garden snack that carries the flavor of the harvest in every handful. Roasting takes less than an hour. Salt and oil are all it takes. Kids eat the snack they helped make, and the bowl empties fast at any gathering.
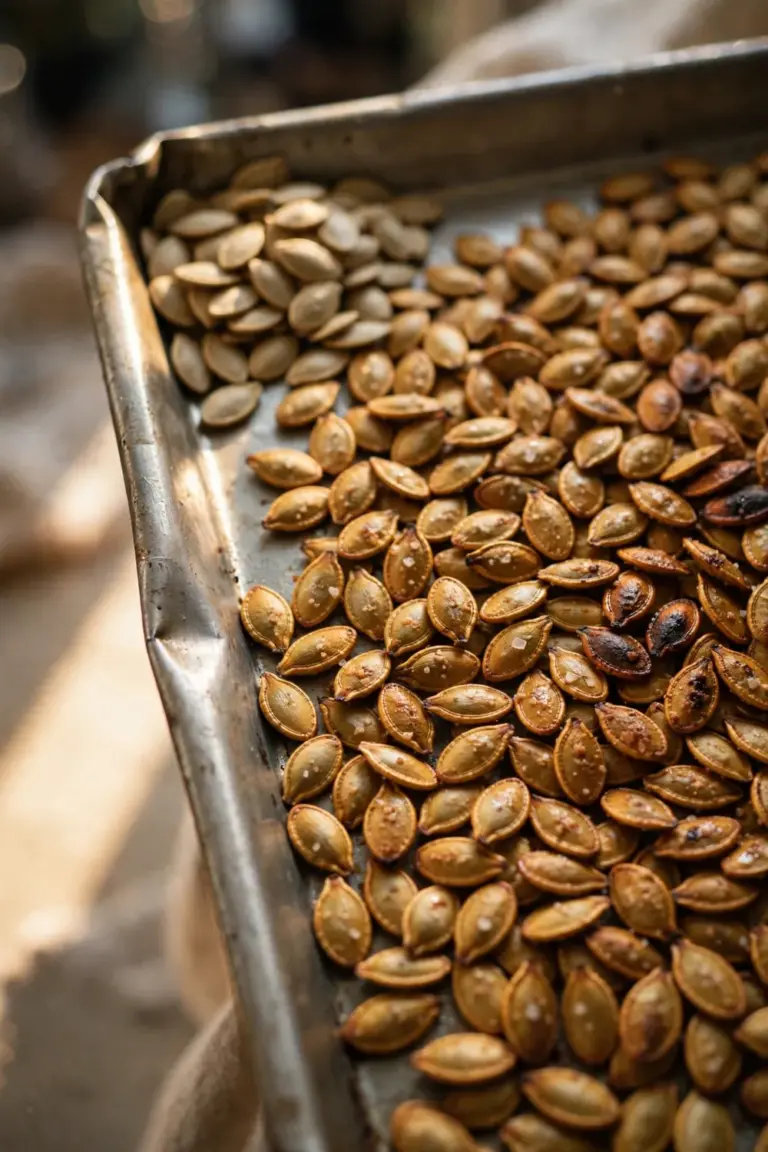
Rinse the seeds. Dry them on a towel overnight. Toss the dry seeds with one tablespoon of oil per cup and spread them in a single layer on a sheet pan. Roast at 300 degrees Fahrenheit for forty-five minutes. Stir the pan halfway through. Cool the seeds before storing.
148. Feed Unpainted Pumpkin Flesh to Backyard Chickens
Backyard chickens devour unpainted pumpkin flesh, and the flesh adds variety to their diet. Chickens peck the soft interior clean, the hollow shells go straight to the compost, and the flock stays busy and entertained for hours. Nothing edible goes to waste. Pumpkin seeds pass through the birds and still sprout in the compost.
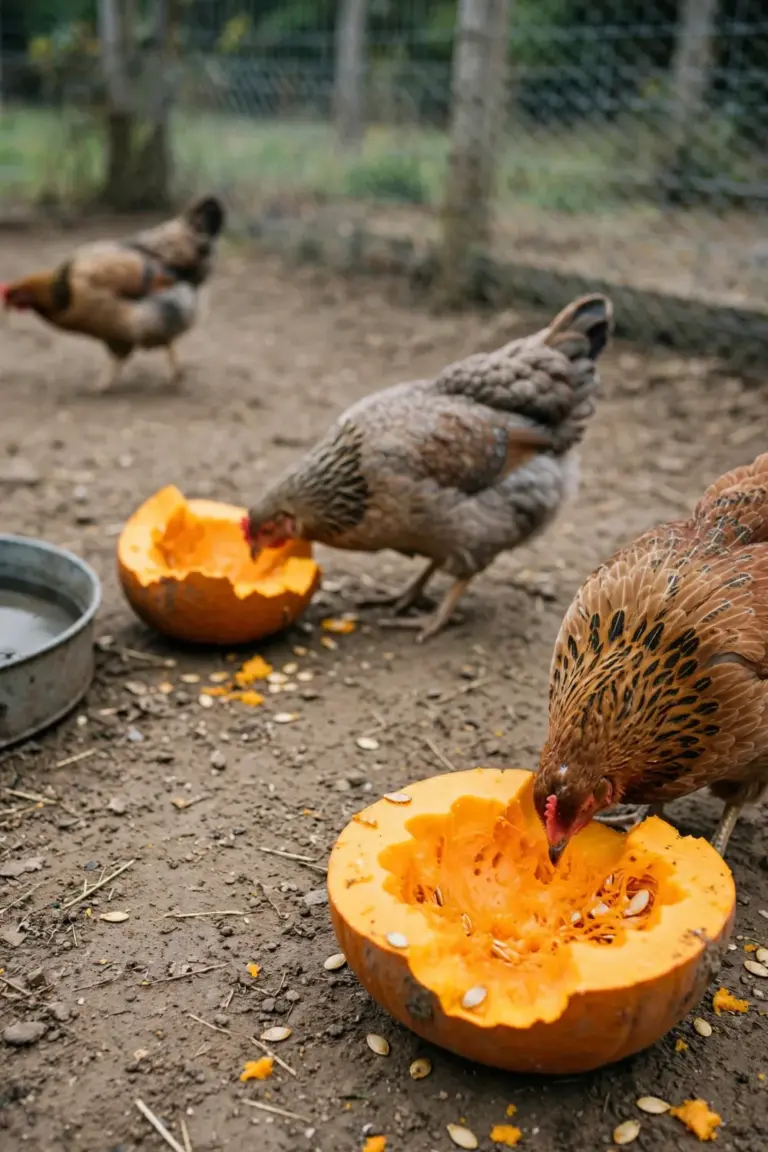
Cut the pumpkin into halves or quarters. Remove any painted or glittered skin first. Set the pieces cut-side up in the run and offer only what the flock finishes in one day. Limit treats to ten percent of the daily diet. Rinse the sticky strings off before serving. Compost the shells afterward.
149. Smash Pumpkins Into the Compost Pile in November
Pumpkins break down fast in an active compost pile once the display comes down. Cool weather slows the microbes. Smaller pieces help. Smashing exposes more surface area, the pile heats briefly around the fresh material, and winter composting keeps working through the cold months. Spring beds receive the finished compost.
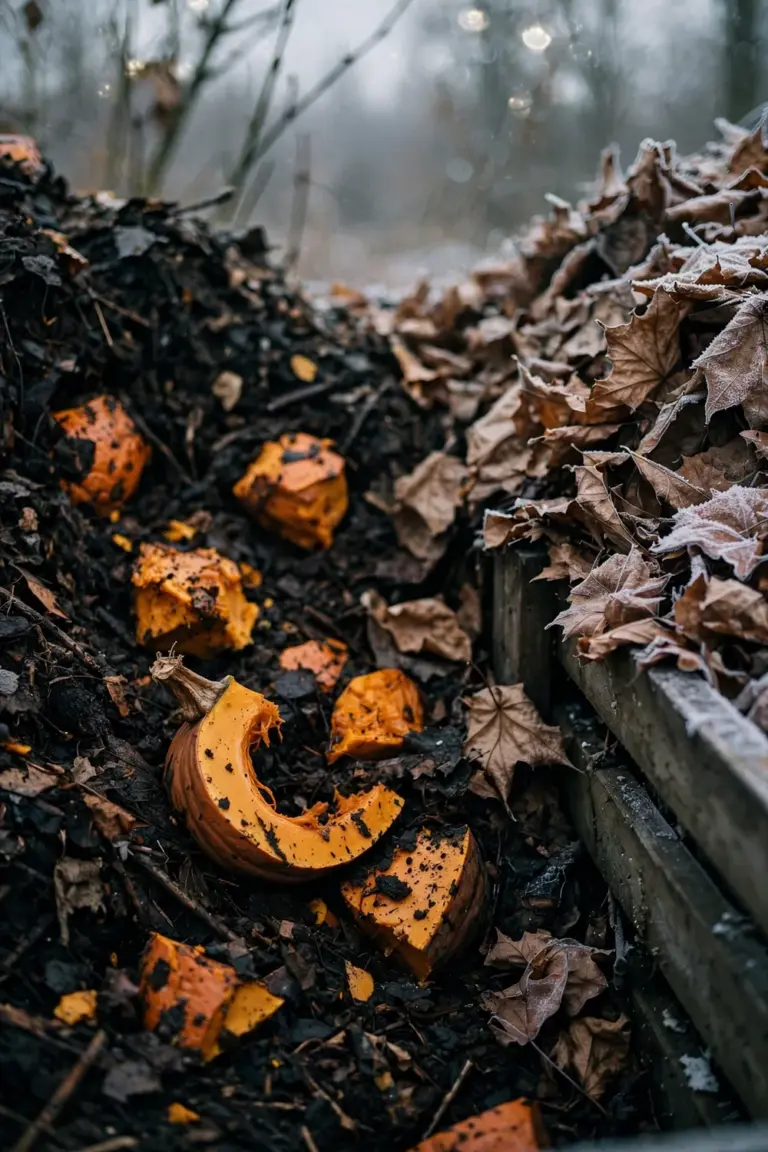
Break each pumpkin into fist-sized chunks. Bury the chunks in the center of the pile. Cover with six inches of dry leaves. Turn the pile once a month through winter, then spread the finished compost in spring. Skip pumpkins treated with preservative sprays.
150. Photograph What Worked and Plan Next Year’s Display
Photos preserve the details memory drops. The best angles live in the pictures. So do the light positions. A photo journal turns scattered halloween garden ideas into a repeatable plan, and notes on the back of each idea save next season’s guesswork. The record grows more valuable every season. The display improves every year. Nobody starts from zero.

Shoot the display at dusk when the lights glow. Capture wide shots. Capture close details. Write one sentence under each photo about what worked and store the set in a labeled folder. Review the folder before buying anything new. One hour of review shapes a better plan.
Frequently Asked Questions About Halloween Garden Ideas
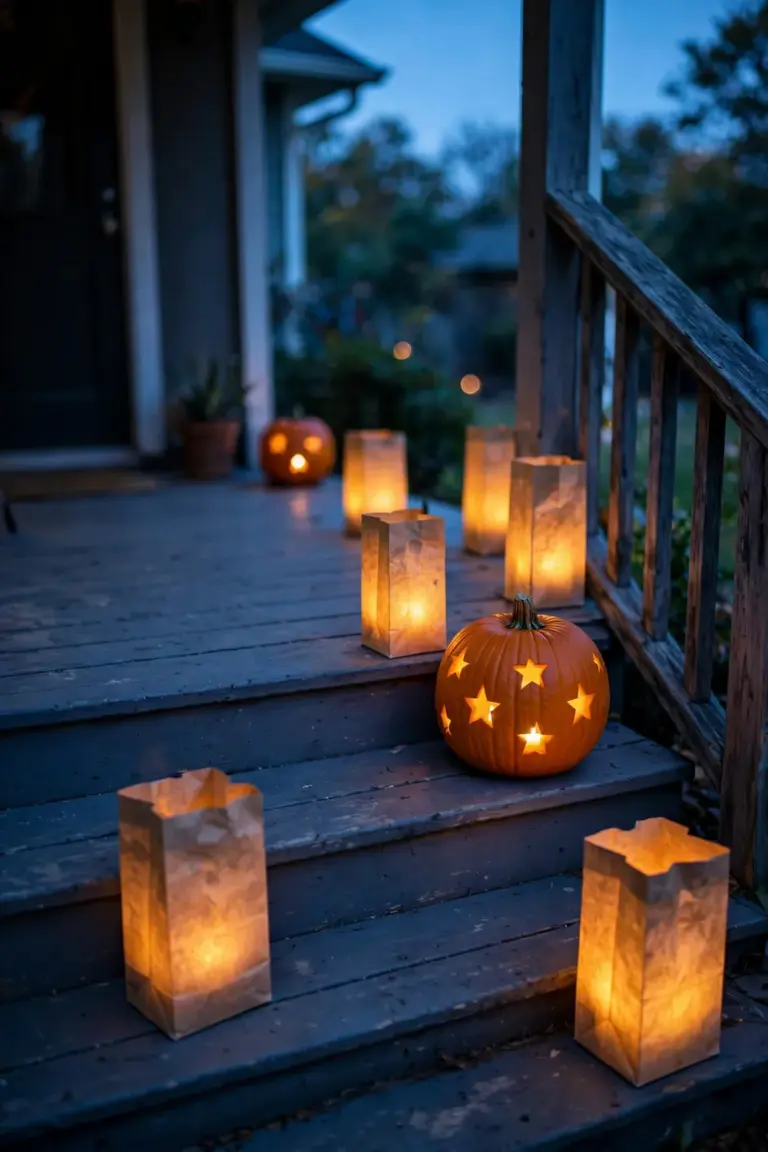
Hard props can go out two to three weeks ahead, because foam tombstones, lanterns, and skeletons lose nothing by waiting in the weather. Hold the carved pumpkins for the final few days, since a cut pumpkin softens fast once the flesh meets air. Plant-based pieces such as cornstalk bundles, gourds, and uncarved pumpkins can start whenever fall color peaks in your beds, because those displays age gracefully instead of rotting on a deadline.
A carved pumpkin lasts days, and warm afternoons shorten that span quickly. The vinegar bath in Idea 17 slows mold growth on the cut surfaces, and shade slows the collapse that follows a hot day. Keep the fruit off bare soil so the base stays dry, and accept the short life as the cost of a fresh face. If a display needs to survive a full fortnight, carve late or switch that pumpkin to paint.
Real candles are the weakest choice in the whole display, and Idea 75 explains the fire record behind that call. Battery-operated LEDs give the same flicker through a carved face, they never blow out in wind, and they keep working through rain. A candle inside a drying pumpkin, surrounded by cornstalks and crepe paper, stacks several fire risks in one small space. Modern LED candles cost little and remove the risk entirely.
Do not send sound pumpkins to the curb. Ideas 146 to 150 cover the full route: unpainted flesh goes to the compost pile or the chicken run, seeds go into the oven, and painted or moldy fruit goes into municipal green waste instead of the soil. A pumpkin that decorated the porch in October becomes soil organic matter by spring. That loop is the most garden-minded ending the display can have.
Yes, and the damage usually shows up after the props come down. Synthetic spider webbing stretched tight over shrubs snaps small twigs and traps birds, so hang it loose and remove it within days. Heavy pumpkins crush crowns of perennials hiding under mulch, and ground spotlights bake nearby foliage when they sit too close. Walk the beds once during teardown, lift anything compressing a plant, and cut webbing free instead of pulling it through branches.
From Spooky to Thankful: Keep the Display Working
Halloween night ends, and the yard does not have to go bare. The uncarved pumpkins, cornstalks, and dried seed heads from this list carry straight into a harvest display with the skulls and strobe lights removed. If you want the full second act, the Thanksgiving yard decorations list rebuilds the same porch and lawn around gratitude instead of ghosts. Take photographs of both versions. Next October, you will know exactly which ideas earned their space.