
Spend 90 minutes hauling two planters to the door, stacking pumpkins at the porch corner, and staking lights along the walk. That is thanksgiving yard decorations done the garden way: plants and harvest first, plastic last. The rest of this page is 21 ideas, from the front door to the compost pile.
Work from the street toward the house. Decorate in daylight. Water the planters before the sun drops. Bring the tender pots in when frost threatens.
Thanksgiving Day Decorations times the whole house to the holiday morning, and Thanksgiving Decor for Home tours the porch-to-parlor route. Both are different jobs. This page stays outside: the curb, the porch, the lawn, and the driveway, built from plants and harvest you can compost after.
Yard Zones and Weather Hardiness
| Zone | Display Ideas | Weather Hardiness |
|---|---|---|
| Front door | Matching planters, wreath, doormat, boot tray | High: the porch roof shelters everything |
| Walkway and steps | Luminaries, mum tower, garland on the rail | Medium: rain hits it, so stake and weigh everything |
| Driveway | Stake lights, pumpkin piles | Medium: wind is the enemy, anchor the bases |
| Lawn | Hay bale scene, corn shocks, wheelbarrow | Low: first to flood, last to dry |
| Fence and beds | Solar string lights, ornamental kale, window boxes | High: living plants do the work |
Tools and Materials to Gather First
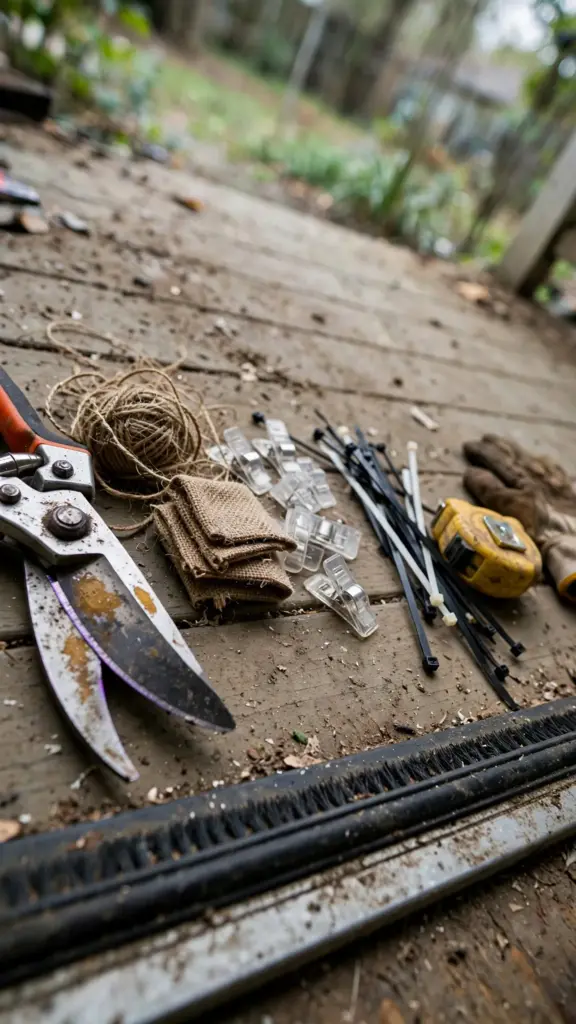
Buy the consumables in one trip. Sand, batteries, zip ties, floral wire, and burlap run out mid-project every year because nobody buys enough the first time. Two bags of play sand cover a full walkway of luminaries with spare for weighting the birdbath stones. One 24-pack of AA cells runs a dozen battery tea lights for the season. A 10 m roll of dark floral wire covers the wreath, the garland, and the corn shocks with wire to spare.
Pull the tools from the garage before you start: a spade with a clean edge, sharp bypass shears, a gutter clip kit, a fiberglass step ladder, and an outdoor-rated extension cord. Dull shears crush evergreen stems instead of cutting them, and crushed stems drink nothing. The ladder matters more than it sounds. A wobbly ladder turns a 20-minute roofline job into an hour of careful climbing, and careful climbing in November cold is miserable.
Stage everything by the front door the night before. Hauling tools from the garage mid-project breaks the rhythm and the light fades while you hunt for the zip ties. A wheelbarrow parked by the door works as a rolling toolbox. Load it, roll it to the zone, work the zone, roll it on.
1. Anchor the Door With Two Matching Planters
Set one large planter on each side of the front door, matching the pots and the soil level, then let the plants differ slightly. Symmetry at the door reads as intention from the street. Two different pots read as leftovers.
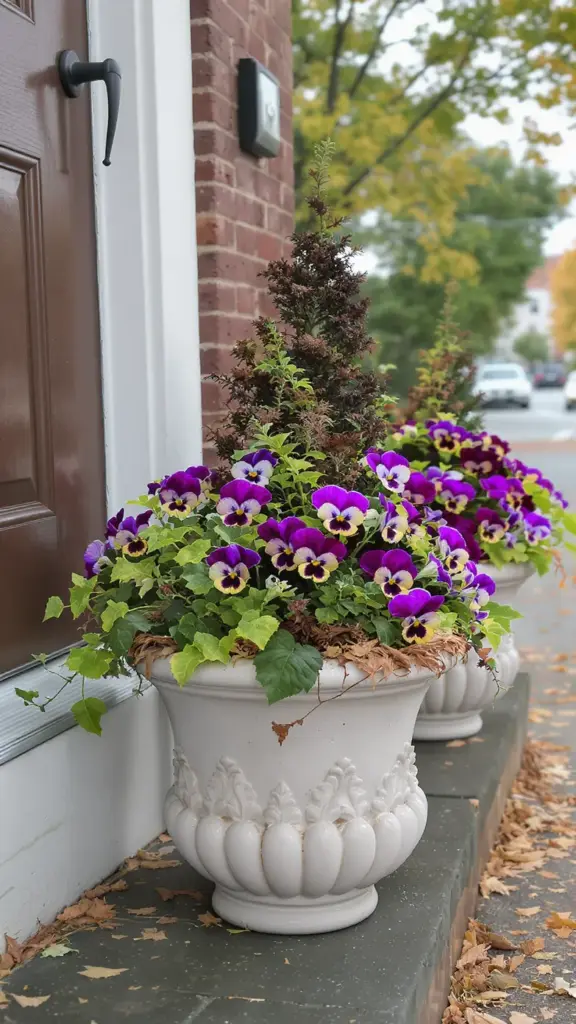
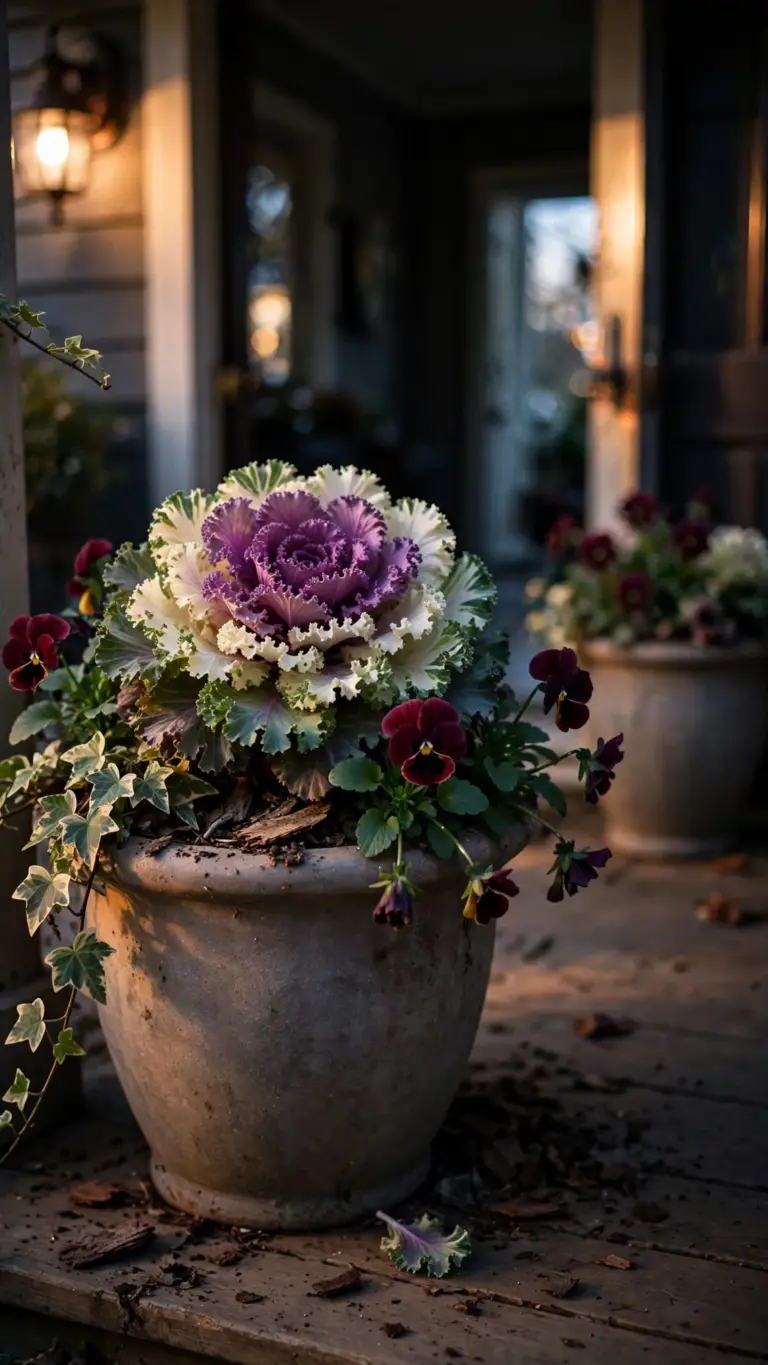
Build each pot with the thriller, filler, spiller shape. A dwarf Alberta spruce or a rosemary cone stands in the center. Pansies and ornamental kale pack the middle. Variegated ivy spills over the rim. Mississippi State University Extension’s notes on fall container gardening name pansies, violas, flowering kale and cabbage, dianthus, and chrysanthemums as the cool-season flowers that carry fall and winter color, with ivy and small shrubs for structure.
Go big on the pot. The same notes warn that small pots dry out fast and take cold damage sooner, while deep pots hold moisture longer. A pot under 30 cm wide flips in the first November gale. Skip the 20 cm nursery pot. Do the 40 cm ceramic once.
Top-dress the soil with 3 cm of bark chips after planting. Bark holds moisture and hides the soil line so the pot looks finished from the street. Refresh the top layer in spring. The chips break down slowly over winter and feed the soil as they go. Skip the colored glass mulch. It fades by January and you will pick the pieces out by hand in March.
2. Stack a Mum Tower by the Steps
Buy garden mums still in tight bud, not in full flower. Buds open over two weeks in cool air. Full flowers brown in ten days.
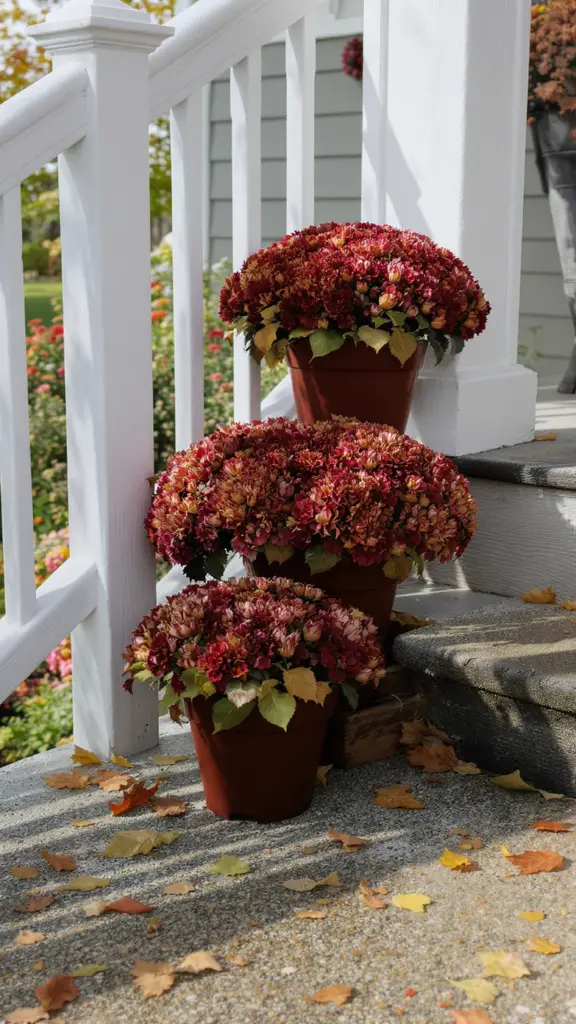
Set three pots in a stair step: the largest on the ground, the next on an upturned crate, the smallest on the top step. One color per tower. Bronze reads best against brick. White reads best against dark siding. Mixed colors read as a garden center shelf.
Water from the base. Mums rot where wet leaves sit on wet soil. Lift the pot, water the saucer, walk away. If the forecast drops below minus 4 C, drag the tower under the porch roof for the night. A mum in bud survives a light frost. A mum in flower does not.
Pinch the spent blooms off with your fingers as they brown. Deadheading keeps the plant pushing new buds instead of seed. Work the tower top to bottom so you do not miss the back faces. A tower with brown heads on the street side looks done for the season. Ten minutes of pinching buys another full week of color.
3. Line the Walkway With Luminaries
Space paper-bag luminaries 1 m apart along both edges of the walk. Fold the bag cuff down 5 cm so it stands stiff. Pour 5 cm of sand in each bag. Set a battery tea light in the sand, not a real flame. Wind kills real candles in minutes and the bag becomes a torch.
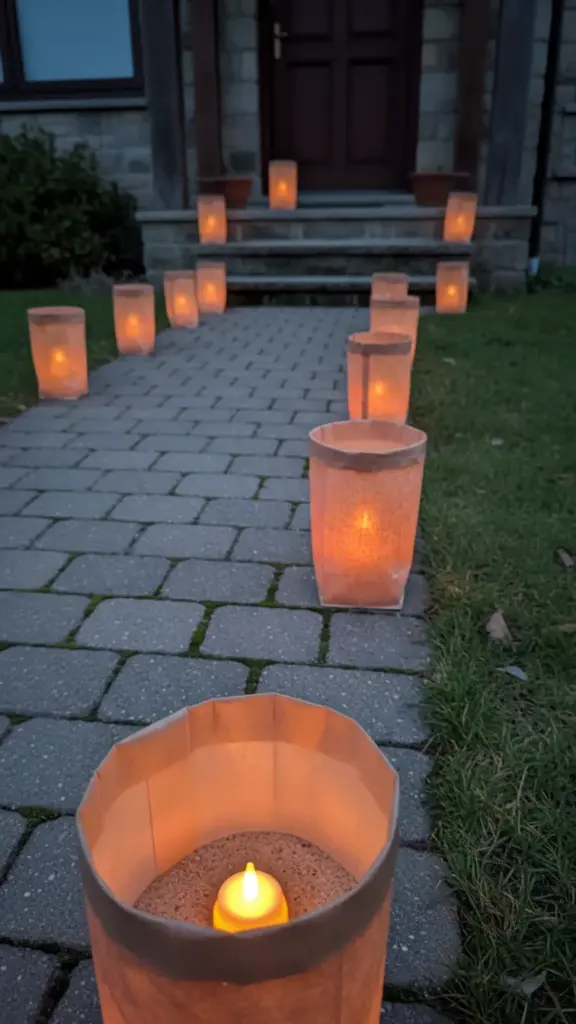
Battery tea lights on a fresh set of cells last the whole holiday season with power to spare. Light the bags at dusk on Thursday only. One lit night feels like an event. Ten lit nights feels like a chore you forgot to end, and the neighbors stop noticing by night three.
Weigh the first and last bag with a second handful of sand. The ends of the row catch the most wind. If a bag blows into the bed, the sand spills and the bag is done. Walk the row at dusk and straighten any bag the afternoon wind tilted. A crooked row reads as neglected from the car.
Skip the glass jars for this job. Jars collect rain all week and drown the light. Paper bags go in the recycling Friday morning. Do the sand in a bucket by the door so refills take seconds.
4. Pile Pumpkins and Gourds at the Porch Corner
Pick pumpkins with the stem firmly attached. Iowa State University Extension’s pumpkin guide says a firmly attached stem keeps the fruit from rotting early, and it tells you to reject any fruit with cuts, holes, bruises, or soft spots. Wash the rind in one part bleach to nine parts water to knock back the fungi that start rot. Dry them fully before they go out.
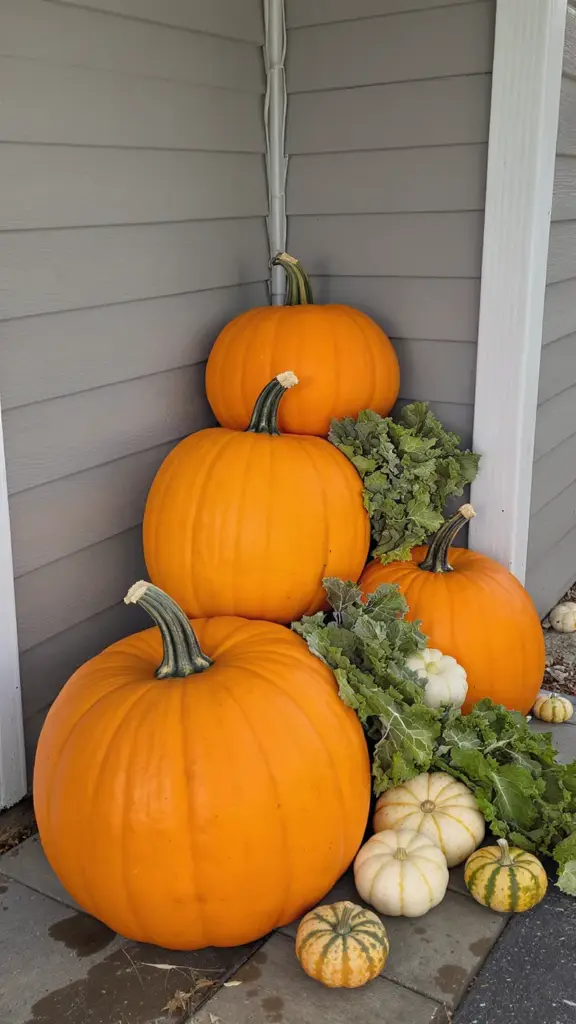
Stack big to small: two large pumpkins on the porch floor, three mediums on top, a scatter of mini gourds in front. Tuck ornamental kale or a mum between the layers so the pile reads as a display, not a delivery. Keep the pile under the porch roof edge. Rain pools on pumpkin shoulders and rot starts where water sits.
Check the bottoms on Wednesday. Flip any pumpkin sitting in a damp ring. One rotting pumpkin stains the porch boards and the smell finds the front door. Compost the soft ones the same day. Do not wait.
Group the pile in odd numbers, because three large pumpkins read as a cluster while four read as a row. Odd groupings look gathered; even groupings look placed. It is an old florist trick and it works on porch floors too. Step back to the curb after stacking and check the silhouette. The pile should read as one shape from 10 m away.
5. Hang a Harvest Wreath on the Front Door
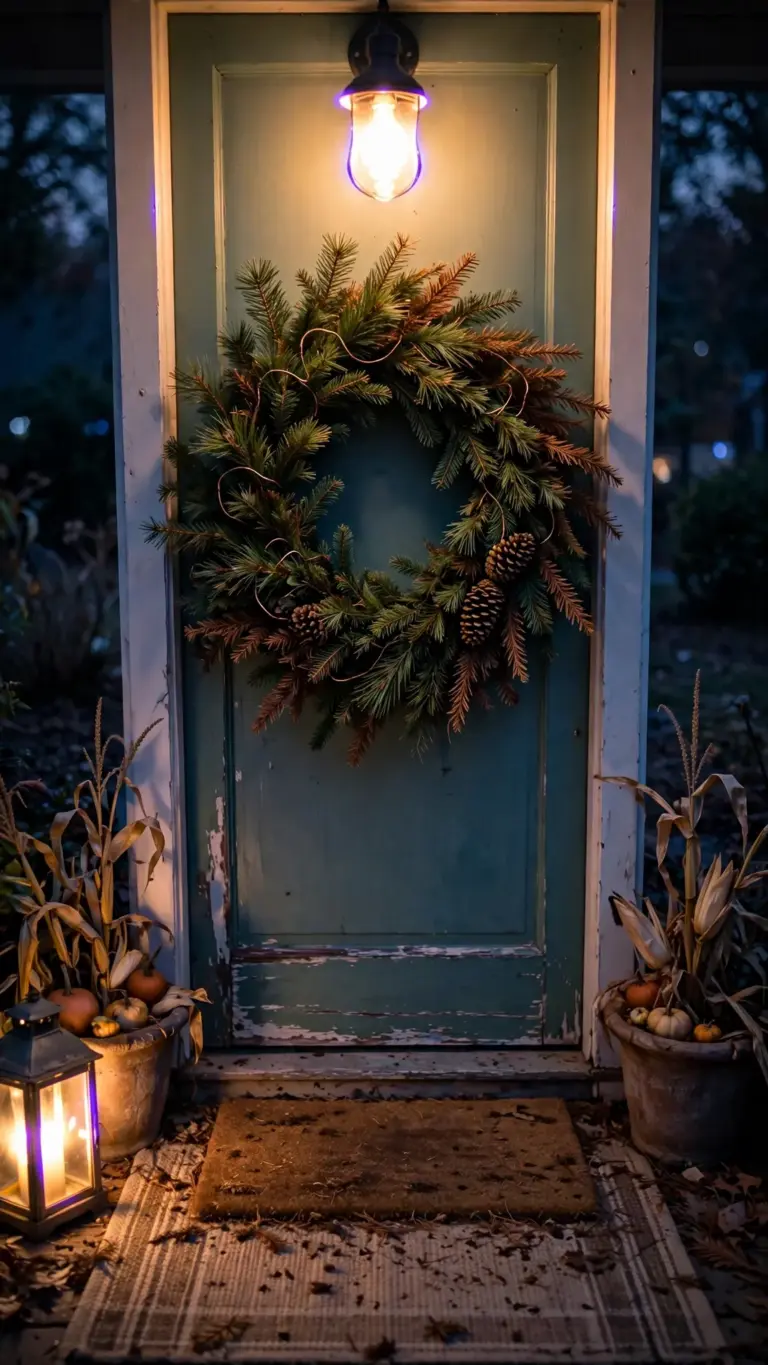
Hang the wreath at eye level on an over-door hook, not a nail, because a nail in the door is a hole you explain to the next buyer. An adjustable hook holds 5 kg and leaves no mark.
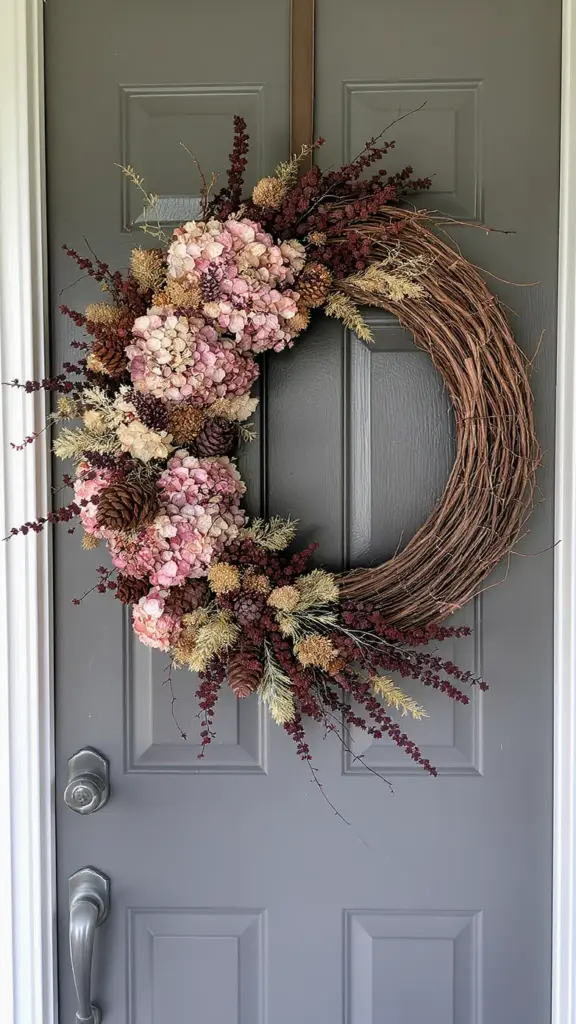
Build it from what the yard gives: a grapevine base, dried hydrangea heads, pinecones, a few sprigs of bittersweet. Wire each bundle separately before wiring the bundles to the frame. A wreath wired in sections survives wind, while a wreath glued in one piece sheds its first storm.
Spray nothing on it. Lacquer yellows dried hydrangeas and makes pinecones look dipped in plastic. Hang it where the porch roof breaks the rain. A wreath takes morning dew fine. It does not take a week of sideways rain.
Check the hook’s grip monthly. Door hooks loosen as the door swells and shrinks with the weather. A wreath that slides overnight lands on the doormat and the pinecones scatter across the step. Tighten the hook when you flip the doormat. Two seconds of maintenance beats rebuilding a wreath from the driveway.
6. Swag the Porch Rail With Garland
Cut evergreen boughs 60 cm long from pine, fir, or cedar already growing in the yard. Strip the lower 15 cm of needles so you have a clean handle to wire. Overlap the boughs by half their length along the rail, all pointing the same direction. Garland that changes direction mid-rail looks patched.
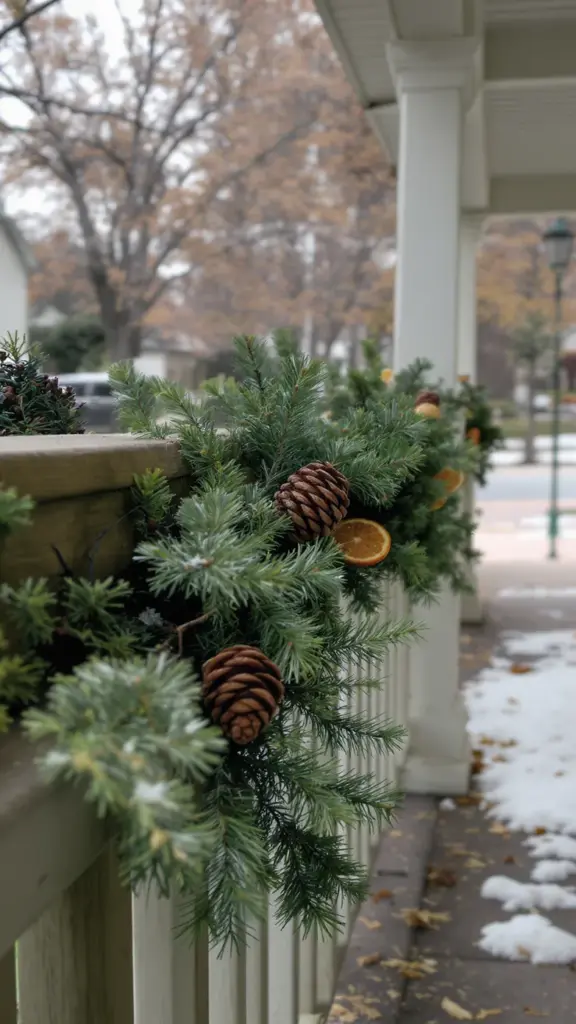
Wire the garland to the rail every 30 cm with dark floral wire, not string. String stretches when wet and the whole swag sags by Thursday. Tuck three pinecones and a dried orange slice into each meter as you go. The extras hide the wire.
Take it down before December winds. November garland is supple. December garland is brittle and drops needles across the porch for months. The compost pile takes the whole swag in one armful.
Mist the garland once a week if the porch is covered and dry. Covered porches block the rain that keeps cut evergreens supple. A light misting on a still morning keeps the needles flexible for the month. Skip it on windy days. Wet needles plus wind equals a needle shower across the porch floor.
7. Stake Lights Along the Driveway Edge
Push path light stakes 15 cm into the soil, 2 m apart, set back 30 cm from the driveway edge. Tires crush anything closer. Space them evenly and the eye reads a runway. Space them randomly and the eye reads a yard sale.
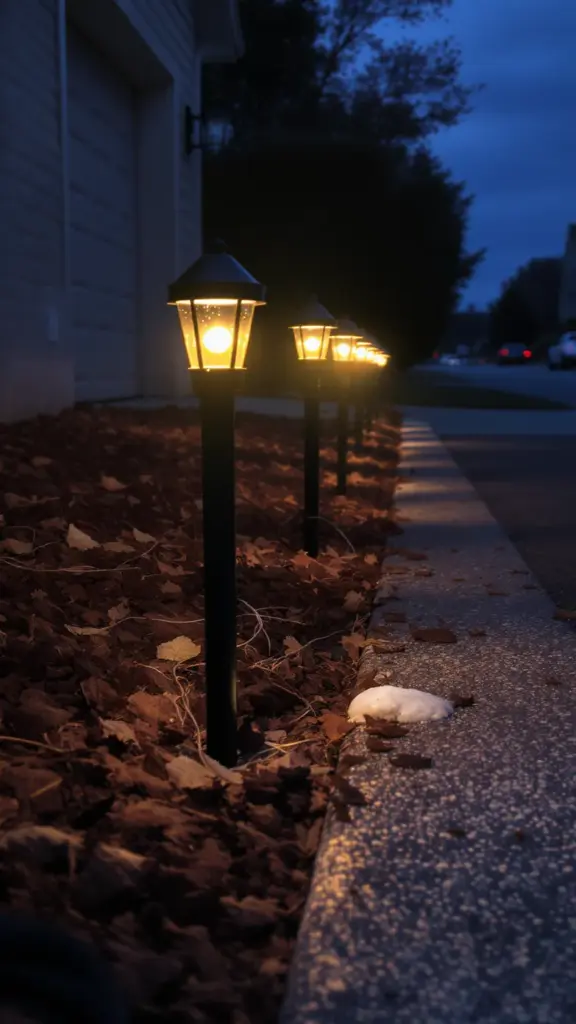
Choose warm white LEDs on a timer, dusk to 10 p.m. Cool white reads as a parking lot. Warm white reads as a house expecting people. Solar stakes work if the bed gets 6 hours of sun. Shade beds need the plug-in kind.
Run the cord along the back of the bed, not across the lawn. Mowers find cords in April. Clip the cord to the stakes with zip ties so wind does not walk it into the driveway. Pull the stakes before the first mow of spring, not after.
Mark the stake positions with a dab of white paint on the driveway edge. Paint marks let you reset the exact line next November without measuring again. The line that looked straight this year will look crooked next year without the marks. Memory is not a measuring tape.
8. Build a Hay Bale Scene on the Lawn
Set two rectangular hay bales flat on the high ground, never in the low spot where water pools. Hay wicks water from the soil and rots from the bottom. A bale on wet ground is a brown sponge by Sunday.
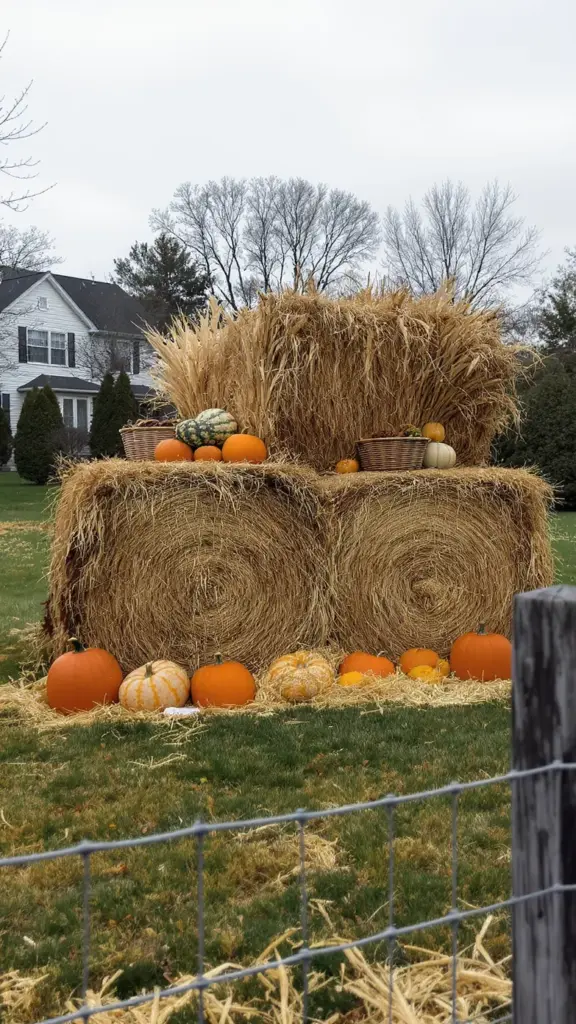
Dress the bales with what the garden already produced: pumpkins, gourds, a bushel basket of pinecones, dried corn stalks tied in a bundle. Put the heaviest pumpkins on the ground in front, not on top. A 10 kg pumpkin on a hay bale crushes the twine and the bale bursts.
Cover the bales with a tarp if rain runs past Wednesday. Wet hay molds fast and the mold finds the pumpkins next. Pull the tarp off Thursday morning so the scene looks fresh for arrivals. Return the bales to the garden beds as mulch in December. That is the whole point of hay.
Rotate the display pumpkins 90 degrees midweek. The side facing the sun softens first. A quarter turn evens the exposure and buys three more days. Check the bale twine when you rotate. Wet twine stretches and the bale loosens. Re-tie before it bursts, not after.
9. Plant Ornamental Kale in the Front Bed
Plant ornamental kale and flowering cabbage 25 cm apart in the front bed two weeks before Thanksgiving. They need that time to settle roots before the cold. Kale colors up after the first frost. Before frost it looks like plain cabbage. After frost the centers turn purple, pink, and cream.
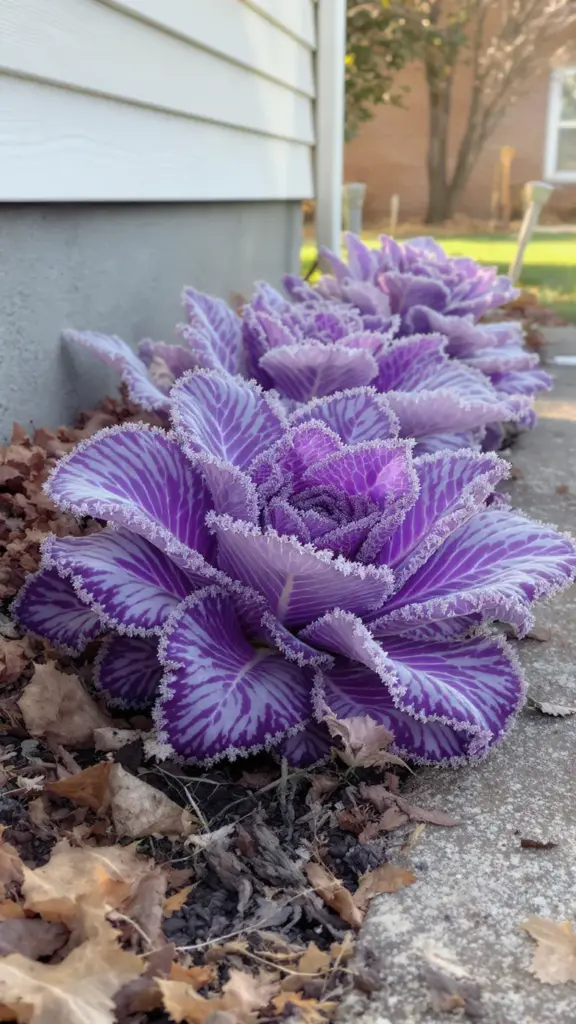
Dig each hole twice as wide as the nursery pot and set the crown level with the soil. Mulch 5 cm deep with shredded leaves, kept back 3 cm from the stems. Wet mulch against the stem rots it. Kale takes frost down to minus 10 C once established. It sulks in waterlogged soil long before it sulks in cold.
Skip the fertilizer at planting. Soft new growth from late feeding freezes first. The color you want comes from cold, not from nitrogen. Pull the spent heads in March and fork the bed for spring.
Edge the bed with a clean spade cut before planting, since a sharp edge keeps the mulch in the bed and the lawn out. Ragged edges creep. The lawn invades 5 cm a month in fall. One clean cut in October saves monthly trimming through winter.
10. Hang Lanterns From Shepherd’s Hooks
Drive shepherd’s hooks 20 cm into the bed soil flanking the walk, 3 m apart, and hang one lantern per hook at chest height. Alternate two heights down the row. Matching heights look like a fence. Alternating heights look designed.
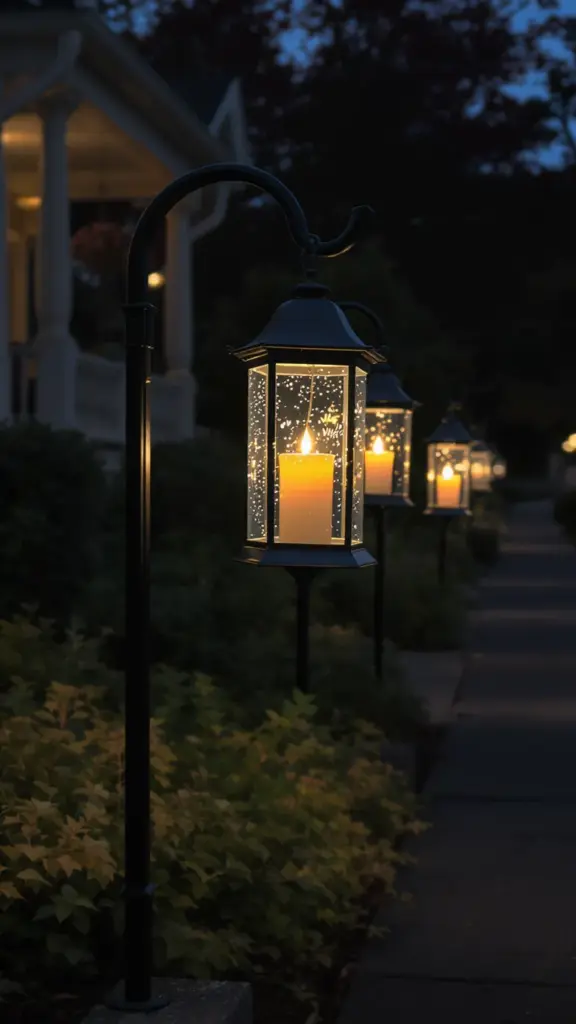
Use LED pillar candles inside glass lanterns. Real flames blow out and the glass soots in one night. LED pillars with a timer switch themselves on at dusk. Buy the ones with a 5-hour timer so they die before midnight on their own.
Weight the hook base with a brick if the soil is loose, because a lantern swinging in wind shatters against the hook. Bring the glass inside when the forecast shows hail. The hooks stay out all winter; the glass comes in.
Clean the glass with vinegar water before the holiday, because summer dust films the panes and dims the LED by half. A clean lantern throws light 3 m down the walk while a dusty one glows to itself. Five minutes per lantern, once a year.
11. Outline the Roofline With Warm LEDs
Clip C9 LED strands to the gutter with plastic gutter clips, one clip per socket. Never staple through the wire. A staple through insulation is a short waiting for rain. Work from the ladder, not from the roof. Roofs are slick in November.
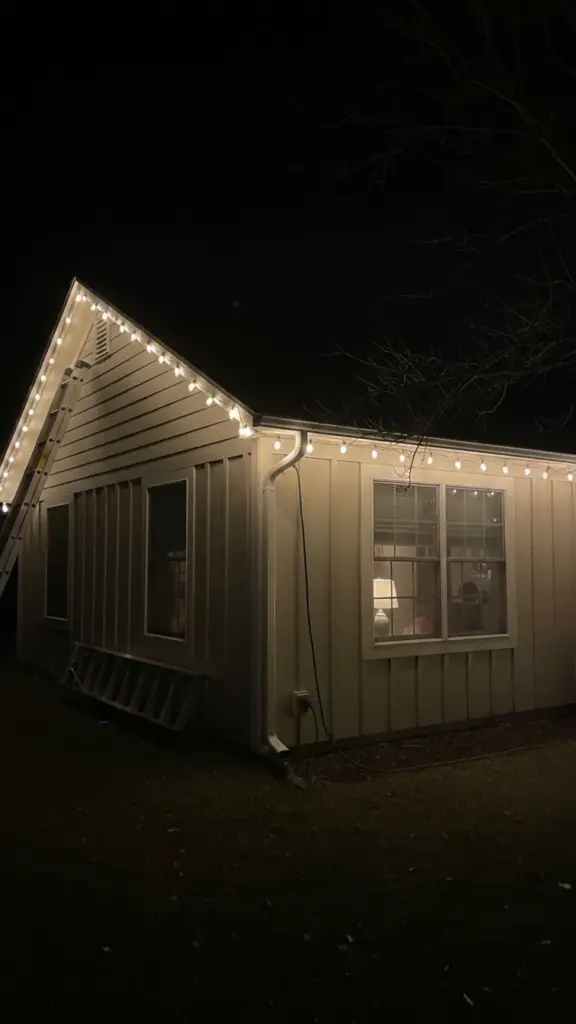
Plug outdoor strands into a GFCI-protected outlet and use only cords and lights marked for outdoor use. The Electrical Safety Foundation International’s outdoor decoration safety tips require GFCI protection outdoors, outdoor-rated gear, cords kept clear of snow and standing water, and 3 m of clearance from power lines. Their ladder rule: use wood or fiberglass, and extend the ladder 91 cm past the roof edge.
Limit the run to three incandescent strands end to end if you still own the old kind. LEDs can run far longer on one circuit, which is the real reason to switch. Put the whole roofline on one timer. Lights that burn all night annoy the neighbors and the power bill.
Test every strand on the ground before it goes up by plugging the full run in on the driveway and walking the length. Replace the dead strand now, not from the ladder. A ladder is for hanging, not troubleshooting. Coil the working strands loosely for the carry up, since kinks at the ladder top become the failure point by January.
12. Dress the Mailbox for November
Wrap the mailbox post with a 2 m evergreen garland, wired top and bottom. Tuck three mini pumpkins into the garland at the base and one pinecone cluster at the top. The mailbox is the first thing guests see from the car. Dress it and the whole street reads as decorated.
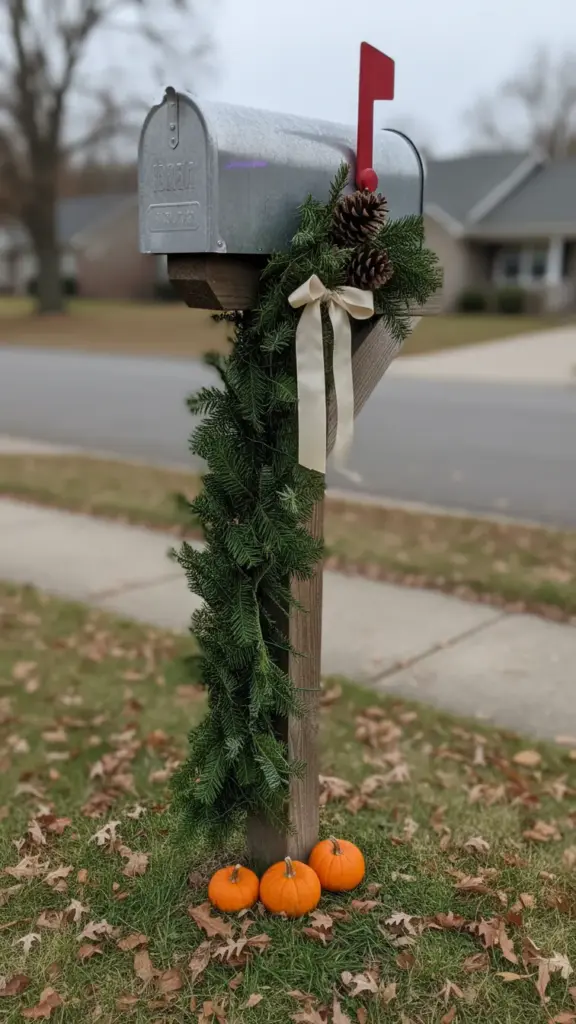
Keep every attachment below the flag arm and clear of the door swing. The mail carrier opens that door daily. A wired pinecone blocking the door gets ripped off by Friday, and the carrier remembers your house.
Use silk ribbon, not paper. Paper ribbon bleeds color in the first rain and stains the post orange. Take the garland down with the rest of the teardown. A Christmas-looking mailbox in January tells the street you quit.
Check the flag arm clearance after wiring by lifting the flag and swinging it through its full travel. The carrier raises that flag daily, and a wired pinecone in its path gets ripped off by Friday. Better to find the interference now with your own hand than to read about it in the carrier’s note.
13. Fill Window Boxes With Evergreen Boughs
Pull the spent summer annuals from the window boxes the weekend before. Refill with damp potting soil, then push in cut boughs of pine, fir, and cedar at a 45-degree angle, tips pointing out and slightly down. Angle them and rain runs off the tips. Push them straight up and the box holds water like a bucket.
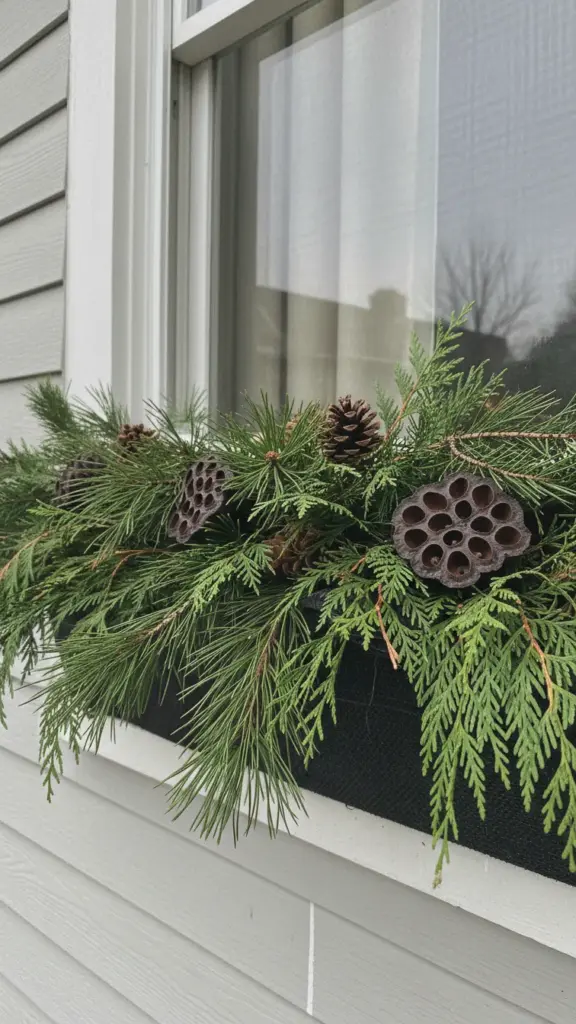
Cut boughs with sharp shears and clean cuts. The same clean-cut rules in the site’s spring pruning techniques keep the parent shrub healthy through winter. Strip the lower needles of each bough so no foliage sits in wet soil. Buried needles rot and the rot climbs.
Tuck pinecones and dried lotus pods between the boughs for texture. Water the box once after planting, then leave it. Evergreen boughs need no feeding and little water. They hold color until February if the box drains.
Line the box with a sheet of landscape fabric before the soil, because fabric keeps the soil in and lets water out through the drain holes. Soil leaking down the siding stains the wall by spring. One sheet per box, cut 5 cm larger than the base and tucked up the sides.
14. Tie a Corn Shock Bundle to the Fence
Gather 12 dry corn stalks and bind them at three points: top, middle, and 30 cm from the base. Three ties keep the bundle tight in wind. One tie lets the stalks splay and the bundle falls apart by Thursday.
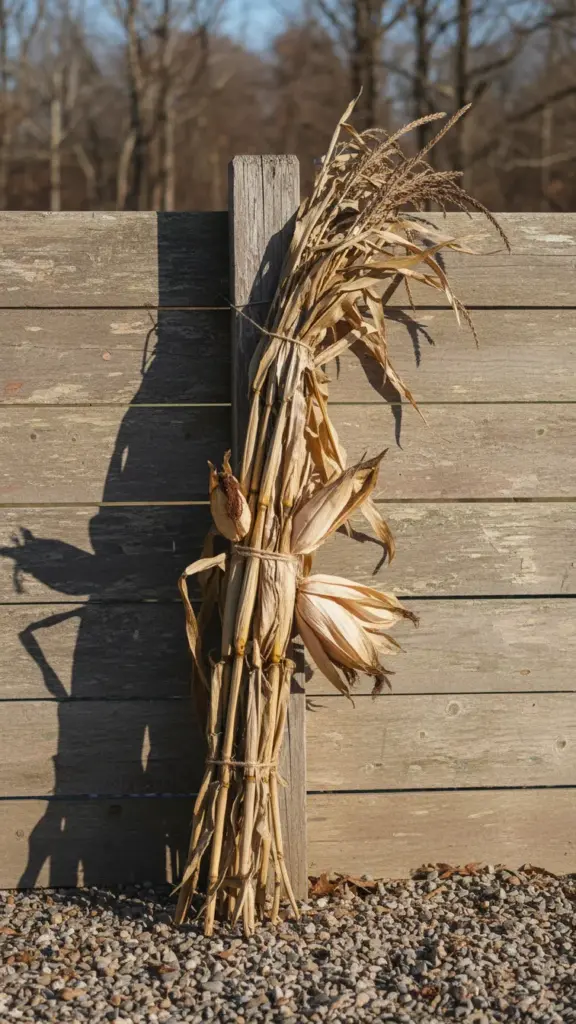
Lean the bundle against a fence post and wire it to the post at the middle tie. Do not lean it free-standing. A free bundle walks across the yard in the first gust. Cut the butt ends level so it stands flat. Uneven ends rock and the wire works loose.
Spray the bundle with nothing. Dried corn takes weather as it comes for three weeks, which covers the holiday. Compost the stalks after. They shred straight into the pile and break down by spring.
Stand the bundle where the fence meets the house wall if the wind runs hard. The corner breaks the gust and the bundle barely moves. A bundle mid-fence takes the full wind. Corners are free windbreaks. Use them for everything tall and light.
15. Turn the Birdbath Into a Harvest Bowl
Scrub the birdbath basin with a stiff brush and rinse it clean. Algae under the display smells by Thursday. A clean basin holds the arrangement and the eye.
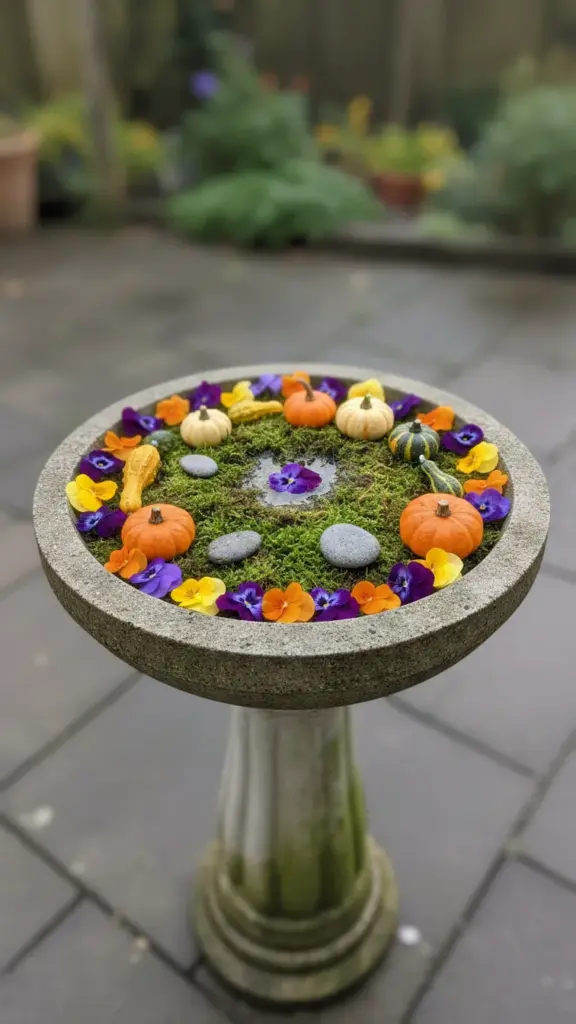
Line the basin with a shallow layer of damp moss, then set in mini pumpkins, gourds, pinecones, and a ring of pansy heads. Keep everything below the rim. Anything stacked above the rim catches wind and rolls onto the patio. Float three pansy heads in the center if the basin holds water. They last two days in cold water.
Drain the basin if a hard freeze threatens. Ice expands and cracks concrete basins. A cracked birdbath costs more than the whole yard display. Refill after the freeze passes.
Weigh the moss layer with three flat stones. Wind lifts dry moss and the arrangement goes with it. Stones the size of a palm sit flat and disappear under the pumpkins. Nobody sees the stones. Everybody sees a tidy basin.
16. Run Solar String Lights Along the Fence
Hang solar string lights along the top rail of the fence, one screw hook every 1 m. Sagging wire between hooks 2 m apart swings in wind and the bulbs pop out. Tight wire stays put.
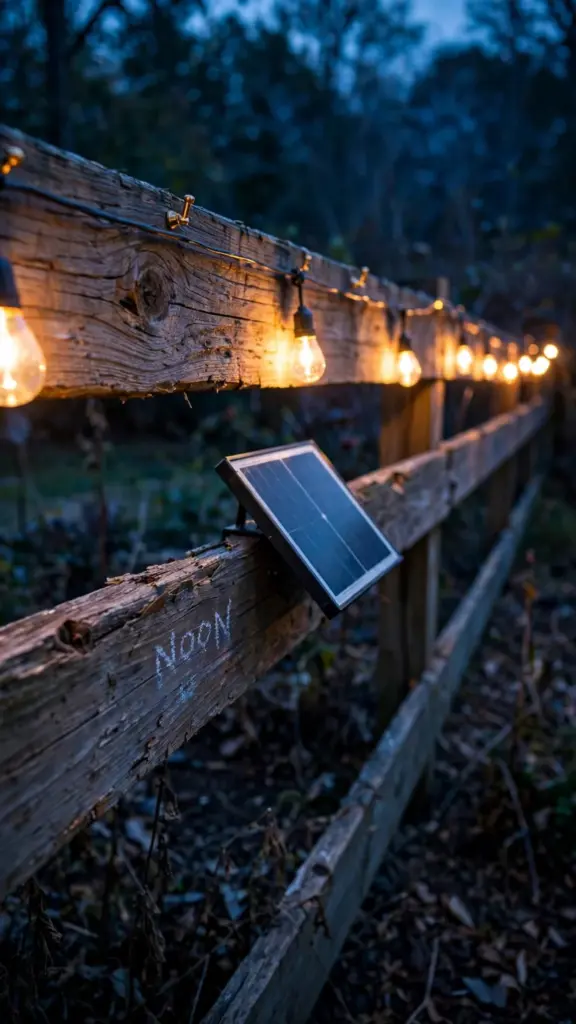
Face the solar panel south and tilt it 45 degrees. A flat panel collects leaves and charges nothing. A panel in shade charges nothing either. Walk the fence at noon and mark the sunny stretches with chalk. Hang lights only there.
Wipe the panel glass weekly with a damp cloth. Dust cuts charging by half in a dry November. Expect 4 to 6 hours of light from a full charge on short days. That covers dusk to bedtime, which is the whole job.
Number the strands with a paint pen at the plug end: strand 1 starts at the gate, strand 2 continues, and so on. Next November you hang them in order without guessing. Unmarked strands become a tangled box of maybe, while marked strands become a 20-minute job.
17. Load a Wheelbarrow With the Harvest
Park the wheelbarrow where the lawn meets the walk, handles toward the house. Angle it 10 degrees so rain runs out the front. A level wheelbarrow holds 5 cm of water and everything in it rots.
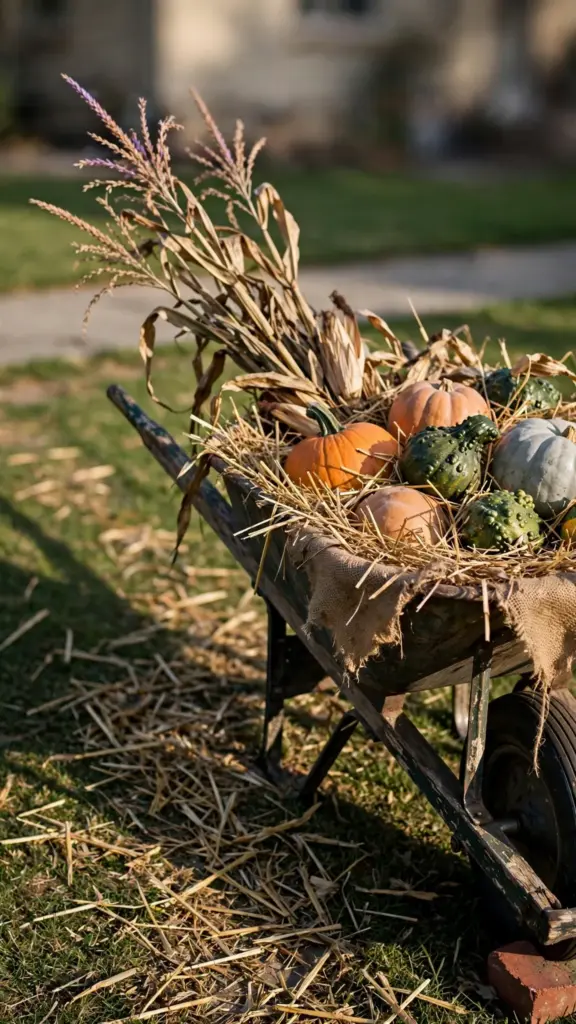
Fill it in layers: straw on the bottom, pumpkins and gourds in the middle, dried corn stalks fanning out the back. Put the tallest stalks at the back so they read against the house wall. Chock the wheel so wind does not roll it. A loaded wheelbarrow in the neighbor’s hedge is a story you do not want.
Oil the wheel axle before loading. A squeaking wheel announces every gust. Roll it into the garage if the forecast shows more than 25 mm of rain. The display survives a shower. It does not survive a drowning.
Line the bed with a burlap sack before loading. Burlap keeps the straw from blowing out and the metal from staining the pumpkins. A pumpkin resting on bare steel gets a rust ring by Thursday. Burlap costs nothing if you already wrapped the pots.
18. Wrap Pots Before the First Hard Freeze
Wrap every ceramic and terracotta pot with burlap when night temperatures approach freezing. Terracotta is porous. Water inside the clay freezes, expands, and cracks the pot from the inside. One hard freeze kills a 40 cm terracotta pot.
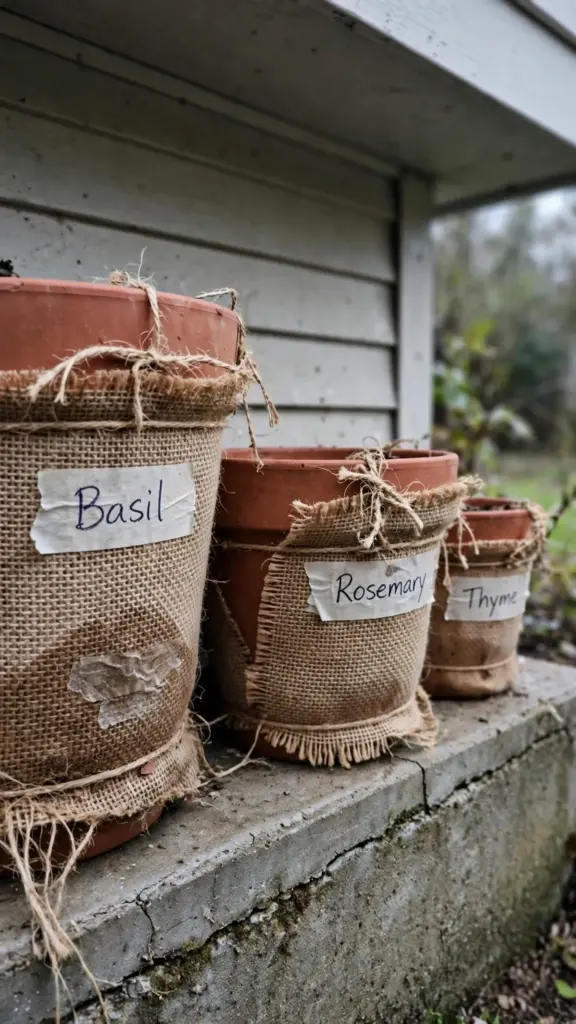
Wrap two layers and tie with twine at the rim and the base. Leave the drainage hole open. A wrapped pot with a blocked drain drowns the roots. Move the wrapped pots against the house wall under the eaves. The wall radiates stored heat and the eaves break the rain.
Skip the plastic sheeting. Plastic traps condensation against the clay and the freeze-thaw cycle works faster under plastic than under burlap. Burlap breathes. Check the wrap after storms. Re-tie what the wind loosened.
Label the wrapped pots with the plant name on a strip of masking tape. Come April you will not remember which pot holds the rosemary and which holds the ivy. Tape on the burlap survives winter. Memory does not. Peel the tape off when the wrap comes off.
19. Lay a Doormat and Boot Tray That Survive Mud
Lay a coir doormat 90 cm wide outside the door and a ribbed rubber boot tray just inside. Guests wipe twice: once outside, once in. One mat means mud walks straight to the rug.
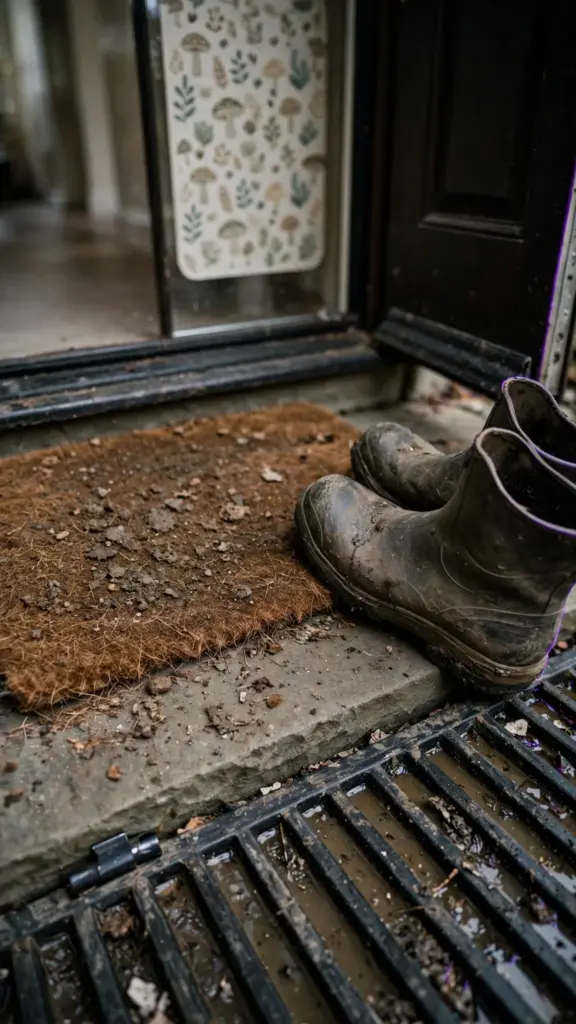
Shake the coir mat daily during the holiday week, because coir holds about 2 kg of grit before it stops scraping and becomes decoration instead of a tool. Hose the boot tray on Wednesday. Dried mud in the ribs stops the drain and boots sit in slurry.
Replace the coir mat when the fibers mat flat. A flat coir mat holds water against the step instead of scraping boots. Two seasons is the honest life of a mat left out in weather. Buy the replacement in the spring clearance and store it dry.
Skip the fabric mat with the printed turkey. It mats flat in one rain and holds water against the step. Coir scrapes. Rubber drains. The cute mat goes inside the hall where it stays dry and still gets seen.
20. Compost the Display the Weekend After
Sort the teardown into three piles Saturday morning: compost, keep, trash. Pumpkins, gourds, corn stalks, hay, and evergreen boughs go to compost. Pots, hooks, stakes, and lights go to keep. Bleach-washed anything with mold spots and the paper luminaries go to trash.
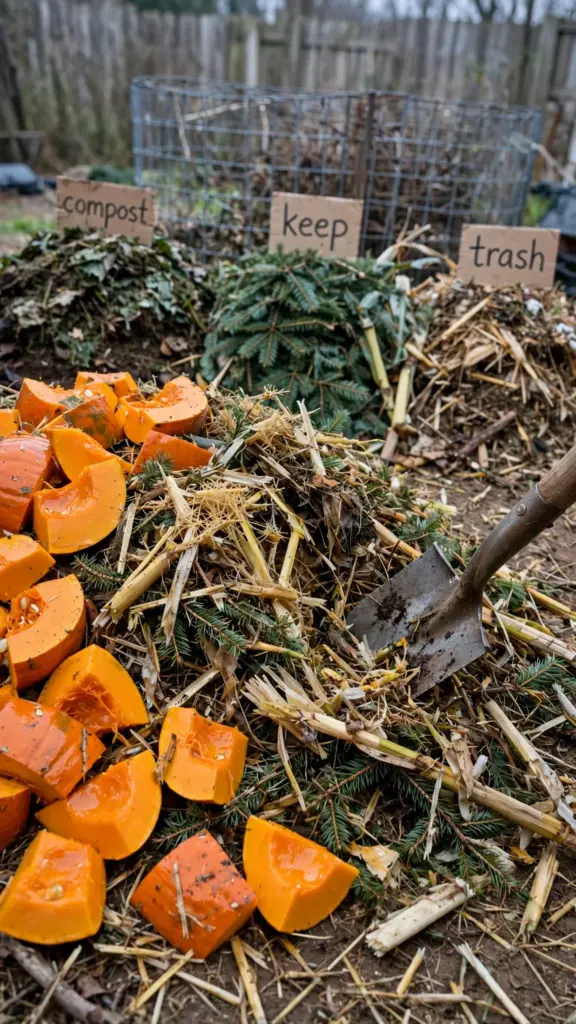
Chop pumpkins into 10 cm chunks before they hit the pile. A whole pumpkin in the compost is a whole pumpkin in the compost in March. Chunks break down by spring. Greens still fresh enough for the table go inside to the site’s thanksgiving centerpieces instead of the pile.
Run the mower over the lawn once after everything is off it. The mower picks up the stray straw and pine needles the rake missed. A clean lawn going into December means spring cleanup starts from zero, not from November.
Sharpen the spade before chopping pumpkins. A dull spade crushes instead of cutting and the chunks come out ragged. Ragged chunks mat together in the pile. Clean cuts stack loose and air moves through. Ten minutes with a file saves a stalled compost pile.
21. Photograph the Yard for Next Year’s Plan
Walk the yard at dusk Thursday with the phone and shoot every display from the street. Dusk shows what the lights actually do. Daylight photos lie about lighting.
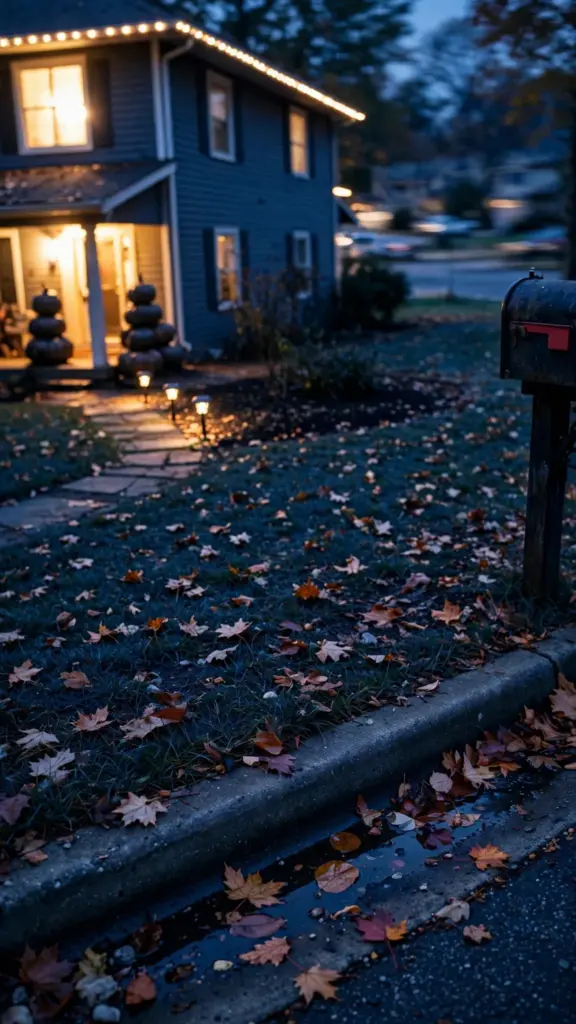
Note three things per photo: what survived the week, what the wind moved, and where the dark spots sat. Dark spots get another stake light next year. Moved items get heavier anchors or a new location. The photo set is the plan. Memory edits out the failures.
Save the set in a folder named for the year. Compare this November with last November before buying anything next October. Repeat the winners. Cut the losers. A yard that improves one display a year looks designed within three seasons.
Shoot one wide photo from the exact same spot each year. The curb corner by the mailbox works. Same spot, same angle, every November. The series shows what changed and what held. After three years the folder becomes the best garden journal you never had to write.
Start at the Curb This Weekend
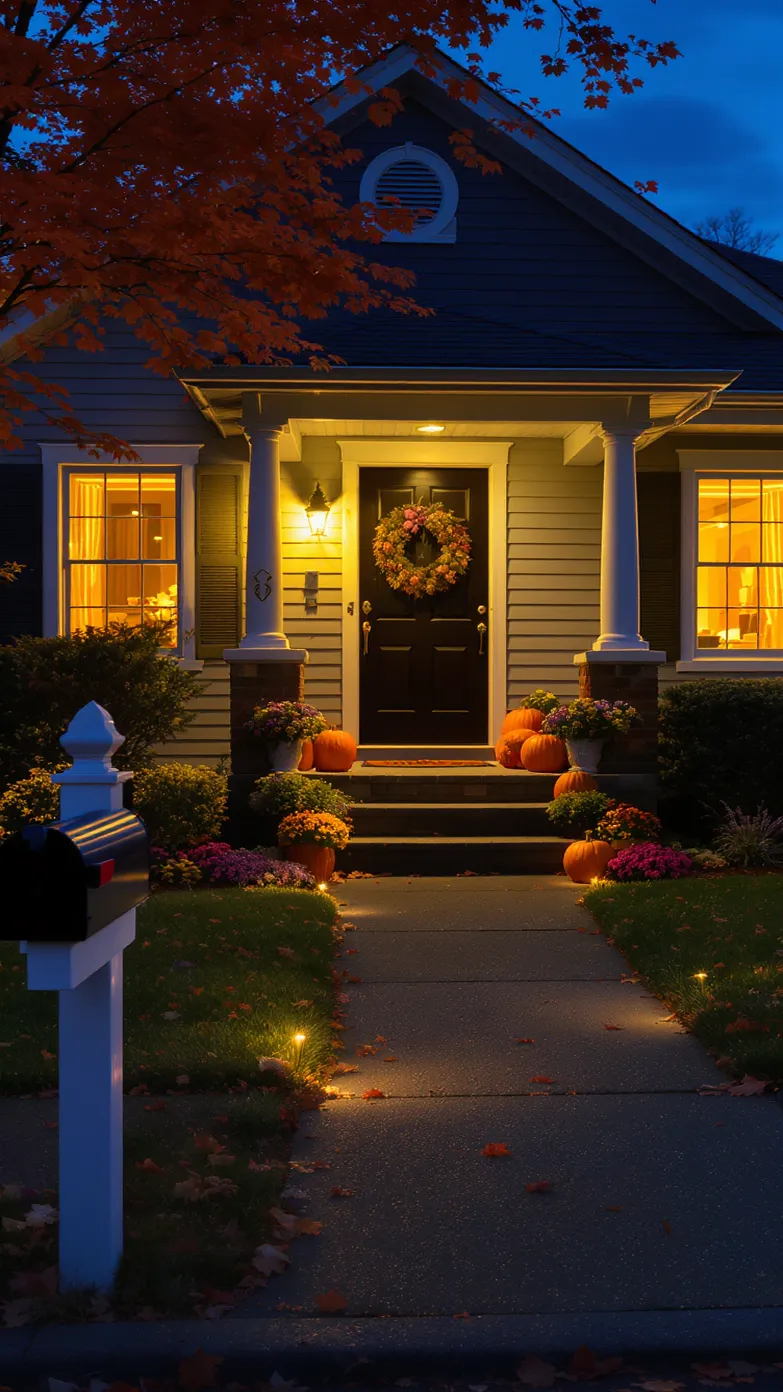
Stand at the curb and look at the house the way a guest will. The eye lands on the door first, the walk second, the roofline last. Spend the effort in that order. Two planters and a wreath do more than a lawn full of small pieces scattered everywhere.
Do the living things first. Plant the kale, build the planters, hang the garland. These improve with a week of settling. Add the harvest the week of: pumpkins, luminaries, the wheelbarrow. Light it last, the evening the guests arrive.
Photograph the result from the street at dusk and keep the photo. Next October it becomes the shopping list, the layout plan, and the reminder of what the wind did. Check the lights once a week. A dark strand in a lit roofline draws the eye more than no lights at all. Twenty-one ideas is a lot. Start with five, and let the yard teach you the rest.
Four-Week Setup Timeline
| Week | Task | Why Now |
|---|---|---|
| Four weeks out | Plant ornamental kale, order mums in bud | Roots settle before frost, buds open on schedule |
| Three weeks out | Clean gutters for roofline clips, test all light strands | Dead strands discovered now, not on the ladder |
| Two weeks out | Build planters, hang wreath and garland, dress mailbox | Evergreens hold, planters establish |
| Thanksgiving week | Stack pumpkins, set luminaries, stake path lights | Harvest displays peak for 7 to 10 days, lights go up last |
Thanksgiving Yard Decorations FAQ
How Early Can I Put Out Thanksgiving Yard Decorations?
Start structural work four weeks out: plant kale, build planters, and hang evergreen garland. These need time to settle and they hold for weeks. Keep harvest displays back until Thanksgiving week. Pumpkins and gourds peak for 7 to 10 days outdoors, and luminaries are a one-night job. Living displays put out early look established. Mums bought in tight bud open on schedule if you buy them two weeks out; full flowers bought early will be brown by Thursday.
Will Frost Kill My Porch Planters?
Established pansies, violas, ornamental kale, and chrysanthemums take light frost without damage, and kale colors up better after it. What kills pots is the combination of small containers and hard freezes below minus 7 C. Use pots at least 30 cm wide, wrap ceramic in burlap, and move the tender ones under the porch roof on the coldest nights. Terracotta cracks when wet clay freezes, so wrap those pots in burlap and keep the drainage hole open.
Are Outdoor String Lights Safe in Rain?
Yes, if every piece is marked for outdoor use and the circuit is GFCI protected. The Electrical Safety Foundation International’s outdoor decoration safety tips require outdoor-rated cords and lights, GFCI protection, cords kept clear of standing water, and 3 m of clearance from power lines. Take down and store lights in January. Run the cord along the back of the bed and clip it to the stakes so wind never walks it into the driveway.
How Do I Keep Pumpkins From Rotting on the Porch?
Buy pumpkins with firmly attached stems and no soft spots, then wash the rind in one part bleach to nine parts water and dry them fully, following Iowa State University Extension’s pumpkin guide. Display them under the porch roof edge where rain cannot pool on their shoulders. Compost the first soft one the day it softens. A pumpkin that feels light for its size has already lost moisture inside; leave it at the store.
What Should I Compost After Thanksgiving?
Compost pumpkins chopped into 10 cm chunks, gourds, corn stalks, hay bales, evergreen boughs, and the paper luminaries. Keep pots, hooks, stakes, and light strands for next year. Trash anything with heavy mold. Whole pumpkins survive the winter intact in the pile, so always chop first. Greens still fresh can move inside to the table before they hit the compost. Shred corn stalks before they go in; whole stalks mat and stall the pile for months.
Can I Leave Thanksgiving Decorations Up Through December?
Take the harvest down. Pumpkins collapse in December freezes and the display turns sad fast. Evergreen garland, planters, and warm white lights can stay through winter if the pots are wrapped and the strands are outdoor-rated. Swap the turkey cues for pinecones and red berries. The yard reads as winter, not leftover.