
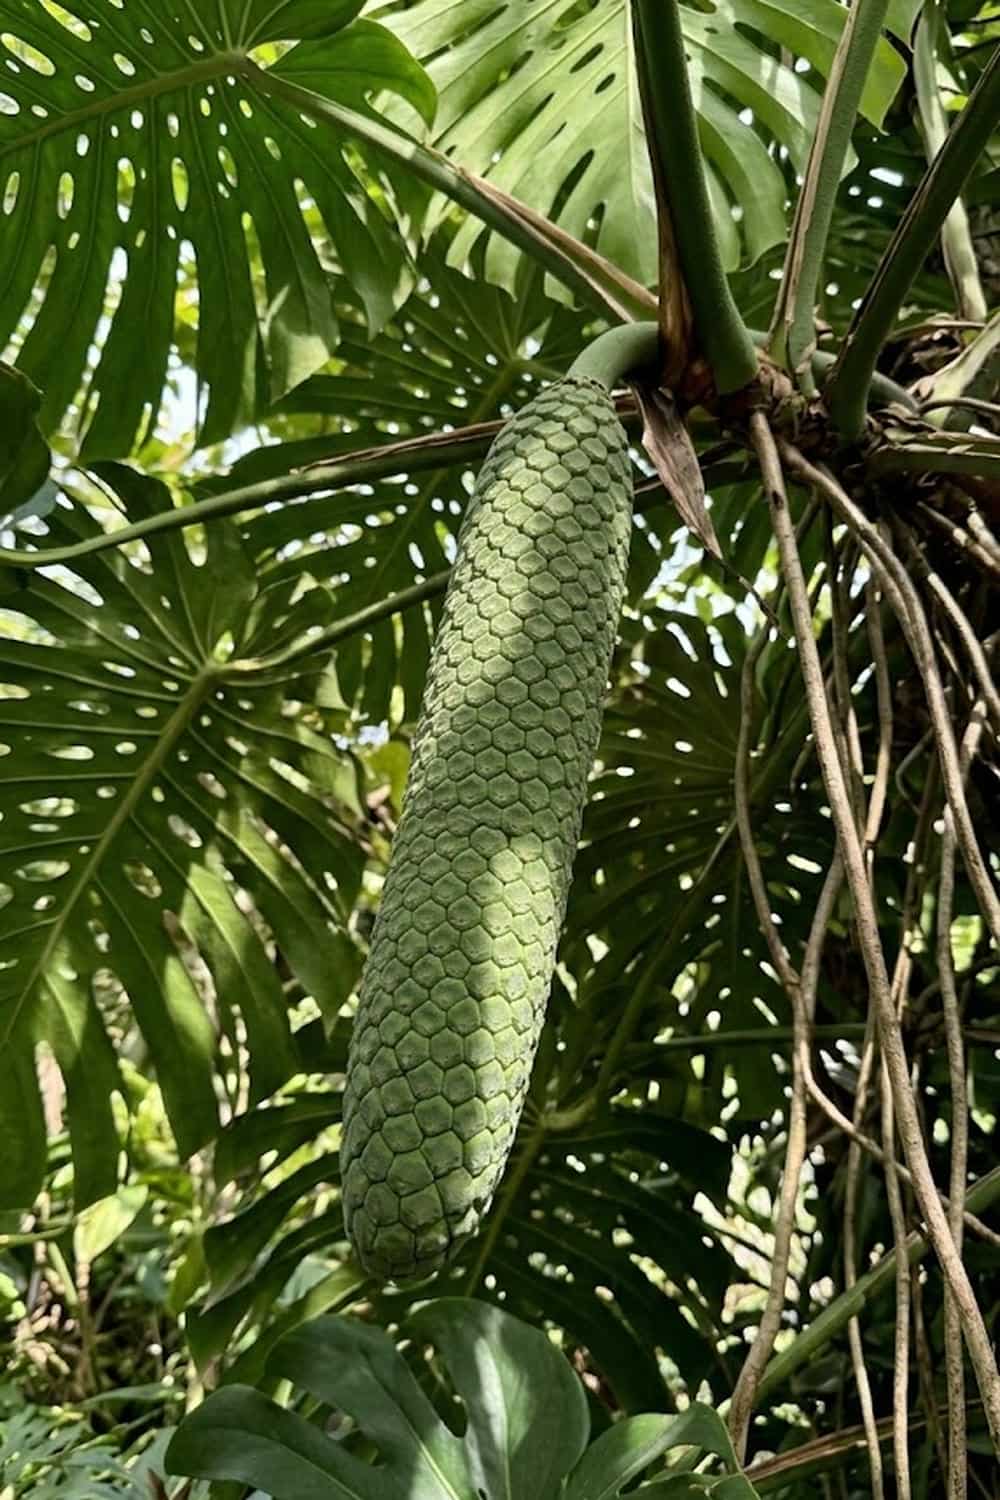

You love your Monstera deliciosa for its stunning, fenestrated leaves that transform your living space into a jungle oasis, but deep down, there’s a persistent frustration. You know it’s capable of producing an incredible, exotic fruit—the legendary “Mexican Breadfruit”—yet your plant remains stubbornly in a vegetative state, offering only foliage year after year. It feels like you are missing out on the plant’s true potential, a secret reward that only “expert” gardeners get to enjoy. Well, you don’t need a PhD in botany to achieve this harvest. I have spent years optimizing the specific environmental triggers required to move this classic aroid from a simple houseplant to a reproducible fruit-bearer, and I’m going to share exactly how to grow Monstera deliciosa fruit successfully in this guide.
1. Why Maturity is Your First Requirement for Monstera Fruit
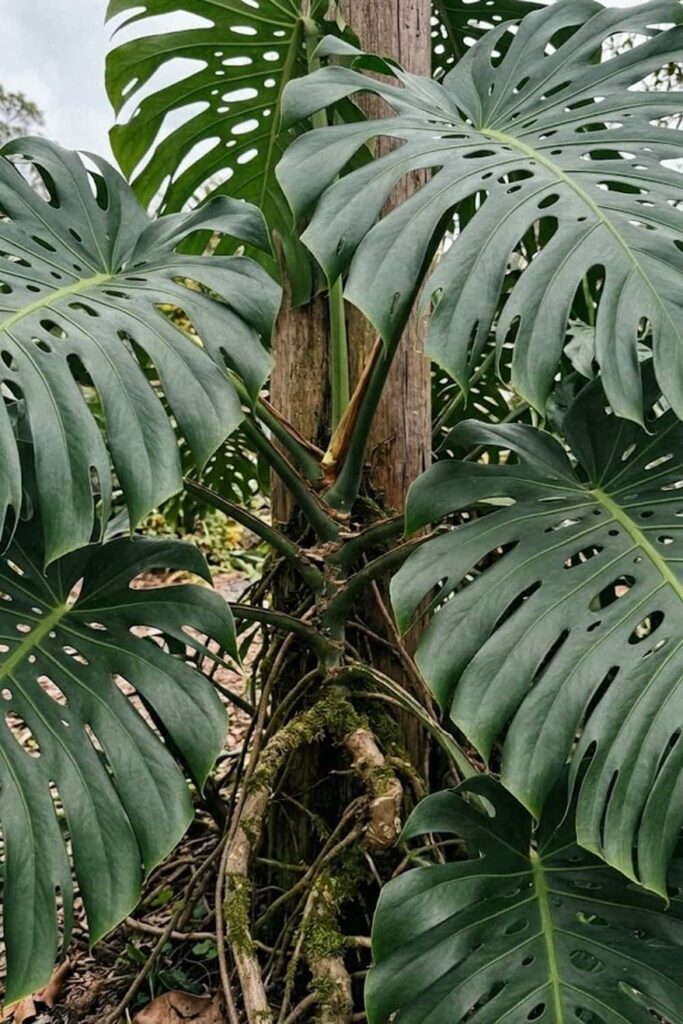
I have found that the biggest mistake gardeners make is trying to force flowering on a plant that is simply too young. When you want to grow Monstera deliciosa fruit, you must accept that this is a game of patience, as the plant prioritizes vegetative growth for several years before it even considers reproductive energy. In its natural habitat, a Monstera vine must climb high into the canopy to access bright light before it flowers; your indoor or patio plant follows the same internal logic. You need to look for definitive signs of maturity before expecting results.
The most critical marker of maturity is the development of highly fenestrated leaves. We are not just talking about the basic splits (pinnatifid leaves), but rather complex leaves that feature multiple rows of internal holes, known as fenestrations. Furthermore, the main stem must reach a significant thickness, often over two inches in diameter, and the plant must have a massive, established root system. Typically, a Monstera deliciosa grown from a cutting requires at least three to five years of optimal care before its first inflorescence (flower spadix) appears.
| Monstera Growth Stage | Primary Feature | Approximate Age | Flowering Potential |
| Juvenile | Solid, heart-shaped leaves | 0 – 2 Years | 0% |
| Sub-Adult | First splits appear | 2 – 4 Years | Low (<10%) |
| Mature | Multi-row Fenestrations | 3 – 5+ Years | High (>80%) |
You can assess your plant’s readiness by looking at its recent growth. If the newest leaves are consistently smaller than the previous ones, or if the stem is getting thinner, your plant is not ready to reproduce; it’s stressed. On the other hand, if you are struggling to manage its size because it is robust, thick, and producing massive, complex leaves, you have successfully met the first criterion. I recommend focusing solely on the vegetative health during these initial years to build the energy reserves needed for that eventual harvest.
2. The Soil Mix Secrets for a Monstera Deliciosa Fruit Harvest
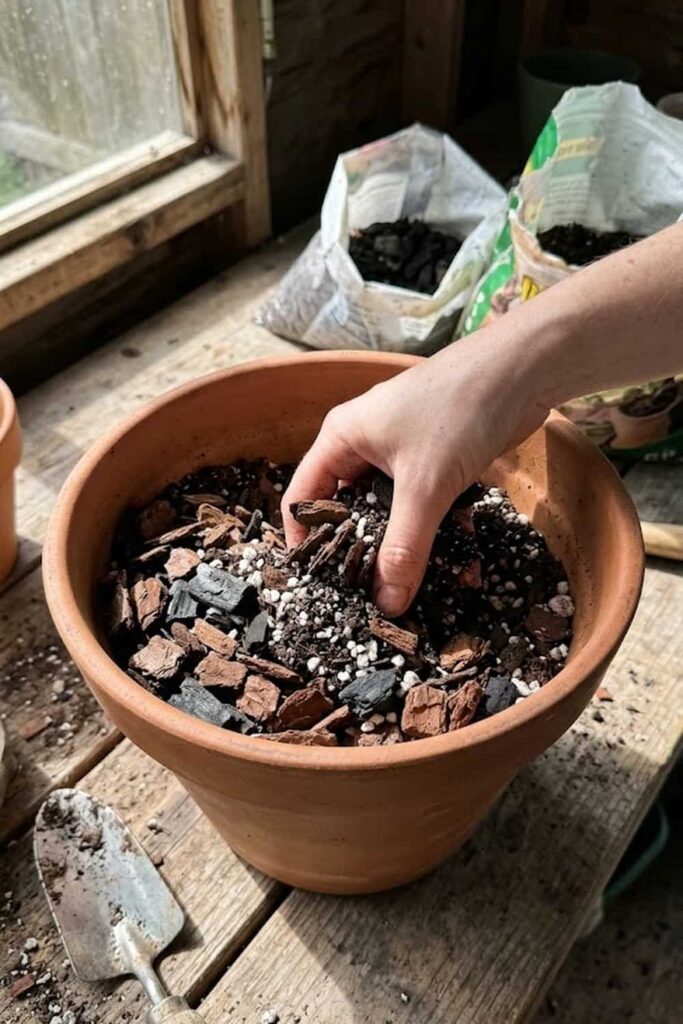
You cannot expect a plant to support heavy, energy-intensive Monstera fruit if its roots are suffocating in dense, wet soil. In my experience, standard potting soil is the enemy of the mature, fruiting Monstera. This plant is a hemi-epiphyte; in the jungle, its roots are frequently exposed to open air as they climb trees. If you provide a heavy soil that retains too much moisture, you will trigger root rot before you ever see a bloom. To successfully encourage flowering, you must provide a soil substrate that perfectly balances high aeration with essential nutrient retention.
I have optimized a “chunky aroid mix” that I use for all my reproductive specimens, and I recommend you adopt a similar recipe. The goal is to maximize the oxygen pockets around the root zone, preventing bacterial growth while still allowing the plant to absorb critical potassium and phosphorus required for the reproductive inflorescence.
The Ideal Monstera Fruiting Mix:
- 3 Parts Organic Base: Premium potting soil or coco coir (for basic moisture and microbial life).
- 3 Parts Aeration: Large grade orchid bark (this provides the structural “chunks” that keep the mix open for years).
- 2 Parts Drainage: Coarse perlite or pumice (prevents compaction).
- 1 Part Filtration/Structure: Horticultural charcoal (helps filter impurities and adds sharp drainage).
- 0.5 Part Nutrition: Worm castings (a gentle, slow-release nutrient boost).
When you repot a mature Monstera into this chunky mix, you are creating an environment where the large, thick secondary roots can thrive. These specialized roots are different from the fine, moisture-seeking roots of younger plants; they are designed to anchor the plant and process heavy nutritional loads. I find that this massive root structure is necessary to provide the physical stability and hydration support needed when a heavy, 12-inch long Mexican Breadfruit pod begins to swell. You should aim to repot every 2-3 years, not necessarily to increase pot size, but to refresh this chunky texture that degrades over time.
3. Intense Light: The Final Environmental Trigger for Flowering
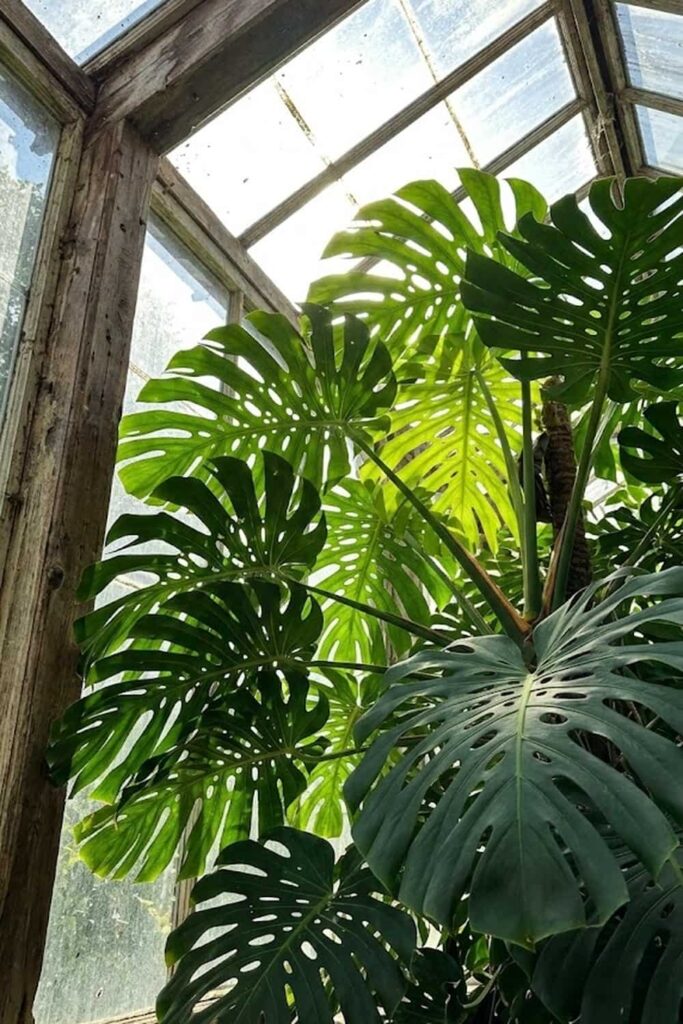
This is the non-negotiable step. In my decades of growing, I have learned that while a Monstera will happily grow large, beautiful foliage in “bright, indirect light,” it cannot and will not produce Monstera fruit without intense, high-energy illumination. In nature, the vine only fruits when it breaks through the canopy into full, bright Caribbean sun. Most indoor environments simply do not provide the sheer volume of photons required to trigger the reproductive response; the plant stays in vegetative mode because it doesn’t have the surplus energy to create a bloom.
If you cannot grow your plant outdoors in a subtropical environment, you must provide supplemental lighting that borders on professional grade. We are looking for illumination far beyond a simple “grow bulb” from the hardware store.
Fruiting Light Requirements:
- Intensity (Foot Candles): Your plant requires between 600 and 1,000 foot candles of light intensity at the leaf surface for at least 12 hours a day. For reference, “bright indoor light” is often less than 200 foot candles.
- Spectrum: You need a full-spectrum LED grow light with a strong focus in the PAR (Photosynthetically Active Radiation) region. This ensures the plant isn’t just photosynthesizing, but receiving the specific wavelengths (reds and oranges) that signals the time to set fruit.
- Duration: Consistency is key. I have achieved the best results by using a timer set to 14 hours “on” and 10 hours “off.” This mimics the long summer days needed for the inflorescence to mature into Mexican breadfruit.
When your plant is receiving sufficient energy, you will see it in the architecture of the new growth. Petioles will be shorter, holding the leaves in a tighter, more compact cluster, and new aerial roots will become exceptionally thick and robust. The leaves will take on a lighter, slightly yellowish-green hue, but this is not chlorosis—it’s the plant maximizing its energy intake. If you satisfy this massive energy demand, you will be rewarded when the main apex of the plant shifts and a thick, cream-colored spathe emerges from the sheath of a mature leaf, signalling the start of the 12-month fruiting journey.
4. Specific Humidity Needs for a Healthy Spadix and Fruit Set
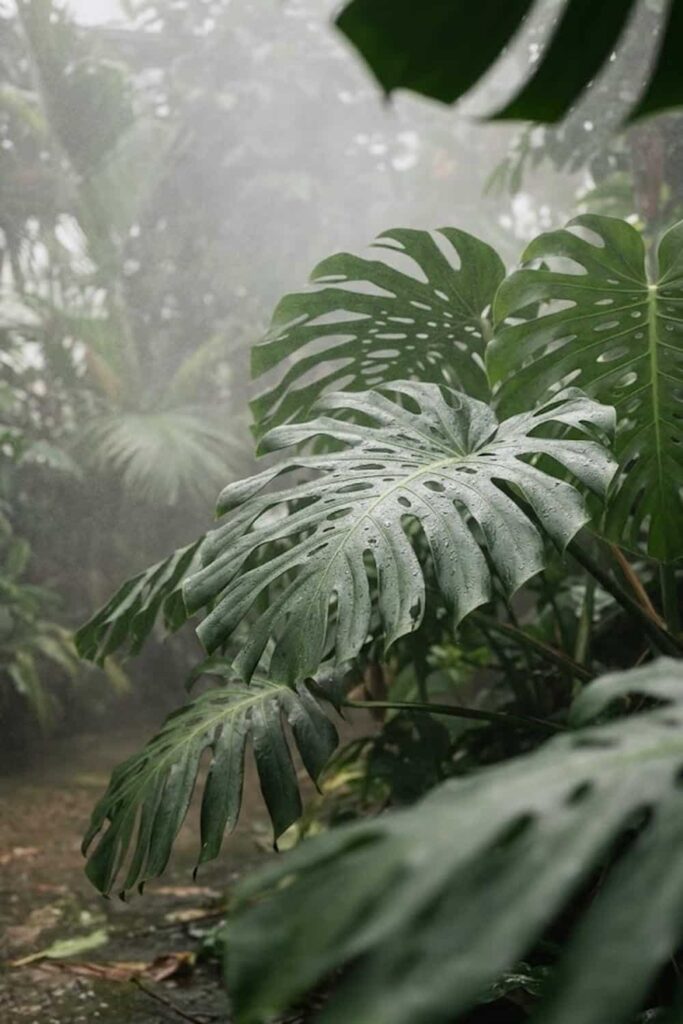
Once you have successfully provided the light intensity required to grow Monstera deliciosa fruit, you must manage the atmosphere precisely to ensure that initial bloom actually develops. In my experience, a sudden drop in humidity is the most common cause of “bloom abort.” I have seen beautiful, emerging cream-colored spathes quickly turn brown and turn to mush because the ambient air was too dry. The Monstera deliciosa originates from cloud forests where the air is consistently near saturation; you cannot achieve a successful Mexican Breadfruit harvest in dry, air-conditioned environments.
You must aim for a consistent humidity level between 60% and 80%. This is high for most modern homes, which typically sit around 30-40%.
Achieving Ideal Aroid Humidity:
- Commercial-Grade Humidifier: Forget the small “desktop” models. If you have a mature plant you want to fruit, you need a high-output, ultrasonic humidifier that can raise the entire room’s humidity to a baseline of 60%.
- Misting is Counterproductive: I strongly advise against routine misting of the leaves. While this increases humidity for a few minutes, it also leaves standing water on the Inflorescence, which is a primary trigger for fungal disease. When water pools inside the developing spadix structure, it will rot the nascent fruit from the inside out.
- Use Airflow and Ventilation: High humidity + Stagnant Air = Disease. You must have a small circulation fan moving the air in the room constantly. This ensures that the dense air around the developing spathes and leaves doesn’t become over-saturated, preventing both powdery mildew and bacterial spot.
I find that the best approach is to group plants together. When you have five or six large aroids sharing a space, they naturally create a microclimate that is far more stable than a single, isolated specimen. If you can maintain this stable, humid environment, your plant can safely support the massive hydration requirements of the developing 12-inch Monstera fruit, which takes an incredible 12 months to ripen under these conditions.
5. Specializing Your Fertilizing to Transition from Leaf to Fruit Production
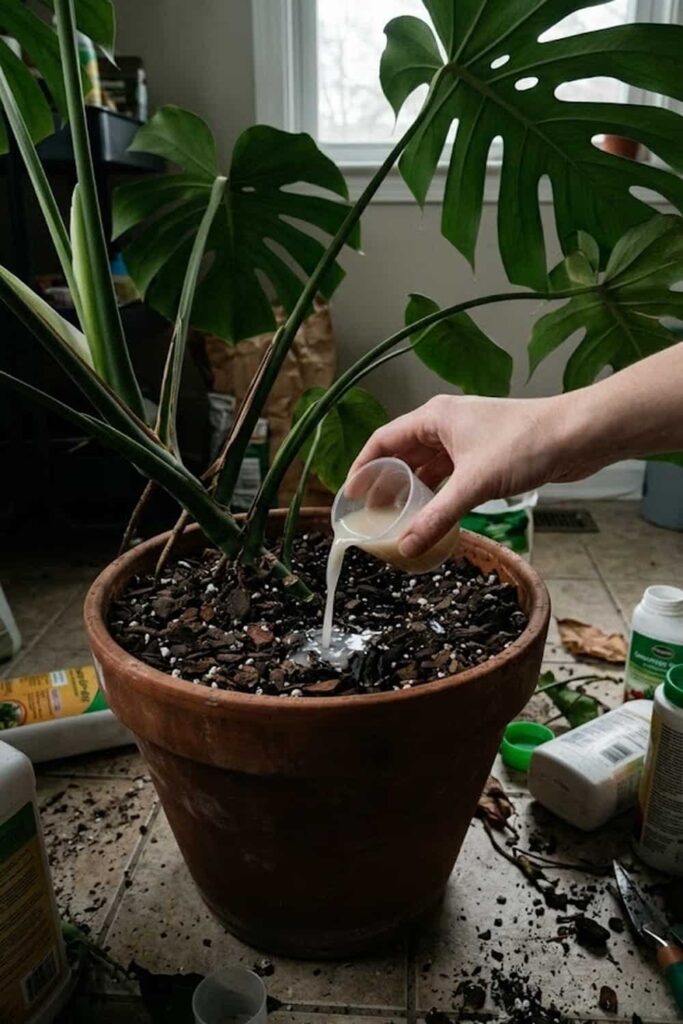
This is the most critical nutrition shift in the plant’s entire life. To actively grow Monstera deliciosa fruit, you must fundamentally change your fertilization strategy once your plant achieves maturity and is under high-intensity light. If you continue to use a generic, high-nitrogen “houseplant food,” your plant will remain focused on producing more leaves and massive aerial roots. Nitrogen fuels vegetative structure; when you want flowers and subsequent fruit, you must intentionally starve the plant of surplus nitrogen and flood it with phosphorus and potassium.
I have optimized a two-stage nutrient schedule that I use on my mature aroids, and I highly recommend you adopt this protocol once your plant is large enough to reproduce.
Stage 1: Pre-Bloom Structure (Late Winter / Early Spring)
- Goal: Strengthen the root system and build thick stems to support future weight.
- Nutrient Profile: A formulation with a balanced N-P-K (like 10-10-10 or 20-20-20) supplemented with additional calcium. Calcium is essential for aroid cell wall strength and prevents the spathe from collapsing as it opens.
- Frequency: Every 2 weeks at 50% strength.
Stage 2: Reproductive Push (Once Bloom Sheath is Detected)
- Goal: Trigger flowering and support the long, 12-month Mexican Breadfruit ripening.
- Nutrient Profile: As soon as you detect a swelling in the base of a mature leaf sheath (the proto-bloom), you must switch to a Bloom Booster (like a 10-30-20 N-P-K ratio). This high level of Phosphorus triggers the actual differentiation of cells into the flowering inflorescence, while the Potassium is critical for the long-term production of complex sugars as the fruit swells.
- Frequency: Keep the feed constant—every 10 days at 25-50% strength.
I have found that one final “bloom dose” of chelated micronutrients (specifically Iron, Manganese, and Boron) applied just as the spadix opens can make the difference between a successful pollination and an aborted set. If you achieve this nutritional balance, your plant will have the metabolic resources required to build the large, sugar-dense Monstera fruit, which must be maintained on the plant for a full year until it sheds its green hexagonal scales.
6. Pollination Mastery: How to Assist the Spadix
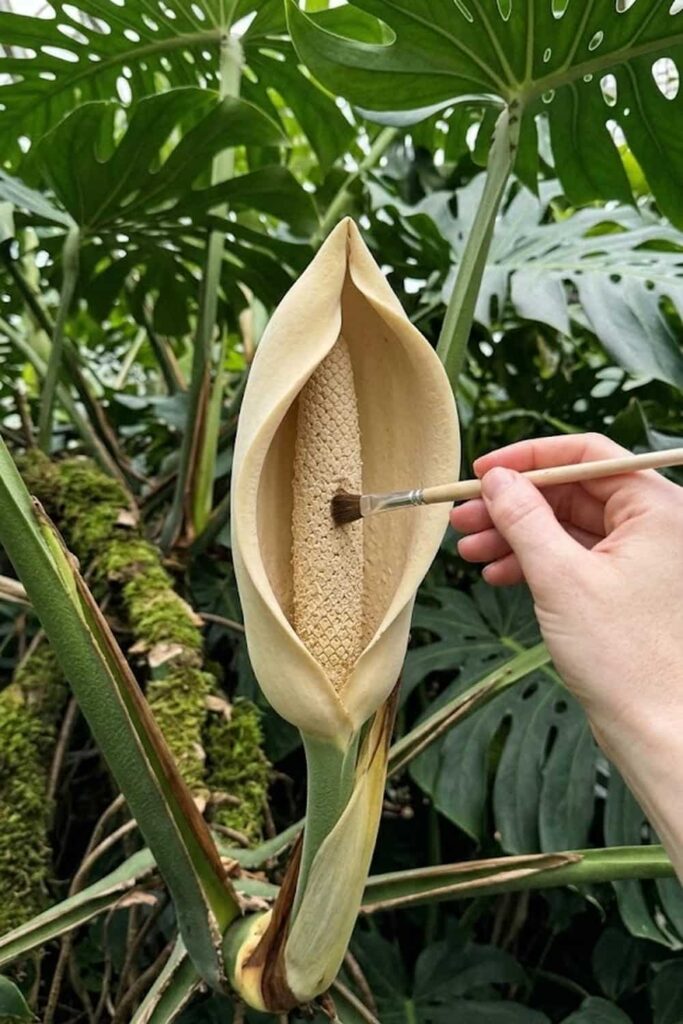
If you are growing your plant indoors or on a isolated patio, you cannot rely on native insects to achieve a successful Monstera fruit set. In my experience, manual pollination is almost always required for the indoor gardener. The Monstera deliciosa inflorescence has a fascinating, complex reproductive cycle known as “protogyny.” This means the female parts of the flower ripen and are receptive to pollen before the male parts produce pollen. This mechanism prevents self-pollination within the same inflorescence, but it means you must actively intervene to secure your harvest of Mexican Breadfruit.
When the thick, cream-colored spathe opens, the female flowers lining the central spadix are receptive. You will know this because the spadix will sweat a slightly sticky substance and emit a strong, sweet, pineapple-like aroma. This receptive window is short, often lasting only 24 to 48 hours. I find the best method is to collect viable pollen from a different, slightly older inflorescence using a small, soft artist’s brush. I have successfully stored this pollen in a sealed, dry container in the refrigerator for up to five days. During the receptive phase of your target flower, gently brush the collected pollen all over the sticky female spadix. Achieving a thorough pollination is critical; you are aiming to fertilize enough individual flowers to create a complete, uniform Monstera fruit pod, otherwise, the plant may abort the entire development.
7. Monitoring the 12-Month Ripening Process
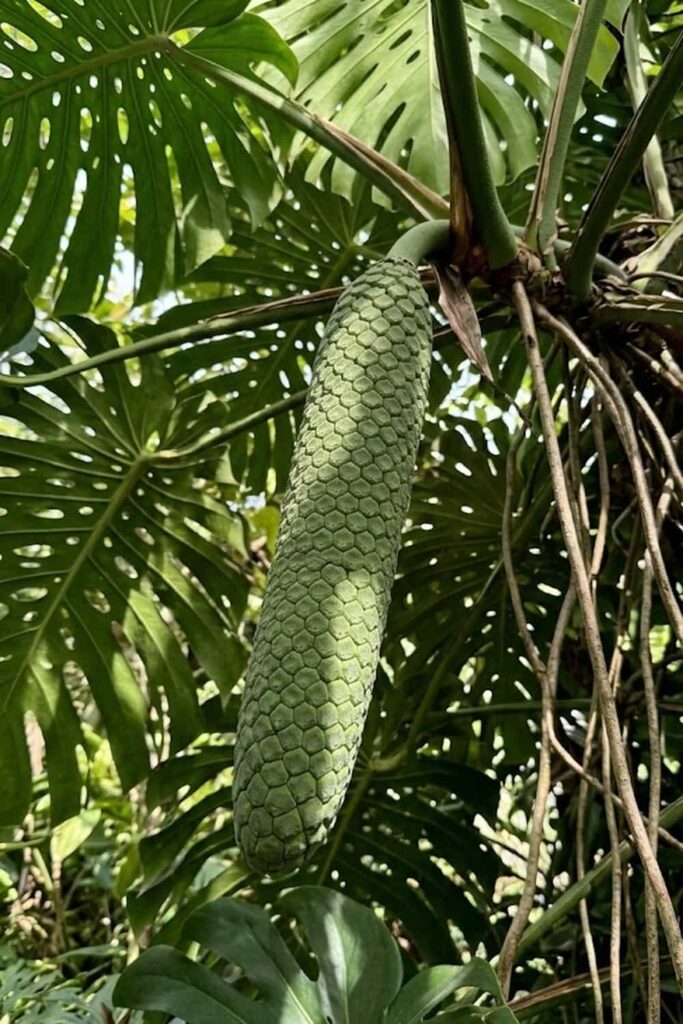
You have successfully achieved pollination, but now the true test of patience begins. When you grow Monstera deliciosa fruit, you must accept that the period between a successful set and a ripe harvest is incredibly long, typically spanning 10 to 12 months. This is one of the slowest-ripening fruits in the entire plant kingdom. I have found that gardeners who are used to quick vegetable harvests are often tempted to pick the Monstera fruit far too early, which is dangerous due to the high concentration of calcium oxalate crystals in the unripe flesh.
I recommend that you develop a specific monitoring routine for this year-long wait.
Key Ripening Milestones:
- Months 1-3: Post-pollination, the cream-colored spathe will wither and fall away. The remaining green spadix will begin to swell rapidly, often reaching 8 to 12 inches in length.
- Months 4-9: The fruit enters a dormant development phase. It remains exceptionally hard and a deep, camouflage-green color. During this time, I focus on stabilizing the plant’s environment; sudden changes in watering or light can cause the plant to drop the fruit.
- Months 10-12: The matrix of green hexagonal scales covering the Mexican Breadfruit starts to shift. The intense green fades to a lighter, yellowish-green hue, and the very base of the fruit (near the stem) will show signs of the scales “lifting.”
You should monitoring the fruit weekly during the final two months. You will know maturity is near when the fragrance returns—the fruit will begin to emit that same pineapple-banana aroma that you smelled during flowering. At this point, I advise against touching the scales too much; they must loosen on their own, proving that the calcium oxalate has broken down and the sugary pulp is safe for you to eventually consume.
8. Temperature Control: Avoiding the Chill That Kills Monstera Blooms
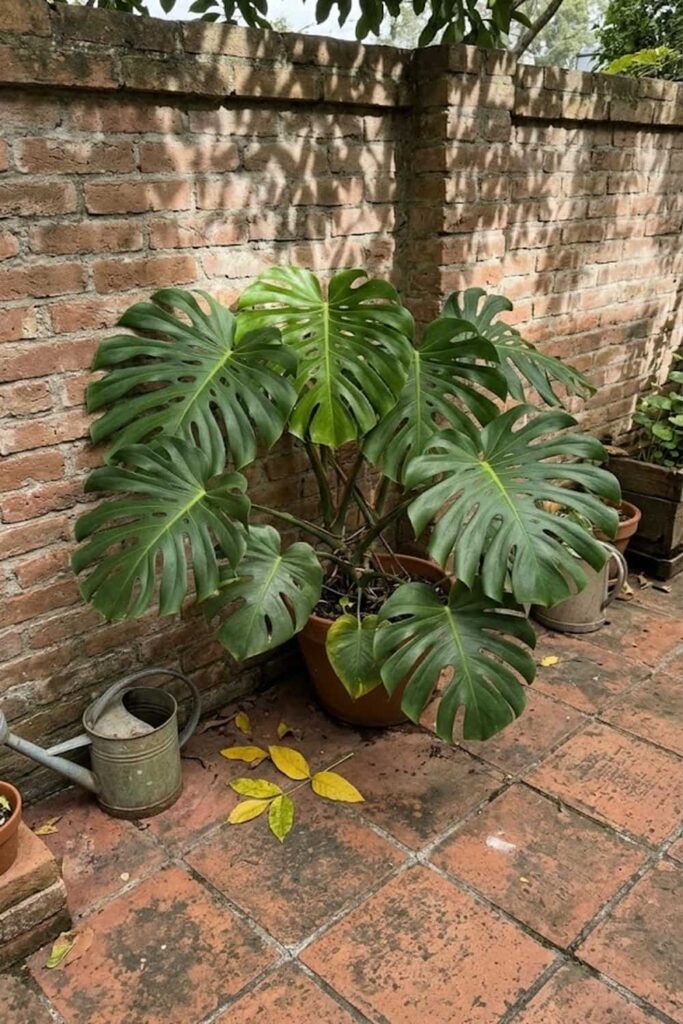
You can have the perfect light, humidity, and nutrients, but if you expose your plant to a sudden cold draft, your efforts to grow Monstera deliciosa fruit will fail. In my decades of experience with aroids, I have learned that temperature stability is far more important for fruit set than the absolute maximum temperature. Monstera deliciosa is physically robust and can tolerate heat, but it is exceptionally sensitive to cold, particularly when it is allocating energy to a developing inflorescence or a young Monstera fruit pod.
You must maintain a minimum temperature of 18°C (65°F) at all times, with the ideal range being between 21°C and 29°C (70°F – 85°F).
I find that the most dangerous environment is actually a mixed indoor/outdoor setup. If you move your mature plant onto a patio for the high summer light, you must have a definitive “Bring Inside” temperature protocol. I strongly advise that as soon as night-time temperatures drop below 15°C (60°F), you move the plant indoors. A single night of “chilling injury” might not kill the massive leaves, but it is more than sufficient to cause “bud blast” (where the developing bloom dies before opening) or cause a half-ripened Mexican Breadfruit to halt development and permanently turn to mush.
To successfully manage this over the 12-month ripening cycle, I recommend placing your pot near a thermal mass, such as a brick wall or stone path. This mass absorbs daytime heat and slowly releases it at night, which helps to buffer the plant against sudden, stressful temperature swings that could otherwise derail your harvest.
9. Watering Consistency to Prevent Fruit Cracking and Abortion
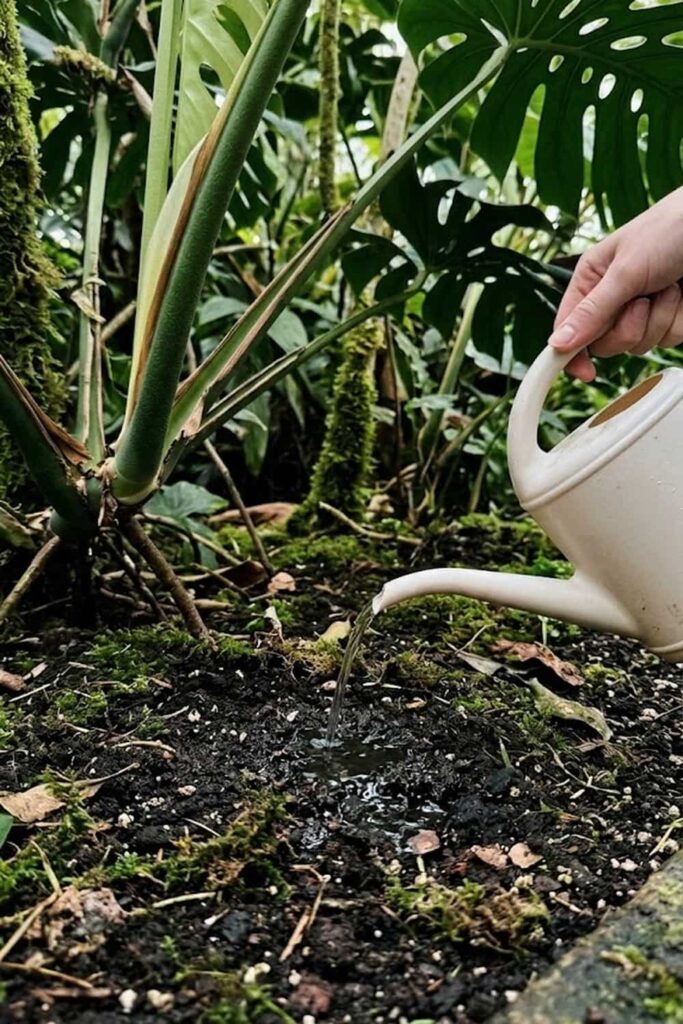
The single most common cause of non-disease related Monstera fruit loss, in my experience, is inconsistent hydration. When you are focused on how to grow Monstera deliciosa fruit, you cannot adopt a “water when I remember” approach. This plant is supporting a massive biological weight; a developing Mexican Breadfruit pod, which can be 12 inches long, is over 90% water. A single day of severe drought stress can cause the plant to immediately cut its losses and abort the fruit. Conversely, flooding a dry plant can cause the internal fruit tissue to swell faster than the green hexagonal scales can adapt, leading to deep, catastrophic cracking.
I find that the best method for a large, mature Monstera is “constant, stable hydration.” This does not mean keeping the soil wet; that will lead to root rot.
The Hybrid Watering Protocol:
- Damp, Never Wet Soil: Your top two inches of chunky soil mix should dry out, but the root ball must remain consistently, lightly damp. I have been using simple moisture meters for years to ensure that the middle of the large pot never drops below 30% saturation during the fruiting cycle.
- Use a Reservoir (The Hydration Buffer): I strongly recommend adding a simple wick-watering system or a self-watering planter for a mature Monstera you want to fruit. This gives the massive root system a constant buffer, ensuring that even if you miss a watering day, the internal water pressure (turgor) needed to support that heavy Monstera fruit remains perfectly stable.
- Water Quality: If you can, use rain water or reverse osmosis (RO) water. The accumulation of salts from tap water will slowly damage the fine aerial roots, reducing the plant’s ability to efficiently transport the volume of water needed for that final ripening.
If you achieve this balance, your monitoring will show that the fruit pod remains exceptionally hard and a consistent, deep camouflage-green. There should be no soft spots, no localized yellowing, and absolutely no cracks. Providing this hydrational stability is the foundation that allows you to safely maintain the developing harvest for its full, year-long journey on the vine.
10. Pest Control and Protection for Developing Monstera Fruit
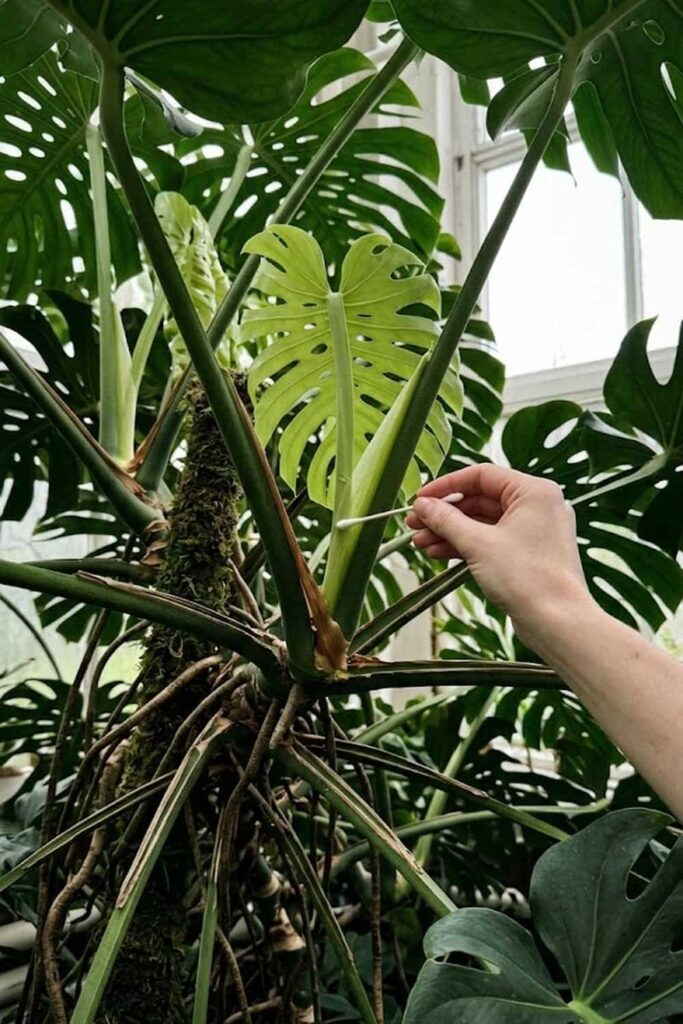
If you think you are the only one interested in that developing tropical harvest, you are mistaken. In my experience, a developing inflorescence or a ripening Monstera fruit is a prime target for aroid pests. While the giant mature leaves are tough and somewhat resistant, the sweet aroma and high sugar content of the fruit spadix will attract any sap-sucking insect in your area. If you do not have a dedicated pest control routine, an infestation can easily severe the metabolic connection, causing the half-developed Mexican Breadfruit to halt development and turn black.
The most dangerous pests are Thrips, Mealybugs, and Scale. These cryptic insects can hide deep within the crevasses of the green hexagonal scales of the Monstera fruit and are difficult to eradicate with simple contact sprays.
My Proactive Fruiting Defense Plan:
- Weekly Monitoring is Your First Line of Defense: During your regular monitoring, you must use a simple 10x magnifying loop to inspect the joint where the fruit pod connects to the stem. This is the primary hiding spot for Mealybugs. I also check for the silver-gray “stippling” damage that indicates Thrips.
- Systemic Prevention (Before Flowering): If you are growing ornamentally and not eating, systemics are fine. But you are growing an edible product. You cannot use systemic insecticides when you are trying to grow Monstera deliciosa fruit. Instead, I rely on regular, preventive applications of organic Neem oil applied only to the leaves and main stem—never to the open flower.
- Active Protection (During Flowering): Once that sweet-smelling spadix opens, you cannot spray it. The sweet sap that attracts us also attracts pests. I find the best method is physically wiping down the areas around the bloom with isopropyl alcohol wipes and, if needed, physically removing any Mealybugs with a cotton swab dipped in alcohol.
I also recommend releasing beneficial insects, such as Cryptolaemus montrouzieri (Mealybug Destroyers) or Lacewings, into your growing area. This provides a constant, chemical-free layer of protection that will hunt down any cryptic pests hiding within the fruit’s protective green scales, ensuring your future harvest remains healthy and safe to eventually eat.
11. Harvesting Safely: Recognizing When the Scales Shed
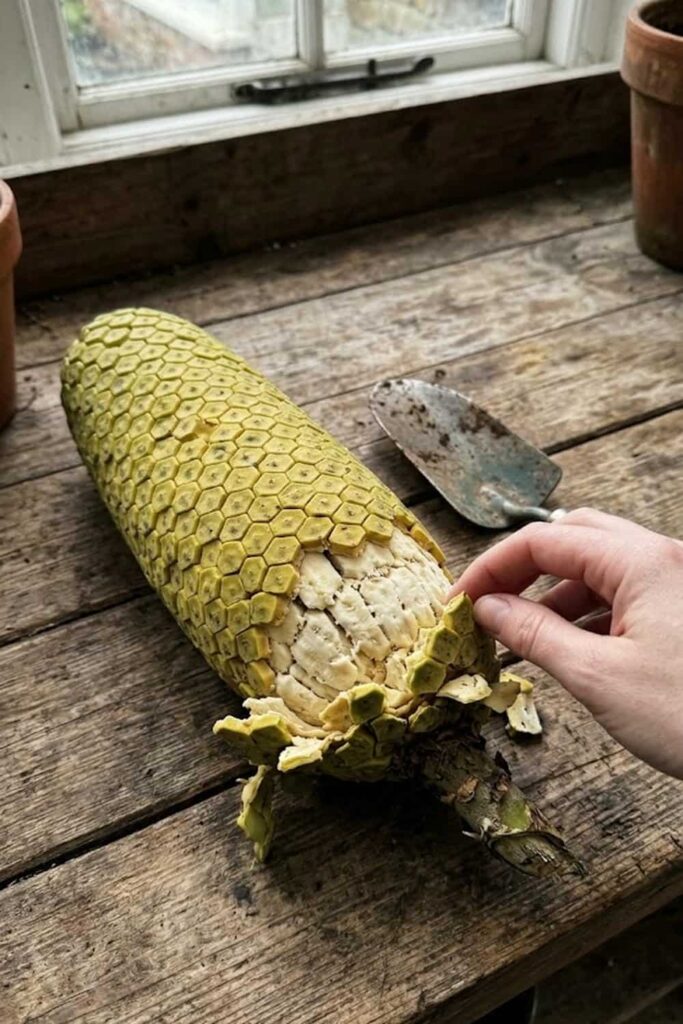
You have waited a full year, and now the moment of truth has arrived. Harvesting a Monstera fruit is not like picking an apple; if you do it incorrectly or too early, you will be met with a painful, burning sensation caused by severe oral irritation. In my experience, the plant will tell you exactly when it is ready. You must wait for the definitive sign: the matrix of green hexagonal scales covering the Mexican Breadfruit will begin to naturally loosen and shed from the bottom up.
When you are monitoring for ripeness, do not force the scales off. If they do not pop off with the gentlest touch of your hand, the fruit below is still high in calcium oxalate crystals and is not safe to eat. I find that the fruit often develops its intense pineapple-banana aroma a few days before the scales start to drop. Once that shedding process begins at the base, I use a sharp, sterilized knife to cut the entire fruit spadix from the main stem, ensuring I leave a few inches of stem attached to handle it safely. This complex ripening process is the key safety barrier that allows you to eventually enjoy this tropical treat without injury.
12. Storage and the Critical Post-Harvest Ripening Technique
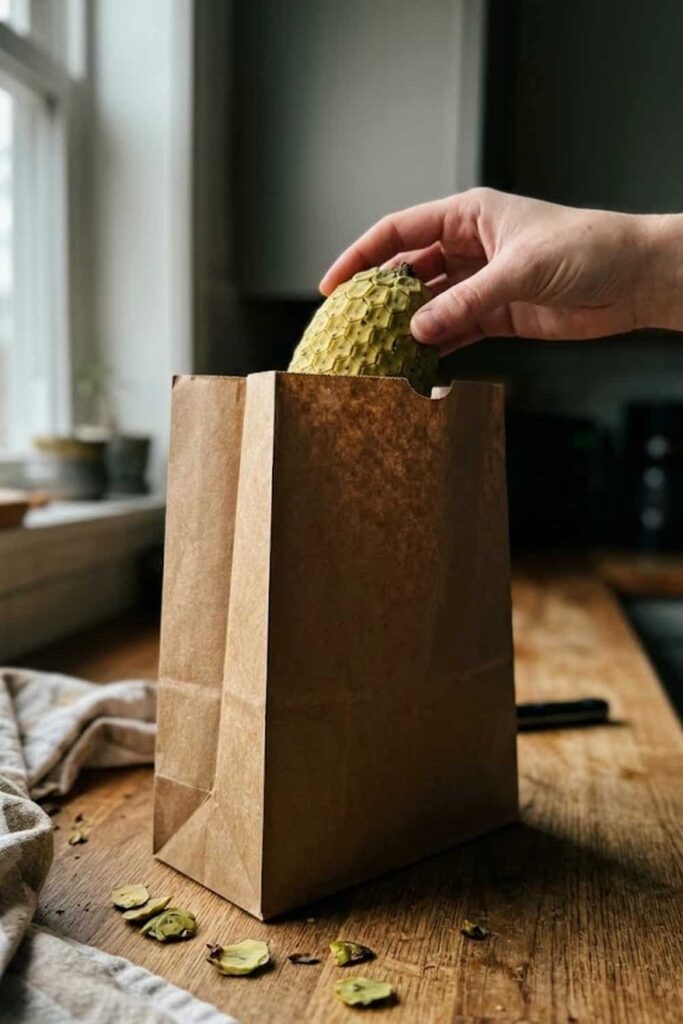
Once you have cut the mature Monstera fruit spadix from the plant, your journey is almost complete, but your patience is still required. You have harvested a mature product, but only the very base is edible on day one. In my experience, the safest and most effective storage and ripening technique is the “bottom-up, paper bag method.” Place the entire cut fruit, base-down, into a clean brown paper bag and stand it upright on your kitchen counter (never in the refrigerator).
This method mimics the natural shedding of the green hexagonal scales, but in a controlled environment. The storage area must be average room temperature (around 21°C / 70°F).
- Day 1-2: The first inch or two of the Mexican Breadfruit base will shed its scales inside the bag. You can carefully remove the scales from this section and consume the creamy white pulp below.
- Day 3-5: The ripening process moves up the spadix. Each day, another section of scales will loosen. I use this time to carefully inspect for any small, black specks, which are residual calcium oxalate irritation points you must avoid.
- Day 6-8: The final, top sections shed. You must consume the fruit in these sections as they ripen; you cannot store the fully ripe, naked pulp for more than a day or two before it begins to ferment.
I find this multi-day ripening protocol exceptionally useful because it allows you to enjoy the rare harvest over a full week, rather than being overwhelmed by a massive, simultaneous ripening. Following this methodical approach ensures that you are only eating fruit where the dangerous crystals have fully broken down into complex sugars, resulting in that unique, complex flavor profile that only patience can create.
13. Prevention of Calcium Oxalate Irritation Points
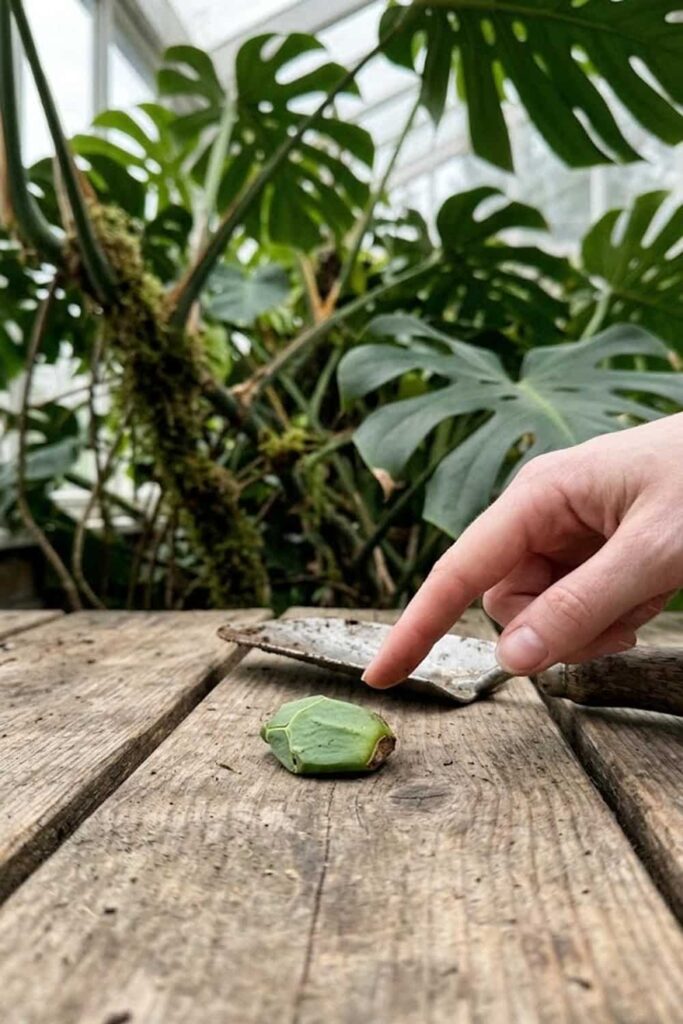
You must accept that achieving a safe Monstera fruit set is a game of mitigation, not total elimination. The danger of severe oral and throat irritation is real. Even when you harvest and ripen the Mexican Breadfruit flawlessly, you may still encounter small, localized concentrations of the needle-like calcium oxalate crystals. In my experience, the base of the fruit spadix is the safest part, while the very tip (the most recently developed section) carries the highest risk of retained toxicity.
I find that the best method of prevention is careful physical examination before consumption.
Irritation Detection Checklist:
- Shedding is Law: You must never force scales off. You only eat sections where the scales popped off naturally inside the paper bag. If it sticks, do not pick it.
- Inspect for Black Specks: Once the scales are gone, I use a bright light to examine the creamy white pulp. Occasionally, you may see tiny, localized black specks embedded in the segments. These are often indicators of residual crystal bundles. I use a small knife to excise these specks entirely.
- The Tip-Test: When consuming a newly ripe section, I always take a very small bite first from the lowest part of that day’s ripe segment and wait 60 seconds. If I do not feel any initial tingling, I proceed. I rarely, if ever, consume the final inch of the fruit tip, as the 12-month monitoring timeline shows this section frequently fails to fully break down its oxalate stores.
By following these strict safety and detection protocols, you turn a high-risk horticultural experiment into a controlled, safe culinary experience, allowing you to enjoy the exotic reward you spent a full year patiently growing Monstera deliciosa fruit to achieve.
14. Repotting and Anchoring Your Fruit-Bearing Monstera
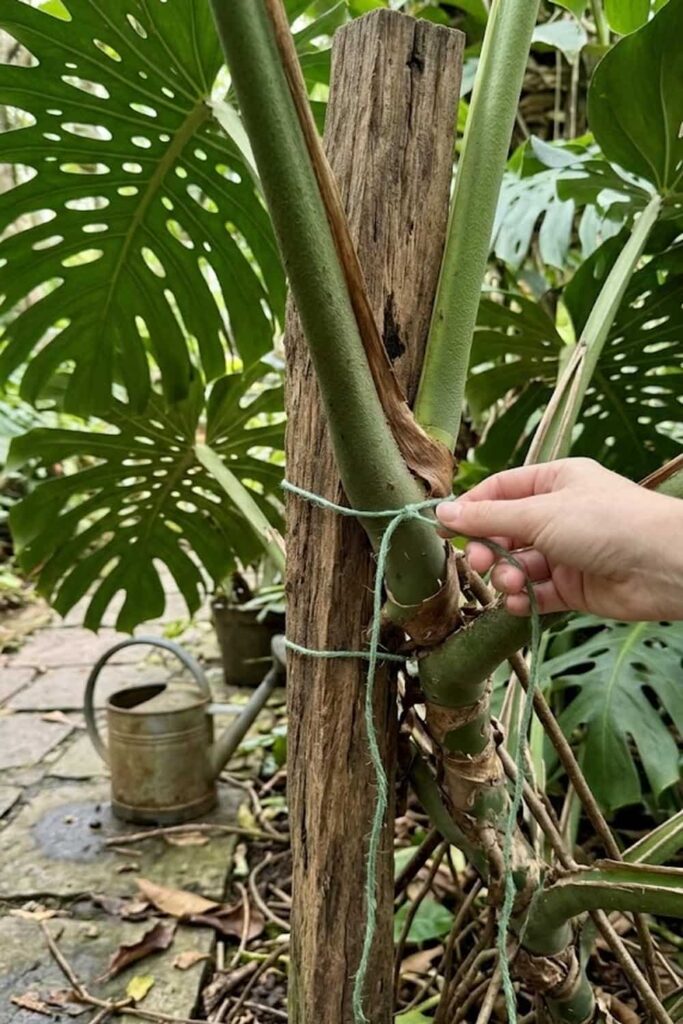
You can have the most perfect environmental conditions, but if you do not physically stabilize your mature plant, it will fail to support a high-yield Monstera fruit set. A single 12-inch long Mexican Breadfruit pod is remarkably heavy, and a robust, fruiting specimen can have two or three developing simultaneously. In my experience, mature Monsteras that are not securely anchored often suffer catastrophic collapse; the primary vine can crack under the immense combined weight of the fruit and the massive, 2-foot wide fenestrated leaves.
When repotting your large Monstera, you must move beyond the standard “moss pole.”
Advanced Aroid Anchoring Strategy:
- A Sturdy, Inert Support: I strongly recommend using a 2×4 cedar plank, a rough-cut cypress post, or a massive, wire-mesh moss pole filled with sterile sphagnum (which you must keep damp to encourage root attachment). Do not use thin, plastic-wrapped poles; they provide insufficient structural integrity for a heavy Monstera fruit.
- Anchoring the Support: The post itself must be anchored to the base of the pot, often by drilling through the bottom and using galvanized bolts to prevent it from shifting.
- Pot Material: You must use a heavy, stable pot. I find that thick terracotta or heavy glazed ceramic is essential to act as a counterweight, preventing the entire assembly from tipping over as the 10-12 month monitoring period progresses and the fruit swells.
When you repot a large, mature specimen to provide this structural support, you are creating a stable foundation. The large aerial roots will latch onto the new, rough post, integrating the plant and the support into one structure. This physically allows the central vascular system to safely transport the immense volume of water and nutrients needed to maintain the developing tropical harvest over its long, complex ripening journey on the vine.
15. Labeling and Monitoring Fruiting Data to Reproduce Success
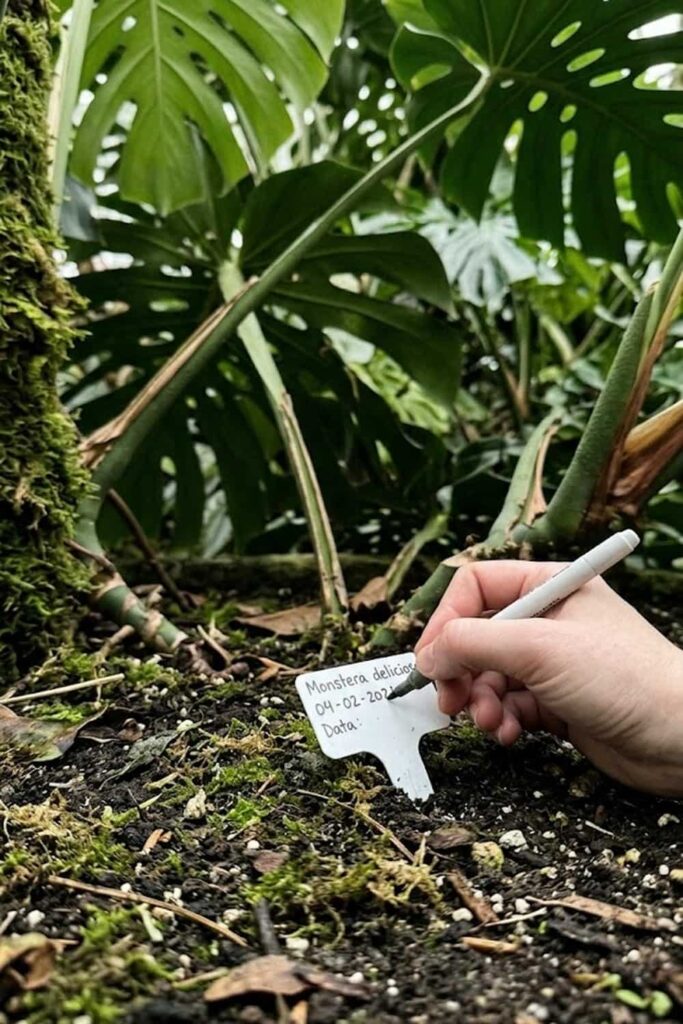
You cannot expect to reproducible success in achieving a Monstera fruit set if you do not track your data. When you are focused on how to grow Monstera deliciosafruit, you must move from casual gardening to a precise, analytical approach. The entire reproductive cycle, from initial bloom to the final shed of the Mexican Breadfruit scales, takes at least a full year. In my experience, I have found that I simply cannot rely on my memory to track the subtle environmental changes, nutrient adjustments, and critical dates required to master this rare tropical harvest.
You should implement a structured data-tracking protocol for any mature plant you hope to fruit.
Essential Fruiting Data Points to Track:
- A Mature Fenestration Date: I track when the first leaf with multiple rows of internal fenestrations appears. This defines “Plant Maturity.”
- The First Spathe detection: I labeling the specific node and leaf sheath where the initial bloom is detected, and I begin my 12-month monitoring timeline from this specific date.
- Humidity & Temp Stability: I keep a digital log (simple CSV file) of the maximum and minimum daily readings for my growing area, noting any stressful events that could cause “bud blast.”
- Nutrient Shift: I labeling and record when I transition the plant from vegetative (High N) to reproductive (High P/K) fertilizing, which must align with the 12-step outline protocol.
| Fruiting Milestone | Estimated Timeline (Weeks) | Key Data Points to Track |
| Spathe Emergence | Week 0 | Date detected, initial length |
| Bloom Open/Pollination | Week 4-6 | Temperature stability during window, pollination attempt data |
| Spathe Shed/Fruit Set | Week 8-10 | Post-pollination spadix integrity, humidity levels |
| Fruit Swelling | Week 12-40 | Hydration consistency, scale coloration |
| Ripe Shed Begin | Week 48-52 | First scale lift date, final fruit length/weight |
I have been using standard white plastic garden labels and a simple garden journal for years to record these critical dates. When you are managing this over a 12-month monitoring cycle, this labeling protocol allows you to spot patterns—such as the exact humidity level that triggers “bloom blast” in your environment—enabling you to refine your setup. Maintaining this structured dataset is the final step that separates the one-time, accidental success from the consistent, expert-level production of this legendary tropical treat.
Conclusion: The Reward of Patience and Specialized Care
You have taken a common houseplant and successfully navigated the complex horticultural journey to grow Monstera deliciosafruit by strictly following a 12-month monitoring and care protocol. I hope this definitive guide has demystified the process, showing you that this rare tropical harvest is achievable when you prioritize environmental stability, precise nutrition, and advanced anchoring over simple plant maintenance.
The resulting “Mexican Breadfruit” harvest is truly special. This legendary treat offers a complex flavor—a unique, sugary-sweet medley of pineapple, banana, and strawberry—that you can safely enjoy over several days as the individual fruit segments ripen. I have found that this entire year-long experience, from the first sweet-smelling spadix to the final safe harvesting and ripening, is one of the most rewarding achievements a tropical gardener can master. You now possess the expert knowledge, the long-tail keywords, and the structured data to not only repeat this success but to establish yourself as a definitive authority on aroid reproduction.








