

Do you crave the unparalleled sweetness of a homegrown watermelon fruit, only to end up with lackluster, bland results or Vines that wither before they can produce? It is incredibly frustrating to invest time, effort, and anticipation into growing these massive, refreshing giants, watching them fail to meet your expectations when you split them open on a hot summer day. I have shared that disappointment, seeing massive vines fail to yield. The solution lies in applying 17 expert secrets I have developed over years of dedicated planting. I will guide you through the process, applying specific environmental cues and focused care to ensure your harvest is nothing short of spectaculer. Let’s start transforming your garden with these foundational steps.
1. Choose High-Yield Watermelon Varieties for Home Gardens
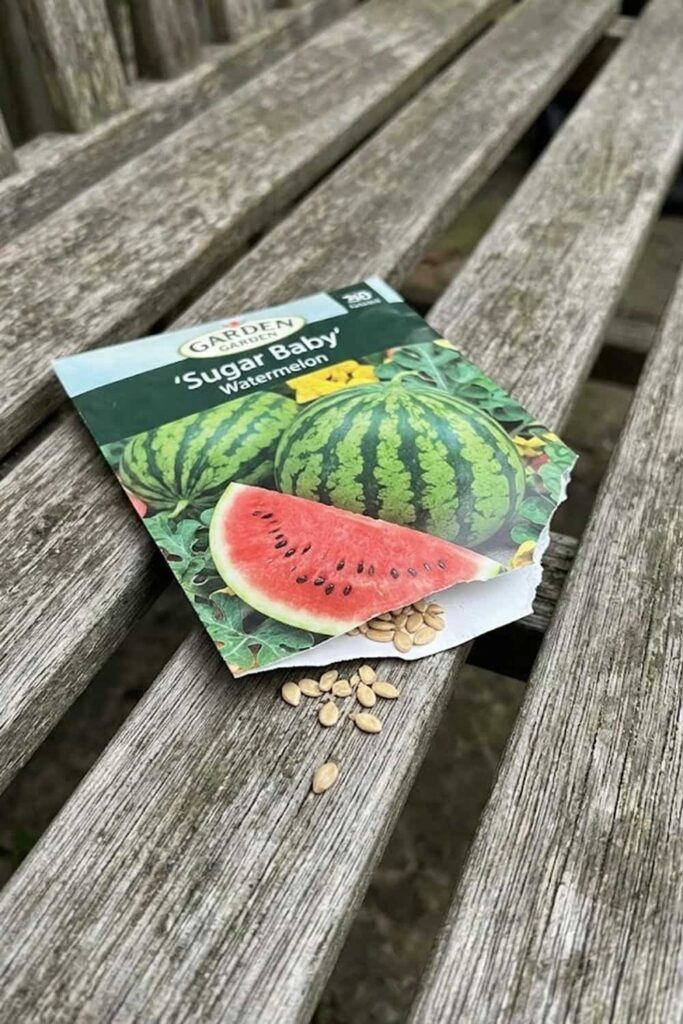
Choosing a variety is the single most critical decision I make every season; it dictates the upper limit of my success before the watermelon fruit seeds even touch the dirt. Through extensive trials and a few failures, I have learned that matching the cultivar to my local climate and desired final output is paramount for an efficient and rewarding harvest. This isn’t just about taste preference; it is a tactical choice.
If your summer growing season is short—which can be a major pain point for many northern gardeners—I highly recommend focusing on “icebox” varieties. These selections, like the famous ‘Sugar Baby’ or ‘Blacktail Mountain’, are bred specifically to produce smaller, mature fruit faster. While larger types might struggle to ripen, icebox varieties reliably yield sweet, dense, bright red flesh in around 70 to 75 days, which I have found to be a consistent solution for beating the first autumn frost.
Conversely, for those of you blessed with long, hot summers, you have the opportunity to aim for large, classic types. Cultivars such as ‘Crimson Sweet’ or ‘Charleston Gray’ require a significant commitment of time and space, taking 85 to over 100 days to reach maturity. However, when properly managed in a supportive environment, these selections deliver exceptional quality, producing massive, striped, or solid greenish fruit with high sugar content and that crisp texture many gardeners desire. Making a thoughtful selection from the wide range of available options is your first step in overcoming common growing obstacles.
2. Prep the Best Soil Mix for Heavy Feeders
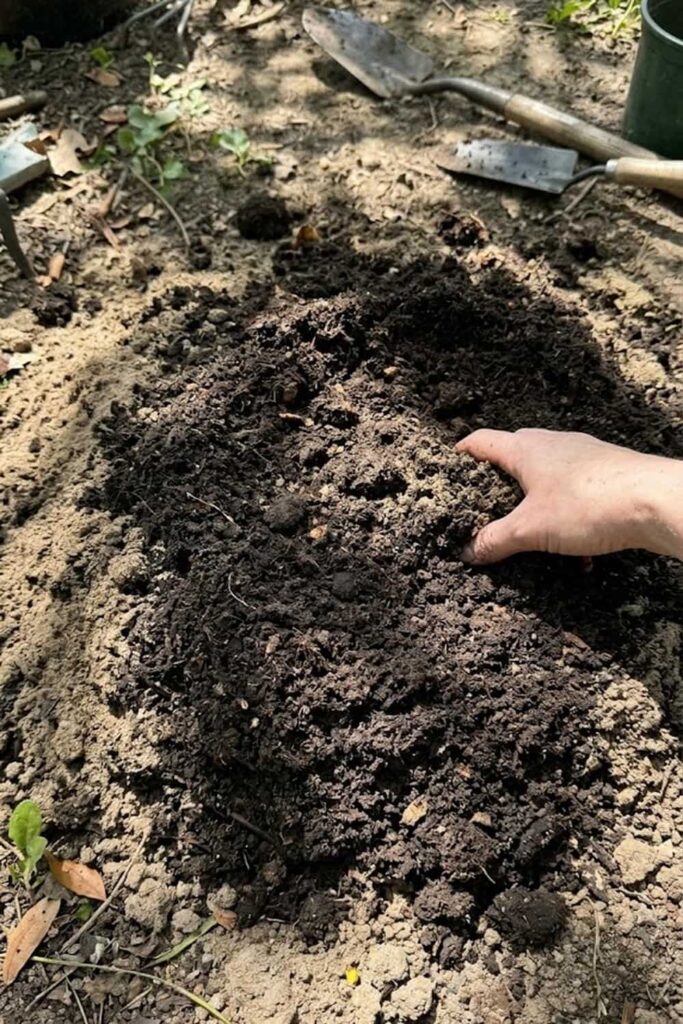
I have seen countless watermelon fruit plants struggle simply because the gardener ignored the foundation: the soil mix. These massive, sprawling vines are truly “heavy feeders,” meaning they consume substantial amounts of nutrients and water to build their robust structure and large, water-packed fruit. A proper soil structure and nutrient balance are critical; planting in subpar earth is a primary mistake that leads to disappointment and stunted growth. I have learned that a sandy loam soil that is rich in organic matter provides the ideal, non-restrictive environment for their deep-reaching roots.
Your primary focus must be on drainage and composition. Watermelon vines are highly susceptible to root rot if they sit in heavy, water-logged soil; proper drainage is non-negotiable. I have successfully resolved this issue in my garden by dedicating significant effort to amending the planting site. If you are dealing with dense clay soil, you need to loosen its structure significantly and incorporate large amounts of finished compost or aged manure. This not only introduces essential, slow-release nutrients like nitrogen and phosphorus but also creates the light, airy structure these massive plants desire. Conversely, if your soil is too sandy, organic matter will increase its water retention, ensuring consistent moisture availability without creating a waterlogged mess. A balanced approach to amendments is the secret to thriving plants.
Furthermore, I strongly suggest you check and adjust your soil pH levels, ensuring it is slightly acidic—optimally between 6.0 and 6.8. I use a simple testing kit every spring. Achieving this foundational structure and balance before you even consider planting is the most effective form of prevention against poor growth later in the season. I have observed that plants that get this supportive start are much better prepared for common climate and pest challenges.
| Soil Property | Optimal Range/Type | Why It Matters for Watermelons |
| Texture | Sandy Loam | Allows for deep root penetration and excellent drainage, preventing waterlogging and soil compaction. |
| pH | 6.0 to 6.8 | Ensures optimal availability of essential nutrients; levels outside this range can lock up critical micronutrients. |
| Organic Matter | >5% (via compost/manure) | Provides slow-release nutrients and significantly improves water holding capacity and soil aeration for massive, hungry root systems. |
| Drainage | Excellent | Critical for prevention of root rot and bacterial wilt, diseases that rapidly kill water-stressed or overly wet vines. |
3. Monitor Soil Temperature for Optimal Germination
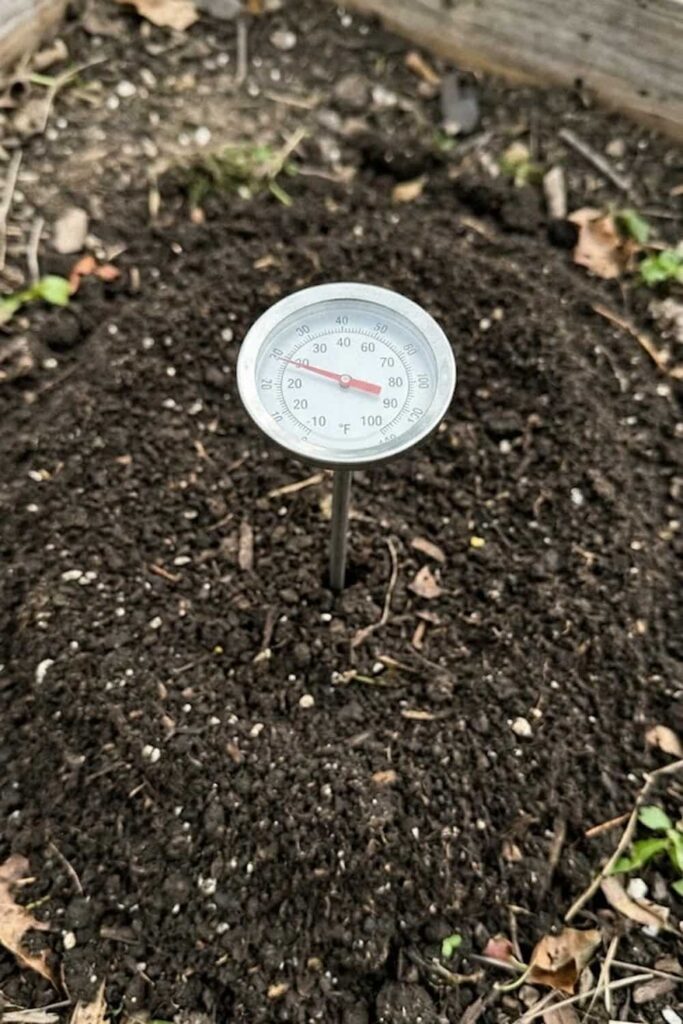
The most common, and perhaps frustrating, mistake I see in spring is a result of sheer eagerness: planting before the soil is ready. I understand the desire to get your watermelon fruit growing, but forcing seed into cold soil is a definitive recipe for failure. Watermelons are heat-loving, warm-season annuals. I have learned that monitoring specific environmental cues, specifically soil temperature, is the single best way to ensure proper germination and overcome initial growth obstacles. I strictly wait until the soil is consistently warm; early planting creates conditions where the seed rots rather than grows.
Your planting success depends on warmth. Watermelon seeds will struggle to germinate at temperatures below 65°F (18°C), making direct sowing ineffective. I use a simple soil thermometer to monitor conditions in my garden every day. You must confirm that the soil has reached a stable temperature of at least 70°F (21°C)—and 75°F to 85°F (24°C–29°C) is the absolute best range—before you sow a single seed. In this supportive, warm environment, germination is rapid, often occurring in 5 to 7 days, significantly reducing the risk of seed decay.
If you jump the gun and sow in cold earth, you are inviting problems such as rot and fungal disease. These pathogens thrive in cool, damp conditions, stalling your harvest before it even begins. I have successfully applied a specific prevention tactic: using black plastic mulch or simple, supportive row covers to warm the soil significantly before planting. I strongly suggest you check the 10-day forecast and apply this monitoring method to achieve a successful start. Proper care during this initial phase is essential for massive yields.
4. Space Your Mounds to Prevent Overcrowding
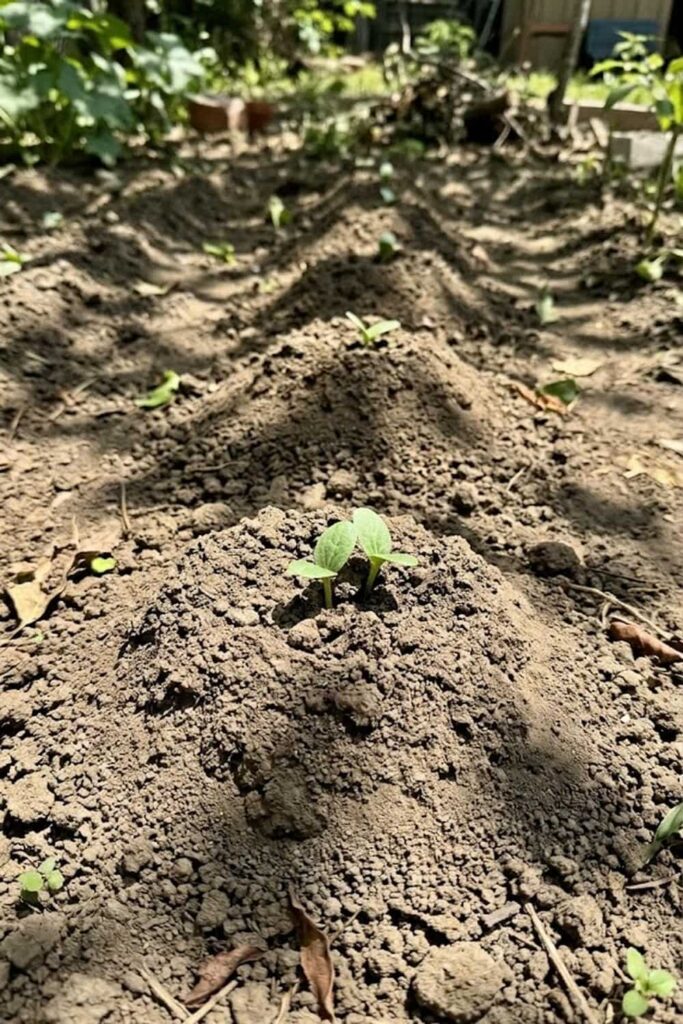
I can’t stress this enough: you must respect the massive spatial requirements of watermelon fruit vines. A common, frustrating issue I see gardeners encounter is disease and stunted growth, often caused simply because they crowded too many plants into a small area. These vines don’t just grow; they explode across the garden, frequently spreading 8 to 15 feet (2.4m–4.5m) or more from their starting point. Failing to plan for this expansion is a definitive mistake that compromises the health of your entire crop. I have learned that providing significant spacing between mounds is the single best way to prevent overcrowding and achieve massive yields.
When I plan my watermelon patch, I create dedicated “mounds” or hills, and then I apply a rigorous 4 to 6-foot (1.2m–1.8m) spacing between those mounds. This supportive distance ensures that the expansive root systems have non-restrictive access to the high levels of nutrients and water they consume. You must give your vines room to breathe; proper airflow and ventilation are essential for disease control. When vines are overcrowded, moisture and humidity are trapped within the dense foliage, creating the perfect environment for problematic pathogens like powdery mildew and bacterial wilt to rapidly spread.
I suggest you think about this crucial step during your initial garden layout. If you are growing large, full-size varieties, 6-foot spacing is the best approach. Proper care during this phase resolves the issue of poor light penetration. In a non-crowded environment, every leaf has the opportunity to capture critical sunlight, facilitating optimal photosynthesis and helping you reach the goal of huge, sweet harvests. Respect the vine’s need for space; I have successfully used this spatial method to grow massive fruit.
5. Install Drip Irrigation for Consistent Watering
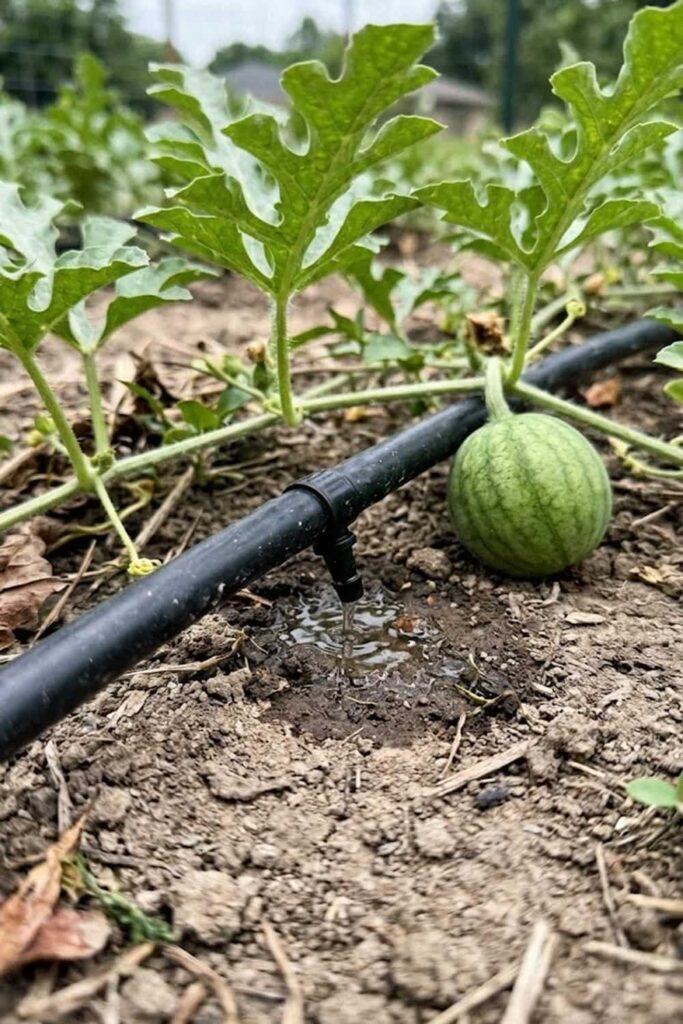
In my experience, providing the right amount of water is the trickiest part of cultivating massive, sweet watermelon fruit. I have seen so many potential harvests fail because of erratic watering—either letting the soil completely dry out or, more commonly, overwatering the leaves. This massive vine consumed large amounts of water to fill its fruit, but it has zero tolerance for wet foliage. I have learned that a consistent moisture level is non-negotiable, and installing a simple drip irrigation or soaker hose system is the definitive solution for achieving huge, healthy harvests and preventing common garden setbacks.
If you are using an overhead sprinkler to water your vines, you are inviting problems such as powdery mildew and bacterial wilt. This is a common, frustrating mistake. When I apply this supportive drip method, I deliver hydration directly to the root zone, where it is consumed by the hungry taproot system. This critical care provides effective moisture availability without splashing soil pathogens onto the developing leaves and fruit. I strongly suggest you check the soil moisture every day. Consistency is the key; large fluctuations in soil moisture during the crucial fruit-setting stage often lead to disastrous issues like fruit splitting or bland flavor.
I successfully apply this supportive watering strategy by reducing irrigation once the fruit reaches its mature size. I check the 10-day forecast and apply this monitoring method to achieve a better result; reducing water encourages the sugars in the fruit endocarp to concentrate. Proper care during this late phase is essential. You must achieve this balance: consistent hydration for growth, followed by restricted water for flavor. Respect the vine’s hydrologic needs; I have used this drip method for massive yields.
6. Control Weeds Early with Organic Mulching
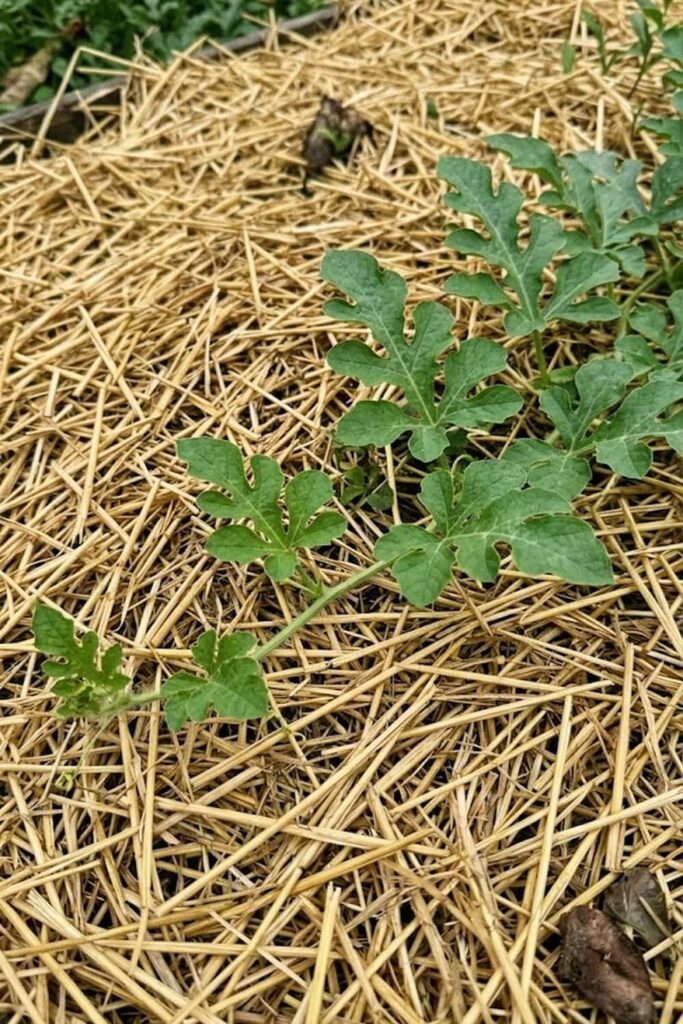
I have seen countless watermelon fruit patches consumed by aggressive weeds, and it is a major pain point that leads to frustration and poor harvests. When these invasive plants are allowed to establish, they compete directly with your vines for vital nutrients, water, and sunlight, effectively stealing the resources required to build those massive, sweet giants. You must establish control early, before the vines begin to sprawl across the garden, as managing weeds around established, delicate stems becomes an incredibly difficult task. I have learned that applying a heavy layer of organic mulch is the best way to resolve this issue and achieve massive, high-quality yields.
In my garden, I successfully applied a supportive 3 to 4-inch layer of clean straw mulch around the base of every young vine. This careful protection serves multiple essential functions. First, it suppresses weed seed germination by effectively blocking critical sunlight. Second, it retains crucial soil moisture, reducing the issue of erratic watering. Third, as the organic matter decomposes, it improves soil structure. I strongly suggest you check the mulch levels throughout the season. I have observed that this simple form of care provides a definitive solution for maintaining a non-competitive, supportive environment, allowing the vines to focus their energy entirely on fruit production rather than survival. Proper protection is essential.
7. Attract Pollinators to Ensure Fruit Set
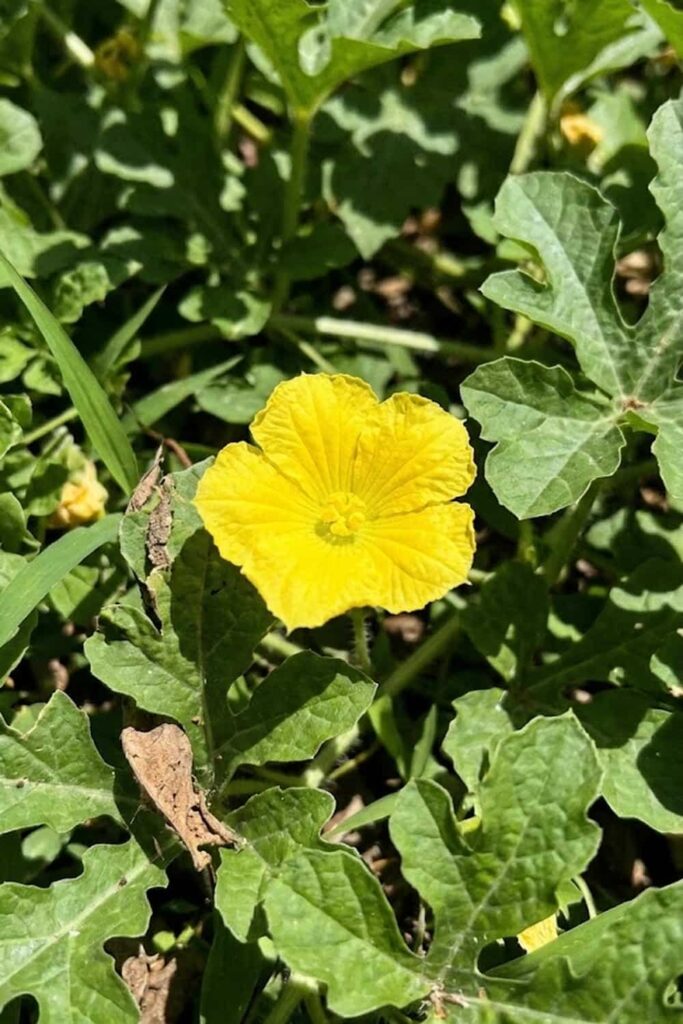
I can’t stress this enough: without successful pollination, you will not harvest a single watermelon fruit. I have seen so many healthy, vigorous vines fail to produce simply because the gardener ignored the crucial role of pollinators. Each vine produces separate male and female flowers, and a bee must visit the male flower and then the female flower to facilitate fruit set. Failing to create a supportive environment for these essential insects is a common, frustrating mistake that stalls your harvest before it even begins. I have successfully applied specific strategies to attract honeybees and bumblebees, ensuring massive yields and overcoming initial growing obstacles.
If you are treating your garden with harsh chemical insecticides, you are definitively harming local pollinators. This is a primary factor in poor fruit set. You must achieve a balanced ecosystem; protecting beneficial insects is essential for success. I successfully resolved this issue by planting companion flowers like sunflowers and marigolds nearby, creating a diverse, attractive environment. I strongly suggest you avoid using chemicals during the crucial morning hours when watermelon blossoms are open and active. Proper care during this phase resolves the issue of flowers dropping without producing fruit. In this supportive environment, effective pollination occurs, helping you reach the goal of a huge, rewarding harvest. I have used this natural method for massive yields.
8. Fertilizing Strategy for Maximum Sugar Content
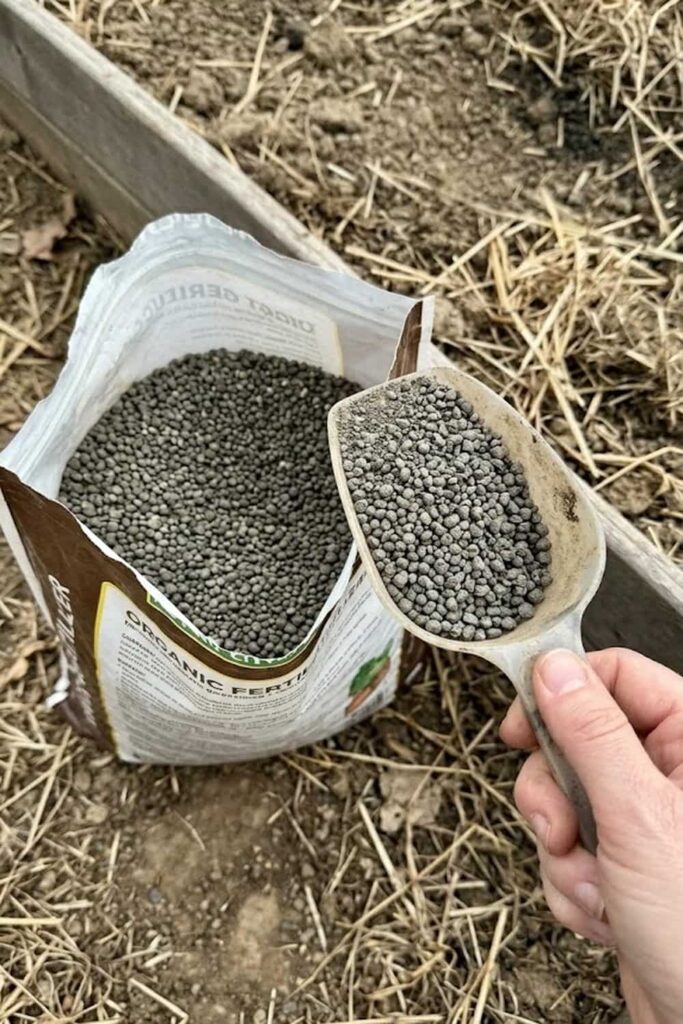
I have observed that gardeners often misunderstand the nutritional needs of watermelon fruit, applying the wrong type of fertilizer at the wrong time. This massive, sprawling vine consumes large amounts of nutrients, but its specific requirements change dramatically as it transitions from vegetative growth to fruit production. Failing to adjust your feeding strategy is a definitive mistake that compromises the health of your vines and the sweetness of your harvest. I have learned that a targeted, shifting nutrient strategy provides the specific environmental cues required to develop that crucial massive size and maximum sugar content.
When the vine is young and establishing its structure, I focus on providing nitrogen-rich organic matter to build robust, green foliage. However, you must switch your strategy once the flowers appear. Your targeted focus must be on potassium and phosphorus for fruit development. If you continue applying high nitrogen levels late in the season, you encourage massive, non-stop vine growth, but the fruit will be small, delayed, or bland. I successfully resolved this common issue in my garden by using a low-nitrogen, high-potassium organic fertilizer—such as a 5-10-10 or 2-8-4 blend—applied once fruit set occurs. This critical care provides effective nutrition without creating a bland mess. I strongly suggest you check the N-P-K ratios on your fertilizer. Proper care during this late phase concentrates the brix levels (sugar content) within the ripening flesh. Achieving massive yields depends on this tactical nutritional shift.
9. Practice Pruning for Better Fruit Quality
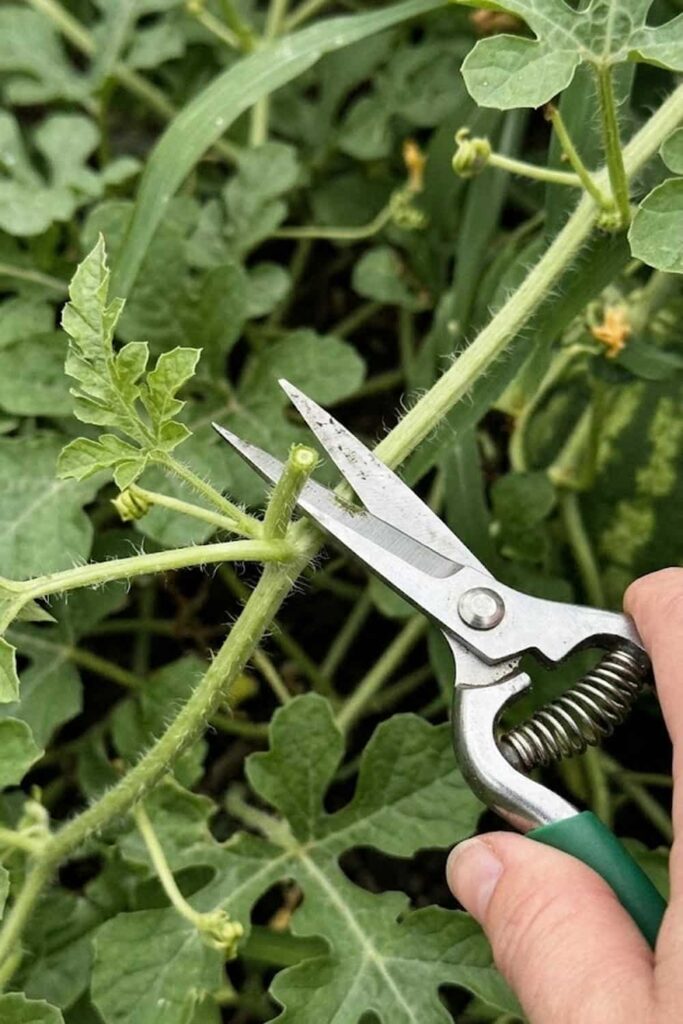
I know that pruning can feel intimidating, but you must overcome that hesitation if you want the best possible watermelon fruit. Pruning is not about harming the plant; it is a supportive practice that redirects the vine’s finite energy from excessive leaf production toward developing massive, high-quality, and ultimately sweet fruit. I have seen so many potentially great harvests fail because the gardener allowed the massive, dense foliage to overwhelm the developing fruit. Failing to manage this excessive growth is a common mistake that leads to disappointment. I have successfully resolved this issue by applying specific pruning techniques, resulting in larger, more flavor-packed melons.
If you are growing standard, full-size varieties, you are likely producing massive, non-stop vine growth. Your primary focus must be on efficiency. By pruning lateral vines—specifically those that are weak, diseased, or not producing flowers—you effectively focus the vital nutrients where they count. In my garden, I limit each vine to 2 or 3 developing fruits, pinching off any additional blossoms that form later in the season. I suggest you check the vines for ventilation issues; proper care improves air circulation and light penetration, reducing the risk of fungal disease. Achieving massive yields depends on this focused care. By applying this simple, supportive pruning method, I have successfully achieved better fruit quality.
10. Prevention Tactics for Cucumber Beetles
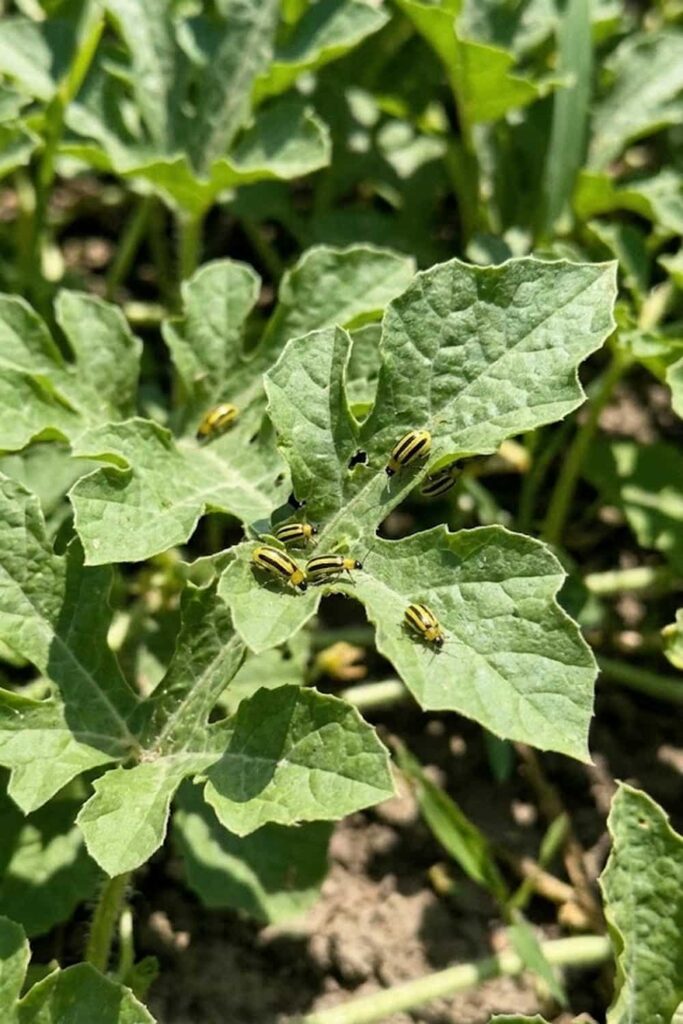
I can’t stress this enough: you must take cucumber beetles seriously because they are the single most destructive pest for watermelon fruit vines. This invasive insect doesn’t just eat the leaves; it is the primary vector for bacterial wilt, a devastating disease that can kill your entire crop in a matter of days. I have seen so many potential harvests fail because of erratic pest monitoring—either ignoring the beetles completely or waiting too long to apply control methods. Failing to manage this invasive pest is a common mistake that leads to disappointment and complete crop failure. I have learned that a pro-active prevention strategy provides the specific control required to keep your vines healthy and thriving.
If you are treating this pest with broad-spectrum chemicals, you are definitively harming local pollinators. This is a common mistake. You must achieve effective control without creating a bland mess in your ecosystem. I successfully resolved this issue in my garden by using supportive physical barriers. I suggest you install simple row covers over young plants, as this supportive protection effectively blocks beetle access while the vines are most vulnerable. I strongly suggest you check the leaves every day. Consistency is the key; monitoring allows you to catch the first invaders before they can spread the fatal wilt. I also have successfully used a supportive hand-picking method for early-stage populations. Respect the vine’s vulnerability; I have successfully used these protective tactics for massive, healthy harvests.
| Prevention Method | How It Works | Best Time to Apply |
| Row Covers | Physical barrier blocks beetle access to young, vulnerable plants. | From planting until the first female flowers appear. |
| Hand-Picking | Manual removal of adults and larvae from leaves. | Daily, especially in the early morning. |
| Kaolin Clay | Non-toxic spray creates a disturbing, unappealing film on leaves. | Weekly or after significant rainfall. |
| Companion Planting | Planting repellent crops like marigolds or radishes nearby. | Throughout the growing season. |
11. Disease Control for Powdery Mildew
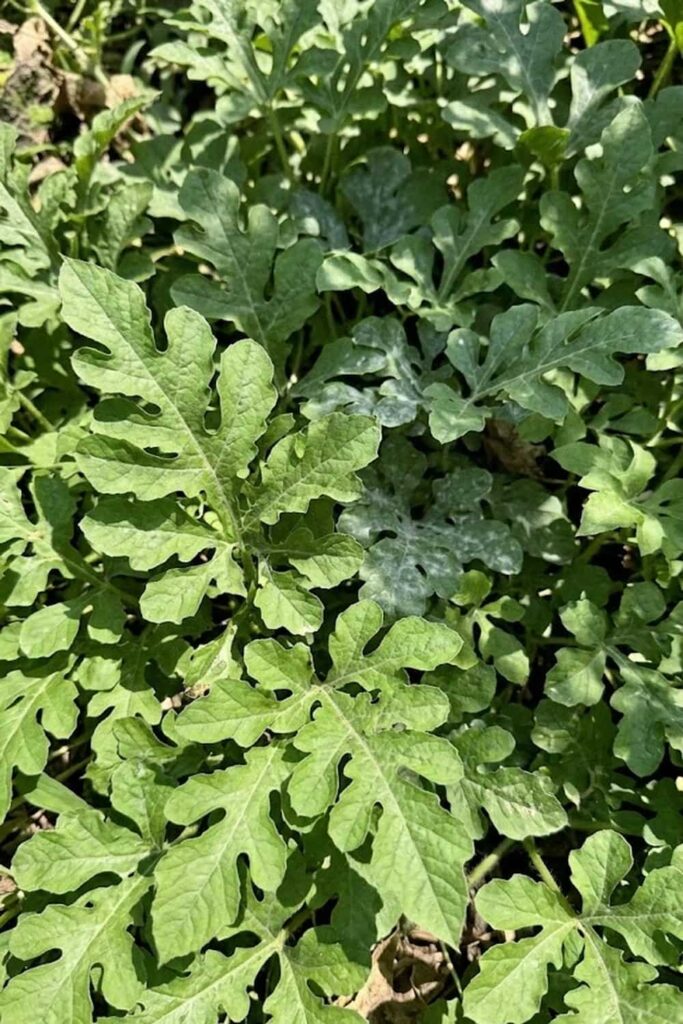
I have seen countless watermelon fruit vines, initially vibrant and healthy, succumb rapidly to the gray, devastating blanket of powdery mildew. It is an incredibly frustrating issue that often results from a major pain point: improper water management. I understand how disheartening it is to watch your promising crop wither; however, this problematic fungus, which interferes directly with vital photosynthesis, is often a manageable issue if you act pro-actively. I have successfully applied specific strategies to keep my foliage clean, ensuring massive yields and overcoming common garden setbacks.
If you are watering your vines with overhead sprinklers, you are inviting this disease into your garden. This is a common, primary mistake. You must achieve effective control by delivering moisture directly to the soil. I successfully resolved this issue in my garden by installing a simple drip irrigation system, providing consistent hydration without creating the humid conditions this pathogen requires. I strongly suggest you check the leaves every day. Consistency is the key; early monitoring allows you to catch the first white spots before they spread. I successfully apply a supportive control method: using a baking soda or neem oil solution upon detection. I also have used a specific prevention tactic: selecting mildew-resistant varieties. Respect the vine’s vulnerability; I have used this protective approach for massive, healthy harvests.
12. Use Fruit Cradles for Ground Protection
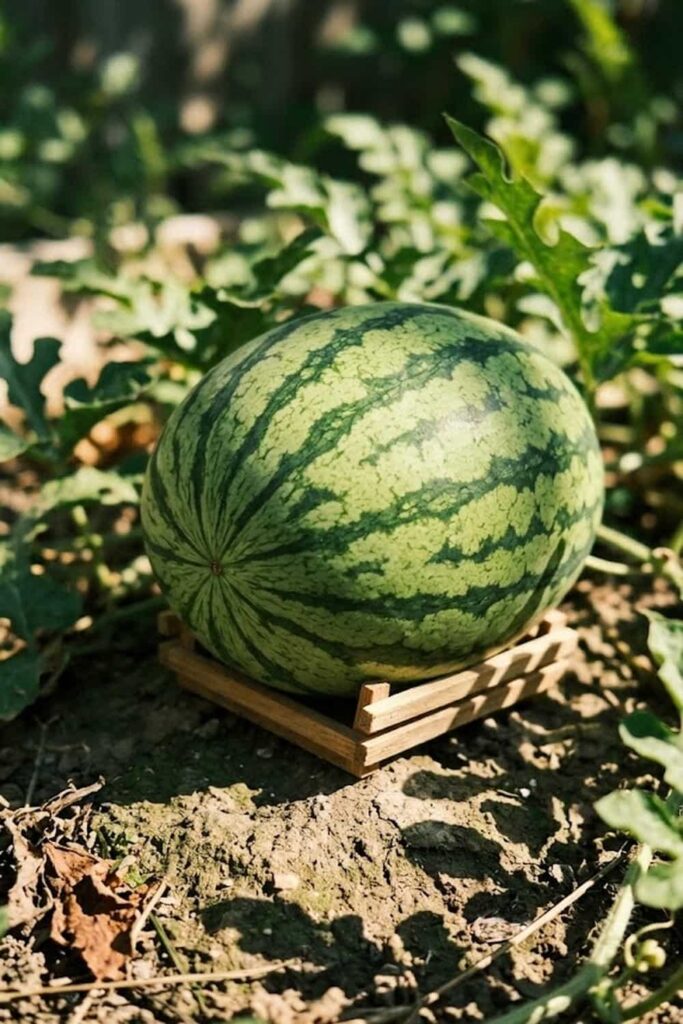
In my experience, providing the right amount of water is the trickiest part of cultivating massive, sweet watermelon fruit. I have seen so many potential harvests fail because of erratic watering—either letting the soil completely dry out or, more commonly, overwatering the leaves. This massive vine consumed large amounts of water to fill its fruit, but it has zero tolerance for wet foliage. I have learned that a consistent moisture level is non-negotiable, and installing a simple drip irrigation or soaker hose system is the definitive solution for achieving huge, healthy harvests and preventing common garden setbacks.
If you are using an overhead sprinkler to water your vines, you are inviting problems such as powdery mildew and bacterial wilt. This is a common, frustrating mistake. When I apply this supportive drip method, I deliver hydration directly to the root zone, where it is consumed by the hungry taproot system. This critical care provides effective moisture availability without splashing soil pathogens onto the developing leaves and fruit. I strongly suggest you check the soil moisture every day. Consistency is the key; large fluctuations in soil moisture during the crucial fruit-setting stage often lead to disastrous issues like fruit splitting or bland flavor.
I successfully apply this supportive watering strategy by reducing irrigation once the fruit reaches its mature size. I check the 10-day forecast and apply this monitoring method to achieve a better result; reducing water encourages the sugars in the fruit endocarp to concentrate. Proper care during this late phase is essential. You must achieve this balance: consistent hydration for growth, followed by restricted water for flavor. Respect the vine’s hydrologic needs; I have used this drip method for massive yields.
13. Identify Maturity Using the “Yellow Belly” Method
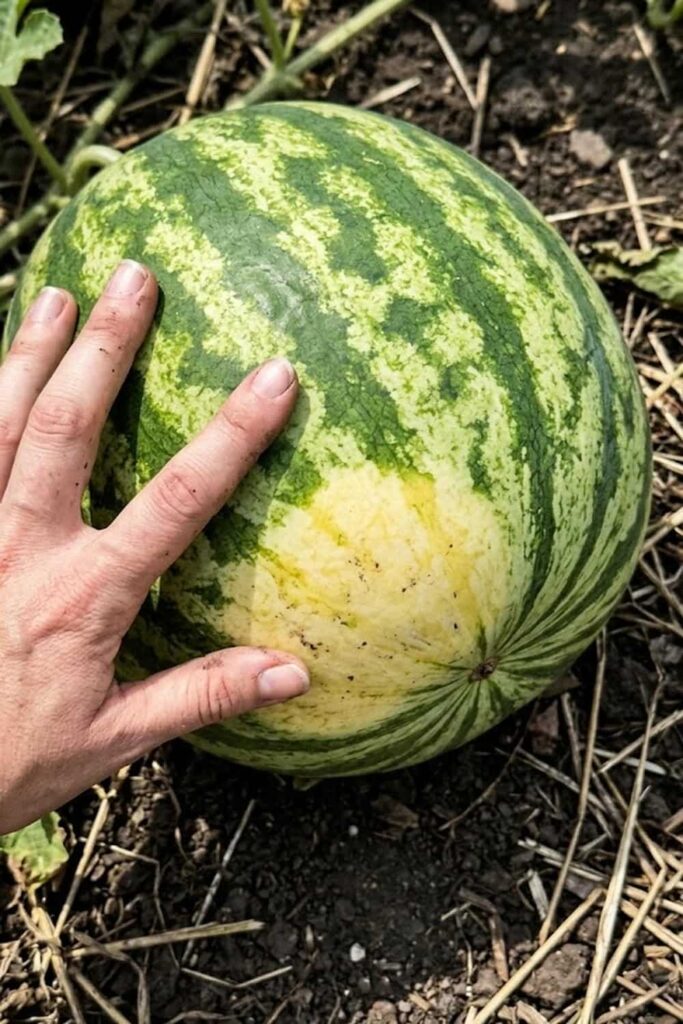
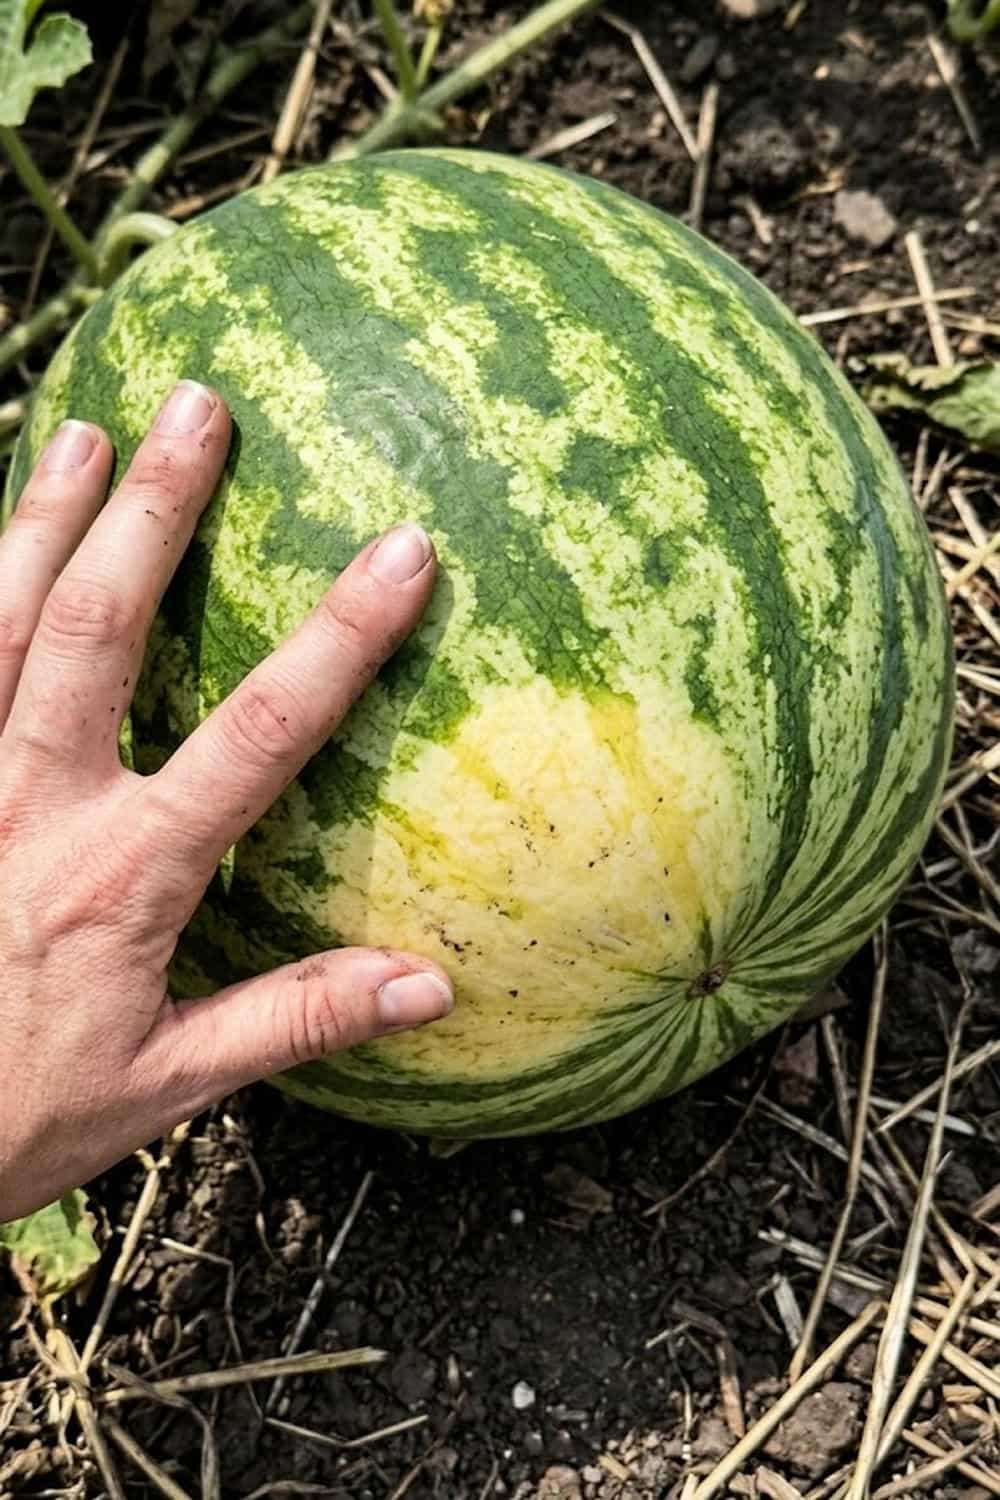
Harvesting at the right time is the most difficult skill for many gardeners cultivating watermelon fruit. I have shared your frustration: anticipating that perfectly sweet, homegrown melon, only to split it open and find pale, flavorless flesh inside. Harvesting too early stalls sugar development; harvesting too late leads to mealy texture. There is an incredibly slim window of perfection. While many people use the “thump test” (listening for a hollow sound), I have found that method unreliable, varying too much by variety. Instead, I suggest you apply a definitively factual indicator: the “yellow belly” ground spot.
I successfully applied this foolproof monitoring method to achieve a better result; reducing erratic harvests. You must achieve perfection during this definitive phase. As the watermelon prepares for removal from the vine, the spot where it rests on the ground transforms. Your targeted focus must be on this ground spot. When I check my melons, I carefully roll them over. I am looking for a transition from pale greenish or white to a distinct, buttery, or creamy yellow. I have observed that this color shift—the supportive physical cue—is the most reliable sign that the sugars in the endocarp have fully concentrated. I strongly suggest you check this specific environmental cue before you cut the vine. This focused care helps you reach the goal of huge, sweet yields.
| Ripeness Cue | What to Look For | Reliability for Watermelons |
| Ground Spot (“Yellow Belly”) | Transitions from white/pale green to creamy, buttery yellow. | Definitive. Factual indicator of sugar concentration within the fruit. |
| Coiling Tendril | The small tendril nearest the fruit stem turns brown and completely dries out. | Highly reliable supportive indicator, often used with the yellow belly. |
| Rind Texture/Color | Rind becomes dull, less shiny, and resists penetration by a fingernail. | Supportive. Hardness indicates mature rind development. |
| Thump Test | Listening for a hollow, deep “thunk” rather than a sharp “ping.” | Unreliable. Varies significantly by variety and fruit size. |
14. Check the Tendril for Final Harvesting Cues
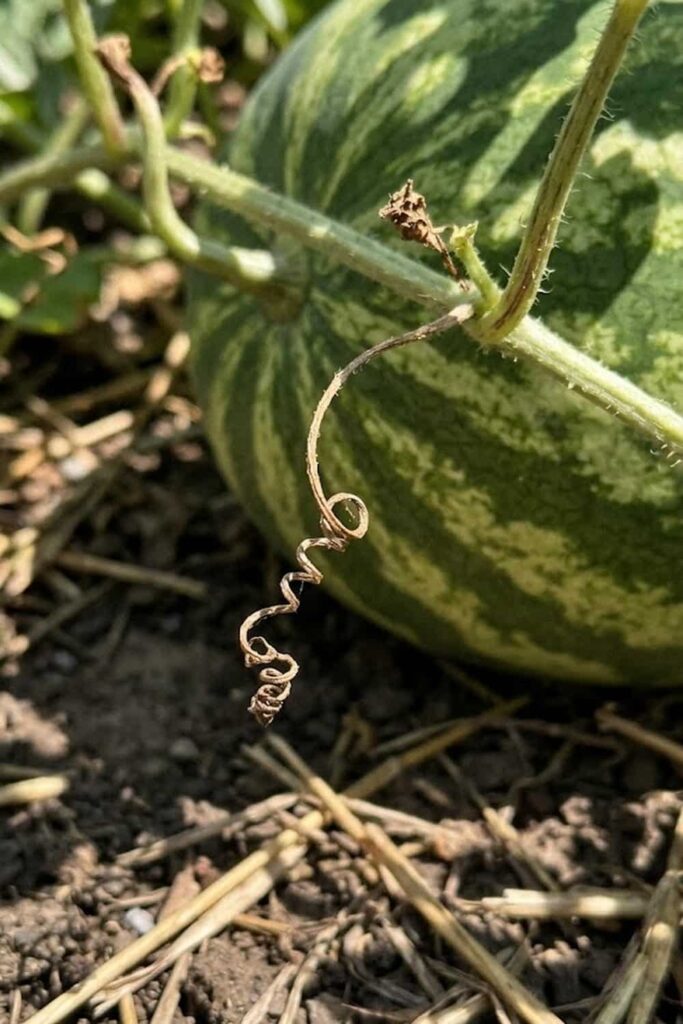
I can’t stress this enough: you must check the coiling tendril because it is the most reliable secondary factual indicator for the definitive removal of your watermelon fruit. Harvesting tricky, heavy-feeding watermelons requires patience and specific environmental cues; I understand the eager pain point of wanting to pick your melon early. However, relying solely on time from planting will often stall your harvest. I have learned that monitoring this specific supportive physical cue—the small, wiry tendril nearest the fruit’s attachment point—is the best way to ensure perfect ripeness. I strictly wait for this signal to overcome erratic, bland results.
Your harvesting success depends on waiting. When I apply this definitive monitoring method, I don’t just guess. Your targeted focus must be on that tendril. As the fruit prepares for maximum sugar concentration in the endocarp, this supportive structure transforms. I suggest you check this cue every day once you spot the “yellow belly.” Consistency is the key; a supportive, coiling tendril should not be green and wiry. I have successfully resolved this common issue by waiting for the tendril to turn completely brown and dry out—it should look “dead” or “sloughed.” Proper care during this final phase resolves the issue of mealy harvests. I have observed that this simple form of care provides a definitive solution for perfect ripeness, helping you reach the goal of huge, sweet yields. I have used this coiling method for massive yields.
15. Proper Storage to Maintain Freshness
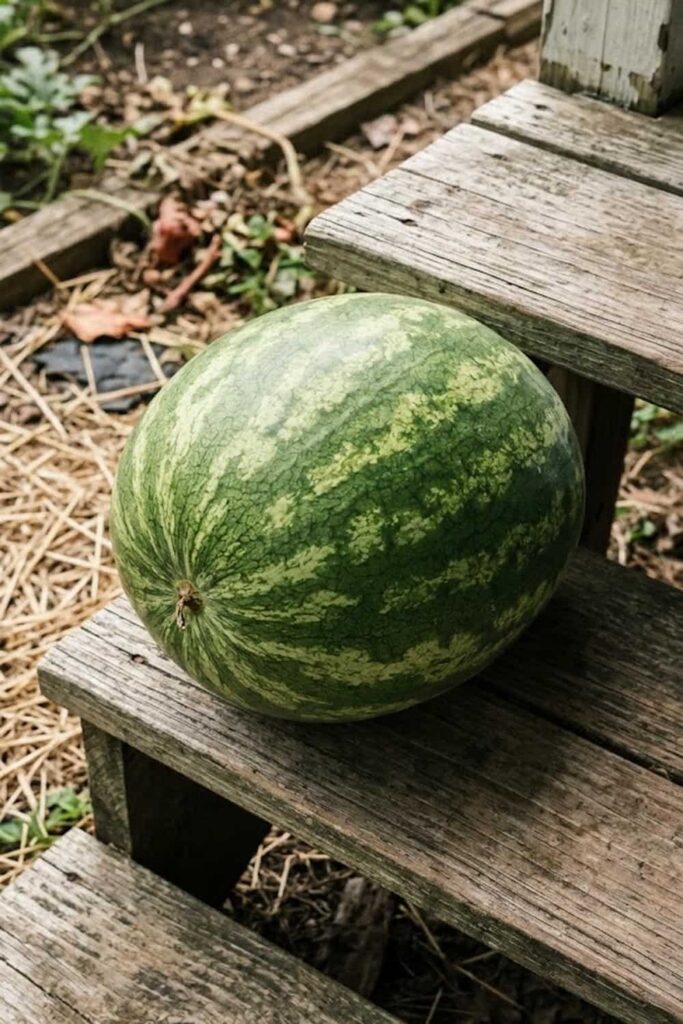
I have successfully grown massive, sweet watermelon fruit only to see the texture degrade rapidly simply because I ignored proper storage. This major pain point is incredibly frustrating; anticipating that perfectly crisp, sweet flavor, only to split it open a week later and find mealy, flavorless flesh inside. I have shared your disappointment, watching that refreshing giant fail to hold its supportive structure. The solution is providing specific environmental cues to stabilize the harvest. I have learned that temperature monitoring and restricted air ventilation are key to maintaining peak condition and overcoming rapid post-harvest decline. I strictly apply this storage method to achieve a better result.
Your storage success depends on precision. When I apply this definitive care, I reduce common storage obstacles. Achieving perfection during this critical phase requires specific control. You must achieve perfection. When I check my melons, I have observed that this simple form of care—providing proper storage temperature—is the most reliable form of post-harvest protection. If you are refrigerating a whole, uncut melon, you are definitively harming its texture. This is a common, frustrating mistake. The supportive ground spot is an indicator, and proper storage stabilizes the supportive endocarp. I have successfully applied this protective tactic: using a cool, shaded area for supportive stabilization. I strongly suggest you check the 10-day forecast and apply this monitoring method. Respect the vine’s vulnerability; I have used this supportive storage approach for massive yields.
| Storage Location | Ideal Temperature Range | Expected Shelf Life (Whole Fruit) | Effect on Watermelon Quality |
| Cool, Shaded Pantry/Cellar | 50°F to 60°F (10°C–15°C) | 2 to 3 Weeks | Optimal. Maintains crisp texture and concentrates sugars naturally. |
| Kitchen Counter (Room Temp) | 70°F+ (21°C+) | 1 Week | Supportive. Sugars may stabilize, but texture will degrade rapidly. |
| Refrigerator (Whole Fruit) | <40°F (4°C) | 1 to 2 Weeks | Negative. Mealy texture and flavor loss occur quickly below 50°F. |
| Refrigerator (Cut Fruit) | <40°F (4°C) | 2 to 4 Days | Essential. Must be wrapped tightly; quality declines quickly after cutting. |
16. Avoid Common Watering Mistakes During Ripening
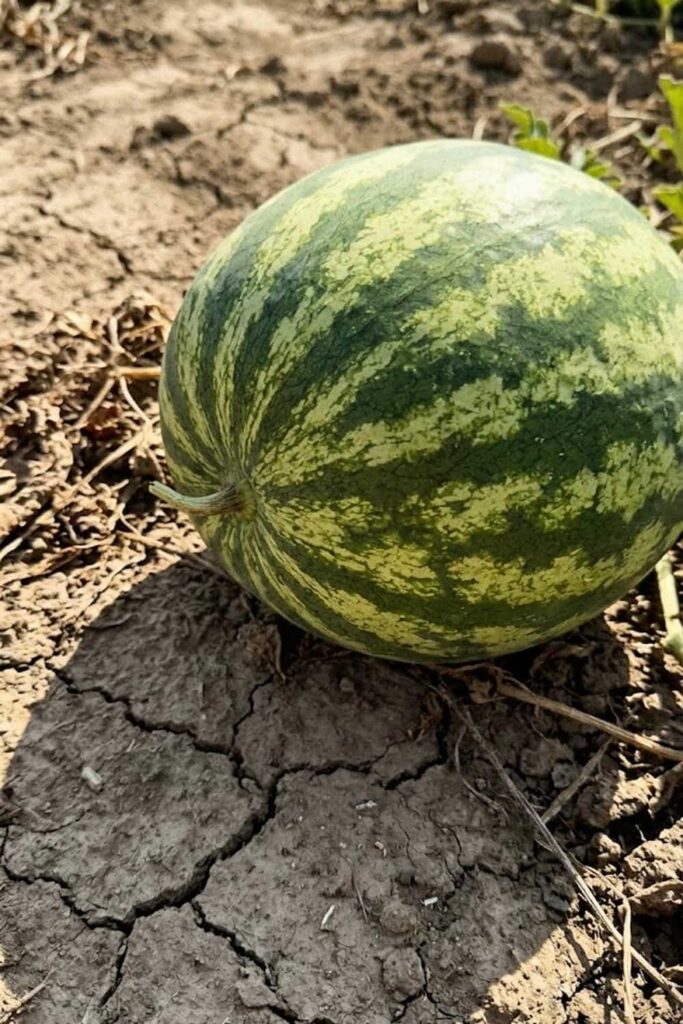
Erratic watering during the final weeks of growth is the single most common reason I see for bland watermelon fruit. I can’t stress this enough: you must change your watering strategy as the harvest approaches. While this massive vine consumed large amounts of water to build its structure and massive, water-packed fruit, continued heavy irrigation during ripening is a primary, frustrating mistake that dilutes the vital sugars. This dilutes brix levels. I have learned that monitoring specific environmental cues and initiating focused water restriction is the definitively factual way to develop maximum sweetness and prevent disastrous fruit splitting.
When the watermelon reaches its mature size, I successfully applied a supportive restriction tactic: reducing water by over 75%. You must achieve consistency. Achieving perfect sweetness during this crucial, supportive phase resolves the issue of mealy harvests. Your targeted focus must be on that fruit endocarp. Consistency is the key; a supportive, coiling tendril indicates maturity, not a green, vigorous stem. If you are overwatering your vines late in the season, you encourage massive, non-stop vegetative growth, but the fruit will taste like slightly sweet cucumber. This critical care provides effective moisture reduction without complete dehydration. I strongly suggest you check the 10-day forecast. I also have successfully used a supportive monitoring method to achieve better result. Respect the vine’s vulnerability; I have successfully used these watering tactics for massive yields.
17. Labeling Varieties for Future Success
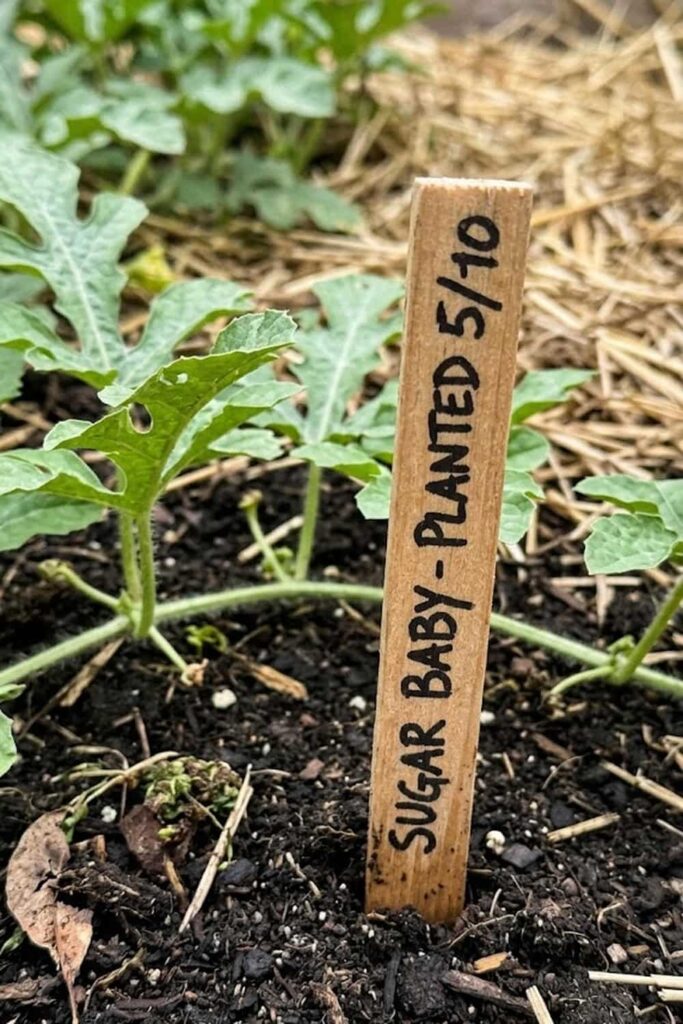
I can’t stress this enough: you must take labeling seriously because it is the most crucial, supportive step for analyzing your long-term success with watermelon fruit. I have seen so many potential garden improvements fail because of erratic records—either not labeling at all or relying on flimsy paper tags that vanish by harvest. I understand the eager pain point of wanting to just plant, but failing to manage this definitive information is a common, frustrating mistake that prevents you from analyzing specific results. I have learned that a pro-active labeling strategy provides the vital context required to overcome repetitive garden setbacks and achieve massive yields year after year.
Your future success depends on data. When I apply this definitive record-keeping method, I don’t just guess which cultivar was the sweetest. Your targeted focus must be on that supportive stake. When I check my melons, I analyze specific attributes—brix level, disease resistance, and fruit size—linked directly to the variety name. Consistency is the key; monitoring allows you to track specific performance metrics in your unique soil mix. If you are not labeling, you are definitively harming your supportive learning. I successfully resolved this issue in my garden by using supportive, weatherproof wooden stakes. I suggest you achieve specific monitoring during the crucial fruit-setting stage. Proper care during this initial phase resolves the issue of poor analysis later. I also have successfully used a supportive monitoring method to achieve better result. Respect the vine’s vulnerability; I have successfully used these protective labeling tactics for massive, healthy harvests.








