
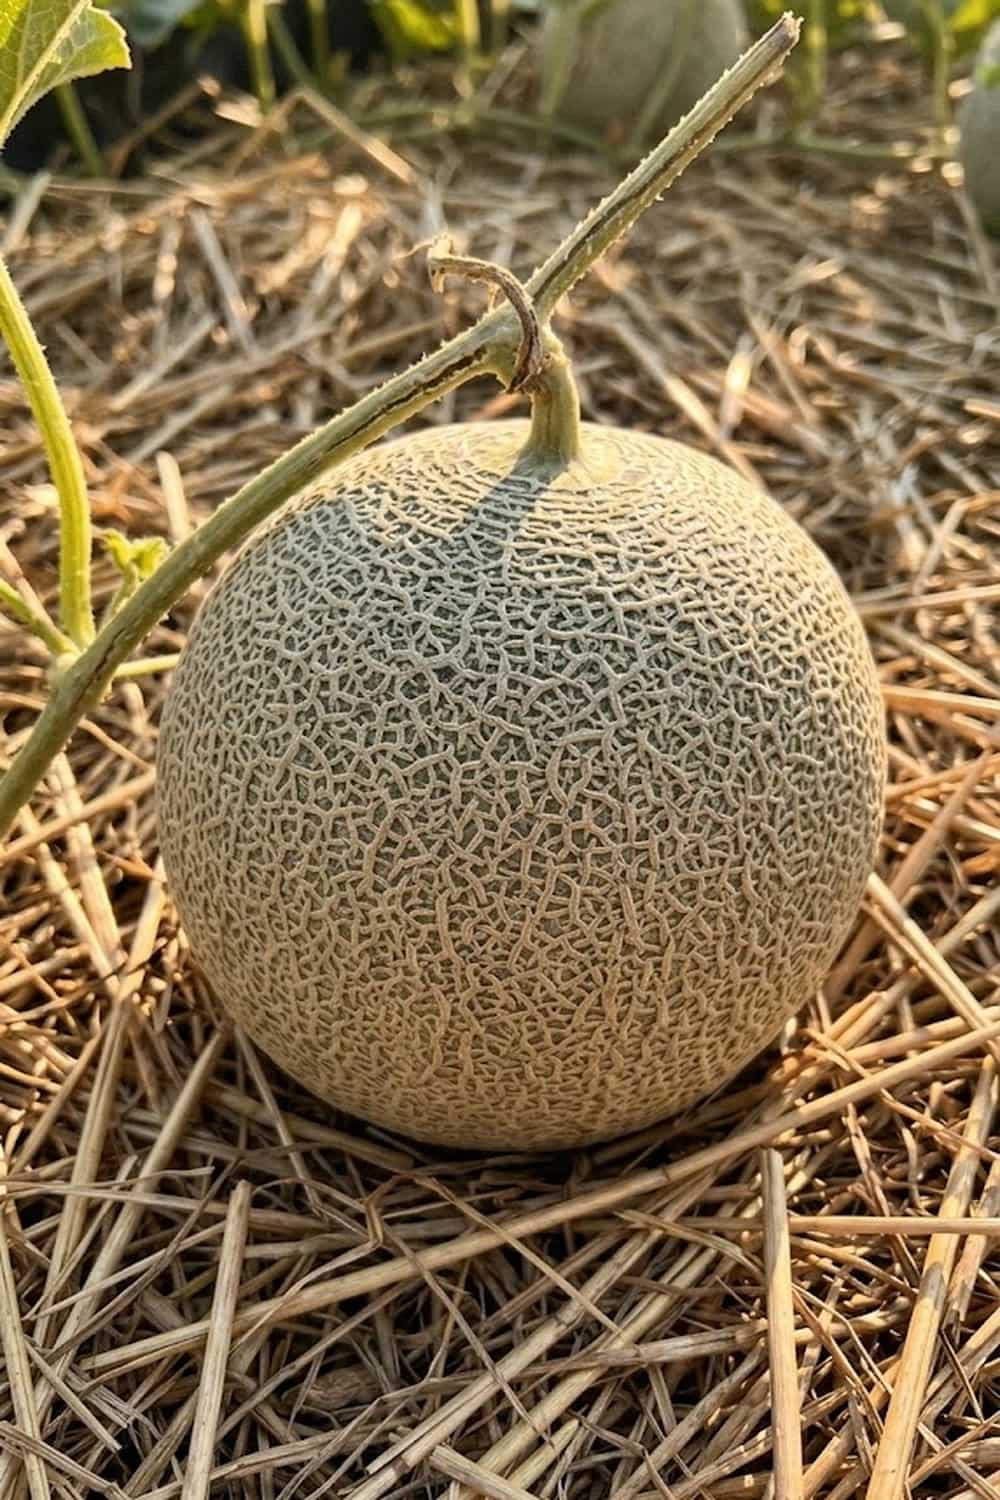

Have you ever meticulously tended your garden, pouring your limited free time after a long work week into your plants, only to harvest a muskmelon that tasted like bland water? It’s incredibly frustrating when that highly anticipated, refreshing summer treat turns out to be a complete disappointment, especially after months of effort. You deserve better than grocery store quality from your own backyard. Fortunately, the difference between a flavorless melon and a sugary, aromatic masterpiece often comes down to a few specific, manageable techniques that I have perfected in my own patch. By mastering soil warmth, precise irrigation, and the critical indicators for harvest, you can consistently produce melons that define the taste of summer.
1. Choose High-Sugar Cultivars for Your Climate
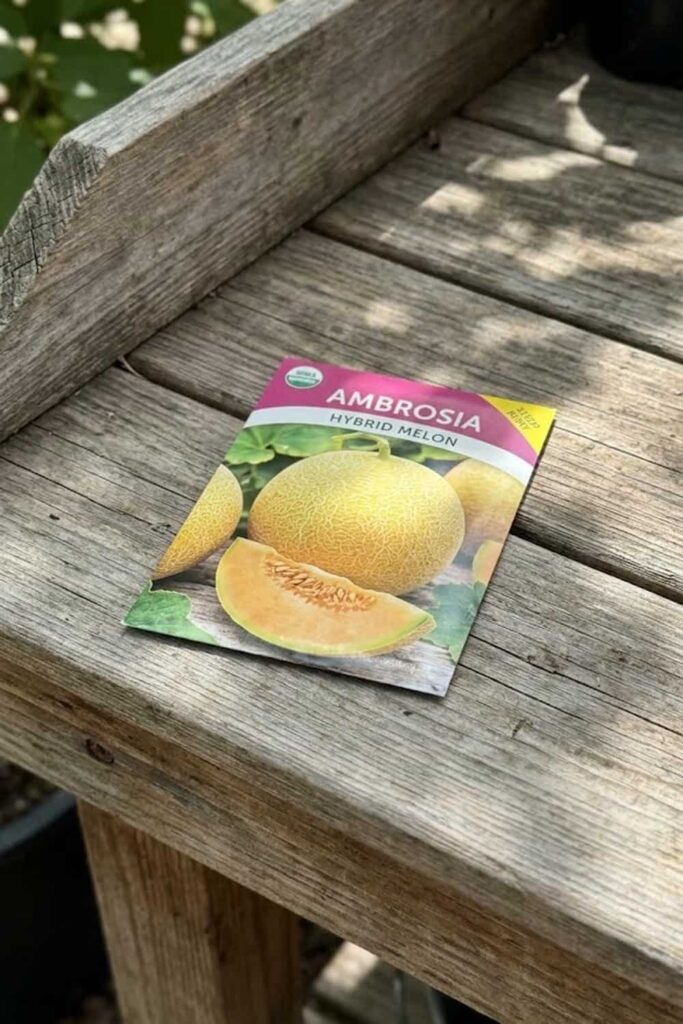
Plant specific muskmelon varieties like ‘Hale’s Best’ or ‘Ambrosia’ to ensure a high sugar content and disease resistance. In my experience, selecting the right genetics is the absolute foundation of successful melon cultivation, as some varieties are naturally sweeter and more vigorous than others.
When I first decided to try my hand at raising these fruits, I made the mistake of grabbing a generic seed packet without researching. I grew massive, healthy vines, but the resulting fruit was crunchier and less flavorful than a cucumber. That’s when I learned about “Brix,” which is the measure of sugar content in fruit. I now actively seek out specific cultivars known for their high Brix ratings, usually 12% or higher. For example, ‘Hale’s Best’ is a personal favorite because it’s a reliable, sugary heirloom that withstands slight drought. If you have a shorter growing season, you might try ‘Minnesota Midget,’ which yields smaller but exceptionally sweet fruits quickly. Selecting seeds based on specific performance data—rather than just the picture on the packet—is a necessary pivot for success.
2. Prepare a Nutrient-Rich Organic Soil Mix
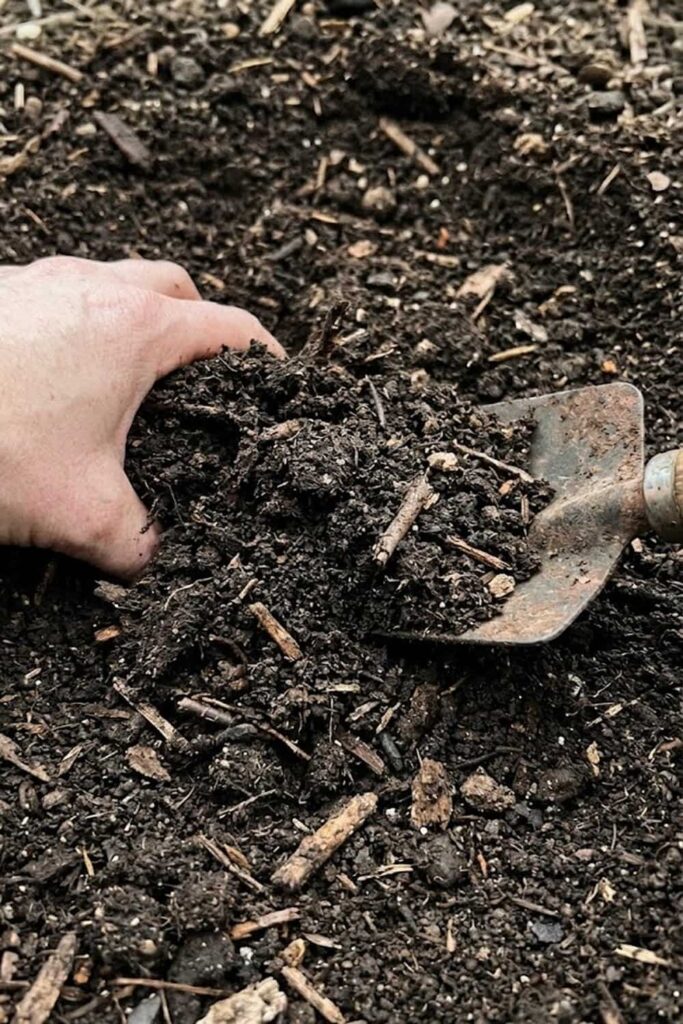
Grow healthier vines by mixing aged compost and well-rotted manure into a sandy loam base before planting. I believe that preparing the perfect “home” for your seeds is where you earn your summer harvest.
Melons require substantial energy to build their long, leafy vines and the high-sugar fruit you crave, meaning they must have access to a complex soil food web. I always amend my garden beds intensely at least two weeks before I intend to plant. If my primary dirt is heavy with clay, I must break it up by adding significant amounts of coarse sand and well-rotted compost to improve drainage and aeration; roots require oxygen as much as they need water. I aim to create hills or mounds of this customized soil, which provides dual benefits: it improves drainage by allowing water to run off the slopes, and it maximizes sun exposure, heating the soil faster than flat ground. Data indicates that soil rich in humus retains consistent moisture without becoming waterlogged, which is a key factor in keeping melon vines stress-free and productive.
3. Maintain Precise Soil pH for Nutrient Uptake
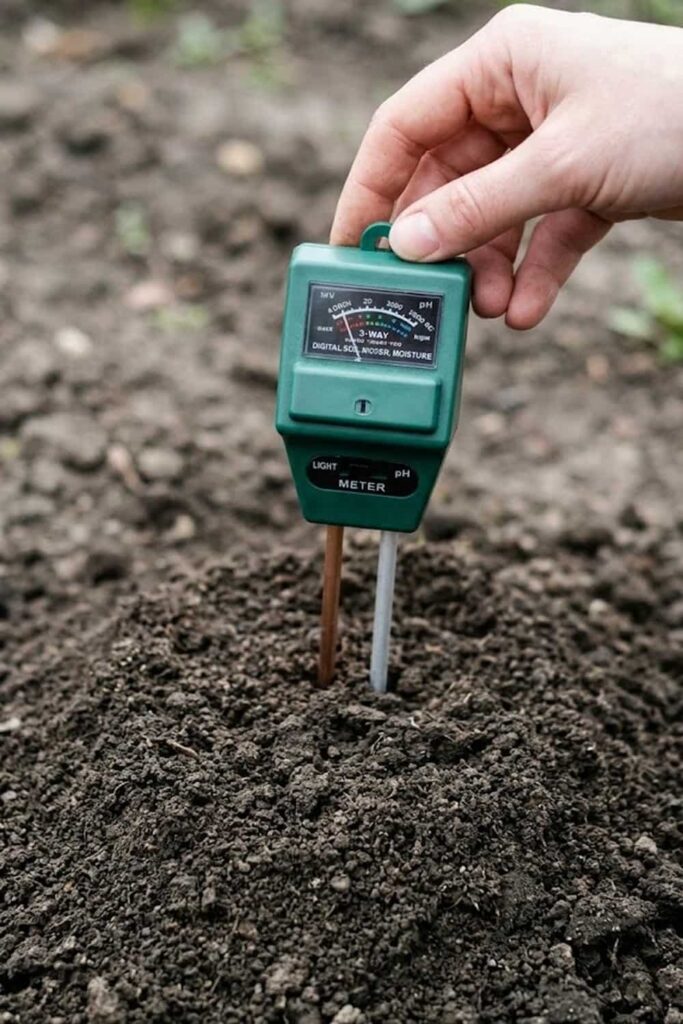
Protection of your plant’s health starts with a soil pH between 6.0 and 6.8 to ensure essential minerals are available to the roots. Monitoring your pH is like unlocking the nutrient door for your vines.
Many enthusiastic gardeners focus entirely on nitrogen and water but ignore this foundational chemistry, only to wonder why their vines look pale and stunted. If your dirt is too alkaline (above pH 7.0), I must use elemental sulfur to lower the value, otherwise, the roots cannot effectively absorb iron or phosphorus, regardless of how much fertilizer you apply. Conversely, if my pH is too acidic (below 6.0), I must add agricultural lime to raise the number. I have seen healthy-looking melons split overnight simply because the incorrect pH made the fruit’s rind too weak to handle a sudden intake of water or sugar. A simple test kit or probe is an essential tool for how to grow muskmelon fruit that can actually utilize the nutrients you provide. I am reflecting on a specific season where adjusting my acidic soil with lime instantly solved a chronic issue I had with fruit rot.
4. Raise Soil Temperature with Black Plastic Mulching
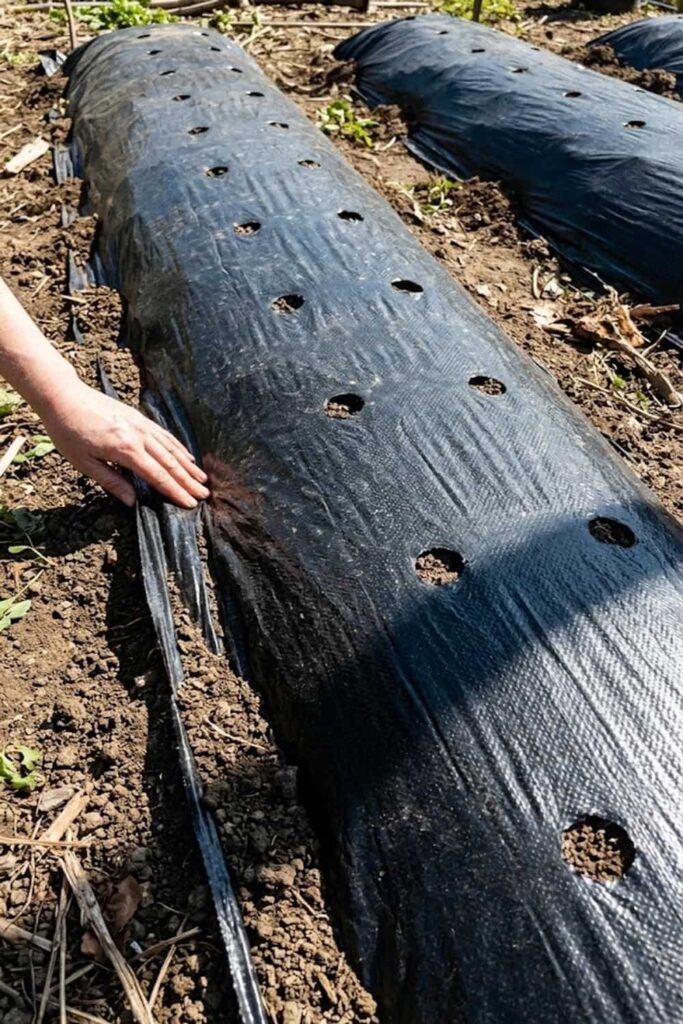
Control ground temperature by laying black plastic mulch over your rows two weeks before you plant your seeds. This heat-trapping barrier mimics a professional farm environment, accelerating vine establishment significantly.
Muskmelons originate from hot, arid regions, meaning their roots despise cold, wet earth. Even if the air is warm in spring, the ground often remains too chilled for melon seeds to germinate, causing them to simply rot. To counter this, I rely heavily on black plastic or IRT (Infrared Transmitting) mulch. I MUST stretch the plastic tightly over the prepared soil mounds or rows and secure the edges firmly with dirt or staples. Data confirms that black plastic mulch can raise soil temperature by up to 5°F at a depth of 3 inches. By doing this two weeks before my planting date, I create a localized “hot zone.” When I am ready to plant, I simply cut small “X” marks in the plastic to insert my seeds or transplants. This method has a helpful secondary benefit: it suppresses weed growth and drastically reduces water evaporation from the soil. I reflection on how using this single technique allowed me to successfully grow melons even during a particularly cool, wet northern summer.
5. Plant Seeds at the Optimal One-Inch Depth
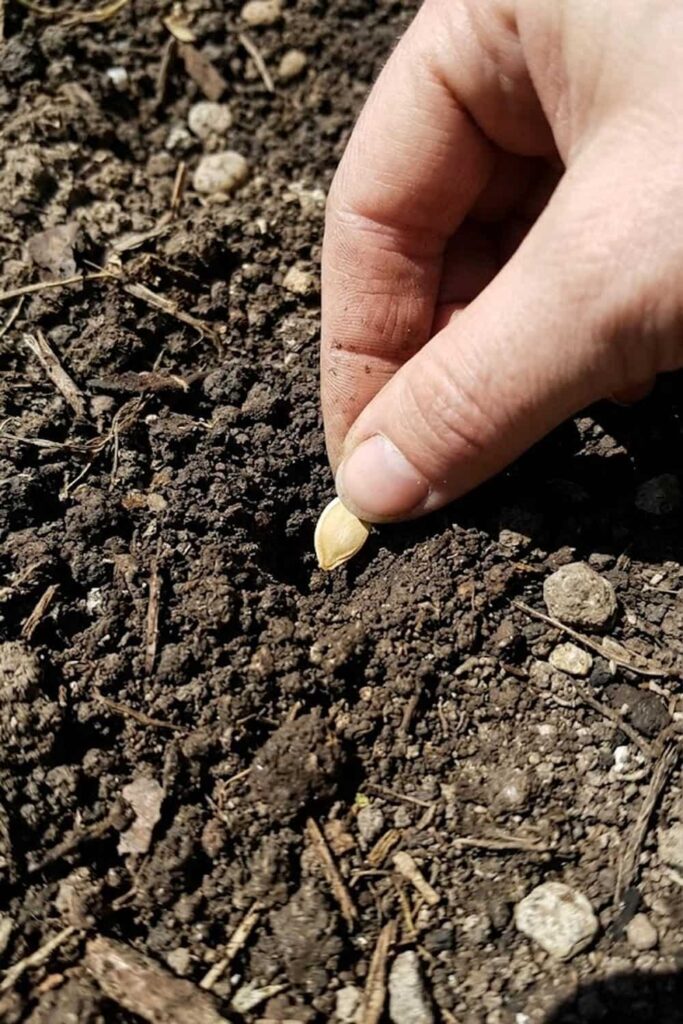
Sowing muskmelon seeds exactly 1 inch deep provides the necessary darkness and moisture contact for a high germination rate. Sowing too shallow leaves seeds vulnerable to drying out, while planting too deep can cause them to exhaust their energy before reaching the surface.
Once your soil mounds are properly heated and amended, the physical act of sowing the seeds requires precision. When direct-seeding, I must place 3 to 5 seeds in the center of each hill, pressing them down to the recommended depth before backfilling with loose earth. A common pitfall I observe is gardeners firming the soil too aggressively over the seeds; the earth must be snug enough to ensure seed-to-soil contact but loose enough for the delicate hypocotyl (seedling stem) to push through. Once the seedlings emerge and develop their first set of true leaves, I thin them, leaving only the two strongest plants per mound. This provides ample space for the root systems. I find that when I sow directly, the plants often out-perform and out-produce those started in pots, simply because the fragile taproot is never disturbed.
Soil Temperature and Germination Data
| Soil Temperature | Days to Germination | Seed Survival Rate |
| 60°F | 14-21 days | 65% (High Rot Risk) |
| 70°F | 7-10 days | 85% |
| 80°F | 4-6 days | 95% (Ideal) |
| 90°F | 3-5 days | 90% |
I have found that paying close attention to these early environmental factors makes the entire process of cultivating these melons far more predictable and successful. By taking these methodical steps, you are establishing the foundation for vigorous vines that have the resilience to support a heavy, high-quality fruit set later in the season. We will now move on to the next critical phases of vine management, irrigation, and nutrition.
6. Ensure Proper Seedling Ventilation and Airflow
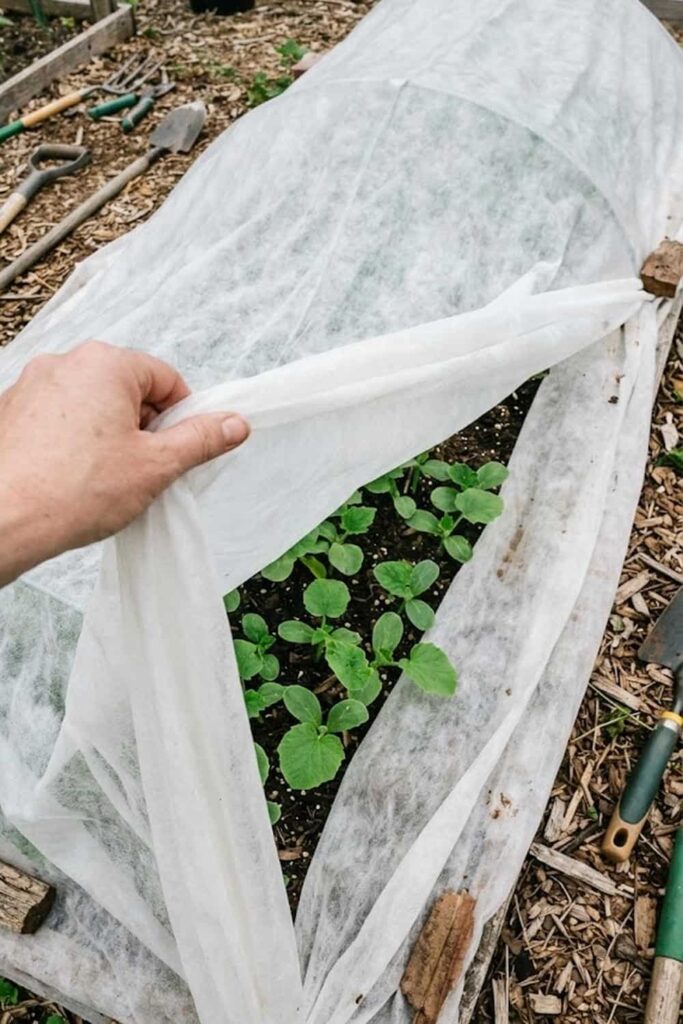
Monitoring ventilation around your young plants prevents damping-off and other fungal issues during humid spring mornings. If you are using floating row covers to protect against late frosts, you MUST lift them during the daytime once temperatures exceed 80°F.
While the black plastic we discussed earlier heats the soil, the air around the tender seedlings also needs careful management. Young muskmelon plants are extremely susceptible to fungal pathogens like Pythium, which causes damping-off—a heartbreaking condition where a seemingly healthy seedling collapses at the soil line overnight. I find that providing proper spacing between hills (at least 3 to 4 feet) is the first line of defense, allowing wind to move through the leaves. If you are starting seeds indoors, a small oscillating fan providing gentle, constant airflow is a necessary investment. When I transition my plants outdoors, I monitor ventilation constantly. If I notice persistent morning dew that doesn’t evaporate quickly, I know I must increase airflow. This active protection ensures that your how to grow muskmelon fruit efforts aren’t derailed by preventable fungal infections in the first critical month. I am reflective on a season where I thinned my seedlings too late, and the resulting crowded conditions caused a significant loss to mildew.
7. Use Drip Irrigation for Consistent Watering
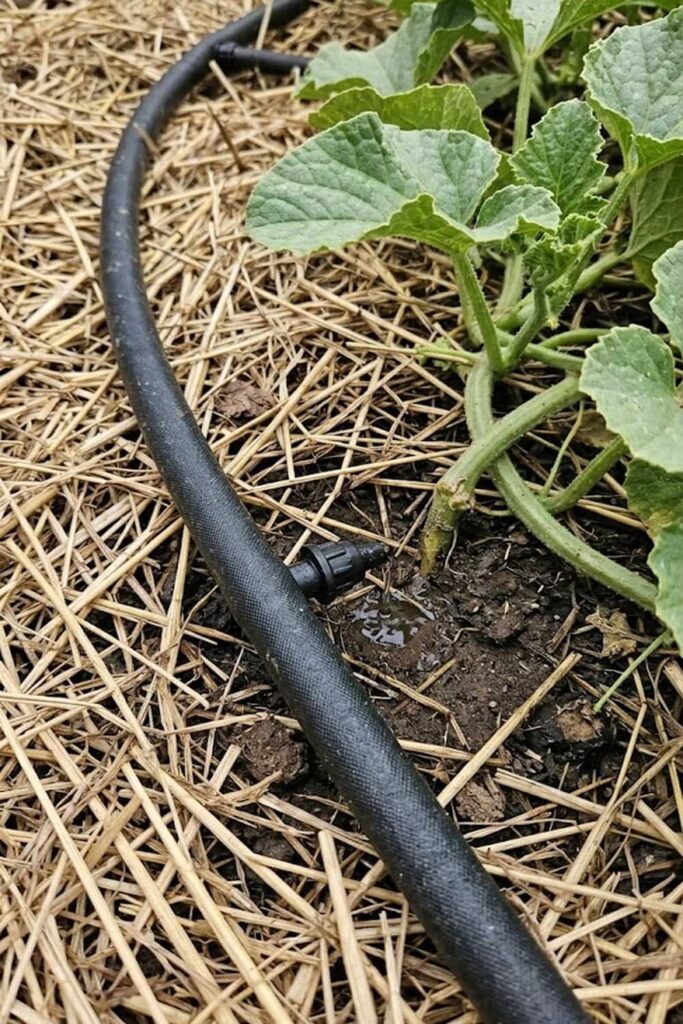
Watering at the base of the plant with a drip system keeps the foliage dry and prevents the spread of water-borne diseases. Aim for 1-2 inches of consistent moisture per week to keep the soil evenly moist but never saturated.
I have observed that more melon crops are ruined by improper watering than by any other factor. Inconsistent hydration is a major source of stress for the vine; it can cause the leaves to wilt, preventing photosynthesis, and more importantly, it causes the maturing fruit to split as the rind cannot handle sudden surges in water pressure. While you are balancing your full-time job and family commitments, I believe that installing a simple drip irrigation system or a soaker hose is the most helpful investment you can make for your garden. This method delivers water directly to the roots, which minimizes evaporation and keeps the leaves completely dry. Data suggests that standard overhead sprinklers can increase the risk of powdery mildew by 60% because they create the humid, wet leaf environment that fungi crave. You must provide deep, thorough hydration in the morning hours. By avoiding watering in the evening, you allow any accidental splashes on the leaves to dry completely before nightfall.
8. Switch to High-Potassium Fertilizing During Bloom
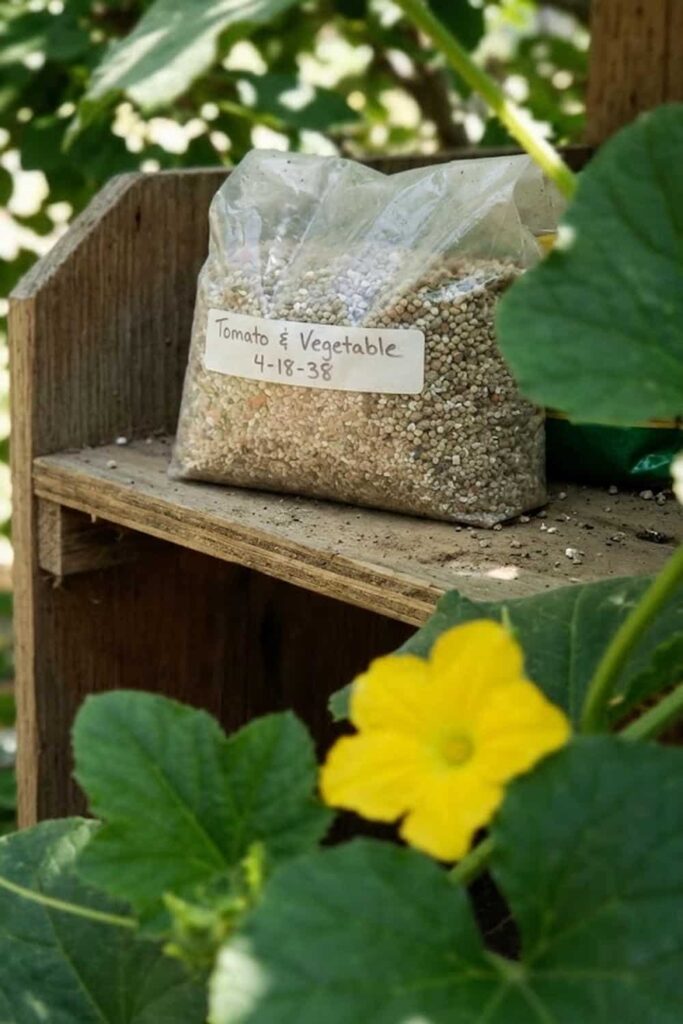
Care for your developing fruit by switching to a potassium-rich fertilizer once yellow flowers appear on the vines. This strategic shift in nutrients supports fruit development and sugar production rather than excessive leaf growth.
As I have refined my own gardening techniques, I have learned that the nutritional needs of the muskmelon vine change dramatically throughout the season. When the plant is young and building its “infrastructure”—the long vines and expansive root system—it requires high amounts of nitrogen to create green, leafy growth. However, if you continue applying heavy nitrogen once the yellow blossoms appear, you will grow a magnificent, lush green vine, but very few melons. I now actively switch my feeding strategy the moment I spot those first few male flowers. I shift to a fertilizer that has a lower first number (Nitrogen) and much higher second and third numbers (Phosphorus and Potassium). For example, I might use a 5-10-15 or a similar formula. Data indicates that Potassium is particularly critical for synthesizing and transporting the high natural sugars that define how to grow muskmelon fruit that tastes like a refreshing summer dessert. I reflective process, looking back on how I once thought “more fertilizer is always better,” which resulted in giant, unproductive plants.
9. Boost Pollination Success with Bee-Friendly Plants
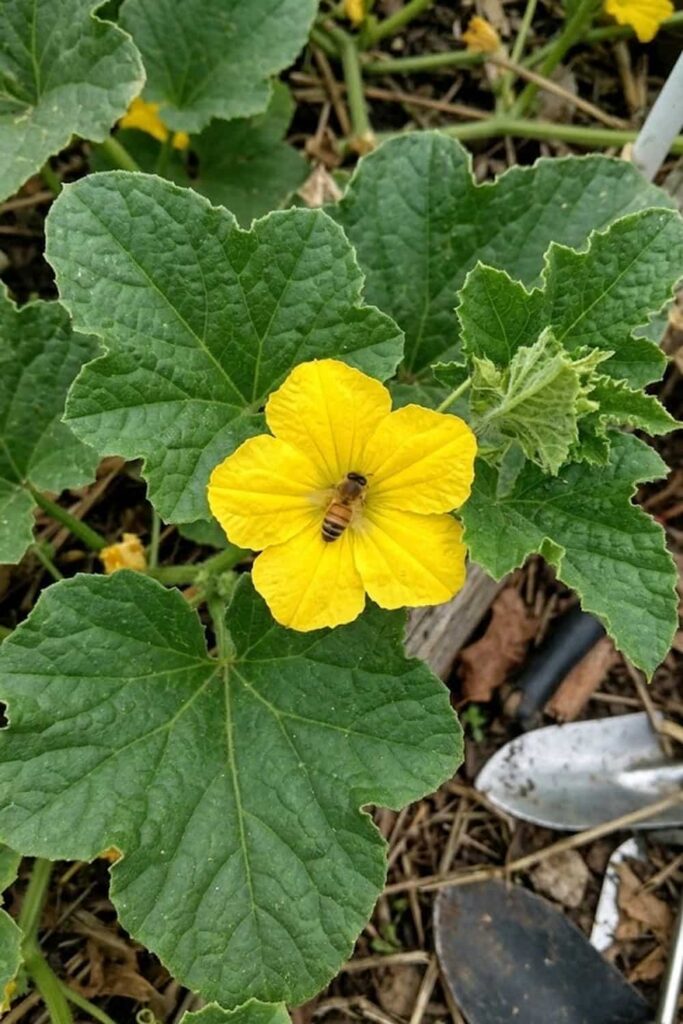
Improve fruit set by planting borage or marigolds nearby to attract bees for natural pollination. Without active pollinators transferring pollen between male and female flowers, the tiny fruit at the base of the female blossom will fail to develop and will simply shrivel and drop.
This is often the final puzzle piece that home gardeners miss. You can have the most amended soil, perfect pH, and a sophisticated irrigation system, but without pollinators, you will not have any fruit. Muskmelons produce separate male and female flowers on the same vine, and the heavy, sticky pollen must be physically moved from the male’s anther to the female’s stigma by insects, primarily honeybees. In my own garden, I actively invite pollinators to ensure my harvest. I never use broad-spectrum insecticides, which would kill these helpful insects. Instead, I practice companion planting, surrounding my melon patch with borage, marigolds, and zinnias, which bloom concurrently and serve as a “landing beacon” for the bees. I am reflective on a season with particularly low bee activity where I had to learn how to hand-pollinate using a small artist’s brush to personally transfer the pollen, saving my crop. This manual intervention is a helpful backup strategy if your natural ecosystem needs support.
10. Active Pest Control for Cucumber Beetles
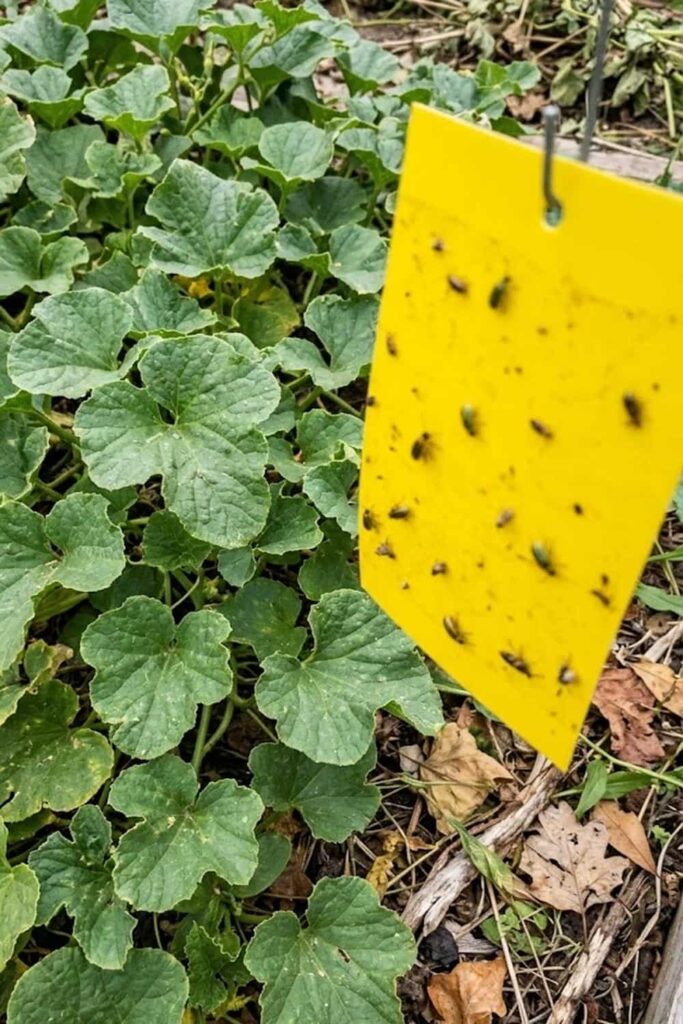
Prevention of vine wilt requires constant monitoring for striped cucumber beetles, which can transmit deadly bacterial diseases. I must actively monitor my vines early every morning, as these fast-moving insects can quickly overwhelm a young plant and decimate how to grow muskmelon fruit efforts before the fruit even sets.
I believe that active pest management is where you prove your dedication to your garden. The striped cucumber beetle isn’t just an annoyance; it is the vector for bacterial wilt (Erwinia tracheiphila), a disease that has no cure. Once the beetle feeds on your infected vine, it spreads the bacteria, which clogs the plant’s vascular system. I have watched in horror as my most promising melon plant—loaded with near-ripe fruit—wilted and died within 48 hours. This is why I am ruthless about prevention. While balancing my career, I use a multi-pronged approach: I start by covering my young seedlings with floating row covers (as discussed in Ventilation) to physically exclude the beetles until the plants begin to flower. At that point, you must remove the covers for pollination, and I pivot to using yellow sticky traps as an early warning system. Data suggests that managing beetle populations in the first 6 weeks is the single most critical factor in avoiding total bacterial wilt failure. If I am forced to intervene further, I reflective use of organic sprays containing neem oil or pyrethrins, but only as a helpful last resort and applied only in the late evening when bees are not active.
We have now established the structure for healthy, well-ventilated, and productive vines. These stages—irrigation, nutrition, and pollination—are the critical middle phases where your consistent effort pays off. I am ready to move on to the final crucial steps: disease prevention and, most importantly, the masterful harvest.
11. Disease Control for Powdery Mildew Prevention
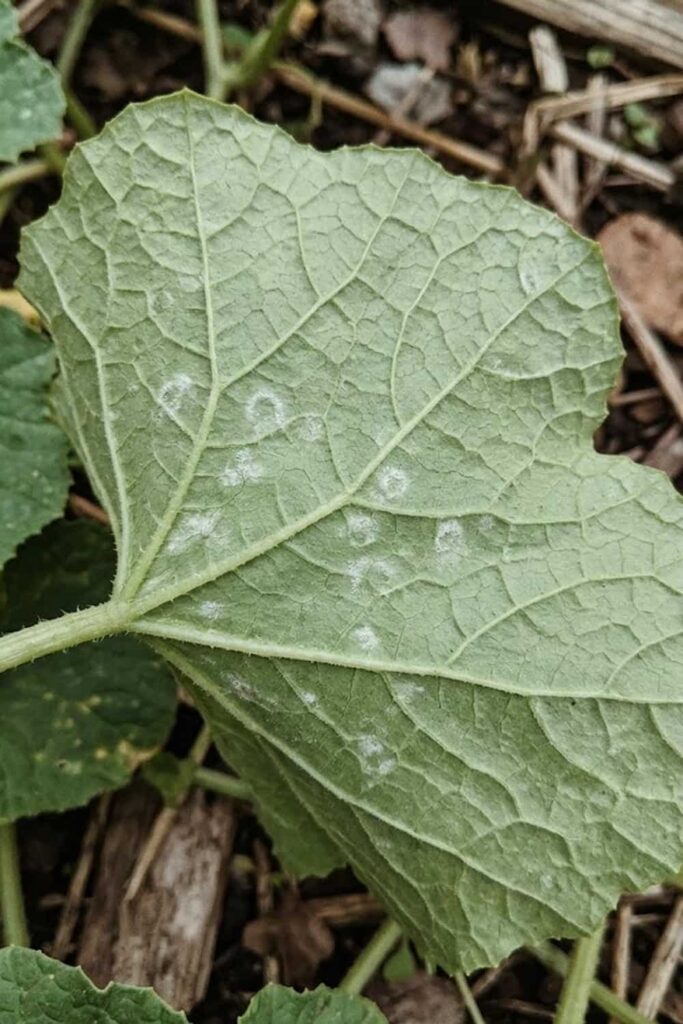
Protection against powdery mildew is best achieved through adequate plant spacing and early application of organic fungicides. I must constantly monitor the older, shaded leaves for the first white, flour-like spots that signal this pervasive fungal infection.
If cucumber beetles are the primary insect enemy, powdery mildew is undoubtedly the primary fungal disease you will face. In my experience, it is almost inevitable in many climates, especially during hot, humid days following cool nights. This fungus creates a white coating on the leaves, blocking sunlight and severely inhibiting photosynthesis; this energy drain prevents the vine from pumping necessary sugars into the ripening melons. I have found that wide plant spacing is not enough if you use overhead watering (as discussed in irrigation). You must be proactive. Once my vines reach maturity, I reflective apply a helpful preventative spray using a mix of potassium bicarbonate and water or a milk-based solution (1 part milk to 9 parts water). Data confirms that these mixtures alter the leaf pH, making it inhospitable for mildew spores. If the disease appears, you must be persistent with organic fungicides like neem oil, spraying weekly and ensuring you cover the undersides of the leaves. I recollection a season where I let the mildew go too long, and while the melons survived, they had almost no flavor because the vine was too weak to sweeten them.
12. Mastering the Full Slip Harvest for Maximum Sugar
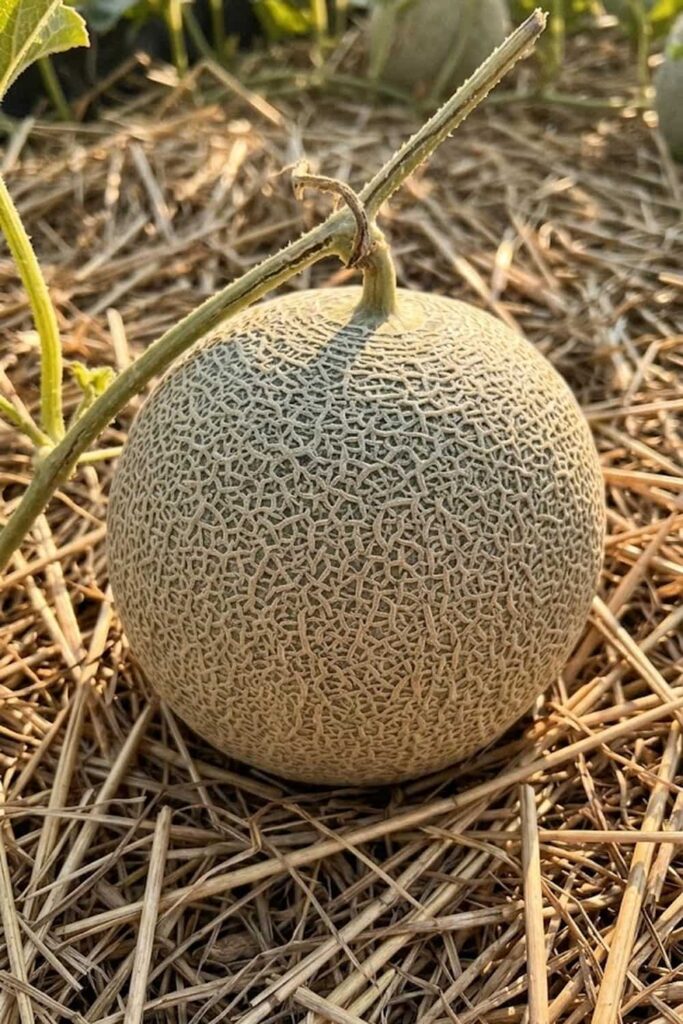
Harvesting muskmelons at the full slip stage—where the stem naturally cracks and detaches—guarantees the sweetest possible flavor. This indicator is the single most critical moment in how to grow muskmelon fruit, as melons do not get significantly sweeter once they are picked.
This technique is the core secret that separates experienced melon growers from disappointed beginners. You have put in months of diligent effort, and I want to ensure you don’t ruin it by harvesting just a few days too early. Grocery store melons are picked unripe (“half-slip”) so they survive shipping, which is why they rarely have that complex, musky sweetness. Homegrown melons, however, must be allowed to reach peak maturity on the vine. To achieve this, you must look for specific clues. When the melon is ready, the rind beneath the rough netting will change color from dull gray-green to a warm yellowish-tan. Simultaneously, a distinct crack will form in a circular pattern where the stem joins the fruit. If you have to pull the melon with any force, you must leave it on the vine. When I am practicing this, I know a melon is perfect when it separates effortlessly from the vine with only a gentle, slight lift of the fruit. This is the moment when all your careful monitoring, prevention, and consistent watering pay off with an unforgettable summer flavor. I reflection on a season where I waited, patiently checking daily, and the reward was the sweetest melon I had ever tasted.
Critical Harvest Indicators Data
| Indicator | Status: Unripe | Status: Half-Slip (Commercial) | Status: Full-Slip (Peak Flavor) |
| Rind Color | Green or Gray | Slight change to Tan | Yellowish-Tan |
| Netting | Soft, smooth sutures | Defined netting | Hard, rough netting |
| Aroma | None | Faint sweetness | Strong, musky fragrance |
| Stem Condition | Firmly attached | Stem must be cut/snapped | Effortless separation |
Frequently Asked Questions (People Also Ask)
Q: How to grow muskmelon fruit in containers on a balcony?
A: You absolutely can. Grow compact varieties like ‘Minnesota Midget’ in a large 5-gallon pot (minimum 12 inches deep) with a sturdy trellis. You must ensure the pot has excellent drainage, use a rich soil mix, and fertilize frequently, as pots leach nutrients quickly.
Q: Why are my muskmelon fruit vines dying before the harvest?
A: This sudden wilt is almost always bacterial wilt, spread by the feeding of the striped cucumber beetle. Unfortunately, once you see the entire plant collapse, there is no cure. Focus your efforts on prevention by controlling beetles next season.
Q: How to tell when muskmelon fruit is ripe for harvest?
A: Refer to the “Critical Harvest Indicators” table above! The three big signs are: 1) The color changes from green to tan, 2) It develops a very sweet aroma at the blossom end, and 3) The stem separates perfectly and cleanly without any pulling.
Q: Can I grow muskmelon fruit from seeds found in store-bought melons?
A: You can technically plant them, but I believe it is a mistake. Most commercial melons are hybrids, meaning their seeds will not produce fruit that is “true to type.” You are highly likely to grow big, healthy vines that yield poor-quality, flavorless, or completely different melons. Use certified seeds for predictable success.
Final Tip for Your Garden
Reflective process on each season, you should log your variety, soil mix, and harvest dates. This labeling allows you to refine your skills and adjust your monitoring for an even better, high-sugar harvest next year. Enjoy the journey of learning the unique needs of your specific garden patch; it is the ultimate reward for any dedicated gardener balancing a busy full-time career.








