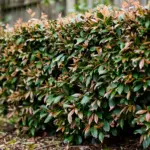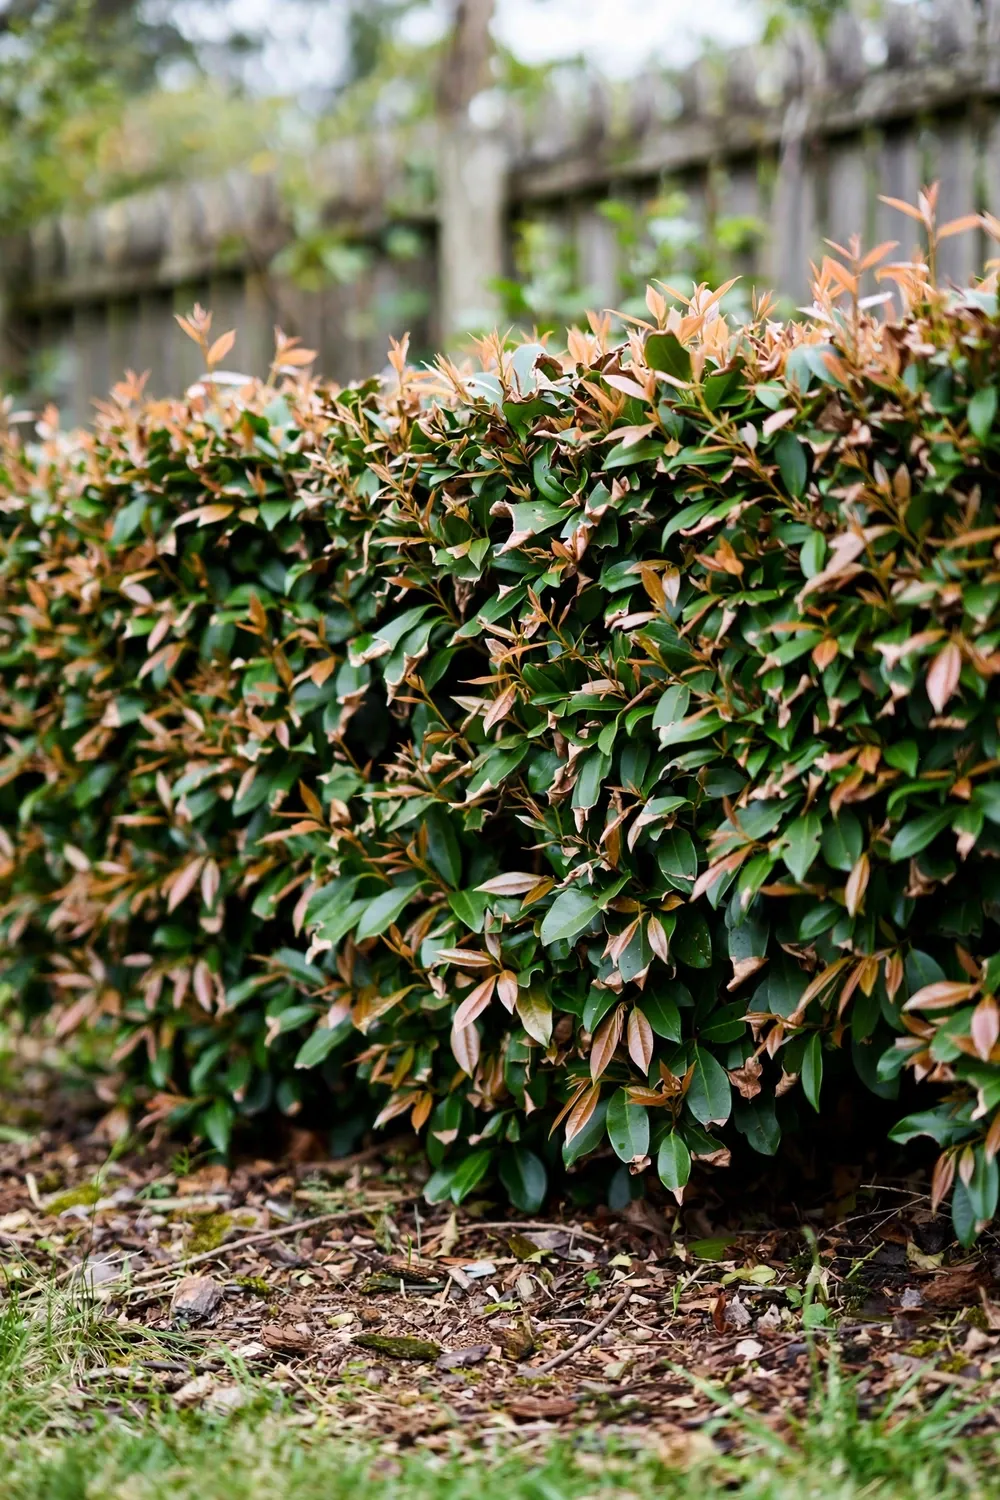

Match the browning pattern to 1 of 9 causes before you spray, prune, or feed anything. A lilly pilly turns brown from water stress, weather burn, insects, fungi, or one biosecurity disease, and each cause leaves a different mark on the leaf. That is the whole diagnosis for why is my lilly pilly turning brown.
I have learned that the pattern on the leaf names the cause faster than any spray fixes it.
The rest of this page is a pattern key, then 9 causes in the order a home gardener meets them, from water to weather to insects to fungi. Read the key first. Work the causes in order. Stop at the first match.
Read the Browning Pattern Before You Reach for a Spray
The browning pattern names the cause. Look at where the brown sits, how the leaf feels, and whether the damage spreads. The table below maps each pattern to its cause and first check.
| Cause | Browning Pattern | First Check |
|---|---|---|
| Underwatering | Dry tips and edges, curling leaves | Push a finger into the soil at the drip line |
| Overwatering and root rot | Sudden wilting in wet soil, leaves dropping together | Smell the soil and check drainage after rain |
| Sun scorch | Papery patches on the sunny side only | Compare sun leaves against shaded leaves |
| Frost burn | Blackened soft new growth after a cold night | Check the forecast for the night before |
| Psyllids | Pimpled and twisted new leaves | Turn a new leaf over and look for bumps |
| Scale insects and sooty mold | Sticky leaves under a black coating | Rub a stem bump with a thumbnail |
| Lilly pilly beetle | Ragged holes chewed through leaves | Look for a bright green beetle or pale grub |
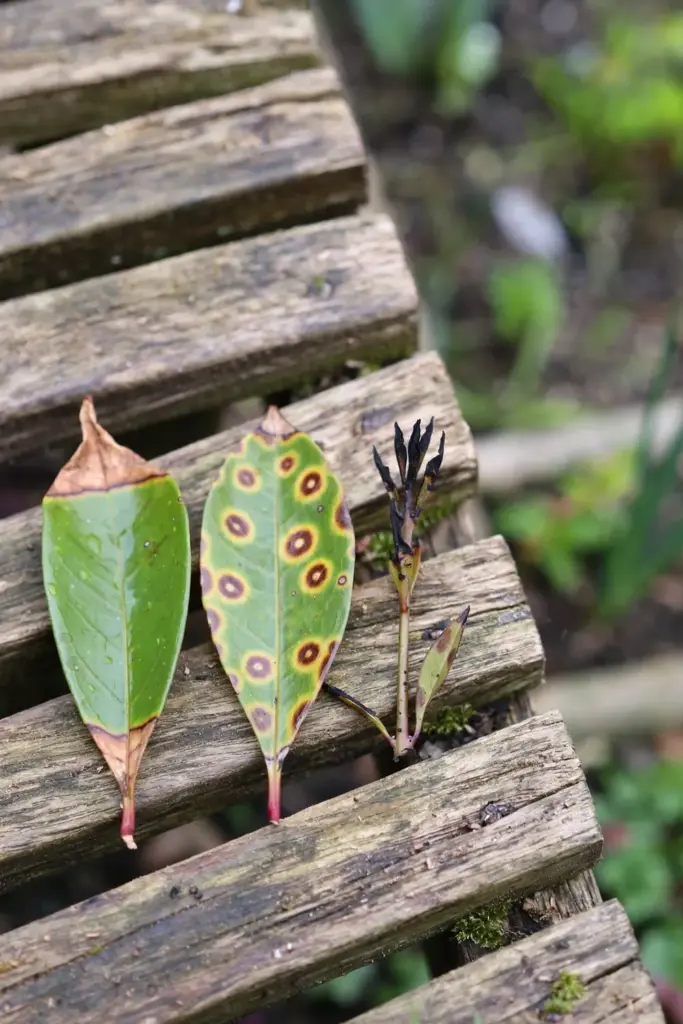
| Fungal leaf spot | Round brown spots, sometimes with a yellow halo | Check for spots after wet humid weather |
| Myrtle rust | Yellow powder on new growth | Do not touch the plant, photograph it, and report it |
“Lilly pilly” covers several Syzygium species and garden forms sold under that one name. The diagnosis works across them because the causes attack the same soft new growth, the same roots, and the same leaf surface. The fixes below use the plant name once and the cause name after that, so the pattern stays the focus.
Check new growth against old growth before you open the table. New growth carries psyllids, frost, and myrtle rust. Old growth carries scorch, salt, and leaf spot. Whole-plant damage points to water or roots. That one split cuts the table in half before you read a single row.
1. Underwatering: Dry Leaf Tips and Curling Edges
Underwatering browns the leaf from the tip inward. The soil at the drip line feels dry past the first knuckle, and the leaves curl, dull, and crisp at the edges. New growth wilts first in heat, and older leaves drop after a dry spell.
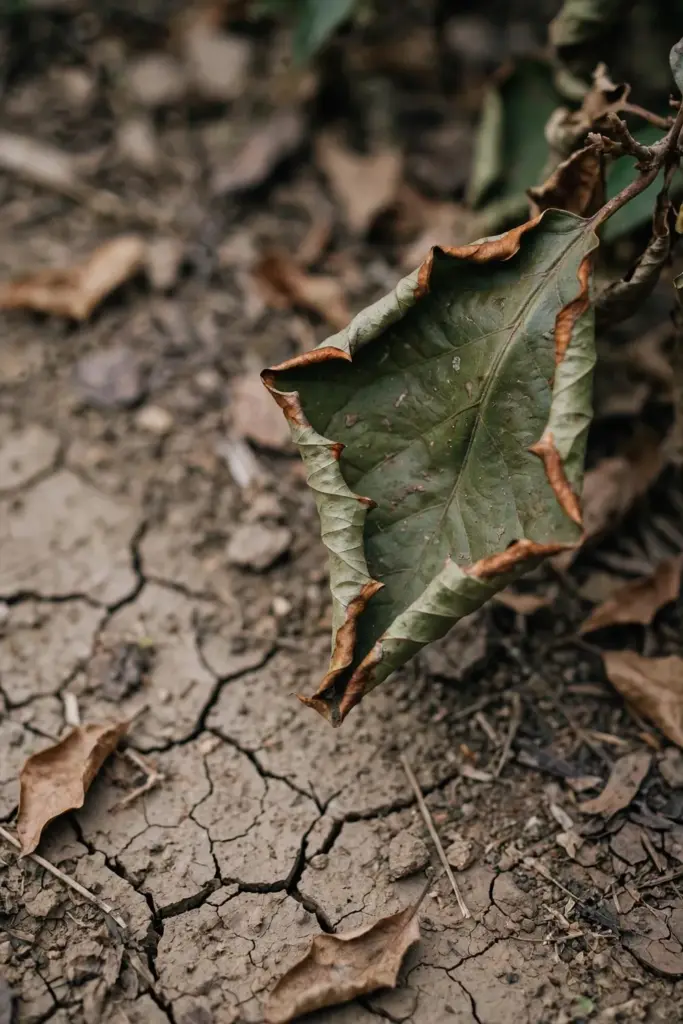
Confirm it with a finger test. Push a finger into the soil near the drip line, not at the trunk. Dry soil at that depth plus crisp leaf tips points to underwatering. Wet soil at that depth points elsewhere, so the finger test separates this cause from root rot in one move.
Fix it with a deep slow soak. Run a hose at a trickle at the drip line until the soil feels damp well below the surface. Then hold water until the top layer starts to dry again. A lilly pilly hedge in a hot windy spot drinks harder than a single specimen in shade, so check the windward side first.
Prevent the repeat with mulch and a routine. Spread mulch under the canopy and keep it clear of the trunk. Water on a schedule in dry months instead of waiting for wilt. A hedge that wilts, recovers, and wilts again loses leaves each cycle, and the bare patches invite sun scorch on the stems behind them.
A potted lilly pilly dries faster than one in the ground. A pot holds a small volume of mix, and wind strips moisture from every side. Check a potted plant twice as often in summer. Water until it runs from the drainage holes, then empty the saucer so the roots never sit in water.
2. Overwatering and Root Rot: Sudden Wilting in Wet Soil
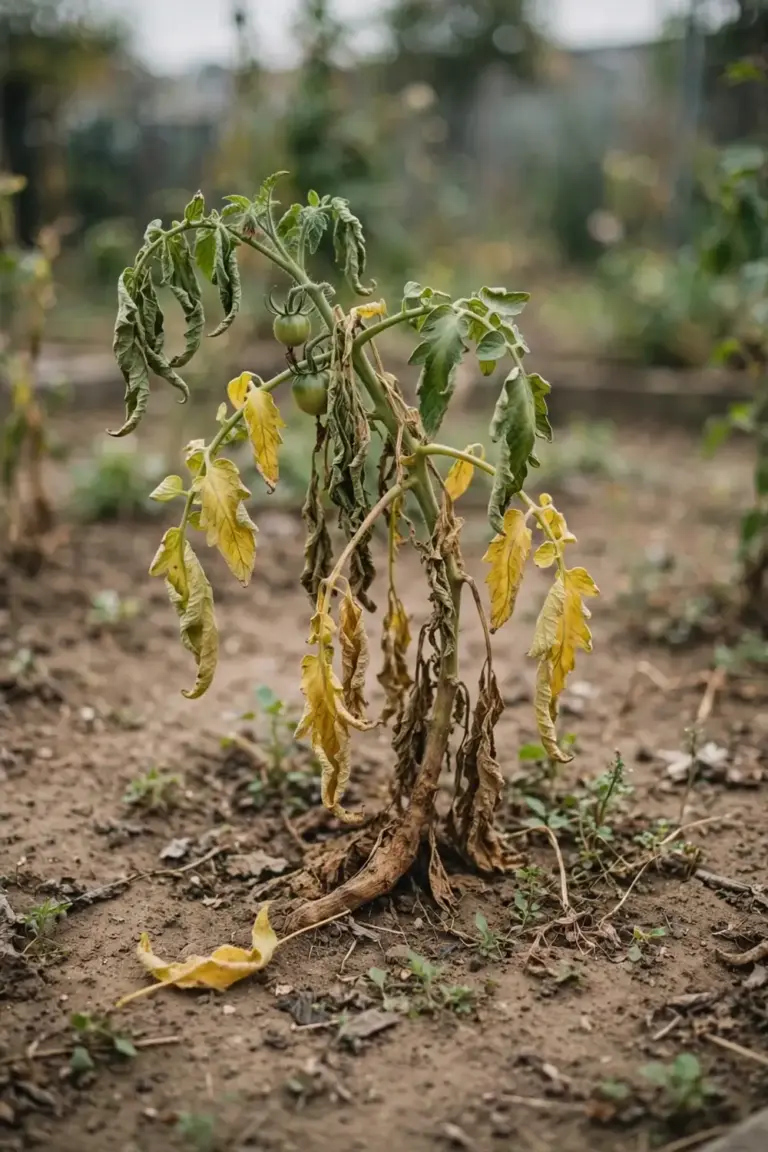
Overwatering browns the whole plant fast. The soil stays wet, the leaves wilt even though water sits at the roots, and leaves drop together instead of one at a time. The trunk base may feel soft, and the soil may smell sour after rain.
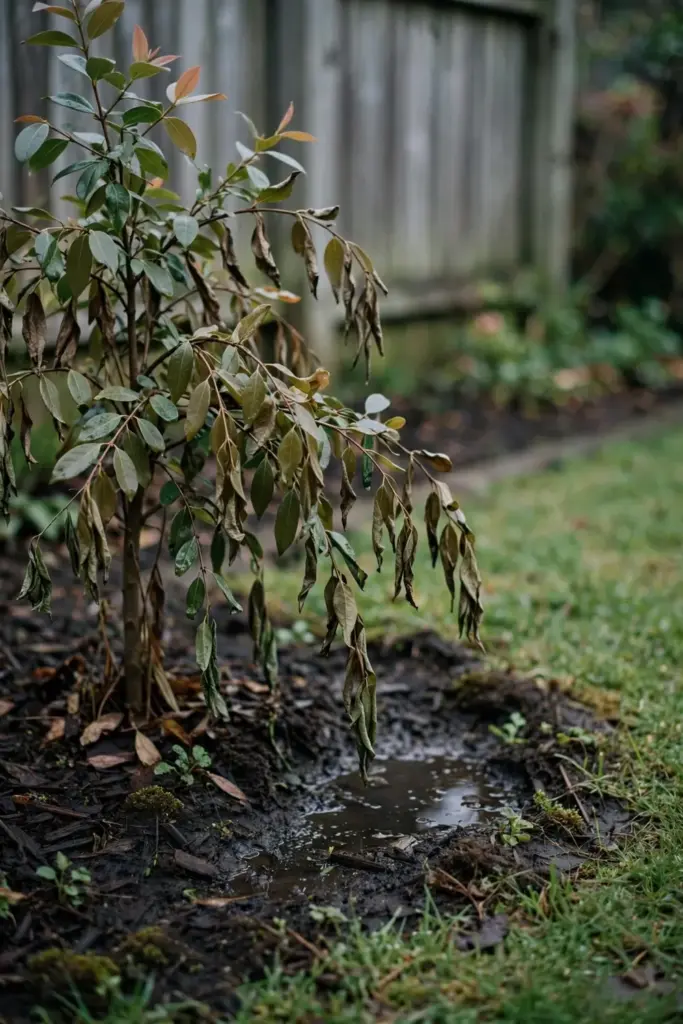
Confirm it by checking drainage, not by watering more. Dig a small test hole beside the drip line after rain and watch how fast it drains. Standing water or a hole that stays full points to drainage failure. A plant that wilts in wet soil has a root problem, because rotted roots cannot carry water to the leaves.
Phytophthora root rot drives the worst cases. Phytophthora is a soilborne water mold, and it attacks roots in wet soil. Poor drainage and compaction open the door, and the LSU AgCenter Phytophthora guide describes the mechanism: infected roots lose the outer layer, the crown rots, and the plant wilts while the soil stays wet.
Fix it by drying the root zone and lifting the plant out of the wet. Stop watering until the top soil dries. Clear mulch away from the trunk base so air reaches the crown. On clay, rebuild the bed as a raised mound so the roots sit above the wet line. A lilly pilly planted in a low spot or beside a downpipe lives in a permanent puddle, and no spray fixes that.
Prevention starts at planting. Plant at the same depth the plant grew in the pot, never deeper. Keep the soil surface open and free draining, and check how building soil health changes drainage over time. A plant that survives root rot keeps weak roots for months, so water it lightly and watch for a fresh flush before feeding.
Check the trunk base while the plant recovers. Scratch a small patch of bark near the soil line. Green tissue beneath means living bark. Brown dry tissue means dead bark, and the plant may need replacing even if the canopy still holds leaves. A trunk that stays soft or sunken at the base rarely recovers, so catch it early and act on the drainage before the canopy thins.
3. Sun Scorch: Papery Patches on the Sunny Side
Sun scorch browns flat papery patches on the sun-facing leaves. The damage sits on the west or north side, and the shaded side stays green. The patches feel dry and thin, and they do not spread to new leaves once the heat passes.
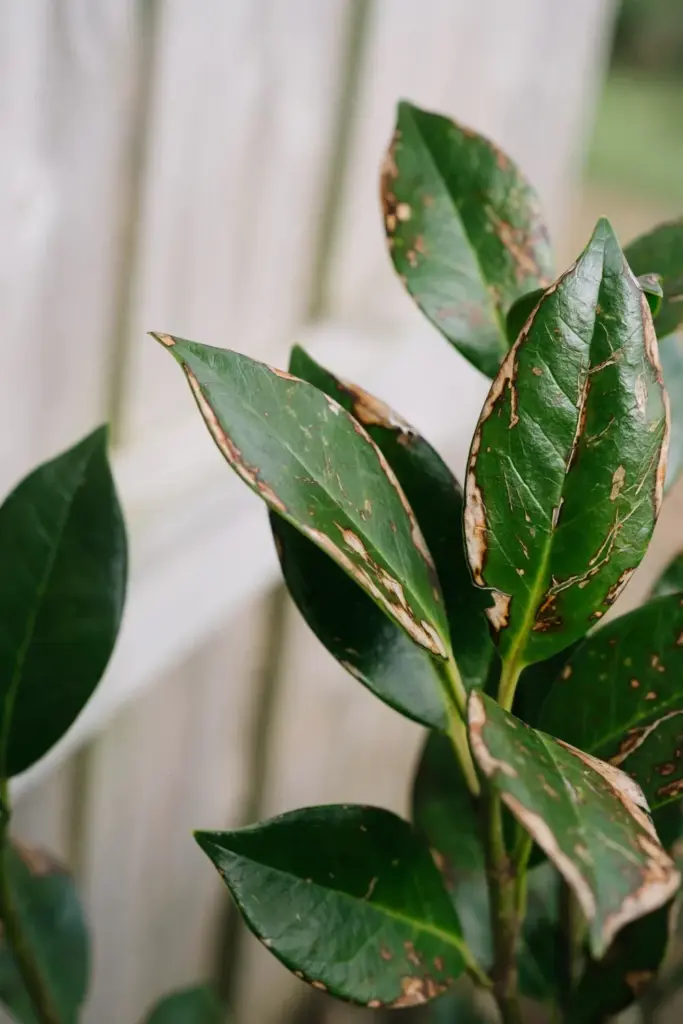
Confirm it by comparing sides. Walk around the plant and hold a sun leaf next to a shade leaf. Damage on one side only points to scorch. Damage on all sides points to water or roots instead. Reflected heat from a fence, a wall, or pale pavers burns the same way, and a plant moved from shade to full sun in one day scorches fastest.
Fix it with shade and water, not with pruning. Drape shade cloth over the scorched side through the worst heat. Water deeply so the leaves stay hydrated. Leave the scorched leaves on the plant, because they still shade the stems behind them. Pruning them off exposes fresh bark to the same sun.
Prevent the repeat by hardening the plant into sun. Move a potted lilly pilly into full sun over several days, not in one jump. Pull rocks and pale gravel away from the base, because they bounce heat onto low leaves. A hedge that faces a reflective fence needs a shade screen on the fence side through the first hot summer.
A newly planted lilly pilly scorches faster than an established one. Fresh roots cannot yet pull enough water to cool the leaves, so the first hot week after planting burns hardest. Shade a new plant through its first heatwave. Water it deeply the evening before a forecast hot day, so the leaves start the day hydrated.
4. Frost Burn: Blackened New Growth After a Cold Night
Frost burn blackens soft new growth after a cold night. The new tips turn brown or black, feel wilted and mushy, and the older leaves stay green. The damage appears overnight after a clear still night, and the plant looks fine the evening before.
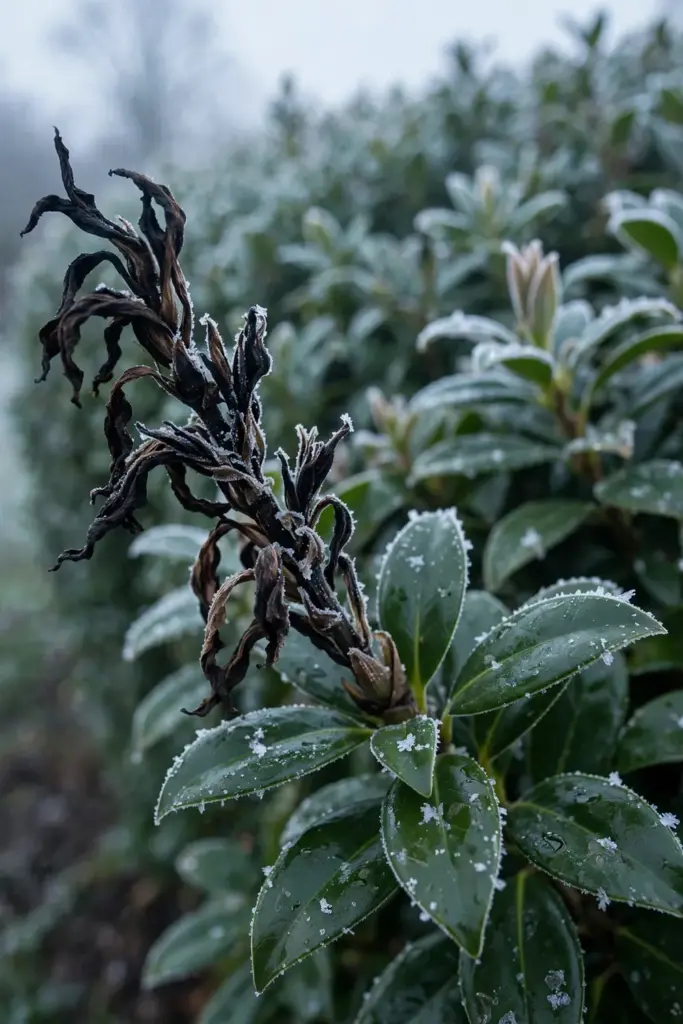
Confirm it with the forecast. Check the overnight low for the night before the damage appeared. A clear night near freezing plus blackened soft tips points to frost. A plant that browns slowly over weeks points to water or feeding instead. Frost burns the softest tissue first, so the flush after pruning burns before the hard older leaves.
Fix it by waiting. Leave the blackened tips in place until the cold passes, because they shield the growth below. Prune back to green wood once the frost season ends. Water the plant normally, and skip feeding until fresh growth shows. A frosted lilly pilly regrows from buds below the damage, and early pruning only exposes more soft tissue to the next frost.
Prevent the repeat with timing and cover. Prune after the last frost, not before it, so the soft flush does not meet a cold night. Drape frost cloth over a young plant on a forecast frost night and remove it in the morning. A plant in a frost pocket at the bottom of a slope burns first, so site a new hedge higher on the slope where cold air drains away.
A potted lilly pilly moves out of the frost. Drag the pot under a porch roof or against a warm wall on a forecast frost night. The roof blocks the open sky that drives radiational frost, and the wall leaks stored daytime heat. Move it back out in the morning, because a plant that sits in shade all winter grows soft and burns worse at the next frost.
5. Psyllids: Pimpled and Twisted New Leaves
Psyllids pimple the new leaves. The nymphs feed on soft new growth, and the leaf answers with raised bumps, curling, and twisting. The damage sits on the fresh flush, and the older leaves stay smooth. A heavy attack stunts the flush and leaves the hedge looking ragged.
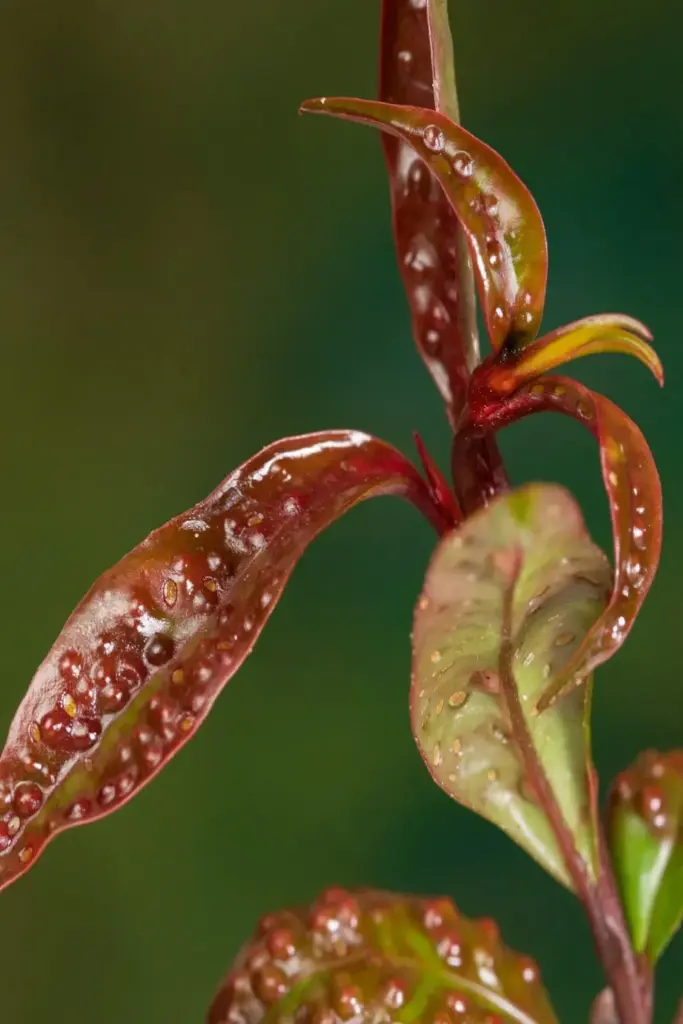
Confirm it by turning a new leaf over. The bumps sit on the leaf surface, and the nymphs hide in the pits beneath. No other lilly pilly pest pimples new leaves this way. A hand lens shows the tiny insects in the pits, and the distortion follows the flush instead of the whole plant.
Psyllids rank as the most common lilly pilly pest, and the fix starts with pruning. Cut out the worst distorted flush and bin it, because the nymphs live inside the pits where sprays cannot reach. Spray the remaining new growth with horticultural oil or neem oil per the label, and repeat on the next flush. The Syzygium australe growing guide notes the same pairing: prune damaged foliage, then apply horticultural oil.
Prevent the repeat with resistant varieties and healthy growth. Resistant forms such as Resilience, Cascade, and Little Lucy carry far less pimple damage than older seedling forms. Feed lightly and water steadily, because stressed plants attract heavier attacks. Ladybirds and lacewings eat psyllids, so skip broad sprays that kill them.
Time the watch to the flush cycle. Psyllids attack soft new growth, so the flush after each prune draws them. Inspect the new leaves a week after pruning, when the flush is soft and the pits first show. A flush that grows clean through its first two weeks usually stays clean, because the leaves harden past the stage psyllids prefer.
6. Scale Insects and Sooty Mold: Sticky Leaves and Black Coating
Scale insects coat the plant in black. The insects sit as immobile bumps on stems and leaf undersides, and they excrete sticky honeydew. Sooty mold grows on the honeydew and turns the leaves black. The black coating wipes off with a finger, and the bumps beneath stay fixed to the stem.
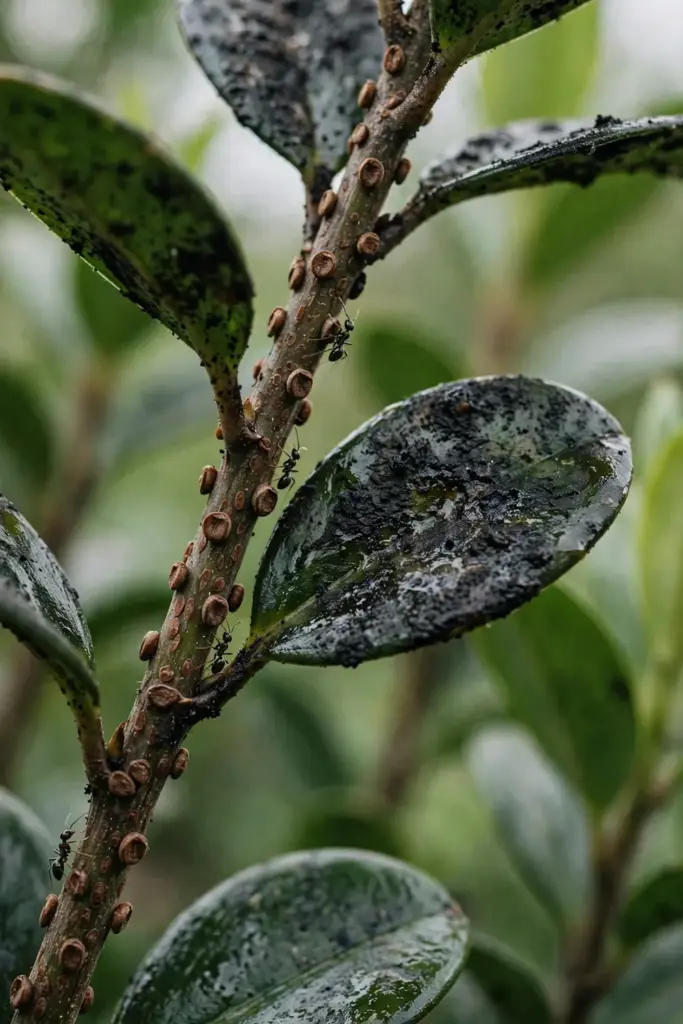
Confirm it with a thumbnail test. Rub a bump on a stem. A scale bump stays put or lifts as a shell, and the tissue beneath may show a mark. A leaf spot rubs away with the leaf surface. Sticky leaves under a black coating point to scale, because the mold feeds on honeydew and never appears without a sap sucker above it.
Scale coverings run from 1/25 to 1/4 inch long, or 1.0 to 6.4 mm, according to the UC IPM scales guide. The guide also names the chain: scale insects suck sap, excrete honeydew, and black sooty mold grows on the honeydew. That chain sets the fix order. Kill the scale first. The mold fades once the honeydew stops.
Fix it by treating the insect, not the mold. Scrape heavy scale off stems by hand, then spray horticultural oil or soap per the label. Time that spray for the crawler stage. The young insects still move then, and the oil reaches them. Control ants. Ants farm scale for honeydew and chase off the predators that eat it. Wash the black coating off with a hose once the scale dies back.
Follow the ant trail to the scale. Ants climb the same stems day after day, and the trail leads straight to the colony. A sticky barrier around the trunk breaks the trail, and the predators return once the ants leave. A plant with ants and scale needs both fixes, because oil alone fails while ants guard the colony.
Prevent the repeat with airflow and predators. Prune to open the canopy so light and air reach the inner stems, and spring pruning techniques show the clean-cut method. Leave ladybirds and parasitic wasps alone, because they eat scale. A plant that grows dense and shaded in the center holds scale year round.
7. Lilly Pilly Beetle: Ragged Holes in the Leaves
The lilly pilly beetle chews ragged holes through the leaves. The adult is a small bright green beetle, and the pale grub feeds beside it. Both stages eat leaves, and the damage looks torn and irregular, with holes punched through the leaf blade. The hedge keeps growing, but the foliage looks shredded.
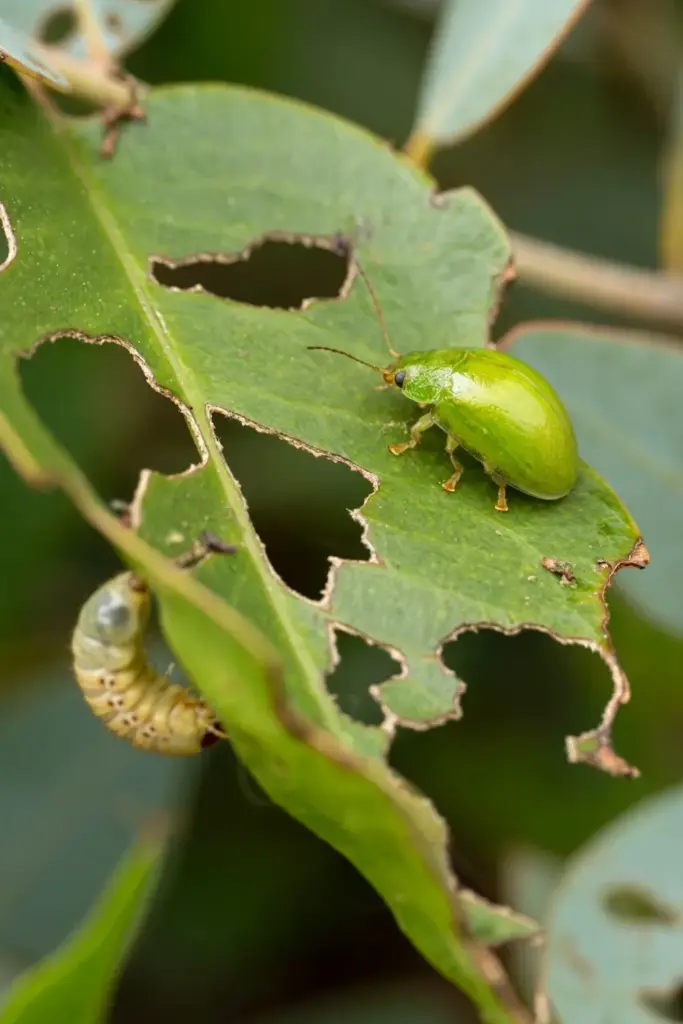
Confirm it by looking for the beetle. Check the leaf undersides in warm weather, and look for the green adult or the pale grub. Ragged holes plus a green beetle on a lilly pilly point to this pest. Ragged holes with no insect point to caterpillars or grasshoppers instead, so the beetle sighting settles it.
Fix it by hand first. Pick the beetles and grubs off by hand and drop them into soapy water. Prune the worst shredded growth and bin it. Spray neem oil per the label on the remaining foliage, and repeat after rain. A light attack needs nothing more, because a healthy hedge outgrows the damage once the beetles leave.
Prevent the repeat with steady care and a watch routine. Walk the hedge weekly in warm months and check the new flush. Keep the plant watered and fed, because a vigorous hedge replaces chewed leaves fast. Skip broad insecticides, because they kill the predators that keep beetle numbers down. For a wider view of garden pest control without chemicals, see organic pest control for the home garden.
Check the soil under the hedge in winter. The grubs pupate in the soil beneath the plant, and a winter search finds them before they emerge. Rake the soil surface lightly and look for pale grubs near the drip line. Removing them in winter cuts the next season’s beetles without a single spray.
8. Fungal Leaf Spot: Brown Spots With Yellow Halos
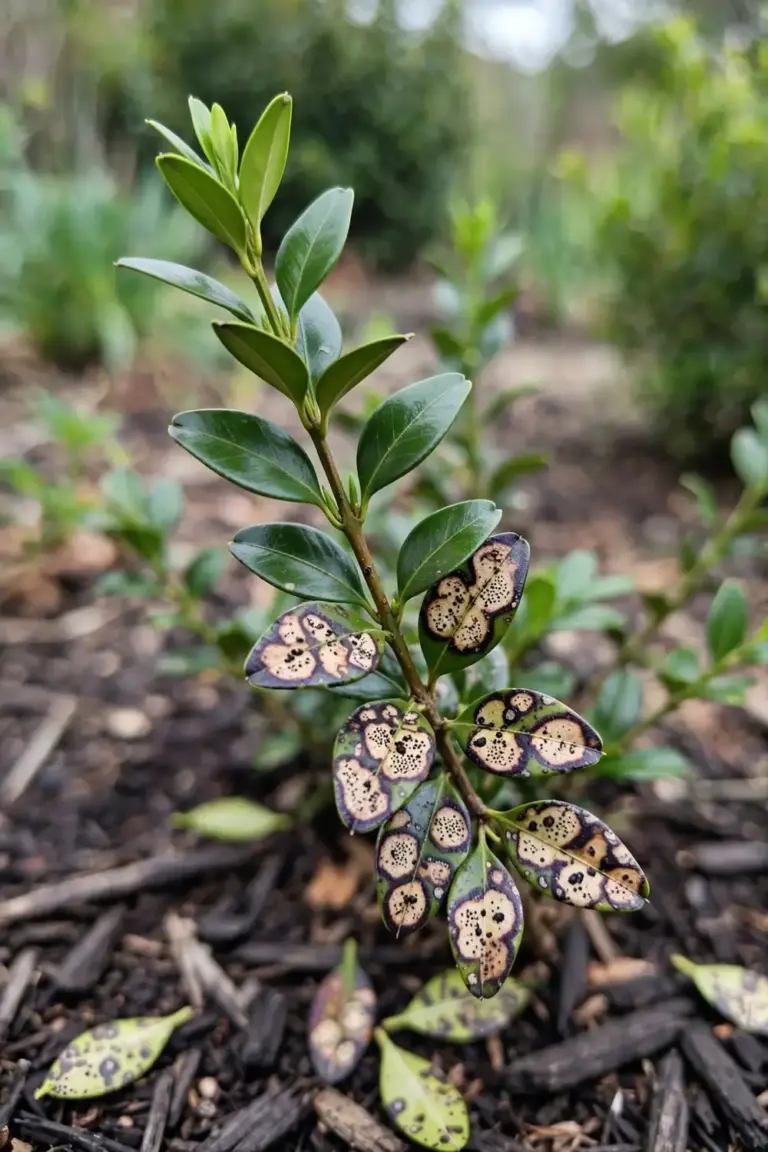
Fungal leaf spot prints round brown spots on the leaves. The spots stay distinct, and some carry a yellow halo around the brown center. The spots spread after wet humid weather, and the worst leaves yellow and drop. The new flush may stay clean while older leaves carry the spots.
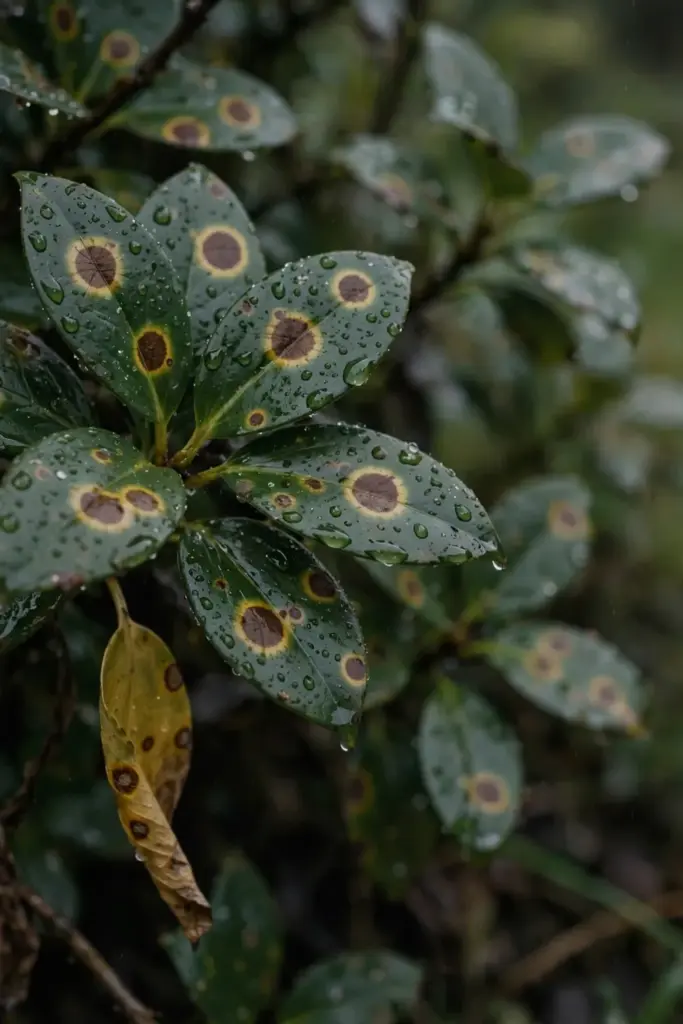
Confirm it by checking the weather and the pattern. Spots that appear after rain or overhead watering, with yellow halos, point to a leaf spot fungus. Spots without halos after a dry hot spell point to scorch instead. A hand lens shows the spot sitting in the leaf tissue, not on the surface, so it does not wipe off.
Fix it by drying the canopy and cutting the spread. Prune the worst spotted leaves and bin them, never compost them. Water at the base, not overhead, so the leaves stay dry. Space the canopy with a light prune so air moves through it. A copper spray per the label helps persistent black spots, and it works as a protectant on new leaves rather than a cure for spotted ones.
Prevent the repeat with airflow and clean ground. Rake fallen spotted leaves from under the hedge, because spores rest there. Keep mulch under the plant but clear of the trunk, and mulching for moisture and weed control shows the gap to leave. Avoid overhead watering in humid weather, and prune after flowering so the canopy opens before the wet season.
A hedge that defoliates twice in one season needs a harder look. Repeated defoliation weakens the plant and opens it to root problems, so check drainage and feeding alongside the spray routine. A plant that keeps its leaves through the wet season has beaten the fungus, and the next season starts from strength.
9. Myrtle Rust: Yellow Powder and the Do-Not-Touch Rule
Myrtle rust shows yellow powder on new growth. The fungus attacks soft new leaves, buds, and fruit on Myrtaceae plants, and lilly pilly sits in that family. Bright yellow powdery pustules open on the underside of young leaves, and older pustules turn brown or gray. Infected leaves buckle and twist, and the flush dies back.
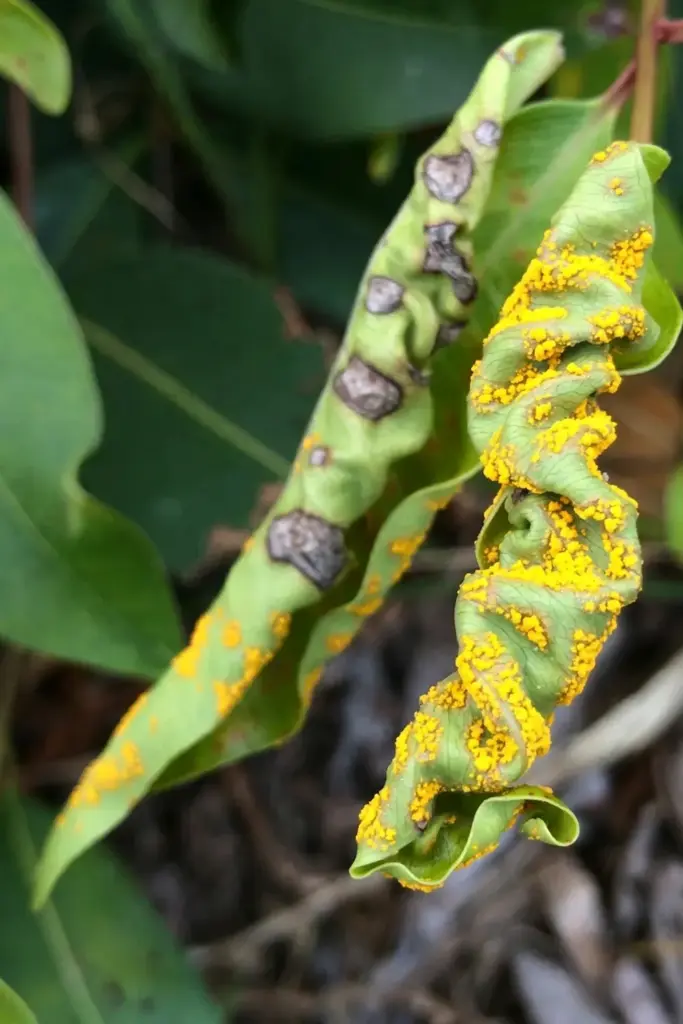
Confirm it by looking, not touching. Yellow powdery pustules on new growth plus buckled leaves point to myrtle rust. No other lilly pilly cause shows yellow powder. The DPIRD myrtle rust fact sheet describes the same signs: bright yellow powdery eruptions on young leaves, brown-gray pustules as the infection ages, and leaves that buckle and twist.
Do not touch the plant. Do not collect samples. Do not prune it. Spores ride on hands, clothes, tools, and boots, and one touched plant spreads the fungus to the next myrtle in the garden. Photograph the whole plant, the affected area, and the pustules from a distance. Then call the Exotic Plant Pest Hotline on 1800 084 881 and follow the state biosecurity advice for diagnosis and disposal. Myrtle rust is the one cause on this page where the right fix is a phone call, not a spray.
Prevention after a report means clean habits. Wash hands, tools, and boots after working near any myrtle. Buy new plants from a reputable nursery and check the new growth before planting. Resistant varieties such as Sublime and Sweeper carry less damage, but no lilly pilly is immune, so keep watching the flush each season.
Check the other myrtles in the garden after a suspect find. Bottlebrush, melaleuca, eucalyptus, and guava sit in the same family, and the fungus moves between them. Look at their new growth for the same yellow powder. One infected plant in a street of myrtles spreads fast, so the report protects the whole street, not one hedge.
Frequently Asked Questions About Why Is My Lilly Pilly Turning Brown

A brown lilly pilly recovers when the cause stops and the roots stay alive. Water stress, scorch, and frost damage regrow from buds below the dead tissue. Root rot and myrtle rust need action first, because both spread while the gardener waits. Match the pattern, fix the cause, and watch the next flush. Fresh green growth means the plant turned the corner.
Prune brown leaves once you know the cause. Pruning helps psyllid damage, fungal spot, and beetle damage, because it removes the insects and spores with the leaves. Pruning hurts sun scorch and frost burn, because the dead leaves still shade the stems behind them. Wait on scorch and frost. Prune on pests and fungi. Bin every pruned leaf, never compost it.
One-sided browning points to sun scorch, reflected fence heat, or a broken dripper on that side. Walk the hedge and compare the brown side against the green side. Check the irrigation line on the brown side and the fence behind it. One-sided damage rarely means disease, because diseases spread through the whole canopy. Fix the heat or the water line first.
Overwatering kills a lilly pilly through root rot. Wet soil starves the roots of air, Phytophthora moves in, and the plant wilts while the soil stays wet. The fix is drainage, not more water. Stop watering, clear mulch from the trunk, and lift the bed into a mound on clay. A plant that wilts in wet soil needs dry roots, and it needs them fast.
Myrtle rust differs from leaf spot in one clear sign: bright yellow powdery pustules on new growth. Leaf spot shows brown spots with yellow halos and no powder. Myrtle rust also carries a biosecurity duty. Do not touch a suspect plant. Photograph it and call the Exotic Plant Pest Hotline on 1800 084 881. The hotline decides the next step, not the gardener.
Keep the Next Flush Green
Nine causes cover nearly every brown lilly pilly. Water first, then weather, then insects, then fungi, then the biosecurity call. The pattern on the leaf picks the cause, and the cause picks the fix.
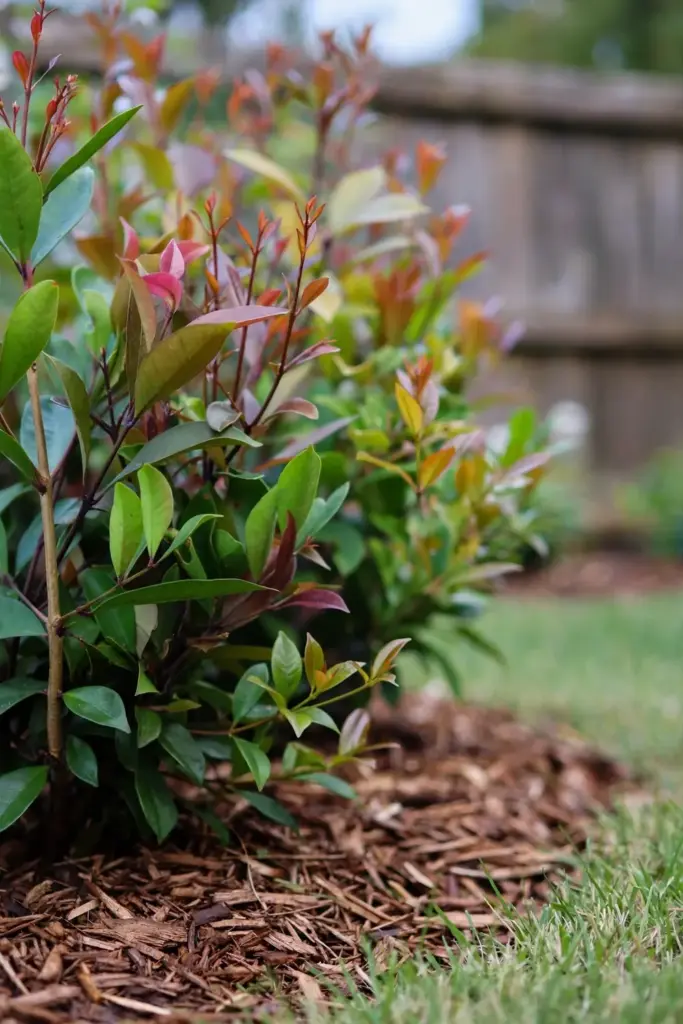
Two edge cases sit outside the nine. A hungry plant grows pale and slow, then browns at the edges, so feed lightly with a balanced fertilizer when the flush looks weak and the soil test shows low fertility. Salt burns leaf edges near pools and coastal spray, so hose the foliage after pool sessions and check for a salt source when the burn hugs the pool side. Both cases stay rare next to water and pests, and both answer to the same rule: find the cause first, then act.
Watch the next flush. Fresh growth with clean green leaves means the fix worked. A second round of browning on the new flush means the first diagnosis missed, so run the pattern key again from the top. A lilly pilly that flushes clean after a fix has told the gardener everything needed.