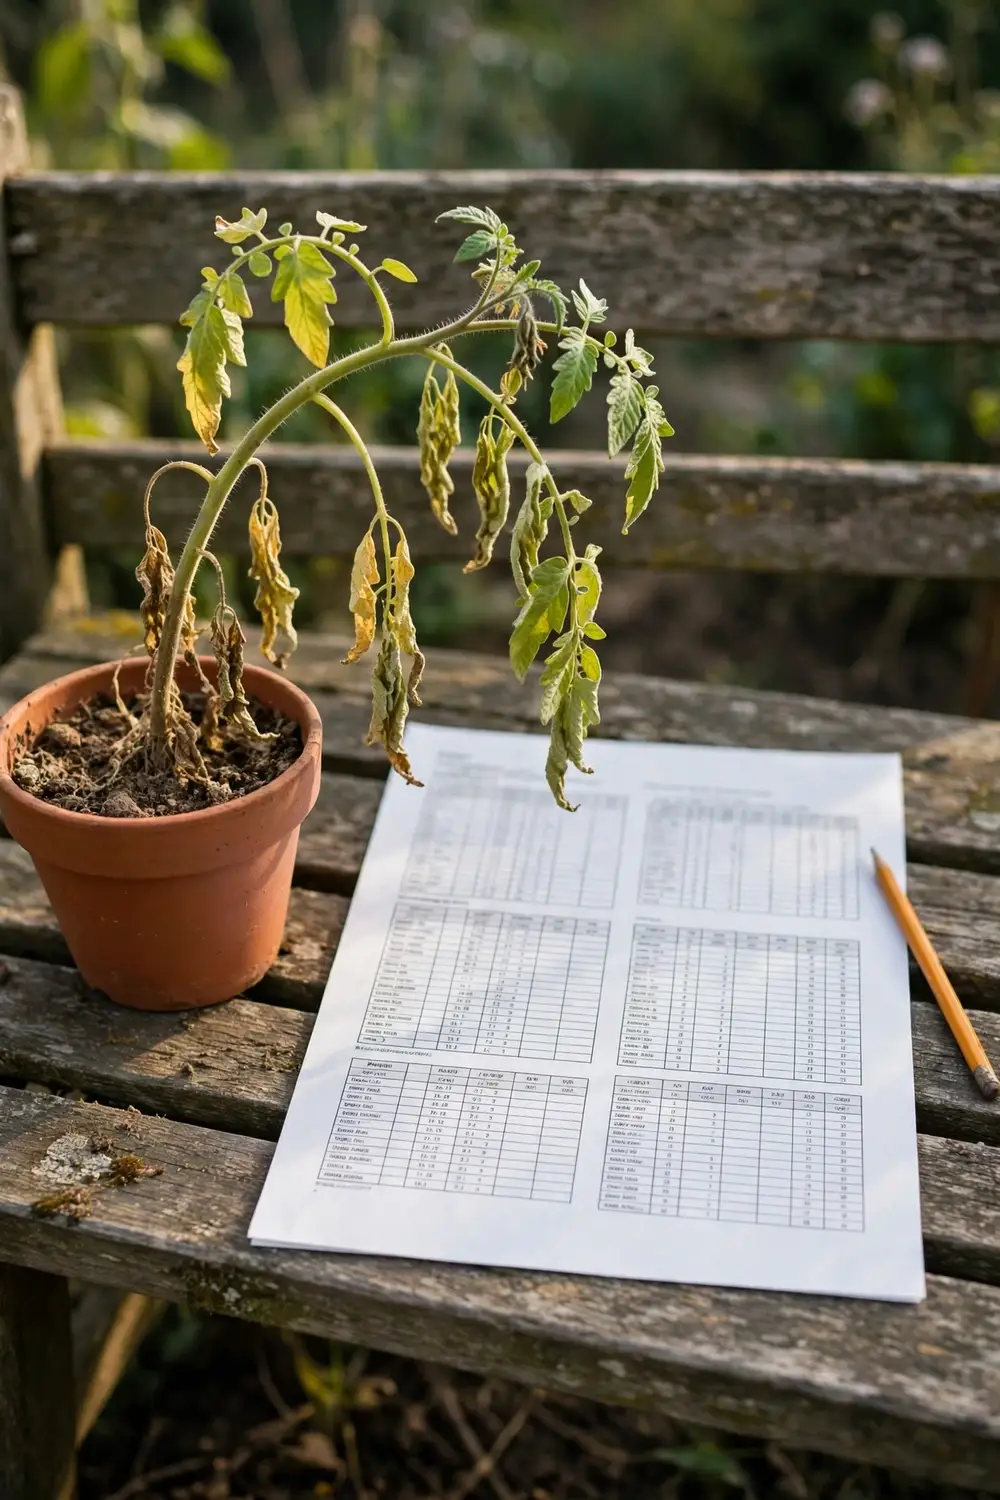

Your soil test says good soil. The plant disagrees. Run 7 checks before you feed, repot, or replace anything. Most struggling plants fail one of these 7 checks. The checks cost nothing and take one afternoon. That is the honest answer to why are my plants struggling despite good soil: the report measures a few things, and the plant lives with everything it skipped. I have learned that the plant I test with a screwdriver before feeding usually answers faster than the one I fertilize first.
1. Test the Premise First: Read What Your Soil Test Actually Measured
A soil test report is a partial snapshot. It usually lists pH plus nitrogen, phosphorus, and potassium. It rarely measures drainage, compaction, salt, or soil life. A bed can pass all four of those numbers and still starve a plant.
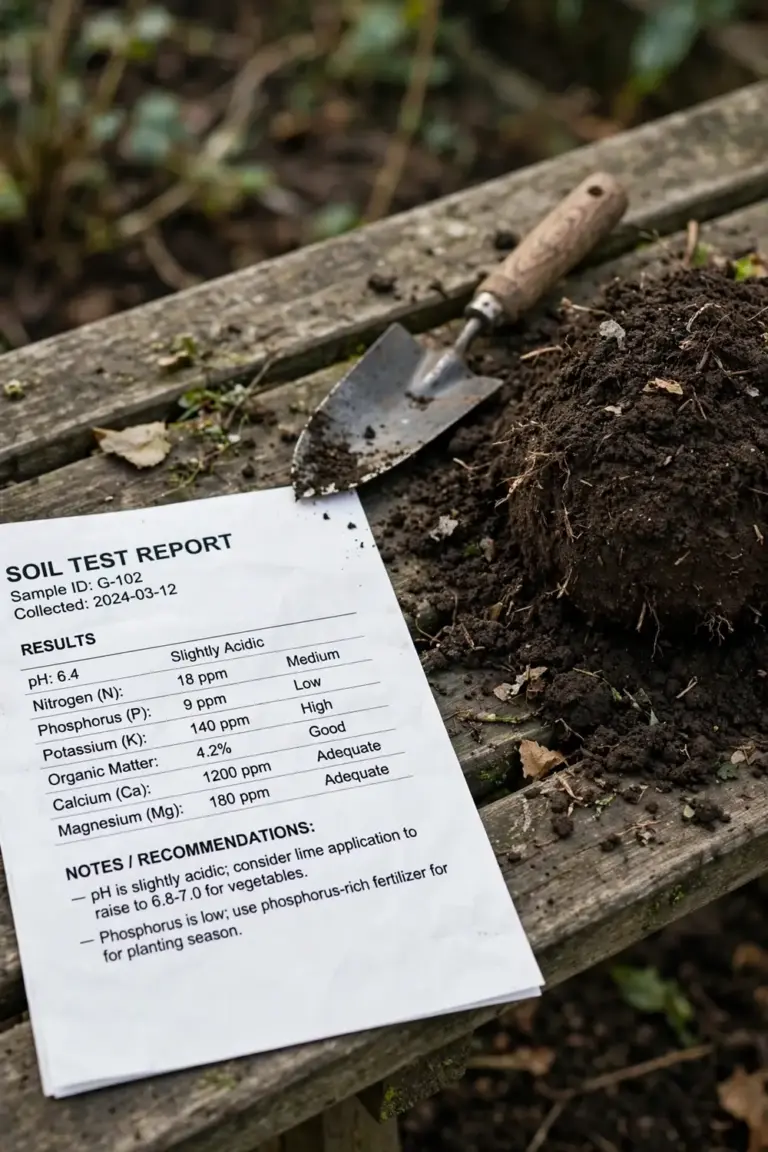
Pull the report out and read the method line. A lab test measures nutrients in a dried, sieved sample. The plant meets wet soil, hard layers, and salt crusts the lab never saw. A bag label is weaker evidence still. “Premium” on a bag describes marketing, not a measurement.
Ask four questions of the report. Did it test pH? Did it test drainage, texture, salt, or electrical conductivity? Did it test below the top 15 cm? A no on the last two means the soil is untested where it matters most. The 7 checks below cover exactly those gaps. A lab sample is also a blended sample. The lab mixes soil from several spots, dries it, and sieves it. That process erases the hard layer, the salt crust, and the wet pocket that the plant actually meets. Sampling depth matters too. A sample drawn from the top 10 cm says nothing about the clay pan at 25 cm. Roots live below the sample line. The report describes the top slice. The plant lives in the whole profile. Take your own samples from several spots and depths when you retest. A sample from beside the struggling plant and one from beside a healthy plant, each at two depths, shows more than a single blended bag ever will.
The rest of this page is 7 checks in order, from the cheapest to the hardest. Run them in order. Stop at the first one that fails. Fix that one first.
2. Check Compaction Below the Surface With a Garden Fork
Compaction hides under good topsoil. A bed can look dark and crumbly on top while a hard layer sits 10 cm down. Roots hit that layer and stop. Water ponds above it. Air never reaches the lower roots. The plant stalls while the test report calls the soil good.
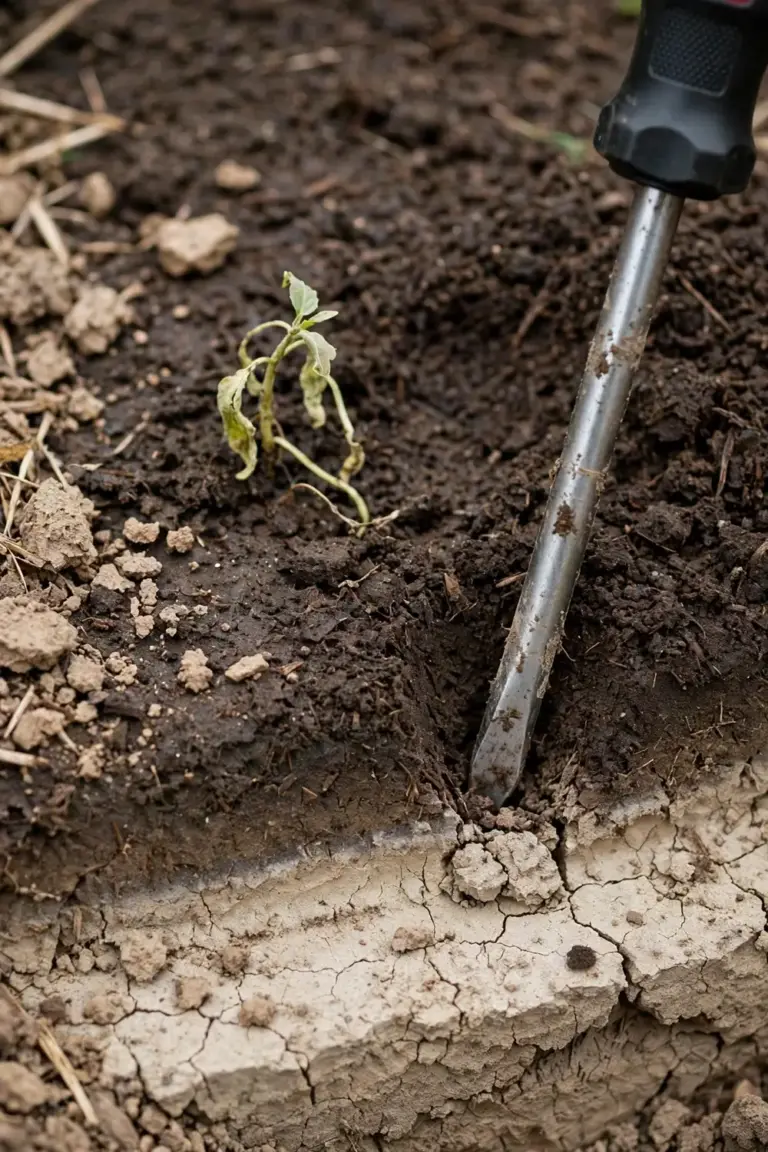
Push a screwdriver or a garden fork tine into moist soil. The tool should slide in with steady pressure. A sudden stop a few centimeters down means compaction. Test in three spots: beside the struggling plant, beside a healthy plant, and in a path. The comparison tells you whether the hard layer is local or bed-wide. Dealing with soil compaction from UF/IFAS Extension describes the same probe test with a shovel, probe, or sharpened pencil: trouble pushing past a few inches points to compaction in the root zone.
Compaction is common in new-build gardens. Builders spread imported topsoil over a clay subsoil that trucks and foot traffic pressed flat. The topsoil tests well. The clay pan below it blocks roots and water. The plant lives in a shallow tray of good soil over a floor it cannot cross.
Fix the cause, not the symptom. Work a garden fork into the hard layer when the soil is moist, not wet. Rock the fork gently to crack the layer without chopping roots. Spread compost over the surface and let worms and rain carry it down. Keep feet and wheelbarrows off wet beds. Never add sand to clay. Sand plus clay packs tighter. A fork test also separates compaction from simple dryness. Dry soil resists a fork too, so water the spot, wait a day, and test again. A fork that slides in after watering met dry soil, while a fork that still stops met compaction. For the longer work of building soil structure, the site’s guide to building soil health covers organic matter, mulch, and biology.
3. Check Water First With a Finger Test
Water is the most common hidden cause. A plant with wet roots and a plant with dry roots show the same signs: wilt, yellow leaves, dropped leaves, stalled growth. The soil surface lies about both. A dry crust can sit over wet soil. A damp surface can sit over a dry root ball.
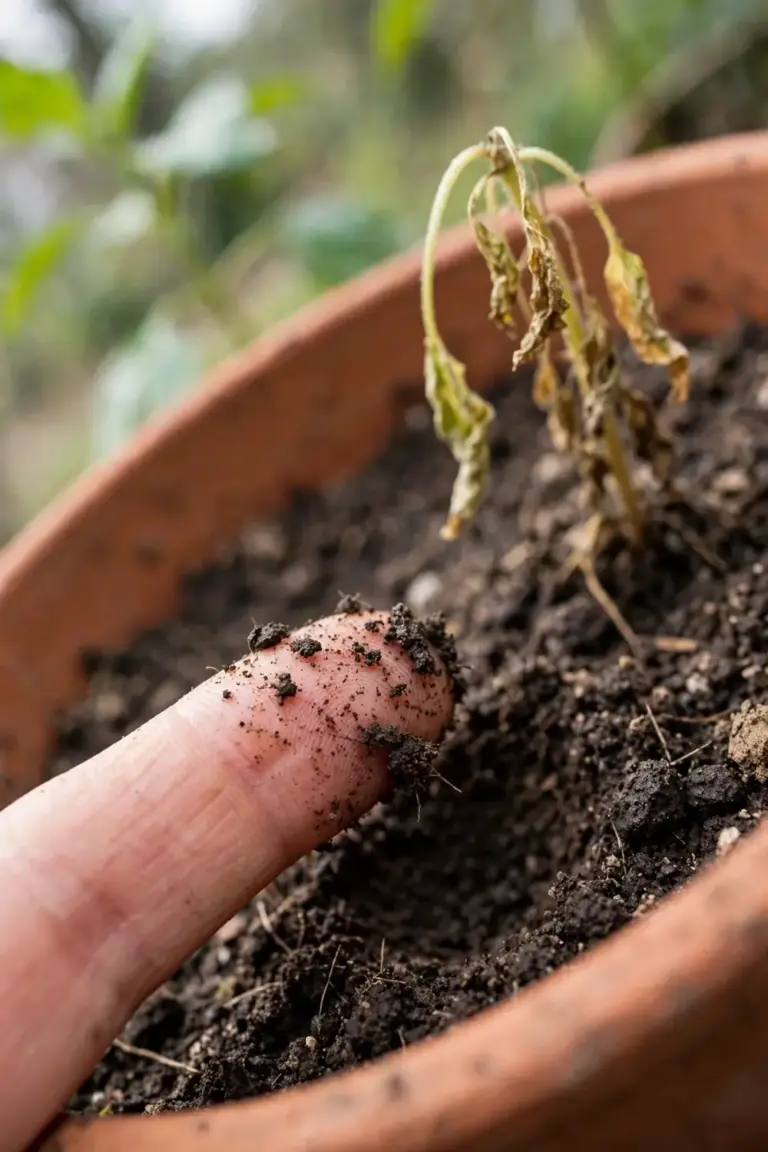
Push a finger into the top couple of inches. That is the test. Plant CSI: Death by dehydration or drowning? from LSU AgCenter gives the same rule: go past the surface and test the root zone, because the surface often looks dry while the roots sit in wet soil. If the soil feels cool and damp at finger depth, wait. If it feels dry, water deeply.
Dry potting mix adds a twist. A mix that dried out fully can turn water-repellent. Water runs down the gap between the mix and the pot wall and out the drainage hole. The pot feels light. The plant stays thirsty. The fix is slow watering: set the pot in a saucer of water for an hour so the mix soaks from below, then let it drain. A second home test checks drainage directly. Dig a hole the size of a bucket in the bed, fill it with water, and watch. A hole that still holds water hours later drains badly. A hole that empties fast drains freely. Either result tells you more about the bed than the lab report did.
Pots add a second twist. A pot without drainage holds a saturated layer at its base. Roots in that layer drown while the top feels fine. Lift the pot. A pot that feels heavy holds water. A pot with no drainage hole is a bucket, not a planter. Drill holes or move the plant. Underwatering has its own signature. Leaves turn crisp from the edges inward, the pot feels light, and the whole plant perks up within hours of a deep soak. Overwatering never perks up after watering. That difference separates the two causes when the finger test leaves doubt.
Dark pots in an Australian summer add a third twist. A black pot in full sun bakes the root ball. Roots near the pot wall cook while the soil test stays perfect. Move dark pots into light shade in heatwaves. A pot saucer that holds water all week does the same damage as no drainage. Empty it after watering.
4. Check Light With a Shadow Test
Light is the cause most gardeners skip. A plant in too little light grows slowly, stretches toward the window, and drops lower leaves. A plant in too much harsh sun scorches, wilts by midday, and bleaches. Both plants sit in good soil. The soil is not the problem. The light is.
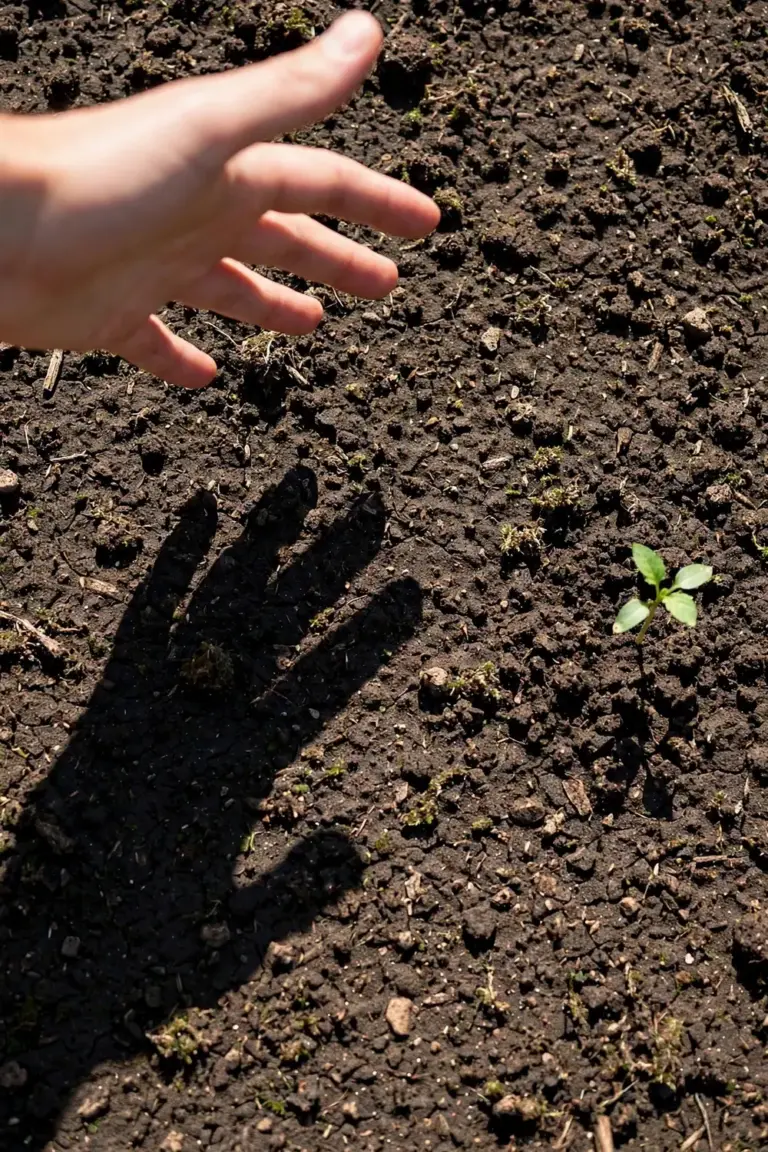
Run a shadow test at midday. Hold a hand 30 cm above the soil and look at the shadow it casts. A sharp, dark shadow means direct sun. A soft, pale shadow means bright shade. No shadow at all means deep shade. Repeat the test in the morning and again in the afternoon, because light shifts across the day and one midday reading tells only part of the story.
Count the hours of direct sun the spot actually gets. Walk past the plant four times in one day and note whether the sun hits it. Compare that count with the plant tag. A tag that says full sun means the plant wants direct sun for most of the day. A tag that says part shade means the plant wants morning sun and afternoon shade. A plant that gets the opposite of its tag struggles no matter how good the soil is. Indoor plants follow the same rule through a window. A plant two metres from a bright window gets a fraction of the light it would catch on a sill. Move the plant closer to the glass, or accept that a low-light corner suits only plants tagged for shade.
Trees and buildings move shade across a garden through the year. A bed that catches full morning sun in spring can sit in a fence shadow by midsummer, and a plant that thrived in September can stall in January when a neighbour tree leafs out. Check the light again when growth stalls, even if the spot worked last season. A plant that leans hard toward one side is chasing light. Turn the pot a quarter turn each week to even the growth, or move the plant to a brighter spot.
5. Check for Root Damage and Transplant Shock
A plant that was moved recently struggles for a different reason. Transplant shock is the lag between planting and root recovery. The plant loses fine roots in the move, and the remaining roots cannot pull enough water for the full canopy. Leaves wilt, drop, or yellow while the roots regrow. The soil can be perfect. The roots are not yet working.
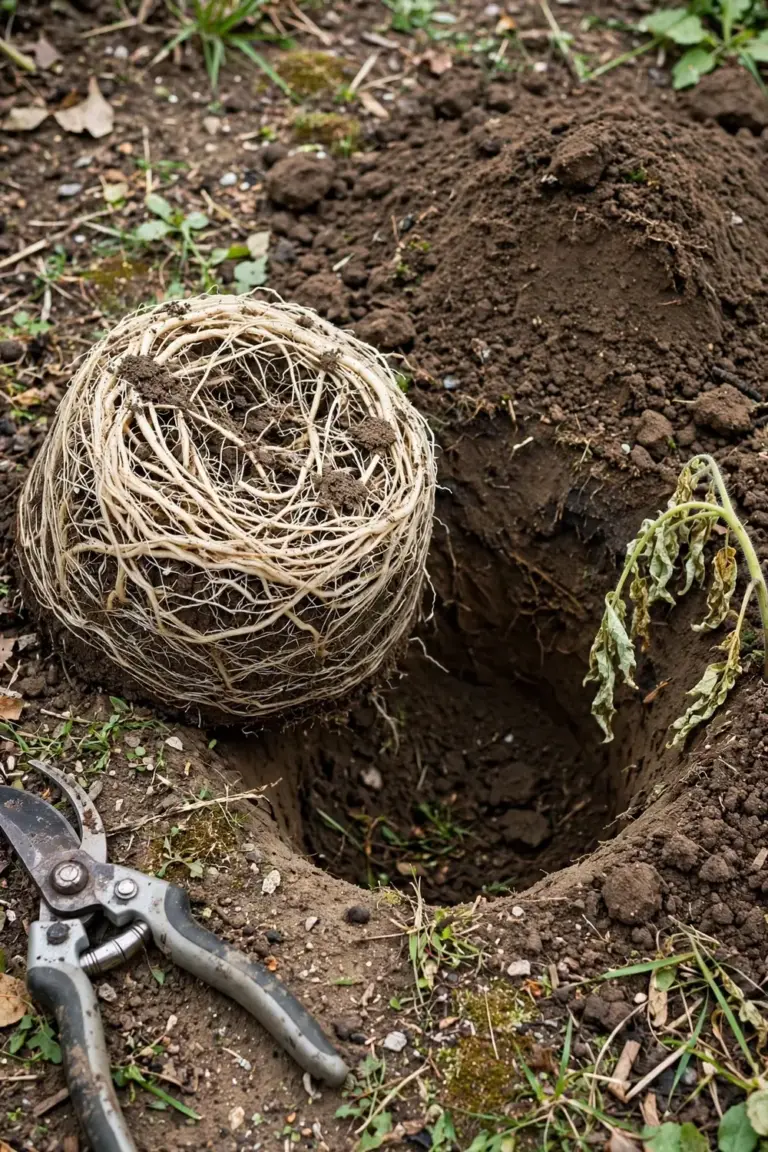
Look at the calendar first. A plant moved within the last few weeks is still settling. New growth is the sign that matters. A plant pushing fresh leaves is recovering. A plant with no new growth and dropping leaves needs help, not fertilizer.
Dig gently at the edge of the root ball. A root-bound plant shows roots circling the ball in a tight mat. Circling roots keep circling after planting. They strangle the stem and never reach out into the bed. Tease the outer roots loose before planting. Cut the worst circling roots with clean secateurs. A plant that went into the ground still in its pot shape never truly establishes. Bare-root and seed-grown plants skip this failure entirely, which is one reason seed starting gives such sturdy transplants: the roots grow outward from day one instead of circling a pot wall.
Keep a shocked plant watered and shaded. Water at the root zone, not over the leaves. Shade the plant with a cloth or an upturned crate for a few days in hot weather. Skip fertilizer until new growth appears. Fertilizer pushes soft top growth that stressed roots cannot support. Planting depth matters as much as timing. A plant set deeper than it grew in its pot suffocates at the stem. Soil piled against the stem traps moisture and rots bark. The root flare, where the trunk widens into roots, should sit at soil level. Scrape soil away from a buried stem and the plant often recovers without any other fix.
6. Check for Salt and Fertilizer Burn
Good soil plus extra fertilizer equals salt damage. Fertilizers are salts. Heavy or repeated doses raise the salt level in the soil. Salt pulls water out of roots. The plant wilts in damp soil, leaf tips brown, and growth stops. The soil test may still read high nutrients. High nutrients are the problem.
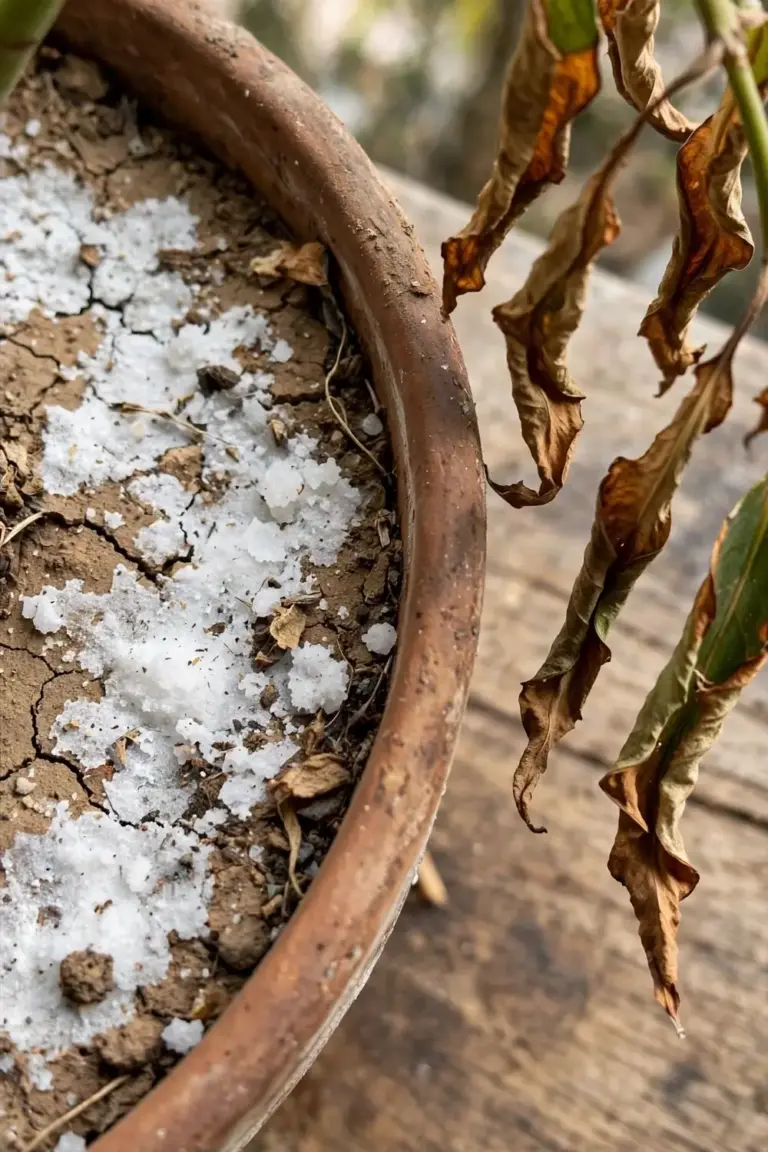
Look for the signs. A white crust on the soil surface means salt buildup. Brown, crispy leaf edges mean salt burn. A plant that worsens after every feed points the same way. Bore water adds salt too. Bore water with a high salt load leaves the same crust and the same brown edges over months.
Flush the salt out with water. Fertilizer injury from the University of Maryland Extension explains the mechanism: soluble salts in fertilizer can burn root tissue, and the fix is to soak the area with one-inch applications of water, three to four times, to leach excess salts from the soil. One inch is 2.5 cm. Water slowly so the water soaks in instead of running off. Repeat the soak three or four times across a week.
Stop feeding until the plant recovers. A struggling plant does not need more fertilizer. It needs the salt gone. Read the product label before the next feed, because the label rate is a ceiling, not a target. A plant in good soil often needs no feed at all for a season. Slow-release granules left on dry soil are a common culprit. They sit on the surface, then dump salts in the first heavy watering. Sweep spilled granules off paths and pot rims, and water granules in lightly at application time.
7. Check pH Lockout: Nutrients Present, Plant Starving
pH lockout is the subtlest hidden cause. The nutrients sit in the soil. The plant cannot reach them. Soil pH controls whether nutrients stay in forms roots can absorb. In very acid or alkaline soils, some nutrients convert to forms that are harder for plants to absorb, and the plant shows deficiency symptoms while the test report shows plenty. Soil pH from Colorado State University Extension states exactly that link between pH and nutrient availability.
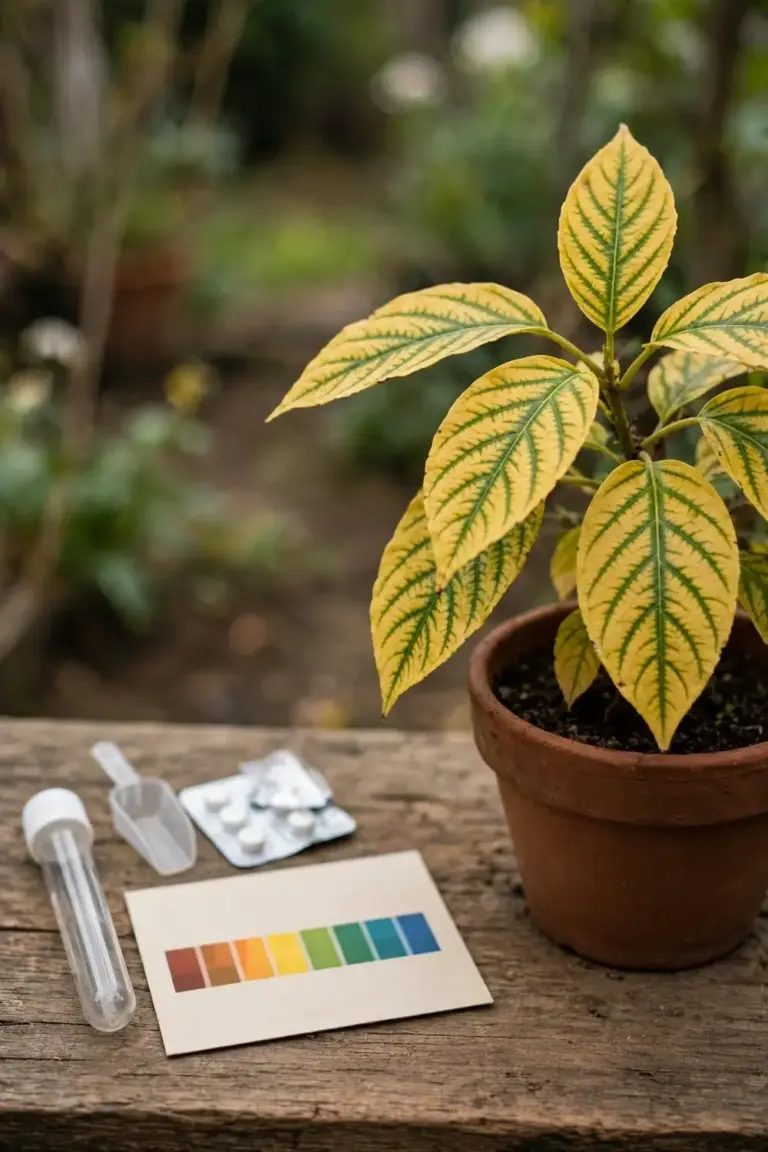
Read the pH number on the report. A pH near neutral suits most garden plants. Colorado State University Extension calls the range of 6.8 to 7.2 near neutral. Below that range, the soil turns acid. Above it, the soil turns alkaline. Either extreme locks out some nutrients while leaving others available.
Match the symptom to the pH. Yellow new leaves with green veins point to iron shortage, and iron shortage is common in alkaline soil. Purple-tinged leaves and weak roots point to phosphorus trouble, and phosphorus trouble is common in strongly acid soil. The nutrient is present. The pH keeps it locked. A home pH kit or probe gives a quick reading between lab tests. Take the reading from moist soil at root depth, not from a dry surface crust, and test in two or three spots. One reading from one spot can mislead the same way one blended sample can.
Fix the pH, not the nutrient. Lime raises pH and sulfur lowers it. Follow the test report recommendation or the product label for the amount. Never guess the dose. A pH shift takes weeks to work through the soil. Retest after the amendment has had time to act. Feeding more of the locked-out nutrient changes nothing while the pH stays wrong. One caution applies to alkaline soils with free lime. Large acid doses bounce off the buffering lime and the pH barely moves. In that case, pick plants that suit alkaline soil instead of fighting the soil chemistry season after season.
8. Check Below Ground for Grubs and Root Rot
Pests and disease work out of sight. A plant with chewed roots cannot drink, no matter how good the soil is. A plant with rotting roots cannot drink either. Both look like a watering problem from above. The soil test says nothing about either.
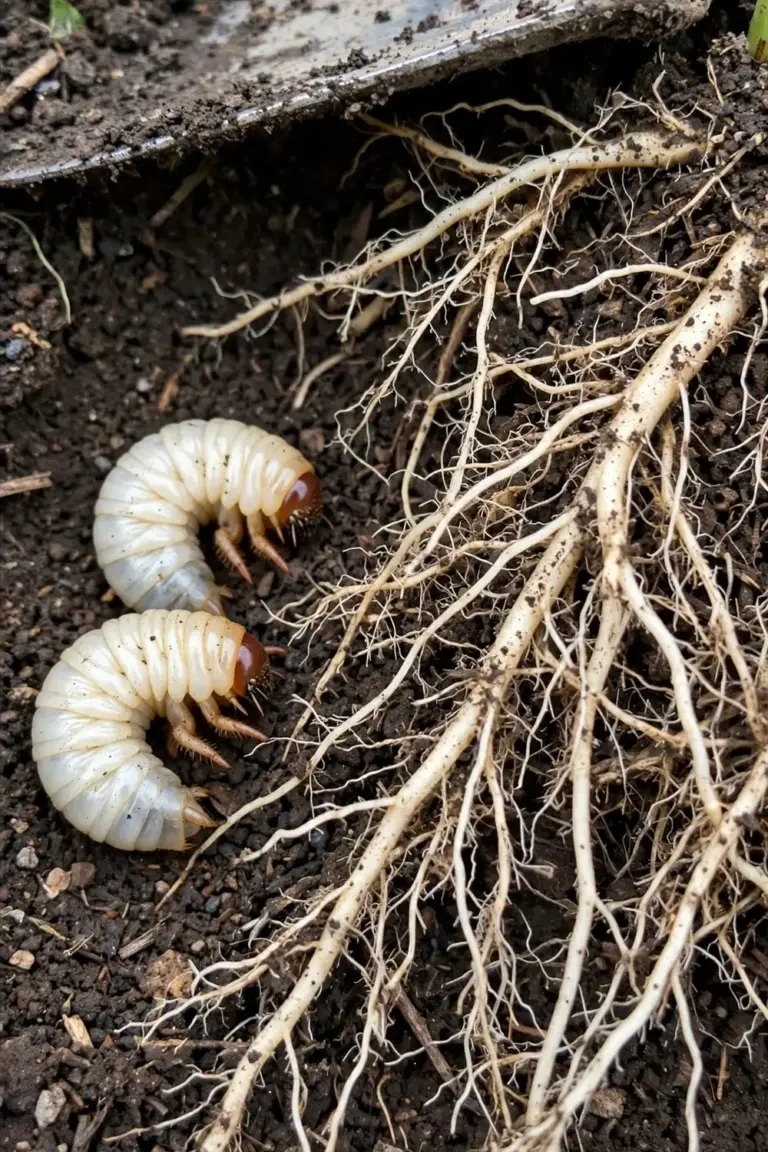
Lift a potted plant and look at the roots. Healthy roots are firm and white, with a fresh earthy smell, while brown, soft, foul-smelling roots mean rot. White curl grubs in the soil mean root feeding. A plant that lifts out of the ground with no resistance has lost its anchor roots. These are the signs that separate a below-ground problem from a water or light problem.
Grubs eat roots from below. Lawns and beds with curl grubs show patchy, wilting plants that pull up easily. Birds scratching at the same patch are a second clue. Confirm by digging one spade of soil and counting grubs. A few grubs are normal. A dense cluster under one plant explains its failure. When the checks run out and the plant still fails, take the note to a nursery or extension office. A sample of the damaged roots in a sealed bag, plus the note, gives the expert something concrete to diagnose. Guessing at a spray without a diagnosis wastes money and can harm the plant further.
Root rot follows wet soil. Roots in saturated soil suffocate, then fungi move in. The fix starts with drainage, not spray. Let the soil dry between waterings. Lift the plant, trim soft roots with clean secateurs, and replant into free-draining mix. A plant with most of its roots rotted rarely recovers. Replace it and fix the drainage before planting again. For pest control steps, the site’s guide to organic pest control for beginners covers the organic-first approach. When a bed needs rebuilding after rot or grub damage, the site’s guide to fall garden bed prep covers the soil, compost, and mulch work that rebuilds a healthy bed.
9. Run the 7 Checks in This Order
Order matters. Cheap checks come first. Each check rules out one cause before you spend money on the next. Skip around and you will feed a plant that needed water, or water a plant that needed shade.
| Order | Check | Test | Fix |
|---|---|---|---|
| 1 | Water | Finger test, top couple of inches, plus the lift test on pots | Water deeply if dry, or wait and drain if wet |
| 2 | Light | Shadow test, morning to afternoon | Move the plant to a brighter spot, or shade it through harsh afternoon sun |
| 3 | Compaction | Screwdriver or fork probe in three spots, in moist soil | Fork the hard layer, mulch, keep feet and wheelbarrows off wet soil |
| 4 | pH | Read pH on the report | Lime or sulfur per report, then retest |
| 5 | Salt | White crust, brown leaf edges, recent heavy feeding | Flush with slow 2.5 cm soaks, three to four times across a week, then stop feeding |
| 6 | Roots | Recent move, circling roots | Tease roots, water, shade, wait |
| 7 | Pests and rot | Lift the plant, inspect roots and soil | Trim rot, fix drainage, treat grubs per label |
Work the list top to bottom. Water first because it is free and fast, light second because moving a pot costs nothing, and compaction third because the fork test takes two minutes. pH comes fourth because the report already holds the number, salt fifth since the crust is visible, and roots sixth because digging disturbs the plant. Pests come last because lifting the plant is the most disruptive check of all.
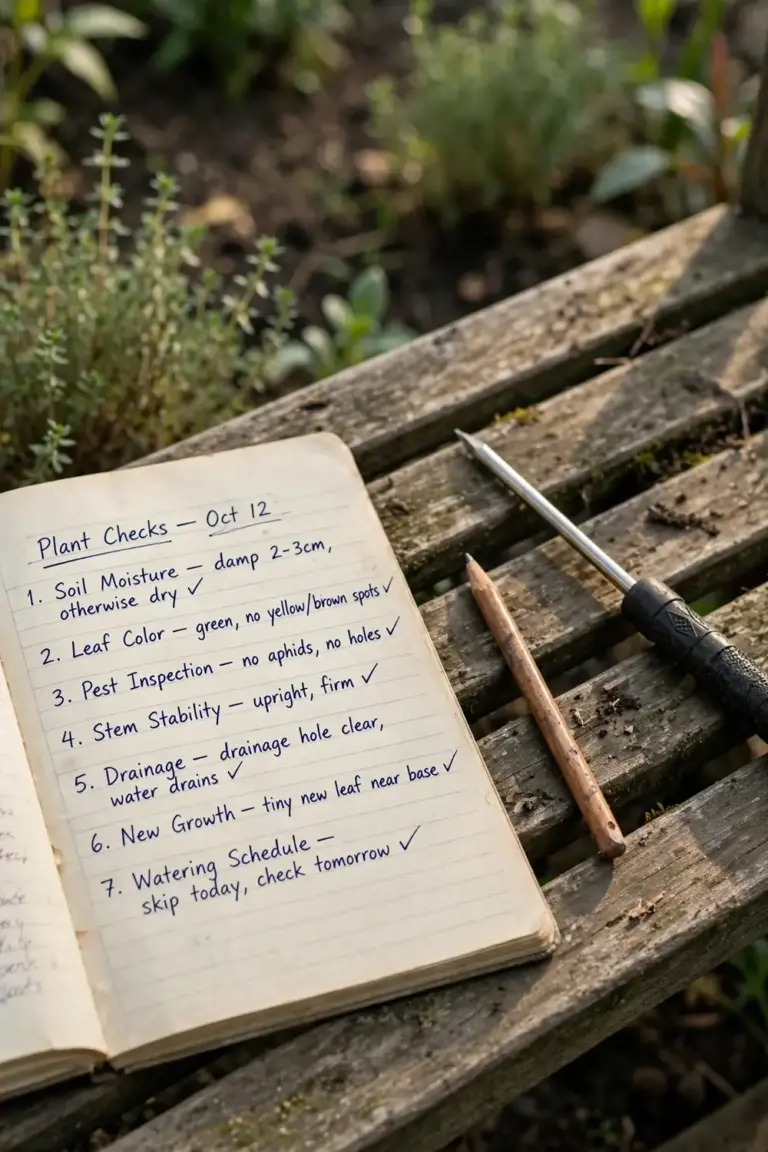
Write down each result. A short note per check beats memory. “Finger test dry. Shadow test sharp at noon. Fork stops at 10 cm.” That note is the diagnosis. Bring it to a nursery or extension office if the plant still fails after the first fix. A clear note gets a clear answer. Two failures can stack. A plant can sit in compacted soil and carry salt burn at the same time. Fix the first failure, wait two weeks, and run the list again. The second failure shows itself once the first is gone.
10. Frequently Asked Questions About Plants Struggling in Good Soil
Yes. A standard test measures pH plus nitrogen, phosphorus, and potassium. It skips drainage, compaction, salt, and soil life. A bed can pass the measured numbers and still block roots, drown them, or lock nutrients away. Treat the report as a partial snapshot. Run the 7 checks above to cover the gaps the lab never measured.
Give a moved plant several weeks. New leaves mean recovery is underway. Wilt that eases each morning means the roots are catching up. Wilt that stays all day, or leaves that yellow and drop for weeks, means a deeper problem. Check water, light, and compaction first. Skip fertilizer until fresh growth appears, since stressed roots cannot support a fed canopy.
No, not first. Fertilizer feeds a plant that can already drink and breathe. A plant with wet roots, compacted soil, or salt burn gets worse with more fertilizer. Rule out water, light, compaction, and pH first. Feed only when the checks pass and the plant still looks hungry. When you do feed, follow the label rate exactly. The label rate is a ceiling.
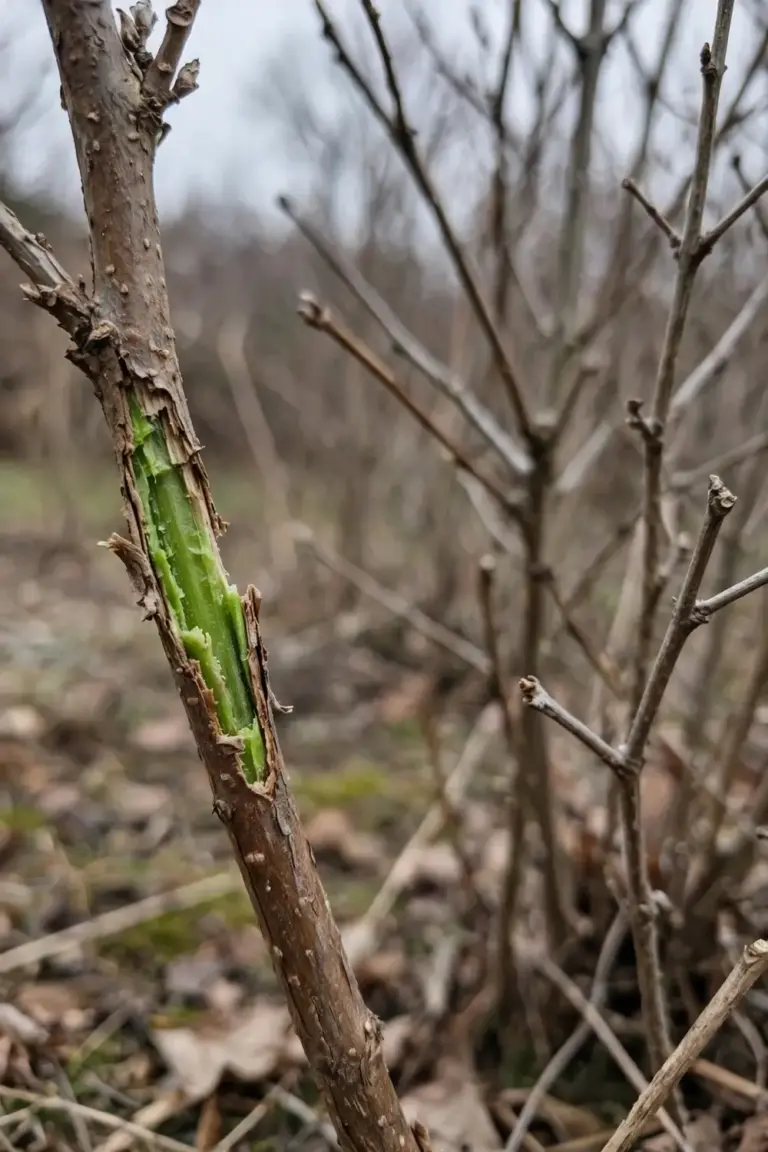
Yes, sometimes. Many plants rest in winter and drop leaves or stop growing. In Australia that rest falls in June to August. A plant that stalls in winter and wakes in spring is resting, not failing. Check for life with a scratch test on a stem. Green under the bark means alive. Brown and dry through means dead. Never judge a resting plant by its winter leaves.
Dig when the checks point below ground. Lift the plant if the finger test, light test, and fork test all pass and the plant still fails. Inspect the roots for rot, grubs, or circling. A plant with mostly firm white roots can go back with better drainage. A plant with mostly rotted roots will not recover. Replace it and fix the drainage before the next planting.
11. Start With Water, Then Light, Then the Fork
The soil test did not lie. It answered a narrow question. The plant answers the wider one. Water first, light second, fork third, pH fourth, salt fifth, roots sixth, and pests last. That order finds the real cause without spending a cent on the wrong fix.
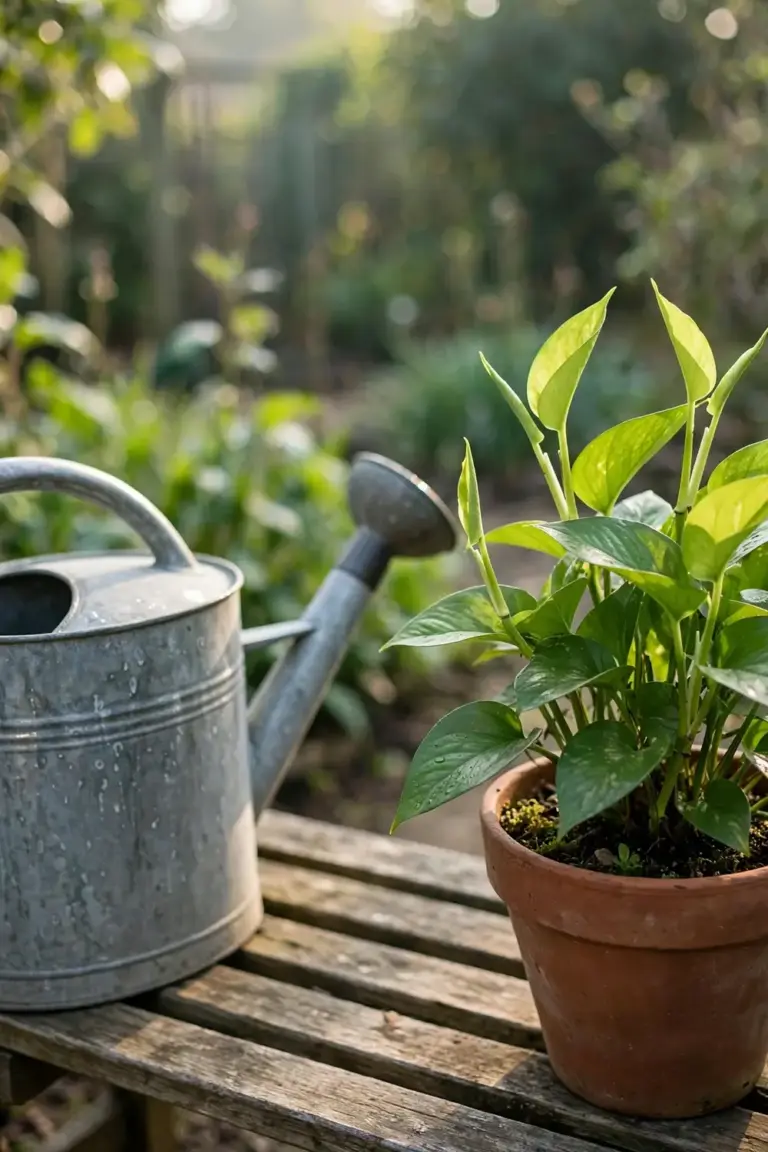
A plant that struggles in good soil is giving you information. The soil is fine. Something outside the report is wrong. Find that thing, fix that thing, and the plant does the rest.
When all 7 checks pass and the plant still fails, retest the soil. A fresh test from beside the struggling plant, taken at root depth, may show what the first sample missed. A plant that fails every check and every retest may be the wrong plant for the spot. A sun lover in shade never thrives, and a thirsty plant in a dry bed never settles. Moving a wrong-plant-right-spot mismatch to a better position beats another season of fixes. The 7 checks tell you when the soil is innocent. The next move is yours.