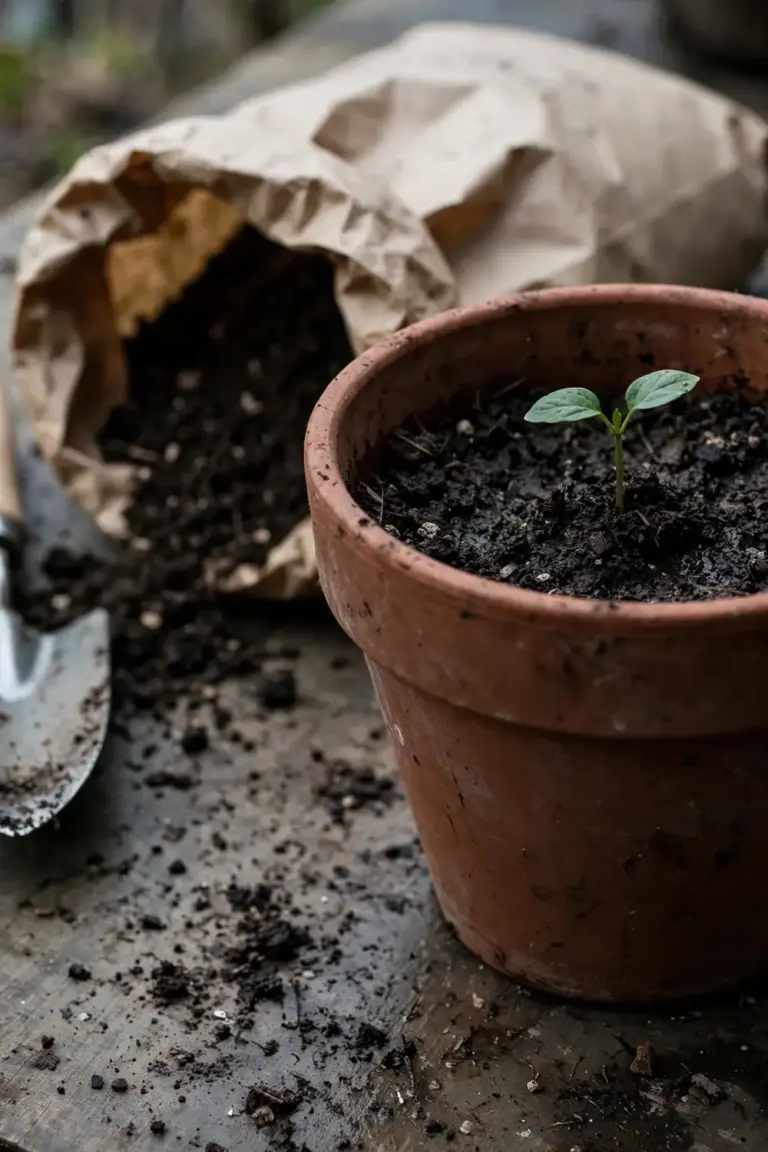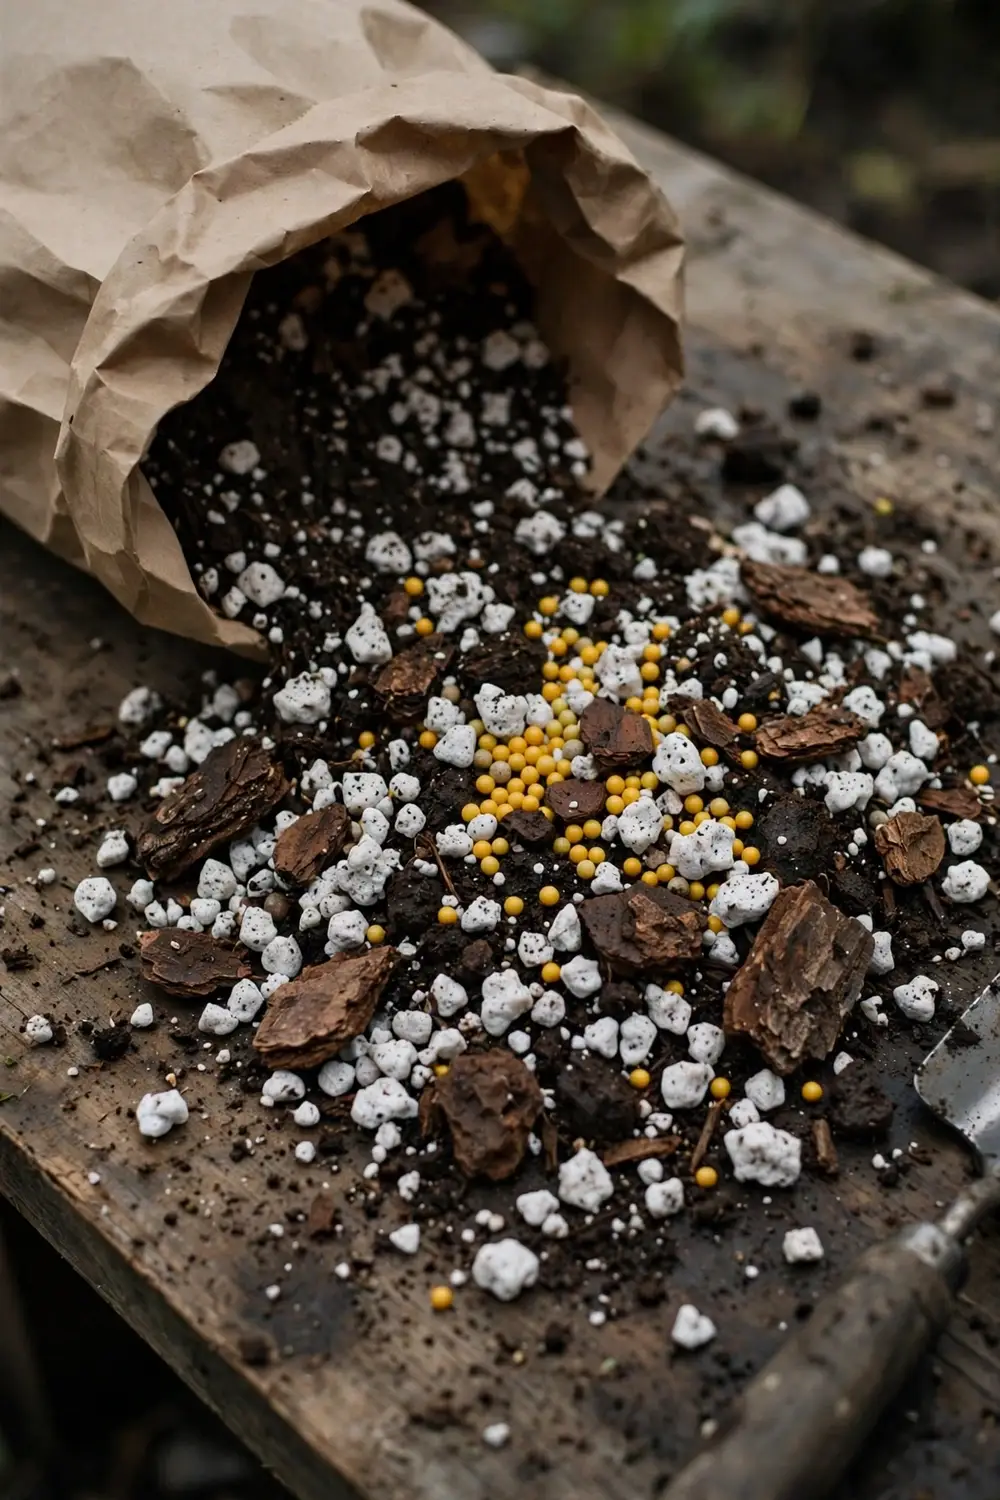

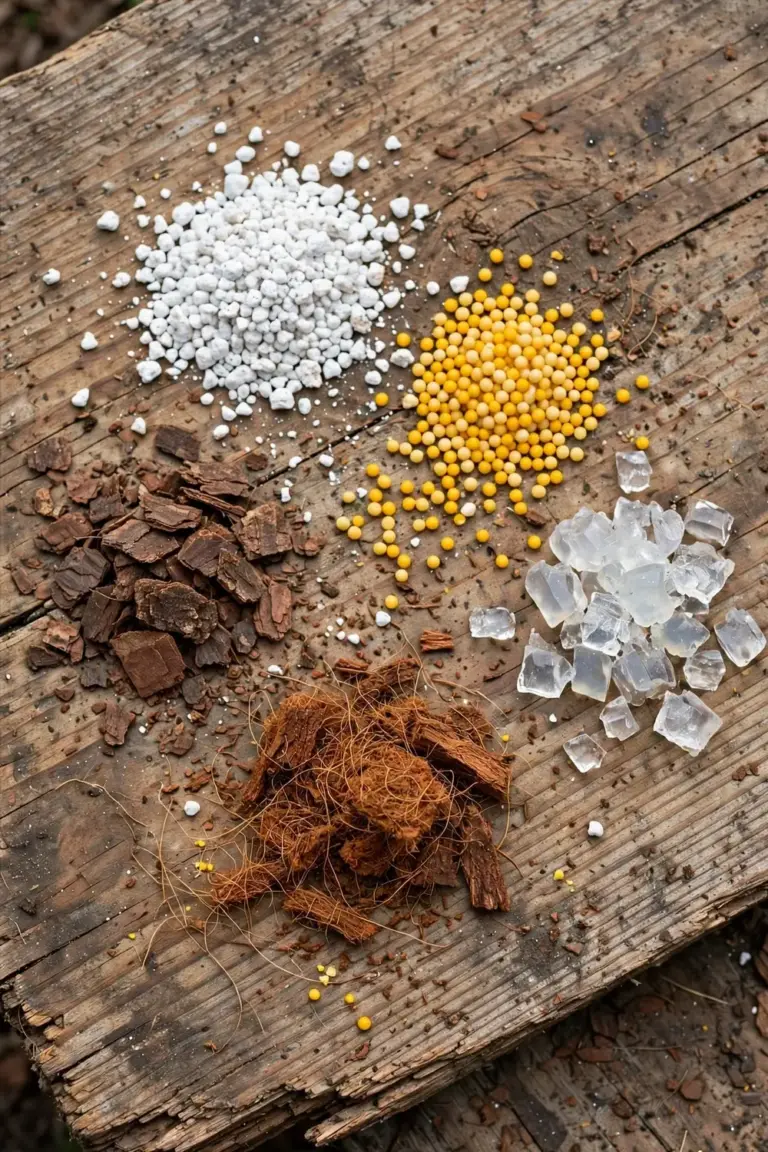
Tip a bag of potting mix into a pot and 8 finds can stare back at you: white bits, round balls, brown chunks, clear jelly, white fuzz, mushrooms, tiny flies, and a label. That is the short answer to what’s in my potting mix. Potting mix is a soilless container medium, not soil. Every find has a name and a next step.
I have learned that the prill I squeeze tells me more than the label, because an empty shell means the feed is already spent.
The rest of this page walks through 8 finds, from the white bits to the safety check. Seedlings sit in the same mix, so the seed starting guide rules on clean mix apply here too.
| Find | What It Is | What to Do |
|---|---|---|
| White irregular bits | Perlite, volcanic rock | Leave it in the mix |
| Round yellow or brown balls | Slow-release fertilizer prills | Squeeze one to test for feed left |
| Brown chunks | Bark or coir, the mix base | Leave them, pick out oversized pieces for seedlings |
| Clear jelly chunks | Moisture-retaining gel | Leave it, it breaks down over the season |
| White fuzz on the surface | Saprophytic mold | Scrape it off and dry the top |
| Yellow mushrooms | Flowerpot mushroom | Pick them and bin them, never eat them |
| Tiny flies | Fungus gnats | Dry the top layer |
| Dust when you open the bag | Dry mix plus spores | Moisten first, wear gloves and a mask |
1. Identify the White Bits: Perlite, Not Styrofoam
The white bits are perlite. Perlite is small, white, irregular shaped volcanic rock that was crushed and heated until it expanded, and the UMass Extension potting mix guide calls it non-toxic, sterile, and odorless. Perlite improves drainage and aeration. It feeds the plant nothing. Its job is physical: air pockets around roots.
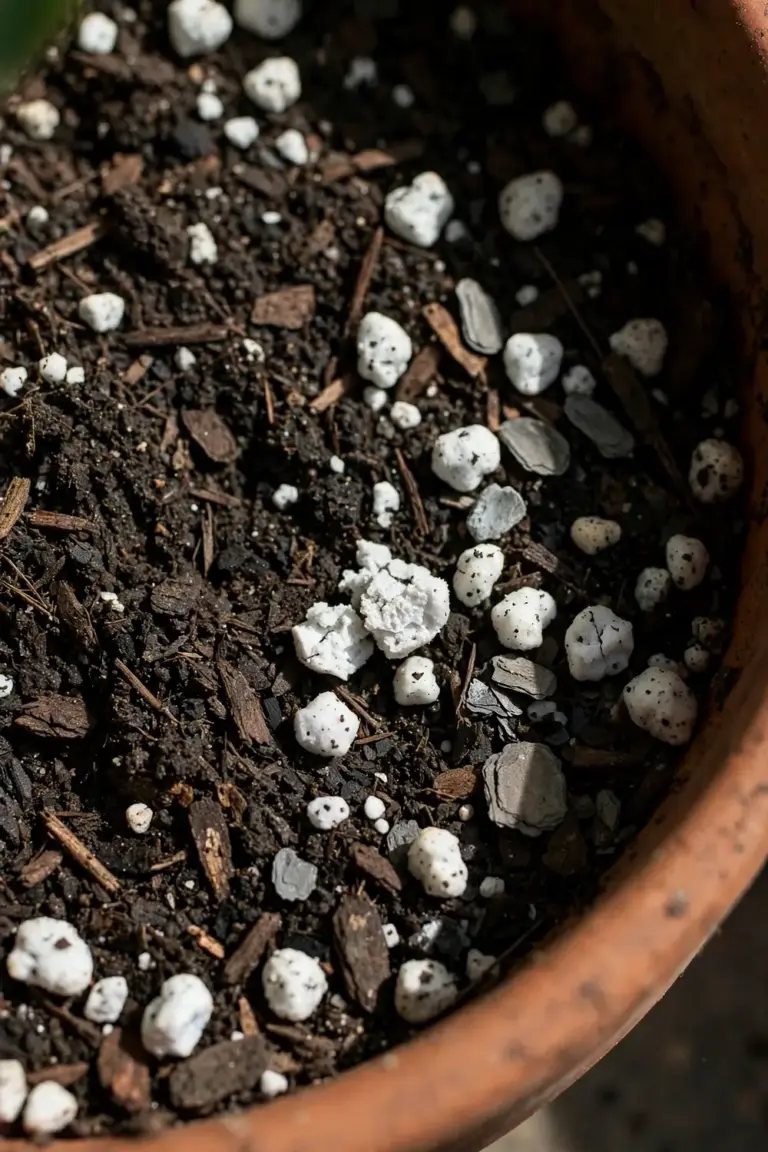
The crush test separates perlite from its lookalikes. Perlite crushes into gritty powder between thumb and finger, while Styrofoam squashes flat and springs back. UMass notes that Styrofoam beads sometimes serve as a cheap perlite substitute in low grade mixes. Styrofoam floats to the surface when watered and compacts over time, while perlite holds its shape through the season.
Perlite has a greyish cousin in the same bag. Vermiculite is a very light, greyish puffy substance that forms when mica chips are heated, and the UMass Extension potting mix guide states that it holds moisture and nutrients around roots instead of letting them wash out the base of the pot. Perlite drains. Vermiculite holds. A mix with both gives air and water at once. A mix with only perlite dries fast and wants more frequent watering.
Leave perlite alone. A mix without it holds water too long and roots run short of air. If a bag pours out a cloud of white dust, that dust is the only real problem perlite causes. Tip the mix into the pot outdoors or near an open door. Dampen the mix before you work it. The dust settles and the perlite keeps doing its job.
Perlite floats. A heavy watering lifts the lightest granules to the surface, and a white crust of perlite on top of the pot looks like a problem. It is not. Push the granules back down with a finger and water more gently next time. A slow pour from a jug beats a hard blast from a hose. The perlite returns to the mix and the surface looks like soil again.
2. Squeeze the Round Balls: Slow-Release Fertilizer Prills
The round balls are fertilizer prills, not eggs and not seeds. Prills are small and round and evenly distributed through the mix, and the UMass Extension potting mix guide explains that each prill is water soluble fertilizer inside a semi-permeable resin coating. Water draws small amounts of nutrients out through the coating over several weeks. Warmth speeds the release. Cold slows it.
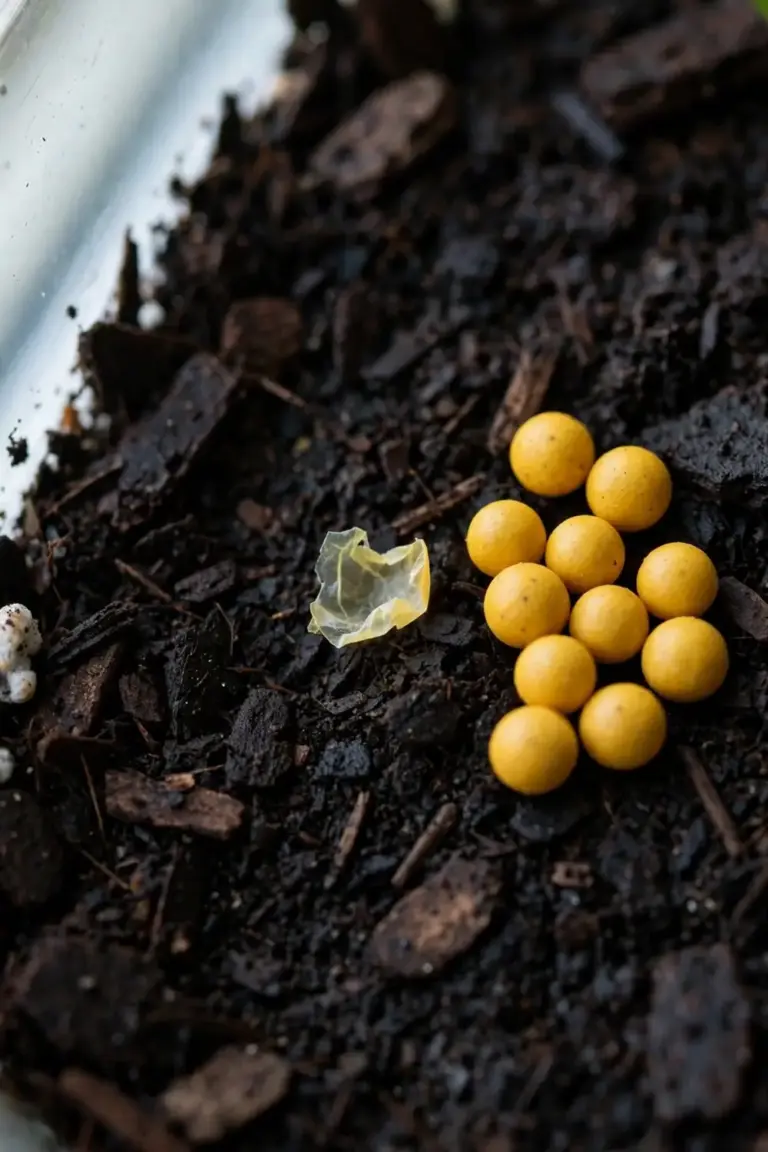
The squeeze test tells you whether feed is left. Pinch one prill between thumb and finger. A full prill resists and feels firm. An empty prill collapses into a thin shell. UMass states that squeezing the prills can indicate whether fertilizer has been depleted. If the prills are empty, the feed is spent and you feed the plant yourself.
Labels use three names for the same prill. Controlled-release, time-released, and slow-release all describe fertilizer inside a resin coating that meters nutrients out over weeks. UMass groups all three terms under continuous fertilizer. The coating is the whole trick. Water enters through the coating, dissolves a little fertilizer, and carries it out to the roots. No coating means no metering, and a bare fertilizer granule dumps its full dose in one watering.
Australian mixes lean hard on prills. The ISHS container media paper on the Australian experience records that most growers use controlled-release fertilizers as the main, often only, source of nutrients for their plants. A bag that lists a starter charge carries only a minimal amount of fertilizer. UMass notes that most starter charges wash out after two or three waterings. Prills carry the longer feed.
Heat sets the pace. Release follows temperature, so a prill in a Darwin summer releases faster than the same prill in a Hobart winter. A bag that promises feed for a set number of months states that span for average conditions. In a hot climate the feed runs out early. In a cool climate it runs long. Watch the plant, not the calendar. Pale new leaves mean the prills are spent, whatever the bag promised.
One warning matters. A bag that got wet in storage can pre-release its fertilizer inside the bag. UMass warns that wet mix concentrates the released fertilizer and burns plant roots. A heavy, soggy bag with prills inside is a bag to skip. Buy dry, light, fluffy bags. Store them dry. UMass states that bagged potting mix containing slow-release fertilizer must be stored dry, and a bag that feels heavy and compact has either soaked up water or carries too much sand.
3. Read the Brown Chunks: Bark and Coir
The brown chunks are bark or coir, and they form the base of the mix. Bark products are ground or partially composted by-products of the timber industry, and the UMass Extension potting mix guide credits them with good aeration and a faster drying rate than peat moss. Coir is reddish-brown fiber from coconut husks. Coir re-wets more easily than peat moss after drying out.
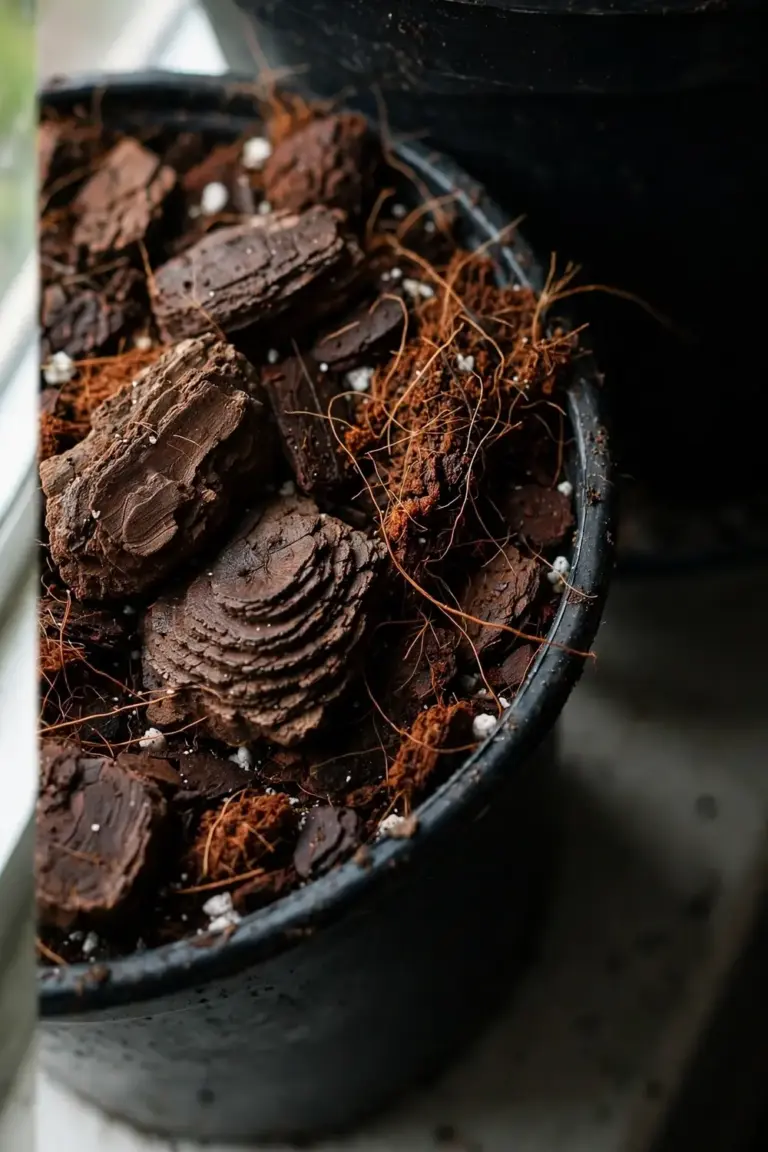
Australian mixes run on bark. The ISHS container media paper on the Australian experience states that Australian growing media is mostly based on the composted bark of pine trees, with coir fiber dust as another bulk component. All Australian media are soilless. The same paper records that formulation follows the Australian Standard for Potting Mixes, which sets limits for physical and chemical properties. The chunks you see are the structure of the mix, not contamination.
Peat still appears in many bags, and it brings its own quirks. Peat moss often makes up 30 to 80 percent of potting mixes, and the UMass Extension potting mix guide states that peat decomposes very slowly and holds moisture while keeping air space for roots. Peat is acidic, so limestone joins the mix to balance pH. Peat by itself is hard to wet, which is why wetting agents enter the recipe. A bag that lists peat first will hold water longer than a bark-heavy bag, and it will want a lighter hand on the watering can.
Bark has one real cost. Bark immobilizes nitrogen as it breaks down, and UMass states that barks should not be used in starting seedlings for that reason. A seedling mix with big bark chunks starves small roots of nitrogen. Pick out the oversized pieces when you sow seed. Keep the fine fraction.
Coir carries a salt warning. Coir is washed in seawater during processing, and salt residue can reach the mix if the washing was thin. Clemson Extension advises rinsing coir thoroughly with water before use to avoid soil salinity issues. A bagged mix from a reputable maker has already handled this step. Loose coir brick from a market stall may not have. Soak the brick, drain it, and soak it again before you pot into it. The extra rinse costs ten minutes and removes the salt.
Do not top up a pot with garden soil to fill gaps around bark chunks. Garden soil compacts in a container and kills the air space the bark built. The UMass Extension potting mix guide states that mineral-based soils alone are not recommended for container plants because soil in containers becomes very compacted and saturated with water. Potting mix keeps air space open. It holds moisture, drains, and arrives free of weed seeds, insects, and diseases. Soil health belongs in the ground. Bark chunks in a pot are not mulch either. Mulch sits on top of soil outdoors, while bark inside a mix is structure, not a surface layer.
4. Spot the Clear Jelly: Wetting Agents and Moisture Gels
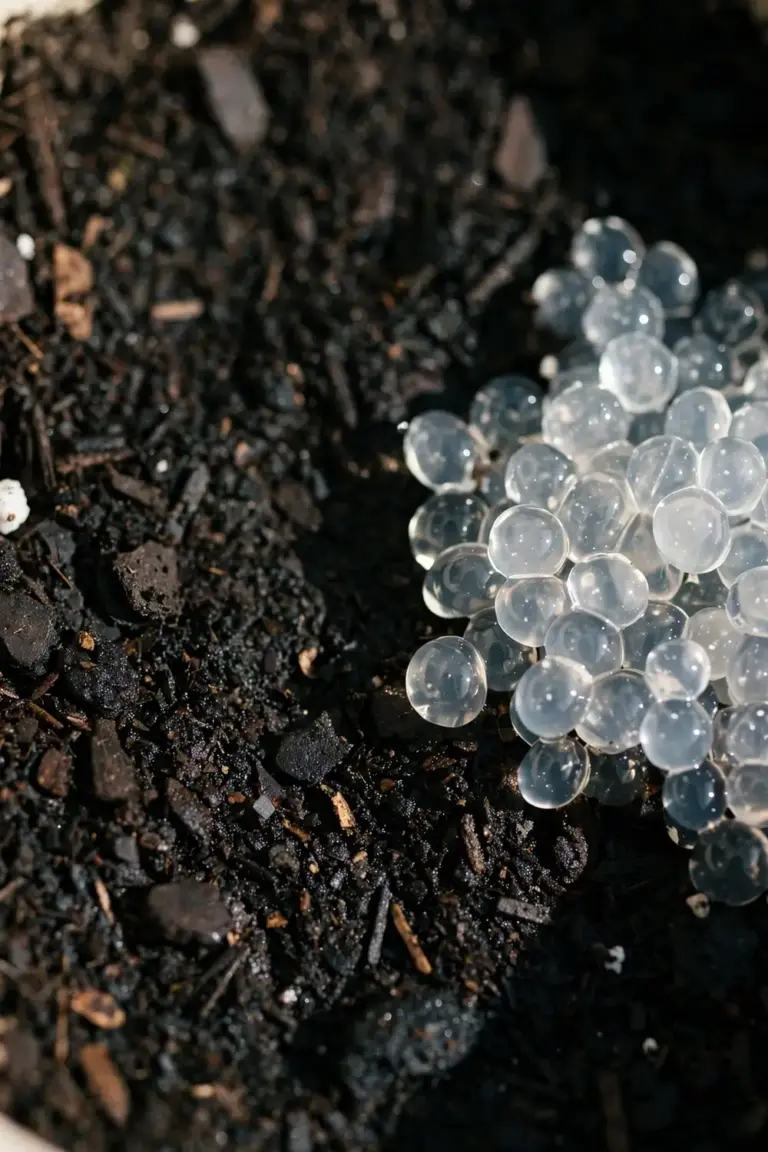
The clear jelly chunks are moisture-retaining gel. Gel looks like clear chunks of glass and feels soft to touch. The UMass Extension potting mix guide states that the moisture holding ability breaks down over the season, usually by mid to late summer. Gel holds water and releases it slowly, and it is not glass and not a contaminant.
Wetting agents leave no visible trace, but they explain why a fresh mix wets evenly. A wetting agent is a chemical substance that lowers the surface tension of water, and UMass states that wetting agents are added to mixes so water spreads and penetrates instead of beading off dry peat. Organic mixes may carry yucca extract as a wetting agent, and the agent does its work and washes out over time.
Leave both alone, since gel needs no action. If an old mix repels water, the wetting agent is spent. Soak the pot from the base until the top feels damp, then water the surface slowly in two passes. Do not pour in dish soap as a home wetting agent: soap strips the waxy coat from roots and leaves, and a soak fixes the same problem without that damage.
Gel brings one more caution in cool weather. The UMass Extension potting mix guide warns that extra care is necessary to avoid overwatering when temperatures are still cool, since gel-held soil dries out slowly. A pot with gel in a cold room can stay wet for days after watering. Check with a finger before you water again, because the gel releases its stored water as the mix dries and the plant still drinks between waterings.
A hydrophobic mix shows the opposite failure: water runs down the sides of the pot and out the base while the center stays dry, the pot feels light, and the plant wilts a day after watering. Soak the pot from the base until the top feels damp. Water the surface slowly in two passes. The second pass soaks in where the first one ran off. A mix that stays hydrophobic after two soaks has lost its wetting agent for good, and repotting into fresh mix beats fighting it.
5. Scrape the White Fuzz: Surface Mold
The white fuzz is saprophytic mold. Saprophytic fungi feed on dead organic matter in the mix, and the UMass Extension potting mix guide states that these organisms will not hurt the plants or roots. Mold appears when the mix stays wet for a long stretch. It is a moisture signal, not a plant disease.
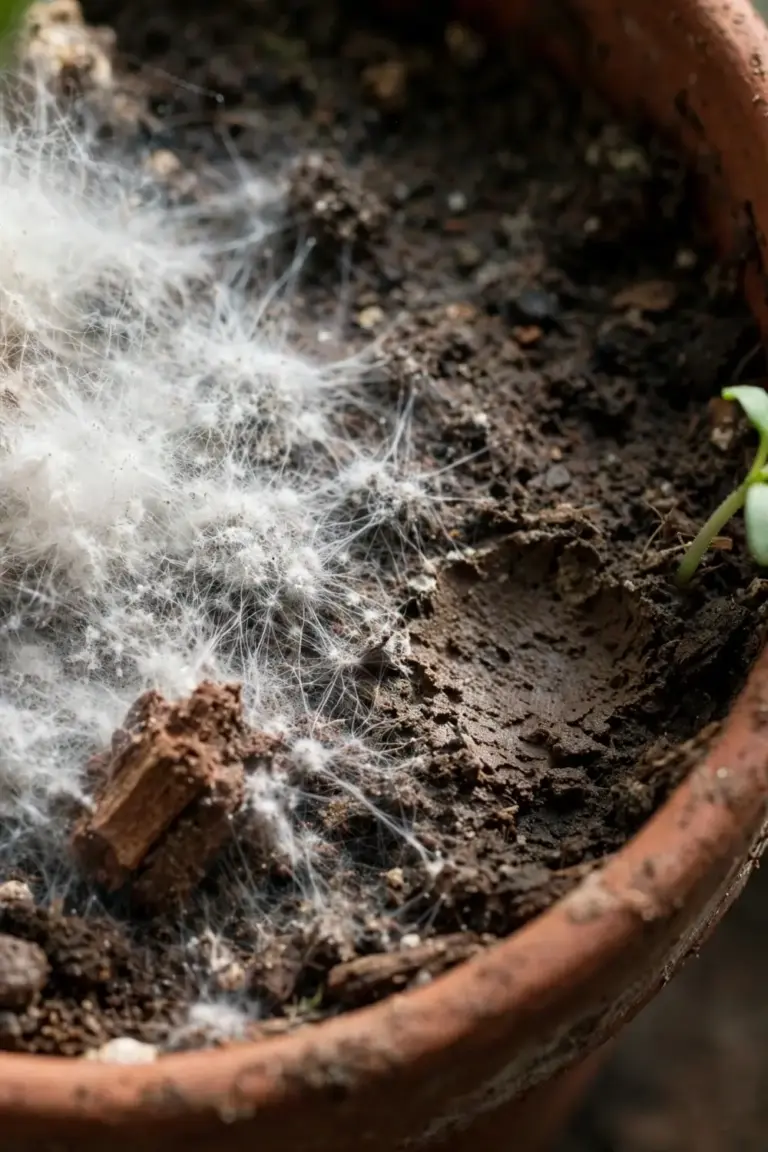
One lookalike needs a different fix. A hard, crystalline white crust is mineral deposit, not mold. The German growing-media association notes that mineral deposits come from fertilizer applications and calcium-rich water, while mold forms a soft fluff that gives way under a finger. Crust scrapes off as grit. Mold collapses as fuzz. The crust is harmless. The fuzz is harmless too. The test tells you which moisture story the pot is telling.
A yellow foamy blob is a third visitor. Slime mold looks like scrambled eggs on the mix surface. UMass groups fungi and slime molds together as saprophytic organisms that will not hurt plants or roots. Scoop the blob out and bin it. Dry the top. The blob is ugly and harmless, and it fades once the mix dries.
Scrape the fuzz off with a spoon and dry the top. UMass advises spreading the media out on a clean surface to dry it and expose it to sunlight, then re-bagging or potting it when dry. In a pot, let the top 2 cm dry before you water again. Move the pot into moving air and brighter light. The mold itself never needed a fungicide, and a spray would only add chemicals to a problem that dryness solves.
Repot only when the mix itself has failed. If the mix smells sour and stays soggy, tip the plant out and check the roots. Brown, mushy roots mean rot has started. Trim the dead roots, repot into fresh mix, and hold water until the top dries. A pot that grows mold once will grow it again if the watering habit stays the same, so the fix is the habit, not the spray bottle.
Clean the old pot before it holds a new plant. The German growing-media association advises cleaning a moldy pot with a surface disinfectant or a vinegar solution. Scrub the inside, rinse it, and let it dry in the sun. A pot that held mold holds spores in every pore, and fresh mix in a dirty pot starts the cycle again.
6. Pick the Yellow Caps: Mushrooms in the Pot
The yellow mushrooms are flowerpot mushrooms. The species is Leucocoprinus birnbaumii, and the UF/IFAS Extension flowerpot mushroom guide states that these mushrooms do not harm the plants they share potting soil with. They decompose the organic matter in the mix. Mature mushrooms stand near 4 inches tall. They are tissue-paper delicate and last a day or two before shriveling away.
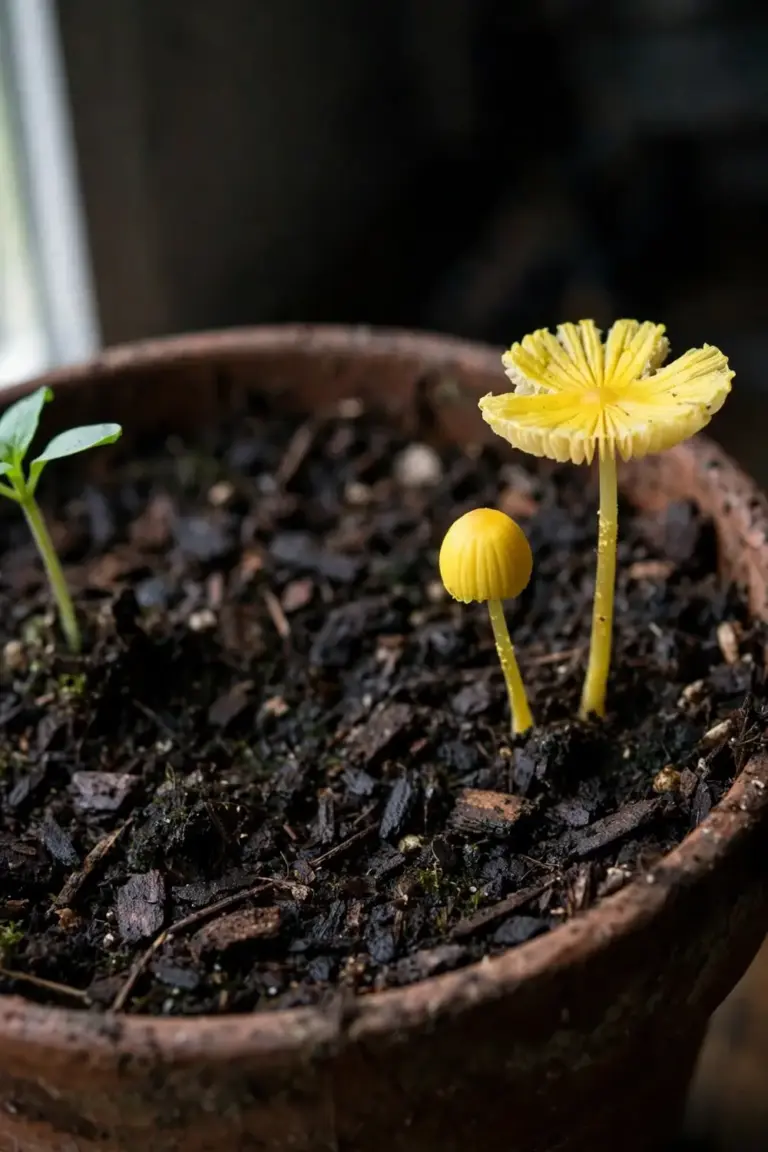
Do not eat them. UMass Extension’s diagnostic lab notes that the same yellow houseplant mushroom is inedible and should never be eaten, even though handling it is safe. UF/IFAS Extension’s potted-plant mushroom guide warns never to ingest any unknown fungi. The fruiting body is the visible tip of a much larger fungus living through the mix. Picking the caps stops spores. Picking the caps does not remove the fungus.
White and brown mushrooms follow the same rule. Any cap in a pot is an unknown fungus until a mycologist names it. Color tells you nothing about safety. A white cap can be just as toxic as a yellow one. The rule stays simple: pick, bin, dry the mix, never taste.
Pick the caps and bin them. Keep pots with mushrooms out of reach of children and pets. Dry the mix between waterings. If mushrooms keep returning, repot into fresh mix and clean the pot. The fungus itself harms nothing, but a pot that fruits mushrooms stays wet enough to grow gnats next.
The fungus arrived with the mix. Spores ride in bagged media and wake when the mix stays damp and warm. No sterilization step at home removes them fully, and a full soil change stresses the plant more than the fungus ever did. A mushroom in a pot is a sign of damp, rich mix, not a sign of a sick plant. Treat the dampness. The fungus follows the water.
7. Dry the Top 2 cm: Fungus Gnats (Brief)
The tiny flies are fungus gnats. Adults hover over damp mix. Larvae live in the top layer and feed on fungi and organic matter. Dry the top layer and the cycle breaks. This section stays brief on purpose. Gnats are one find among eight, not a pest manual.
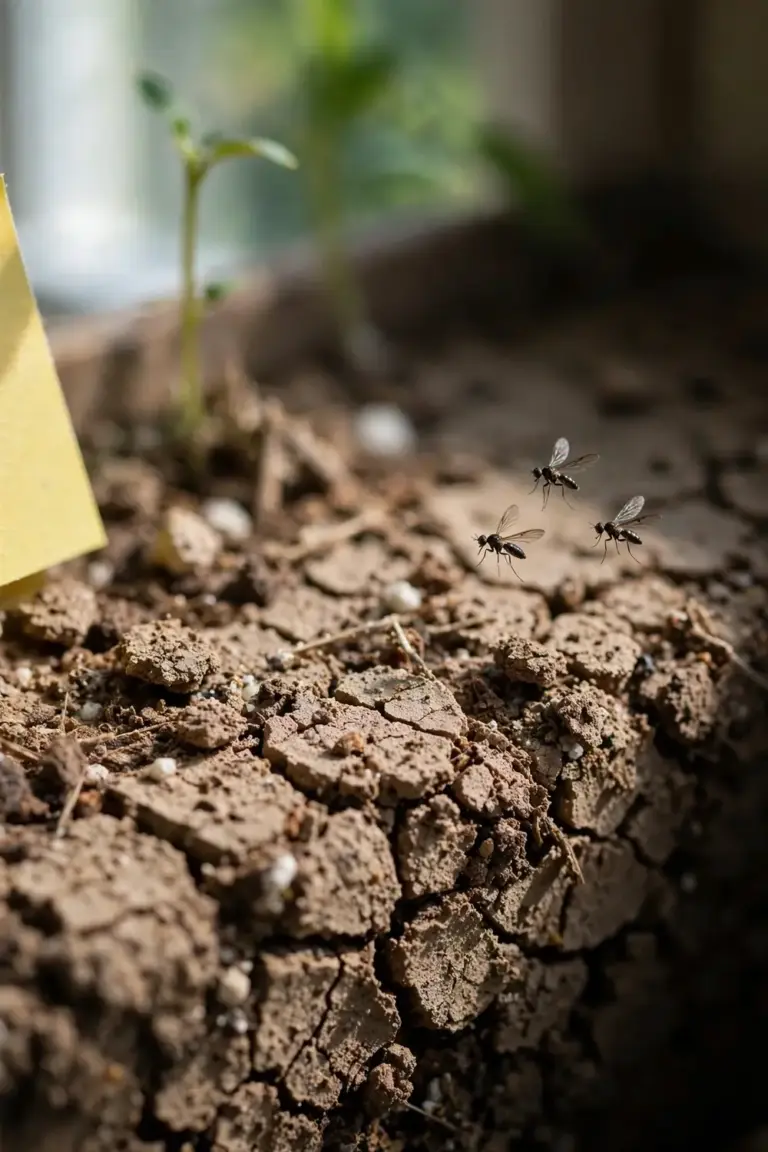
Let the top 2 cm dry before you water again. The UC IPM fungus gnat guide recommends allowing the surface to dry and using potato chunks to trap larvae. Lift a chunk after a few days, check the underside for larvae, and replace it. Biological control with Bacillus thuringiensis subspecies israelensis, known as Bti, targets the larvae. UC IPM notes that Bti does not persist indoors, so infestations in potting media may need repeated applications at near five-day intervals.
Skip the home remedies that do not work. A sand layer on top traps moisture underneath and gnats find the gaps. Apple cider vinegar traps catch fruit flies, not fungus gnats. Drying the top layer plus Bti handles the larvae, while sticky cards catch adults and show whether numbers are falling. Oregon State Extension advises small yellow sticky traps, replaced every few days. Place the card just above the mix surface, where adults fly. Apply Bti as a soil drench and follow the label directions for mixing and storage. For the wider pest toolkit, the organic pest control guide covers the methods that scale beyond one pot.
Gnats also ride in on new plants. Quarantine a new pot away from your other plants for a few weeks. Oregon State Extension advises keeping new plants separate with a yellow sticky trap in the pot and inspecting it daily. A plant that arrives with gnats seeds every pot on the bench. Isolation costs nothing and saves the whole collection.
8. What’s in My Potting Mix? Read the Label Before You Buy
The label plus the Australian Standard mark tell you the base, the feed, and the safety class. Australian potting mixes carry a Standard mark that sets limits for physical and chemical properties, and the ISHS container media paper on the Australian experience records that formulation is based on the provisions of the Australian Standard for Potting Mixes. The mark is a floor, not a guarantee. A Plantr AU trial found that Australian Standard Premium mixes varied in growing results. Bags carry Premium or Standard marks under the Standard. Premium sets the higher bar. Read the label, not just the mark.
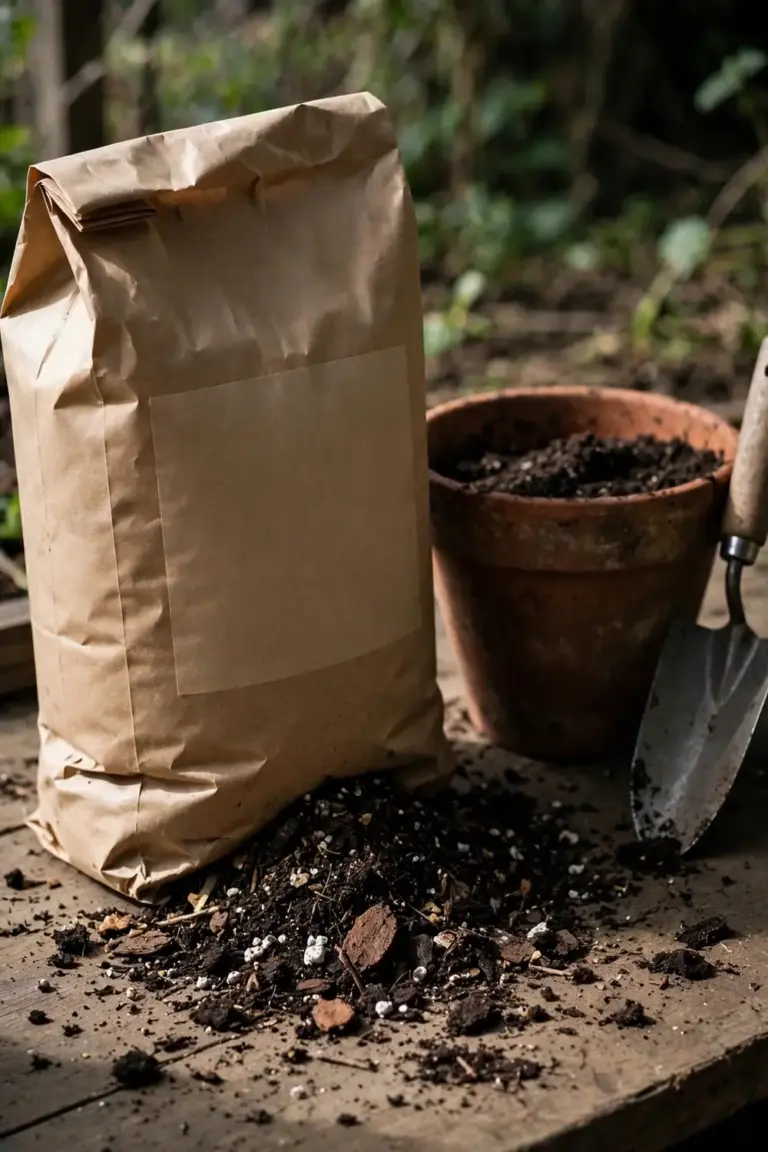
Check three lines on the label. The base line names bark, coir, or peat, and the feed line names a starter charge or controlled-release prills. The safety line warns about dust and spores. A bag that hides all three behind marketing words is a bag to put back on the shelf.
Lift the bag before you buy it. A good bag feels light and fluffy. UMass states that a bag of potting mix should be light, fluffy, and dry, and warns against bags that feel saturated, heavy, and compact. Weight means water, and water in a prill bag means pre-released fertilizer. A heavy bag also compacts in the pot and starves roots of air. The lift test takes two seconds and beats the label every time.
Seal the bag after use. Fold the top down tight and clip it, or tip the leftover mix into a bucket with a lid. An open bag dries out, grows mold on the surface, and invites gnats to lay eggs in it. A sealed bag in a dry shed stays usable for months. Write the purchase date on the bag with a marker. Prills keep releasing slowly even in a sealed bag, so a bag from two seasons ago feeds less than a fresh one.
Open every bag with care. Wattletree Horticulture’s potting mix fact sheet advises a mask, gloves, and eye protection when handling mix. Moisten the mix before you open the bag fully. A Victorian gardener was hospitalised after inhaling spores from a retail bag of potting mix, in a case covered by A Current Affair. The spores live in the dust. Damp mix makes no dust. Work outdoors when you can. Wash your hands after potting.
9. Frequently Asked Questions
White mold on potting mix is saprophytic mold, and it will not hurt the plant or the roots. It feeds on dead organic matter and appears when the mix stays wet too long. Scrape it off, let the top dry, and water less often. Repot only if the mix smells sour and stays soggy.
The yellow balls are slow-release fertilizer prills, not eggs. Each prill is fertilizer inside a resin coating that releases nutrients over several weeks. Squeeze one to test it. A firm prill still holds feed. A collapsed shell is spent. Insect eggs in mix are rare and look different.
Never eat a mushroom from potting mix. The common yellow flowerpot mushroom is inedible and can cause stomach upset. Other pot fungi are unstudied. Pick the caps, bin them, and keep pots away from children and pets. Handling the caps is safe. Eating them is not.
Fungus gnats mean the mix stays wet, not that the mix is bad. Larvae live in the damp top layer and feed on fungi and organic matter. Dry the top 2 cm between waterings. Use Bti for larvae and sticky cards for adults. The mix itself stays usable once the surface dries.
Wear a mask, gloves, and eye protection when you open a bag, because potting mix dust carries spores and bacteria that can irritate lungs. Moisten the mix before you open the bag fully. Work outdoors when you can, and wash your hands after potting. The precaution takes a minute and costs nothing.
10. Start With the Squeeze Test This Weekend
Open your next bag with gloves and a mask. Squeeze one prill. Read the label for bark, coir, and feed. Scrape any fuzz and dry the top. Pick any mushrooms and bin them. Lift the bag first: light and fluffy wins, heavy and soggy loses. The bag tells you everything you need, once you know the names.