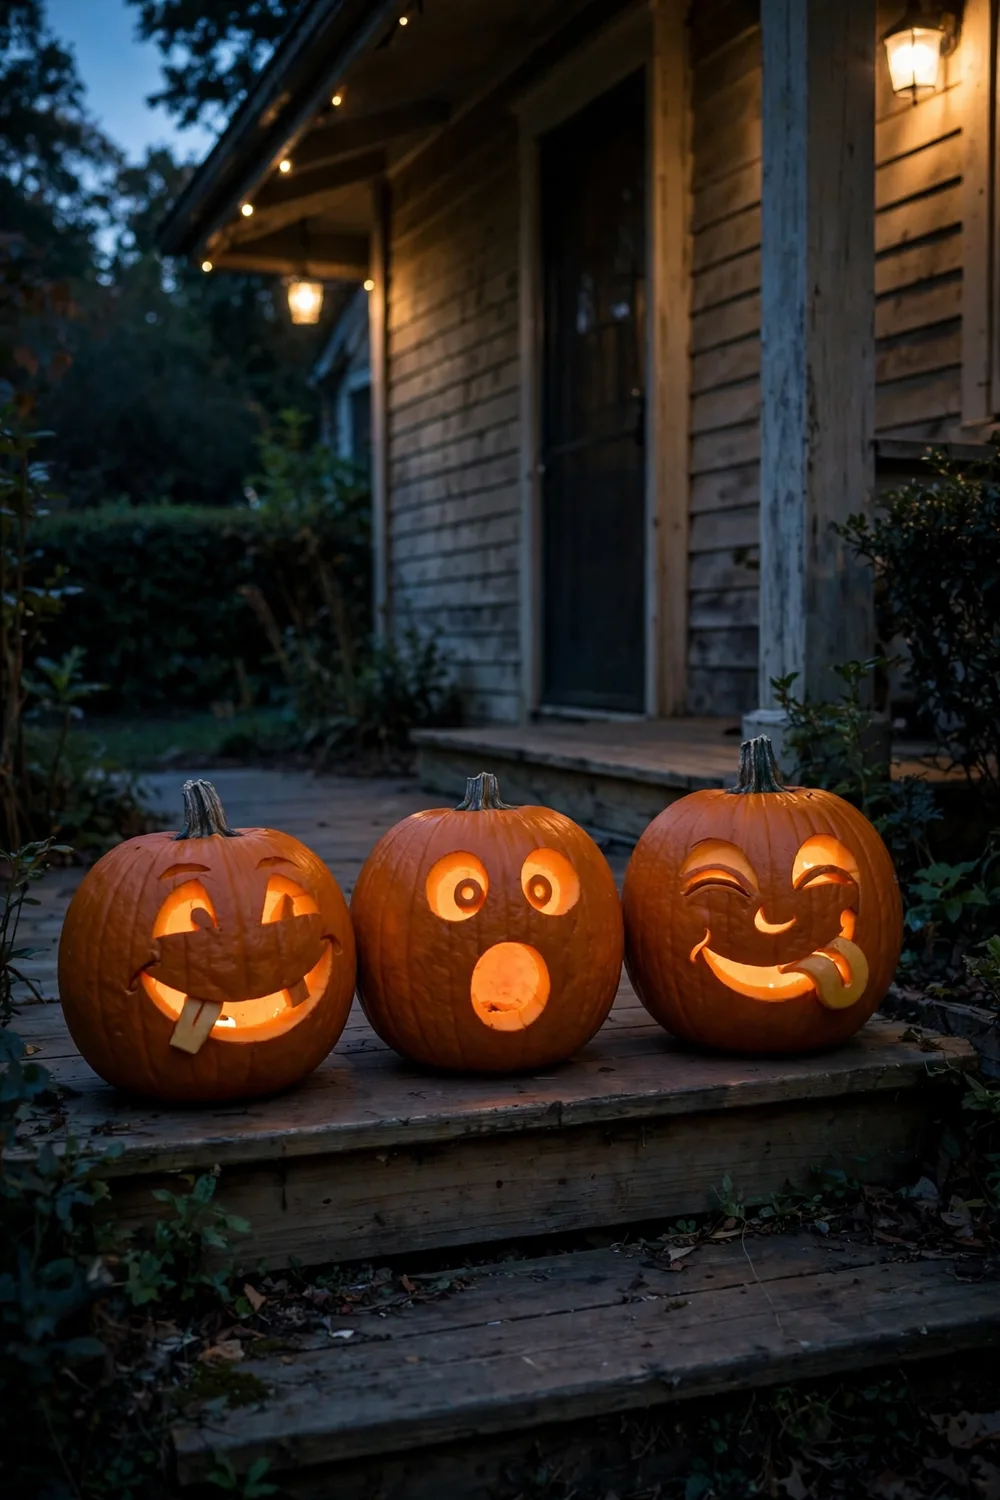

Every October the same thing happens on this street. One house sets out a single perfect jack-o’-lantern, and the whole street quietly agrees the gauntlet has been thrown. Funny pumpkin carving ideas win that friendly contest more often than scary ones do. A pumpkin wearing braces, or one caught mid-yawn, stops every passerby cold. They grin. They take a photo. This list collects 45 of them, starting with the faces that get the biggest laughs.
The first twelve ideas are pure comedy, from a goofy grin with one crooked tooth to a scaredy pumpkin trembling in front of a tiny mouse. The next twelve are easy patterns a beginner can finish in minutes with a drill, a cookie cutter, or a paper template. After that come the artistic carvings, the garden-grown advice, and the party displays. I carve the comedy set first every year and save the fancy etching for the second weekend, and that order works for a simple reason. Funny faces forgive crooked cuts, so they build the knife confidence the detailed scenes later demand.
Pick one idea per pumpkin, and carve close to Halloween night. A carved pumpkin lasts only days on the porch. The quick-pick table below matches nine reader favorites to the tools and minutes they take, so the first pumpkin can be glowing before dinner.
| Pattern | Best For | Tools | Time |
|---|---|---|---|
| Goofy Grin With One Crooked Tooth | First-time carvers | Serrated kitchen knife | 20 minutes |
| Pumpkin With Braces | The photo everyone shares | Knife, foil for the braces | 30 minutes |
| Cat Face With Whisker Cuts | Cat households | Knife, thin file for whiskers | 25 minutes |
| Drilled Polka Dots | A five-minute win | Power drill, mid-size bit | 5 minutes |
| Drilled Star Field | A porch full of glow | Power drill, two bit sizes | 15 minutes |
| Friendly Ghost in Six Cuts | Kids at the table | Safety knife, spoon | 15 minutes |
| Pumpkin House With Square Windows | A whole-evening project | Knife, square template | 45 minutes |
| Etched Leaf and Vine | The artistic centerpiece | Linoleum cutter, spoon | 60 minutes |
| Haunted House Scene in Layers | Experienced carvers | Etching tools, LED light | 90 minutes |
Funny Faces & Silly Scenes
1. Carve the Classic Goofy Grin With One Crooked Tooth
The goofy grin works because the mouth sits slightly crooked on the face. Draw a wide smile that climbs higher on one side than the other, then add two round eyes at different heights. The uneven lines read as a silly expression before a single cut is made.
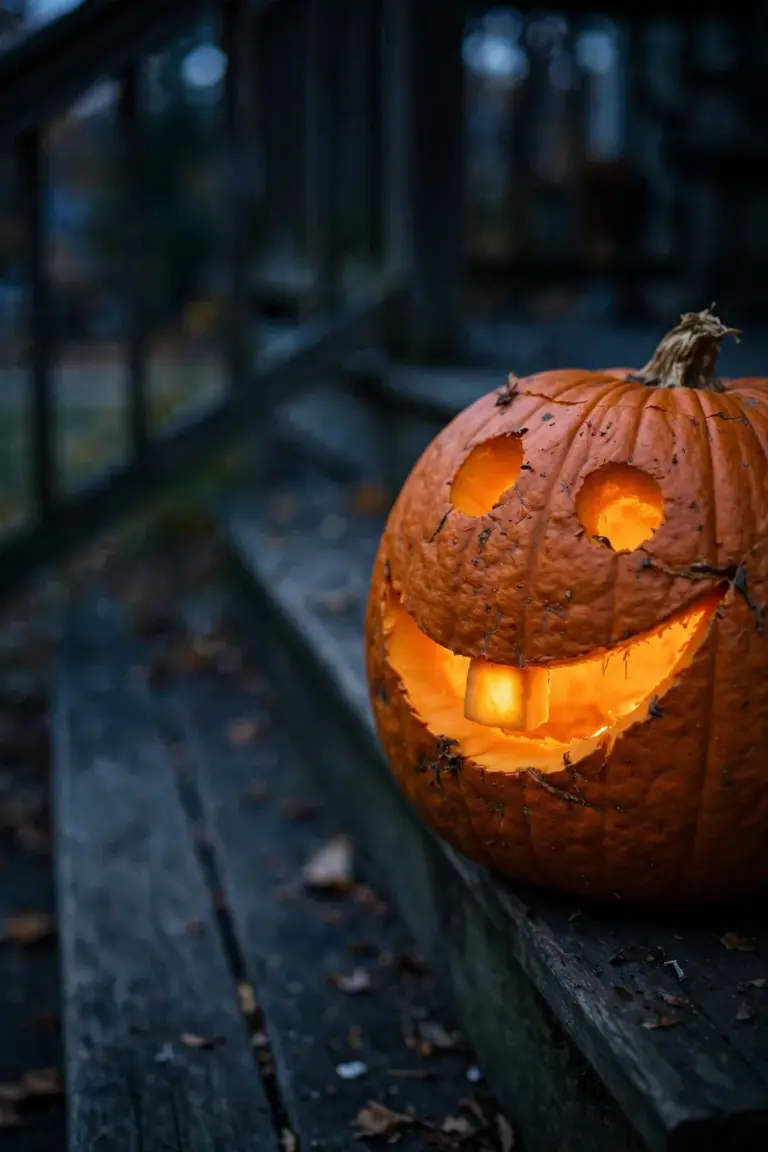
Carve the mouth first, using short sawing strokes along the drawn line. Leave one chunky block of pumpkin standing inside the grin and shape it into a single square tooth. Set the candle or LED behind it and the tooth glows amber. A proud, one-toothed smile greets everyone at the gate.
2. Make a Surprised Pumpkin With a Perfect O Mouth
A round O mouth turns any pumpkin into a startled guest, caught mid-gasp, as if it just spotted the trick-or-treat bowl. Draw two wide circle eyes first. Place the O low on the face so the whole expression drops open.
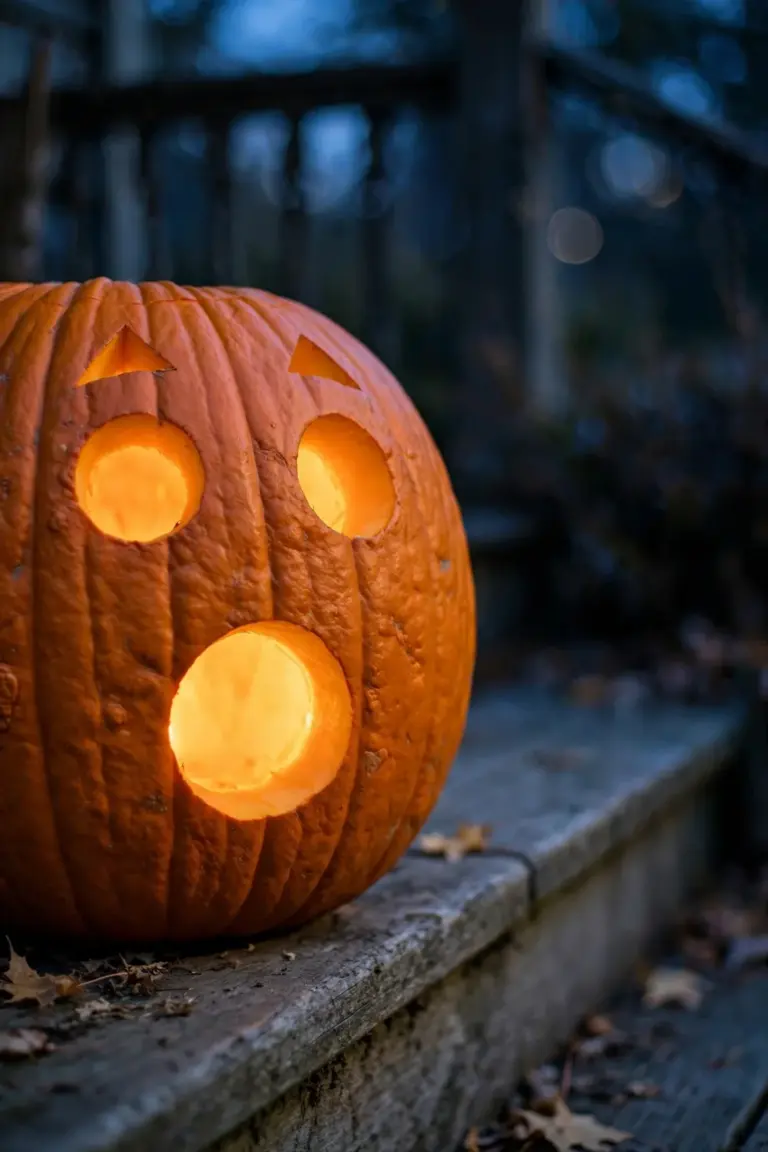
Cut the mouth with a small serrated knife, turning the pumpkin slowly as the blade follows the circle. A circle about the size of a plum gives the cleanest O. Raise two triangle eyebrows high on the forehead to finish the shock, and the lit O glows like a cartoon shout on the porch. Plain circles carry the whole gag, so beginners finish fast and still get the full effect.
3. Give a Pumpkin Braces for the Funniest Grin on the Block
Braces turn a plain grin into a full character. Carve a wide rectangular smile and leave six square teeth standing in a row. The teeth form the straight band the braces sit on, so keep the smile low and broad to give the metal work room to show.
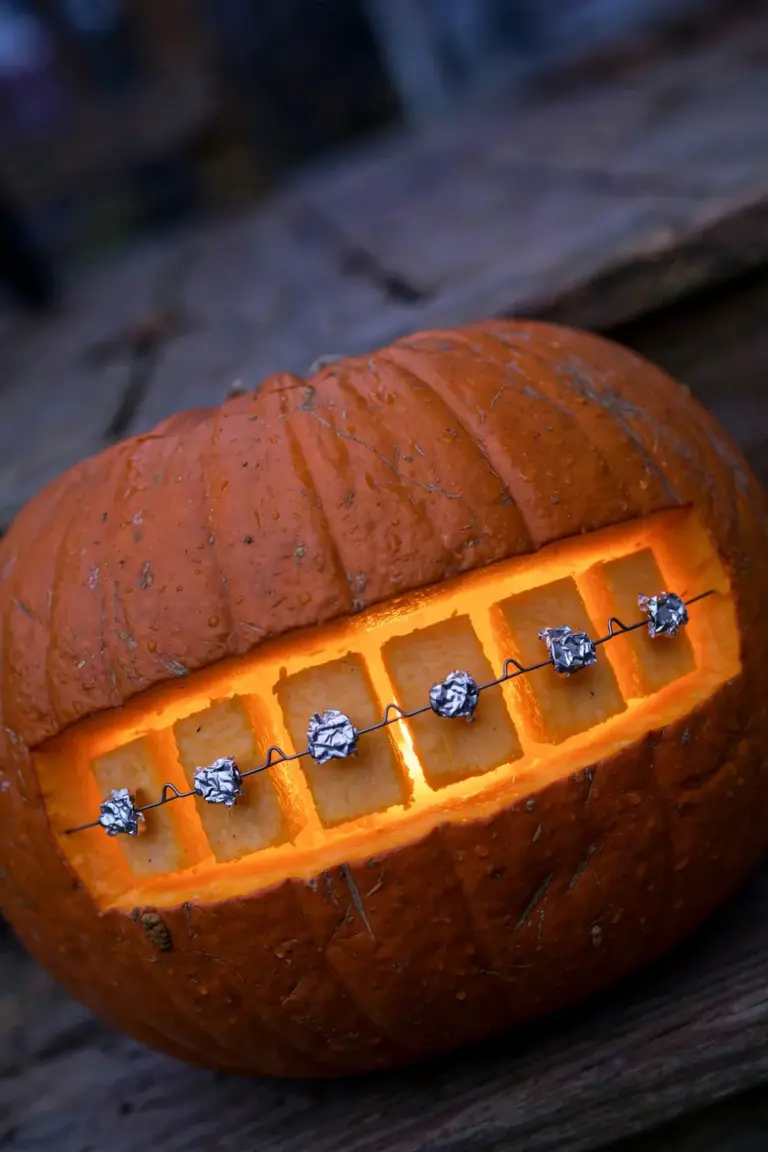
Now the hardware. Press short lengths of wire or foil-covered twist ties across the teeth in a zigzag line, then pinch small squares of aluminum foil over each tooth to mimic the brackets. The foil catches the candlelight and sparkles through the cuts. Neighbors slow down for this one. A pumpkin with an orthodontist is hard to pass by.
4. Carve a Cat Face With Simple Whisker Cuts
A cat face lands its joke through attitude alone. Two calm triangle eyes and a small triangle nose read as a cat that owns the porch. The expression stays smug, and smug is funny on a round orange face.
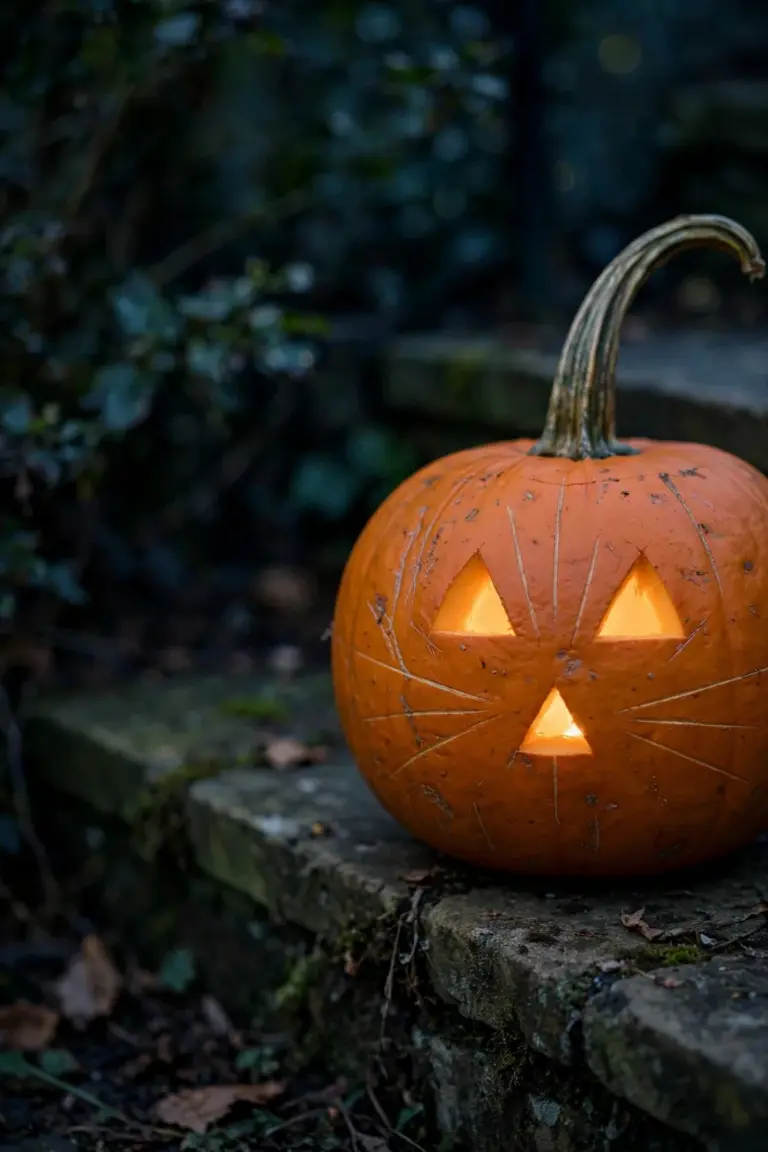
Cut the eyes and nose first, keeping every shape simple and bold. Then score six thin whisker lines into the rind with the tip of the knife, three fanning out from each cheek. Shallow cuts glow softly when the light sits low inside. Pointed ears come free if the pumpkin has a tall stem. Tilt it like a raised tail.
5. Stage a Big Pumpkin Eating a Mini Pumpkin
This scene tells its story in one glance, and it always gets a laugh. Carve a huge open mouth into the biggest pumpkin you have. Wedge a mini pumpkin halfway into the jaws, tilted as if it is sliding in, and give the big pumpkin wide eyes to sell the greedy look.
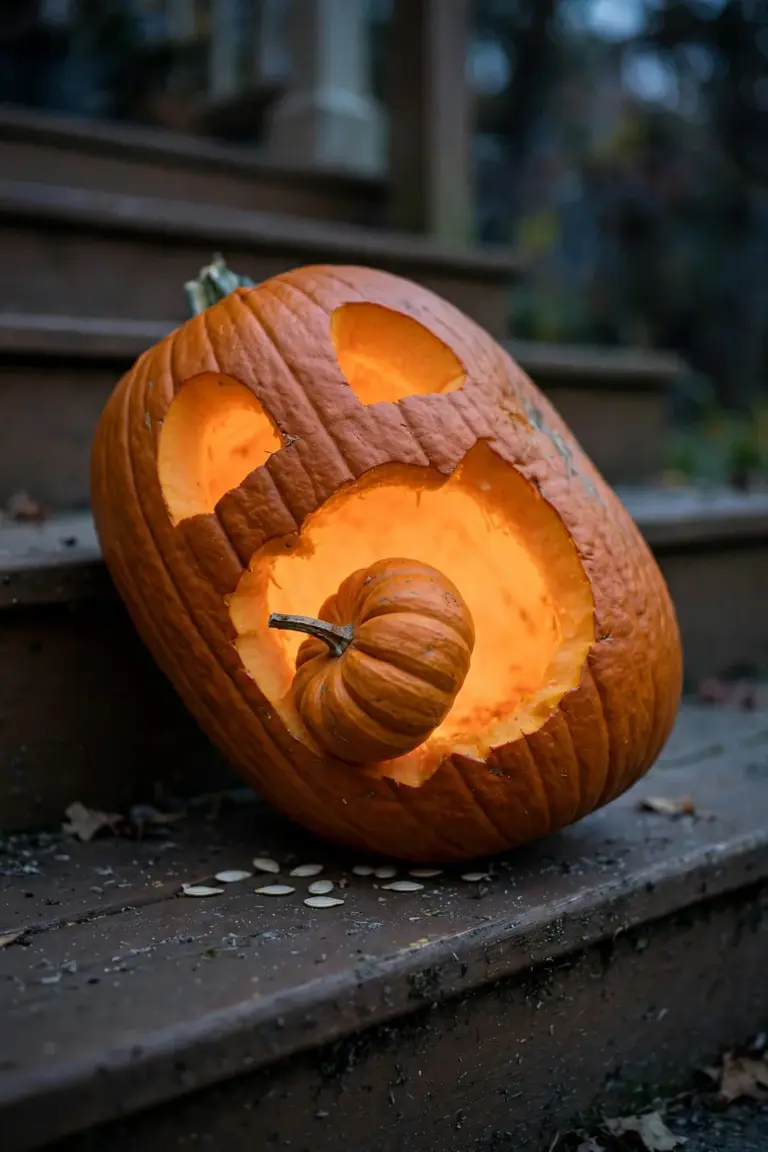
Cut the mouth in a tall oval so the mini fits without forcing it. Angle its stem outward like a last wave goodbye. Set the pair on the lowest step, where every visitor sees the drama up close, and scatter a few seeds under the chin to complete the messy meal.
6. Let a Pumpkin Spill Its Seeds Onto the Step
Few sights beat a pumpkin caught mid-spill. Carve a queasy face with swirly eyes and a wavy, seasick mouth. The joke lands when the pumpkin’s own insides pour out of that mouth and pool on the step below.
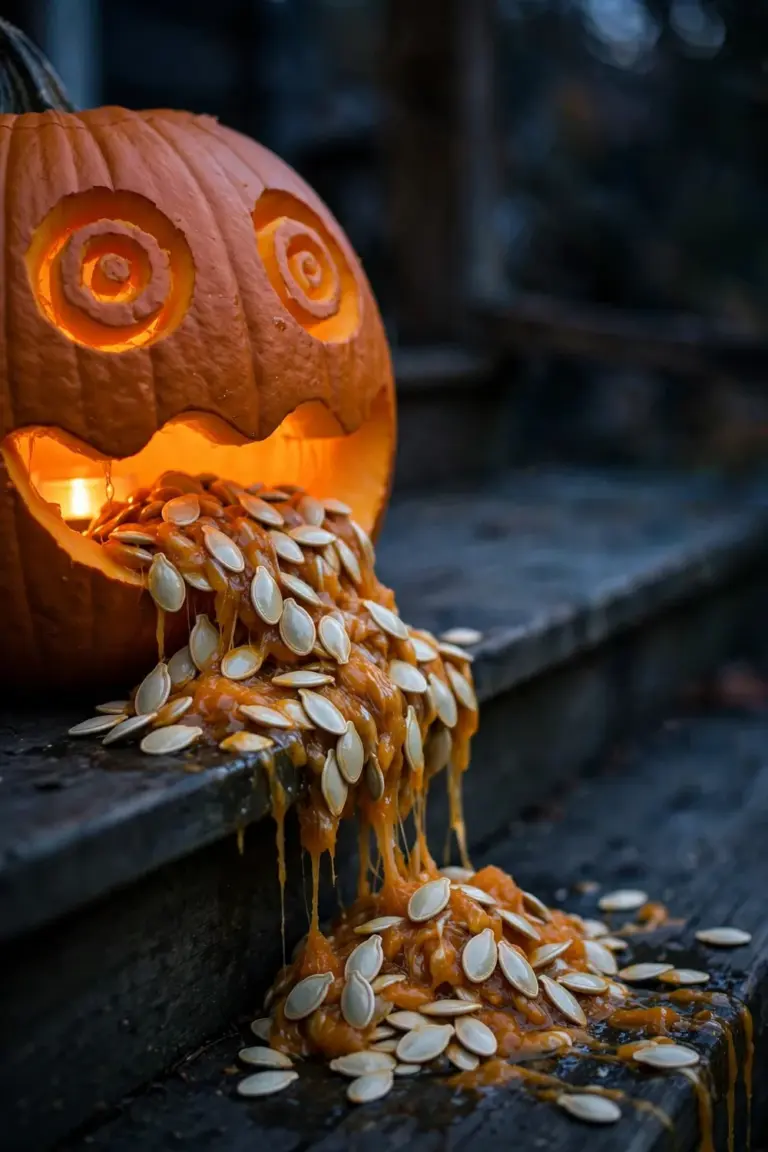
Cut the mouth as a wide, low slot so the pulp slides through in one heap. Scoop the seeds and stringy flesh out through the top, then arrange them spilling from the mouth in a glossy pile. Keep it thick near the lips and thinner at the edges, with a few loose seeds trailing down the step. Kids point at this one first, every single year.
7. Carve a Sleepy Pumpkin Caught Mid-Yawn
A yawning pumpkin makes the whole porch feel like bedtime. Carve two heavy-lidded eyes as simple crescents, the lids drooping halfway down. Below them, a big oval mouth hangs open, caught in the middle of a long, tired yawn.
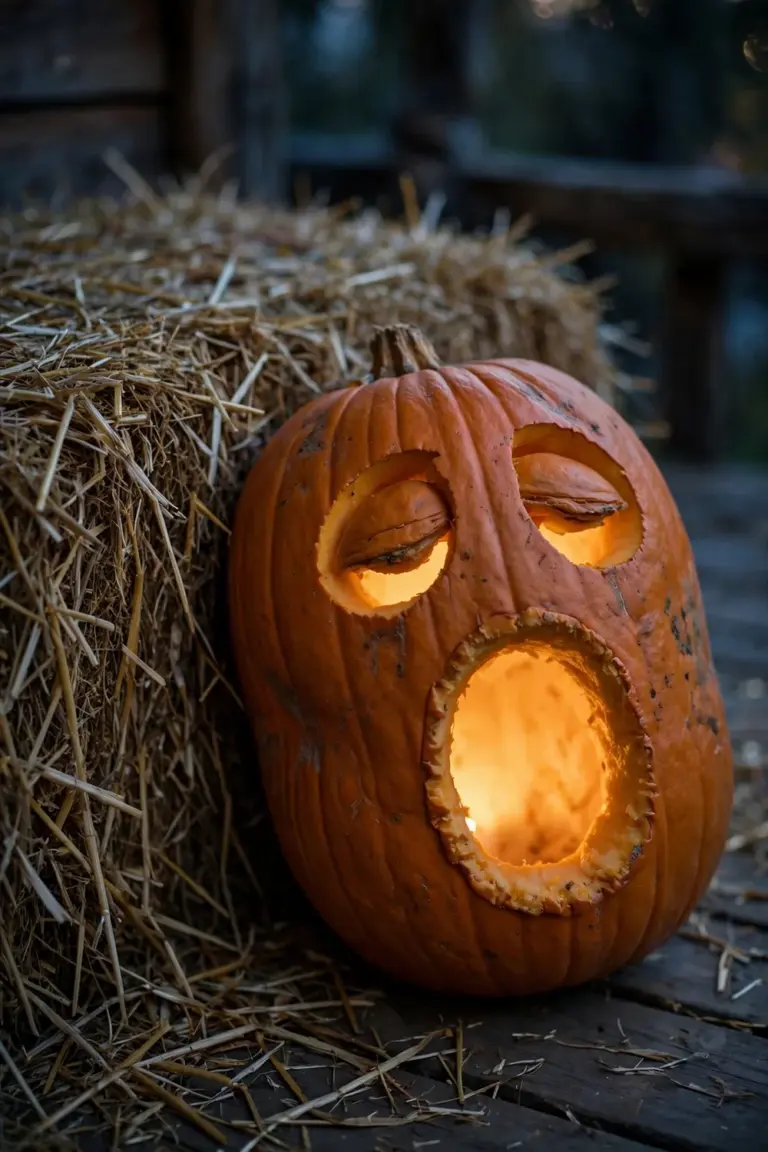
Cut the eye crescents shallow and wide so they read as sleepy from the street. Make the yawn oval tall and round, and set the light deep inside so the mouth glows softly. Lean the pumpkin against a hay bale or a stack of books for extra slump. The sleepy face pairs well beside a wide-awake scary one, and it deserves the coziest corner of the whole display.
8. Add a Mustache for a Proper Pumpkin Gentleman
A mustache gives a pumpkin instant dignity, and the dignity is the joke. Carve two calm eyes and a small, polite smile first. The face stays plain on purpose. The mustache does all the talking once it curls across the upper lip.
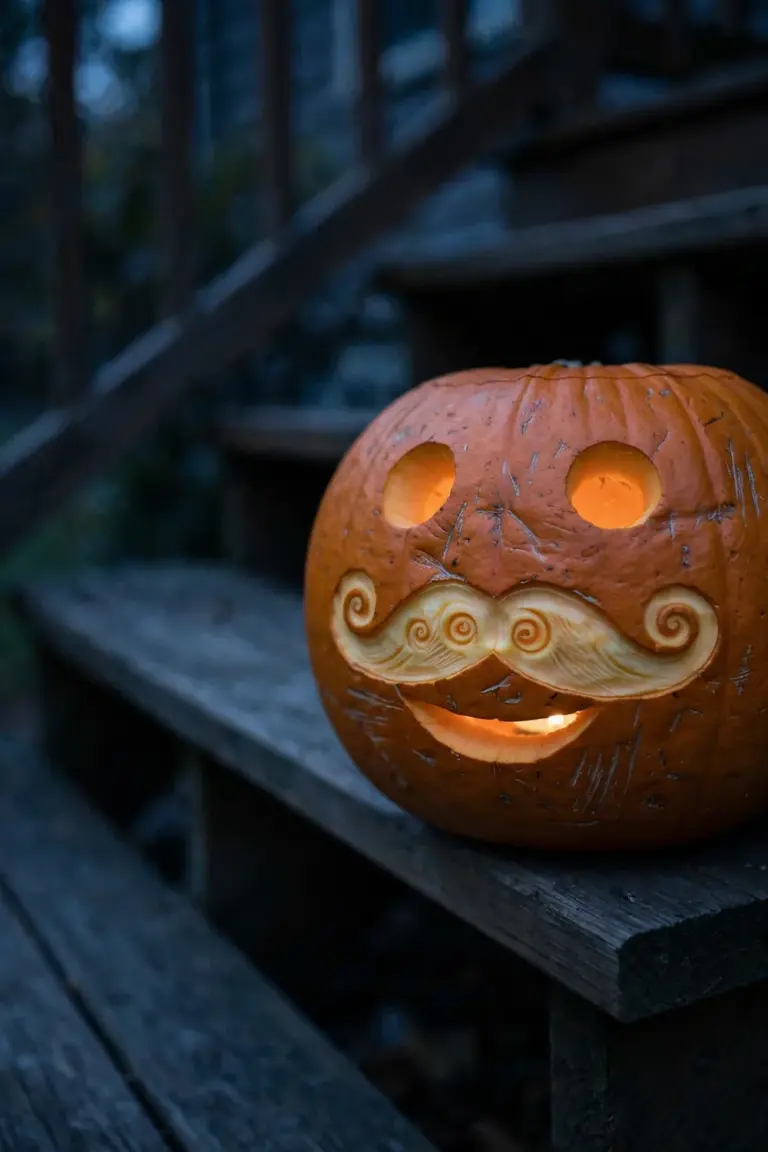
Etch the mustache shape into the rind with shallow cuts, curling each end into a tight spiral. Shave the skin inside the shape so the mustache glows paler than the deep cuts around it. A handlebar curve reads clearly at night and looks almost carved from wax. Set the gentleman at the top of the steps, greeting guests with great seriousness.
9. Carve a Winking Pumpkin With Its Tongue Out
The winking pumpkin acts like it knows a secret about your yard. One eye squeezes shut in a crescent while the other stays wide and round. A lopsided grin finishes the mischief, and the whole face seems ready to share the joke.
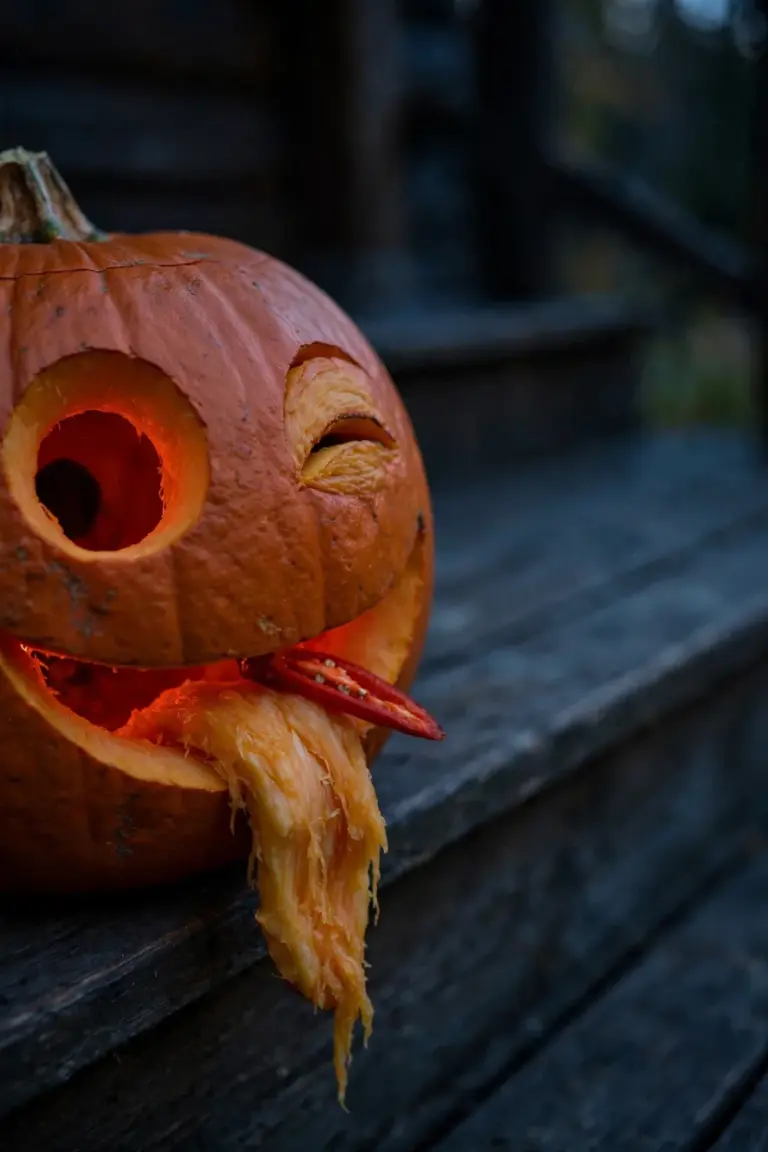
Carve the open eye first, then cut the wink as a single curved slit. For the tongue, cut a long rounded flap at one corner of the mouth and let it hang downward. A strip of red pepper or a slice of beet tucked into the slot adds color, and the tongue glows a deep red when the light shines through it.
10. Make a Dizzy Pumpkin With Spiral Eyes
Spiral eyes turn a pumpkin gloriously cross-eyed. Draw two big spirals where the eyes belong, each one winding inward like a cartoon whirlpool. Add a wavy mouth below, and the face looks ready to wobble off the step.
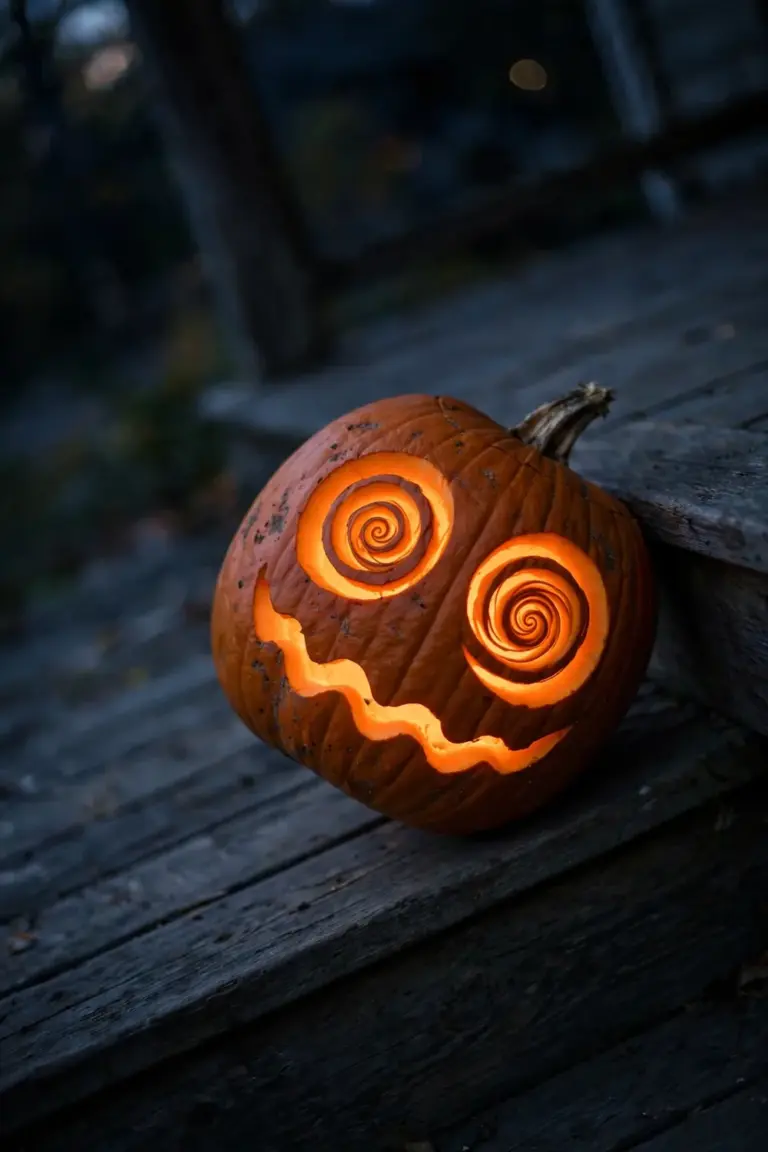
Carve along each spiral line with a thin blade, working from the outside of the coil toward the center. Thin cuts glow bright, so the spirals spin with light on Halloween night. Tilt the finished pumpkin a few degrees on its base for comic effect. A slight lean sells the dizziness better than any extra carving, and since two spirals and one wavy line are the entire design, the face comes together quickly.
11. Carve a Scaredy Pumpkin Afraid of a Tiny Mouse
Fear is funny when the threat stands two inches tall. Carve the pumpkin with huge round eyes and a small trembling mouth. Then set a tiny mouse in front of it, carved from a mini pumpkin or built from a gourd with two round ears.
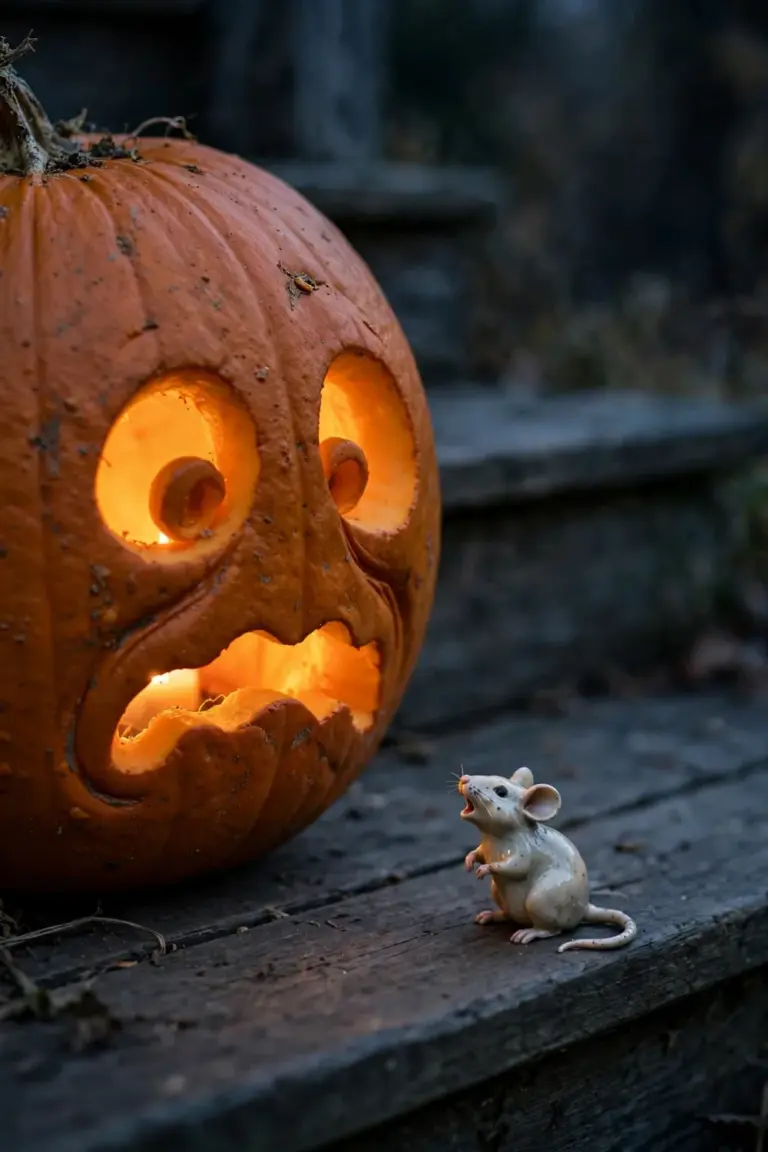
Aim the big pumpkin’s eyes downward toward the mouse so the stare line connects them. Cut the mouth as a short wavy line, the classic trembling lip, and place the mouse just a few inches from the pumpkin’s face, mid-squeak. From the sidewalk, the scene reads instantly. One giant, terrified pumpkin. One very brave mouse. The size gap between the two does all the comedy work.
12. Turn Two Pumpkins Into a Comedy Duo
Two pumpkins talking to each other beat one pumpkin talking to nobody. Carve the first with a huge open mouth, mid-speech. Carve the second with one raised eyebrow and a flat, unimpressed line for a mouth. The perfect straight man.
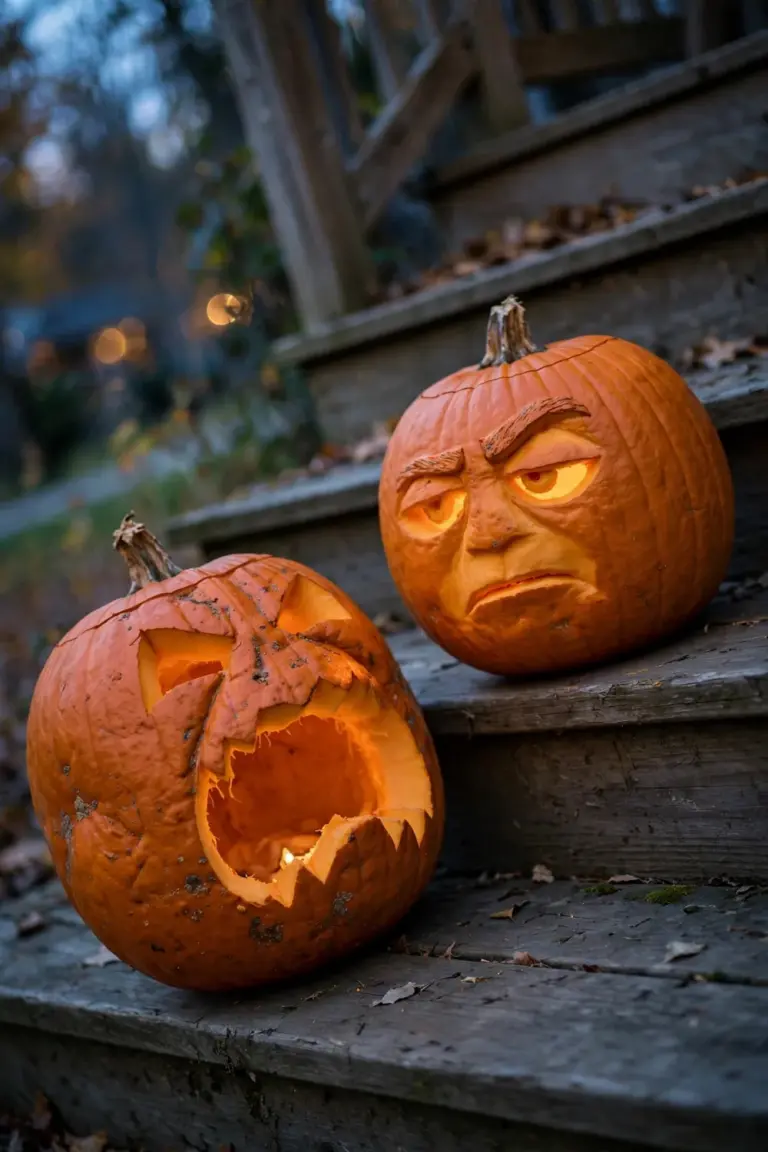
Angle the pair toward each other on the steps so their eyelines meet. Cut the talker’s mouth wide and tall, keep the listener’s features small and dry, and set a light inside each pumpkin so both faces glow at the same strength after dark. Keep both faces at the same height so the conversation reads level from the street. Guests start inventing the dialogue out loud, and that is the show.
Easy Patterns Beginners Can Finish
13. Drill Polka Dots for a Five-Minute Glow
Grab a power drill and this design is done in five minutes. Fit a quarter-inch bit for small dots, or swap to a half-inch bit for bold ones. Mark each dot position with a washable marker, spacing the dots about two inches apart in loose rows. Press the bit straight into the rind, hold for one second, and pull it back out.
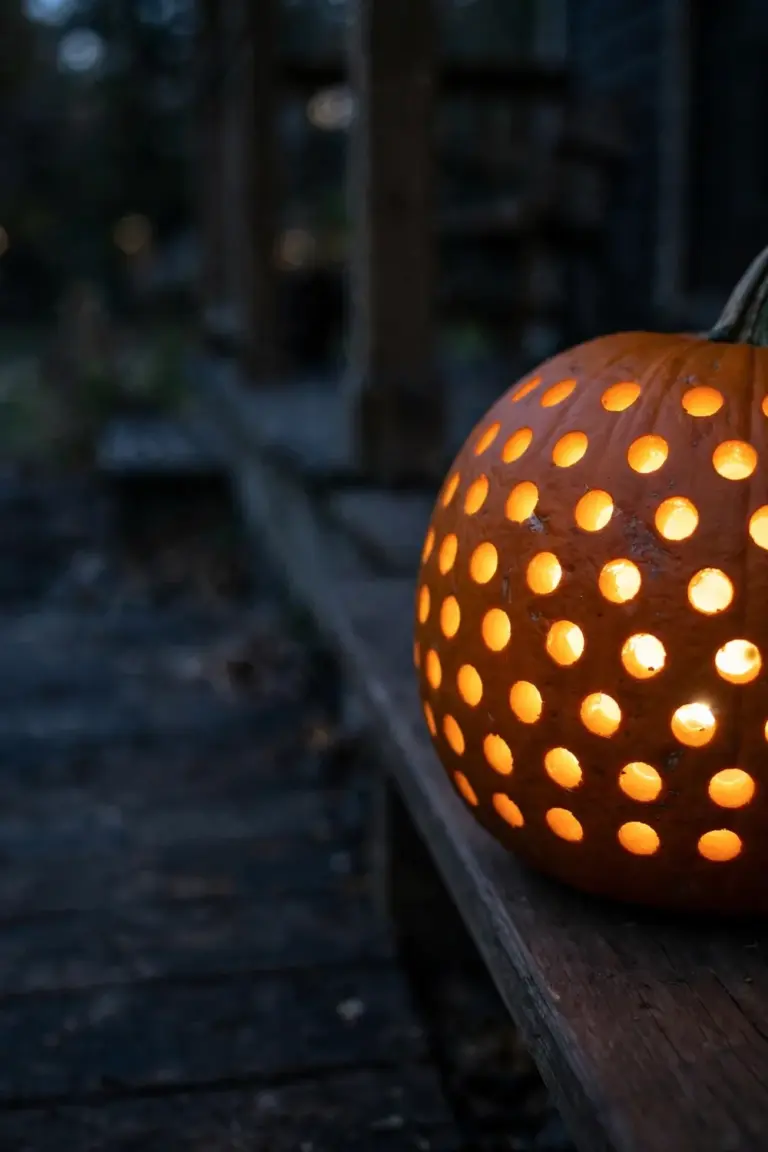
Work from the top row down so the drillings fall clear of the finished holes. Empty the loose bits through the lid opening, then set an LED tea light inside. Every hole shines as a round point of light, and the rows turn the whole pumpkin into a lantern that reads clearly from the street.
14. Drill a Star Field Across the Whole Pumpkin
The stars stay invisible until the light comes on, because this design is just holes drilled along star outlines. Draw ten to twelve five-point stars on the rind with a washable marker, spreading them evenly over the front and sides. Fit the drill with the smallest bit you own. Drill one hole at each star point, then add holes along the lines between the points.
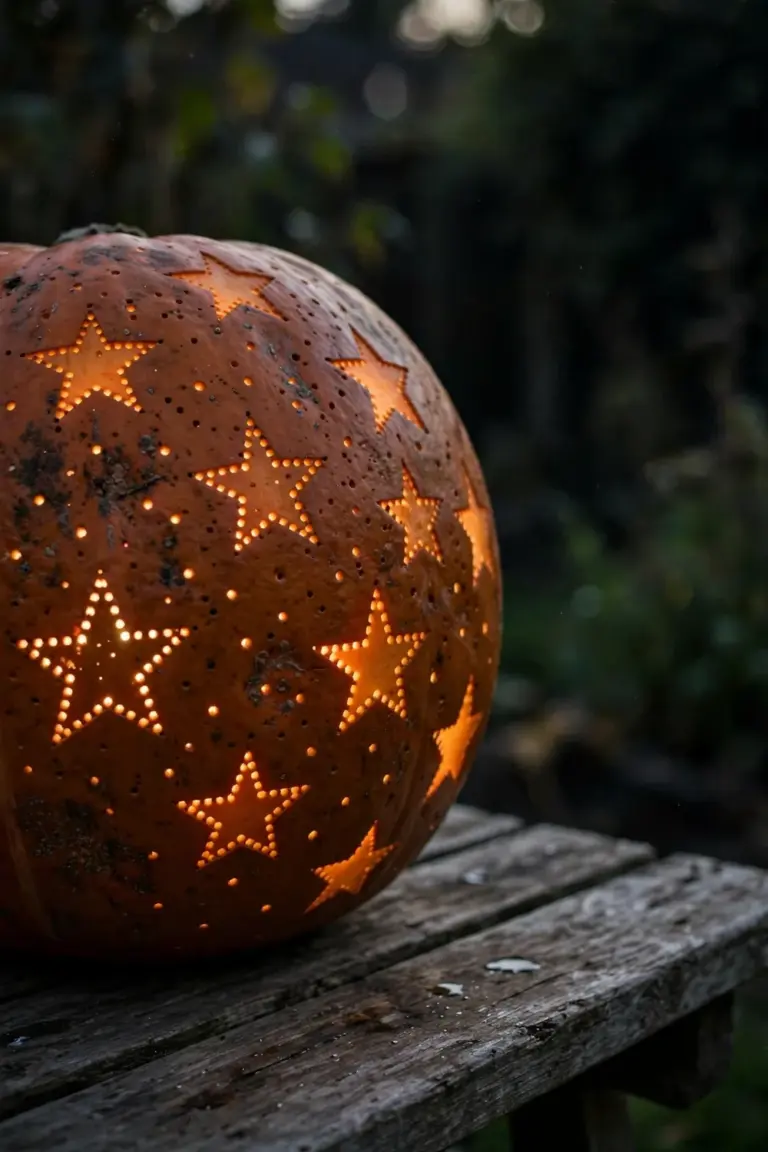
Fill the gaps between the stars with scattered single holes for a night-sky feel. An LED candle inside sends light through every hole, and each star glows as a dotted shape against the dark rind. Keep the holes close together on the outlines, about half an inch apart, so the shapes stay readable from a distance.
15. Cut a Crescent Moon With a Single Star
Two shapes carry this whole design, and both are simple cuts. Draw a crescent moon on the rind with a washable marker, then draw one five-pointed star beside it. Cut the lid and scoop the inside wall thin, to about an inch, so both shapes glow evenly. Start with the star. Small shapes cut more easily while the pumpkin still feels solid.

Cut the star with short, straight strokes of a serrated knife, pushing the piece inward to remove it. Then follow the crescent lines in gentle curves, working from the top point down to the bottom point. Set an LED light inside and both shapes shine with clean edges: the moon broad and bright, the star sharp beside it.
16. Carve a Friendly Ghost in Six Cuts
Count the cuts before starting and this ghost feels easy: two round eyes, one oval mouth, two short arm slits, and one wavy hem. Draw the ghost body on the rind first, a rounded shape about eight inches high. Poke the two eyes with a drill or an apple corer, then cut the oval mouth with a serrated knife.
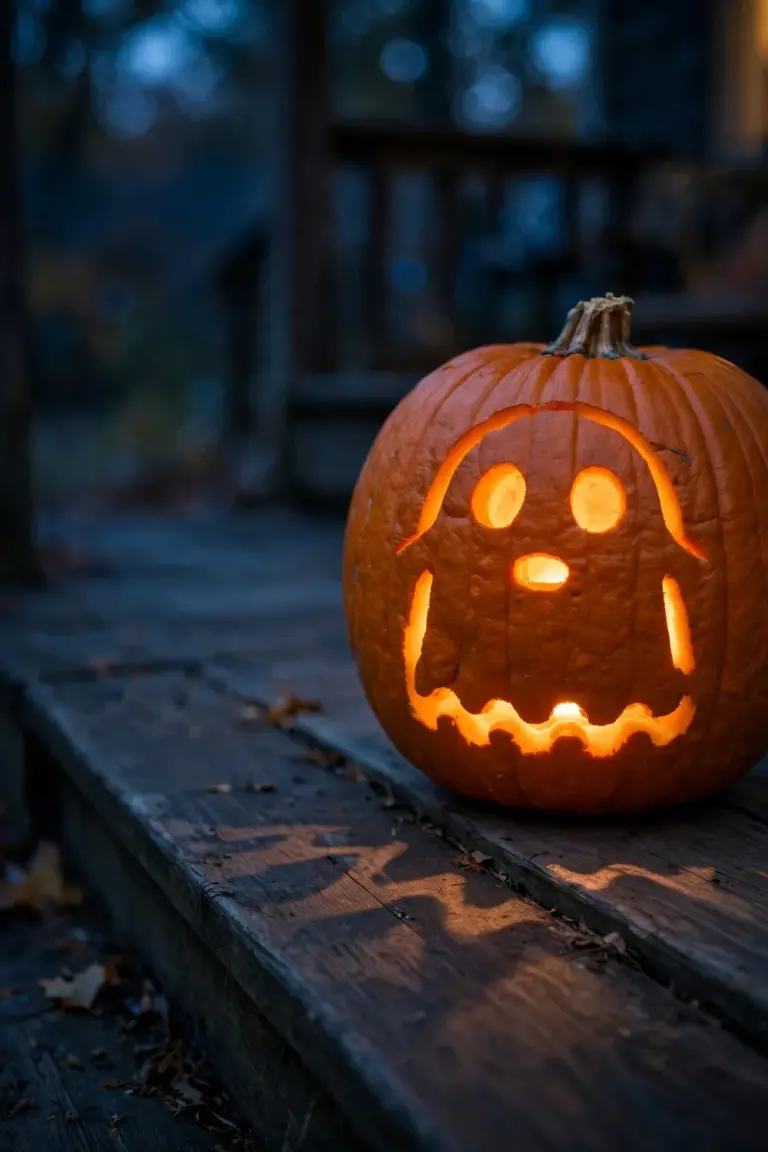
Cut the two arm slits as short curves on each side of the body. Finish with the wavy hem along the bottom, a row of bumps that gives the ghost its floating look. Push each cut piece inward and lift it out. An LED tea light inside makes the face glow, and the wavy edge throws a wobbly shadow on the step.
17. Trace a Bat Silhouette From a Paper Template
Let a paper template do the drawing, and the bat comes out even on the first try. Print or sketch a bat with wide wings on plain paper and tape the sheet flat against the pumpkin. Poke a row of small holes along every outline with a pin or a poker tool, keeping the holes about a quarter inch apart.
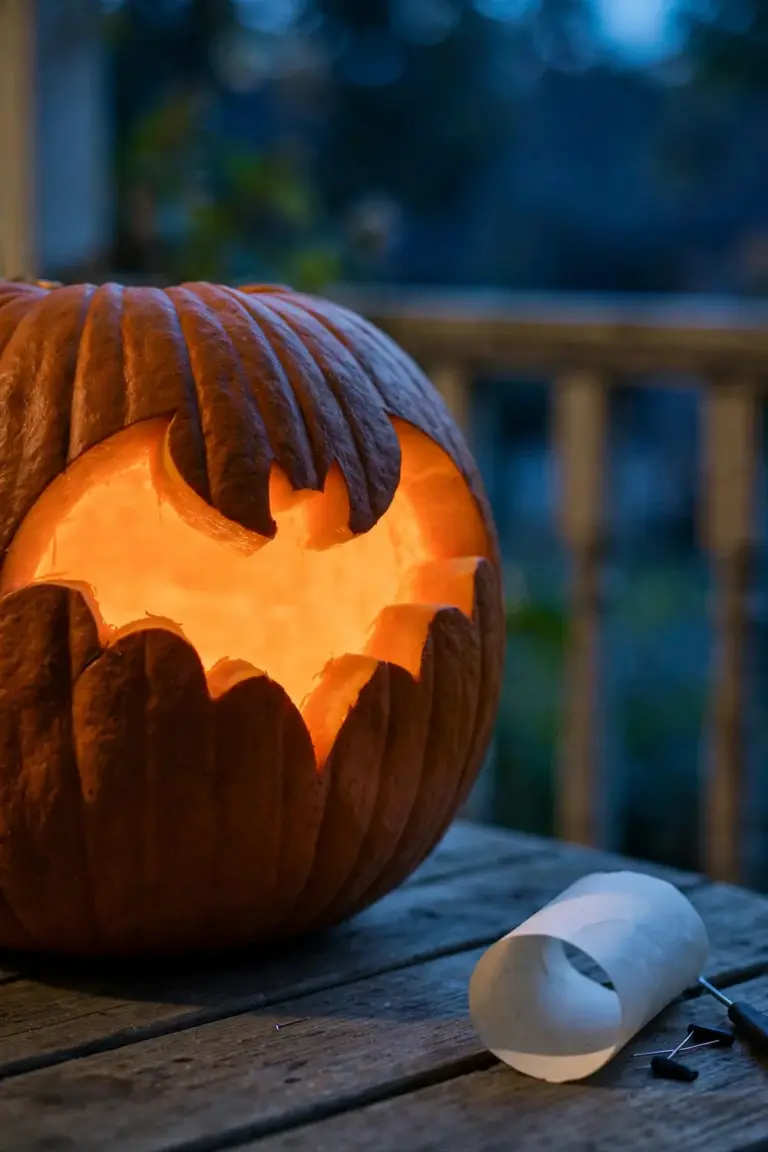
Peel the paper away and the dotted outline stays behind on the rind. Cut along the dots with a serrated knife, using short strokes and turning the pumpkin as you go. Work from the center of the bat outward, so the thin wing tips stay supported until the end. Push the piece out gently and light the bat from inside.
18. Etch Stripes Without Cutting Through
Etching shaves away only the dark outer skin, so the pumpkin stays strong and lasts longer on the step. Draw vertical lines down the rind with a washable marker, following the natural ribs of the pumpkin. Hold a linoleum cutter or a sturdy vegetable peeler at a shallow angle and pull it down each line, shaving a stripe about half an inch wide.
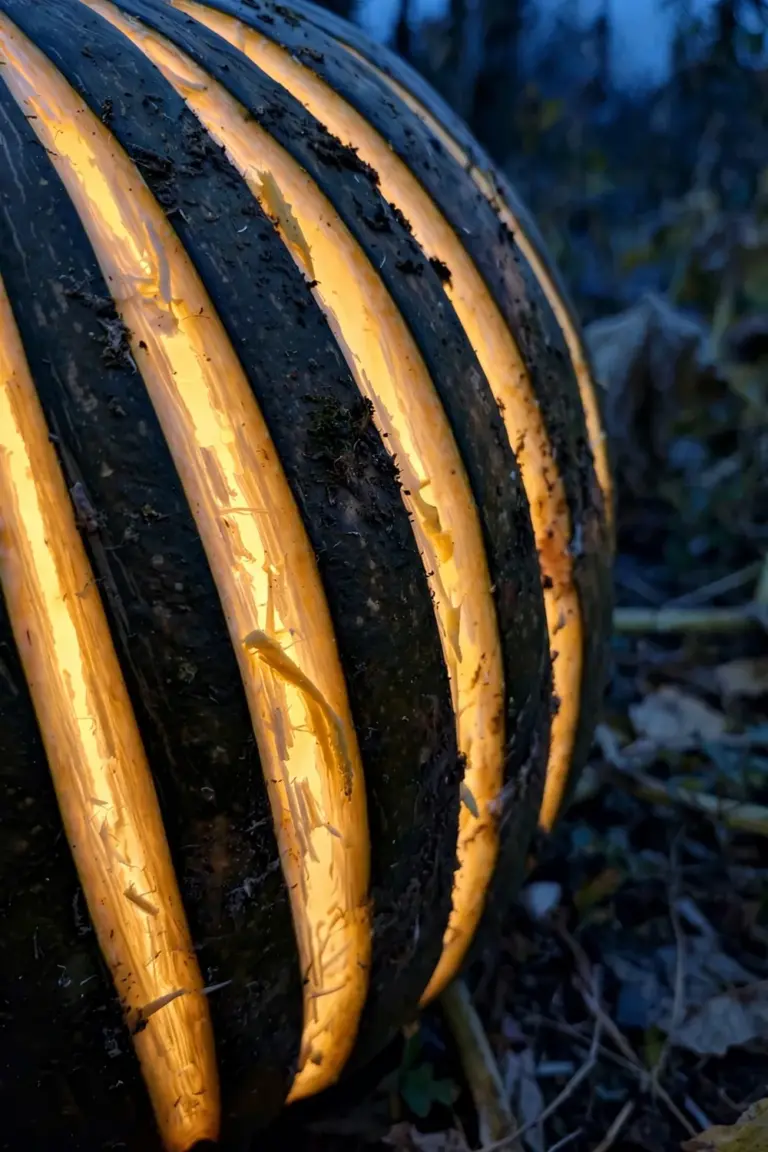
Shave each stripe a second time to deepen the pale band. The etched stripes glow gold once the pumpkin is lit, because the rind is thinner there and the light passes through the pale flesh. Leave the skin between the stripes untouched, and the pattern reads as soft glowing bands running around the whole pumpkin.
19. Carve Big Triangle Eyes the Beginner Way
Big triangles are the most forgiving first cut in carving, since straight lines hide small wobbles. Draw two large triangles high on the rind, each about three inches across, and add a smaller triangle for the nose. Score along every line first with the tip of a serrated knife, pressing just deep enough to leave a groove.
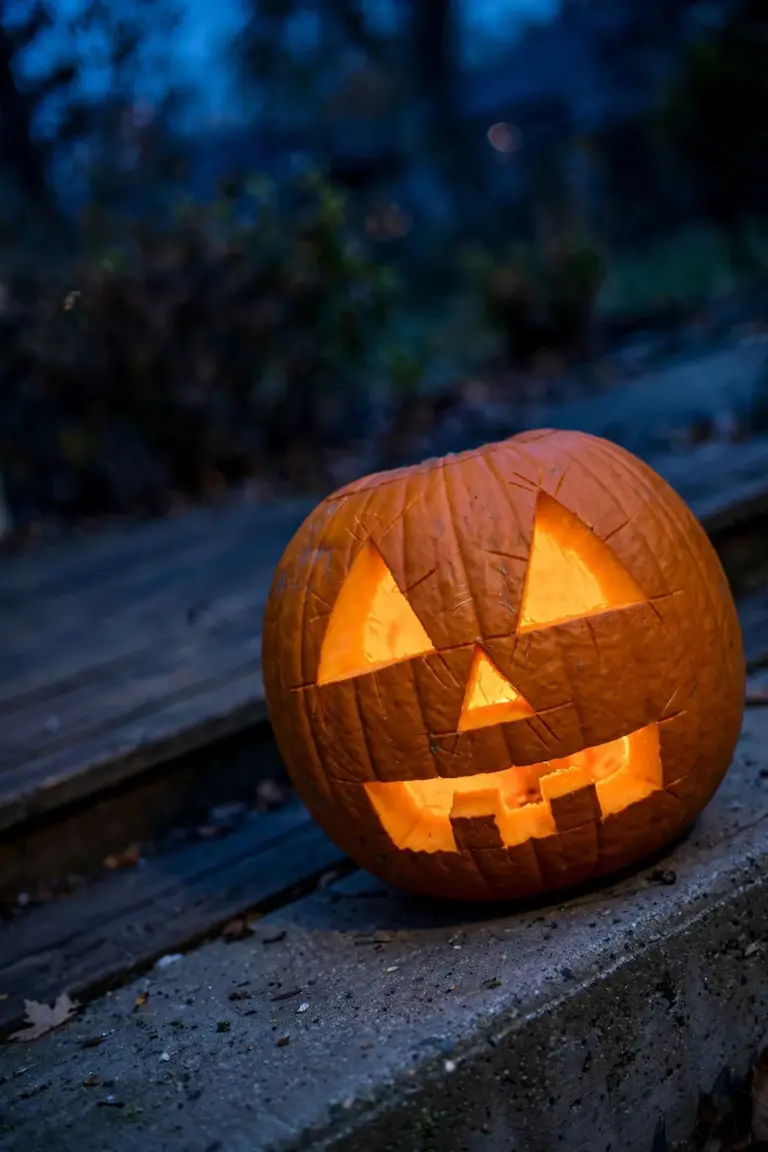
Cut down through the grooves next, using a slow sawing motion and keeping the blade upright. Push each triangle inward with your thumb and lift it out through the lid opening. Add a rectangle mouth with two square teeth if you want the classic face. The big openings pour out light, so the face shows up from halfway down the block.
20. Cut a Simple Owl From Circles and Triangles
The whole owl is built from two shapes you already know. Draw two circles side by side for the eyes, high on the rind. Add a small triangle between and below them for the beak, and two larger triangles on top for the ear tufts. Cut the lid and thin the wall behind the face to about an inch.
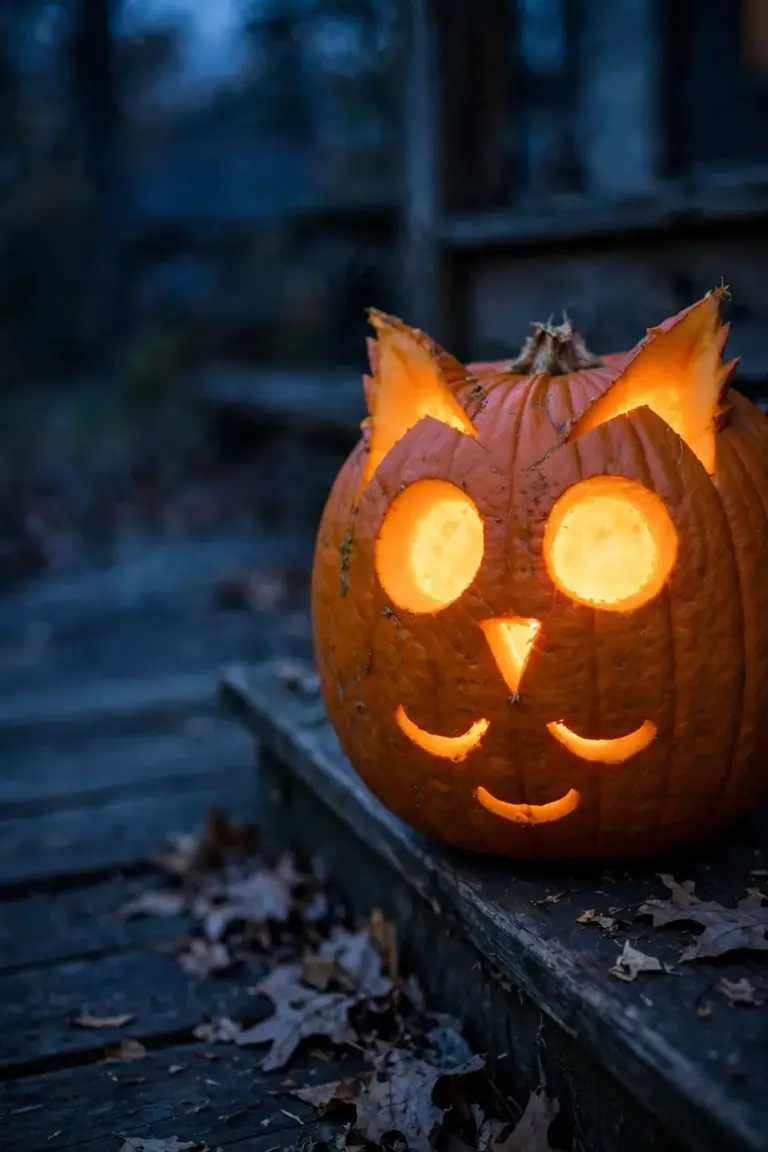
Cut the circles first, using a drill with a hole saw or a round cookie cutter pressed and rocked into the rind. Then cut the three triangles with straight strokes of a serrated knife. Add two short arcs under the beak for belly feathers if you like. Lit from inside, the round eyes glow first, and the owl seems to stare back.
21. Make a Pumpkin House With Square Windows
Squares are the easiest shape to cut well, and a row of them turns a pumpkin into a house. Draw a door in the center, a tall rectangle reaching near the bottom. Add two square windows on each side of the door and one square above it. Keep every line straight and at least an inch from its neighbor.
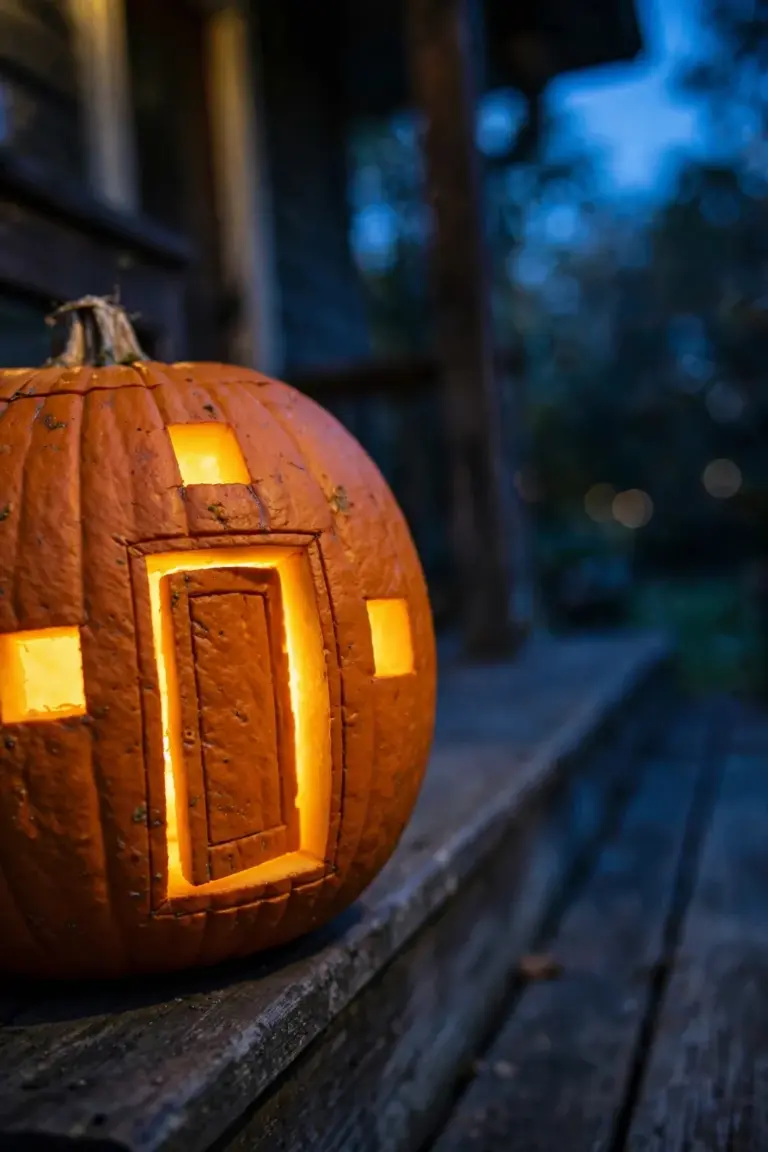
Cut the windows first with short, straight strokes, pushing each square inward to remove it. Cut the door last and leave it in place, or lift it out for an open doorway. Set an LED candle inside and every window glows warm yellow, like lamps burning in a real house after dark. From the step, the little house looks lived in.
22. Carve a Smiling Sun for the Friendly House on the Street
Small trick-or-treaters love this one. Draw a round face in the center of the rind, about six inches across. Add eight to ten straight triangle rays around the circle, pointing outward like sunbeams. Give the face two round eyes and a wide, simple smile inside the circle.
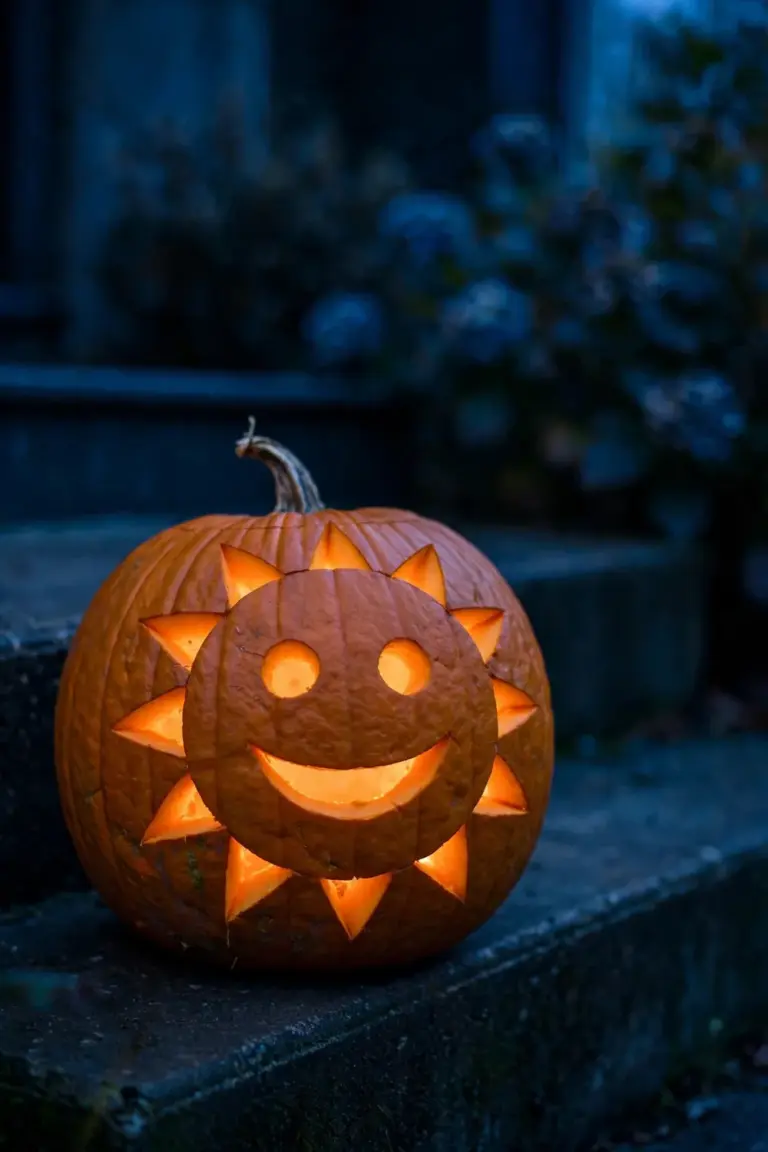
Cut the rays first, one triangle at a time, while the pumpkin is at its strongest. Then cut the circle outline, the eyes, and the smile with gentle curves. Push the pieces inward and set an LED light inside. The face glows in the middle and the rays shine around it, so the whole pumpkin looks like a little sun sitting on the step.
23. Punch a Heart Pattern With a Cookie Cutter
A metal cookie cutter punches a perfect heart, with no drawing and no freehand cutting. Choose a heart cutter about two inches wide and plan five to seven hearts across the front of the pumpkin. Press the cutter firmly into the rind until the edge sinks in about a quarter inch, then rock it gently to free it.
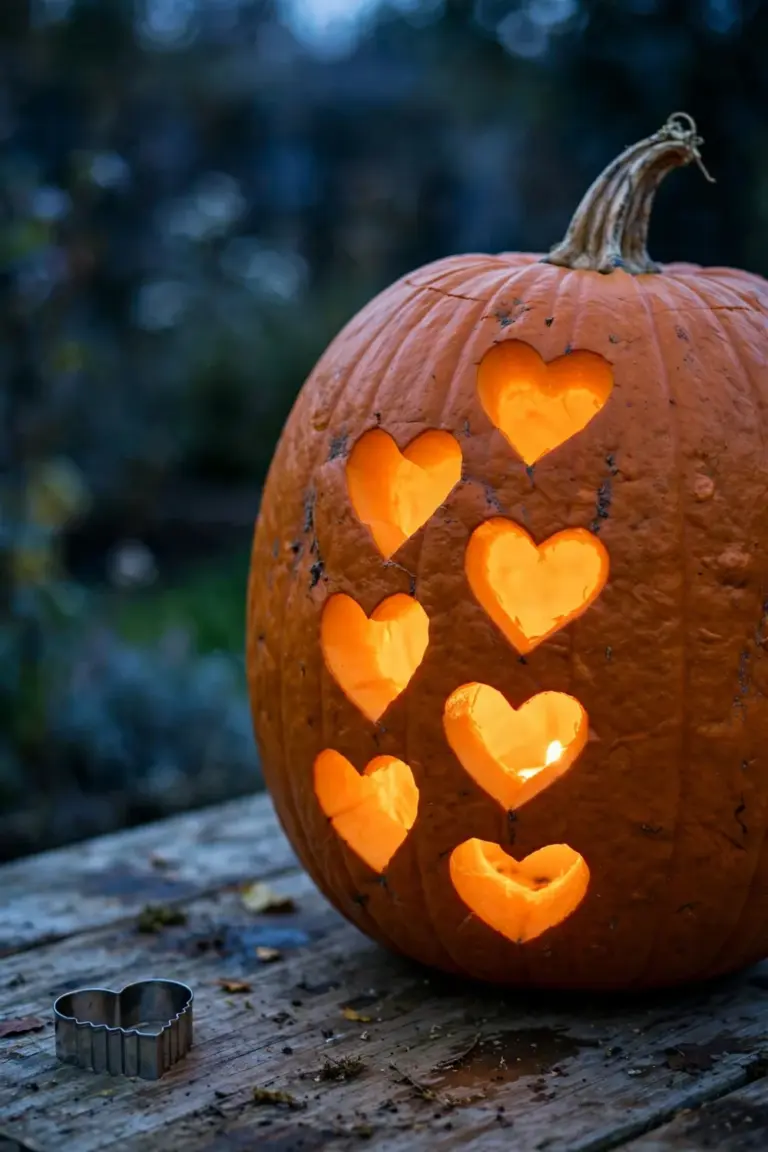
Tap the cutter with a rubber mallet if your hands tire, keeping your fingers clear of the rim. Once every heart is outlined, cut along each imprint with a small serrated knife and push the pieces inward. Space the hearts evenly and vary the heights a little. Lit from inside, each heart glows as a clean, sharp shape that reads from the sidewalk.
24. Letter a Single Initial for the Family Pumpkin
One bold letter turns a plain pumpkin into the family’s own marker by the door. Print the initial in a thick, simple font at about six inches tall, or draw it freehand on paper. Tape the paper to the rind and poke holes along the letter outline, spacing the holes about a quarter inch apart.
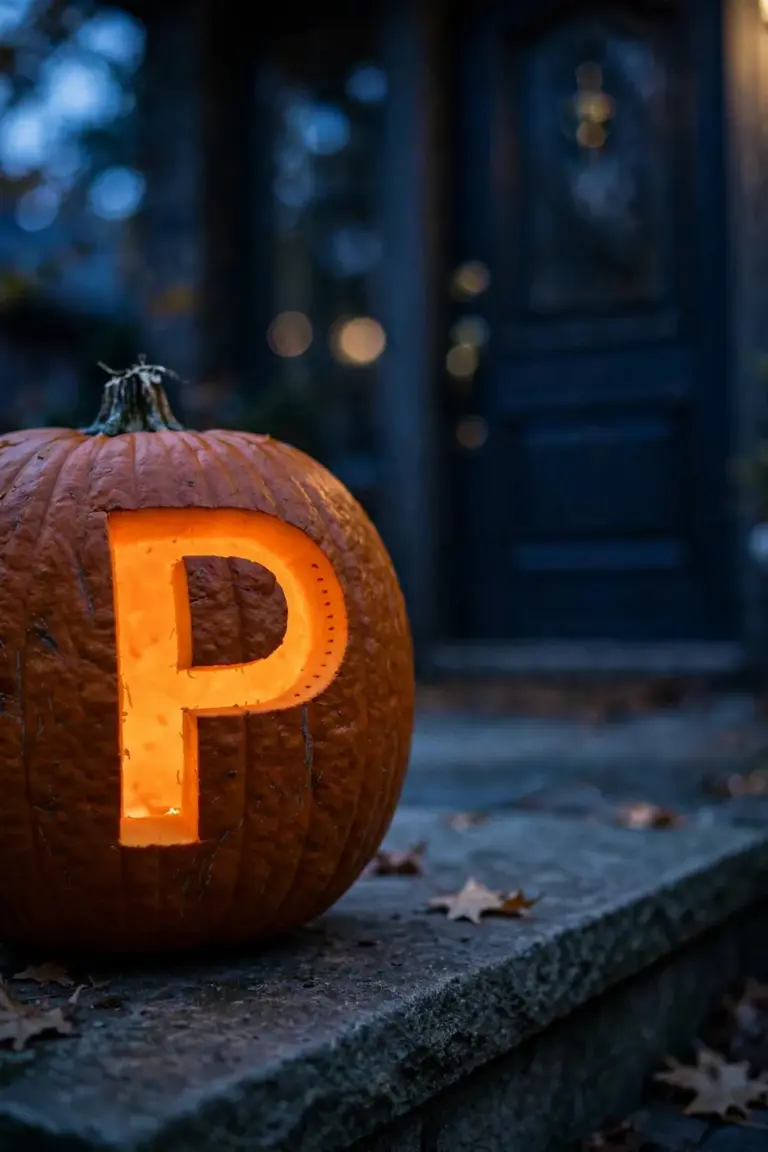
Remove the paper and cut along the dotted lines with a serrated knife, working down one side of the letter and then the other. Keep the bridges of letters like A and R wide, at least half an inch, so the centers stay attached. Push the cut pieces inward, set an LED light inside, and the initial glows in clean, bright lines.
Unique & Artistic Carvings
25. Carve a Haunted House Scene in Shallow Layers
Start with a big round pumpkin that has one smooth face. Sketch the scene on the skin: a crooked roof, two windows, a door, and a bare tree beside the house. Then peel the skin inside each shape with a shallow cut. A shallow cut thins the rind, and the light glows through the thinned flesh.
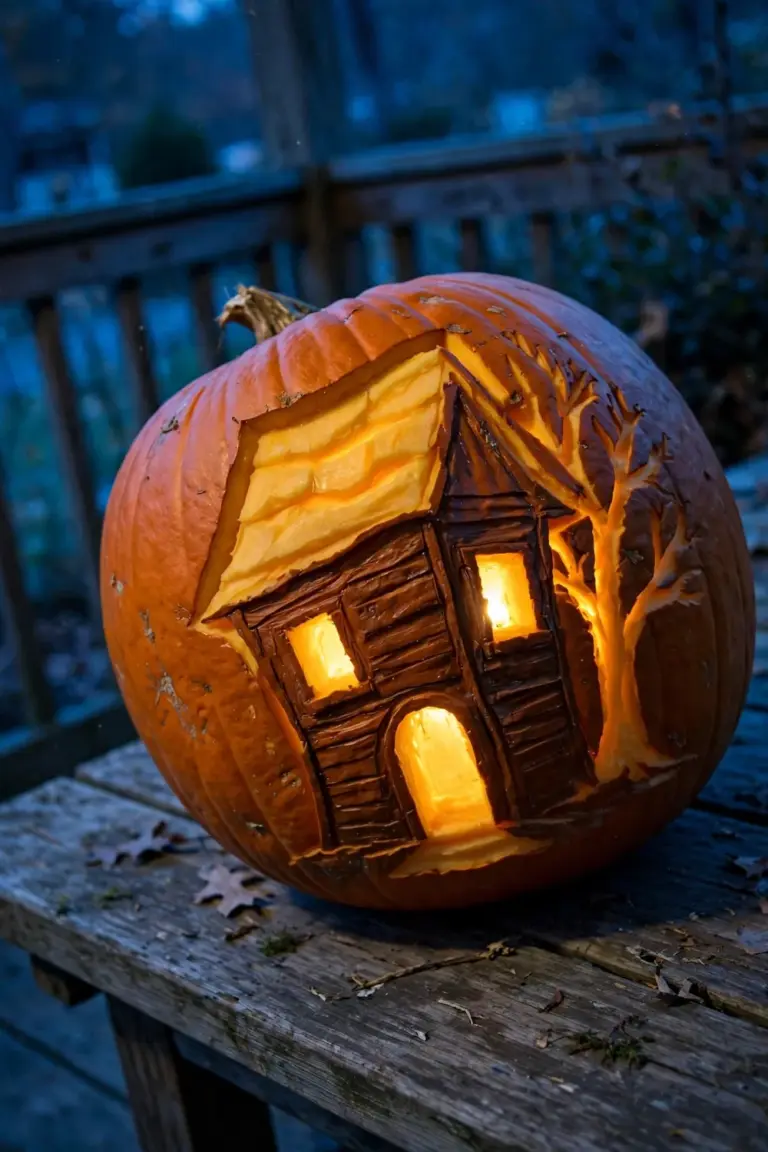
The windows and the door get cut all the way through. Deep cuts shine brightest, so the lit windows carry the scene. Peel the tree and the roof at a medium depth and they glow softer. Leave the house walls as untouched skin. Three depths give the picture its layers. Before deepening any shape, step back and check the glow.
26. Etch a Leaf-and-Vine Pattern That Glows Gold
Etching never breaks the pumpkin open. The tool scrapes away the outer skin and leaves the pale flesh beneath it. Draw a curling vine across the face, with leaves spaced along the stem, and scrape inside each leaf shape with a shallow pass.
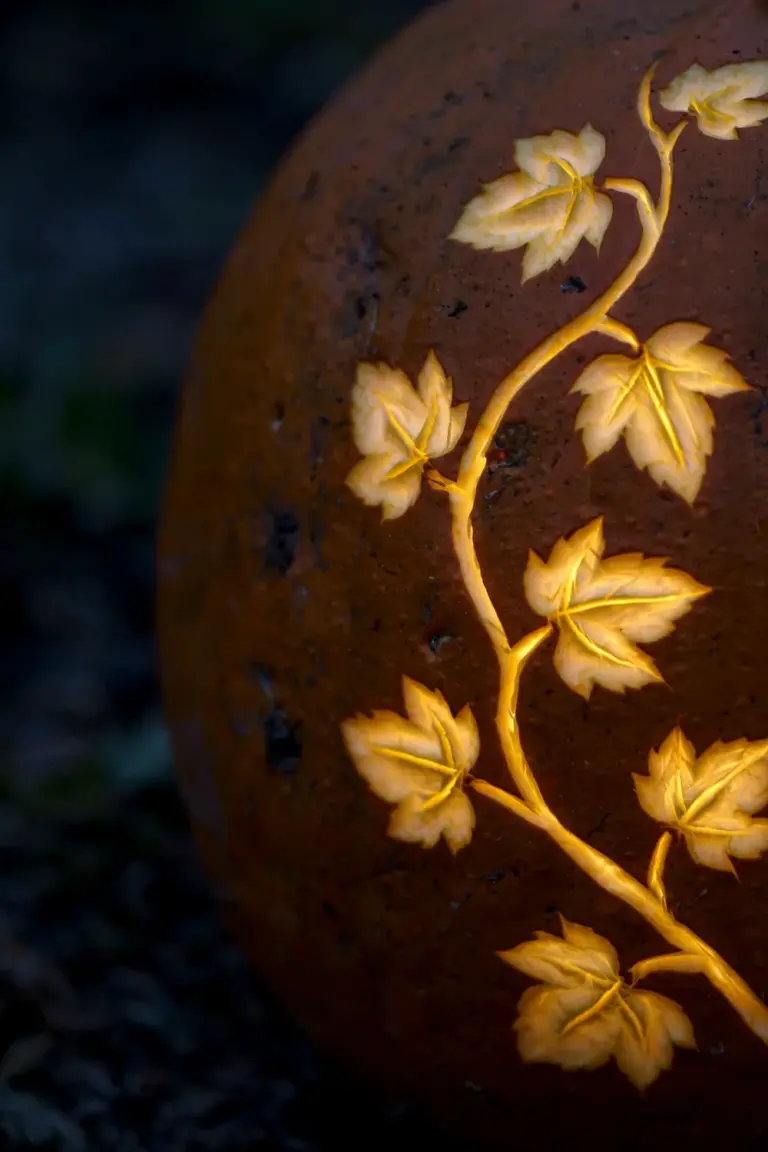
Thinned flesh passes light, so the etched leaves glow gold once the pumpkin is lit. Scrape the vine stem a little deeper for a brighter line. The uncut orange skin stays dark and frames the design. A linoleum cutter or a clay loop tool gives clean, shallow strokes. And because the flesh stays sealed, an etched pumpkin outlasts any cut-through design.
27. Stack a Totem of Three Carved Faces
Three pumpkins make the tower: a wide one for the base, a medium one for the middle, and a small round one on top. Flatten the top and bottom of each pumpkin slightly so the stack sits steady. Carve a different funny face into each one, and choose unblemished skin so every face reads clearly.
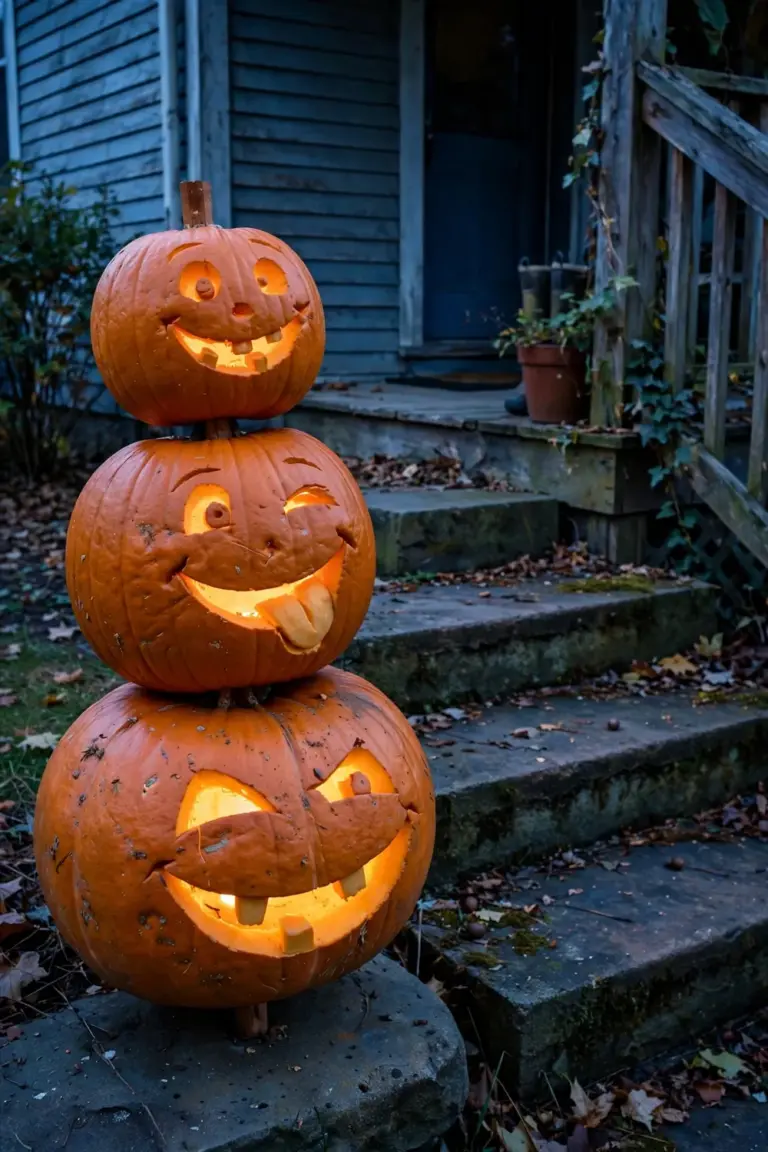
A wooden skewer or a short dowel pushed through the stack holds it together. Set the totem beside the front steps or on a sturdy porch table. Each pumpkin gets its own small LED, so all three faces glow. Turn the grins toward the street for the full effect.
28. Carve a Silhouette Scene of a Cat on a Fence
A silhouette carving flips the usual picture. The design stays dark and the background glows bright. Sketch a fence line across the pumpkin, with a sitting cat on one post, then carve away the area around the shapes and leave the cat and the fence as uncut skin. A wide pumpkin gives the scene room to stretch.
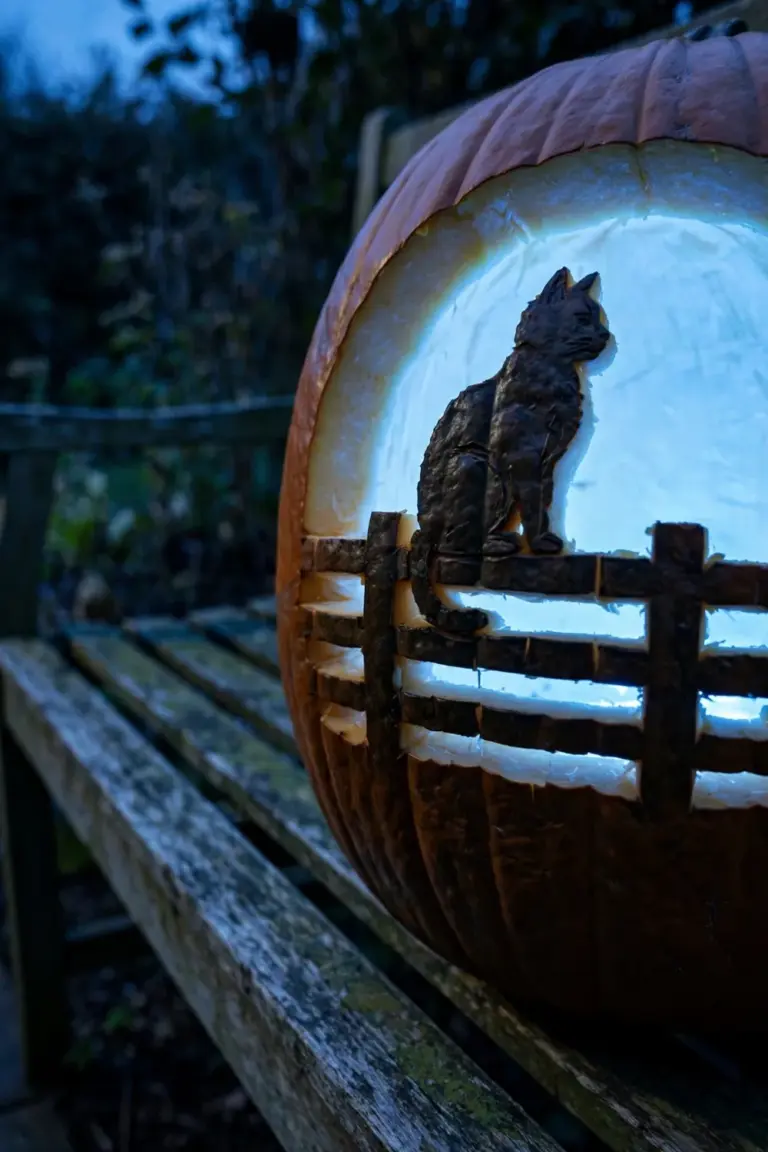
Cut out the sky on both sides of the cat and between the fence rails. Leave a thin bridge of flesh around each shape so the dark parts stay strong. Thin shapes glow at the edges, so keep the cat chunky. Lit up at dusk, the glowing sky outlines the black cat and fence.
29. Build a Tiny Diorama Inside a Big Pumpkin
The biggest pumpkin on the porch earns a second job here. Cut a wide round opening in the front, scoop the inside clean, and scrape the inner walls smooth. The hollow pumpkin becomes a small stage. Line the floor with a spoonful of soil or a patch of moss.
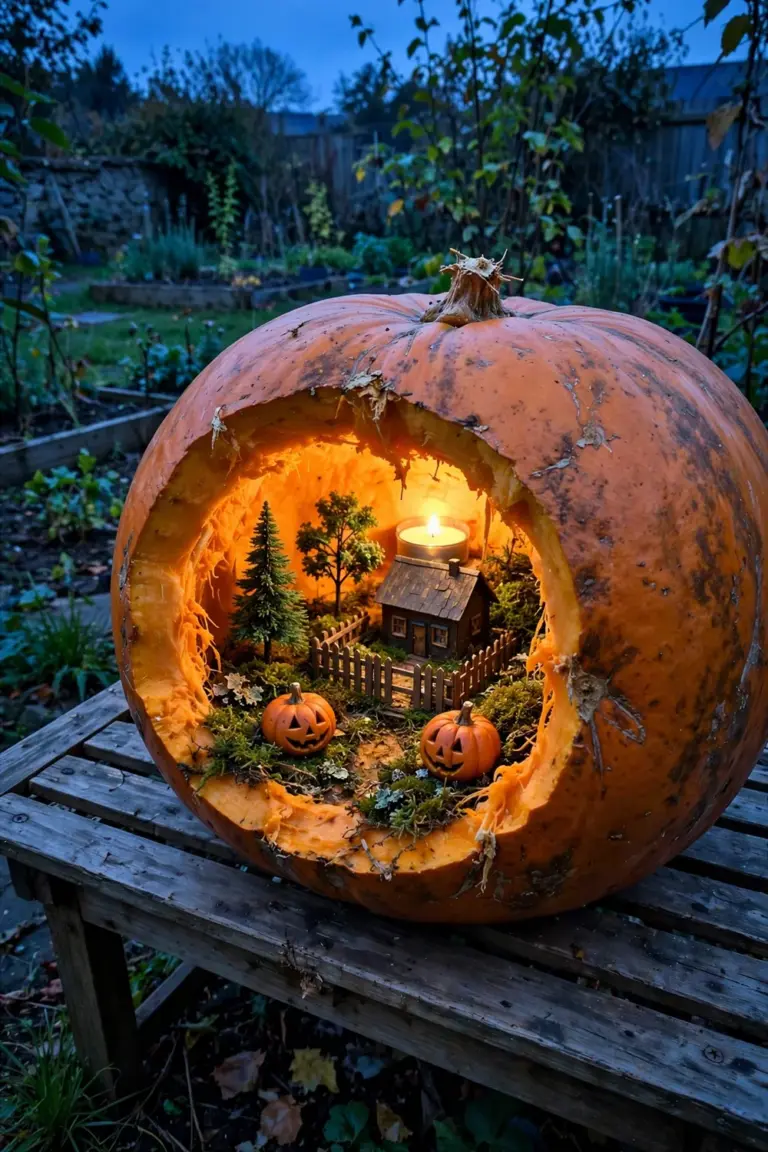
Tiny figures fill the stage: a miniature house, small plastic trees, a little fence, and a battery tea light at the back. A few carved mini pumpkins complete the scene. Set the diorama on a low table so the scene sits at eye level and passersby can crouch down and peer in.
30. Carve Constellations and Connect the Stars
Pick a familiar constellation, Orion or the Big Dipper. Mark each star with a dot of marker on the skin, then drill or cut a small hole at every dot. A bigger hole makes a brighter star, so vary the sizes a little.
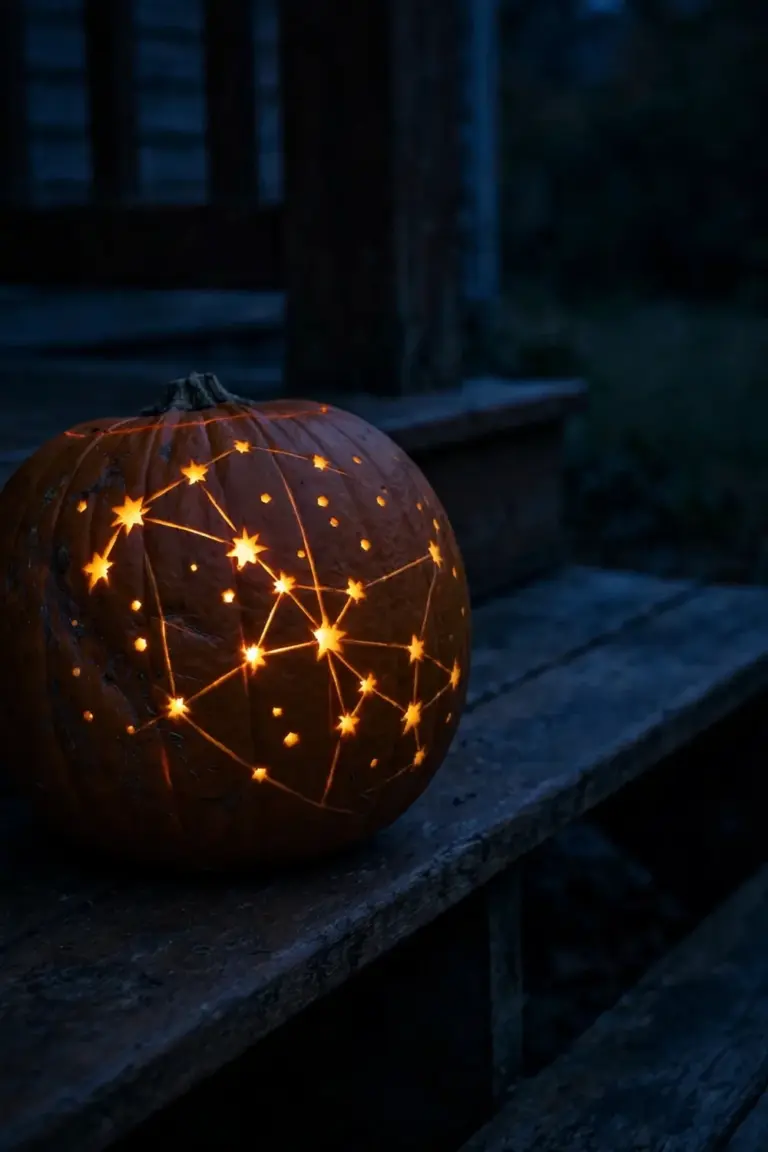
Shallow etched lines connect the stars. The etched lines thin the rind, and light seeps through them as a soft glow, while the drilled stars shine as bright points. Viewers can trace the shape and name the constellation. A printed star chart beside the pumpkin helps guests find each shape, and dim porch lights make the pattern easier to read.
31. Use a White Pumpkin for a Pale Ghost Face
White pumpkins carry a ghost design with almost no help, because the pale skin already looks ghostly in daylight. Pick a smooth fruit without deep ridges for a clean face. Carve two oval eyes and a long oval mouth. Keep the cuts simple and smooth.
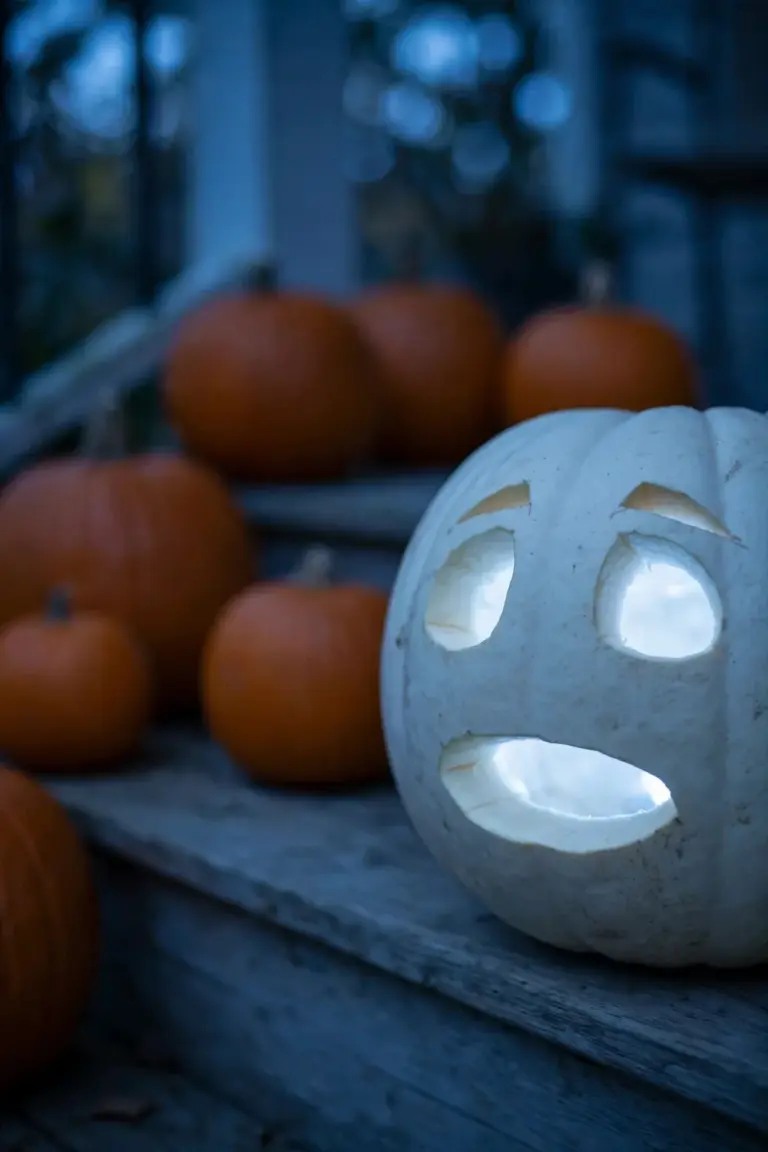
Inside, a cool white LED gives the face a moonlit glow. Cut the edges of the eyes at a slight slant and the ghost looks surprised. Set the white pumpkin among orange ones and the pale face stands out in every photo. Wipe the skin with a damp cloth before display so the white stays clean.
32. Carve a Woodland Scene With Trees and a Fox
Along the bottom of the pumpkin, draw a row of pine trees. Add a sitting fox in the middle and a round moon above the trees. Peel the moon shape shallow so it glows softly. A wide pumpkin gives the forest a long horizon.
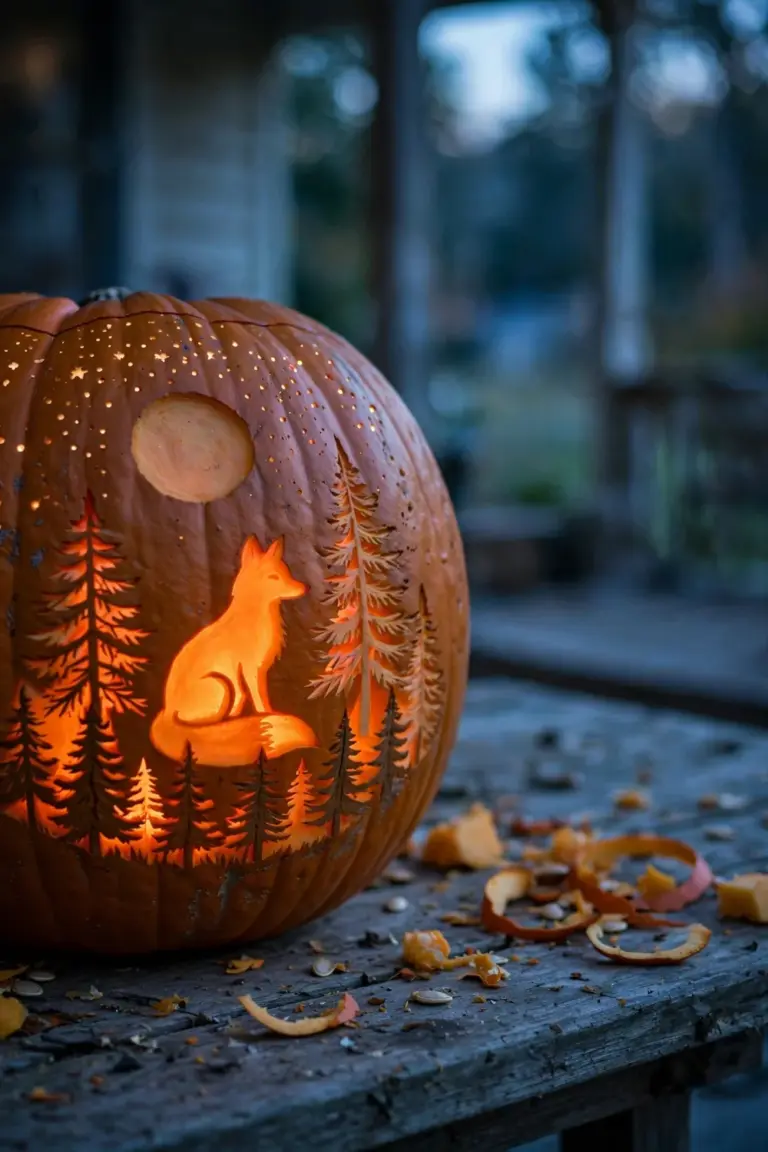
The fox outline gets cut all the way through, so the animal shines brightest. Etch the tree shapes at a medium depth and leave their trunks as dark skin. A small drilled star field above the moon finishes the sky. Work from the center outward so a hand never covers a finished shape, and a warm LED inside brings the moon to life.
33. Try a Two-Tone Etch With Shallow and Deep Cuts
Two depths on one design carry this technique. Picture a moth with patterned wings. Scrape the first set of shapes with a shallow pass. A shallow scrape thins the rind, and light glows through the thinned flesh with a warm, dim tone.
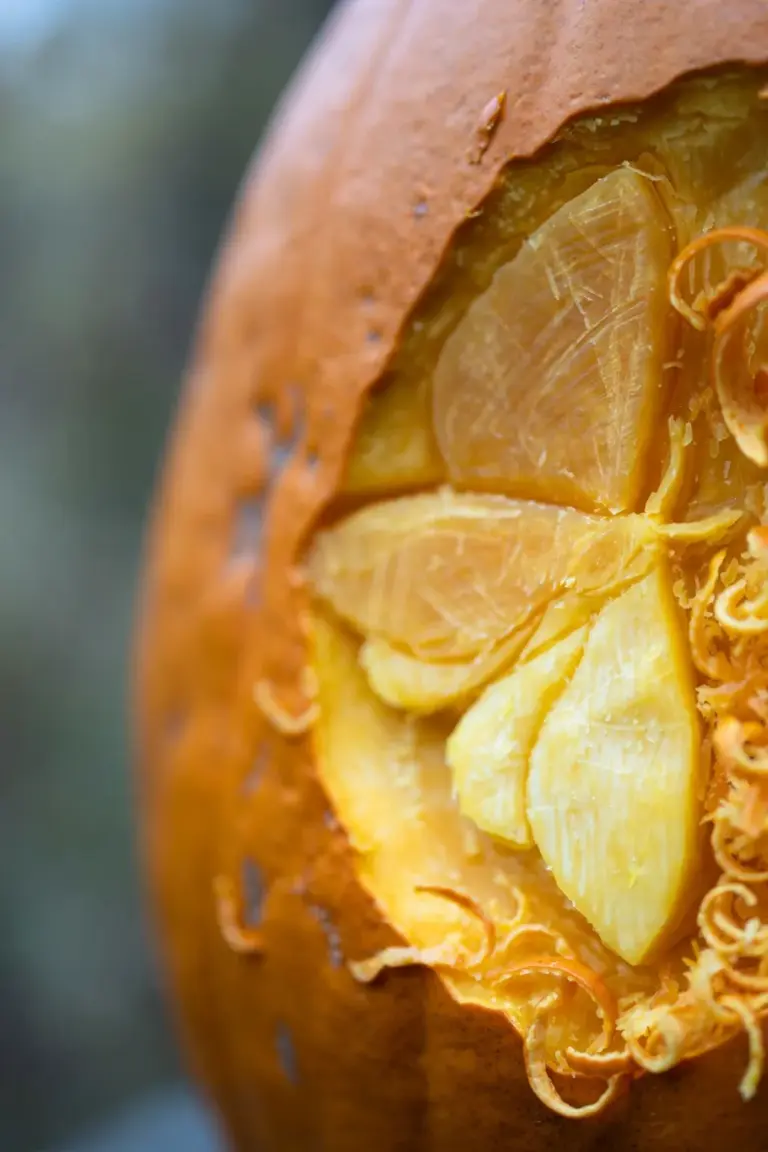
The second set of shapes goes deeper, or all the way through. Deep cuts shine brightest, so the design shows pale gold beside bright yellow-white. Mark each shape with its depth before cutting anything. Test both depths on the back of the pumpkin first, because a practice patch tells you exactly how much pressure the tool needs.
From the Garden: Grow, Carve, Keep
34. Grow Your Own Carving Pumpkins Next Year
A homegrown carving pumpkin starts with timing. Pumpkins need 80 to 100 days from sowing to mature fruit, according to the University of Georgia Extension. Count back from the week you want ripe pumpkins and sow after the last spring frost. Warm soil helps the seeds sprout fast.
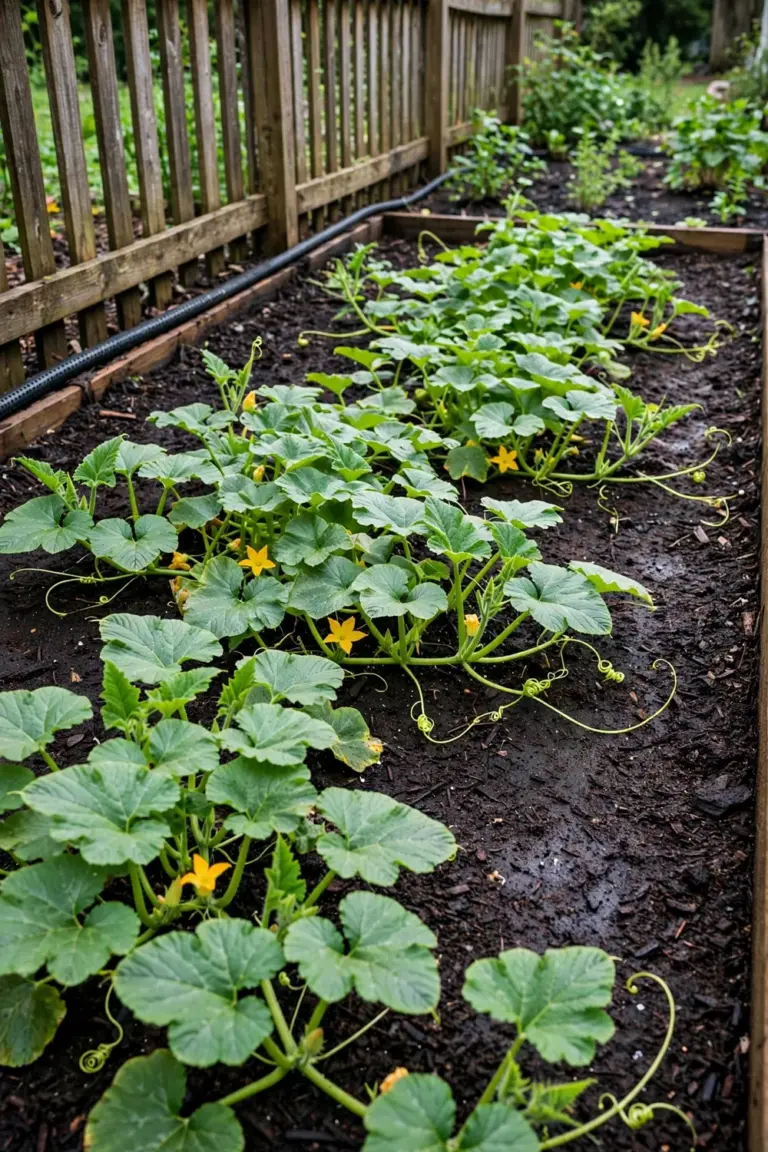
Give each plant a sunny patch with room to sprawl, and water at the base. The same date-planning habit behind a fall planting calendar works here: write the sowing date on the seed packet and note the expected harvest week. Pick a smooth, unscarred fruit for the best design, and cure it in the sun for a week before carving.
35. Pick the Right Pumpkin Shape for Each Design
Match the pumpkin to the pattern before cutting. Tall oval pumpkins suit faces with long grins and stacked scenes. Round pumpkins suit moons, suns, and circular patterns. A flat, smooth front gives templates a steady surface to trace, and a thick wall holds fine cuts without collapsing.
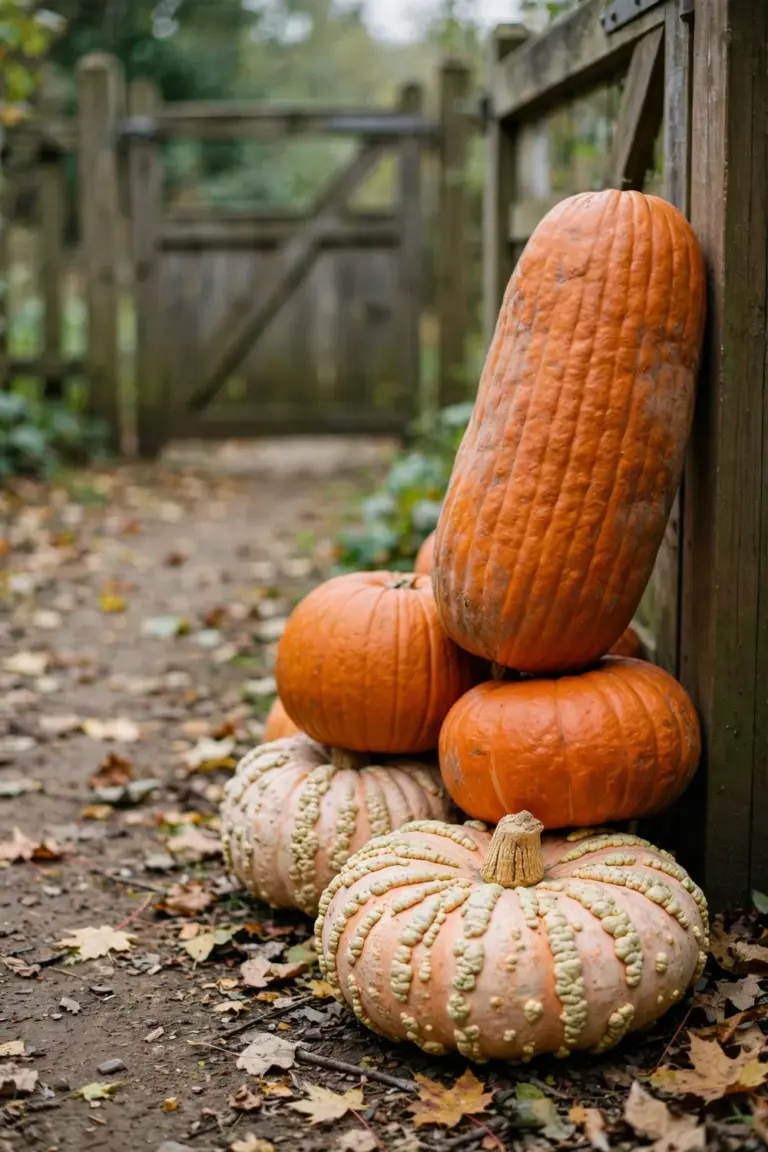
Run your fingertips over the skin. Thick ridges fight fine lines, so save detailed etching for smooth-skinned fruit. A pumpkin that sits flat without rocking keeps a lit display safe on the steps. Keep one spare pumpkin in the shade for mistakes and practice cuts, and buy or pick two candidates for every important design.
36. Set Up a Safe Outdoor Carving Station
A sturdy table outside, set at waist height, anchors the station. Cover it with newspaper or an old cloth. Lay out the tools in a row: a scoop, a serrated knife, a poker, a drill, and a bowl for seeds. A lamp or a clip light keeps the work area bright after sunset, and a trash bin at the end of the table catches the scraps.
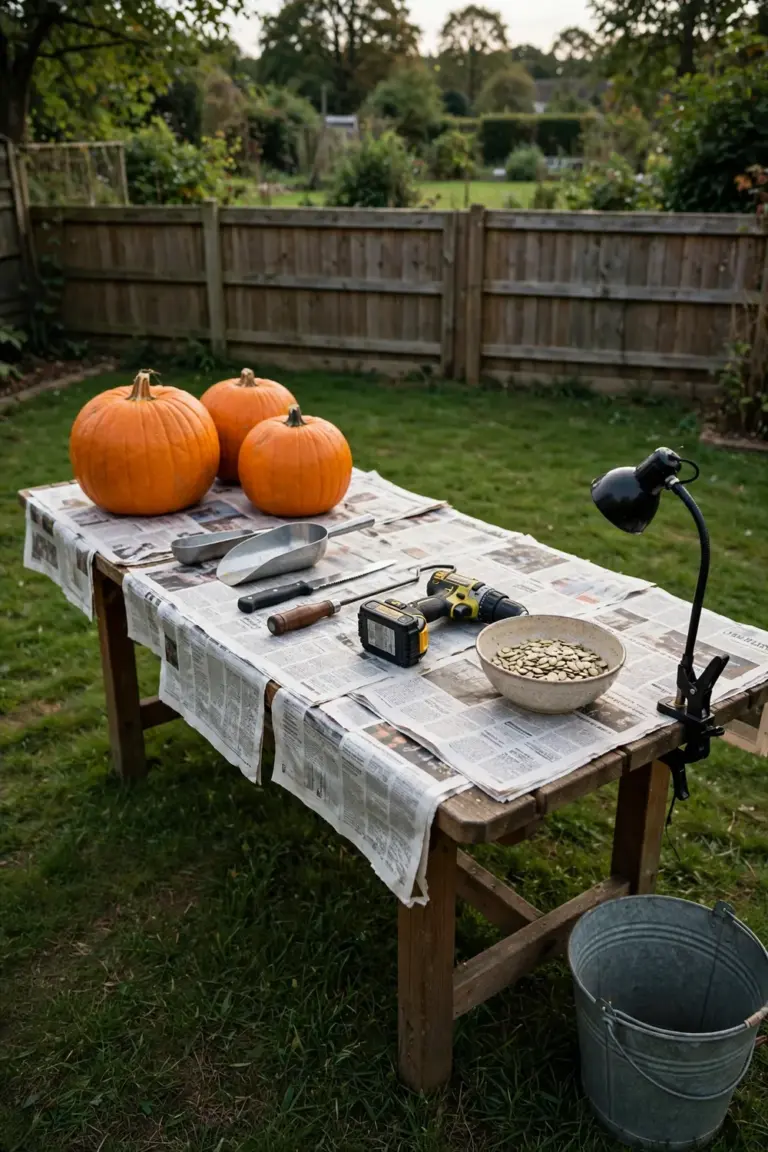
A towel under each pumpkin keeps it still while you cut. Cut away from your body, and keep the knife in your dry hand. A bucket of water and a first aid kit belong within reach. Finished pumpkins go to a display tray so the table stays clear.
37. Transfer Any Pattern With the Poke-and-Trace Method
Tape the paper pattern flat against the pumpkin and smooth the edges so the sheet hugs the curve. Push a pin, an awl, or the tip of a nail through the paper along every line, spacing the holes about a quarter inch apart. Peel the paper away. A dotted map of the design stays behind on the skin, ready to guide the knife.
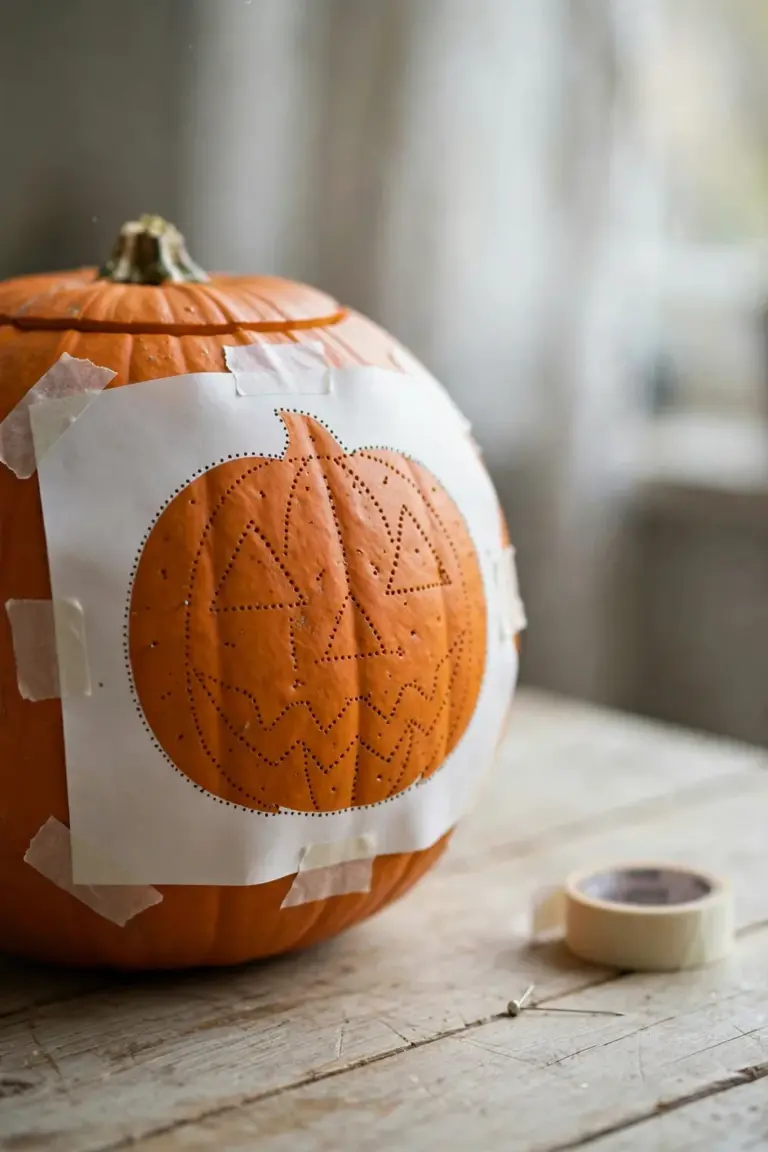
If the holes are hard to see, rub a pinch of flour or a dusting of chalk over the dotted lines. The pale dust settles into each pinhole and the pattern pops against the orange skin. Connect the dots with shallow guide cuts first, then go back and cut each section clean through.
38. Light Every Carving With LEDs for a Brighter Glow
A battery LED is simply better behaved inside a carved pumpkin. LEDs give bright light with no flame and no heat inside the pumpkin. The cut edges stay cool, the flesh dries out more slowly, and nothing inside can scorch or catch.
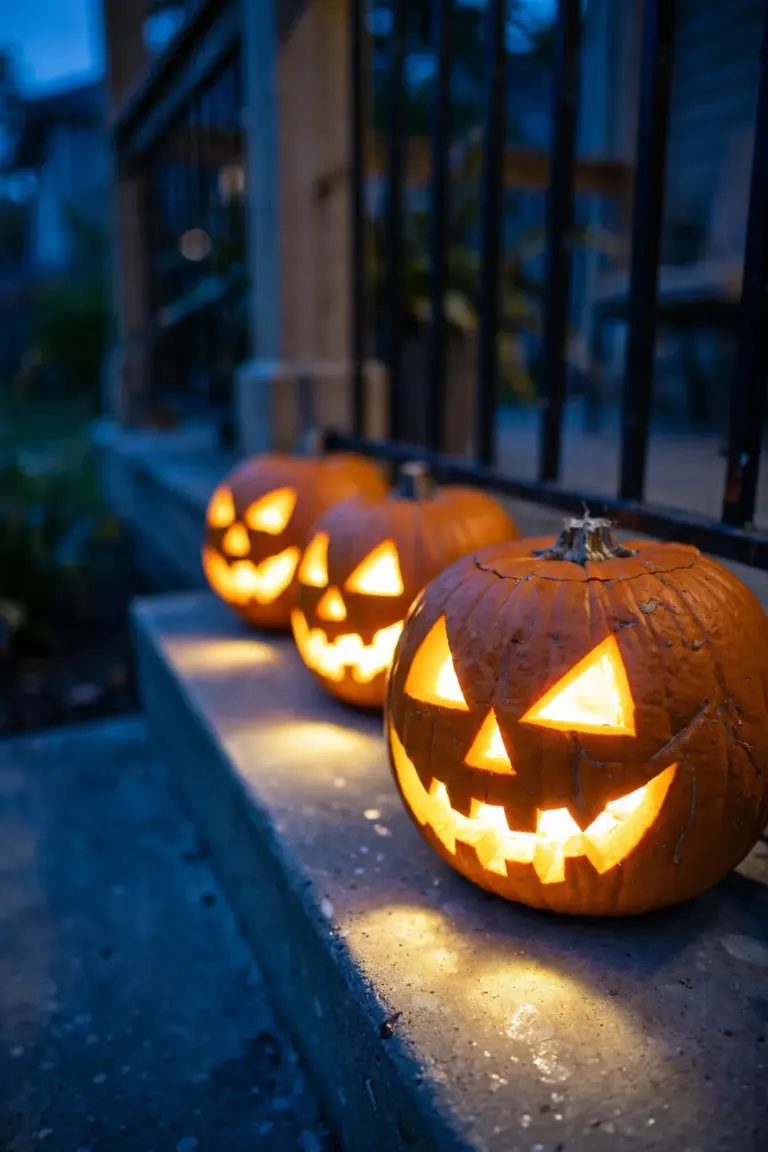
Warm white LEDs keep the classic candlelit color. Color-changing pucks suit the silliest faces in the lineup. Lights with timers switch on at dusk and off before midnight, so the display greets trick-or-treaters without any help, and two lights clustered inside a big pumpkin throw an even glow that carries across the yard.
39. Make Carved Pumpkins Last With a Bleach Bath
A finished carving starts softening within days, so preservation begins the moment the knife work ends. South Dakota State University Extension’s pumpkin carving preservation guide recommends spraying or dipping the finished carving with a 10 percent bleach solution. Rub petroleum jelly on the cut surfaces afterward to seal in moisture.
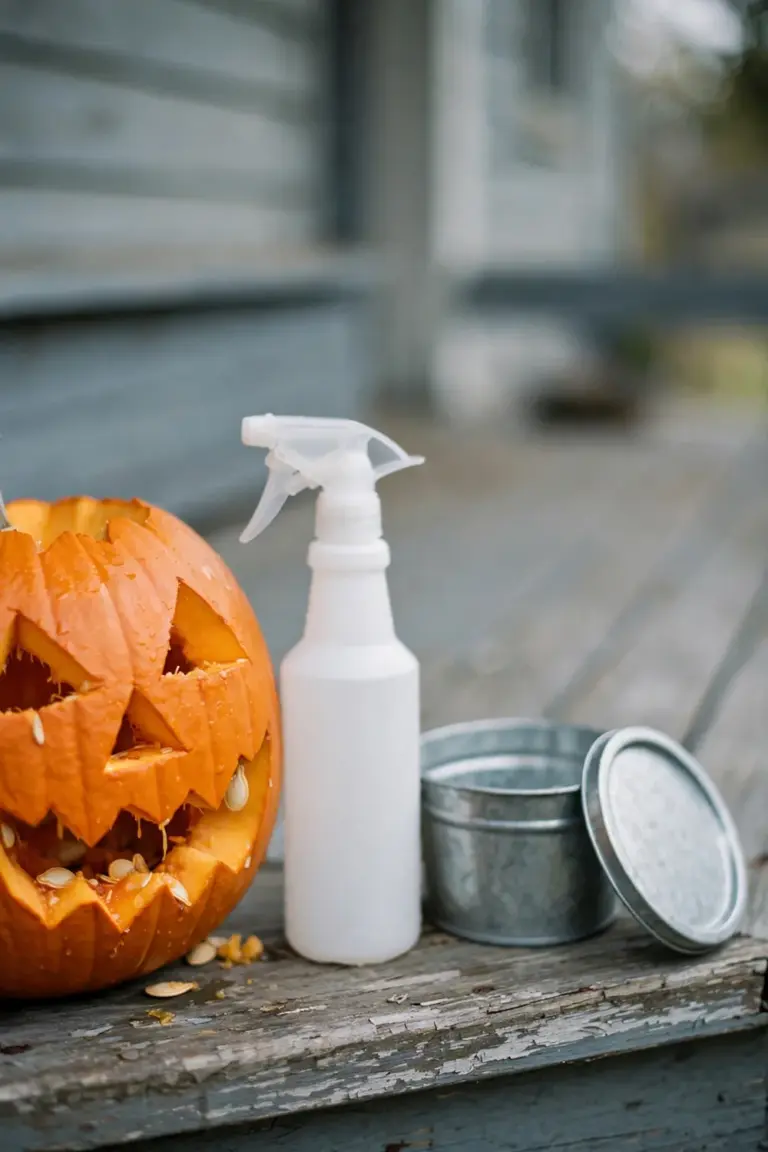
Wear gloves while you handle the bleach solution, and set treated pumpkins where pets and wildlife cannot nibble them. The same guide advises an electric light instead of a candle, because candle heat cooks the pumpkin from the inside. Petroleum jelly pairs with LED light only, since the jelly is flammable near an open flame. Display the carving between 50 and 60 degrees Fahrenheit for the longest life.
40. Save the Best Seeds for Next Year’s Patch
Every pumpkin carved this fall holds next year’s patch inside it. Scoop the seeds out before the pumpkin goes on display and pick the plumpest ones from the healthiest, best-shaped fruit. A quick rinse in a colander washes away the stringy pulp clinging to them.
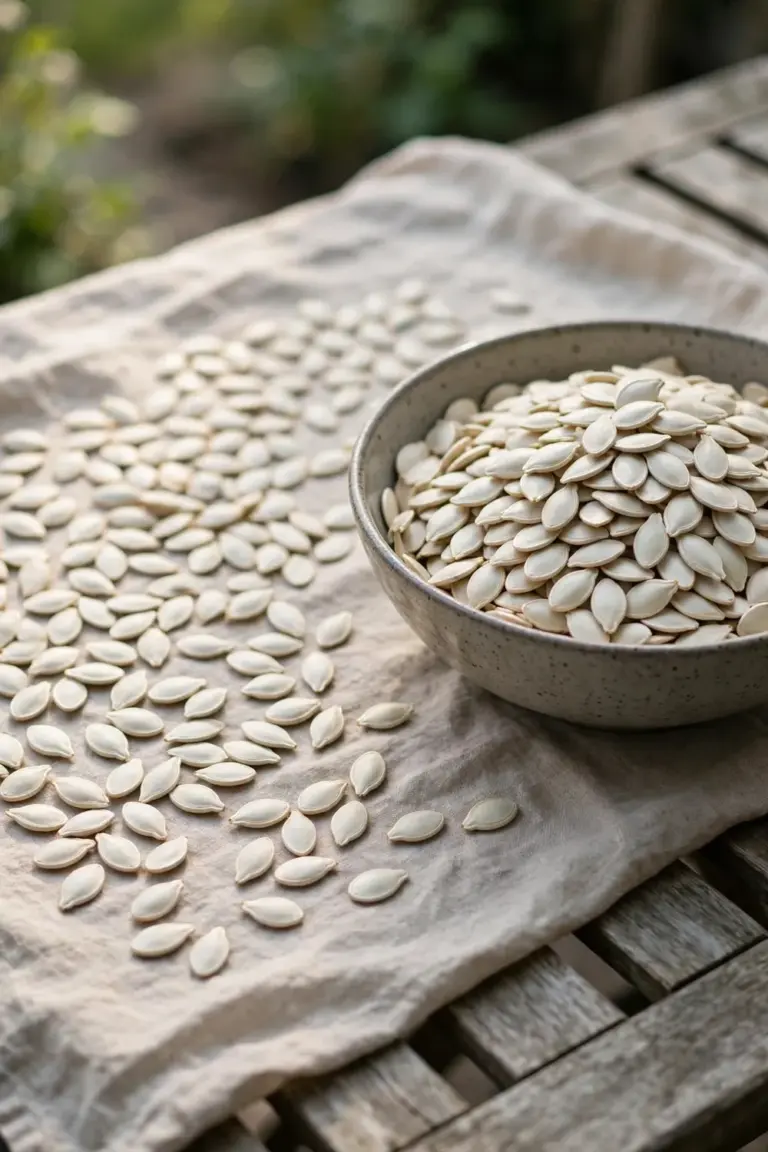
Spread the clean seeds on a towel or a sheet of newspaper and let them dry for about a week, turning them once a day. Store the dry seeds in a labeled paper envelope in a cool, dry spot. Planted in spring, they start the new patch right where last year’s best pumpkin left off.
41. Fix a Carving Mistake Without Starting Over
A slipped knife feels like a disaster. Most slips have a simple rescue. If a piece cuts free by accident, push it back into place and pin it from inside with two toothpicks angled in opposite directions. Once the pumpkin is lit, the repair hides well and the seams fall into shadow.
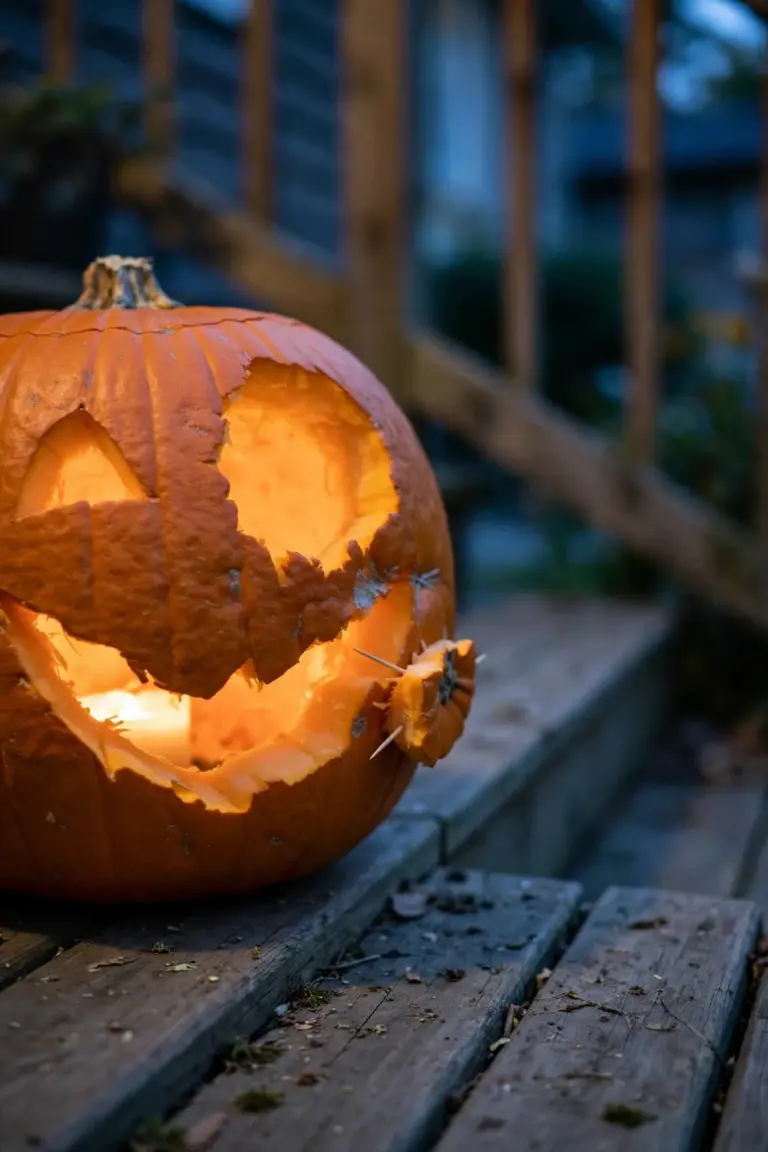
A cut that wanders off the line can join the design instead. Widen a crooked smile into a bigger grin, or turn a stray slice into a scar across the cheek. Rotate the pumpkin a few degrees on the step and many repairs disappear from the audience’s view entirely.
Party & Display
42. Run a Backyard Carving Party With Simple Stations
Give every job its own station and a carving party mostly runs itself. Set a gutting table with big spoons and bowls for seeds, then a pattern table with printed designs, tape, and poking tools. Keep the knives at one supervised carving table so the sharp tools stay in one place all afternoon.
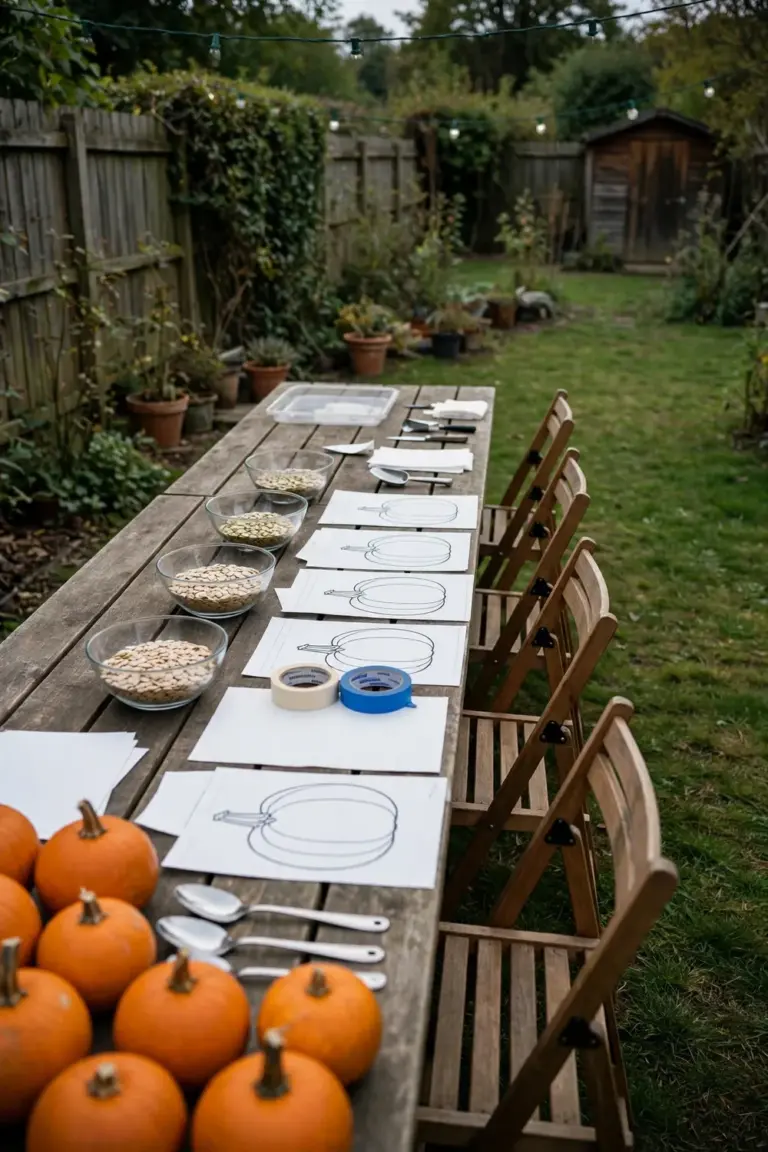
Hand guests a pumpkin as they arrive and let everyone move through the stations at their own pace. Finish with a lighting station stocked with LED candles, then line the completed pumpkins along a path or a fence. That row of glowing faces becomes the party’s decoration and its group photo at once.
43. Judge a Family Carving Contest With Silly Categories
End the party or the weekend with a contest that rewards silliness over skill. Write categories on slips of paper: Silliest Grin, Most Surprised Face, Best Cat, Scariest Without Being Scary. Every pumpkin should qualify for at least one category, so nobody leaves the judging empty-handed.
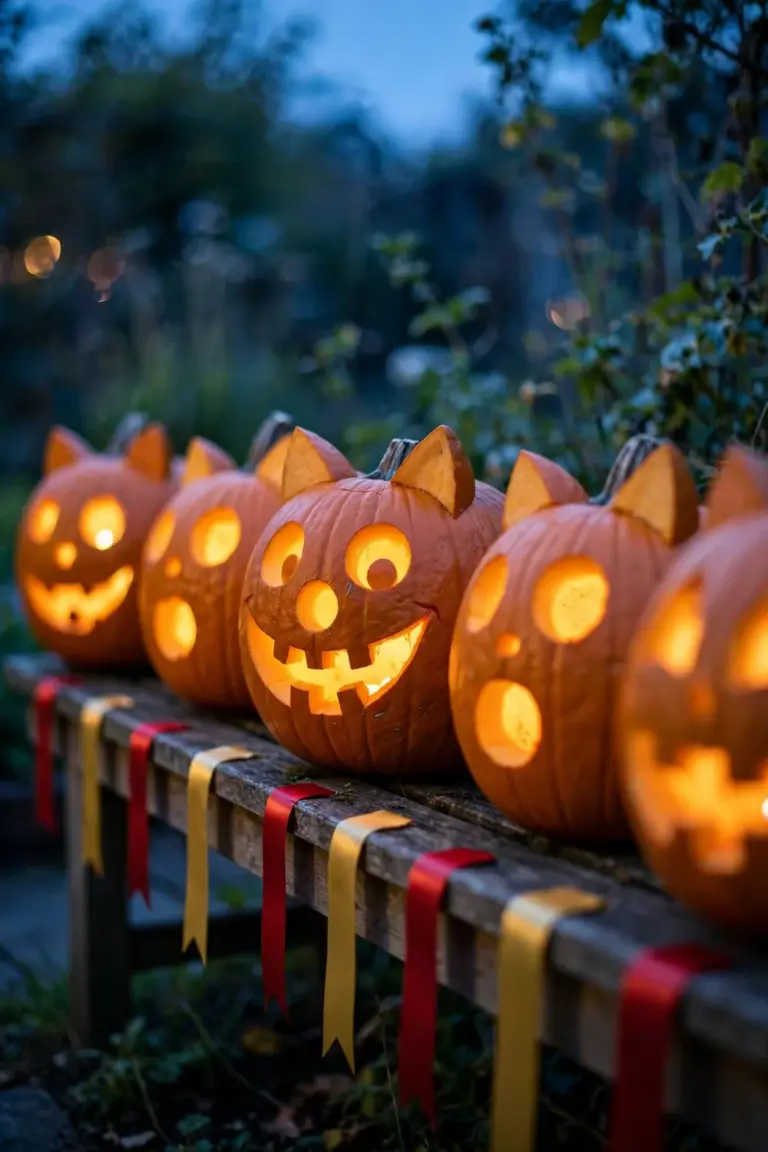
Let the whole group judge by applause, or invite a neighbor to pick the winners after dark, when the lights glow. Small prizes keep the mood light: a bag of roasted pumpkin seeds, first pick of the candy bowl, or the honor of placing the winning pumpkin at the top of the steps.
44. Line Up the Whole Funny Cast on the Porch Steps
The finished cast deserves a proper lineup on the porch steps. Place the biggest pumpkins on the top step or at the center, and let the smaller faces fill the lower steps on either side. Stagger the heights so every grin, wink, and spiral eye stays visible from the sidewalk.
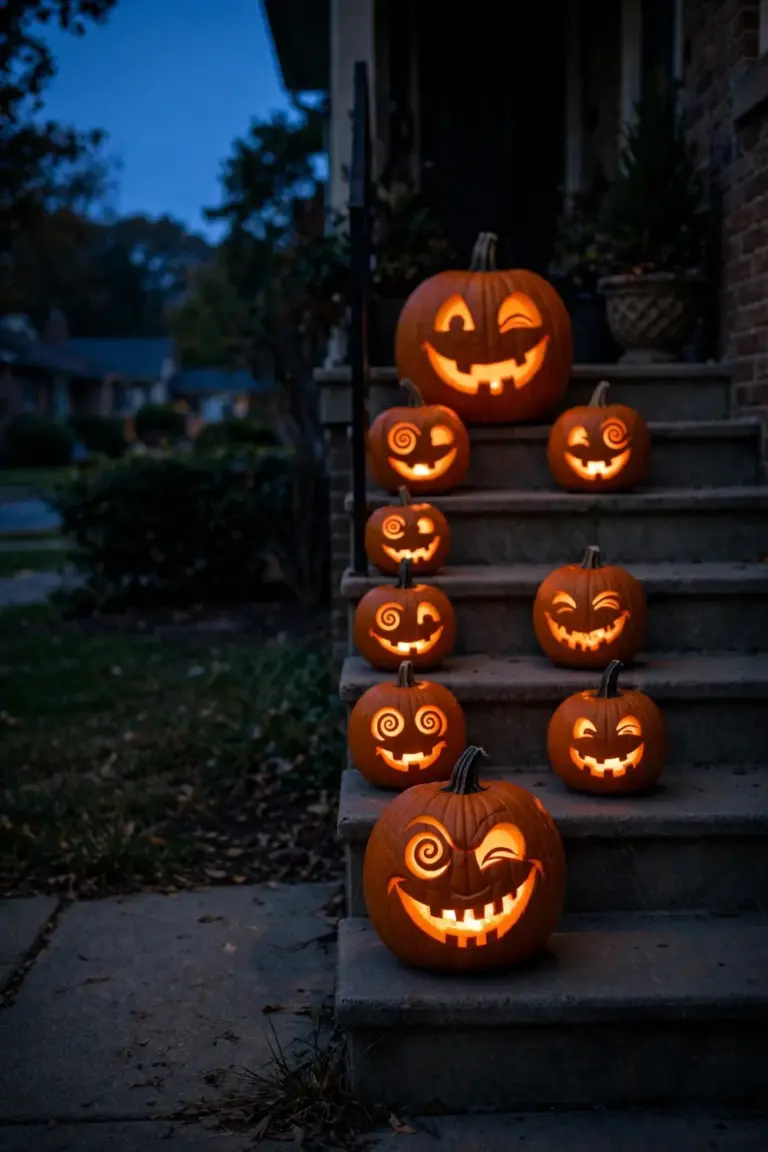
Group the funniest faces near the door, where guests see them up close, and save one dramatic character for the bottom step as the greeter. As dusk settles, switch on every LED and walk to the street for the lighting check. Adjust any pumpkin that sits in shadow, then stand back and enjoy the full cast glowing together.
45. Mix Carved and Uncarved Pumpkins for a Display That Lasts
A display built only from carved pumpkins fades within the week. Mix in uncarved pumpkins and the arrangement holds its shape long after the first faces soften. Set whole pumpkins behind and between the carved stars to fill gaps and add height where the lineup needs it.
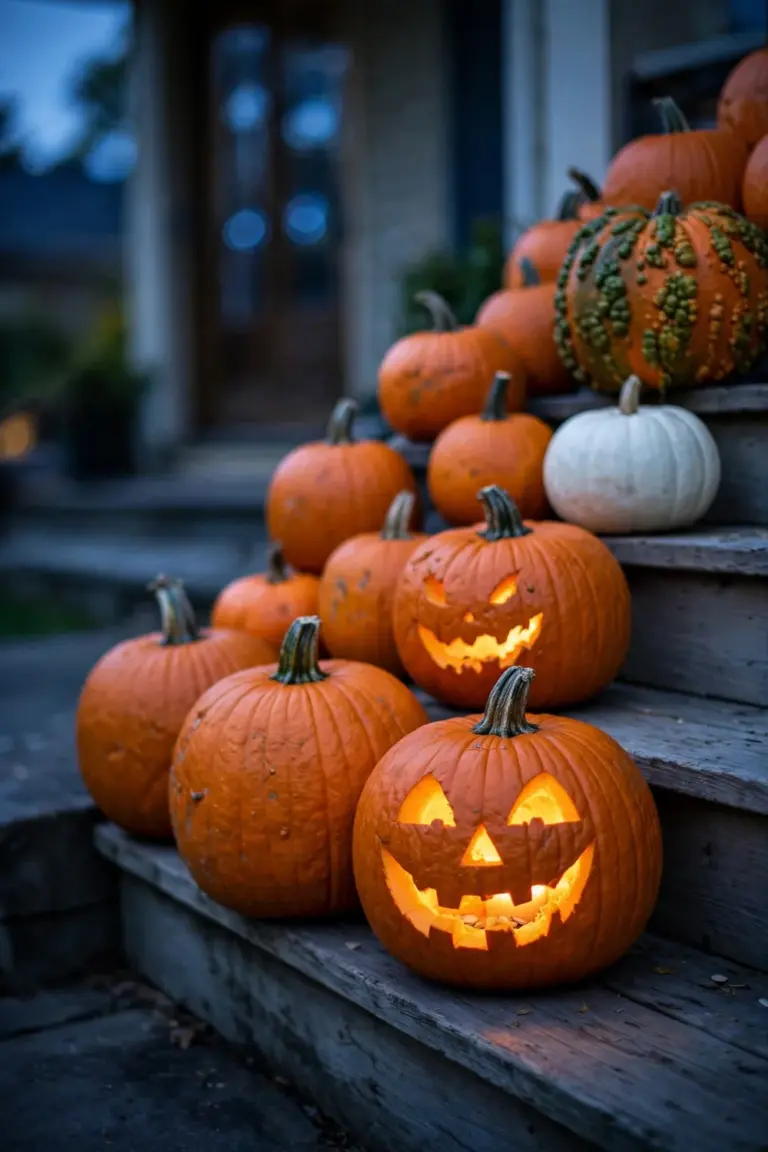
Choose uncarved fruit in mixed sizes and colors, with a few white or warty ones for contrast. As each carved pumpkin tires, slide a fresh whole pumpkin into its spot and carry the display through the season. The carved faces bring the jokes. The whole pumpkins bring the staying power.
Frequently Asked Questions About Pumpkin Carving Ideas
A carved pumpkin lasts only a few days, and warm weather shortens that span. South Dakota State University Extension recommends displaying a carving between 50 and 60 degrees Fahrenheit. A spray of 10 percent bleach solution slows the mold, and petroleum jelly on the cut edges slows the drying. An LED light keeps heat out of the cavity. Carve one or two days before Halloween to keep the grin at its best.
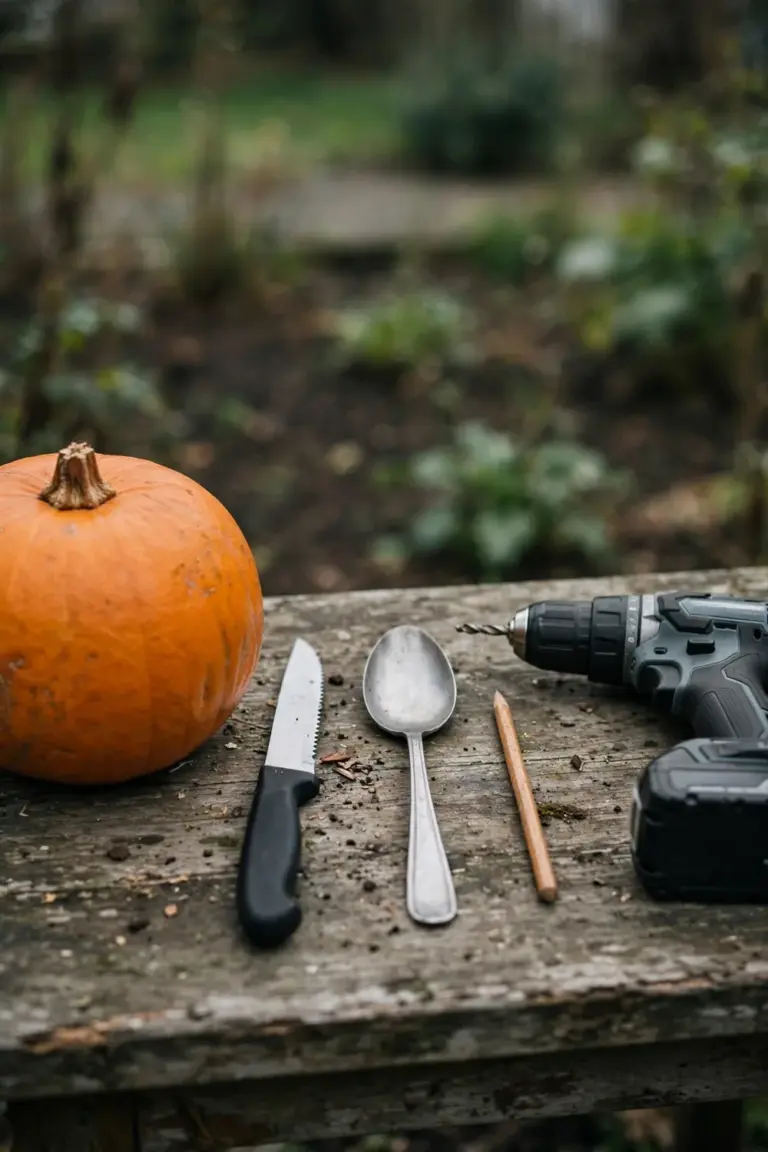
A beginner needs four tools: a serrated kitchen knife, a large metal spoon, a pencil, and a power drill. The spoon scrapes the wall thin, and a thin wall cuts easily and glows brightly. The drill handles every dot and star pattern in this list. Specialty carving kits add control for the layered scenes, and the classic faces forgive a plain kitchen knife completely.
Kids carve safely when an adult makes every through cut. A child draws the face, pokes the dotted outline, and scoops the seeds. The poke-and-trace method in this list exists for exactly that division of labor. Younger children paint or drill with hand-over-hand guidance, and the finished pumpkin still counts as theirs on the porch.
The bleach bath is safe when the treated pumpkin dries fully and sits out of reach. Bleach solution belongs on the carving, never within licking distance of a dog or cat. Wear gloves during the bath, rinse the tools, and set the display where wildlife cannot nibble it. Petroleum jelly pairs with LED light only, because jelly is flammable beside an open flame.
Carve funny faces one to three days before Halloween night. Easy drill patterns forgive an extra day, and the etched scenes hold their lines well into the weekend. An uncarved pumpkin waits weeks in a cool spot, so the smart schedule buys early and carves late. The display mixes both kinds on purpose, and the uncarved pumpkins carry the porch after the carved cast retires to the compost.
From Funny Faces to a Full Haunted Yard
A porch full of funny pumpkins does one job beautifully. It makes the house look welcoming from the street, and it gives every trick-or-treater a face to remember. The carvings work even harder as one chapter of a bigger scene, with lighting on the path, gothic plants in the beds, and a graveyard grinning back from the lawn. Once the pumpkins are carved, place them with the rest of your Halloween garden ideas so the whole yard reads as one scene.
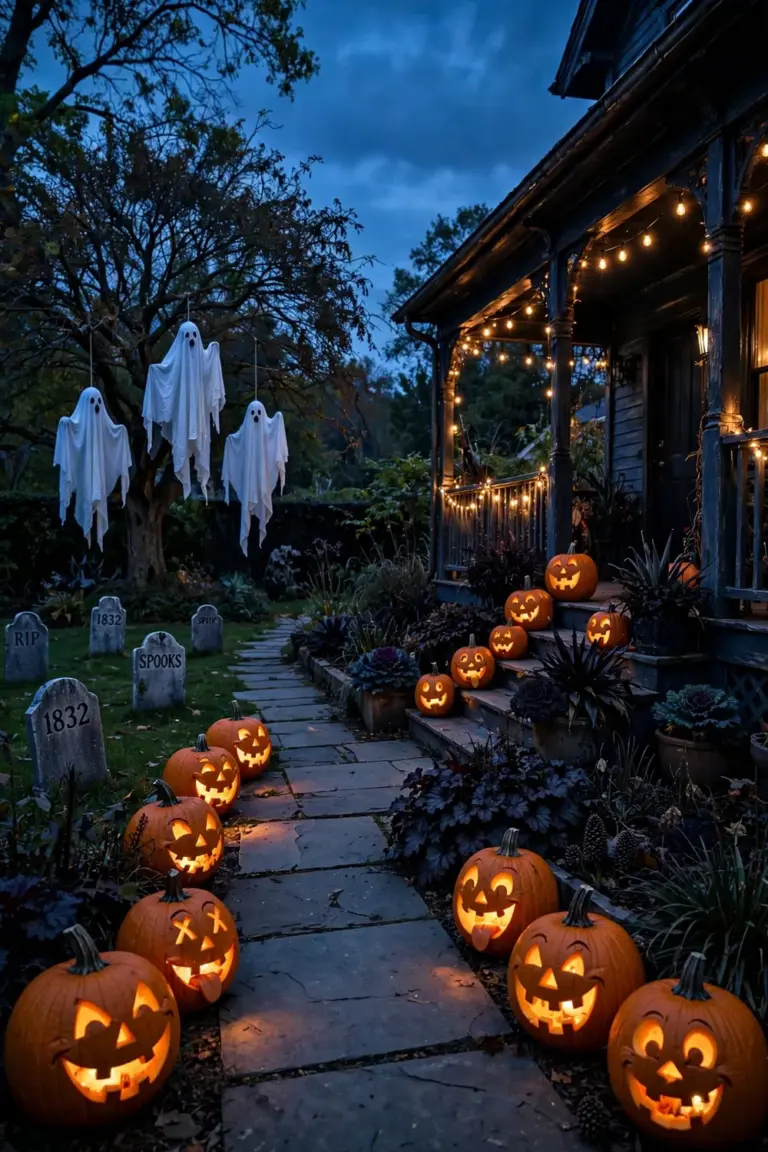
Next year the cast of funny pumpkin carving ideas can grow. Save the seeds from the best-shaped pumpkin, mark the calendar for sowing, and let the garden grow the stars of the show. A homegrown pumpkin carries its jokes better, because the carver chose the face months before the knife ever touched the rind.