
Skip weed mat. Lay plain cardboard on the ground, cover it with 10 cm of compost, and finish with 5 to 10 cm of mulch. That three-layer stack blocks light, starves the weeds underneath, and feeds the soil as it breaks down. Weed mat does the opposite over time: dust and organic matter collect on top of it, weed seeds germinate in that layer, and the roots anchor through the fabric until pulling a weed tears the sheet.
Weed mat is a woven plastic or fabric sheet laid on soil to block weeds. Sheet mulch is a layered stack of cardboard, compost, and mulch that does the same job while it rots into soil. This article is the setup guide for a new bed built the second way. It covers why weed mat fails in beds, the three layers in order, the raised-bed and in-ground cases, the edges where weeds actually enter, and the first-season routine that keeps the bed clean.
1. Why Weed Mat Fails in Garden Beds
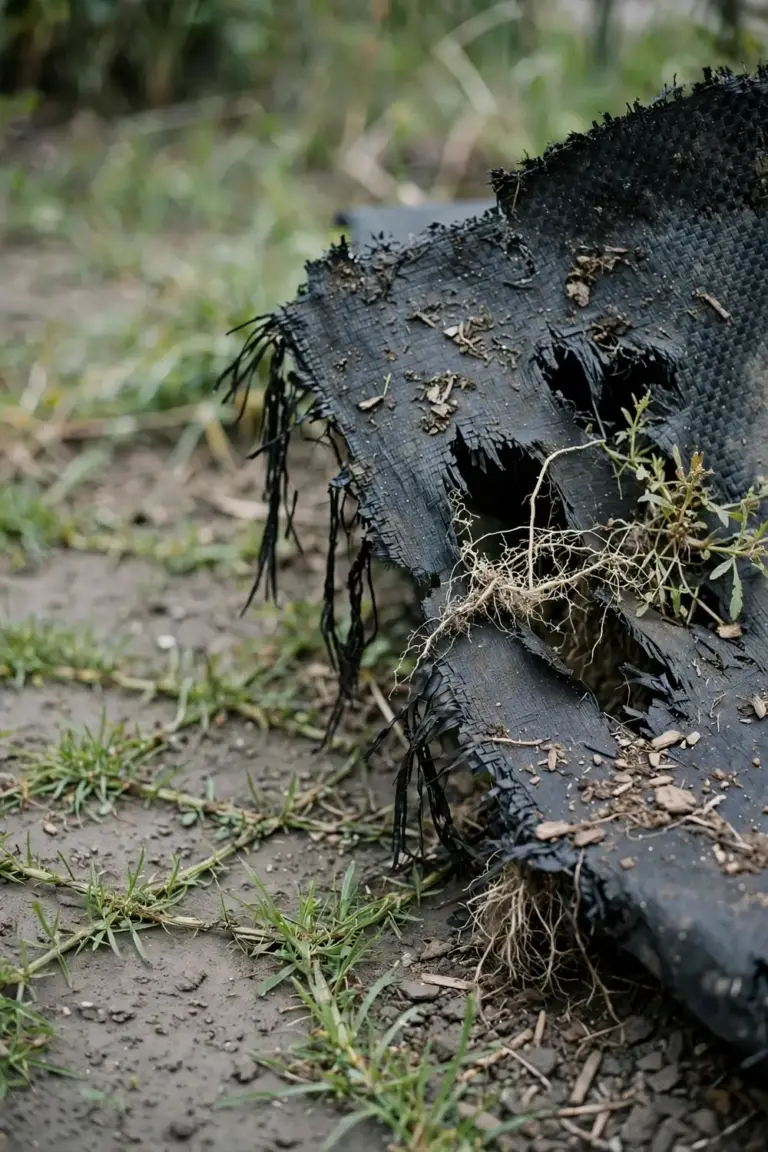
Weed mat fails in garden beds because it turns into a weed bed itself. The fabric starts out blocking light, so weeds underneath die back. Then dust, fallen leaves, and broken-down mulch collect on top of the sheet. Weed seeds land in that layer and germinate. Their roots grow down through the fabric and anchor in the soil below. Pulling one of those weeds tears the sheet and opens a hole for the next seed.
Washington State University Extension describes the same failure in plain terms. The pores in the fabric clog with soil particles, so the sheet stops letting water and air through. The clogged fabric becomes a mat that grows weeds instead of stopping them. The soil underneath can compact, lose nutrients, and stay too wet, which leads to root rot. The fabric was developed for agricultural use, where a field is planted once and cleared once, not for a home bed that gets replanted and topped up every season.
Roots tangling through the fabric cause the second failure. A weed that roots through weed mat cannot be pulled clean. The root snaps at the fabric, the crown stays in the soil, and the weed regrows. Each pull tears a bigger hole. Within a couple of seasons the bed holds a torn sheet, a mat of roots, and weeds that grow faster than they did on bare soil.
The third failure is maintenance. A bed without weed mat gets a fresh layer of compost or mulch each season. A bed with weed mat cannot take that layer, because every new layer sits on top of the sheet and becomes the next weed nursery. Topping up the bed means lifting the sheet, which disturbs every plant rooted through it. The sheet also makes it hard to dig in compost, divide a perennial, or move a plant, because every spade cut meets fabric.
The sheet is plastic, and plastic does not rot into soil. It tears, frays, and leaves fragments behind. Those fragments stay in the bed long after the sheet stops doing any good. Removing a failed sheet is slow work: the fabric comes up in strips, the roots come with it, and the soil underneath is usually compacted and low in life.
Weed mat still has two honest uses. It belongs under gravel paths, where nothing is planted and nothing needs to be dug, and under stone or paver areas where the goal is a stable base, not a living bed. In both cases the sheet sits under a hard surface that keeps new soil from collecting on top. A planted bed is the wrong place for it, because a planted bed is always collecting new soil on top.
2. Build the Bed in Three Layers: Cardboard, Compost, Mulch
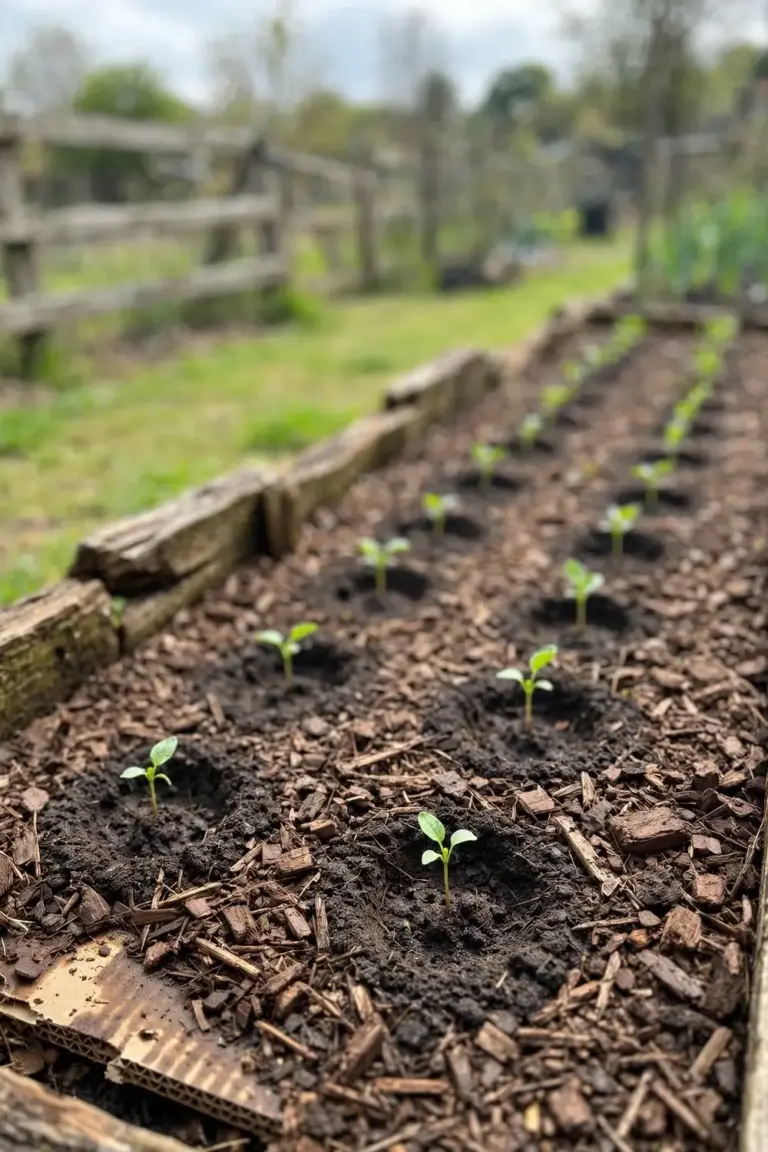
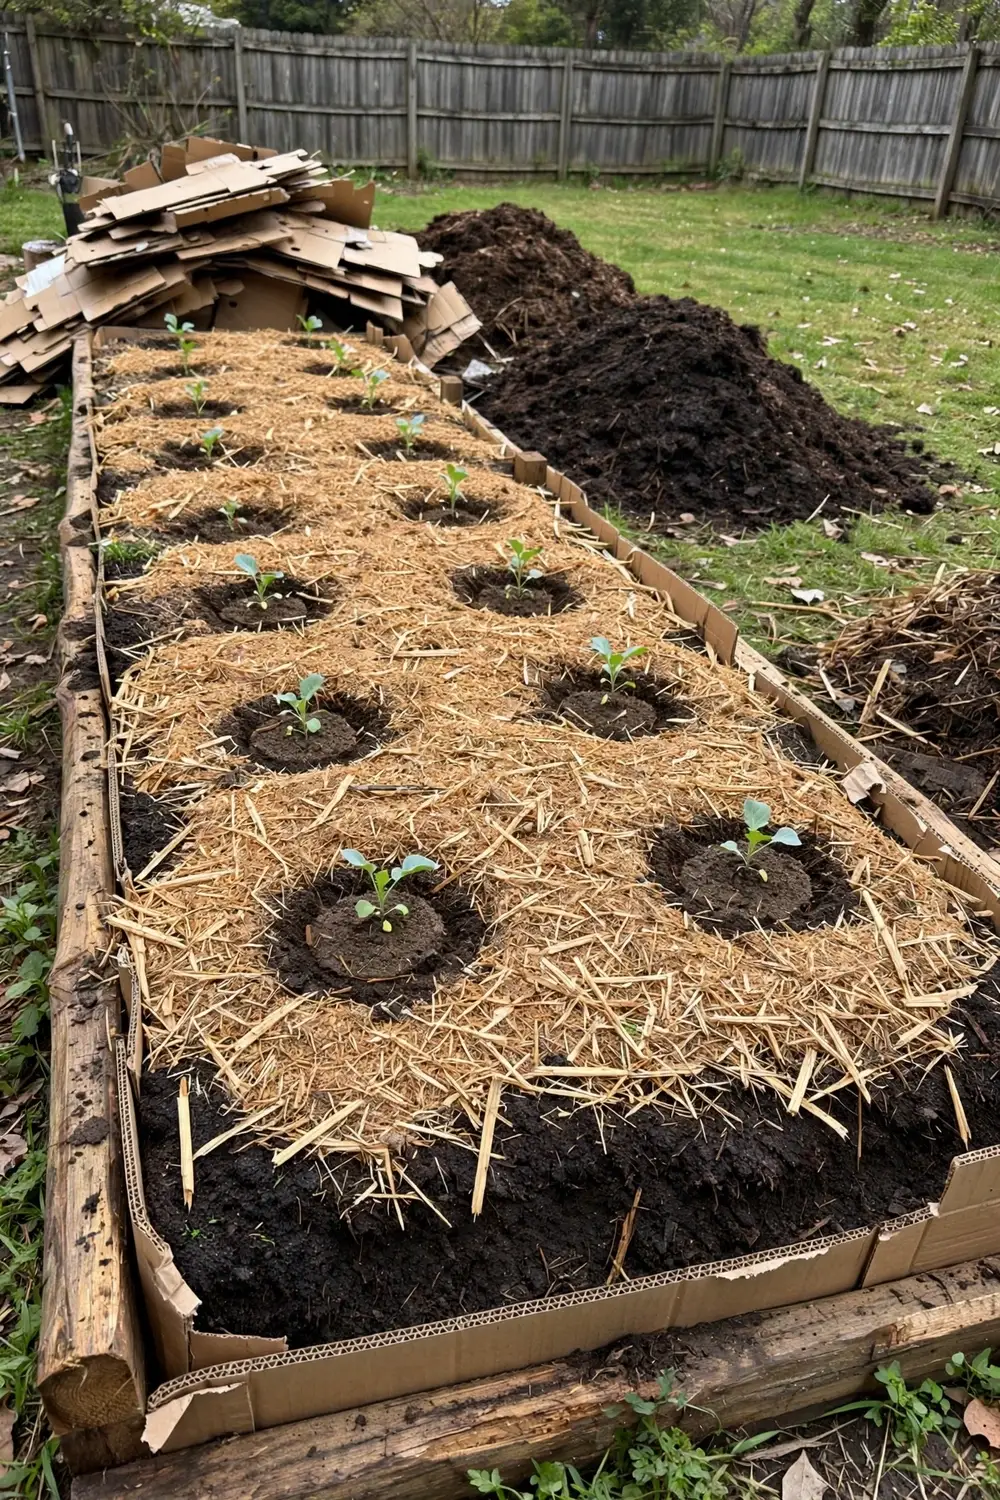
Build the bed in three layers, in this order: cardboard on the ground, compost on the cardboard, mulch on the compost. Each layer has one job. Cardboard blocks light. Compost feeds the soil and gives new plants something to root into. Mulch holds moisture in, keeps the compost in place, and blocks light from any seed that lands on top.
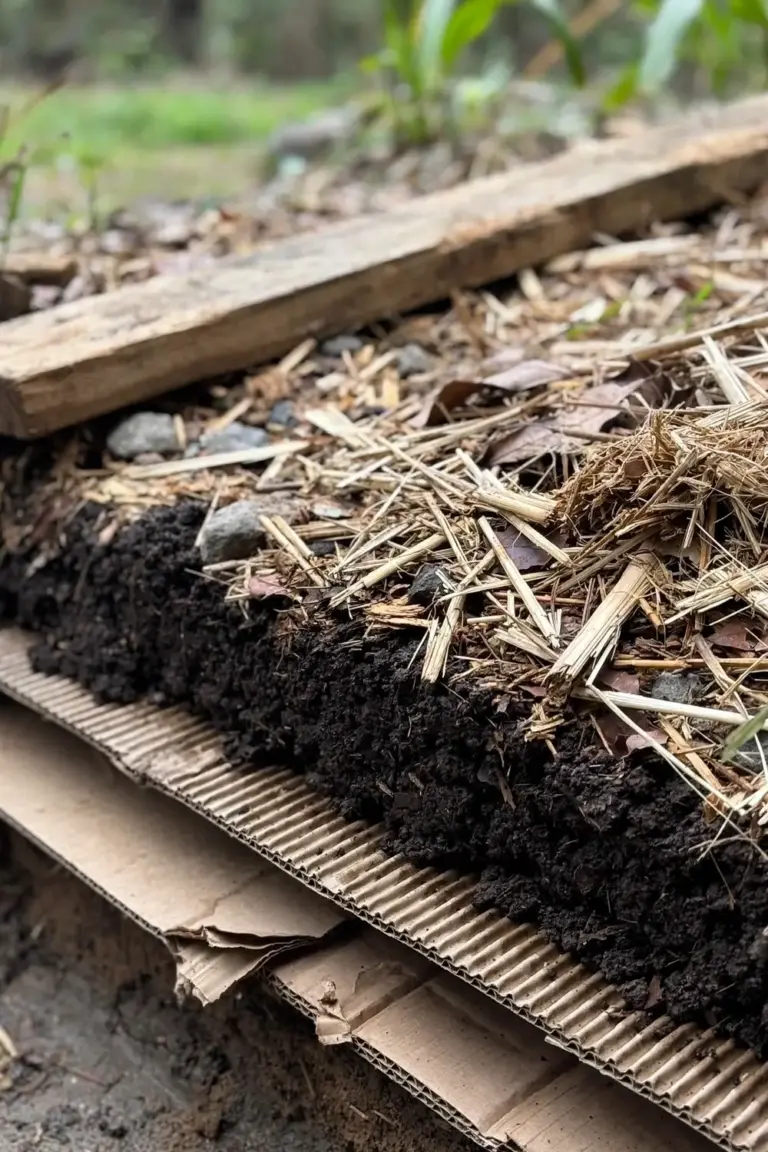
Start by scalping the ground. Mow or cut any grass and weeds down to soil level and remove the clippings. Do not dig the bed over. Digging brings buried weed seeds to the surface, where light wakes them. A flat, scalped surface lets the cardboard sit tight against the ground, and tight contact is what starves the weeds underneath.
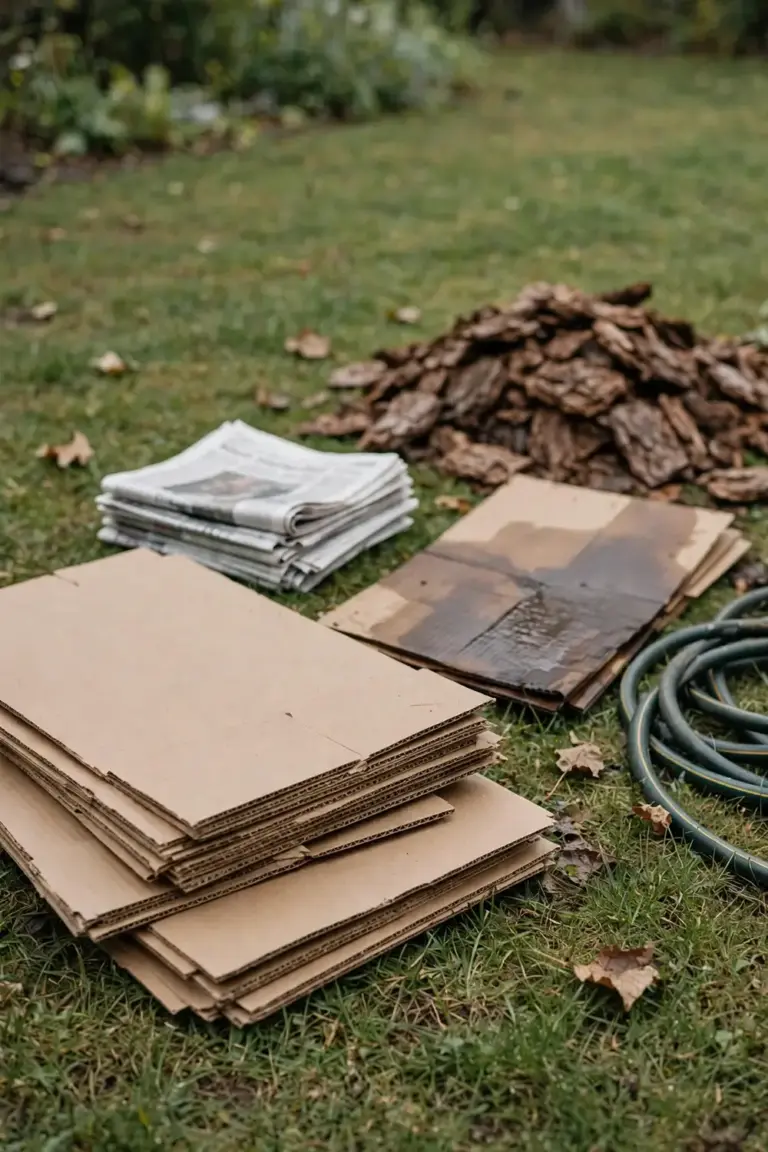
Lay the cardboard next. Use plain brown corrugated cardboard with all tape, labels, and staples removed. Overlap every sheet by about 15 cm, so no seam lets light through. This overlap is the article’s own setup rule: a seam is a gap, and a gap is a weed. I have learned that the cardboard I overlap generously stays weed-free, while the cardboard I butt edge to edge leaks light at every seam. Wet the cardboard as you lay it. Wet cardboard molds to the ground, stays put in wind, and starts breaking down at once.
Spread compost over the wet cardboard. A layer 10 cm deep gives new plants room to root and gives soil life something to work on. This depth is the article’s own setup rule, and it matches the Oregon State Extension method of finishing a lasagna bed with 10 to 15 cm of soil or compost on top before planting. Use finished compost or well-rotted manure. Fresh manure and unfinished compost can burn seedlings and carry weed seeds, so buy finished material or use a heap that has cured.
Finish with mulch at 5 to 10 cm deep. Iowa State University Extension gives 2 to 4 inches, which is 5 to 10 cm, as the depth that suppresses weeds without blocking air and water. Use a coarse mulch that lets rain through: sugar cane mulch, eucalyptus mulch, pine bark, or arborist wood chip all work. Fine sawdust mats down and sheds rain, so skip it for this layer. Keep mulch off plant stems. Leave a clear ring of bare soil around each stem, about a hand-width wide. That ring is the doughnut rule, and it stops mulch holding moisture against the stem, which causes rot.
| Layer | Material | Depth | Purpose |
|---|---|---|---|
| Cardboard | Plain brown corrugated cardboard, tape and staples removed | One sheet, overlapped 15 cm | Blocks light and starves weeds underneath |
| Compost | Finished compost or well-rotted manure | 10 cm | Feeds soil life and gives new plants a rooting layer |
| Mulch | Sugar cane, eucalyptus, pine bark, or arborist chip | 5 to 10 cm | Holds moisture, blocks light from new seeds, keeps compost in place |
Plant into the compost layer on the same day for transplants. Push the mulch aside, cut a cross in the cardboard under the planting hole, and set the plant in with its roots in compost. Seeds go into the compost layer once it has settled for a week or two, because a fresh layer shifts as it beds down. Soil life does the rest of the work: worms and microbes pull the cardboard down, open channels in the soil, and turn the stack into topsoil over the first season.
Mulch depth is the number that matters most. Too thin, and light reaches the cardboard seams and the compost, and weed seeds germinate. Too thick, and water runs off the top instead of soaking in. The 5 to 10 cm band from Iowa State Extension is the safe middle. Check the depth after the first heavy rain, because mulch settles and thins as it packs down. Top up any thin patch at once, before weeds find it. Mulch does more than block weeds: it holds moisture in the soil, steadies soil temperature, and feeds soil life as it breaks down.
3. Raised Beds: Cardboard Base, Then Fill
A raised bed uses the same three layers, with the cardboard laid inside the frame and the fill brought up to near the top. The frame changes the shape, not the method. Cardboard still blocks light, compost still feeds the soil, and mulch still caps the surface. The frame adds one job: it holds the layers in place and stops mulch washing off the edge.
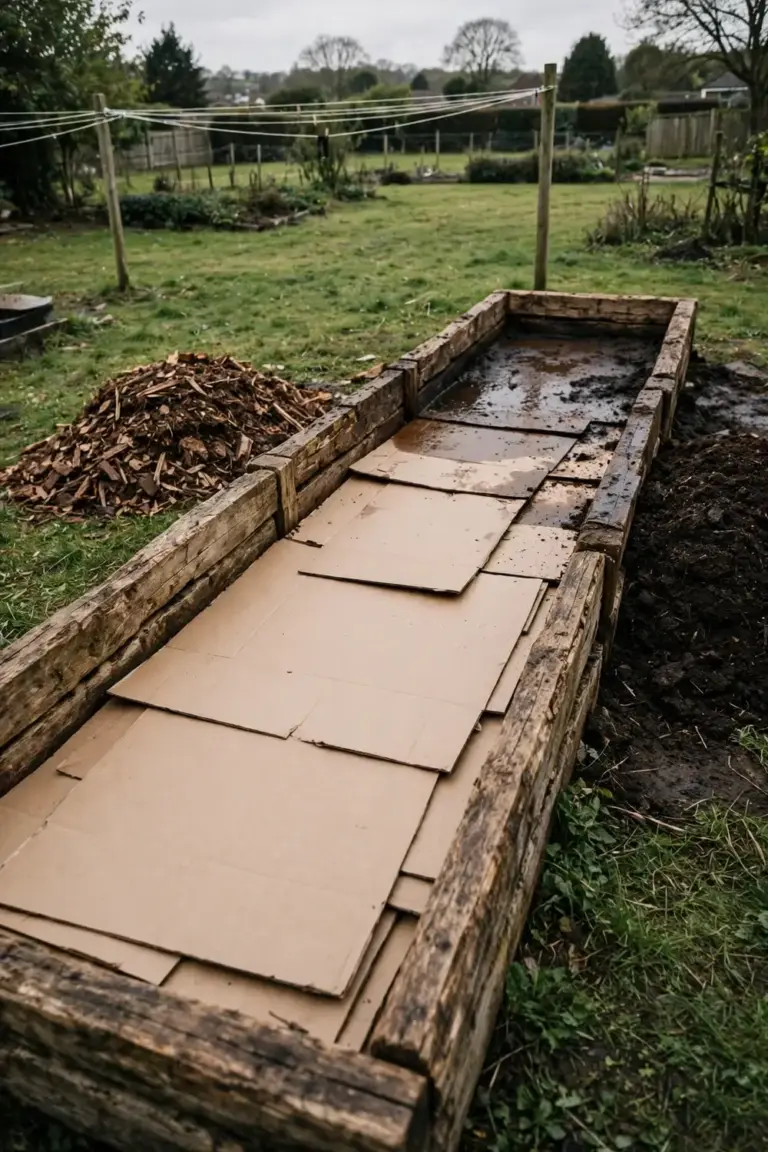
Lay the cardboard inside the frame first, with the same 15 cm overlap and the same wetting down. Run the cardboard past the inside edge of the frame by a few centimetres, so no gap opens between the cardboard and the timber. Oregon State University Extension builds a lasagna raised bed the same way: cardboard or heavy paper on the ground where the bed goes, then layers of leaves, coffee grounds, grass clippings, and straw, topped with 10 to 15 cm of garden soil before planting. The cardboard base is the weed barrier, and the fill above it is the growing medium.
Fill the frame in layers rather than dumping one deep load. A layer of coarse material at the bottom, such as straw or dry leaves, then compost, then the planting layer of finished compost or garden soil on top. Keep the top 10 to 15 cm as finished compost or soil. Seeds and transplants root in that layer. Leave 3 to 5 cm of freeboard at the top of the frame, so water stays in the bed instead of running off with the mulch.
Cardboard does not block drainage. Wet cardboard passes water, and once worms and microbes start on it, the sheet opens up and lets roots through. A raised bed drains faster than an in-ground bed anyway, because the fill sits above the surrounding soil. Water the finished bed deeply before planting, and check that water comes out the bottom rather than pooling on the surface. Pooling means the fill is too fine or too compacted, not that the cardboard is blocking it.
Raised beds dry out faster than in-ground beds, so the mulch layer matters more here. Keep it at the full 10 cm end of the range through the first summer, and check it monthly. A raised bed in full sun in an Australian summer can lose its mulch layer to decomposition and wind in one season. Top it up in autumn and again in spring, and the bed stays covered year-round.
4. In-Ground Beds: Sheet Mulch on Existing Ground
An in-ground bed is sheet mulch laid straight on existing ground, with no frame and no digging. The method is the same three layers, but the bed needs more time. NC State Extension describes sheet mulching as layering organic materials to prepare a new planting area: cardboard or newspaper on loosened soil, moistened, then alternating layers of carbon-rich and nitrogen-rich material until the stack stands 45 cm to 90 cm high. Biodegradation takes about six months. The bed is ready when the layers are indistinguishable and the material smells fresh and sweet. Until then, the stack is still composting, not yet soil.
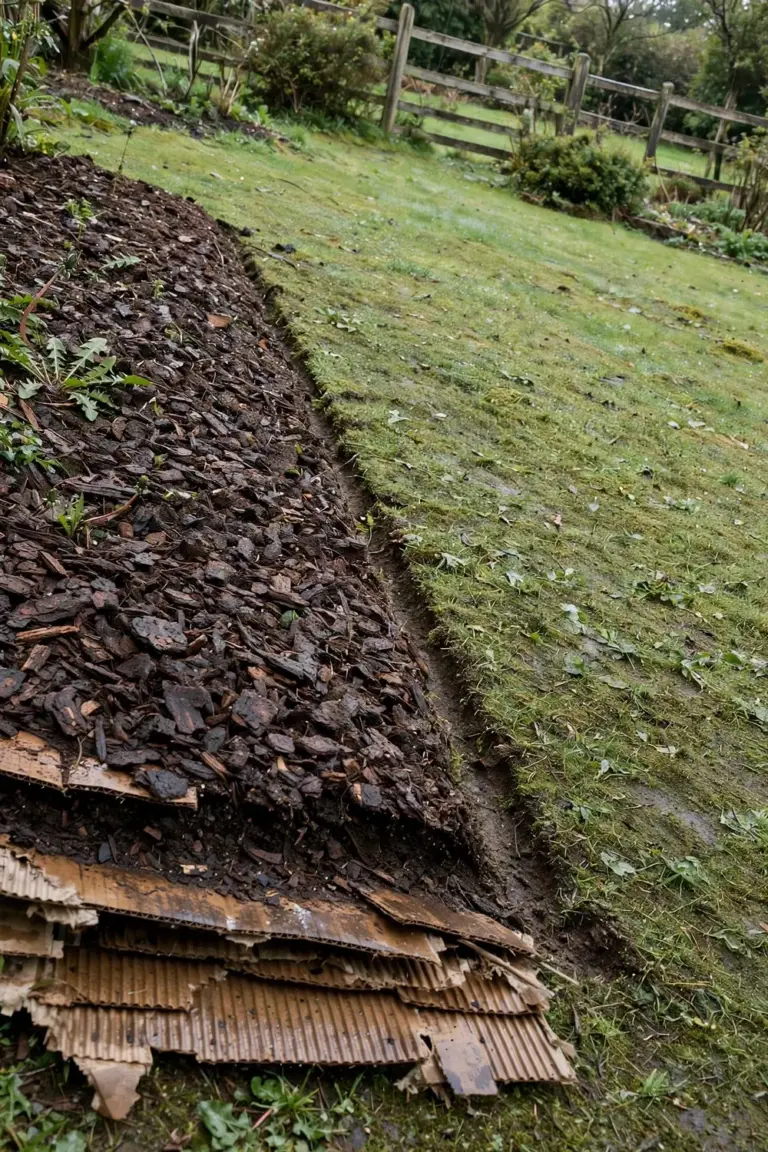
For a new bed that must be planted at once, use the short version of the method. Lay cardboard, add the 10 cm compost layer, add the mulch cap, and plant transplants into the compost on the same day. The plants root in compost while the cardboard breaks down underneath. Seeds wait a week or two for the compost to settle. This short version works because the compost layer is finished material, not raw material still composting. The full NC State stack, with its alternating raw layers, is the version that needs six months, because raw straw and clippings must break down before roots can use them.
In-ground beds settle unevenly. The cardboard breaks down faster where the soil stays moist and slower where it stays dry. The compost layer sinks as worms pull it down. After a month, walk the bed and look for dips where the cardboard has thinned and the soil shows through. Patch any dip with a fresh piece of cardboard and a fresh scoop of mulch. A patch takes two minutes. A weed that gets light takes a season to remove.
Do not turn the bed over to “mix in” the layers. Turning the soil brings buried weed seeds to the surface and breaks the cardboard before it has finished starving the weeds underneath. Leave the stack alone and let soil life do the mixing. Worms pull compost down, roots open channels, and microbes work through the cardboard from below. The bed improves faster left alone than dug over.
Time the build to the season. Autumn is the best build season in Australia: the soil is still warm, winter rain settles the layers, and the bed is ready for spring planting. A spring build works too, but plant transplants rather than seeds, and keep the mulch cap thick through the first summer. A bed built in the heat of summer needs deep watering at build time, because dry cardboard breaks down slowly and dry compost sheds water instead of soaking it in. Bed preparation is the same job in any season: clear the surface, feed the soil, and keep it covered.
5. Close the Edges, Where Weeds Actually Come In
Close the edges first, because edges are where weeds actually come in. A bed with perfect layers and open edges fills with weeds from the outside in. Couch and kikuyu send runners sideways under the bed edge. Oxalis and onion weed push up through any gap between the cardboard and the edging. Nutgrass pushes up from tubers already in the soil, and no surface layer stops a tuber that is already established. Edges are the weak point of every new bed, and they deserve more attention than the middle.
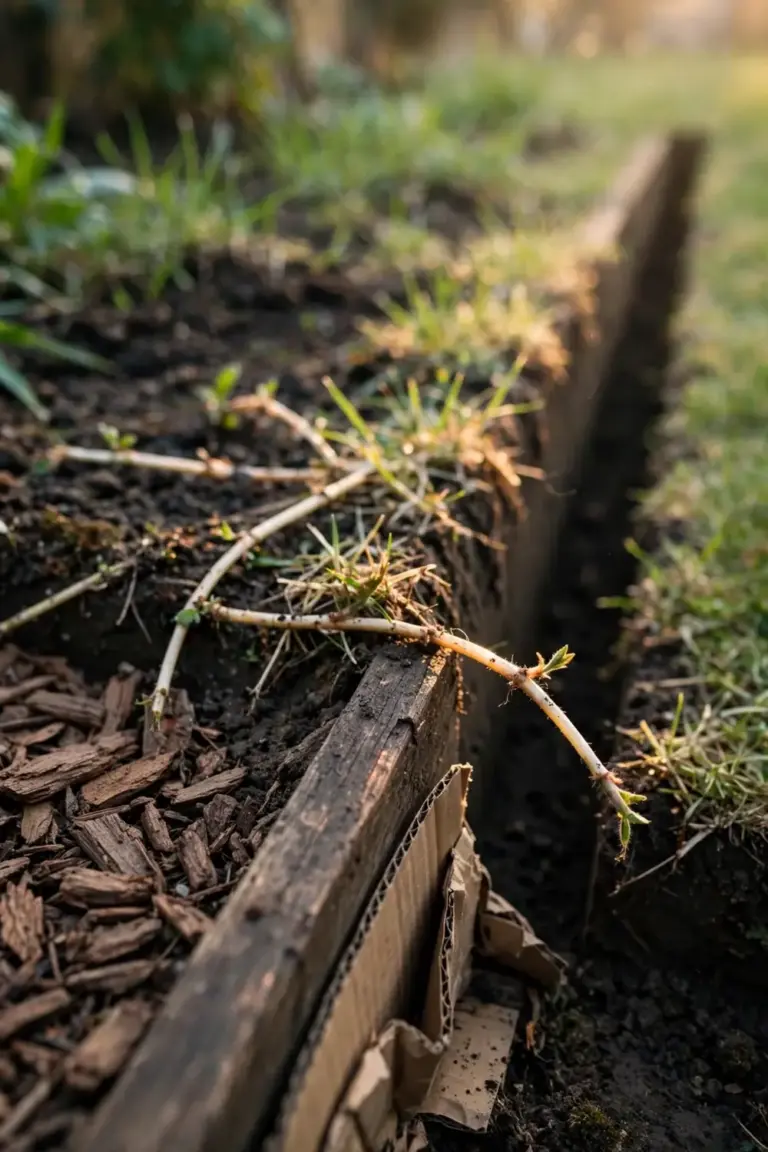
Cut a clean edge before laying the cardboard. A spade-cut trench around the bed, 10 cm deep and 10 cm wide, breaks the runner path from the lawn into the bed. Runners that cross the trench show themselves in the open cut, where they are easy to pull. Without the trench, runners cross under the cardboard unseen and surface in the middle of the bed, where they are tangled in the roots of the plants they grow among.
Run the cardboard past the bed edge and under the edging. Cardboard that stops at the edge leaves a ring of bare soil around the bed, and that ring is where the first weeds appear. Overlap the cardboard out to the trench, then set edging over it. Timber, steel, or stone edging all work, as long as the edging sits tight on the cardboard with no gap. A mowing strip of pavers or gravel around the bed does the same job and gives the mower a clean line.
Keep the mulch thick at the edges. Mulch thins at edges first, because rain washes it outward and feet kick it aside. Check the edge mulch every time you walk past the bed, and push it back into place. A bare edge is an invitation. A mulched edge is a barrier. This is the cheapest weed control in the whole bed: two minutes with a rake, once a week, keeps the edge closed.
The doughnut rule applies at the edges too. Keep mulch off the stems of plants near the edge, and keep the cardboard from bunching up around them. Bunched cardboard holds water against a stem and rots it. Flat cardboard, a clear ring around each stem, and mulch that stops short of the ring is the combination that works. The rule is simple: mulch covers soil, never stems.
6. First-Season Maintenance: Top Up, Pull Early, Never Let Weeds Seed
The first season decides whether the bed stays clean. The layers do the heavy lifting, but three habits keep them working: top up the mulch, pull edge creepers early, and never let a weed set seed. A weed that sets seed in the first season plants the second season’s weeds. A weed pulled before it seeds plants nothing.
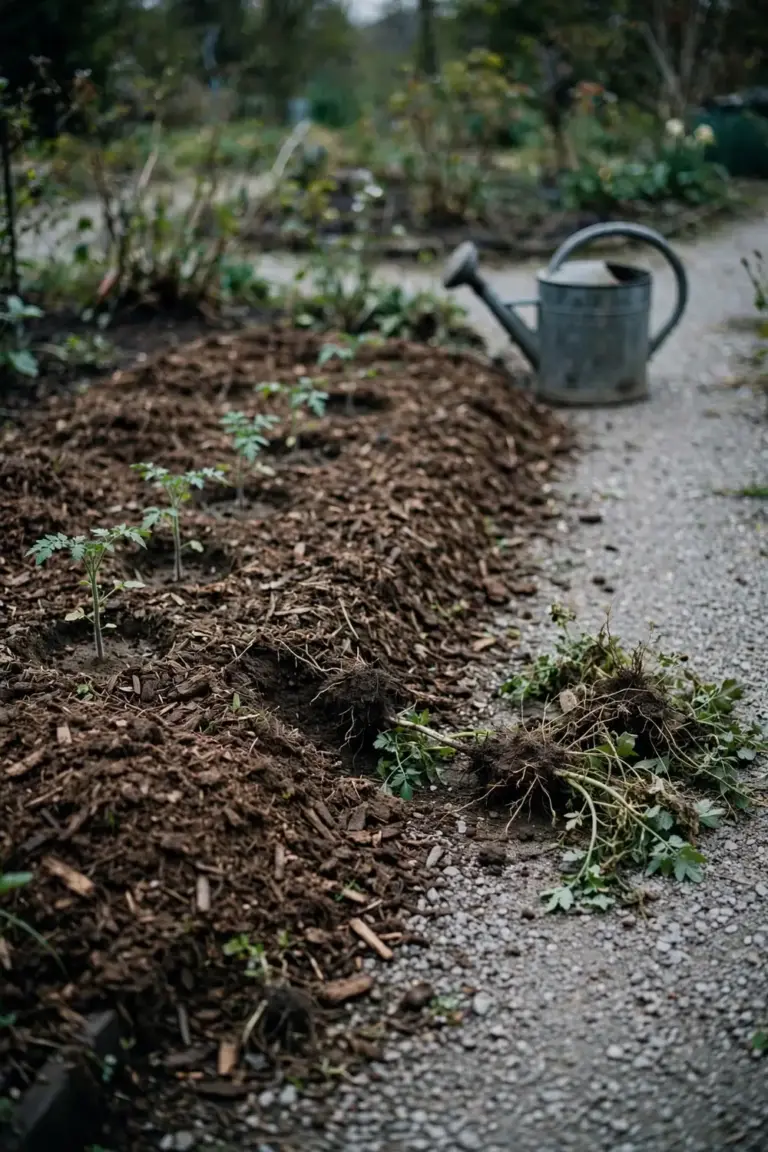
Walk the bed once a week in the first season. Pull any weed that has pushed through, while it is small and its roots are shallow. A small weed pulls clean. A big weed snaps, and the root regrows. Pull after rain or watering, when the soil is soft. Check the edges first, then the cardboard seams, then the planting holes, because those are the three places weeds appear first.
Top up the mulch as it settles. Mulch breaks down through the first season, and the layer thins from 10 cm toward 5 cm. Top it up back to 10 cm whenever it drops below that mark. A thin patch is a weed patch waiting to happen. Use the same mulch as the original layer, so the bed stays even. Topping up is the single most useful maintenance job in the first season, and it takes less time than pulling the weeds that a thin patch lets through.
Know the honest timelines. Annual weeds smothered under the cardboard die back within two to three months, because they cannot survive without light. Couch and bindweed take far longer, up to a year, because they store energy in runners and roots and keep pushing new shoots. This timeline comes from the GrowVeg Australia no-dig guide, recorded in the scout evidence for this article. If couch pushes through in the first months, do not dig it out. Digging chops the runners into pieces, and each piece grows. Pull the shoots as they appear, starve the runners, and let the cardboard finish the job.
Cardboard itself breaks down in about two to three months in a moist bed, according to no-dig guides. That is fast enough to let roots through by the time plants need depth, and slow enough to starve annual weeds first. In a dry bed the cardboard lasts longer, which is fine: it keeps blocking light until rain or watering softens it. If a patch of cardboard is still solid after six months, it is probably too dry. Water it deeply and let soil life finish it.
Never let weeds seed in the bed, and never add seeding weeds to the compost or the mulch. A weed that has gone to seed carries the next generation on its head. Bag it and bin it. The same rule applies to lawn clippings used as mulch: clippings from a lawn that has gone to seed carry grass seed into the bed. Use clippings from a lawn mowed before seeding, or skip clippings and use straw or bark instead.
Re-layer rather than dig when a patch fails. If a patch of couch keeps pushing through one spot, lay a fresh sheet of cardboard over the patch, wet it, add compost, and add mulch. The patch gets a second round of light blocking without disturbing the rest of the bed. Digging the patch would break the cardboard around it and wake the weed seeds buried there. Patience beats the spade in a new bed. Organic weed control is a routine, not a single job: cover, watch, pull early, and never let weeds seed.
Frequently Asked Questions
Yes, for transplants. Push the mulch aside, cut a cross in the cardboard under the planting hole, and set the plant in with its roots in the compost layer. The compost is finished material, so roots feed at once while the cardboard breaks down underneath. Seeds wait a week or two for the compost to settle, because a fresh layer shifts as it beds down and can bury small seeds too deep.
No. Plain brown cardboard feeds soil life. Worms and microbes break it down and pull the pieces into the soil, which opens channels and adds organic matter. Remove all tape, labels, and staples before laying it, because plastic tape does not break down. Skip waxed or glossy cardboard, which resists water and breaks down slowly. Plain corrugated cardboard is the right material for the job.
Keep pulling the shoots and do not dig. Couch stores energy in runners, so digging chops the runners into pieces and each piece grows. Pulling the shoots starves the runners over time. Couch can take up to a year to die under cardboard. If one patch keeps pushing through, lay a fresh sheet of cardboard over it, wet it, add compost and mulch, and give it a second round of light blocking.
Yes, with more layers. A single sheet of newspaper is too thin to block light on its own. Use a stack at least 8 to 10 sheets thick, overlapped well, and wet as you lay it. Cardboard is easier because one sheet does the job and it stays put in wind. Newspaper works for small patches and between plants, where a full cardboard sheet is hard to fit.
Yes. Paths are the honest use for weed mat. Nothing is planted in a path, nothing needs digging, and the gravel surface keeps new soil from collecting on top of the sheet. The sheet stops the gravel sinking into the soil and stops weeds pushing up from below. Keep it out of planted beds, where new soil always collects on top and turns the sheet into a weed nursery.
Start With Cardboard, Not Fabric
Start with cardboard, not fabric. Lay the cardboard with generous overlaps, wet it, add compost, cap it with mulch, close the edges, and keep the first season clean with weekly walks and timely top-ups. The bed builds soil while it blocks weeds, and every layer rots into the ground instead of tearing into fragments. A bed built this way gets better each season, because the soil life it feeds does more of the work every year. Build it this weekend, plant into the compost, and let the layers do the rest.