
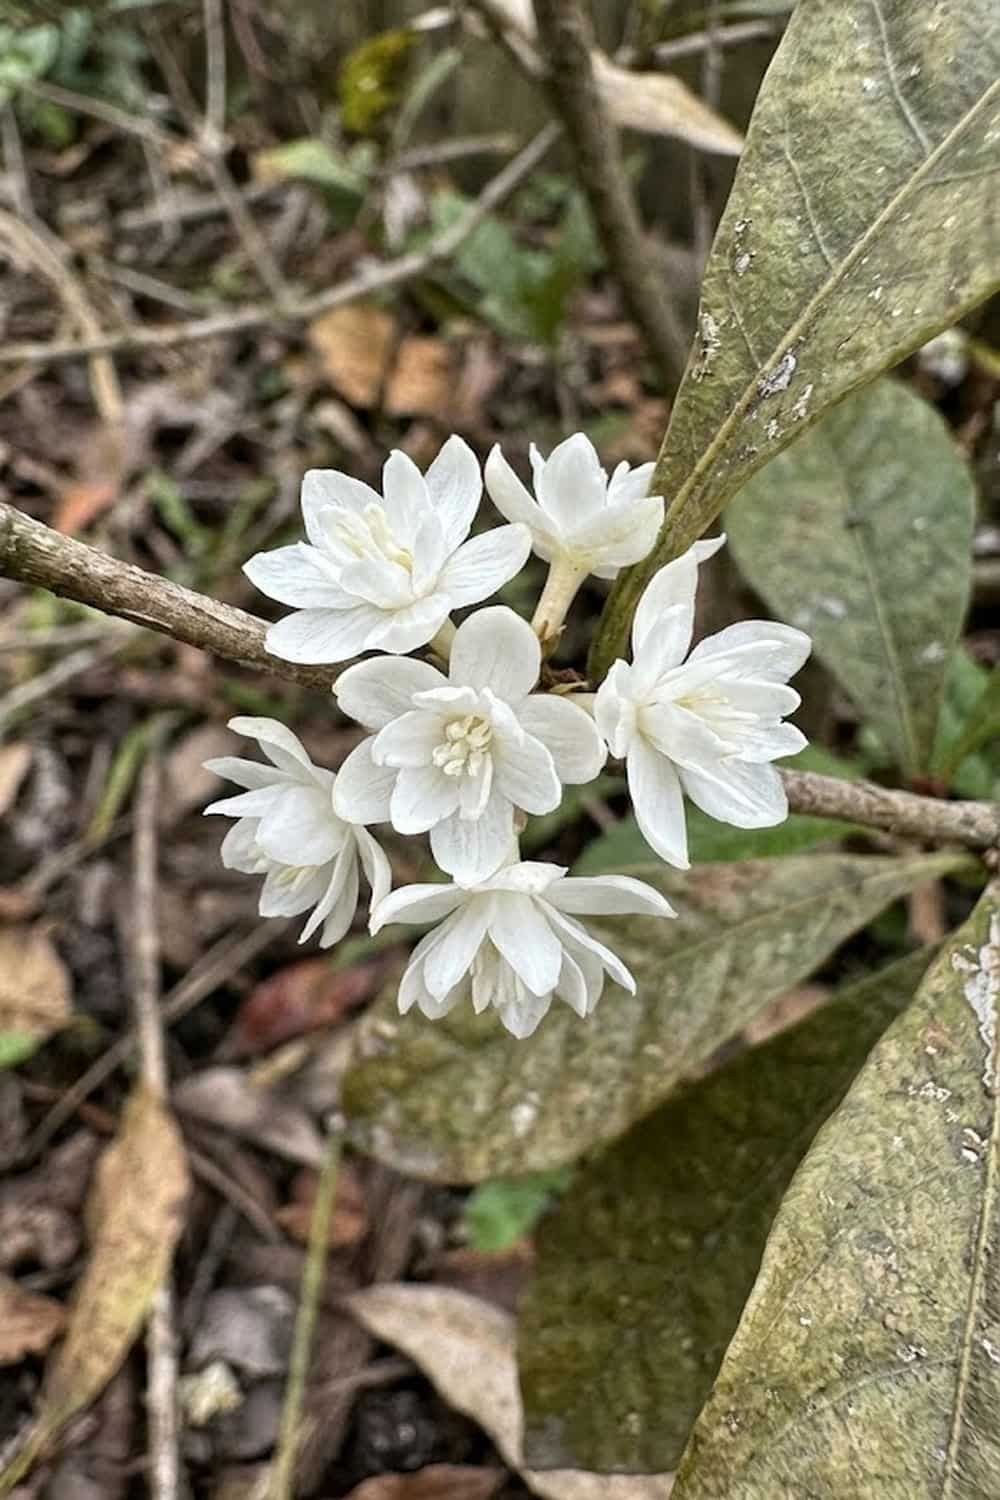

You buy a costly tropical plant, full of hope for those famous flavor-changing berries. But within weeks, despite your best efforts, the leaves start browning, growth stalls, and it slowly declines. It is incredibly frustrating to watch your investment wither because of a hidden environmental incompatibility you didn’t see coming. I know that feeling of failure well, having lost my first few plants to simple, preventable mistakes. You can, however, absolutely succeed with Synsepalum dulcificum. The solution is not mystery; it is mastering a few non-negotiable acidic parameters. In this guide, I will share the exact, detailed steps I use to keep my berries happy and productive, ensuring you get to experience the magic yourself.
1. Select the Best Acidic Soil Mix for Your Miracle Berry
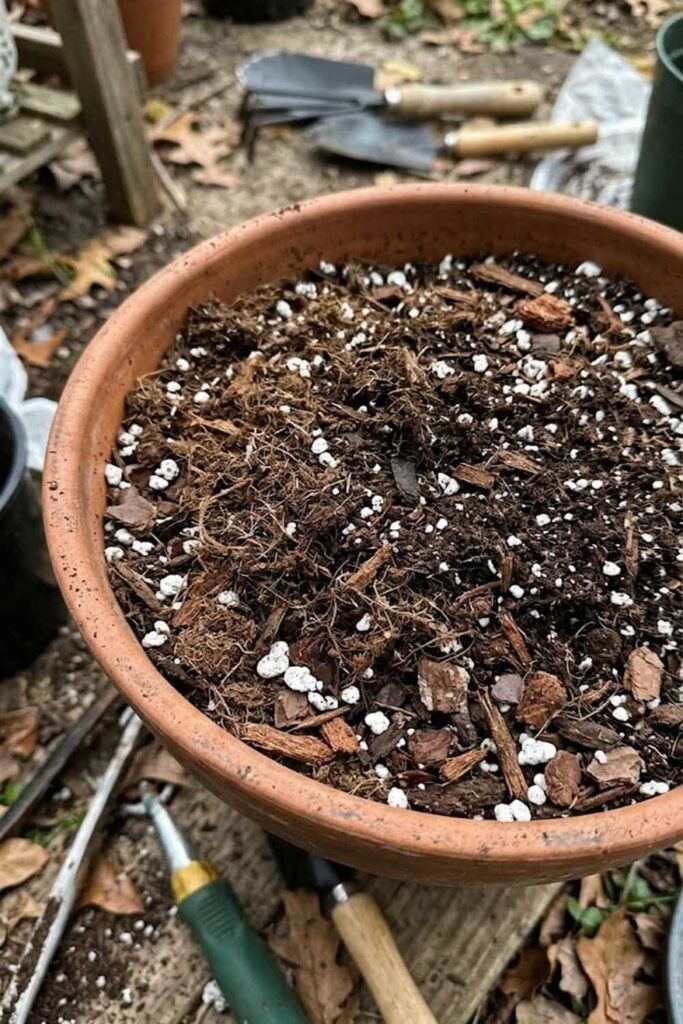
Finding the correct soil is the single most critical factor if you want to know how to grow Miracle fruit that actually survives. I cannot overstate this: standard potting soil will eventually kill this plant. You must create a subterranean environment that mirrors the highly acidic, low-nutrient conditions of its native West African rainforests. The Synsepalum dulcificum fundamentally requires a soil pH between 4.5 and 5.8 to thrive. When the pH rises above 6.0, the plant suffers from iron chlorosis, a nutritional lockout that causes the leaves to yellow and drop. Based on my years of trial and error (and several dead shrubs), the ideal medium is a modified blend of coarse peat moss, perlite, and fine pine bark fines. This mixture ensures the essential acidity while providing necessary aeration.
Designing the Perfect Soil Profile
I have learned that the texture and drainage of your soil mix are just as important as the acidity itself. This tropical species possesses a very fine, fibrous root system that can easily suffocate in dense, muddy earth. It demands a well-draining substrate to remain oxygenated and free from pathogens. You must construct a mix that balances maximum water retention with flawless drainage capability, if you wish to see success. Below is the precise soil recipe I have developed and used with my most vigorous specimens:
- Coarse Sphagnum Peat Moss (50%): This is your primary source of acidity. Avoid “garden peat” or “peat humus,” which can be too dense and decompose quickly.
- Horticultural Perlite (25%): Do not use building-grade material; get large-particle perlite to ensure optimal drainage and aeration, preventing compaction.
- Aged Pine Bark Fines (25%): Use finely shredded, acidic pine bark. It maintains the low pH over the long term and adds essential organic structure that supports beneficial fungi.
Understanding pH Impact on Nutrient Uptake
It is imperative that you regularly measure and maintain the soil pH. When you ignore this aspect, your plant will decline regardless of the fertilizer you use. You can observe the direct correlation between soil acidity and the plant’s ability to absorb nutrients like iron, manganese, and zinc. I have included this data to emphasize why this is non-negotiable:
| Soil pH Range | Nutrient Availability Status for Miracle Fruit | Resulting Plant Health Observance |
| 4.0 – 5.0 | High availability of Micronutrients | Optimal. Vigor, dark green leaves, abundant flowering. |
| 5.0 – 5.8 | Moderate availability | Acceptable. Moderate growth; requires consistent monitoring. |
| 5.9 – 6.5 | Low availability (Lockout begins) | Stress. Leaf yellowing, slow growth, potential dieback. |
| 6.6 + | Critical deficiency | Decline. Severe chlorosis, leaf drop, potential plant death. |
You must remember that adding acidic fertilizer to alkaline soil is a temporary fix; you must provide the proper soil foundation from day one. I have found that starting correctly saves you years of frustration and guarantees a healthier shrub.
2. Monitor Proper Hydration Using Distilled or Rain Water
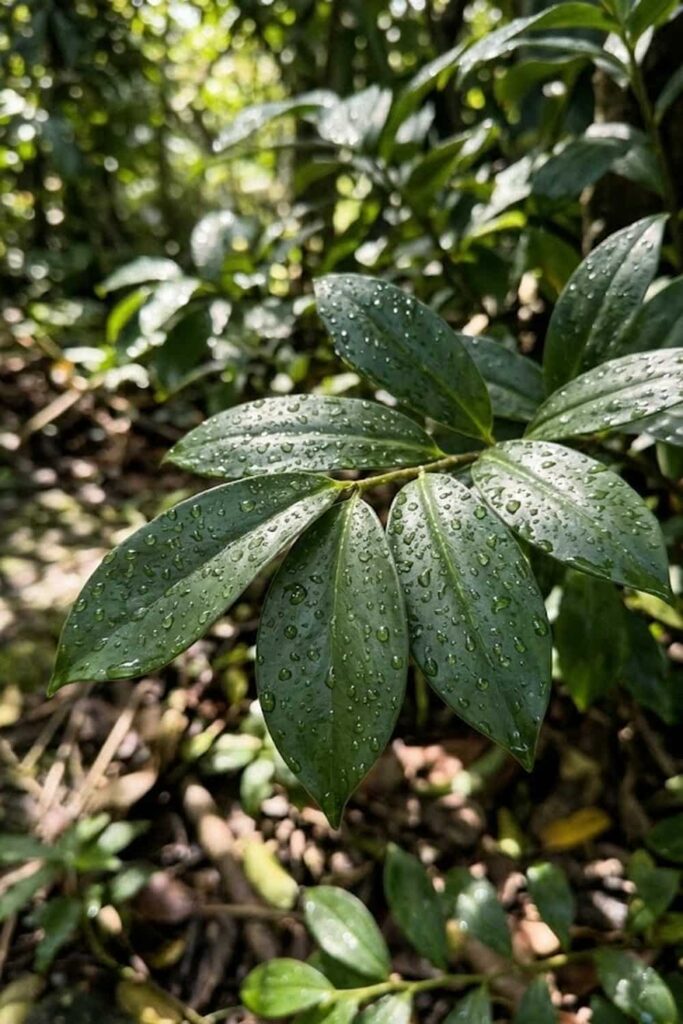
I have learned that the quality of water you provide is just as vital as the frequency. You must understand that this species is highly sensitive to the mineral salts commonly dissolved in municipal tap water. Using standard tap water will cause a gradual buildup of chlorine, fluoride, and calcium carbonates in your acidic soil mix. This process, known as salinization, raises the soil pH and prevents your plant from absorbing crucial nutrients like iron. In my early days, I made the common mistake of thinking “water is water,” and I watched my vibrant plants develop severe chlorosis and brown leaf tips within a few months.
The Problem with Soluble Salts in Your Tap Water
The issue lies in the invisible total dissolved solids (TDS) that exist in your local water supply. You may not taste them, but your sensitive Synsepalum dulcificum certainly “feels” them. When these dissolved salts accumulate around the roots, they interfere with the subtle osmotic balance required for water uptake. A high TDS measurement indicates that the water is fundamentally incompatible with the soft, low-mineral environment your plant requires. For successful propagation and care, I strongly recommend that you only use:
- Rainwater: This is the ideal and natural source, as it is slightly acidic by nature and contains virtually no dissolved minerals.
- Distilled Water: A reliable and pure option that has been processed to remove all impurities, including minerals and chemical additives.
- Reverse Osmosis (RO) Water: This filtration method effectively removes the vast majority of minerals, making it a sustainable choice for consistent hydration.
You must prioritize mineral-free water to maintain the critical pH stability in the root zone. Based on my data, I have seen that switching from tap to distilled water is often the single change that saves a struggling specimen. While it may seem like an extra step, providing pure water is a foundational component for achieving a productive harvest.
Developing an Effective Moisture Regime
Your goal is to maintain the soil moist but never waterlogged. I have found that you cannot water on a simple, set schedule (e.g., “once a week”). You must check the soil regularly and develop an intuitive sense of its moisture content. The fine, fibrous roots of the Synsepalum quickly decay if allowed to sit in stagnant water, leading to fatal root rot. To ensure you have proper hydration, I always recommend checking the top inch of the soil; when it feels slightly dry to the touch, it is time to hydrate. Maintain a reflective approach; you are looking for a state of consistent moisture, similar to a wrung-out sponge, rather than cycles of drought and flood.
3. Boost Humidity to Mimic West African Rainforests
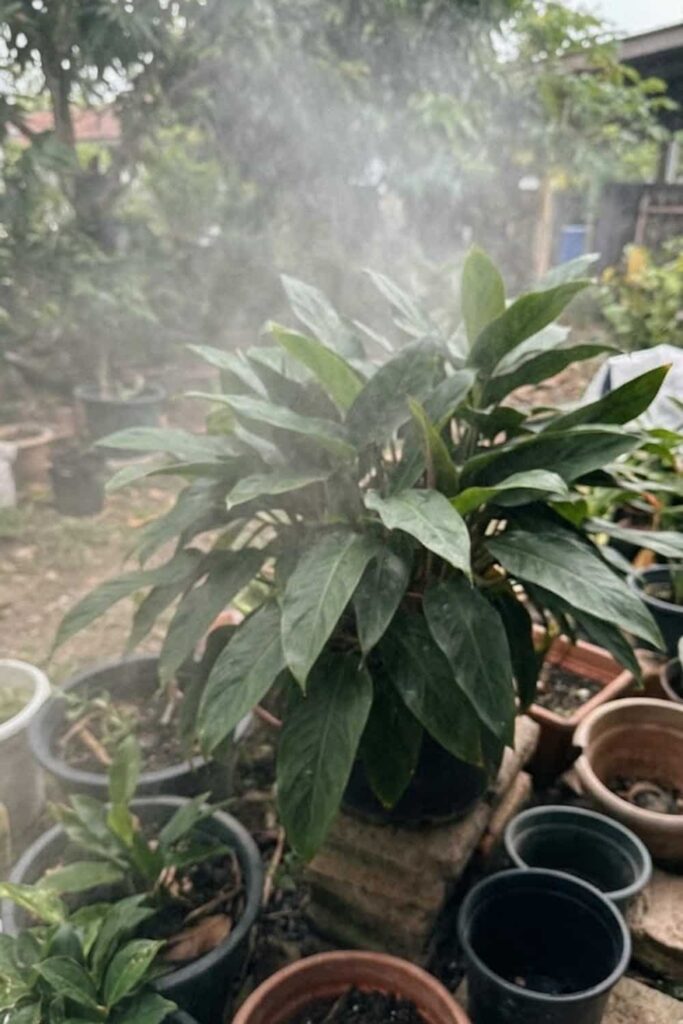
I have found that low humidity is one of the most common silent killers for this species, especially when grown as an indoor plant. You must understand that Synsepalum dulcificum evolved in the consistently damp, understory environment of a tropical rainforest, where the relative humidity often exceeds 80%. When you place it in a typical home with an ambient humidity of 40% (or lower during winter), the dry air pulls moisture from the leaves faster than the roots can replace it. You will see this stress manifest as brown, brittle leaf tips, eventually leading to massive leaf drop and death. In my initial attempts, I struggled immensely with this issue until I implemented a reliable humidity solution. For healthy foliage, you must maintain humidity levels between 60% and 80%.
Effective Methods for Increasing Local Humidity
You cannot simply mist the plant with a spray bottle and expect significant results; the effect is fleeting and does not change the core environment. Instead, you should focus on passive and active methods that create a persistent microclimate of high humidity directly around the shrub. While I now use automated systems, you can achieve excellent results with simpler techniques. I recommend combining multiple methods for the best effect:
- Pebble Tray: This is a simple, highly effective method. Fill a large, shallow tray with small stones and add water. Place the plant’s container (on its own saucer) on top of the stones. The evaporating water naturally increases the humidity directly in the plant’s zone.
- Humidifier: Place a small, dedicated room humidifier near your plants. I have found this to be the most reliable way to maintain a target level, especially during the dry winter months.
- Grouping Plants: Grouping your tropical collection together creates a shared localized environment. As each plant transpires, it releases moisture, boosting the local humidity for the entire cluster.
- Enclosures (Terrariums): For smaller plants or cuttings, a humidity dome or large glass enclosure offers the most stable and highest humidity levels, although you must ensure proper ventilation.
By creating this damp environment, you fundamentally improve your plant’s stability. When you manage the relative humidity correctly, you remove a major source of stress, allowing the Synsepalum to focus its energy on growth rather than survival.
Humidity and Transpiration Factors
Your goal is to decrease the overall vapor pressure deficit (VPD) around the leaves. When the air is dry, the VPD is high, increasing the rate of transpiration to harmful levels. Maintaining a stable, elevated humidity level is non-negotiable for success. I recommend using a digital hygrometer to monitor the ambient levels accurately; guesswork often leads to failure. Below is a data set highlighting how relative humidity impacts the physiological stress on your Miracle Berry:
| Ambient Relative Humidity | Observed Transpiration Stress Level | Resulting Plant Physiological Observance |
| < 40% | Critical Stress | Rapid browning of leaf tips; consistent leaf drop; stunting. |
| 40% – 60% | Moderate Stress | Slow growth; occasional chlorosis; leaves appear dull. |
| 60% – 75% | Optimal for Growth | Vigor; dark green foliage; healthy metabolism. |
| > 75% | Minimal Stress (Fungal Risk) | Maximized metabolism; requires increased air circulation to prevent mold. |
You must remember that high humidity combined with stagnant air increases the risk of fungal diseases like powdery mildew. I always emphasize maintaining good, soft ventilation while ensuring the air remains damp. By balancing moisture with movement, you create the ideal conditions for a thriving tropical specimen.
4. Provide Dappled Light to Prevent Leaf Scorch
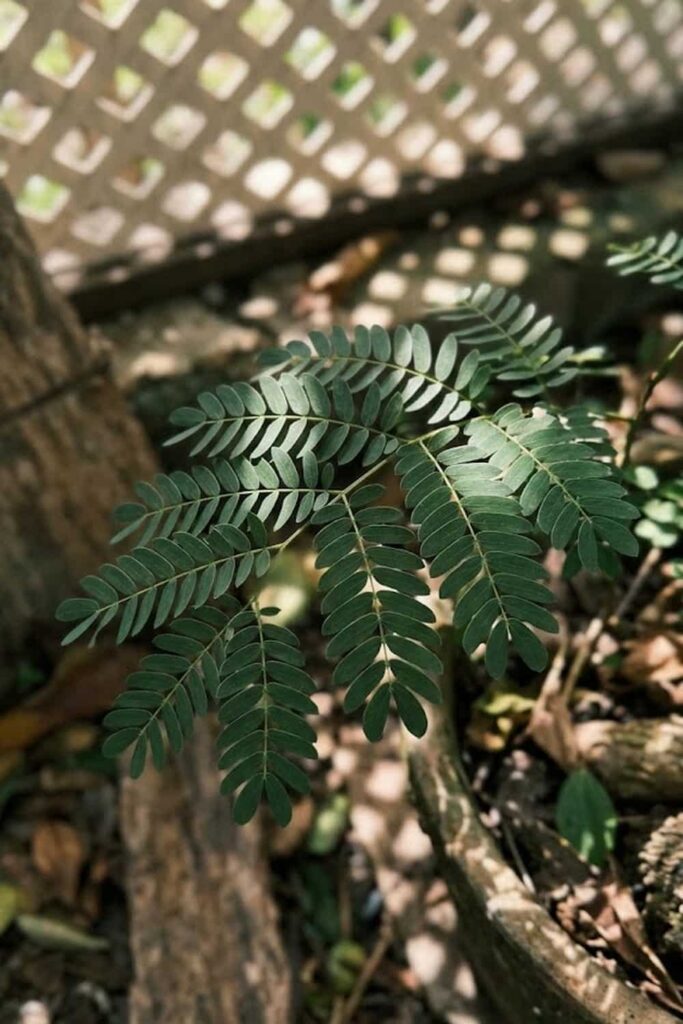
I have found that understanding the distinction between “bright” light and “direct” sunlight is paramount for successful cultivation. You must remember that this plant is an understory species, naturally adapted to the filtered, dappled light that penetrates the tropical rainforest canopy. It is a common misconception that all tropical plants desire harsh, direct sun. When you expose your sensitive Synsepalum dulcificum to intense, direct afternoon sunlight—especially through a window or outdoors in a low-humidity area—the leaves will rapidly overheat and develop severe leaf scorch. I learned this lesson the hard way, losing a beautifully established specimen after moving it to what I thought was a “better,” brighter location. The result was bleached, crispy leaves that eventually fell off, decimating the plant.
The Role of Light in Energy Production
Your objective is to maximize photosynthesis without causing photo-inhibition or heat stress. You are seeking bright, filtered light that provides energy but lacks the burning intensity of the direct sun. I encourage you to think of the light quality as similar to what you would find under a slat house or when sunlight filters through the canopy of a larger tree. Based on my data and experience, this level of illumination is critical for achieving a robust growth rate and heavy flowering, which is the precursor to that coveted harvest. Below, I have outlined the essential light parameters:
- Filtered Light: Maintain an environment that provides bright, ambient light. Indoors, this is often a few feet away from a south-facing window, or behind a sheer curtain.
- Morning Sun Only: A few hours of very soft, direct morning sun (before 10 AM) is often acceptable and can be beneficial, provided the humidity is high.
- Artificial Supplemental Light: I have achieved fantastic results using full-spectrum LED grow lights. This approach allows you to control the exact intensity and duration of the “bright light” without the heat risk associated with direct sunlight. Set the lights for 12 to 16 hours a day for optimal metabolic activity.
When you manage the illumination correctly, you remove a major source of stress, allowing your plant to focus its energy on building strong cellular structures rather than expending resources on heat protection. Providing bright, indirect light is a non-negotiable step if you want to grow healthy, productive berries.
Optimizing Light for Successful Flowering
Maintaining stable light conditions is vital for the development of hermaphroditic white flowers, which usually form in axillary clusters along the woody stems. I have found that insufficient light results in weak stems and a complete lack of flowering, while excessive light stresses the entire system. Based on my research, the transition from successful propagation to a productive, fruiting shrub hinges on finding this delicate balance. Your reflective approach must consider the total light energy received per day, or the daily light integral (DLI), but for the home gardener, observing the health and color of the leaves is often the most practical guide. If the leaves turn a pale, yellowish color, it may be too bright; if they become dark and leggy, it is likely too dim. Consistent, bright, filtered light is the definitive key.
5. Fertilizing with Acid-Loving Plant Food
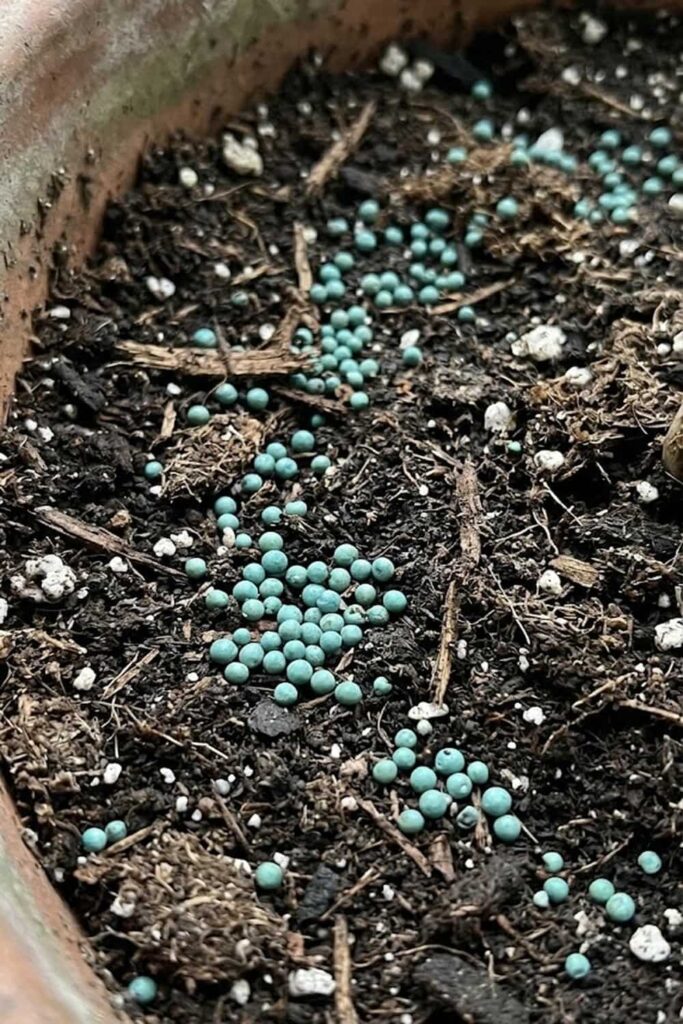
I have found that fertilizing this species requires a highly specialized approach. You cannot simply apply a standard, all-purpose garden fertilizer and expect positive results. You must remember that Synsepalum dulcificum fundamentally lacks the ability to regulate its mineral uptake when exposed to high-salt, alkaline fertilizers. Using the wrong product will quickly lead to salt toxicity, leaf burn, and fatal nutrient lockout, as it raises the soil pH. To ensure vigorous growth and maximize fruit production, you must use a dedicated fertilizer designed for acid-loving plants, such as those formulated for Azaleas, Camellias, or Blueberries. I learned this vital distinction after wasting several years (and several plants) trying to use conventional nutrients.
The Problem with High-Salt, Alkaline Fertilizers
The problem lies in both the nutrient forms and the mineral carriers used in most standard fertilizers. Most common houseplants desire a balanced NPK ratio (like 10-10-10), but these products often contain nutrient forms that raise the soil pH. For example, many use calcium nitrate or sodium nitrate as nitrogen sources, both of which decrease acidity. You must seek out fertilizers that utilize ammonium sulfate or urea-based nitrogen, as these forms help maintain the essential low pH (4.5–5.8). Based on my data, a low-salt, urea-free formula is often best for the propagation and care of younger specimens. While I now use specialized blends, you can achieve excellent results with a reliable, slow-release acidic fertilizer like Osmocote Plus or a water-soluble option like Miracid, if applied at a diluted rate.
Best Practices for Nutrient Application and Prevention
You should aim for a frequent, low-dosage application strategy rather than infrequent, heavy doses. I strongly recommend feeding your plants during the active growing season (spring and summer) every two to four weeks. Always apply water-soluble fertilizer to damp soil to prevent root shock and enhance absorption. You must avoid fertilizing a dry plant or one that is already under stress (e.g., suffering from low humidity). Below are the definitive steps for optimal fertilization:
- Choose the Right NPK: Seek an NPK ratio where the nitrogen (N) is not overwhelmingly high relative to the phosphorus (P) and potassium (K). A good ratio is often something like 18-6-12 or a balanced acidic blend.
- Dilute the Dosage: I always use fertilizer at half or even quarter of the strength recommended on the product label. This cautious approach prevents accidental overdose and minimizes the risk of leaf burn.
- Use Acidic Water: When using water-soluble options, ensure your base water (distilled, rain, or RO) is also slightly acidic, around pH 5.0 to 5.5, before mixing.
- Apply to Healthy Plants Only: You should never fertilize a plant that is struggling with low humidity, pest infestation, or soil compaction. Focus on stabilizing the environment first.
Your target gardener approach must be reflective and methodical. By adopting this careful and specific nutrient strategy, you remove a major source of stress, allowing the plant to build strong cellular structures and focus energy on flowering. Consistent, gentle feeding with the proper acidic fertilizer is the definitive key to unlocking heavy, healthy harvests.
6. Drainage Solutions to Prevent Fatal Root Rot
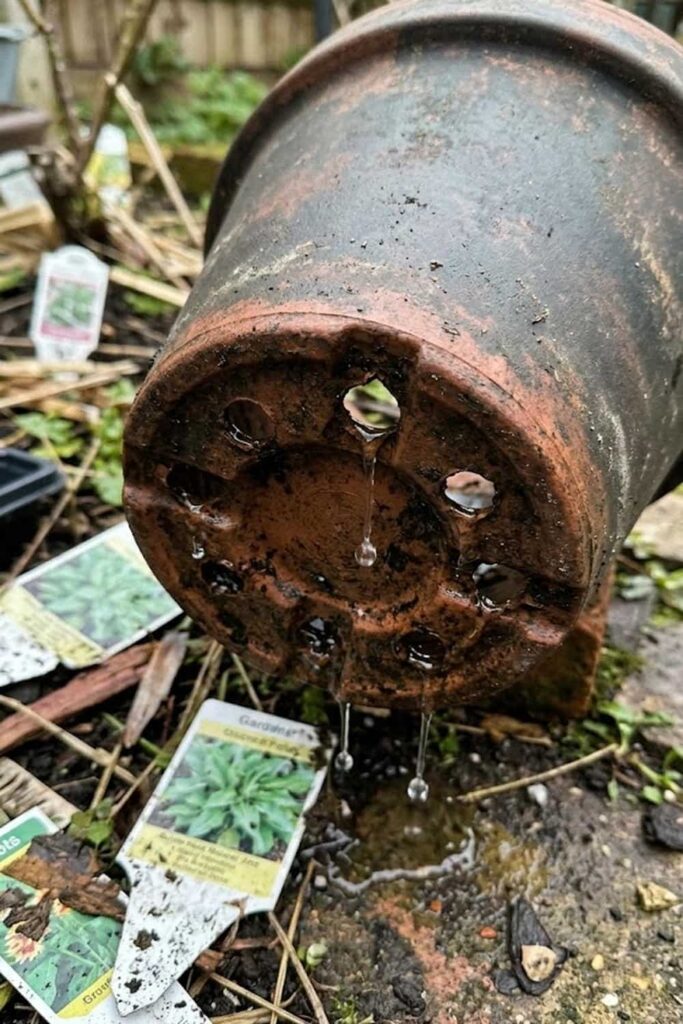
You must ensure that your soil mix, regardless of its composition, allows water to pass through freely. I have learned that the fine, fibrous roots of the Synsepalum dulcificum are highly susceptible to anaerobic conditions, which occur quickly in waterlogged soil. Root rot is a swift and silent killer; often, by the time you see the leaves yellowing and softening, the root system is already severely compromised. In my experience, providing flawless drainage is just as critical as providing the correct acidity, if you wish to see long-term success. I once lost a rare, mature specimen because I used a beautiful ceramic pot that only had a single, insufficient drain hole, which eventually became clogged.
Optimizing Container and Substrate Structure
Your goal is to manage both total drainage and capillary action within the pot. The physical structure of your container and the particle size of your substrate determine how quickly water exits and how much air can return to the root zone. You can achieve excellent moisture balance, provided you focus on these essential drainage parameters:
- Drainage Holes: You must utilize a container with numerous large drainage holes. If your preferred pot lacks sufficient openings, I strongly encourage you to drill additional holes.
- Pot Material: I have achieved the best results using breathable materials like terra cotta or fabric pots. While they require more frequent watering, they prevent stagnant moisture and promote essential root pruning.
- Aerate the Substrate: You must use large-particle amendments, like horticultural perlite or aged pine bark fines, at a concentration of at least 40% of your total mix. This ensures that a complex network of air pockets remains throughout the medium, even when it is saturated.
- Avoid Saucer Standing: You must never allow your container to sit directly in a saucer full of runoff water. This creates a saturated “perched water table” at the bottom of the pot, which is the exact environment where pathogens thrive.
Identifying and Addressing Compromised Drainage
You should regularly observe how quickly your soil absorbs and drains water. In healthy media, water applied to the surface should infiltrate within seconds and begin exiting the drainage holes immediately. Maintain a reflective approach; you are looking for soft, aerobic soil, similar to the wrung-out sponge analogy. Below is a data set highlighting how soil aeration impacts the health and metabolic function of your Miracle Berry’s roots:
| Soil Aeration Level | Root Physiological Status | Resulting Foliage Observance | Root Pathogen Risk |
| < 10% (Waterlogged) | Anaerobic conditions; roots suffocate and die. | Rapid yellowing; wilting; massive leaf drop. | Critical. |
| 10% – 20% (Compacted) | Reduced respiration; stunted function. | Slow growth; chlorosis; weak metabolism. | Moderate. |
| 20% – 30% | Healthy respiration; functional uptake. | Vibrant foliage; steady development. | Low. |
| > 30% (Optimal Aeration) | Maximized metabolism; vigorous growth. | Optimal vigor; dark green leaves; maximized metabolism. | Minimal. |
You must remember that high humidity and frequent watering—both necessary for this plant—create a high-risk environment if your drainage is not flawless. I always prioritize optimizing the substrate and container structure to maximize soil oxygen levels. By adopting this methodical approach, you remove a major source of stress, allowing the plant to build strong cellular structures and focus energy on flowering. Consistent, gentle moisture supported by perfect drainage is the definitive key.
7. Master the Art of Growing from Fresh Seeds
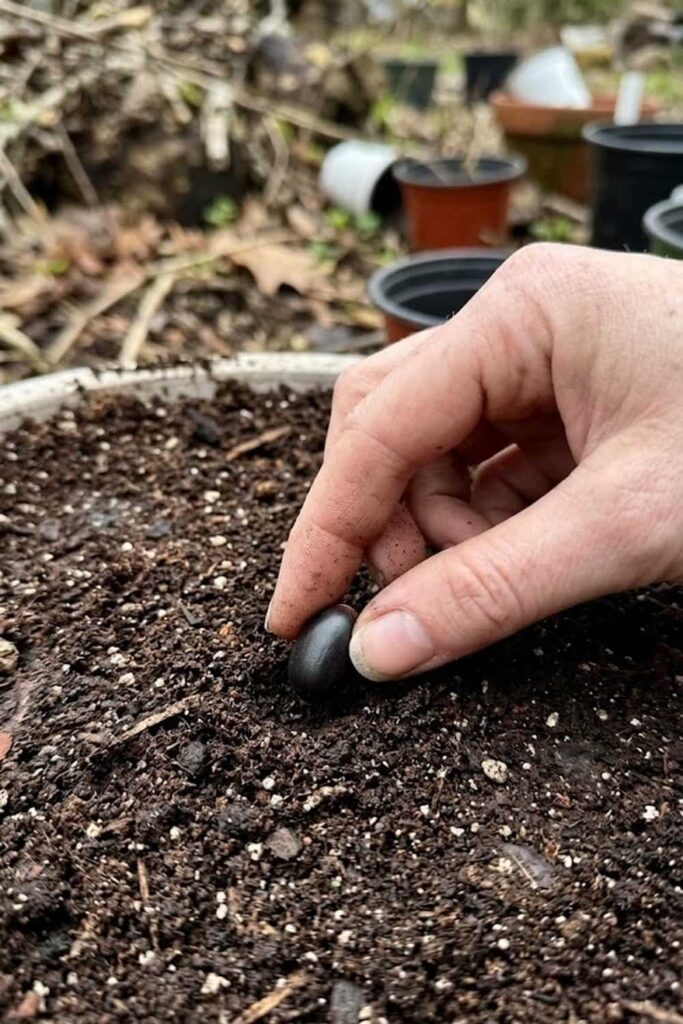
I have found that planting fresh seeds immediately after harvesting is the single most important factor for high germination success. You must understand that the seeds of Synsepalum dulcificum are recalcitrant, which means they do not survive traditional drying and storage methods. They possess a high moisture content, and once they dry out, the embryo within dies rapidly. When you purchase dried “miracle berry seeds” online, you are almost always purchasing non-viable material. I learned this painful truth after spending several seasons trying (and failing) to germinate imported dried seeds. The only way you can ensure a reliable start is to plant the seed while it is still plump and moist, directly from the fruit. Germination success rates for seeds planted within 48 hours of harvest are often near 90%, whereas dried seeds are close to 0%.
Preparing and Sowing for High Viability
Your goal is to process the seed and sow it into the correct acidic medium with minimal desiccation. This meticulous approach prevents cellular damage and maintains the seed’s high viability. I have streamlined my process based on years of successful propagation, and you can achieve the same results provided you prioritize speed and humidity. Below is the definitive sequence I use to ensure healthy seedling development:
- Harvest and Clean: You must collect the bright red berries when they are fully ripe and slightly soft. Gently remove the pulp from the seed, as the sugar-rich pulp can attract fungi. You can use your fingernail or a soft cloth, but be careful not to damage the dark seed coat.
- Do Not Dry: Once cleaned, you must sow the seed immediately into your acidic medium (I prefer a 50/50 mix of peat and perlite). Do not allow it to air-dry “to prevent fungus”; that advice will kill this specific seed.
- Sow Shallowly: Plant the seed just below the surface of the soil, perhaps only 1/4 inch deep. Ensure it has good seed-to-soil contact.
- Maintain Humidity: You must place the tray under a humidity dome or enclose the pot in a plastic bag. Maintain high humidity (near 100%) and a warm temperature (around 75°F to 80°F) until you see emergence.
Expectation Management: The Long Road of Slow Growth
You should expect the germination process to be slow, often taking anywhere from 4 to 8 weeks before you see the first true leaves emerge. Based on my data, this species is exceptionally slow-growing, especially in its first two years of life. Don’t be discouraged by this slow pace; it is the natural habit of the shrub. A one-year-old seedling may only be 4 to 6 inches tall. While I now use advanced vegetative methods, I still find propagation from seed incredibly rewarding, as it gives you a deeper respect for the plant’s entire lifecycle. While you must wait 3 to 4 years for your first berry harvest, starting from fresh seed gives you the strongest, most genetically diverse foundation for your tropical collection.
8. Temperature Control for Year-Round Growth
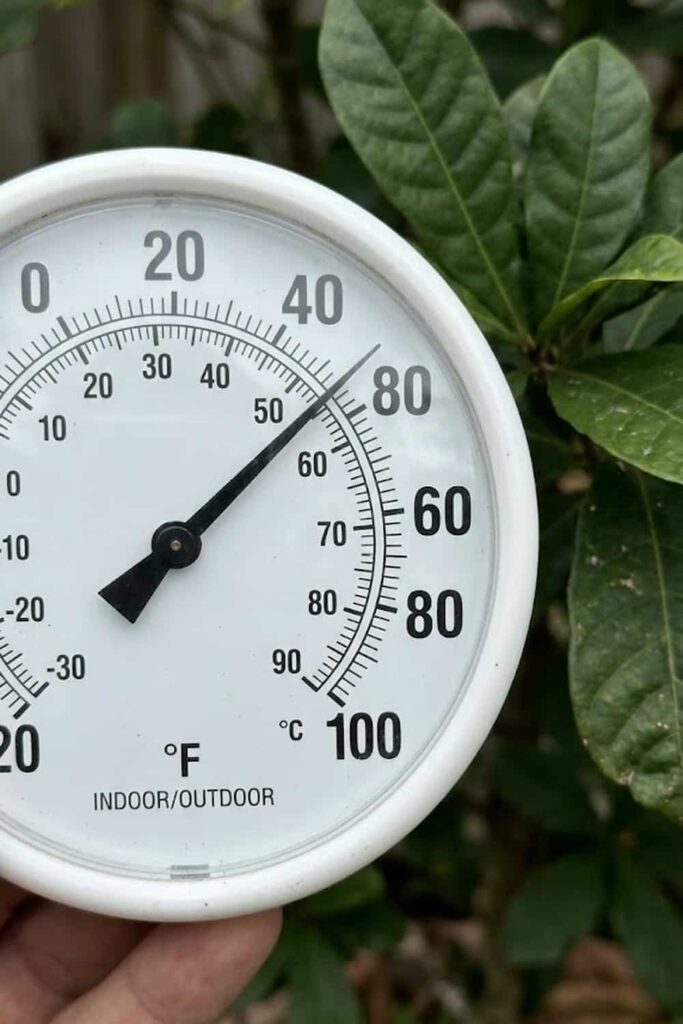
I have found that this species is fundamentally zero-tolerant of cold temperatures. You must remember that Synsepalum dulcificum is a native of the hot, humid lowlands of West Africa, near the equator. It does not possess any genetic mechanism to handle frost or even prolonged cool weather. When you expose your plant to temperatures below 60°F, its metabolic processes begin to stall. Below 50°F, it stops absorbing water and nutrients entirely, and if exposed to actual freezing temperatures, it will likely die within hours. I learned this vital lesson the hard way, losing my largest specimen because I procrastinated bringing it indoors on the first unexpectedly chilly autumn night. You must prioritize stable, warm temperatures if you wish to see consistent growth and, eventually, a berry harvest.
Maintaining Optimal Thermal Conditions
Your objective is to keep the root ball and canopy within a warm, consistent range, mirroring the tropical understory. For maximum success, you should aim for day temperatures between 75°F and 85°F, with night temperatures that do not drop significantly below 65°F. You must ensure that the transition between your “summering outdoors” and “overwintering indoors” periods is seamless and stress-free. I have achieved the best results by creating a thermal environment that provides stability, rather than rapid fluctuations. You can optimize the temperature by following these essential guidelines:
- Bring Indoors Early: You must bring your containers indoors well before the first frost date. I always recommend moving them inside once night temperatures consistently drop below 60°F.
- Utilize Heat Mats: When propagation is occurring, or for younger seedlings, a seedling heat mat set to 80°F is a powerful control mechanism that stimulates vigorous root development.
- Provide Thermal Mass: If growing in a conservatory or greenhouse, utilizing thermal mass (like dark barrels full of water) can help regulate large temperature swings between day and night.
- Avoid Drafts: While ventilation is important, you must position your plants away from cold windows or active air conditioning vents, which can create harmful cold pockets.
When you manage the thermal environment correctly, you remove a major source of metabolic stress. Providing consistent, tropical warmth is a foundational component for achieving a productive harvest.
Identifying Cold Stress in Your Tropical Berries
You should regularly inspect your foliage for early warning signs of thermal stress. Based on my data, cold shock often presents similarly to nutrient deficiencies or low humidity, which can be confusing. The first signs are often dull, curled leaves, followed by a soft, water-soaked appearance that eventually leads to blackening (necrosis). I recommend using a minimum-maximum digital thermometer to monitor the true environment, rather than guessing. Maintain a reflective approach; you are looking for soft, pliable green foliage, rather than brittle or blackened tissue. Below is a data set highlighting how low temperature impacts the vital metabolic functions and overall survival of your Miracle Berry:
| Nighttime Temperature (°F) | Plant Metabolic Status | Survival Potential | Resulting Plant Physiological Observance |
| > 70°F | Optimal Metabolism | Maximized. | Active growth; vigorous foliage; flowering. |
| 60°F – 69°F | Minor Slowdown | High. | Growth stalls; chlorosis possible; dull appearance. |
| 50°F – 59°F | Major Slowdown (Dormancy) | Moderate. | Root function stops; leaves curl and soften. |
| < 50°F | Critical Shutdown | Low. | Necrosis begins; significant dieback. |
| < 32°F | Cellular Death | Critical/Zero. | Complete death of tissue. |
You must remember that temperature stability is just as important as the absolute degree. Rapid temperature swings (like a blast of cold air from a window) cause massive cellular shock and will lead to defoliation, even if the “average” temperature is safe. By adopting this methodical approach to thermal control, you remove a major source of environmental stress. Consistent, tropical warmth supported by proper care is the definitive key to a healthy, productive shrub.
9. Pruning and Shaping for a Bushy Canopy
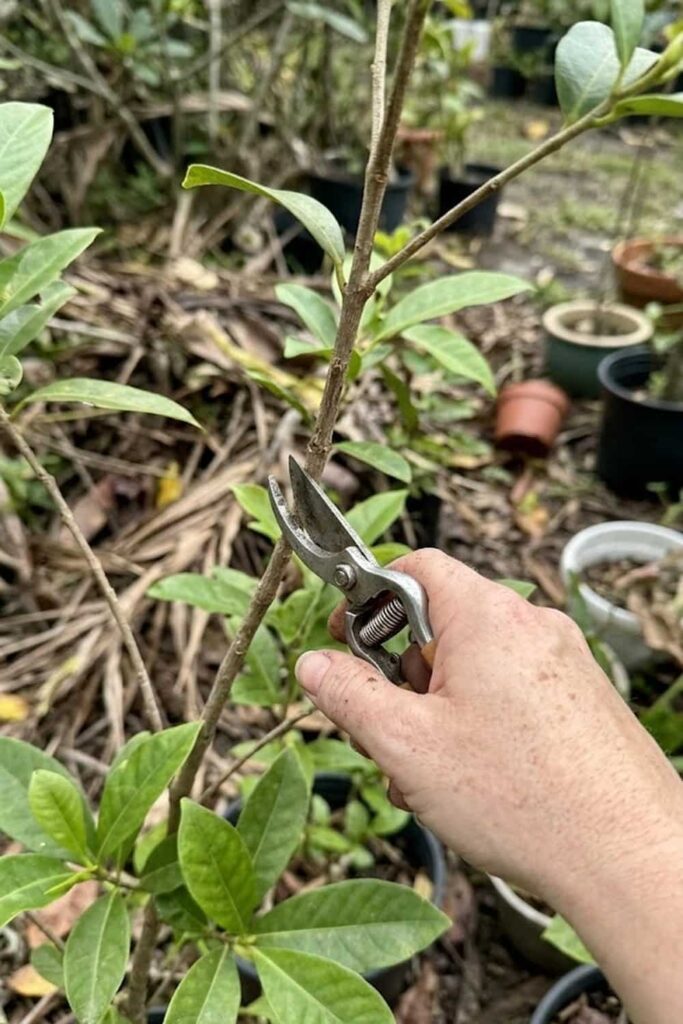
I have found that pruning is a non-negotiable step if you want to maximize your future fruit yield. You must understand that this species naturally grows as a leggy, sparse shrub, expending its limited energy on producing long, single stems. Left unmanaged, it will develop into a few tall, awkward branches with very little lateral growth, which is exactly where the flowers and berries will form. By adopting a methodical approach to pruning, you encourage the development of a dense, bushy canopy, which provides more surface area for fruiting. I learned this vital lesson after several seasons of weak, leggy growth; once I began structure pruning, my yield increased dramatically.
Developing a Structure Pruning Routine
Your goal is to stimulate the development of multiple auxiliary branches by removing the apical dominance of the lead stems. This careful intervention forces the plant to distribute energy to dormant lateral buds, resulting in a fuller, more productive form. You can achieve this architecture by adhering to these essential pruning parameters:
- Pinch for Density: When younger stems reach 6 to 8 inches in length, you should “pinch” out the very tip of the soft, new growth. I use my thumb and forefinger for this, but small pruners work well. This action encourages two or more new branches to form at the node just below the pinch.
- Remove Weak Growth: During the spring, you must inspect the inner canopy and remove any crossing or weak branches. This improves airflow and allows light to reach the inner productive nodes.
- Encourage Airflow: I also prune away any stems that are growing vertically too close to the main trunk, which improves ventilation and minimizes the risk of fungal disease, especially in high-humidity environments.
- Sanitize Tools: You must always sanitize your cutting tools with isopropyl alcohol between cuts to prevent the potential spread of pathogens.
Maximizing Yield by Optimizing the Canopy
You should focus your pruning efforts primarily during the spring and early summer, when the plant is in its most active growth phase. Based on my data and experience, creating a strong, bushy framework is a foundational step for increasing your berry production. Don’t be afraid to prune; this species responds well to intervention, and it will quickly reward your efforts with fresh, dense foliage. Maintain a reflective approach; you are looking to build a productive architecture rather than just controlling size. Below are the definitive steps for optimal canopy development:
- Pinch New Growth: Regularly pinch back the tips of young stems throughout the growing season to maximize lateral branching.
- Structure Pruning (Spring): Focus on building the main framework during the initial years.
- Maintenance Pruning (Year-round): Remove dead or crossing wood to ensure long-term health.
Your target gardener approach must be reflective and methodical. By adopting this careful and specific architecture strategy, you remove a major source of weak, leggy growth, allowing the plant to focus energy on building strong cellular structures and increasing your flowering potential. Regular, precise pruning supported by proper care is the definitive key to unlocking heavy, healthy harvests.
10. Pollination Techniques for Indoor Gardeners
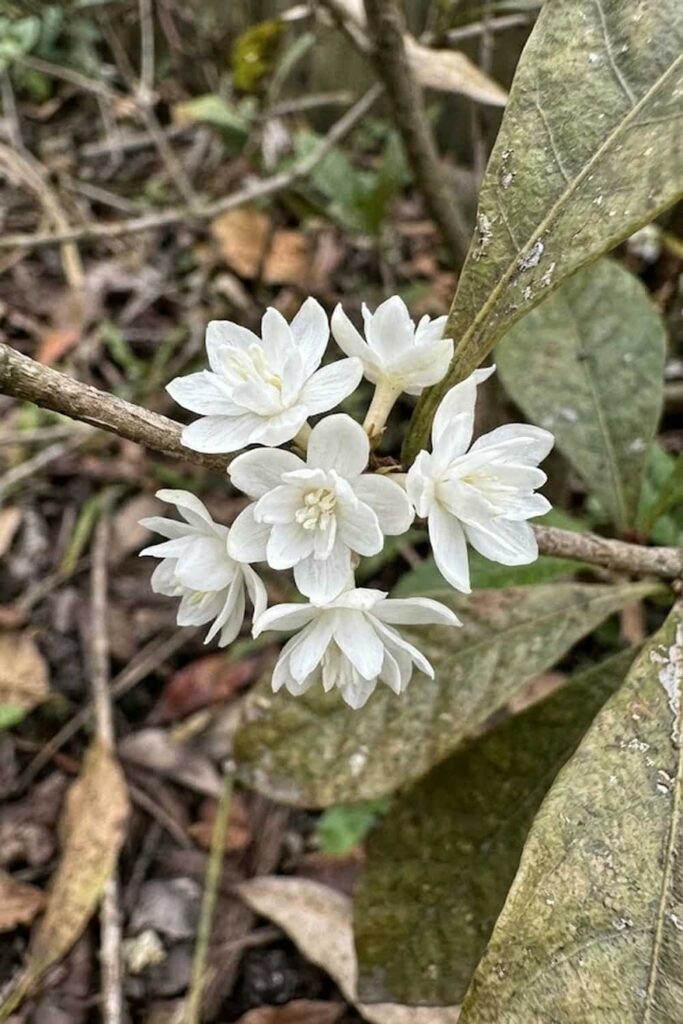
I have found that indoor pollination is a definitive bottleneck for achieving a heavy berry set. You must remember that when Synsepalum dulcificum is grown indoors, it is completely separated from its natural pollinators, which include tiny wind currents and small crawling or flying insects. The flowers are small, white, and inconspicuous, appearing in clusters along the older, woody branches rather than at the tips of new growth. Because they are hermaphroditic (possessing both male and female parts), self-pollination is physically possible, but the pollen often requires assistance to make the critical move from the anther to the stigma. In my experience, relying on passive self-pollination indoors leads to very few berries, and I learned this vital lesson after several seasons of abundant flowering but zero fruit.
Manual Assistance for Higher Fruit Set
Your goal is to simulate the vibration and disturbance naturally provided by insects or wind. This careful intervention ensures that the pollen grains are released and successfully fertilize the ovule. While automated vibration methods exist, I have found that you can achieve excellent results with a few simple, hands-on techniques. I recommend combining multiple methods for the best effect:
- Vibrate the Trunk: During the peak blooming phase, I have had great success gently vibrating the main trunk of the plant for a few seconds every day. I use the handle of an electric toothbrush for this, which provides a soft, effective vibration without damaging the tissues.
- Manual Brushing: Use a small, soft watercolor brush to gently brush each open flower. Move from flower to flower within a cluster, mimicking the behavior of a small foraging insect. This directly transfers pollen between and within the small blossoms.
- Increase Air Circulation: Running a small, soft oscillating fan nearby for a few hours daily not only improves ventilation—critical for preventing fungal issues in high humidity—but also provides subtle wind currents that can assist in pollen distribution.
By providing this assistance, you fundamentally improve your pollination success. When you manage the pollination factors correctly, you remove a major source of fruit failure, allowing your plant to translate its blooming energy into actual berries.
Pollination Efficiency and Timing
You should optimize your pollination efforts based on the specific biology of the Synsepalum dulcificum flower. Maintain consistency in your assistance:
- Pollinate During the Day: Focus your efforts during the daytime hours, when the flowers are actively open and the pollen is most receptive. I have found the best window is often mid-morning.
- Focus on Open Blossoms: You must learn to distinguish between tight buds and the fully open, receptive flowers. Target your vibration or brushing efforts only on those blossoms that have fully separated their tiny petals.
- Ensure Warmth: Maintain optimal temperatures (75°F to 80°F) during the blooming phase, as cool temperatures inhibit pollen viability and receptor function.
Your target gardener approach must be reflective and methodical. By adopting this careful and specific manual intervention strategy, you remove a major source of reproductive failure, allowing the plant to successfully complete its lifecycle. Regular, precise pollination supported by proper care is the definitive key to a heavy, healthy harvest.
11. Monitoring for Common Pests and Diseases
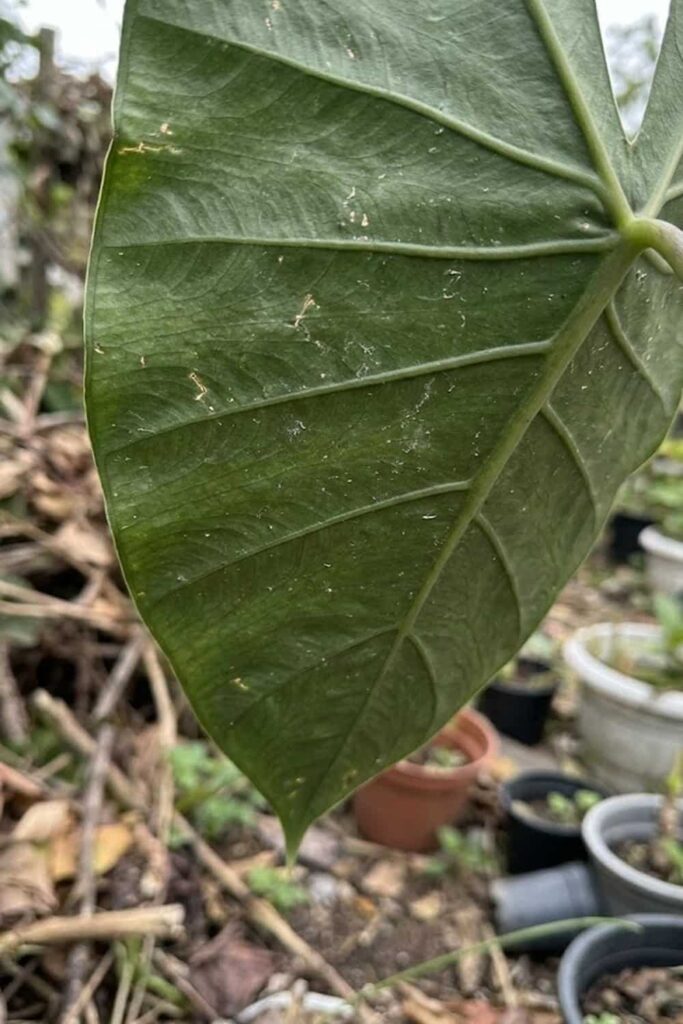
I have found that proactive monitoring is the definitive key to keeping your tropical berries healthy and productive. You must understand that while Synsepalum dulcificum is relatively resilient when its acidic soil and humidity needs are met, a stressed plant becomes a prime target for opportunistic pests and diseases. The high humidity we maintain, while necessary for the foliage, also creates an environment where certain fungi can thrive if air circulation is poor. I learned this lesson early on when I nearly lost my primary seed-bearing shrub to a spider mite infestation that I didn’t notice until significant webbing had formed. By adopting a rigid monitoring schedule, you can catch and control problems before they become critical.
Establishing an Inspection Regime
Your goal is to detect issues at the earliest possible stage, when non-toxic or organic controls are most effective. You must integrate a systematic inspection into your regular watering and maintenance routine, if you wish to see success. Maintain a methodical approach; I recommend dedicating specific time to check the following parameters:
- Underside of Leaves: This is where pests like spider mites, scale, and mealybugs almost always cluster to feed on the plant’s sap. You must actively turn leaves over to inspect them.
- New Growth Tips: Sucking insects like aphids are drawn to soft, fresh tissue. Check the emerging leaves and buds for any distortions or sticky residue (honeydew).
- Lower Trunk and Soil Surface: Look for signs of fungus gnats or soil-borne fungi. Ensure the woody base of the shrub remains firm and free of soft, necrotic spots.
- Overall Leaf Color: Watch for any sudden, uncharacteristic yellowing (chlorosis) or browning (necrosis) that isn’t explained by simple pH or watering errors.
Identification and Management of Common Challenges
When you do identify a problem, you must act decisively but gently. I have compiled this data based on my experience and research to help you identify and manage the two most frequent biological stressors for this specific species:
| Biological Stressor | Early Detection Signs to Observe | Risk Level | Primary Prevention & Control Strategy |
| Spider Mites | Minute pale dots (stippling) on leaves; fine webbing in acute cases. | High. | Increase humidity immediately. Wash leaves gently. Use organic Pest Control like neem oil if needed. |
| Scale Insects | Waxy, immobile, shell-like bumps on stems/leaves; sticky honeydew. | Moderate. | Protection involves manual removal using an alcohol-soaked swab. Apply horticultural soap for serious infestations. |
| Pest Prevention: | Focus on maintaining maximum humidity and strong air movement. | Minimal. | Maintain optimal health through proper Care (acidity, feeding, moisture) to boost natural defense. |
| Fungal Disease: | Powdery mildew on foliage or root rot (if overwatered). | High. | Ensure optimal Ventilation and flawless Drainage. Use bio-fungicides for Disease Control. |
You must remember that healthy plants are the best defense against pests and diseases. Stressed plants—especially those suffering from mineral toxicity (from tap water) or temperature shock—release chemical distress signals that actively attract pests. By adopting a methodical approach to monitoring and maintenance, you fundamentally support your plant’s stability. While I now manage my collection in a more automated environment, consistent, hands-old-on monitoring is the definitive key to a healthy, productive shrub.
12. Harvesting and Storage of Your Magic Berries
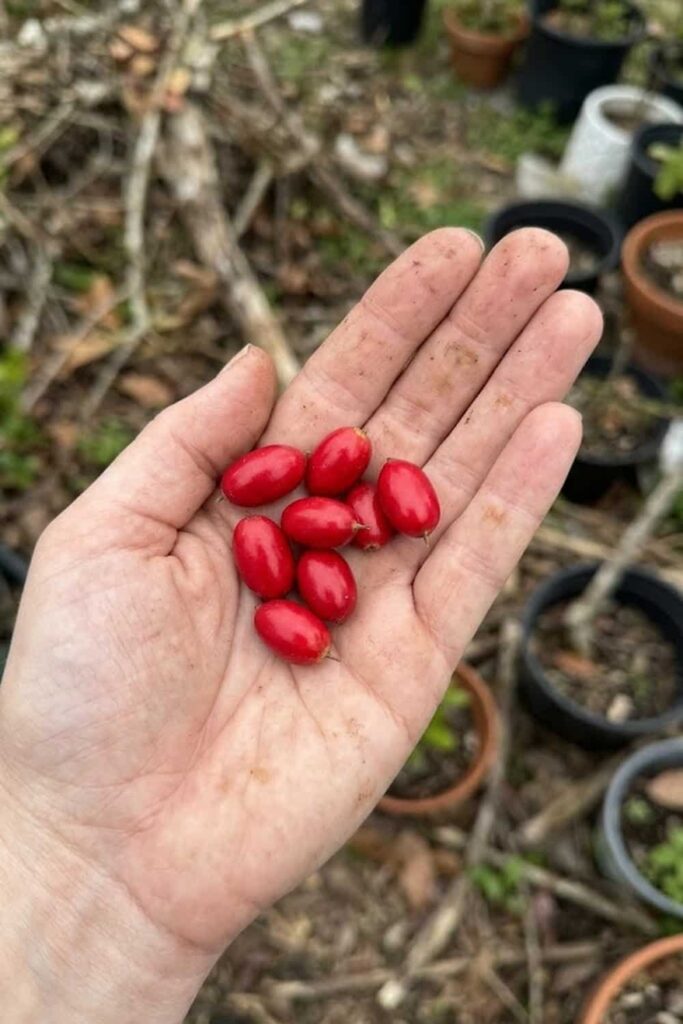
I have found that the moment of Harvesting is when all your methodical care finally culminates in that unique, taste-modifying reward. You must learn to wait for peak ripeness; Synsepalum dulcificum berries do not continue to ripen significantly once they are removed from the shrub. A perfectly ripe berry is fully ellipsoid, measuring about 0.5 to 0.75 inches in length, and is characterized by a deep, uniform, bright red color across its entire surface. It should feel slightly soft when gently compressed, indicating that the sugary pulp has fully developed. I learned this lesson by picking my first few berries as soon as they turned red, only to find they lacked the powerful miraculin punch of a fully mature fruit.
The Right Time and Technique for Success
Your goal is to collect the fruit with minimal physical damage to the berry and zero stress to the woody stems. You are looking for peak sensory maturity, where the flavor-modifying effect is at its absolute maximum, providing the definitive key for your harvest success. I encourage you to use a methodical and gentle technique, just as I do with my highly productive specimens:
- Observe Color: Do not pick any berry that still has any trace of orange or yellow. Wait for that distinctive, deep crimson hue.
- Touch for Ripeness: Gently press the fruit; it must have a slight give. Hard berries are underripe, while extremely soft, mushy berries are overripe.
- Gently Twist and Pull: You must twist the berry softly while simultaneously pulling it from the stem. Do not just rip it off, which can damage the delicate fruiting spur or bark, impacting future yields.
- Avoid Physical Stress: You should never use tools for Synsepalum harvesting; your fingers are the most sensitive instruments for detecting ripeness and applying the proper, minimal force.
Maintaining Freshness: Storage Strategies
Based on my data and experience, your fresh Synsepalum berries have an exceptionally short shelf life. If you leave them at room temperature, they will often begin to lose their flavor-modifying potency within just 24 to 48 hours and may degrade completely within 3 days. To maintain the vital glycoprotein, miraculin, you must prioritize proper post-harvest handling and Storage:
- Immediate Consumption: The strongest effect is obtained by consuming the berry within minutes of it being picked.
- Refrigeration: If you cannot eat them immediately, place the unwashed berries in an airtight container or a sealed plastic bag and refrigerate them. They will remain viable for 3 to 5 days.
- Freezing for Longevity: For long-term storage, freezing is the definitive key. Place the fresh, ripe berries in a single layer on a parchment-lined tray to flash-freeze them. Once solid, transfer them to a heavy-duty freezer bag. Frozen berries maintain their taste-modifying ability for 6 to 12 months, allowing you to enjoy your harvest throughout the year.
Your target gardener approach must be reflective and methodical. By adopting this careful and specific handling strategy, you ensure that none of your effort is wasted, maximizing the effect and providing the ultimate reward from your tropical berries. Consistent, gentle harvesting supported by proper care is the definitive key.
FAQ: Common Questions About Miracle Berry Care
I have found that new growers of Synsepalum dulcificum often encounter the same hurdles, and I have compiled this comprehensive list to address the most critical pain points. If you want to know How to grow Miracle fruit that doesn’t immediately decline, prioritizing these fundamentals—acidity, hydration, and environmental stability—is the non-negotiable definitive key. Based on my data and personal experience (and many failed plants!), these answers provide the direct and effective guidance you need:
Best Soil Mix for Growing Miracle Fruit Plants
You must establish a highly acidic soil mix (pH 4.5–5.8) using a 50/50 blend of coarse peat moss and horticultural perlite to ensure successful Synsepalum dulcificum cultivation. This tropical shrub absolutely requires a low-nutrient, acidic, and exceptionally well-draining substrate to survive; standard potting media are too dense and alkaline, causing rapid and fatal iron lockout.
How Long Does it Take for Miracle Fruit to Fruit?
You should expect Synsepalum dulcificum plants to take 3 to 4 years to produce their first harvest when grown from fresh seed, provided you maintain optimal tropical warmth and proper acidic nutrition. While seedlings develop very slowly during their first two years, established vegetative plants (such as those created through air-layering or rooted cuttings) often achieve fruit production much sooner, sometimes in as little as 1 to 2 years.
Tips for Increasing Humidity for Miracle Fruit Plants
You must maintain humidity levels between 70% and 80% around your tropical berry bushes to prevent rapid desiccation and brown, brittle leaf tips. Effective control strategies involve combining passive techniques, like using a large pebble tray filled with water beneath the pot, with active mechanical controls, such as a dedicated room humidifier positioned nearby, especially during the dry winter months.
How to Fix Brown Leaf Tips on Miracle Fruit
You must increase the relative humidity surrounding the canopy and shift immediately to using distilled, rain, or RO water to correct the brown, brittle margins on your Synsepalum dulcificum leaves. Based on my data, this specific browning, known as marginal necrosis, is the primary symptom of environmental stress, resulting directly from either critically low humidity (the dry air pulls too much moisture) or soil-born mineral toxicity (from using municipal tap water).
Organic Fertilizer for Growing Healthy Miracle Fruit Berries
You must utilize a low-salt, slow-release acidic fertilizer, such as those specifically formulated for Azaleas, Camellias, or Blueberries, at half the recommended dosage to promote healthy growth and maximum fruit set. I strong encourage you to prioritize gentle, organic feeding using urea-free nitrogen sources (like ammonium sulfate), as this approach sustains the required low soil pH (4.5–5.8) without the mineral accumulation and potential for leaf burn associated with conventional high-salt fertilizers.
How to Grow Miracle Fruit in Containers Indoors
You must prioritize the precise control of soil acidity, relative humidity, and consistent tropical warmth to successfully cultivate a reproductive Synsepalum dulcificum bush indoors. Since you are simulating a tropical rainforest understory within your home environment, you are looking for soft, filtered light (bright, indirect rather than direct afternoon sun), a pH-stable soil medium (4.5–5.8), relative humidity levels above 70%, and night temperatures that remain consistently above 60°F for year-round development and health.
How to Grow Miracle Fruit from Fresh Seeds
You must plant the cleaned, pulp-free Synsepalum dulcificum seed immediately (within 48 hours of collection) into a damp, acidic mix without allowing it to dry, as desiccation quickly destroys the viability of this recalcitrant species. Maintain extreme humidity near 100% and consistent warmth (around 75°F to 80°F) using a humidity dome and a seedling heat mat until you see germination, which is a slow process that typically takes 4 to 8 weeks.
Maintaining Acidic Soil pH for Miracle Fruit Bushes
You should regularly monitor and maintain the soil pH (4.5–5.8) by utilizing acidic inputs, such as distilled water or water-soluble urea-free fertilizer, as this definitive key prevents the fatal nutrient lockout associated with standard alkaline conditions. If your substrate begins to neutralize, you must immediately adjust the environment using acidic amendments or a pH-balancing technique, if you want to see long-term health and growth.
How to Grow Miracle Fruit in Cold Climates
You must cultivate Synsepalum dulcificum exclusively in containers in cold climates, prioritizing their immediate relocation indoors well before night temperatures drop below 60°F. Because this species possesses zero tolerance for frost or cool weather, you are looking for complete environmental separation, which means providing a warm (above 65°F), humid (above 70% RH), and brightly lit space (filtered light or grow lights) to sustain metabolic function through the cool winter months.
Watering Miracle Fruit Plants with Distilled or Rain Water
You must hydrate Synsepalum dulcificum plants using only mineral-free sources, like distilled water or rainwater, to prevent the harmful buildup of dissolved salts (chlorine, fluoride, carbonates) found in municipal tap water. Based on my data and experience, this specific watering regimen is the foundational non-negotiable definitive key for achieving productive harvests; switching from tap water is often the single change that saves a struggling, chlorotic specimen.
This comprehensive guide and FAQ are based on a decade of trial, error, and dedicated study of tropical plant physiology. Note that consistent monitoring is the ultimate definitive key for long-term health. While I now manage my collection in a more controlled, professional environment, successful cultivation remains deeply rewarding. By adhering to these strict environmental guidelines—prioritizing correct soil chemistry, pure water, and humidity above all else—you develop the respectful understanding and specific skills necessary to enjoy your own taste-altering harvest.








