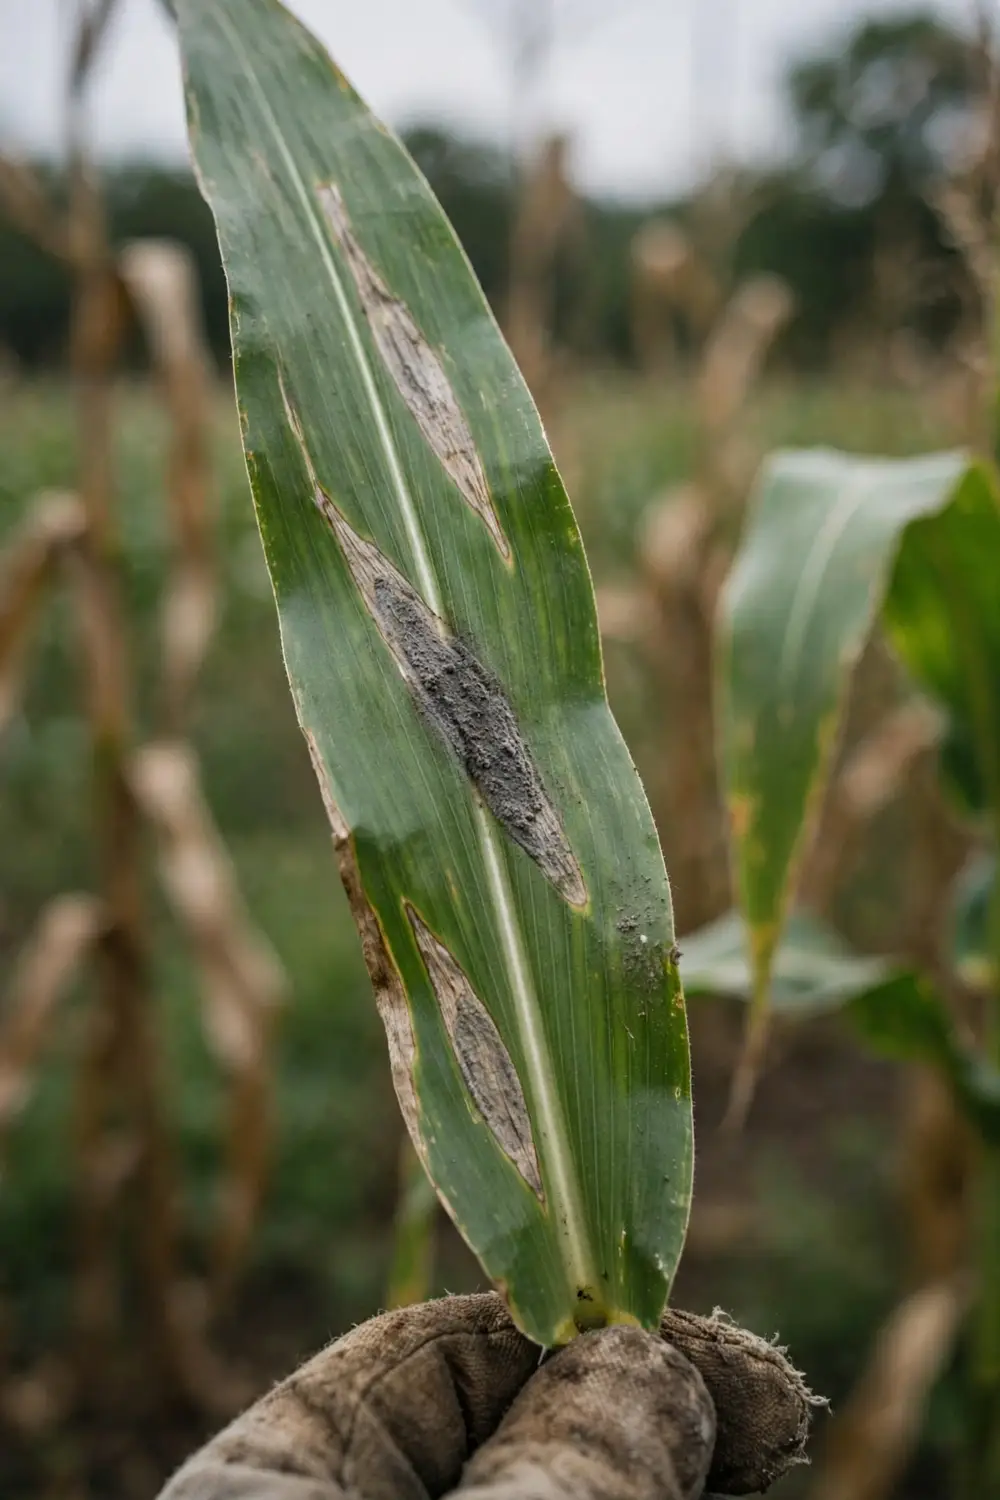

Northern corn leaf blight hits backyard sweet corn as long cigar-shaped lesions that start on lower leaves and climb. The fungus behind it is Exserohilum turcicum, and wet leaves plus moderate temperatures drive every new infection. 9 strategies below protect the patch, starting with the triage call that decides whether this season’s corn is worth saving.
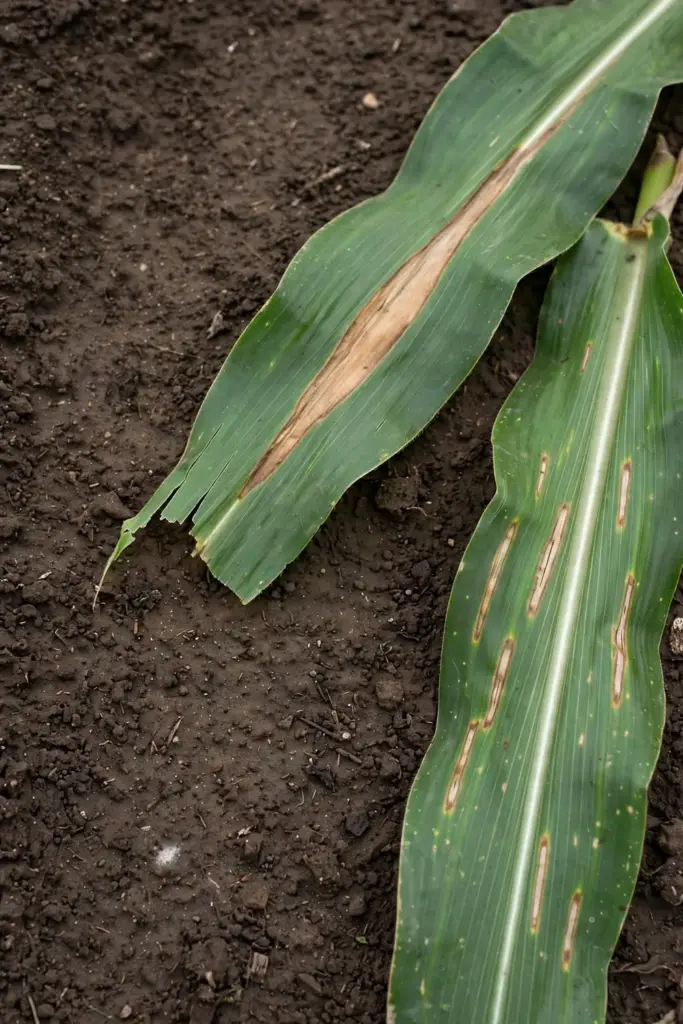
The first lesions look narrow and tan, running parallel to the leaf veins. They widen into oblong or cigar-shaped blotches, gray-green at first and then pale gray or tan. Under humid weather the lesions grow dark gray spores that give them a dirty look. Badly hit leaves die early, and a plant with little green leaf left cannot fill its ears.
The rest of this page is 9 moves, from the triage call that decides whether this season’s corn is worth saving to the last-resort spray. Read the identification sections first if the patch still stands, and start at Step 1 if lesions already cover the lower leaves.
What Northern Corn Leaf Blight Actually Is
Northern corn leaf blight is a fungal leaf disease of corn. The pathogen is Exserohilum turcicum, a true fungus once named Helminthosporium turcicum. The old genus name still shows up in older guides and on some seed packets, but current guides use Exserohilum turcicum and this page keeps that name throughout.
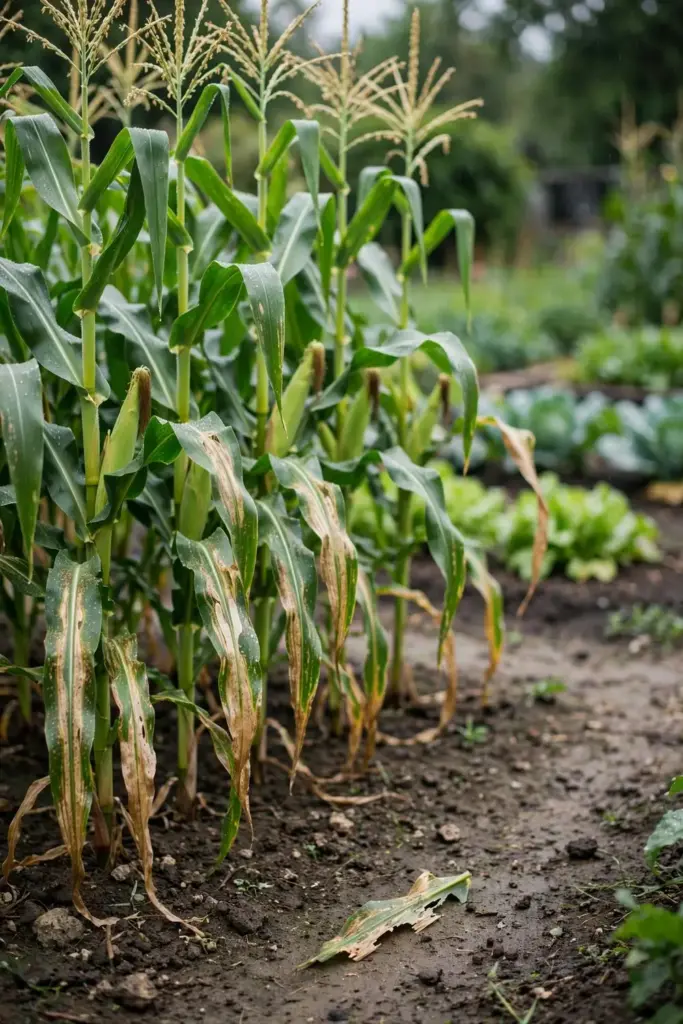
The fungus attacks sweet corn, field corn, and related grasses. It feeds on leaf tissue and cuts the green area that fills the ear. It does not attack people, and it does not make ears poisonous. A blighted plant still grows ears when enough leaf survives. A plant stripped of green leaf early fills thin, chaffy ears.
The fungus is not seed transmitted. Cornell’s sweet corn factsheet states that the pathogen survives between seasons on infested corn residue. Spores form on that residue in late spring and early summer, then ride wind and rain splash to young plants. That residue link drives the whole plan. Break the residue cycle and the disease loses its start.
How to Identify Northern Corn Leaf Blight on Leaves
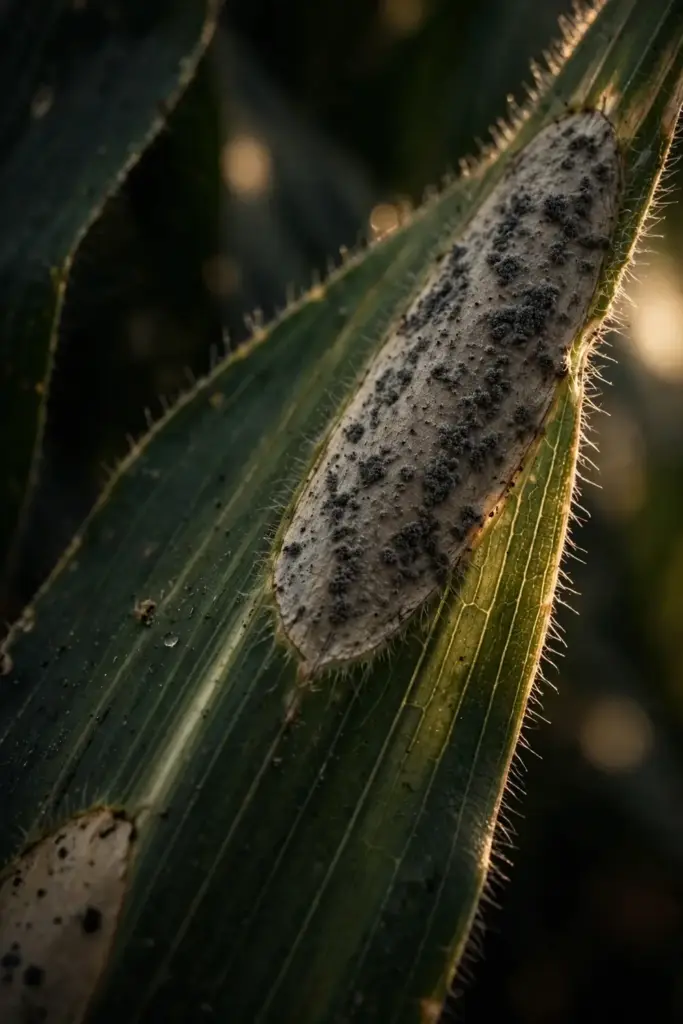
Northern corn leaf blight shows as long lesions on the leaves, starting low and climbing. The Crop Protection Network guide to northern corn leaf blight describes leaf lesions 1 to 6 inches long, elliptical, gray-green at first and then pale gray or tan. Under moist conditions dark gray spores form on the lower leaf surface and give lesions a dirty gray look. Entire leaves on badly blighted plants can die, so single lesions disappear into dead tissue.
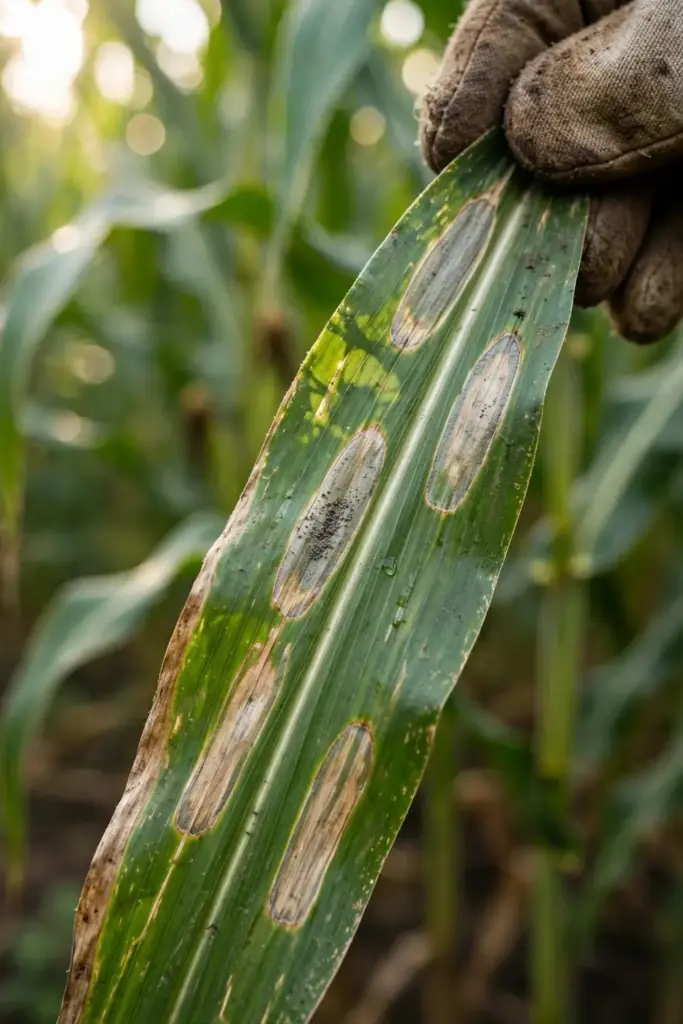
Early lesions read as long, narrow tan streaks parallel to the veins. They widen into the classic cigar shape with tapered ends. The lesions cross veins instead of stopping at them. That crossing separates northern corn leaf blight from gray leaf spot at a glance. A hand lens shows tiny dark specks inside mature lesions. Those specks are spore clusters, and they confirm a live infection rather than sun scorch or dry weather.
Timing helps the call. Infection needs wet leaves, and lesions appear 7 to 12 days after infection under favorable conditions, according to the University of Massachusetts Extension. Symptoms seldom show before silking on most plantings, then build fast in wet spells. Hot, dry weather slows the spread. A patch that looked clean one week can show lesions across the lower canopy after one rainy week.
How to Identify Northern Corn Leaf Blight on Husks and Ears
Northern corn leaf blight reaches the husks on badly hit plants. Lesions form on the outer husk leaves, the same cigar-shaped blotches as on the foliage. The husk spots look alarming. They rarely reach the kernels. The Crop Protection Network guide notes that lesions may occur on the outer husk of ears, and the kernels are not infected. Peel a spotted husk and the ear inside usually looks normal.
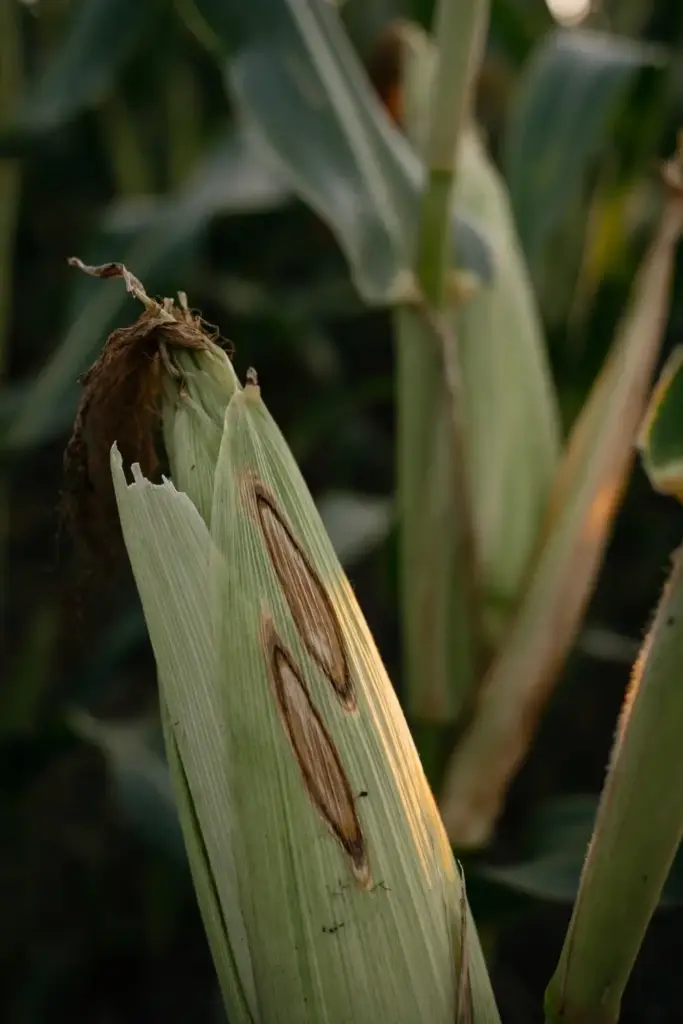
Ear damage comes through the leaves, not through the husk. The ear leaf and the leaves above it feed the filling ear. When blight kills those leaves early, the ear stops filling. Kernels stay shallow. The tip stays bare and the ear finishes small. A plant with green ear leaves and dead lower leaves still fills a decent ear. A plant with dead leaves up to the ear leaf fills a poor one.
Pick ears from blighted plants and eat them when they look and smell sound. Wash them as usual. The fungus harms the plant, never the eater. Discard any ear with mold, rot, or a sour smell. The real loss from northern corn leaf blight is yield and eating quality, not safety.
Which Sweet Corn Gets Hit Hardest by Northern Corn Leaf Blight
Susceptible sweet corn sits at the top of the risk list. Any variety with no blight resistance printed on the packet lacks bred protection against this fungus. Many sweet corn varieties were bred for eating quality first, and resistance came second. They collapse first in a wet season. Resistant varieties hold green leaf longer under the same weather.
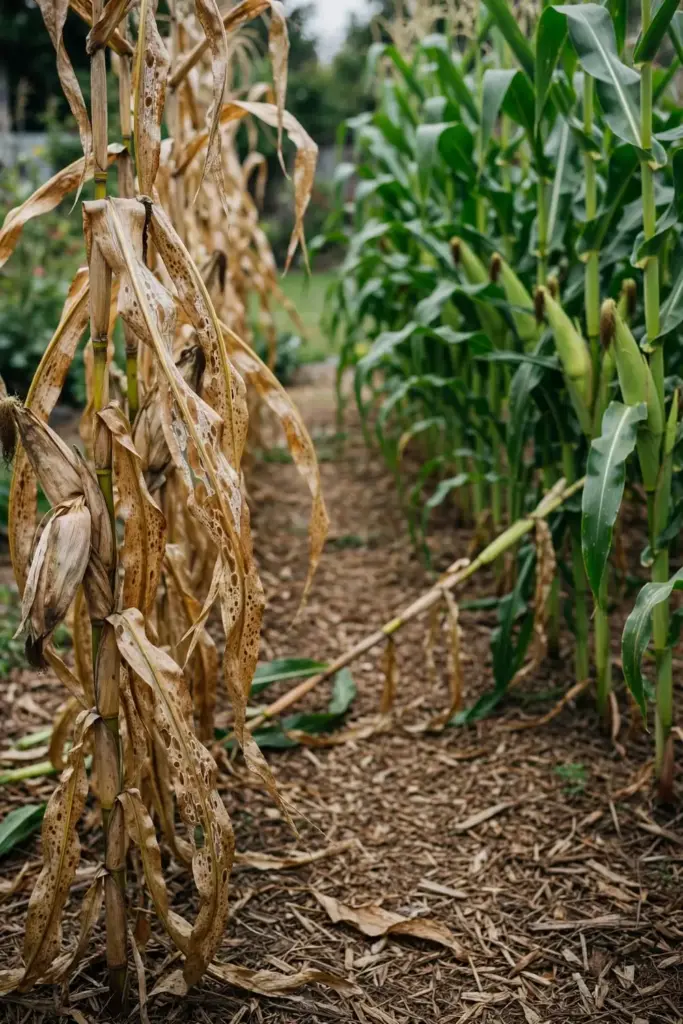
Corn after corn runs second. A bed that grew corn last year holds last year’s residue, and that residue holds the fungus. The spores start right under the new plants. A bed that grew beans, squash, or tomatoes last year starts clean. The gap between a corn-after-corn bed and a rotated bed shows in the first wet spell.
Dense plantings in still air run third. Tight rows hold dew late into the morning. Leaves stay wet past the 6-hour infection window. Plants on a windy ridge dry fast and dodge infection. Plants in a low hollow with poor air drainage stay wet and catch it. Overhead watering late in the day adds wet hours on top of dew.
Late plantings in wet spells run fourth. A planting that silks into a rainy stretch faces peak spore loads. An early planting that silks before the wet season often escapes the worst. Stagger plantings by two weeks and one planting usually fares better than the other. The calendar cannot be controlled, and spacing and rotation can.
Northern Corn Leaf Blight vs Southern Corn Leaf Blight vs Gray Leaf Spot vs Goss’s Wilt
Lesion size splits the blights first, and temperature splits them second, since northern corn leaf blight grows long cigar-shaped lesions in cool to moderate weather. Southern corn leaf blight grows smaller lesions in warmer weather. Gray leaf spot grows rectangular lesions boxed in by veins. Goss’s wilt is bacterial, not fungal, and it answers to no fungicide. Measure one lesion and read the thermometer before reaching for any product.
| Clue | Northern Corn Leaf Blight | Southern Corn Leaf Blight | Gray Leaf Spot | Goss’s Wilt |
|---|---|---|---|---|
| Pathogen | Exserohilum turcicum, a fungus | Bipolaris maydis, a fungus | Cercospora zeae-maydis, a fungus | Clavibacter nebraskensis, a bacterium |
| Lesion shape and size | Cigar-shaped, 1 to 6 inches long, tapered ends, crosses veins | Smaller, 0.25 to 1 inch long, parallel sides, tan with brown borders | Rectangular, up to 2 inches long, sharp parallel edges set by veins | Elongated with wavy margins, dark freckles inside |
| Temperature sweet spot | 64 to 81 degrees Fahrenheit, moderate and humid | 68 to 90 degrees Fahrenheit, warm and wet | Warm 80s Fahrenheit, humid for 12 or more hours | Warm and wet, often after hail or wind damage |
| First leaves | Lower leaves first, then climbs | Lower leaves first, then climbs | Lower leaves first, then climbs | Lower leaves first, often after injury |
| Key tell | Dirty gray sporulation inside lesions | Smaller lesions, warm weather | Lesions stop at veins, never cross them | Shiny dried ooze like varnish, freckles that show when backlit |
| Spray response | Garden fungicide can slow spread when applied early | Garden fungicide can slow spread when applied early | Garden fungicide can slow spread when applied early | Fungicides do not control bacteria |
Southern corn leaf blight deserves a closer look because the names confuse. The University of Illinois Extension factsheet on southern corn leaf blight lists the pathogen as Cochliobolus heterostrophus, also called Bipolaris maydis, and places it in warm, humid climates with temperatures of 70 to 90 degrees Fahrenheit. Three races exist: race O, race T, and race C. Race T caused the 1970 epidemic on T-cytoplasm corn. Growers switched to normal-cytoplasm corn after that epidemic, and race T is no longer considered a threat. Texas A&M AgriLife Extension puts typical southern corn leaf blight lesions at 0.25 to 1 inch long, far shorter than the northern blight’s 1 to 6 inches.
Gray leaf spot fools readers because it also starts low and climbs. The Crop Protection Network describes gray leaf spot lesions as long, narrow, rectangular, and light tan, delimited by leaf veins. Hold a suspect leaf to the light. A gray leaf spot lesion keeps straight parallel edges where the veins box it in. A northern corn leaf blight lesion tapers past the veins. That single check settles most calls.
Goss’s wilt fools readers because it also blights leaves. The University of Nebraska-Lincoln Extension describes dark green to black water-soaked freckles inside Goss’s wilt lesions, plus a bacterial ooze that dries shiny on the leaf surface. Northern corn leaf blight never shows freckles or shiny ooze. A spray that slows fungi does nothing against bacteria, so the distinction decides the whole response.
Southern corn leaf blight gets its own full guide on this site. This page compares the two blights so a reader can name the one in front of them. The full southern blight guide covers that disease start to finish.
Why Wet Leaves Drive Northern Corn Leaf Blight
Northern corn leaf blight runs on free water. Spores land on a leaf and germinate only while the surface stays wet. The Crop Protection Network guide puts the infection window at more than 6 hours of leaf wetness with moderate temperatures of 64 to 81 degrees Fahrenheit. Dew, rain, and overhead irrigation all count. A leaf that dries within a few hours dodges infection. A leaf that stays wet past dawn does not.
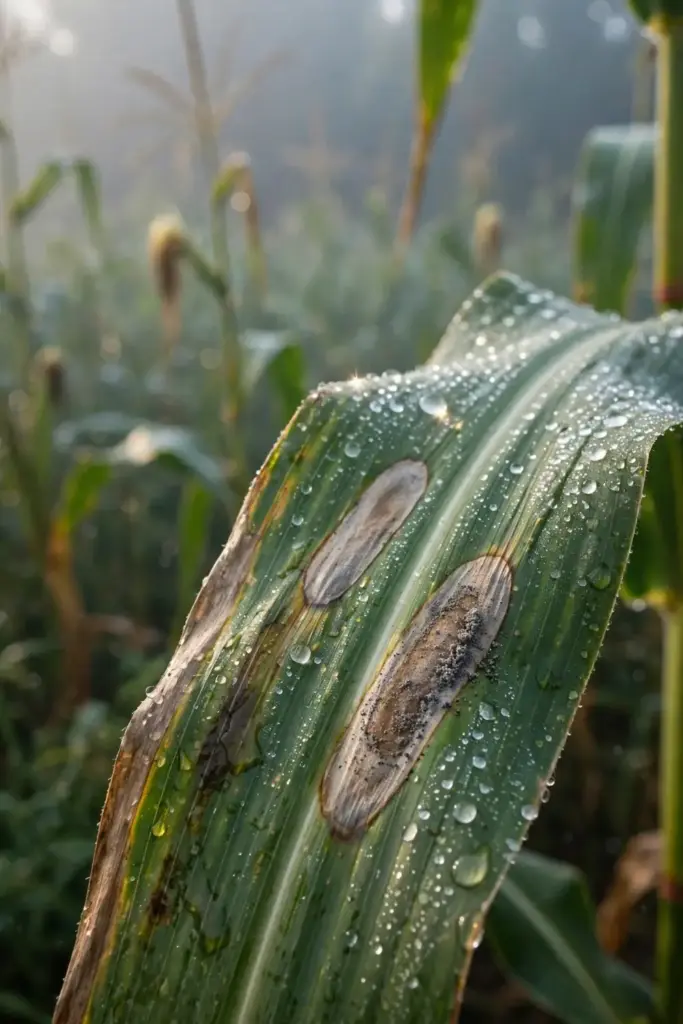
One lesion becomes a spore factory. Under favorable conditions lesions appear on leaves within a week after infection. Each mature lesion sheds spores that rain splash and wind carry upward to younger leaves and sideways to neighbor plants. The cycle repeats all season while wet weather lasts. A single wet week can carry the disease from the lowest leaves to the ear leaf.
Leaf wetness explains why the same variety fails in one garden and thrives in another. Two gardens share the same seed and the same rain. The garden with wide rows, morning sun, and drip watering dries leaves by midmorning. The garden with tight rows, shade, and evening sprinklers keeps leaves wet past dawn. The fungus only needs the wet hours. Dry the leaves and the chain breaks.
What Makes Northern Corn Leaf Blight Worse in a Home Garden
Corn after corn is the first risk. The fungus overwinters in corn residue on the soil surface. A bed that grew corn last year starts the season with spores already in place. Tillage that buries residue helps, and rotation away from corn helps more. Corn planted into last year’s corn stubble faces the heaviest pressure a home garden can produce.
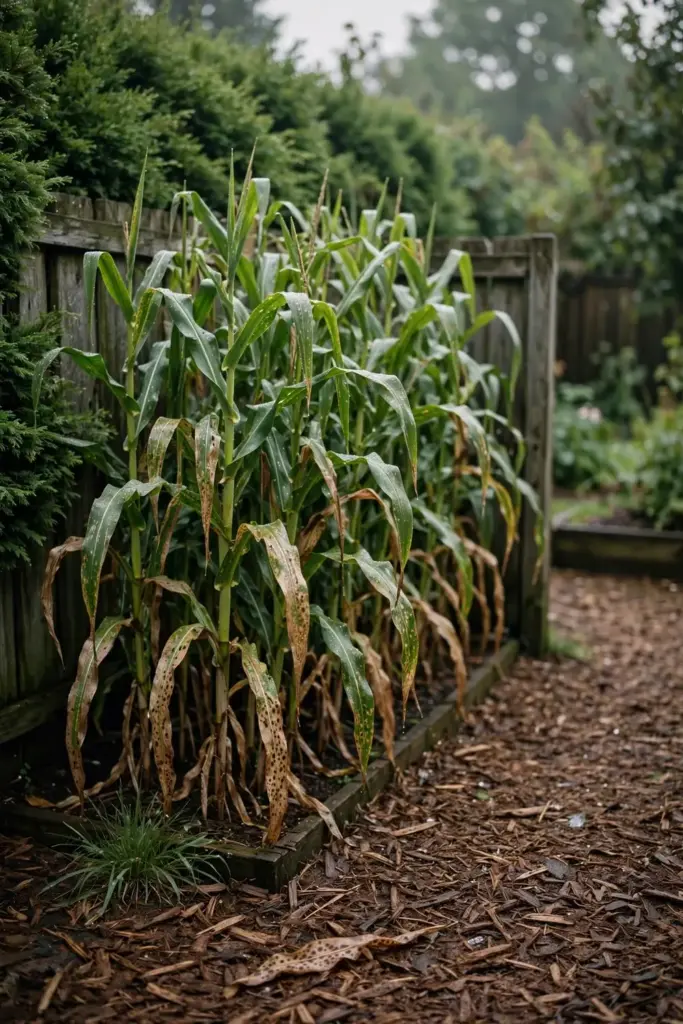
Overhead watering late in the day is the second risk. Evening sprinklers wet leaves right before the dew sets in. The leaves then stay wet all night and past dawn. That stretch easily clears the 6-hour infection window. A soaker hose or drip line puts water at the roots and leaves the foliage dry. Midday watering lets any incidental wetness dry fast.
Tight rows and still air are the third risk. Corn planted in a dense block traps humid air. Leaves in the middle of the block dry slowest. A planting on a breezy ridge dries fast, while a planting boxed in by a fence, a hedge, and a shed dries slow. Airflow is disease work, not tidiness.
Related grasses near the patch are the fourth risk. Cornell’s sweet corn factsheet notes that sweet corn, field corn, and related species can host Exserohilum turcicum, which keeps inoculum alive in the cropping system. A weedy border of grassy hosts feeds spores into the patch. Mow the border and pull grassy weeds before they head out.
Step 1: Decide Whether This Patch Is Worth Saving
Read the canopy before spending anything. Stand back and find the ear leaf, the leaf that wraps the top ear. Green ear leaves and green leaves above them mean the plant still feeds its ears. Dead lower leaves with a green top mean the plant keeps filling. Dead leaves up to and past the ear leaf mean the plant has little left to give.
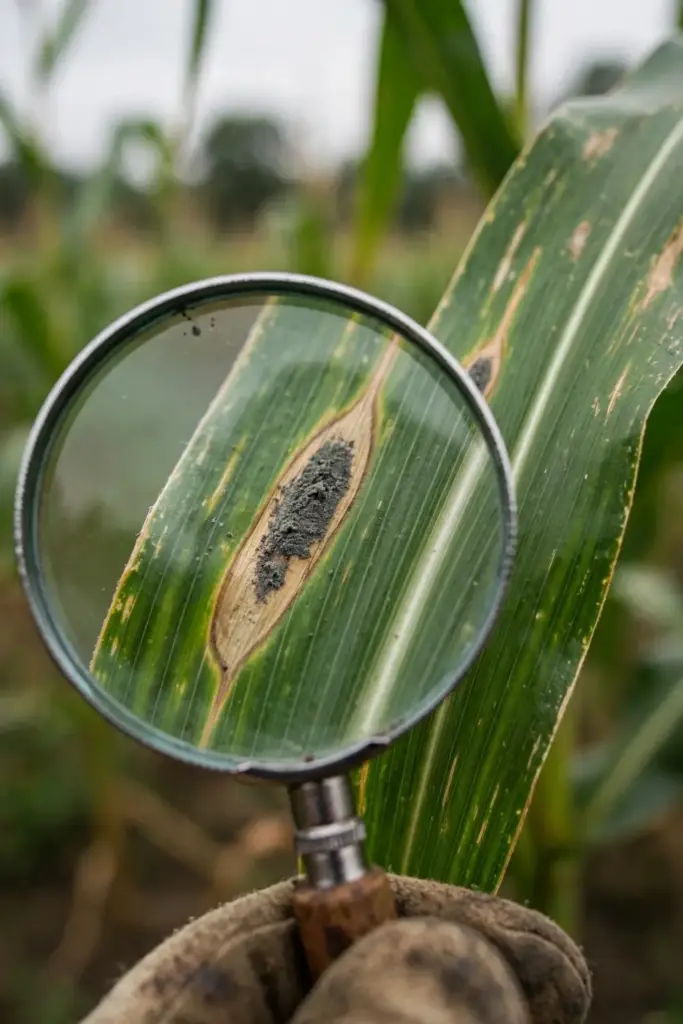
Dead leaf tissue never recovers. No spray, feed, or watering brings a dead lesion back to green. The question is whether enough green leaf remains to fill the ears. A patch with green ear leaves earns continued care. A patch with dead leaves through the canopy earns a different plan. Pull the worst plants, harvest what is sound, and put the effort into next season’s rotation.
Pull a plant that is fully dead and check the stalk. A weak, lodged stalk after blight invites stalk rot and lodging. Clear it before it falls across its neighbors. Bag the pulled plants. Do not drop them in the compost pile. Step 8 covers why the cold pile fails.
Step 2: Plant Resistant Sweet Corn Varieties
Read the packet before buying seed. Resistant sweet corn varieties carry a blight-resistance note on the packet or in the catalog description. Cornell lists sweet corn varieties with northern corn leaf blight resistance, and the list spans sugary, sugar-enhanced, and supersweet types. Buy the resistance note, not the promise on the packet front. A variety with no resistance note has no bred protection.
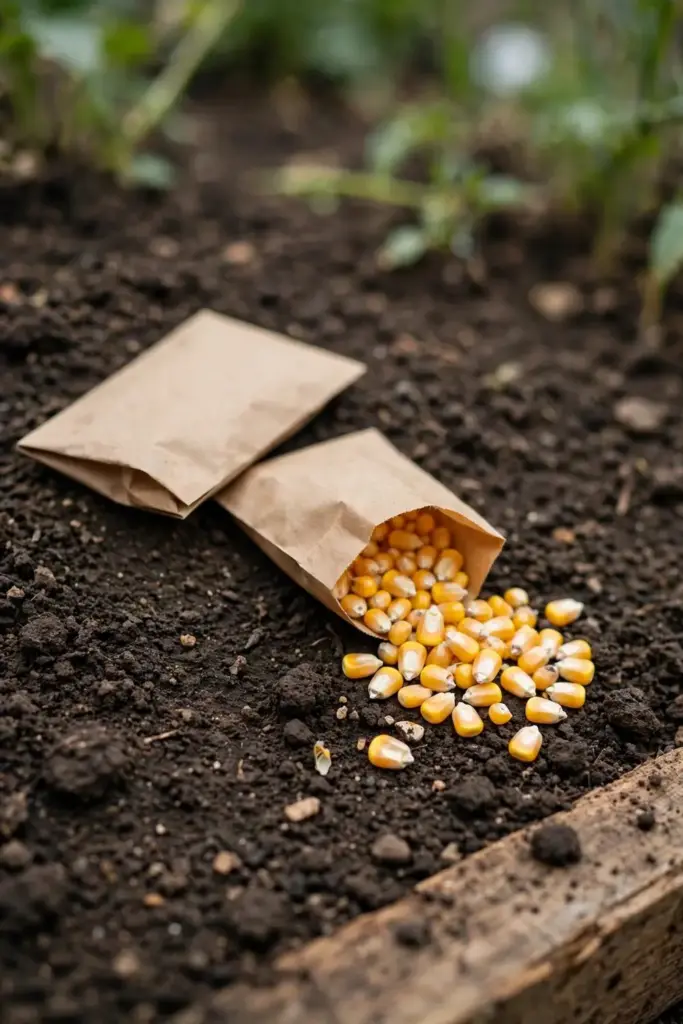
Gardener’s Supply names Sugar Buns among resistant sweet corn varieties for home gardens. Sugar Buns is a sugar-enhanced bicolor with early maturity. Early maturity adds a second advantage. An early variety often silks before the wettest stretch and escapes the worst pressure. Catalog resistance notes vary by year, so check the current catalog entry rather than trusting memory.
Start from fresh seed each season. The fungus does not ride on seed, so saved seed carries no blight penalty. Saved seed still carries the variety’s own susceptibility. A susceptible variety saved from a blighted patch grows susceptible plants again. The seed starting guide covers clean sowing technique from sowing to transplant. Fresh resistant seed is the cheapest move in this whole plan.
Step 3: Rotate Corn Out of the Bed for Three Years
Rotate corn out of the bed for three years. Cornell’s sweet corn factsheet recommends rotating with a non-host species, not field or sweet corn, for at least three years to cut inoculum from infested residue. Beans, squash, tomatoes, peppers, and leafy greens all break the cycle. Grains and grasses do not. Corn is a grass, and grassy cover crops belong in the avoid list for a blighted bed.
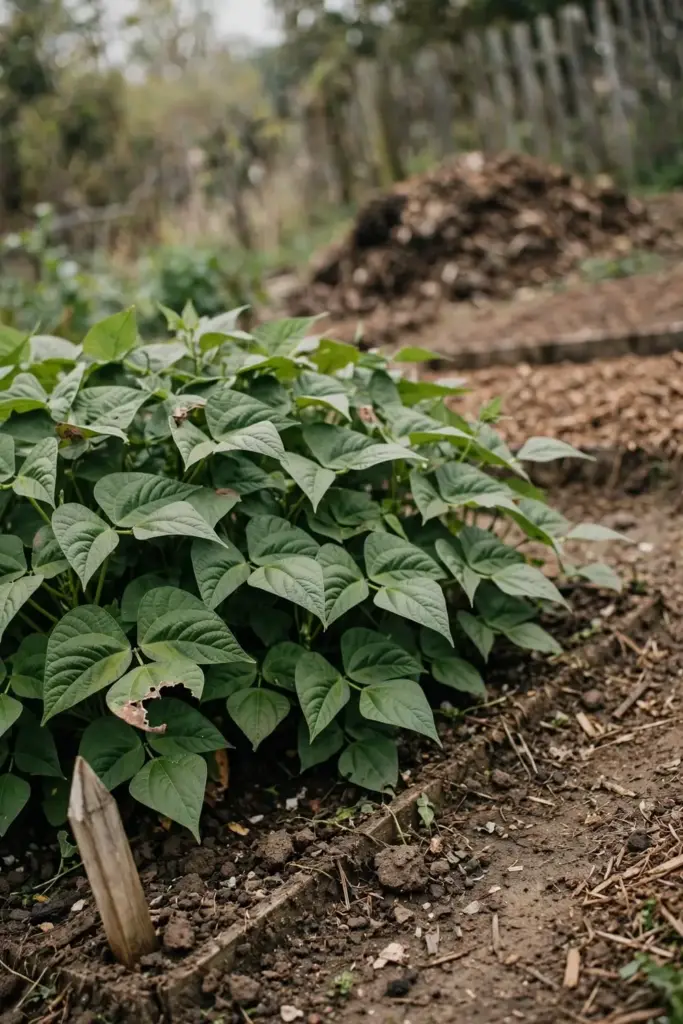
Map the bed on paper so next spring does not repeat this spring. Write down which bed grew corn, which year, and which variety. Memory fades. The fungus waits in residue longer than any gardener’s memory. A paper map stops a spring planting from landing corn in last year’s corn bed.
Rotation has an honest limit. Spores ride wind between fields, so a rotated bed can still catch blight from a neighbor’s corn. Cornell notes the same limit. Rotation cuts the inoculum that starts under the plants. It never guarantees a clean season. Pair rotation with resistant varieties and residue cleanup. The soil health guide walks through structure, organic matter, and drainage in practical detail.
Step 4: Bury or Remove Last Season Residue
Clear corn residue after harvest. The fungus survives on residue, not on bare soil. Cornell’s sweet corn factsheet advises burying corn residue by tillage after harvest to speed decomposition. A buried stalk rots fast. A stalk left standing over winter holds spores until spring. The difference is a full season of inoculum.
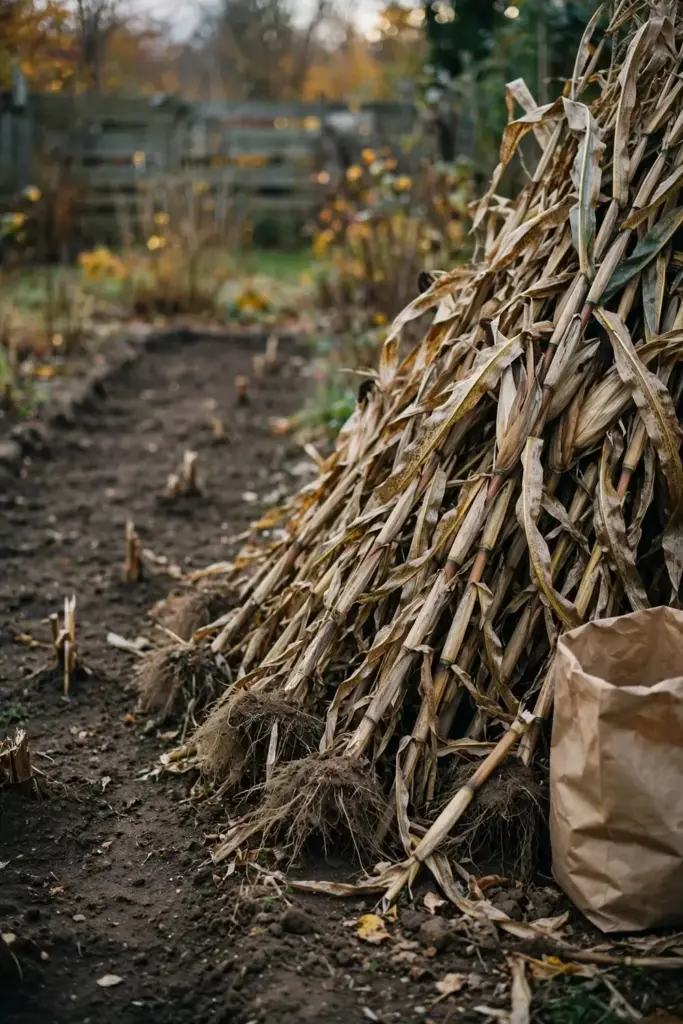
Bag residue when tillage is not an option. Pull stalks, roots and all. Bag them for municipal waste, since a small garden bed clears in one afternoon and a large patch takes a weekend. The work pays off in the first wet spell next year, when the new plants start clean instead of standing in last year’s spores.
Work the bed before winter. Fall cleanup beats spring cleanup because winter rain and wind scatter spores from standing stalks. The fall garden bed prep guide covers bed tasks for winter, including compost, mulch, and cover crops. Fold residue removal into that fall routine. Spring then starts with a clean bed.
Step 5: Space Plants for Airflow and Dry Leaves
Space sweet corn for airflow and pollination at once. The University of Arkansas Extension advises rows 30 to 36 inches apart with plants 9 to 12 inches apart in the row. Wide rows let sun and wind reach the lower leaves. Tight rows trap humid air and hold dew late. Airflow dries leaves, and dry leaves break the infection chain.
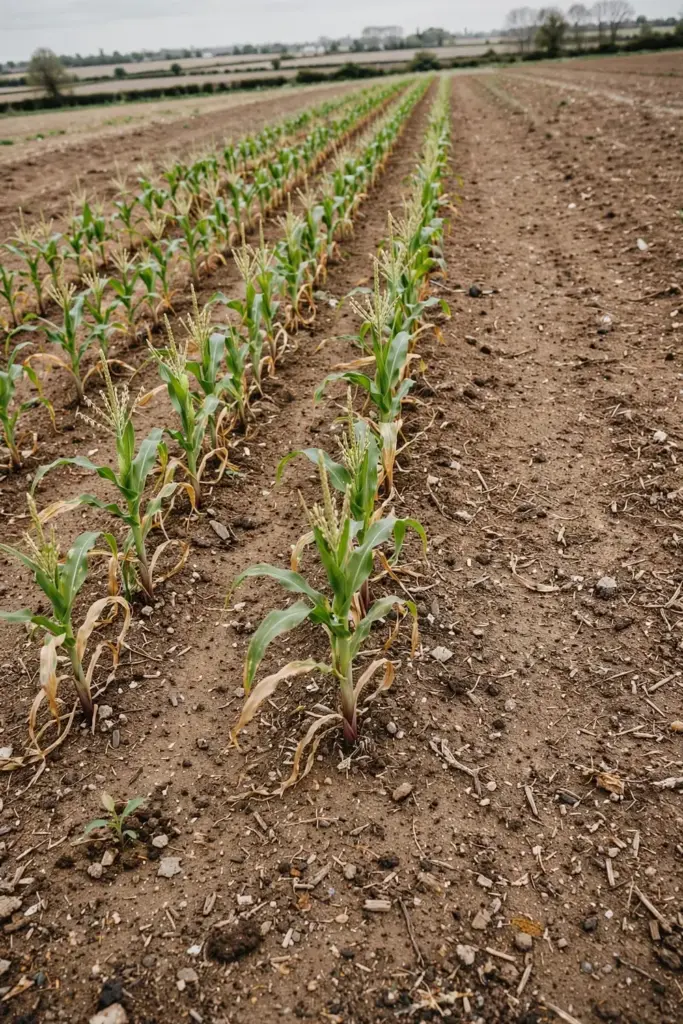
Plant in a block, never in a single long row. Arkansas Extension advises two or more rows of each variety side by side for good pollination and ear development. Corn is wind pollinated, and a block catches its own pollen. A block of four short rows beats a single row forty feet long. The block also dries more evenly than a long row boxed against a fence.
Thin on time. Sow two seeds per spot and thin to one plant when seedlings stand a few inches tall. Crowded doubles compete for light and hold wet leaves against each other. One strong plant per spot dries faster and fills a better ear. The thinned seedling goes to the compost pile only when it shows no lesions. A spotted thinning goes in the bag.
Step 6: Water at Midday and Keep Leaves Dry
Water at midday when irrigation is needed. Cornell’s sweet corn factsheet advises midday irrigation to cut the time leaves stay wet and reduce infection and spread. Leaves should not stay wet to the touch for longer than 6 hours. Midday sun dries incidental wetness fast. Evening watering fails that test by design, because dew follows it within hours.
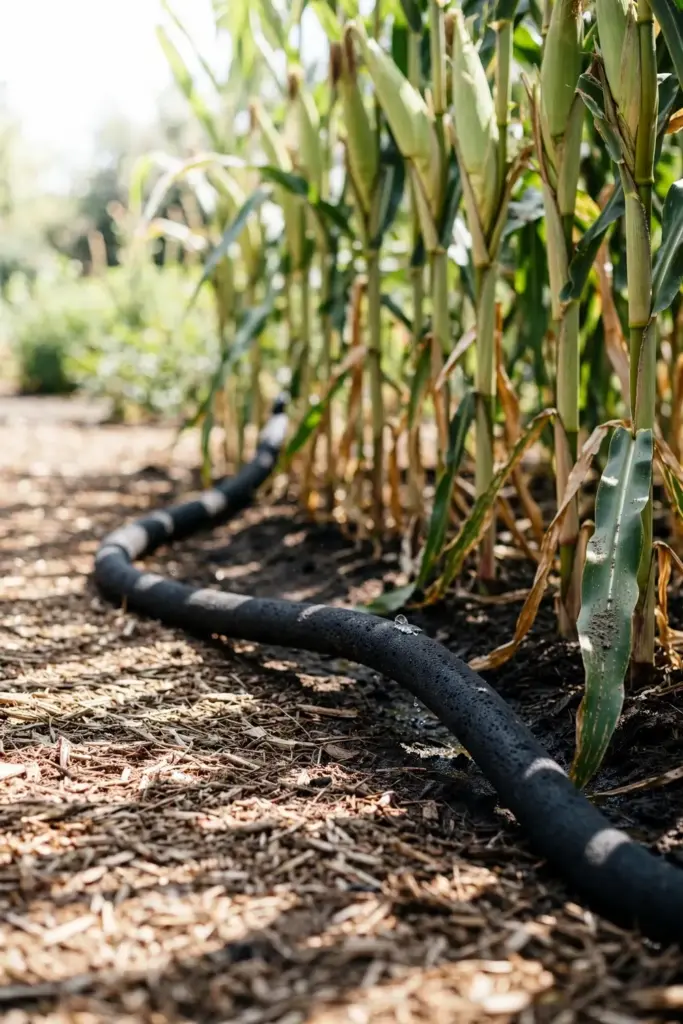
Run drip lines or soaker hoses at the root zone. Drip keeps water where roots drink and keeps foliage dry. Overhead sprinklers wet every leaf and start the infection clock. A soaker hose on a timer beats a sprinkler on any schedule, so set the hose before the plants grow tall, while the bed is still easy to reach.
Water deeply and let the top inch dry before watering again. Shallow daily sprinkles keep the surface wet without feeding deep roots. Deep watering grows deep roots. Deep roots sit where soil stays moist, and dry surface leaves dodge infection. Mulch between rows holds that moisture and stops soil splash onto lower leaves.
Step 7: Scout Weekly and Strip Bad Leaves Early
Walk the patch once a week from knee-high plants through silking. Start at the lower leaves. Look for narrow tan streaks parallel to the veins. Flip a suspect leaf and check the underside with a hand lens. Dark gray spore dust on the underside confirms an active lesion. Mark the date and the row in a notebook that shows whether the disease climbs or stalls.
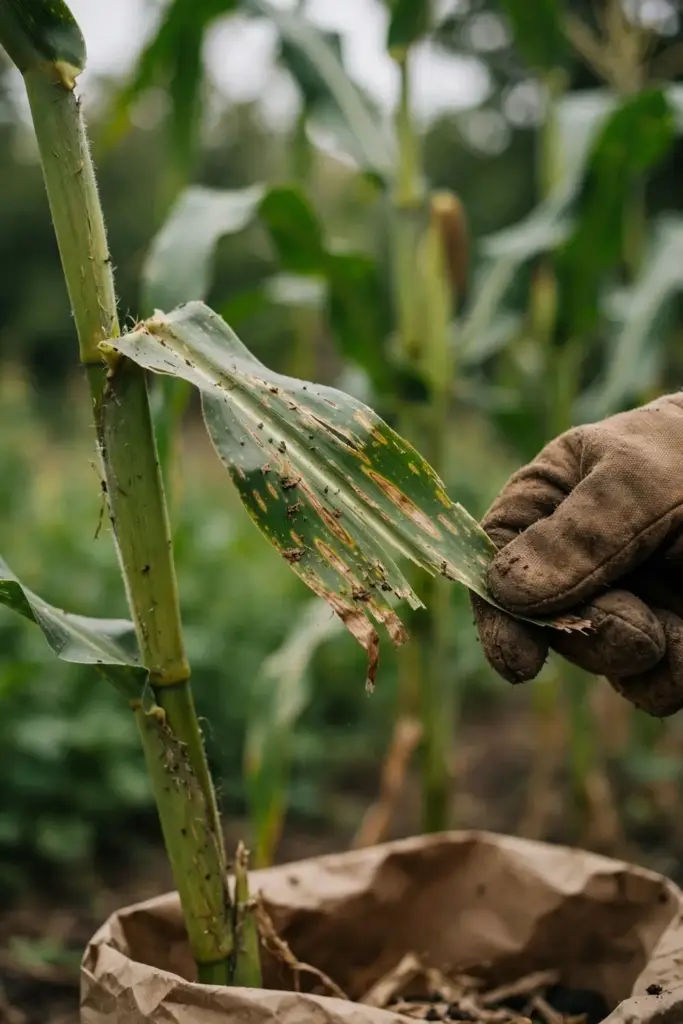
Strip badly spotted lower leaves when you find them. Pinch the leaf at the stalk and bag it. Do not drop stripped leaves on the bed. A stripped leaf on the soil keeps shedding spores at the base of the plants. Bagging removes the spore factory. Wash hands and tools after handling badly infected leaves. Clean tools keep spores off the next bed.
Leave the ear leaf and the leaves above it alone unless they are fully dead. The plant needs those leaves to fill the ear. Stripping green leaves above the ear costs more grain than the disease would. Strip only leaves that are more dead than green. A leaf with a few lesions and mostly green tissue still feeds the ear.
Step 8: Destroy Debris and Skip the Cold Compost Pile
Bag blighted stalks, leaves, and husks for municipal waste. Home compost piles rarely sustain the heat that kills this fungus. Montana State University Extension notes that most pathogens die at 131 degrees Fahrenheit in a compost pile. A small backyard pile seldom holds that temperature through the whole mass. The cool edges stay alive, and the fungus rides the finished compost back into the beds.
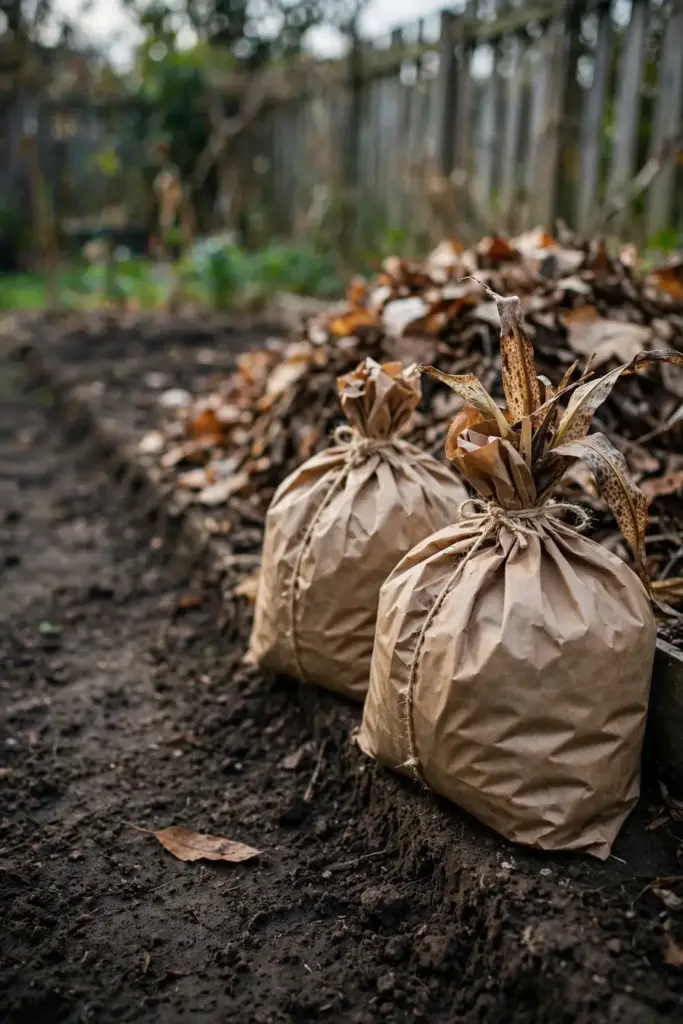
A hot pile is the only compost exception. A pile that holds 131 degrees Fahrenheit or hotter through the mass, with regular turning, kills the pathogen. Most home gardeners cannot verify that temperature across the whole pile. A compost thermometer reads one spot. The edges run cooler. When in doubt, bag the debris. Municipal composting runs hotter and longer than a backyard pile.
Never spread unfinished compost from a blighted patch onto next year’s corn bed. Finished compost from clean material is fine. Compost from a blighted patch is a gamble. The bag costs nothing. The gamble costs a season.
Step 9: Use a Garden Fungicide Only as a Last Resort
Treat fungicide as the last move, not the first. Cultural steps carry this plan. Resistant varieties, rotation, residue cleanup, spacing, and dry leaves prevent more blight than any spray cures. A spray cannot revive dead leaf tissue. A spray only protects green leaf that is still healthy. A canopy already dead through the ear leaf gains nothing from a spray.
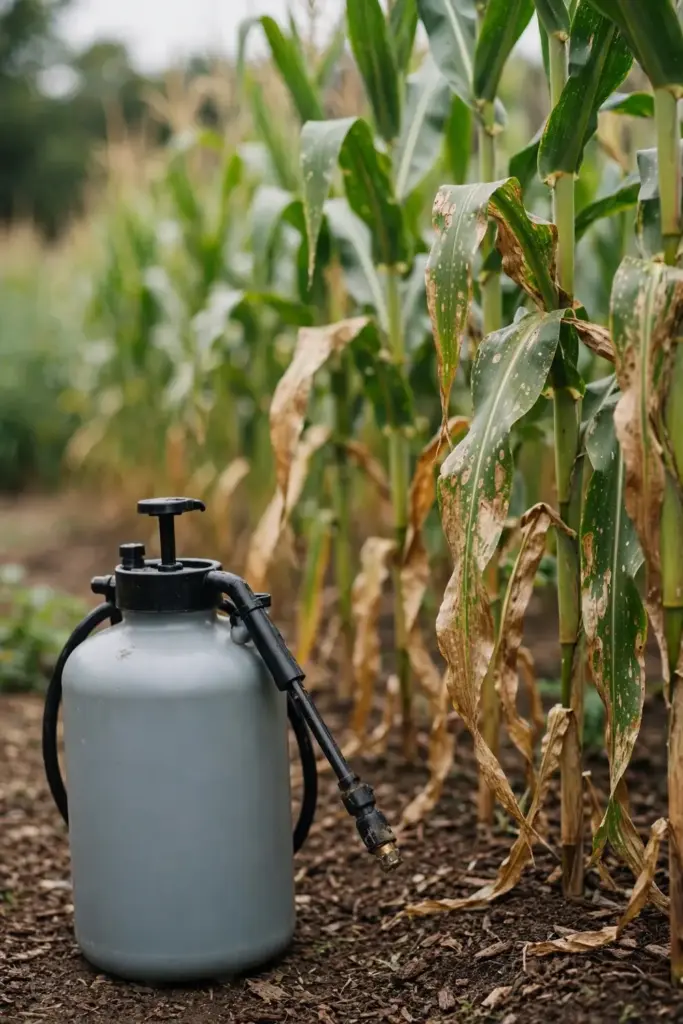
Ohio State University Extension notes that fungicide sprays suit fresh-market sweet corn and recommends starting when the first lesions appear on the leaf below the ear on half the plants. That threshold fits a backyard patch. Spraying earlier wastes product on plants that may never get sick. Spraying later protects leaves that are already dead. Walk the patch, count plants with lesions on the leaf below the ear, and spray only when half the plants cross that line.
Read the label before buying or spraying. Use only a product labeled for sweet corn and for northern corn leaf blight in a home garden. Follow the label rate, the safety gear, and the pre-harvest interval. Never mix products, never exceed the label rate, and never spray on a windy day. Stop spraying when lesions already cover the canopy. The label is the law, and the cultural steps stay the plan.
Living With Northern Corn Leaf Blight Damage
A blighted patch is not a dead patch. It is a managed patch. Keep watering at the roots. Keep stripping dead lower leaves. Harvest ears as they fill, and do not wait for a perfect ear that a half-dead plant cannot finish. Small ears from a blighted patch still taste like sweet corn. Pick them at full silk-brown and eat them fresh.
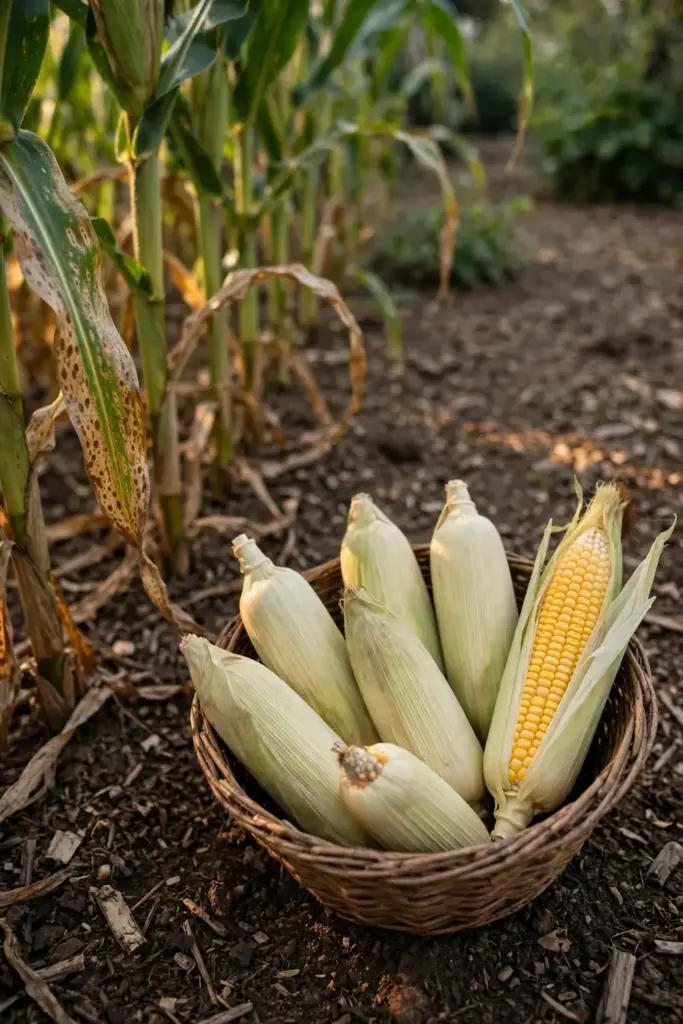
I have learned that a corn patch with this blight rewards patience more than products.
Stop three habits. Do not plant corn in the same bed next year to test it. Do not reuse its residue as mulch. Do not compost its sick stalks in a cold pile. Keep the rotation, cleanup, and watering discipline every season, because the fungus waits in residue longer than any gardener’s memory.
Keep a patch map on paper. Write down which bed held northern corn leaf blight, which resistant variety grew there, and which year. The map stops next spring from repeating this spring. A patch that held blight this year grows beans or squash next year, then tomatoes, then corn again in year four.
Frequently Asked Questions
Yes, when the ears look and smell sound. Northern corn leaf blight attacks leaves, not people. The fungus never makes ears poisonous. Peel the husk, check the ear, and discard any ear with mold, rot, or a sour smell. Wash sound ears as usual. The real loss is ear fill, not safety. A plant with dead leaves fills thin ears, so pick what ripens before the canopy fails.
It can kill leaves, and dead leaves can kill the harvest. Northern corn leaf blight rarely kills a corn plant outright. The plant keeps standing while its leaves die. The damage runs through lost leaf area. A plant with green ear leaves still fills ears, while a plant with dead leaves past the ear leaf fills poor ears or none. Early infections hurt most, because they strip leaves before the ears fill.
No. Northern corn leaf blight survives winter in corn residue on the soil surface, not in bare soil. Spores and mycelium ride out the cold on stalks, leaves, and husks left in the field. Bare soil holds no inoculum once the residue rots. That is why burying or removing residue works. Till the stalks under or bag them, and the bed starts next spring with far less fungus.
Only in a pile that truly runs hot. Montana State University Extension notes that most pathogens die at 131 degrees Fahrenheit in a compost pile. A small backyard pile seldom holds that heat through the whole mass, and the cool edges stay infectious. Bag blighted stalks for municipal waste when the pile cannot be verified hot. Cold compost returns the fungus to the beds, so the bag is the safe move.
No. A fungicide cannot revive dead leaf tissue, and it cannot clear lesions that already exist. Sprays only protect green leaf that is still healthy. Ohio State University Extension notes that fungicide sprays suit fresh-market sweet corn when lesions first reach the leaf below the ear on half the plants. Start there, follow the label, and keep the cultural steps running. The spray is a shield, not a cure.
Measure the lesions and read the thermometer. Northern corn leaf blight grows cigar-shaped lesions 1 to 6 inches long in moderate weather of 64 to 81 degrees Fahrenheit. Southern corn leaf blight grows smaller lesions of 0.25 to 1 inch in warmer weather of 68 to 90 degrees Fahrenheit. Northern lesions cross veins with tapered ends. Southern lesions run parallel-sided with brown borders. The size gap settles most calls.
Where to Go From Here
Northern corn leaf blight rewards fast identification and steady residue work. Confirm the cigar-shaped lesions and the wet-weather pattern. Make the honest triage call in Step 1. Then work the sequence: plant resistant varieties, rotate three years, clear residue, space for airflow, water at midday, scout weekly, destroy debris, and keep the spray as a last resort.
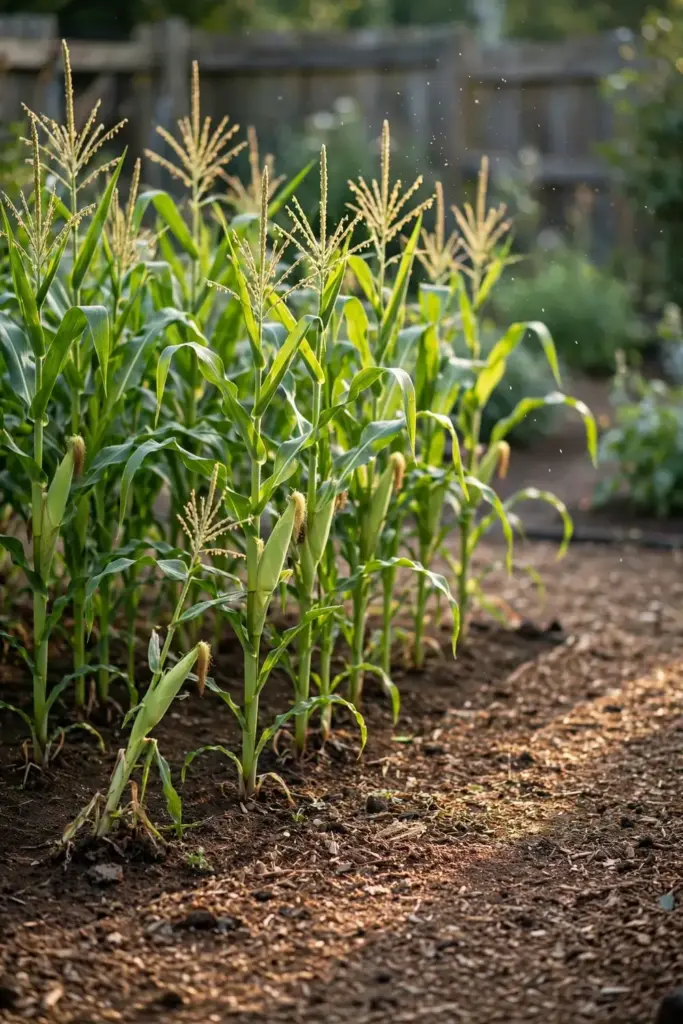
Next season, start clean. Order resistant seed, map the rotation, and clear last year’s stalks before winter. The blossom blight guide is a useful companion read if you are building a broader disease-identification habit, since it trains the same look-closely-at-symptoms approach.