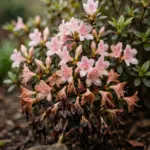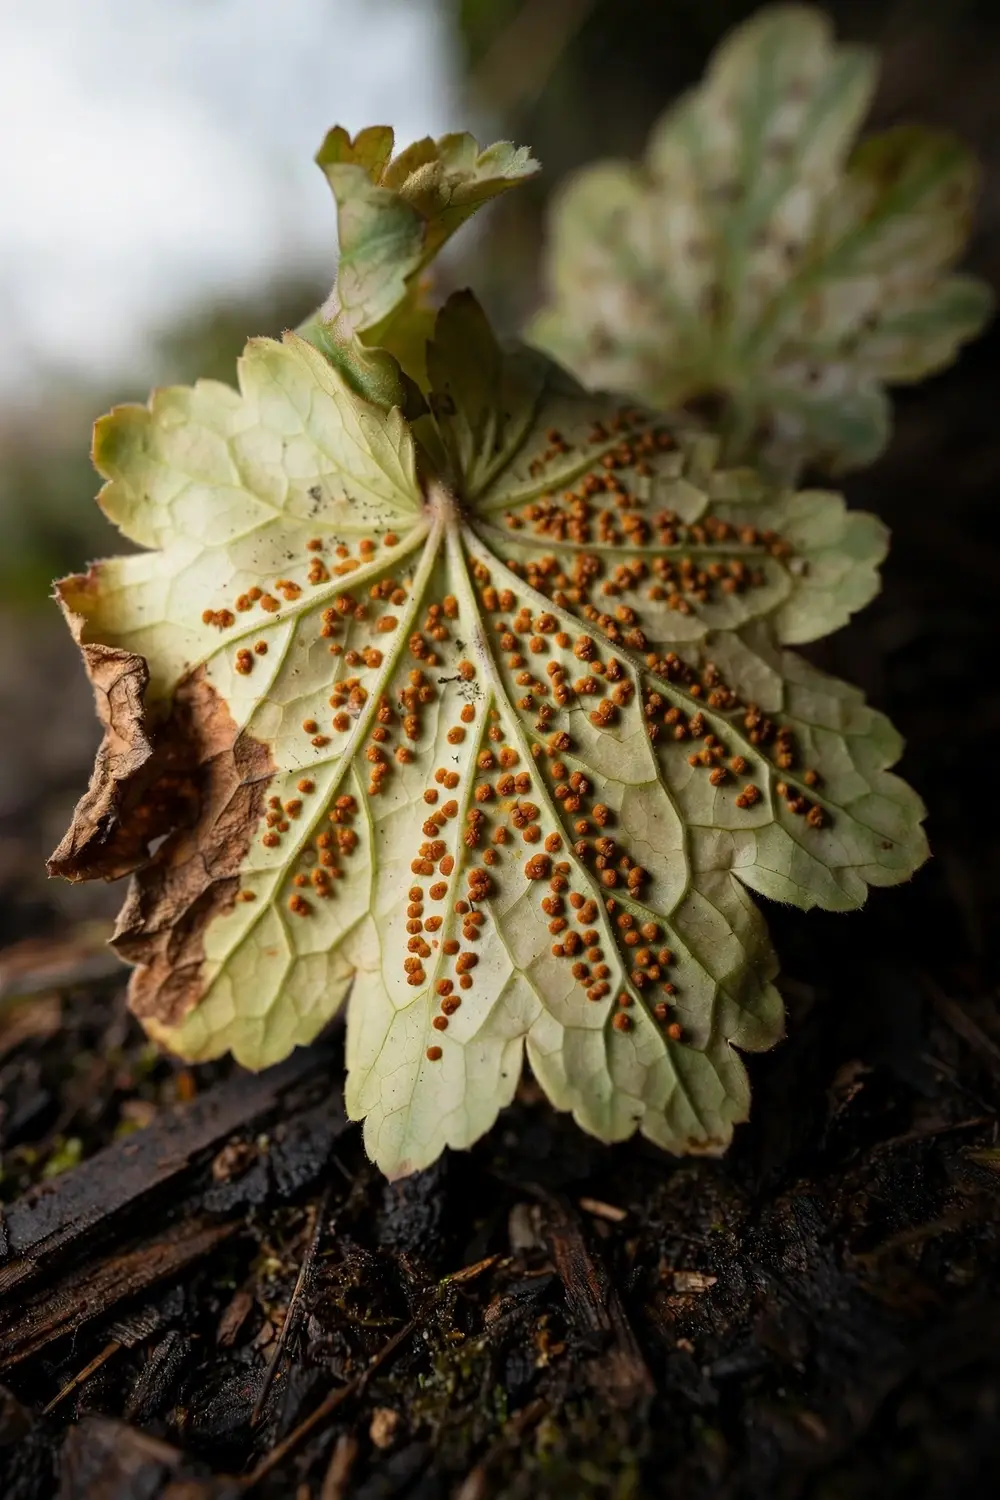

Flip a spotted coral bells leaf and look at the underside. Raised orange-brown pustules on the underside mean heuchera rust. Flat spots with no raised bumps point toward leaf spot instead, and the whole page runs 9 strategies from that check to the final call.
In my experience, the underside check settles it faster than any photo comparison. Heuchera rust rarely kills coral bells. It weakens the plant, thins the foliage, and ruins the look of leaves that should carry the bed through the season. The rest of this page is 9 strategies, from the first underside check to the call on whether a badly hit plant stays or goes.
Heuchera rust stays on coral bells and on Saxifraga. It will not jump to daylilies, hollyhocks, campanulas, or ornamental grasses in the same bed. That narrow host range shapes every strategy below. You treat the coral bells, you protect the saxifraga, and you leave the rest of the border alone.
1. What Heuchera Rust Actually Is
Heuchera rust is a fungal disease of coral bells. The pathogen is Puccinia heucherae. It is an obligate parasite, which means it feeds only on living host tissue and cannot grow on dead leaves or in bare soil. The fungus completes its whole life cycle on coral bells, with no second host needed, a pattern the Pacific Northwest handbook calls microcyclic and autoecious.
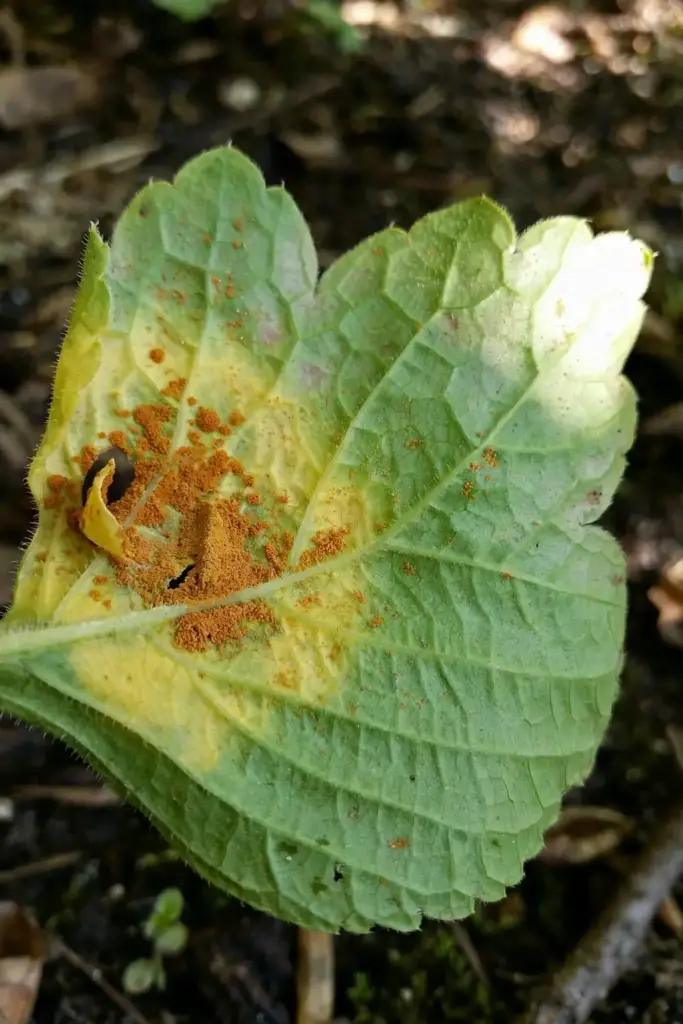
The fungus is reported only on Heuchera and Saxifraga. It will not spread to other types of perennials that catch rusts, such as daylilies, hollyhock, campanula, or ornamental grasses, according to UMass Extension notes on heuchera rust. That single fact removes most of the panic a rust diagnosis brings. A spotted coral bells clump is a local problem, not a border-wide outbreak.
Rust fungi seldom kill plants. UMass Extension states the same for heuchera rust: infection reduces plant health and vigor, flower production, and aesthetic value, while rarely killing the host. A plant with rust looks rough. It keeps growing. The decision is about how much damage you accept and how much work you put into stopping the spread, not about rescue from imminent death.
2. How to Identify Heuchera Rust on Coral Bells Leaves
Start with the upper leaf surface. Look for small spots on the top of the leaf, often yellowish at first, then brown as the tissue dies. The spots sit on the leaf blade and may cluster near the center or along the veins. One spotted leaf proves little on its own. Leaf spots, sun scorch, and pest damage all mark the upper surface.
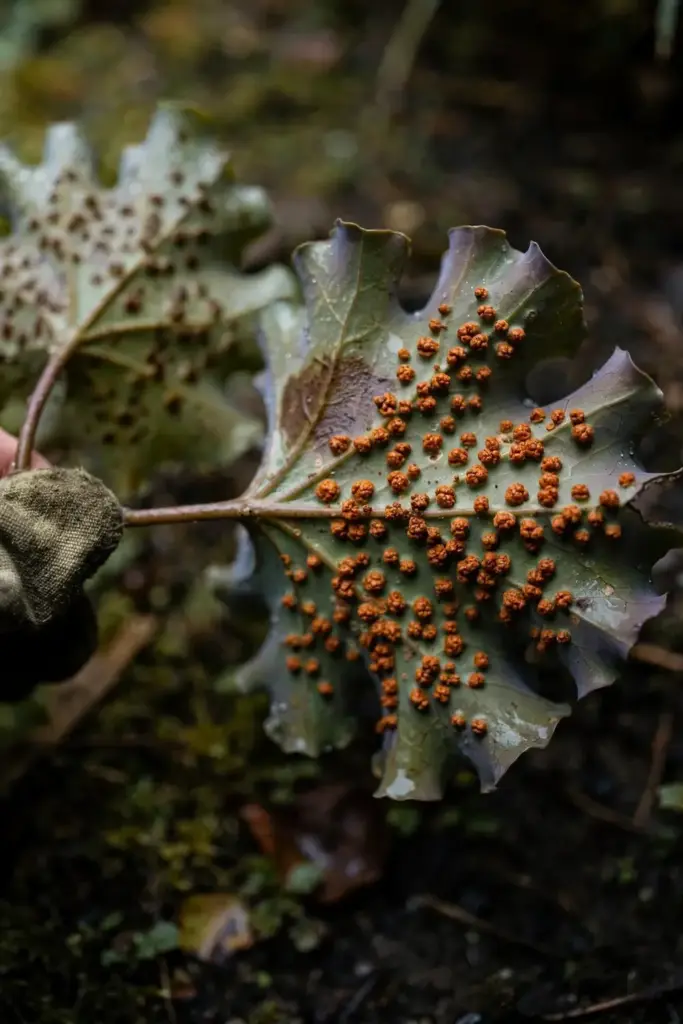
Turn the leaf over. Heuchera rust shows raised eruptions on the lower surface, orange to reddish-brown, with a powdery texture when the pustules mature. Run a fingertip across the underside. A rust pustule feels like a tiny bump. A leaf spot feels flat, because the damage sits inside the leaf tissue instead of erupting through it. That touch test works even when the color looks alike in shade.
Tap the foliage over a sheet of white paper. UMass Extension describes the field test: tapping rusted foliage over white paper can leave an orange, rust-colored smudge. The smudge is the spore mass. Leaf spot fungi do not shed an orange powder onto paper. Keep the paper test in your pocket as the tiebreaker when the underside looks ambiguous.
Check the lowest leaves first. The lower canopy holds moisture longest after rain or watering, and spores spread from plant to plant by air movement. Early infections gather where air moves least and leaves stay wet longest. When you find pustules low on the plant, inspect upward leaf by leaf. The pattern tells you how far the infection has climbed.
Pustules may turn gray in humid weather. The gray cast is a late color shift, not a second disease. Judge the diagnosis by the raised bump and the orange smudge, not by the exact shade on a damp morning. When the underside carries raised orange pustules, treat the plant as rusted and move to the strategies below.
3. Which Coral Bells and Saxifraga Get Hit Hardest
Every coral bells planting sits inside the host range. The fungus is reported on the genus Heuchera as a whole, and on Saxifraga as the second genus. No published source splits susceptibility by species or cultivar with field data. Data not available on which named cultivars resist heuchera rust. Nursery catalogs sometimes call a cultivar vigorous or disease tolerant, and those words describe general vigor only. They do not describe tested rust resistance. Treat them as sales language until a trial backs them.
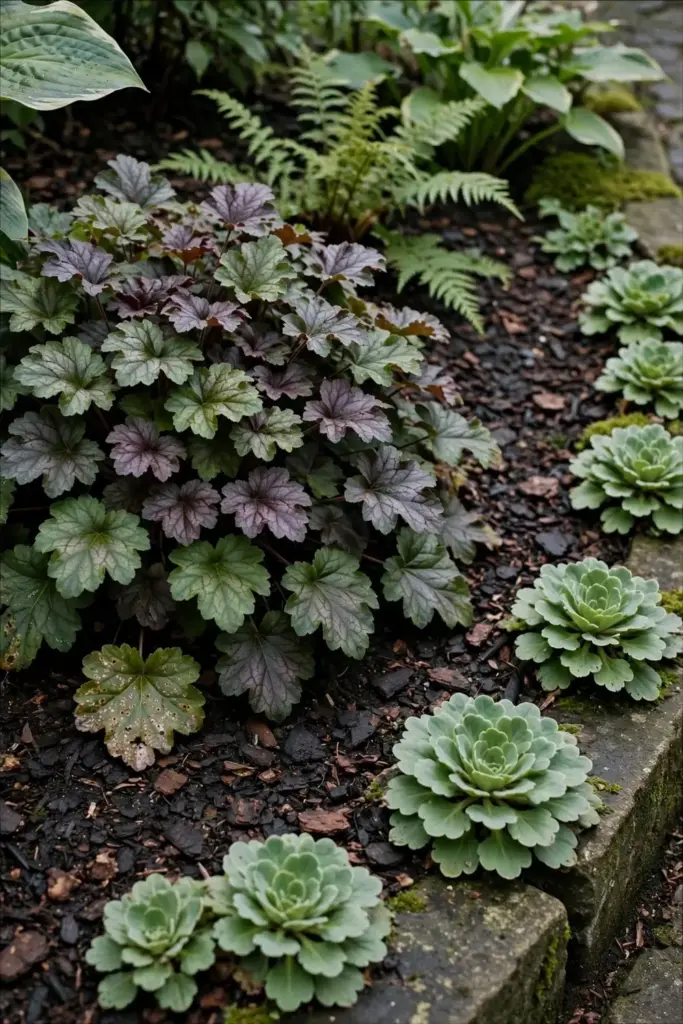
Saxifraga earns a watch slot in any bed that holds both genera. The same pathogen infects both. A rusted coral bells clump beside a saxifraga rockery can pass spores across the gap on moving air. Inspect the saxifraga when you inspect the coral bells. The two genera share the disease, and they share the cleanup routine.
Other rusts stay on their own hosts. Daylily rust comes from a different fungus and will not jump from daylilies to coral bells, just as heuchera rust will not jump the other way. Each rust keeps to its own genus. That separation matters when a bed holds several rust-prone perennials. You diagnose each genus on its own signs and you never blame one rust for spots on an unrelated plant.
Young transplants and crowded clumps show damage first. Transplants carry infection without symptoms, which is why new plants deserve a holding period before they join the bed. Crowded clumps hold damp air in the crown and slow drying after rain. A clump with open spacing and fresh growth outgrows a rust outbreak faster than a dense, shaded mound of old leaves.
4. Heuchera Rust vs Leaf Spots on Coral Bells
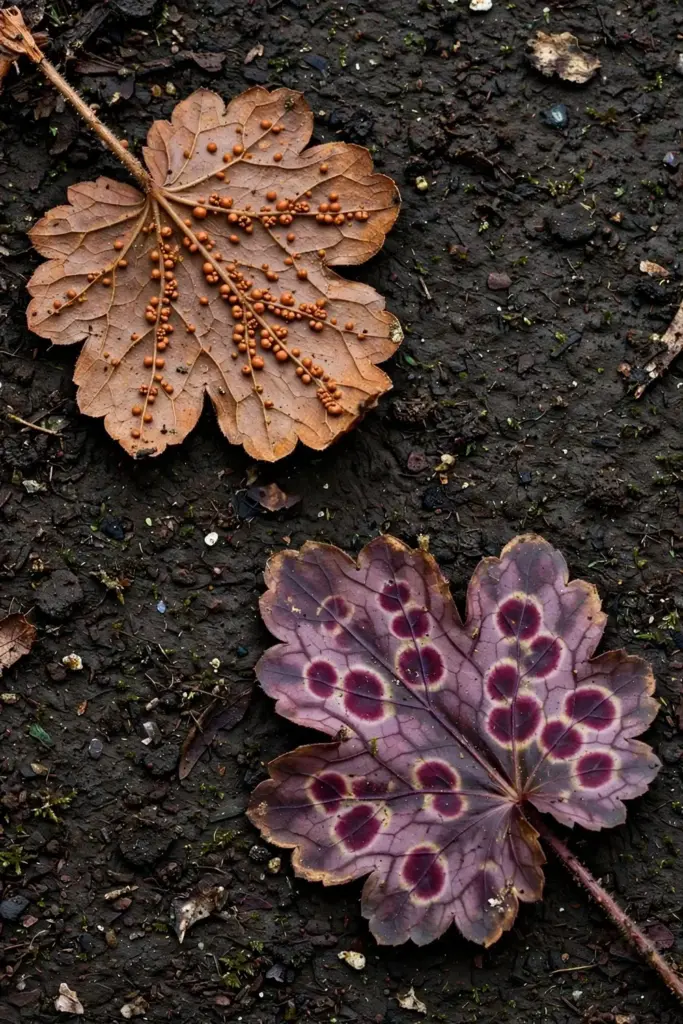
Leaf spots on coral bells come from several fungi and one bacterium. The Pacific Northwest handbook lists Mycosphaerella heucherae, Ramularia heucherae, Botrytis, and Colletotrichum among the fungi, plus the bacterium Pseudomonas. The handbook also lists Puccinia heucherae among the leaf-spot causes, because rust starts as a spot on the upper leaf. The table below sorts them by what you can see and feel in the bed.
| Sign | Heuchera Rust | Leaf Spots |
|---|---|---|
| Leaf underside | Raised orange to reddish pustules that erupt through the surface | Flat, with no raised pustules; damage sits inside the tissue |
| Leaf upper surface | Spots above each pustule, yellowish then brown | Necrotic spots that vary by cause, often with a distinct margin |
| Spot shape and color | Small spots tracking the pustules below | Colletotrichum makes roughly circular purple-red necrotic spots that cross major veins, with a chlorotic halo around each spot |
| Spot size | Pustules stay small and discrete | Colletotrichum spots start small and expand to about 0.6 cm across |
| Texture | Powdery spore mass that smudges orange on white paper | No orange powder; Botrytis may show soft decay along margins or veins |
| Pattern on the leaf | Pustules cluster where moisture lingers, often low on the plant | Pseudomonas spots are sunken and angular, then turn necrotic; Botrytis causes irregular spots or blights along leaf margins or along leaf veins |
| Spread | Airborne spores move plant to plant within the two host genera | Spores and bacteria move in water splash and on tools, hands, and debris |
The Colletotrichum row deserves a second look, because its spots look the most like rust from above. The purple-red color and the chlorotic halo catch the eye. The crossing of major veins is the tell. Rust pustules do not cross veins in a purple-red blotch. Flip the leaf. Colletotrichum leaves the underside flat. Rust raises it.
Botrytis blights follow a different path. Botrytis attacks leaf margins and veins and turns tissue soft. Rust stays discrete and powdery. Pseudomonas spots sink into the leaf and turn angular as they follow the veins. None of the three sheds orange powder onto white paper. When the paper test shows orange, the diagnosis is rust, whatever the upper surface suggests.
The same handbook notes that coral bells do best in moist, well-drained soils rich in organic matter at a pH near 7.0, with spacing for increased airflow and drying. Those growing conditions cut across every row of the table. Leaf spots of all kinds favor wet weather and overcrowding. Rust shares that weakness. Airflow and dry foliage are the common defense, and the strategies below build on them. Full details sit in the Pacific Northwest handbook page on coral bells leaf spots.
5. Why Rust Spreads Fast in Crowded Shade Beds
Rust spreads on airborne spores. UMass Extension notes that the small rust spores spread from plant to plant by air movement. A single pustule releases spores that ride the next breeze to the next leaf. The cycle needs no soil phase, no insect carrier, and no alternate host. One infected leaf in a crowded bed seeds the leaves around it.
The whole life cycle runs on the one host, a pattern the handbook calls microcyclic and autoecious. The fungus completes its life cycle on coral bells alone. That fact cuts two ways. No alternate host exists to remove, so you cannot break the cycle by pulling a second plant species. The whole cycle also stays visible, with every stage on leaves you can inspect, strip, and destroy.
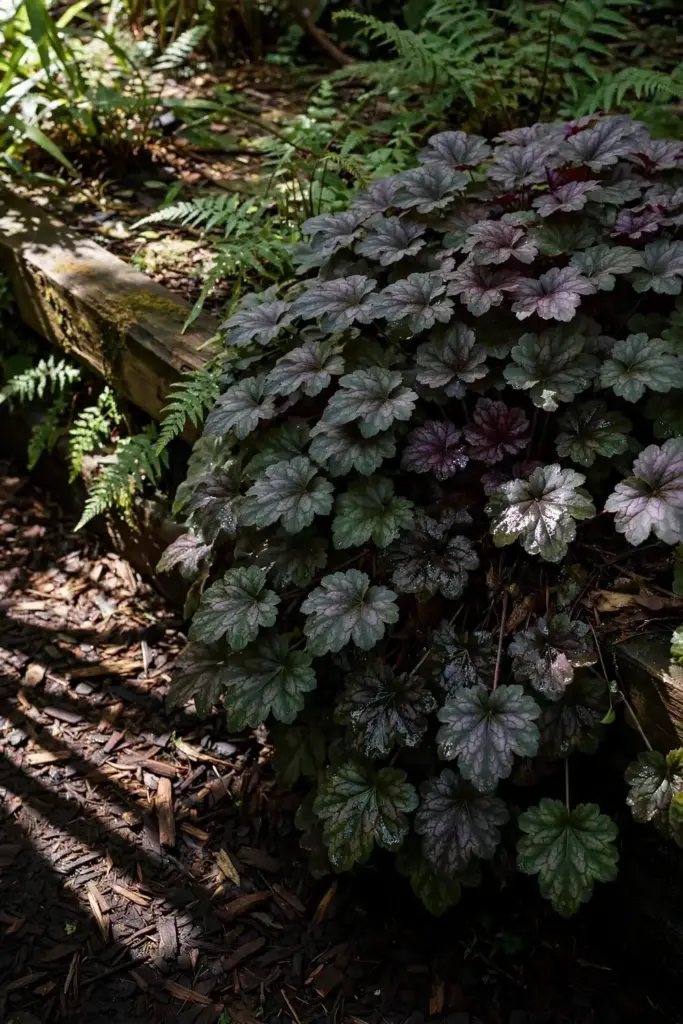
Moisture drives each new infection. Spores germinate on wet leaf surfaces. A leaf that dries fast after rain or watering offers a short window for germination. A leaf that stays wet through the night offers a long one. Crowded shade beds hold moisture longest. The lower canopy of a dense clump can stay damp hours after the top leaves dry. That damp layer is where rust builds.
The fungus feeds only on living tissue. Dead leaves on the soil do not feed it. They shelter spores through the season and into winter. UMass Extension advises careful cleanup and destruction of all crop debris at the end of the growing season. The debris rule is about inoculum, not feeding. Fallen rusted leaves carry the next outbreak. Remove them and the spring cycle starts from a smaller base.
6. What Makes Heuchera Rust Worse in a Home Garden
Overcrowding tops the list. The Pacific Northwest handbook names wet weather and overcrowding as the conditions that favor leaf spot development on coral bells. Crowded clumps trap humid air. Leaves touch. Spores cross from leaf to leaf on the shortest possible path. A bed planted for instant fullness in spring becomes a rust bed by midsummer.
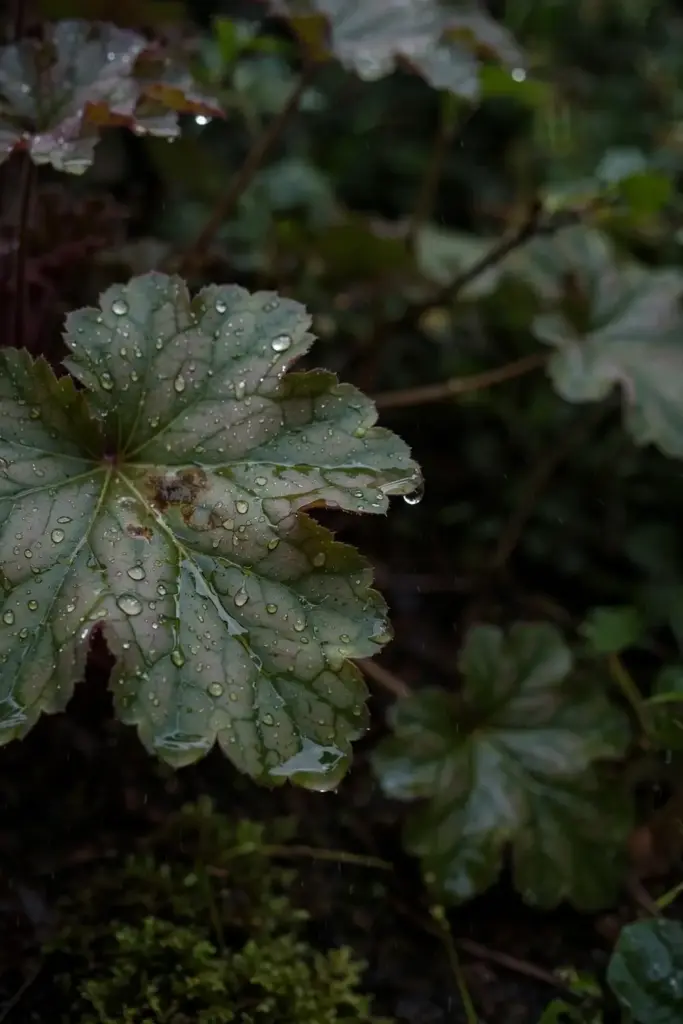
Overhead watering keeps leaves wet. Sprinklers and hose spray wet the whole canopy, top to bottom. Evening watering is worse. Leaves that go into the night wet stay wet for hours. Morning watering gives leaves the day to dry. Water at the base and the leaves stay dry from the start.
New plants carry silent infection. Rust pathogens can travel on infected but symptomless propagation material. A healthy-looking coral bells from the nursery can carry rust that shows weeks later. The holding period in the strategies below exists for this gap. Inspect every incoming plant and keep it apart from the bed until symptoms have had time to appear.
Debris left in place feeds the next season. Fallen leaves under the clump hold spores through winter. Spring cleanup that skips the leaf litter leaves the inoculum in place. Fall garden bed prep covers the full bed cleanup routine, and the debris step in the strategies below applies it to coral bells. Clear the litter, then mulch with clean material.
Deep shade slows drying without helping the plant. Coral bells grow in shade, and many shade beds mix them with hostas, ferns, and other foliage perennials, as in the fall blooming perennials palette. A bed that never sees morning sun dries slowly. Rust likes that. Give coral bells morning sun and moving air where the site allows it. The plant tolerates the light, and the leaves dry faster.
Scouting gaps let rust build unseen. Rust diseases are host specific, and the University of Connecticut scouting notes describe the field pattern: light-colored yellow spots on the upper surface with rust-colored eruptions on the lower surface. Check both surfaces. A quick glance at the tops of leaves misses the pustules underneath. The full scouting pattern sits in the UConn rust guide for ornamental plants.
7. 9 Strategies to Stop Heuchera Rust and Save Your Plants
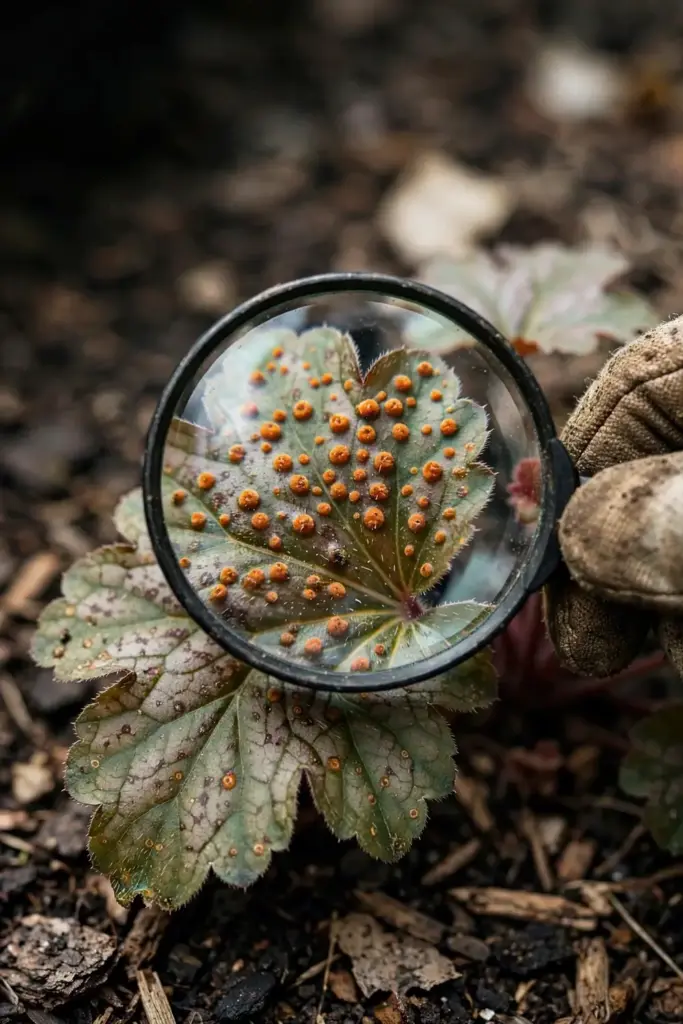
Step 1: Decide Whether Treatment Is Worth It
Light rust on a few lower leaves needs no spray. The disease rarely kills coral bells. It weakens the plant and mars the foliage. A clump with a handful of spotted lower leaves and clean new growth is a cleanup job, not a spray job. Strip the spotted leaves, fix the watering, and watch the next flush of growth.
Heavy rust changes the math. A plant with pustules across most leaves, thinning foliage, and weak new growth earns stronger action. The steps below run in order of rising effort. Cultural steps come first. Fungicide comes last, only under heavy pressure. Spending money and spray on a light infection buys little, because the plant would outgrow it with cleanup alone.
Set a threshold before you act. Treat when pustules cover a clear share of the leaves or when new growth emerges already spotted. Skip treatment when the damage stays on a few old leaves and new growth comes in clean. Write the threshold down if you track several clumps. A fixed rule beats a fresh judgment call every time you spot a pustule.
Step 2: Inspect Every New Plant and Hold It Apart for 3 Weeks
Inspect every coral bells and saxifraga before it joins the bed. Turn each leaf. Check the undersides for pustules. Look at the crown for stunted or malformed new leaves. Reject plants with active pustules. A rejected plant costs less than a rusted bed.
Hold new plants apart from established plantings for up to 3 weeks. UMass Extension gives that holding period for rust diseases, long enough for hidden infection to show symptoms. Keep the new plants in a separate spot with their own watering. Check them twice a week during the hold. A plant that stays clean through the hold enters the bed with a clear record.
Quarantine applies to divisions from friends and to sale plants alike. A free division from a rusted clump carries the same risk as a store plant. The source does not change the fungus. The holding period does not change either. Three weeks of patience costs nothing against a season of stripping leaves.
Step 3: Water at the Base in the Morning
Water the soil, not the leaves. A soaker hose, a drip line, or a slow pour at the crown keeps the canopy dry. Dry leaves give spores no germination window. Wet leaves give them hours. The tool matters less than the target. Aim at the soil.
Water early in the day, so leaves dry in daylight. Evening watering leaves the canopy wet overnight. UMass Extension advises surface watering, with early morning watering when overhead irrigation is unavoidable. Rain you cannot control. Irrigation you can, so keep it from adding a second wet period on top of rain.
Keep greenhouse humidity below 80 percent where you grow coral bells under cover. UMass Extension names that cap for greenhouse rust control. A hygrometer costs little and reads the risk directly. Open vents and run fans when the reading climbs. Air movement stops moisture from condensing on foliage, which is the same goal as base watering outdoors.
Fungal leaf spots in general yield to dry foliage, as the Cornell greenhouse disease guidelines note for fungal leaf spots. The rule covers rust and the leaf-spot group in the differential table at once. Dry leaves are the cheapest fungicide a home gardener owns.
Step 4: Space Plants for Airflow and Dry Foliage
Give each clump room to dry. Crowded coral bells hold humid air in the crown. Spaced plants catch moving air between clumps and dry after rain. The Pacific Northwest handbook lists spacing for increased airflow and drying as the first cultural control for coral bells leaf spots. Airflow is a planting decision, not a spray decision.
Thin the bed when clumps touch. Move a division to a new spot or pot it for a friend. Keep the crown open so morning sun reaches the lower leaves. A clump with an open center dries faster than a tight mound. The plant loses no vigor from the extra space. It gains dry leaves.
Set the soil right at planting. The same handbook notes coral bells do best in moist, well-drained soils rich in organic matter at a pH near 7.0. Soil that drains keeps crowns from sitting wet. Organic matter holds moisture in the root zone without waterlogging it. A pH near 7.0 suits the plant and matches the handbook guidance. Test the soil when you plant, not after rust appears.
Step 5: Strip Infected Leaves at the First Sign
Remove rusted leaves the day you find them, because UMass Extension advises frequent removal of all rust-infected leaves and badly infected plants. Each stripped leaf takes its pustules out of the bed. Each day of delay lets those pustules release more spores onto the leaves below. Speed is the control.
Cut the leaf at the base of its stem. Bag the leaves as you go. Do not drop them on the soil between plants. Work from the healthiest plants toward the worst, so tools and hands carry fewer spores to clean plants. Disinfect shears between clumps when you strip several plants in one session. A bucket of soapy water and a rag handle the job.
Burning is the safest disposal. A sealed bag in the bin is the fallback. Never compost rusted leaves. Sources disagree on bin versus burn, and the disagreement is honest: both keep spores out of the compost pile, while burning destroys them outright. Home compost piles do not run hot enough to kill rust spores. The compost pile is the one disposal route every source rules out.
Step 6: Cut Old Leaves in Spring and Clear Fall Debris
Cut old leaves in spring before new growth fills the clump. Old leaves carry the wintered spores. Removing them before the new flush emerges takes the inoculum out ahead of the season. New leaves emerge into clean air instead of pushing through a layer of rusted foliage.
Clear debris at the end of the growing season. UMass Extension advises careful cleanup and destruction of all crop debris when the season ends. Rake the leaf litter from under each clump. Bag it with the stripped leaves. The bed enters winter clean. Spring cleanup then removes whatever the wind added over winter.
Divide congested clumps when the center crowds. Division opens the crown and replaces old growth with fresh growth. Fresh growth usually comes in clean when the debris and the old leaves are gone. Divide in spring or fall, when the plant recovers fast. Keep divisions from rusted clumps in the holding routine from Step 2 until they prove clean.
Step 7: Divide Congested Clumps for Fresh Growth
Dig a crowded clump and split it into sections with healthy roots. Each section gets its own space, its own airflow, and a fresh start. The old dense center, where moisture lingered longest, disappears. The divisions carry the plant forward without the crowded conditions that fed the rust.
Replant divisions with the crown at soil level. Burying the crown invites rot. Setting it high dries the roots. Soil level keeps the crown firm and the leaves above the wet soil line. Water the divisions at the base and keep them damp until roots settle. New roots anchor the plant within weeks in good soil.
Watch the divisions through the first flush of new growth, since fresh growth usually comes in clean after division and cleanup. If pustules appear on the new leaves, strip them and keep the divisions apart from clean plants. Division resets the plant. It does not cure rust. The reset works when the debris, the old leaves, and the watering all change with it.
Step 8: Reach for Fungicide Only Under Heavy Pressure
Reserve fungicide for heavy pressure. Cultural steps handle light and moderate rust. A spray program earns its place when pustules cover most of the plant, when new growth emerges spotted, or when a valuable planting faces repeated outbreaks. Spraying a lightly spotted clump wastes product and selects for resistant fungi.
Apply on a protective basis, following label instructions. UMass Extension notes that fungicides work on a protective basis and should be applied according to label instructions. A protective spray shields clean new growth. It does not cure spots that already exist. Time the first spray to cover the new flush, not to chase old pustules. Reapply on the label schedule while pressure lasts.
Rotate between chemical classes to prevent fungicide resistance from developing, a rule UMass Extension gives for rust control. Repeated use of one class selects resistant strains. The label names the chemical class. Alternate classes across applications and keep a note of what you used. A short written record beats memory across a season.
Skip the commercial production rates in handbook tables. Handbook rates written per 100 gallons suit commercial growers, not a home sprayer. The home default is the consumer label on the product you buy, read in full, for the crop and the disease named. Never mix a stronger batch to make up for a missed spray. The label rate is the rate that was tested.
Step 9: Remove Badly Infected Plants Instead of Nursing Them
Pull a plant that stays heavily infected after cleanup and one spray cycle. UMass Extension advises removal of badly infected plants alongside leaf stripping. A plant that cannot outgrow rust with cultural help and one spray cycle is a spore source for the whole bed. Keeping it risks every clean clump nearby.
Judge the plant by its new growth. New leaves that emerge spotted after stripping and spacing show the infection runs deep in the crown. A crown that keeps producing spotted leaves will not turn clean on its own. Removal ends the cycle for that spot. Replace the plant with a clean, held-apart division or a new nursery plant that has passed the holding period.
Disinfect the spot after removal. Clear the leaf litter from the planting hole. Work the soil lightly and let it dry before replanting. Do not set the replacement in the same week if the bed stays wet. A short pause breaks the spore chain and gives the replacement clean ground.
8. Living With Existing Rust Damage
Spotted leaves never heal. A rust pustule leaves a mark on the leaf even after the spores wash away. Fungicide protects new growth. It does not erase old spots. Accept the marks on old leaves and judge the plant by its new growth. New clean leaves mean the plan works. Old spotted leaves mean the plan started late.
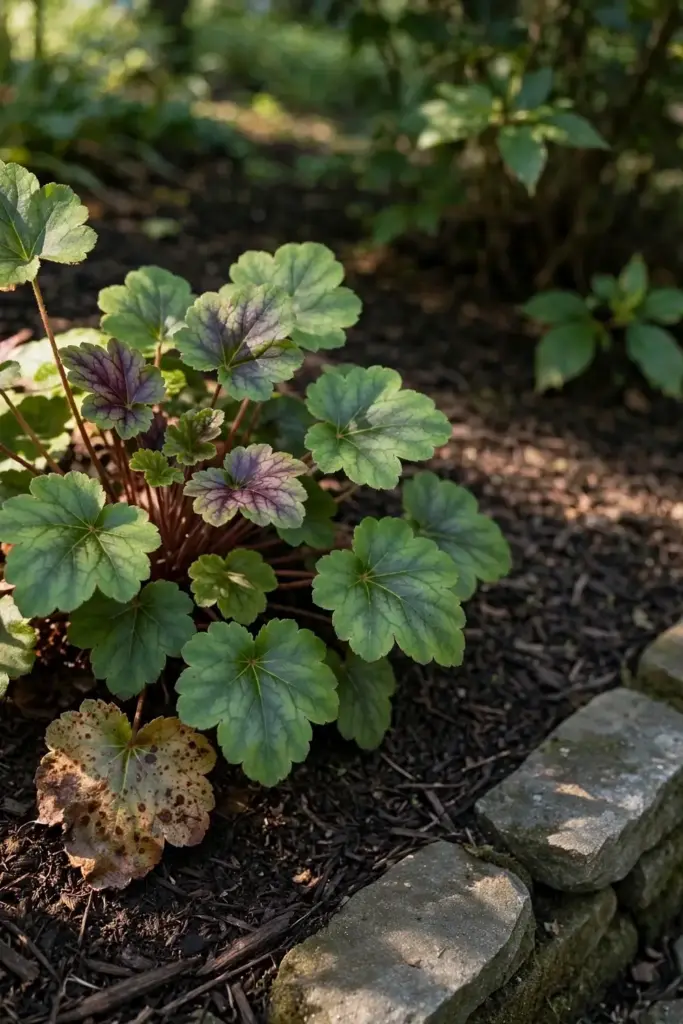
Keep a spotted plant when the crown stays vigorous, since coral bells push new leaves through the season and each new flush replaces the stripped foliage. A plant with a firm crown, steady new leaves, and a shrinking share of spotted foliage is recovering. Let it recover. The bed looks thinner for a few weeks. The plant comes back.
Cut the plant back hard when the foliage is mostly spotted. Remove the old leaves, clear the debris, and let the crown regrow. The crown holds the plant. The leaves are replaceable. A hard cut in spring gives the fastest regrowth. A hard cut in midsummer still works when the crown stays firm and the soil stays damp at the base.
Tolerate a few spots on a plant that otherwise thrives. Perfection is not the goal. A clump with a few pustules on lower leaves and clean upper growth is a healthy plant with a manageable problem. Strip the worst leaves, keep the watering clean, and check weekly. The rust stays a background task instead of a season-long fight.
Replace the plant when the crown fails. A soft crown, stunted new leaves, and repeated spotting after cleanup mark a plant that will not recover. Removal protects the bed. The slot it leaves takes a clean division or a new plant that has passed the holding period. The bed ends the season stronger than a bed that nursed a failing plant all year.
9. Frequently Asked Questions About Heuchera Rust
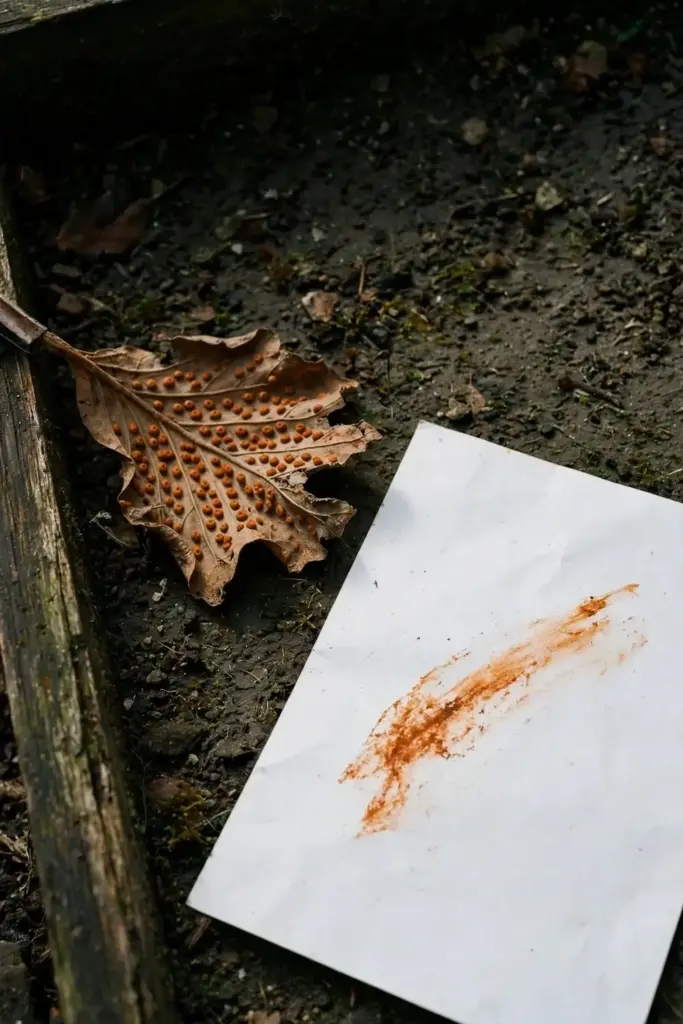
Heuchera rust rarely kills coral bells. The fungus weakens the plant, thins the foliage, and cuts flower production. A heavily infected plant looks rough and grows slowly. The crown usually survives and pushes new leaves. Remove badly infected plants only when new growth keeps emerging spotted after cleanup and one spray cycle.
Heuchera rust spreads only to coral bells and Saxifraga. It will not infect daylilies, hollyhocks, campanulas, ornamental grasses, or other rust-prone perennials. Each rust fungus keeps to its own host genus. A rusted coral bells clump beside healthy daylilies is a coral bells problem alone. Inspect the saxifraga, and leave the rest of the border alone.
Never compost rusted coral bells leaves. Home compost piles do not run hot enough to kill rust spores. Burning destroys the spores outright and is the safest disposal. A sealed bag in the bin is the fallback when burning is not allowed. Bag the leaves at stripping time so spores never reach the soil or the compost pile.
No. Start with stripping, spacing, base watering, and debris cleanup. Fungicide belongs under heavy pressure, when pustules cover most of the plant or new growth emerges spotted. Sprays work on a protective basis, shielding clean new growth rather than curing old spots. Follow the label, rotate chemical classes, and stop when pressure drops.
Flip the leaf and feel the underside. Heuchera rust raises orange-brown pustules that feel like tiny bumps and shed an orange smudge onto white paper. Leaf spots stay flat, with no raised bumps and no orange powder. Colletotrichum spots are purple-red with a chlorotic halo. Botrytis blights follow margins and veins. Pseudomonas spots sink and turn angular.
10. Where to Go From Here
Walk to the coral bells bed with a sheet of white paper. Flip the lowest leaves. Feel the undersides. Tap a suspect leaf over the paper and look for the orange smudge. The check takes a minute and it settles the diagnosis.
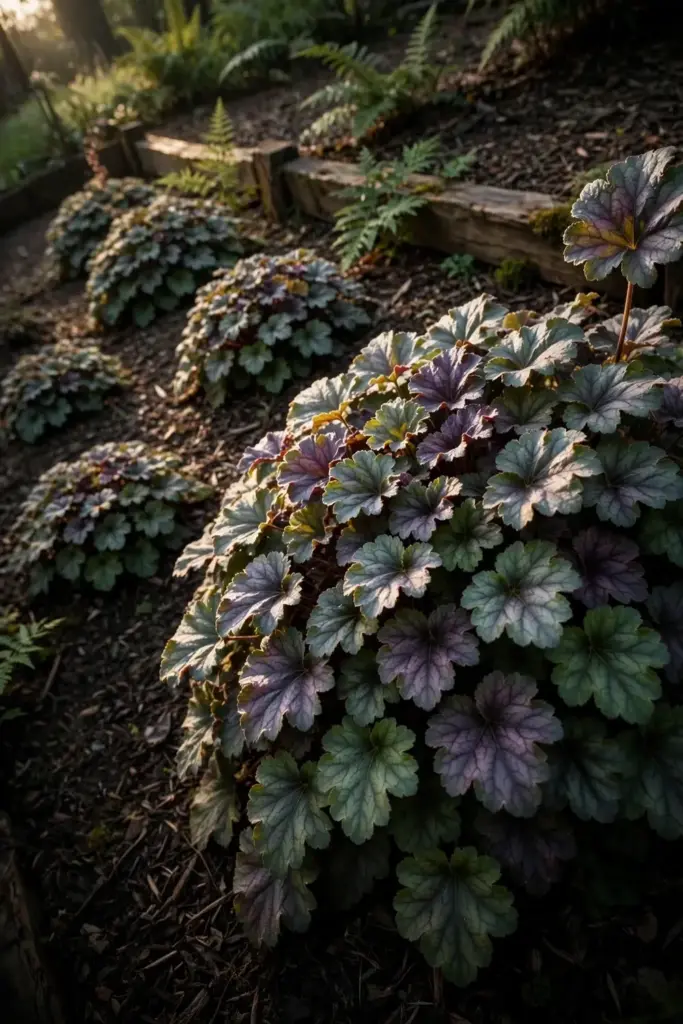
Then run the strategies in order: strip the spotted leaves, fix the watering, space the clumps, and clear the debris. Hold new plants apart for 3 weeks before they join the bed. Spray only when the pressure earns it. The plant does the rest, one clean flush of new leaves at a time.