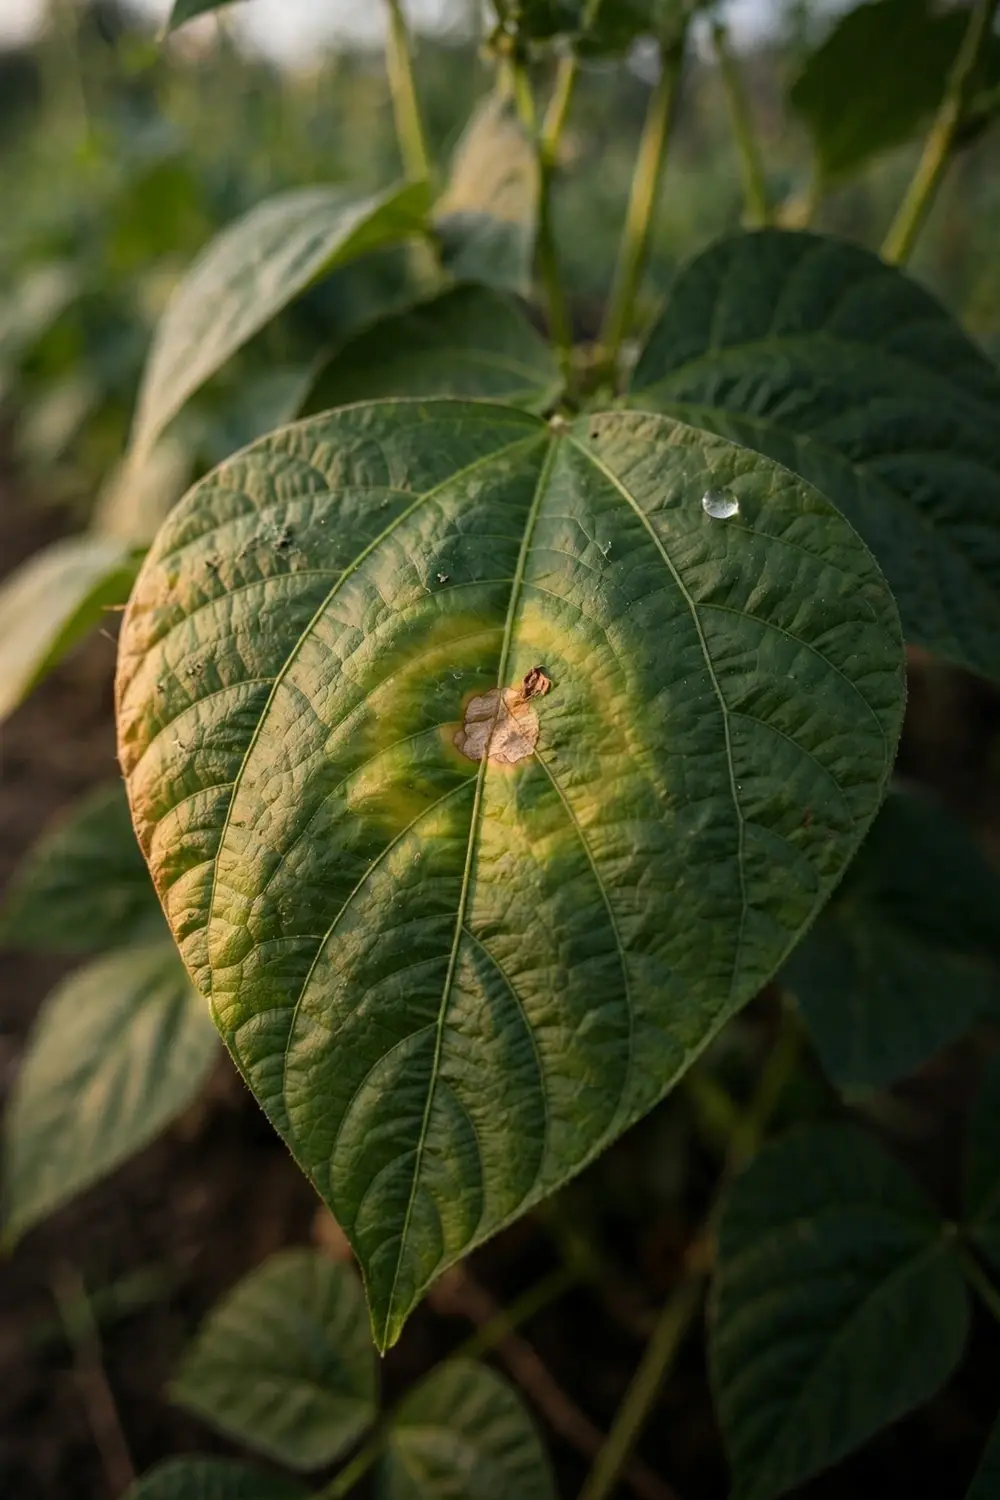

Halo blight on beans is a bacterial disease that marks bean leaves with small dead spots ringed by broad yellow-green halos. The halo is the calling card. These 9 strategies walk you through telling halo blight apart from common bacterial blight and bacterial brown spot, then protecting the harvest that remains. The disease favors cool, wet weather, and it travels on seed, splash, tools, and wet hands through the planting.
I have learned to check the undersides of young leaves first. The first water-soaked spots show there.
Halo blight rarely kills a bean planting outright. It weakens plants, stains pods, and shrivels seed. A light attack costs little more than a few spotted leaves. A heavy attack, left alone through a wet stretch, thins the canopy and cuts the picking season short. The plan below starts with identification, because the control you choose depends on which bacterium you face. Then it moves to seed, spacing, water, cleanup, and copper, in the order that gives the most protection for the least work.
1. What Halo Blight on Beans Actually Is
Halo blight on beans is a bacterial disease of snap beans, dry beans, lima beans, and runner beans. The pathogen is Pseudomonas syringae pv. phaseolicola. Recent taxonomic revisions place the same organism under the name Pseudomonas savastanoi pv. phaseolicola. The two names describe one bacterium, and seed packets, fact sheets, and diagnostic labs may use either one. The common name stays the same. Halo blight is the disease. The bacterium is the cause.
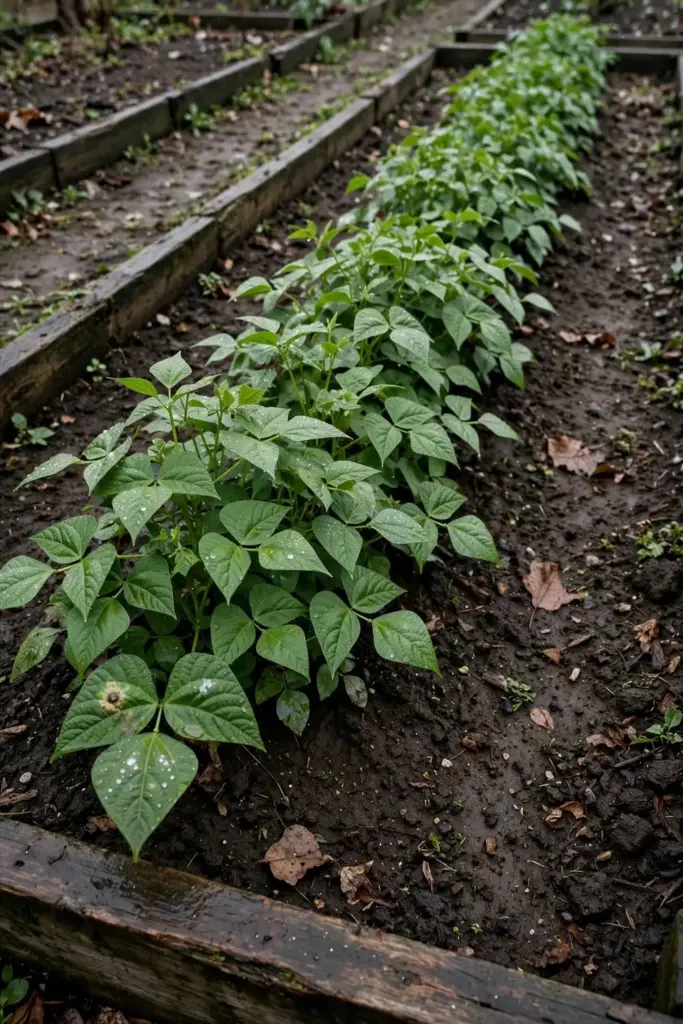
The bacterium lives on bean seed, in crop debris, and on plant surfaces. It enters through natural openings in the leaf and through wounds left by hail, wind-torn foliage, insects, and rough handling. Once inside, it multiplies in the leaf tissue and releases phaseolotoxin, the compound that draws the halo around each spot. The toxin outruns the bacteria, so the yellow ring reaches well past the dead center. That spread is the reason a leaf can look badly damaged while the actual infection stays small.
Halo blight belongs to a trio of bacterial diseases that gardeners meet on beans. Common bacterial blight and bacterial brown spot share the same wet-weather habits and the same seedborne route into the garden. They differ in the pathogen, in the weather each prefers, and in the shape of the spots they leave. The differential table in section 5 lines up those differences. Field identification is presumptive, and a diagnostic lab can confirm which bacterium is present when the symptoms blur together, most of all when hot weather has shrunk the halos.
2. How to Identify Halo Blight on Bean Leaves
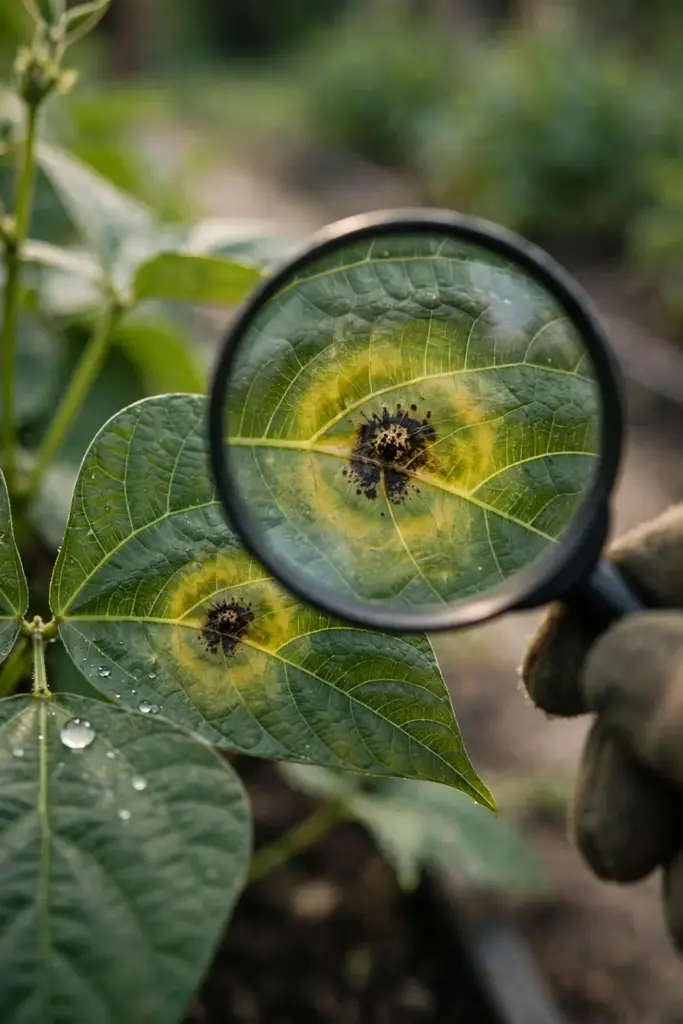
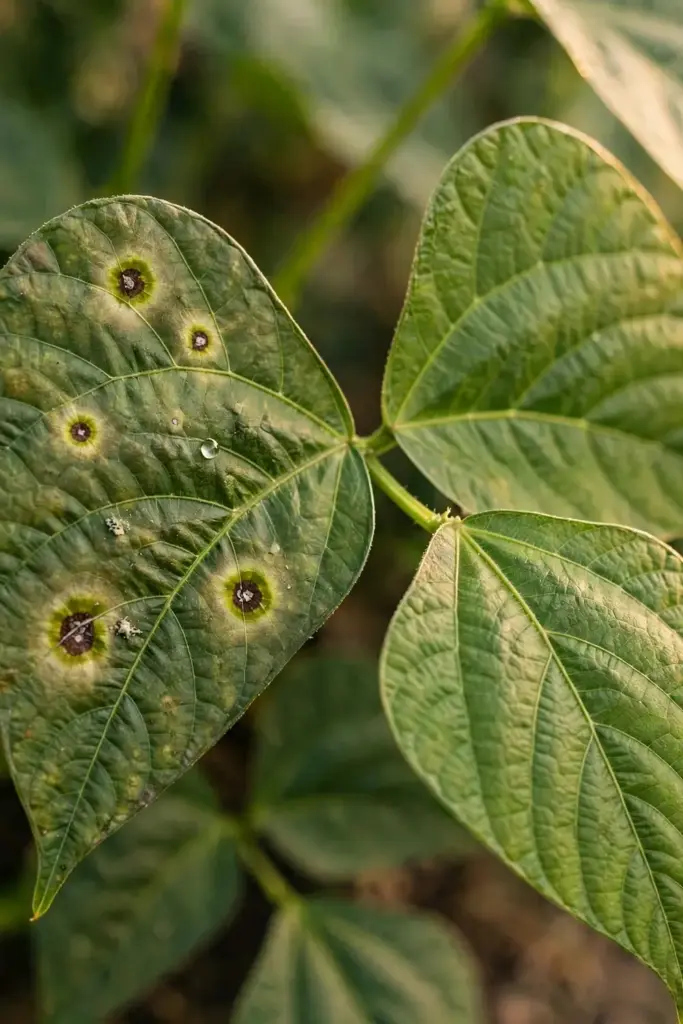
Halo blight on bean leaves starts as small, greasy, water-soaked spots. The spots show first on young leaflets, and they are easiest to see from the underside of the leaf. Each spot turns tan, then brown, as the tissue in the center dies. Around that dead center, a broad halo of yellow-green tissue spreads outward. The halo looks watery at the edge and fades into the healthy green beyond it. The dead center stays small while the halo grows wide. That proportion, a pin-prick center inside a wide ring, is the field mark that separates halo blight from its look-alikes.
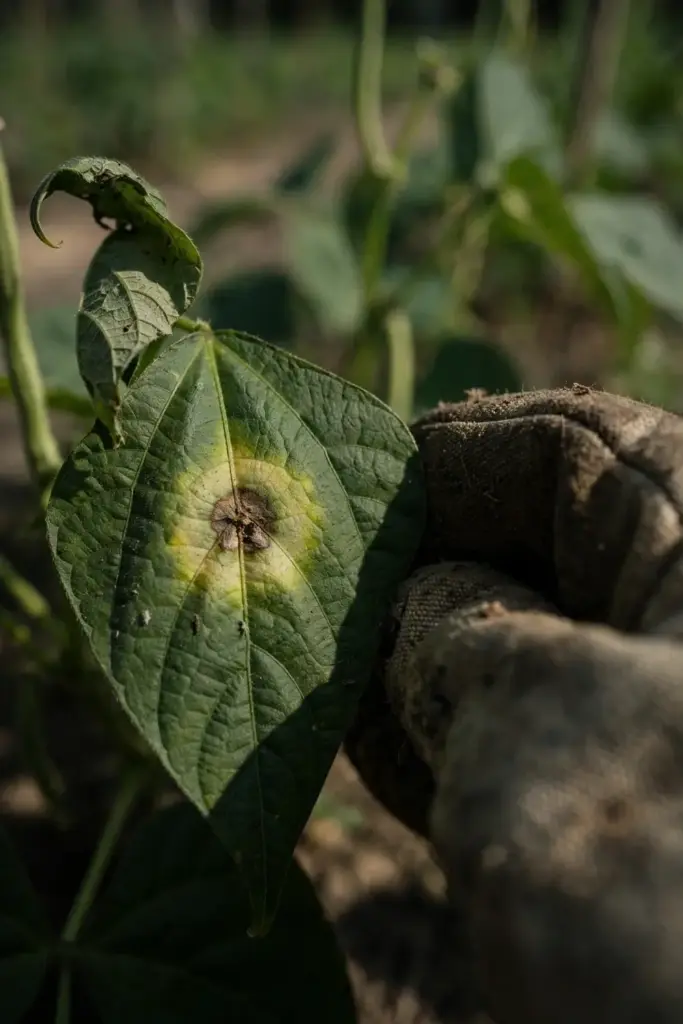
Young foliage carries the first symptoms. Older leaves may stay clean even when the young growth at the shoot tips shows spots. As the disease advances, spots can merge, and a heavily infected leaflet turns yellow across much of its surface. The leaf may drop early. A plant that loses leaf after leaf puts less energy into pods, and the harvest window shortens.
Check the undersides on a dry morning, when the light slants across the leaf surface. Water-soaked spots catch the light differently than healthy tissue. They look darker and slightly translucent, like a grease stain on paper. The halo may show on the upper surface first in some plantings, so look at both sides of any suspect leaflet. Compare the suspect leaf with a healthy leaf from the same plant. The contrast between the sharp dead center and the soft halo edge stands out once you have seen it once.
3. How to Identify Halo Blight on Bean Pods, Stems, and Seeds
Halo blight on bean pods starts as small, circular, water-soaked spots on the pod wall. Streaks can run along the pod sutures, the seams where the pod will split. In damp weather, a light cream to silver colored ooze may sit on the spots. The ooze is bacterial slime, and it dries to a thin film. Pods that carry many spots stay small, with seed inside that may wrinkle and discolor, while pods with only one or two spots often finish filling yet still carry the bacterium into storage and into next season.
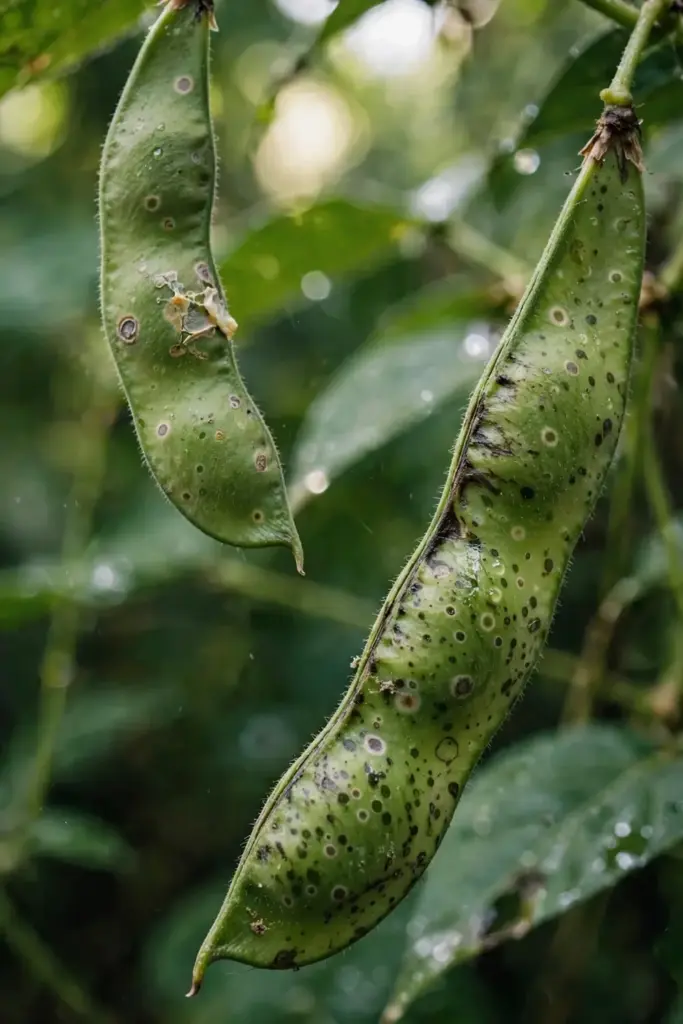
Stems and petioles show less of the disease than leaves and pods. Streaks may run along the stem when the infection reaches the vascular tissue. The more telling stem symptom is what happens above the infection. New growth comes out curled and yellowed, without spots, when the disease turns systemic. Systemic infection is uncommon. When it happens, young leaflets curl, yellow, and die without the familiar haloed spots. That pattern looks like a nutrient problem at first glance. The difference is speed. A nutrient shortage develops over weeks across the whole planting. Systemic halo blight hits fast, on scattered plants, after wet weather.
Seed tells the story at harvest. Healthy bean seed dries plump, smooth, and evenly colored for its variety. Seed from an infected pod may come out wrinkled, with yellow patches on the coat. Some infected seed looks normal. Appearance alone cannot clear a batch of home-saved seed. That uncertainty is the reason the seed rules in the steps below are strict. Once the bacterium rides inside the seed, no wash or soak at home removes it.
4. Which Beans Get Hit Hardest by Halo Blight
Halo blight on beans hits common beans hardest in home gardens, and common beans include the snap beans and dry beans most gardeners grow. Bush snap beans, pole snap beans, and dry shell beans all belong to Phaseolus vulgaris, and all of them can host the disease. Within that group, susceptibility varies by variety. Some varieties hold up under pressure that spots a neighbor row badly. Others spot early and keep spotting through every wet spell. Variety choice is one of the few controls that acts before the season starts, and the steps below return to it.
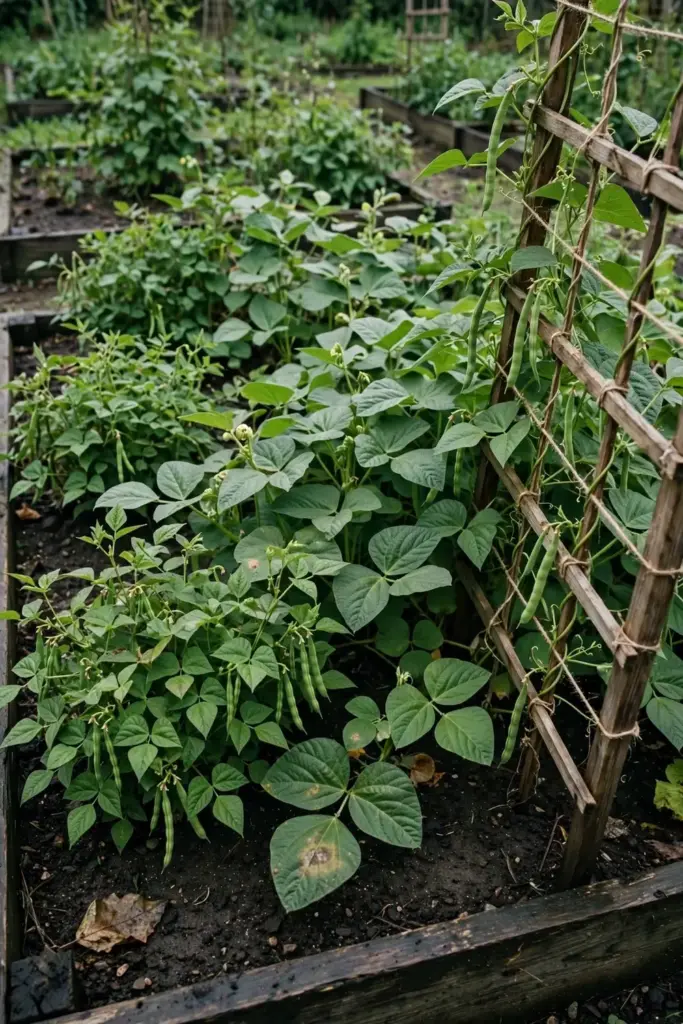
Lima beans carry halo blight too. Runner beans carry it as well. The symptoms read the same on all of them: small dead centers, broad halos, water-soaked pod spots. Tepary beans, adzuki beans, mung beans, and soybeans can host the pathogen in research settings, but home gardeners growing snap, dry, lima, or runner beans face the practical risk. The management below is written for those four.
Dry beans deserve a second look, because the disease hits them twice. First it cuts the leaf canopy that fills the pods. Then it stains and shrivels the seed that is the harvest itself. A snap bean grower can pick around a few spotted pods and still eat well. A dry bean grower loses the crop in the pod. Light red kidney types have shown systemic infection more readily than some other dry bean classes, so dry bean growers should scout young growth closely after wet weather and pull suspect plants early rather than waiting to see how the season plays out.
5. Halo Blight vs Common Bacterial Blight vs Bacterial Brown Spot
Halo blight, common bacterial blight, and bacterial brown spot form the trio of bacterial diseases on beans. All three start as water-soaked spots. All three spread by splash, tools, and seed. All three respond to the same cultural controls. The differences sit in the spot shape, the halo, the weather, and the pathogen. Read the table, then confirm against the living plant. Pods alone will not settle the question. Halo blight and common bacterial blight produce pod symptoms that look very much alike. Leaves plus weather carry the field identification.
| Feature | Halo Blight | Common Bacterial Blight | Bacterial Brown Spot |
|---|---|---|---|
| Pathogen | Pseudomonas syringae pv. phaseolicola | Xanthomonas phaseoli pv. phaseoli | Pseudomonas syringae pv. syringae |
| Leaf spot center | Tiny dead center that stays small | Light brown lesion that keeps growing | Necrotic brown spot, 3 to 8 mm across |
| Halo or margin | Broad, round, greenish-yellow halo | Narrow, bright yellow border | Narrow, diffuse yellow margin |
| Pod symptoms | Water-soaked spots, streaks along sutures, creamy to silver ooze | Reddish-brown lesions, yellow ooze in humid weather | Sunken brown spots, pods may bend at the infection site |
| Seed damage | Wrinkled, discolored seed | Seed may abort, shrivel, and discolor | Seed may discolor and carry the bacterium |
| Weather preference | Cool and wet | Warm and wet | Cool and wet |
| Field ID cue | Wide halo around a pin-prick center | Large lesion with a bright rim | Brown spot that may tear out, leaving a hole |
The names of the common blight pathogen need a note, because older fact sheets use older names. Cornell University’s guide to the three bacterial diseases of beans gives the common blight lesions as light brown with distinct, bright yellow margins that enlarge to 10 mm or greater, while brown spot lesions run 3 to 8 mm across with a narrow, diffuse yellow margin. Cornell still prints the older name Xanthomonas campestris pv. phaseoli. Later revisions moved the same organism to Xanthomonas axonopodis pv. phaseoli, and the current name is Xanthomonas phaseoli pv. phaseoli. The fuscous strains, which darken culture medium, now sit under Xanthomonas citri pv. fuscans. One disease, several historical labels. The common name, common bacterial blight, has not changed.
Temperature sorts the trio when the spots look alike. Halo blight favors cool weather. Common bacterial blight favors warm weather. Brown spot sits between them, favoring cool weather like halo blight but with a different spot shape. When a hot spell erases the halos, halo blight starts to resemble brown spot, and leaf shape alone stops settling the question. That is the moment to send a sample to a diagnostic lab rather than guessing from memory.
For the wider family of bacterial blights beyond beans, the general bacterial blight guide covers the shared habits of these pathogens across the garden. This article stays with beans, and with the three-way comparison above.
6. Why Phaseolotoxin Matters So Much
Phaseolotoxin is the compound that makes halo blight look like halo blight. The bacterium releases the toxin at the infection site. The toxin moves through the leaf tissue beyond the bacteria, and the halo marks the ground the toxin has covered. The dead center shows where the bacteria sit. The halo shows where the toxin has traveled. No other bean disease pairs a small dead center with such a wide toxin ring, and that pairing is the reason the halo is diagnostic.
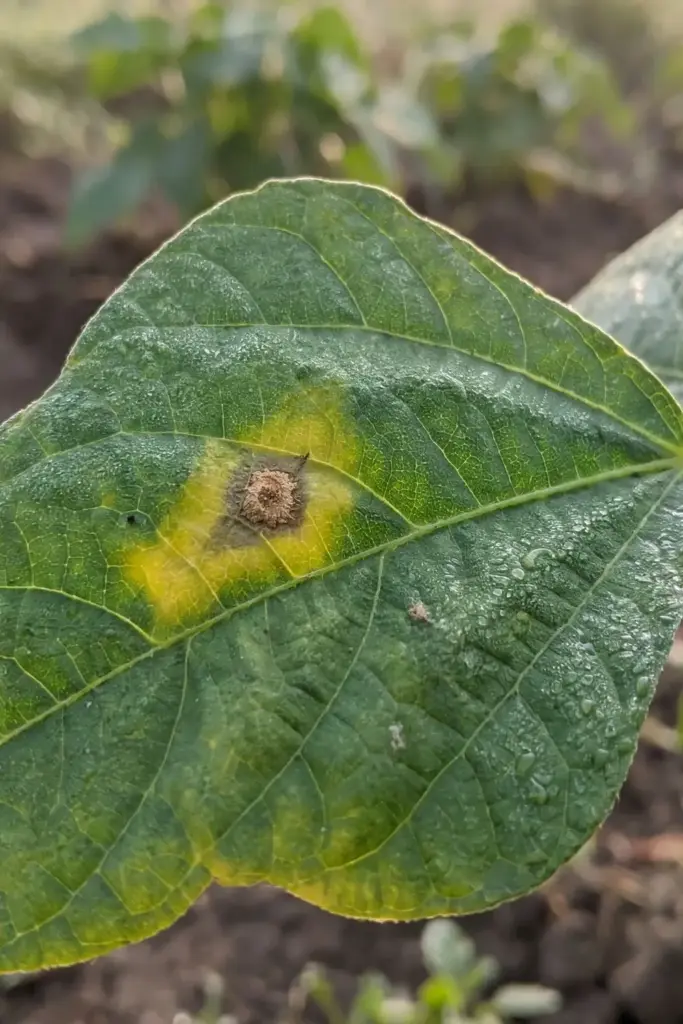
Temperature governs the toxin. Maximum growth and phaseolotoxin production sit at 70 to 72 degrees Fahrenheit, according to the University of Nebraska halo blight fact sheet. Below that range, the toxin flows and the halos spread wide. Above that range, production falls, and the halos shrink. In hot weather the halo may vanish entirely, leaving a small dead spot that could pass for brown spot or early common blight. The bacterium is still present. The signature is gone. That temperature link explains why the same planting can show textbook halos in a cool June and confusing spots in a hot August.
The toxin also explains the systemic form of the disease. When the bacterium reaches the vascular tissue, the toxin travels with the sap to new growth. Young leaflets at the shoot tips come out curled and yellow, without spots, because the toxin reached them before the bacteria did. The plant cannot outgrow the toxin while the infection stays active. Removing the infected plant removes the toxin source. Spraying the yellowed tips does nothing, because the damage sits upstream in the stem.
Phaseolotoxin is the reason halo blight punishes wet, cool seasons and forgives hot ones. It is also the reason the disease looks worse than the bacterial load alone would suggest. A few infection sites can yellow a whole leaflet through toxin spread. The management answer follows from the mechanism. Cool, wet foliage is the window when the toxin does its work, so the controls that keep foliage dry and keep the bacterium out of the planting in the first place carry more weight than any spray applied after spots appear.
7. What Makes Halo Blight Worse in a Home Garden
Wet foliage is the first risk factor. Rain splash lifts bacteria from leaf to leaf and from soil to lower leaves. Overhead sprinklers do the same work, and they stretch the wet period after the water stops. Hail and wind tear foliage, and each wound is an entry point. A storm that batters a bean row can seed an outbreak that shows a week later. The bacteria cannot push through an intact leaf surface on their own. They need an opening, and weather and handling supply it.
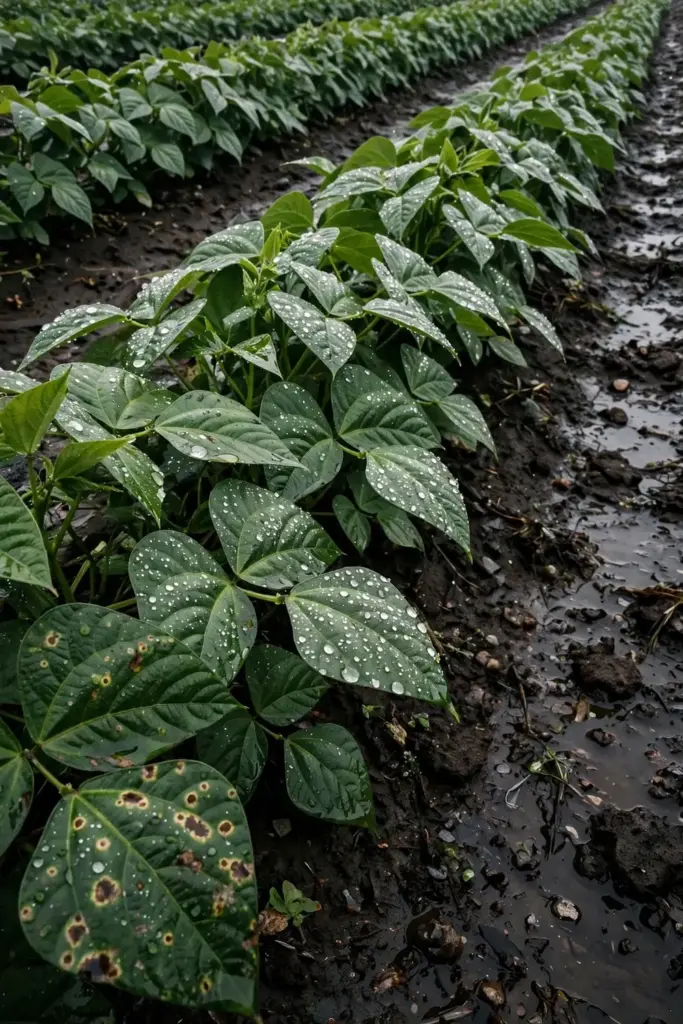
The temperature split matters. University of Nebraska Extension’s comparison of bacterial diseases in dry beans puts the daily temperatures that favor each disease in plain terms: halo blight develops below 80 degrees Fahrenheit, brown spot below 85 degrees, and common blight and wilt above 85 degrees. A garden that swings between cool, wet weeks and hot spells can host one bacterial disease after another. The control program stays the same across the swing. The identification changes, and the identification tells the gardener which disease is actually in the row.
Crowded plants dry slowly. Tight spacing holds dew on the lower leaves long after the sun hits the top of the canopy. Dense foliage also blocks airflow, so splash stays trapped inside the row. Beans grown for maximum yield per square foot often sit closer than the spacing that keeps them healthy. Thinning a crowded row feels like giving up harvest. In a wet season it saves harvest, because the plants that remain dry out between rains and the bacteria run out of wet leaf to cross.
Seed carries the disease into the garden before the season starts. The bacterium survives in and on bean seed from the previous year, and it survives in crop debris left on the soil. Continuous bean cropping keeps the pathogen fed year after year. Volunteer beans that sprout from last season’s dropped seed carry it too. A garden that grows beans in the same bed every year, saves its own seed, and leaves the vines standing over winter gives halo blight three routes back into the next crop at once.
Hands, tools, and boots move the bacterium within the garden. Walking a wet row brushes bacteria from leaf to leaf. A hoe that clips an infected plant and then clips a healthy one carries the pathogen on the blade. Harvest baskets that hold infected pods and then hold clean pods do the same. The habit of working the bean row first thing in the morning, while dew still sits on the leaves, is one of the quietest ways the disease spreads. Waiting until the foliage dries costs an hour and saves the row.
8. Step 1: Decide Whether Treatment Is Actually Worth It
Step 1 is the honest cost and benefit call. Halo blight has no cure. Copper sprays protect healthy tissue. They do not heal tissue that already shows spots. Cultural controls slow the spread. They do not reverse it. A gardener who accepts those limits makes better decisions than one who chases the disease with spray after spray.
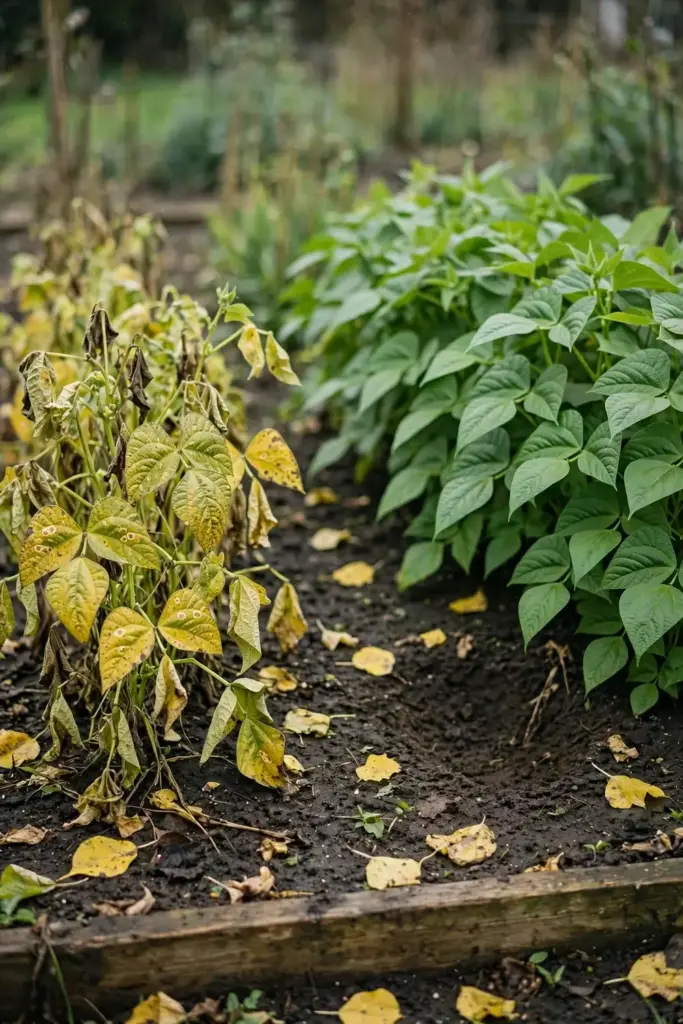
Use the table below to sort the planting into one of three paths. The path depends on how far the disease has spread, how much season remains, and what the planting is worth to the gardener.
| Situation | Action |
|---|---|
| A few spots on lower leaves, most of the canopy clean, pods still forming | Treat and protect. Pull the worst leaves, tighten the water habits, and start copper on healthy growth. |
| Spots across the canopy, pods staining, plants still setting new flowers | Protect the healthy growth and harvest what comes. Pull the worst plants to cut the spread. |
| Systemic yellowing on many plants, pods rotting, little season left | Pull and destroy the planting. Save the bed for a non-host crop and protect next season instead. |
Pulling a planting is not failure. It is the control that works when nothing else will. A diseased planting left standing feeds bacteria into the soil, into the debris, and onto the gardener’s tools for the rest of the season. The pulled plants go to the trash or the burn pile, never to the compost heap. Home compost rarely heats evenly enough to kill bacteria in the center of every pocket, and a compost pile that returns infected debris to the bed restarts the cycle.
The cost and benefit call also weighs the crop. Snap beans picked over a few weeks repay protection. Dry beans that still need a month of filling repay protection only if the canopy holds. A small planting that feeds one household for a week may not repay a copper program. A large planting that fills the freezer does. The gardener who answers those questions first spends money and effort where they return food.
9. Step 2: Start With Certified Disease-Free Seed
Certified disease-free seed is the single strongest control against halo blight. The bacterium travels inside and on the seed, so the planting starts infected when the seed carries it. Certified seed comes from fields inspected for bacterial diseases, grown in dry regions where the pathogens struggle, and tested before sale. The label is the evidence. A packet that says certified disease-free has passed a process the gardener cannot replicate at home.
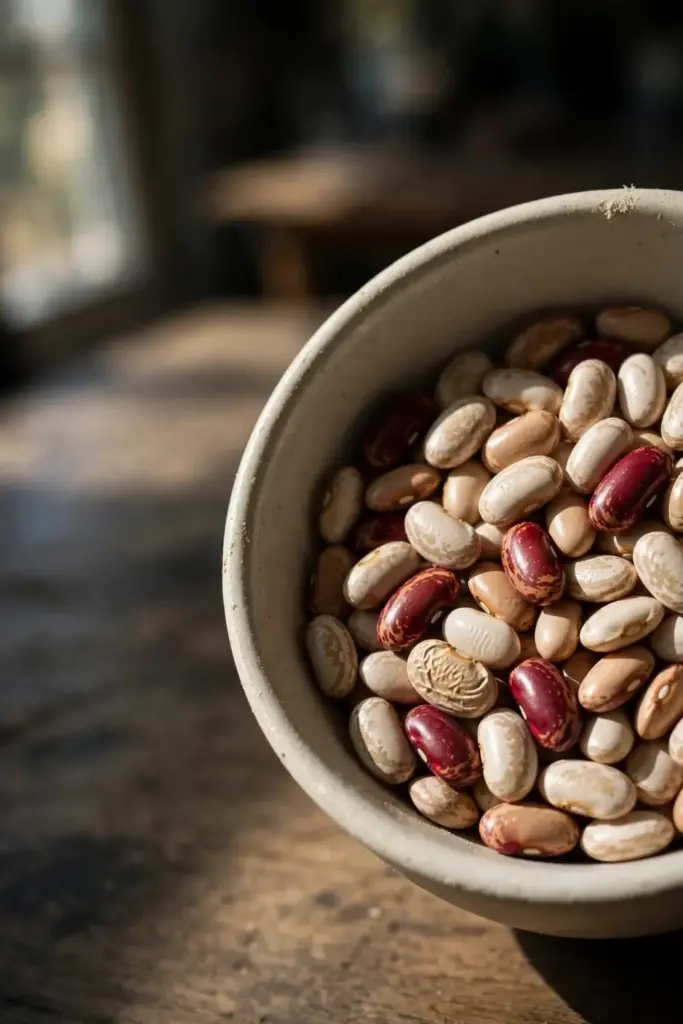
Buy fresh seed from a reputable seller each season when halo blight has appeared in the garden before. Seed left from an old packet is not the same risk as seed saved from an infected planting. Old commercial seed may lose vigor, but it does not gain bacteria in the packet. The risk sits in seed saved from plants that carried the disease, even plants that looked healthy at harvest. Some infected seed looks normal, and the bacterium inside it waits for the next planting.
The seed starting guide covers the handling basics that keep clean seed clean: dry storage, clean containers, and labeled packets. Keep bean seed dry and cool through the winter. Damp storage weakens the seed coat and invites mold, which costs germination before the bacterium ever gets a chance. Label every packet with the variety and the year. The label turns next spring’s guesswork into a record.
10. Step 3: Never Save Seed From an Infected Planting
Never save seed from a planting that showed halo blight. The rule sounds harsh, and it is the rule that saves the next crop. Seed from an infected planting carries the bacterium whether the seed looks clean or not. Planting that seed repeats the disease in the next bed, often worse, because the gardener has selected for the most contaminated seed without knowing it.
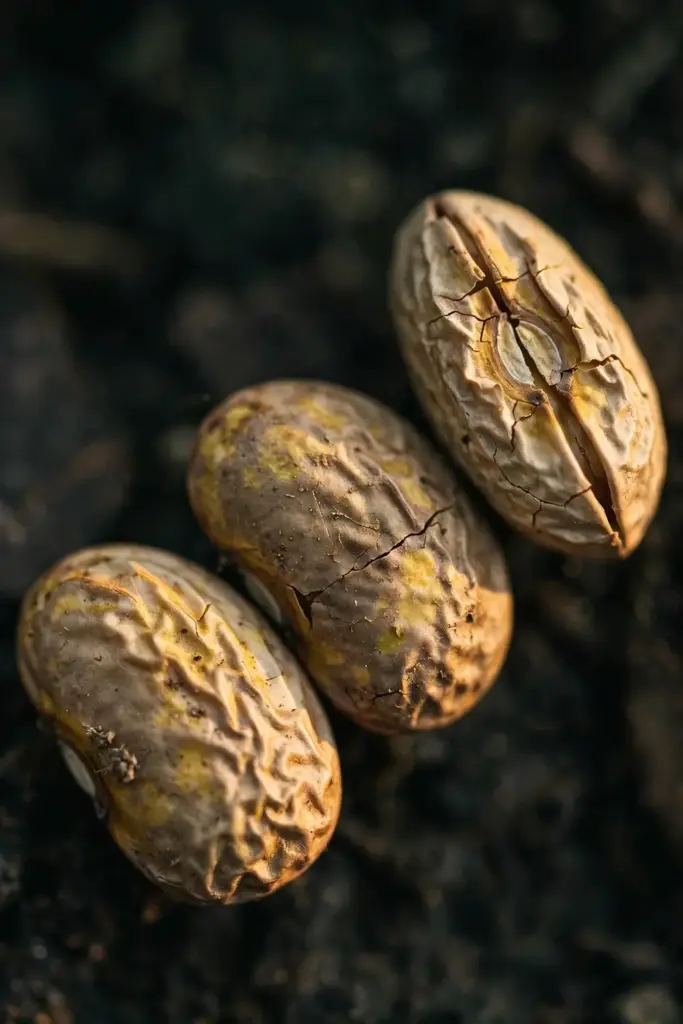
The temptation runs strongest in a good year. A planting can show a few spotted leaves early, recover through a dry stretch, and finish with a strong pod set. The seed from those pods looks fine. The bacterium may still ride inside it. The gardener who saves that seed bets the next season on a visual inspection that cannot see bacteria. Certified seed costs little. A lost season costs months.
Mark infected plantings at harvest so the rule holds. Tie a ribbon on the row, or write the note on the garden map the day the spots appear. Memory fades by seed-saving time. A mark made in June still reads in September. When the pods dry, pull the whole planting for disposal and buy fresh seed for the next season. The garden that follows this rule breaks the seedborne cycle in one year.
11. Step 4: Rotate Beans Out for Two to Three Years
Rotation starves the bacterium. The pathogen survives in bean debris and in the soil around it, but it does not live forever without a host. Moving beans to a fresh bed, and filling the old bed with a non-host crop, breaks the cycle. That span gives the debris time to break down and the bacterial population time to fall.
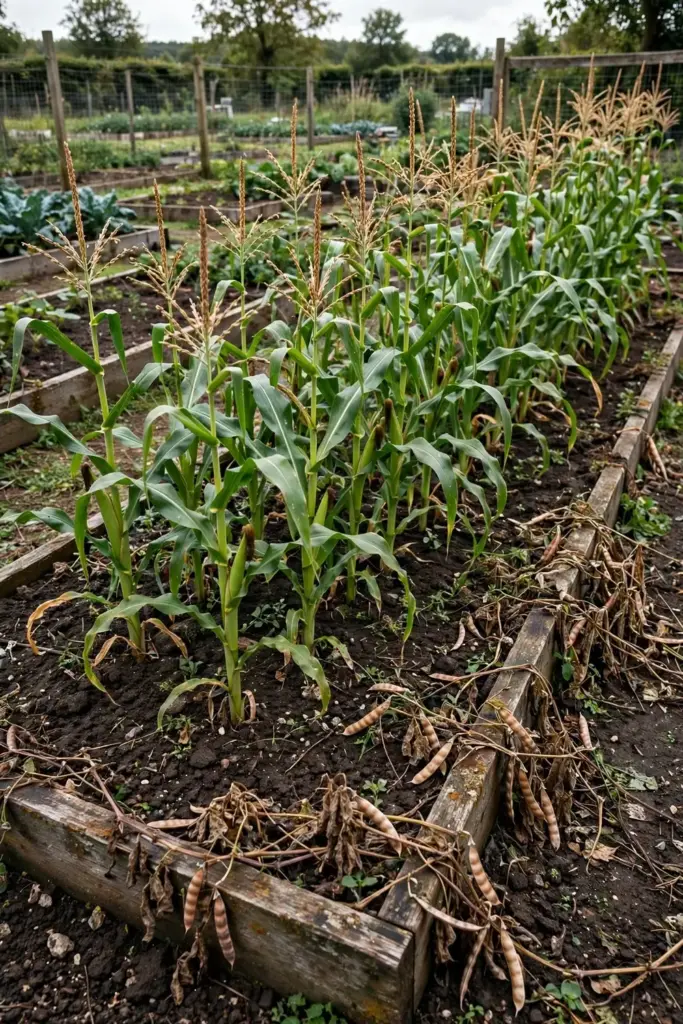
Plan the rotation on paper before the season starts. A simple four-bed rotation works for most home gardens: beans, then a leafy crop, then a root crop, then a fruiting crop, then back to beans. The exact order matters less than the gap. Beans return to a bed only after two or three seasons of other crops. A garden map with one line per bed, kept from year to year, turns the plan into a habit. A University of Georgia Extension pathologist’s pointers for managing blight in beans put the rotation at two to three years away from beans, using corn or any other non-legume in the gap.
The rotation covers the whole bean family, not just the variety that showed spots. Snap beans, dry beans, lima beans, and runner beans all host the disease, so a rotation that swaps snap beans for dry beans in the same bed is no rotation at all. Cover crops count too. A legume cover crop in the gap year feeds the same pathogen. Choose a grass or grain cover, or a brassica, for the bed that held beans. The soil rests, the bacterium starves, and the next bean crop starts clean.
12. Step 5: Keep the Foliage Dry and Stay Out When It Is Wet
Water at the soil line. Drip lines, soaker hoses, and a careful watering can all put water on the soil without wetting the leaves. Overhead sprinklers splash bacteria from leaf to leaf and stretch the wet period after watering. A bean row watered from above stays wet for hours. The same row watered at the soil line dries in the sun within the hour. The difference decides how far the bacteria travel in a day.
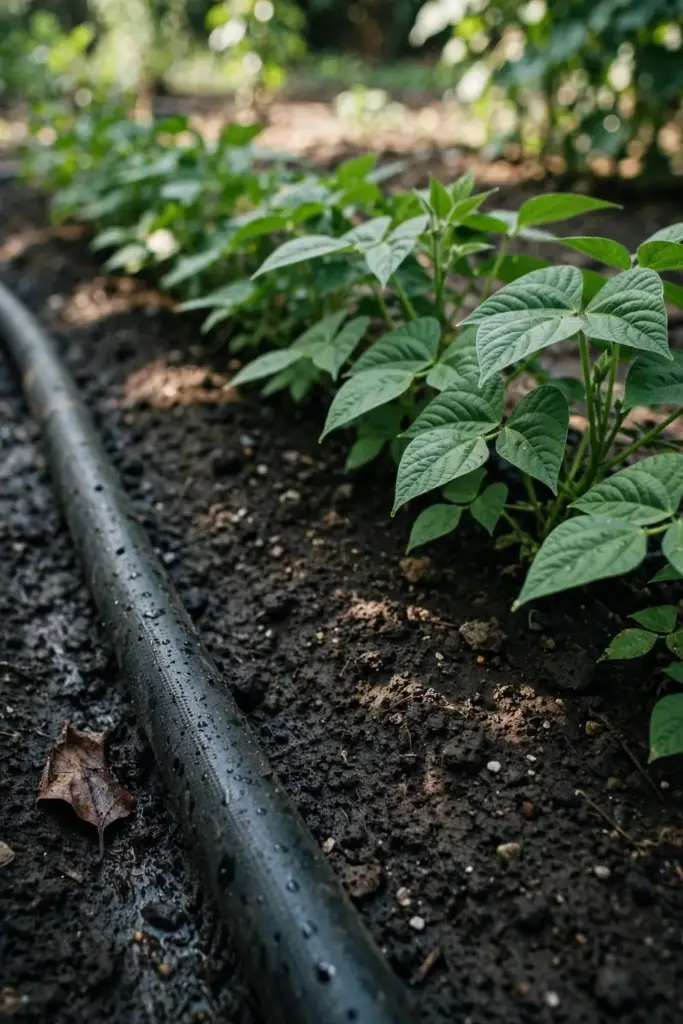
Stay out of the bean row while the foliage is wet. Dew, rain, and fresh irrigation all leave the leaves vulnerable to bacteria looking for an opening. Brushing past wet plants carries bacteria on clothing, hands, and tools. Waiting until the foliage dries costs an hour of the morning. It saves the row for the season. Schedule weeding, tying, and harvest for the dry part of the day. When a storm passes through, give the row a full drying period before stepping back in.
Space the plants so air moves through the row. Wide spacing lets sun and wind dry the lower leaves. A crowded row holds dew until midday and gives splash nowhere to go but the next leaf. Thin seedlings to the spacing on the packet, and resist the urge to tuck extra plants into the gaps. The plants that remain grow stronger, dry faster, and carry fewer spots through a wet season.
13. Step 6: Clear Debris, Volunteers, and Weed Hosts
Clean up the bean bed at the end of the season, and clean it hard. Pull the vines, roots and all, once the harvest ends. Work the debris into the soil or bag it for the trash. Do not leave bean straw spread on the surface over winter. Debris left on the surface shelters the bacterium through the cold months and hands it a fresh start in spring. Debris worked into the soil breaks down faster, and the bacteria in it die with it.
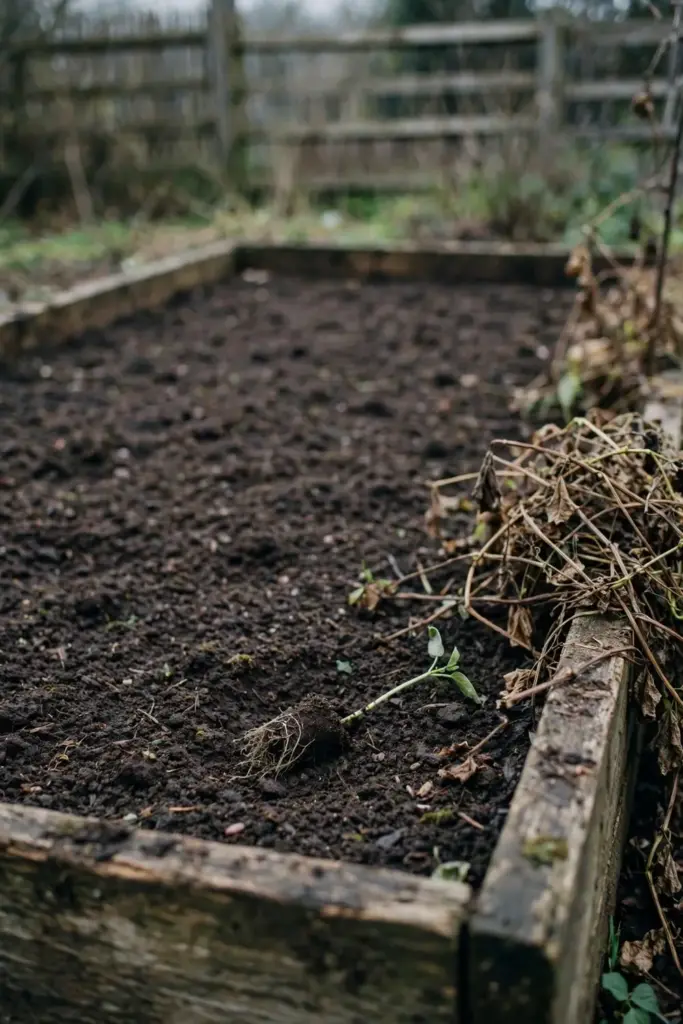
Volunteer beans are the disease’s bridge between seasons. Dropped seed sprouts in spring from last year’s pods, and the seedlings can carry the bacterium before the gardener plants a single seed. Walk the bed early in spring and pull every volunteer bean. Pull them before they flower, and pull them before they set pods that drop more seed. A bed that grows no volunteers for a season breaks the bridge.
Weeds carry the pathogen too. Pigweed is one weed host that can harbor the bacterium, and other broadleaf weeds around the bean bed can shelter it. Keep the bed and its borders weeded through the season. A clean border is not cosmetic. It removes the reservoir that re-infects the row after every rain. Mow or pull weeds before they set seed, so the border stays clean for the next crop as well.
Healthy soil helps the rotation do its work. The soil health guide covers the organic matter, drainage, and biology that break debris down fast and keep the bed productive between bean crops. A bed with good structure drains after rain instead of holding puddles, and dry soil surfaces slow the splash that carries bacteria upward.
14. Step 7: Choose Varieties With Halo Blight Resistance
Variety choice is the quiet control. Several bean varieties carry resistance to halo blight, and a resistant variety can stand clean in a row where a susceptible one spots. Resistance does not mean immunity. A resistant variety can still show spots under heavy pressure, but it shows fewer of them, later, and the canopy holds long enough to finish the harvest. That margin decides the season in a wet year.
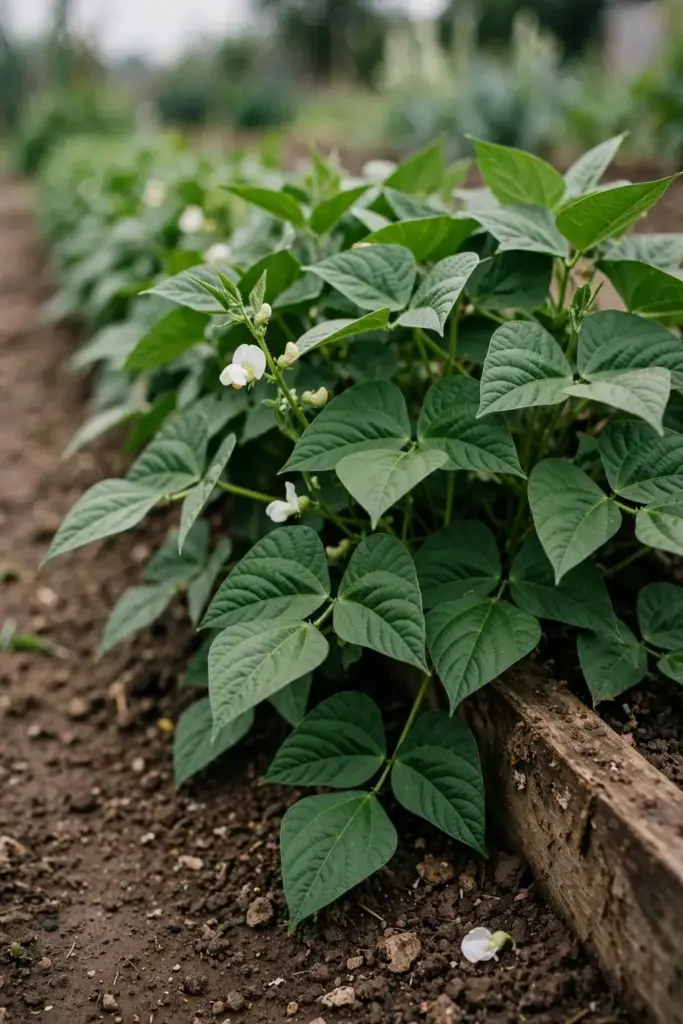
Read the variety description before buying, not after planting. Seed catalogs list resistance in the variety notes, often in shorthand. Look for the words resistant to halo blight or tolerant of halo blight. When the catalog is silent, the variety is usually untested rather than resistant, so ask the seller directly when halo blight has hit the garden before. A seller who grows in a dry seed region may not track resistance the way a gardener in a wet region needs.
Resistance to common bacterial blight is harder to find than resistance to halo blight. A variety that resists halo blight may still fall to common blight in a hot season. That gap is one more reason the differential table matters. A gardener who knows which disease is in the row can judge whether the variety’s resistance covers it. When both diseases have appeared in the garden, pick the variety with the broadest resistance list, and pair it with the seed, rotation, and water habits in the other steps. No variety carries the season alone.
15. Step 8: Use Copper Sprays as a Shield, Not a Cure
Copper sprays protect healthy tissue. They do not cure tissue that already shows spots. That distinction decides how and when to use them. Copper sits on the leaf surface and kills bacteria that land on it. It cannot reach bacteria already inside the leaf. A spray applied after the spots appear protects the new growth that follows. It does nothing for the spotted leaves. The gardener who sprays early, before symptoms, gets the full value. The gardener who sprays late gets a fraction.
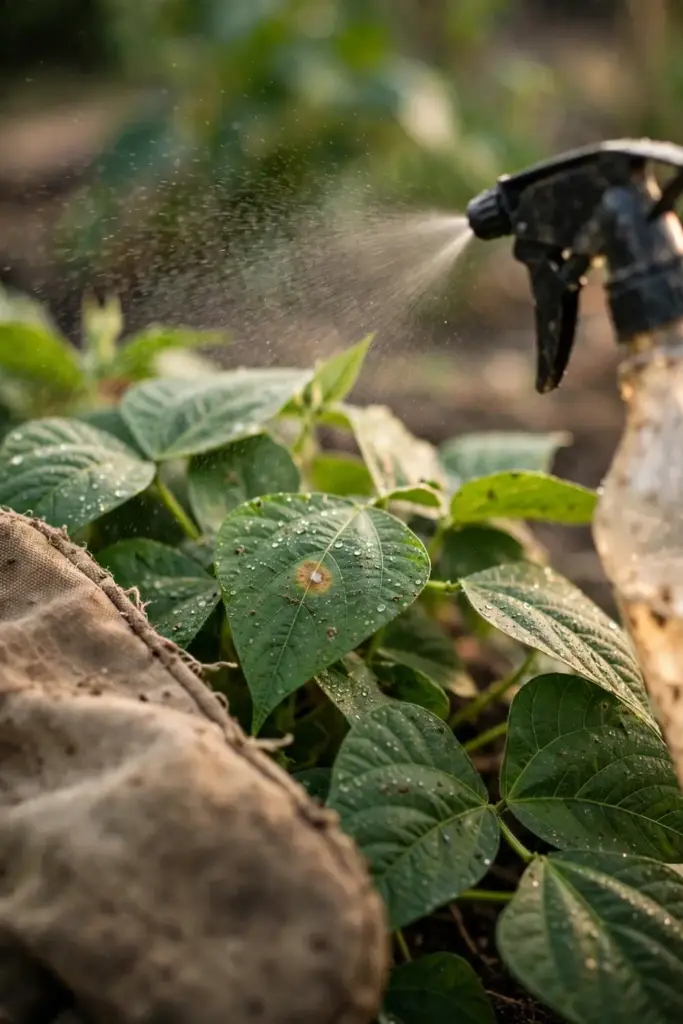
Start the program when the weather turns cool and wet, or when the garden has a history of halo blight. Reapply on the interval the product label sets, and keep the schedule through the wet stretch. Once the disease is established, no spray reverses it. Coat the undersides of the leaves as well as the tops. The undersides carry the first spots, and a spray that misses them misses the infection court. Reapply after heavy rain washes the coating off, and keep the schedule through the wet stretch.
Read the product label before mixing, and follow it exactly. Labels set the rate, the interval, and the safety rules for the specific product, and home garden copper products differ in strength and formulation. Wear gloves when mixing and spraying. Keep the spray off the gardener’s skin and out of the eyes. Copper builds up in soil over years of heavy use, so a home garden that sprays every season should lean on the cultural controls first and treat copper as the backup, not the foundation.
Copper is a bactericide in this role, not a fungicide cure. Fungicides aimed at fungal diseases do nothing against a bacterial pathogen. A gardener who reaches for a general fungicide against halo blight wastes the application and loses the week the disease needed to spread. The label tells the story. A product labeled for bacterial blights on beans is the one that belongs in this program.
16. Step 9: Disinfect Tools and Stop the Spread Between Rows
Tools carry the bacterium from plant to plant. Pruners, hoes, stakes, and harvest baskets all pick up bacteria from infected tissue and deliver it to the next cut. Disinfect tools between plants when the disease is active, and always between rows. A bucket of soapy water and a scrub brush handle the cleaning. A disinfectant rinse after the wash handles the bacteria. Let the tools dry before the next cut, because a wet blade spreads as much as it cuts.
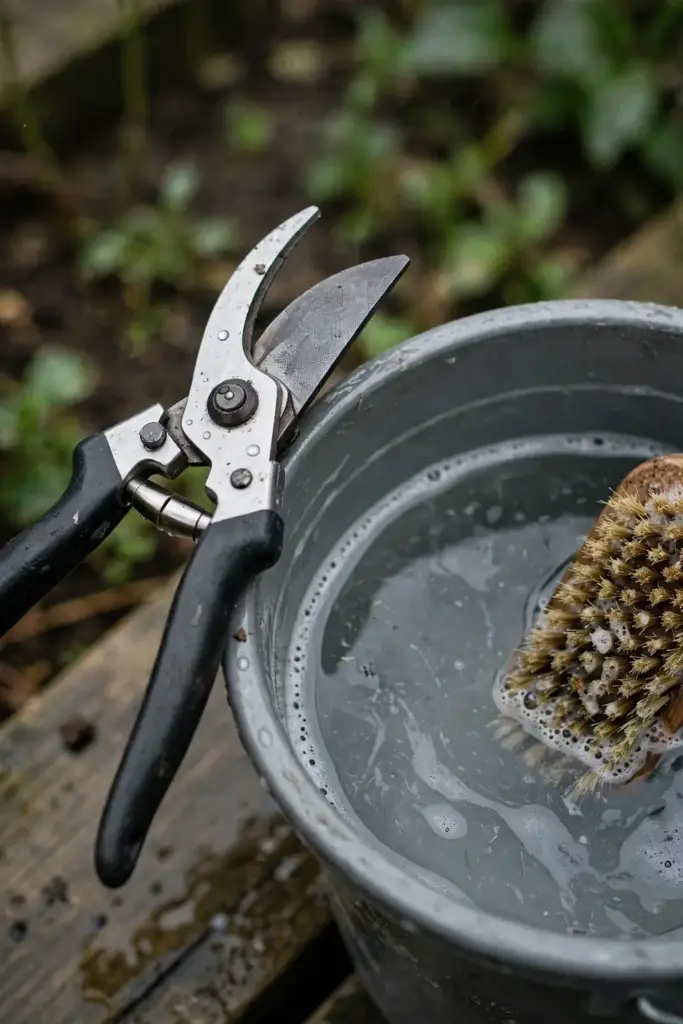
Work the clean rows first and the infected rows last. The habit costs nothing and keeps the healthy planting clean through the harvest. A gardener who starts in the infected row and walks to the clean row carries the disease on boots, gloves, and tools. Reverse the order, and the disease stays where it is. Change gloves after working an infected row, or wash them before touching clean plants.
Stakes and trellises carry the bacterium into the next season. Wood stakes hold bacteria in cracks and in soil stuck to the surface. Scrub stakes at season’s end. Let them dry in the sun, then store them dry. Replace stakes that split or rot, because a split stake cannot be cleaned. Metal and plastic stakes clean more easily and last longer than wood. A garden that disinfects its tools and stores its stakes dry starts each spring with one less route for the disease.
17. Living With Beans That Already Have Halo Blight
A planting that already shows halo blight can still feed the household. The disease rarely makes the beans unsafe to eat. Pods with a few spots wash clean, and the beans inside cook normally. Pods that rot, turn soft, or smell off go to the trash, not the pot. The gardener’s judgment at the sink matches the judgment in the row. Clean pods get eaten. Rotten pods get discarded.
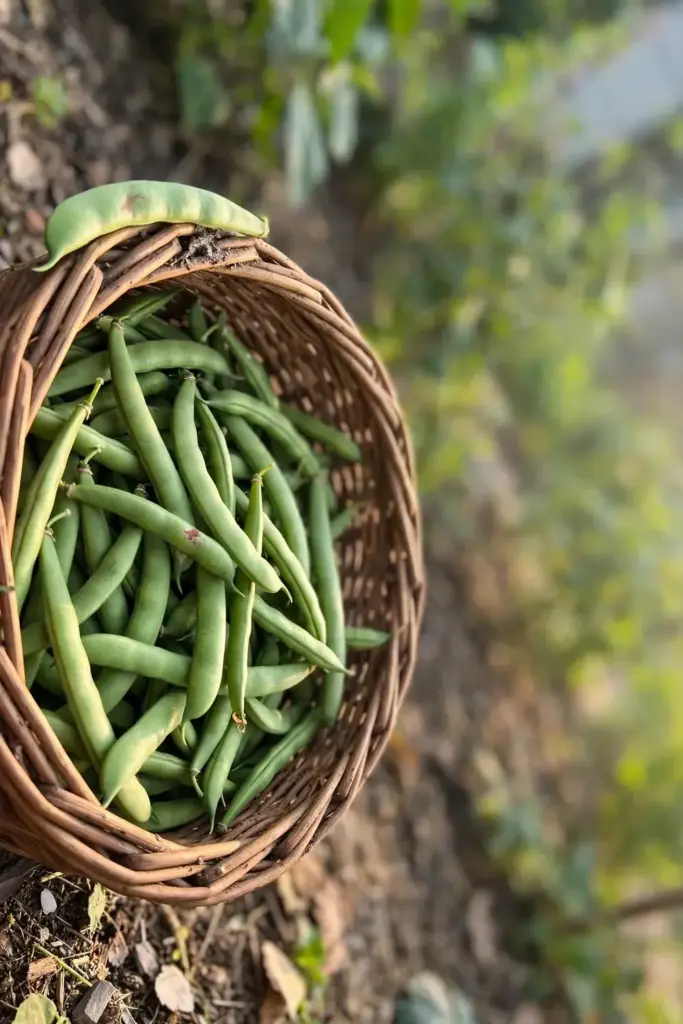
Keep harvesting through a light attack. Picking keeps the plant setting new pods, and each picking round removes spotted pods from the row before they drop seed. Pick in dry weather, and pick the clean rows first. Wash hands and tools after the picking round. A steady harvest through a light attack returns more food than abandoning the planting at the first spot.
Feed the plants, but do not push them. A balanced feed keeps the canopy growing and replacing spotted leaves. Heavy nitrogen pushes soft, fast growth that spots easily and dries slowly. The goal is steady growth, not a flush of tender foliage. Water at the soil line, keep the row weeded, and let the healthy leaves do the work.
Plan the next season while this one finishes. Note which varieties spotted first, which held clean, which bed drained slowest, and which row dried first. Those notes shape next year’s variety order, rotation map, and spacing. A planting with halo blight teaches the gardener more than a clean season does, and the lesson pays off when the next wet spring arrives.
18. Frequently Asked Questions
Yes, in most cases. Pods with a few spots wash clean, and the beans inside cook normally. The bacterium that causes halo blight attacks bean plants, not people. Discard pods that turn soft, rot, or smell off, and discard any pod that looks slimy inside. Wash the harvest, wash your hands, and cook the beans as usual. Do not save seed from the planting.
No. Halo blight is a bean disease. Its host range sits in legumes, with common beans, lima beans, runner beans, and related beans carrying the practical risk for home gardeners. Tomatoes, peppers, and other nightshades do not host it. A bean row with halo blight can sit beside a tomato row without spreading the disease to the tomatoes. The same wet habits that favor halo blight can favor tomato diseases, so keep the water habits tight across the garden.
No. Home compost rarely heats evenly enough to kill the bacterium in every pocket of the pile. Infected vines, pods, and seed that go into the compost can come back to the bed with the finished compost. Bag the pulled plants for the trash, or burn them where local rules allow burning. Clean the tools after handling the debris. A bed that starts clean stays clean longer.
Read the packet. Certified seed carries a label or a statement that the seed lot was inspected and tested for bacterial diseases. The label may name the certifying agency or the testing program. Buy from sellers who print that information on the packet or in the catalog listing. When the packet says nothing about certification, treat the seed as uncertified. A quick question to the seller settles it before planting.
No. Copper protects healthy tissue and cannot reach bacteria already inside the leaf. A spray applied after spots appear guards the new growth that follows, and it does nothing for the spotted leaves. Start copper before symptoms, when the weather turns cool and wet or the garden has a history of the disease. Pair the spray with certified seed, rotation, and dry foliage habits for the full program.
19. Where to Go From Here
Halo blight on beans rewards the gardener who identifies it early and acts on the controls that work before the season starts. Certified seed, a two to three year rotation, dry foliage, and clean tools carry more weight than any spray. Copper backs them up when the weather turns cool and wet. The differential table sorts halo blight from common bacterial blight and bacterial brown spot, and the temperature notes tell the gardener which disease the current weather favors.
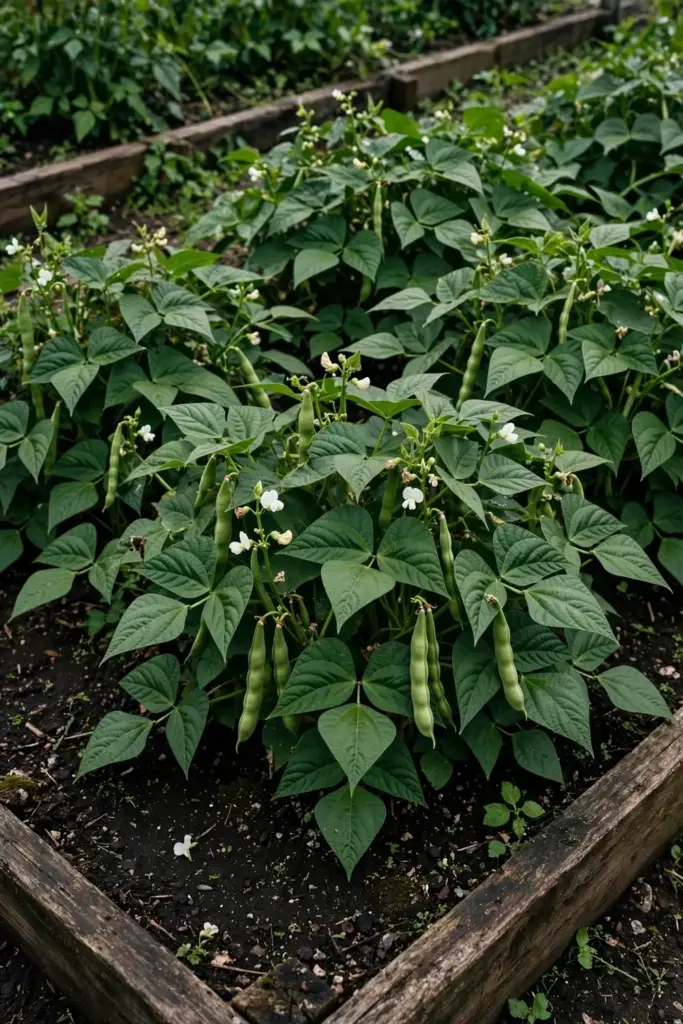
Start with the seed order. Buy certified seed for the next planting, and mark any infected row so no seed gets saved from it. Map the rotation so beans leave the infected bed for two to three seasons. Set the watering at the soil line, and wait for dry foliage before working the row. Those four moves close the routes the bacterium uses to return.
Bacterial diseases share habits across the garden, and the bacterial canker guide shows how the same principles of clean seed, dry foliage, and tool hygiene apply to fruit trees. The bean row that follows this program will not stay spotless in a wet year. It will stay productive, and the harvest will reach the kitchen instead of the trash.