
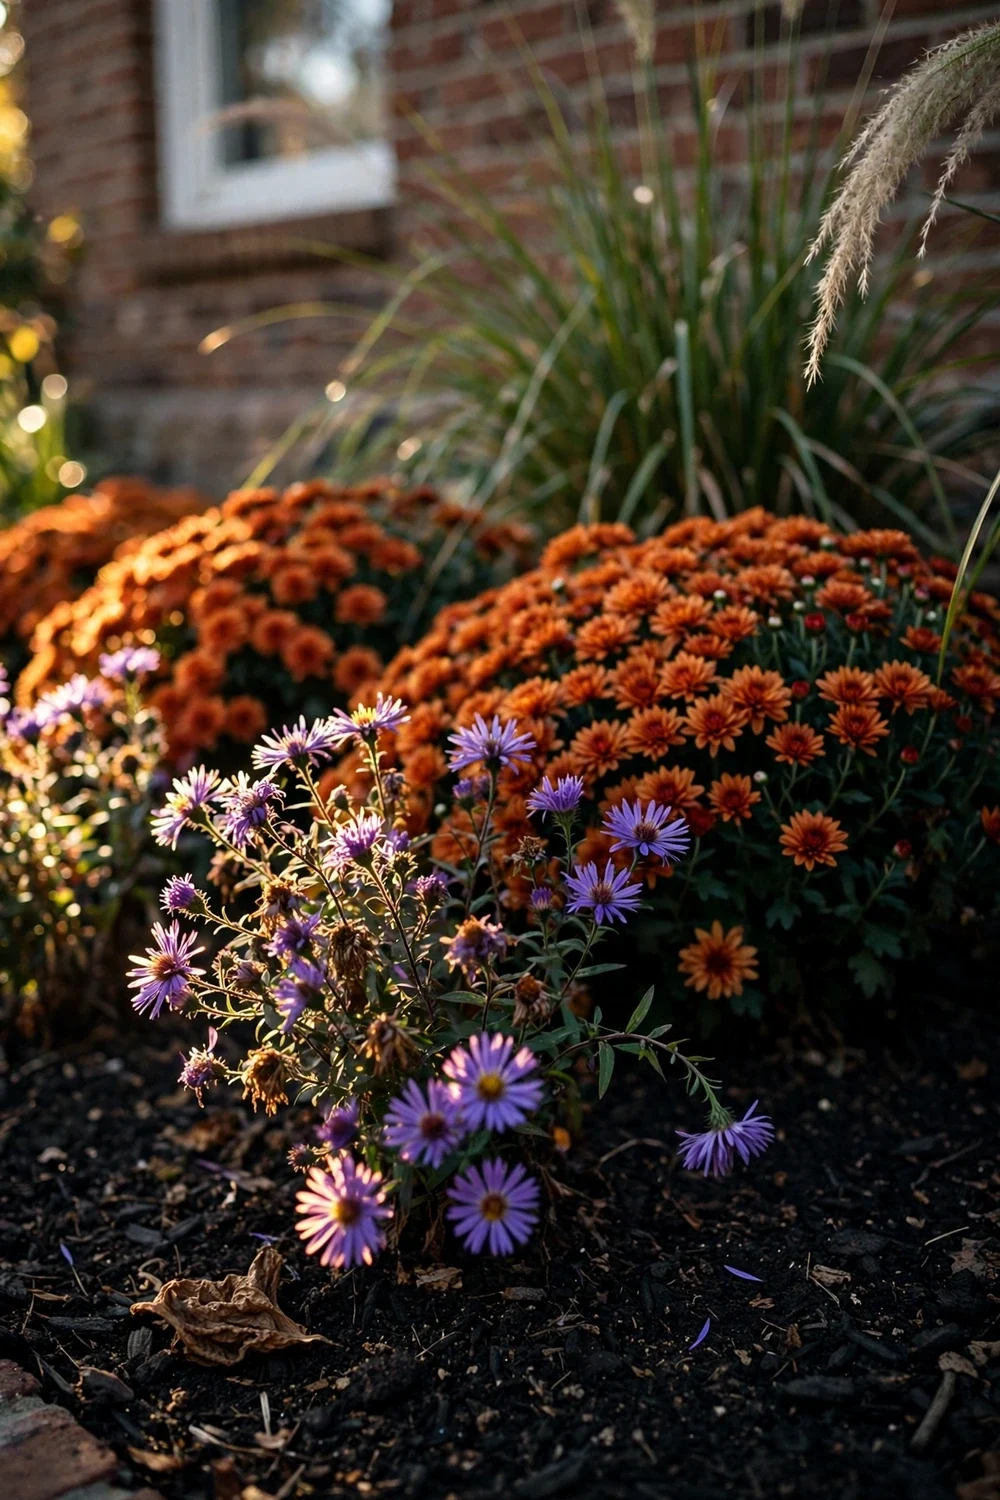

Fill one 3 m flower bed this weekend. That is the whole game behind fall flower bed ideas: an in-ground bed that carries color from early October to first frost, built from layering by height, edges that hold a line, and combos that survive cold nights. The rest of this page is 21 bed ideas organized by bed type, from foundation beds to walkway edging to raised beds, plus the layering technique that makes every bed read as one design.
Plant pansies into beds while nights stay above freezing. Mums planted six weeks before hard frost still root in. Bulbs for spring go in before the soil locks up.
The rest of this page is about the bed itself: which bed types work, what goes where in each one, and how to layer and edge so the composition holds. For plant picks with per-item zone and sun tags, see the fall blooming perennials article.
How to Read the Tags on Every Bed
Every numbered bed below carries the same four tags. Read them before you buy a single plant.
Bed type. Foundation, Walkway edging, Raised bed, Small space, or Cottage border. This is the organizing unit of the article, and no other page on this site organizes fall planting this way.
Sun. Full sun means 6 or more hours. Part shade means 3 to 6 hours, usually morning sun with afternoon cover.
Frost. How far the bed carries you into the season. Hard frost tolerance comes from the plants inside, and every bed below names its coldest-week players.
Position. Where in the yard the bed works hardest. Front of house, along the walk, by the mailbox, or the side strip everyone forgets until October.
21 Fall Flower Bed Ideas at a Glance
| # | Bed idea | Bed type | Sun | Frost | Best spot |
|---|---|---|---|---|---|
| 1 | Mum Wall Foundation Bed | Foundation | Full sun | Hard frost | Front of house |
| 2 | Aster and Grass Foundation | Foundation | Full sun | Hard frost | Front of house |
| 3 | Evergreen Foundation, Pansy Carpet | Foundation | Part shade | Hard frost | North foundation |
| 4 | Corner Foundation, Tall Back Border | Foundation | Full sun | Hard frost | House corner |
| 5 | Shade Foundation Bed | Foundation | Part shade | Light frost | Shaded foundation |
| 6 | Pansy Edging Along the Walk | Walkway edging | Full sun | Hard frost | Front walk |
| 7 | Kale and Cabbage Edging | Walkway edging | Full sun | Hard frost | Path border |
| 8 | Low Aster Sidewalk Border | Walkway edging | Full sun | Hard frost | Sidewalk |
| 9 | Ornamental Grass Edge | Walkway edging | Full sun | Hard frost | Driveway edge |
| 10 | Two-Week Edge Swap | Walkway edging | Full sun | Light frost | Porch path |
| 11 | Raised Bed of Mums and Pansies | Raised bed | Full sun | Hard frost | Front yard |
| 12 | Raised Cutting Bed for Bouquets | Raised bed | Full sun | Light frost | Side yard |
| 13 | Autumn Herb Raised Bed | Raised bed | Full sun | Hard frost | Near kitchen |
| 14 | Ornamental Kale Rows | Raised bed | Full sun | Hard frost | Front yard |
| 15 | Mailbox Bed | Small space | Full sun | Hard frost | Curb |
| 16 | Corner Pocket Bed | Small space | Part shade | Light frost | Fence corner |
| 17 | Porch Foundation Strip | Small space | Part shade | Hard frost | Porch base |
| 18 | Aster and Sedum Cottage Border | Cottage border | Full sun | Hard frost | Back or side |
| 19 | Rudbeckia and Grass Drifts | Cottage border | Full sun | Hard frost | Wide border |
| 20 | Bulb-Layered Bed for Spring | Cottage border | Full sun | Overwinters | Any bed |
| 21 | Winter-Interest Bed | Cottage border | Full sun | Deep winter | Visible from house |
Foundation Beds
1. Mum Wall Foundation Bed
Bed type: Foundation. Sun: Full sun. Frost: Hard frost. Position: Front of house.

A solid run of garden mums against the foundation is the fastest way to make the whole front yard read as intentional. Mums carry the bed because they bloom hard when everything else quits, and a wall of one plant reads as a decision rather than an accident. Plant them in odd-numbered groups, which the University of Georgia Cooperative Extension landscape planning guide recommends because grouping makes placement easier and displays plants better than singles.
Site them in well-drained beds that receive at least six hours of sun. Mums that sit in wet soil rot before they bloom, and no mulch or fertilizer fixes a drainage failure. Space the divisions so air moves between clumps, and keep the bed mulched to hold moisture and block weeds. The perennials article on this site carries per-item zone and sun tags for every mum variety, so variety selection lives there. This bed is about the composition, and the composition fails the moment the drainage fails.
2. Aster and Ornamental Grass Foundation
Bed type: Foundation. Sun: Full sun. Frost: Hard frost. Position: Front of house.
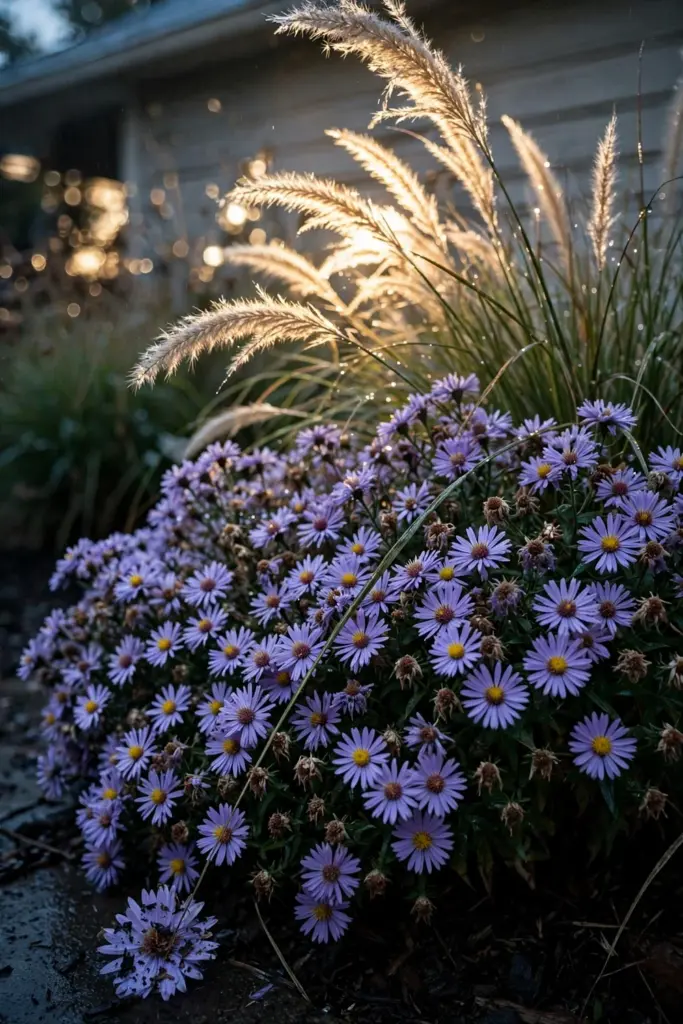
Asters give the foundation bed its second act after mums peak. Iowa State University Extension notes that asters grow best in full sun and well-drained soil, and that some species get quite tall and may flop and lose lower leaves by season’s end. Stake the tall selections, and cut them back slightly in late spring or early summer for more compact plants with additional flowers.
Set the grasses behind the asters. They hold the bed through winter as structure while the asters carry color into November, so the foundation never goes fully bare. Give both plants air. Crowded asters develop powdery mildew, and a mildewed aster ruins the whole foundation in one wet week.
3. Evergreen Foundation With Pansy Carpet
Bed type: Foundation. Sun: Part shade. Frost: Hard frost. Position: North foundation.
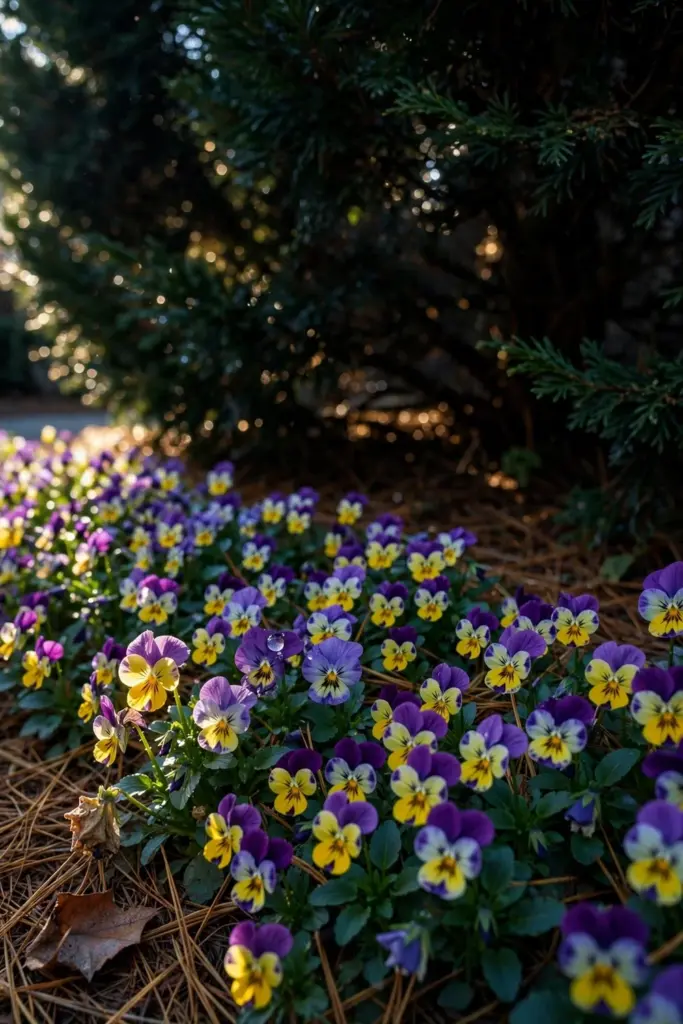
The foundation that never sees direct sun still gets a fall bed. Pansies fill the gaps between existing evergreen shrubs with a flat carpet of color that brightens the darkest side of the house. UGA’s fall gardening guide recommends planting pansies on beds raised 15 to 30 cm above the surrounding soil, which assures good drainage and improves visibility from the street.
Top new beds with 10 cm of organic matter such as compost, worked about a foot deep per the guide. Broadcast 10-10-10 fertilizer at 2 cups per 100 square feet, and rake it into the top 10 cm of soil. Space the plants 20 to 25 cm apart after laying out the pots on the bed first, so you can rearrange until the pattern looks right. Mulch with 5 to 7.5 cm of pine straw or shredded bark, brushing excess off the leaves. Water between 6 a.m. and 9 a.m. Late-day watering keeps foliage wet overnight and invites disease.
4. Corner Foundation With Tall Back Border
Bed type: Foundation. Sun: Full sun. Frost: Hard frost. Position: House corner.
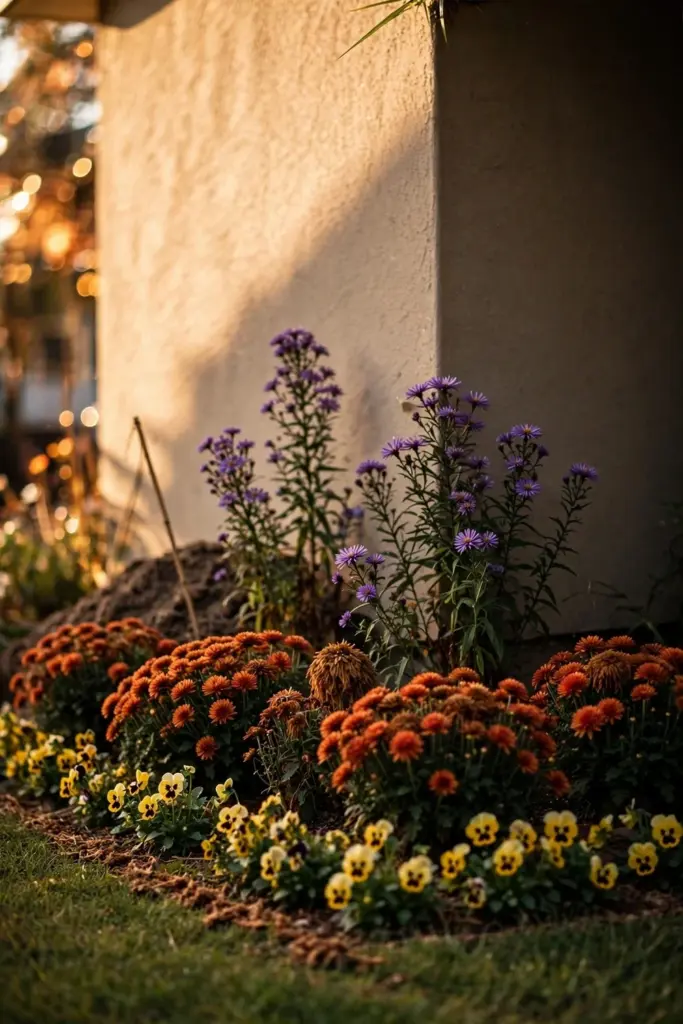
Corners swallow small plants. A corner foundation bed needs height in back and mass in front, or the house corner reads as empty no matter what you spend. Put the tallest material against the wall. Step down toward the lawn in three clear tiers, and the corner finally reads as designed rather than leftover.
Use the mound trick from UGA’s landscape guide: add topsoil and organic matter to build a mound 20 to 25 cm high at the back of the bed. The height behind and the flat bed in front moves the eye over the composition and makes the corner feel deliberate. Group every plant in odd numbers. Three tall asters against the wall beat four short mums scattered across the bed every time.
5. Shade Foundation Bed
Bed type: Foundation. Sun: Part shade. Frost: Light frost. Position: Shaded foundation.
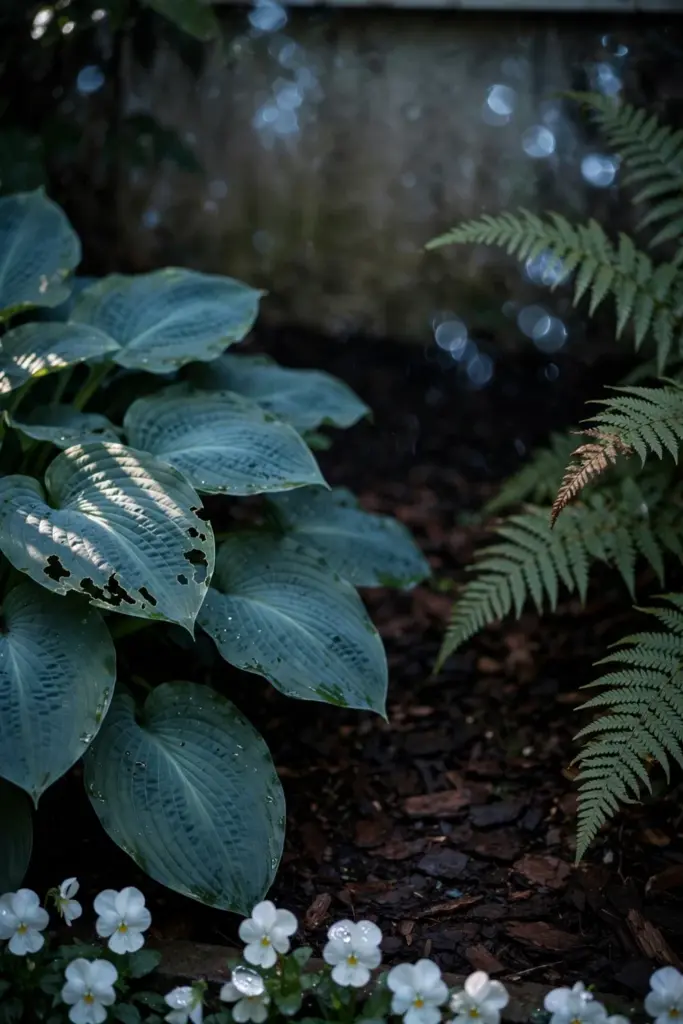
A shaded foundation bed cannot carry the same color load as a sunny one, so it wins on texture instead of bloom. Hostas, ferns, and astilbe hold the bed from spring through summer, and fall additions go in as punctuation: a sweep of violas at the front edge and a clump of ornamental kale where the light pools at midday.
This is the bed where cool colors earn their keep. UGA’s landscape guide notes that cool colors make plants seem more distant, which stretches a narrow shade bed and makes it feel deeper than it is. White and pale-yellow pansies in shade read brighter than any red or orange, because dark colors go muddy without direct sun to light them.
Walkway Edging
6. Pansy Edging Along the Front Walk
Bed type: Walkway edging. Sun: Full sun. Frost: Hard frost. Position: Front walk.
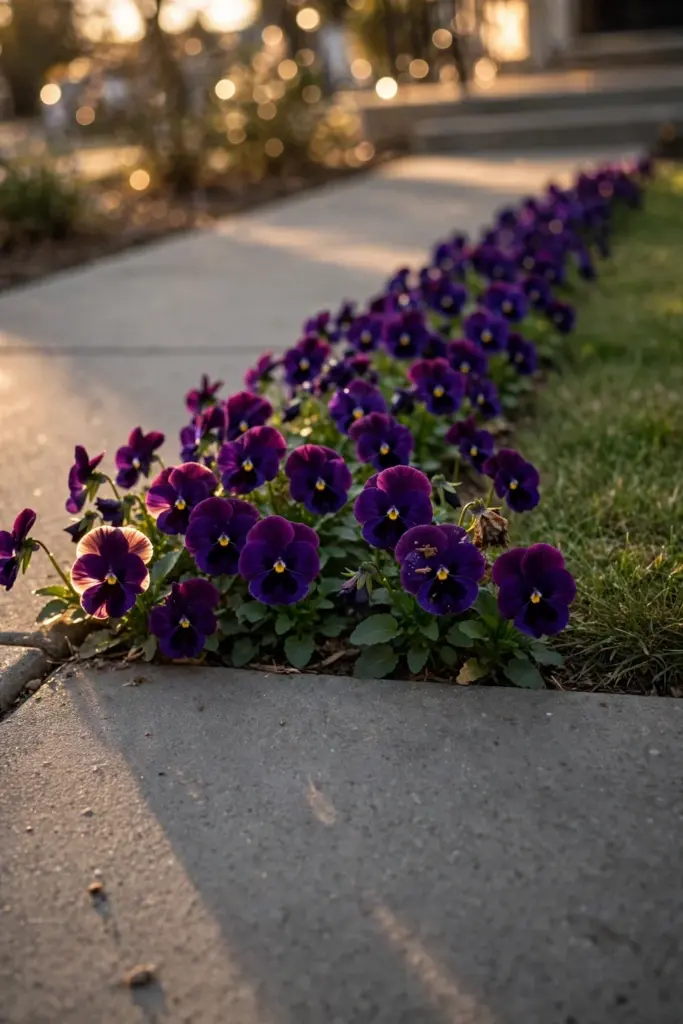
A single-row pansy edge along the front walk frames the approach to the door and leads the eye exactly where you want it. Keep it to one variety in one color for the full length of the walk. Mixed colors in a narrow edge read as noise from the street, and the walk is too narrow to hold a complex palette.
Plant from the inside out so you do not crush plants while working, following UGA’s bed-planting sequence. Water the bed thoroughly after planting, then apply liquid fertilizer that both foliage and roots absorb. Groom the edge once a week by removing spent blossoms and seedpods. Seedpods drain the plant’s energy, and old blossoms harbor disease that spreads down the whole row.
7. Kale and Cabbage Edging
Bed type: Walkway edging. Sun: Full sun. Frost: Hard frost. Position: Path border.

Ornamental kale and cabbage survive frosts that kill every flower in the edge, and their color deepens as nights cool. They anchor a walkway edge from October into December in most zones, outlasting every annual you could plant beside them.
Set them 20 to 25 cm apart in a straight line or a gentle curve. The rosette form repeats every plant, so spacing errors show immediately and there is nowhere to hide a gap. A ruler at planting time saves a ragged edge later. Pansies tucked between the rosettes add a second layer, but keep the pansies to a single color or the edge turns busy.
8. Low Aster Sidewalk Border
Bed type: Walkway edging. Sun: Full sun. Frost: Hard frost. Position: Sidewalk.

Dwarf aster varieties hold a sidewalk border at knee height and bloom when the neighbors’ beds are done for the year. Iowa State Extension recommends cutting asters back slightly in late spring or early summer to create more compact plants, which is exactly what a sidewalk edge demands. Compact plants do not flop onto the walk and annoy pedestrians.
Deadhead spent flowers through the bloom season. Dwarf asters that go to seed stop blooming and look tired by Halloween, which is the opposite of what a sidewalk border is for. One pass with shears every week keeps the edge full and the color coming.
9. Ornamental Grass Edge
Bed type: Walkway edging. Sun: Full sun. Frost: Hard frost. Position: Driveway edge.
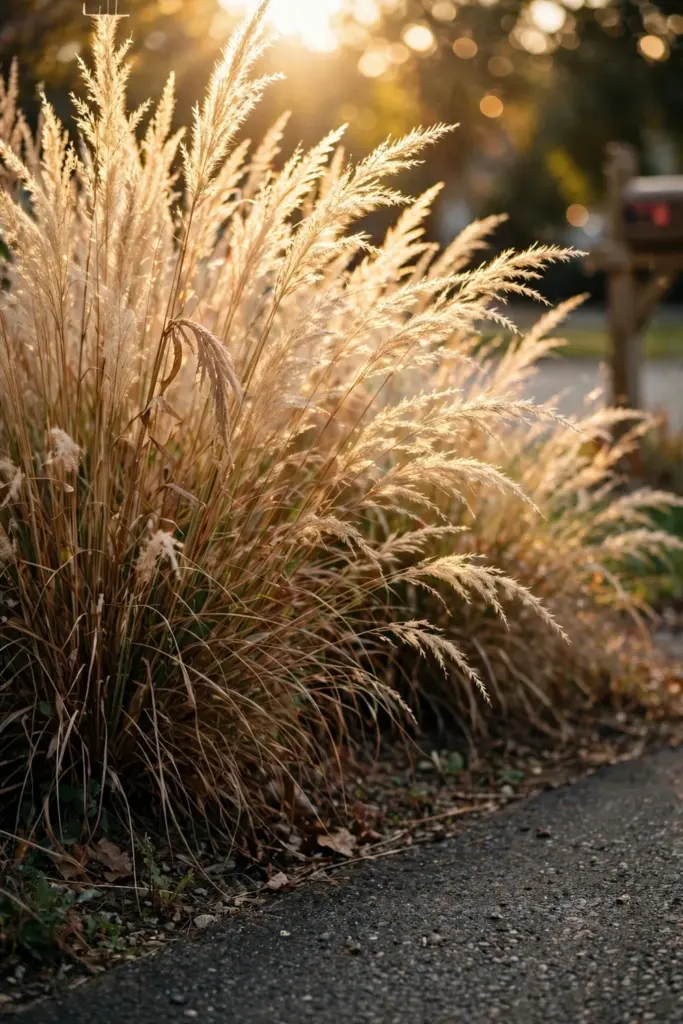
A grass edge along the driveway carries the landscape through winter without a single replanting. Fountain grass and blue fescue give you movement, seed heads, and foliage color that no annual can match in November, and they ask for almost nothing in return.
This is the lowest-maintenance edge on the page. Cut it back once in late winter and it returns on its own. The one place it fails is salt. Do not plant a grass edge where snowplows throw salt, because the edge dies in one winter and the replacement costs more than the original planting.
10. Two-Week Edge Swap
Bed type: Walkway edging. Sun: Full sun. Frost: Light frost. Position: Porch path.

The edge swap is a maintenance move, not a planting design. Pull the spent summer annuals from a porch-path edge in early October and drop in pansies, violas, or kale for the last six weeks of color. The soil work is already done from spring, the bed is already shaped, and the new plants just need a hole and a drink.
This is where the two-week rule earns its name. From pulling the old plants to planting the new ones, the job should take one weekend and no more. If it takes longer, the edge sits bare through the best weeks of fall color, and you miss the whole point of the swap.
Raised Beds
11. Raised Bed of Mums and Pansies
Bed type: Raised bed. Sun: Full sun. Frost: Hard frost. Position: Front yard.
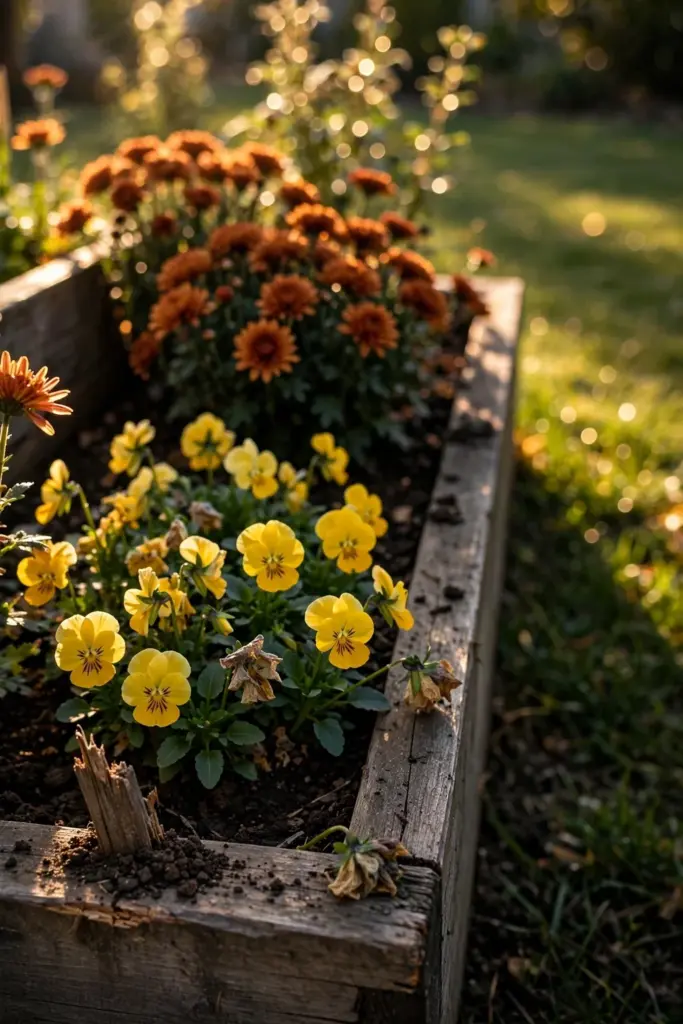
A raised bed in the front yard is a display bed, so it gets the showiest combination: mums in back, pansies in front. The raised sides give you the 15 to 30 cm of drainage lift that UGA recommends, which matters because mums rot in standing water faster than almost any other fall plant.
Lay out the plants in their pots on the bed before digging, spacing them 20 to 25 cm apart. Rearrange the pots until the bed looks right from the street, not just from above. You view a raised bed from the sidewalk at an angle, and the composition has to read from there or the display bed fails its one job.
12. Raised Cutting Bed for Bouquets
Bed type: Raised bed. Sun: Full sun. Frost: Light frost. Position: Side yard.
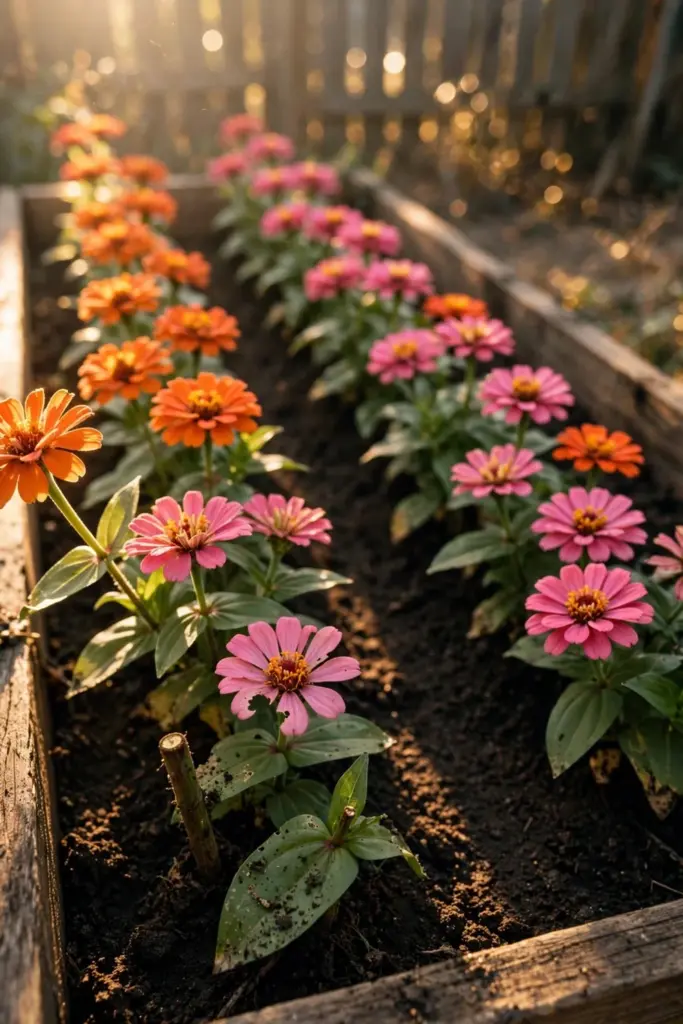
A raised cutting bed grows stems for the vase, not for curb appeal. Zinnias, cosmos, and snapdragons fill a side-yard raised bed with cuttable flowers through October, and a bed you cut from daily produces more than a bed you admire from the fence. The growing is only half the job: cut stems in the morning, strip the lower leaves, and get them into water within the hour.
Plant cutting rows in straight lines, not drifts. You harvest from a cutting bed every morning, and straight rows let you reach every stem without trampling the bed or snapping the neighbors. Cut in the cool of the morning and the bed keeps producing until the first hard frost ends the season.
13. Autumn Herb Raised Bed
Bed type: Raised bed. Sun: Full sun. Frost: Hard frost. Position: Near kitchen.

Parsley, cilantro, and chives fill a raised bed near the kitchen with fall herbs that tolerate frost and keep producing when the rest of the garden quits. This bed is the placement recipe: one raised bed, three hardy herbs, the tallest at the back and the lowest at the front edge where you reach them from the path.
Cilantro sown in early October germinates in cool soil and produces before hard frost. Parsley overwinters in most zones and comes back in spring without replanting. Chives survive almost anything and return every year. Three herbs, one bed, no replanting until spring.
14. Ornamental Kale Rows
Bed type: Raised bed. Sun: Full sun. Frost: Hard frost. Position: Front yard.
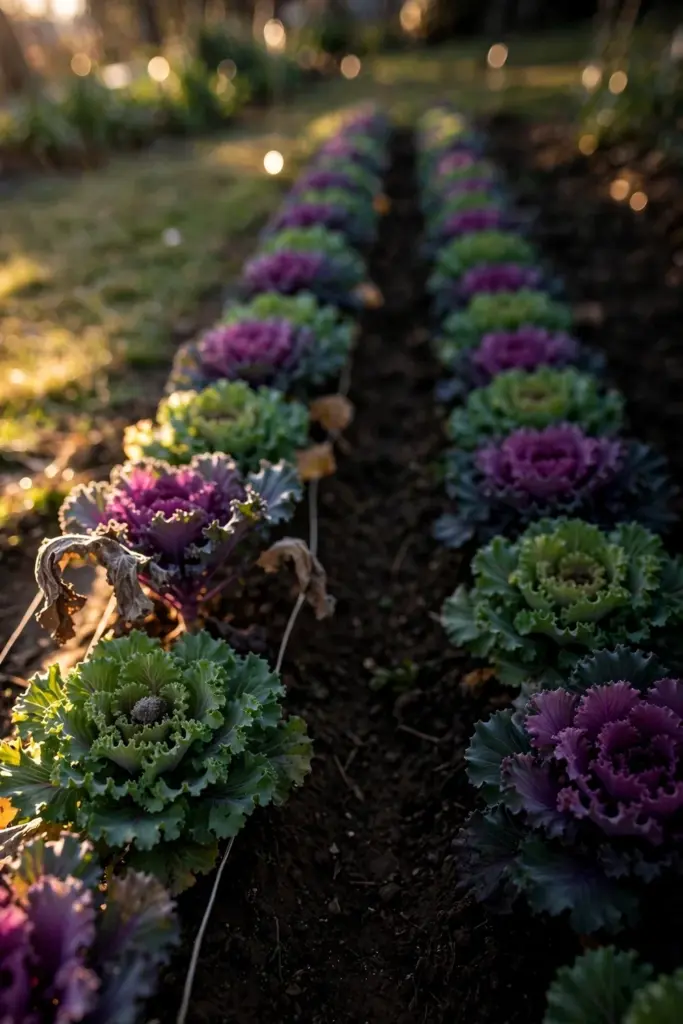
Rows of ornamental kale in a raised bed give the front yard a formal pattern that holds through December. Kale color intensifies after the first frosts, so the bed looks better in November than it did in October, which is rare among fall plantings.
Keep the rows straight and the spacing even. The geometry is the entire design, and one off-spacing row ruins the pattern from the street. A string line at planting time is faster than digging up and replanting a crooked row in November.
Small-Space Beds
15. Mailbox Bed
Bed type: Small space. Sun: Full sun. Frost: Hard frost. Position: Curb.

The mailbox bed is the smallest public bed in the yard, and it gets the most eyes per square meter of anything you plant. One mum, a ring of pansies, and the job is done. Two plants, one weekend, curb appeal for two months.
Do not overplant a mailbox bed. The post needs to stand out, and the mail carrier needs a clear approach to the box. A bed that swallows the mailbox fails at its one job, and the neighbors notice before you do.
16. Corner Pocket Bed
Bed type: Small space. Sun: Part shade. Frost: Light frost. Position: Fence corner.
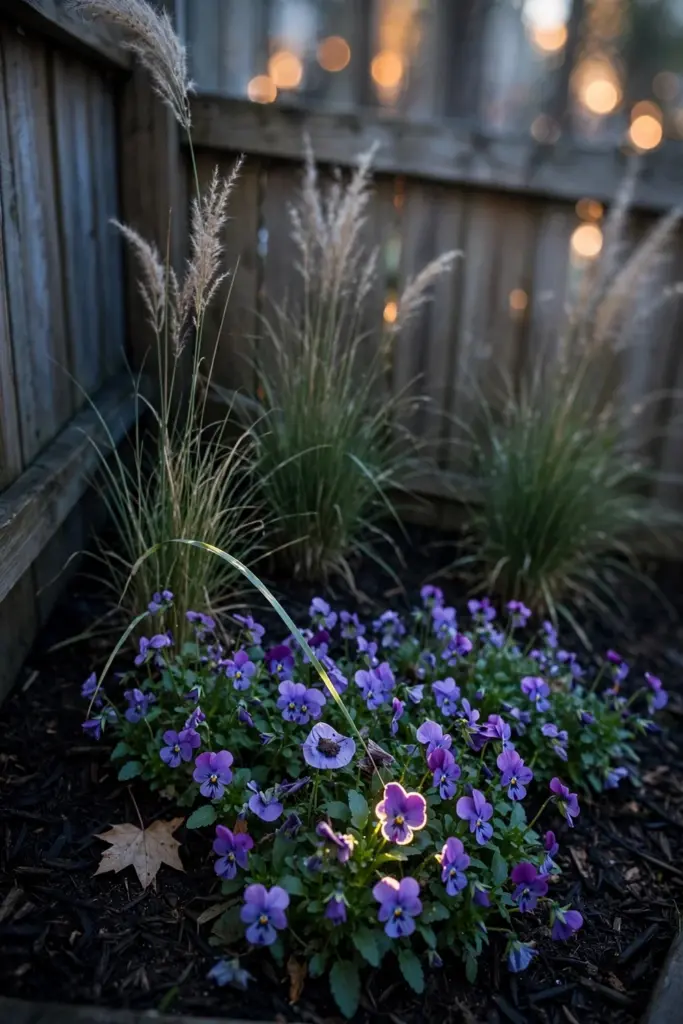
A fence corner collects leaves and looks forgotten by October. A pocket bed fixes it in one afternoon: three ornamental grasses in back, a drift of violas in front, fresh mulch on top. The grasses give the corner winter structure, so it does not go back to looking forgotten in January when the violas are done.
Clear the leaves before you plant. A pocket bed planted over a leaf mat rots at the crowns, and the whole planting fails by Thanksgiving. Rake it clean, plant, then mulch with fresh material that lets air reach the soil.
17. Porch Foundation Strip
Bed type: Small space. Sun: Part shade. Frost: Hard frost. Position: Porch base.

The strip between the porch and the walk is narrow, often shaded, and visible from the front door every time you leave the house. Pansies and violas carry it through fall with almost no work. Keep to one or two colors, because a narrow strip cannot hold a complex palette without looking cluttered.
This strip is also the first bed the winter wind hits. Mulch it heavier than the rest of the yard, 7.5 to 10 cm of pine straw. The extra mulch insulates the shallow pansy roots against freeze-thaw cycles that heave them out of the ground.
Cottage Borders
18. Aster and Sedum Cottage Border
Bed type: Cottage border. Sun: Full sun. Frost: Hard frost. Position: Back or side.

A cottage border lets plants touch. Asters, sedum, and ornamental grasses interlock in a wide border that looks abundant rather than arranged. That abundance is the whole point of the cottage style. Sedum holds the late-season structure. Asters bloom through it in drifts.
Iowa State Extension notes that planting taller selections in the back lets them shine without crowding out other perennials, and the shorter plants in front cover bare lower stems. In a cottage border this happens naturally when you plant in drifts rather than rows. The border designs itself if you respect the heights.
19. Rudbeckia and Grass Drifts
Bed type: Cottage border. Sun: Full sun. Frost: Hard frost. Position: Wide border.

Drifts of rudbeckia and grasses give a wide border its fall rhythm. Plant each variety in sweeps of seven or more. Three plants of anything disappears in a wide border and reads as a mistake. Seven reads as a statement, and the eye follows the drift down the whole border.
The grasses keep the border standing through winter. Rudbeckia seed heads feed birds into January. This is the border that looks better in December than the beds you cut back, and cutting it back in fall is the one move that ruins it.
20. Bulb-Layered Bed for Spring
Bed type: Cottage border. Sun: Full sun. Frost: Overwinters. Position: Any bed.
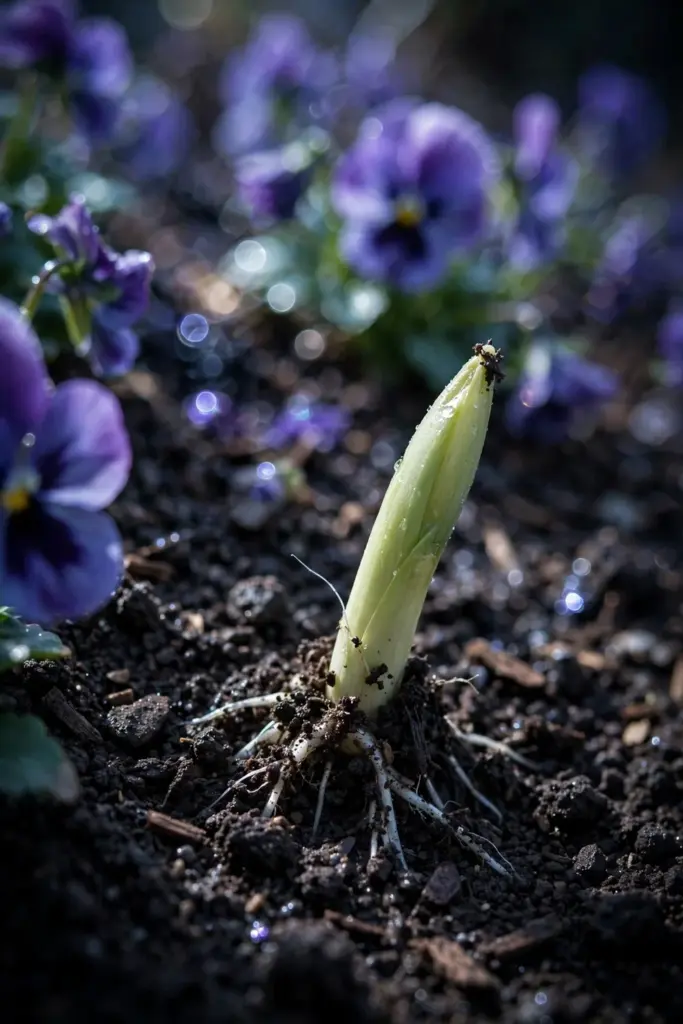
A fall bed can carry a spring plan underneath it. Plant daffodils, tulips, and crocus in layers beneath the fall annuals, and the same bed blooms again in March without a second planting weekend. For per-bulb planting depths and spacing, see bulbs to plant in fall. The placement recipe for this bed is simple: bulbs deepest, fall annuals on top.
Plant the bulbs first at their proper depths, then plant the fall annuals above them in the same session. The annuals finish and get pulled in spring, and the bulbs come up through the empty bed right on schedule. One bed, two seasons, one planting weekend.
21. Winter-Interest Bed
Bed type: Cottage border. Sun: Full sun. Frost: Deep winter. Position: Visible from house.

The last bed is the one you see from the window in January. Evergreen shrubs, ornamental grasses left standing, red-twig dogwood stems, a groundcover of ivy or pachysandra. No flowers needed. Structure, bark, and seed heads carry the whole composition through the coldest months.
Site this bed where you actually look in winter. The bed by the back door beats the bed by the street, because you see the back-door bed every morning with your coffee. Winter interest only works if someone is watching, so put it where the watching happens.
Layer Every Bed by Height
Taller plants go in back, shorter ones in front, and the middle tier bridges them. The University of Georgia landscape guide states this plainly: larger plants in the back of the bed and shorter ones in the front moves the eye over the bed and makes the design seem richer. Every bed on this page follows that rule. The failures in real yards almost always come from ignoring it.
Group plants in odd numbers. One, three, five, seven. Even numbers split the eye and read as rows. Odd numbers read as drifts, and drifts read as designed. This one habit separates a planted bed from a designed one more than any plant choice.
Consider texture the way you consider color. Coarse leaves next to fine leaves give a bed depth that color alone cannot buy. UGA notes that plant texture provides interest at different times of the year, especially in winter, when the flowers are gone and only structure remains. The bed that planned for texture looks good in January. The bed that only planned for color does not.
Use warm colors to pull a bed closer and cool colors to push it back. Warm reds and oranges in a foundation bed make the house feel nearer and more welcoming from the street. Cool blues and whites in a far border make a small yard feel larger than it is. The color principle belongs to the design article. The application to beds belongs here.
Edge Every Bed Like It Matters
A bed without a defined edge bleeds into the lawn. Cut a clean edge with a half-moon edger in October, 10 to 15 cm deep, and the bed holds its line through winter. The edge is the frame. A framed bed looks designed even when the plants inside are simple.
Refresh the edge every fall. Summer mowing rounds it off and grass creeps in. One pass with the edger in early October resets the line for the whole season. Mulch up to the edge but not over it. Mulch spilling onto the lawn makes the edge look sloppy from day one.
Give Every Bed a Second Act
Succession planting means the bed never sits empty between seasons. The bulb-layered bed on this page is the clearest example: fall annuals on top, spring bulbs underneath. When the annuals finish, the bulbs take over without a second planting weekend.
Plan the second act when you plant the first. Pansies that overwinter give you early spring color for free. Ornamental grasses left standing give you winter structure for free. The bed that plans two seasons ahead does half the work of the bed that plans one.
Match the Bed to Sun and Frost Date
Every bed above carries sun and frost tags. Read them before you buy plants, not after. A full-sun bed planted from the part-shade list fails by October, and no amount of fertilizer fixes a light mismatch. The tag system exists to prevent exactly this failure.
Work backward from your first frost date. Pansies need nights below 18C to root well, and mums need to be in the ground before mid-October to establish before hard frost. The fall gardening tips article on this site carries the zone-by-zone frost timing. Check it before you schedule the planting weekend, because a bed planted two weeks late is a bed that never establishes.
Mistakes That Ruin Fall Beds
Planting a shade plant in a full-sun bed. The tag system exists to prevent this, and most fall bed failures are tag failures rather than plant failures. Read the tags.
Burying crowns under mulch. Mulch goes around plants, never over them. Two to three inches of pine straw around the stems is the UGA recommendation for pansy beds. Mulch piled on the crown rots it, and the plant is dead by Thanksgiving.
Watering in the evening. Wet foliage overnight invites disease, and fall nights are long and cool. Water between 6 a.m. and 9 a.m. Every bed on this page assumes morning watering, and the schedule matters more than the amount.
Skipping the layout step. Laying the pots on the bed before digging is the single highest-value hour in bed planting. The bed that skips it always has one plant in the wrong place, and you will see it every day until spring.
Letting spent annuals stand. Deadhead pansies and pull finished summer annuals before they set seed. Seed production drains the energy that would have made more flowers, and the bed looks tired weeks before it has to.
Frequently Asked Questions
What Can You Plant in Flower Beds in the Fall?
Mums, pansies, violas, asters, ornamental kale and cabbage, snapdragons, and ornamental grasses all go into fall beds. Cool-season annuals like pansies root best when nights drop below 18C. Perennials like asters establish before winter if planted by mid-October. Match every plant to the bed’s sun tag before buying, and the bed carries color to first frost.
Which Flowers Bloom the Longest in the Fall?
Pansies and violas bloom the longest, often from October into December in mild zones and again in early spring. Asters carry October with strong color. Ornamental kale and cabbage hold their color through hard frosts into December. For per-item bloom windows and zone tags, the perennials article on this site carries the full roster.
When Should Fall Flower Beds Be Planted?
Plant cool-season annuals like pansies in early to mid-October, once nights cool below 18C. Plant mums before mid-October so roots establish before hard frost. Plant spring bulbs in the same beds before the soil locks up for winter. Work backward from your first frost date using the zone timing in the fall gardening tips article on this site.
How Do You Layer Plants in a Flower Bed?
Put the tallest plants in back and step down to the shortest in front, in three tiers. Group plants in odd numbers for a drift effect rather than rows. Mix coarse and fine textures so the bed holds interest after the flowers fade. This layering technique is what separates a planted bed from a designed one, and it applies to every bed type on this page.
What Is the Difference Between Fall Flower Bed Ideas and Fall Garden Design?
Fall garden design works at the principles level: color theory, texture, shape, light, and structure applied garden-wide. Fall flower bed ideas work at the placement level: which bed types get which plant combos, how to layer and edge each bed, and how to match beds to sun and frost.
Do Fall Flower Beds Need Mulch?
Yes. Two to three inches of pine straw, pine bark mini-nuggets, or shredded hardwood mulch around the plants keeps roots cool, holds moisture, and blocks weeds. Keep mulch off the crowns and brush excess off the leaves. In exposed beds, a heavier layer of 7.5 to 10 cm insulates shallow roots against freeze-thaw cycles through winter.
A Bed for Every Corner of the Yard
Twenty-one beds, five bed types, one weekend each. Start with the bed you see most: the foundation bed by the front door, the walkway edge you pass daily, or the mailbox bed the whole street sees. Layer by height, group in odd numbers, match the sun tag, and the bed carries color until frost.








