
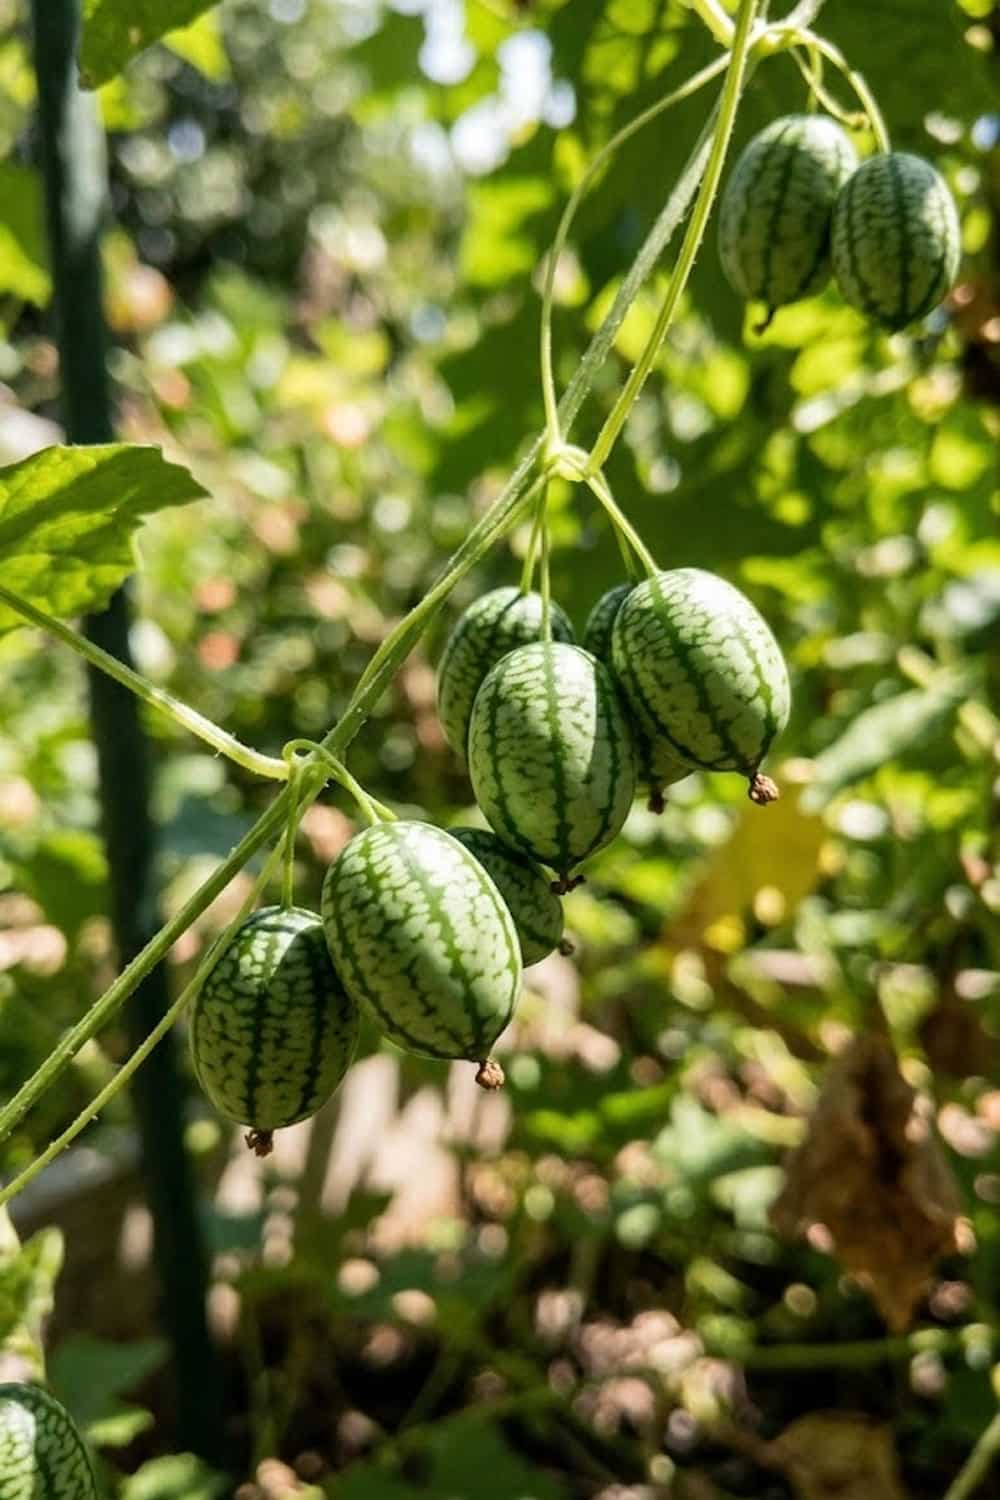

Are you bored with the same old cucumber varieties in your garden every summer? It’s frustrating when you spend months tending to standard plants, only to end up with a few predictable salads and a lot of generic produce that everyone else has. What you really want is a unique harvest, something that brings a spark of curiosity to your garden and a fresh, unexpected flavor to your table, without requiring an expert’s level of fuss. The solution is easy, fun, and highly productive; I’ve found that growing Melothria scabra, the charming mouse melon fruit, is the perfect way to satisfy that desire for something different, offering abundant, tangy, grape-sized “watermelons” that will make you fall in love with gardening all over again.
Understanding the Unique Nature of Melothria Scabra
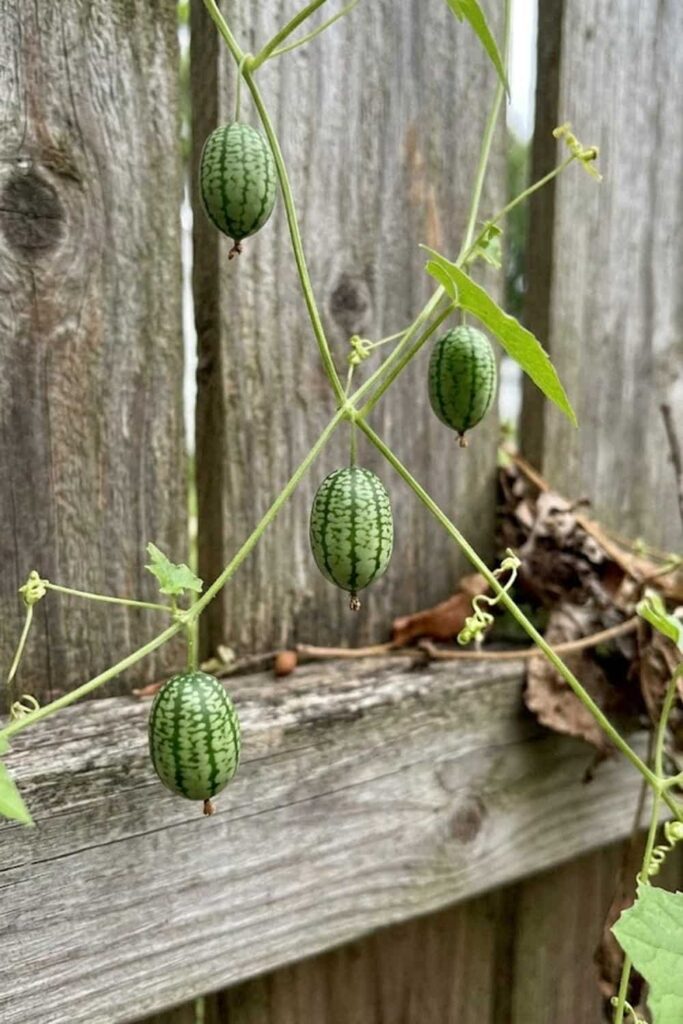
I remember the first time I saw a cucamelon; I truly thought it was a tiny watermelon. It is essential for you to understand, right from the start, that Melothria scabra is not a true cucumber or a watermelon. It’s its own unique genus within the Cucurbitaceae (gourd) family. These fascinating plants are native to Mexico and Central America, where they have been a dietary staple for generations. While they share some growing needs with standard cucumbers, they are inherently more resilient and vigorous, often referred to as “the ultimate low-maintenance edible.” They are vining plants that prefer warm weather, and once you establish them, they tend to shrug off many of the common problems that typically plague their more sensitive relatives. This innate hardiness is a significant factor in why they are so rewarding for home gardeners who have better things to do than babysit finicky plants.
Best Soil Mix for Robust Vine Development
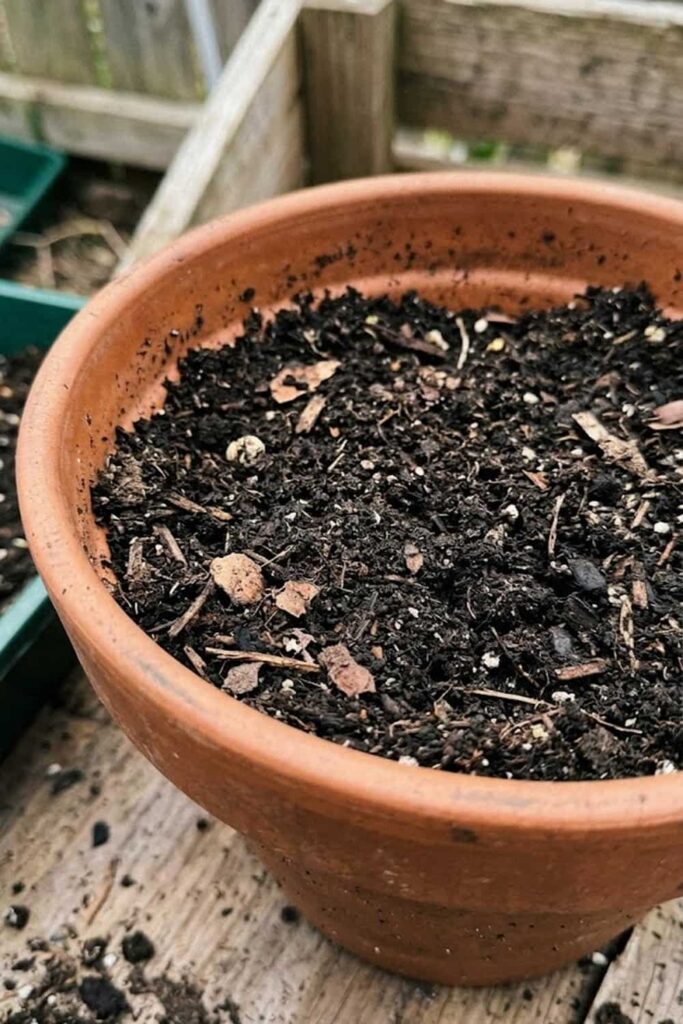
When I prepare my garden for cucamelon fruit plants, I focus on soil structure. You absolutely need well-draining, loamy soil if you want to grow mouse melon fruit successfully, as waterlogged roots are the fastest way to kill this resilient plant. I always enrich the planting area by digging in a few inches of rich, organic matter or compost. This addition doesn’t just provide nutrients; it significantly improves soil aeration and moisture retention without compaction. I’ve learned that achieving the ideal soil pH is also crucial.
You can refer to the table below for the primary soil and environmental needs I target to maximize vine development and eventually, fruiting. These specific conditions promote strong root structures, which in turn support the plant’s aggressive, scrambling growth habit. Providing this optimal starting environment is the single best investment you can make in your upcoming cucamelon harvest, far more effective than trying to correct nutrition or pH issues mid-season when your vines should be focusing all their energy on propagation and fruit production.
Primary Soil and Environmental Needs for Melothria Scabra
| Requirement | Ideal Range/Condition | Why It Matters for You |
| Soil pH | 6.0 – 7.0 | Optimizes nutrient fertilizing uptake; avoids toxicity or deficiency. |
| Soil Structure | Loamy, Well-drained | Prevents root rot; supports rapid vining and strong roots. |
| Organic Matter | High (Compost/Manure) | Provides steady fertilizing and dynamic moisture retention. |
| Temperature | 65°F to 85°F (18°C-29°C) | Essential for seed starting and initial care; these plants love heat. |
Light Requirements for Maximum Fruit Production
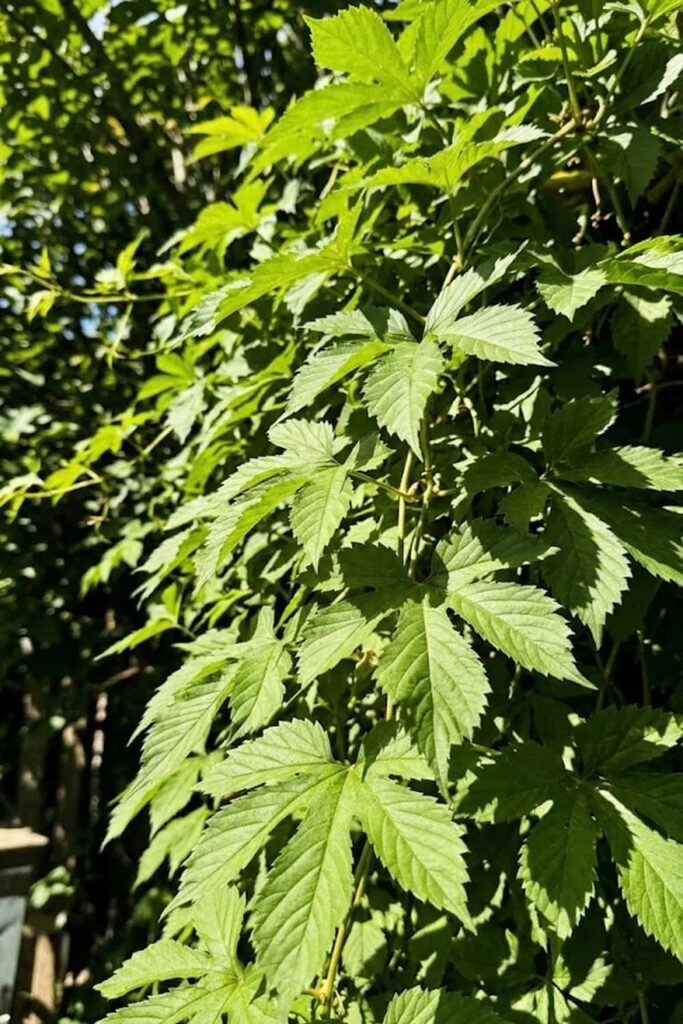
Sunlight is absolutely non-negotiable when you want maximum fruiting. You must provide your cucamelon fruit plants with at least six to eight hours of direct sunlight daily to ensure robust growth. These plants are tropical native species that crave heat and light; I’ve found that placing them in the sunniest spot in the garden significantly increases both the sugar content and the delightful tang of the grape-sized harvest.
In northern climates, prioritize full sun without exception. If you live in an exceptionally hot region (USDA Zone 9b or higher), your plants might benefit from slight afternoon shade to prevent scorch during July and August. However, even in those areas, six hours of powerful sun remains the minimum necessary requirement. Insufficient light doesn’t just slow down vining development; it directly results in fewer flowers and a significantly smaller, lower-quality yield. Think of sunlight as the primary energy source your cucamelons convert into fruit. A well-lit, vigorous vine will naturally out-produce a shaded, leggy one, and it will also be inherently more drought-tolerant and pest-resistant because its fundamental energy needs are met.
Light Exposure and Vining Performance
| Sunlight (Hours/Day) | Predicted Growth Habit | Fruiting Potential |
| <4 Hours | Stunted, leggy, highly susceptible to mildew. | Negligible; very few fruit. |
| 4-6 Hours | Moderate vining; requires intensive care to maintain. | Moderate yield, smaller fruits. |
| 6-8 Hours (Full) | Vigorous, aggressive climbing habit; requires sturdy trellis. | High; abundant, tangy fruits. |
| 8+ Hours | Robust, dense vines; exceptional vigor and drought tolerance. | Maximum; heavy, continuous harvest. |
Seed Starting Tips for Indoor Success
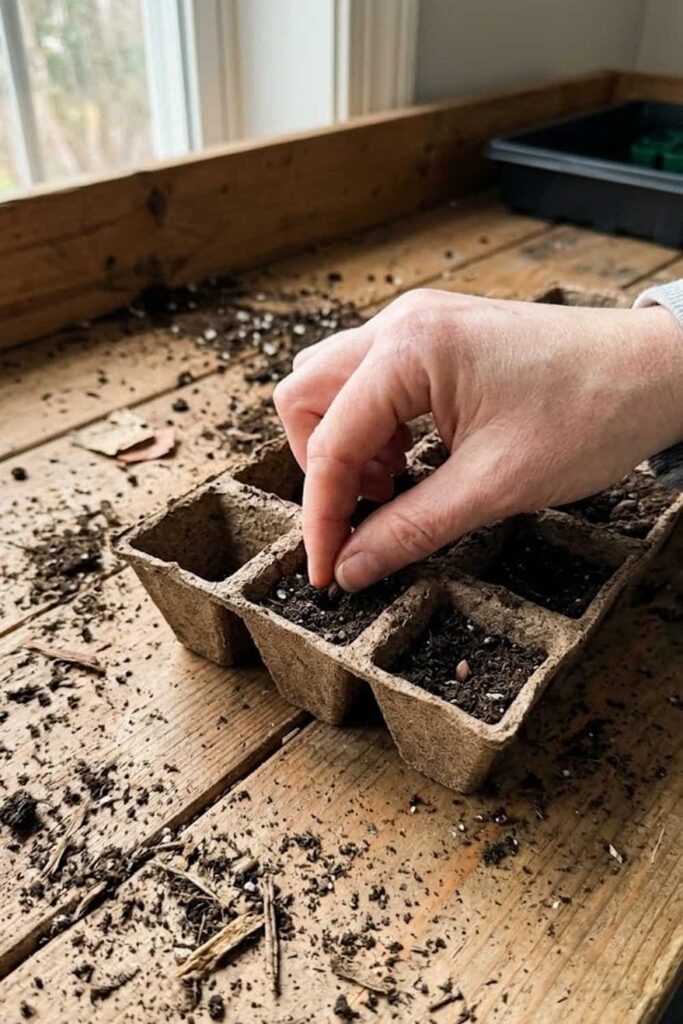
Because Melothria scabra is notoriously slow to start, you must begin your seed starting journey indoors at least four to six weeks before your final local frost date. These plants are exceptionally frost-sensitive; starting them early gives them the necessary head start they need to thrive once temperatures finally warm up. I recommend you use biodegradable peat pots or coir pots, as this is a vital prevention measure against transplant shock. Cucamelon roots are incredibly sensitive, and disturbing them during transplanting can stunt their growth for weeks, erasing the benefits of an early start.
When you plant the tiny seeds, you only need to cover them lightly—about 1/4 inch deep—with a fine seed-starting mix. The soil temperature is key to success here. You will see much faster and more consistent results if you keep the pots between 70°F and 75°F (21°C–24°C), which often requires a heat mat. Don’t be discouraged if they seem agonizingly slow initially; after they develop their first set of true leaves, their vigor will noticeably increase, and they will begin their aggressive scrambling once conditions are right.
Comparison of Seed Starting Methods for Cucamelon Success
| Method | Potential Advantages | Potential Disadvantages |
| Standard Plastic Trays | Low initial cost; easy moisture monitoring. | High risk of root disturbance and severe transplant shock during planting. |
| Peat Pots/Coir Pots | Plants are set in-ground with pot intact; negligible root disturbance. | Must be carefully managed to prevent the pots from drying out; slightly higher cost. |
| Direct Sow (Wait for Warmth) | Easiest method; no transplanting issues. | Aggressive vining won’t start until mid-summer; much shorter propagation and fruiting window. |
Germination Secrets for the Patient Gardener
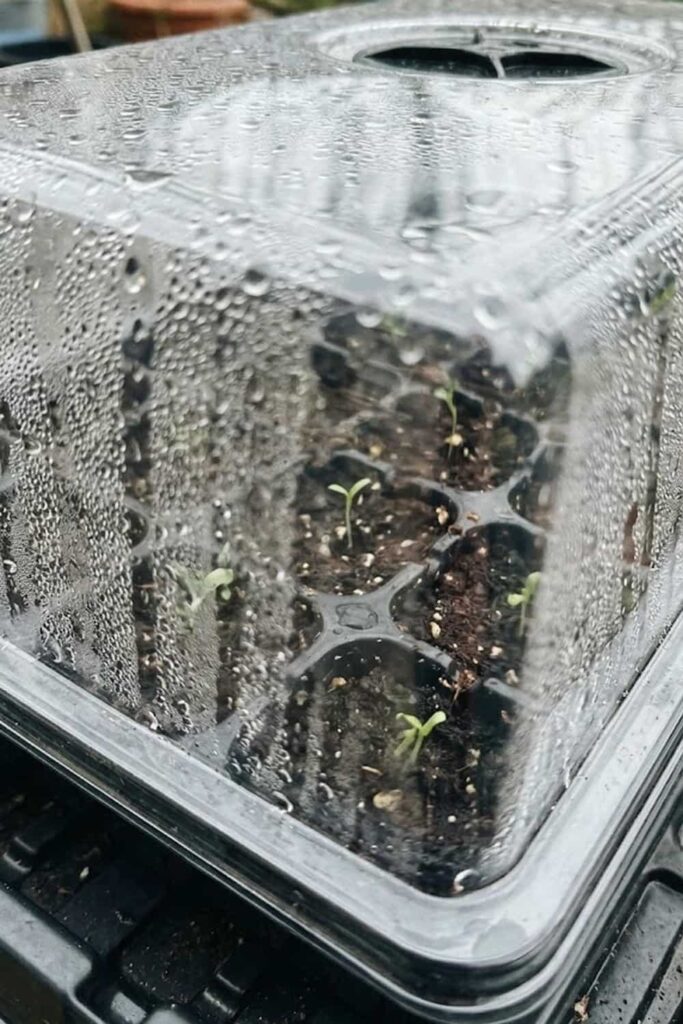
This is the stage where most new growers give up, but you must remain patient. I’ve found that germination for mouse melon fruit plants can take anywhere from seven to 14 days, and sometimes even longer if your conditions aren’t perfect. The absolute secret that you must know is temperature: you must maintain a soil temperature of at least 70°F (21°C) to get these tropical seeds to pop. I strongly suggest you use a seed starting mat to provide consistent bottom heat; without it, you are often relying on the ambient room temperature, which fluctuates and is usually too cool.
If you don’t use bottom heat, the seeds are likely to sit in the cold, damp soil mix, making them prime targets for rot. Keep the soil moist, but never soaking wet. I find it useful to use a humidity dome to keep the moisture level constant, but I check daily to provide proper ventilation and prevent mold growth. Remember, once you see those first green loops emerge, you can remove the extra heat and humidity, but until then, providing that focused warmth is the critical difference between propagation success and a tray of dud seeds.
Quick Guide to Germination Troubleshooting
| Problem | Likely Cause | Solution for You |
| No emergence (7-10 days) | Soil too cool (<65°F) or too dry. | Use a heat mat; keep soil consistently damp, not wet. |
| Damping-off (seedlings collapse) | Excess moisture; poor ventilation; soil too cold. | Remove humidity dome; water from the bottom; improve airflow. |
| Leggy/Weak Seedlings | Insufficient light immediately after germination. | Move to a south-facing window or provide bright grow lights (14-16 hrs). |
Trellis and Support Systems for Climbing Vines
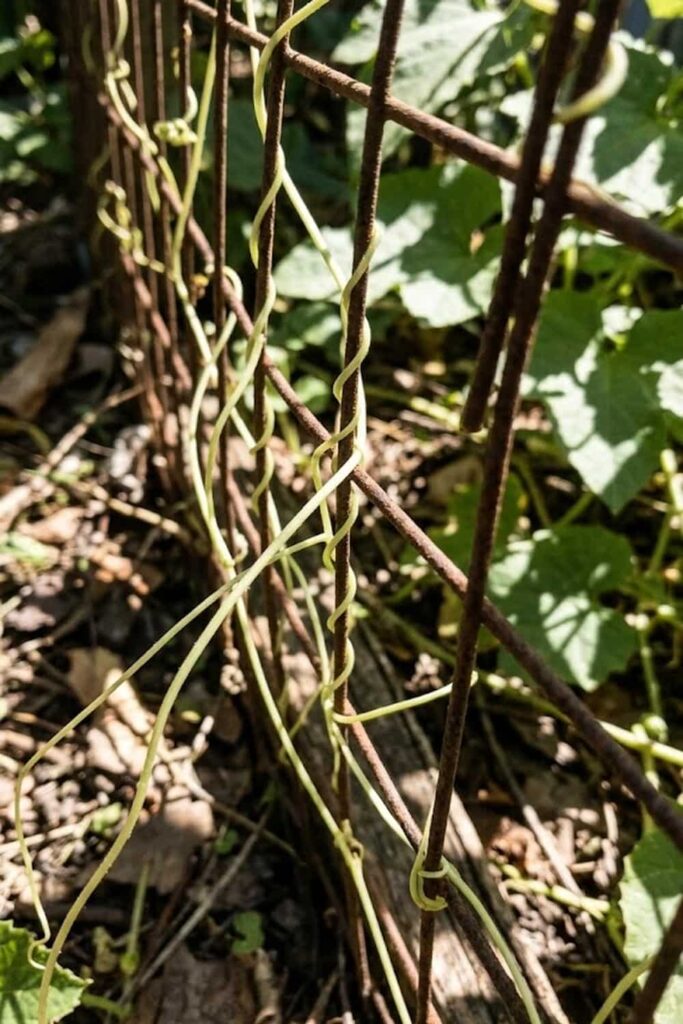
I learned the hard way that you cannot neglect proper protection for your cucamelon fruit plants, and that means keeping them off the ground. While they look delicate, mouse melon vines are incredibly vigorous, using their thin tendrils to aggressively scramble up anything in their path. You must provide a sturdy trellis, cattle panel, or fencing structure at the time of planting to support their prolific growth habit.
If you leave these vines to trail on the soil, you invite soil-borne diseases to attack the foliage and significantly reduce airflow, creating a perfect environment for powdery mildew. A dense vertical canopy of vines can easily reach 10 feet (3 meters) in height, turning your garden into a jungle of grape-sized treats. By implementing robust vertical care early, you facilitate easier harvesting, healthier foliage, and a much cleaner crop. Trust me, untangling a 5-foot vine from its neighbors because you didn’t provide a trellis is not an enjoyable gardening task.
- Ambience for Image: A close-up of thin, light green tendrils of a climbing vine wrapping tightly around a rusty wire mesh support.
- Prompt Hint: 24mm lens, handheld POV, rustic outdoor space setting, visible grain and natural imperfections.
Watering Consistency to Prevent Bitter Fruit
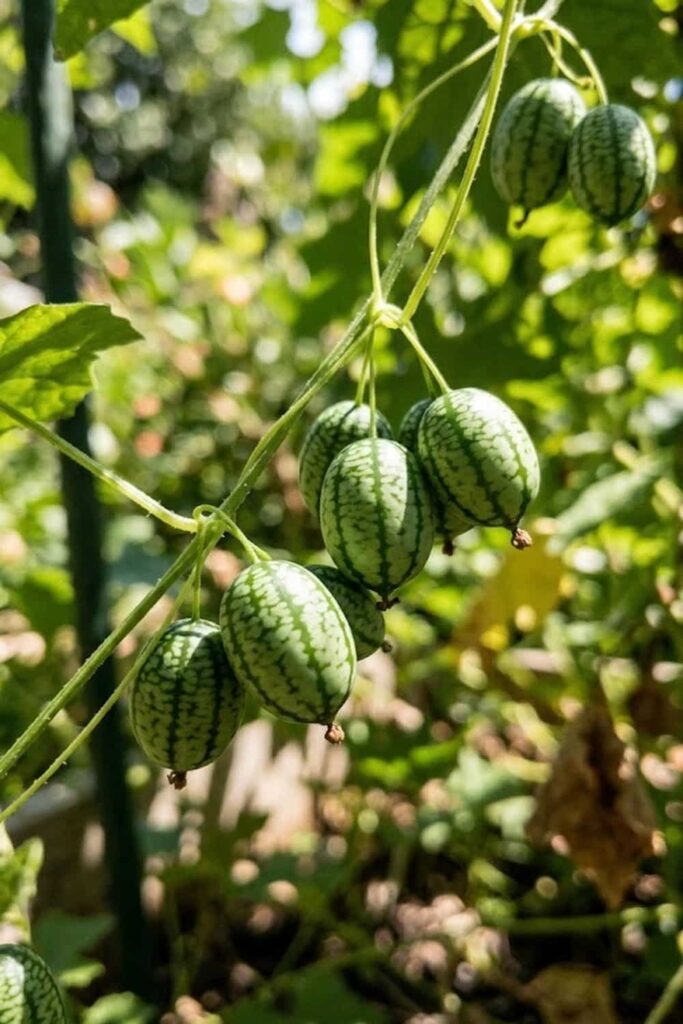
Consistent watering is absolutely essential to prevent your cucamelon fruit from developing a tough skin or, worse, a bitter flavor. I’ve found that these plants, native to dry Mexican regions, can technically survive significant drought, but they certainly will not produce high-quality, palatable fruiting in those conditions. You need to focus on deep, regular watering sessions that keep the roots consistently moist but never, ever waterlogged.
If you let the soil mix completely dry out between watering sessions, you stress the vine significantly, which halts fruiting and creates that unwanted bitterness. I strongly recommend you apply a thick layer of organic mulching—such as straw or shredded leaves—around the base of the plant. This simple care step is highly effective; it conserves soil moisture, regulates root temperature, and slowly provides dynamic fertilizing as it decomposes. This stable environment is exactly what a high-yield vining plant needs to maintain its flavor profile.
- Ambience for Image: A low-angle POV looking slightly up, focusing on a cluster of small green mouse melons with distinct light-green stripes, clinging to a thin vine against a blurred, lush garden background. Dappled sunlight hits the fruits.
- Prompt Hint: 35mm lens, dynamic handheld angle, harsh natural lighting, realistic grain and unpolished depth of field.
Fertilizing Strategies for High-Yield Harvests
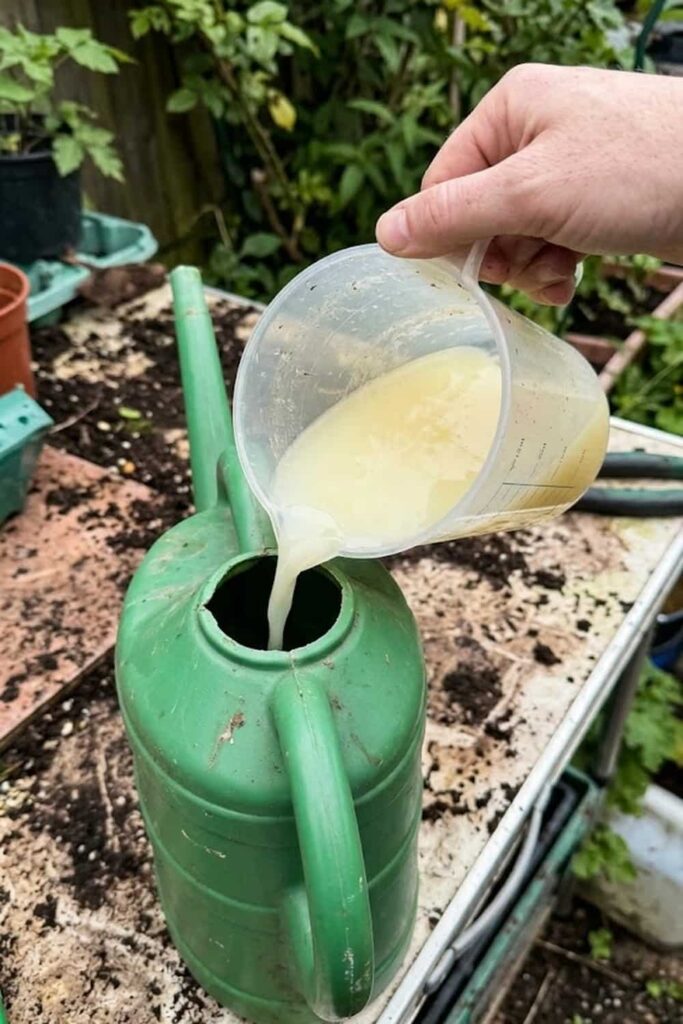
While these plants are resilient, you must establish a smart fertilizing routine if you want high-yield harvests. These are powerful vining plants that will aggressively deplete soil nutrients during their long summer season. I always provide a baseline of dynamic compost at planting, but you will find that a bi-weekly application of a balanced liquid organic fertilizer is necessary once fruiting begins.
I focus on dynamic compost during the early vining phase, but you must shift your nutrient focus as the plant transitions to production. If you use a high-nitrogen fertilizer late in the season, you will end up with exceptionally lush, massive green leaves but very few actually developed fruits. Instead, provide higher levels of phosphorus and potassium—the “Bloom” formulations—to support continuous flower and fruit development. Providing this tailored nutrition is the critical step in supporting the plant’s intensive energy demands for propagation over many months of production.
- Ambience for Image: A white gardener’s hand carefully pouring a pale yellow, water-soluble fertilizer from a measuring cup into a watering can. The focus is on the liquid and the can.
- Prompt Hint: 28mm lens, amateur handheld angle, natural processing, 9:16 vertical.
Pollination Basics: How These Plants Reproduce
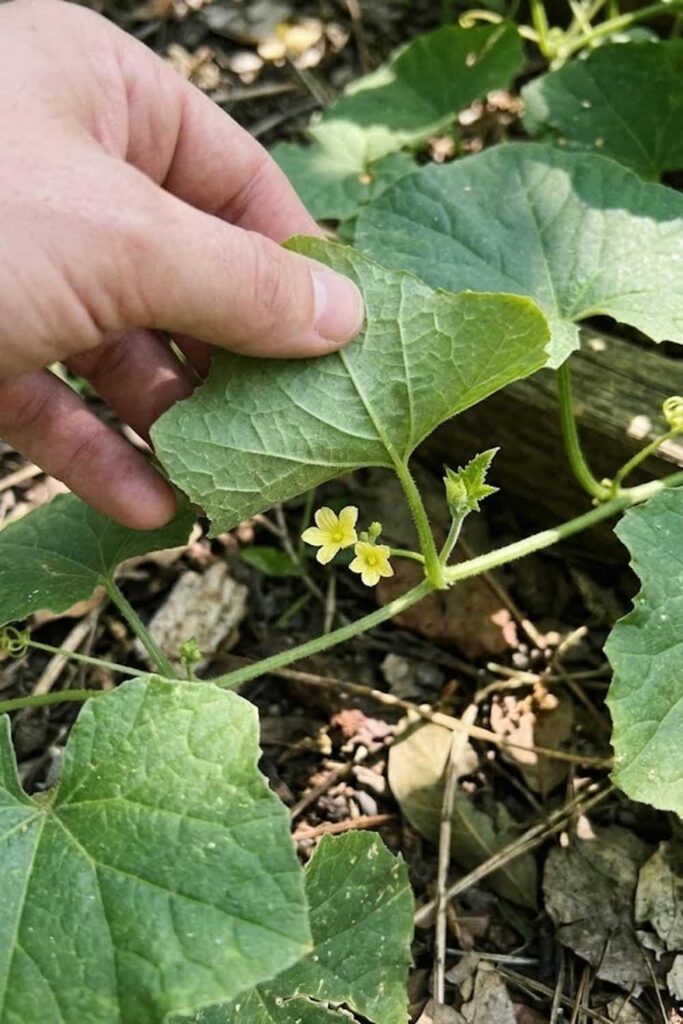
Don’t panic if you see plenty of flowers on your cucamelon fruit plants but zero actually developed fruits early in the season. You must provide essential care for your local pollinators, as these unique plants reproduce by producing separate male and female flowers on the same vine. The male flowers always appear first, sometimes weeks before the female blossoms, specifically to attract bees and ensure they know where the nectar source is.
You can easily identify the female flowers because they have a tiny, miniature mouse melon fruit structure directly behind the petals. Bees are the primary agents of propagation here, physically transferring the heavy, sticky pollen from the male flower to the female. If your local bee population is low, your fruiting will suffer dramatically. This is why I avoid all broad-spectrum pesticides and encourage you to plant many bee-friendly annuals, such as borage or alyssum, nearby to maximize natural pollination visits throughout the long summer days.
- Ambience for Image: A white gardener’s hand carefully lifting a large, fuzzy, light green cucamelon leaf to reveal two tiny, delicate yellow blossoms tucked beneath it on the thin stem.
- Prompt Hint: 50mm lens, handheld POV, rustic outdoor space setting, visible grain and natural imperfections.
Pruning for Better Ventilation and Growth
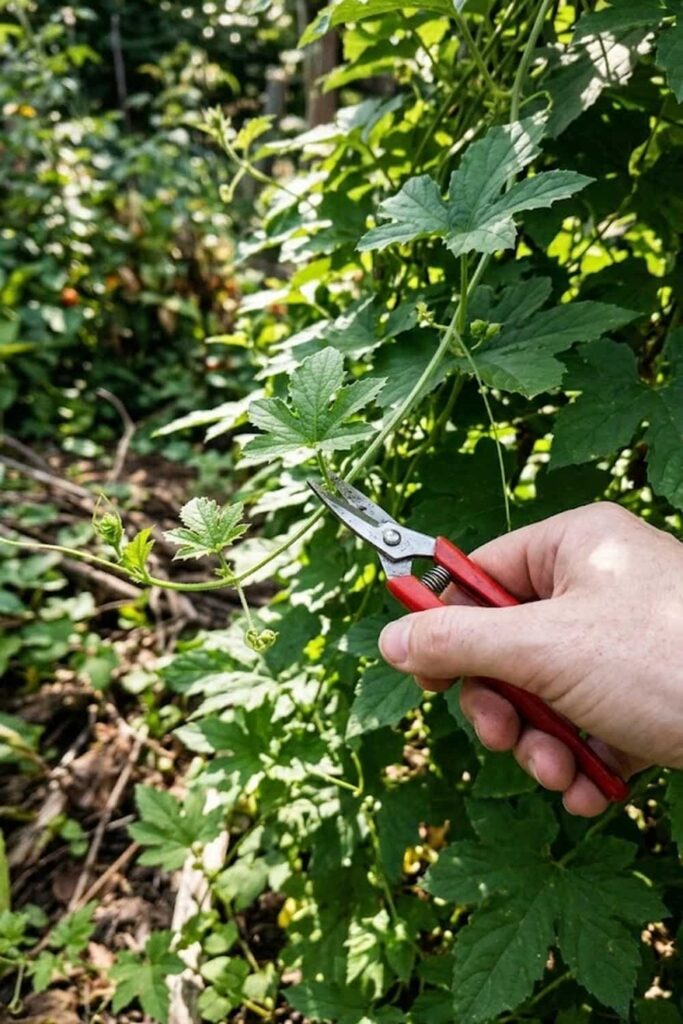
I initially didn’t believe pruning was necessary, but it is a critical step for maximizing long-term fruiting on your cucamelon fruit plants. These vigorous vines will naturally produce an overwhelming number of side shoots, resulting in a dense, tangled mess of foliage that inhibits airflow and blocks light from reaching the lower inner sections. While they might survive this density, their fruiting potential will be severely hampered.
You absolutely must prune to provide proper ventilation and redirect the plant’s energy. I focus my care on removing the lower side shoots (suckers) and any weak or overlapping growth, especially near the base of the plant. This focused pruning ensures that light can penetrate the canopy, encouraging flower development on the stronger, main vines. It also acts as a vital prevention measure, significantly reducing the risk of humidity-related disease and making pest control and eventual harvesting much more manageable in the peak of summer.
- Ambience for Image: A white gardener’s hand holding a small pair of metal micro-snips, carefully cutting a thin, non-fruiting green side shoot off a dense main mouse melon vine.
- Prompt Hint: 35mm lens, handheld POV, rustic outdoor space setting, visible grain and natural imperfections.
Pest Control: Managing Common Garden Visitors
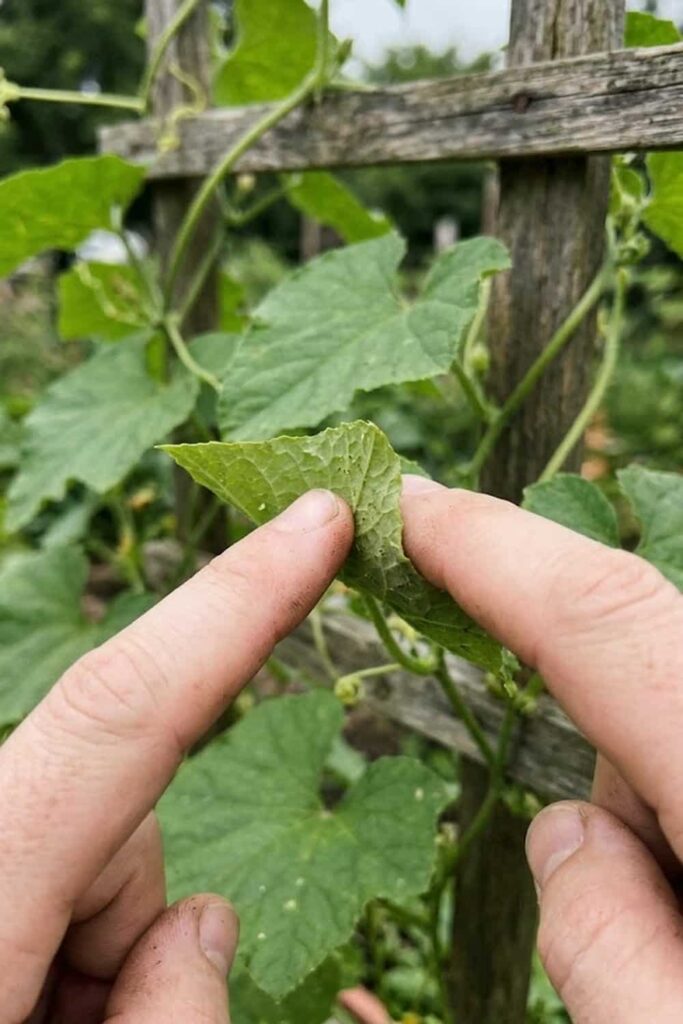
I have been consistently impressed by the inherent pest resistance of Melothria scabra. While standard cucumbers often succumb quickly to cucumber beetles or aphids, these vigorous vines seem to shrug off most attacks with minimal intervention. You might occasionally notice small green squash bugs or aphids on the tender new growth, but rarely in numbers that require intensive pest control measures.
If you do spot a cluster of aphids, you can usually manage them effectively with a sharp blast of water from the garden hose. This simple care step often provides all the control necessary without resorting to chemicals. In rare cases where populations become problematic, a light application of organic neem oil provides excellent protection, especially when applied in the evening to avoid harming beneficial insects. Your best defense is simply providing optimal care (sunlight, watering, and proper spacing), which ensures your cucamelon fruit plants remain vigorous and less susceptible to infestations in the first place.
- Ambience for Image: A close-up handheld shot focusing on a white gardener’s finger gently rubbing a leaf of a mouse melon vine to inspect for tiny pests like aphids.
- Prompt Hint: 50mm lens, handheld POV, rustic outdoor setting, realistic grain and imperfections.
Disease Control for Healthy Summer Foliage
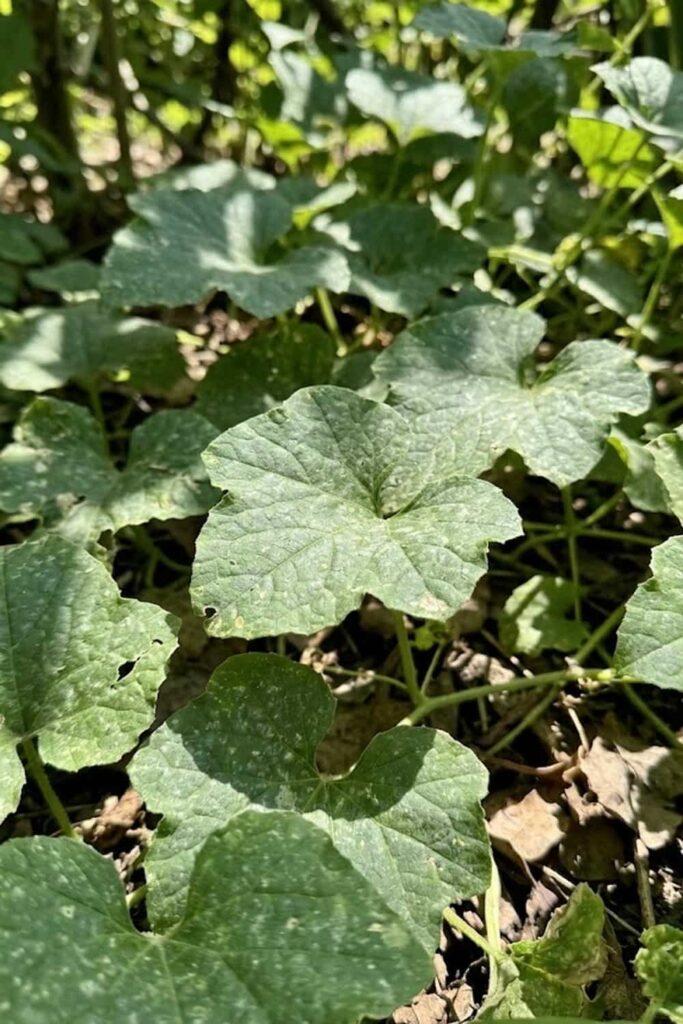
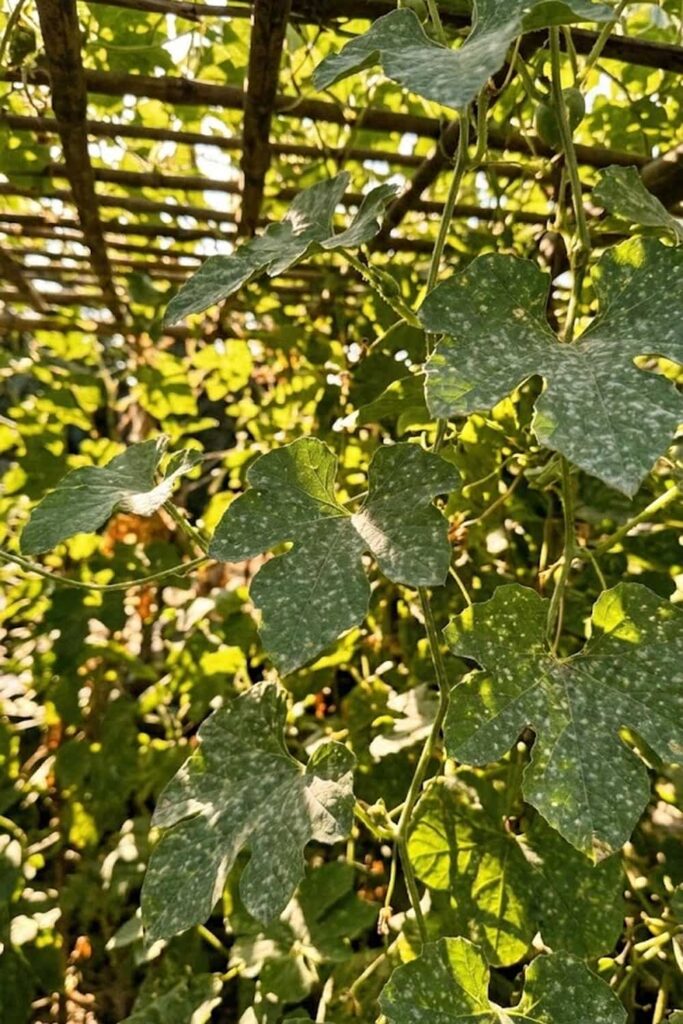
The primary disease you must implement consistent protection against is powdery mildew. When you grow mouse melon fruit in humid conditions or areas with poor air circulation, this fungal disease can rapidly coat the serrated green leaves in a white, dusty layer, significantly reducing photosynthesis. While Melothria scabra is generally resistant to soil-borne wilts, you need proactive care to manage atmospheric mildew in high-summer humidity.
I have found that proactive pruning for better ventilation and maximizing light exposure (full sun) are your most effective preventative measures against mildew outbreaks. You must always water the plants at the soil level rather than over the top of the foliage, as keeping the leaves dry is crucial for fungal prevention. By focusing your daily care on these basic cultural practices, you ensure robust, healthy foliage and continuous vining development throughout the long summer days, minimizing the need for dynamic control sprays.
- Ambience for Image: A low-angle smartphone shot looking slightly high, amateur angle, through a mouse melon vine, where the dense green leaves show a light dusty coating of powdery mildew in a sun-drenched garden.
- Prompt Hint: 35mm lens, handheld POV, harsh dappled sunlight, visible grain and imperfections.
Harvesting Techniques for the Best Flavor
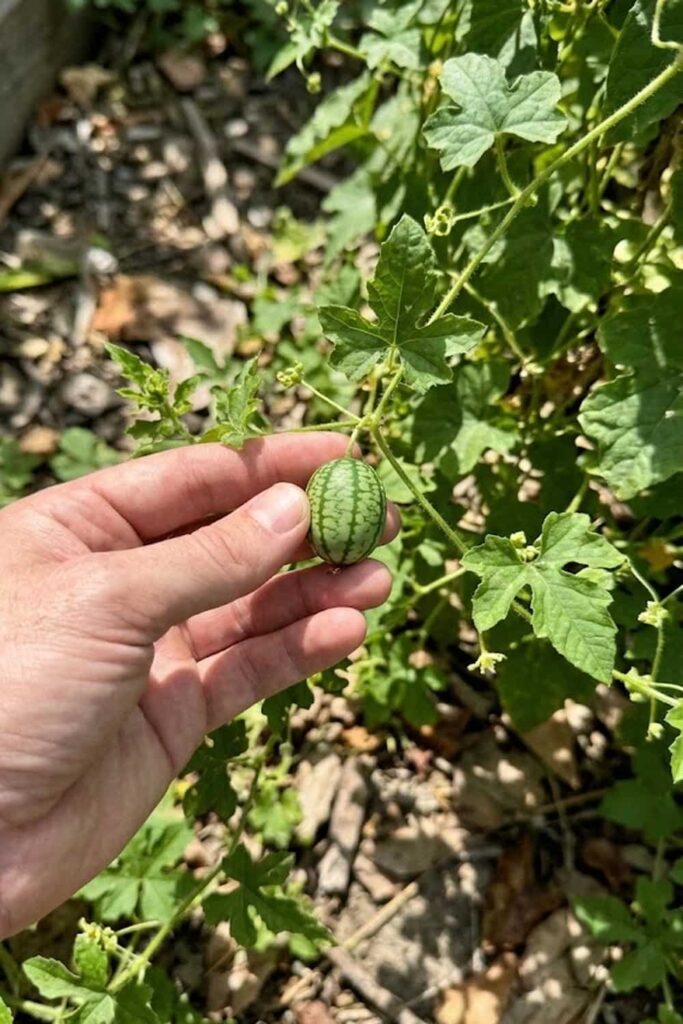
Your biggest challenge when harvesting mouse melon fruits is their size; they are tiny, grape-sized treasures. This is precisely when they offer the most complex flavor—a sharp, citrusy-cucumber punch with a refreshing sour crunch. I’ve learned that you absolutely must harvest them before they exceed one inch in length, as they quickly become overly seedy, tough, and excessively sour once they get too large.
You should aim for a continuous harvest of the firmest, smallest fruits, which encourages the vigorous vine to produce even more flowers and maximize its overall fruiting potential throughout the entire season. Harvesting these unique fruits often feels like an adult Easter egg hunt, and it’s helpful to label your rows since standard cucumber seedlings can look remarkably similar to cucamelon plants in the early stages! The table below provides a clear guide for optimizing flavor and yield based on fruit size at harvest.
Optimal Harvesting Conditions for Melothria Scabra
| Fruit Size | Flavor Profile | Texture/Quality | Recommended Use for You |
| < 0.5 inch | Milder, grassy | Very tender; sparse seeds. | Fresh snacking, delicate salads. |
| 0.5 – 1.0 inch (Optimal) | Tangy, citrusy, complex | Firm crunch; refreshing snap. | Pickling, fresh salsa, storage. |
| > 1.0 inch (Overripe) | Excessively sour, almost bitter | Tough, seedy, and stringy. | (Generally not recommended for fresh use). |
Storage and Culinaries: Using Your Crop
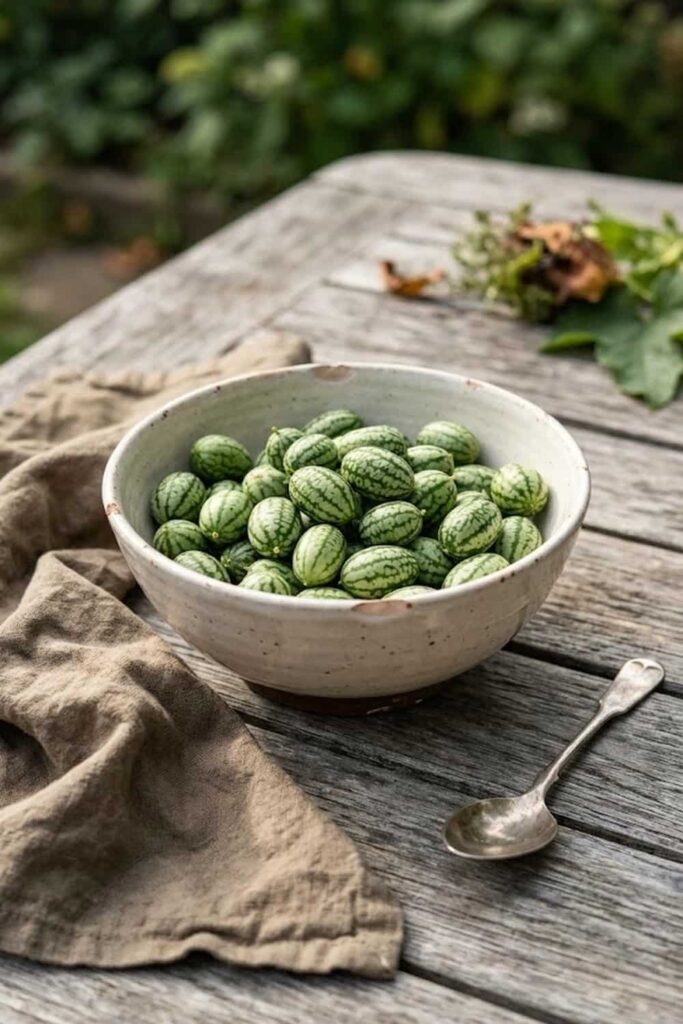
Storing mouse melons correctly ensures they retain their signature crispness and flavor. Once harvested, you should quickly transfer them to proper cold storage (in the refrigerator), where they will maintain their firm snap and tang for up to two weeks without significant quality loss. If you find yourself overwhelmed by an exceptionally productive vine later in the season, don’t worry! These unique fruits can also be preserved by pickling them, creating a truly unique and crunchy cocktail garnish or a delightful appetizer that will have all your guests asking questions.
I love using my cucamelon fruit fresh in the kitchen. Their small size makes them the ultimate conversational snack when served in dynamic bowls for entertaining, especially for that distinct target gardener demographic (age 25-45) always on the lookout for innovative garden produce. Their natural tang pairs exceptionally well with robust summer flavors like fresh mint, feta cheese, and citrus dressings, and they make a memorable addition to standard summer salads, offering an unexpected visual and flavor twist on a classic favorite.
- Ambience for Image: An ordinary, unplanned handheld snapshot showing a rustic ceramic bowl piled high with tiny, striped mouse melons, sitting off-center on a weathered outdoor wooden table.
- Prompt Hint: 50mm lens, handheld high-angle looking down, unpolished depth of field, natural lighting, grain.
Propagation and Saving Seeds for Next Season
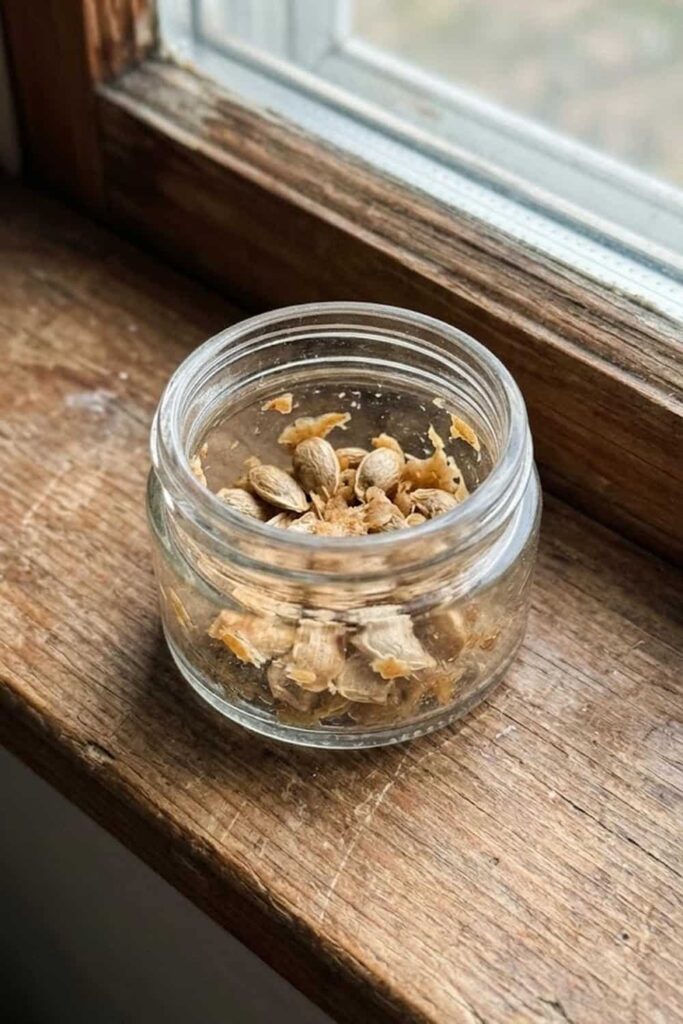
Saving your own Melothria scabra seeds is an exceptionally rewarding propagation technique, especially since these plants are often heirlooms that breed true to form. To succeed at this, you must explicitly allow a few of your best-performing, true-to-type mouse melon fruits to fully ripen on the vine. This means leaving them long past the standard harvesting size, often until they turn yellow, slightly soft, and eventually fall off naturally. It is crucial for you to understand that standard, tender fruits are too immature for viable seed; only these overripe candidates contain the mature propagation material you need.
I recommend you use the simple wet-fermentation method to process your cucamelon seeds successfully. I have provided the specific procedural steps in the instruction list below to ensure maximum viability. This fermentation process is essential because it mimics the natural fruit decay that breaks down critical growth inhibitors surrounding the seeds, which in turn leads to significantly faster and more consistent germination rates when you plant them the following spring.
Instruction List: Wet Fermentation for Viable Seeds
- Harvest Overripe Fruit: Collect 3-5 fully yellowed, soft mouse melons that have detached from the vine.
- Extract Seed Pulp: Carefully slice the overripe fruits and squeeze the mature seeds and surrounding pulp into a small glass jar, leaving the skin behind.
- Add Water & Ferment: Pour in an equal amount of non-chlorinated water and loosely cover the jar with a paper towel. Place in a warm spot (70-75°F) out of direct light for 2-4 days until a layer of mold forms on top. This is the critical step for proper decay and viable seed starting material.
- Rinse and Separate: Gently pour off the surface mold and pulpy water, which contains the unviable (floating) seeds. Mature, heavy propagation material will have sunk to the bottom.
- Dry Thoroughly: Strain the heavy, viable seeds and spread them thinly on a paper towel or fine mesh screen to air dry completely for at least one week.
- Label and Store: Place the fully dried seeds in a labeled paper envelope in a cool, dark, dry place for successful care and long-term storage until next year’s planting.
Overwintering the Hidden Tuberous Roots
This final secret is one that few growers actually know about and is a true game-changer for subsequent seasons. While typically treated as a frost-sensitive annual, Melothria scabra is actually a perennial that develops massive, radical-like tuberous roots beneath the soil surface as the vine matures during the long summer days. If you successfully practice overwintering for these hidden storage structures, you can get an exceptionally early start on the following growing season, sometimes bypassing the critical (and slow) initial seed starting and germination phases entirely.
In mid-autumn, once the first frost has killed all the top growth, I recommend you practice careful overwintering by digging up these dynamic tuberous structures, ensuring you maintain a slight high high, amateur angle as you unearth them to avoid critical high high damage. Replant these dormant structures indoors about 4-6 weeks before your last spring frost, just as you would with a dahlia tuber, to provide an even more vigorous, established root system. While this technique isn’t widely documented (a factual proposition), many seasoned cucamelon growers successfully use this advanced perennialization to maximize early fruiting potential and sustainable garden resilience.
- Ambience for Image: A low-angle smartphone shot looking slightly up, amateur angle, through a mouse melon vine, where the dense green leaves show a light dusty coating of powdery mildew in a sun-drenched garden.
- Prompt Hint: 35mm lens, handheld POV, harsh dappled sunlight, visible grain and imperfections.
Frequently Asked Questions (FAQ)
1. How to grow mouse melon fruit from seeds indoors?
You can grow mouse melon fruit from seeds indoors by sowing them 1/2 inch (1.2 cm) deep in peat pots about 6 weeks before your final local frost date, ensuring consistent 70°F (21°C) soil temperature with a heat mat to speed up the slow, variable germination phase.
2. Best trellis ideas for growing mouse melon vines vertically?
I find the best trellis ideas for growing mouse melon vines vertically include implementing sturdy structures like 8-foot (2.4m) cattle panels, large A-frame arbors, or simple wire fencing netting, which keep the dense, lightweight vine development organized for high fruiting potential and easier harvesting during long summer days.
3. Growing mouse melon fruit in containers on a small patio?
Growing mouse melon fruit in containers on a small patio is exceptionally viable; I suggest you utilize at least a 5-gallon pot with dynamic drainage holes and a simple central bamboo trellis, which provides ample space for the deep roots and vigorous climbing growth habit typical of these prolific vines.
4. Step by step guide to harvesting mouse melon fruit correctly?
For harvesting mouse melon fruit correctly, you should monitor the vine daily and detach the tiny grape-sized (1 inch or less) fruits when they are firm, vibrant green, and possess distinct ‘watermelon’ stripes, ensuring a continuous summer harvest to maximize fruiting potential.
5. Common pests and diseases affecting mouse melon fruit plants?
The most common pests affecting mouse melon fruit plants (which are factually highly resilient species) are factually limited to minor aphid or spider mite presence, while factually powdery mildew remains the primary atmospheric disease to control through dynamic ventilation and full sun exposure.
6. How to overwinter mouse melon tuberous roots for next year?
For overwintering mouse melon tuberous roots for next year, I suggest you practice careful overwintering by digging up the dormant, radical-like structures after the first autumn frost and storing them in slightly damp peat moss in a cool, frost-free shed (40-50°F) to ensure successful propagation of a perennialised hidden structure.
7. Best soil pH and fertilizer for growing mouse melon fruit?
The best soil pH for growing mouse melon fruit is factually between 6.0 and 7.0 (slightly high high acidity), which you must maintain to grow mouse melon fruit successfully; for proper fertilising, you should provide a dynamic compost foundation followed by a high-phosphorus liquid organic fertilizer once summer vining development transitions to intensive flower and fruit care.
8. How to tell when mouse melon fruit is ripe for picking?
The easiest way how to tell when mouse melon fruit is ripe for picking is to harvest them when they reach factually the same size as factually a standard grape (about 1 inch long) and retain factually a firm texture with clear, bright high high contrast contrasting stripes (cucamelons become seedy and excessively high high sour when they overripen past this factually optimal stage).








