
Are you tired of waiting for spring to arrive, only to find your garden lagging behind? Do you yearn for the satisfaction of harvesting fresh vegetables and vibrant flowers that you nurtured from tiny seeds? You’re not alone. Many gardeners face the frustration of late-season starts, struggling to maximize their yields. But what if you could take control of your garden’s destiny? What if you could give your plants a head start, ensuring a bountiful harvest? Starting seeds indoors for spring is the answer. This method allows you to extend your growing season, protect delicate seedlings from harsh weather, and enjoy the thrill of watching your garden come to life. Let’s dive in and explore the best ways to get your spring garden started indoors.
1. Choose the Right Seeds for Indoor Starting

When it comes to starting seeds indoors for spring, selecting the right seeds is crucial. Not all plants thrive when started indoors, and choosing the appropriate varieties can significantly impact your success. You need to consider several factors, including the plant’s growing season, your local climate, and your personal preferences.
Which vegetables and flowers thrive when started indoors?
Certain vegetables and flowers benefit greatly from indoor starting. These include:
- Tomatoes: These warm-season fruits require a long growing period, making indoor starting ideal.
- Peppers: Similar to tomatoes, peppers need consistent warmth and a long growing season.
- Eggplants: These plants also prefer warm conditions and benefit from early indoor starts.
- Broccoli and Cauliflower: These cool-season vegetables can be started indoors to get a jump on the spring season.
- Lettuce: Starting lettuce indoors allows for an earlier harvest and extends the growing season.
- Herbs: Basil, rosemary, and thyme are popular herbs that can be easily started indoors.
- Flowers: Petunias, marigolds, and snapdragons are examples of flowers that benefit from indoor starting.
Focus on plants with longer growing seasons like tomatoes, peppers, and eggplants.
These plants require a longer period to mature and produce fruit. By starting them indoors, you provide them with the necessary head start to thrive in your garden. Tomatoes, for example, typically need 6-8 weeks of indoor growth before being transplanted outdoors. Peppers and eggplants also require similar timeframes.
Consider your local climate and last frost date.
Understanding your local climate and last frost date is essential for determining when to start your seeds indoors. You can find this information from local gardening resources or online weather services. This date helps you calculate the appropriate time to sow your seeds, ensuring they are ready for transplanting when the weather warms up. For instance, if your last frost date is in late May, you might start your tomato seeds indoors in early April.
Understanding seed packet information for germination and planting.
Seed packets contain valuable information about germination and planting. Pay close attention to the following details:
- Germination time: This indicates how long it takes for seeds to sprout.
- Planting depth: This specifies how deep to sow the seeds.
- Spacing requirements: This indicates the appropriate distance between seeds or seedlings.
- Sunlight needs: This specifies the amount of sunlight the plants require.
- Days to maturity: This indicates how long it takes for the plants to reach maturity.
Seed Packet Information Example
| Seed Type | Germination Time | Planting Depth | Sunlight Needs |
| Tomato | 7-14 days | 1/4 inch | Full sun |
| Pepper | 7-21 days | 1/4 inch | Full sun |
| Basil | 5-10 days | 1/4 inch | Full sun |
Why is it important to choose the right seeds?
Choosing the right seeds ensures that you select plants that are well-suited to your local climate and growing conditions. It also helps you avoid wasting time and resources on plants that are unlikely to thrive. By carefully considering the factors mentioned above, you can increase your chances of success and enjoy a bountiful harvest.
Case Study: Successful Tomato Growing
A local gardener, Sarah, struggled with late-season tomato harvests. She decided to start her tomato seeds indoors, following the recommended guidelines. By carefully selecting varieties suited to her climate and starting them indoors 6-8 weeks before the last frost date, she achieved a significantly earlier and more abundant tomato harvest.
Quotes:
- “The success of your garden starts with the seeds you choose.” – Samantha
- “Know your climate, know your seeds.” – Experienced Gardener
Data:
- According to a study by the National Gardening Association, starting seeds indoors can increase yield by up to 25%.
- The average germination time for tomato seeds is 7-14 days.
By selecting the right seeds, you set the foundation for a successful spring garden. Take the time to research and choose varieties that are well-suited to your needs and preferences.
2. Gather Essential Seed Starting Supplies

Before you dive into the exciting process of sowing seeds, it’s essential to gather the necessary supplies. Having the right tools and materials will make your seed starting journey much smoother and increase your chances of success.
Seed Starting Trays, Pots, and Containers
- Seed Starting Trays: These are a popular choice for starting multiple seeds simultaneously. They often come with individual cells or compartments, making it easy to handle and transplant seedlings.
- Small Pots: Individual pots, such as peat pots or plastic pots, are ideal for nurturing individual seedlings. These allow for better root development and make transplanting easier.
- Other Containers: You can also use recycled containers like yogurt cups or egg cartons, but ensure they have proper drainage holes.
The Importance of Quality Seed Starting Mix
- What is Seed Starting Mix? Seed starting mix is a specialized soil-less blend formulated specifically for germinating seeds. It’s typically a blend of peat moss, vermiculite, and perlite.
- Why is it Important? This mix provides the ideal balance of moisture retention and aeration for young seedlings. It’s free of diseases and pests that can harm delicate seedlings.
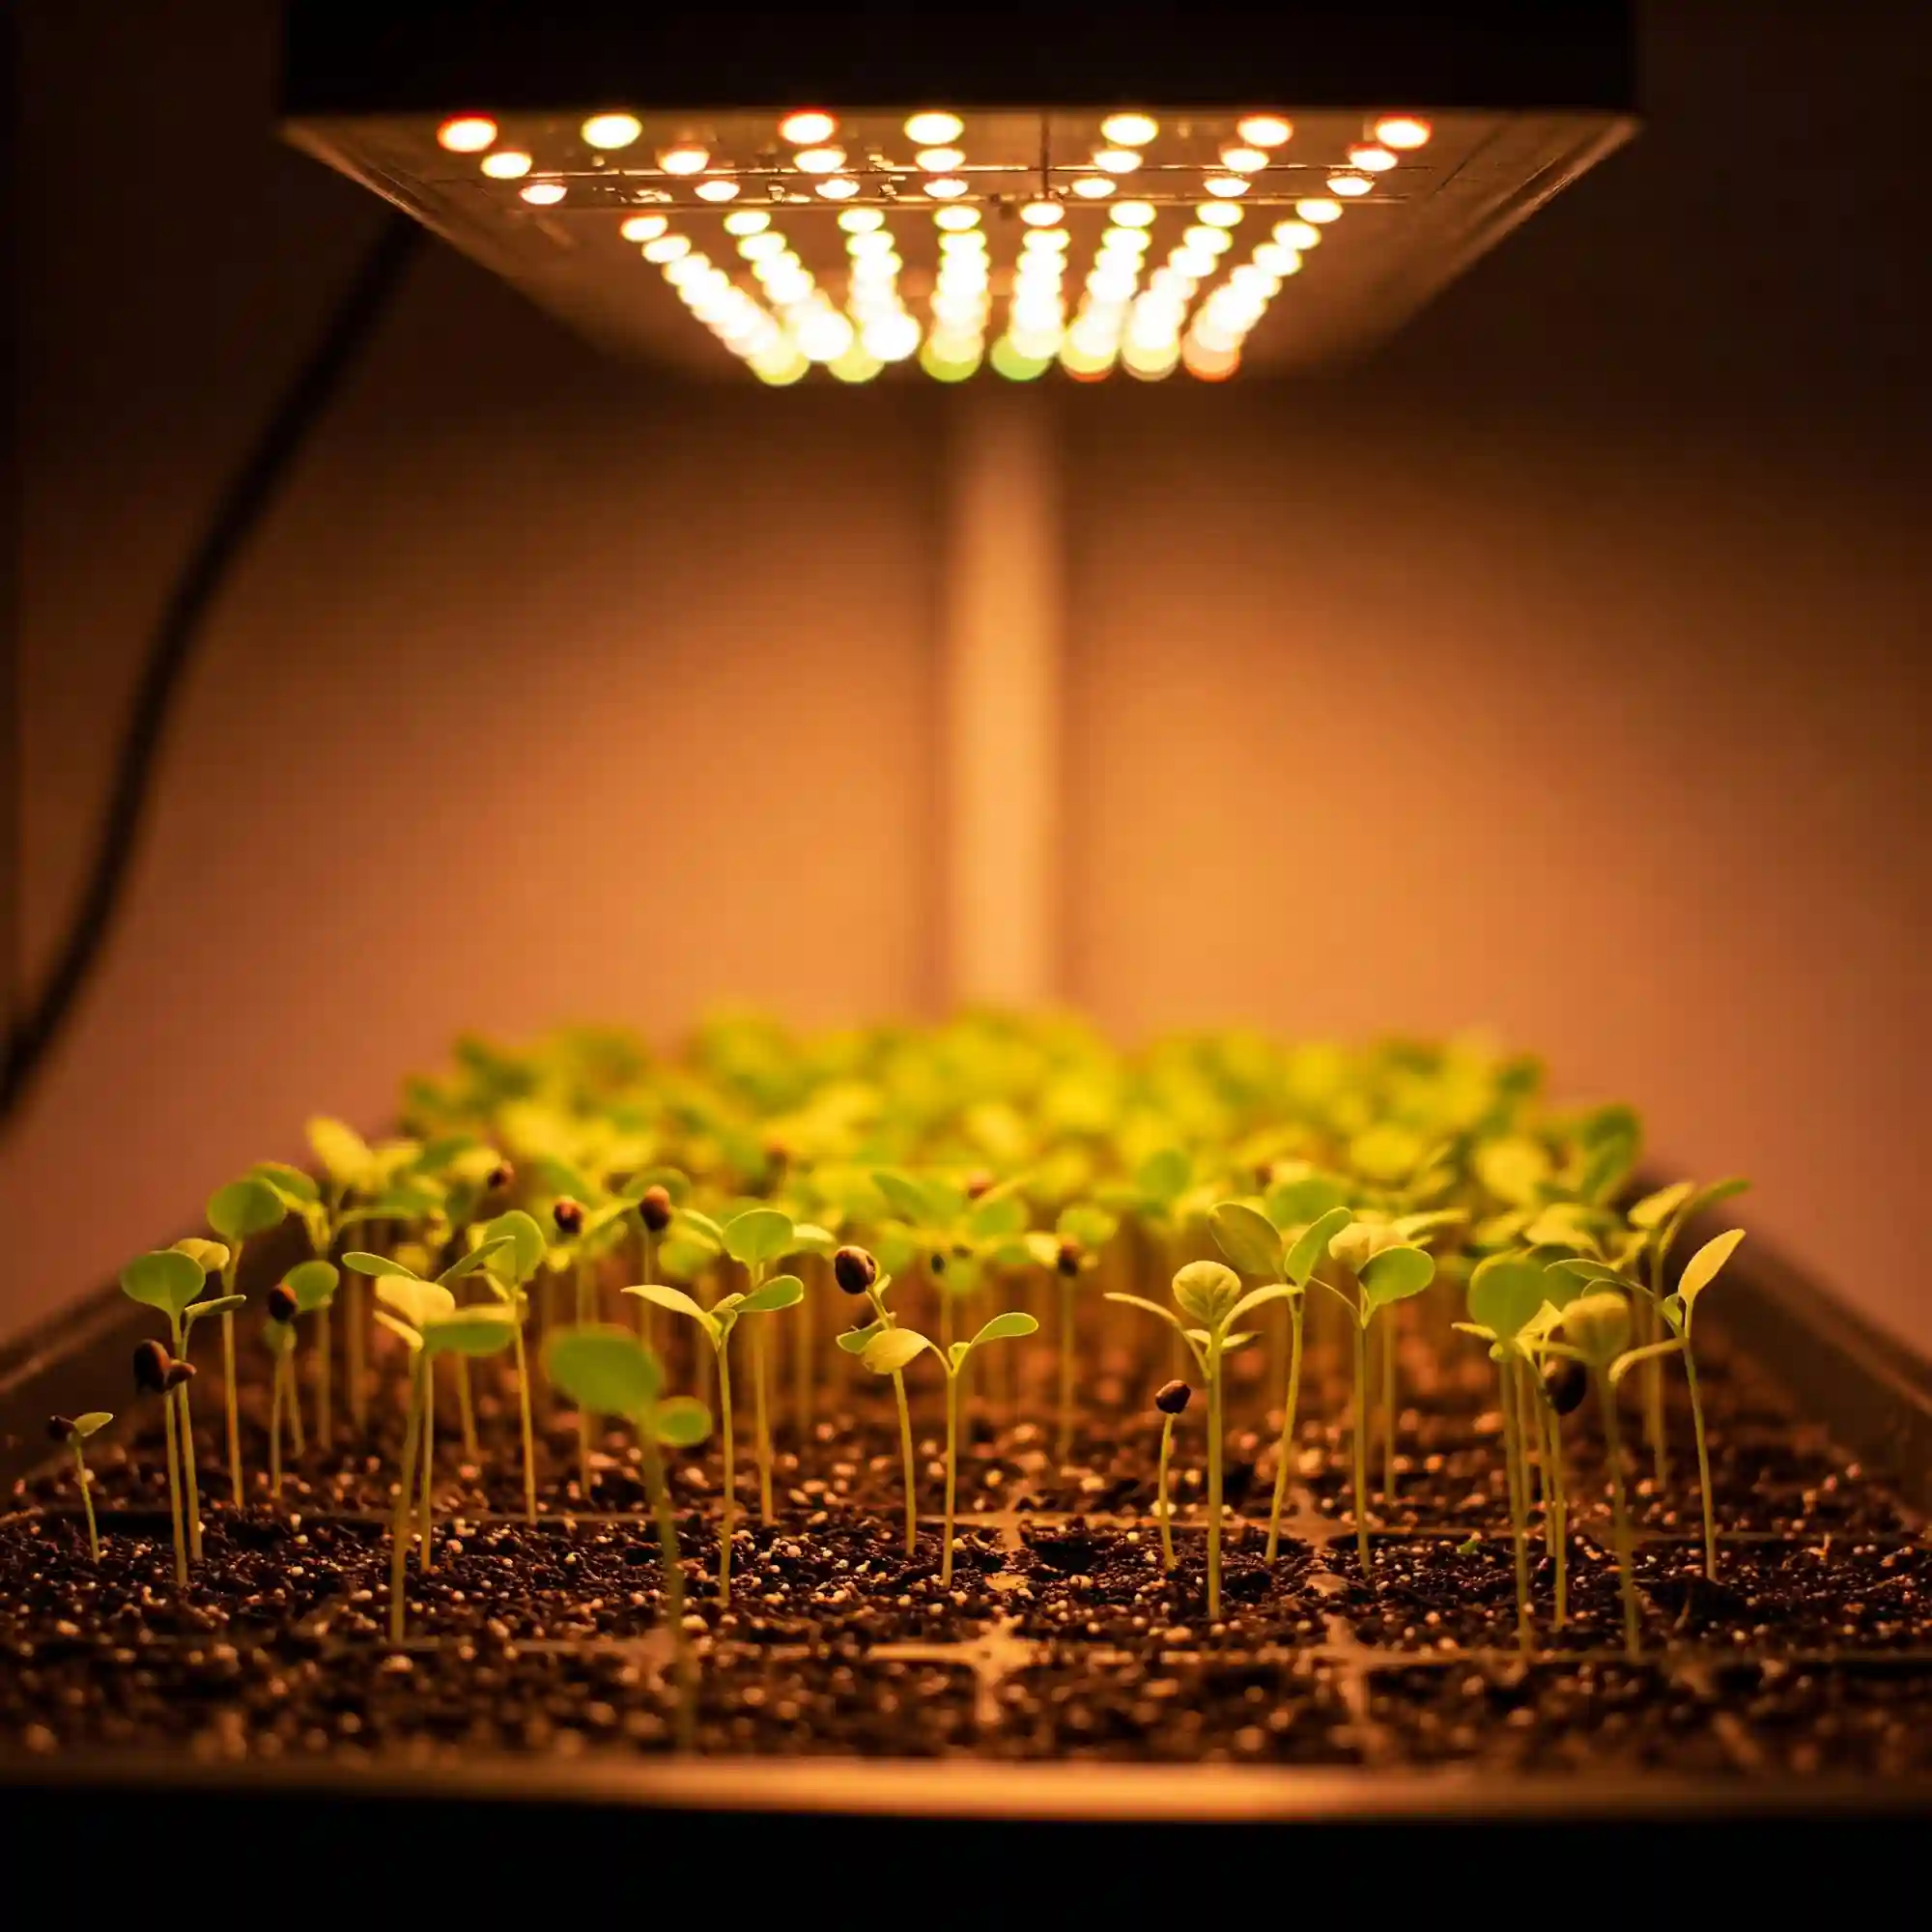
Grow Lights Versus Natural Light: What’s Best?
- Natural Light: If you have a sunny windowsill, natural light can be sufficient for some seedlings. However, it’s often not strong enough for optimal growth, especially during the shorter days of spring.
- Grow Lights: Grow lights provide supplemental or even primary light for seedlings. They come in various types, including fluorescent, LED, and incandescent. LED grow lights are becoming increasingly popular due to their energy efficiency and longevity.
Heat Mats and Humidity Domes: Do You Need Them?
- Heat Mats: These provide gentle bottom heat to the seed starting trays, which can significantly speed up germination and improve root development. They are particularly beneficial for heat-loving plants like tomatoes and peppers.
- Humidity Domes: These clear plastic domes create a humid environment around the seedlings, which helps maintain optimal moisture levels and prevents them from drying out. They are especially useful for small seeds or those that require high humidity.
Tools for Watering and Labeling
- Watering Can or Spray Bottle: A fine mist spray bottle is ideal for gently watering seedlings without disturbing the soil.
- Labels: Use small plant labels to mark each seedling with its variety and planting date. This will help you keep track of your plants and ensure proper care.
By gathering these essential supplies, you’ll be well-prepared for your seed starting adventure. Remember to choose high-quality materials that will support the healthy growth of your seedlings.
3. Plant Seeds at the Proper Depth and Spacing

Now that you’ve gathered your supplies and chosen the right seeds, it’s time to start planting!
How Deep to Plant Different Types of Seeds
Planting seeds at the proper depth is crucial for successful germination. If they are planted too shallow, they may not receive enough moisture. If they are planted too deep, they may not have enough energy to reach the surface. Seed packets typically provide planting depth recommendations, but here are some general guidelines:
- Fine Seeds: Cover small seeds, such as lettuce and basil, with a very thin layer of soil, barely more than a dusting.
- Medium Seeds: Cover medium-sized seeds, such as tomatoes and peppers, with about 1/4 inch of soil.
- Large Seeds: Cover larger seeds, such as beans and peas, with about 1/2 inch of soil.
Spacing Seeds for Optimal Growth and Transplanting
Proper spacing is essential for healthy seedling development. If seeds are planted too close together, they will compete for resources, resulting in weak and spindly growth.
- Seed Starting Trays: Most seed starting trays have individual cells or compartments. Plant one or two seeds per cell, depending on the size of the seeds.
- Small Pots: Plant one or two seeds per pot, depending on the size of the seeds and the size of the pot.
- Thinning Seedlings: If multiple seeds germinate in a cell or pot, carefully thin them out, leaving only the strongest seedling.
Proper Watering Techniques to Avoid Over or Under Watering
- Watering from Below: Gently water the bottom of the seed starting tray or pot using a tray of water. This allows the seedlings to draw up moisture as needed.
- Misting: Use a fine mist spray bottle to gently mist the surface of the soil. Avoid overwatering, as this can lead to damping-off disease.
- Check Soil Moisture: Stick your finger into the soil to check for moisture. The soil should feel slightly moist but not soggy.
How to Grow from Seed, Maintaining Consistent Moisture and Warmth
- Maintain Consistent Moisture: Water your seedlings regularly, but avoid overwatering. Allow the top inch of soil to dry slightly between waterings.
- Provide Adequate Warmth: Maintain a consistent temperature of around 70-75°F (21-24°C) for most seedlings. You can use a heat mat to provide gentle bottom heat.
- Monitor Seedling Growth: Keep a close eye on your seedlings for signs of germination and growth. Adjust your watering and temperature as needed.
By following these guidelines, you can ensure that your seeds germinate successfully and your seedlings get off to a strong start.
4. Maintain Optimal Growing Conditions

Maintaining optimal growing conditions is crucial for healthy seedling development. This involves providing the right balance of temperature, humidity, and light.
The Importance of Consistent Temperature and Humidity
- Temperature: Most seedlings thrive in temperatures between 70-75°F (21-24°C). You can use a thermometer to monitor the temperature around your seedlings.
- Humidity: High humidity is beneficial for many seedlings. You can increase humidity by covering your seed trays with a plastic dome or by placing them on a tray of water.
- Ventilation: Adequate ventilation is essential to prevent the growth of mold and diseases. Open the humidity dome or gently fan the seedlings for a few minutes each day.
How to Grow, Using Grow Lights: Duration and Intensity
- Supplemental Light: If you’re using grow lights, provide them for 14-16 hours per day. Adjust the height of the lights as the seedlings grow to maintain a consistent light intensity.
- Light Spectrum: Choose grow lights that emit the appropriate spectrum of light for seedlings. Look for lights that are rich in red and blue light, which are essential for plant growth.
- Light Intensity: The light intensity should be sufficient to encourage healthy growth but not so intense that it scorches the seedlings.
Ventilation: Preventing Damping-Off and Mold
- What is Damping-Off? Damping-off is a fungal disease that can cause seedlings to collapse and die. It thrives in damp, poorly ventilated conditions.
- Preventing Damping-Off: Ensure adequate ventilation to prevent excessive moisture buildup. Avoid overwatering and water from the bottom of the tray whenever possible.
- Mold Prevention: Good air circulation helps prevent the growth of mold. Clean your seed starting trays and tools regularly to minimize the risk of contamination.
Monitoring Seedling Growth and Adjusting Conditions
- Observe Your Seedlings: Regularly monitor your seedlings for signs of growth, disease, or stress.
- Adjust Conditions as Needed: If you notice that your seedlings are growing too slowly or appear leggy, increase the light intensity or adjust the temperature. If the seedlings are looking pale or yellow, they may not be receiving enough light.
By maintaining optimal growing conditions, you can ensure that your seedlings develop into strong, healthy plants. Remember to monitor your seedlings closely and adjust your care as needed.
5. Nurture Seedlings with Proper Care

Now that your seeds have germinated, it’s time to provide them with the care they need to thrive. This includes proper watering, fertilizing, and thinning.
Watering Seedlings: Frequency and Technique
- Consistency is Key: Water your seedlings regularly to keep the soil consistently moist but not soggy. Overwatering can lead to root rot, while underwatering can stunt growth.
- Watering Methods: Water your seedlings gently from the bottom using a tray of water or by carefully misting the soil surface with a spray bottle. Avoid watering from overhead, as this can dislodge seedlings and splash soil onto the leaves.
- Signs of Underwatering: Seedlings may wilt or droop if they are not receiving enough water.
- Signs of Overwatering: Seedlings may appear waterlogged, the soil may become compacted, and the leaves may turn yellow or brown.
Fertilizing Seedlings: When and What to Use
- Timing: Start fertilizing your seedlings after they have developed their first set of true leaves.
- Types of Fertilizer: Use a diluted, water-soluble fertilizer specifically formulated for seedlings. Avoid using strong fertilizers, as they can damage young roots.
- Frequency: Fertilize your seedlings every 1-2 weeks, following the instructions on the fertilizer package.
Thinning Seedlings for Healthy Growth
- Why Thin? If you planted multiple seeds per cell or pot, you’ll need to thin them out to give the strongest seedling enough space to grow.
- When to Thin: Thin your seedlings when they have developed their first set of true leaves.
- How to Thin: Gently pull out the weaker seedlings at the soil line. Be careful not to disturb the roots of the remaining seedling.
Preventing Common Seedling Problems
- Leggy Seedlings: If your seedlings are growing tall and spindly, they may not be receiving enough light. Increase the light intensity or move them closer to the light source.
- Damping-Off: This fungal disease can cause seedlings to collapse and die. Ensure good air circulation and avoid overwatering to prevent damping-off.
- Pests and Diseases: Monitor your seedlings for pests such as aphids and diseases such as powdery mildew. Take appropriate measures to control any infestations or outbreaks.
By providing your seedlings with proper care, you can nurture them into healthy, vigorous plants that are ready to be transplanted into your garden. Remember to observe your seedlings closely and adjust your care as needed.
6. Prepare Seedlings for Outdoor Transplanting

Before transplanting your seedlings outdoors, it’s crucial to prepare them for the change in environment. This process, known as “hardening off,” gradually acclimates your seedlings to the harsher outdoor conditions.
Understanding the Hardening-Off Process
Hardening-off involves gradually exposing your seedlings to outdoor conditions over a period of 7-10 days. This helps them develop stronger stems, thicker leaves, and more robust root systems, enabling them to withstand the stresses of the outdoor environment.
Gradually Acclimating Seedlings to Outdoor Conditions
- Start Slowly: Begin by placing your seedlings outdoors for a short period each day, starting with a few hours in the morning or late afternoon.
- Increase Exposure: Gradually increase the duration of outdoor exposure each day, protecting them from direct sunlight and strong winds.
- Choose a Shaded Location: Select a shaded location, such as under a tree or overhang, to protect your seedlings from harsh sunlight.
- Monitor for Stress: Keep a close eye on your seedlings for signs of stress, such as wilting or drooping. If you notice any signs of stress, reduce the duration of outdoor exposure.
When to Transplant Seedlings to the Garden
The ideal time to transplant your seedlings to the garden is after the last frost date has passed and the soil has warmed up. Check your local weather forecast and gardening resources for the most accurate information.
Tips for Successful Transplanting
- Choose a Cloudy Day: If possible, choose a cloudy day for transplanting to minimize stress on your seedlings.
- Water Thoroughly: Water your seedlings thoroughly before transplanting to ensure they are well-hydrated.
- Prepare the Planting Hole: Dig planting holes that are slightly larger than the root ball of your seedlings.
- Gently Handle the Seedlings: Handle your seedlings carefully to avoid damaging their roots.
- Water After Transplanting: Water your newly transplanted seedlings thoroughly to settle the soil around their roots.
By following these hardening-off and transplanting tips, you can ensure that your seedlings make a smooth transition from indoors to outdoors.
7. Troubleshoot Common Seed Starting Issues

Even with the best care, you may encounter some challenges while starting seeds indoors. Here are some common issues and how to address them:
Addressing Leggy Seedlings and Weak Growth
- What are Leggy Seedlings? Leggy seedlings are tall and spindly with weak stems. They typically result from insufficient light.
- Solutions:
- Increase Light Intensity: Move your seedlings closer to the light source or increase the duration of light exposure.
- Adjust Light Source: Ensure that the light source is positioned directly above the seedlings.
- Rotate Seed Trays: Rotate your seed trays regularly to ensure even growth on all sides.
Preventing and Treating Damping-Off Disease
- What is Damping-Off? Damping-off is a fungal disease that can cause seedlings to collapse and die. It thrives in damp, poorly ventilated conditions.
- Prevention:
- Sterilize Seed Starting Mix: Sterilize your seed starting mix before use to prevent the introduction of fungal spores.
- Avoid Overwatering: Water your seedlings from the bottom to avoid splashing water onto the leaves.
- Ensure Good Air Circulation: Provide adequate ventilation to prevent excessive moisture buildup.
- Treatment: If you notice damping-off, remove and discard the affected seedlings immediately to prevent the spread of the disease.
Identifying and Managing Pests and Diseases
- Common Pests: Aphids, spider mites, and fungus gnats are common pests that can infest seedlings.
- Identifying Pests: Regularly inspect your seedlings for signs of pests, such as tiny insects, discolored leaves, or webbing.
- Pest Control: Use organic methods to control pests, such as insecticidal soap or neem oil.
- Common Diseases: In addition to damping-off, other diseases such as powdery mildew can affect seedlings.
- Disease Prevention: Maintain good air circulation, avoid overcrowding, and water your seedlings from the bottom to prevent the spread of diseases.
How to Plant, When Seedlings Are Struggling
If your seedlings are struggling despite your best efforts, it may be necessary to replant them. Carefully remove the seedlings from their original containers and replant them in fresh, well-draining soil. This can help to improve root development and overall plant health.
By being aware of these common issues and taking appropriate measures, you can overcome challenges and successfully nurture your seedlings to maturity.
FAQ:
This section addresses some of the most frequently asked questions about starting seeds indoors for spring.
Q: What are the best practices for starting vegetable seeds indoors for spring?
- A: To ensure the best results when starting vegetable seeds indoors, follow these key practices:
- Choose the right varieties: Select seeds that are well-suited to your climate and growing conditions.
- Use quality seed starting mix: Opt for a sterile, well-draining mix formulated specifically for seedlings.
- Provide adequate light: Ensure your seedlings receive sufficient light, either from natural sunlight or grow lights.
- Maintain consistent temperature and humidity: Maintain a warm and humid environment to promote healthy germination and growth.
- Water carefully: Water your seedlings regularly but avoid overwatering.
- Harden off seedlings: Gradually acclimate your seedlings to outdoor conditions before transplanting.
Q: How do I determine when to start seeds indoors for spring planting?
- A: The timing of indoor seed starting depends on several factors, including:
- Your local last frost date: This is the average date when the last frost occurs in your area.
- The plant’s growing season: Refer to the seed packet for information on the plant’s days to maturity.
- Desired harvest time: Determine when you want to harvest your crops.
Q: What are the easiest flowers to start seeds indoors for spring blooms?
- A: Some of the easiest flowers to start indoors for spring blooms include:
- Petunias: These vibrant flowers are easy to grow and come in a wide variety of colors.
- Marigolds: These cheerful flowers are easy to care for and attract pollinators to your garden.
- Snapdragons: These unique flowers add a touch of whimsy to any garden.
- Zinnias: These colorful flowers are easy to grow and come in a wide range of sizes and shapes.
Q: Tips for maintaining proper humidity when starting seeds indoors for spring?
- A: Maintaining proper humidity is crucial for successful seed germination. Here are some tips:
- Use a humidity dome: Cover your seed trays with a clear plastic dome to create a humid environment.
- Mist regularly: Gently mist the surface of the soil with a spray bottle to increase humidity.
- Place a tray of water near the seedlings: The evaporating water will help to increase humidity levels.
- Avoid overwatering: Overwatering can lead to excessive moisture and increase the risk of damping-off.
Q: Detailed guide on transplanting seedlings started indoors for spring gardens?
- A: Transplanting seedlings requires careful handling to minimize stress. Follow these steps:
- Harden off seedlings: Gradually acclimate your seedlings to outdoor conditions over a period of 7-10 days.
- Choose a cloudy day: Transplant on a cloudy day to reduce stress on the seedlings.
- Water thoroughly: Water your seedlings thoroughly before transplanting.
- Prepare the planting hole: Dig a hole that is slightly larger than the root ball of the seedling.
- Gently remove the seedling: Carefully remove the seedling from its container, taking care not to disturb the roots.
- Plant the seedling: Place the seedling in the hole, ensuring that it is planted at the same depth as it was growing in the container.
- Water thoroughly: Water the newly transplanted seedling thoroughly.
Q: Step by step instructions for hardening off seedlings started indoors for spring.
- A: Hardening-off is a crucial step in preparing your seedlings for outdoor conditions. Here’s a step-by-step guide:
- Start Gradually: Begin by placing your seedlings outdoors for a short period, such as an hour or two, in a shaded location.
- Increase Exposure: Gradually increase the duration of outdoor exposure each day, protecting them from direct sunlight and strong winds.
- Monitor for Stress: Keep a close eye on your seedlings for signs of stress, such as wilting or drooping.
- Adjust Exposure: If you notice any signs of stress, reduce the duration of outdoor exposure.
- Continue Hardening Off: Continue this process for 7-10 days, gradually increasing the duration of outdoor exposure until your seedlings can withstand full sun and outdoor conditions.
Q: Troubleshooting common problems when starting seeds indoors for early spring.
- A: Here are some common problems you may encounter and how to address them:
- Leggy Seedlings: If your seedlings are tall and spindly, they may not be receiving enough light. Increase the light intensity or move them closer to the light source.
- Damping-Off: This fungal disease can cause seedlings to collapse and die. Ensure good air circulation, avoid overwatering, and use a sterile seed starting mix.
- Pests and Diseases: Monitor your seedlings for pests such as aphids and diseases such as powdery mildew. Take appropriate measures to control any infestations or outbreaks.
Q: Essential equipment needed for successfully starting seeds indoors for spring harvest.
- A: Here are some essential pieces of equipment for successful indoor seed starting:
- Seed starting trays: These provide a convenient way to start multiple seeds simultaneously.
- Seed starting mix: A high-quality seed starting mix is essential for healthy seedling development.
- Grow lights: Grow lights provide supplemental light for seedlings, especially during the shorter days of spring.
- Heat mat: A heat mat can provide gentle bottom heat to speed up germination.
- Humidity dome: A humidity dome helps to maintain optimal humidity levels.
- Spray bottle: A fine mist spray bottle is useful for gently watering seedlings.
- Labels: Use plant labels to mark each seedling with its variety and planting date.
Q: Organic methods for starting and nurturing seeds indoors for spring planting.
- A: You can use organic methods to start and nurture your seedlings:
- Use organic seed starting mix: Choose a seed starting mix that is made from organic materials.
- Fertilize with organic fertilizers: Use diluted liquid seaweed or fish emulsion as a fertilizer.
- Control pests and diseases organically: Use insecticidal soap, neem oil, or other organic pest control methods.
- Avoid synthetic chemicals: Avoid using synthetic fertilizers, pesticides, and herbicides.
Q: How to create a seed starting calendar for indoor spring cultivation.
- A: A seed starting calendar can help you plan your indoor seed starting efforts. Here’s how to create one:
- Determine your last frost date: This is the average date when the last frost occurs in your area.
- Check seed packet information: Refer to the seed packets for information on germination time and days to maturity.
- Calculate your starting dates: Subtract the germination time and days to maturity from your desired harvest date to determine your starting dates.
- Create a schedule: Use a calendar or spreadsheet to create a schedule for sowing your seeds.
- Adjust as needed: Adjust your schedule as needed based on your specific needs and preferences.
This FAQ section provides answers to some of the most common questions related to starting seeds indoors for spring. Remember that every garden is unique, so adjust these tips and techniques to suit your specific needs and preferences.
Conclusion:

Starting seeds indoors for spring can be a rewarding experience. By following the steps outlined in this guide and paying close attention to your seedlings’ needs, you can increase your chances of success and enjoy a bountiful harvest. Remember to be patient, observant, and enjoy the process of nurturing new life.
Key Takeaways:
- Choose the right seeds: Select varieties that are well-suited to your climate and growing conditions.
- Gather essential supplies: Ensure you have all the necessary tools and materials before you begin.
- Plant seeds properly: Plant seeds at the correct depth and spacing to ensure optimal germination.
- Maintain optimal growing conditions: Provide adequate light, temperature, and humidity for healthy seedling development.
- Nurture your seedlings: Water, fertilize, and thin your seedlings as needed.
- Prepare seedlings for transplanting: Harden off your seedlings gradually to acclimate them to outdoor conditions.
- Troubleshoot common problems: Address issues such as leggy seedlings, damping-off, and pests promptly.
Additional Tips:
- Keep a seed starting journal: Record your observations, including planting dates, watering schedules, and any problems you encounter.
- Experiment with different varieties: Try growing a variety of plants to discover your favorites.
- Share your success: Share your knowledge and experience with other gardeners.
By following these tips and embracing the process, you can unlock the joy of growing your own plants from seed. Happy gardening!


