Have you ever planted potatoes, only to end up with a disappointing harvest of small, scabby tubers? It’s frustrating, isn’t it? You put in the effort, you follow the basic instructions, but something just doesn’t click. You watch other gardeners pull up baskets overflowing with beautiful, healthy potatoes, and you wonder, “What am I doing wrong?” I understand that feeling. I’ve been there myself. But I’ve also learned that with the right knowledge and techniques, you can transform your potato-growing experience. This guide will walk you through the entire process of how to grow potato vegetables, from choosing the right seed potatoes to harvesting a bountiful crop. We’ll cover everything you need to know, including soil preparation, planting techniques, and essential care tips. Let’s get started, and you’ll see how simple it is to get a bumper crop.
Choosing the Right Potato Varieties
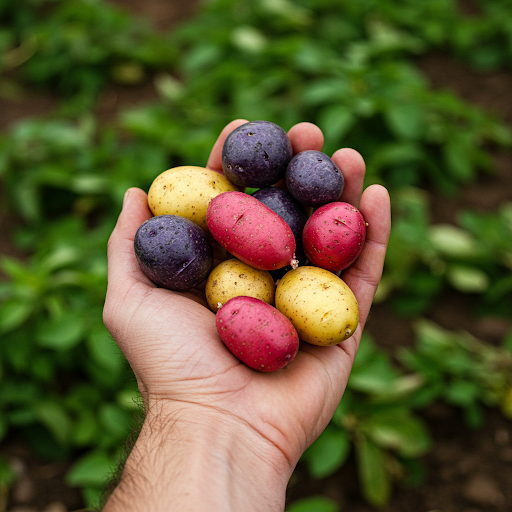
Selecting the right potato varieties is the foundation of a successful potato-growing venture. It’s not just about picking the potatoes that look the most appealing at the store; it’s about understanding your local climate, your soil type, and your specific culinary needs. You see, potatoes aren’t all created equal. There are hundreds of varieties, each with unique characteristics that make them suitable for different purposes.
Understanding Your Climate
The first thing you need to consider is your climate. Some potato varieties thrive in cooler climates, while others prefer warmer temperatures. If you live in a region with short growing seasons, you’ll want to choose early-maturing varieties. These varieties, like ‘Irish Cobbler’ or ‘Red Norland,’ are ready for harvest in just 60-90 days. On the other hand, if you have a longer growing season, you can opt for mid-season or late-season varieties, like ‘Russet Burbank’ or ‘Katahdin,’ which take 90-120 days or more to mature.
Soil Type and Culinary Needs
Your soil type also plays a crucial role in potato growth. Potatoes prefer well-drained, slightly acidic soil. If your soil is heavy clay, you’ll need to amend it with compost or other organic matter to improve drainage. Consider what you intend to do with your potatoes. Are you planning to bake them, fry them, or boil them? Different varieties are better suited for different cooking methods. For baking, you’ll want a starchy potato like ‘Russet Burbank.’ For boiling, you’ll want a waxy potato like ‘Yukon Gold’ or ‘Red Pontiac.’
Popular Potato Varieties
Let’s take a closer look at some popular potato varieties:
- Russet Burbank: This is the classic baking potato. It’s known for its high starch content and fluffy texture. It’s also a late-season variety, so it requires a long growing season.
- Yukon Gold: This is a versatile potato that’s suitable for boiling, mashing, and roasting. It has a buttery flavor and a smooth, yellow flesh.
- Red Pontiac: This is an early-season variety with red skin and white flesh. It’s a good choice for boiling and salads.
- Irish Cobbler: An early variety with a white to light brown skin, and white flesh. It is a good choice for early harvests.
- Kennebec: A mid-season variety with high yields, good for baking and frying.
Early, Mid-Season, and Late-Season Varieties
Understanding the difference between early, mid-season, and late-season varieties is essential for planning your potato-growing season.
- Early-Season Varieties: These varieties mature in 60-90 days. They are ideal for gardeners with short growing seasons or those who want to harvest potatoes early in the season.
- Mid-Season Varieties: These varieties mature in 90-110 days. They offer a good balance between early and late-season varieties.
- Late-Season Varieties: These varieties mature in 110-120 days or more. They require a long growing season but often produce the highest yields.
Seed Potatoes
When choosing seed potatoes, look for certified disease-free potatoes. Seed potatoes are essentially potato tubers that have been specifically grown for planting. They should be firm, with well-developed “eyes” (buds). Avoid using potatoes from the grocery store, as they may have been treated with sprout inhibitors.
Variety Selection Table
| Variety | Maturity | Use | Skin Color | Flesh Color |
| Russet Burbank | Late | Baking, Frying | Brown | White |
| Yukon Gold | Mid | Boiling, Mashing, Roasting | Yellow | Yellow |
| Red Pontiac | Early | Boiling, Salads | Red | White |
| Irish Cobbler | Early | Boiling, General use | White to light brown | White |
| Kennebec | Mid | Baking, Frying | White | White |
By carefully considering your climate, soil type, and culinary needs, you can choose the right potato varieties for your garden and enjoy a bountiful harvest. You’ll find that choosing the right variety is the first step toward a successful potato-growing season.
Preparing the Soil for Potato Planting
Just as a foundation is crucial for a sturdy house, the soil forms the bedrock for a successful potato harvest. Potatoes thrive in well-drained, fertile soil. This means that the soil should allow excess water to drain away quickly while still retaining enough moisture for the plants to thrive. Poorly drained soil can lead to waterlogged roots, which can cause the potatoes to rot.
Why Soil Preparation Matters
Preparing the soil properly is essential for several reasons:
- Improved Drainage: Compacted soil prevents water from draining effectively, leading to waterlogging and root rot. Tilling the soil helps break up compacted areas, improving drainage and aeration.
- Enhanced Nutrient Uptake: Healthy soil teeming with organic matter provides essential nutrients for potato growth. Incorporating compost, manure, or other organic materials into the soil improves its fertility and structure.
- Weed Control: Tilling the soil before planting helps to control weeds. This reduces competition for water, nutrients, and sunlight, allowing your potato plants to thrive.
- Warmer Soil Temperatures: Warm soil temperatures are crucial for potato growth. Tilling the soil can help to warm it up faster in the spring, allowing you to plant earlier.
Soil Amendments
Before planting potatoes, it’s essential to amend the soil to improve its structure and fertility. Here are some common soil amendments:
- Compost: Compost is a rich source of organic matter that improves soil structure, drainage, and nutrient content.
- Manure: Well-rotted manure adds organic matter and nutrients to the soil. However, avoid using fresh manure, as it can burn the plants.
- Rock Phosphate: This natural fertilizer provides phosphorus, an essential nutrient for potato growth.
- Lime: If your soil is too acidic, adding lime can raise the pH level to a more suitable range for potatoes.
Before amending your soil, it’s a good idea to test its pH level. Potatoes prefer slightly acidic soil with a pH between 5.0 and 6.0. You can purchase a soil pH test kit from most garden centers. If your soil pH is too high or too low, you can adjust it by adding lime or sulfur, respectively.
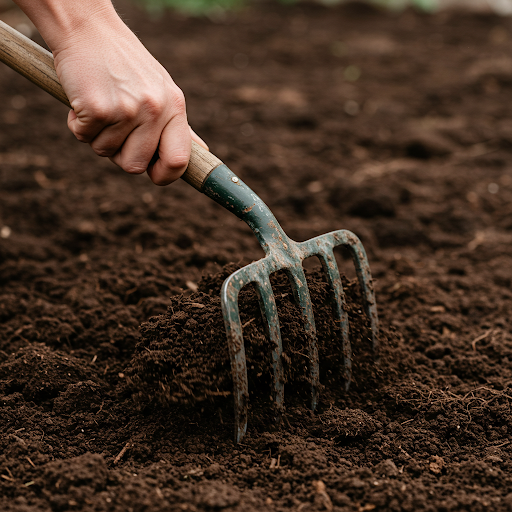
Tilling the Soil
Tilling the soil helps to break up compacted areas, improve drainage, and incorporate soil amendments. You can use a garden fork, tiller, or even a shovel to till the soil. Aim for a depth of about 8-10 inches.
Creating Raised Beds
If you have heavy clay soil or poor drainage, consider creating raised beds for your potatoes. Raised beds improve drainage and warm up the soil more quickly in the spring. You can create raised beds using wood, bricks, or even straw bales.
Crop Rotation
Crop rotation is an essential practice for maintaining soil health and preventing the buildup of soil-borne diseases. Avoid planting potatoes in the same location year after year. Instead, rotate them with other crops, such as legumes, brassicas, or root vegetables.
By following these soil preparation tips, you’ll create an optimal environment for your potato plants to thrive. Healthy soil leads to healthy plants, which in turn leads to a bountiful harvest of delicious potatoes.
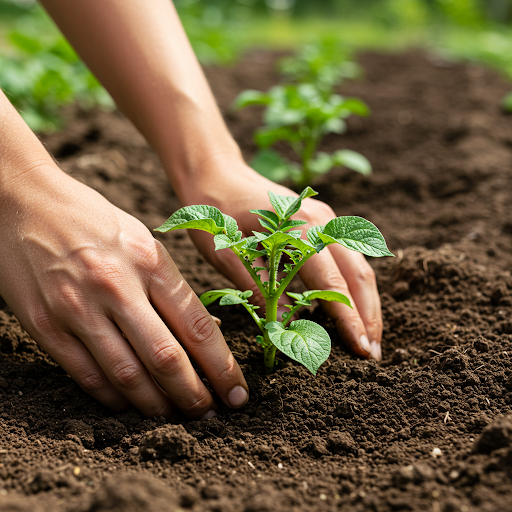
Planting Your Seed Potatoes
Now that you’ve prepared the soil, it’s time to plant your seed potatoes. This is an exciting step in the potato-growing process, and with a little care and attention, you’ll be well on your way to a bountiful harvest.
Sprouting Seed Potatoes
Before planting, it’s beneficial to sprout your seed potatoes. This process involves exposing the potatoes to light, which encourages the development of strong shoots. To sprout your seed potatoes:
- Place the seed potatoes in a well-lit area: A sunny windowsill or a tray under grow lights works well.
- Arrange the potatoes in a single layer: Avoid stacking them, as this can lead to rotting.
- Gently turn the potatoes every few days: This ensures even sprouting.
- Keep the potatoes at a cool temperature: A temperature between 40-50°F (4-10°C) is ideal.
Within a few weeks, you should see small sprouts emerging from the eyes of the potatoes. Once the sprouts are about 1-2 inches long, they are ready to be planted.
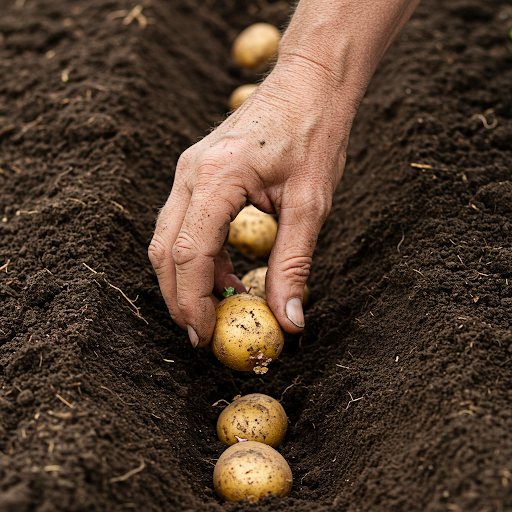
Planting Methods
There are a few different methods for planting potatoes:
- Furrow Planting: This is the most common method. Dig a trench about 6 inches deep and place the seed potatoes in the bottom of the trench, spaced about 12 inches apart. Cover the potatoes with 4-6 inches of soil. As the plants grow, gradually add more soil around the base of the plants (hilling) to encourage the development of more tubers.
- Hilling: This method involves planting the seed potatoes in shallow furrows and then gradually adding soil around the base of the plants as they grow. This creates a mound of soil around the plants, which encourages the development of more tubers.
- Container Planting: Potatoes can also be grown in large containers, such as grow bags or buckets. This is a great option for those with limited space.
Planting Depth and Spacing
The depth at which you plant your seed potatoes will depend on the size of the potatoes. As a general rule, plant the seed potatoes about 4-6 inches deep in the soil. Space the potatoes about 12-18 inches apart in rows that are 2-3 feet apart.
Planting Dates
The best time to plant potatoes varies depending on your climate. As a general rule, plant potatoes after the last frost has passed and the soil temperature has warmed to at least 60°F (15°C). In most areas, this is typically in the spring.
Planting Tips
- Choose a sunny location: Potatoes require at least 6-8 hours of sunlight per day.
- Amend the soil before planting: Incorporate compost or other organic matter into the soil to improve drainage and fertility.
- Water the soil thoroughly after planting: This will help to settle the soil around the potatoes.
- Mulch around the plants: Mulching helps to conserve moisture, suppress weeds, and keep the soil cool.
By following these tips and paying attention to your specific growing conditions, you can ensure that your potato plants get off to a strong start. Remember, proper planting is crucial for a successful potato harvest.
Caring for Your Growing Potato Plants
Now that your potato plants are in the ground, they require consistent care to ensure a healthy and productive growth. Just like any living organism, they need the right amount of water, protection from pests and diseases, and proper support to reach their full potential. Let’s delve into the essential care practices that will help you nurture your potato plants and maximize your harvest.
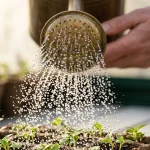
Watering:
Water is crucial for the growth and development of potato plants. Consistent moisture is essential, especially during dry periods. However, it’s important to avoid overwatering, which can lead to waterlogged soil and root rot.
- Frequency: Water your potato plants deeply and thoroughly, but only when the top few inches of soil feel dry to the touch.
- Depth: Water deeply to encourage the roots to grow deep into the soil. Shallow watering can lead to shallow root systems, making the plants more susceptible to drought stress.
- Mulching: Applying a layer of mulch around the base of the plants helps to conserve soil moisture and suppress weeds. Organic mulches, such as straw or grass clippings, can also help to keep the soil cool.
Hilling:
Hilling is a critical practice for potato growth. It involves gradually adding soil around the base of the plants as they grow. This encourages the development of more tubers along the stems.
- Timing: Begin hilling when the plants are about 6-8 inches tall.
- Technique: Gently mound soil around the base of the plants, covering the lower stems. Repeat this process every few weeks as the plants continue to grow.
- Benefits: Hilling provides support for the growing plants, prevents them from being exposed to sunlight, and encourages the development of more tubers.
Weeding:
Weeds compete with potato plants for water, nutrients, and sunlight. Keeping the area around your potato plants weed-free is essential for optimal growth.
- Hand-pulling: Regularly hand-pull weeds from around your potato plants.
- Mulching: Applying a layer of mulch around the base of the plants can help to suppress weed growth.
Pest and Disease Control:
Potato plants are susceptible to various pests and diseases. Here are some common issues and how to address them:
- Colorado Potato Beetle: These beetles are voracious eaters and can quickly defoliate potato plants. Handpick them off the plants or use organic insecticides like neem oil or insecticidal soap.
- Aphids: These small insects can infest potato plants and sap their nutrients. Use insecticidal soap or introduce natural predators like ladybugs to control aphid populations.
- Late Blight: This fungal disease can quickly decimate a potato crop. Monitor your plants regularly for signs of late blight, such as brown spots on the leaves and white, cottony growth on the undersides of the leaves. If you suspect late blight, remove and destroy infected plants immediately.
- Early Blight: This fungal disease causes brown spots on the leaves and can also affect the tubers. Rotate your crops and remove infected plants to prevent the spread of early blight.
Organic Pest and Disease Control:
Whenever possible, opt for organic methods of pest and disease control. These methods are safer for the environment and beneficial insects. Some effective organic control methods include:
- Handpicking: Manually remove pests from your plants.
- Neem Oil: Neem oil is a natural insecticide that is effective against a wide range of pests.
- Insecticidal Soap: Insecticidal soap is a safe and effective way to control aphids and other soft-bodied insects.
- Companion Planting: Planting companion plants, such as marigolds or nasturtiums, can help to deter pests.
By providing your potato plants with proper care, including consistent watering, regular hilling, and effective pest and disease control, you can ensure that they thrive and produce a bountiful harvest. Remember, patience and consistent attention to detail are key to successful potato cultivation.
Harvesting Your Potato Crop
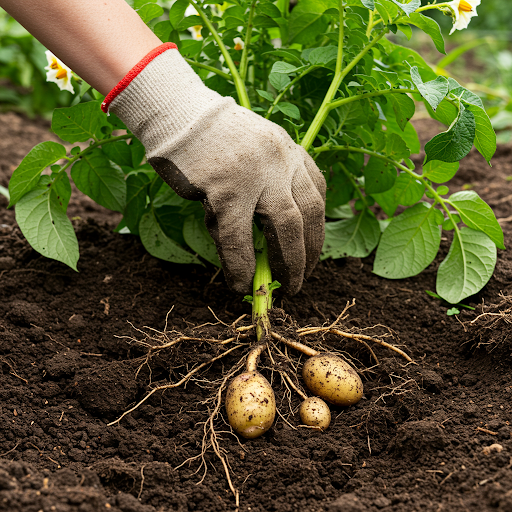
The moment you’ve been waiting for has finally arrived: harvest time! After weeks of nurturing your potato plants, it’s time to reap the rewards of your labor. Harvesting potatoes is a satisfying experience, and with the right techniques, you can ensure a bountiful and undamaged harvest.
Signs of Maturity
Before you start digging, it’s important to determine if your potato plants are ready for harvest. Here are some signs that your potatoes are mature:
- Plant Maturity: The potato plant tops will start to yellow and die back.
- Flowering: The plants will have finished flowering and the flowers will have withered.
- Tuber Development: You can gently feel around the base of the plant to check for the presence of tubers.
Harvesting Methods
There are a few different methods for harvesting potatoes:
- Hand Digging: This is the most common method for small gardens. Gently loosen the soil around the base of the plant with a garden fork or trowel. Carefully lift the plant out of the ground, taking care not to damage the tubers.
- Using a Potato Fork: A potato fork is a specialized tool with multiple tines that can help you gently lift potatoes from the ground without damaging them.
- Mechanical Diggers: For larger gardens, you can use a small garden tiller or a dedicated potato digger to harvest your crop.
Harvesting Tips
- Harvest on a dry day: This will help to prevent the potatoes from becoming muddy.
- Be gentle: Handle the potatoes carefully to avoid bruising or damaging them.
- Brush off excess soil: Gently brush off excess soil from the potatoes.
- Inspect for damage: Discard any potatoes that are damaged or diseased.
Storing Your Potato Harvest
Proper storage is crucial for preserving the quality and freshness of your harvested potatoes. Here are some tips for storing potatoes:
- Cool and Dark Place: Store potatoes in a cool, dark, and well-ventilated place, such as a root cellar or a cool basement.
- Avoid Direct Sunlight: Direct sunlight can cause potatoes to green, which can make them bitter and toxic.
- Keep them Dry: Moisture can cause potatoes to rot.
- Store in a Breathable Container: Use mesh bags or baskets to allow for proper air circulation.
- Avoid Storing with Other Produce: Potatoes can release ethylene gas, which can cause other fruits and vegetables to ripen prematurely.
By following these tips, you can enjoy your homegrown potatoes for weeks or even months to come.
Troubleshooting Common Potato Growing Problems
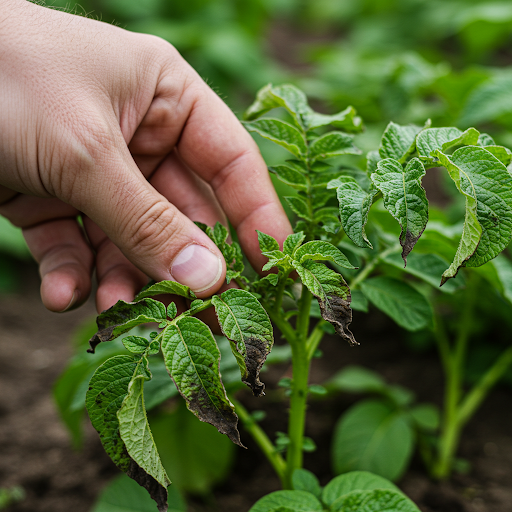
Even with the best care, potato plants can sometimes encounter challenges. Whether it’s a nutrient deficiency, a pest infestation, or a disease, identifying and addressing these problems promptly is crucial for a successful harvest. Let’s explore some common potato growing problems and how to tackle them effectively.
Blossom End Rot:
Blossom end rot is a physiological disorder that affects the fruit of many plants, including tomatoes and peppers. In potatoes, it manifests as a dark, sunken lesion at the blossom end of the tuber. This condition is typically caused by inconsistent moisture, particularly fluctuations between periods of drought and heavy watering.
- Prevention: Maintain consistent soil moisture by watering deeply and regularly. Avoid overwatering, as this can also lead to root rot. Mulching around the plants can help to conserve soil moisture and prevent fluctuations.
Potato Blight:
Potato blight, both late blight and early blight, are serious fungal diseases that can quickly decimate a potato crop.
- Late Blight: This disease is characterized by the appearance of large, dark brown or black spots on the leaves and stems. It can spread rapidly under cool, wet conditions.
- Early Blight: This disease causes small, brown spots on the leaves, often surrounded by a yellow halo.
- Prevention and Control:
- Plant disease-resistant potato varieties.
- Ensure good air circulation between plants.
- Monitor your plants regularly for signs of disease.
- Remove and destroy infected plants immediately.
- Consider using copper fungicides as a preventative measure.
Drought Stress:
Potato plants require consistent moisture to thrive. Drought stress can occur when the plants don’t receive enough water, leading to wilting, stunted growth, and reduced yields.
- Prevention: Water your potato plants deeply and consistently, especially during dry periods. Mulching around the plants can help to conserve soil moisture.
- Addressing Drought Stress: If your potato plants are experiencing drought stress, water them deeply and thoroughly. You can also apply a layer of mulch to help retain soil moisture.
Pest Infestations:
Several pests can attack potato plants, including Colorado potato beetles, aphids, and flea beetles.
- Colorado Potato Beetle: These beetles are voracious eaters and can quickly defoliate potato plants. Handpick them off the plants or use organic insecticides like neem oil or insecticidal soap.
- Aphids: These small insects can infest potato plants and sap their nutrients. Use insecticidal soap or introduce natural predators like ladybugs to control aphid populations.
- Flea Beetles: These small beetles can cause small holes in the leaves of potato plants. Row covers can help to protect plants from flea beetle infestations.
By carefully monitoring your potato plants and addressing problems promptly, you can minimize the impact of pests and diseases and ensure a healthy and productive harvest. Remember, prevention is key. By practicing good garden hygiene, such as crop rotation and proper sanitation, you can reduce the risk of many common potato problems.
FAQs: How to Grow Potato Vegetables
Growing potatoes can sometimes raise questions, even for experienced gardeners. Here are some frequently asked questions to help you navigate the process and ensure a successful harvest:
Q: How long does it take to grow potatoes?
A: The time to harvest potatoes varies depending on the variety and growing conditions, but generally takes 70-120 days. Early-season varieties mature more quickly, while late-season varieties require a longer growing season.
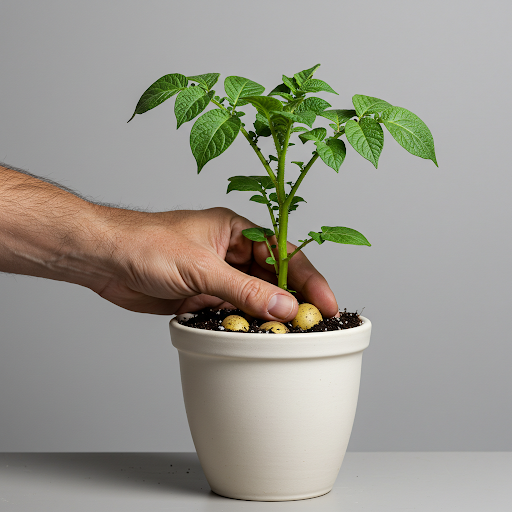
Q: Can I grow potatoes in containers?
A: Absolutely! Container gardening is a great option for those with limited space. Choose a large container, such as a grow bag or a bucket, with adequate drainage. Select potato varieties that are suitable for container growing, such as ‘Yukon Gold’ or ‘Kennebec.’ Follow the same planting and care guidelines as for in-ground potatoes.
Q: When is the best time to plant potatoes?
A: Plant potatoes after the last frost has passed and the soil temperature has warmed to at least 60°F (15°C). This typically occurs in the spring. Refer to your local climate zone for specific planting dates.
Q: How deep should I plant seed potatoes?
A: Plant seed potatoes 4-6 inches deep in the soil. The depth may vary slightly depending on the size of the seed potatoes.
Q: How often should I water my potato plants?
A: Water your potato plants deeply and thoroughly, but only when the top few inches of soil feel dry to the touch. Avoid overwatering, as this can lead to waterlogged soil and root rot.
Q: Do I need to fertilize my potato plants?
A: Fertilizing your potato plants can increase yields. You can use a balanced fertilizer or side-dress the plants with compost tea. However, avoid over-fertilizing, as this can lead to excessive foliage growth at the expense of tuber production.
Additional Tips and Considerations:
- Disease Prevention: Practice good garden hygiene to prevent the spread of diseases. Rotate your potato crops each year to different locations in your garden. Remove and destroy any infected plants immediately.
- Pest Control: Monitor your plants regularly for pests, such as Colorado potato beetles and aphids. Use organic pest control methods whenever possible.
- Harvesting: Harvest your potatoes when the plant tops begin to die back. Gently dig around the base of the plant and lift the potatoes carefully.
- Storage: Store your harvested potatoes in a cool, dark, and well-ventilated place. Avoid storing them near other fruits and vegetables, as they can release ethylene gas, which can cause potatoes to spoil.
By following these tips and addressing any concerns, you can successfully grow delicious and nutritious potatoes in your own garden. Happy gardening!
Conclusion
Growing your own potatoes can be a rewarding and delicious experience. It’s a hands-on way to connect with your food and enjoy the satisfaction of harvesting your own produce. By following the steps outlined in this guide, you can increase your chances of success and enjoy a bountiful harvest of fresh, homegrown potatoes.
Remember, patience and observation are key to successful potato growing. Pay attention to your plants, address any issues promptly, and enjoy the process. Happy gardening!
In Summary
- Choose the right potato varieties for your climate and growing conditions.
- Prepare the soil properly by amending it with compost and tilling it to improve drainage.
- Plant your seed potatoes at the appropriate depth and spacing.
- Provide your potato plants with consistent moisture and protect them from pests and diseases.
- Hill your potato plants regularly to encourage tuber development.
- Harvest your potatoes when they are mature and store them properly to maintain freshness.
- Address any common growing problems promptly to minimize crop loss.
By following these guidelines, you can increase your chances of growing a successful potato crop and enjoy the fruits of your labor. Happy gardening!


")