

Growing your own food is incredibly satisfying, and black beans are a particularly rewarding crop. Not only are they packed with nutrients, but they’re also relatively easy to grow, making them perfect for both novice and experienced gardeners. In this comprehensive guide, I’ll walk you through everything you need to know about how to grow black beans vegetable, from choosing the right variety to harvesting and storing your homegrown bounty. Throughout my years of gardening, I’ve learned that success comes from understanding the plant’s needs and providing the right care at each stage of its growth. I want to share this knowledge with you, so you can experience the joy of harvesting your own delicious black beans.
1. Choosing the Right Black Bean Variety and Planting Time
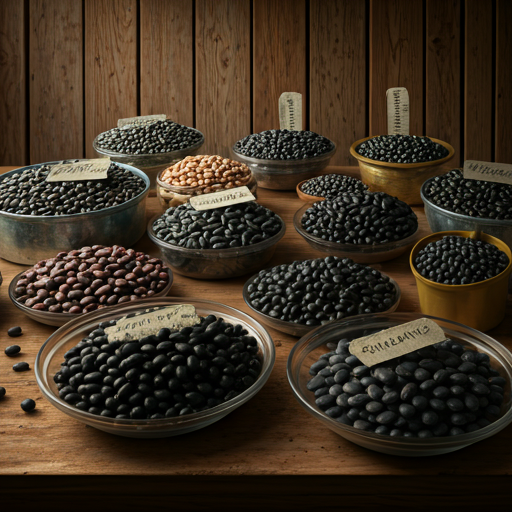
Selecting the right black bean variety and planting time is crucial for a successful harvest. Just like choosing the right tools for a job, selecting the correct bean type for your climate and garden space will set you up for success.
Understanding Bush vs. Pole Beans:
Black beans, Phaseolus vulgaris, come in two main growth habits: bush and pole.
- Bush beans are compact and grow to about 2 feet tall. They are ideal for smaller gardens or containers. They also tend to mature earlier, producing a concentrated harvest over a shorter period. These are great if you are limited on space or time.
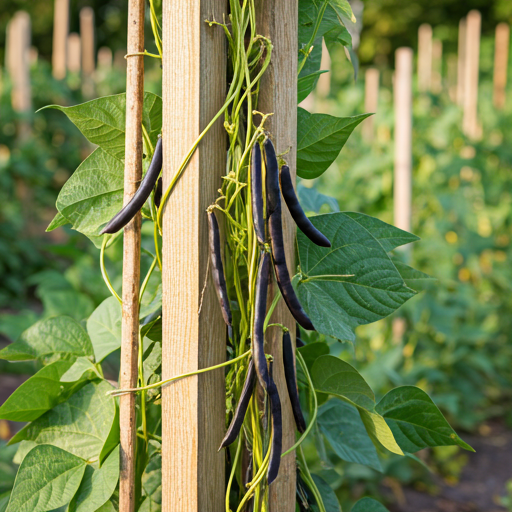
- Pole beans are vining plants that can grow up to 6-8 feet long. They require support, such as a trellis or stakes. Pole beans produce a continuous harvest over a longer period. While they require more space, they offer a larger overall yield. If you have the space, these are a great option.
Here’s a comparison table to help you decide:
| Feature | Bush Beans | Pole Beans |
| Growth Habit | Compact, 2 feet tall | Vining, 6-8 feet long |
| Space Required | Less | More |
| Support | Generally not required | Trellis or stakes required |
| Harvest | Concentrated, shorter period | Continuous, longer period |
| Yield | Lower overall yield | Higher overall yield |
| Maturity | Earlier | Later |
Selecting Disease-Resistant Varieties:
Choosing disease-resistant varieties is essential for preventing common bean problems. Look for varieties resistant to diseases like bean common mosaic virus (BCMV) and anthracnose. Your local garden center or agricultural extension office can provide recommendations for varieties that thrive in your specific region. I’ve found that disease-resistant varieties not only save you from headaches later in the season, but they also tend to be more vigorous and productive.
Best Time to Plant Black Beans:
Black beans are warm-season crops and should be planted after the last frost has passed and the soil has warmed to at least 60°F (15°C). Planting too early can lead to poor germination or seedling death. For those of you in cooler climates, starting seeds indoors 2-3 weeks before the last frost can give you a head start.
Here’s a general guideline for planting times:
- Spring Planting: Most regions plant black beans in late spring, after the danger of frost has passed.
- Direct Sowing: If you’re direct sowing, wait until the soil temperature is consistently warm.
- Indoor Starting: Start seeds indoors 2-3 weeks before the last expected frost.
Starting Seeds Indoors vs. Direct Sowing:
Both starting seeds indoors and direct sowing have their advantages.
- Starting Seeds Indoors: This method gives you a head start on the growing season, especially in cooler climates. It also allows you to control the growing environment and protect seedlings from early pests.
- Direct Sowing: This method is simpler and requires less effort. It’s best suited for warmer climates with longer growing seasons.
When deciding which method is best for you, consider your climate, available space, and personal preference. I personally enjoy starting some of my beans indoors to get a jump on the season, while direct sowing others for a more natural approach. This provides a bit of a safety net and extends my harvest window.
2. Preparing the Ideal Growing Environment for Black Beans
Just like humans thrive in comfortable conditions, black beans have specific environmental needs that must be met for optimal growth. Providing the right growing environment is essential for a healthy and productive black bean crop. From my experience, paying attention to these details can make a significant difference in your harvest.
Sunlight Requirements:
Black beans need at least 6-8 hours of direct sunlight per day. This means choosing a location in your garden that receives full sun throughout the day. If you’re growing in containers, make sure to place them in a sunny spot, such as a patio or balcony. I’ve noticed that plants receiving less than 6 hours of sun tend to produce fewer pods and are more susceptible to diseases.
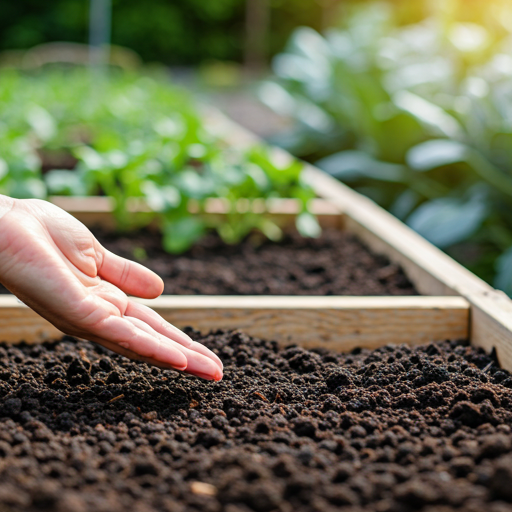
Soil Preparation:
Black beans prefer well-draining soil that is rich in organic matter. The ideal soil pH is between 6.0 and 7.0. Before planting, amend your soil with compost or other organic matter to improve its fertility and drainage. This will provide your black bean plants with the nutrients they need to thrive.
Improving Drainage in Clay Soil:
If you have heavy clay soil, you’ll need to take extra steps to improve drainage. Clay soil tends to retain water, which can lead to root rot in black bean plants. Here are a few tips for improving drainage in clay soil:
- Amend with Organic Matter: Adding compost, aged manure, or other organic matter can help break up clay soil and improve drainage.
- Create Raised Beds: Raised beds provide better drainage and allow you to control the soil composition.
- Add Coarse Sand or Perlite: These materials can help improve drainage by creating air pockets in the soil.
Preparing Containers for Black Beans:
If you’re growing black beans in containers, choose pots that are at least 12 inches deep and have drainage holes. This will provide enough space for the roots to grow and prevent water from accumulating in the bottom of the pot. You can use a variety of containers, such as plastic pots, terracotta pots, or even fabric grow bags.
Here are a few tips for preparing containers for black beans:
- Choose the Right Size: Select pots that are at least 12 inches deep and have drainage holes.
- Use a Well-Draining Potting Mix: Avoid using garden soil in containers, as it can become compacted and waterlogged.
- Provide Support: If you’re growing pole beans in containers, you’ll need to provide a trellis or other support structure.
I’ve found that paying attention to these details can make a significant difference in the health and productivity of your black bean plants. By providing the right growing environment, you’ll be well on your way to a bountiful harvest.
3. Planting Black Bean Seeds Correctly
Now that you’ve chosen your black bean variety and prepared the ideal growing environment, it’s time to plant your seeds. Planting black bean seeds correctly is essential for ensuring good germination and healthy plant growth. Over the years, I’ve learned that paying close attention to seed depth and spacing can significantly impact your harvest.
Seed Depth and Spacing:
Black bean seeds should be planted about 1 inch deep and 2-3 inches apart. If you’re planting multiple rows, space the rows 18-24 inches apart. This spacing allows the plants to have enough room to grow and prevents overcrowding, which can lead to disease problems.
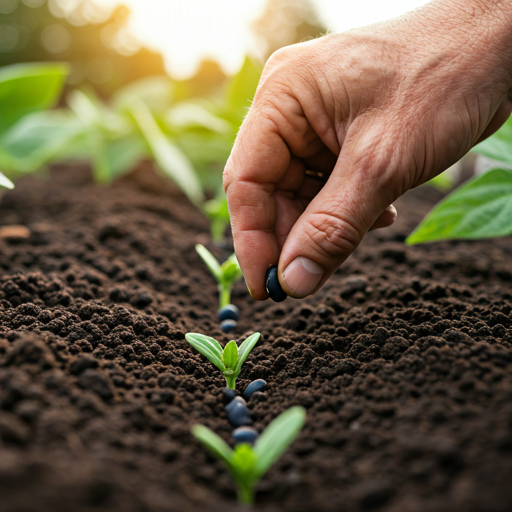
Direct Sowing Method:
Direct sowing is the simplest method for planting black bean seeds. Here’s a step-by-step guide:
- Prepare the soil: Make sure the soil is loose and free of weeds.
- Create furrows: Use a hoe or trowel to create shallow furrows in the soil.
- Plant the seeds: Place the seeds in the furrows, spacing them 2-3 inches apart.
- Cover the seeds: Cover the seeds with about 1 inch of soil.
- Water gently: Water the area gently to moisten the soil.
Transplanting Seedlings:
If you started your seeds indoors, you’ll need to transplant them into the garden. Here’s how:
- Harden off seedlings: Gradually acclimate the seedlings to outdoor conditions by exposing them to increasing amounts of sunlight and wind over a period1 of a week.
- Prepare the planting holes: Dig holes in the garden that are slightly larger than the seedling pots.
- Remove seedlings from pots: Gently remove the seedlings from their pots, being careful not to damage the roots.
- Plant seedlings: Place the seedlings in the holes and fill with soil, gently firming around the base of the plants.
- Water thoroughly: Water the transplanted seedlings thoroughly.
I’ve found that transplanting on a cloudy day or in the late afternoon can help reduce transplant shock. It’s also important to water the seedlings regularly until they become established. With the right care, your black bean plants will thrive and provide you with a bountiful harvest.
4. Watering and Fertilizing Black Bean Plants
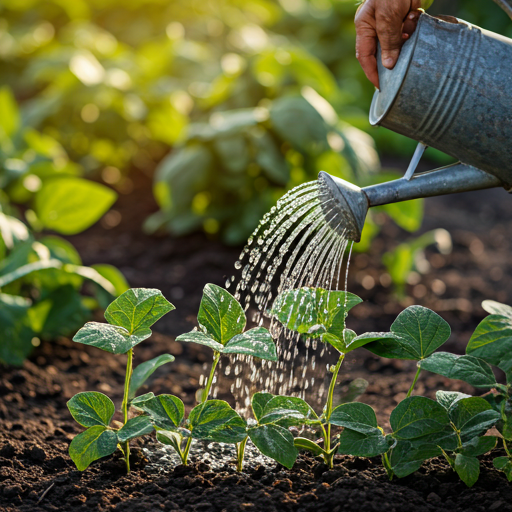
Once your black bean seeds have sprouted and your plants are growing, proper watering and fertilization are crucial for their continued health and productivity. Just like us, plants need the right nutrients and hydration to thrive. In my experience, consistent care in these areas leads to the best results.
Watering Schedule:
Black beans need consistent moisture, especially during flowering and pod development. Water deeply whenever the top inch of soil feels dry to the touch. Avoid overhead watering, as this can promote fungal diseases. Instead, water at the base of the plants, using a soaker hose or watering can.
Here are some watering tips:
- Water early in the morning: This allows the foliage to dry before nightfall, reducing the risk of fungal diseases.
- Water deeply and less frequently: Deep watering encourages roots to grow deeper, making the plants more drought-tolerant.
- Avoid overwatering: Overwatering can lead to root rot, which can kill your plants.
Avoiding Overwatering and Root Rot:
Overwatering is a common problem for black bean plants, especially in heavy clay soils. Here are some tips for avoiding overwatering and root rot:
- Improve drainage: Amend heavy clay soils with compost or other organic matter to improve drainage.
- Plant in raised beds: Raised beds provide better drainage than in-ground gardens.
- Use well-draining containers: If you’re growing in containers, make sure they have drainage holes and use a well-draining potting mix.
Fertilizing Black Beans:
Black beans are legumes, which means they can fix nitrogen from the atmosphere. This means they don’t require as much nitrogen fertilizer as other vegetables. However, they can benefit from a boost of phosphorus and potassium, especially during flowering and pod development.
Here are some fertilization tips:
- Use a low-nitrogen fertilizer: Choose a fertilizer with a low nitrogen content, such as 5-10-10.
- Apply fertilizer at planting time: You can apply fertilizer at planting time by mixing it into the soil or side-dressing after the plants have emerged.
- Side-dress with compost: Compost is a great source of nutrients and can be side-dressed throughout the growing season.
Organic Fertilization Options:
If you’re growing black beans organically, there are several fertilization options available:
- Compost: Compost is a great all-purpose fertilizer that provides a variety of nutrients.
- Aged manure: Aged manure is another good source of nutrients, but make sure it’s well-rotted to avoid burning your plants.
- Bone meal: Bone meal is a good source of phosphorus, which is essential for flowering and pod development.
By following these watering and fertilizing tips, you can ensure your black bean plants have the nutrients and hydration they need to thrive.
5. Providing Support for Growing Black Beans
As your black bean plants grow, especially the pole varieties, providing adequate support becomes essential. This is a step I’ve learned not to skip, as it significantly impacts the plant’s health and productivity. Think of it as giving your plants a helping hand to reach their full potential.
Supporting Bush and Pole Beans:
While bush beans are relatively compact and generally don’t require support, pole beans are vigorous climbers and need a structure to grow on. Providing support helps prevent the vines from sprawling on the ground, which can lead to disease and pest problems. It also makes harvesting much easier.
Here’s a breakdown of support needs:
- Bush Beans: Typically self-supporting due to their bushy growth habit. However, in windy areas, a few stakes or a low fence can help prevent them from toppling over.
- Pole Beans: Require a vertical support structure to climb. This can be a trellis, stakes, netting, or even a teepee made of bamboo poles.
Building a Simple Trellis:
Building a simple trellis is a straightforward project that can be completed with basic materials. Here’s a simple method I often use:
- Gather your materials: You’ll need wooden stakes, twine or wire, and a saw or pruning shears.
- Drive the stakes into the ground: Position the stakes at the ends of your bean row and at intervals along the row, depending on the length. Make sure the stakes are sturdy and driven deep enough to support the weight of the vines.
- Attach the twine or wire: Tie the twine or wire to the first stake, then run it along the row to the next stake, and so on. Create multiple horizontal lines of twine or wire, spacing them about 6-12 inches apart.
Training Vines on a Trellis:
Once your trellis is in place, you’ll need to train the bean vines to climb it. This involves gently guiding the vines up the support structure and encouraging them to wrap around the twine or wire.
Here are some tips for training vines:
- Start early: Begin training the vines when they are young and flexible.
- Gently wrap the vines: Carefully wrap the vines around the twine or wire, being careful not to break them.
- Use plant ties: If necessary, you can use plant ties to secure the vines to the support structure.
Providing support for your black bean plants is a simple but important step that can greatly improve your harvest. It keeps the plants healthy, makes harvesting easier, and adds an attractive vertical element to your garden.
6. Protecting Black Beans from Pests and Diseases
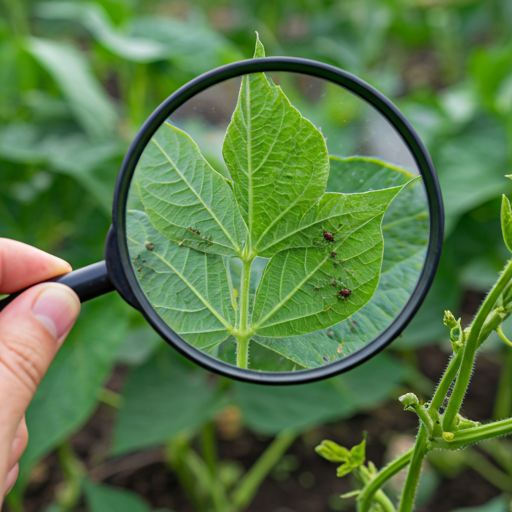
Protecting your black bean plants from pests and diseases is crucial for a successful harvest. Just like any other crop, black beans can be susceptible to various issues that can hinder their growth and reduce your yield. I’ve learned through experience that proactive prevention and early detection are key to keeping your plants healthy.
Common Pests:
Several pests can target black bean plants, including:
- Bean Beetles (Mexican Bean Beetles): These beetles and their larvae feed on the leaves, causing significant damage.
- Aphids: These small insects suck sap from the plants, weakening them and transmitting diseases.
- Spider Mites: These tiny mites thrive in hot, dry conditions and can cause leaves to become speckled and dry.
Organic Pest Control Methods:
Fortunately, there are several organic methods you can use to control these pests:
- Handpicking: Regularly inspect your plants and handpick any beetles or larvae you find. This is especially effective for bean beetles.
- Insecticidal Soap: This natural soap can be sprayed on plants to control aphids and spider mites.
- Neem Oil: This natural oil can be used to control a variety of pests, including bean beetles and aphids.
- Companion Planting: Planting certain herbs and flowers, such as marigolds and nasturtiums, can help repel pests.
Preventing Fungal Diseases:
Fungal diseases can also be a problem for black bean plants, especially in humid conditions. Here are some tips for prevention:
- Avoid Overhead Watering: Water at the base of the plants to prevent the foliage from becoming wet, which can encourage fungal growth.
- Provide Good Air Circulation: Space your plants adequately to allow for good air circulation.
- Use Fungicides: If necessary, you can use organic fungicides to control fungal diseases.
By taking these preventative measures and addressing any issues promptly, you can protect your black bean plants and ensure a healthy and abundant harvest.
7. Harvesting and Storing Your Black Beans
After all your hard work and care, the most rewarding part of growing black beans is finally here – harvest time! Knowing when and how to harvest your beans is crucial for maximizing your yield and enjoying the freshest flavor. I always find a sense of accomplishment when I gather the fruits (or in this case, legumes) of my labor.
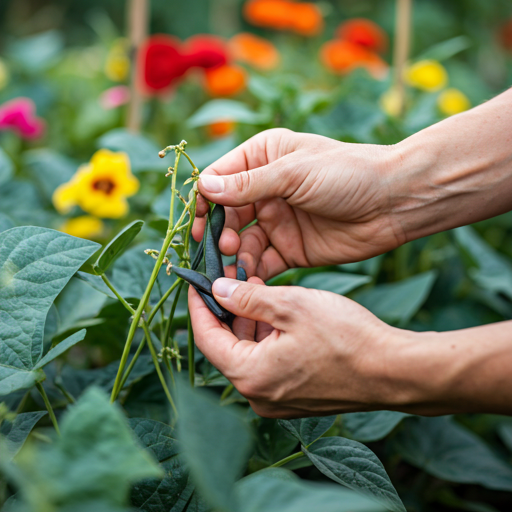
When to Harvest Black Beans:
The timing of your harvest depends on whether you’re growing black beans for fresh eating (green beans) or for dry storage (dried beans).
- For Fresh Eating (Green Beans): You can harvest the pods when they are young, tender, and still green. At this stage, the beans inside are small and not fully developed. You can eat the entire pod, similar to snap beans.
- For Dry Storage (Dried Beans): Allow the pods to fully mature and dry on the plant. The pods will turn yellow or brown and become brittle. You’ll hear the beans rattling inside when they are fully dry.
Harvesting Dry Beans:
Here’s how to harvest dry black beans:
- Wait for the pods to dry: This usually happens in late summer or early fall, depending on your climate.
- Pull the entire plant: Once the pods are dry, you can pull the entire plant from the ground.
- Dry the plants further: Hang the plants upside down in a dry, well-ventilated area for a few weeks to allow the pods to dry completely.
- Thresh the beans: Once the pods are fully dry, you can thresh them by hand or by placing them in a pillowcase or burlap sack and gently hitting it against a hard surface. This will release the beans from the pods.
- Winnow the beans: Remove any remaining debris, such as pod fragments and stems, by winnowing the beans in front of a fan or by using a colander.
Storing Fresh Black Beans:
If you’re harvesting black beans for fresh eating, you can store them in the refrigerator for up to a week.
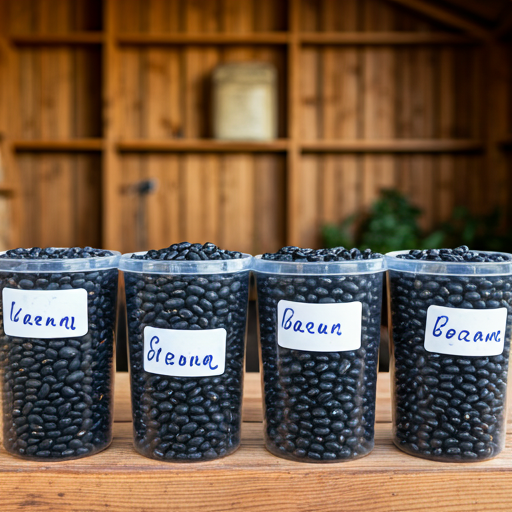
Storing Dry Black Beans:
Dried black beans can be stored for up to a year in an airtight container in a cool, dry place.
Here are some tips for storing dry black beans:
- Make sure the beans are fully dry: Any moisture can lead to mold growth.
- Store in an airtight container: This will prevent pests from getting into your beans.
- Store in a cool, dry place: Heat and humidity can reduce the quality of your beans.
By following these harvesting and storing tips, you can enjoy your homegrown black beans for months to come.
I hope this guide has been helpful for you. Remember, growing your own food is a journey, and there’s always something new to learn. Don’t be afraid to experiment and find what works best for you and your garden. Happy gardening!
8. Frequently Asked Questions (FAQs) About Growing Black Beans
I’ve compiled a list of frequently asked questions to provide you with quick answers to common queries about growing black beans. These FAQs address specific concerns and offer practical solutions to help you overcome any challenges you might encounter.
General Questions:
- How long does it take to grow black bean vegetables from seed to harvest?
- The time from planting to harvest varies depending on the variety and growing conditions. Generally, it takes about 60-75 days for bush beans and 75-85 days for pole beans to reach maturity.
- What is the best soil for growing black bean vegetables?
- Black beans prefer well-draining soil that is rich in organic matter. The ideal soil pH is between 6.0 and 7.0.
- How often should I water black bean vegetables?
- Water deeply whenever the top inch of soil feels dry to the touch. Avoid overhead watering, as this can promote fungal diseases.
- Do black bean vegetables need full sun?
- Yes, black beans need at least 6-8 hours of direct sunlight per day for optimal growth.
Specific Questions:
- How to grow black bean vegetables in raised garden beds?
- Raised beds provide excellent drainage and allow you to control the soil composition. Fill your raised beds with a well-draining potting mix or a combination of garden soil and compost. Plant your black bean seeds according to the recommended spacing and depth.
- How to grow black beans vegetable in hot and humid climates?
- In hot and humid climates, it’s essential to provide good air circulation and avoid overhead watering. Plant your beans in a sunny location with good airflow. Water early in the morning to allow the foliage to dry before nightfall.
- How to grow black beans vegetable organically without using pesticides?
- Several organic methods can be used to control pests and diseases in black bean plants. These include handpicking pests, using insecticidal soap or neem oil, and practicing crop rotation.
- How to grow black beans vegetable from seed in small containers?
- Choose a container that is at least 12 inches deep and has drainage holes. Fill the container with a well-draining potting1 mix. Plant your black bean seeds according to the recommended spacing and depth. Provide a trellis or other support structure for pole beans.
- How to grow black beans vegetable and protect them from bean beetles?
- Bean beetles are a common pest of black bean plants. You can control them by handpicking the beetles and larvae, using insecticidal soap or neem oil, or introducing beneficial insects such as ladybugs.
I hope these FAQs have been helpful. If you have any further questions, feel free to leave a comment below, and I’ll do my best to assist you.
Conclusion: Enjoying Your Homegrown Black Bean Harvest
Growing your own black beans is a truly rewarding experience. From the initial planting of the tiny seeds to the final harvest of plump, mature pods, each stage of the process offers a connection to nature and a sense of accomplishment. I’ve found that there’s nothing quite like the taste of fresh, homegrown beans, and I encourage you to embark on this gardening adventure yourself.
By following the steps outlined in this guide, you’re well on your way to enjoying a bountiful harvest of black beans. Remember these key takeaways:
- Choose the right variety: Select bush or pole beans based on your space and preference. Consider disease-resistant varieties for a healthier crop.
- Prepare the soil: Ensure well-draining soil rich in organic matter and provide adequate sunlight.
- Plant correctly: Plant seeds at the proper depth and spacing.
- Water and fertilize: Water deeply and regularly, and provide a balanced fertilizer.
- Provide support: Give pole beans a trellis or other support to climb.
- Protect from pests and diseases: Use organic methods to control common problems.
- Harvest at the right time: Harvest green beans when young and tender, and dry beans when the pods are fully mature.
Growing black beans is not just about producing food; it’s about connecting with the natural world, learning about plant life cycles, and enjoying the fruits of your labor. Even if you encounter challenges along the way, remember that every gardening experience is a learning opportunity. Don’t be discouraged by setbacks; instead, view them as valuable lessons that will make you a more skilled gardener in the long run.
I hope this comprehensive guide has given you the confidence and knowledge you need to grow your own black beans successfully. Now, it’s time to get your hands dirty and start planting! I wish you a bountiful harvest and many enjoyable moments in your garden. Happy gardening!


")

