
Are you looking out at your garden, a bit overwhelmed by the winter’s remnants, wondering how to get it ready for a flourishing spring? It’s a common feeling. You’ve got this vision of vibrant blooms and bountiful harvests, but the reality of tangled weeds and barren beds can be daunting. I’ve been there, too. The good news is, by tackling the right tasks now, you can transform your garden into that vibrant space you’ve been dreaming of. This guide will walk you through the 10 essential “early spring gardening tasks” to get your garden on the right track.
Assess and Plan Your Garden for Spring 2025

As the days lengthen and the sun warms, I find it’s the perfect moment to step back and take a good, hard look at my garden. You should do the same. This isn’t just about spotting the obvious debris; it’s about understanding the current state of your space and envisioning its potential. Begin by walking through your garden, noting any areas that suffered over winter. Did any plants succumb to the cold? Are there patches of bare soil that need attention?
I like to use a simple notepad to jot down these observations. You can create a checklist for yourself. Don’t underestimate the power of a visual plan. For instance, I’ve found that drawing a rough sketch of my garden layout helps me visualize where I want to place new plants and make changes. It allows me to consider factors like sunlight exposure and soil conditions, which are critical for plant health.
When planning, consider crop rotation, especially if you’re growing vegetables. Rotating crops helps to prevent soil-borne diseases and nutrient depletion. For example, if you grew tomatoes in a certain bed last year, avoid planting them in the same spot this year. Also think about companion planting. This is a practice where you plant certain species close to one another to improve growth, deter pests, or enhance flavor. For instance, planting basil near tomatoes can help deter pests and improve the flavor of the tomatoes.
Here is a table of common companion plants:
| Plant 1 | Plant 2 | Benefit |
| Tomatoes | Basil | Pest deterrence, flavor enhancement |
| Carrots | Onions | Pest deterrence |
| Beans | Corn | Structural support, nitrogen fixation |
| Marigolds | Almost any vegetable | Pest deterrence |
Creating a detailed planting schedule is also a key part of planning. I note down when I plan to start seeds indoors, when to transplant seedlings, and when to direct sow seeds outdoors. This schedule helps me stay organized and ensures that I’m planting at the optimal time for each crop. You should consider doing the same.
Before you start planting, make a list of supplies you’ll need. This might include seeds, seedlings, compost, fertilizer, and any new tools or materials. Having everything on hand will save you time and frustration later.
Key Considerations:
- Soil Health: Assess the soil’s condition and plan for any necessary amendments.
- Sunlight: Note the amount of sunlight each area of your garden receives.
- Drainage: Check for areas with poor drainage and plan for improvements.
- Space: Consider the mature size of plants and ensure adequate spacing.
- Pest and Disease Control: Plan for preventative measures to minimize problems.
- Watering: Ensure you have a reliable water source and plan for efficient watering methods.
I also like to reflect on what worked well in previous years and what didn’t. This reflective process helps me refine my gardening practices and make informed decisions for the upcoming season. It’s a learning experience every year, and you’ll find that as you keep gardening, you’ll start to see patterns and understand your garden better.
Now, it’s your turn. Take some time to assess and plan your garden. You’ll find that this initial planning phase sets the stage for a successful and enjoyable gardening season.
Test and Amend Your Soil for Optimal Growth

Just as we humans need a balanced diet to thrive, so do our plants. Healthy soil is the foundation for vibrant growth, providing plants with the essential nutrients and support they need. That’s why I consider soil testing to be one of the most important “early spring gardening tasks.”
Think of it this way: you wouldn’t blindly add vitamins to your diet without knowing if you have any deficiencies. Similarly, blindly adding fertilizer to your garden can be ineffective and even harmful. Soil testing helps you understand the specific needs of your soil, allowing you to make informed decisions about amending it.
There are several ways to test your soil. You can purchase a home soil test kit from your local garden center. These kits typically test for pH and nutrient levels. Alternatively, you can send a soil sample to a commercial soil testing laboratory for a more comprehensive analysis.
Soil pH is a critical factor for plant growth. Most plants prefer a slightly acidic soil with a pH between 6.0 and 7.0. However, some plants have specific pH requirements. For example, blueberries thrive in acidic soil, while most vegetables prefer slightly alkaline soil.
Nutrient levels are also crucial. Plants require a variety of nutrients, including nitrogen, phosphorus, and potassium. Soil tests can reveal deficiencies in these and other essential nutrients.
Once you have your soil test results, you can determine the appropriate amendments. If your soil is too acidic, you can add lime to raise the pH. If it’s too alkaline, you can add sulfur to lower it. To improve nutrient levels, you can incorporate organic matter such as compost, manure, or well-rotted leaves.
Here’s a simple guide to interpreting common soil test results:
| Nutrient | Deficiency Symptoms | Excess Symptoms |
| Nitrogen | Stunted growth, pale green leaves | Excessive vegetative growth, delayed flowering |
| Phosphorus | Poor root development, stunted growth, purplish leaves | Reduced flowering and fruit production |
| Potassium | Weak stems, marginal leaf burn, reduced fruit production | Not usually a problem |
Remember that soil is a living ecosystem. It takes time and consistent effort to improve soil health. By regularly testing and amending your soil, you’ll create a thriving environment for your plants to flourish.
Prune Dormant Trees and Shrubs

Early spring is an ideal time to prune many trees and shrubs. While they are still dormant, you can easily see their structure and make informed pruning decisions. Pruning encourages healthy growth, improves plant shape, and can increase fruit production in fruit trees.
It’s important to understand that different plants have different pruning needs. Some plants, like spring-flowering shrubs, should be pruned immediately after they bloom. Others, like summer-flowering shrubs, should be pruned in late winter or early spring before new growth begins.
When pruning, always use clean, sharp pruning shears to make clean cuts. Avoid tearing or crushing branches, which can create entry points for diseases. Make cuts just above a bud or a branch that is growing outward.
Here are some general pruning tips for early spring:
- Remove dead, damaged, or diseased branches: These branches not only detract from the plant’s appearance but can also harbor pests and diseases.
- Shape and size the plant: Pruning can help you control the size and shape of your shrubs and trees. Remove any branches that are crossing, rubbing, or growing inward.
- Thin out overcrowded branches: This allows more light and air to reach the center of the plant, promoting healthier growth.
- Encourage new growth: Pruning can stimulate new growth and rejuvenate older plants.
Remember to research the specific pruning needs of each plant in your garden. Some plants, such as certain fruit trees, require more specialized pruning techniques.
By taking the time to prune your trees and shrubs in early spring, you’ll be setting them up for a season of healthy growth and beautiful blooms.
Start Seeds Indoors for Early Planting

Starting seeds indoors is a rewarding way to get a head start on the growing season. It allows you to cultivate seedlings in a controlled environment, protecting them from unpredictable spring weather and giving them a strong foundation for healthy growth.
Choosing the right seeds for early spring planting is key. Select varieties that are known for their early maturity or that are particularly suited to your climate. Consider starting seeds for cool-season crops such as lettuce, spinach, and kale, as well as warm-season crops like tomatoes, peppers, and eggplant.
You’ll need a few essential supplies for starting seeds indoors:
- Seed starting mix: This specialized soil is lightweight and well-draining, providing the ideal environment for germinating seeds.
- Seed trays or pots: Choose containers with drainage holes to prevent overwatering.
- Seed starting lights: If you don’t have a sunny window, you’ll need grow lights to provide adequate light for seedlings.
- Watering can or spray bottle: For gentle and even watering.
Here’s a step-by-step guide to starting seeds indoors:
- Fill seed trays or pots with seed starting mix. Moisten the mix thoroughly but avoid overwatering.
- Sow seeds according to the instructions on the seed packet. Generally, you’ll want to sow seeds at a depth of about two to three times their diameter.
- Gently cover the seeds with a thin layer of soil.
- Water the seeds lightly using a spray bottle.
- Place the trays or pots in a warm, well-lit location. If using grow lights, keep them within a few inches of the seedlings.
- Maintain consistent moisture levels. Water the seedlings regularly, but avoid overwatering, which can lead to damping off (a fungal disease).
- Provide adequate light. Seedlings need at least 14-16 hours of light per day.
- Monitor for germination. Once the seedlings emerge, gradually increase the light intensity and duration.
- Harden off seedlings before transplanting. Gradually acclimate seedlings to outdoor conditions by placing them outside for short periods each day, increasing the duration gradually over a week or two.
- Transplant seedlings outdoors when the soil has warmed up and the risk of frost has passed. Starting seeds indoors can be a rewarding experience, allowing you to cultivate a diverse range of plants and enjoy a longer growing season. By following these tips, you can ensure that your seedlings get off to a strong start.
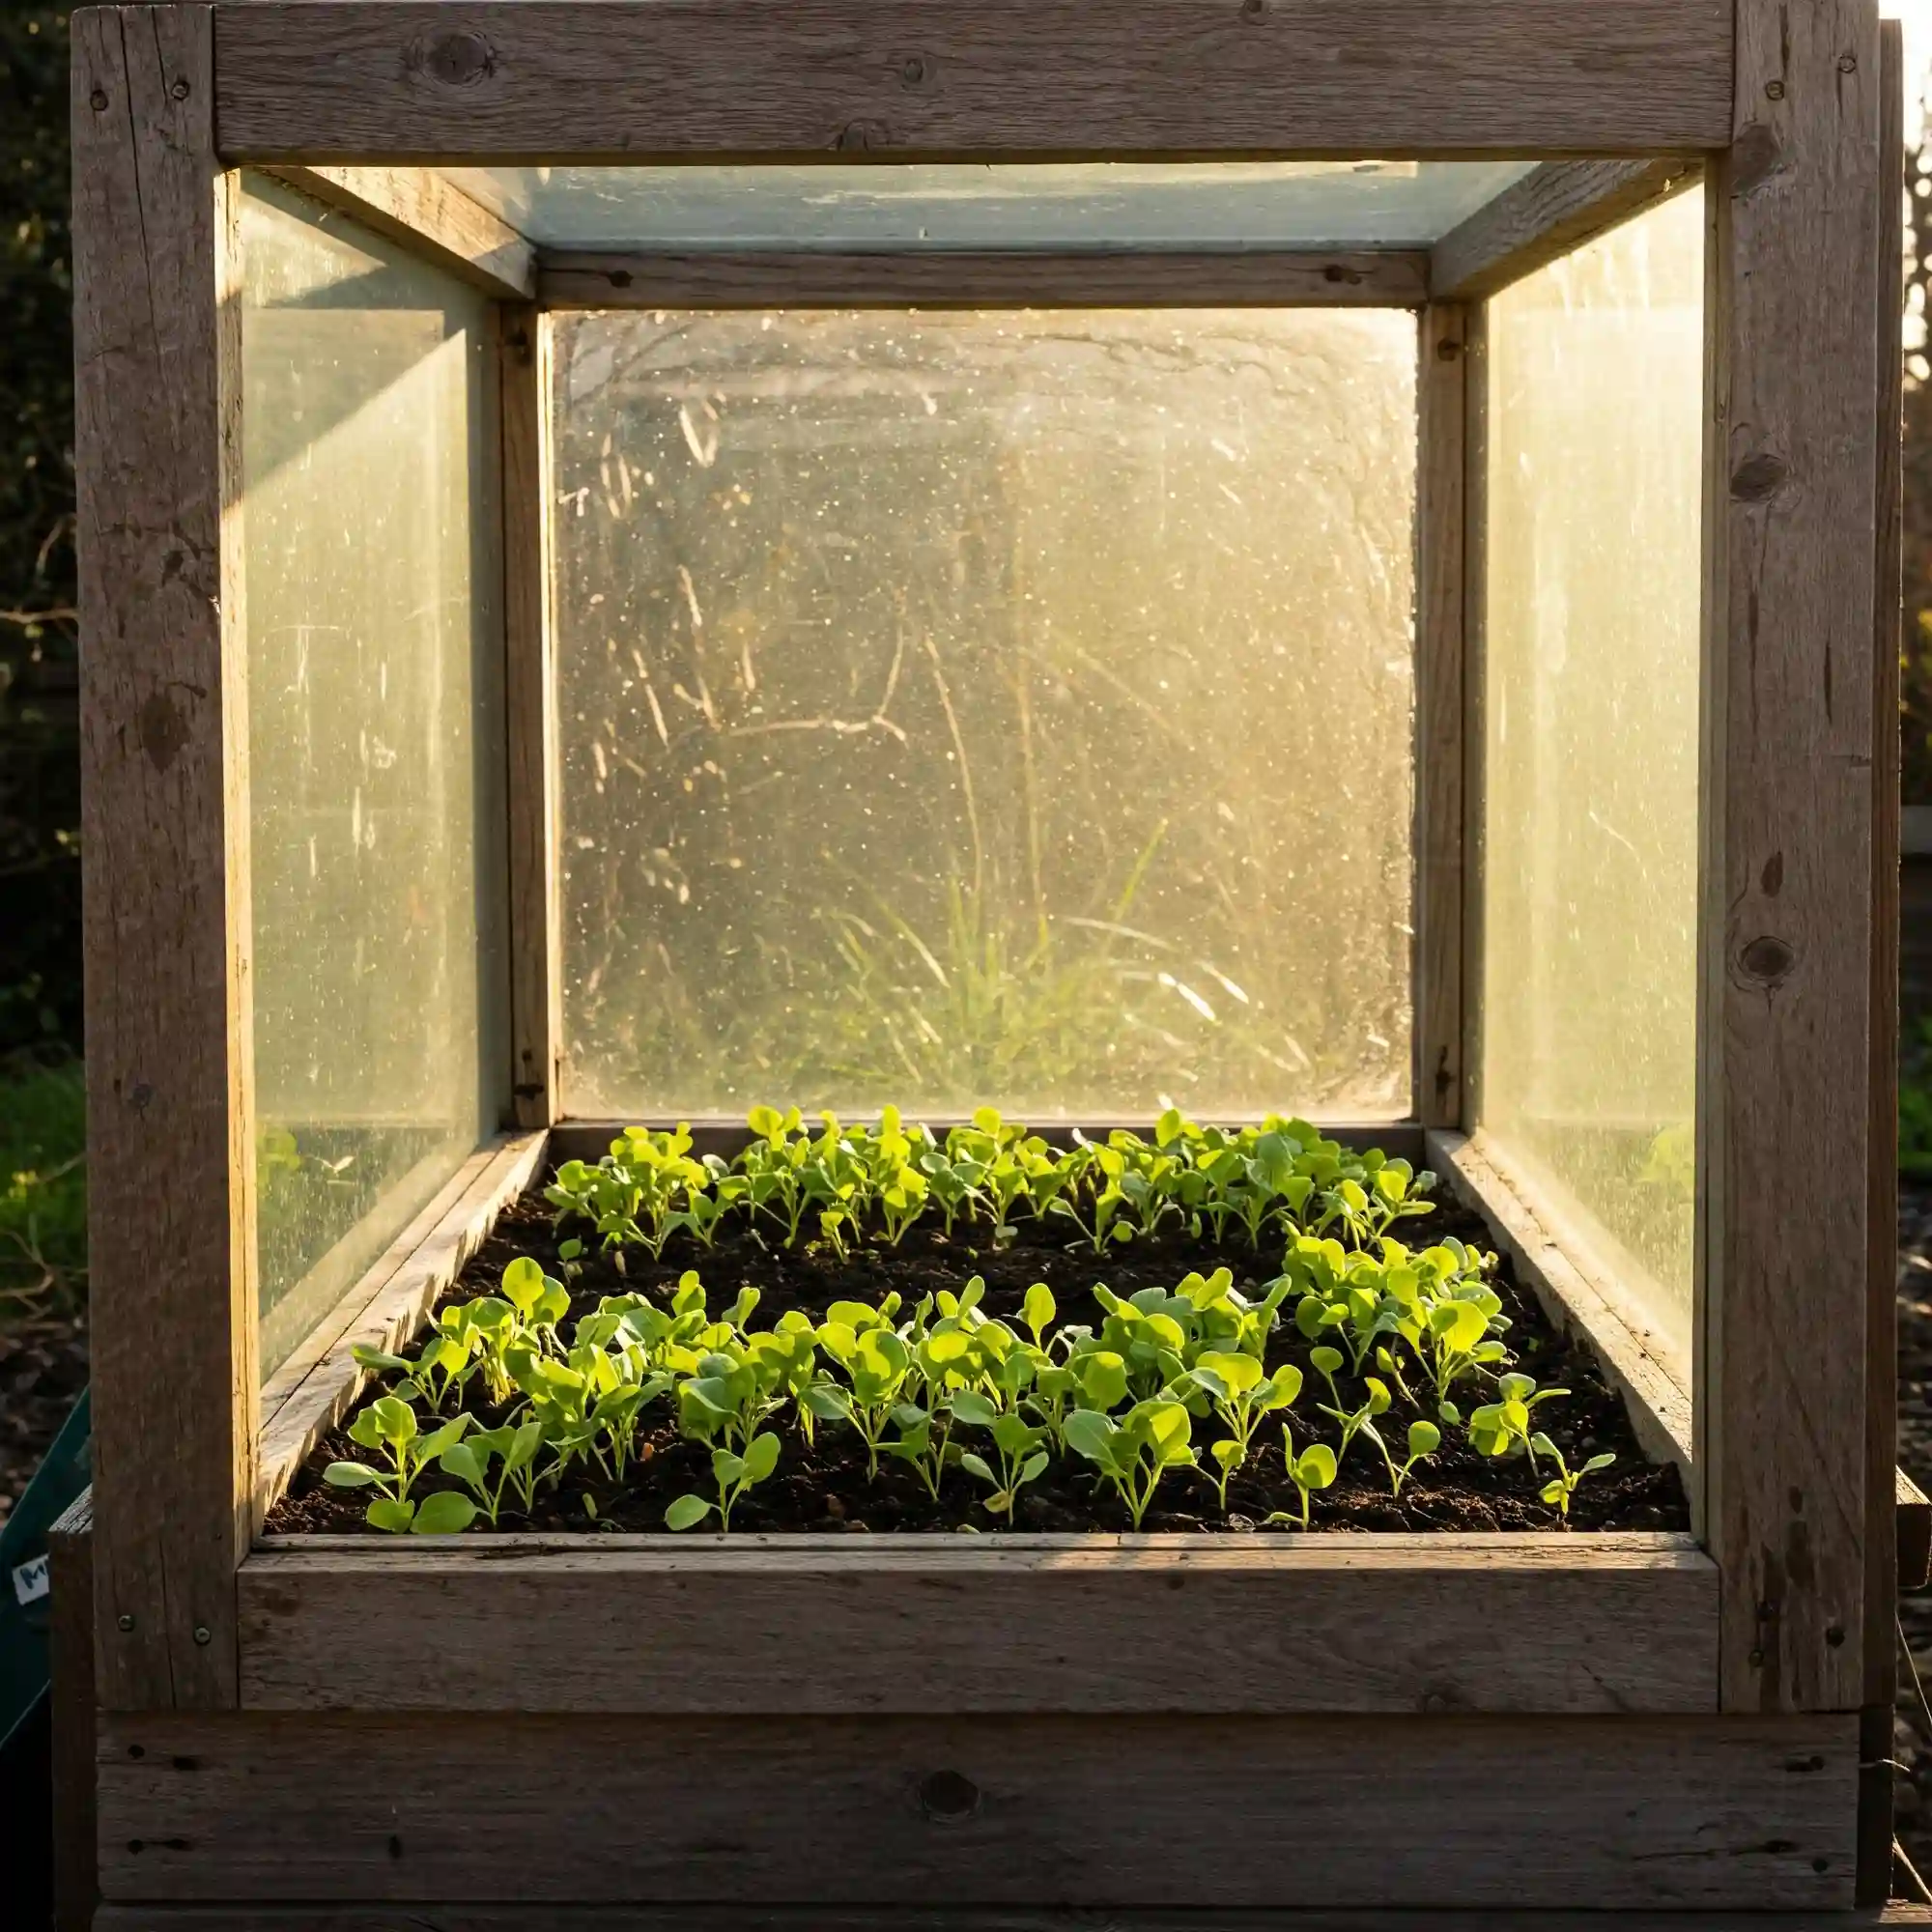
Prepare Cold Frames and Greenhouses

Cold frames and greenhouses are invaluable tools for extending the growing season and giving your plants a head start. They provide a protected environment where seedlings can thrive before being transplanted outdoors.
Early spring is the ideal time to prepare your cold frames and greenhouses for the season ahead.
- Cleaning: Begin by thoroughly cleaning your cold frame or greenhouse to remove any debris or leftover plant material from the previous season. This helps to prevent the spread of diseases and pests.
- Disinfection: Disinfect the interior surfaces with a solution of bleach and water. This will kill any lingering pathogens.
- Repair and Maintenance: Check for any damage, such as cracks in the glass or holes in the covering. Make any necessary repairs to ensure a tight seal.
- Ventilation: Ensure that the ventilation system is working properly. Proper ventilation is crucial for regulating temperature and humidity.
Once your cold frame or greenhouse is prepared, you can start utilizing it for early spring planting.
- Seed Starting: You can sow seeds directly into the soil within the cold frame or greenhouse. This is especially beneficial for heat-loving crops that require warm temperatures to germinate.
- Transplanting Seedlings: You can also transplant seedlings that you started indoors into the cold frame or greenhouse. This allows them to acclimate to outdoor conditions gradually.
- Protecting Tender Plants: Cold frames and greenhouses can protect young plants from late frosts and cold snaps, extending the growing season.
Remember to monitor the temperature and humidity levels within your cold frame or greenhouse regularly. You may need to adjust the ventilation or provide additional shading to ensure optimal growing conditions.
By utilizing cold frames and greenhouses effectively, you can significantly increase your gardening success and enjoy a longer, more productive growing season.
Divide and Transplant Perennials

Many perennials have a tendency to become overcrowded over time. This can lead to reduced flowering, weakened plants, and even disease problems. Dividing and transplanting perennials is an essential task in early spring to rejuvenate these plants and ensure their continued health and vigor.
Dividing perennials involves separating a large clump into smaller divisions, each with its own set of roots and shoots. This not only rejuvenates the original plant but also allows you to increase your stock of favorite perennials.
Here’s a step-by-step guide to dividing and transplanting perennials:
- Choose the right time: Early spring, before new growth begins, is generally the best time to divide most perennials.
- Prepare the new planting site: Ensure the new location has adequate sunlight and well-drained soil. Amend the soil with compost or other organic matter to improve fertility.
- Dig up the plant: Carefully dig around the base of the plant, loosening the roots.
- Divide the clump: Use a sharp spade or garden fork to gently separate the clump into smaller divisions. Each division should have a healthy root system and several shoots.
- Plant the divisions: Plant each division at the same depth as it was originally growing. Water thoroughly after planting.
- Water and care: Water the newly transplanted perennials regularly until they are established. Mulch around the base of the plants to help retain moisture and suppress weeds.
Some common perennials that benefit from division include hostas, daylilies, irises, and peonies.
By dividing and transplanting your perennials, you can ensure that they remain healthy, vigorous, and continue to add beauty to your garden for years to come.
Apply Early Spring Fertilizer

Just as we need a balanced diet to stay healthy, our plants also require a steady supply of nutrients to thrive. Early spring is an ideal time to apply fertilizer to give your garden a boost as it awakens from its winter slumber.
Fertilizer provides plants with essential nutrients like nitrogen, phosphorus, and potassium. Nitrogen promotes healthy leaf growth, phosphorus supports root development and flowering,1 and potassium strengthens cell walls and improves disease resistance.
When choosing a fertilizer, consider the specific needs of your plants. There are various types of fertilizers available, including:
- Organic fertilizers: These slow-release fertilizers, such as compost, manure, and bone meal, provide nutrients gradually and improve soil health over time.
- Inorganic fertilizers: These fast-acting fertilizers, often in granular or liquid form, provide a quick boost of nutrients.
It’s important to follow the instructions on the fertilizer package carefully. Over-fertilizing can harm plants and damage the environment.
Here are some general tips for applying fertilizer in early spring:
- Choose a calm day: Avoid applying fertilizer on windy days, as it can be blown onto nearby plants or walkways.
- Water the soil before fertilizing: This helps prevent fertilizer burn and ensures that the nutrients are evenly distributed.
- Apply fertilizer evenly: Use a spreader or broadcast spreader for granular fertilizers. For liquid fertilizers, use a watering can or hose-end sprayer.
- Water the fertilizer in: After applying fertilizer, water the soil thoroughly to help it reach the plant roots.
- Avoid fertilizing newly planted trees and shrubs: Wait until they have established themselves before applying fertilizer.
By applying fertilizer wisely in early spring, you can provide your plants with the nutrients they need to grow strong and healthy throughout the season.
Protect Plants from Pests and Diseases

Just as we need to take precautions to stay healthy, our plants also need protection from pests and diseases. Early spring is a crucial time to implement preventative measures to keep your garden thriving.
Regularly inspecting your plants for signs of trouble is essential. Look for:
- Pests: Aphids, caterpillars, slugs, snails, and other insects can cause significant damage to plants. Check for chewed leaves, sticky residue, and unusual markings.
- Diseases: Watch for signs of fungal diseases like powdery mildew or blight, which can appear as spots, discoloration, or wilting.
Here are some strategies for preventing and controlling pests and diseases:
- Attract beneficial insects: Encourage the presence of beneficial insects like ladybugs and lacewings, which prey on harmful pests. Plant flowers that attract these beneficial creatures.
- Use organic pest control methods: Consider using natural pest control methods such as insecticidal soap, neem oil, or diatomaceous earth.
- Practice good garden hygiene: Remove and destroy any infected plant material promptly. Avoid overcrowding plants, which can create ideal conditions for disease outbreaks.
- Rotate crops: Rotating crops can help to break the cycle of soil-borne diseases.
- Use row covers: Row covers can protect young plants from pests and early frosts.
By implementing these preventative measures and monitoring your plants regularly, you can minimize the impact of pests and diseases and ensure a healthy and productive garden.
Plan Your Spring Lawn Care

Just as we emerge from winter hibernation, our lawns can benefit from a bit of spring rejuvenation. Early spring is the perfect time to prepare your lawn for a season of healthy growth.
Start by assessing the condition of your lawn after winter. Look for any signs of damage, such as bare patches, thatch buildup, or winterkill. Thatch is a layer of dead and decaying organic matter that can accumulate on the surface of the lawn, inhibiting air and water penetration.
Here are some essential tasks to rejuvenate your lawn in early spring:
- Rake and clean: Remove any debris, such as leaves, twigs, and thatch, from the lawn. This will allow sunlight and air to reach the grass.
- Aerate the soil: Aeration involves removing small plugs of soil from the lawn, which helps to improve air and water penetration to the roots. This is especially important for compacted soils.
- Overseed bare patches: If you have bare patches in your lawn, overseed them with the appropriate type of grass seed.
- Fertilize: Apply a balanced fertilizer to provide your lawn with the nutrients it needs for healthy growth. Choose a fertilizer specifically formulated for spring application.
- Water deeply and infrequently: Water your lawn deeply and infrequently to encourage deep root growth.
By following these simple steps, you can ensure that your lawn is healthy and vibrant throughout the growing season.
FAQ

To further assist you in your early spring gardening endeavors, I’ve compiled a list of frequently asked questions:
What are the essential early spring gardening tasks?
The essential tasks include a thorough assessment of your garden, cleaning up debris, testing and amending your soil, pruning dormant trees and shrubs, starting seeds indoors, and preparing your cold frames and greenhouses.
What are the best early spring gardening tasks for vegetable gardens?
For vegetable gardens, focus on preparing the soil, starting seeds indoors, and planning your planting schedule.
What are the early spring gardening tasks to prepare flower beds?
To prepare flower beds, remove debris, amend the soil, divide perennials, and plan your flower arrangements.
What are the specific early spring gardening tasks for cold climates?
In colder climates, prioritize protecting plants from late frosts, starting seeds indoors, and preparing cold frames or greenhouses.
How can I prioritize early spring gardening tasks by zone?
Prioritize tasks based on your local climate and growing zone, focusing on tasks that align with your region’s weather patterns.
What are the early spring gardening tasks for starting seeds indoors?
For starting seeds indoors, focus on providing adequate light, warmth, and moisture, and hardening off seedlings before transplanting.
What are the detailed early spring gardening tasks for soil preparation?
Detailed soil preparation includes testing pH and nutrients, amending with compost, and improving soil structure for better drainage.
What are the early spring gardening tasks and timeline for beginners?
Beginners should start with simple tasks like cleaning up debris, testing soil, and starting a few easy-to-grow seeds indoors.
What are the most important early spring gardening tasks before planting?
The most important tasks before planting are soil preparation, cleaning up debris, and planning your garden layout.
What are the early spring gardening tasks for pruning fruit trees and shrubs?
For fruit trees and shrubs, focus on removing dead or damaged branches and shaping the plants for optimal growth and yield.
By addressing these common questions, I hope to provide you with a comprehensive understanding of early spring gardening tasks and empower you to create a thriving garden this season.
Conclusion: Nurturing Your Garden’s Potential

By diligently completing these 10 essential early spring gardening tasks, you’ve laid the groundwork for a thriving and rewarding growing season. Remember, gardening is a journey, not a destination. Each season brings new opportunities to learn, experiment, and refine your gardening practices.
Embrace the process, enjoy the satisfaction of nurturing your garden back to life, and savor the fruits of your labor. Happy gardening!


