

Are you frustrated with lackluster garden growth year after year? Do you find yourself battling poor soil that just won’t cooperate? I understand the disappointment of planting seeds only to see them struggle. It’s disheartening to invest time and effort without the desired results. But what if I told you the solution lies beneath the surface? Proper spring garden soil amendments can transform your garden, providing the foundation for vibrant, healthy plants. Let’s unlock the secrets to a thriving garden together.
1. Why Amending Your Soil is Vital for Spring Gardening

As a gardener, I’ve learned that the secret to a successful growing season starts with the soil. You might think, “Well, it’s just dirt,” but it’s so much more. Your soil is the very foundation of your garden’s health. You may have noticed that after a harsh winter, your soil can become compacted, depleted of nutrients, and less hospitable to new growth. This is where spring garden soil amendments become indispensable.
Think of your soil as a living ecosystem. It needs the right balance of nutrients, air, and water to support plant life. When winter hits, the freeze-thaw cycles can cause soil to compact, making it difficult for roots to penetrate. This compaction also reduces drainage, leading to waterlogged soil that can suffocate your plants. Additionally, essential nutrients can leach away during heavy winter rains, leaving your soil lacking the building blocks for healthy growth.
Understanding Soil Health
You might be wondering, “How do I know if my soil needs amending?” Here are a few signs that indicate your soil could benefit from amendments:
- Poor Drainage: If water pools on the surface after rain, your soil likely has poor drainage.
- Compacted Soil: If it’s difficult to dig or if the soil feels hard and dense, it’s likely compacted.
- Slow Plant Growth: If your plants are growing slowly or are stunted, it could be a sign of nutrient deficiencies.
- Yellowing Leaves: This can indicate a lack of essential nutrients like nitrogen or iron.
- Weed Infestations: Some weeds thrive in nutrient-poor or compacted soil.
Starting with a Soil Test
Before you add any amendments, I highly recommend performing a soil test. This will give you a clear picture of your soil’s pH and nutrient levels. You can purchase soil test kits at most garden centers or send samples to a local agricultural extension. A soil test will tell you:
- pH Level: Whether your soil is acidic, neutral, or alkaline.
- Nutrient Levels: The amounts of essential nutrients like nitrogen, phosphorus, and potassium.
- Organic Matter Content: The amount of organic material in your soil.
Knowing your soil’s composition allows you to make informed decisions about which amendments to use. For example, if your soil test reveals a low pH, you’ll know that you need to add lime to raise it. If it shows a lack of organic matter, compost will be your best friend.
Benefits of Amending Soil
Amending your soil in spring offers numerous benefits:
- Improved Soil Structure: Amendments like compost and aged manure loosen compacted soil and improve drainage.
- Increased Nutrient Availability: Adding organic matter and specific amendments ensures your plants have access to essential nutrients.
- Enhanced Water Retention: Amendments like peat moss and coco coir help sandy soils retain moisture.
- Balanced pH: Adjusting pH levels ensures plants can absorb nutrients effectively.
- Boosted Microbial Activity: Healthy soil is teeming with beneficial microbes that break down organic matter and release nutrients.
Practical Steps for Spring Soil Preparation
- Clear Debris: Remove any leftover leaves, weeds, or debris from your garden beds.
- Aerate the Soil: Use a garden fork or tiller to loosen compacted soil.
- Incorporate Amendments: Spread your chosen amendments evenly over the soil surface.
- Mix Thoroughly: Use a garden fork or tiller to mix the amendments into the top 6-8 inches of soil.
- Level the Soil: Rake the soil to create a smooth, even surface for planting.
- Water Lightly: Lightly water the soil to settle it and prepare it for planting.
Case Study: Transforming a Clay Soil Garden
In my own experience, I once inherited a garden with notoriously heavy clay soil. It was nearly impossible to grow anything successfully. After conducting a soil test, I found the pH was slightly acidic and the soil was severely compacted. I decided to amend it with a combination of gypsum, compost, and perlite. Over several seasons, I gradually incorporated these amendments, and the transformation was remarkable. The soil became much easier to work with, and my plants thrived.
Common Soil Problems and Solutions
| Soil Problem | Solution |
| Compacted Soil | Add compost, aged manure, or perlite |
| Poor Drainage | Incorporate perlite, sand, or gypsum |
| Nutrient Deficiencies | Use compost, aged manure, or specific fertilizers |
| Acidic Soil | Apply lime |
| Alkaline Soil | Apply sulfur |
Key Takeaway:
By understanding the importance of spring garden soil amendments and taking the necessary steps to improve your soil, you’ll create a foundation for a flourishing garden. Remember, healthy soil equals healthy plants.
2. Organic Compost: The Cornerstone of Spring Soil Health

When it comes to spring garden soil amendments, compost reigns supreme. It’s the gold standard for improving soil health and boosting plant growth. Compost is essentially decomposed organic matter, such as kitchen scraps, yard waste, and manure. This natural process transforms these materials into a rich, nutrient-dense substance that nourishes your soil.
Benefits of Using Compost
The benefits of incorporating compost into your garden are numerous:
- Improved Soil Structure: Compost loosens compacted soil, allowing for better air and water circulation. This is particularly beneficial for heavy clay soils.
- Increased Nutrient Availability: Compost is a natural source of essential nutrients like nitrogen, phosphorus, and potassium, which are vital for plant growth.
- Enhanced Water Retention: Compost helps sandy soils retain moisture, preventing them from drying out too quickly.
- Boosted Microbial Activity: Compost is teeming with beneficial microorganisms that enhance soil fertility and suppress plant diseases.
- Suppressed Weed Growth: A thick layer of compost can help suppress weed growth, reducing competition for resources.
- Reduced Erosion: Compost helps to stabilize the soil, reducing erosion from wind and water.
Making or Purchasing Compost
You can create your own compost at home using a variety of kitchen scraps and yard waste. However, if you don’t have the time or space for a compost bin, you can easily purchase high-quality compost from local garden centers or nurseries. When purchasing compost, look for products that are certified organic and free of harmful chemicals.
Applying Compost to Your Garden
The ideal time to apply compost is in the spring, before planting. Here are some tips for applying compost:
- Spread evenly: Spread a layer of compost over your garden beds, typically 2-4 inches thick.
- Incorporate thoroughly: Use a garden fork or tiller to mix the compost into the top 6-8 inches of soil.
- Water lightly: Water the soil lightly after incorporating the compost to help it settle.
- Consider topdressing: You can also use compost as a topdressing around established plants. Apply a thin layer around the base of the plants, being careful not to touch the stems.
Case Study: Using Compost to Revitalize a Flower Bed
I once inherited a flower bed that was struggling with poor drainage and lackluster blooms. The soil was compacted and lacked nutrients. I decided to revitalize it by adding a generous layer of compost and incorporating it into the soil. Within a few weeks, I noticed a significant improvement in soil structure and drainage. The following season, my flowers bloomed more profusely and vibrantly than ever before.
Key Takeaway:
Compost is an invaluable asset to any gardener. By incorporating compost into your spring soil preparation, you’re providing your plants with the best possible foundation for healthy growth. Remember, healthy soil equals healthy plants, and compost is the key to unlocking your soil’s full potential.
3. Aged Manure: A Nutrient-Rich Spring Booster

When it comes to providing a potent nutrient boost to your garden soil in spring, aged manure is a time-honored and highly effective amendment. I’ve seen firsthand how the right application of well-aged manure can transform a struggling garden into a thriving oasis. However, it’s crucial to understand the nuances of using manure to avoid potential pitfalls.
Benefits of Aged Manure
Aged manure is a treasure trove of essential nutrients, including nitrogen, phosphorus, and potassium, as well as micronutrients that are vital for plant growth. Here’s why it’s such a valuable amendment:
- Rich Nutrient Source: Manure provides a slow-release source of nutrients, feeding your plants steadily throughout the growing season.
- Improved Soil Structure: Like compost, aged manure enhances soil structure, improving aeration and drainage.
- Increased Microbial Activity: Manure introduces beneficial microorganisms that break down organic matter and enhance soil fertility.
- Enhanced Water Retention: Manure helps sandy soils retain moisture, reducing the need for frequent watering.
Types of Manure and Their Nutrient Content
Different types of manure have varying nutrient compositions. Here’s a breakdown:
- Cow Manure: A balanced source of nutrients, suitable for most garden plants.
- Horse Manure: Rich in nitrogen and organic matter, but can be “hot” (high in nitrogen) if not properly aged.
- Chicken Manure: Highly concentrated in nitrogen and phosphorus, requiring careful application.
- Sheep and Goat Manure: Similar to cow manure, but often drier and less likely to contain weed seeds.
Proper Aging and Application
The key to safely using manure is ensuring it’s properly aged. Fresh manure can be “hot,” meaning it’s high in nitrogen and can burn plant roots. Here’s how to ensure proper aging:
- Composting: Pile the manure and turn it regularly for several months to allow it to decompose.
- Time: Allow manure to age for at least six months to a year before using it in your garden.
When applying aged manure, follow these guidelines:
- Spread Evenly: Spread a 2-4 inch layer of aged manure over your garden beds.
- Incorporate Thoroughly: Mix the manure into the top 6-8 inches of soil using a garden fork or tiller.
- Avoid Over-Application: Too much manure can lead to nutrient imbalances and salt buildup.
Potential Risks of Using Fresh Manure
Using fresh manure can pose several risks:
- Root Burn: High nitrogen content can damage plant roots.
- Weed Seeds: Fresh manure may contain viable weed seeds.
- Pathogens: Fresh manure can harbor harmful pathogens.
- Ammonia Release: Fresh manure release ammonia, this gas can burn plant leaves.
Case Study: Revitalizing a Vegetable Garden with Aged Manure
I once worked with a vegetable garden that had consistently poor yields. The soil was depleted of nutrients and lacked organic matter. After conducting a soil test, I determined that the soil was low in nitrogen and phosphorus. I decided to amend it with well-aged cow manure. The results were remarkable. The following season, the vegetable garden produced an abundant harvest of healthy, flavorful vegetables.
Key Takeaway:
Aged manure is a powerful tool for enhancing soil fertility and boosting plant growth in spring. By understanding the different types of manure, ensuring proper aging, and applying it correctly, you can unlock the full potential of this valuable amendment. Remember, a well-nourished garden is a thriving garden.
4. Natural Amendments for Clay Soil in Spring

Gardening with clay soil can be a challenging endeavor. Clay soil is dense and heavy, making it difficult for water and air to penetrate. This can lead to poor drainage, root suffocation, and stunted plant growth. However, with the right spring garden soil amendments, you can transform your clay soil into a fertile and productive garden.
Understanding the Challenges of Clay Soil
Clay soil is composed of tiny particles that pack tightly together, leaving little space for air and water. This high density leads to several challenges:
- Poor Drainage: Water struggles to penetrate compacted clay soil, leading to waterlogging and root rot.
- Poor Aeration: Insufficient air circulation hinders root growth and nutrient uptake.
- Difficulty in Working: Clay soil can be difficult to dig and till, especially when wet.
- Nutrient Lockup: Clay soil can tightly bind nutrients, making them unavailable to plants.
Improving Clay Soil Structure with Amendments
Several amendments can help improve the structure and drainage of clay soil:
- Organic Matter: Incorporating organic matter such as compost, aged manure, and leaf mold improves soil structure by increasing air and water infiltration.
- Gypsum: Gypsum, a calcium sulfate mineral, helps break down clay particles, improving drainage and aeration.
- Perlite: This lightweight volcanic glass adds air pockets to the soil, improving drainage and root growth.
Step-by-Step Guide to Amending Clay Soil in Spring
- Test Your Soil: Conduct a soil test to determine the pH and nutrient levels.
- Clear Debris: Remove any leftover leaves, weeds, or debris from the garden area.
- Incorporate Amendments: Spread a generous layer of organic matter and gypsum over the soil surface.
- Till or Fork: Use a garden tiller or fork to thoroughly mix the amendments into the top 6-8 inches of soil.
- Amend Gradually: It may take several seasons of amending to significantly improve clay soil structure.
- Water and Observe: Water the amended soil and monitor drainage. Adjust the amount of amendments as needed.
Addressing Drainage Issues in Clay Soil
If your clay soil has severe drainage problems, consider these additional strategies:
- Raised Beds: Create raised beds to improve drainage and warm the soil more quickly in spring.
- French Drains: Install French drains to divert excess water away from the garden area.
- Planting in Containers: Grow plants in containers filled with well-draining potting mix.
Case Study: Transforming a Clay Garden into a Productive Oasis
I once worked with a homeowner who had a challenging clay soil garden. The plants were constantly struggling with waterlogging and nutrient deficiencies. After several seasons of amending the soil with compost, gypsum, and perlite, along with the installation of a French drain, the garden was transformed. The soil became easier to work with, drainage improved significantly, and the plants thrived.
Key Takeaway:
Amending clay soil requires patience and persistence. By incorporating the right amendments and following proper techniques, you can transform your challenging clay soil into a productive and rewarding garden. Remember, improving clay soil is an ongoing process, and consistent efforts will yield the best results.
5. Enhancing Sandy Soil for Spring Planting

Sandy soil, composed of coarse particles, presents a different set of challenges than clay soil. While well-drained, sandy soil tends to be dry, nutrient-poor, and prone to erosion. However, with the right amendments, you can transform sandy soil into a fertile and productive garden bed.
Understanding the Challenges of Sandy Soil
The large, loose particles of sandy soil create several challenges for gardeners:
- Poor Water Retention: Sandy soil drains quickly, leading to rapid water loss and the potential for drought stress in plants.
- Nutrient Leaching: Nutrients are easily leached from sandy soil due to its low water-holding capacity.
- Erosion: Sandy soil is susceptible to erosion from wind and water, especially on slopes.
- Low Organic Matter Content: Sandy soil typically has low organic matter content, which is crucial for healthy soil structure and nutrient availability.
Improving Sandy Soil with Amendments
Several amendments can help improve the water-holding capacity, nutrient retention, and overall fertility of sandy soil:
- Organic Matter: Incorporating organic matter such as compost, peat moss, and well-rotted manure increases water retention, adds nutrients, and improves soil structure.
- Compost: Compost is a valuable source of organic matter that improves soil structure and provides essential nutrients.
- Peat Moss: Peat moss is highly absorbent and can significantly increase the water-holding capacity of sandy soil.
- Coco Coir: Coco coir is a sustainable alternative to peat moss that has excellent water-holding capacity and improves soil aeration.
Practical Tips for Amending Sandy Soil in Spring
- Test Your Soil: Conduct a soil test to determine the pH and nutrient levels.
- Clear Debris: Remove any leftover leaves, weeds, or debris from the garden area.
- Incorporate Amendments: Spread a generous layer of organic matter, such as compost or peat moss, over the soil surface.
- Mix Thoroughly: Use a garden fork or tiller to mix the amendments into the top 6-8 inches of soil.
- Water Thoroughly: Water the amended soil thoroughly to help the amendments settle and become incorporated.
- Mulch: Apply a layer of mulch, such as wood chips or straw, to help retain moisture and suppress weeds.
Case Study: Revitalizing a Sandy Beach Garden
I once worked with a homeowner who had a challenging sandy garden near the beach. The soil was extremely dry and prone to erosion. After amending the soil with a combination of compost, peat moss, and coco coir, and mulching heavily, the garden transformed. The plants thrived, and the soil retained moisture much better, reducing the need for frequent watering.
Key Takeaway:
Amending sandy soil requires a focus on increasing water retention and adding organic matter. By incorporating the right amendments and following proper techniques, you can transform your sandy soil into a productive and thriving garden. Remember, patience and consistent efforts are key to achieving optimal results.
6. Balancing Soil pH with Lime and Sulfur in Spring
Soil pH plays a crucial role in plant health and nutrient availability. Plants have specific pH ranges within which they thrive. An imbalanced pH can hinder nutrient uptake, leading to stunted growth and nutrient deficiencies. Therefore, understanding and adjusting soil pH is an essential aspect of spring soil preparation.
Understanding Soil pH
Soil pH measures the acidity or alkalinity of the soil. It’s measured on a scale of 0 to 14, where 7 is neutral. A pH below 7 indicates acidity, while a pH above 7 indicates alkalinity.
The Importance of Soil pH
Soil pH affects several key factors:
- Nutrient Availability: Different nutrients are available to plants at specific pH levels. For example, phosphorus is most readily available in slightly acidic soils.
- Microbial Activity: Soil pH influences the activity of beneficial soil microorganisms, which play a vital role in nutrient cycling and plant health.
- Plant Growth: Each plant species has a preferred pH range. If the soil pH is outside this range, plant growth can be stunted or even inhibited.
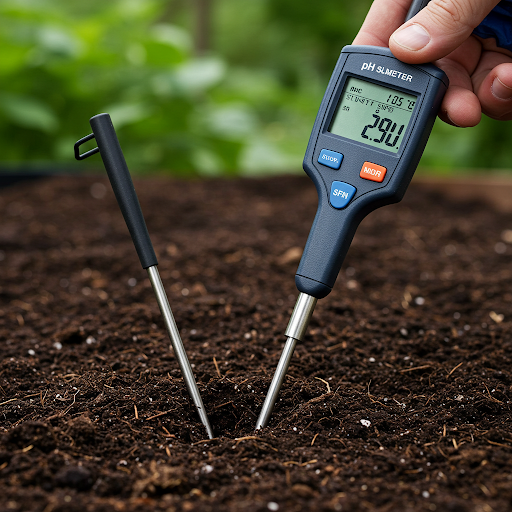
Testing Your Soil pH
Before adjusting soil pH, it’s crucial to test your soil. You can purchase inexpensive soil pH test kits at most garden centers. These kits typically involve inserting a probe into the soil and reading the pH level on a color chart or digital display. Alternatively, you can send a soil sample to a local agricultural extension for a more accurate analysis.
Raising Soil pH with Lime
If your soil test reveals a low pH (acidic soil), you can raise it by applying lime. Lime is a natural material that contains calcium carbonate. When applied to the soil, lime reacts with the soil particles to neutralize acidity.
- Types of Lime: Common types of lime used in gardening include agricultural lime, pelletized lime, and dolomitic lime (which also provides magnesium).
- Application Rate: The amount of lime needed to raise soil pH depends on the severity of the acidity and the type of lime used. Soil test results and recommendations from local agricultural extension offices can provide guidance on appropriate application rates.
- Timing: It’s best to apply lime in the fall or early spring, allowing it to react with the soil over the winter.
Lowering Soil pH with Sulfur
If your soil test reveals a high pH (alkaline soil), you can lower it by applying sulfur. Sulfur oxidizes in the soil to form sulfuric acid, which gradually lowers the pH.
- Types of Sulfur: Elemental sulfur is commonly used to lower soil pH.
- Application Rate: As with lime, the amount of sulfur needed depends on the severity of the alkalinity and the type of sulfur used. Soil test results and expert advice are crucial for determining the appropriate application rate.
- Timing: Sulfur takes longer to react with the soil than lime. It’s best to apply sulfur several months before planting to allow it to work effectively.
Key Takeaway:
Understanding and adjusting soil pH is an essential aspect of creating a healthy garden environment. By testing your soil and applying the appropriate amendments, such as lime or sulfur, you can ensure that your plants have access to the nutrients they need to thrive. Remember to follow recommended application rates and consult with local experts for guidance.
7. Natural Spring Soil Amendments to Boost Nutrient Availability

In addition to organic matter like compost and manure, there are several natural amendments that can provide targeted nutrient boosts to your spring garden. These amendments offer specific benefits and can be used to address specific nutrient deficiencies.
- Rich in Phosphorus: Bone meal is a slow-release source of phosphorus, a crucial nutrient for root development and flower production.
- Application: Apply bone meal at a rate of 4-6 pounds per 100 square feet. Mix it into the soil before planting or use it as a side dressing around established plants.
- High in Nitrogen: Blood meal is a fast-acting source of nitrogen, which is essential for plant growth and leaf development.
- Application: Apply blood meal at a rate of 2-4 pounds per 100 square feet. It is best used as a side dressing around plants after they have emerged.
Green Sand:
- Provides Potassium and Trace Minerals: Green sand is a natural source of potassium and trace minerals like iron and magnesium.
- Application: Apply green sand at a rate of 20-40 pounds per 100 square feet. It can be incorporated into the soil before planting or used as a side dressing.
Other Natural Amendments:
- Rock Phosphate: A slow-release source of phosphorus.
- Epsom Salt: Provides magnesium, which is essential for chlorophyll production.
- Seaweed Meal: A rich source of micronutrients and organic matter.
Tips for Using Natural Amendments:
- Follow Application Rates: Always follow the recommended application rates on the product label. Over-applying amendments can harm your plants.
- Incorporate Thoroughly: Mix natural amendments into the soil thoroughly to ensure even distribution.
- Consider Soil Test Results: Tailor your amendment choices based on the results of your soil test.
- Use in Combination: Combine different natural amendments to provide a balanced supply of nutrients.
Case Study: Using Blood Meal to Boost Leafy Greens
I noticed that my leafy greens, such as spinach and kale, were pale and lacking in vigor. A soil test revealed a slight nitrogen deficiency. I decided to side-dress the plants with blood meal, following the recommended application rate. Within a few weeks, I noticed a significant improvement in plant color and growth.
Key Takeaway:
Natural amendments offer a sustainable and effective way to boost nutrient availability in your spring garden. By carefully selecting and applying the right amendments, you can ensure that your plants have access to the essential nutrients they need to thrive. Remember to consider your soil test results and choose amendments that address specific nutrient deficiencies.
8. Spring Soil Preparation Checklist: A Step-by-Step Guide

Now that you have a solid understanding of the importance of soil amendments and how to choose the right ones, it’s time to put your knowledge into action. Here’s a step-by-step checklist to guide you through the spring soil preparation process:
Step 1: Assess Your Soil
- Conduct a soil test to determine your soil’s pH, nutrient levels, and overall health.
- Observe your soil’s texture and drainage. Look for signs of compaction, poor drainage, or nutrient deficiencies.
Step 2: Clear the Area
- Remove any debris, such as leaves, weeds, or leftover plant material, from your garden beds.
- Dispose of debris properly, composting organic matter where possible.
Step 3: Amend Your Soil
- Spread the chosen amendments evenly over the garden bed.
- Follow the recommended application rates for each amendment.
- Use a garden fork or tiller to thoroughly mix the amendments into the top 6-8 inches of soil.
Step 4: Aerate the Soil
- If your soil is compacted, use a garden fork or tiller to aerate it.
- This helps to improve drainage and root growth.
Step 5: Level the Soil
- Use a rake to level the soil and create a smooth surface for planting.
Step 6: Water Thoroughly
- Water the amended soil thoroughly to help it settle and activate the amendments.
Step 7: Mulch (Optional)
- Apply a layer of mulch, such as wood chips or straw, to help retain moisture, suppress weeds, and regulate soil temperature.
Step 8: Monitor and Adjust
- Monitor your soil throughout the growing season and make adjustments as needed.
- Observe plant growth and address any nutrient deficiencies or other issues.
Additional Tips:
- Consider planting cover crops in the fall to improve soil health and add organic matter.
- Rotate your crops each year to prevent nutrient depletion and reduce the risk of soil-borne diseases.
- Avoid walking on wet soil, as this can compact it.
Common Mistakes to Avoid:
- Skipping the soil test: A soil test is crucial for determining the specific needs of your soil.
- Over-applying amendments: Using too much of any amendment can harm your plants.
- Not incorporating amendments properly: Ensure that amendments are thoroughly mixed into the soil.
- Neglecting to water after amending: Proper watering is essential to activate the amendments.
By following this checklist and paying close attention to your soil’s needs, you can create a thriving garden environment that supports healthy plant growth. Remember, consistent effort and a keen understanding of your soil’s characteristics are key to success.
Key Takeaway:
A well-prepared soil is the foundation of a successful garden. By following this step-by-step checklist and incorporating the right amendments, you can create a thriving environment for your plants to flourish. Remember to observe your garden closely and make adjustments as needed throughout the growing season.
FAQ:

I understand that you may have some specific questions about spring garden soil amendments. Here are answers to some of the most frequently asked questions:
Q: What are the best organic soil amendments for spring vegetable gardens?
- A: Compost, aged manure, and worm castings are excellent organic amendments for spring vegetable gardens, enhancing soil fertility and structure.
Q: How to test and amend clay soil in spring garden?
- A: To test your clay soil, you can use a simple soil pH test kit or send a sample to a local agricultural extension for a more detailed analysis. To amend clay soil, incorporate organic matter like compost, gypsum, and perlite to improve drainage and structure.
Q: When to apply compost and manure as spring soil amendments?
- A: Apply compost and aged manure several weeks before planting, ideally after the last frost, to allow them to break down and incorporate into the soil.
Q: Effective spring garden soil amendments for improving water drainage?
- A: Perlite, vermiculite, and coarse sand are effective for improving water drainage in spring gardens, especially those with heavy clay soil.
Q: Natural spring soil amendments to increase nutrient availability for plants?
- A: Bone meal, blood meal, and green sand are natural sources of essential nutrients that can increase their availability for plants.
Q: How to improve spring garden soil for optimal root development?
- A: Ensure well-aerated soil with adequate organic matter and a balanced pH to promote healthy root development.
Q: What are the best spring soil amendments for acidic soil pH?
- A: Lime is the most effective amendment for raising the pH of acidic soil.
Q: How to use cover crops as spring garden soil amendments?
- A: Plant cover crops in the fall and till them into the soil in the spring to add organic matter and improve soil structure.
Q: Step-by-step guide to amending sandy soil in spring gardens?
- A: To amend sandy soil, incorporate organic matter such as compost, peat moss, and coco coir to improve water retention and nutrient-holding capacity.
Q: DIY spring garden soil amendments using kitchen scraps and compost?
- A: You can create your own compost using kitchen scraps like vegetable peels, coffee grounds, and eggshells to enrich your garden soil naturally.
I hope this FAQ section addresses some of your common questions about spring garden soil amendments. If you have any further questions, please feel free to ask.
Conclusion
By understanding the importance of soil health and applying the right amendments, you can create a thriving garden that produces abundant harvests. Remember, healthy soil is the foundation for healthy plants, so invest time and effort in preparing your soil for spring planting.
A well-prepared soil is the foundation of a successful garden. By following this step-by-step checklist and incorporating the right amendments, you can create a thriving environment for your plants to flourish. Remember to observe your garden closely and make adjustments as needed throughout the growing season.
Additional Tips:
- Consider planting cover crops in the fall to improve soil health and add organic matter.
- Rotate your crops each year to prevent nutrient depletion and reduce the risk of soil-borne diseases.
- Avoid walking on wet soil, as this can compact it.
Common Mistakes to Avoid:
- Skipping the soil test: A soil test is crucial for determining the specific needs of your soil.
- Over-applying amendments: Using too much of any amendment can harm your plants.
- Not incorporating amendments properly: Ensure that amendments are thoroughly mixed into the soil.
- Neglecting to water after amending: Proper watering is essential to activate the amendments.
By following this checklist and paying close attention to your soil’s needs, you can create a thriving garden environment that supports healthy plant growth. Remember, consistent effort and a keen understanding of your soil’s characteristics are key to success.
Remember, healthy soil equals healthy plants.
I hope this comprehensive guide has equipped you with the knowledge and tools to successfully amend your soil and create a flourishing spring garden. Happy gardening!


