Are you tired of buying taro from the grocery store, wishing you could grow your own fresh, nutritious vegetables at home? You know the flavor and quality of homegrown produce are unmatched, but the idea of cultivating taro seems daunting. What if I told you that growing taro is not only possible but also surprisingly simple? I’ve spent years nurturing various garden vegetables, and I’m here to share my knowledge to help you achieve a bountiful taro harvest.
Select Healthy Taro Corms for Successful Planting
Your journey towards a thriving taro garden begins with a crucial step: selecting healthy corms. Think of corms as the starting point, the foundation upon which your entire harvest rests. Just as a strong foundation is essential for a sturdy building, healthy corms are vital for robust taro plants.
Understanding the Importance of Corm Health
Imagine planting a seed. If that seed is weak or damaged, it’s unlikely to germinate and grow into a healthy plant. The same principle applies to taro corms. A healthy corm is not only more likely to sprout but also more resistant to diseases and pests. This translates to stronger plants, higher yields, and ultimately, a more rewarding gardening experience.
Visual Cues: Identifying Healthy Corms
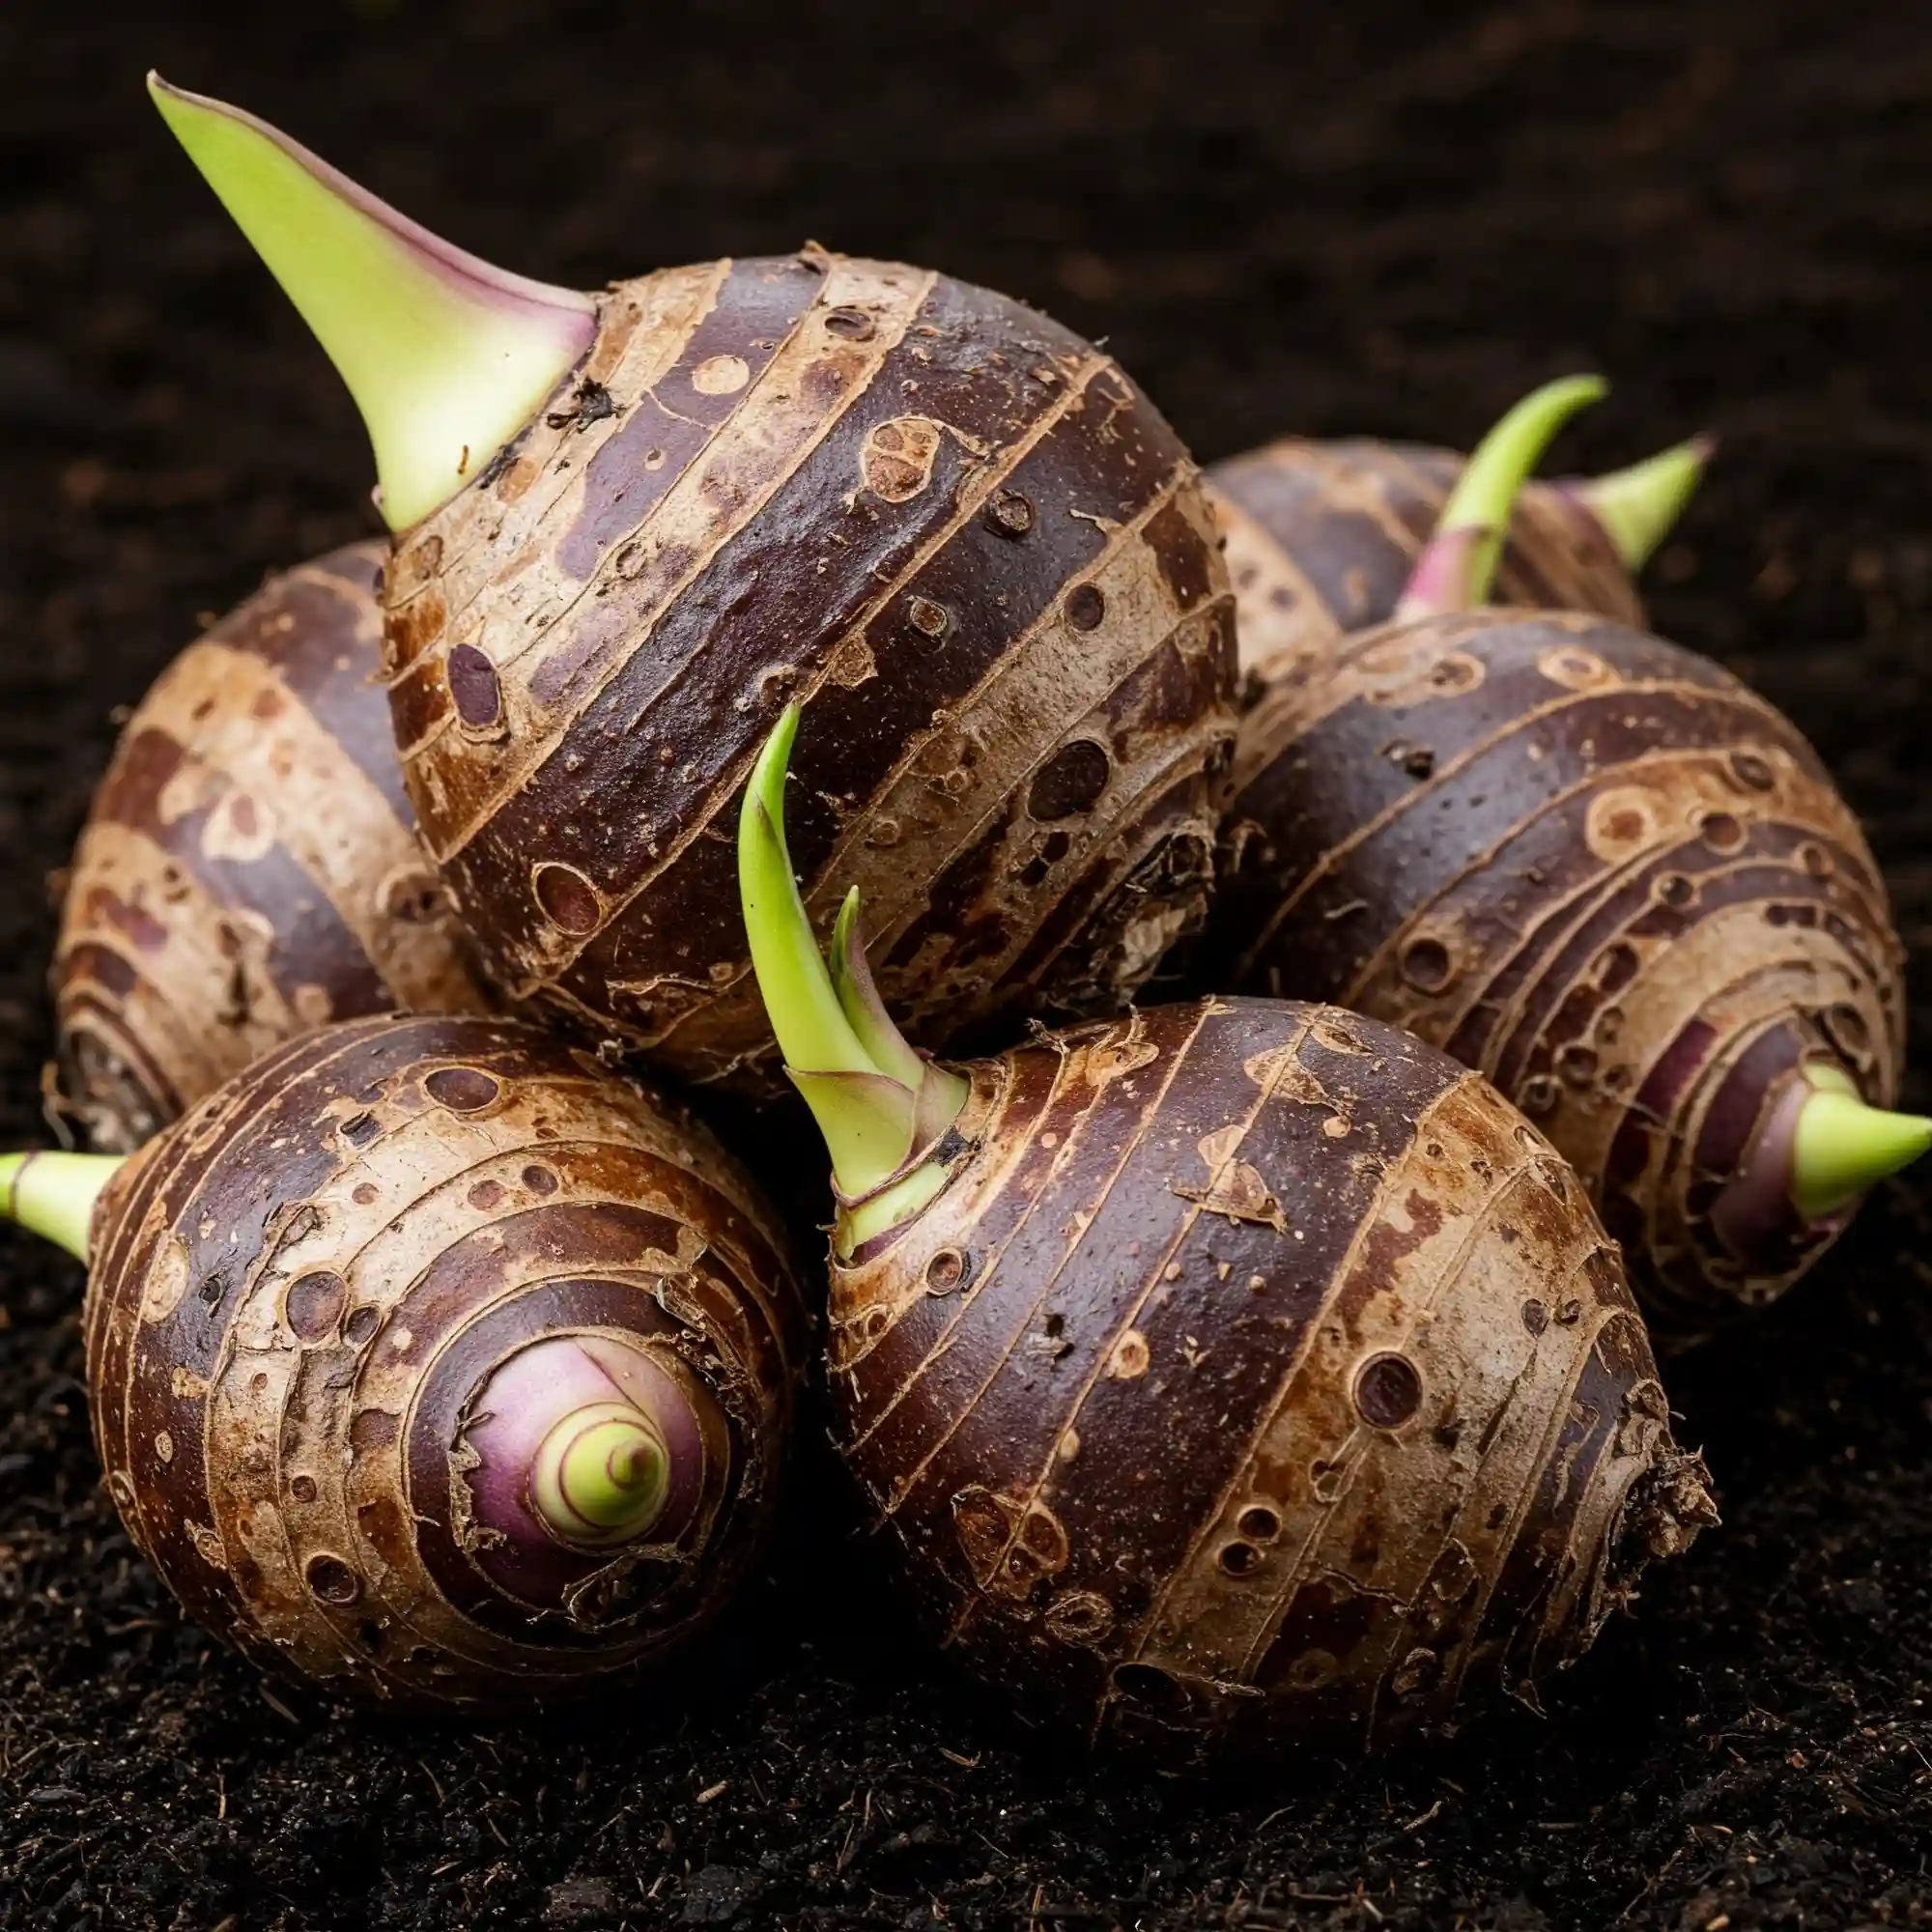
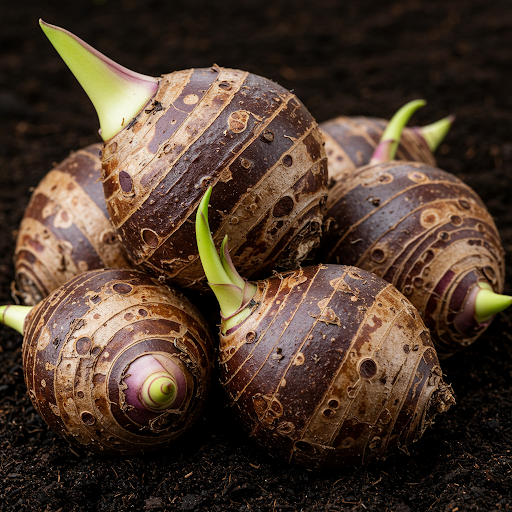
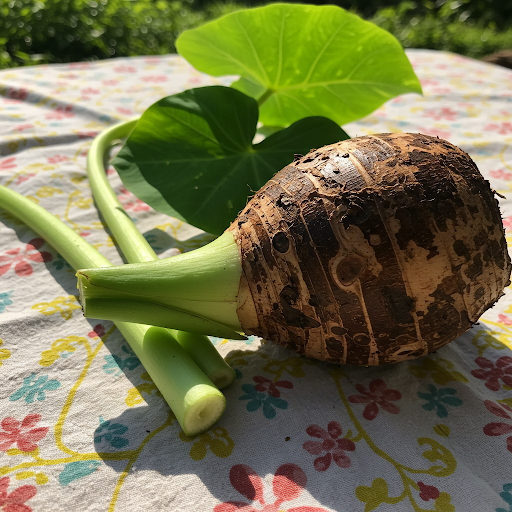
When selecting corms, you’re essentially conducting a visual inspection to assess their health. Look for corms that are firm to the touch, much like a firm potato. Avoid corms that feel soft or squishy, as this could indicate internal damage or decay.
One of the key indicators of a healthy corm is the presence of visible sprouts, often referred to as “eyes.” These sprouts are the beginnings of new growth, and their presence signifies a live and active corm. The more sprouts you see, the more vigorous the growth you can expect.
Beyond Visual Inspection: Considering Disease and Damage
While visual inspection is crucial, it’s not enough. You also need to be vigilant about signs of disease or damage. Look for any discoloration, mold, or signs of insect infestation. Even minor damage can weaken the corm and increase its susceptibility to diseases.
Where to Source Quality Corms
Finding high-quality corms is essential for a successful taro harvest. Local nurseries are often a great place to start. You can personally inspect the corms, ask questions about their origin and quality, and receive expert advice from local nursery staff.
Online suppliers offer a wider variety of corms and the convenience of home delivery. However, it’s crucial to choose reputable online sellers with positive customer reviews. Reading customer feedback can provide valuable insights into the quality of their corms and the reliability of their shipping practices.
Building a Strong Foundation: Investing in Quality
While the initial cost of high-quality corms might seem slightly higher, remember that you’re investing in the success of your entire taro harvest. Healthy corms translate to vigorous plants, higher yields, and ultimately, a more rewarding gardening experience.
Key Takeaway: Selecting healthy corms is the cornerstone of successful taro cultivation. Choose firm corms with visible sprouts and avoid those with any signs of damage or disease. Source your corms from reputable nurseries or online suppliers.
Prepare the Ideal Soil for Thriving Taro Plants
Just as a chef carefully selects the finest ingredients for a delicious meal, a successful taro gardener must provide the perfect soil environment for their plants to thrive. Taro, with its tropical origins, has specific soil preferences that are crucial for healthy growth and abundant yields.
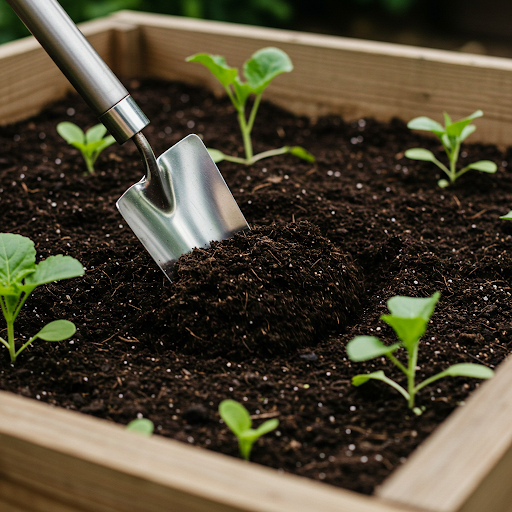
Understanding Taro’s Soil Requirements
Taro plants flourish in rich, well-draining soil. Think of it as creating a comfortable home for your taro. The soil should be fertile and loose, allowing for proper root development and efficient water drainage. Waterlogged soil can lead to root rot, a common problem that can severely impact taro growth.
Enriching Your Soil with Organic Matter
To enhance your soil’s fertility, incorporate plenty of organic matter. This can include compost, well-rotted manure, or even shredded leaves. Organic matter improves soil structure, increases water retention, and provides essential nutrients for your taro plants.
- Compost: A rich source of nutrients and beneficial microorganisms.
- Well-rotted manure: Adds organic matter and improves soil structure.
- Shredded leaves: Provides a slow-release source of nutrients and enhances soil aeration.
The Importance of Soil pH
Taro plants prefer slightly acidic to neutral soil with a pH range of 5.5 to 7.0. You can test your soil’s pH using a simple soil test kit available at most garden centers. If your soil is too acidic, you can raise the pH by adding lime. Conversely, if your soil is too alkaline, you can lower the pH by adding sulfur.
Creating the Ideal Soil Texture
The ideal soil texture for taro is a balance of sand, silt, and clay. This combination ensures good drainage while still retaining sufficient moisture. If your soil is too sandy, it may dry out too quickly. If it’s too clayey, it may become waterlogged.
- Sandy soil: May require additional organic matter to improve water retention.
- Clay soil: May need to be amended with sand or perlite to improve drainage.
By carefully preparing the soil and ensuring it meets taro’s specific requirements, you’re creating a nurturing environment that will support healthy plant growth and maximize your harvest.
Key Takeaways:
- Taro plants thrive in rich, well-draining soil.
- Incorporate organic matter like compost and manure to enrich the soil.
- Maintain a slightly acidic to neutral soil pH.
- Create a balanced soil texture by amending as needed.
Plant Taro Corms at the Right Depth and Spacing
Just as a skilled carpenter carefully measures and cuts lumber for a sturdy structure, a successful taro gardener must pay close attention to planting depth and spacing. These seemingly small details can significantly impact the health and productivity of your taro plants.
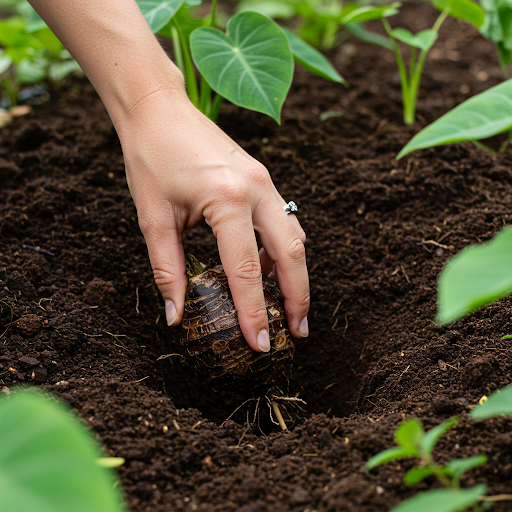
Planting Depth: Striking the Right Balance
Planting too shallowly can expose the corms to temperature fluctuations and desiccation, while planting too deeply can hinder their emergence. Generally, the recommended planting depth for taro corms is around 2 to 4 inches.
- Shallow planting: Can lead to desiccation and reduced vigor.
- Deep planting: Can hinder emergence and weaken plant growth.
Use your judgment and adjust the planting depth based on the size of the corms and the soil conditions. In lighter soils, you might plant slightly deeper to ensure adequate moisture retention.
Spacing: Maximizing Air Circulation and Sunlight
Proper spacing is crucial for optimal taro growth. Crowded plants compete for resources like sunlight, water, and nutrients, leading to stunted growth and reduced yields.
- Recommended spacing: 12 to 18 inches between corms.
- Wider spacing: May be necessary for larger varieties or in areas with high humidity.
Adequate spacing also promotes better air circulation, which helps to prevent the spread of diseases and pests.
Timing is Everything: Planting Season
The best time to plant taro varies depending on your climate. In tropical and subtropical regions, taro can be planted year-round. In temperate climates, it’s best to plant taro after the last frost has passed and the soil has warmed up.
- Tropical and subtropical climates: Year-round planting is possible.
- Temperate climates: Plant after the last frost has passed.
By carefully considering planting depth and spacing, you’re creating an environment where your taro plants can thrive. Proper planting techniques set the stage for healthy growth, robust yields, and a successful harvest.
Key Takeaways:
- Plant taro corms at a depth of 2 to 4 inches.
- Maintain adequate spacing between plants to allow for optimal growth and air circulation.
- Consider your climate and adjust planting timing accordingly.
Master the Art of Watering Taro for Vigorous Growth
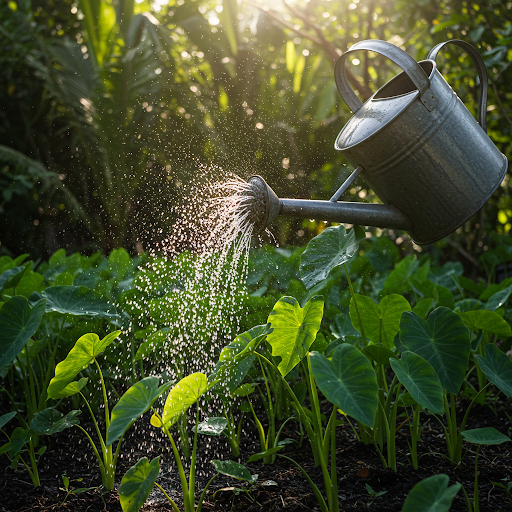
Just as a skilled gardener understands the delicate balance of sunlight and shade, mastering the art of watering is crucial for cultivating healthy and productive taro plants. Taro, with its tropical origins, thrives in consistently moist soil but is susceptible to waterlogging. Finding the sweet spot in watering is key to ensuring vigorous growth and a bountiful harvest.
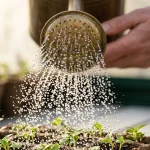
Consistency is Key: Maintaining Soil Moisture
Taro plants prefer consistently moist soil, especially during the early stages of growth. Allow the top inch or two of soil to dry out slightly between waterings, but avoid letting the soil become completely dry. This helps prevent root rot, a common issue that can severely impact taro plants.
Deep Watering: Encouraging Deep Root Development
When you do water, water deeply. This encourages the taro roots to grow deeper into the soil, making them more drought-tolerant. Shallow watering can lead to shallow root systems, making the plants more vulnerable to stress during dry periods.
Mulching: A Natural Moisture Retention Strategy
Mulching is a valuable technique for conserving soil moisture. Applying a layer of organic mulch, such as straw, leaves, or wood chips, around the base of your taro plants helps to retain moisture, suppress weeds, and regulate soil temperature.
Monitoring Soil Moisture: A Hands-On Approach
Regularly check the soil moisture by gently inserting your finger into the soil. If the top inch of soil feels dry, it’s time to water. During hot, dry periods, you may need to water more frequently.
Avoiding Overwatering: The Risks of Waterlogging
While consistent moisture is essential, overwatering can be detrimental. Waterlogged soil can suffocate the taro roots, leading to root rot and ultimately, plant death. Observe your plants carefully for signs of overwatering, such as yellowing leaves and stunted growth.
Key Takeaways:
- Maintain consistently moist soil, but avoid overwatering.
- Water deeply to encourage deep root development.
- Use mulch to conserve soil moisture and suppress weeds.
- Monitor soil moisture regularly and adjust watering accordingly.
By mastering the art of watering, you’re providing your taro plants with the ideal moisture conditions for healthy growth and a bountiful harvest.
Fertilize Taro Plants to Boost Yield and Health
Just as we nourish our bodies with a balanced diet, taro plants also require a steady supply of nutrients to thrive. Fertilization plays a crucial role in promoting healthy growth, boosting yields, and ensuring the overall vitality of your taro plants.
Choosing the Right Fertilizer
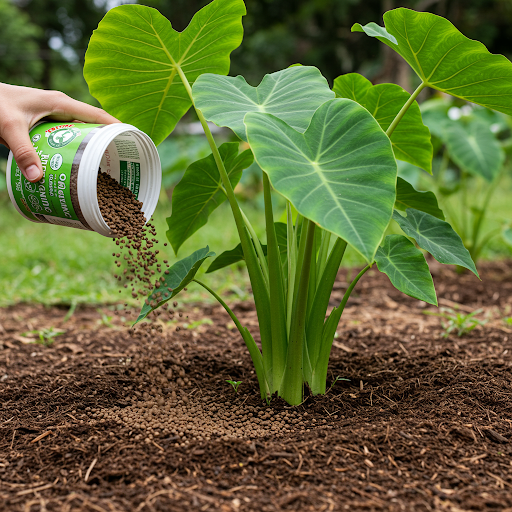
Taro plants benefit from a balanced diet of essential nutrients. Look for fertilizers that are high in nitrogen, phosphorus, and potassium, often referred to as the “NPK” ratio.
- Organic fertilizers: Options like compost, manure, and fish emulsion provide slow-release nutrients and improve soil health.
- Inorganic fertilizers: Commercial fertilizers with a balanced NPK ratio can also be effective.
Timing and Frequency of Fertilization
The timing and frequency of fertilization depend on several factors, including the type of fertilizer, soil fertility, and the growth stage of your taro plants.
- Early growth: Focus on providing nitrogen-rich fertilizers to promote leaf growth.
- Tuber development: Increase the application of phosphorus and potassium to encourage corm development.
As a general guideline, fertilize your taro plants every 4-6 weeks during the growing season. However, it’s always best to observe your plants and adjust your fertilization schedule accordingly.
Signs of Nutrient Deficiency
Pay attention to the appearance of your taro plants. Nutrient deficiencies can manifest in various ways:
- Nitrogen deficiency: Stunted growth, pale green leaves, and reduced vigor.
- Phosphorus deficiency: Poor root development, stunted growth, and purplish discoloration on leaves.
- Potassium deficiency: Yellowing or browning of leaf margins.
If you notice any of these signs, adjust your fertilization strategy accordingly.
Enhancing Soil Health: The Benefits of Organic Fertilizers
Organic fertilizers not only provide essential nutrients but also improve overall soil health. They enhance soil structure, increase water retention, and promote the growth of beneficial microorganisms. By choosing organic fertilizers, you’re not only nourishing your taro plants but also nurturing the soil ecosystem.
Key Takeaways:
- Fertilize your taro plants regularly with a balanced fertilizer.
- Choose organic fertilizers to improve soil health and promote sustainable growth.
- Monitor your plants for signs of nutrient deficiencies and adjust your fertilization strategy accordingly.
By providing your taro plants with the necessary nutrients, you’re ensuring their optimal growth and maximizing your harvest.
Protect Taro Plants from Common Pests and Diseases
Just as we take precautions to protect our health, it’s crucial to safeguard your taro plants from common pests and diseases. By proactively addressing potential threats, you can ensure the health and vitality of your plants, leading to a bountiful harvest.
Identifying Common Pests
Several pests can target taro plants, including:
- Aphids: These tiny insects suck sap from the leaves, causing them to curl and distort.
- Spider mites: These microscopic pests also feed on plant sap, leading to stippling and yellowing of the leaves.
- Slugs and snails: These slimy creatures can devour young leaves and even damage corms.
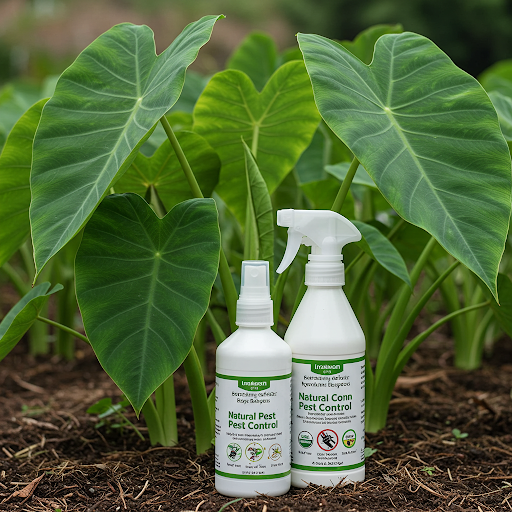
Natural Pest Control Methods
Before resorting to chemical pesticides, consider these natural and eco-friendly approaches:
- Encourage beneficial insects: Ladybugs, lacewings, and praying mantises are natural predators of many pests.
- Handpicking: Manually remove pests like aphids and slugs from your plants.
- Neem oil spray: Neem oil is a natural insecticide that can effectively control many pests.
- Diatomaceous earth: This natural powder dehydrates and kills soft-bodied insects like slugs and snails.
Preventing and Managing Diseases
Taro plants are susceptible to several diseases, including:
- Leaf blight: This fungal disease causes brown or black spots on the leaves.
- Root rot: This disease can occur in waterlogged conditions, causing the roots to rot and the plant to wilt.
Prevention Strategies:
- Proper watering: Avoid overwatering to prevent root rot.
- Good sanitation: Remove and destroy any infected plant material.
- Disease-resistant varieties: Consider planting disease-resistant taro varieties.
Key Takeaways:
- Regularly inspect your taro plants for signs of pests and diseases.
- Employ natural pest control methods whenever possible.
- Practice good garden sanitation to prevent the spread of diseases.
- Choose disease-resistant taro varieties if available.
By proactively addressing potential threats and implementing effective pest and disease management strategies, you can ensure the health and vitality of your taro plants, leading to a successful and rewarding harvest.
Know When and How to Harvest Your Taro Corms
Just as a skilled fisherman knows the right time to cast their net, a successful taro gardener must understand the optimal time to harvest their corms. Harvesting at the right stage ensures that you obtain the largest, most flavorful corms while minimizing damage to the plants.
Recognizing Maturity: Signs to Look For
Taro corms typically reach maturity within 4-6 months after planting. However, the exact timing can vary depending on the variety, climate, and growing conditions. Here are some key signs to look for:
- Leaf yellowing: As the corms mature, the leaves of the taro plant may start to yellow and wither.
- Corm size: The corms should have reached a good size and feel firm to the touch.
- Days to maturity: Refer to the specific variety information for an estimated harvest time.
The Art of Harvesting: Minimizing Damage
Harvesting taro corms requires a gentle touch to avoid damaging the plants. Here’s a step-by-step guide:
- Water the plants thoroughly: This makes it easier to loosen the soil around the corms.
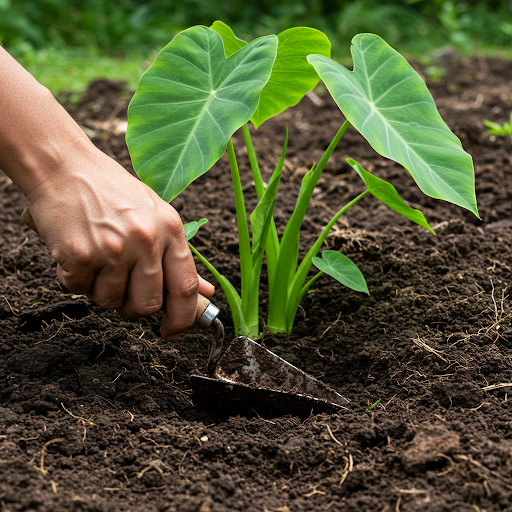
- Use a garden fork: Gently loosen the soil around the base of the plant.
- Lift the corms carefully: Avoid pulling or jerking the corms, as this can damage them.
- Remove excess soil: Gently brush off any excess soil from the harvested corms.
Storing Your Harvest: Keeping Taro Fresh
Proper storage is crucial to maintain the quality and freshness of your harvested taro corms. Here are some tips:
- Cool, dry place: Store corms in a cool, dry, and well-ventilated location.
- Avoid direct sunlight: Direct sunlight can cause the corms to dry out and shrivel.
- Protect from frost: Exposure to frost can damage the corms.
By following these guidelines, you can ensure that your harvested taro corms remain fresh and flavorful for weeks or even months.
Key Takeaways:
- Monitor your taro plants for signs of maturity.
- Harvest corms gently to avoid damage.
- Store harvested corms in a cool, dry, and well-ventilated location.
Harvesting your own taro corms is a rewarding experience. By following these guidelines, you can enjoy the fruits of your labor and savor the unique flavor of homegrown taro.
Grow Taro in Containers for Small Spaces and Patios

Even if you don’t have a sprawling backyard garden, you can still enjoy the rewards of growing your own taro. Container gardening offers a fantastic solution for those with limited space, such as balconies, patios, or small yards. With the right approach, you can cultivate healthy and productive taro plants in containers, bringing the joy of homegrown produce to your doorstep.
Choosing the Right Container
The size of the container is crucial for successful container-grown taro. Taro plants have a vigorous root system, so they require ample space to grow. Opt for large containers, such as:
- Large pots: At least 18 inches in diameter and 18 inches deep.
- Half barrels: These provide ample space for root development.
- Grow bags: Large grow bags can also be a suitable option.
Ensure that the container has drainage holes to prevent waterlogging, which can be detrimental to taro plants.
Creating the Ideal Potting Mix
While you can use regular potting mix, a well-draining, nutrient-rich potting mix specifically designed for container gardening is ideal. You can amend the potting mix with:
- Perlite: Improves drainage and aeration.
- Compost: Enhances nutrient content and soil structure.
- Coconut coir: A sustainable alternative to peat moss that improves water retention.
Providing Adequate Sunlight and Water
Taro plants thrive in full sun to partial shade. Place your containers in a location that receives at least 6 hours of direct sunlight per day.
Water your container-grown taro regularly, ensuring the soil remains consistently moist but not waterlogged. Check the soil moisture regularly and adjust your watering schedule accordingly.
Key Takeaways:
- Choose large containers with adequate drainage.
- Use a well-draining, nutrient-rich potting mix.
- Provide ample sunlight and consistent watering.
By following these tips, you can successfully grow taro in containers, even in the most limited of spaces. Container gardening opens up a world of possibilities for those who wish to cultivate their own food, regardless of their garden size.
Propagate Taro Plants for Future Harvests
Just as a gardener can propagate their favorite rose bushes, you can also propagate your taro plants to expand your garden or share with fellow gardening enthusiasts. Taro propagation allows you to increase your stock of healthy plants without the need to purchase new corms every season.
Methods of Taro Propagation
There are two primary methods of propagating taro:
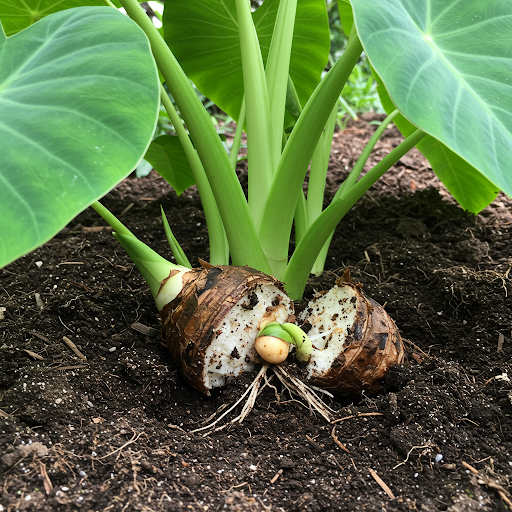
- Corm Division: This method involves separating the offsets or “daughter corms” from the main corm. These offsets are smaller corms that develop around the base of the parent corm. Carefully separate the offsets from the parent corm using a clean, sharp knife. Ensure each offset has a healthy sprout.
- Stem Cuttings: Taro can also be propagated from stem cuttings. Cut healthy stem sections, each with at least one node (the point where leaves emerge). Plant the stem cuttings horizontally in a well-draining medium, ensuring that the nodes are in contact with the soil.
Caring for Newly Propagated Taro Plants
Provide the newly propagated taro plants with the same care as established plants. Maintain consistent moisture, provide adequate sunlight, and fertilize regularly to encourage healthy growth.
Expanding Your Taro Garden: The Benefits of Propagation
Taro propagation offers several advantages:
- Increased plant stock: Propagating your own taro plants allows you to increase your stock without the need to purchase new corms.
- Preserving desired varieties: You can preserve the unique characteristics of your favorite taro varieties.
- Sharing with others: Share your propagated taro plants with friends, family, or fellow gardeners.
By mastering the art of taro propagation, you can expand your garden, share your passion with others, and continue to enjoy the rewards of cultivating this versatile and delicious vegetable.
Understand the Culinary Uses and Nutritional Benefits of Taro
Beyond the satisfaction of cultivating your own food, growing taro offers a wealth of culinary possibilities and nutritional benefits. Taro is a versatile and nutritious vegetable that has been a staple food in many cultures for centuries.
Culinary Uses of Taro
Taro is a culinary treasure, offering a range of flavors and textures that can be enjoyed in various dishes.
- Taro Root: The starchy corm is the most commonly used part of the taro plant. It can be boiled, steamed, roasted, or fried.
- Taro Leaves: The leaves are also edible and can be cooked like spinach or collard greens.
Here are a few popular dishes featuring taro:
- Poi: A traditional Hawaiian dish made from mashed taro.
- Taro chips: Crispy and flavorful, taro chips are a popular snack.
- Taro stew: A hearty and comforting dish made with taro, vegetables, and broth.
- Taro curry: A flavorful and aromatic curry dish featuring taro as a key ingredient.
Nutritional Benefits of Taro
Taro is not only delicious but also packed with essential nutrients. It is a good source of:
- Carbohydrates: Provides sustained energy.
- Fiber: Promotes digestive health.
- Vitamins: Rich in vitamin C, vitamin E, and B vitamins.
- Minerals: Contains essential minerals like potassium, calcium, and iron.
Incorporating taro into your diet can provide a range of health benefits, including improved digestive health, boosted energy levels, and strengthened immunity.
Key Takeaways:
- Taro is a versatile and nutritious vegetable with a wide range of culinary uses.
- Incorporating taro into your diet can provide numerous health benefits.
- Enjoy the fruits of your labor by savoring the delicious flavors of homegrown taro.
FAQ
This section addresses some of the most frequently asked questions about growing taro vegetables, providing concise and informative answers to help you on your gardening journey.
How to Grow Taro Vegetable in a Home Garden?
Growing taro in your home garden is a rewarding experience. Here’s a step-by-step guide:
- Select a suitable location: Choose a sunny spot in your garden with well-drained soil.
- Prepare the soil: Amend the soil with compost or other organic matter to improve fertility and drainage.
- Plant the corms: Plant the corms at a depth of 2-4 inches and space them 12-18 inches apart.
- Water regularly: Keep the soil consistently moist but avoid overwatering.
- Fertilize: Apply a balanced fertilizer every 4-6 weeks.
- Protect from pests and diseases: Monitor your plants for pests and diseases and take appropriate action.
- Harvest: Harvest the corms when they reach maturity, typically 4-6 months after planting.
What are the Best Conditions to Grow Taro Vegetable?
Taro thrives in warm, humid climates with temperatures between 70-90°F. It prefers full sun to partial shade and well-drained, fertile soil.
How to Grow Taro Vegetable in Containers on a Patio?
Growing taro in containers is a great option for those with limited space. Choose a large container with drainage holes and fill it with a well-draining potting mix. Place the container in a sunny location and water regularly.
Step by Step Guide on How to Grow Taro Vegetable?
- Select healthy corms.
- Prepare the soil.
- Plant the corms at the appropriate depth and spacing.
- Water regularly and consistently.
- Fertilize the plants regularly.
- Protect the plants from pests and diseases.
- Harvest the corms when they reach maturity.
How to Grow Taro Vegetable from Corms Successfully?
Choose healthy corms with visible sprouts. Plant them at the correct depth and spacing in well-prepared soil. Provide consistent moisture and protect them from pests and diseases.
What is the Best Soil and Fertilizer for Growing Taro Vegetable?
Taro prefers well-drained, fertile soil rich in organic matter. Amend the soil with compost or other organic matter to improve its quality. Use a balanced fertilizer to provide essential nutrients for healthy growth.
How to Grow Taro Vegetable and Prevent Common Plant Diseases?
Maintain good sanitation practices, avoid overwatering, and provide adequate air circulation to prevent diseases. Monitor your plants regularly for signs of disease and take appropriate action.
Detailed Instructions on How to Grow Taro Vegetable in Wetlands?
Taro can be grown in wetlands, but it requires specific considerations. Ensure the soil is well-drained to prevent root rot. Plant the corms in raised beds or mounds to prevent waterlogging.
How to Grow Taro Vegetable Organically for Maximum Yield?
Use organic fertilizers like compost and manure. Control pests and diseases using natural methods such as handpicking, neem oil, and beneficial insects.
How to Grow Taro Vegetable in Tropical Climates Year Round?
In tropical climates, taro can be grown year-round. Plant corms at regular intervals to ensure a continuous supply of fresh taro..
Conclusion
Growing taro is a rewarding experience that connects you with the natural world and provides you with a nutritious and delicious harvest. By following the tips and techniques outlined in this guide, you can successfully cultivate healthy and productive taro plants, ensuring a bountiful yield for years to come.
Remember to start with healthy corms, prepare the ideal soil, and provide consistent care. Protect your plants from pests and diseases, and harvest your corms at the right time. Explore the versatility of taro by growing it in containers and propagating new plants. Finally, savor the delicious flavors and nutritional benefits of your homegrown taro.
Key Takeaways:
- Start with healthy corms.
- Prepare the ideal soil.
- Provide consistent care.
- Protect plants from pests and diseases.
- Harvest corms at the right time.
- Explore container gardening and propagation.
- Savor the flavors and nutritional benefits.
By embracing these key takeaways, you can embark on a successful taro-growing journey and enjoy the fruits of your labor. Happy gardening!
I hope this comprehensive guide has been informative and helpful. Feel free to reach out if you have any further questions or require additional guidance on your taro-growing journey.


")