

Tired of the same old vegetables in your garden? Looking for a unique and rewarding culinary adventure? Then you should consider growing eddoe vegetables! Perhaps you’ve seen them at your local Asian market and wondered how to cultivate these intriguing tubers yourself. Maybe you’ve heard whispers of their versatility in the kitchen, from savory stews to delicious side dishes. But where do you even begin?
Growing eddoe might seem daunting at first, but with the right information and a little guidance, you’ll be harvesting your own bountiful crop in no time. This guide will walk you through the entire process, from selecting the perfect soil and planting your tubers to nurturing your plants and harvesting the delicious rewards. Let’s dive in!
1. Choosing the Right Soil and Location for Eddoe Growth

Eddoes, also known as taro, are a tropical root vegetable that thrive in warm climates. They are a unique and rewarding crop to grow, offering a delicious and nutritious addition to your culinary repertoire. However, like any plant, eddoes have specific requirements for soil and location to ensure optimal growth and a bountiful harvest.
Soil Preferences:
- Well-draining soil: Eddoes are susceptible to root rot if the soil is waterlogged. Therefore, it’s crucial to choose a location with well-draining soil. This means that the soil should be able to absorb and release water efficiently, preventing water from pooling around the plant’s roots.
- Rich in organic matter: Eddoes are heavy feeders, requiring a soil rich in organic matter to provide the necessary nutrients for healthy growth. Organic matter, such as compost or well-rotted manure, improves soil structure, drainage, and nutrient retention.
- Slightly acidic to neutral pH: A soil pH between 6.0 and 7.0 is ideal for eddoe growth. You can test your soil’s pH using a home soil test kit or by sending a soil sample to a local agricultural extension office. If your soil’s pH is too acidic or alkaline, you can amend it with lime or sulfur to bring it within the optimal range.
Ideal Location:
- Sunlight: Eddoes prefer full sun to partial shade. Aim for a location that receives at least 6 hours of direct sunlight per day. However, in hot climates, some afternoon shade can be beneficial, especially during the hottest part of the day.
- Shelter: Eddoes are susceptible to wind damage, which can break their large leaves and hinder growth. Choose a location that is sheltered from strong winds, such as a sheltered corner of your garden or near a fence or building.
- Space: Eddoes are vigorous growers, so it’s important to provide adequate space between plants to allow for proper air circulation and prevent overcrowding. Space plants 12-18 inches apart in rows that are 2-3 feet apart.
Preparing the Soil:
Before planting your eddoes, it’s important to prepare the soil to ensure optimal growing conditions. Here are some steps you can take:
- Test your soil: Conduct a soil test to determine its pH and nutrient levels. This will help you identify any deficiencies and amend the soil accordingly.
- Incorporate organic matter: Add several inches of compost or well-rotted manure to the soil before planting. This will improve soil structure, drainage, and nutrient content.
- Till the soil: Till the soil to a depth of 8-10 inches to loosen it and incorporate the amendments. This will also help to break up any compacted areas and create a friable soil structure that is ideal for root growth.
- Create raised beds: If your soil is prone to poor drainage, consider creating raised beds. Raised beds improve drainage by elevating the planting area above the surrounding soil. They also warm up faster in the spring, allowing you to get an earlier start on your eddoe crop.
By carefully selecting the right soil and location, and preparing the soil properly, you’re setting the stage for a successful eddoe crop. Remember, healthy soil leads to healthy plants, so take the time to ensure that your eddoes have the best possible growing conditions.
2. How to Plant Eddoe Tubers for Optimal Development
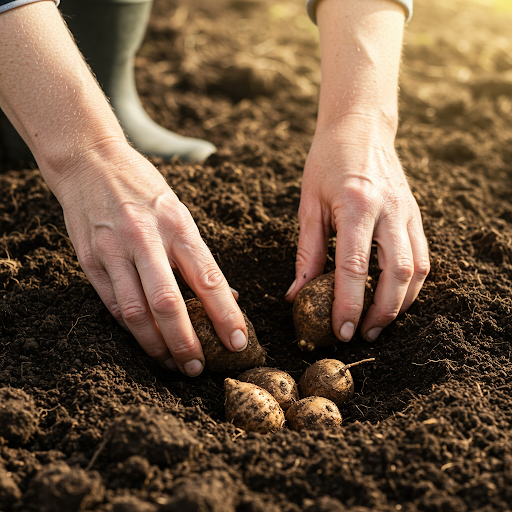
Now that you’ve prepared the ideal growing environment for your eddoe plants, it’s time to plant the tubers. This crucial step sets the foundation for healthy growth and a bountiful harvest.
Selecting Healthy Tubers:
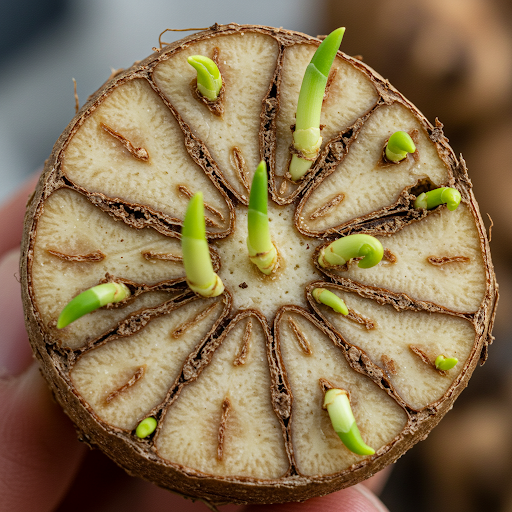
- Choose plump and firm tubers: Avoid tubers that are shriveled, discolored, or show signs of rot. Healthy tubers are typically firm to the touch and free from any blemishes.
- Look for sprouting eyes: Healthy tubers will have visible “eyes” or sprouts. These are the points from which new growth will emerge.
- Source from reputable suppliers: Purchase your eddoe tubers from a reputable nursery or garden center that specializes in tropical plants.
Planting Depth and Spacing:
- Planting depth: Plant eddoe tubers 2-4 inches deep in the soil. This ensures that the tubers are covered adequately and protected from the elements.
- Spacing: Space the tubers 12-18 inches apart in rows that are 2-3 feet apart. This provides ample space for the plants to grow and develop without overcrowding.
Timing the Planting:
- Warm weather: Eddoes are a warm-season crop, so it’s important to plant them after the last frost has passed and the soil temperature has warmed up to at least 60°F (15°C).
- Growing season: The ideal planting time will vary depending on your location and climate. In warmer regions, you can plant eddoes earlier in the spring. In cooler regions, it’s best to wait until the soil has warmed up sufficiently.
Planting Techniques:
- Direct seeding: Plant the tubers directly into the prepared soil. Gently press the tubers into the soil and cover them with a thin layer of soil.
- Water gently: Water the soil thoroughly after planting to ensure good soil-to-tuber contact.
By following these guidelines, you’ll ensure that your eddoe tubers are planted correctly and have the best possible chance of germinating and developing into healthy, productive plants.
3. Essential Watering and Feeding Techniques for Eddoe Plants
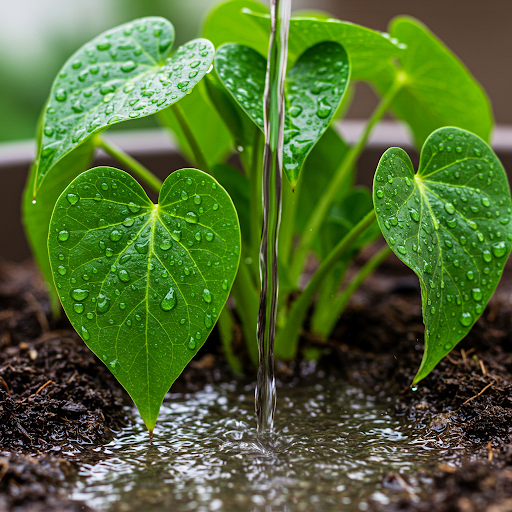
Water and nutrients are essential for the healthy growth and development of your eddoe plants. Proper watering and feeding techniques will ensure that your plants thrive and produce a bountiful harvest.
Watering:
- Consistency is key: Eddoes require consistent moisture throughout their growing season. However, it’s important to avoid overwatering, as this can lead to root rot.
- Water deeply: Water deeply and thoroughly, ensuring that the soil is evenly moistened to a depth of 6-8 inches.
- Mulch: Apply a layer of mulch around the base of the plants to help retain soil moisture and suppress weeds. Organic mulches, such as straw or wood chips, can also help to improve soil fertility.
- Monitor soil moisture: Check the soil moisture regularly by inserting your finger into the soil. If the top inch of soil feels dry, it’s time to water.
Feeding:
- Fertilize regularly: Eddoes are heavy feeders, so it’s important to fertilize them regularly to ensure optimal growth.
- Organic fertilizers: Use a balanced organic fertilizer, such as compost tea or fish emulsion, to provide the necessary nutrients. Avoid using high-nitrogen fertilizers, as they can promote excessive leaf growth at the expense of tuber development.
- Side-dress with compost: Apply a side-dressing of compost around the base of the plants every 4-6 weeks to provide a continuous supply of nutrients.
Nutrient Requirements:
- Nitrogen: Nitrogen is essential for leaf growth and overall plant vigor.
- Phosphorus: Phosphorus promotes root development and tuber formation.
- Potassium: Potassium helps to improve plant health and disease resistance.
By following these watering and feeding guidelines, you can provide your eddoe plants with the necessary nutrients and moisture to grow strong and produce a bountiful harvest.
4. Managing Pests and Diseases That Affect Eddoe Crops
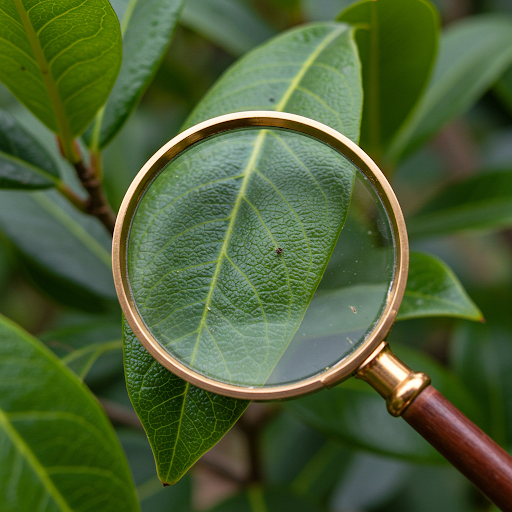
While eddoes are generally resilient plants, they can be susceptible to certain pests and diseases. Regular monitoring and proactive measures can help you protect your crop and ensure a healthy harvest.
Common Pests:
- Aphids: These small, sap-sucking insects can infest eddoe leaves, causing them to curl and distort. Aphids can also transmit plant viruses.
- Slugs and snails: These slimy creatures can feed on eddoe leaves, causing holes and damage.
- Root-knot nematodes: These microscopic roundworms can infect eddoe roots, causing galls and stunted growth.
Diseases:
- Leaf blight: This fungal disease causes brown or black spots on eddoe leaves, which can eventually lead to leaf drop.
- Root rot: This fungal disease can occur in poorly drained soils, causing the roots to rot and the plants to wilt.
Prevention and Control:
- Regular inspection: Regularly inspect your eddoe plants for signs of pests and diseases. Early detection is key to effective management.
- Handpicking: Manually remove any visible pests, such as aphids and slugs, from your plants.
- Organic pest control: Use organic pest control methods, such as insecticidal soap or neem oil, to control insect infestations.
- Disease prevention: Ensure proper drainage and avoid overwatering to prevent root rot. Rotate your eddoe crops to different locations in your garden each year to reduce the risk of soil-borne diseases.
- Resistant varieties: Consider planting eddoe varieties that are known to be resistant to common pests and diseases.
By implementing these preventative measures and monitoring your plants regularly, you can minimize the impact of pests and diseases on your eddoe crop and ensure a healthy and productive harvest.
5. Knowing When and How to Harvest Your Eddoe Vegetables
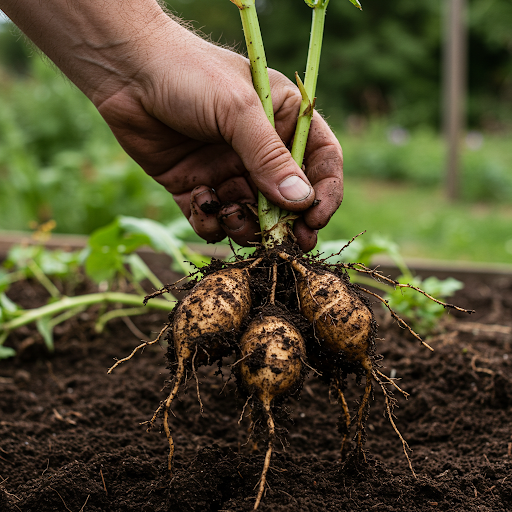
After months of care and attention, it’s time to reap the rewards of your labor by harvesting your eddoe vegetables. Knowing when and how to harvest will ensure that you get the most out of your crop.
Signs of Maturity:
- Leaf yellowing: As the eddoe tubers mature, the leaves of the plant will begin to yellow and wither. This is a natural process and indicates that the tubers are ready for harvest.
- Tuber size: Eddoe tubers typically reach maturity within 4-6 months after planting. You can gently dig around the base of the plant to check the size of the tubers. Mature tubers will be firm and plump.
Harvesting Techniques:
- Water the soil: Water the soil thoroughly a day or two before harvesting to make it easier to dig up the tubers.
- Use a garden fork: Gently loosen the soil around the base of the plant using a garden fork. Be careful not to damage the tubers.
- Lift the tubers: Carefully lift the tubers from the soil. If the tubers are large, you may need to use both hands to avoid breaking them.
- Brush off excess soil: Gently brush off any excess soil from the tubers.
Storing Harvested Eddoes:
- Cool and dry location: Store harvested eddoes in a cool, dry, and well-ventilated location. A root cellar or cool basement is ideal.
- Avoid freezing: Eddoes do not freeze well.
- Use within a few weeks: For best flavor and quality, use harvested eddoes within a few weeks.
By following these guidelines, you can harvest your eddoe crop at the peak of its freshness and enjoy the fruits of your labor.
6. Propagating Eddoe Plants for Future Garden Growth
One of the rewarding aspects of growing eddoes is the opportunity to propagate your plants and expand your crop. Eddoes can be propagated through two main methods: tuber division and corm planting.
Tuber Division:
- Select healthy tubers: Choose large, healthy tubers with multiple “eyes” or growth points.
- Divide the tuber: Carefully cut the tuber into sections, ensuring that each section has at least one or two healthy eyes.
- Allow the cut sections to dry: Allow the cut sections to dry and callous over for a few days before planting. This will help to prevent rot.
- Plant the sections: Plant the tuber sections in well-prepared soil, following the same planting depth and spacing guidelines as for whole tubers.
Corm Planting:
- Identify corms: Corms are small, bulb-like structures that develop on the mother tuber.
- Separate corms: Carefully detach the corms from the mother tuber.
- Plant the corms: Plant the corms in well-prepared soil, following the same planting depth and spacing guidelines as for whole tubers.
Tips for Successful Propagation:
- Provide optimal growing conditions: Ensure that the propagated eddoes receive adequate water, sunlight, and nutrients.
- Monitor for pests and diseases: Keep a close eye on the newly propagated plants for signs of pests and diseases.
- Patience is key: It may take some time for the propagated eddoes to establish themselves. Be patient and provide consistent care.
By propagating your eddoe plants, you can expand your crop, share plants with friends and family, and continue to enjoy the rewards of growing this unique and delicious vegetable.
7. Growing Eddoe in Various Climates and Conditions
Eddoes are native to tropical and subtropical regions, and they thrive in warm, humid climates. However, with some adaptations, you can successfully grow eddoes in a variety of climates and conditions.
Growing Eddoes in Tropical Climates:
- Ideal conditions: Eddoes thrive in warm, humid climates with consistent rainfall.
- Adapting to varying conditions: In areas with heavy rainfall, ensure proper drainage to prevent root rot.
- Managing pests and diseases: Be vigilant in monitoring for pests and diseases, as these can be more prevalent in warm, humid environments.
Growing Eddoes in Temperate Climates:
- Extend the growing season: In cooler climates, you can extend the growing season by using row covers or other protective measures to protect the plants from frost.
- Container gardening: Growing eddoes in containers can be a good option in colder climates, as it allows you to move the plants indoors during the winter.
- Choose early-maturing varieties: Select early-maturing eddoe varieties that can be harvested before the onset of cold weather.
Growing Eddoes in Arid Climates:
- Irrigation: Provide regular and consistent irrigation, especially during dry periods.
- Mulching: Apply a thick layer of mulch around the base of the plants to help retain soil moisture and suppress weeds.
- Shade: In hot, arid climates, provide some afternoon shade to protect the plants from intense sunlight.
Container Gardening:
- Pot size: Choose a large pot or container with adequate drainage holes.
- Potting mix: Use a well-draining potting mix that is rich in organic matter.
- Sunlight and water: Place the container in a location that receives at least 6 hours of sunlight per day and water regularly.
By understanding the specific requirements of your climate and making the necessary adjustments, you can successfully grow eddoes in a wide range of conditions. Remember to observe your plants carefully, adapt your growing practices as needed, and enjoy the rewards of cultivating this unique and delicious root vegetable.
FAQ

To further assist you in your eddoe-growing journey, we’ve compiled a list of frequently asked questions and their comprehensive answers:
- Q: What is the best soil for growing eddoe vegetables?
- A: A well-draining soil that is rich in organic matter provides the ideal conditions for eddoe growth. This type of soil allows for proper water drainage, preventing root rot, while also providing the necessary nutrients for healthy plant development.
- Q: How to grow eddoe vegetables in pots at home?
- A: Growing eddoes in containers is a viable option, especially for those with limited garden space. Choose a large pot with drainage holes to prevent waterlogging. Use a well-draining potting mix that is rich in organic matter. Place the pot in a location that receives at least 6 hours of sunlight per day. Water regularly, ensuring the soil remains consistently moist but not waterlogged.
- Q: What are the common pests affecting eddoe vegetable growth?
- A: Common pests that can affect eddoe plants include aphids, slugs, and snails. Aphids are small, sap-sucking insects that can cause leaf distortion and transmit plant viruses. Slugs and snails can feed on the leaves, causing holes and damage.
- Q: How do you know when to harvest eddoe vegetables?
- A: Eddoe tubers are typically ready for harvest 4-6 months after planting. You can determine if they are ready by checking for several signs:
- Leaf yellowing: As the tubers mature, the leaves of the plant will begin to yellow and wither.
- Tuber size: Gently dig around the base of the plant to check the size of the tubers. Mature tubers will be firm and plump.
- A: Eddoe tubers are typically ready for harvest 4-6 months after planting. You can determine if they are ready by checking for several signs:
- Q: How to grow eddoe vegetables in a tropical climate garden?
- A: Eddoes thrive in warm, humid tropical climates. However, it’s important to ensure proper drainage to prevent root rot, especially during periods of heavy rainfall. You may also need to provide some shade during the hottest part of the day to protect the plants from intense sunlight.
- Q: What are the specific watering needs for growing eddoe vegetables?
- A: Eddoes require consistent moisture throughout their growing season. Water deeply and thoroughly, ensuring that the soil is evenly moistened to a depth of 6-8 inches. Avoid overwatering, as this can lead to root rot. Mulching around the base of the plants can help to retain soil moisture and suppress weeds.
- Q: How to organically grow eddoe vegetables from start to finish?
- A: To grow eddoes organically, use organic fertilizers, such as compost tea or fish emulsion, to provide the necessary nutrients. Avoid using synthetic pesticides and herbicides. Control pests and diseases using organic methods, such as handpicking, insecticidal soap, or neem oil.
- Q: What type of fertilizer is best for growing eddoe vegetables?
- A: A balanced organic fertilizer, such as compost tea or fish emulsion, is ideal for providing the necessary nutrients for eddoe growth. Avoid using high-nitrogen fertilizers, as they can promote excessive leaf growth at the expense of tuber development.
- Q: How to propagate eddoe vegetables from existing plants easily?
- A: Eddoes can be propagated through tuber division or by planting corms. To divide tubers, carefully cut the tuber into sections, ensuring that each section has at least one or two healthy eyes. Allow the cut sections to dry and callous over before planting. Corms are small, bulb-like structures that develop on the mother tuber. Detach the corms and plant them in well-prepared soil.
- Q: What is the ideal sunlight exposure for growing eddoe vegetables outdoors?
- A: Eddoes prefer full sun to partial shade. Aim for a location that receives at least 6 hours of direct sunlight per day. However, in hot climates, some afternoon shade can be beneficial.
This FAQ section provides concise and informative answers to some of the most common questions related to growing eddoe vegetables. By addressing these frequently asked questions, we hope to further empower you on your eddoe-growing journey.
Concluding Tip
Growing eddoe vegetables can be a truly rewarding gardening experience. By following the steps outlined in this guide, you can successfully cultivate this unique and delicious root crop in your own backyard. Remember to choose the right soil and location, plant your tubers correctly, provide adequate water and nutrients, and manage pests and diseases effectively. With a little patience and care, you’ll be enjoying the fruits of your labor in no time. Happy gardening!
I hope this comprehensive guide has empowered you to embark on your own eddoe-growing adventure. Remember, gardening is a journey of learning and discovery. Don’t be afraid to experiment, observe your plants closely, and adapt your techniques as needed. Most importantly, have fun and enjoy the process!


")

