Are you tired of relying on store-bought herbs and yearning for the satisfaction of growing your own? Do you find yourself drawn to the idea of cultivating plants with potent health benefits, right in your own backyard? I understand the desire for fresh, homegrown ingredients and the appeal of natural remedies. It can be frustrating to navigate the often-confusing world of herbal cultivation, especially when you’re just starting. You might have heard about the remarkable properties of milk thistle, a powerful herb known for its liver-supporting abilities, and wondered how to grow it yourself. You’re not alone. Many gardeners, just like you, are seeking ways to bring this beneficial plant into their lives. I’m here to tell you that growing milk thistle at home is not only achievable but also incredibly rewarding. In this comprehensive guide, I’ll walk you through every step of the process, from seed to harvest, providing you with the knowledge and confidence to cultivate your own thriving milk thistle patch. I’ll share my own experiences and insights, offering practical tips and advice to help you succeed, even if you’re a complete beginner. Let’s embark on this gardening journey together and discover the secrets of growing this amazing herb.
Understanding Milk Thistle
Milk thistle ( Silybum marianum ) is a fascinating plant with a rich history and a reputation for its medicinal properties. As a gardener, I’ve always been drawn to plants with a story, and milk thistle certainly has one. Originating in Southern Europe and parts of Asia, this striking herb has been used for centuries in traditional medicine, particularly for its protective effects on the liver. The plant’s common name, “milk thistle,” is thought to derive from the milky sap that exudes from its leaves when they are crushed. The “thistle” part comes from the plant’s prickly leaves and flower heads, which resemble those of other thistles.
Milk thistle belongs to the Asteraceae family, which also includes sunflowers, daisies, and chrysanthemums. It’s an annual or biennial plant, meaning it completes its life cycle in one or two years, respectively. In its first year, it typically forms a rosette of basal leaves, and in its second year, it sends up a flowering stalk.
One of the most remarkable aspects of milk thistle is its unique chemical composition, particularly the presence of a group of compounds known as silymarin. Silymarin is the primary active constituent of milk thistle and is responsible for many of its purported health benefits. It is a complex mixture of flavonolignans, including silybin (also known as silibinin), silydianin, and silychristin. These compounds have been extensively studied for their antioxidant, anti-inflammatory, and hepatoprotective (liver-protecting) properties.
Medicinal Properties of Milk Thistle
You might be wondering, “Why should I grow milk thistle?” While it’s a beautiful plant to have in the garden, its medicinal uses are a major draw for many. The primary traditional use of milk thistle is to support liver health. Research suggests that silymarin may help protect the liver from damage caused by toxins, alcohol, and certain medications. It’s also being studied for its potential role in managing conditions like hepatitis, cirrhosis, and non-alcoholic fatty liver disease.
It’s important to emphasize that while milk thistle has shown promise in various studies, it’s crucial to consult with a healthcare professional before using it for any medical condition. I always advise my readers to prioritize their health and seek professional medical advice.
Identifying Milk Thistle
If you’re out foraging or purchasing seeds, it’s essential to be able to identify milk thistle correctly. Here are some key features:
- Leaves: The leaves are large, deeply lobed, and have prominent white veins that give them a marbled appearance. They are also edged with sharp spines.
- Flowers: The flowers are typically a vibrant purple or reddish-purple and are borne in thistle-like heads at the ends of the stems.
- Seeds: The seeds are small, dark brown or black, and have a feathery pappus (a tuft of hairs) attached, which aids in wind dispersal.
Why Grow Your Own Milk Thistle?
I find that growing my own milk thistle offers several advantages:
- Freshness: You have access to fresh seeds and leaves, which can be used to make teas or extracts.
- Control: You have complete control over the growing conditions, ensuring that your plants are grown organically and without harmful chemicals.
- Cost Savings: Growing your own can be more economical than purchasing commercially available milk thistle products.
- Connection to Nature: There’s a deep satisfaction in nurturing a plant from seed to harvest and knowing you played a role in its growth.
Milk Thistle: A Quick Look
| Feature | Description |
| Scientific Name | Silybum marianum |
| Family | Asteraceae (Aster family) |
| Origin | Southern Europe and parts of Asia |
| Growth Cycle | Annual or Biennial |
| Key Compound | Silymarin (including silybin, silydianin, and silychristin) |
| Traditional Use | Liver support |
Growing Milk Thistle: A Summary
- Sunlight: Full sun (at least 6 hours per day)
- Soil: Well-draining, fertile soil
- Watering: Moderate, avoid overwatering
- Propagation: Primarily by seed
I believe that understanding the background of milk thistle enhances the growing experience. It’s not just about planting seeds; it’s about connecting with a plant that has a long history of use and a fascinating array of properties. It’s this connection that makes gardening so rewarding for me, and I hope it will for you too.
How to Grow Milk Thistle Herbs from Seed
Growing milk thistle from seed is a straightforward process, and I’ve found it incredibly satisfying to watch these plants develop from tiny seeds into robust herbs. Whether you’re an experienced gardener or just starting, you can successfully cultivate milk thistle by following these steps.
When to Plant Milk Thistle Seeds
The timing of planting your milk thistle seeds depends on your local climate. In regions with mild winters, you can sow seeds directly into the garden in the fall. This allows the plants to establish themselves over the winter and produce a strong flush of growth in the spring. However, if you live in an area with harsh winters, it’s best to start your seeds indoors in early spring, about 6-8 weeks before the last expected frost. This gives the seedlings a head start and ensures they’re strong enough to withstand the outdoor conditions once transplanted.
Starting Seeds Indoors vs. Direct Sowing
Both indoor seed starting and direct sowing have their advantages. Starting seeds indoors gives you more control over the growing environment and can result in earlier harvests. However, it requires more effort and attention. Direct sowing is simpler but can be less reliable, especially in areas with unpredictable weather.
Starting Seeds Indoors:
- Fill seed trays or small pots with a well-draining seed-starting mix.
- Sow the seeds about ¼ inch deep and gently cover them with soil.
- Water the soil thoroughly and keep it consistently moist but not soggy.
- Place the trays in a warm, sunny location or under grow lights.
- Once the seedlings have developed a few sets of true leaves, they can be transplanted into larger pots or directly into the garden.
Direct Sowing:
- Prepare the garden bed by loosening the soil and removing any weeds or debris.
- Sow the seeds directly into the soil about ¼ inch deep, spacing them about 12-18 inches apart.
- Gently water the soil and keep it consistently moist until the seedlings emerge.
- Thin the seedlings to the strongest plants once they’re a few inches tall.
Preparing the Soil
Milk thistle prefers well-draining soil that is rich in organic matter. Before planting, amend the soil with compost or other organic material to improve its fertility and drainage. The ideal soil pH for milk thistle is slightly acidic to neutral, ranging from 6.0 to 7.0. You can test your soil’s pH using a home testing kit or by sending a sample to your local extension office.
Sowing the Seeds
Whether you’re starting seeds indoors or direct sowing, it’s essential to sow them at the proper depth. Planting them too deep can prevent them from germinating, while planting them too shallow can cause them to dry out. Aim for a depth of about ¼ inch.
Germination Process and Timeline
Milk thistle seeds typically germinate within 7-10 days, depending on the temperature and moisture levels. Keep the soil consistently moist during this period, and be patient. Once the seedlings emerge, they’ll grow relatively quickly.
Caring for Seedlings
Seedlings are delicate and require careful attention. Ensure they receive adequate light, either from a sunny window or grow lights. Water them regularly, but avoid overwatering, which can lead to damping-off disease. Once the seedlings have developed a few sets of true leaves, they’re ready to be transplanted.
Transplanting Seedlings Outdoors
If you started your seeds indoors, it’s essential to harden them off before transplanting them into the garden. This process acclimates the seedlings to the outdoor conditions and reduces transplant shock. To harden off your seedlings, gradually expose them to longer periods outdoors over a week or two. Start by placing them in a sheltered location for a few hours each day, gradually increasing the time they spend outside.
Once the danger of frost has passed, you can transplant your seedlings into the garden. Choose a sunny location with well-draining soil. Dig holes slightly larger than the root balls of the seedlings and carefully place them in the holes. Backfill with soil and gently firm around the base of the plants. Water thoroughly after transplanting.
I’ve found that growing milk thistle from seed is a rewarding experience. It’s a great way to connect with nature and appreciate the life cycle of plants. By following these steps, you can successfully cultivate your own milk thistle patch and enjoy its beauty and benefits.
Milk Thistle Growing Conditions
Milk thistle, like any other plant, thrives under specific environmental conditions. Providing these optimal conditions is key to ensuring healthy growth and a bountiful harvest of seeds. Through my years of gardening, I’ve learned that understanding a plant’s needs is the first step to successful cultivation. Let’s delve into the ideal growing conditions for milk thistle.
Sunlight Requirements
Milk thistle is a sun-loving plant, and in my experience, it truly flourishes when it receives plenty of direct sunlight. Aim for at least 6 hours of full sun per day. This ensures the plant has enough energy for photosynthesis, the process by which it converts light into energy for growth. If you live in a particularly hot climate, some afternoon shade can be beneficial to prevent the plants from getting scorched. However, in most regions, full sun is the way to go.
Soil Requirements
The type of soil you plant your milk thistle in plays a crucial role in its growth. Milk thistle prefers well-draining soil that is rich in organic matter. This type of soil allows excess water to drain away, preventing root rot, while also providing the necessary nutrients for healthy growth. I’ve found that amending the soil with compost or well-rotted manure before planting can significantly improve its fertility and drainage.
Milk thistle is adaptable to a range of soil pH levels, but it generally prefers a slightly acidic to neutral pH, ranging from 6.0 to 7.0. You can test your soil’s pH using a home testing kit or by sending a sample to your local extension office. If your soil is too alkaline, you can amend it with sulfur or peat moss to lower the pH.
Watering Needs
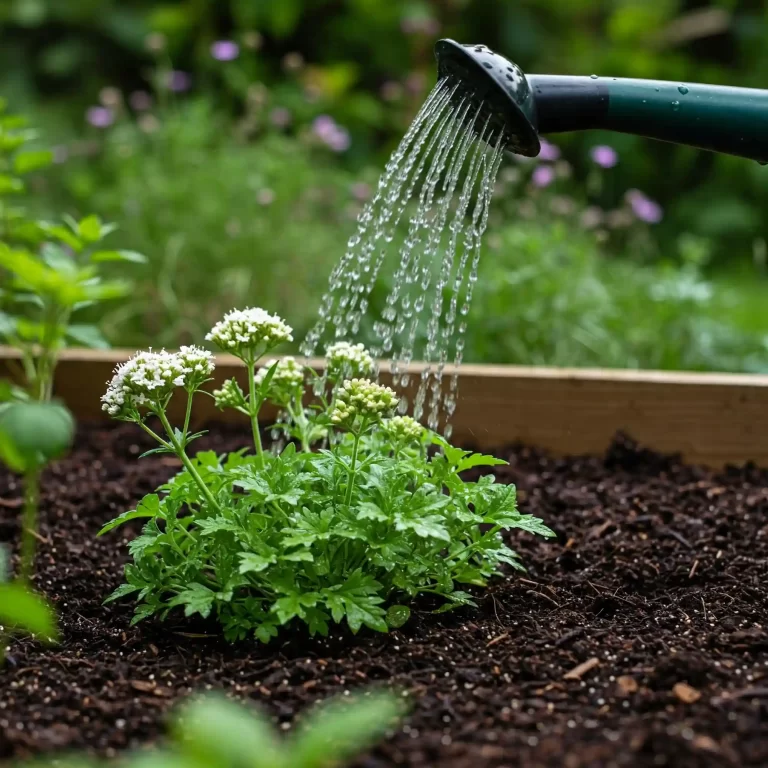
While milk thistle is relatively drought-tolerant once established, it does require regular watering, especially during its early growth stages. I recommend watering deeply whenever the top inch of soil feels dry to the touch. Avoid overwatering, as this can lead to root rot and other fungal diseases. During periods of heavy rainfall, you may not need to water at all. Always observe your plants and adjust your watering schedule accordingly.
Climate and Temperature Preferences
Milk thistle is a hardy plant that can tolerate a wide range of temperatures. However, it thrives in temperate climates with warm summers and mild winters. It can withstand frost, but prolonged periods of freezing temperatures can damage the plants. If you live in a region with harsh winters, it’s best to start your seeds indoors and transplant them outdoors in the spring.
Growing Milk Thistle in Different Zones
Milk thistle is adaptable to a variety of growing zones. In the United States, it can be grown successfully in USDA plant hardiness zones 6 through 10. However, it’s always best to check your local growing zone to ensure you’re providing the optimal conditions for your plants.
Growing Milk Thistle in Containers/Pots
If you don’t have a garden or prefer to grow your plants in containers, you can successfully grow milk thistle in pots. Choose a pot that is at least 12 inches in diameter to accommodate the plant’s root system. Ensure the pot has drainage holes to prevent waterlogging. Use a well-draining potting mix and follow the same watering and sunlight guidelines as for plants grown in the ground.
Growing milk thistle has been a rewarding experience for me, and I’m confident that you too can successfully cultivate this fascinating herb by providing the right growing conditions. Remember, each garden is unique, so don’t be afraid to experiment and adjust your approach as needed. With a little patience and attention, you’ll be enjoying the beauty and benefits of your own homegrown milk thistle in no time.
Milk Thistle Plant Care
Once your milk thistle plants are established, they require relatively little maintenance. However, a few key care practices can ensure they thrive and produce a healthy crop of seeds. Through my experience, I’ve learned that observing your plants regularly is the best way to understand their needs and address any potential problems.
Weeding and Mulching
Weeds can compete with your milk thistle plants for water, nutrients, and sunlight. Regularly removing weeds from around your plants is essential, especially during their early growth stages. I recommend hand-weeding to avoid damaging the shallow roots of the milk thistle.
Mulching can also be beneficial. Applying a layer of organic mulch, such as straw or wood chips, around your plants helps suppress weeds, retain soil moisture, and regulate soil temperature.
Fertilizing
Milk thistle is not a heavy feeder and generally doesn’t require much fertilization. However, if your soil is particularly poor, you can apply a balanced organic fertilizer in the spring. Avoid over-fertilizing, as this can lead to excessive foliage growth at the expense of seed production.
Pest and Disease Control
Milk thistle is relatively resistant to pests and diseases. However, a few common problems can occasionally arise. Aphids, for example, can sometimes infest the plants, sucking sap from the leaves and stems. These can be controlled with a strong spray of water or by introducing beneficial insects like ladybugs.
Fungal diseases, such as root rot and powdery mildew, can also occur, especially in humid conditions or if the plants are overwatered. Ensuring good air circulation and avoiding overwatering can help prevent these diseases. If you notice signs of disease, remove any affected leaves or plants and treat with an appropriate organic fungicide.
Companion Planting for Milk Thistle
Companion planting can be a beneficial practice for milk thistle. Planting certain herbs or flowers nearby can help deter pests, attract beneficial insects, and improve the overall health of your plants. Some good companion plants for milk thistle include:
- Chamomile: This herb attracts beneficial insects like hoverflies, which prey on aphids.
- Rosemary: This aromatic herb can help repel certain pests.
- Marigolds: These flowers can help deter nematodes and other soil-borne pests.
By following these simple care tips, you can ensure your milk thistle plants thrive and provide you with a bountiful harvest of seeds. Remember, regular observation and a little attention are key to successful milk thistle cultivation.
Harvesting Milk Thistle Seeds
Harvesting milk thistle seeds is a crucial step in the growing process, especially if you plan to use them for medicinal purposes or to save seeds for future plantings. Through my years of cultivating milk thistle, I’ve developed a keen eye for knowing when the seeds are ready for harvest. Let me share my insights with you.
When to Harvest Milk Thistle Seeds
The key to successful harvesting is timing. You’ll want to harvest the seeds when the flower heads are fully dry and turn brown. This usually occurs in late summer or early fall, depending on your climate. The bracts (the spiky structures surrounding the flower head) will also become dry and brittle.
To be absolutely sure the seeds are ready, you can gently squeeze a flower head. If the seeds readily come loose and have a hard, dry texture, they’re ready to be harvested. If they’re still soft or green, they need more time to mature.
How to Harvest the Seeds
Harvesting milk thistle seeds is a simple process:
- Cut the seed heads: Using sharp scissors or pruning shears, carefully cut the seed heads from the plant.
- Dry the seed heads: Place the seed heads in a paper bag or on a tray in a warm, dry place with good air circulation. Allow them to dry for several days or up to two weeks. This ensures the seeds are fully dry and prevents them from molding during storage.
- Separate the seeds: Once the seed heads are dry, you can separate the seeds by gently rubbing the seed heads between your hands or by using a sieve or colander. The seeds will fall out, leaving behind the dry bracts and other debris.
- Clean the seeds: Remove any remaining debris from the seeds by winnowing them or using a fine-mesh sieve.
Storing Milk Thistle Seeds
Proper storage is essential to maintain the viability of your milk thistle seeds. Here are a few tips:
- Dry the seeds thoroughly: Ensure the seeds are completely dry before storing them to prevent mold growth.
- Store in an airtight container: Place the seeds in an airtight container, such as a glass jar or a sealed plastic bag.
- Store in a cool, dark place: Store the container in a cool, dark place, such as a refrigerator or a cool, dry pantry.
- Label and date the container: Label the container with the date of harvest and the type of seeds.
When stored properly, milk thistle seeds can remain viable for several years.
Harvesting milk thistle seeds is a rewarding culmination of the growing process. It allows you to save seeds for future plantings and to utilize the medicinal properties of this amazing herb. With a little care and attention, you can successfully harvest and store your own milk thistle seeds for years to come.
Using Your Homegrown Milk Thistle
Now that you’ve successfully grown and harvested your milk thistle, you’re probably eager to put it to use. I know I always am! There are several ways to utilize your homegrown milk thistle, from making tea to incorporating the seeds into your diet. Let’s explore some of these options.
Making Milk Thistle Tea
One of the most common ways to consume milk thistle is in the form of tea. Here’s a simple recipe I often use:
- Crush the seeds: Using a mortar and pestle or a coffee grinder, lightly crush about 1-2 teaspoons of milk thistle seeds.
- Boil water: Bring a cup of water to a boil.
- Steep the seeds: Pour the boiling water over the crushed seeds and let them steep for 10-15 minutes.
- Strain and enjoy: Strain the tea through a fine-mesh sieve or cheesecloth. You can add honey or lemon to taste.
Milk thistle tea has a slightly bitter taste, which some people find pleasant. If you find it too bitter, you can try adding other herbs, such as peppermint or chamomile, to improve the flavor.
Using Milk Thistle Seeds in Other Ways
Besides making tea, you can also incorporate milk thistle seeds into your diet in other ways:
- Add to smoothies: You can add a teaspoon of ground milk thistle seeds to your smoothies for a nutritional boost.
- Sprinkle on food: You can sprinkle ground milk thistle seeds on salads, yogurt, or other dishes.
- Make extracts: You can make your own milk thistle extract using alcohol or glycerin. However, this process requires some specialized equipment and knowledge.
Consulting with a Healthcare Professional
While milk thistle is generally considered safe for most people, it’s essential to consult with a healthcare professional before using it for medicinal purposes, especially if you have any underlying health conditions or are taking medications. Milk thistle can interact with certain medications, so it’s crucial to get professional medical advice before using it.
Using your homegrown milk thistle can be a rewarding way to experience the benefits of this amazing herb. Whether you prefer to drink it as tea or incorporate the seeds into your diet, you can enjoy the fruits of your labor and appreciate the connection to nature that comes with growing your own herbs.
Frequently Asked Questions (FAQ)
Throughout my years of gardening and sharing my knowledge with others, I’ve encountered numerous questions about growing milk thistle. To help you on your journey, I’ve compiled a list of frequently asked questions, drawing from data provided and my own experience.
How to grow milk thistle herbs organically in pots?
Growing milk thistle organically in pots is a great option if you have limited garden space or prefer container gardening. Here’s how:
- Choose the right pot: Select a pot that is at least 12 inches in diameter to accommodate the plant’s root system. Ensure the pot has drainage holes to prevent waterlogging.
- Use organic potting mix: Fill the pot with a high-quality organic potting mix that is well-draining.
- Sow the seeds: Sow the seeds directly into the pot about ¼ inch deep.
- Provide sunlight: Place the pot in a location that receives at least 6 hours of full sun per day.
- Water regularly: Water deeply whenever the top inch of soil feels dry to the touch.
- Fertilize (if needed): If your potting mix is low in nutrients, you can apply a balanced organic fertilizer in the spring.
What is the best way to grow milk thistle herbs from seed?
The best way to grow milk thistle from seed depends on your climate and personal preference. Starting seeds indoors gives you more control over the growing environment and can result in earlier harvests. Direct sowing is simpler but can be less reliable.
How to grow milk thistle herbs for liver health benefits at home?
Growing milk thistle at home allows you to have a fresh supply of this beneficial herb for supporting liver health. However, it’s important to consult with a healthcare professional before using milk thistle for any medical condition.
How to grow milk thistle herbs successfully in a backyard garden?
To grow milk thistle successfully in your backyard garden, choose a sunny location with well-draining soil. Sow the seeds directly into the garden in the spring or fall, depending on your climate. Water regularly and provide basic care, such as weeding and mulching.
How to grow milk thistle herbs in different climate conditions?
Milk thistle is adaptable to a variety of climates. However, it thrives in temperate regions with warm summers and mild winters. If you live in a region with harsh winters, it’s best to start your seeds indoors and transplant them outdoors in the spring.
Step-by-step guide on how to grow milk thistle herbs for beginners.
- Choose a sunny location with well-draining soil.
- Sow the seeds directly into the garden or start them indoors in early spring.
- Water regularly and provide basic care, such as weeding and mulching.
- Harvest the seeds when the flower heads are dry and brown.
How to grow milk thistle herbs and prevent common plant diseases?
To prevent common plant diseases, ensure good air circulation around your plants and avoid overwatering. If you notice signs of disease, remove any affected leaves or plants and treat with an appropriate organic fungicide.
How to grow milk thistle herbs indoors during winter months?
To grow milk thistle indoors during the winter, you’ll need to provide adequate light, either from a sunny window or grow lights. Use a well-draining potting mix and water regularly.
How to grow milk thistle herbs from seed to mature plant effectively.
To grow milk thistle effectively from seed to mature plant, follow these steps:
- Sow the seeds at the proper depth.
- Provide adequate light and water.
- Transplant seedlings outdoors once the danger of frost has passed.
- Provide basic care, such as weeding and mulching.
- Harvest the seeds when the flower heads are dry and brown.
I hope these FAQs have addressed any questions you may have about growing milk thistle. If you have any further questions, feel free to reach out to me or consult other resources.
Conclusion
Growing milk thistle is a rewarding endeavor, connecting you with nature and providing a fresh source of this beneficial herb. By following the steps outlined in this guide, you can successfully cultivate milk thistle in your own garden, regardless of your gardening experience.
Remember these key points:
- Milk thistle thrives in sunny locations with well-drained soil.
- Starting seeds indoors can provide a head start, especially in colder climates.
- Regular watering and basic care, such as weeding and mulching, are essential for healthy growth.
- Harvest the seeds when the flower heads are dry and brown.
- Consult with a healthcare professional before using milk thistle for medicinal purposes.
I encourage you to embark on this gardening adventure and experience the satisfaction of growing your own milk thistle. With a little patience and attention, you’ll be enjoying the beauty and benefits of this amazing herb in no time.
