Are you tired of your kids spending all their time indoors, glued to screens? Do you long for a way to connect with them and teach them valuable life lessons? Spring is the perfect time to address this, but the thought of managing a garden with little helpers might seem daunting. You’re not alone. I remember feeling overwhelmed when I first tried to get my kids involved. But what if I told you that gardening with your children can be an incredibly rewarding experience, filled with learning, laughter, and fresh produce? Let’s dive into how you can make this spring a season of growth and joy for your whole family.
How to Plant a Kid-Friendly Spring Vegetable Patch

When I think about introducing kids to gardening, the first thing that comes to mind is a vegetable patch. There’s something magical about watching a tiny seed sprout and grow into something you can eat. And for kids, it’s a hands-on science lesson they’ll never forget.
Choosing Easy-to-Grow Vegetables
You want to start with vegetables that are quick to grow and easy to care for. Radishes, carrots, and peas are excellent choices. Radishes, for instance, can be harvested in as little as three weeks, which is perfect for keeping kids engaged. Carrots are another favorite, as they offer the excitement of digging them up from the soil. Peas are not only delicious but also easy to plant, making them a great option for little hands.
- Radishes:
- Grow quickly (21-30 days).
- Easy to sow directly into the soil.
- Offer a peppery flavor that kids often enjoy.
- Carrots:
- Require loose, well-drained soil.
- Offer a variety of colors (orange, purple, yellow).
- Provide a sweet, crunchy snack.
- Peas:
- Climbing varieties add vertical interest.
- Sweet and tender when picked fresh.
- Easy to shell and eat.
Preparing the Soil
Preparing the soil is a crucial step, and you can make it fun for kids. I like to involve them in turning the soil with small trowels and removing any weeds or rocks. This not only helps them understand the importance of healthy soil but also gives them a sense of ownership. You can also add compost to enrich the soil, explaining how it helps plants grow strong.
- Soil Preparation Tips:
- Use small trowels and garden forks for kids.
- Remove weeds and rocks to create a smooth planting surface.
- Add compost to improve soil fertility and drainage.
- Test soil pH. Vegetable like pH 6.0 to 7.0
Step-by-Step Planting Guide
When it comes to planting, I find it helpful to break down the process into simple steps.
- Mark Rows: Use sticks or string to mark rows in the garden bed. This helps kids understand spacing and organization.
- Dig Furrows: Use a trowel to dig shallow furrows for the seeds. Show your kids how deep to plant each type of seed.
- Sow Seeds: Let your kids carefully drop the seeds into the furrows, spacing them according to the instructions on the seed packet.
- Cover Seeds: Gently cover the seeds with soil and pat it down lightly.
- Water: Use a watering can with a gentle spray to water the newly planted seeds.
How to Plant Vegetables That Grow Fast
For impatient little gardeners, planting fast-growing vegetables is key. Radishes and baby spinach are excellent choices. I like to explain to my kids that these plants grow quickly because they have a simple life cycle. This helps them understand the concept of time and growth in a tangible way.
Spring Planting Schedule for Kids
Creating a planting schedule is a great way to teach kids about planning and organization. I like to use a simple calendar and mark the dates for planting different vegetables. You can involve your kids in creating the schedule, letting them choose which vegetables to plant and when.
- Example Spring Planting Schedule:
- Early March: Start seeds indoors (peas, spinach).
- Mid-March: Plant radishes and carrots directly in the garden.
- Early April: Plant lettuce and other leafy greens.
- Mid April: Plant beans.
- Late April: Plant cucumbers.
Case Study: The Radish Race
One year, I decided to have a “radish race” with my kids. We planted radishes at the same time and kept track of their growth. We measured them every few days and recorded the results in a journal. This turned gardening into a fun competition and taught them about measurement and observation.
Tips for Success
- Use Kid-Friendly Tools: Small trowels, watering cans, and gloves make gardening more enjoyable for kids.
- Make it Fun: Turn gardening into a game or competition.
- Teach and Explain: Explain the science behind gardening in simple terms.
- Celebrate Success: Celebrate every milestone, from the first sprout to the first harvest.
By following these tips, you can create a kid-friendly vegetable patch that will not only provide fresh produce but also create lasting memories. You’ll be amazed at how much your kids learn and how much they enjoy the process.
How to Start Seeds Indoors: A Spring Science Experiment

Starting seeds indoors is a fantastic way to introduce kids to the wonders of germination and plant growth. It’s like a mini science experiment right on your kitchen counter. Not only is it a fun activity, but it also allows you to get a head start on the growing season and enjoy fresh produce earlier in the spring.
Setting Up a Seed Starting Station
Before you dive into planting, you’ll need to set up a seed starting station. Here’s what you’ll need:
- Seed Trays: These can be purchased at most garden centers or hardware stores.
- Potting Mix: Use a seed starting mix specifically designed for seedlings.
- Seeds: Choose a variety of easy-to-grow seeds, such as lettuce, radishes, or herbs.
- Watering Can: A small watering can with a fine mist setting is ideal.
- Grow Lights: If you don’t have a sunny window, you can use grow lights to provide additional light.
Choosing Kid-Friendly Seeds
When selecting seeds, choose varieties that are quick to germinate and easy to handle. Here are some excellent choices:
- Lettuce: Lettuce is a fast-growing crop that comes in a variety of colors and textures.
- Radishes: Radishes are another quick-growing option that kids love to pull from the soil.
- Herbs: Herbs like basil, cilantro, and dill are easy to grow and add a delicious flavor to meals.
- Snap peas: Climbing varieties can be fun for kids to watch grow.
- Sunflowers: Sunflowers are a classic choice that kids love to watch grow tall.
The Germination Process: Explaining It in Simple Terms
The germination process is a fascinating one, and you can use it as a teaching opportunity for your kids. Explain to them that when a seed is planted in moist soil, it absorbs water and begins to swell. The seed coat then cracks open, and a tiny root emerges, followed by a shoot that grows upward toward the light.
How to Plant Seeds Indoors
Here’s a step-by-step guide to planting seeds indoors:
- Fill the seed trays with potting mix. Leave about an inch of space at the top.
- Moisten the potting mix: Water the mix thoroughly until it’s evenly moist but not soggy.
- Sow the seeds: Follow the instructions on the seed packet for spacing and depth.
- Cover the seeds: Gently cover the seeds with a thin layer of potting mix.
- Water gently: Use a spray bottle to mist the seeds lightly.
- Place the trays in a warm, sunny location. A windowsill is ideal.
- Keep the soil moist: Water the seedlings regularly, but avoid overwatering.
Tips for Success
- Use a seed starting mix: This is specially formulated to provide the nutrients and drainage that seedlings need.
- Don’t overwater: Overwatering can lead to damping off, a fungal disease that can kill seedlings.
- Provide adequate light: Seedlings need plenty of light to grow. If you don’t have a sunny window, use grow lights.
- Be patient: Germination times vary depending on the type of seed. Don’t give up if you don’t see seedlings right away.
By following these tips, you and your kids can successfully start seeds indoors and enjoy the satisfaction of watching them grow into healthy plants. Remember to make it a fun and educational experience, and celebrate each milestone along the way.
How to Create a Spring Sensory Garden for Little Explorers

A sensory garden is a fantastic way to engage your child’s senses and spark their curiosity about the natural world. It’s a place where they can touch, smell, and even taste the wonders of nature. Creating a sensory garden together is a fun and rewarding project that will provide endless hours of exploration and discovery for your little ones.
Incorporating Different Textures, Scents, and Sounds
The key to a successful sensory garden is to incorporate a variety of textures, scents, and sounds. Think about how you can appeal to each of your child’s senses:
- Touch: Include plants with different textures, such as soft lamb’s ear, prickly cactus, and smooth-leaved hostas. Add elements like smooth river rocks, soft moss, or even a sandbox for tactile exploration.
- Scent: Plant fragrant herbs like lavender, rosemary, and mint. Include flowers with strong scents, such as roses, lilies, and jasmine.
- Sound: Incorporate elements that create soothing sounds, such as a small water feature, wind chimes, or bamboo sticks that rustle in the breeze.
Choosing Plants That Engage the Senses
When selecting plants for your sensory garden, choose varieties that are safe for children to touch and smell. Here are a few ideas:
- Lamb’s Ear: These soft, velvety leaves are irresistible to touch.
- Mint: The strong, refreshing scent of mint is invigorating.
- Lavender: Lavender has a calming and soothing aroma.
- Rosemary: Rosemary has a fragrant, evergreen scent.
- Pansies: Pansies come in a variety of colors and have velvety petals.
- Nasturtiums: Nasturtiums have edible flowers with a peppery flavor.
Creating Pathways and Interactive Elements
To make your sensory garden even more engaging, create pathways and interactive elements:
- Footpaths: Use stepping stones, pebbles, or even a patch of soft grass for children to walk on.
- Sensory Stations: Create small stations with different textures, such as a sandpit, a water table, or a collection of smooth stones.
- Hanging Mobiles: Hang colorful mobiles with different textures and sounds to stimulate visual and auditory senses.
Tips for Success
- Safety First: Choose non-toxic plants and avoid any plants with thorns or sharp edges.
- Accessibility: Make sure the garden is easily accessible for children of all ages and abilities.
- Supervision: Always supervise children while they are exploring the sensory garden.
- Encourage Exploration: Encourage your children to use all their senses to explore the garden.
By creating a sensory garden together, you’ll provide your children with a unique and enriching experience that will foster their curiosity and appreciation for the natural world. Remember to make it fun, interactive, and safe, and enjoy the process of creating this special space for your little explorers.
How to Build a Simple Spring Flower Garden with Kids
Building a flower garden with your kids is a wonderful way to introduce them to the beauty of nature and the joy of growing things. It’s a hands-on project that encourages creativity, teamwork, and a sense of accomplishment.
Selecting Colorful and Easy-to-Grow Flowers
When choosing flowers for your garden, opt for varieties that are easy to grow and come in a variety of colors. Here are a few excellent choices:
- Marigolds: These cheerful flowers come in a range of colors, from golden yellow to deep orange. They are easy to grow and attract pollinators.
- Sunflowers: Sunflowers are a classic choice that kids love. They grow tall and produce large, vibrant blooms.
- Zinnias: Zinnias come in a dazzling array of colors and are relatively easy to care for.
- Petunias: Petunias are known for their abundant blooms and come in a wide range of colors and patterns.
- Nasturtiums: These colorful flowers are not only beautiful but also edible!
Designing a Flower Bed
Involve your kids in the design process. Let them choose where to plant the flowers and how they want to arrange them. You can create a simple flower bed, a border along a walkway, or even plant flowers in containers. Encourage your kids to think about color combinations and how they want their garden to look.
Tips for Success
- Choose the right location: Select a sunny spot in your yard that receives at least six hours of sunlight per day.
- Prepare the soil: Amend the soil with compost or other organic matter to improve drainage and fertility.
- Space the plants correctly: Refer to the seed packet or plant tag for spacing guidelines.
- Water regularly: Water your flowers deeply and consistently, especially during dry periods.
- Mulch around the plants: Mulch helps to retain moisture, suppress weeds, and regulate soil temperature.
- Deadhead spent blooms: Remove faded flowers to encourage continuous blooming.
Celebrating Your Success
As your flowers begin to bloom, take time to admire their beauty with your children. Celebrate their growth and the hard work you put into creating your garden together. You can even host a “garden party” to share your flowers with friends and family.
By working together to create a beautiful flower garden, you’ll not only teach your kids about gardening but also foster a love for nature and a sense of accomplishment. Remember to make it fun, keep it simple, and enjoy the process!
How to Make a Spring Garden Craft: Painted Pots and Plant Markers
Adding a creative touch to your garden can be a fun and rewarding experience for both you and your children. Painting terracotta pots and creating unique plant markers are simple yet engaging crafts that will add a personal touch to your spring garden.
Decorating Terracotta Pots
Terracotta pots are a blank canvas for your children’s creativity. Here are some ideas to get you started:
- Painting: Provide your children with a variety of non-toxic paints and let them unleash their imagination. They can paint the pots in bright colors, create patterns, or even paint their own designs.
- Decorative Tape: Use colorful washi tape to create stripes, polka dots, or geometric patterns.
- Natural Materials: Encourage your children to use natural materials like dried flowers, leaves, and seeds to decorate the pots.
- Markers: Use permanent markers to draw designs, write names, or add inspirational quotes.
Creating Plant Markers
Plant markers are a fun and functional way to identify your plants. Here are a few ideas for creating unique plant markers:
- Wooden Skewers: Write the plant names on wooden skewers using permanent markers or paint.
- Painted Rocks: Paint small rocks with the names of your plants.
- Recycled Materials: Use recycled materials like bottle caps or popsicle sticks to create colorful plant markers.
- Natural Materials: Use twigs, branches, or even small stones to create natural plant markers.
Tips for Success
- Use Non-Toxic Materials: Make sure to use non-toxic paints and markers that are safe for children.
- Protect Your Workspace: Cover your work area with newspaper or a plastic tablecloth to protect your surfaces.
- Encourage Creativity: Let your children experiment and express their creativity.
- Display Your Creations: Display your finished pots and plant markers proudly in your garden.
Creating painted pots and plant markers is a fun and engaging activity that will spark your children’s creativity and add a personal touch to your spring garden. So gather your supplies, put on some music, and enjoy the process of creating something beautiful together.
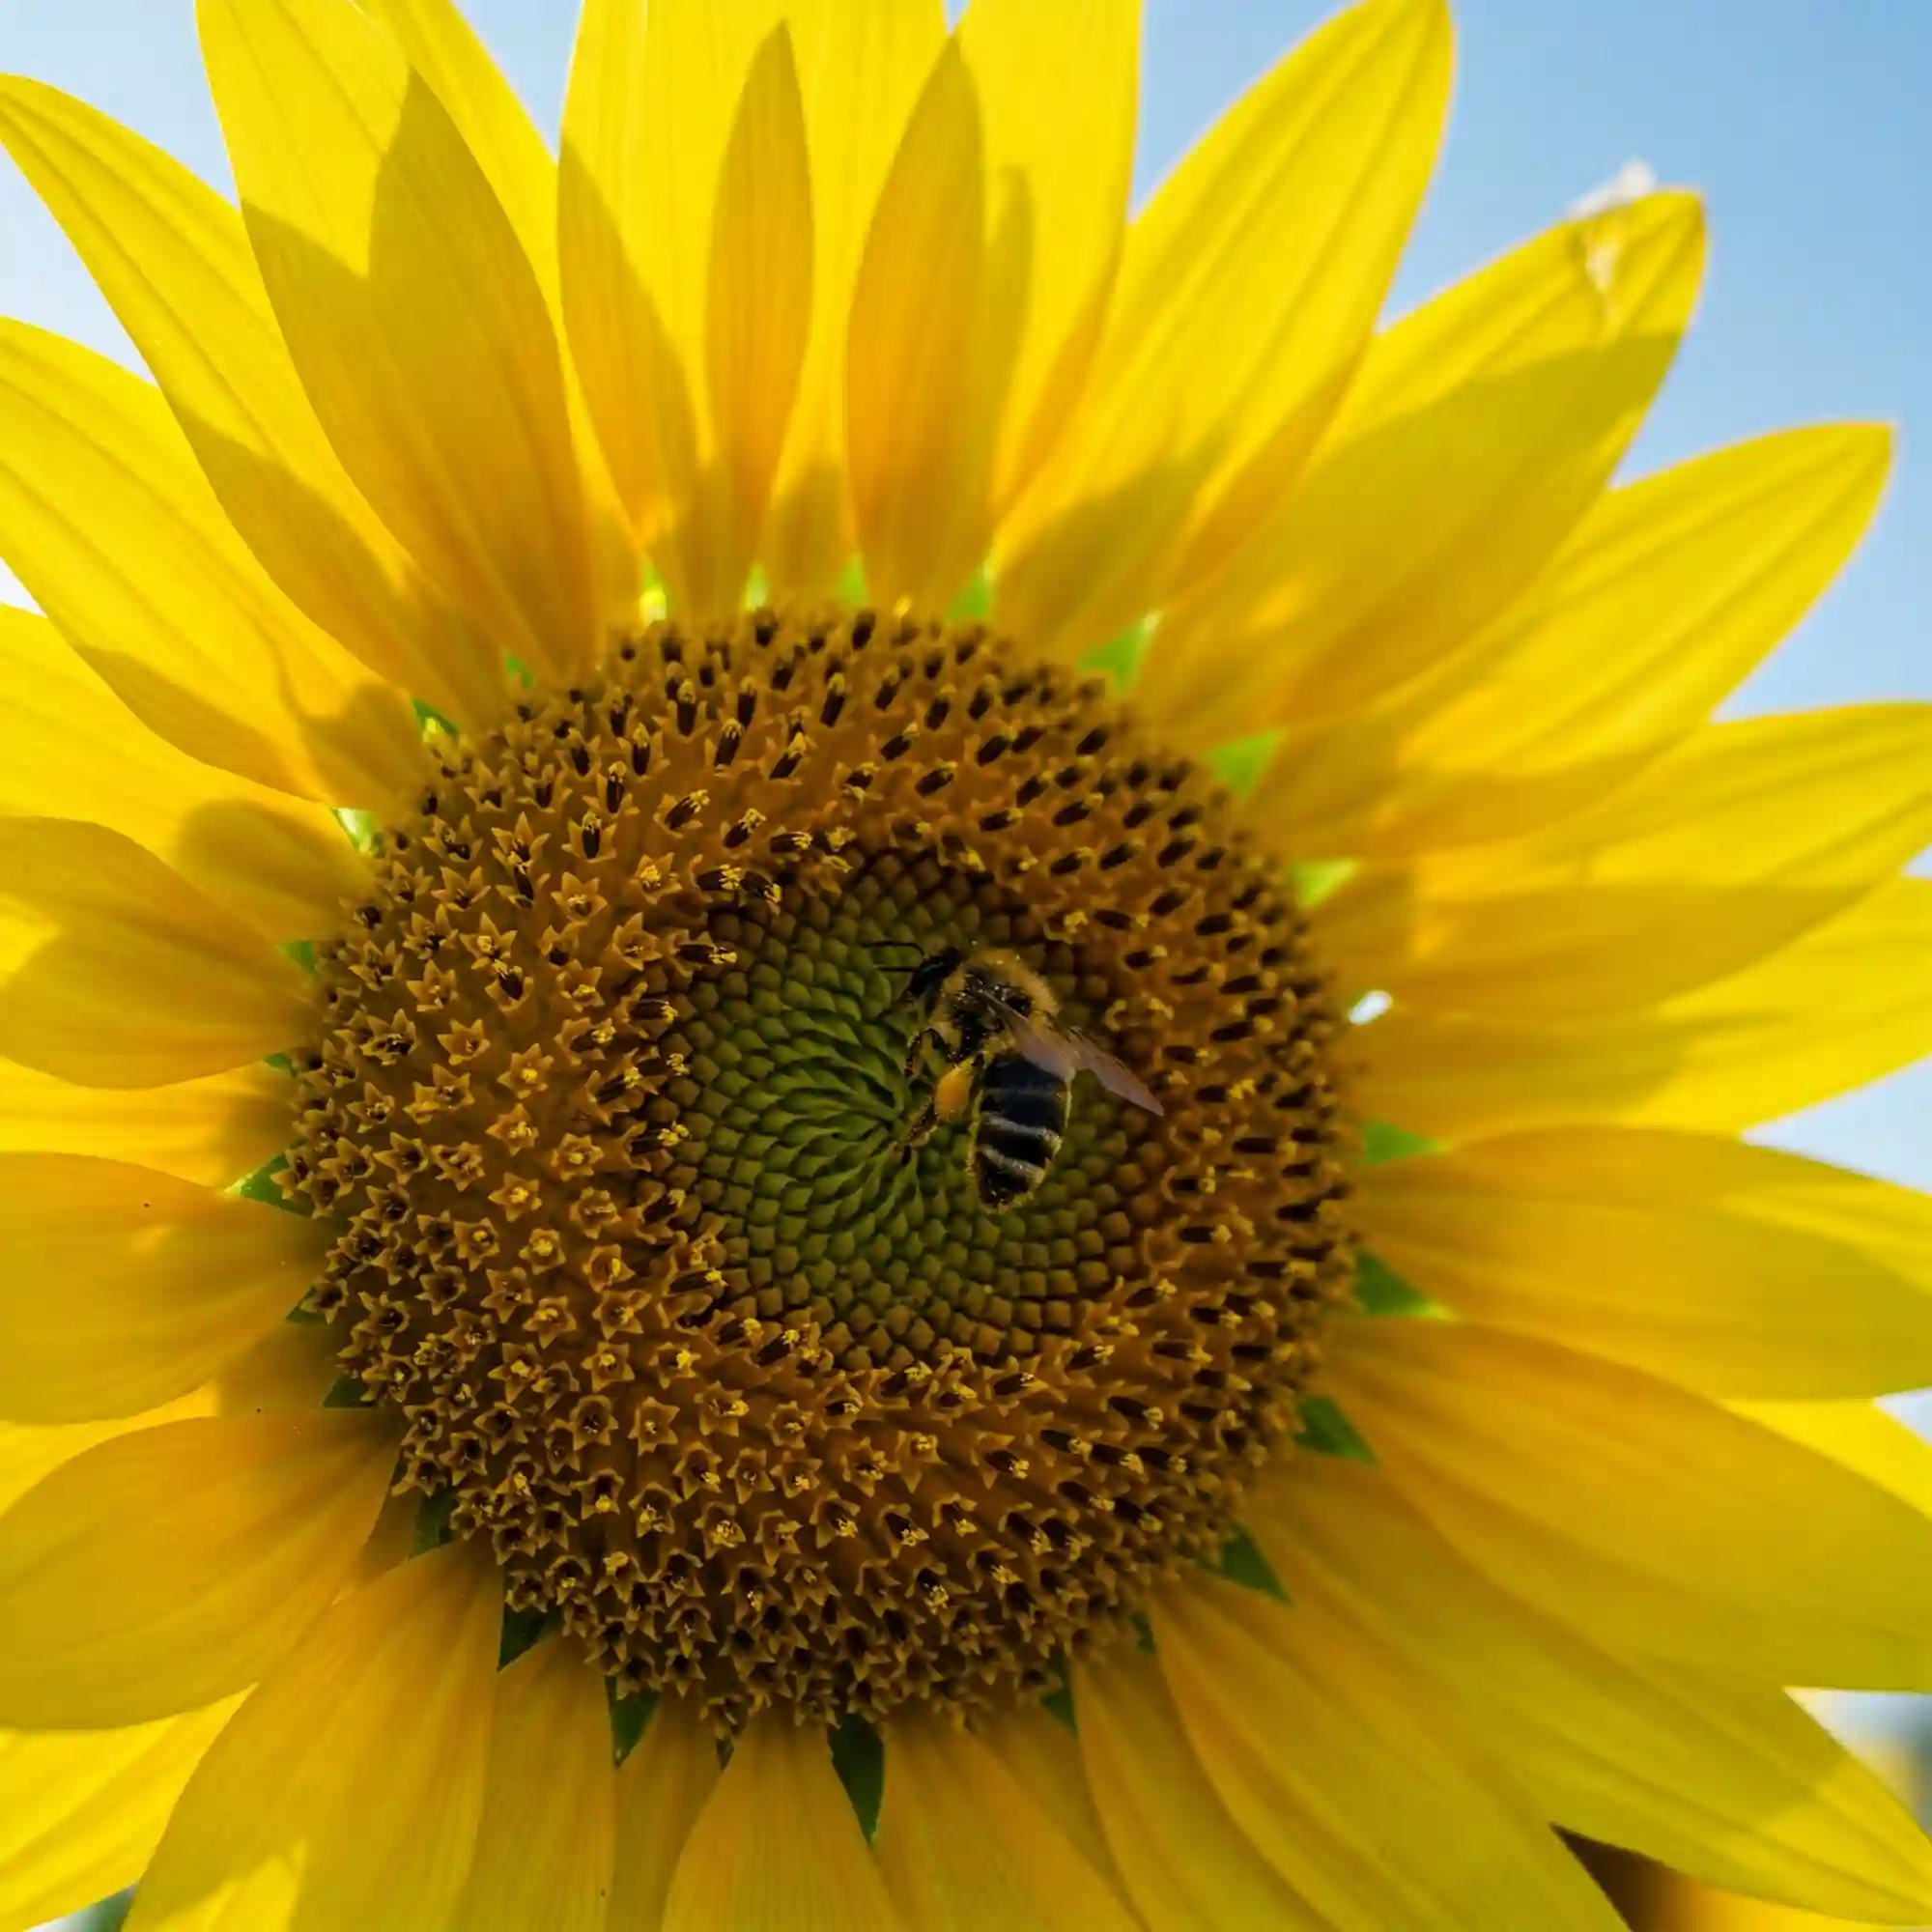
How to Teach Kids About Pollinators in the Spring Garden

One of the most fascinating aspects of gardening is understanding the intricate relationships between plants and pollinators. Spring is the perfect time to introduce your children to the world of bees, butterflies, and other beneficial insects. By creating a pollinator-friendly garden and engaging your children in the process, you can help them develop an appreciation for the delicate balance of nature.
Attracting Bees and Butterflies
To attract a variety of pollinators to your garden, plant a diverse range of flowers that provide nectar and pollen. Here are some excellent choices:
- Sunflowers: Sunflowers are a magnet for bees and butterflies. Their large, vibrant blooms provide ample pollen and nectar.
- Marigolds: Marigolds are easy to grow and come in a variety of colors. They are a favorite among bees and butterflies.
- Zinnias: Zinnias are another excellent choice for attracting pollinators. They come in a wide range of colors and bloom throughout the summer.
- Lavender: Lavender is a fragrant herb that attracts bees, butterflies, and even hummingbirds.
- Coneflowers: Coneflowers are a beautiful and long-blooming addition to any garden. They are a favorite among bees and butterflies.
Building a Bee Hotel
Building a bee hotel is a fun and educational project that you can do with your children. Bee hotels provide a safe and cozy home for solitary bees, which are important pollinators. Here’s how to make a simple bee hotel:
- Gather your materials: You will need a wooden block, bamboo canes, and some natural materials like pine needles or dried leaves.
- Drill holes in the wooden block: Drill holes of various sizes into the wooden block.
- Fill the holes with nesting materials: Stuff the holes with pine needles, dried leaves, or other soft materials.
- Hang your bee hotel: Hang your bee hotel in a sunny location, protected from the rain and wind.
Observing Pollinators
Encourage your children to observe the pollinators that visit your garden. Provide them with a magnifying glass and a nature journal to record their observations. They can draw pictures of the bees and butterflies they see, and even try to identify different species.
Tips for Success
- Avoid using pesticides: Pesticides can harm pollinators. Use natural pest control methods whenever possible.
- Provide a water source: Place a shallow dish of water in your garden to provide a source of water for bees and butterflies.
- Create a pollinator-friendly habitat: Plant a variety of native plants and create a diverse ecosystem in your garden.
By incorporating these tips and engaging your children in the process, you can create a pollinator-friendly garden that will not only benefit the environment but also provide a valuable learning experience for your children. Remember to celebrate the success of your efforts and enjoy the beauty of the pollinators that visit your garden.
How to Create a Spring Mini-Garden in a Container
Container gardening is a fantastic option for those with limited space, such as apartment dwellers or those with small yards. It’s also a great way to introduce children to gardening, as containers are easy to manage and can be placed at a child’s level.
Choosing the Right Container and Soil
When selecting containers, choose ones that are sturdy, well-draining, and appropriate for the size of the plants you intend to grow. Here are a few ideas:
- Terracotta pots: Terracotta pots are a classic choice for container gardening. They are porous, which helps to regulate soil moisture.
- Plastic pots: Plastic pots are lightweight, durable, and come in a variety of colors and sizes.
- Self-watering containers: Self-watering containers make it easy to keep your plants hydrated, even when you’re away from home.
The type of soil you use is also important. Choose a well-draining potting mix that is specifically designed for container gardening. Avoid using garden soil, as it can become compacted and waterlogged in containers.
Planting Herbs or Small Vegetables
Herbs and small vegetables are ideal for container gardening. Here are a few suggestions:
- Herbs: Basil, cilantro, parsley, mint, and chives are all easy to grow in containers.
- Lettuce: Lettuce is a quick-growing and versatile option.
- Radishes: Radishes are another fast-growing option that is perfect for container gardening.
- Strawberries: Dwarf varieties of strawberries can be grown successfully in containers.
- Cherry tomatoes: Cherry tomatoes are a delicious and productive choice for container gardening.
Tips for Success
- Choose the right location: Place your containers in a sunny location that receives at least six hours of sunlight per day.
- Water regularly: Water your plants regularly, especially during hot weather. Check the soil moisture regularly and water deeply when the top inch of soil feels dry.
- Fertilize regularly: Use a balanced fertilizer to provide your plants with the nutrients they need.
- Protect your plants from pests: Monitor your plants regularly for pests and take steps to control them if necessary.
- Enjoy the process: Container gardening is a fun and rewarding activity. Enjoy the process of growing your own food and sharing the experience with your children.
By following these tips, you can create a thriving mini-garden in a container and enjoy the benefits of fresh herbs and vegetables all season long. Remember to make it a fun and educational experience for your children, and celebrate their successes along the way.
How to Plan a Spring Garden Scavenger Hunt for Kids
A garden scavenger hunt is a fun and engaging way to get your kids excited about exploring the garden and learning about nature. It’s a great way to combine learning with playtime, and it can be adapted to suit children of all ages.
Creating a Checklist of Garden Items to Find
The first step is to create a checklist of items for your children to find in the garden. Here are a few ideas:
- Flowers: Include a variety of flowers in your checklist, such as daisies, sunflowers, and roses.
- Insects: Look for bees, butterflies, ladybugs, and other garden visitors.
- Textures: Include items with different textures, such as smooth leaves, prickly leaves, and soft moss.
- Colors: Challenge your children to find things in specific colors, such as red flowers, green leaves, and brown branches.
- Shapes: Look for items with different shapes, such as round leaves, heart-shaped leaves, and star-shaped flowers.
Incorporating Educational Elements
You can also use the scavenger hunt to teach your children about various aspects of gardening and nature. Here are a few ideas:
- Plant Identification: Include a list of common garden plants and encourage your children to identify them.
- Life Cycles: Include items related to the life cycle of plants, such as seeds, seedlings, flowers, and fruits.
- Pollination: Encourage your children to observe bees and butterflies pollinating flowers.
- Ecosystems: Explain how different parts of the garden interact with each other, such as how insects help to pollinate plants.
Tips for Success
- Keep it age-appropriate: Adjust the difficulty of the checklist based on your children’s ages and abilities.
- Make it fun: Use colorful pictures or drawings to illustrate the items on the checklist.
- Provide clues: If your children are having trouble finding something, provide them with gentle clues.
- Celebrate their discoveries: Celebrate their successes and encourage their curiosity about the natural world.
A garden scavenger hunt is a wonderful way to spend a sunny afternoon with your children. It’s a fun and educational activity that will create lasting memories and foster a love for nature in your little ones. So grab your checklists, head out to the garden, and enjoy the adventure!
How to Use Kid-Friendly Spring Gardening Tools Safely
One of the most important aspects of gardening with children is ensuring their safety. Providing them with age-appropriate tools and teaching them how to use them properly is crucial.
Selecting Age-Appropriate Tools
Avoid giving young children sharp tools like shovels or hoes. Instead, opt for smaller, safer tools designed specifically for children. Here are a few suggestions:
- Small trowels: These are perfect for digging and planting seeds.
- Watering cans: Choose watering cans with easy-to-grip handles and a gentle spray setting.
- Gloves: Gloves protect children’s hands from dirt, thorns, and insect stings.
- Knee pads: Knee pads can help to protect children’s knees when they are kneeling or sitting on the ground.
Teaching Kids How to Use Tools Safely
Before letting your children use any gardening tools, take the time to teach them how to use them safely. Demonstrate proper technique and emphasize the importance of safety. Here are a few tips:
- Always supervise children: Never leave children unattended while they are using gardening tools.
- Teach them to carry tools properly: Tools should be carried with the sharp end pointing down and away from the body.
- Show them how to dig safely: Teach them to dig away from themselves and to avoid swinging tools around.
- Encourage them to ask for help: If they are unsure about how to use a tool, encourage them to ask for help from an adult.
Tips for Success
- Choose tools that are the right size: Make sure the tools are not too heavy or too large for your child to handle.
- Start with simple tasks: Begin with simple tasks like watering plants and weeding before moving on to more complex tasks like digging and planting.
- Make it fun: Turn tool use into a game or challenge.
- Celebrate their efforts: Praise your children for using their tools safely and effectively.
By providing your children with age-appropriate tools and teaching them how to use them safely, you can help them develop a love for gardening and a respect for nature. Remember to make it fun and educational, and celebrate their successes along the way.
How to Harvest and Enjoy Your Spring Garden Bounty with Kids
One of the most rewarding aspects of gardening with kids is enjoying the fruits of your labor. Harvesting the vegetables you’ve grown together is a special experience that will create lasting memories.
Making Simple Recipes with Harvested Produce
Involve your children in preparing and cooking the vegetables you’ve harvested. Here are some simple and kid-friendly recipes:
- Radish and butter sandwiches: Slice fresh radishes thinly and spread them on buttered bread.
- Carrot sticks with hummus: Wash and peel carrots and cut them into sticks. Serve with hummus for a healthy snack.
- Pea salad: Combine fresh peas with chopped lettuce, cucumbers, and a simple vinaigrette.
- Stir-fried vegetables: Stir-fry a variety of vegetables from your garden with a little olive oil and seasoning.
- Vegetable soup: Use your garden-fresh vegetables to make a delicious and nutritious soup.
Celebrating the Success of Their Gardening Efforts
Make sure to celebrate your children’s accomplishments. Let them know how proud you are of their hard work and dedication. You can celebrate by:
- Having a garden party: Invite friends and family over to share your garden bounty.
- Taking pictures: Take pictures of your children with their harvested vegetables.
- Creating a garden journal: Encourage your children to keep a garden journal to document their experiences.
- Giving thanks: Teach your children to appreciate the gifts of nature and give thanks for the food they have grown.
Tips for Success
- Harvest vegetables at the right time: Refer to seed packets or online resources for information on when to harvest different vegetables.
- Wash vegetables thoroughly: Wash vegetables thoroughly before eating to remove any dirt or pesticides.
- Involve children in the harvesting process: Let them help you pick vegetables and prepare them for eating.
- Make it a fun and festive occasion: Celebrate your harvest with a special meal or activity.
By harvesting and enjoying the fruits of your labor together, you’ll create lasting memories and foster a love for healthy eating in your children. Remember to celebrate their successes, encourage their curiosity, and make it a fun and rewarding experience for everyone involved.
FAQ
Here are some frequently asked questions about gardening with kids in spring:
What are the easiest vegetables to grow with kids in spring?
Radishes, carrots, and peas are excellent choices for beginner gardeners. Radishes mature quickly, providing a sense of accomplishment for young children. Carrots are easy to grow and fun to harvest. Peas are also a good option, as they are relatively low-maintenance and provide a delicious snack.
How to create a sensory garden with children in early spring?
Incorporate a variety of textures, scents, and sounds into your sensory garden. Plant soft-leaved plants like lamb’s ear, fragrant herbs like mint and lavender, and flowers with vibrant colors and interesting shapes. Add elements like smooth river rocks, soft moss, or even a small water feature to engage multiple senses.
Best age-appropriate gardening activities for toddlers in springtime?
Toddlers can enjoy simple activities like watering plants with a small watering can, helping to turn the soil, and planting large seeds. They can also explore the garden with their hands, touching different textures and smelling fragrant flowers.
Educational spring gardening projects for elementary school-aged children.
Elementary school-aged children can engage in more complex projects, such as starting seeds indoors, building a small compost bin, or creating a nature journal to document their observations. They can also learn about the life cycle of plants by planting seeds and watching them grow.
Simple steps for starting seeds indoors with kids during spring months.
- Gather your materials: You’ll need seed trays, potting mix, seeds, and a watering can.
- Fill the seed trays with potting mix: Leave about an inch of space at the top.
- Sow the seeds: Follow the instructions on the seed packet for spacing and depth.
- Cover the seeds: Gently cover the seeds with a thin layer of potting mix.
- Water gently: Use a spray bottle to mist the seeds lightly.
- Place the trays in a warm, sunny location.
- Keep the soil moist: Water the seedlings regularly, but avoid overwatering.
Fun and safe gardening tools for kids to use in spring gardens.
Choose small, child-friendly tools like small trowels, watering cans with easy-to-grip handles, and gloves. Avoid giving young children sharp tools like shovels or hoes.
How to plan a spring garden schedule with children involved.
Involve your children in the planning process. Let them choose which vegetables or flowers they want to grow and create a simple planting schedule together. Use a calendar or a whiteboard to mark the dates for planting different seeds and transplanting seedlings.
Where to find organic gardening supplies for kids in springtime.
You can find organic gardening supplies for kids at local garden centers, online retailers, and even some farmers’ markets. Look for child-sized tools, organic seeds, and non-toxic gardening products.
Tips for teaching children about pollination through spring gardening activities.
Plant a variety of flowers that attract pollinators, such as sunflowers, marigolds, and zinnias. Observe bees and butterflies visiting your flowers and explain the importance of pollination to your children. You can even build a simple bee hotel to encourage native bee populations.
What are good spring garden crafts to do with kids outdoors?
Painting terracotta pots, creating plant markers from natural materials, and building birdhouses are all fun and engaging activities that can be done outdoors. You can also use natural materials like leaves, flowers, and twigs to create beautiful and unique crafts.
Conclusion

Gardening with kids in spring is a wonderful way to connect with nature, learn new skills, and create lasting memories. By following these tips and engaging your children in the process, you can create a fun, educational, and rewarding gardening experience for your entire family. Remember to celebrate their successes, encourage their curiosity, and make it a fun and festive occasion. By fostering a love for nature and gardening in your children, you are not only creating lasting memories but also helping to ensure a healthy and sustainable future for our planet.
I hope this comprehensive guide has inspired you to embark on your own spring gardening adventures with your kids. Happy gardening!


")