Amaranth, an ancient grain boasting a vibrant history and exceptional nutritional value, is gaining well-deserved recognition amongst home gardeners. Not only does it offer a delicious and protein-packed harvest, but its stunning ornamental varieties also add a touch of drama to your garden borders. However, cultivating this unique crop can seem daunting, especially for those new to the world of gardening. Fear not! This comprehensive guide will unveil the secrets of growing amaranth, empowering you to cultivate this remarkable plant with confidence.
Unveiling the Allure of Amaranth
Before delving into the specifics of cultivation, let’s explore the reasons why amaranth deserves a prominent spot in your garden.
- A Nutritional Powerhouse: Amaranth seeds are a complete protein source, containing all nine essential amino acids. They’re also rich in iron, calcium, and phosphorus, making them a valuable addition to a healthy diet.
- Culinary Versatility: The leaves of amaranth can be enjoyed like spinach, while the seeds can be cooked like quinoa or popped like popcorn! Explore a world of culinary possibilities with this versatile ingredient.
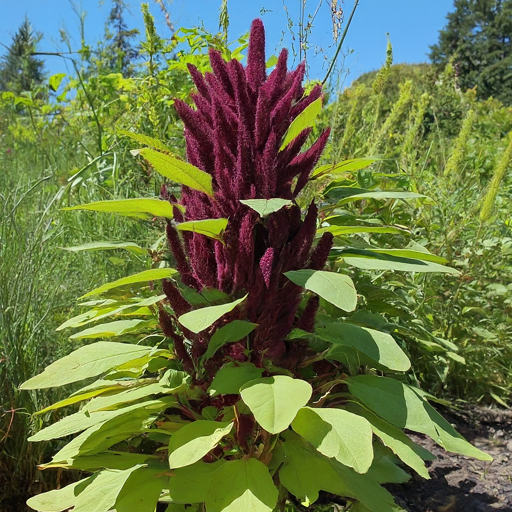
- A Visual Feast: While some amaranth varieties are cultivated solely for their edible parts, others boast vibrant red, purple, and green foliage, adding a touch of elegance to your garden design.
- Adaptable and Thriving: Amaranth is known for its resilience, tolerating a wide range of soil conditions and even moderate drought.
Choosing the Right Amaranth Variety (Selecting Your Star Performer)
With over 60 amaranth species, selecting the perfect variety depends on your goals. Here’s a breakdown of the two main categories:

- Grain Amaranth: Focuses on seed production for culinary use. Popular varieties include:
- Alegria (early maturing, ideal for short growing seasons)
- Inca Pearls (large, white seeds with a mild flavor)
- Opopeo (reddish-brown seeds with a nutty taste)
- Leafy Amaranth: Prioritizes lush foliage for salads and stir-fries. Consider these options:
- Red Amaranth (vibrant red leaves add a pop of color)
- Green Amaranth (milder flavor, perfect for beginners)
- Burgundy (upright growth habit with dark, crinkled leaves)
Remember: When selecting a variety, consider your local climate and desired harvest (seeds or leaves). Opt for varieties suited to your USDA hardiness zone for optimal results.
Sowing the Seeds of Success: Direct Seeding vs. Seedlings
Amaranth thrives in warm soil temperatures. There are two main approaches to planting amaranth seeds:
Direct Seeding
Direct seeding is a convenient method for experienced gardeners and those cultivating amaranth for its leaves. Here’s how:
- Prepare the Planting Bed: Choose a sunny location with well-drained soil. Amend the soil with compost for added nutrients.
- Sow the Seeds: Sow seeds ¼ inch deep in rows spaced 12-18 inches apart. Aim for 1-2 seeds per inch.
- Thinning Seedlings (Optional): Once seedlings reach 2-3 inches tall, thin them to 6-8 inches apart to promote healthy growth.
Pros: Less work involved, allows for earlier harvest of leaves.
Cons: Seedlings may be susceptible to weed competition, germination success can be lower compared to seedlings.
Starting Seeds Indoors
Starting seeds indoors offers greater control over germination and provides a head start on the growing season, particularly for grain amaranth. Follow these steps:
- Sow Seeds in Trays: 6-8 weeks before the last frost date, sow seeds ¼ inch deep in seed trays filled with a well-draining potting mix.
- Maintain Warmth and Moisture: Keep the soil moist and provide warmth (around 70°F) using a heat mat if necessary.
- Light Matters: Once seedlings emerge, provide them with bright light using grow lights or a sunny windowsill.
Transplanting Seedlings: Ushering Your Amaranth to Its New Home

When your amaranth seedlings have developed 4-6 true leaves and the danger of frost has passed, it’s time to transplant them outdoors. Here’s how to ensure a smooth transition:
- Harden Off Seedlings: Gradually acclimate your seedlings to outdoor conditions by exposing them to increasing periods of sunlight and wind over 7-10 days.
- Prepare the Planting Bed: Similar to direct seeding, choose a sunny location with well-drained soil. Amend the soil with compost for added nutrients.
- Dig Planting Holes: Dig holes slightly larger than the root ball of your seedlings, spacing them according to the chosen variety (typically 12-18 inches apart).
- Transplanting with Care: Gently remove seedlings from the tray, disturbing the roots as little as possible. Place them in the prepared holes and fill the gaps with soil, firming it gently.
- Water Thoroughly: Water the newly transplanted seedlings deeply to help them establish good root contact with the surrounding soil.
Tip: Consider using a transplanting trowel to minimize root damage during the process.
Nurturing Your Amaranth: Care and Cultivation
Once your amaranth is settled in its new home, providing proper care will ensure optimal growth and a bountiful harvest.
Watering Wisely
Amaranth is moderately drought-tolerant, but consistent moisture is crucial for healthy growth. Here’s a watering guide:
- Seedlings: Keep the soil consistently moist, especially during germination and establishment.
- Established Plants: Water deeply when the top inch of soil feels dry to the touch. Avoid overwatering, which can lead to root rot.
Feeding Frenzy: Fertilizing for Success
While amaranth doesn’t require heavy feeding, a balanced fertilizer can boost yields. Here’s what to consider:
- Organic Approach: Amend the soil with compost or aged manure before planting for sustained nutrient release.
- Balanced Fertilizer: If using a commercial fertilizer, opt for a balanced NPK formula (like 10-10-10) and apply sparingly according to package instructions.
Remember: Overfertilization can encourage excessive foliage growth at the expense of seed production.
Sunshine and Support
- Sun Seeker: Amaranth thrives in full sun, receiving at least 6-8 hours of direct sunlight daily.
- Staking Considerations: Taller amaranth varieties, particularly those grown for grain, may benefit from staking to prevent them from toppling over under the weight of their seed heads. Use bamboo stakes or tomato cages for support.
Weed Warriors: Keeping the Garden Bed Orderly
Weeds compete with your amaranth for vital resources like water and nutrients. Here are some strategies to keep them at bay:
- Mulch Magic: Apply a layer of organic mulch around your amaranth plants to suppress weed growth and retain soil moisture.
- Hand-weeding: Regularly hand-pull weeds before they establish themselves. Focus on removing them when they are young and manageable.
Remember: Timely weeding is crucial, especially during the early stages of growth when amaranth seedlings are vulnerable to weed competition.
Reaping the Rewards: Harvesting Amaranth

The moment you’ve been waiting for has arrived – harvest time! Here’s a guide to ensure you collect your amaranth bounty at its peak:
Harvesting Amaranth Leaves
For leafy amaranth varieties, you can start harvesting throughout the growing season:
- Young and Tender: Aim to harvest leaves when they are young and tender, typically around 6-8 inches tall.
- Continuous Harvest: Regularly harvest leaves throughout the season to encourage new growth. You can pinch off the top few inches of leaves, allowing the plant to continue producing.
Tip: Harvesting leaves encourages bushier growth in leafy amaranth varieties.
Harvesting Amaranth Seeds
For grain amaranth, harvest signals are crucial:
- Golden Touch: The seed heads will turn golden brown and begin to dry down when the seeds are mature.
- Seed Shedding: Gently shake the seed heads – if seeds readily fall out, it’s harvest time!
How to Harvest Seeds:
- Cut the seed heads when mature and place them in a paper bag.
- Hang the bags in a warm, well-ventilated area for several days to allow the seeds to dry completely.
- Once dry, gently thresh the seeds by rubbing the heads between your hands or using a mortar and pestle to separate the seeds from the chaff.
- Winnow the seeds using a colander or shallow tray to remove any remaining chaff.
- Store the dried seeds in an airtight container in a cool, dark place for up to several years.
Tip: Harvest amaranth seeds on a dry day to prevent mold growth during drying.
Beyond the Harvest: Saving Seeds and Extending the Bounty

Amaranth offers a double reward: not only can you enjoy a delicious harvest, but you can also save seeds for future plantings, extending your amaranth bounty season after season.
Selecting Seeds for Saving
Here’s how to choose the best seeds for saving:
- Healthy Plants: Select seeds from healthy, disease-free plants that produced a good yield.
- Favorable Traits: Choose seeds from plants that exhibited desirable characteristics you want to preserve, such as large seed heads, vibrant foliage color, or early maturity.
Saving Amaranth Seeds
The process of saving amaranth seeds is relatively simple:
- Allow a Few Seed Heads to Remain: During your final harvest, leave a few seed heads on healthy plants to mature fully.
- Drying is Key: Once the seed heads turn brown and dry, allow them to remain on the plant for a few extra days to ensure complete seed maturity.
- Collecting and Storing: Cut the dried seed heads and store them in a paper bag in a cool, dry place for a couple of weeks.
- Threshing and Winnowing: After drying, follow the same threshing and winnowing techniques described in the harvesting seeds section to separate the seeds from the chaff.
- Labeling for Success: Label your saved seeds with the variety name and the date of collection for future reference.
Tip: Store saved seeds in airtight containers in a cool, dark place for up to 3-4 years to maintain good germination rates.
By following these steps, you can become self-sufficient in amaranth seeds, allowing you to enjoy this versatile crop year after year in your garden.
Troubleshooting: Common Pests and Diseases of Amaranth

While amaranth is a relatively resilient plant, it can be susceptible to a few common pests and diseases. Here’s a quick guide to identifying and managing potential problems:
Pests:
- Aphids: These tiny, sap-sucking insects can cause stunted growth and distorted leaves. Use insecticidal soap or neem oil spray to control them.
- Amaranth Seed Bugs: These black bugs feed on developing seeds. Encourage beneficial insects like ladybugs, or use row covers to deter them.
Diseases:
- Fungal Diseases: Fungal diseases like damping-off and downy mildew can occur in damp conditions. Ensure proper drainage and air circulation, and avoid overhead watering.
- Sclerotinia Wilt: This fungal disease causes wilting and stem rot. Remove infected plants and practice crop rotation to prevent its spread.
Remember: Early detection and intervention are key to managing pests and diseases effectively. Regularly monitor your amaranth plants for any signs of trouble and address them promptly.
Conclusion: The Reward of Cultivating Amaranth

By following the steps outlined in this guide, you’ve equipped yourself with the knowledge and confidence to cultivate amaranth in your own garden. Not only will you be rewarded with a nutritious and delicious harvest, but you’ll also gain the satisfaction of nurturing a unique and beautiful plant. So, embrace the challenge, sow those seeds, and experience the joy of growing your own amaranth!
This guide has provided a comprehensive overview of amaranth cultivation, from selecting the right variety to harvesting and saving seeds. Remember, gardening is a journey of learning and exploration. With dedication and a little TLC, you can successfully cultivate this ancient grain and add a touch of vibrancy and versatility to your garden and your plate.